Embed Size (px)
Citation preview
Sure-Fit Designs™Continuous Lap Sleeve Placket
Fitting the Fast & Easy way with...
PRINTED IN U.S.A.Copyright© 2011, Sure-Fit Designs™ Ranita Corporation, Eugene, Oregon. All rights reserved.
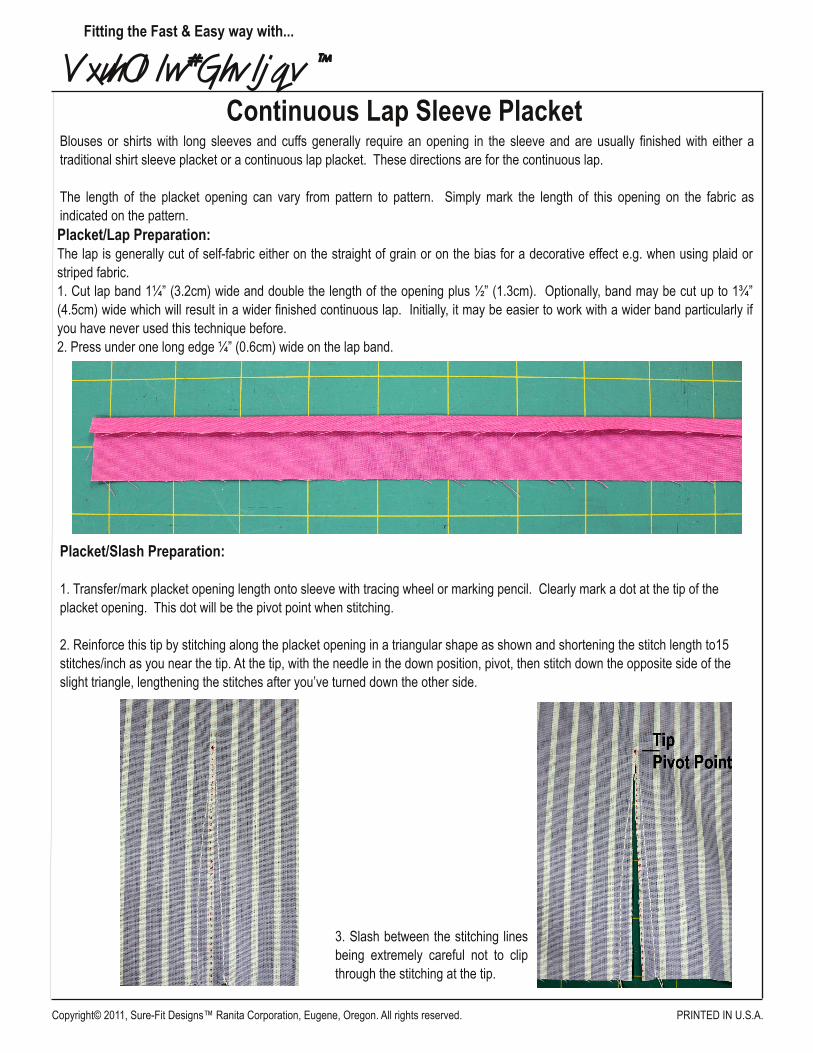
Blouses or shirts with long sleeves and cuffs generally require an opening in the sleeve and are usually finished with either a traditional shirt sleeve placket or a continuous lap placket. These directions are for the continuous lap.
The length of the placket opening can vary from pattern to pattern. Simply mark the length of this opening on the fabric as indicated on the pattern.Placket/Lap Preparation:The lap is generally cut of self-fabric either on the straight of grain or on the bias for a decorative effect e.g. when using plaid or striped fabric.1. Cut lap band 1¼” (3.2cm) wide and double the length of the opening plus ½” (1.3cm). Optionally, band may be cut up to 1¾” (4.5cm) wide which will result in a wider finished continuous lap. Initially, it may be easier to work with a wider band particularly if you have never used this technique before.2. Press under one long edge ¼” (0.6cm) wide on the lap band.
Placket/Slash Preparation:
1. Transfer/mark placket opening length onto sleeve with tracing wheel or marking pencil. Clearly mark a dot at the tip of the placket opening. This dot will be the pivot point when stitching.
2. Reinforce this tip by stitching along the placket opening in a triangular shape as shown and shortening the stitch length to15 stitches/inch as you near the tip. At the tip, with the needle in the down position, pivot, then stitch down the opposite side of the slight triangle, lengthening the stitches after you’ve turned down the other side.
3. Slash between the stitching lines being extremely careful not to clip through the stitching at the tip.
Page 2 - Continuous Lap Sleeve Placket
PRINTED IN U.S.A.Copyright© 2011, Sure-Fit Designs™ Ranita Corporation, Eugene, Oregon. All rights reserved.
Sure-Fit Designs™
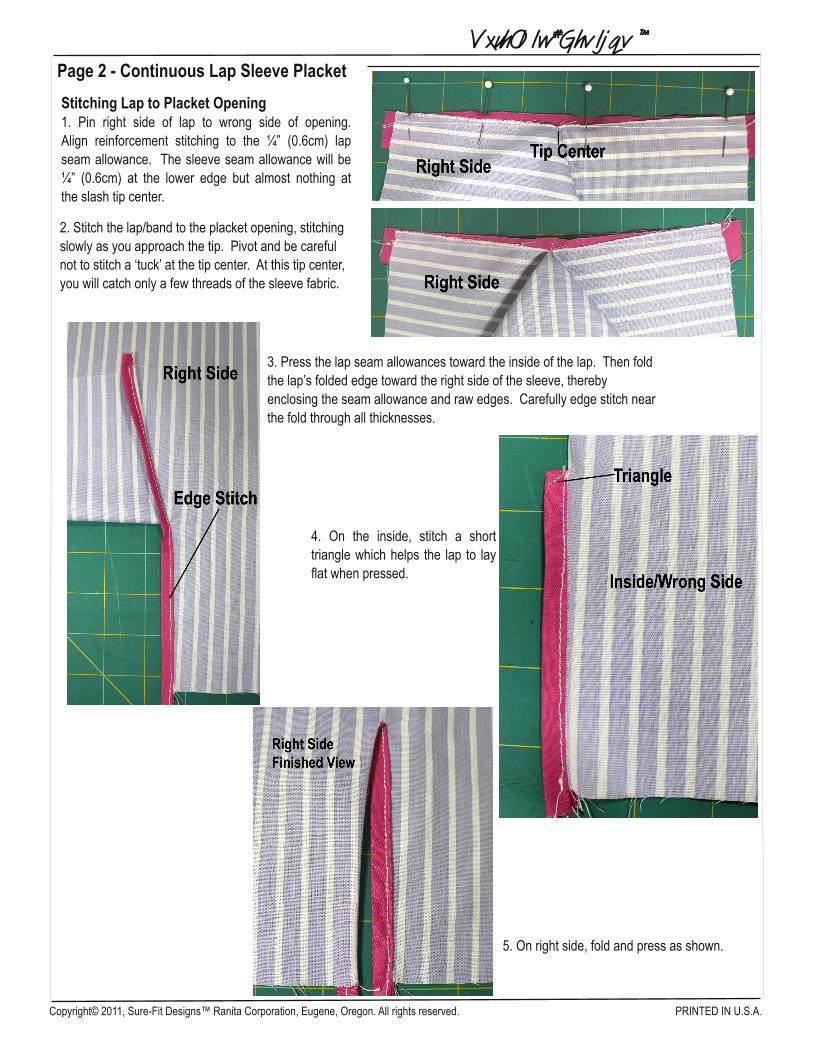
Stitching Lap to Placket Opening1. Pin right side of lap to wrong side of opening. Align reinforcement stitching to the ¼” (0.6cm) lap seam allowance. The sleeve seam allowance will be ¼” (0.6cm) at the lower edge but almost nothing at the slash tip center.
4. On the inside, stitch a short triangle which helps the lap to lay flat when pressed.
3. Press the lap seam allowances toward the inside of the lap. Then fold the lap’s folded edge toward the right side of the sleeve, thereby enclosing the seam allowance and raw edges. Carefully edge stitch near the fold through all thicknesses.
2. Stitch the lap/band to the placket opening, stitching slowly as you approach the tip. Pivot and be careful not to stitch a ‘tuck’ at the tip center. At this tip center, you will catch only a few threads of the sleeve fabric.
5. On right side, fold and press as shown.