Embed Size (px)
Citation preview
Creating Spot UV files in Illustrator
1 Open the CMYK file. From the top menu go to Window > Color > Create New Swatch.
Your Promotional Experts
C = 75M = 0Y = 100K = 25
C = 50M = 0Y = 100K = 0
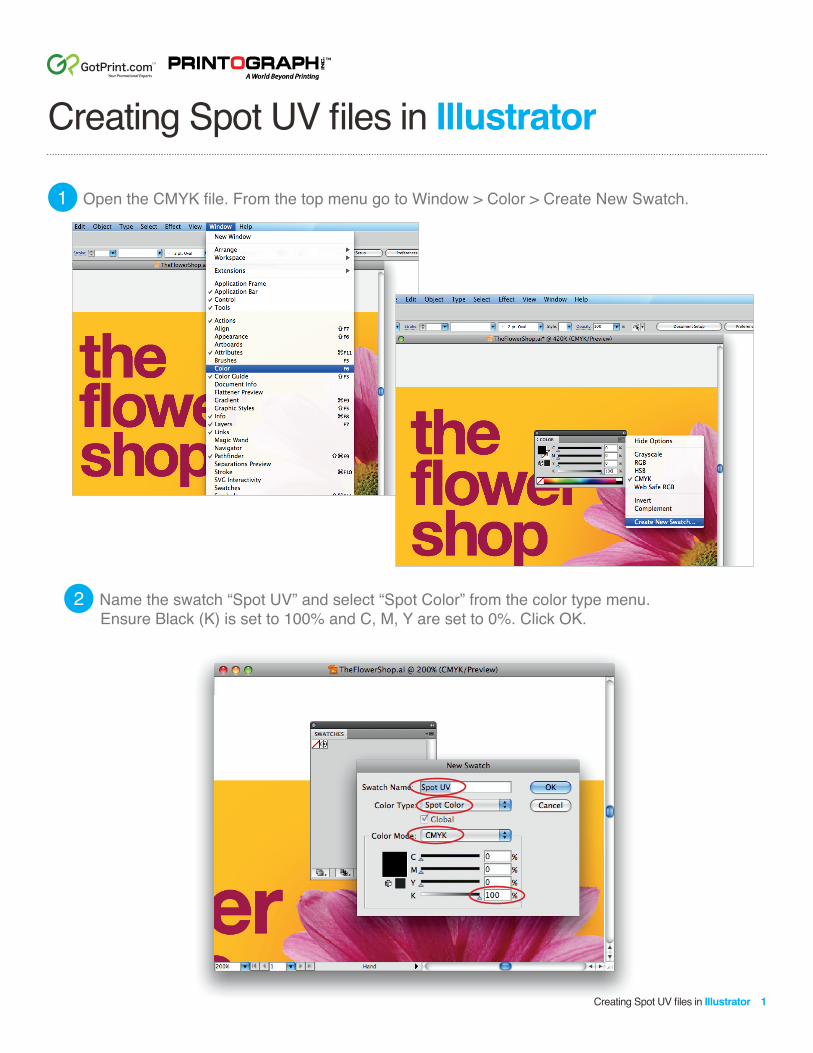
2 Name the swatch “Spot UV” and select “Spot Color” from the color type menu. Ensure Black (K) is set to 100% and C, M, Y are set to 0%. Click OK.
Creating Spot UV files in Illustrator 1
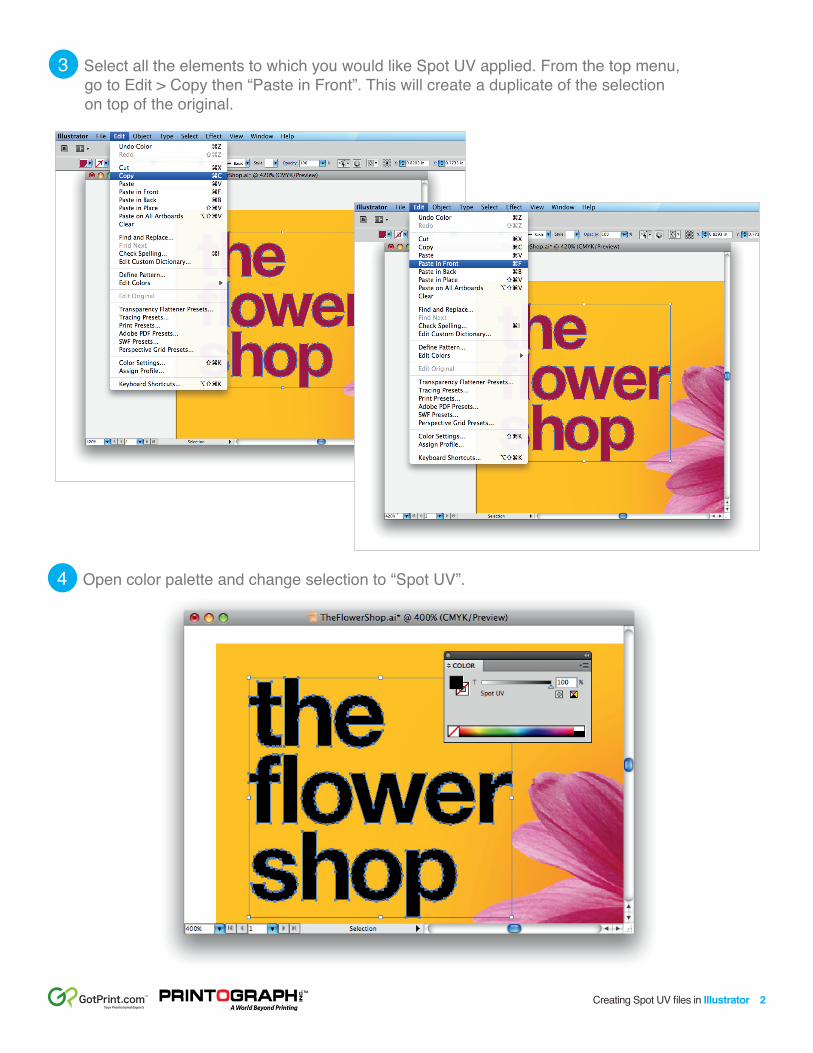
3 Select all the elements to which you would like Spot UV applied. From the top menu, go to Edit > Copy then “Paste in Front”. This will create a duplicate of the selection on top of the original.
Creating Spot UV files in Illustrator 2Your Promotional Experts
C = 75M = 0Y = 100K = 25
C = 50M = 0Y = 100K = 0
4 Open color palette and change selection to “Spot UV”.
Creating Spot UV files in Illustrator 3Your Promotional Experts
C = 75M = 0Y = 100K = 25
C = 50M = 0Y = 100K = 0
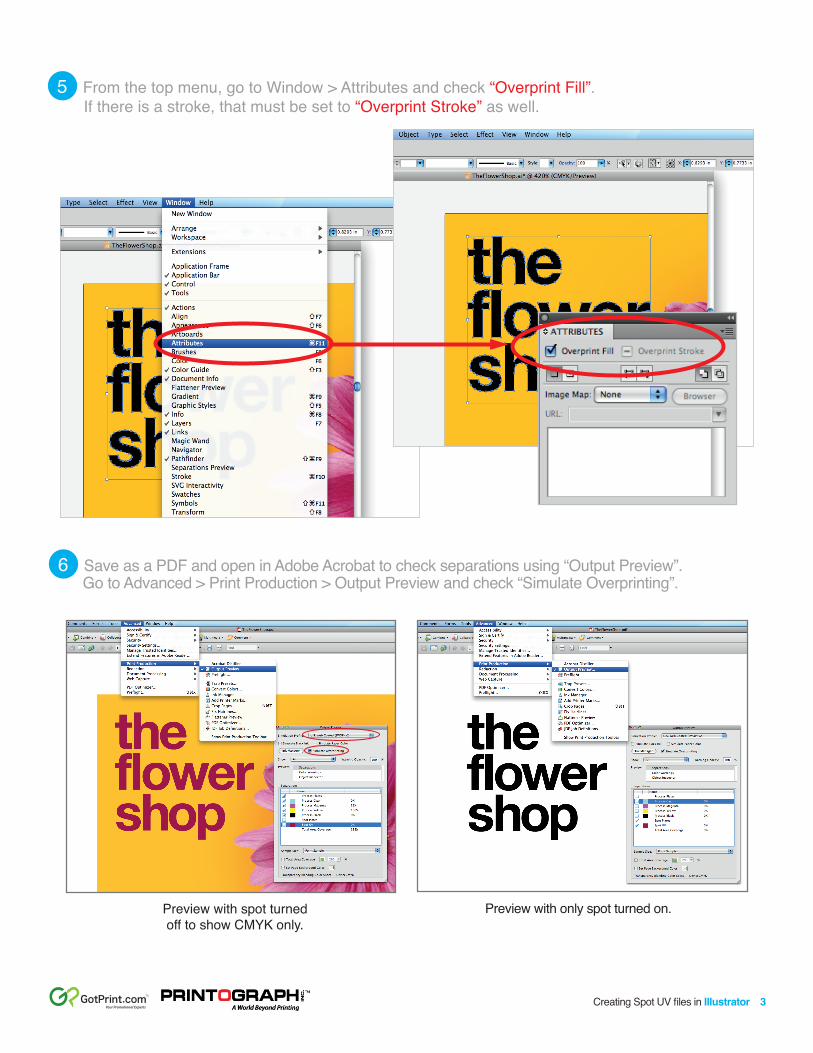
6 Save as a PDF and open in Adobe Acrobat to check separations using “Output Preview”. Go to Advanced > Print Production > Output Preview and check “Simulate Overprinting”.
Preview with spot turned off to show CMYK only.
Preview with only spot turned on.
5 From the top menu, go to Window > Attributes and check “Overprint Fill”. If there is a stroke, that must be set to “Overprint Stroke” as well.