Embed Size (px)
Citation preview
1
ADVANCED MICROSOFT WORDLesson 13 – Working with
Long Documents
Microsoft Office 2003:
Advanced
2
Objectives
Move or copy text between documents.
Format text flow options.
Create and edit styles.
Reveal formatting to verify paragraph formats.
Clear formats.
3
Objectives (cont.)
Navigate through a document using Thumbnails and the Document Map.
Create and modify hyperlinks.
Create and revise footnotes and endnotes.
Revise footnotes and endnotes.
4
Terms Used in This Lesson
Auto Summarizing – A word feature that can determine key facts or point of your document by analyzing each sentence.
Bookmark – Is an item or a location in a document that you identify and name for future reference. Assigns a location in a document.
Clipboard – Temporary storage area for text that is to be moved (cut) or copied and then pasted to another location. Use to cut, copy and paste from one document to another without having to open and close documents separately.
Endnote – Printed at the end of your document as a group, it is used to document quotations, figures, summaries, or other text that you do not want to include in the body of the document.
Footnote – Printed at the bottom of each page of the document where they are referenced, it is used to document quotations, figures, summaries, or other text that you do not want to include in the body of the document.
5
Terms Used in This Lesson
Orphan – The first line of a paragraph printed by itself on the bottom of a page.
Style – A predefined set of formatting options (instructions) that have been named and saved. These instruction tells Word how to format text in a document
Style sheet – A list of styles that are part of a document or document template.
Thumbnails – Miniature-sized images (visual impressions) of each page in your document. These are displayed in a separate pane in your working window and can be used to navigate through long documents.
Widow – The last line of a paragraph printed by itself at the top of a page.
6
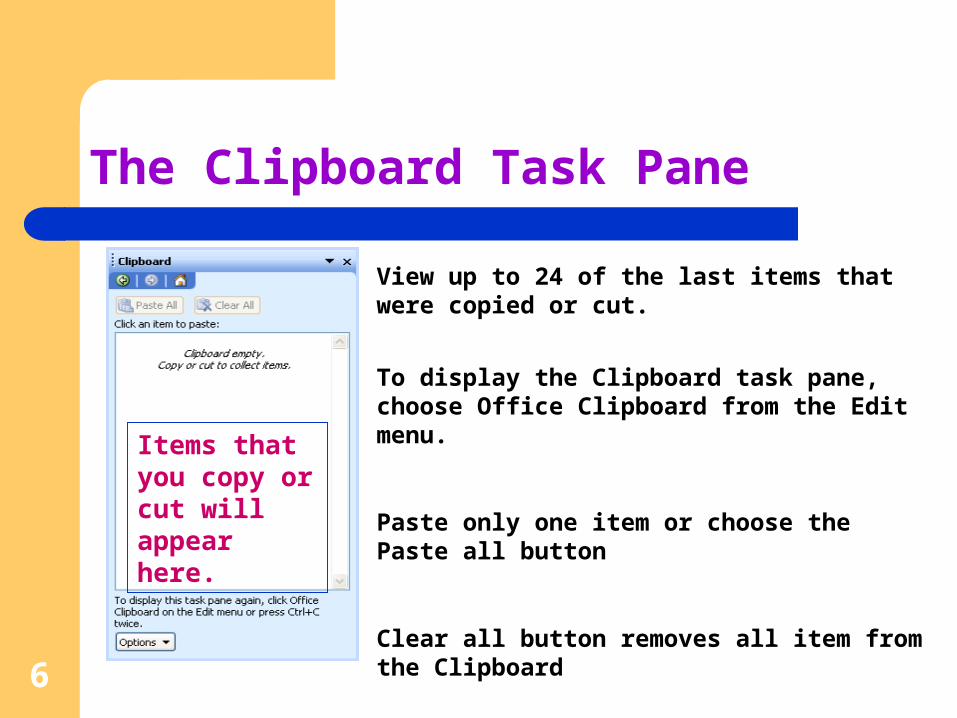
The Clipboard Task Pane
Items that you copy or cut will appear here.
View up to 24 of the last items that were copied or cut.
To display the Clipboard task pane, choose Office Clipboard from the Edit menu.
Paste only one item or choose the Paste all button
Clear all button removes all item from the Clipboard
7
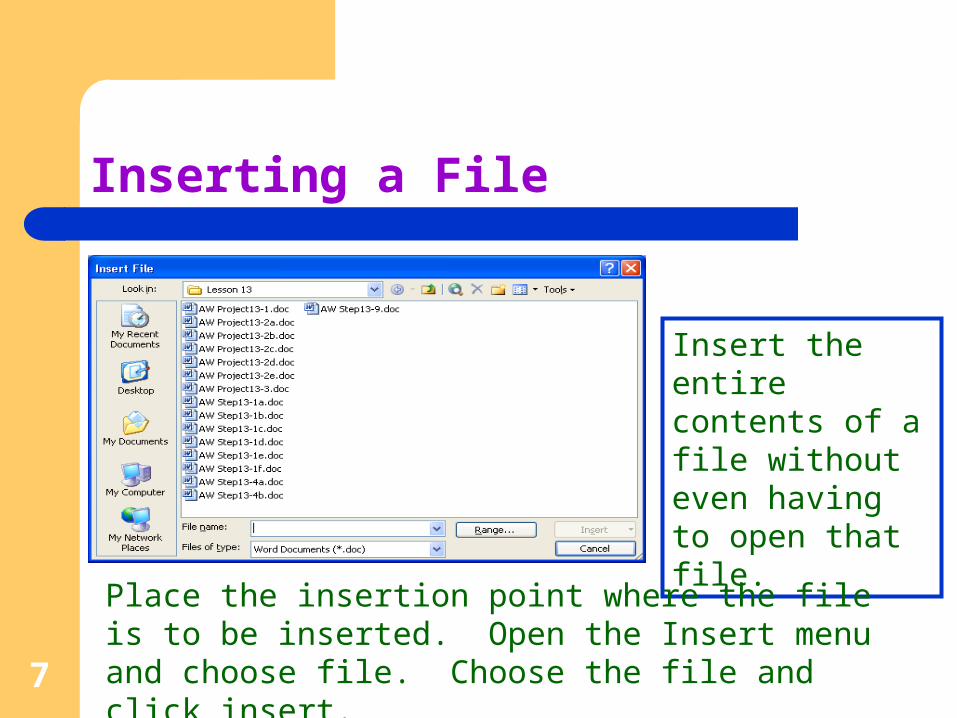
Insert the entire contents of a file without even having to open that file.
Inserting a File
Place the insertion point where the file is to be inserted. Open the Insert menu and choose file. Choose the file and click insert.
8
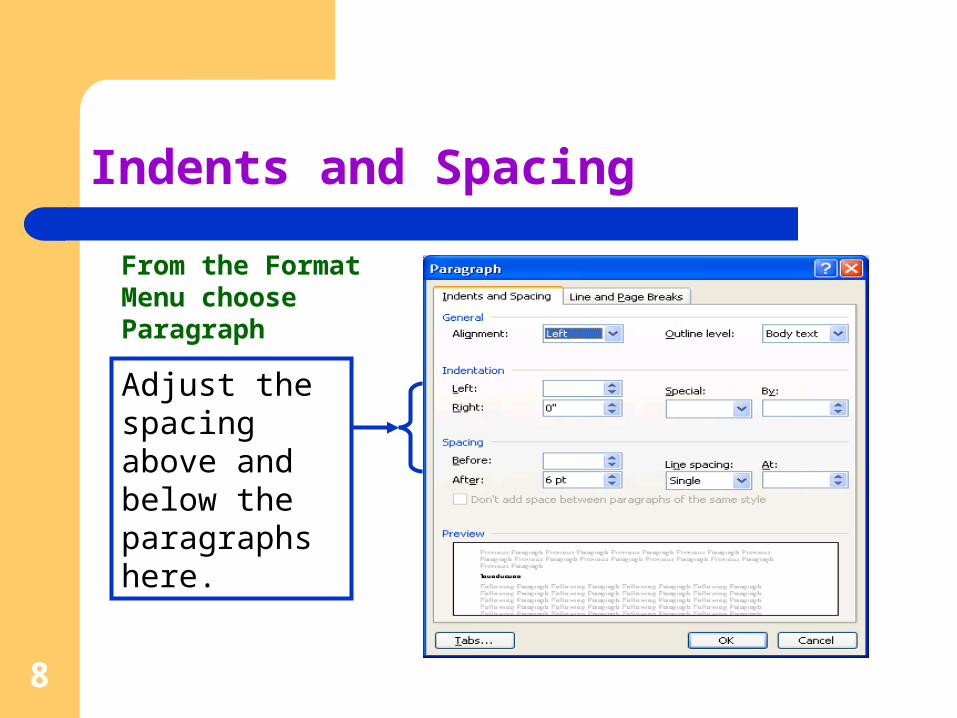
Indents and Spacing
Adjust the spacing above and below the paragraphs here.
From the Format Menu choose Paragraph
9
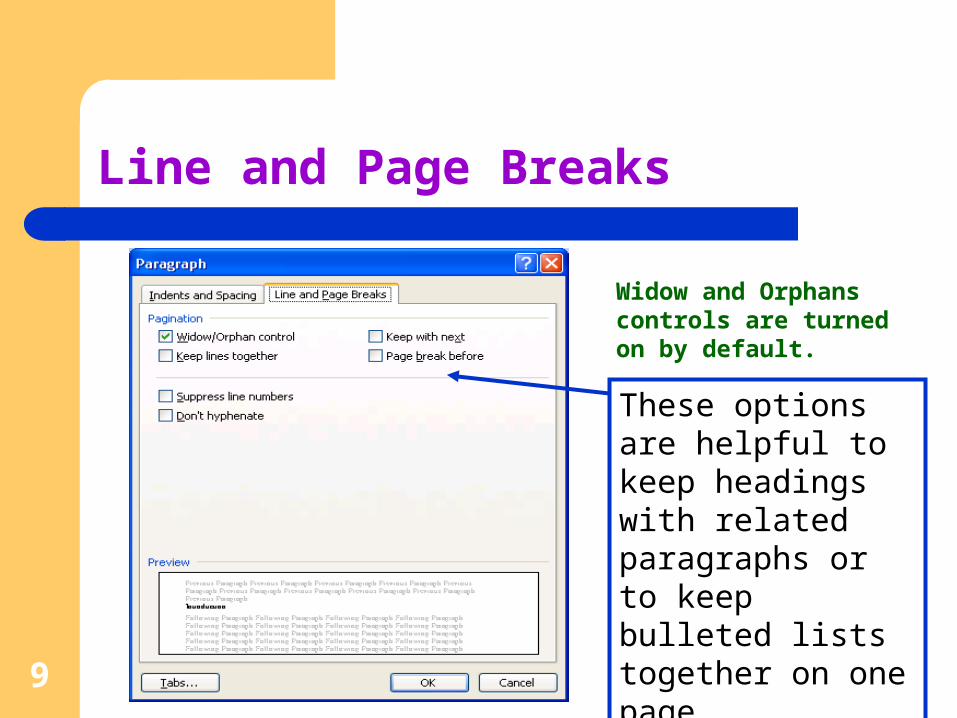
These options are helpful to keep headings with related paragraphs or to keep bulleted lists together on one page.
Line and Page Breaks
Widow and Orphans controls are turned on by default.
10
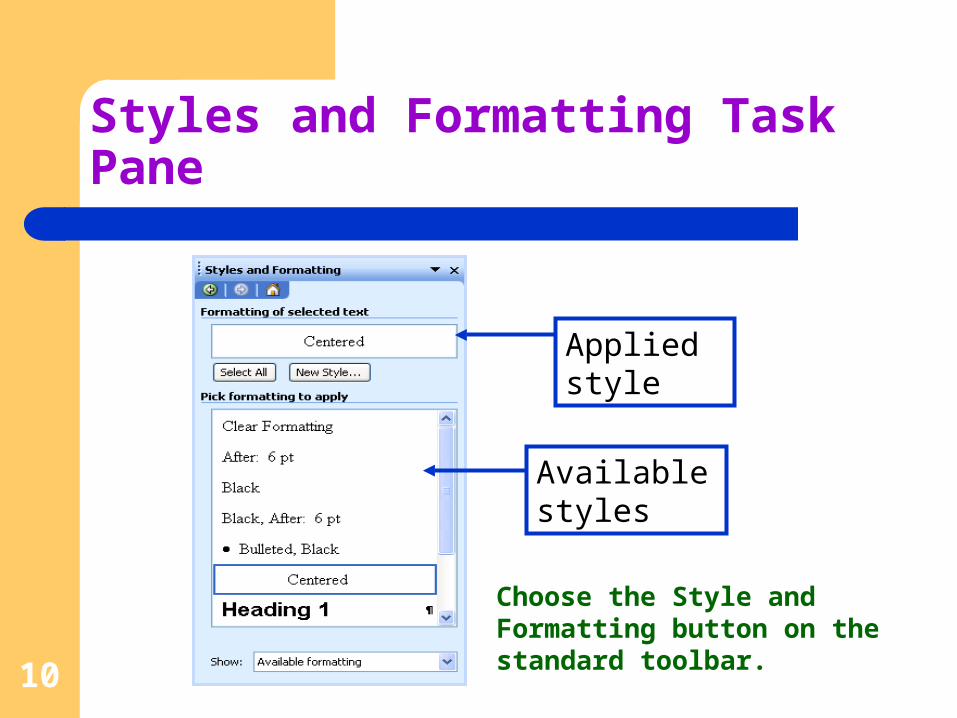
Available styles
Applied style
Styles and Formatting Task Pane
Choose the Style and Formatting button on the standard toolbar.
11
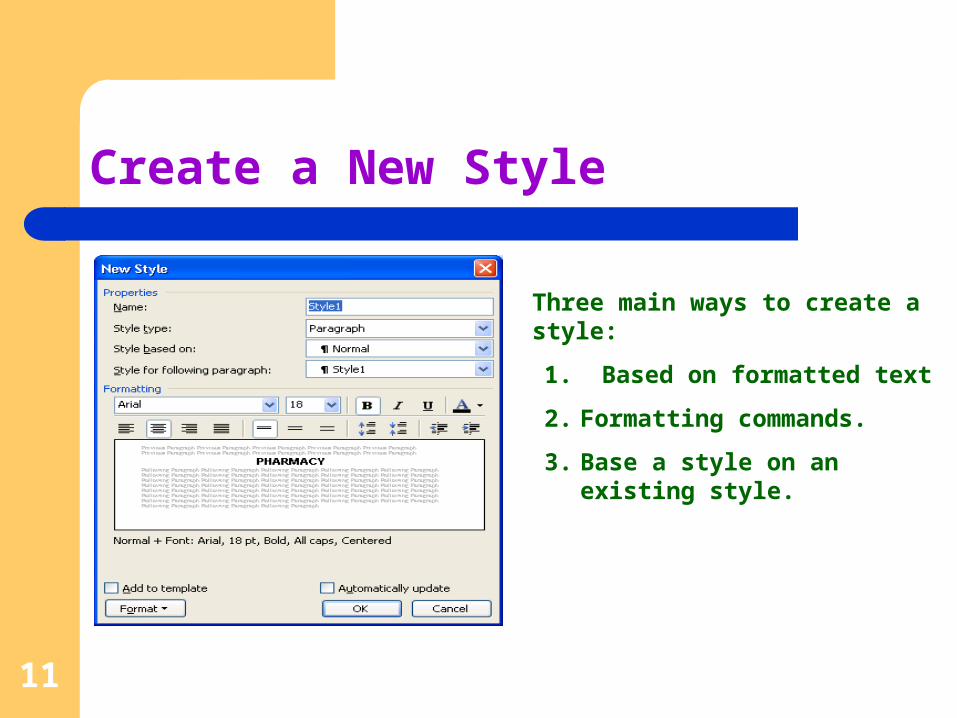
Create a New Style
Three main ways to create a style:
1. Based on formatted text
2. Formatting commands.
3. Base a style on an existing style.
12
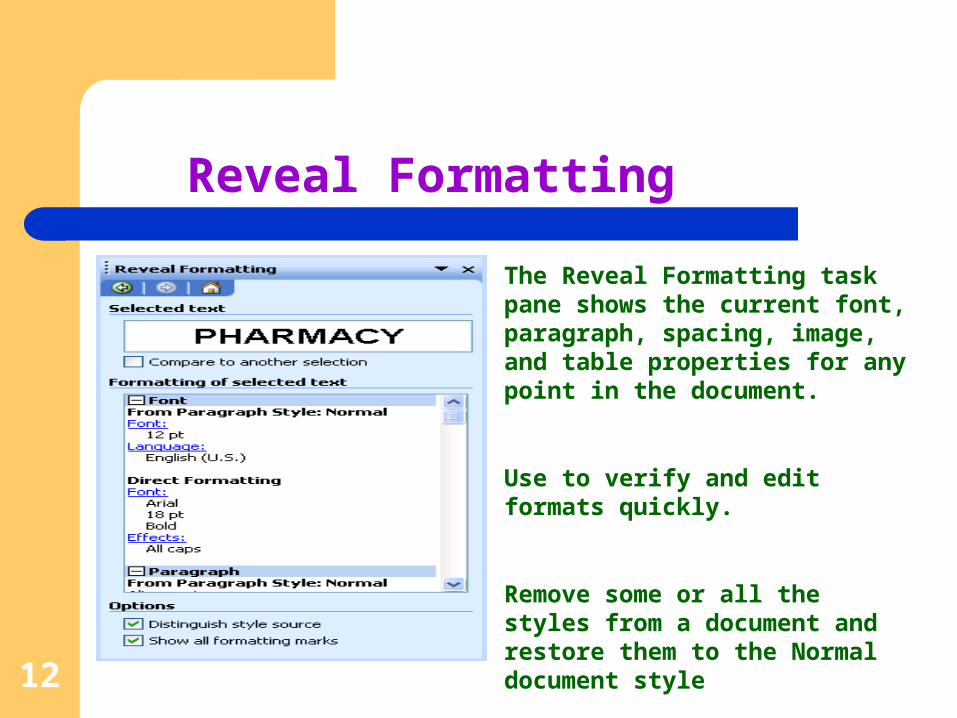
Reveal Formatting
The Reveal Formatting task pane shows the current font, paragraph, spacing, image, and table properties for any point in the document.
Use to verify and edit formats quickly.
Remove some or all the styles from a document and restore them to the Normal document style
13
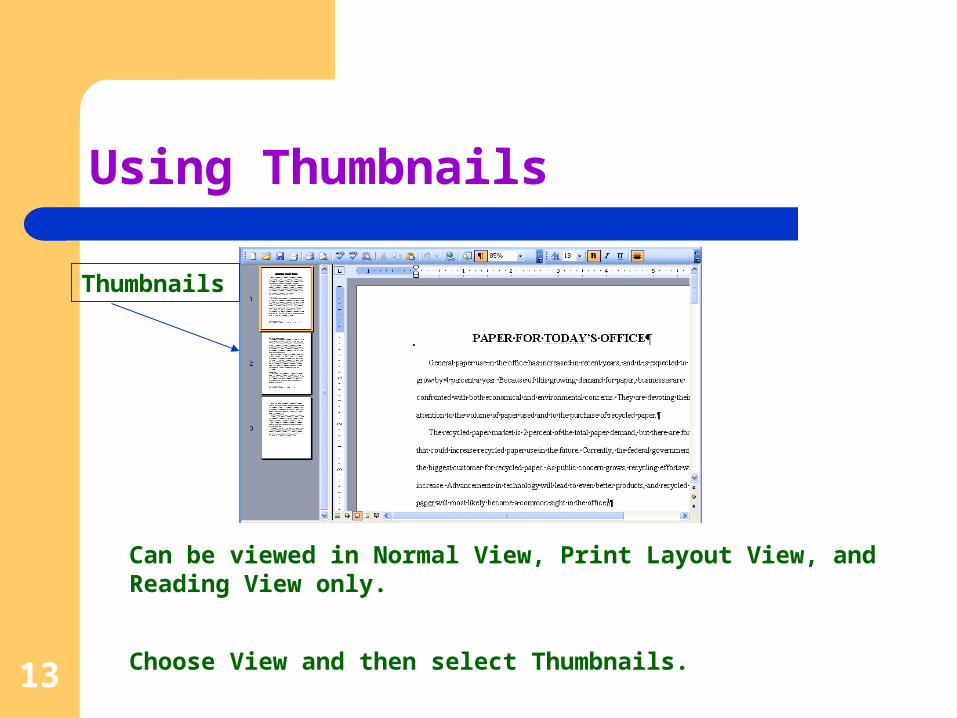
Using Thumbnails
Thumbnails
Can be viewed in Normal View, Print Layout View, and Reading View only.
Choose View and then select Thumbnails.
14
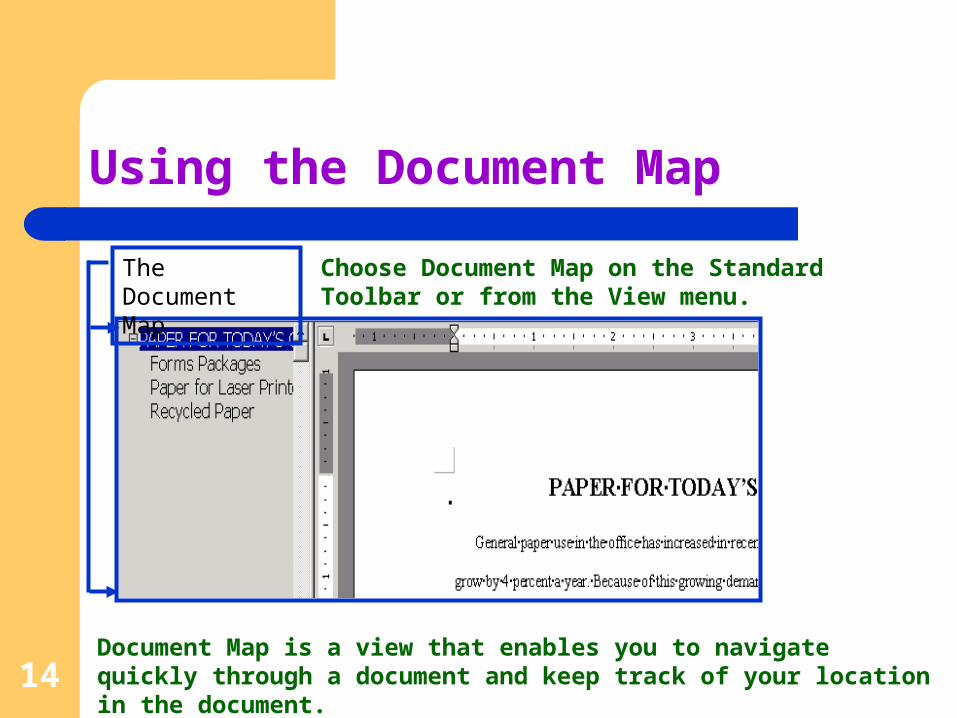
The Document Map
Using the Document Map
Document Map is a view that enables you to navigate quickly through a document and keep track of your location in the document.
Choose Document Map on the Standard Toolbar or from the View menu.
15
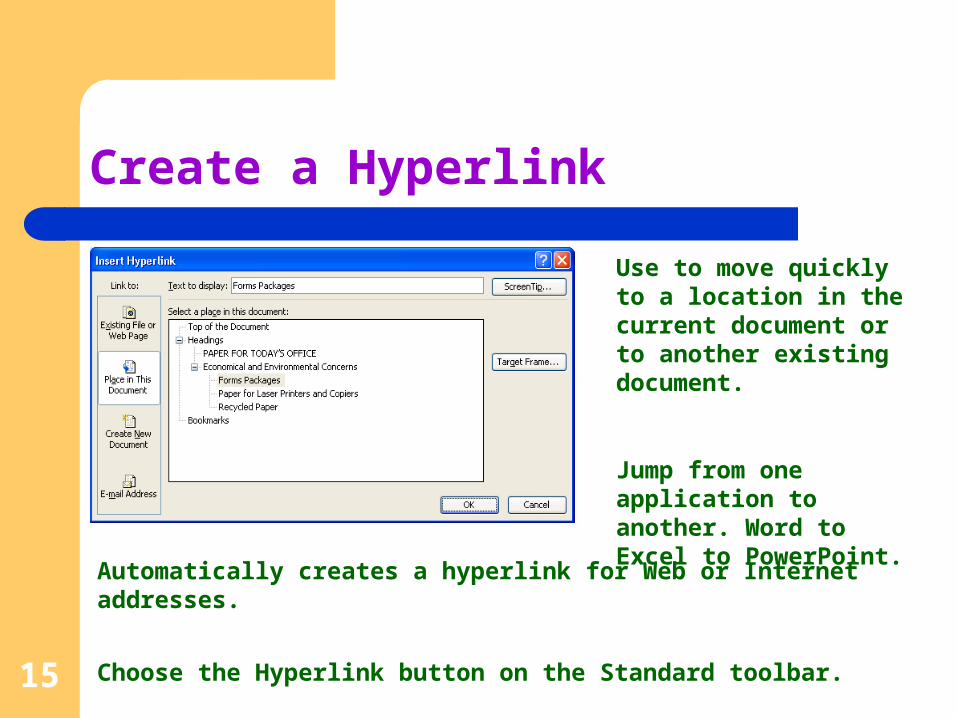
Create a Hyperlink
Use to move quickly to a location in the current document or to another existing document.
Jump from one application to another. Word to Excel to PowerPoint.
Automatically creates a hyperlink for Web or Internet addresses.
Choose the Hyperlink button on the Standard toolbar.
16
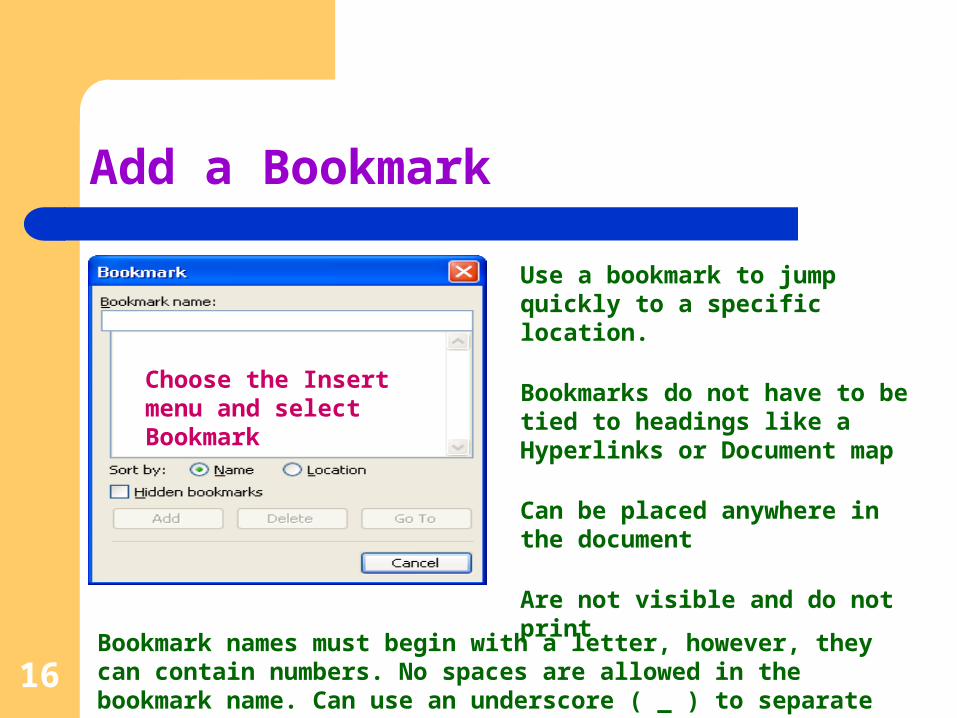
Add a Bookmark
Use a bookmark to jump quickly to a specific location.
Bookmarks do not have to be tied to headings like a Hyperlinks or Document map
Can be placed anywhere in the document
Are not visible and do not print
Bookmark names must begin with a letter, however, they can contain numbers. No spaces are allowed in the bookmark name. Can use an underscore ( _ ) to separate words.
Choose the Insert menu and select Bookmark

17
Create a Footnote or Endnote
Place the insertion point where you want the reference mark to appear.
Open the Insert menu, choose the Reference command and then select the Footnote or Endnote option.
18
Time Saver
You can easily remove all formats from text by choosing the Clear Formatting in the task pane.
OR
Select all of the text then press CTRL + SHIFT N
19
Summary
You can copy up to 24 items to the Office Clipboard.
You can control page breaks by choosing text flow options.
Character and paragraph styles ensure consistent formatting.
20
Summary (cont.)
Revealing formats enables you to view formats as you work with a document and edit the formats easily.
The Clear Formatting option enables you to remove applied styles quickly and restore the document text to the Normal style.
Thumbnails and the Document Map enable you to navigate quickly through a document.
21
Summary (cont.)
Hyperlinks and bookmarks take you to new locations in the same document.
Footnotes and endnotes are automatically numbered and renumbered when you rearrange the order.
You can easily convert footnotes to endnotes and vice versa.
22
HOMEWORK – Word Lesson 13
Review Questions True/False Fill in the Blank
Project 13-1 Project 13-2 Project 13-3