Embed Size (px)
Citation preview

A
Published by Macmillan/McGraw-Hill, of McGraw-Hill Education, a division of The McGraw-Hill Companies, Inc.,
Two Penn Plaza, New York, New York 10121.
Copyright © by Macmillan/McGraw-Hill. All rights reserved. No part of this publication may be reproduced
or distributed in any form or by any means, or stored in a database or retrieval system, without the prior written consent
of The McGraw-Hill Companies, Inc., including, but not limited to, network storage or transmission, or broadcast for
distance learning.
Printed in the United States of America
1 2 3 4 5 6 7 8 9 024 09 08 07 06
All photographs are by Macmillan/McGraw-Hill (MMH) except as noted below.
Cover Photos: George D. Lepp/CORBIS.
Science Content Standards for California Public Schools reproduced by permission, California Department of Education, CDE
Press, 1430 N Street, Suite 3207, Sacramento, CA 95814.
LIFE SCIENCE
Chapter 1 Living Things Need Energy . . . . . . . . . . . . . . . . . . . . . . . . . . . . 1
Chapter 2 Living Things and Their Environment . . . . . . . . . . . . . . . . . . . 25
EARTH SCIENCE
Chapter 3 Rocks and Minerals . . . . . . . . . . . . . . . . . . . . . . . . . . . . . . . . . .49
Chapter 4 Slow Changes on Earth . . . . . . . . . . . . . . . . . . . . . . . . . . . . . . . 73
Chapter 5 Fast Changes on Earth . . . . . . . . . . . . . . . . . . . . . . . . . . . . . . . 93
PHYSICAL SCIENCE
Chapter 6 Electricity . . . . . . . . . . . . . . . . . . . . . . . . . . . . . . . . . . . . . . . . . .113
Chapter 7 Magnetism . . . . . . . . . . . . . . . . . . . . . . . . . . . . . . . . . . . . . . . . 133
Everyday Science Activities . . . . . . . . . . . . . . . . . . . . . . . . . . . . . . . . . . . . . 153
Learning Labs . . . . . . . . . . . . . . . . . . . . . . . . . . . . . . . . . . . . . . . . . . . . . . . . . 185
iii
Contents
Activity Lab Book
California science standards are noted at the top of activity pages. For the text of the standards, please refer to the Reference section of the California Science Student Edition.
© M
acm
illa
n/M
cG
raw
-Hill
Date Name
• leaves from two plants
• hand lens
Materials
Explore
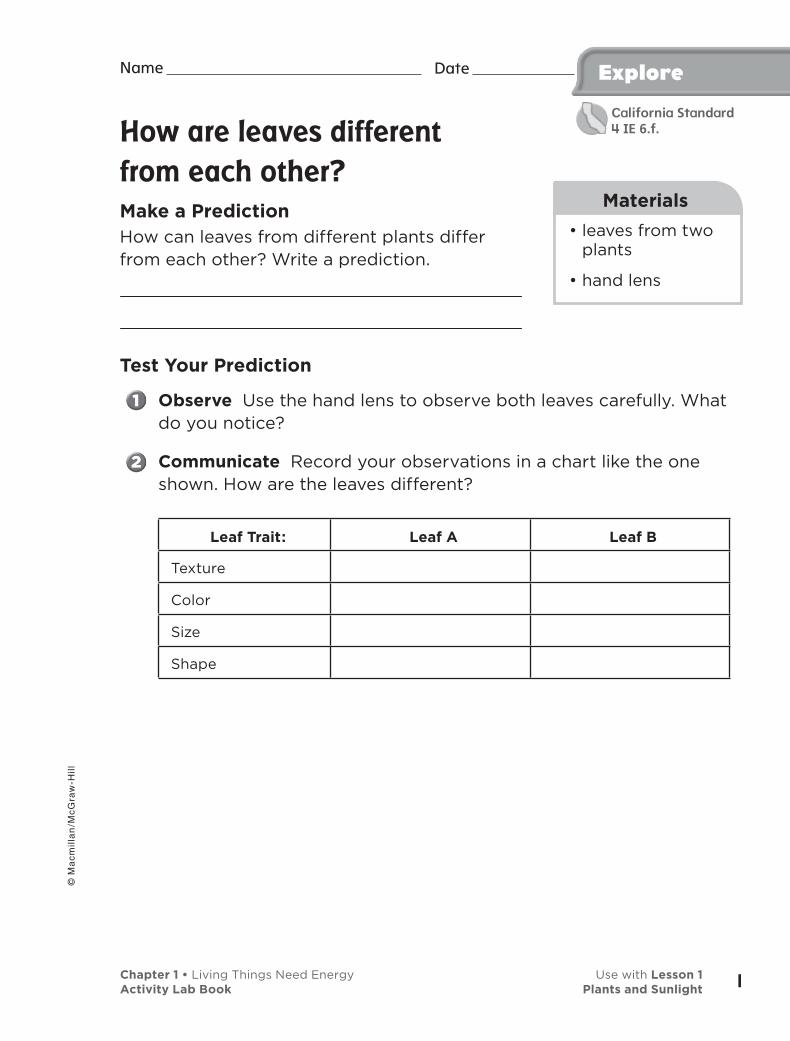
How are leaves different
from each other?
Make a PredictionHow can leaves from different plants differ from each other? Write a prediction.
Test Your Prediction
Observe Use the hand lens to observe both leaves carefully. What do you notice?
Communicate Record your observations in a chart like the one shown. How are the leaves different?
Leaf Trait: Leaf A Leaf B
Texture
Color
Size
Shape
California Standard4 IE 6.f.
Chapter 1 • Living Things Need Energy Use with Lesson 1Activity Lab Book Plants and Sunlight
© M
ac
mil
lan
/Mc
Gra
w-H
ill
1
Explore
Draw Conclusions
Infer Tell what each leaf trait on the chart is for. For example, you might infer that fuzzy leaves are for catching rain. Colored leaves might be for attracting insects. Record your ideas.
Explore MoreWhat leaf traits do both leaves have in common? Tell what each shared leaf trait is for. Make a plan to test your idea.
Inquiry: Open Think of your own question about what a leaf needs to survive.
My question is:
How I can test it:
My results are:
Date Name
Chapter 1 • Living Things Need Energy Use with Lesson 1Activity Lab Book Plants and Sunlight2
© M
ac
mil
lan
/Mc
Gra
w-H
ill
Leaf match
Observe Look at each of the five leaves. What special features do you notice in each one?
Infer What special purpose might specific physical features serve in each leaf?
Classify Find the card that shows the unique purpose of special features on each leaf. Place each leaf on its card.
• five different kinds of leaves
• index cards with leaf descriptions
Materials
AlternativeExplore
Date Name
Chapter 1 • Living Things Need Energy Use with Lesson 1Activity Lab Book Plants and Sunlight
© M
ac
mil
lan
/Mc
Gra
w-H
ill
3
Quick Lab
Photosynthesis
Label two identical plants “Plant A” and “Plant B.” Wrap each individual leaf of Plant A with aluminum foil. Keep the leaves of Plant B uncovered. Put the plants on a sunny windowsill. Make sure each plant gets the same amount of sunlight and water.
Predict What do you think will happen to each plant?
Observe Uncover Plant A after four days. Record your observations about each plant in a chart.
Date Name
Infer Why do Plant A and Plant B differ after four days?
Draw Conclusions Where on a plant does photosynthesis take place? How can you tell?
Plant A Plant B
Chapter 1 • Living Things Need Energy Use with Lesson 1Activity Lab Book Plants and Sunlight4
© M
ac
mil
lan
/Mc
Gra
w-H
ill
ObserveYou just read about plants, including ways they use water. You read that water travels from the roots of a plant up its stem. How do scientists know this? They observe plants!
Learn ItWhen you observe, you use one or more of your senses to learn about the world around you. Although scientists know a lot about plants, they continue to observe them. Scientists are always learning new things about plants. They record their observations so they can share information with others. They use their observations to try to understand things in our world. You can, too.
Try ItIn this activity you will observe how water moves through a plant. Remember to record your data as you observe.
Step 1: Pour 100 mL of water into a jar.
Step 2: Add a few drops of blue food coloring to the cup and stir with the measuring spoon.
Step 3: Use scissors to cut about 3 cm off the bottom of a fresh celery stalk.
Step 4: Put the stalk in the cup. Record the time that you did this.
Step 5: Observe the celery for a half hour.
Date Name Focus onInquiry Skills
• clear 8 oz. cup
• water
• measuring spoon
• 1 tsp. blue food coloring
• scissors
• stalk of celery
Materials
California Standard4 IE 6.a.
Chapter 1 • Living Things Need Energy Use with Lesson 1Activity Lab Book Plants and Sunlight
© M
ac
mil
lan
/Mc
Gra
w-H
ill
5
Record your observations. Use your observations to describe how water moves through a plant.
Process Observations: What Happened
Step 1
Step 2
Step 3
Record start time:
Step 4
Record start time:
Focus onInquiry Skills
Date Name
Chapter 1 • Living Things Need Energy Use with Lesson 1Activity Lab Book Plants and Sunlight6
© M
ac
mil
lan
/Mc
Gra
w-H
ill
Apply ItNow observe how water travels through other plants. Repeat the investigation using a white flower, such as a carnation. Record your observations so you can share them with classmates.
What I Did What I Observed
Focus onInquiry Skills
Date Name
Chapter 1 • Living Things Need Energy Use with Lesson 1Activity Lab Book Plants and Sunlight
© M
ac
mil
lan
/Mc
Gra
w-H
ill
7

Student Journal Notes
Chapter 1 • Living Things Need Energy Use with Lesson 1Activity Lab Book Plants and Sunlight8
© M
ac
mil
lan
/Mc
Gra
w-H
ill
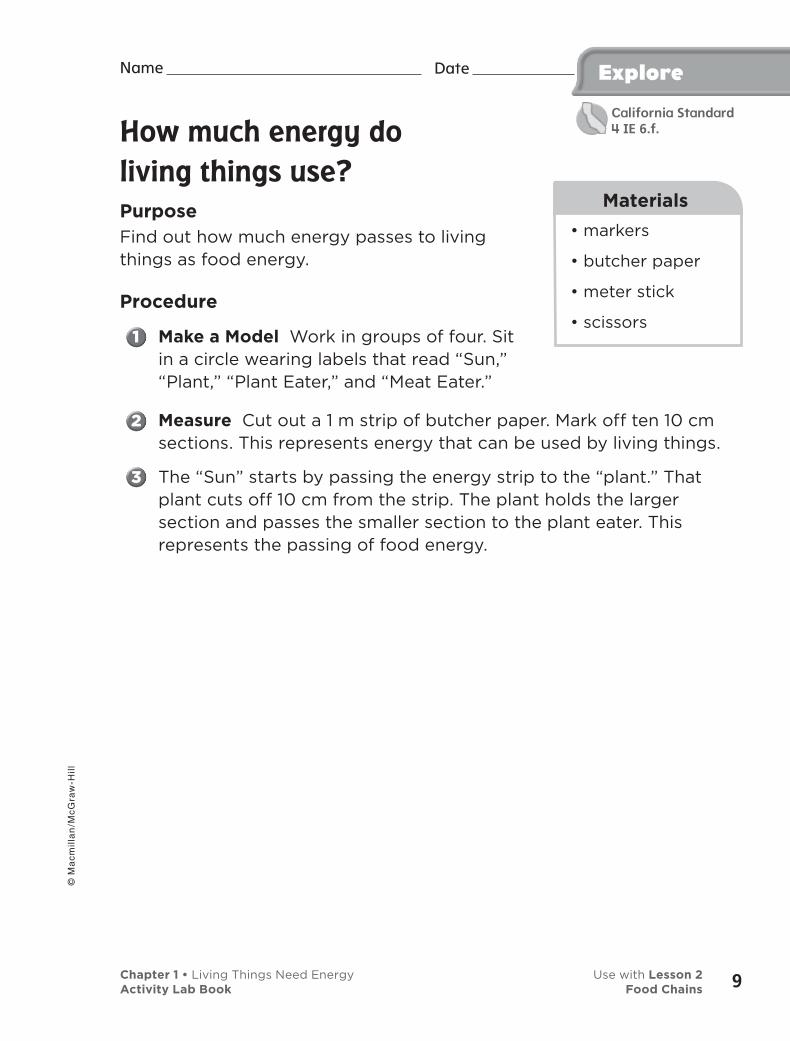
How much energy do
living things use?
Purpose Find out how much energy passes to living things as food energy.
Procedure
Make a Model Work in groups of four. Sit in a circle wearing labels that read “Sun,” “Plant,” “Plant Eater,” and “Meat Eater.”
Measure Cut out a 1 m strip of butcher paper. Mark off ten 10 cm sections. This represents energy that can be used by living things.
The “Sun” starts by passing the energy strip to the “plant.” That plant cuts off 10 cm from the strip. The plant holds the larger section and passes the smaller section to the plant eater. This represents the passing of food energy.
• markers
• butcher paper
• meter stick
• scissors
Materials
ExploreDate Name
California Standard4 IE 6.f.
Chapter 1 • Living Things Need Energy Use with Lesson 2Activity Lab Book Food Chains
© M
ac
mil
lan
/Mc
Gra
w-H
ill
9
Explore
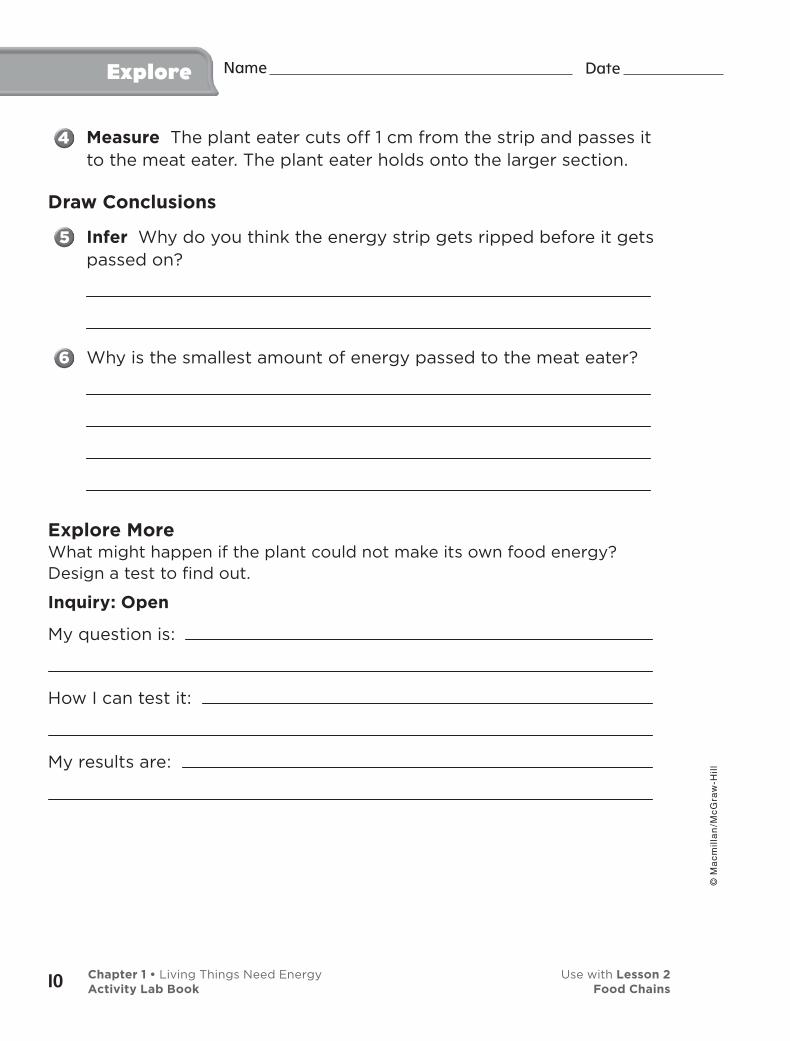
Measure The plant eater cuts off 1 cm from the strip and passes it to the meat eater. The plant eater holds onto the larger section.
Draw Conclusions
Infer Why do you think the energy strip gets ripped before it gets passed on?
Why is the smallest amount of energy passed to the meat eater?
Explore MoreWhat might happen if the plant could not make its own food energy? Design a test to find out.
Inquiry: Open
My question is:
How I can test it:
My results are:
Date Name
Chapter 1 • Living Things Need Energy Use with Lesson 2Activity Lab Book Food Chains10
© M
ac
mil
lan
/Mc
Gra
w-H
ill
Pond Food Chain
Procedure
Investigative Team Work with a partner. Get a piece of paper, markers, crayons, and scissors.
Be careful. Handle the scissors very carefully.
Make a Model Draw and label a picture of a Sun, hawk, frog, grasshopper, and grass.
Arrange the Sun and organisms into a food chain in the correct order.
• paper
• markers
• crayons
• scissors
Materials
AlternativeExplore
Date Name
Chapter 1 • Living Things Need Energy Use with Lesson 2Activity Lab Book Food Chains
© M
ac
mil
lan
/Mc
Gra
w-H
ill
11
Quick Lab
Find a Food Chain
Take a walk with a partner around the schoolyard. Make a chart to list the plants and animals that you see.
Classify Which organisms are producers? Why?
Producers Consumers
Classify Which organisms are consumers? Why?
Communicate Circle organisms that might belong to the same food chain and link them together. What organisms are in your food chain?
Date Name
Chapter 1 • Living Things Need Energy Use with Lesson 2Activity Lab Book Food Chains12
© M
ac
mil
lan
/Mc
Gra
w-H
ill
Can an environment have
more than one food chain?
Form a HypothesisEnergy from the Sun helps desert grasses grow. A mouse eats the desert grass. A coyote eats the mouse. Is this the only food chain that can be found in a desert? What happens when one environment has many producers and consumers? Write a hypothesis in the form, “If different producers and consumers can be found in an environment, then . . .”
Test Your Hypothesis
Make a Model Write “Sun,” “desert grass,” “mouse,” and “coyote” each on an index card. Use tape to connect the cards in the order of a food chain.
Use books and the Internet to research another desert food chain. Find a new producer, herbivore, and carnivore that can be linked together in a food chain.
Be aScientist
• research tools
• index cards
• tape
• scissors
• markers
Materials
Date Name
California Standard4 IE 6.f.
© M
ac
mil
lan
/Mc
Gra
w-H
ill
13Chapter 1 • Living Things Need Energy Use with Lesson 2Activity Lab Book Food Chains

Write the names of the new organisms on index cards. Find pictures of each plant and animal to put on the cards, or draw your own pictures.
Make a Model Assemble the second set of index cards in the order of a food chain. You will now have two separate food chains.
Draw Conclusions
Did your results support your hypothesis? Why or why not?
What does this activity tell you about the number of different food chains in one environment?
Compare How are the food chains alike? How are they different?
Be a Scientist
Date Name
Chapter 1 • Living Things Need Energy Use with Lesson 2Activity Lab Book Food Chains14
© M
ac
mil
lan
/Mc
Gra
w-H
ill
Be aScientist
Inquiry: Guided
How can food chains change?
Form a HypothesisWhat might happen to the organisms in your food chain if the producer is taken out of the chain? Answer in the form, “If the producer is taken out of the food chain, then . . .”
Test Your HypothesisDesign an experiment to investigate what might happen if the producer is removed from a food chain. Write out the steps you will follow. Record your results and observations.
Draw ConclusionsDid your test support your hypothesis? Why or why not? Compare your results with a classmate.
Date Name ©
Ma
cm
illa
n/M
cG
raw
-Hil
l
15Chapter 1 • Living Things Need Energy Use with Lesson 2Activity Lab Book Food Chains
Inquiry: Open What else would you like to learn about organisms and food chains? For example, what happens if a new consumer is added to the environment? Determine the steps you will follow to answer your question. Keep a record of any materials you used in your investigation.
Remember to follow the steps of the scientific process.
My question is:
My hypothesis is:
How I can test it:
My conclusions are:
Be aScientist
Ask a Question
Form a Hypothesis
Test Your Hypothesis
Draw Conclusions
Date Name
Chapter 1 • Living Things Need Energy Use with Lesson 2Activity Lab Book Food Chains16
© M
ac
mil
lan
/Mc
Gra
w-H
ill
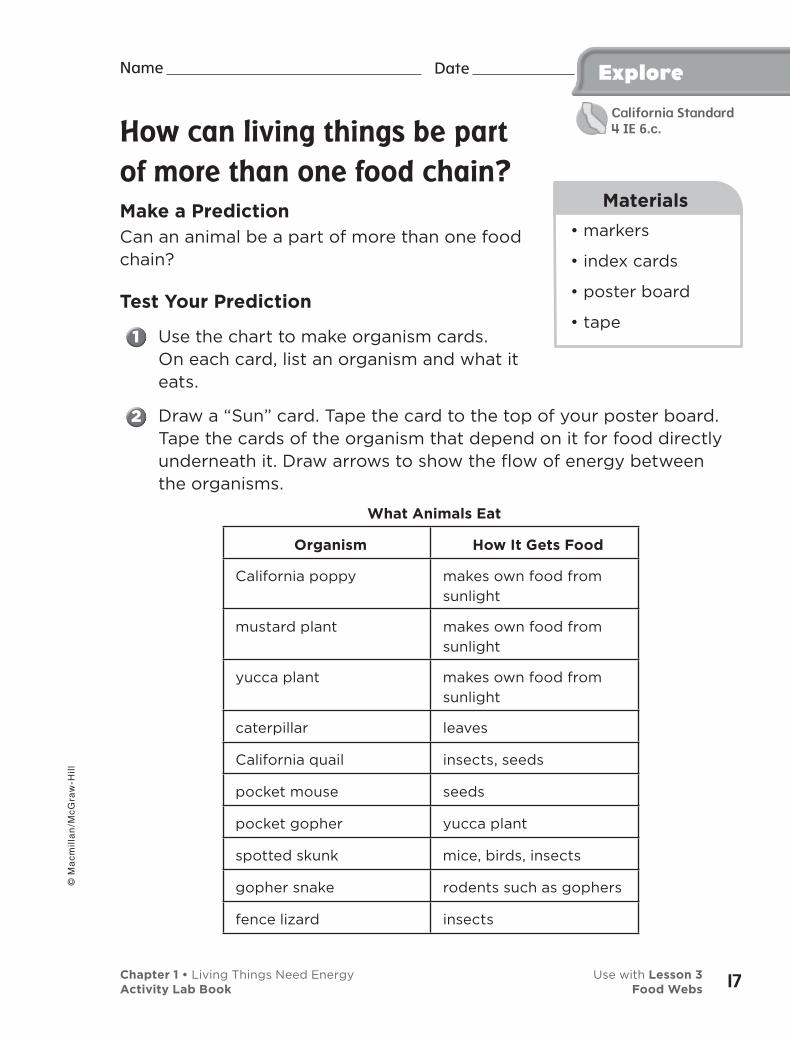
How can living things be part
of more than one food chain?
Make a PredictionCan an animal be a part of more than one food chain?
Test Your Prediction
Use the chart to make organism cards. On each card, list an organism and what it eats.
Draw a “Sun” card. Tape the card to the top of your poster board. Tape the cards of the organism that depend on it for food directly underneath it. Draw arrows to show the flow of energy between the organisms.
What Animals Eat
Organism How It Gets Food
California poppy makes own food from
sunlight
mustard plant makes own food from
sunlight
yucca plant makes own food from
sunlight
caterpillar leaves
California quail insects, seeds
pocket mouse seeds
pocket gopher yucca plant
spotted skunk mice, birds, insects
gopher snake rodents such as gophers
fence lizard insects
• markers
• index cards
• poster board
• tape
Materials
ExploreDate Name
California Standard4 IE 6.c.
Chapter 1 • Living Things Need Energy Use with Lesson 3Activity Lab Book Food Webs
© M
ac
mil
lan
/Mc
Gra
w-H
ill
17
Explore
Continue to add cards to the poster. Draw arrows to link each card to the organisms it directly depends on for food.
Draw Conclusions
Analyze Data How many food chains does the spotted skunk belong to?
What can you conclude about food chains from this poster?
Explore More What might happen if the pocket mouse were taken off the poster? Make a prediction and make a plan to test your prediction.
Inquiry: Open
My question is:
How I can test it:
My results are:
Date Name
Chapter 1 • Living Things Need Energy Use with Lesson 3Activity Lab Book Food Webs18
© M
ac
mil
lan
/Mc
Gra
w-H
ill
What is my role in the
food web?
Procedure
Record Data List the foods you ate for breakfast today.
Classify Identify whether each thing you ate was a producer or consumer.
Make a Model Make a diagram of the foods you ate, and link them together in food chains that make a food web. Include yourself in the diagram.
Draw Conclusions What is your role in the food web?
• paper
• pencils
• markers or colored pencils
Materials
AlternativeExplore
Date Name
Chapter 1 • Living Things Need Energy Use with Lesson 3Activity Lab Book Food Webs
© M
ac
mil
lan
/Mc
Gra
w-H
ill
19
Quick Lab Date Name
Changes in Food Webs
Copy or trace the kelp forest food web shown on page 54 in your textbook.
Put an X through each organism that was affected by the change in sea otter populations.
Analyze Data Copy your new food web. How many organisms are left?
Communicate How can a change in one population affect other populations in a food web?
Draw Conclusions What does your new food web tell you about why it is important to protect environments?
Chapter 1 • Living Things Need Energy Use with Lesson 3Activity Lab Book Food Webs20
© M
ac
mil
lan
/Mc
Gra
w-H
ill
How can tiny living things
change plant material?
Make a Prediction How can tiny living things change an apple? Write a prediction.
Test Your Prediction
View each piece of apple under a microscope. Record what you see.
Predict What do you think will happen to a piece of apple if it is left out for one week? Record your predictions.
Put a piece of apple in each of three plastic bags. Seal the bags.
Observe Leave the apples in the bags for one week. Observe them every day. Do apples change?
Observe Your teacher will prepare a slide of your apples. View them under a microscope. Record what you see.
Date Name
• three peeled pieces of apple
• plastic bags
• microscope
Materials
Explore
California Standard4 IE 6.d.
Chapter 1 • Living Things Need Energy Use with Lesson 4Activity Lab Book Microorganisms
© M
ac
mil
lan
/Mc
Gra
w-H
ill
21
Draw Conclusions
What happened to the apples after one week? Did your results match your predictions?
Infer What caused the apples to change?
Explore MoreHow do you think a slice of bread might change after a week? Make a plan to find out.
Inquiry: Open
My question is:
How I can test it:
My results are:
Explore Date Name
Chapter 1 • Living Things Need Energy Use with Lesson 4Activity Lab Book Microorganisms22
© M
ac
mil
lan
/Mc
Gra
w-H
ill
Discover pond organisms
ProcedureYour teacher has prepared a sample of water that might be found in a farm pond or a wild pond.
Observe Look at a drop of the pond water under a microscope. What do you see?
Record Data Make a drawing of one of the organisms you see on the slide. Write notes about the organism.
• jar
• cut hay
• pond water
• white corn syrup
• microscope slides and slip covers
• water dropper
• microscope
• soap
Materials
AlternativeExplore
Lab Safety Make sure that you wash your hands and work area with soap. The organisms in pond water can be harmful.
Date Name
Chapter 1 • Living Things Need Energy Use with Lesson 4Activity Lab Book Microorganisms
© M
ac
mil
lan
/Mc
Gra
w-H
ill
23
Observing Decomposers
Put soil on the bottom of a plastic tub. Add food scraps such as bread crusts, banana peels, or other fruits.
Add leaves and place a few earthworms in the tub. Cover the tub and leave it outside.
Predict What do you think will happen to the food scraps and leaves?
Observe Use a hand lens to observe the mixture over the next few days. Record what you see.
Infer What do the results tell you about decomposers?
Quick Lab Date
• soil
• leaves
• food scraps (banana crusts or peels, or other fruits)
Materials
Name
Chapter 1 • Living Things Need Energy Use with Lesson 4Activity Lab Book Microorganisms24
© M
ac
mil
lan
/Mc
Gra
w-H
ill
• item
• item
Materials
25
Explore
What are some living and
nonliving things in your
environment?
Make a PredictionWhat living and nonliving things might you find in your environment? Write a prediction.
Test Your Prediction
Measure Mark off an area of ground that is about 1 m square. Stick a clothespin in the ground at each corner. Wrap yarn around the tops of the clothespins.
Observe Use your hand lens to look at the living and nonliving things in this area.
Record Data Use a chart to record what you see. Label each object as living or nonliving.
Living Nonliving
Share your findings with a classmate. Compare the environments each of you observed.
Draw Conclusions
Analyze Data How many different kinds of living and nonliving things are in your environment? What did you see most of?
Date Name
• meter tape
• 4 clothespins
• ball of yarn
• hand lens
Materials
California Standard4 IE 6.f.
Chapter 2 • Living Things and Their Environment Use with Lesson 1Activity Lab Book Ecosystems
Choose one living thing you observed. What are the characteristics of this organism?
Explore MoreHow do the living things in the environment use the nonliving things in the environment?
Inquiry: Open Choose an ecosystem different from the ecosystem of the school grounds. Think about the relationships between the living things and nonliving things in this ecosystem. Come up with a question on this topic and carry out research to answer it.
My question is:
How I can test it:
My results are:
Explore Date Name
Chapter 2 • Living Things and Their Environment Use with Lesson 1Activity Lab Book Ecosystems26
© M
ac
mil
lan
/Mc
Gra
w-H
ill
Date Name
Ecosystems
Work in small groups.
Observe Find the living and nonliving things in your group’s photograph.
Record Data Write down what you see as living, and nonliving.
Communicate Share what your group found, and discuss the different ecosystems observed by other groups.
AlternativeExplore
• color pictures of various ecosystems:
• tropical rain forest
• pond
• desert
• grassland
• other
Materials
Chapter 2 • Living Things and Their Environment Use with Lesson 1Activity Lab Book Ecosystems
© M
ac
mil
lan
/Mc
Gra
w-H
ill
27
Quick Lab Date
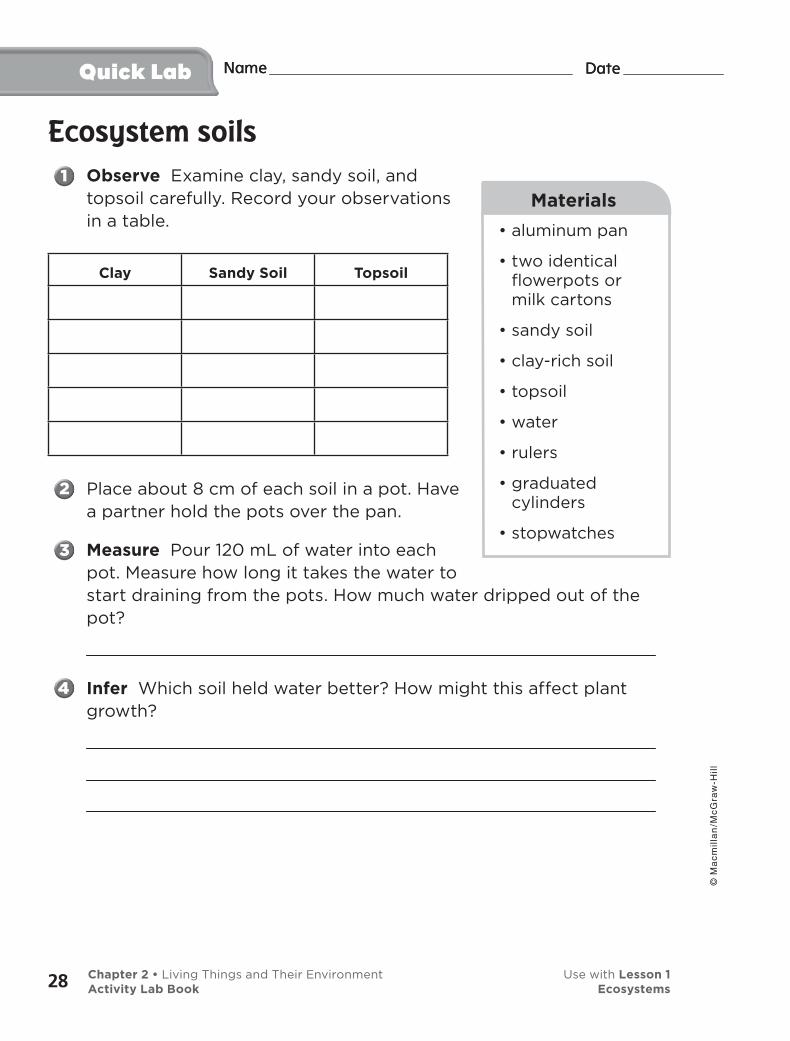
Ecosystem soils
Observe Examine clay, sandy soil, and topsoil carefully. Record your observations in a table.
Clay Sandy Soil Topsoil
Place about 8 cm of each soil in a pot. Have a partner hold the pots over the pan.
Measure Pour 120 mL of water into each pot. Measure how long it takes the water to start draining from the pots. How much water dripped out of the pot?
Infer Which soil held water better? How might this affect plant growth?
Name
• aluminum pan
• two identical flowerpots or milk cartons
• sandy soil
• clay-rich soil
• topsoil
• water
• rulers
• graduated cylinders
• stopwatches
Materials
Date Name
Chapter 2 • Living Things and Their Environment Use with Lesson 1Activity Lab Book Ecosystems28
© M
ac
mil
lan
/Mc
Gra
w-H
ill
Date Name
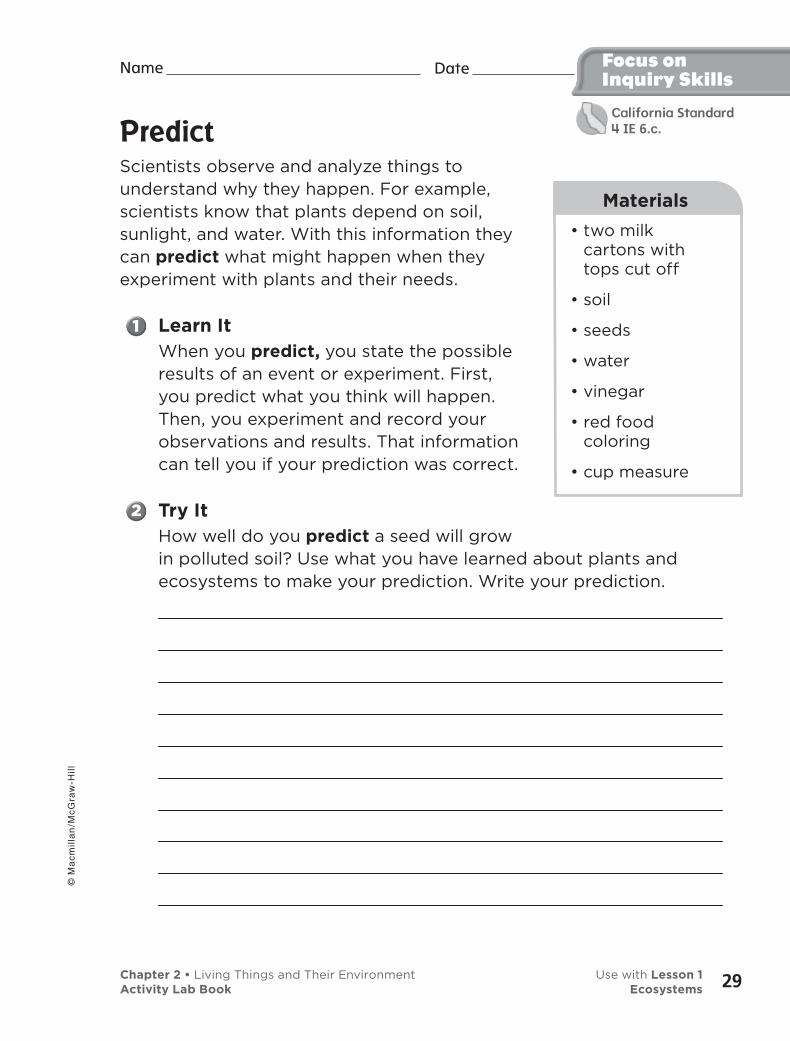
PredictScientists observe and analyze things to understand why they happen. For example, scientists know that plants depend on soil, sunlight, and water. With this information they can predict what might happen when they experiment with plants and their needs.
Learn ItWhen you predict, you state the possible results of an event or experiment. First, you predict what you think will happen. Then, you experiment and record your observations and results. That information can tell you if your prediction was correct.
Try ItHow well do you predict a seed will grow in polluted soil? Use what you have learned about plants and ecosystems to make your prediction. Write your prediction.
Focus on Inquiry Skills
• two milk cartons with tops cut off
• soil
• seeds
• water
• vinegar
• red food coloring
• cup measure
Materials
California Standard4 IE 6.c.
Chapter 2 • Living Things and Their Environment Use with Lesson 1Activity Lab Book Ecosystems
© M
ac
mil
lan
/Mc
Gra
w-H
ill
29
Date Name
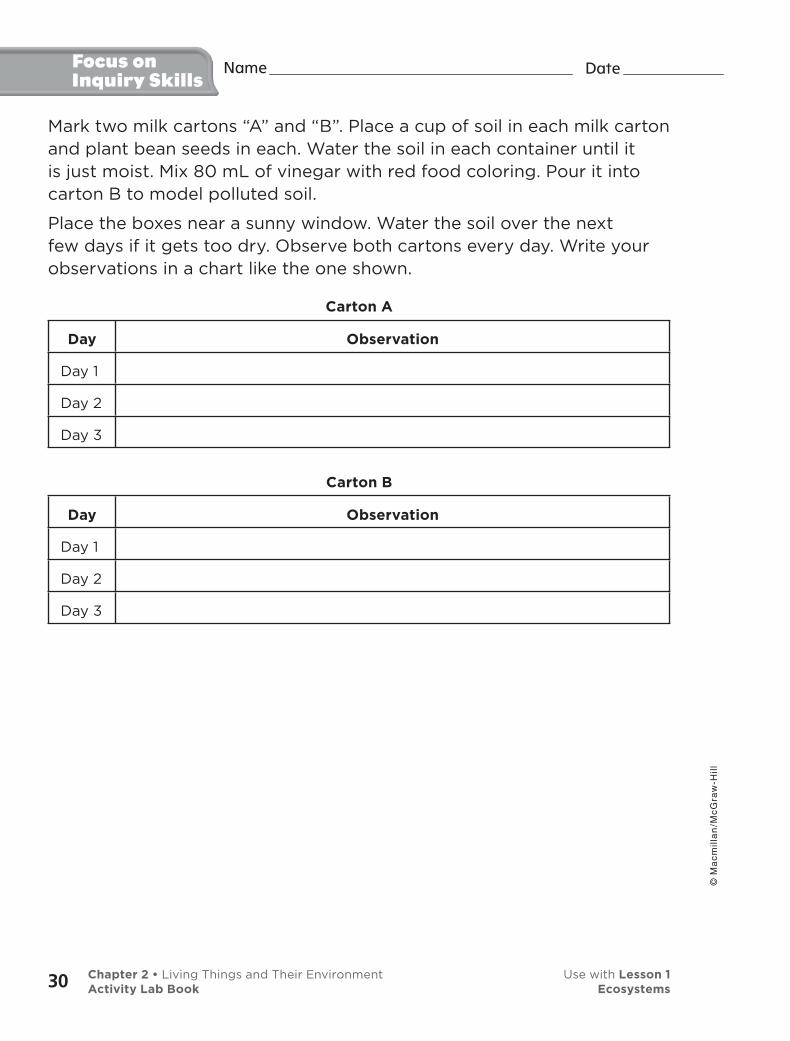
Mark two milk cartons “A” and “B”. Place a cup of soil in each milk carton and plant bean seeds in each. Water the soil in each container until it is just moist. Mix 80 mL of vinegar with red food coloring. Pour it into carton B to model polluted soil.
Place the boxes near a sunny window. Water the soil over the next few days if it gets too dry. Observe both cartons every day. Write your observations in a chart like the one shown.
Carton A
Day Observation
Day 1
Day 2
Day 3
Carton B
Day Observation
Day 1
Day 2
Day 3
Focus onInquiry Skills
Chapter 2 • Living Things and Their Environment Use with Lesson 1Activity Lab Book Ecosystems30
© M
ac
mil
lan
/Mc
Gra
w-H
ill
Date Name
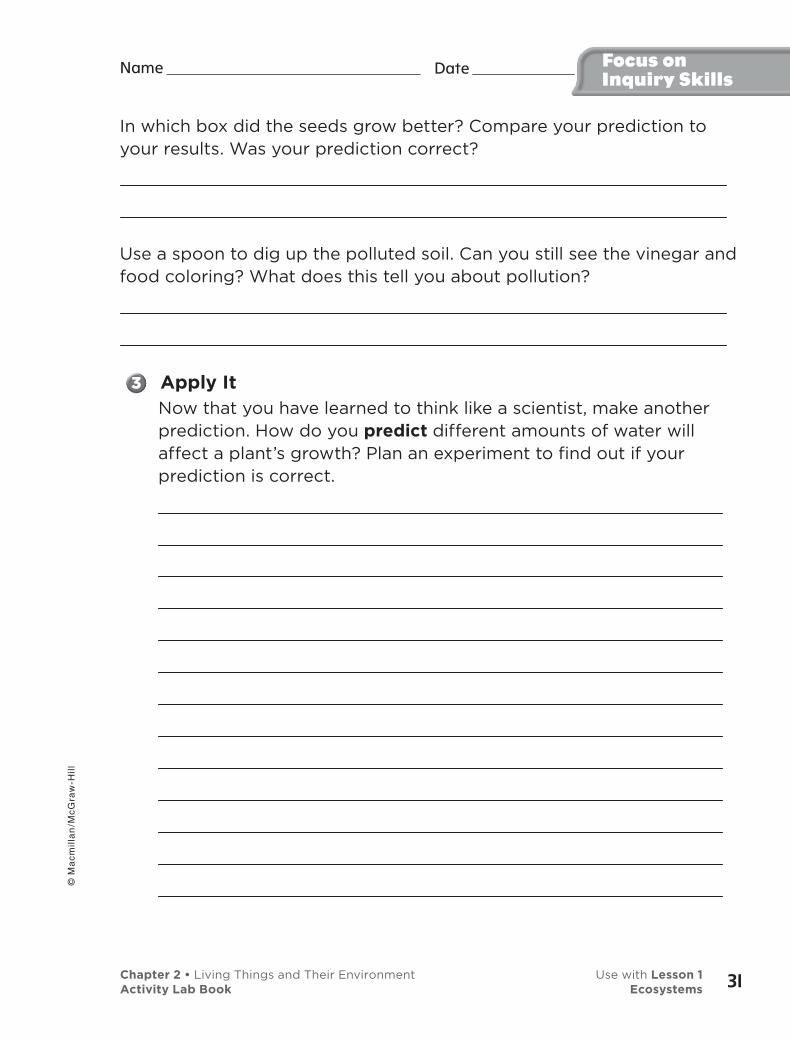
In which box did the seeds grow better? Compare your prediction to your results. Was your prediction correct?
Use a spoon to dig up the polluted soil. Can you still see the vinegar and food coloring? What does this tell you about pollution?
Apply ItNow that you have learned to think like a scientist, make another prediction. How do you predict different amounts of water will affect a plant’s growth? Plan an experiment to find out if your prediction is correct.
Focus onInquiry Skills
Chapter 2 • Living Things and Their Environment Use with Lesson 1Activity Lab Book Ecosystems
© M
ac
mil
lan
/Mc
Gra
w-H
ill
31

Student Journal Notes
Chapter 2 • Living Things and Their Environment Use with Lesson 1Activity Lab Book Ecosystems32
© M
ac
mil
lan
/Mc
Gra
w-H
ill
Date Name Explore
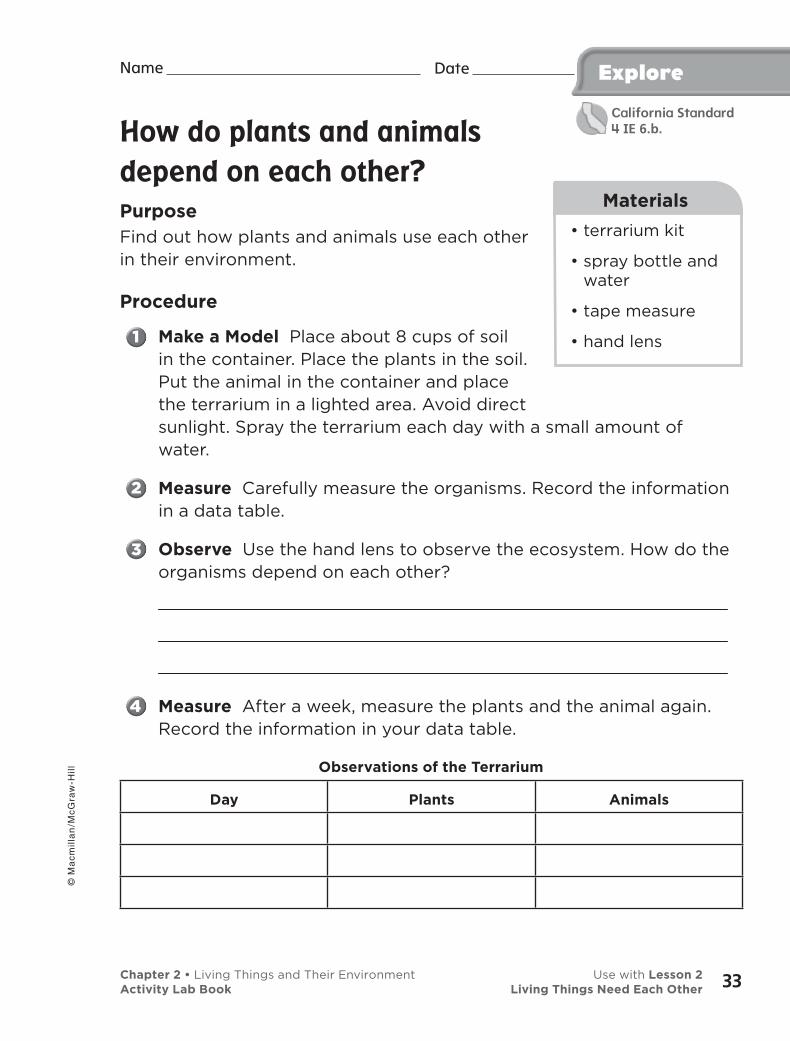
How do plants and animals
depend on each other?
PurposeFind out how plants and animals use each other in their environment.
Procedure
Make a Model Place about 8 cups of soil in the container. Place the plants in the soil. Put the animal in the container and place the terrarium in a lighted area. Avoid direct sunlight. Spray the terrarium each day with a small amount of water.
Measure Carefully measure the organisms. Record the information in a data table.
Observe Use the hand lens to observe the ecosystem. How do the organisms depend on each other?
Measure After a week, measure the plants and the animal again. Record the information in your data table.
Observations of the Terrarium
Day Plants Animals
• terrarium kit
• spray bottle and water
• tape measure
• hand lens
Materials
California Standard4 IE 6.b.
Chapter 2 • Living Things and Their Environment Use with Lesson 2Activity Lab Book Living Things Need Each Other
© M
ac
mil
lan
/Mc
Gra
w-H
ill
33
Explore Date
Draw Conclusions
Analyze Data Draw a diagram of your terrarium. Draw arrows to show how the organisms depend on one another.
Infer What are the living and nonliving things in your terrarium?
Explore MoreHow might another animal use plants as food and shelter? How might you test your ideas?
Inquiry: Open Many people like to watch butterflies in their garden. Find out how people can attract butterflies to their garden. Make up a question on this topic, then carry out research to answer it.
My question is:
How I can test it:
My results are:
Name
Chapter 2 • Living Things and Their Environment Use with Lesson 2Activity Lab Book Living Things Need Each Other34
© M
ac
mil
lan
/Mc
Gra
w-H
ill
Date Name
What animals eat
Work in pairs. Your team will be using various reference materials to find out what different animals eat.
Observe Your teacher will model how to find what one animal eats and where the food comes from.
Research Now it’s your turn. Find what five different animals eat. Where does their food come from?
Animal Food Source of Food
AlternativeExplore
• reference materials
Materials
Chapter 2 • Living Things and Their Environment Use with Lesson 2Activity Lab Book Living Things Need Each Other
© M
ac
mil
lan
/Mc
Gra
w-H
ill
35
Quick Lab Date
Flower parts
Use a hand lens to carefully observe the parts of a flower. Make a drawing of the flower and label each part you see, including the pistil, stamen, and anther.
Be Careful. Do not do this activity if you are allergic to flowers.
Use tweezers or toothpicks to open the ovary at the base of the pistil. Draw what you observe.
Make a list of the plant parts. Label which parts are “male” and which are “female”.
Name
• flower
• tweezers or toothpicks
Materials
Chapter 2 • Living Things and Their Environment Use with Lesson 2Activity Lab Book Living Things Need Each Other36
© M
ac
mil
lan
/Mc
Gra
w-H
ill
Date Name Explore
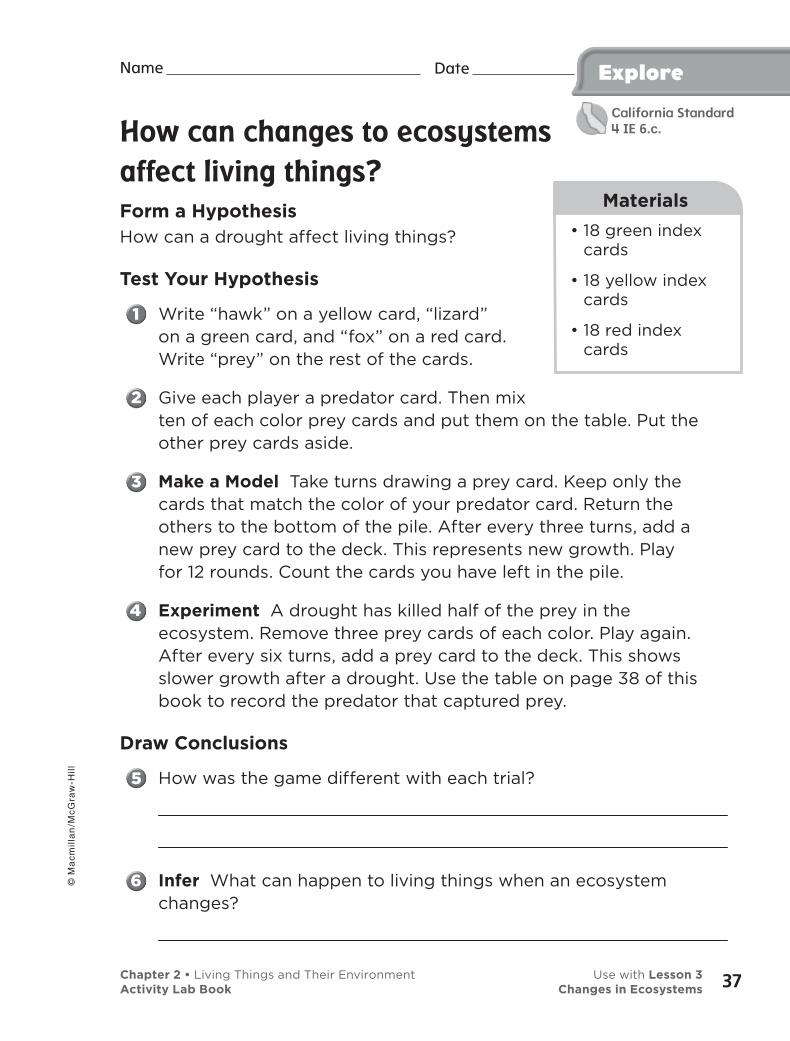
How can changes to ecosystems
affect living things?
Form a HypothesisHow can a drought affect living things?
Test Your Hypothesis
Write “hawk” on a yellow card, “lizard” on a green card, and “fox” on a red card. Write “prey” on the rest of the cards.
Give each player a predator card. Then mix ten of each color prey cards and put them on the table. Put the other prey cards aside.
Make a Model Take turns drawing a prey card. Keep only the cards that match the color of your predator card. Return the others to the bottom of the pile. After every three turns, add a new prey card to the deck. This represents new growth. Play for 12 rounds. Count the cards you have left in the pile.
Experiment A drought has killed half of the prey in the ecosystem. Remove three prey cards of each color. Play again. After every six turns, add a prey card to the deck. This shows slower growth after a drought. Use the table on page 38 of this book to record the predator that captured prey.
Draw Conclusions
How was the game different with each trial?
Infer What can happen to living things when an ecosystem changes?
• 18 green index cards
• 18 yellow index cards
• 18 red index cards
Materials
California Standard4 IE 6.c.
Chapter 2 • Living Things and Their Environment Use with Lesson 3Activity Lab Book Changes in Ecosystems
© M
ac
mil
lan
/Mc
Gra
w-H
ill
37
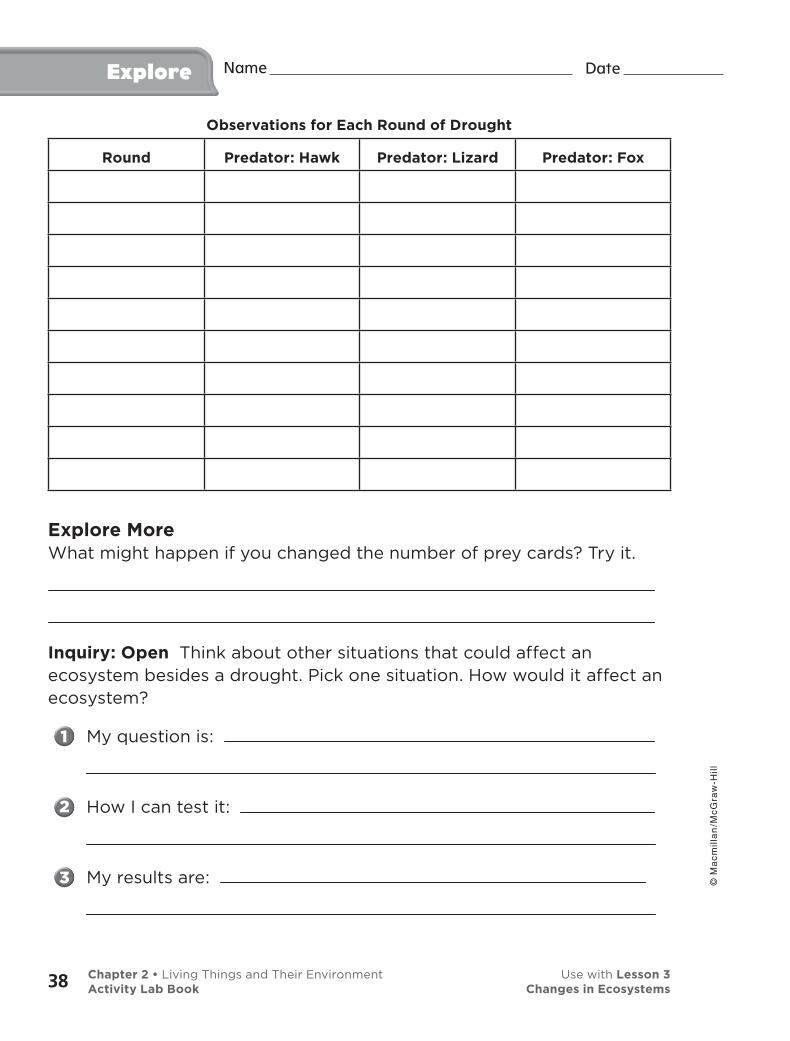
Explore Date
Observations for Each Round of Drought
Round Predator: Hawk Predator: Lizard Predator: Fox
Explore MoreWhat might happen if you changed the number of prey cards? Try it.
Inquiry: Open Think about other situations that could affect an ecosystem besides a drought. Pick one situation. How would it affect an ecosystem?
My question is:
How I can test it:
My results are:
Name
Chapter 2 • Living Things and Their Environment Use with Lesson 3Activity Lab Book Changes in Ecosystems38
© M
ac
mil
lan
/Mc
Gra
w-H
ill
Date Name
What can affect a food chain?
Observe Look at the pictures of organisms of a forest food chain on the board, with arrows in between showing the energy flow relationship.
Infer What would happen if less rain fell one year?
Infer What would happen if there were a fire in the forest?
Communicate Discuss the importance of changes in an ecosystem on all organisms that live there.
AlternativeExplore
• pictures of organisms in a forest food chain
Materials
Chapter 2 • Living Things and Their Environment Use with Lesson 3Activity Lab Book Changes in Ecosystems
© M
ac
mil
lan
/Mc
Gra
w-H
ill
39
Quick Lab Date
Crowded ecosystems
Make a Model Drop 10 paper clips into a small box. This shows the room needed for a population in an ecosystem. How many of the paper clips are touching each other?
Repeat step 1 three times.
Predict What might happen if the ecosystem becomes crowded?
Make a Model Toss 20 paper clips into the box. This shows a population in a crowded ecosystem. How many of the paper clips are touching?
Repeat step 4 three times.
Infer What happens when organisms are crowded in an ecosystem? How might this affect how a population meets its needs?
Name
• 20 colored paper clips
Materials
Chapter 2 • Living Things and Their Environment Use with Lesson 3Activity Lab Book Changes in Ecosystems40
© M
ac
mil
lan
/Mc
Gra
w-H
ill
Date Name Explore
How does the shape of a bird’s
beak affect what it eats?
Form a HypothesisWhy do some bird beaks pick up some foods better? Write a hypothesis.
Test Your Hypothesis
Predict The first five materials represent different shapes and kinds of bird beaks. Which “beaks” do you think will work best for picking up rice grains? Foam chunks? Water? Record your predictions.
Experiment Try picking up each “food” with each type of “beak.” Record your results and observations in a chart like the one shown.
• chopsticks
• empty cup
• spoon
• fork
• straw
• rice grains
• large foam packing material
• water
Materials
California Standard4 IE 6.c.
Chapter 2 • Living Things and Their Environment Use with Lesson 4Activity Lab Book Adaptations
© M
ac
mil
lan
/Mc
Gra
w-H
ill
41
Explore Date
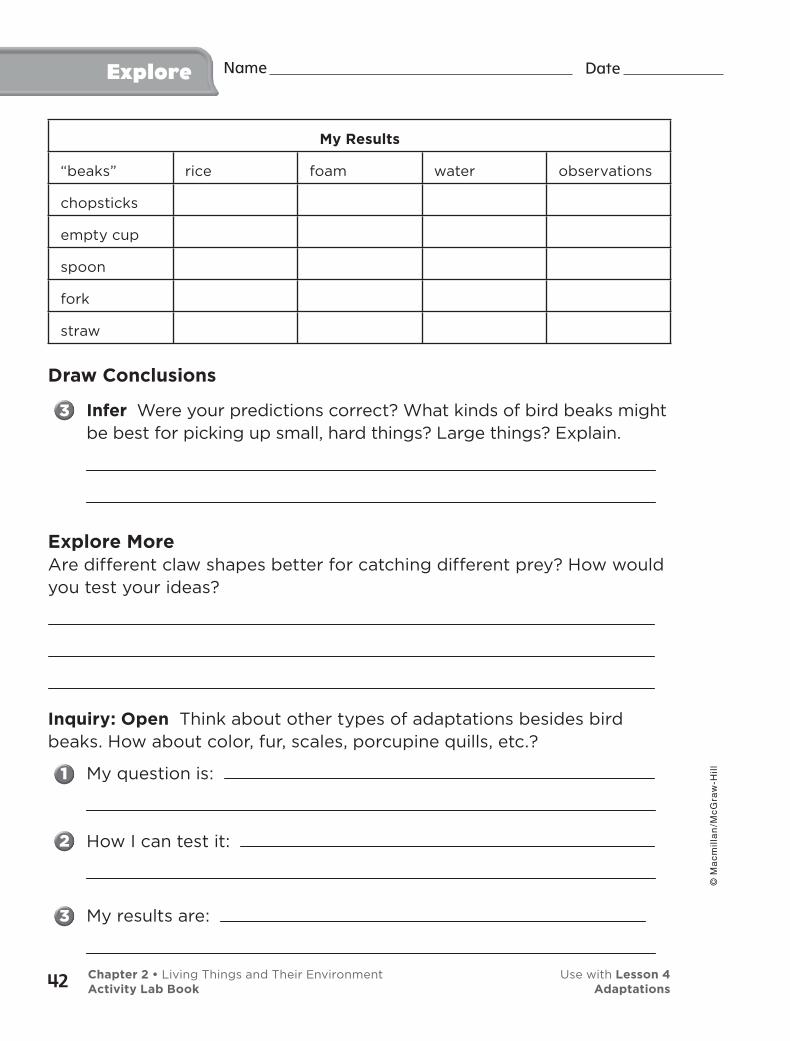
My Results
“beaks” rice foam water observations
chopsticks
empty cup
spoon
fork
straw
Draw Conclusions
Infer Were your predictions correct? What kinds of bird beaks might be best for picking up small, hard things? Large things? Explain.
Explore MoreAre different claw shapes better for catching different prey? How would you test your ideas?
Inquiry: Open Think about other types of adaptations besides bird beaks. How about color, fur, scales, porcupine quills, etc.?
My question is:
How I can test it:
My results are:
Name
Chapter 2 • Living Things and Their Environment Use with Lesson 4Activity Lab Book Adaptations42
© M
ac
mil
lan
/Mc
Gra
w-H
ill

Date Name
Which beak is best?
Work in small groups and look through magazines for pictures of different kinds of birds. Cut the pictures out.
Then look through magazines for pictures of types of foods that they eat (for example insects, nectar from flowers, seeds. . . ). Cut the pictures out.
Compare the bird beaks. Match which beak might be best for eating each type of food.
Communicate Discuss with classmates your conclusions.
AlternativeExplore
• magazines
• scissors
Materials
Chapter 2 • Living Things and Their Environment Use with Lesson 4Activity Lab Book Adaptations
© M
ac
mil
lan
/Mc
Gra
w-H
ill
43
Quick Lab Date
Absorbing heat
Predict Which color do you think will take in heat best—black, green, or white? Write your prediction.
Place black, green, and white construction paper side by side on a windowsill. Use sheets of paper that are the same size.
After a while, feel each piece of paper with your hand. Put the papers in order from warmest to coolest.
Record your results. Was your prediction correct?
Infer How do you think color affects heat absorption?
Name
• black, green, white construction paper
• sunny windowsill
Materials
Chapter 2 • Living Things and Their Environment Use with Lesson 4Activity Lab Book Adaptations44
© M
ac
mil
lan
/Mc
Gra
w-H
ill
Date Name
How are some animals adapted
to swimming?
Form a HypothesisAdaptations help plants and animals survive in their environments. Animals such as ducks and penguins have webbed feet. How do webbed feet help these animals? Write your hypothesis in the form, “If an animal has webbed feet, then . . .”
Test Your Hypothesis
Make a Model Spread out three craft sticks in a fan shape. Secure the sticks in place with glue. This is the frame for your foot structure.
Make another foot structure identical to the first.
Use Variables Cover the top and bottom of the first foot structure with contact paper to make a webbed foot. Cut the paper to the correct size around the outside of the foot. Leave the second foot uncovered.
Experiment Test each foot in a basin of water to see how it could be used for swimming. Write your observations in your science journal.
Be aScientist
• craft sticks
• glue
• contact paper
• scissors
• basin of water
Materials
California Standard4 IE 6.a.
Chapter 2 • Living Things and Their Environment Use with Lesson 4Activity Lab Book Adaptations
© M
ac
mil
lan
/Mc
Gra
w-H
ill
45
Date Name
Draw Conclusions
Infer Which foot structure works best for swimming? Why?
Infer Did the results of your experiment support or reject your hypothesis? Explain.
Be aScientist
Chapter 2 • Living Things and Their Environment Use with Lesson 4Activity Lab Book Adaptations46
© M
ac
mil
lan
/Mc
Gra
w-H
ill
Date Name
Inquiry: Guided
How do teeth help us eat different foods?
Form a HypothesisAs humans, our front teeth are shaped differently from our back teeth. How does the shape of our teeth help us eat different foods? Write a hypothesis.
Test Your HypothesisDesign an experiment to tell how the different shapes of human teeth are suited for eating different foods. Compare different foods, such as an apple and cracker. Write out the steps you will follow. Record your results and observations.
This is my question:
This is how I will test my question:
These are my results:
Draw ConclusionsDid your experiment support your hypothesis? Why or why not?
Be aScientist
Chapter 2 • Living Things and Their Environment Use with Lesson 4Activity Lab Book Adaptations
© M
ac
mil
lan
/Mc
Gra
w-H
ill
47
Date Name
Inquiry: Open What other questions do you have about adaptations? Design an experiment to answer a question you have. Your experiment must test only one variable, or one item being changed. Your experiment must be written so that another group can complete the experiment by following your instructions.
Remember to follow the steps of the scientific process.
This is my question:
This is my hypothesis:
This is how I will test my question:
This is my result:
Be a Scientist
Ask a Question
Form a Hypothesis
Test Your Hypothesis
Draw Conclusions
Chapter 2 • Living Things and Their Environment Use with Lesson 4Activity Lab Book Adaptations48
© M
ac
mil
lan
/Mc
Gra
w-H
ill
What makes rocks different
from each other?
Purpose Find out ways rocks are different.
Procedure
Observe Look at each rock. What color is each rock? How does each rock feel?
Record Data Write about the properties of each rock in a chart
like the one below.
Date Name
• several different rocks
• hand lens
Materials
Explore
Color Texture Other
Rock 1
Rock 2
Compare Choose one rock that is more than one color. Use a hand lens to compare the parts that are the same color. How do these parts compare? Are they shiny or dull? Are they rough or smooth?
Compare Choose another color in the same rock. How do the properties of the parts with this color compare?
California Standard4 IE 6.a.
Chapter 3 • Rocks and Minerals Use with Lesson 1Activity Lab Book Minerals: The Building Blocks of Rocks
© M
ac
mil
lan
/Mc
Gra
w-H
ill
49
Draw Conclusions
Infer Are the different colored parts of the rock made of the same or different materials? Explain your answer.
What makes rocks different from each other?
Explore MoreChoose one of the rocks. How could you identify the rock and what it is made of? Now try it.
Inquiry: Open Think about how to break a rock down into its separate components. Design an experiment.
My question is:
How I can test it:
My results are:
Explore Date Name
Chapter 3 • Rocks and Minerals Use with Lesson 1Activity Lab Book Minerals: The Building Blocks of Rocks50
© M
ac
mil
lan
/Mc
Gra
w-H
ill
dull
shiny
Heavy
Light
Heavy
Light
One color
One color
Many colors
Many colors
Orange streak
Black streak
White streak
Green streak
White streak
Yellow streak
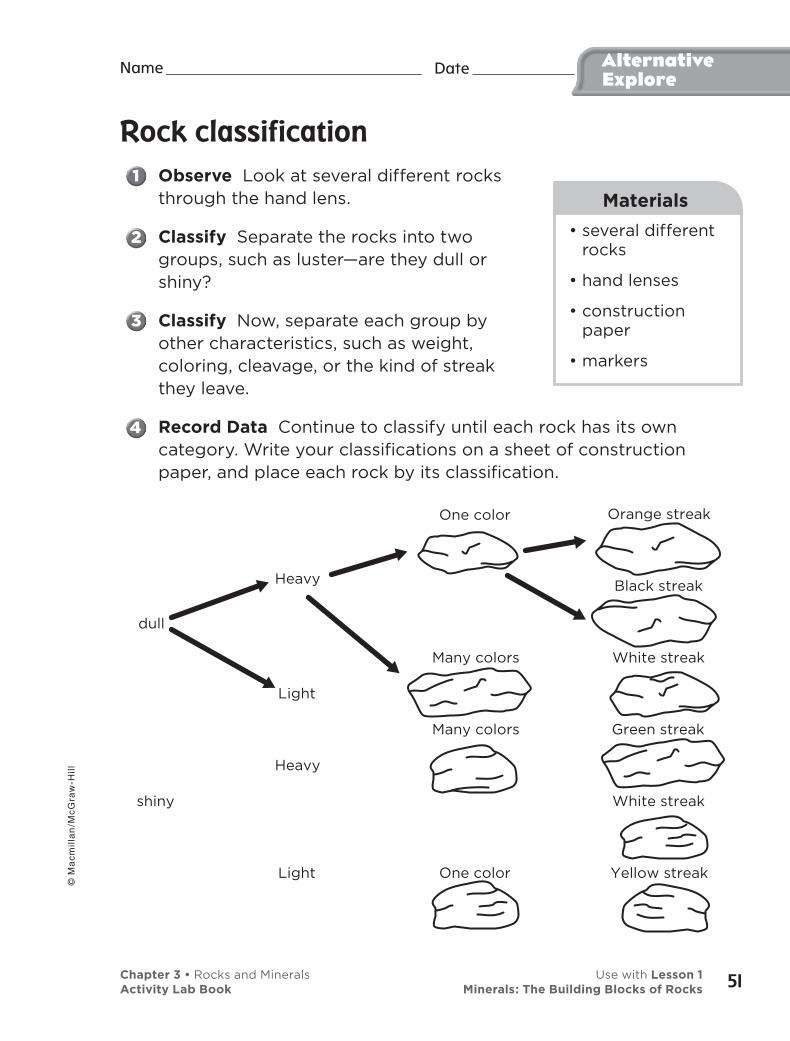
Rock classification
Observe Look at several different rocks through the hand lens.
Classify Separate the rocks into two groups, such as luster—are they dull or shiny?
Classify Now, separate each group by other characteristics, such as weight, coloring, cleavage, or the kind of streak they leave.
Record Data Continue to classify until each rock has its own category. Write your classifications on a sheet of construction paper, and place each rock by its classification.
Date Name
• several different rocks
• hand lenses
• construction paper
• markers
Materials
AlternativeExplore
Chapter 3 • Rocks and Minerals Use with Lesson 1Activity Lab Book Minerals: The Building Blocks of Rocks
© M
ac
mil
lan
/Mc
Gra
w-H
ill
51
Date Name
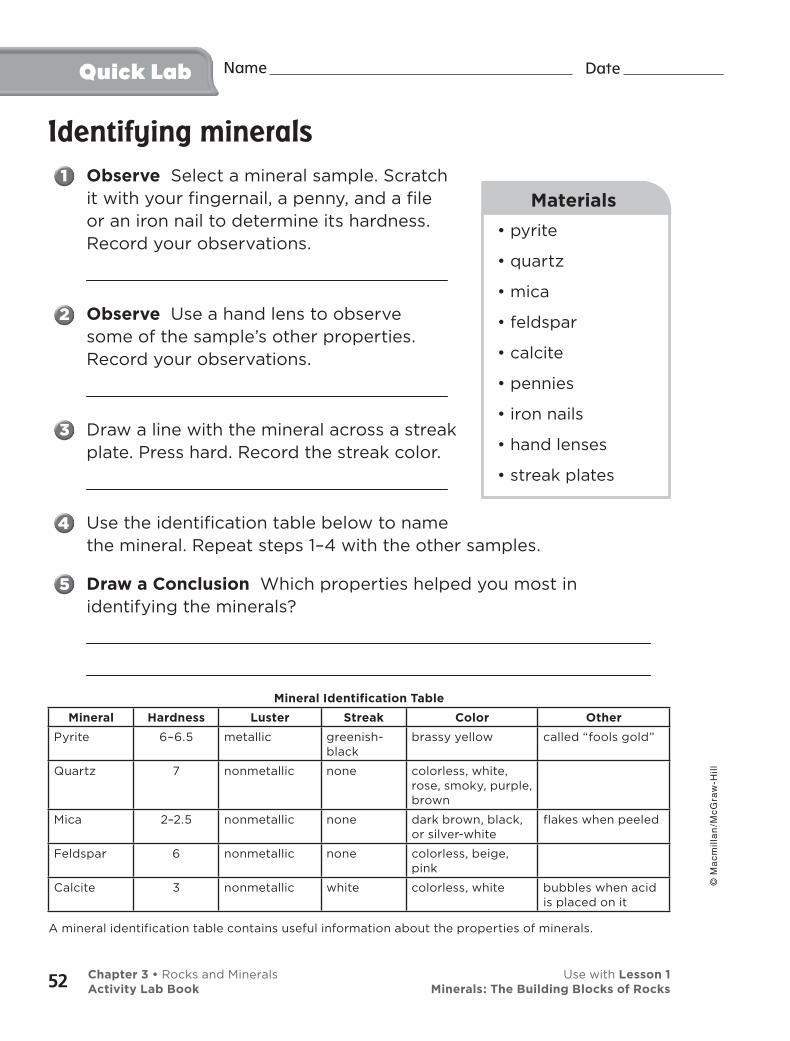
Identifying minerals
Observe Select a mineral sample. Scratch it with your fingernail, a penny, and a file or an iron nail to determine its hardness. Record your observations.
Observe Use a hand lens to observe some of the sample’s other properties. Record your observations.
Draw a line with the mineral across a streak plate. Press hard. Record the streak color.
Use the identification table below to name the mineral. Repeat steps 1–4 with the other samples.
Draw a Conclusion Which properties helped you most in identifying the minerals?
Mineral Identification Table
Mineral Hardness Luster Streak Color Other
Pyrite 6–6.5 metallic greenish-black
brassy yellow called “fools gold”
Quartz 7 nonmetallic none colorless, white, rose, smoky, purple, brown
Mica 2–2.5 nonmetallic none dark brown, black, or silver-white
flakes when peeled
Feldspar 6 nonmetallic none colorless, beige, pink
Calcite 3 nonmetallic white colorless, white bubbles when acid is placed on it
A mineral identification table contains useful information about the properties of minerals.
• pyrite
• quartz
• mica
• feldspar
• calcite
• pennies
• iron nails
• hand lenses
• streak plates
Materials
Quick Lab
Chapter 3 • Rocks and Minerals Use with Lesson 1Activity Lab Book Minerals: The Building Blocks of Rocks52
© M
ac
mil
lan
/Mc
Gra
w-H
ill
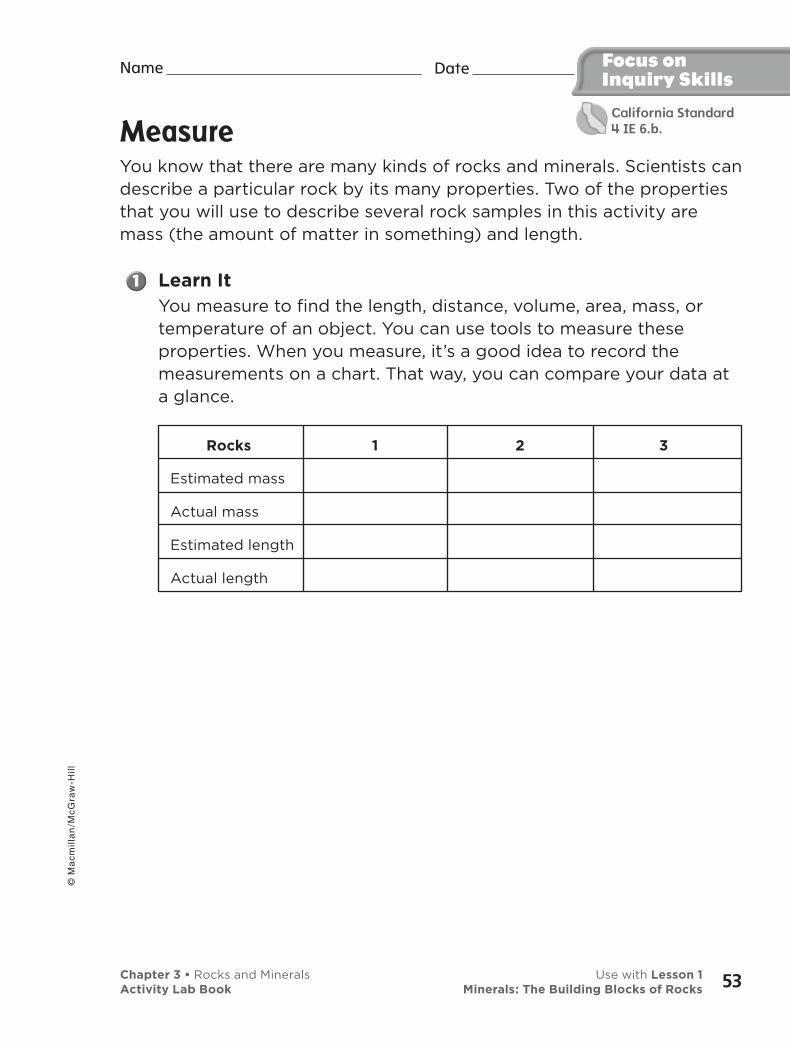
MeasureYou know that there are many kinds of rocks and minerals. Scientists can describe a particular rock by its many properties. Two of the properties that you will use to describe several rock samples in this activity are mass (the amount of matter in something) and length.
Learn ItYou measure to find the length, distance, volume, area, mass, or temperature of an object. You can use tools to measure these properties. When you measure, it’s a good idea to record the measurements on a chart. That way, you can compare your data at a glance.
Date Name Focus onInquiry Skills
Rocks 1 2 3
Estimated mass
Actual mass
Estimated length
Actual length
California Standard4 IE 6.b.
Chapter 3 • Rocks and Minerals Use with Lesson 1Activity Lab Book Minerals: The Building Blocks of Rocks
© M
ac
mil
lan
/Mc
Gra
w-H
ill
53
Date Name
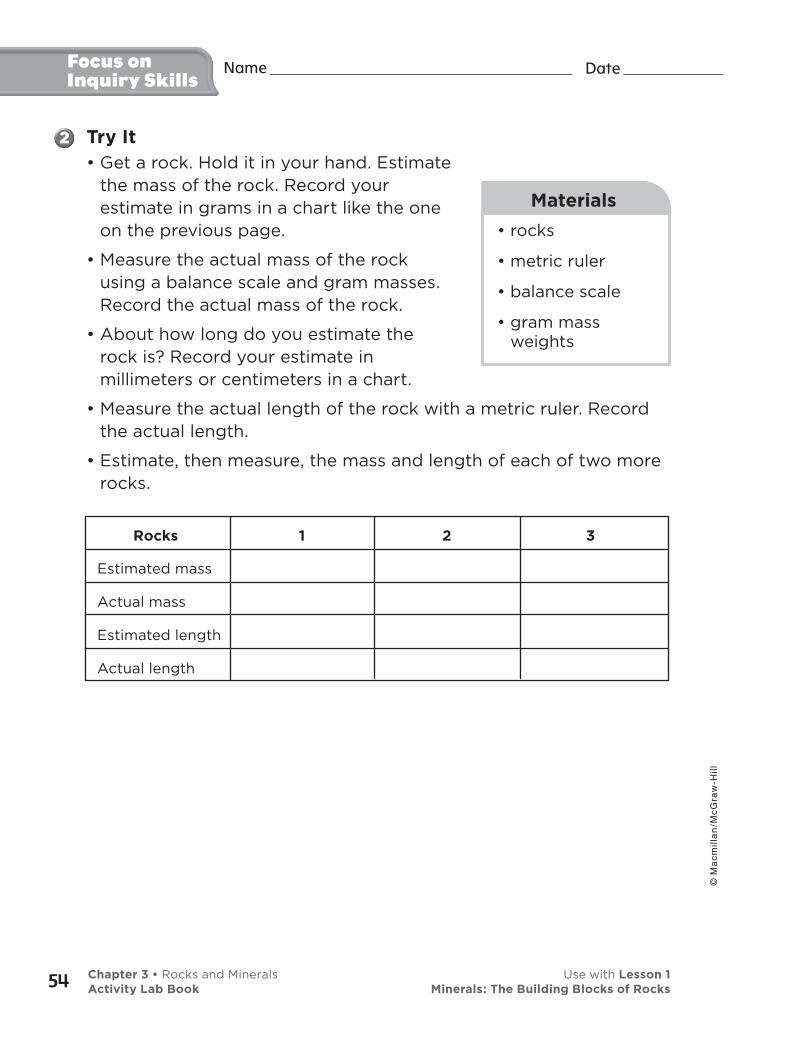
Try It• Get a rock. Hold it in your hand. Estimate
the mass of the rock. Record your estimate in grams in a chart like the one on the previous page.
• Measure the actual mass of the rock using a balance scale and gram masses. Record the actual mass of the rock.
• About how long do you estimate the rock is? Record your estimate in millimeters or centimeters in a chart.
• Measure the actual length of the rock with a metric ruler. Record the actual length.
• Estimate, then measure, the mass and length of each of two more rocks.
• rocks
• metric ruler
• balance scale
• gram mass weights
Materials
Focus onInquiry Skills
Rocks 1 2 3
Estimated mass
Actual mass
Estimated length
Actual length
Chapter 3 • Rocks and Minerals Use with Lesson 1Activity Lab Book Minerals: The Building Blocks of Rocks54
© M
ac
mil
lan
/Mc
Gra
w-H
ill
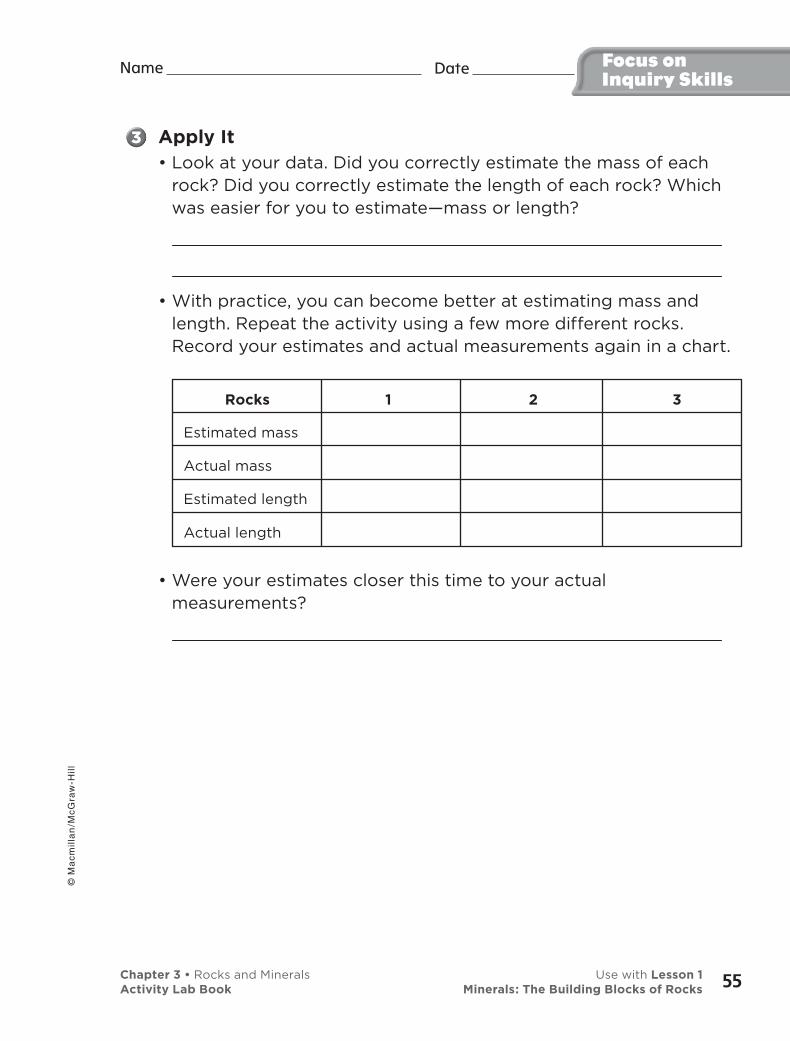
Apply It• Look at your data. Did you correctly estimate the mass of each
rock? Did you correctly estimate the length of each rock? Which was easier for you to estimate—mass or length?
• With practice, you can become better at estimating mass and length. Repeat the activity using a few more different rocks. Record your estimates and actual measurements again in a chart.
Date Name Focus onInquiry Skills
Rocks 1 2 3
Estimated mass
Actual mass
Estimated length
Actual length
• Were your estimates closer this time to your actual measurements?
Chapter 3 • Rocks and Minerals Use with Lesson 1Activity Lab Book Minerals: The Building Blocks of Rocks
© M
ac
mil
lan
/Mc
Gra
w-H
ill
55
Date Name
Find OutDo you think that you can estimate the mass of a rock before actually picking it up?
Estimate Try it for several rocks.
Measure Then use the balance to find the actual mass of each rock.
Infer What is it about a rock that might cause you to have difficulty estimating its mass before you pick it up?
Focus onInquiry Skills
Chapter 3 • Rocks and Minerals Use with Lesson 1Activity Lab Book Minerals: The Building Blocks of Rocks56
© M
ac
mil
lan
/Mc
Gra
w-H
ill
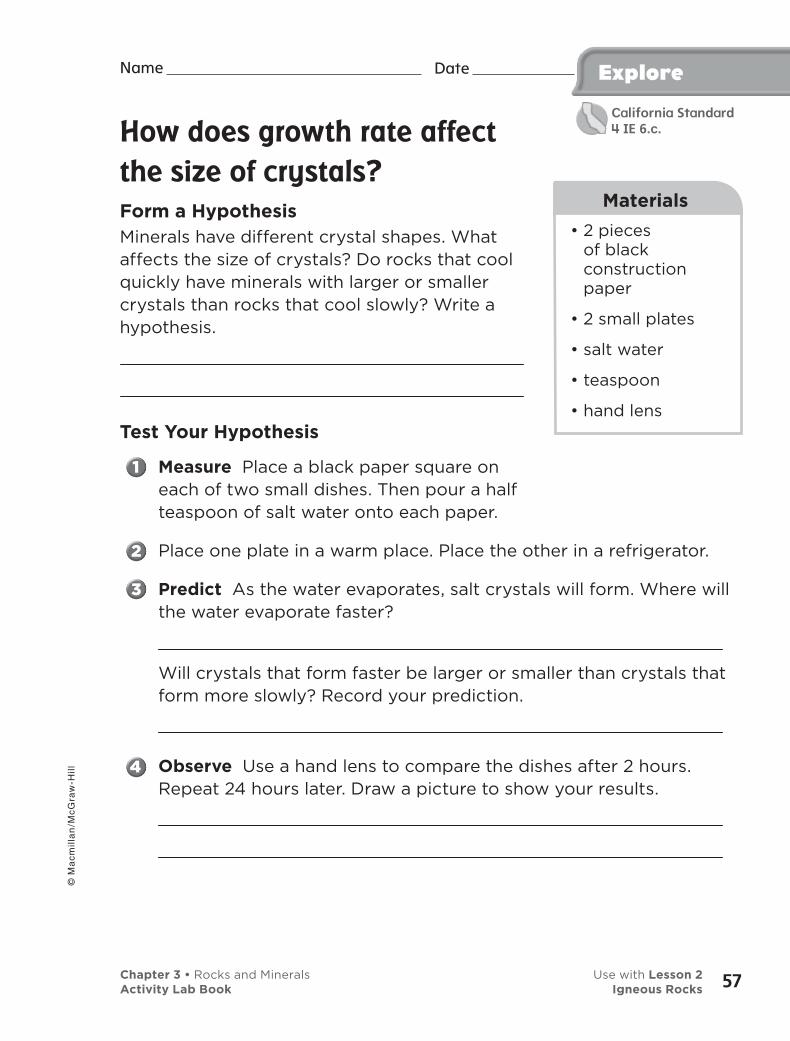
How does growth rate affect
the size of crystals?
Form a HypothesisMinerals have different crystal shapes. What affects the size of crystals? Do rocks that cool quickly have minerals with larger or smaller crystals than rocks that cool slowly? Write a hypothesis.
Test Your Hypothesis
Measure Place a black paper square on each of two small dishes. Then pour a half teaspoon of salt water onto each paper.
Place one plate in a warm place. Place the other in a refrigerator.
Predict As the water evaporates, salt crystals will form. Where will the water evaporate faster?
Will crystals that form faster be larger or smaller than crystals that form more slowly? Record your prediction.
Observe Use a hand lens to compare the dishes after 2 hours. Repeat 24 hours later. Draw a picture to show your results.
Date Name
• 2 pieces of black construction paper
• 2 small plates
• salt water
• teaspoon
• hand lens
Materials
Explore
California Standard4 IE 6.c.
Chapter 3 • Rocks and Minerals Use with Lesson 2Activity Lab Book Igneous Rocks
© M
ac
mil
lan
/Mc
Gra
w-H
ill
57
Draw Conclusions
Analyze Data Where did water evaporate faster? Where were the crystals larger?
Draw Conclusions What is the relationship between the rate of growth and the size of crystals?
Explore MoreYour teacher will give you two rocks. Look at the two rocks. In which rock did crystals grow more quickly? Explain.
Inquiry: Open How does climate or temperature affect the growth rate of crystals? Think about your own climate and about places that are blazing hot or freezing cold.
My question is:
How I can test it:
My results are:
Explore Date Name
Chapter 3 • Rocks and Minerals Use with Lesson 2Activity Lab Book Igneous Rocks58
© M
ac
mil
lan
/Mc
Gra
w-H
ill
Locating igneous rock
Research
How are igneous rocks formed?
What kinds of features in Earth’s crust are most likely to form igneous rocks?
Work in groups of two or three. Use research materials to determine which areas in the world would contain the most igneous rock. Record your group’s findings.
Date Name
• encyclopedias
• maps of the world and/or the United States
• other reference materials
Materials
AlternativeExplore
Chapter 3 • Rocks and Minerals Use with Lesson 2Activity Lab Book Igneous Rocks
© M
ac
mil
lan
/Mc
Gra
w-H
ill
59
Observing igneous rocks
Compare Observe a piece of pumice and granite. How do the two rocks compare in size and weight?
Predict Will the rocks sink or float? Explain your answer.
Observe Place both rocks in water. What happens?
Infer Use the hand lens to examine each rock. How might the differences in texture have contributed to whether the rocks sink or float?
Infer One rock cooled slowly inside Earth’s crust. The other formed from lava. Which is which? How can you support your inference?
Date
• piece of light gray pumice
• piece of granite
• small bowl of water
• hand lens
Materials
Name Quick Lab
Chapter 3 • Rocks and Minerals Use with Lesson 2Activity Lab Book Igneous Rocks60
© M
ac
mil
lan
/Mc
Gra
w-H
ill
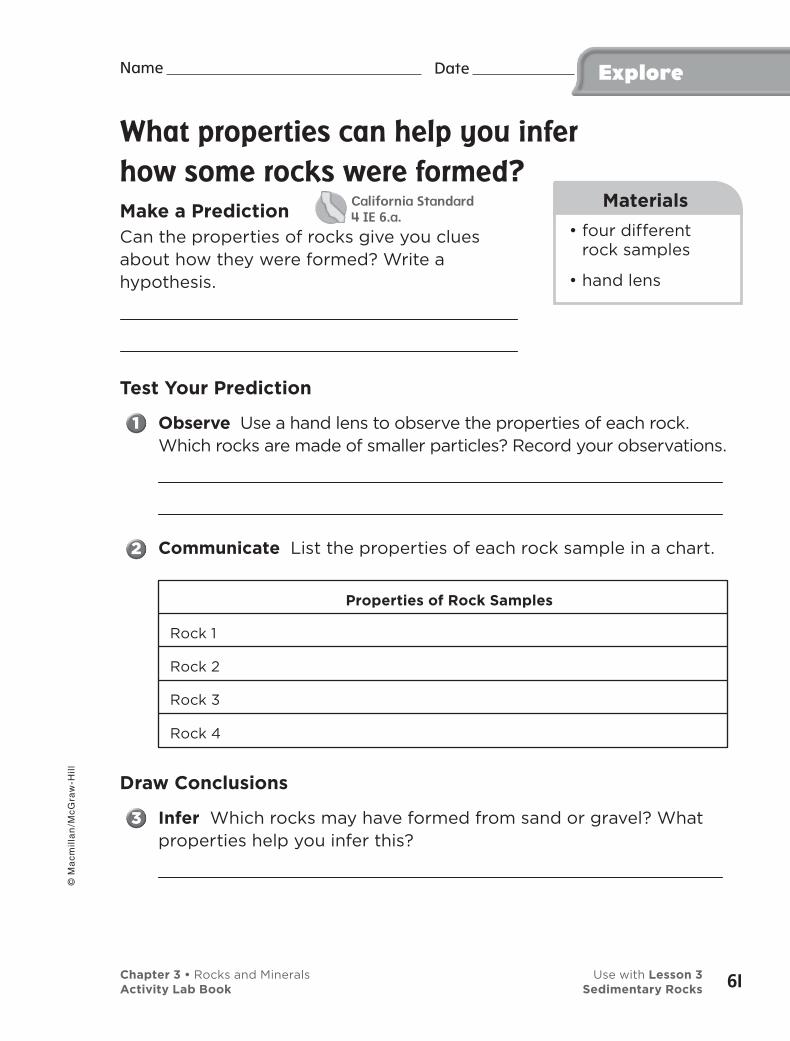
What properties can help you infer
how some rocks were formed?
Make a PredictionCan the properties of rocks give you clues about how they were formed? Write a hypothesis.
Test Your Prediction
Observe Use a hand lens to observe the properties of each rock. Which rocks are made of smaller particles? Record your observations.
Communicate List the properties of each rock sample in a chart.
Date Name
• four different rock samples
• hand lens
Materials
Explore
Properties of Rock Samples
Rock 1
Rock 2
Rock 3
Rock 4
Draw Conclusions
Infer Which rocks may have formed from sand or gravel? What properties help you infer this?
California Standard4 IE 6.a.
Chapter 3 • Rocks and Minerals Use with Lesson 3Activity Lab Book Sedimentary Rocks
© M
ac
mil
lan
/Mc
Gra
w-H
ill
61
Infer Shale and limestone are rocks that are found on the bottom of the ocean. Which of the rock samples might be shale or limestone? What evidence supports your answer?
Communicate Share your conclusions with your classmates. Did you form similar conclusions?
Explore MoreWhen the remains of dead animals are covered with sediment over a long period of time, the sediment and the remains harden into sedimentary rock. Limestone often contains shells or bones from animals. It can even contain plants. The remains of animals or plants from millions of years ago are called fossils.
How can an animal become part of rock? Make a plan to find out. Inquiry: Open Think about how pieces of sand found on a beach can change into sandstone. What else can form into sedimentary rock? Make up your own question on this topic, then design and carry out an experiment to answer it.
My question is:
How I can test it:
My results are:
Explore Date Name
Chapter 3 • Rocks and Minerals Use with Lesson 3Activity Lab Book Sedimentary Rocks62
© M
ac
mil
lan
/Mc
Gra
w-H
ill
How do rock layers form?Properties of rocks give clues about how they were formed.
Observe Use the hand lens to observe the layers in the shale and the small pieces in the conglomerate.
Classify What are the similarities and differences between the samples?
Date Name
• shale and conglomerate rock samples
• hand lens
Materials
AlternativeExplore
Chapter 3 • Rocks and Minerals Use with Lesson 3Activity Lab Book Sedimentary Rocks
© M
ac
mil
lan
/Mc
Gra
w-H
ill
63
Date Name Date Name
A model sandstone rock
Observe Scratch a piece of sandstone with a penny. Record what happens.
Put glue into a container. Mix water with the glue until it becomes runny.
Make a Model Fill a small, clean empty milk carton halfway with sand. Slowly pour the glue mixture onto the sand until the sand is soaked. Stir the glue and sand together. Let the carton sit for a few days.
Compare Carefully peel away the milk carton from the hardened model rock. Scratch the model rock with a penny. What happens? How are the model and the actual rock alike? How are they different?
• sandstone
• penny
• glue
• water
• container
• milk carton
• sand
Materials
Quick Lab
Chapter 3 • Rocks and Minerals Use with Lesson 3Activity Lab Book Sedimentary Rocks64
© M
ac
mil
lan
/Mc
Gra
w-H
ill
Date Name
What are the features of
sedimentary rocks?
Form a HypothesisSedimentary rock can form when sand, rocks, fossils, shell fragments and other items are pressed together. What are the basic characteristics of sedimentary rock? Begin your hypothesis in the following form: “A rock is sedimentary if . . .”
Test Your Hypothesis
Observe Use a hand lens to study the sedimentary rock samples.
Communicate Draw a detailed picture of each rock. Under each picture, record the color, texture, and special features of each rock.
Infer What do you think the rocks are made from? What clues helped you determine this?
Draw Conclusions
Compare What similarities did you see in your sample?
Infer What if you were given a smooth black rock? How would you determine if it is a sedimentary rock?
Date Name
• sedimentary rock samples
• hand lens
• colored pencils
Materials
Be aScientist
California Standard4 IE 6.a.
© M
ac
mil
lan
/Mc
Gra
w-H
ill
65Chapter 3 • Rocks and Minerals Use with Lesson 3Activity Lab Book Sedimentary Rocks
Date Name Date Name
Inquiry: Guided
Form a HypothesisHow can a sedimentary rock form? Write a hypothesis.
Test Your HypothesisMake a plan to model how a sedimentary rock forms. Write out the steps you will follow. Record your results and observations.
This is our plan:
These are the steps we will take:
Our results and observations:
• modeling clay
• plastic knife
• construction paper
• paper plate
• pebbles
• shells
Materials
Be aScientist
66
© M
ac
mil
lan
/Mc
Gra
w-H
ill
Chapter 3 • Rocks and Minerals Use with Lesson 3Activity Lab Book Sedimentary Rocks
Date Name
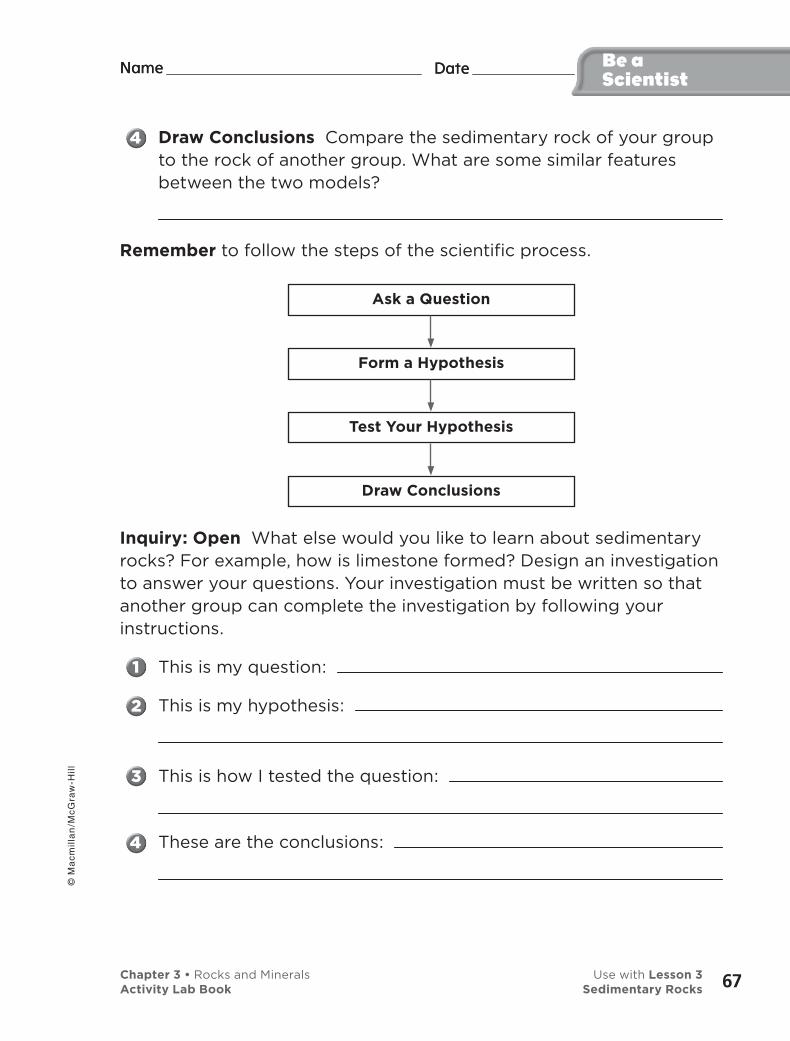
Draw Conclusions Compare the sedimentary rock of your group to the rock of another group. What are some similar features between the two models?
Remember to follow the steps of the scientific process.
Date Name Be aScientist
Inquiry: Open What else would you like to learn about sedimentary rocks? For example, how is limestone formed? Design an investigation to answer your questions. Your investigation must be written so that another group can complete the investigation by following your instructions.
This is my question:
This is my hypothesis:
This is how I tested the question:
These are the conclusions:
Ask a Question
Form a Hypothesis
Test Your Hypothesis
Draw Conclusions
© M
ac
mil
lan
/Mc
Gra
w-H
ill
67Chapter 3 • Rocks and Minerals Use with Lesson 3Activity Lab Book Sedimentary Rocks
Student Journal Notes
68
© M
ac
mil
lan
/Mc
Gra
w-H
ill
Chapter 3 • Rocks and Minerals Use with Lesson 3Activity Lab Book Sedimentary Rocks
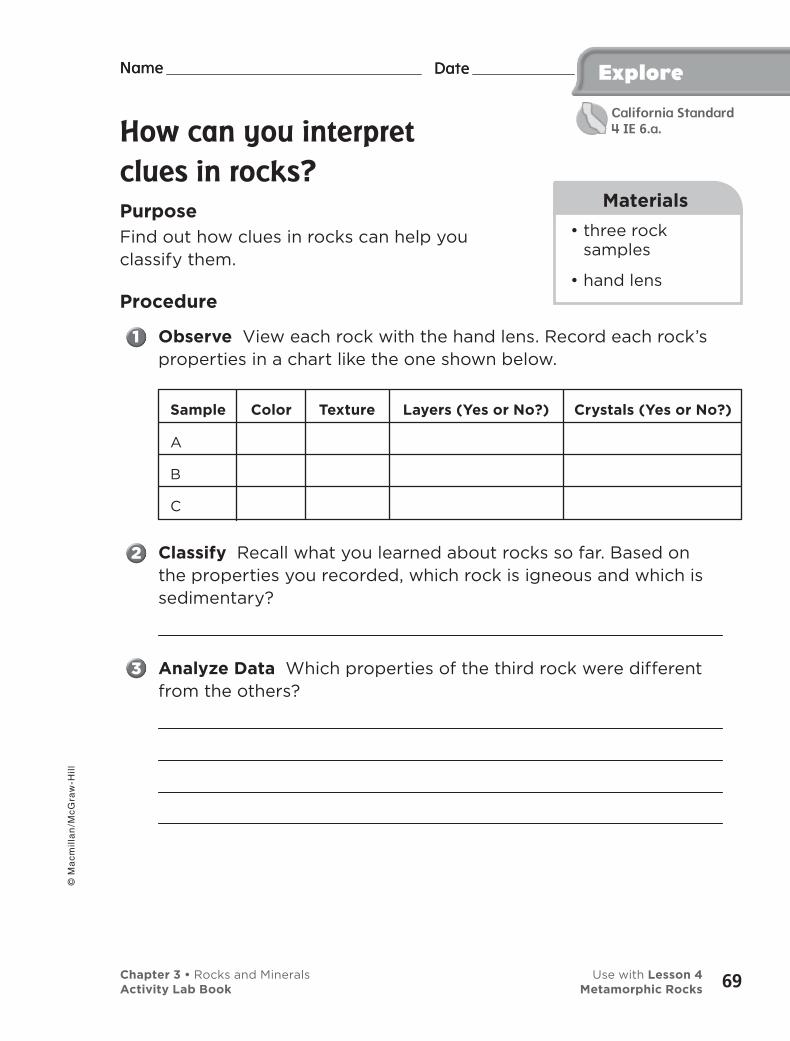
How can you interpret
clues in rocks?
PurposeFind out how clues in rocks can help you classify them.
Procedure
Observe View each rock with the hand lens. Record each rock’s properties in a chart like the one shown below.
Date Name
• three rock samples
• hand lens
Materials
Explore
Classify Recall what you learned about rocks so far. Based on the properties you recorded, which rock is igneous and which is sedimentary?
Analyze Data Which properties of the third rock were different from the others?
Sample Color Texture Layers (Yes or No?) Crystals (Yes or No?)
A
B
C
Date Name
California Standard4 IE 6.a.
Chapter 3 • Rocks and Minerals Use with Lesson 4Activity Lab Book Metamorphic Rocks
© M
ac
mil
lan
/Mc
Gra
w-H
ill
69
Draw Conclusions
Draw Conclusions What can you interpret from a rock’s properties?
Explore More
Form a Hypothesis
How might the third rock have formed? What properties provide clues?
Inquiry: Open A harder rock can scratch a softer rock. How could you use this scratch test to arrange a group of rocks in order from hardest to softest? Develop and design a method to classify rocks by hardness.
My question is:
How I can test it:
My results are:
Explore Date Name
Chapter 3 • Rocks and Minerals Use with Lesson 4Activity Lab Book Metamorphic Rocks70
© M
ac
mil
lan
/Mc
Gra
w-H
ill
Rock properties
Classify Work together with your group to sort 10 rocks into categories.
Record Data What properties did your group use to sort the rocks?
Label Write each category on a note card, and place it next to the proper group of rocks.
Communicate Discuss the sorting methods your group used with the class.
Date Name
• 10 rock samples
• hand lens
• note cards
• markers
Materials
AlternativeExplore
Chapter 3 • Rocks and Minerals Use with Lesson 4Activity Lab Book Metamorphic Rocks
© M
ac
mil
lan
/Mc
Gra
w-H
ill
71
A model metamorphic rock
Make a Model Put three pieces of clay on top of each other to form three layers.
Squeeze the layers together from top to bottom. Then squeeze from side to side.
Observe Use a plastic knife to cut through your model. How have the layers in your model changed?
Draw Conclusions How is your model like some kinds of metamorphic rock?
Date
• three different colors of clay
• plastic knives
Materials
Name Quick Lab
Chapter 3 • Rocks and Minerals Use with Lesson 4Activity Lab Book Metamorphic Rocks72
© M
ac
mil
lan
/Mc
Gra
w-H
ill
• item
• item
Materials
• small plastic bottle
• water
• cloth or dish towel
Materials
73
Explore
Weathering
How can freezing water change rock?
Make a Prediction What do you predict happens to rocks when water freezes in the cracks of rocks?
Test Your Prediction
Make a Model Fill the plastic bottle all the way to the top with water. Put the cap on tightly. Wrap a cloth or dish towel around the bottle. This is a model of water in a crack in rock.
Place your model in a freezer and leave it overnight.
Predict What will happen to the water and the bottle?
Observe Unwrap the bottle. What happened to the water and the
bottle?
Draw Conclusions
Analyze Data Did your observations match your prediction?
Infer What caused the bottle to change?
Infer What do you think happens when water freezes inside a crack in a rock?
Date Name
Chapter 4 • Slow Changes on Earth Use with Lesson 1Activity Lab Book Weathering
California Standard4 IE 6.c.
Explore Date Name
Explore MoreExperiment Repeat the activity. This time, use real rocks with small cracks in them.
Fill the cracks with water before placing the rocks in the freezer.
Take the rocks out and let the ice melt. Then wet them again and put them into the freezer. Repeat the process. How many times did you have to freeze and thaw before the rock split? Why?
Inquiry: Open Think about how long it takes for rocks to change. Make up a question to test this, then design and carry out an experiment to answer it.
My question is:
How I can test it:
My results are:
74
© M
ac
mil
lan
/Mc
Gra
w-H
ill
Chapter 4 • Slow Changes on Earth Use with Lesson 1Activity Lab Book Weathering
Date Name
Materials
AlternativeExplore
Freezing expansion
The night before class, your teacher will fill the measuring cup about half full. Mark the level (volume) of the water on the outside of the cup. Put the cup in the freezer.
Observe The next day, look at the cup of frozen water with the mark. Read the water and ice volumes and calculate their difference.
Predict what would happen if the water were within a crack in a rock.
• plastic measuring cup
• water
• freezer
• marker
© M
ac
mil
lan
/Mc
Gra
w-H
ill
75Chapter 4 • Slow Changes on Earth Use with Lesson 1Activity Lab Book Weathering
Materials
Quick Lab
Chemical weathering
Place a piece of chalk in each of two jars. Pour one cup of water over one piece of chalk. Pour one cup of soda, over the second piece of chalk. Soda contains carbonic acid.
Place the jars on a shelf for a few days.
Observe What changes do you see?
Draw Conclusions What does acid do to rock?
• two pieces of chalk
• two jars with lids
• water
• carbonated soda
Name Date Date Name
76
© M
ac
mil
lan
/Mc
Gra
w-H
ill
Chapter 4 • Slow Changes on Earth Use with Lesson 1Activity Lab Book Weathering
Communicate
You just read that physical weathering changes rocks. How do scientists figure out things like that? They do experiments, record their observations, and analyze the results. Then scientists communicate their findings to others. They may do this by writing, or by making oral presentations.
Learn It• Talking, writing, and drawing are just some ways to communicate.
Scientists talk, write, and draw to communicate their procedures for and results from an experiment. It’s important to write your procedure and record data when you do an experiment. That way, others can follow your directions to see if they get the same results.
• You will conduct an experiment about how water weathers rocks. Then you will communicate the results of that experiment.
Date Name Focus onInquiry Skills
© M
ac
mil
lan
/Mc
Gra
w-H
ill
77Chapter 4 • Slow Changes on Earth Use with Lesson 1Activity Lab Book Weathering
California Standard4 IE 6.f.

Try It Follow the directions below to see if rocks carried in water weather
over time. Communicate your results with words and pictures as you go along.
• Measure a piece of marble, quartz, sandstone, and talc, each rock across its widest part. Record that data and a description of each rock on a chart like this one.
• Place the rocks in a plastic jar. Add just enough water in the jar to cover the rocks. Screw the lid on tightly.
• Shake the jar hard. Continue shaking the jar for one minute. Stop and rest your arm, then shake the jar again. Do this until you shake the jar for a total of five minutes.
• Remove the rocks. Measure the width of each rock again. Record this data on your chart.
• Communicate which rock showed the most weathering. Tell which rock showed the least? Use information from your chart for reference.
Date Name Focus onInquiry Skills
Rock Measurements/Descriptions Measurements/Descriptions
at Start at End
Marble
Quartz
Sandstone
Talc
78
© M
ac
mil
lan
/Mc
Gra
w-H
ill
Chapter 4 • Slow Changes on Earth Use with Lesson 1Activity Lab Book Weathering
Apply It • What do you predict would happen if you put the same rocks
back in the jar and shook it for five more minutes?
• What do you predict would happen if you put the same rocks back in the jar and shook it for ten more minutes?
• Predict What if you took turns with each person in the class and shook the can without stopping?
• Write the steps for your experiment.
This is my question:
This is how I tested the question:
These are my results:
• Then trade steps with a partner. Can your partner follow your instructions?
• Communicate your results. Did the class get similar results?
Date Name Focus onInquiry Skills
© M
ac
mil
lan
/Mc
Gra
w-H
ill
79Chapter 4 • Slow Changes on Earth Use with Lesson 1Activity Lab Book Weathering
Student Journal Notes
Chapter 4 • Slow Changes on Earth Use with Lesson 1Activity Lab Book Weathering80
© M
ac
mil
lan
/Mc
Gra
w-H
ill
Date Name Explore
Materials
Can sediments enter rivers?
Purpose Find out what sediments can do when they enter a river.
Procedure
Make a Model Mix soil, sand, and pebbles together. Place a mound of the soil mixture at one end of the pan. Press the mixture lightly. This mixture is the “land.”
Prop up the pan on two or three books.
Pour a little clean water at the bottom of the pan where there is no soil. This water is the “river.”
Experiment Use a watering can to pour “rainwater” over the “land.”
Communicate What do you observe in the water at the bottom of the pan? Where did it come from?
Draw Conclusions
Infer How can sediments enter a river?
Infer What can sediments do to a river?
Predict What happens to sediments after they enter a river?
• large, deep aluminum pan
• potting soil
• sand
• pebbles
• 2 or 3 books
• water
• watering can
© M
ac
mil
lan
/Mc
Gra
w-H
ill
81Chapter 4 • Slow Changes on Earth Use with Lesson 2Activity Lab Book Erosion and Deposition
California Standard4 IE 6.f.
Explore Date Name
Explore MoreExperiment Can wind add sediments to a river? Design an experiment to find out.
Inquiry: Open Think about how the speed of the water flowing in a river affects how much sediment the river carries and the size of sediment that can be moved. Formulate a question on one of these topics, then design and carry out an experiment to answer it.
My question is:
How I can test it:
My results are:
82
© M
ac
mil
lan
/Mc
Gra
w-H
ill
Chapter 4 • Slow Changes on Earth Use with Lesson 2Activity Lab Book Erosion and Deposition
Date Name
Materials
AlternativeExplore
Water erosion
Your teacher will pour water over a model of land.
Predict What do you think will happen when your teacher pours the water?
Observe When the water has been poured, observe how the sand in the tray moved.
Infer How does this experiment relate to the picture of the Mississippi River in your textbook?
• paint tray
• sand
• pitcher of water
© M
ac
mil
lan
/Mc
Gra
w-H
ill
83Chapter 4 • Slow Changes on Earth Use with Lesson 2Activity Lab Book Erosion and Deposition
Date Name
Materials
Quick Lab
Erosion rate
Make a Model Place clay soil and sandy soil side by side in an aluminum pan. Prop the end of the pan on a pile of two or three books.
Experiment Use a watering can to slowly pour water over the soil at the propped-up end. Pour water back and forth over both soils.
Observe What happens to each soil?
Draw Conclusions Which soil has a faster rate of erosion?
• aluminum pan
• clay soil
• sandy soil
• watering can
• books
• butcher paper
84
© M
ac
mil
lan
/Mc
Gra
w-H
ill
Chapter 4 • Slow Changes on Earth Use with Lesson 2Activity Lab Book Erosion and Deposition
Date Name
Materials
What is erosion
and deposition?
Form a HypothesisWhat happens when water erosion occurs by a stream? Write your hypothesis in the form, “If erosion occurs near a stream, then . . .”
Test Your Hypothesis
Measure Put 2 cm of potting soil in a shallow pan.
Make a Model Press gravel and pebbles down into the soil to make a stream bed. Mold the soil gravel, and pebbles so they are higher on the sides than on the bottom.
Use a plastic cup to gently pour water into the stream. Let the water soak in. Add more water until a stream forms.
Make a Model Use a spray bottle to simulate rain. Spray the soil along the edge of the stream bed at one end of your stream. Continue spraying until the soil is soaked and the bank of the stream begins to erode. Record your observations.
• shallow pan
• potting soil
• gravel
• pebbles
• plastic cup with water
• spray bottle with water
Be aScientist
© M
ac
mil
lan
/Mc
Gra
w-H
ill
85Chapter 4 • Slow Changes on Earth Use with Lesson 2Activity Lab Book Erosion and Deposition
California Standard4 IE 6.f.
Date Name
Draw Conclusions
Infer What was modeled in Step 4?
Communicate What happened to the soil as it entered the stream?
How does soil get deposited?
Form a HypothesisWhat types of materials cause the most deposition to happen in a river? Answer the question in the form, “Deposition occurs most with . . .”
Test Your HypothesisDesign an experiment to investigate how items in a river can cause deposition to occur. Write out the steps you will follow. Record your results and observations.
Here is my question:
Here are the steps in my experiment:
Here are my results:
Be aScientist
86
© M
ac
mil
lan
/Mc
Gra
w-H
ill
Chapter 4 • Slow Changes on Earth Use with Lesson 2Activity Lab Book Erosion and Deposition
Date Name
Draw ConclusionsDid your test support your hypothesis? Why or why not? Share your results with your classmates. Which materials caused the most deposition in your classmate’s experiments?
ConservationWhat else would you like to learn about soil erosion and deposition? For example, what types of plants can decrease the soil erosion during heavy rain? Design an investigation to answer your question. Your investigation must be organized to test only one variable, or one item being changed. Your investigation must be written so that another group can complete the investigation by following your instructions.
Here is my question:
Here is how I tested the question:
Here are my results:
Be aScientist
© M
ac
mil
lan
/Mc
Gra
w-H
ill
87Chapter 4 • Slow Changes on Earth Use with Lesson 2Activity Lab Book Erosion and Deposition
Date Name
Remember to follow the steps of the scientific process.
Be aScientist
Ask a Question
Form a Hypothesis
Test Your Hypothesis
Draw Conclusions
88
© M
ac
mil
lan
/Mc
Gra
w-H
ill
Chapter 4 • Slow Changes on Earth Use with Lesson 2Activity Lab Book Erosion and Deposition
Date Name Explore
Materials
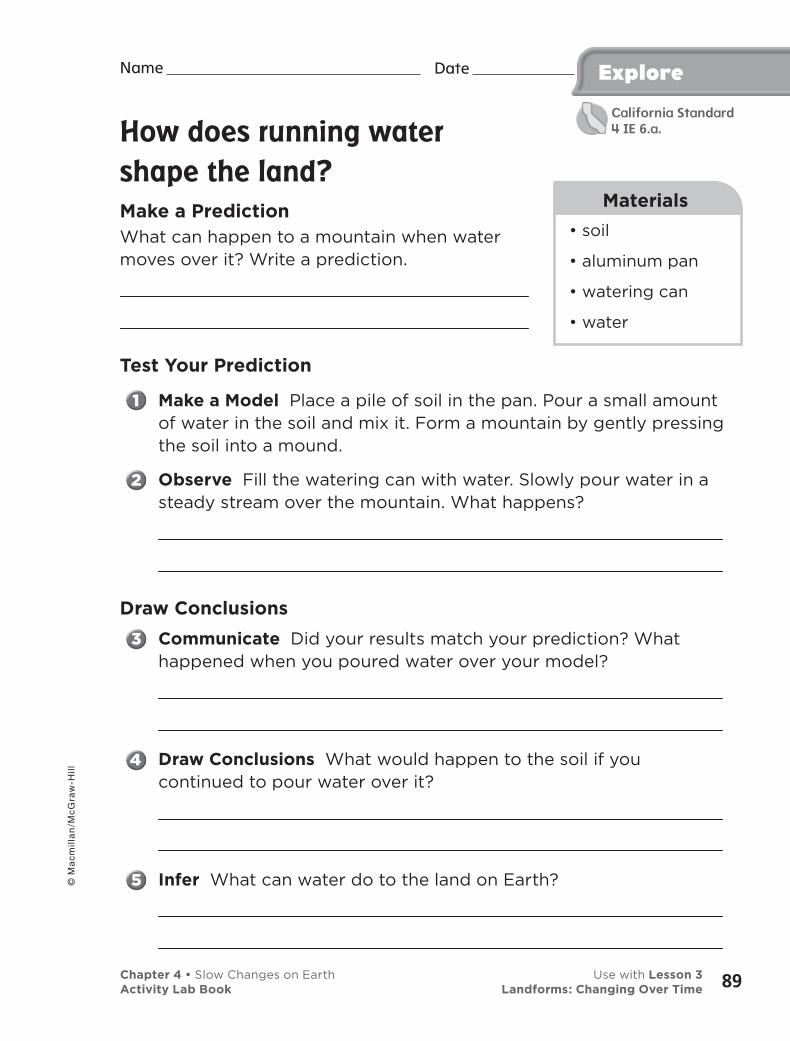
How does running water
shape the land?
Make a PredictionWhat can happen to a mountain when water moves over it? Write a prediction.
Test Your Prediction
Make a Model Place a pile of soil in the pan. Pour a small amount of water in the soil and mix it. Form a mountain by gently pressing the soil into a mound.
Observe Fill the watering can with water. Slowly pour water in a steady stream over the mountain. What happens?
Draw Conclusions
Communicate Did your results match your prediction? What happened when you poured water over your model?
Draw Conclusions What would happen to the soil if you continued to pour water over it?
Infer What can water do to the land on Earth?
• soil
• aluminum pan
• watering can
• water
California Standard4 IE 6.a.
© M
ac
mil
lan
/Mc
Gra
w-H
ill
89Chapter 4 • Slow Changes on Earth Use with Lesson 3Activity Lab Book Landforms: Changing Over Time
Explore Date Name
Explore MoreExperiment What might moving ice do to a mountain? Design an experiment to find out.
Inquiry: Open Think about specific landforms that have been shaped by running water. Make a prediction about how the landform has changed shape over time. Research to determine if your prediction was accurate.
My prediction is:
How I can test it:
My results are:
90
© M
ac
mil
lan
/Mc
Gra
w-H
ill
Chapter 4 • Slow Changes on Earth Use with Lesson 3Activity Lab Book Landforms: Changing Over Time
Date Name
Materials
AlternativeExplore
Water erosion
Cover a flat surface with the newspaper and place the petri dish in the center of the surface.
Fill the dropper with water and squeeze a water drop onto the soil. Hold the dropper about 25 to 30 cm above the dish.
Squeeze several drops quickly onto the soil.
How do the water drops affect the soil? What are the different effects of one drop of water versus several drops of water?
• petri dish half filled with loose soil
• plastic dropper
• newspaper
• water
© M
ac
mil
lan
/Mc
Gra
w-H
ill
91Chapter 4 • Slow Changes on Earth Use with Lesson 3Activity Lab Book Landforms: Changing Over Time
Date Name
Materials
Quick Lab
How sand dunes form
Wear safety goggles. Pour a 2-cm layer of sand in the tray. Place a pebble in the tray.
Observe Gently blow through a straw at the sand. Blow in the direction of the pebble. What happens?
Infer How does this activity show how some sand dunes are formed?
• tray
• sand
• drinking straw
• pebble
• safety goggles
92
© M
ac
mil
lan
/Mc
Gra
w-H
ill
Chapter 4 • Slow Changes on Earth Use with Lesson 3Activity Lab Book Landforms: Changing Over Time
• item
• item
Materials
Explore
93
Explore
How does gravity affect
materials on Earth?
Form a HypothesisPredict what gravity will do to rocks and soil on a hill.
Test Your Prediction
Stir equal amounts of sand, gravel, and soil in the pan. Pat the mixture until it makes a flat layer.
Predict What will happen when you raise one end of the pan? Record your prediction.
Observe Raise one end of the pan 4 cm at a time. Observe what happens. Make a data table to record your results.
Height of Pan Observations
4 cm
8 cm
Draw Conclusions
Draw Conclusions What caused the materials in the pan to change?
Date Name
• deep aluminum baking pan
• measuring cup
• sand
• gravel
• potting soil
• metric ruler
Materials
Chapter 5 • Fast Changes on Earth Use with Lesson 1Activity Lab Book Landslides
California Standard4 IE 6.d.
Explore Date Name
Explore MoreWhat might happen if you poured water on the soil mixture as you raised the pan? How might this affect the results? Try it.
Inquiry: Open Ask students to think about how increasing the amount of water over different periods of time affects the soil’s resistance to gravity. Have them formulate a question on this topic, then design and carry out an experiment to answer it.
My question is:
How I can test it:
My results are:
94
© M
ac
mil
lan
/Mc
Gra
w-H
ill
Chapter 5 • Fast Changes on Earth Use with Lesson 1Activity Lab Book Landslides
Modeling a Landscape
Lift the pan as your teacher pours water on the mixture. Predict what you will see at each step.
Observe how the speed and amount of material that shifts increases. Write your observations.
• sand
• gravel
• potting soil
• deep aluminum foil baking pan
• measuring cup
• metric ruler
AlternativeExplore
Date Name
Materials
© M
ac
mil
lan
/Mc
Gra
w-H
ill
95Chapter 5 • Fast Changes on Earth Use with Lesson 1Activity Lab Book Landslides
Date Name
Materials
Quick Lab
Flooding the land
Pile an equal amount of soil and rocks in one corner of the pan to form a steep slope. Place small twigs in the soil to represent trees.
Use the watering can to quickly pour water over all parts of the pan. This models rain.
Observe When did it begin to flood?
Observe What happens to the rocks, soil, and “trees?”
• soil
• water
• aluminum pan
• small twigs
Date Name
96
© M
ac
mil
lan
/Mc
Gra
w-H
ill
Chapter 5 • Fast Changes on Earth Use with Lesson 1Activity Lab Book Landslides
Focus onInquiry Skills
Materials
ExperimentYou just read that soil, rocks, and trees slide down a hill or mountain rapidly during a landslide. Scientists learn a lot about landslides by doing experiments and drawing conclusions from the results.
Learn ItWhen you experiment, you make and follow a procedure to test a hypothesis. It’s important to record what you observe while you experiment. That information can help you draw a conclusion about whether your hypothesis is supported. It is also important to try your procedure several times. That way, you know if your results are true.
Try ItDo you think that anything can be done to lessen damage from landslides on hilly landscapes? Write your idea in the form of a hypothesis.
1. Spread soil in the bottom of a long, planter box. Push rocks, twig-trees, and small, wooden blocks (houses) into the soil. Sprinkle soil with water until it is damp.
• plastic box
• soil
• twigs
• block houses
• plastic sheet
• overflow tray
• container of water
• books
• bricks or other barrier
Date Name ©
Ma
cm
illa
n/M
cG
raw
-Hil
l
97Chapter 5 • Fast Changes on Earth Use with Lesson 1Activity Lab Book Landslides
California Standard4 IE 6.d.
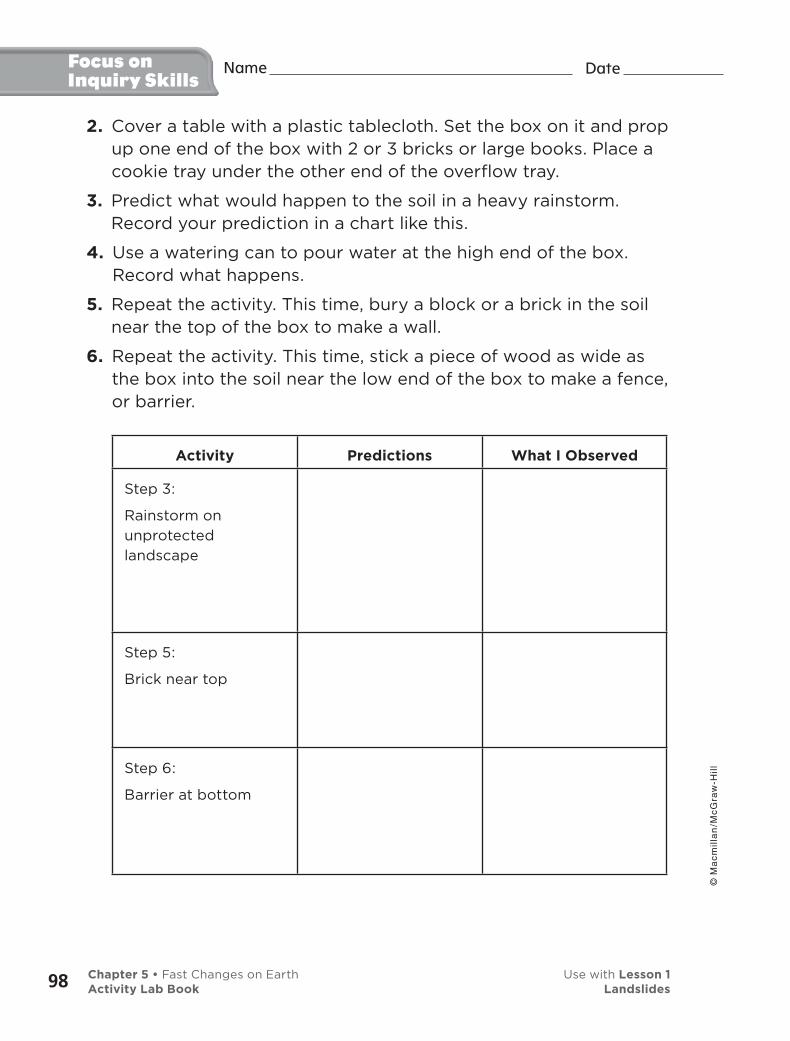
Focus onInquiry Skills
Date Name
2. Cover a table with a plastic tablecloth. Set the box on it and prop up one end of the box with 2 or 3 bricks or large books. Place a cookie tray under the other end of the overflow tray.
3. Predict what would happen to the soil in a heavy rainstorm. Record your prediction in a chart like this.
4. Use a watering can to pour water at the high end of the box. Record what happens.
5. Repeat the activity. This time, bury a block or a brick in the soil near the top of the box to make a wall.
6. Repeat the activity. This time, stick a piece of wood as wide as the box into the soil near the low end of the box to make a fence, or barrier.
Activity Predictions What I Observed
Step 3:
Rainstorm on
unprotected
landscape
Step 5:
Brick near top
Step 6:
Barrier at bottom
98
© M
ac
mil
lan
/Mc
Gra
w-H
ill
Chapter 5 • Fast Changes on Earth Use with Lesson 1Activity Lab Book Landslides
Date Name Focus onInquiry Skills
Draw Conclusions7. Based on the results of your experiment, can anything be done
to prevent or lessen damage caused by landslides? Explain your answer.
8. Was your hypothesis supported or not? Explain.
Apply ItWhat do you hypothesize would happen if the wooden barrier were near the top of the hill? If there was one barrier at the top and one at the bottom? If every house had a wooden fence around it? Design an experiment to test one of those ideas, or one of your own. Remember to write your hypothesis and predictions, record your observations, and draw conclusions from your observations.
Date Name ©
Ma
cm
illa
n/M
cG
raw
-Hil
l
99Chapter 5 • Fast Changes on Earth Use with Lesson 1Activity Lab Book Landslides

Student Journal Notes
100
© M
ac
mil
lan
/Mc
Gra
w-H
ill
Chapter 5 • Fast Changes on Earth Use with Lesson 1Activity Lab Book Landslides
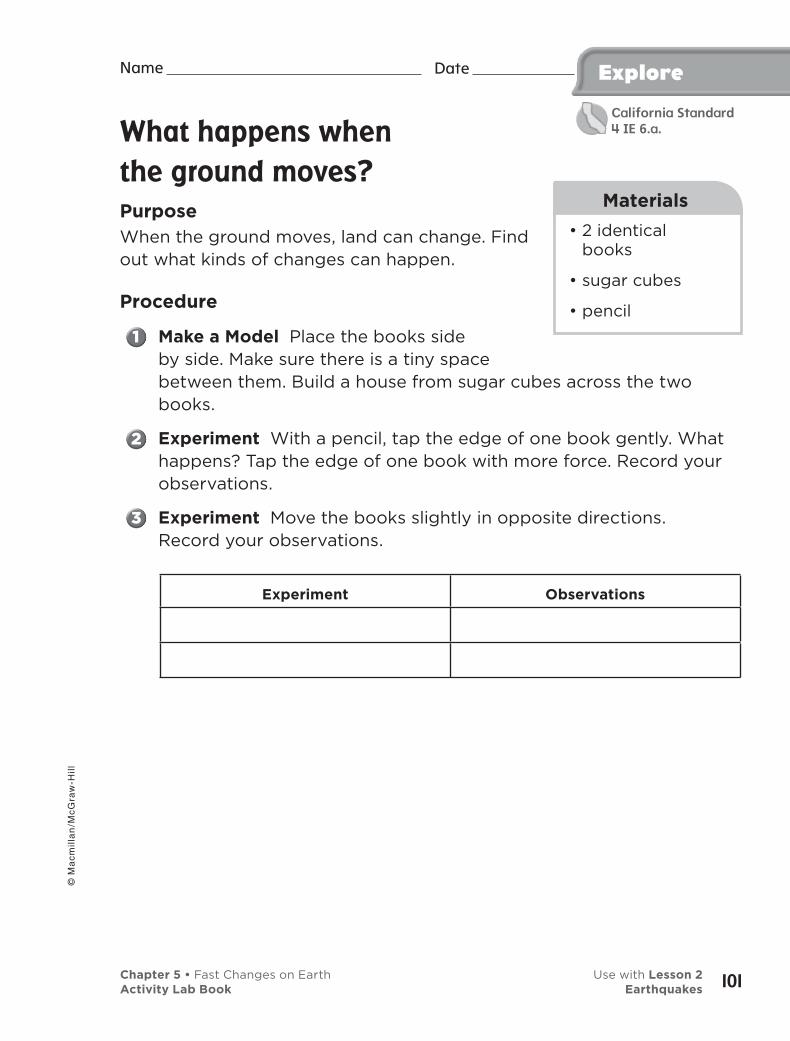
Explore
What happens when
the ground moves?
PurposeWhen the ground moves, land can change. Find out what kinds of changes can happen.
Procedure
Make a Model Place the books side by side. Make sure there is a tiny space between them. Build a house from sugar cubes across the two books.
Experiment With a pencil, tap the edge of one book gently. What happens? Tap the edge of one book with more force. Record your observations.
Experiment Move the books slightly in opposite directions. Record your observations.
Experiment Observations
• 2 identical books
• sugar cubes
• pencil
Date Name
Materials
Chapter 5 • Fast Changes on Earth Use with Lesson 2Activity Lab Book Earthquakes
© M
ac
mil
lan
/Mc
Gra
w-H
ill
101
California Standard4 IE 6.a.
Explore Date Name
Draw Conclusions
Compare How does the damage caused by moving the books in opposite directions compare to the damage caused by tapping?
Infer What do you think happens when Earth’s surface moves?
Explore MoreWhat could happen to a mountain if the surface below it began to move? Model it.
Inquiry: Open Discuss what might be under mountains. Have students formulate a question on this topic, then design and carry out an experiment to answer it.
My question is:
How I can test it:
My results are:
102
© M
ac
mil
lan
/Mc
Gra
w-H
ill
Chapter 5 • Fast Changes on Earth Use with Lesson 2Activity Lab Book Earthquakes

Earthquake effects
Lay the long board across a table.
Build two identical houses out of blocks, on each end of the board.
Predict What will happen to each house when one end of the board is hit with a hammer?
Tap on one end of the board with a hammer.
Discuss what happens to each house.
• 2 x 4 board
• plastic or wooden blocks
• hammer
AlternativeExplore
Date Name
Materials
Chapter 5 • Fast Changes on Earth Use with Lesson 2Activity Lab Book Earthquakes
© M
ac
mil
lan
/Mc
Gra
w-H
ill
103
Date Name
Materials
Quick Lab
Types of faults
Observe Study the diagrams on pages 250 and 251 in your student book.
Make a Model Use the blocks to show the movement of rock in each kind of fault.
Infer Which type of fault might cause a mountain to be built up?
• two identical blocks of wood
104
© M
ac
mil
lan
/Mc
Gra
w-H
ill
Chapter 5 • Fast Changes on Earth Use with Lesson 2Activity Lab Book Earthquakes
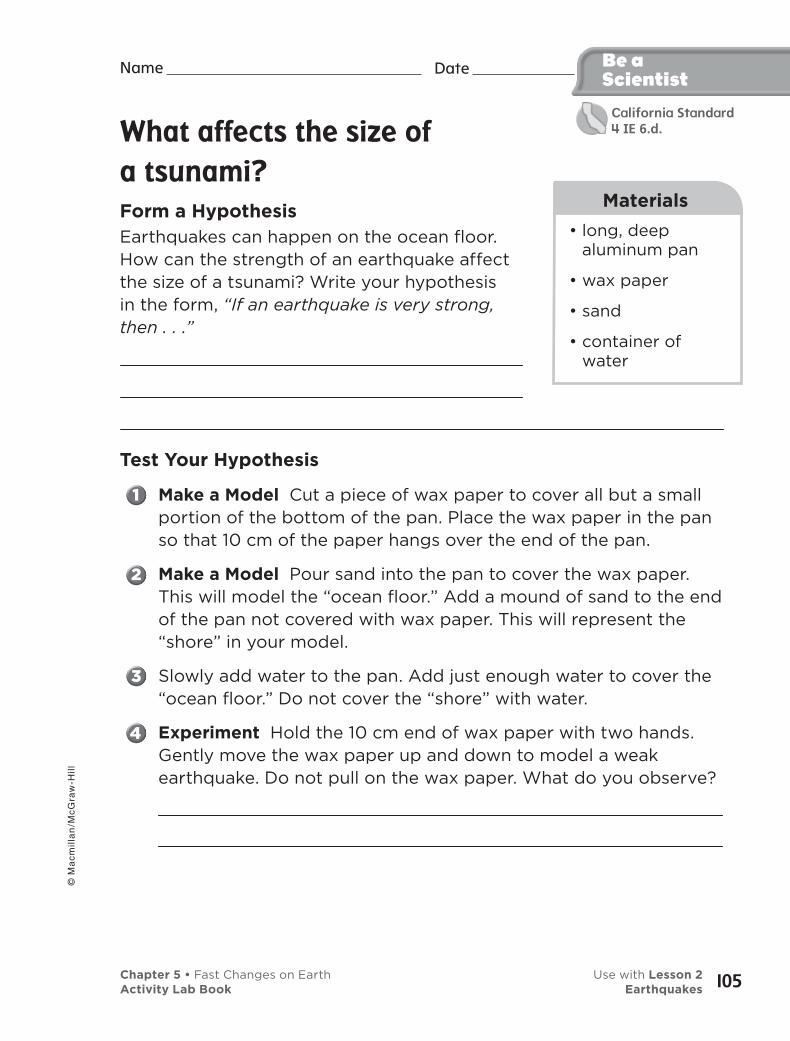
What affects the size of
a tsunami?
Form a HypothesisEarthquakes can happen on the ocean floor. How can the strength of an earthquake affect the size of a tsunami? Write your hypothesis in the form, “If an earthquake is very strong, then . . .”
Test Your Hypothesis
Make a Model Cut a piece of wax paper to cover all but a small portion of the bottom of the pan. Place the wax paper in the pan so that 10 cm of the paper hangs over the end of the pan.
Make a Model Pour sand into the pan to cover the wax paper. This will model the “ocean floor.” Add a mound of sand to the end of the pan not covered with wax paper. This will represent the “shore” in your model.
Slowly add water to the pan. Add just enough water to cover the “ocean floor.” Do not cover the “shore” with water.
Experiment Hold the 10 cm end of wax paper with two hands. Gently move the wax paper up and down to model a weak earthquake. Do not pull on the wax paper. What do you observe?
• long, deep aluminum pan
• wax paper
• sand
• container of water
Be aScientist
Date Name
Materials
Chapter 5 • Fast Changes on Earth Use with Lesson 2Activity Lab Book Earthquakes
© M
ac
mil
lan
/Mc
Gra
w-H
ill
105
California Standard4 IE 6.d.
Date Name Be aScientist
Use Variables Repeat step 4, but increase the speed you use to move the wax paper up and down. This models a stronger earthquake. What do you observe?
Draw Conclusions
Infer Based on your experiment, how do you think the strength of an earthquake affects the size of a tsunami?
Inquiry: Guided
What affects the strength of a tsunami?
Form a HypothesisDoes the distance from where the earthquake starts on the ocean floor make any difference in the strength of the waves on land? Answer the question in the form: “If the distance from where the earthquake begins increases, then the waves will . . .”
This is my hypothesis:
Test Your HypothesisDesign a plan to test your hypothesis. Write out the materials you need
and the steps you will follow.
106
© M
ac
mil
lan
/Mc
Gra
w-H
ill
Chapter 5 • Fast Changes on Earth Use with Lesson 2Activity Lab Book Earthquakes
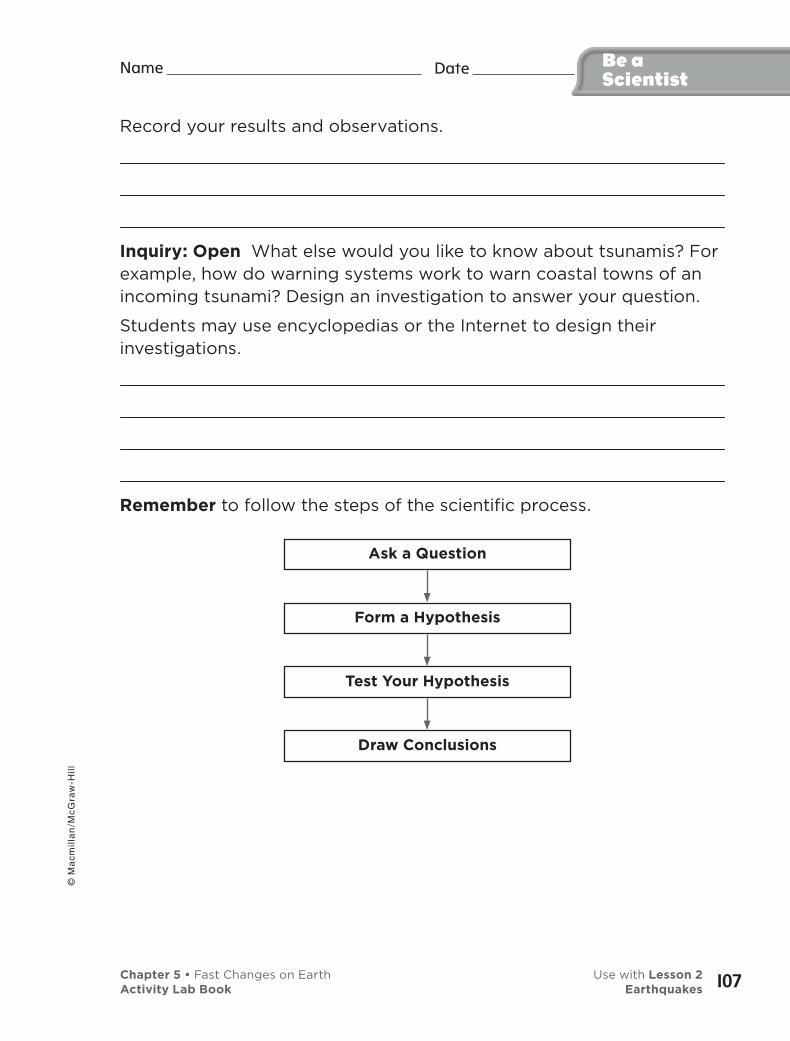
Record your results and observations.
Inquiry: Open What else would you like to know about tsunamis? For example, how do warning systems work to warn coastal towns of an incoming tsunami? Design an investigation to answer your question.
Students may use encyclopedias or the Internet to design their investigations.
Remember to follow the steps of the scientific process.
Ask a Question
Form a Hypothesis
Test Your Hypothesis
Draw Conclusions
Date Name Be aScientist
Chapter 5 • Fast Changes on Earth Use with Lesson 2Activity Lab Book Earthquakes
© M
ac
mil
lan
/Mc
Gra
w-H
ill
107
Student Journal Notes
108
© M
ac
mil
lan
/Mc
Gra
w-H
ill
Chapter 5 • Fast Changes on Earth Use with Lesson 2Activity Lab Book Earthquakes
Date Name Explore
Where are Earth’s volcanoes?
PurposeFind out where volcanoes usually form.
Procedure
Place tracing paper over the map on page 261 of your textbook. Trace the continents and the triangles (volcanoes).
Observe Turn to page 249 of your textbook. Place your tracing on top of the map. Where do most volcanoes occur?
Draw Conclusions
Infer What is the relationship between the location of plates and volcanoes?
• tracing paper
• pencil
• pages 249 and 261 of science textbook
Materials
© M
ac
mil
lan
/Mc
Gra
w-H
ill
109Chapter 5 • Fast Changes on Earth Use with Lesson 3Activity Lab Book Volcanoes
California Standard4 IE 6.f.
Explore Date Name
Explore MoreDo more volcanoes occur on land or in water? How could you find out?
Inquiry: Open Ask students to research about where most of the largest volcanoes are located. Have them make a prediction about the locations of the largest volcanoes and then carry out an activity or experiment to test their prediction. Students again may suggest using Web sites or print materials to find the answer.
This is my question:
How I can test it:
My results are:
110
© M
ac
mil
lan
/Mc
Gra
w-H
ill
Chapter 5 • Fast Changes on Earth Use with Lesson 3Activity Lab Book Volcanoes
AlternativeExplore
• World map that shows plate boundaries and fact sheets about different volcanoes found throughout the world, such as Mt. Saint Helens, Diamond Head, Mauna Loa, Shishaldin, and Surtsey.
Where are volcanoes found?Volcanoes can be found all over Earth’s surface.
Use the fact sheets to locate each volcano and place them on the map.
Discuss what you notice about the locations of Mount St. Helens, Diamond Head, Mauna Loa, Shishaldin, and Surtsey.
Locate other volcanoes using your fact sheets. Place them on the map. What else do you notice about the locations of these volcanoes?
Date Name
Materials
Chapter 5 • Fast Changes on Earth Use with Lesson 3Activity Lab Book Volcanoes
© M
ac
mil
lan
/Mc
Gra
w-H
ill
111
Date Name
Materials
Quick Lab
Model Hawaiian Islands Formation
Make a Model Use seven coins of different sizes to represent each of the Hawaiian Islands shown on page 264 of your textbook. Line up the “islands” next to a sheet of wax paper. The wax paper represents a plate.
Draw a 2-cm red circle on butcher paper to represents a hot spot.
Place the wax paper on top of the butcher paper. Place the first “island” on the wax paper over the hot spot. Slide the “plate” to your left about 5 cm away from the “hot spot.” Stop.
Repeat for each of the other “islands.” Stop when the last island is over the hot spot.
Infer Which islands are dormant volcanoes? Are there any active volcanoes? Explain.
Predict What will eventually happen to the seventh island?
• 7 coins of different sizes (or plastic chips) to represent each of the Hawaiian Islands, wax paper
• red crayon
• butcher paper
112
© M
ac
mil
lan
/Mc
Gra
w-H
ill
Chapter 5 • Fast Changes on Earth Use with Lesson 3Activity Lab Book Volcanoes
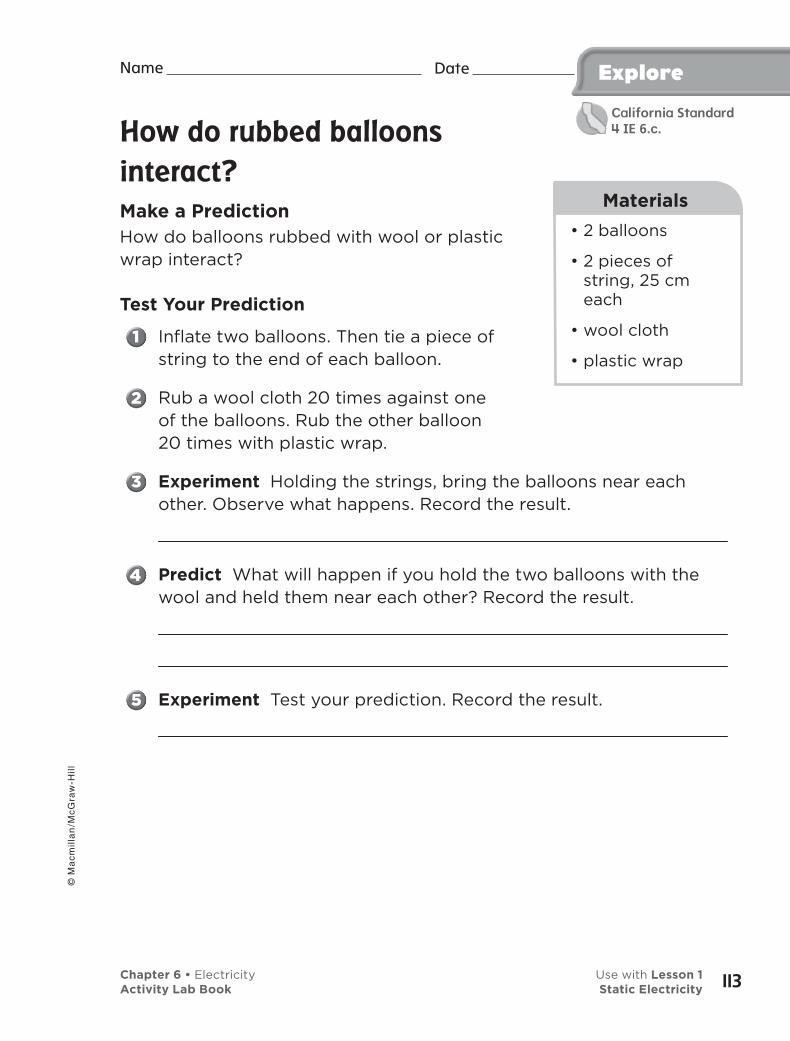
How do rubbed balloons
interact?
Make a PredictionHow do balloons rubbed with wool or plastic wrap interact?
Test Your Prediction
Inflate two balloons. Then tie a piece of string to the end of each balloon.
Rub a wool cloth 20 times against one of the balloons. Rub the other balloon 20 times with plastic wrap.
Experiment Holding the strings, bring the balloons near each other. Observe what happens. Record the result.
Predict What will happen if you hold the two balloons with the wool and held them near each other? Record the result.
Experiment Test your prediction. Record the result.
Date Name
• 2 balloons
• 2 pieces of string, 25 cm each
• wool cloth
• plastic wrap
Materials
Explore
California Standard4 IE 6.c.
Chapter 6 • Electricity Use with Lesson 1Activity Lab Book Static Electricity
© M
ac
mil
lan
/Mc
Gra
w-H
ill
113
Draw Conclusions
How do balloons interact when rubbed with wool or plastic wrap?
Explore MoreWhat do you think would happen if you rubbed both balloons with plastic wrap? What would happen if you held one of the rubbed balloons near other objects? Plan a test and try it. Record your results.
Inquiry: Open Predict what will happen when different combinations of silk cloth, nylon cloth, wool cloth, plastic, rubber, and glass are rubbed together? Design and perform an experiment to test their predictions.
My question is:
How I can test it:
My results are:
Explore Date Name
Chapter 6 • Electricity Use with Lesson 1Activity Lab Book Static Electricity114
© M
ac
mil
lan
/Mc
Gra
w-H
ill
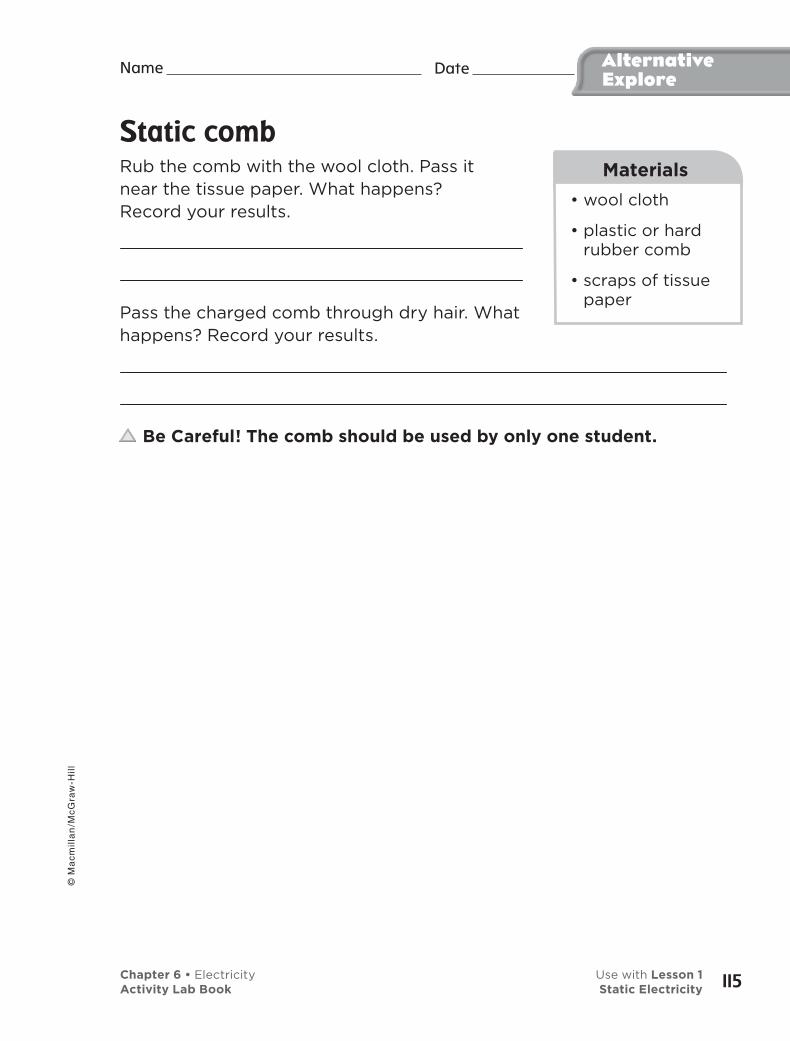
Static combRub the comb with the wool cloth. Pass it near the tissue paper. What happens? Record your results.
Pass the charged comb through dry hair. What happens? Record your results.
Be Careful! The comb should be used by only one student.
• wool cloth
• plastic or hard rubber comb
• scraps of tissue paper
Materials
AlternativeExplore
Date Name
Chapter 6 • Electricity Use with Lesson 1Activity Lab Book Static Electricity
© M
ac
mil
lan
/Mc
Gra
w-H
ill
115
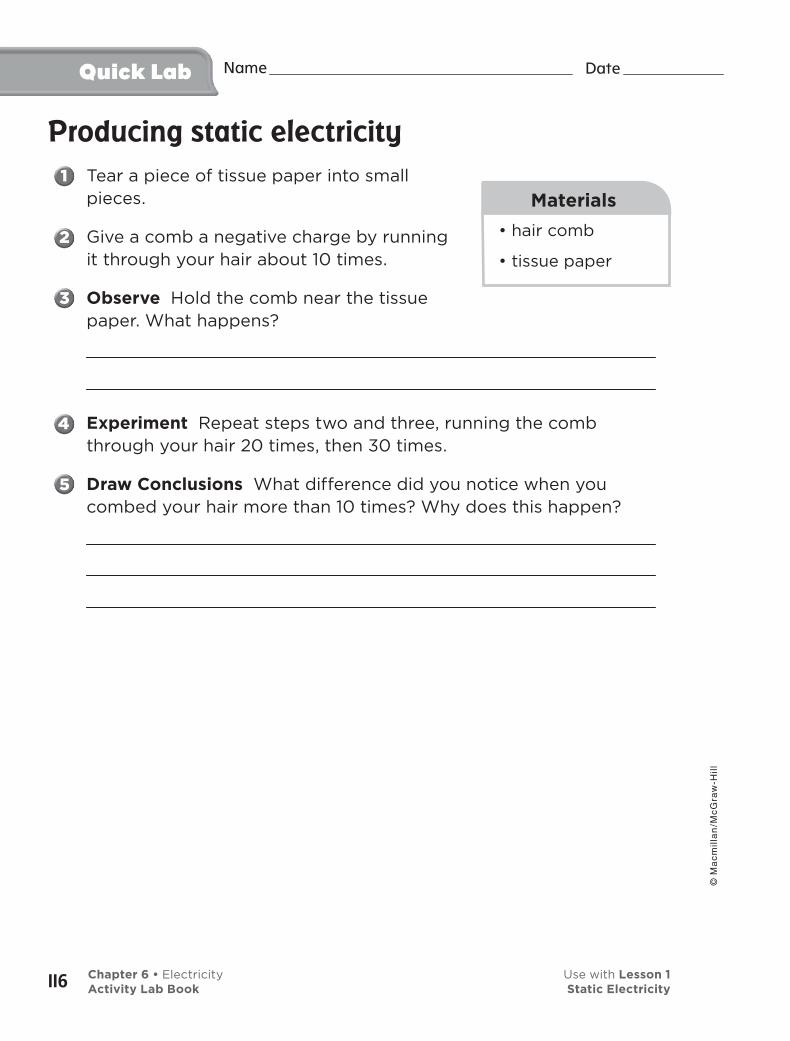
Producing static electricity
Tear a piece of tissue paper into small pieces.
Give a comb a negative charge by running it through your hair about 10 times.
Observe Hold the comb near the tissue paper. What happens?
Experiment Repeat steps two and three, running the comb through your hair 20 times, then 30 times.
Draw Conclusions What difference did you notice when you combed your hair more than 10 times? Why does this happen?
• hair comb
• tissue paper
Materials
Quick Lab Date Name
Chapter 6 • Electricity Use with Lesson 1Activity Lab Book Static Electricity116
© M
ac
mil
lan
/Mc
Gra
w-H
ill
Analyze DataYou discovered that static electricity can cause objects to attract each other. How can you make that attraction stronger? Do some objects produce static electricity more easily than others? You can analyze data from experiments to help you answer questions like these.
Learn ItWhen people do experiments, they collect information called data. Data might be how many ducks hatched in a pond or at what temperature something melts. When you analyze data, you use information that has been gathered to answer questions or solve problems. It is usually easier to analyze the data if it has been organized and placed on a chart or a graph. In that way you can quickly see differences in the data.
Focus onInquiry Skills
Date Name
California Standard4 IE 6.e.
Chapter 6 • Electricity Use with Lesson 1Activity Lab Book Static Electricity
© M
ac
mil
lan
/Mc
Gra
w-H
ill
117
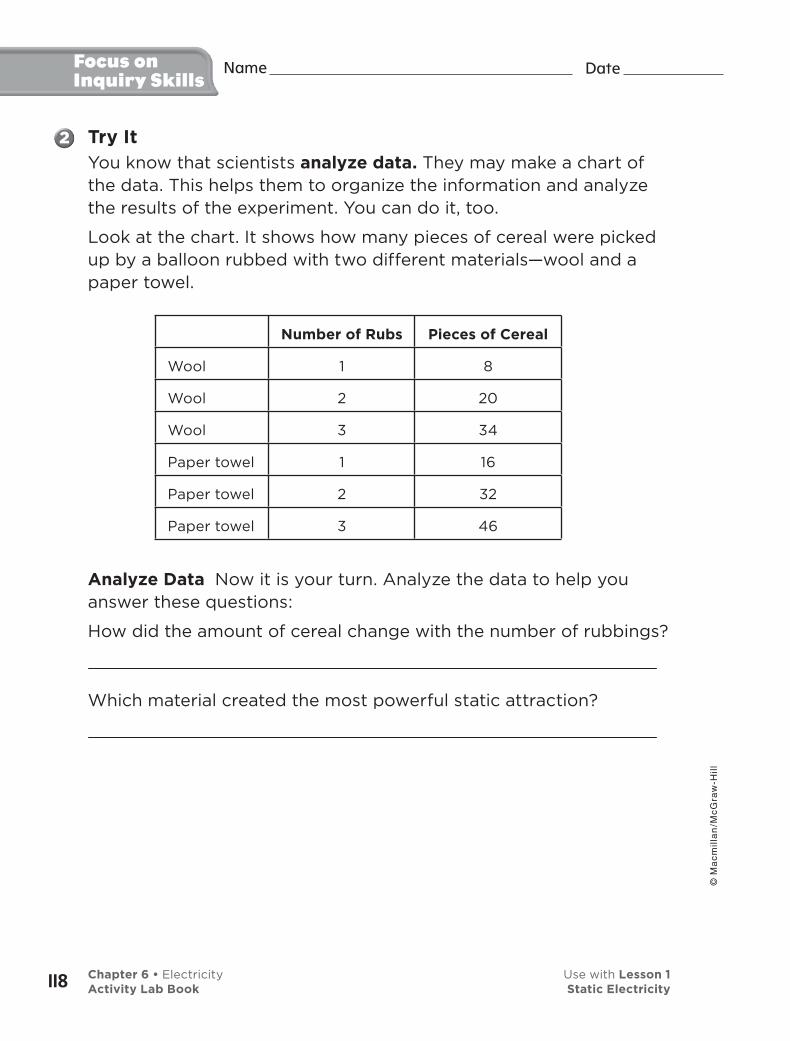
Try ItYou know that scientists analyze data. They may make a chart of the data. This helps them to organize the information and analyze the results of the experiment. You can do it, too.
Look at the chart. It shows how many pieces of cereal were picked up by a balloon rubbed with two different materials—wool and a paper towel.
Analyze Data Now it is your turn. Analyze the data to help you answer these questions:
How did the amount of cereal change with the number of rubbings?
Which material created the most powerful static attraction?
Focus onInquiry Skills
Date Name
Number of Rubs Pieces of Cereal
Wool 1 8
Wool 2 20
Wool 3 34
Paper towel 1 16
Paper towel 2 32
Paper towel 3 46
Chapter 6 • Electricity Use with Lesson 1Activity Lab Book Static Electricity118
© M
ac
mil
lan
/Mc
Gra
w-H
ill
Apply ItUse the data to answer:
About how many pieces of cereal would be picked up if the balloon were rubbed with wool four times?
About how many pieces of cereal would be picked up if the balloon were rubbed with paper towels four times?
Focus onInquiry Skills
Date Name
Chapter 6 • Electricity Use with Lesson 1Activity Lab Book Static Electricity
© M
ac
mil
lan
/Mc
Gra
w-H
ill
119
Charts and graphs not only help you analyze your data. They also help you share that data with other people. Use the data from the chart to make a bar graph. Put the data in order from the fewest rubbings to the most rubbings.
Draw a vertical rule. Label it “Pieces of Cereal Picked Up.” This is the dependent variable. Space out the numbers evenly to show the number of pieces of cereal picked up. Select numbers that work. For example, start with 0 at the bottom and put the highest number of pieces at the top. It may be easiest to choose a scale that shows every 10th number, such as 0, 10, 20, 30.
Draw a horizontal rule for the independent variables. These variables are the kinds of materials used to rub the balloon. And they are the number of times the balloon was rubbed with each material. Leave space on the rule for a label for each type of material. Separate each material along the rule leaving room for the number of times it was used to rub the balloon.
Draw a bar above each material even with the number on the vertical rule closest to the number of pieces of cereal each material picked up.
Focus onInquiry Skills
Date Name
Chapter 6 • Electricity Use with Lesson 1Activity Lab Book Static Electricity120
© M
ac
mil
lan
/Mc
Gra
w-H
ill
What makes a bulb light?
Make a PredictionHow can you connect a battery, a wire, and a light bulb to make the bulb light up?
Test Your Prediction
Experiment Work with your group to try to light the bulb using the materials.
Communicate Draw each setup. Record your results.
Compare When your light bulb is lit, compare your setup to those of other groups. Which made the bulb light? How are the setups the same?
Draw Conclusions
How many setups could you find that made the bulb light? Compare with your classmates. Did they find other setups that worked?
Look at the setups that lit the bulb. What do you think is necessary to make a bulb light up?
Date Name
• D-cell battery
• 20 cm long insulated wire
• light bulb
Materials
ExploreDate Name
California Standard4 IE 6.c., 4 IE 6.d.
Chapter 6 • Electricity Use with Lesson 2Activity Lab Book Electric Circuits
© M
ac
mil
lan
/Mc
Gra
w-H
ill
121
Explore MoreExperiment How could you light two bulbs using only one battery? Can you think of more than one way?
Inquiry: Open Think of ways that more than one battery can be used to light a single bulb and predict how using additional batteries might affect the bulb.
My question is:
How I can test it:
My results are:
Explore Date Name
Chapter 6 • Electricity Use with Lesson 2Activity Lab Book Electric Circuits122
© M
ac
mil
lan
/Mc
Gra
w-H
ill
Power path
Observe Examine a flashlight.
Analyze Identify the path that electricity follows to light the bulb.
Record Data Draw a picture of the electric circuit. Identify how the circuit changes when the switch is in the on and off positions.
• flashlight
• batteries
Materials
AlternativeExplore
Date Name
Chapter 6 • Electricity Use with Lesson 2Activity Lab Book Electric Circuits
© M
ac
mil
lan
/Mc
Gra
w-H
ill
123
Date
Make a series circuit
Screw two light bulbs into sockets.
Use a wire to connect one socket to a battery’s positive terminal.
Use another wire to connect the second socket to the first socket.
Observe Use a third wire to connect the second socket to the battery’s negative terminal. What happens?
Experiment What happens if you remove one of the light bulbs?
Be Careful! The light bulbs may become hot.
• 2 light bulbs
• 2 sockets
• D-cell battery
• 3 insulated wires, each 30 cm long
Materials
Quick Lab Name
Chapter 6 • Electricity Use with Lesson 2Activity Lab Book Electric Circuits124
© M
ac
mil
lan
/Mc
Gra
w-H
ill
How do many loads affect
electric current in a circuit?
Form a HypothesisYou can compare the amount of electric current in circuits by observing light bulbs. A very bright bulb has more current than a dim bulb. How do connecting bulbs in a series circuit affect electric current in the circuit? Write your hypothesis in the form “If you add light bulbs to a circuit, then . . .”.
Test Your Hypothesis
Insert the battery into the battery holder. Screw the light bulbs into the bulb sockets.
Use two wires to connect the battery holder to the bulb socket.
Observe Look at the light bulb. Does it shine brightly or is it dim?
Experiment Disconnect a wire from one side of the light bulb. Make a series circuit by connecting another socket and light bulb with a piece of wire.
Observe Are the two bulbs brighter or dimmer than the bulbs in the first circuit?
Date Name
• D-cell battery
• 4 pieces of wire
• 3 light bulbs
• 3 bulb sockets
• battery holder
Materials
Be aScientist
California Standard4 IE 6.c., 4 IE 6.d.
Chapter 6 • Electricity Use with Lesson 2Activity Lab Book Electric Circuits
© M
ac
mil
lan
/Mc
Gra
w-H
ill
125
Date
Experiment Add the third bulb and socket to the series circuit. How bright are the light bulbs now?
Draw Conclusions
How did adding bulbs to the circuit change the brightness of the bulbs?
Infer How did adding bulbs change the amount of current in the circuit?
Adding bulbs increases the amount of resistance in a circuit. Write a new hypothesis. “If you increase the resistance in a circuit, then . . .”
Be aScientist
Name
Chapter 6 • Electricity Use with Lesson 2Activity Lab Book Electric Circuits126
© M
ac
mil
lan
/Mc
Gra
w-H
ill
Date Name
Batteries in series
Form a HypothesisHave you ever noticed that different devices use different numbers of batteries? A remote control might use two batteries. A stereo might use 6 or more batteries. How will adding batteries affect electric current in the circuit? Write your hypothesis in the form “If you add batteries to a circuit, then . . .”
Test Your HypothesisDesign an experiment to investigate how the number of batteries affects current in a circuit. Write out the materials you will need and the steps you will follow. Record your results and observations.
These are the steps I will follow:
These are my results and observations:
Draw ConclusionsDid your results support your hypothesis? Why or why not?
Be aScientist
Chapter 6 • Electricity Use with Lesson 2Activity Lab Book Electric Circuits
© M
ac
mil
lan
/Mc
Gra
w-H
ill
127
Date
Parallel circuitsInquiry: Open What else can you learn about circuits and how they work? For example, how do batteries and light bulbs change the electric current in parallel circuits? Design your own investigation to answer your question.
This is my question:
This is how I will test my question:
These are my results:
Remember to follow the steps of the scientific process.
Be aScientist
Name
Ask a Question
Form a Hypothesis
Test Your Hypothesis
Draw Conclusions
Chapter 6 • Electricity Use with Lesson 2Activity Lab Book Electric Circuits128
© M
ac
mil
lan
/Mc
Gra
w-H
ill
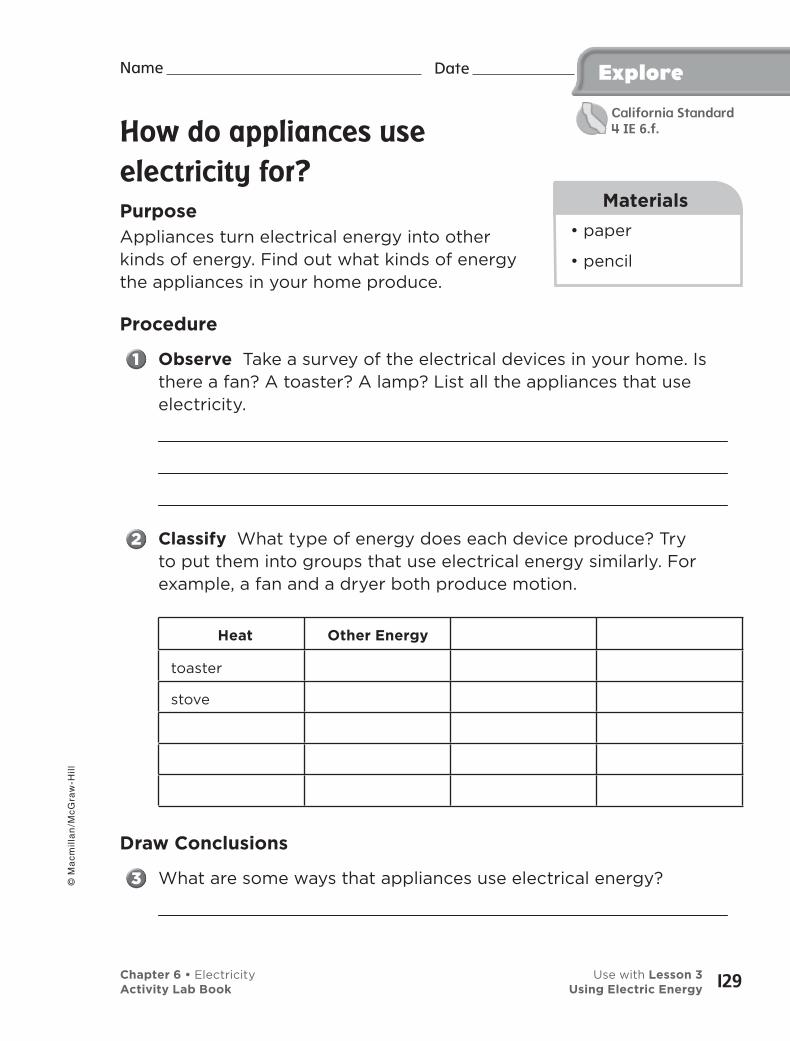
Date Name
• paper
• pencil
Materials
Explore
How do appliances use
electricity for?
PurposeAppliances turn electrical energy into other kinds of energy. Find out what kinds of energy the appliances in your home produce.
Procedure
Observe Take a survey of the electrical devices in your home. Is there a fan? A toaster? A lamp? List all the appliances that use electricity.
Classify What type of energy does each device produce? Try to put them into groups that use electrical energy similarly. For example, a fan and a dryer both produce motion.
Heat Other Energy
toaster
stove
Draw Conclusions
What are some ways that appliances use electrical energy?
California Standard4 IE 6.f.
Chapter 6 • Electricity Use with Lesson 3Activity Lab Book Using Electric Energy
© M
ac
mil
lan
/Mc
Gra
w-H
ill
129

Date Name
Explore MoreName some appliances that produce more than one kind of energy?
Inquiry: Open Think about devices you can make to convert electrical energy from a battery power into light, heat, or motion. Design and build battery-powered devices using simple electrical components or parts from a construction set.
My question is:
How I can test it:
My results are:
Communicate Explain where energy conversions take place as you demonstrate your device to the class.
Explore
Chapter 6 • Electricity Use with Lesson 3Activity Lab Book Using Electric Energy130
© M
ac
mil
lan
/Mc
Gra
w-H
ill
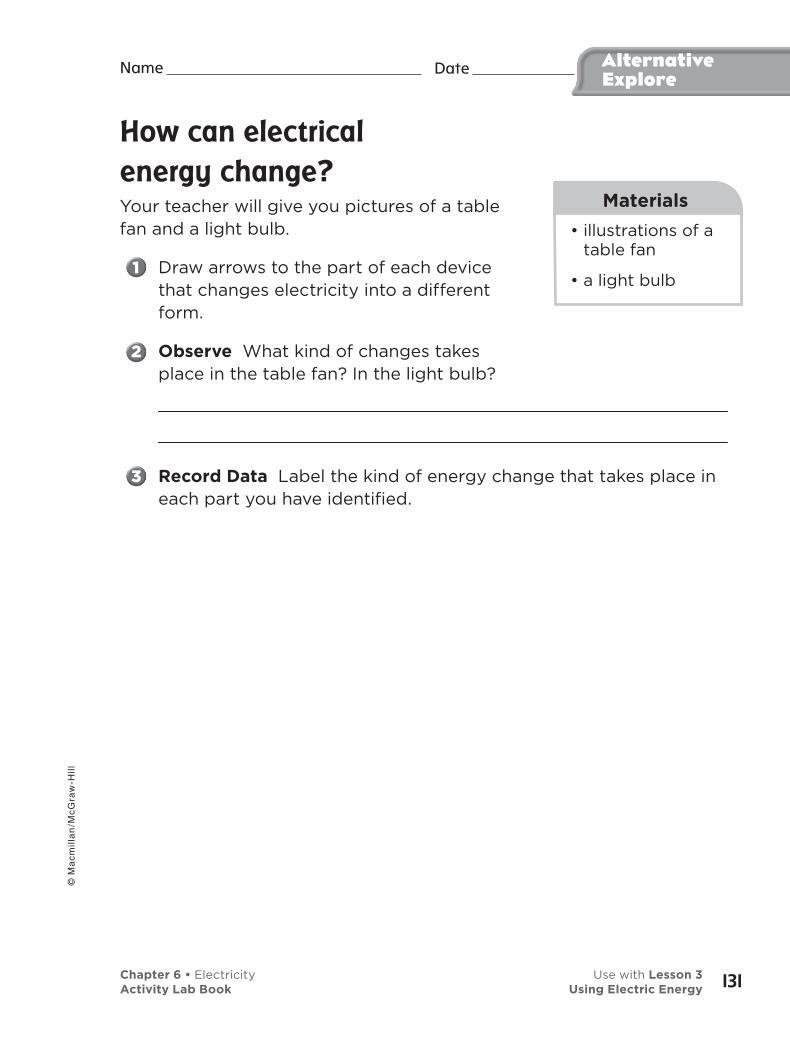
How can electrical
energy change?Your teacher will give you pictures of a table fan and a light bulb.
Draw arrows to the part of each device that changes electricity into a different form.
Observe What kind of changes takes place in the table fan? In the light bulb?
Record Data Label the kind of energy change that takes place in each part you have identified.
Date Name
• illustrations of a table fan
• a light bulb
Materials
AlternativeExplore
Chapter 6 • Electricity Use with Lesson 3Activity Lab Book Using Electric Energy
© M
ac
mil
lan
/Mc
Gra
w-H
ill
131
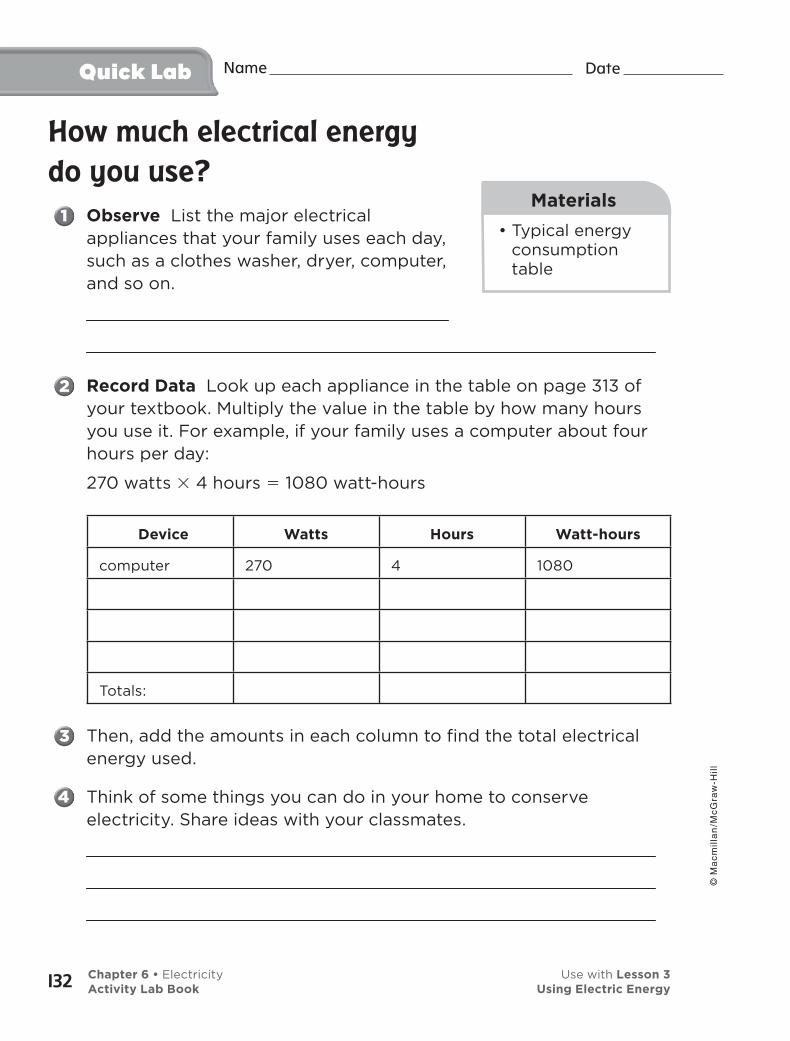
Date
How much electrical energy
do you use?
Observe List the major electrical appliances that your family uses each day, such as a clothes washer, dryer, computer, and so on.
Record Data Look up each appliance in the table on page 313 of your textbook. Multiply the value in the table by how many hours you use it. For example, if your family uses a computer about four hours per day:
270 watts � 4 hours � 1080 watt-hours
Device Watts Hours Watt-hours
computer 270 4 1080
Totals:
Then, add the amounts in each column to find the total electrical energy used.
Think of some things you can do in your home to conserve electricity. Share ideas with your classmates.
• Typical energy consumption table
Materials
Quick Lab Name
132
© M
ac
mil
lan
/Mc
Gra
w-H
ill
Chapter 6 • Electricity Use with Lesson 3Activity Lab Book Using Electric Energy

133
Explore
How do magnets interact?
Make a PredictionWhat happens when one magnet is near another magnet? How do different parts of magnets interact?
Test Your Prediction
Experiment Bring the north pole of one magnet close to the north pole of another magnet. Record what happens. Then try it again.
Predict What do you think will happen if you bring the south poles of the magnets near each other?
Experiment Try it and record the result.
Experiment Bring the north pole of one magnet close to the south pole of the other magnet. Record what happens now. Try it again.
Date Name
• 2 bar magnets with the poles marked
Materials
Chapter 7 • Magnetism Use with Lesson 1Activity Lab Book Magnets
California Standard4 IE 6.d.
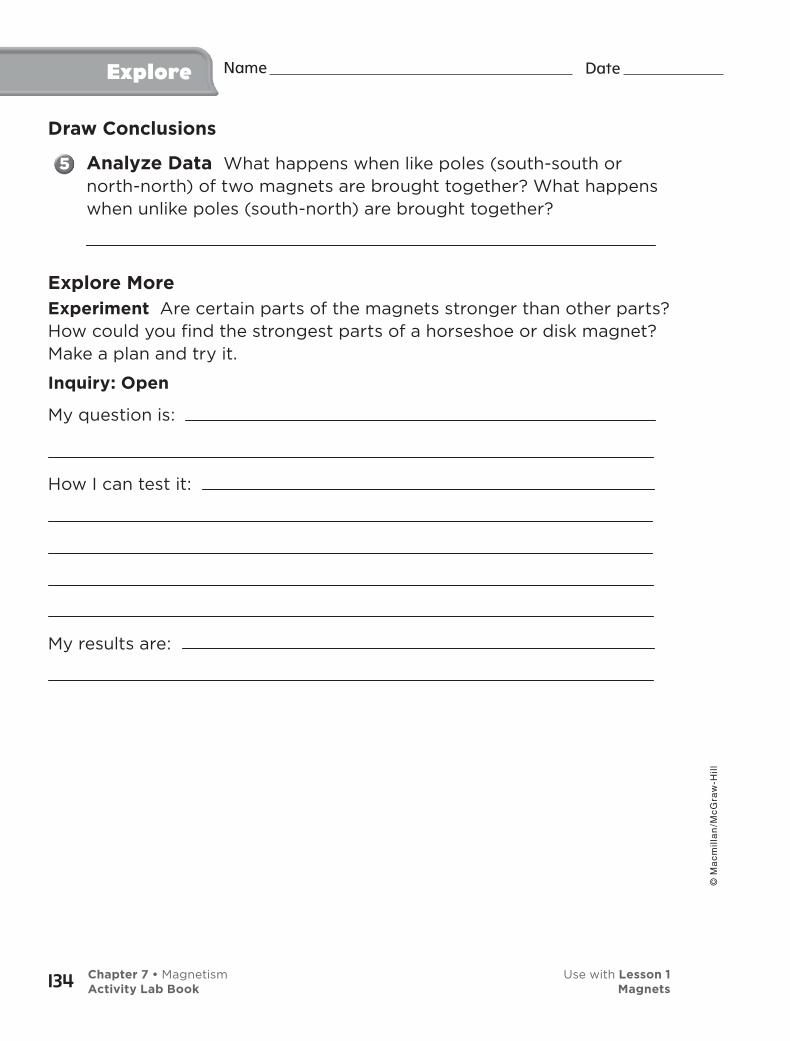
Explore Date
Draw Conclusions
Analyze Data What happens when like poles (south-south or north-north) of two magnets are brought together? What happens when unlike poles (south-north) are brought together?
Explore MoreExperiment Are certain parts of the magnets stronger than other parts? How could you find the strongest parts of a horseshoe or disk magnet? Make a plan and try it.
Inquiry: Open
My question is:
How I can test it:
My results are:
Name
Chapter 7 • Magnetism Use with Lesson 1Activity Lab Book Magnets134
© M
ac
mil
lan
/Mc
Gra
w-H
ill
Date Name AlternativeExplore
Magnetic forces
ProcedureTeam up with a partner to work in pairs.
Place a bar magnet at one end of a desk.
Hypothesize Think of at least two different ways to move this magnet to the other side of the desk using only the other bar magnet.
Experiment Try your two different ways to see if they work.
Observe Write what happened.
Communicate Share your results with the class.
• 2 bar magnets with the poles marked
Materials
Chapter 7 • Magnetism Use with Lesson 1Activity Lab Book Magnets
© M
ac
mil
lan
/Mc
Gra
w-H
ill
135
Quick Lab Date Name
• small magnet
• plastic bags
• fortified cereal
• spoons
Materials
What does a magnet attract?
Predict Many foods, such as cereals, contain iron. Can a magnet attract the iron from these foods?
Pour some iron-fortified cereal into a plastic bag. Seal the bag, then crush the cereal.
Experiment Rub the magnet over the plastic bag. What happens?
Infer What do you think the tiny bits attracted to the magnet are? Explain.
How could you determine which cereal has the most iron?
Chapter 7 • Magnetism Use with Lesson 1Activity Lab Book Magnets136
© M
ac
mil
lan
/Mc
Gra
w-H
ill
Date Name
Draw conclusions
Gather DataWhen people do an experiment, they are trying to answer a question. They make observations and study the results of the experiment in order to draw a conclusion. When you draw conclusions, you interpret the results of an experiment to answer a question. Your conclusions help explain things you observe. They can help you make predictions in future experiments.
Learn It When you draw conclusions, you have to look at all the facts before you can decide on an answer. It is a good idea to record your observations and facts on a chart. That way you will have all the
facts in one place to help you draw your conclusions.
Try It Scientists use observations and information that they know to draw conclusions. You can, too.
• Make a clay base with one flat side. Stick a pencil in the clay. Place the clay on a table or desk. Make sure it holds the pencil upright and steady.
Focus onInquiry Skills
• clay
• pencil
• 2 ring magnets
Materials
Chapter 7 • Magnetism Use with Lesson 1Activity Lab Book Magnets
© M
ac
mil
lan
/Mc
Gra
w-H
ill
137
California Standard4 IE 6.a.
• Place two ring magnets on the pencil. Try different ways of stacking the magnets. Flip one of them over or change their order. Record your observations.
• Next arrange three magnets on the pencil in different ways. Record what happens.
Now use your observations to draw conclusions. Why do some of the magnets float? Why do the others stick together? How could you make one of the magnets float?
My Observations About Magnets
Facts Observations Conclusions
Focus onInquiry Skills
Date Name
Chapter 7 • Magnetism Use with Lesson 1Activity Lab Book Magnets138
© M
ac
mil
lan
/Mc
Gra
w-H
ill
Apply It Now draw conclusions on your own by experimenting and collecting data.
• Add more magnets above the rings on the pencil so that the magnets float.
• Push down on the top magnet, squeezing the magnets together. Then let go.
• Draw Conclusions about how magnets behave. What happened when you let go? Why?
My Conclusions About Magnets
Facts Observations Conclusions
Focus onInquiry Skills
Date Name
Chapter 7 • Magnetism Use with Lesson 1Activity Lab Book Magnets
© M
ac
mil
lan
/Mc
Gra
w-H
ill
139
Student Journal Notes
Chapter 7 • Magnetism Use with Lesson 1Activity Lab Book Magnets140
© M
ac
mil
lan
/Mc
Gra
w-H
ill
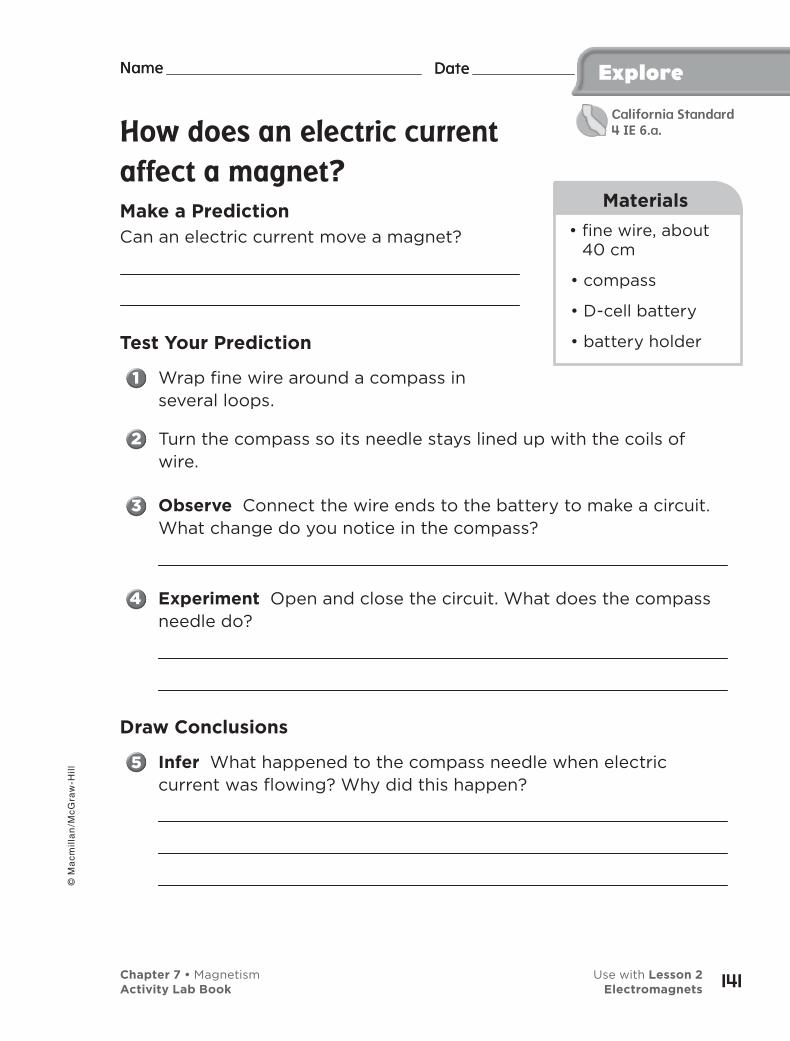
Date Name Date Name Explore
How does an electric current
affect a magnet?
Make a PredictionCan an electric current move a magnet?
Test Your Prediction
Wrap fine wire around a compass in several loops.
Turn the compass so its needle stays lined up with the coils of wire.
Observe Connect the wire ends to the battery to make a circuit. What change do you notice in the compass?
Experiment Open and close the circuit. What does the compass needle do?
Draw Conclusions
Infer What happened to the compass needle when electric current was flowing? Why did this happen?
• fine wire, about 40 cm
• compass
• D-cell battery
• battery holder
Materials
Chapter 7 • Magnetism Use with Lesson 2Activity Lab Book Electromagnets
© M
ac
mil
lan
/Mc
Gra
w-H
ill
141
California Standard4 IE 6.a.
Explore Date
Did you detect a magnetic field around the wire when there was no current?
Explore More
Experiment Reverse the wires on the battery. What happens?
Explain the result.
Inquiry: Open Encourage students to find out if the amount of wire wrapped around the compass has any effect on the needle’s movement. Or, students could walk around the school and note places and objects that seem to affect the compass needle.
My question is:
How I can test it:
My results are:
Name
Chapter 7 • Magnetism Use with Lesson 2Activity Lab Book Electromagnets142
© M
ac
mil
lan
/Mc
Gra
w-H
ill
Date Name
Career search
Research Work with a partner or in a small group. Use the Internet and/or an encyclopedia to research the question, “Which jobs use electromagnets?”
Record Data Record your findings on a sheet of paper or in your notebook. Use a form similar to the one below.
Name of Job How Electromagnets are Used
Communicate Share your group’s results with the class.
AlternativeExplore
• Internet
• encyclopedia
Materials
Chapter 7 • Magnetism Use with Lesson 2Activity Lab Book Electromagnets
© M
ac
mil
lan
/Mc
Gra
w-H
ill
143
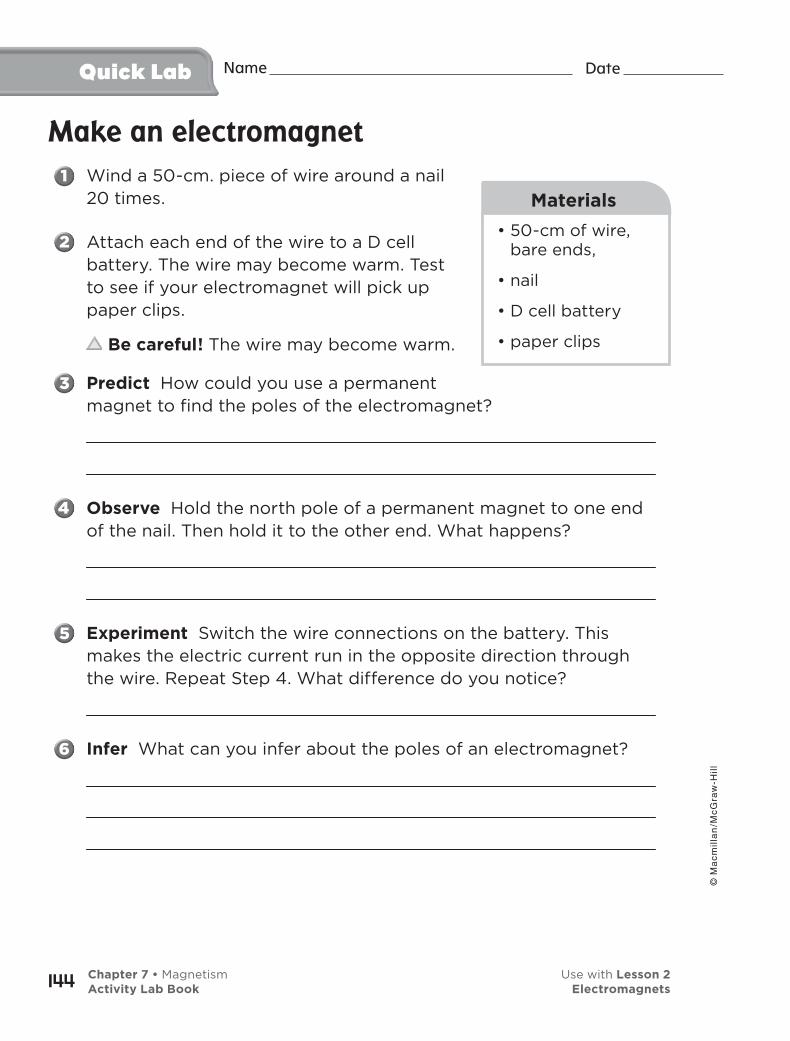
Quick Lab Date
Make an electromagnet
Wind a 50-cm. piece of wire around a nail 20 times.
Attach each end of the wire to a D cell battery. The wire may become warm. Test to see if your electromagnet will pick up paper clips.
Be careful! The wire may become warm.
Predict How could you use a permanent magnet to find the poles of the electromagnet?
Observe Hold the north pole of a permanent magnet to one end of the nail. Then hold it to the other end. What happens?
Experiment Switch the wire connections on the battery. This makes the electric current run in the opposite direction through the wire. Repeat Step 4. What difference do you notice?
Infer What can you infer about the poles of an electromagnet?
• 50-cm of wire, bare ends,
• nail
• D cell battery
• paper clips
Materials
Name
Chapter 7 • Magnetism Use with Lesson 2Activity Lab Book Electromagnets144
© M
ac
mil
lan
/Mc
Gra
w-H
ill
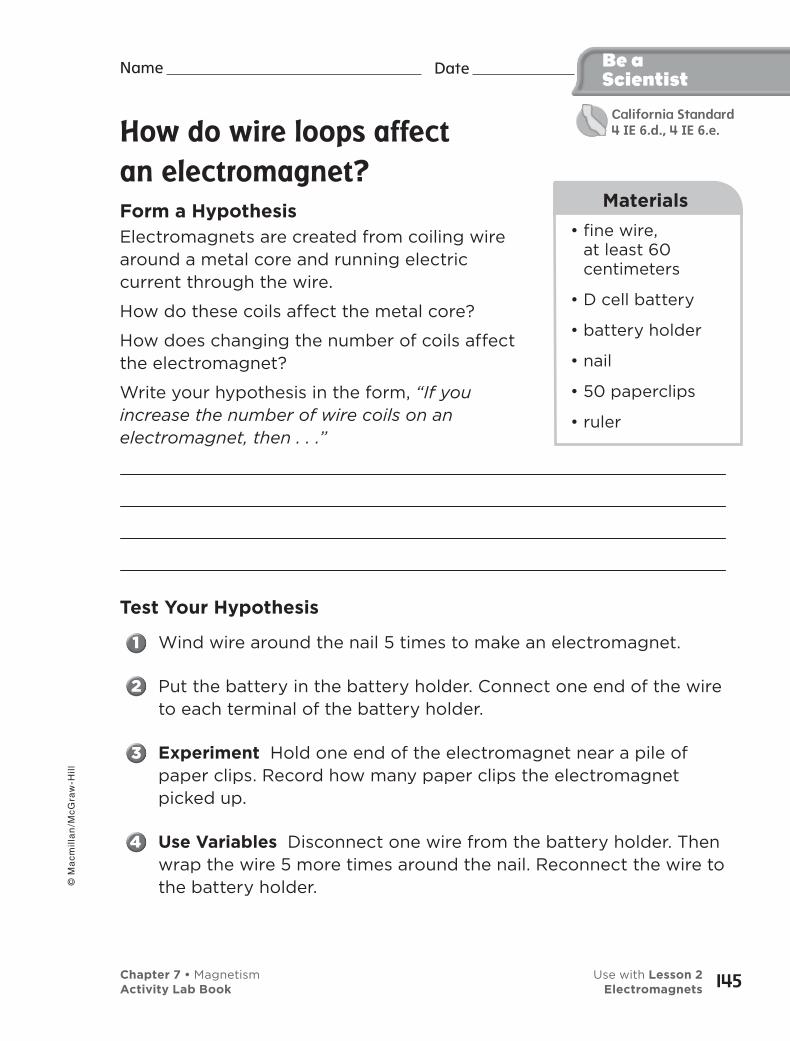
Date Name
How do wire loops affect
an electromagnet?
Form a HypothesisElectromagnets are created from coiling wire around a metal core and running electric current through the wire.
How do these coils affect the metal core?
How does changing the number of coils affect the electromagnet?
Write your hypothesis in the form, “If you increase the number of wire coils on an electromagnet, then . . .”
Test Your Hypothesis
Wind wire around the nail 5 times to make an electromagnet.
Put the battery in the battery holder. Connect one end of the wire to each terminal of the battery holder.
Experiment Hold one end of the electromagnet near a pile of paper clips. Record how many paper clips the electromagnet picked up.
Use Variables Disconnect one wire from the battery holder. Then wrap the wire 5 more times around the nail. Reconnect the wire to the battery holder.
Be aScientist
• fine wire, at least 60 centimeters
• D cell battery
• battery holder
• nail
• 50 paperclips
• ruler
Materials
Chapter 7 • Magnetism Use with Lesson 2Activity Lab Book Electromagnets
© M
ac
mil
lan
/Mc
Gra
w-H
ill
145
California Standard4 IE 6.d., 4 IE 6.e.
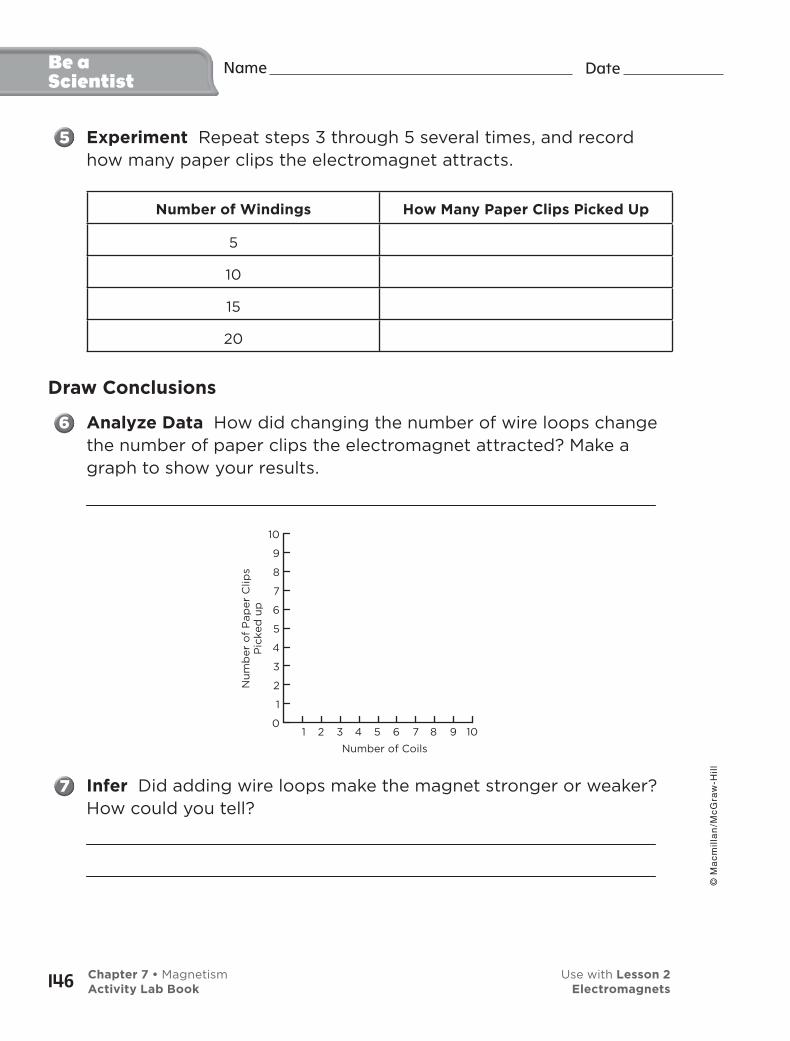
Be a Scientist
Date
Experiment Repeat steps 3 through 5 several times, and record how many paper clips the electromagnet attracts.
Number of Windings How Many Paper Clips Picked Up
5
10
15
20
Draw Conclusions
Analyze Data How did changing the number of wire loops change the number of paper clips the electromagnet attracted? Make a graph to show your results.
Infer Did adding wire loops make the magnet stronger or weaker? How could you tell?
Name
0
1
2
3
4
5
6
7
8
9
10
1 2 3 4 5 6 7 8 9 10
Number of Coils
Nu
mb
er
of
Pap
er
Clip
sP
icked
up
Chapter 7 • Magnetism Use with Lesson 2Activity Lab Book Electromagnets146
© M
ac
mil
lan
/Mc
Gra
w-H
ill
Date Name Be aScientist
How does distance affect a magnet’s strength?
Form a HypothesisDid you have to hold the electromagnet close to the paper clips to pick them up?
How does distance affect the pull of an electromagnet? Write your answer as a hypothesis in the form, “If you move an electromagnet farther from an object, then . . .”
Test Your HypothesisDesign an experiment to investigate how distance affects magnetic force. Write out the steps you will follow. Record your results and observations.
This is my experiment:
These are the steps I will follow:
These are my results and observations:
Chapter 7 • Magnetism Use with Lesson 2Activity Lab Book Electromagnets
© M
ac
mil
lan
/Mc
Gra
w-H
ill
147
Date
Draw Conclusions Did your experiment support your hypothesis? Why or why not? Compare your results with a classmate’s results.
Further InvestigationInquiry: Open What else can you learn about how electromagnets work? For example, how can different numbers of batteries affect an electromagnet? Design an investigation to answer your question.
Remember to follow the steps of the scientific process.
Draw Conclusions Did your experiment support your hypothesis? Why or why not? Compare your results with your classmates.
Name Be a Scientist
Chapter 7 • Magnetism Use with Lesson 2Activity Lab Book Electromagnets148
© M
ac
mil
lan
/Mc
Gra
w-H
ill
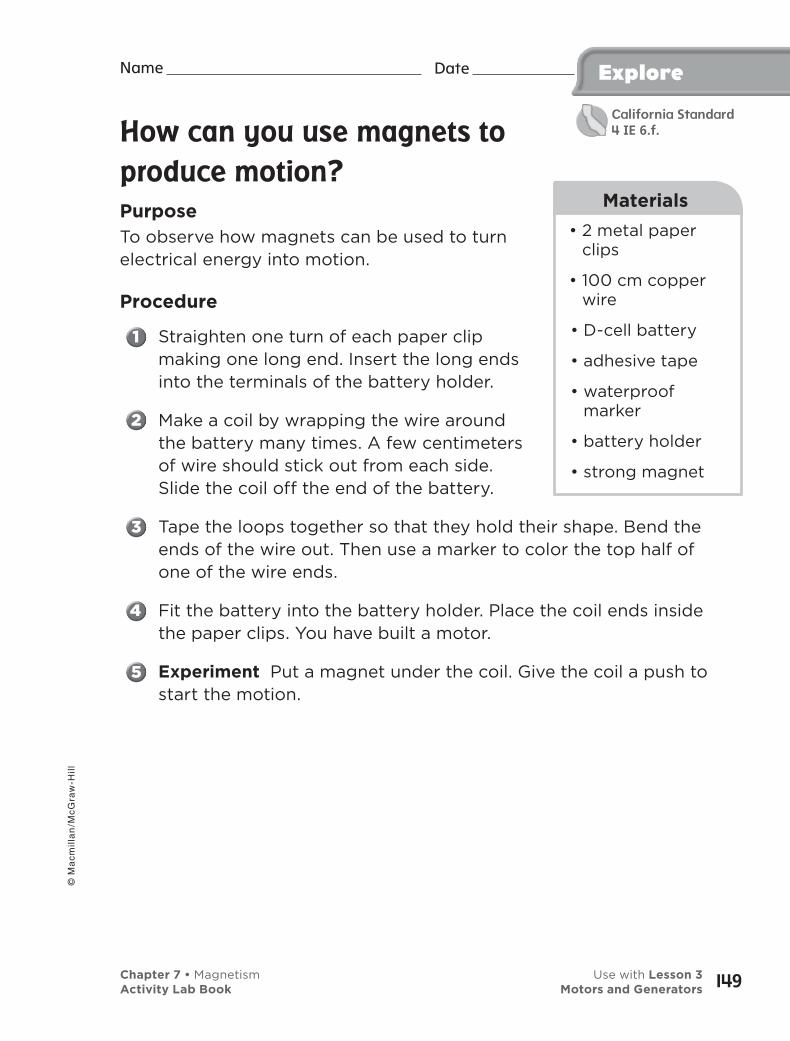
Date Name Explore
How can you use magnets to
produce motion?
PurposeTo observe how magnets can be used to turn electrical energy into motion.
Procedure
Straighten one turn of each paper clip making one long end. Insert the long ends into the terminals of the battery holder.
Make a coil by wrapping the wire around the battery many times. A few centimeters of wire should stick out from each side. Slide the coil off the end of the battery.
Tape the loops together so that they hold their shape. Bend the ends of the wire out. Then use a marker to color the top half of one of the wire ends.
Fit the battery into the battery holder. Place the coil ends inside the paper clips. You have built a motor.
Experiment Put a magnet under the coil. Give the coil a push to start the motion.
• 2 metal paper clips
• 100 cm copper wire
• D-cell battery
• adhesive tape
• waterproof marker
• battery holder
• strong magnet
Materials
Chapter 7 • Magnetism Use with Lesson 3Activity Lab Book Motors and Generators
© M
ac
mil
lan
/Mc
Gra
w-H
ill
149
California Standard4 IE 6.f.
Explore Date
Draw Conclusions
What is making the wire loop turn? Where is the energy to turn the loop coming from?
Explore More
How can you make your motor go faster?What factors affect the strength of an electromagnet? How can you make your electric motor stronger?
Inquiry: Open Design an experiment to test one of the factors you have listed above.
My question is:
How I can test it:
My results are:
Name
Chapter 7 • Magnetism Use with Lesson 3Activity Lab Book Motors and Generators150
© M
ac
mil
lan
/Mc
Gra
w-H
ill
Date Name
History of the compass
Teamwork Your teacher will assign you to a small group of students. You will work together to research the History of the Compass. Decide which roles each member of the team will take.
Role Team Member’s Name
Encyclopedia research
Internet research
Reporter
Research Use an encyclopedia and the Internet to research the history of the compass.
Record Data What did you find?
Communicate Share your findings with your group or with the class.
AlternativeExplore
• Internet
• encyclopedia
Materials
Chapter 7 • Magnetism Use with Lesson 3Activity Lab Book Motors and Generators
© M
ac
mil
lan
/Mc
Gra
w-H
ill
151
Quick Lab Date
Make a generator
Push a nail through a cardboard tube. Place a lump of clay on the nail inside the tube. Stick a disc magnet on each side of the clay.
Wrap wire 50 times around the tube near the nail. Wrap the extra wire around a compass several times. Twist the ends of the wire together.
Turn the compass so that the needle lines up with the wire.
Infer Spin the nail so that the magnets spin inside the tube. What does the compass needle do? Is electric current flowing?
Name
• varnished wire
• cardboard roll
• compass
• 2 disc magnets
• nail
Materials
Chapter 7 • Magnetism Use with Lesson 3Activity Lab Book Motors and Generators152
© M
ac
mil
lan
/Mc
Gra
w-H
ill
Materials
• construction paper
• markers
Materials
153
My Own Food WebWhat does your breakfast cereal have to do with food chains and food webs? What food web did the sandwich you just bought from the cafeteria come from? The food we eat every day comes from plants and animals. You can look on a food label to tell what plants or animals are part of your meal. Most cereals are made from grains or other plants. Many juices are made from fruits.
You can trace the flow of energy from your glass of grape juice all the way back to the Sun. The energy you need to live and grow comes from the Sun, just like it does for other animals. What would a food web that includes you look like?
PurposeIn this activity you will investigate how you are part of a food web.
Make a PredictionDid you eat more producers or consumers during lunch?
Test Your Prediction
Write down all the foods you had for lunch today.
List what plant or animal each food came from.
Date Name EverydayScience
Chapter 1 • Living Things Need Energy Use with Chapter 1Activity Lab Book
Date Name EverydayScience
Where might each of the plants and animals have gotten energy to live and grow?
Make a Model Draw a diagram to show a possible food chain for each item in your meal.
Link the food chains together to make a food web. Be sure to include yourself in the diagram. Include arrows to show how energy passed through the web.
Date Name
154
© M
ac
mil
lan
/Mc
Gra
w-H
ill
Chapter 1 • Living Things Need Energy Use with Chapter 1Activity Lab Book
Draw Conclusions
Analyze Data How many food chains were in your food web?
Compare Did you eat more producers or consumers during your meal?
Critical Thinking
Are humans primary consumers or secondary consumers? How do you know?
What would a food web of your breakfast look like?
Did You Know?Energy from food is measured in a unit called calories. Each day, an average adult should consume about 2,000 calories of energy from foods.
Date Name EverydayScience
© M
ac
mil
lan
/Mc
Gra
w-H
ill
155Chapter 1 • Living Things Need Energy Use with Chapter 1Activity Lab Book

Student Journal Notes
156
© M
ac
mil
lan
/Mc
Gra
w-H
ill
Chapter 1 • Living Things Need Energy Use with Chapter 1Activity Lab Book
Date Name
Materials
EverydayScience
Rain, Rain, Go AwayBiotic and abiotic factors make up an ecosystem. Biotic factors are all the living organisms in an ecosystem. Examples are plants, animals, and microorganisms. Abiotic factors are all nonliving factors that affect an ecosystem. Some examples are temperature, rainfall, and soil. A change in either biotic or abiotic factors can affect an ecosystem drastically.
Acid rain is an abiotic factor that has affected many ecosystems. Acid rain is rain (or snow, fog, or dew) that mixes with impurities. These impurities come from cars, trucks, buses, and power plants. When this acid rain falls in ponds and lakes, animals such as fish cannot survive.
PurposeIn this activity you will investigate how acid can affect a growing plant.
Form a HypothesisWhat would happen if you water plants with vinegar instead of water?
Test Your Prediction
Label one cup A and a second cup B.
Put soil in each cup and add 10 seeds to each cup. Cover the seeds lightly with soil.
• seeds
• potting soil
• plastic cups
Date Name ©
Ma
cm
illa
n/M
cG
raw
-Hil
l
157Chapter 2 • Living Things and Their Environment Use with Chapter 2Activity Lab Book
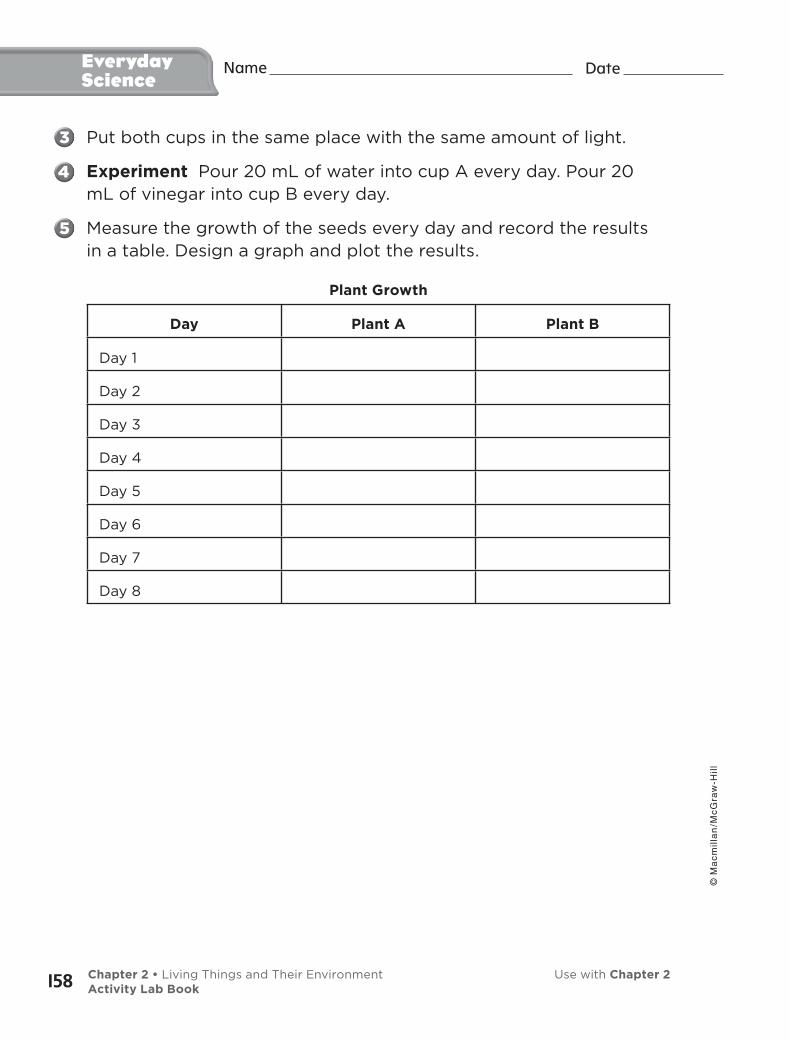
Date Name EverydayScience
Put both cups in the same place with the same amount of light.
Experiment Pour 20 mL of water into cup A every day. Pour 20 mL of vinegar into cup B every day.
Measure the growth of the seeds every day and record the results in a table. Design a graph and plot the results.
Plant Growth
Day Plant A Plant B
Day 1
Day 2
Day 3
Day 4
Day 5
Day 6
Day 7
Day 8
158
© M
ac
mil
lan
/Mc
Gra
w-H
ill
Chapter 2 • Living Things and Their Environment Use with Chapter 2Activity Lab Book
Date Name EverydayScience
Draw Conclusions
Compare How did cup A differ from cup B?
How does acid affect the growth of plants?
Critical Thinking
List the way you treated the plants in each cup. How did the treatment differ?
Why do you think that the most acidic rain is found in the Northeastern part of the United States?
Did You Know?Acid rain can be reduced if alternative kinds of energy such as wind, solar, and water power are more commonly used.
© M
ac
mil
lan
/Mc
Gra
w-H
ill
159Chapter 2 • Living Things and Their Environment Use with Chapter 2Activity Lab Book
Student Journal Notes
160
© M
ac
mil
lan
/Mc
Gra
w-H
ill
Chapter 2 • Living Things and Their Environment Use with Chapter 2Activity Lab Book
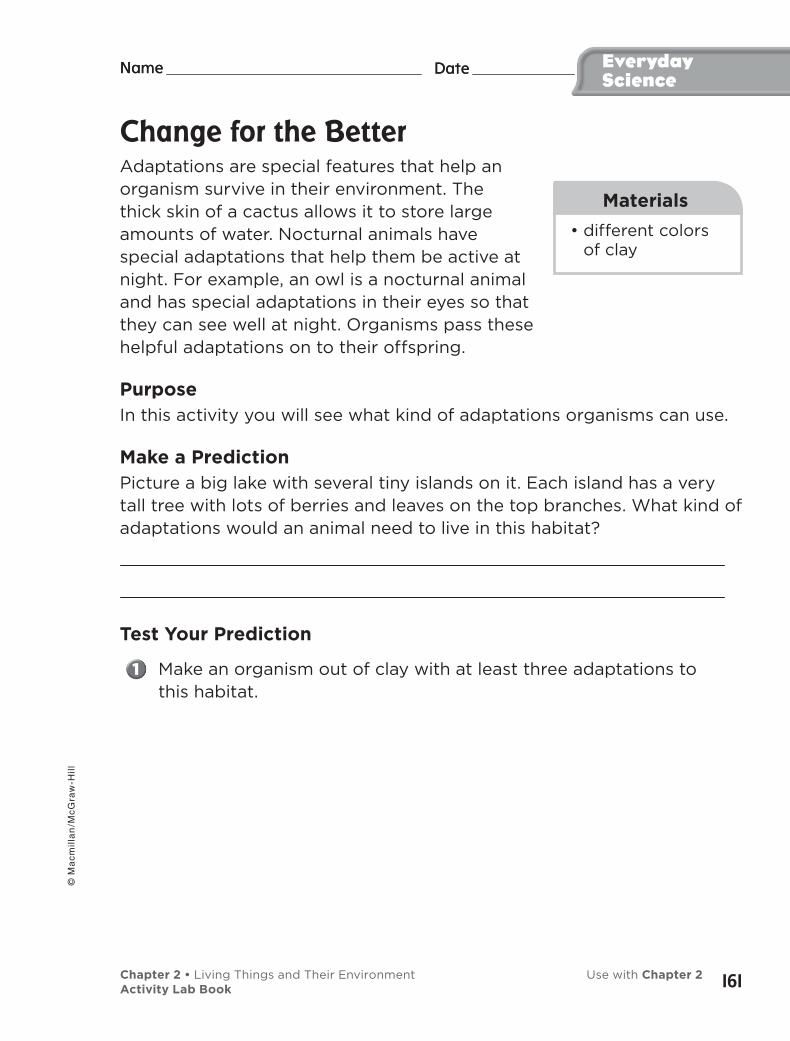
Date Name
Materials
EverydayScience
Change for the Better Adaptations are special features that help anorganism survive in their environment. The thick skin of a cactus allows it to store large amounts of water. Nocturnal animals have special adaptations that help them be active at night. For example, an owl is a nocturnal animal and has special adaptations in their eyes so that they can see well at night. Organisms pass these helpful adaptations on to their offspring.
PurposeIn this activity you will see what kind of adaptations organisms can use.
Make a PredictionPicture a big lake with several tiny islands on it. Each island has a very tall tree with lots of berries and leaves on the top branches. What kind of adaptations would an animal need to live in this habitat?
Test Your Prediction
Make an organism out of clay with at least three adaptations to this habitat.
• different colors of clay
Date Name ©
Ma
cm
illa
n/M
cG
raw
-Hil
l
161Chapter 2 • Living Things and Their Environment Use with Chapter 2Activity Lab Book
Date Name EverydayScience
Describe how the adaptations that you gave your animal will help your animal survive.
Name your animal and explain why you chose that name.
Draw Conclusions
Compare Look at the organisms that other students made. How are they similar to yours? How are they different?
Infer What other adaptations would be advantageous to your organism?
162
© M
ac
mil
lan
/Mc
Gra
w-H
ill
Chapter 2 • Living Things and Their Environment Use with Chapter 2Activity Lab Book
Date Name EverydayScience
Critical Thinking
Suppose all of these organisms live together in the same habitat. Which organism would thrive? Which would have a difficult time competing?
How is hibernation an adaptation for a chipmunk?
Did You Know?Humps are an adaptation found in camels. These humps store fat which allows the camels to survive for long periods of time without food. When this stored fat is used as an energy source, water is produced as a by-product.
© M
ac
mil
lan
/Mc
Gra
w-H
ill
163Chapter 2 • Living Things and Their Environment Use with Chapter 2Activity Lab Book

Student Journal Notes
164
© M
ac
mil
lan
/Mc
Gra
w-H
ill
Chapter 2 • Living Things and Their Environment Use with Chapter 2Activity Lab Book
Date Name EverydayScience
Date Name
Crystal CrazyMinerals have a solid shape and always have the same kind of materials. The mineral fluorite is always made out of calcium and fluorine. The mineral quartz is always made out of silicon and oxygen.
Most minerals have a specific crystal shape. That means that when you look at a mineral under a microscope or magnifying glass, you see a pattern that is repeated over and over. Crystals can form in two different ways. Some crystals are formed when magma cools. Other crystals form when water with certain materials in it evaporates. When this water evaporates, the atoms left behind get very close to one another and form a crystal.
PurposeTo observe the formation of a mineral and its crystal shape.
Make a PredictionSuppose that you poured salt water over charcoal. What would you see when the water had evaporated?
• charcoal
• bowl
• water
• salt
• vinegar
• food coloring
Materials
© M
ac
mil
lan
/Mc
Gra
w-H
ill
165Chapter 3 • Rocks and Minerals Use with Chapter 3Activity Lab Book
Date Name EverydayScience
Test Your Prediction
Put a layer of charcoal in a shallow bowl and spread it out evenly. You may want to add some drops of food coloring to the charcoal. Use a light color.
Dissolve 2 tablespoons of salt in 1_2 cup of warm water.
Add 1_2 tablespoon of vinegar.
Pour the solution over the charcoal.
Let your bowl sit in a safe place until the water has evaporated.
166
© M
ac
mil
lan
/Mc
Gra
w-H
ill
Chapter 3 • Rocks and Minerals Use with Chapter 3Activity Lab Book
Date Name EverydayScience
Draw Conclusions
Observe What do you see in the bowl once the water is gone?
Infer Where did these structures come from?
Compare How do these compare to the original materials?
© M
ac
mil
lan
/Mc
Gra
w-H
ill
167Chapter 3 • Rocks and Minerals Use with Chapter 3Activity Lab Book

Date Name EverydayScience
Critical Thinking
Where do people get the minerals used in making cars, houses, etc?
Are minerals good for your body?
Did You Know?Rock candy is crystallized sugar. It’s a rock made out of sugar!
168
© M
ac
mil
lan
/Mc
Gra
w-H
ill
Chapter 3 • Rocks and Minerals Use with Chapter 3Activity Lab Book
Date Name
Materials
EverydayScience
Magnificent MagmaVolcanoes are formed by magma, which is very hot, liquid rock. High pressure inside Earth pushes the magma through a deep tunnel called a pipe. The magma travels through the pipe to the surface of Earth. When magma comes out to the surface it is called lava.
PurposeTo make a model of a volcano.
Procedure
Tape the bottom of a plastic bottle to the middle of a box top or baking pan.
Wrap construction paper around the bottle to form a cone shape.
Make a paste by adding 2 cups of warm water to 2 cups of flour. Use the paste right away.
• flour
• construction paper
• water
• empty plastic liter bottle
• old newspapers
• box top or baking pan
• dishwasher soap or baking soda
• food coloring
• vinegar
© M
ac
mil
lan
/Mc
Gra
w-H
ill
169Chapter 5 • Fast Changes on Earth Use with Chapter 5Activity Lab Book
Date Name EverydayScience
Cut a newspaper into long strips and dip each strip in the paste. Make sure that the strips are completely soaked in the paste and cover the construction paper cone.
Let the volcano dry overnight. Hint: If you put the volcano in the sun it will dry faster.
Add the following to the bottle: 1_4 cup of warm water, 5 drops
of liquid dish detergent, 5 drops of red food coloring, 1_4 cup
of vinegar.
Draw Conclusions
Observe What happened when you poured the vinegar into the bottle?
170
© M
ac
mil
lan
/Mc
Gra
w-H
ill
Chapter 5 • Fast Changes on Earth Use with Chapter 5Activity Lab Book
Date Name EverydayScience
Compare When the vinegar and detergent combine, they make a lot of carbon dioxide. The gas produces pressure inside the bottle. How is this like a volcano?
Critical Thinking
If it is dangerous to live on a volcano, why do you think some farmers choose to live there?
What is a scientist who studies volcanoes called?
Did You Know?Stromboli, a volcano found near Italy, has been erupting for more than 2,000 years. Stromboli is also the name of a hot pastry filled with cheese and other spicy foods such as pepperoni.
© M
ac
mil
lan
/Mc
Gra
w-H
ill
171Chapter 5 • Fast Changes on Earth Use with Chapter 5Activity Lab Book
Student Journal Notes
172
© M
ac
mil
lan
/Mc
Gra
w-H
ill
Chapter 5 • Fast Changes on Earth Use with Chapter 5Activity Lab Book
Date Name
Materials
EverydayScience
Date Name
A Shocking ExperimentElectricity is the result of electrical charges. Moving electrical charges power things such as lights and radios. Static electricity is also another kind of electricity. When something is static it means that it is not moving. Static electricity is electricity that does not move. When an object has a charge (like what happens after you rub certain objects on your hair), it has static electricity.
PurposeTo see how electric current and static electricity have the same cause.
Make a PredictionWhat would happen if you gave a balloon an electrical charge and held it near a fluorescent light bulb?
• balloon
• wool
• fluorescent light bulb
© M
ac
mil
lan
/Mc
Gra
w-H
ill
173Chapter 6 • Electricity Use with Chapter 6Activity Lab Book

Date Name EverydayScience
Test Your Prediction
Inflate a balloon. Rub the balloon vigorously with a wool cloth. Static electricity will build up on the balloon.
Observe Turn out most of the lights in your classroom. Hold the charged balloon near the side of a fluorescent bulb. Record what happens.
Experiment Charge the balloon again using the wool. Hold the balloon to different parts of the bulb. Record what happens now.
Rub the balloon a different number of times, more or fewer than before. Hold it near the bulb again. Record your observations.
174
© M
ac
mil
lan
/Mc
Gra
w-H
ill
Chapter 6 • Electricity Use with Chapter 6Activity Lab Book
Date Name EverydayScience
Draw Conclusions
Infer What happened when the balloon was held near the bulb? What caused this to happen?
Compare How does rubbing the balloon more or fewer times affect what you observed?
Critical Thinking
How is the gas inside a fluorescent bulb like air during a storm?
You might have seen anti-static sheets. These are sheets that are added to the dryer when clothes are being dried. Why do you think these sheets are added?
Did You Know?Lightning and thunder actually happen at the same time. Light travels faster than sound. Therefore, you see the lightning before you hear the thunder.
© M
ac
mil
lan
/Mc
Gra
w-H
ill
175Chapter 6 • Electricity Use with Chapter 6Activity Lab Book

Student Journal Notes
176
© M
ac
mil
lan
/Mc
Gra
w-H
ill
Chapter 6 • Electricity Use with Chapter 6Activity Lab Book
Date Name
Materials
EverydayScience
Date Name
Choose Your Own PathElectric current is the movement of tiny charged particles. These particles can move through wires and make things like lights and computers work. Electric current will flow only if it can flow in a complete circuit. Circuit comes from an old Latin word that meant “to go around.” Electric current goes around a circuit in a complete path.
A circuit board is a board that lets electric current flow from one point to another through different electronic components. These electronic components form a circuit and often work together to perform a certain function.
PurposeTo make a circuit board and to see how electric current travels.
Make a PredictionHow does a circuit board work? How could you make a model of a circuit board? What materials conduct electric current best?
• piece of cardboard
• light bulb
• light bulb socket
• D cell battery and holder
• wire
• foil and other materials
• glue
© M
ac
mil
lan
/Mc
Gra
w-H
ill
177Chapter 6 • Electricity Use with Chapter 6Activity Lab Book
Date Name EverydayScience
Test Your Prediction
Place a D cell battery in a battery holder. Connect two wires to the holder.
Screw a light bulb into a bulb socket. Connect a piece of wire to one socket terminal. Connect one of the wires from the battery holder to the other socket terminal.
Glue 2 small pieces of foil to opposite corners of the cardboard.
Now glue thin strips of foil to the cardboard to connect the 2 corners. Make sure that the path from one corner to the other is unbroken. Each piece of foil must touch the next piece of foil.
Observe Touch each free wire end to the foil on the circuit board. Record what happens to the light bulb.
178
© M
ac
mil
lan
/Mc
Gra
w-H
ill
Chapter 6 • Electricity Use with Chapter 6Activity Lab Book
Date Name EverydayScience
Experiment Make a new circuit board with a different pattern of foil strips. Repeat the experiment. Record your observations.
Experiment Test your circuit using other materials, such as wood, rubber, a penny, and so on. Record your observations.
Draw Conclusions
How did the shape of the circuit board affect the circuit?
Compare What materials conducted the electric current well? What materials were poor connectors?
© M
ac
mil
lan
/Mc
Gra
w-H
ill
179Chapter 6 • Electricity Use with Chapter 6Activity Lab Book
Date Name EverydayScience
Critical Thinking
Where are circuit boards found?
Why do you think electric eels are not good pets?
Did You Know?Thomas Edison is often credited with having invented the light bulb. In fact, he did not invent the light bulb but merely improved the light bulb so that it would stay lit long enough for practical home use.
180
© M
ac
mil
lan
/Mc
Gra
w-H
ill
Chapter 6 • Electricity Use with Chapter 6Activity Lab Book
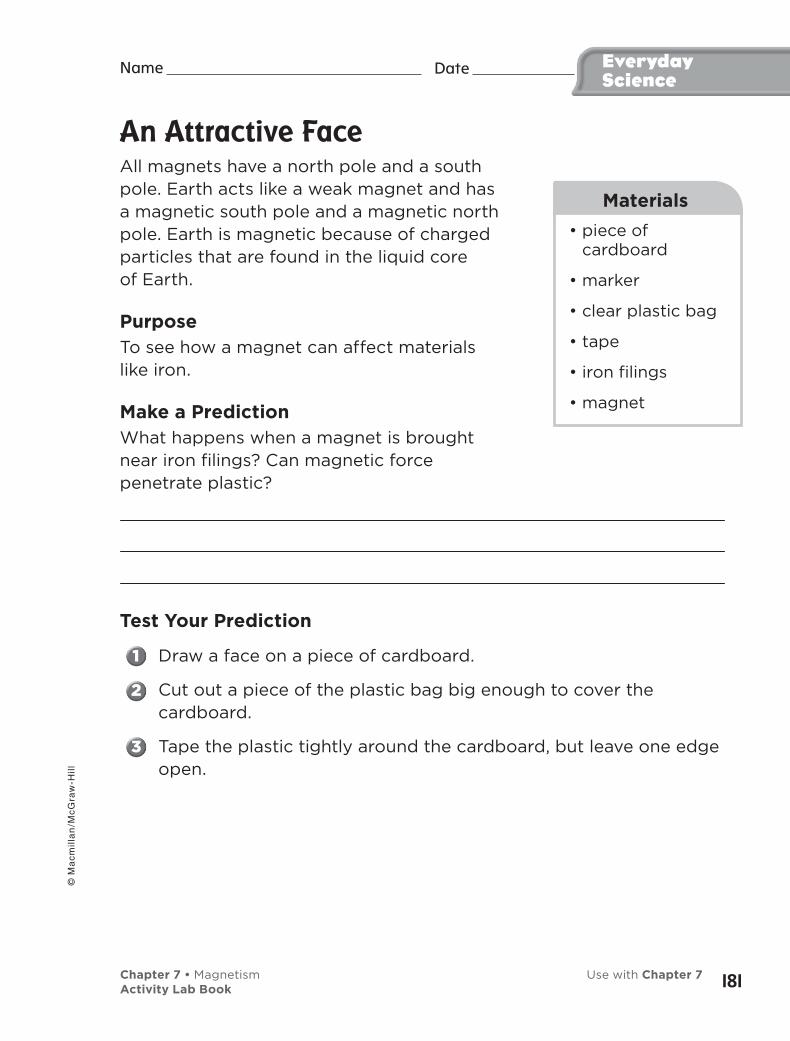
Date Name
Materials
EverydayScience
An Attractive FaceAll magnets have a north pole and a south pole. Earth acts like a weak magnet and has a magnetic south pole and a magnetic north pole. Earth is magnetic because of charged particles that are found in the liquid core of Earth.
PurposeTo see how a magnet can affect materials like iron.
Make a PredictionWhat happens when a magnet is brought near iron filings? Can magnetic force penetrate plastic?
Test Your Prediction
Draw a face on a piece of cardboard.
Cut out a piece of the plastic bag big enough to cover the cardboard.
Tape the plastic tightly around the cardboard, but leave one edge open.
• piece of cardboard
• marker
• clear plastic bag
• tape
• iron filings
• magnet
© M
ac
mil
lan
/Mc
Gra
w-H
ill
181Chapter 7 • Magnetism Use with Chapter 7Activity Lab Book
Date Name EverydayScience
Pour the iron filings through this open side, and then tape the open side closed.
Use a magnet to move the iron filings around. Give your face some hair, a beard, or a moustache! Look at how the filings are arranged when they are near the magnet.
Turn the magnet around and use the other pole to move the filings.
Draw Conclusions
What happened when the magnet was near the iron filings? Did the magnetic field go through the plastic?
Predict Could you make a similar face with real hair or fur? Why or why not?
182
© M
ac
mil
lan
/Mc
Gra
w-H
ill
Chapter 7 • Magnetism Use with Chapter 7Activity Lab Book

Date Name EverydayScience
Critical Thinking
Why are some iron filings attracted to each other when the magnet is held near them?
Are all metals attracted to magnets?
Did You Know?The name magnet comes from a rock called magnetite, which is a natural magnet. This rock was first found at a place called Magnesia.
© M
ac
mil
lan
/Mc
Gra
w-H
ill
183Chapter 7 • Magnetism Use with Chapter 7Activity Lab Book
Student Journal Notes
184
© M
ac
mil
lan
/Mc
Gra
w-H
ill
Chapter 7 • Magnetism Use with Chapter 7Activity Lab Book
Date Name
Materials
Learning Lab
How do things decompose?
Inquiry: StructuredRotten Decomposers
Ask QuestionsDecomposers break down plants, animals, and other things into smaller parts. Those parts can then be used as nutrients by living things to live and grow. Is fast or slow? How do things change as they decompose?
Make a PredictionHow long would it take for a biscuit planted in the ground to decompose? What would the biscuit look like while it was decomposing?
Test Your Prediction
Fill a zip bag about 1_3 full of moist, clean garden soil. Keep the soil
moist for the next 2 weeks by adding small amounts of water. Do not soak the soil.
Plant a biscuit about 3 cm below the surface of the dirt. Place it against the side of the bag so that you can see it. Seal the bag.
• one-gallon plastic freezer zip bag
• 3 cups of garden soil
• biscuit
• hand lens
© M
ac
mil
lan
/Mc
Gra
w-H
ill
185Chapter 1 • Living Things Need Energy Use with Chapter 1Activity Lab Book

Date Name LearningLab
Observe Look at the biscuit often over the next two weeks. Notice how the biscuit changes. Use a magnifying lens to look closely.
Keep a log to record changes to the biscuit every 2 days.
Decomposition of Biscuit
Day Observation of Biscuit
Observation of Soil Around Biscuit
1
3
4
5
9
11
13
15
186
© M
ac
mil
lan
/Mc
Gra
w-H
ill
Chapter 1 • Living Things Need Energy Use with Chapter 1Activity Lab Book
Date Name Learning Lab
Communicate Your Results• How long did it take to decompose the biscuit?
• How did the biscuit change?
• Infer What was causing the biscuit to decompose? Where did the biscuit go?
• Make a poster with drawings showing the sequence of changes that occurred. Have you seen decomposers at work in other places? Share and compare your drawings.
© M
ac
mil
lan
/Mc
Gra
w-H
ill
187Chapter 1 • Living Things Need Energy Use with Chapter 1Activity Lab Book
Date Name
Materials
LearningLab
Inquiry: Guided
The breakdown
Ask QuestionsIf you have ever visited a supermarket, you probably know that foods like milk and eggs are kept on cold shelves. At home, it is important to keep milk in the refrigerator. What happens to the milk if it is left in that warm room? How can the environment around an object affect how it decomposes?
Form a HypothesisHow can we speed up or slow down the decomposition of a biscuit? What do our “decomposers” need to do their job better? What keeps them from doing their job?
Choose a way to change the previous activity. Test to see if the biscuit breaks down more quickly or more slowly than before. Here are some suggestion:
• Use a bag with no soil.
• Put the bag in a refrigerator, by the heater, near a window, or in a dark closet.
• Add lots of water and soak the soil and biscuit.
• Use tap water or pond water instead of soil.
• Crush your biscuit.
• one-gallon plastic freezer zip bag
• biscuit
• hand lens
188
© M
ac
mil
lan
/Mc
Gra
w-H
ill
Chapter 1 • Living Things Need Energy Use with Chapter 1Activity Lab Book

Date Name Learning Lab
Test Your HypothesisYou are going to change one thing about the “Rotten Decomposers” investigation and try it again. Observe how the biscuit decomposes. Keep a log to record changes to the biscuit and to compare to your investigation in Structured Inquiry.
Be careful to only change one thing about the experiment. For example, do not put the biscuit in water and place the bag in a dark closet. If you did, you would not know whether the water or the darkness or both changed the result.
Day My Observations
© M
ac
mil
lan
/Mc
Gra
w-H
ill
189Chapter 1 • Living Things Need Energy Use with Chapter 1Activity Lab Book
Date Name LearningLab
Communicate Your Results• Compare Look at other students’ results. What were some of the
variables your classmates used? How did these variables effect the decomposition?
• Make a bar graph of the time it took for decomposition with different conditions.
• What conditions made the biscuit decompose faster? Slower?
190
© M
ac
mil
lan
/Mc
Gra
w-H
ill
Chapter 1 • Living Things Need Energy Use with Chapter 1Activity Lab Book
Date Name Learning Lab
Inquiry: Open
Other “Rotten” ThingsAsk your own questions and design ways to test you ideas. Here are some suggestions to help you get started:
• How would the decomposition of other materials be different from a biscuit? Do lettuce, carrots, hair, bread, sugar, leather, or wood decompose faster or slower than the biscuit in similar conditions?
• Food in a freezer usually does not decompose. Does freezing kill the decomposers or just make them dormant? How would we find out?
• How are animal consumers like decomposers?
Design a test based on your questions.
My question is:
My prediction is:
My test is:
My conclusions are:
© M
ac
mil
lan
/Mc
Gra
w-H
ill
191Chapter 1 • Living Things Need Energy Use with Chapter 1Activity Lab Book
Student Journal Notes
192
© M
ac
mil
lan
/Mc
Gra
w-H
ill
Chapter 1 • Living Things Need Energy Use with Chapter 1Activity Lab Book
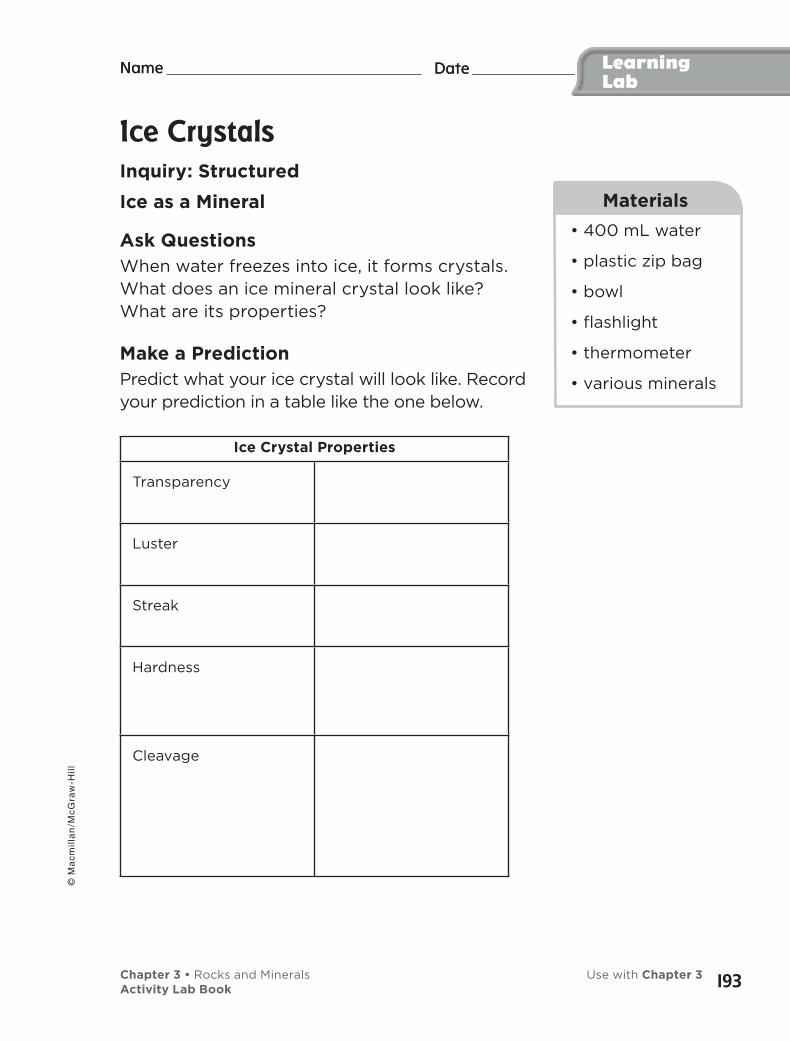
• 400 mL water
• plastic zip bag
• bowl
• flashlight
• thermometer
• various minerals
Ice Crystals
Inquiry: Structured
Ice as a Mineral
Ask QuestionsWhen water freezes into ice, it forms crystals. What does an ice mineral crystal look like? What are its properties?
Make a PredictionPredict what your ice crystal will look like. Record your prediction in a table like the one below.
Ice Crystal Properties
Transparency
Luster
Streak
Hardness
Cleavage
Date Name Date Name
Materials
Learning Lab
© M
ac
mil
lan
/Mc
Gra
w-H
ill
193Chapter 3 • Rocks and Minerals Use with Chapter 3Activity Lab Book
Test Your Prediction
Put about 400 mL of distilled or tap water into a zip bag. Squeeze most of the air out of the bag, and seal it. Place the bag in freezer for 12 to 24 hours until completely frozen.
Observe Place the ice crystal in a bowl. Shine a flashlight on and through the ice. Record what you observe about its structure and appearance.
Test the ice with other materials for streak and hardness. Record your observations.
Experiment As the ice melts, repeat your tests from step 3. What changes do you see?
Date Name Date Name LearningLab
194
© M
ac
mil
lan
/Mc
Gra
w-H
ill
Chapter 3 • Rocks and Minerals Use with Chapter 3Activity Lab Book
Communicate Your Results
Compare your observations and the properties of your ice mineral crystal with those of other students. Discuss any differences in the properties that you observed.
Infer What do you think may have caused those differences?
What if you used 1 liter of water to make the ice crystal? What if you froze the ice in a plastic cup rather than a zip bag? Would these crystals be different?
Date Name Learning Lab
© M
ac
mil
lan
/Mc
Gra
w-H
ill
195Chapter 3 • Rocks and Minerals Use with Chapter 3Activity Lab Book
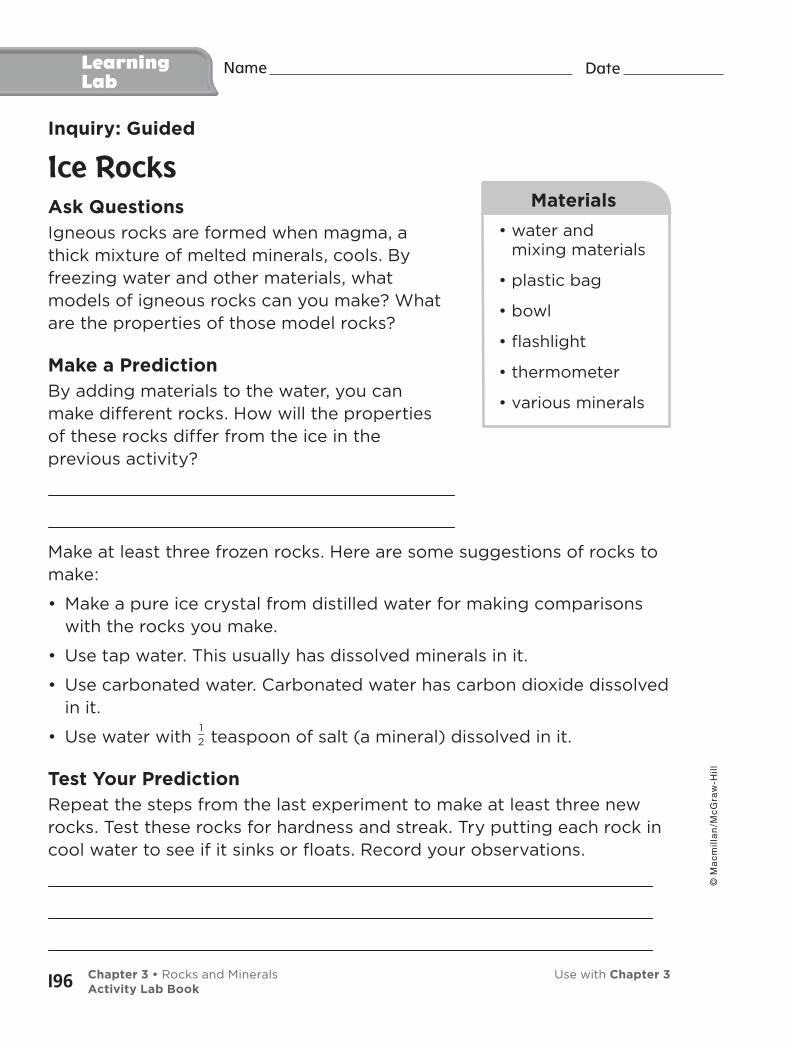
Inquiry: Guided
Ice Rocks
Ask QuestionsIgneous rocks are formed when magma, a thick mixture of melted minerals, cools. By freezing water and other materials, what models of igneous rocks can you make? What are the properties of those model rocks?
Make a PredictionBy adding materials to the water, you can make different rocks. How will the properties of these rocks differ from the ice in the previous activity?
Make at least three frozen rocks. Here are some suggestions of rocks to make:
• Make a pure ice crystal from distilled water for making comparisons with the rocks you make.
• Use tap water. This usually has dissolved minerals in it.
• Use carbonated water. Carbonated water has carbon dioxide dissolved in it.
• Use water with 1_2 teaspoon of salt (a mineral) dissolved in it.
Test Your PredictionRepeat the steps from the last experiment to make at least three new rocks. Test these rocks for hardness and streak. Try putting each rock in cool water to see if it sinks or floats. Record your observations.
• water and mixing materials
• plastic bag
• bowl
• flashlight
• thermometer
• various minerals
Date Name
Materials
LearningLab
196
© M
ac
mil
lan
/Mc
Gra
w-H
ill
Chapter 3 • Rocks and Minerals Use with Chapter 3Activity Lab Book
Communicate Your Results
Discuss the results of your experiment with your classmates. What did they use to make their rocks?
Compare How are your mineral rocks’ properties the same? How are they different?
Infer Based upon your observations, what do you think caused the differences?
Date Name Learning Lab
© M
ac
mil
lan
/Mc
Gra
w-H
ill
197Chapter 3 • Rocks and Minerals Use with Chapter 3Activity Lab Book
Inquiry: Open
More Cool RocksWhat experiments would you like to do to help explain the formation of sedimentary rocks? How would those rock properties compare with your igneous rock models? Here are some ideas to get you started exploring sedimentary rocks:
• Make sedimentary rocks using crushed ice and make an ice ball. Compare them to the ice mineral formed by freezing water in a zip bag.
• Make other rocks using crushed ice mixed with other materials such as sand, pebbles, dirt, or any other kind of mineral or rock. How do the rock’s properties change as the ingredients change? How are the rocks different from the “igneous” rocks formed from freezing the melted ice?
• What else could you make sedimentary rocks out of? Mud? Clay?
Communicate Record the rock properties. Make a poster to show what you did and what you found out.
Date Name LearningLab
198
© M
ac
mil
lan
/Mc
Gra
w-H
ill
Chapter 3 • Rocks and Minerals Use with Chapter 3Activity Lab Book

My question is:
My prediction is:
My test is:
My conclusions are:
Date Name Learning Lab
© M
ac
mil
lan
/Mc
Gra
w-H
ill
199Chapter 3 • Rocks and Minerals Use with Chapter 3Activity Lab Book

Student Journal Notes
200
© M
ac
mil
lan
/Mc
Gra
w-H
ill
Chapter 3 • Rocks and Minerals Use with Chapter 3Activity Lab Book

Date Name
Finding and Testing Invisible Forces
Inquiry: Structured
Testing the Force
Ask QuestionsPermanent magnets and electromagnets have invisible forces that may attract or repel other objects. What do electromagnets and permanent magnets attract? What do they repel? Are the forces of magnets and electromagnets the same or different? How do we know if something is a magnet?
Make a PredictionHow would different objects around you react to a permanent magnet? How would they reactto an electromagnet?
Test Your Prediction
Choose at least 6 items around you. Try to pick items that are made from different materials. You might test a ruler, chalk, paper clips, your desk, or some paper.
Predict How do you think each magnet will affect each item? Record your prediction for each object.
My Predictions
Object Permanent Magnet Electromagnet
• magnets
• 4 electro-magnets, each made with a steel nail, 1 meter of wire, and a D cell battery
• various test objects
Date Name
Materials
Learning Lab
© M
ac
mil
lan
/Mc
Gra
w-H
ill
201Chapter 7 • Magnetism Use with Chapter 7Activity Lab Book
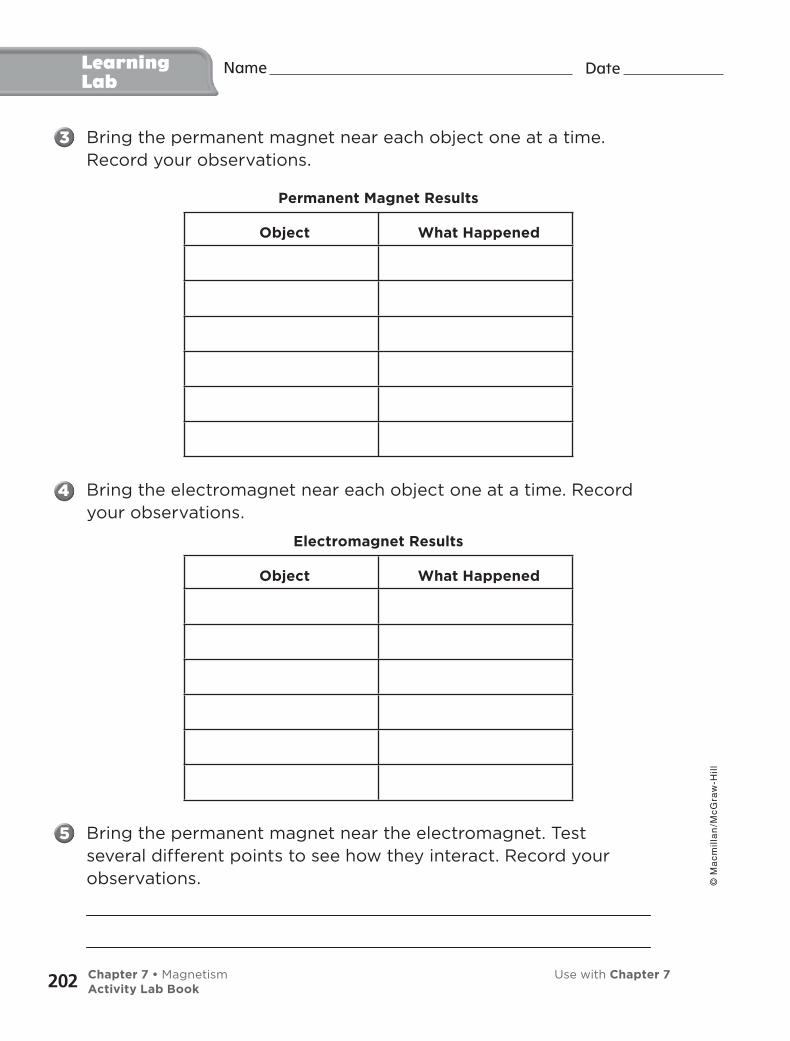
Bring the permanent magnet near each object one at a time. Record your observations.
Permanent Magnet Results
Object What Happened
Bring the electromagnet near each object one at a time. Record your observations.
Electromagnet Results
Object What Happened
Bring the permanent magnet near the electromagnet. Test several different points to see how they interact. Record your observations.
Date Name LearningLab
202
© M
ac
mil
lan
/Mc
Gra
w-H
ill
Chapter 7 • Magnetism Use with Chapter 7Activity Lab Book
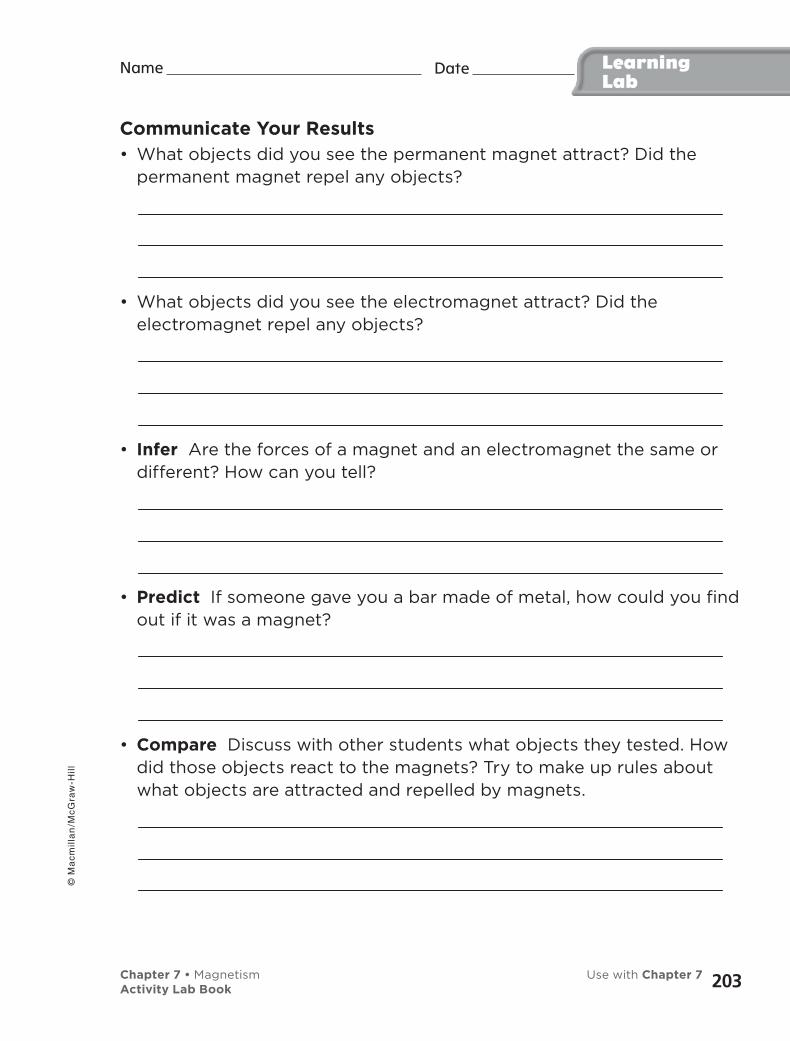
Communicate Your Results• What objects did you see the permanent magnet attract? Did the
permanent magnet repel any objects?
• What objects did you see the electromagnet attract? Did the electromagnet repel any objects?
• Infer Are the forces of a magnet and an electromagnet the same or different? How can you tell?
• Predict If someone gave you a bar made of metal, how could you find out if it was a magnet?
• Compare Discuss with other students what objects they tested. How did those objects react to the magnets? Try to make up rules about what objects are attracted and repelled by magnets.
Date Name Learning Lab
© M
ac
mil
lan
/Mc
Gra
w-H
ill
203Chapter 7 • Magnetism Use with Chapter 7Activity Lab Book
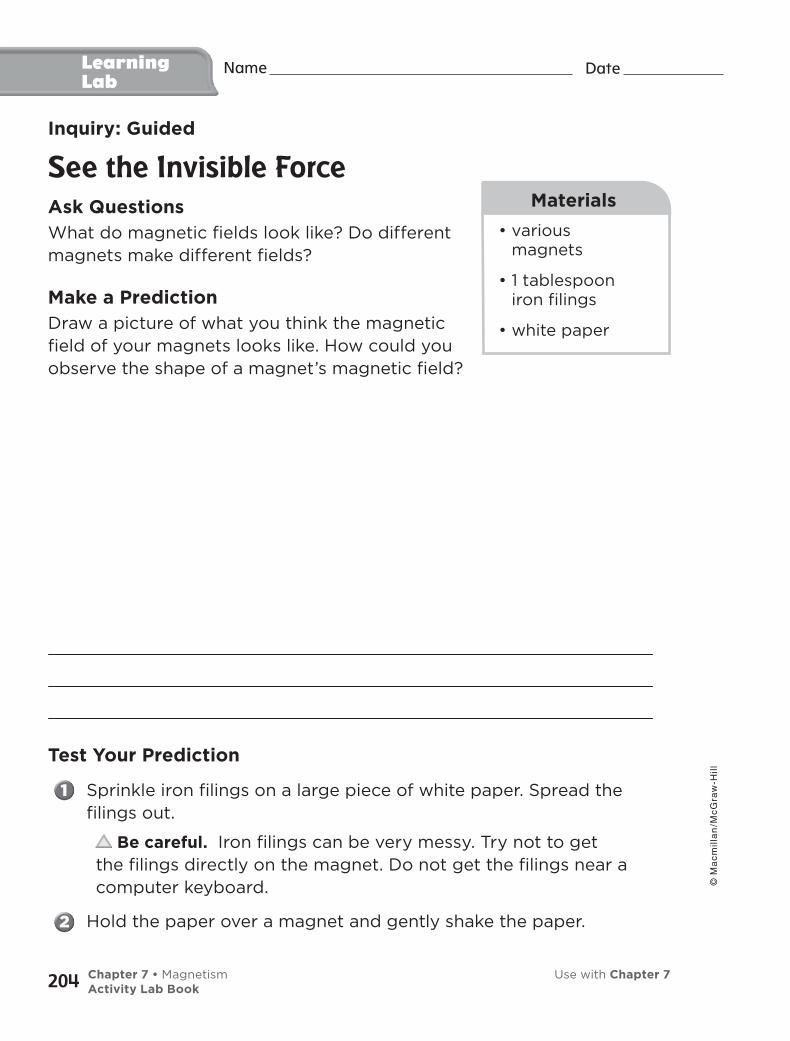
Inquiry: Guided
See the Invisible Force
Ask QuestionsWhat do magnetic fields look like? Do different magnets make different fields?
Make a PredictionDraw a picture of what you think the magnetic field of your magnets looks like. How could you observe the shape of a magnet’s magnetic field?
Test Your Prediction
Sprinkle iron filings on a large piece of white paper. Spread the filings out.
Be careful. Iron filings can be very messy. Try not to get the filings directly on the magnet. Do not get the filings near a computer keyboard.
Hold the paper over a magnet and gently shake the paper.
• various magnets
• 1 tablespoon iron filings
• white paper
Date Name
Materials
LearningLab
204
© M
ac
mil
lan
/Mc
Gra
w-H
ill
Chapter 7 • Magnetism Use with Chapter 7Activity Lab Book
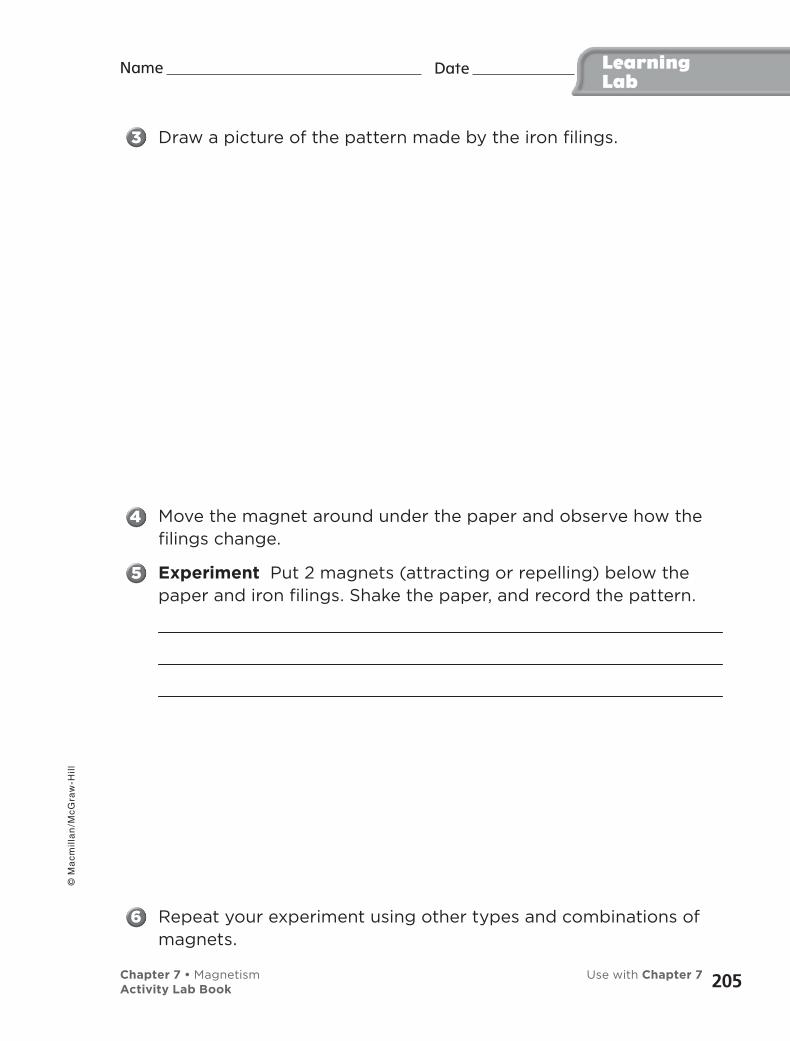
Draw a picture of the pattern made by the iron filings.
Move the magnet around under the paper and observe how the filings change.
Experiment Put 2 magnets (attracting or repelling) below the paper and iron filings. Shake the paper, and record the pattern.
Repeat your experiment using other types and combinations of magnets.
Date Name Learning Lab
© M
ac
mil
lan
/Mc
Gra
w-H
ill
205Chapter 7 • Magnetism Use with Chapter 7Activity Lab Book
Communicate Your Results• Post your drawings and discuss them with other students. Decide
what a magnetic field must look like.
• Compare Look at the drawings you made using two magnets. Compare the magnetic field of two attracting magnets to the field of two repelling magnets.
• Can you actually see the magnetic fields? Are your descriptions of the shape of the magnetic field based upon observations or inferences?
Date Name LearningLab
206
© M
ac
mil
lan
/Mc
Gra
w-H
ill
Chapter 7 • Magnetism Use with Chapter 7Activity Lab Book
Inquiry: Open
More Magnet ExperimentsWhat experiments would you like to develop to find out more about magnetic forces and magnets? Here are some ideas to get you started:
• What can you wrap around a permanent magnet to affect the force? Try wrapping it in paper, plastic, metal, or ice. How does the thickness of the material you wrap the magnet in affect the force?
• How can you place two magnets together so that the total force of both magnets acting together is either more or less than one magnet acting alone?
• What will happen to the magnetic force if you use 2 batteries instead of 1 battery? What is the difference if batteries are connected in series or parallel?
• Build electromagnets using different sizes of batteries. Does the size of a battery (AA, AAA, C, D) make a difference in the force?
Make predictions and tell why you made the prediction. Design an experiment and communicate your findings to your classmates.
Date Name Learning Lab
© M
ac
mil
lan
/Mc
Gra
w-H
ill
207Chapter 7 • Magnetism Use with Chapter 7Activity Lab Book
My question is:
My prediction is:
My test is:
My conclusions are:
Date Name LearningLab
208
© M
ac
mil
lan
/Mc
Gra
w-H
ill
Chapter 7 • Magnetism Use with Chapter 7Activity Lab Book


![MacMillan/McGraw-Hill Treasuresstatic.wixie.com/files/kits/Enhancing_Treasures-Grades_1-6.pdf · Enhancing MacMillan/McGraw-Hill Treasure [ 6 ] Grade 1 - Unit 4: Nature Watch Learn](https://img.pdfslide.net/doc/110x75/5eaaa7c621ec04588163f055/macmillanmcgraw-hill-enhancing-macmillanmcgraw-hill-treasure-6-grade-1-unit.jpg)