Embed Size (px)
Citation preview
Accounts Payable Remittance
1
To Begin the Remittance Process:
Hover over the Financial tab to highlight the Customer Accounting options.
There are 3 options listed for Accounts Payable.
1. Accounts Payable Summary: Summarizes and shows totals of Present,
Past and Future due as of today’s date.
2. Accounts Payable Details: Gives a line item detail view of items that are
current, and past due invoices as of today’s date. This also shows a current amount due including previous days’ activity.
3. Accounts Payable Remittance: This option takes you to your
Remittance Worksheet.
Accounts Payable Remittance
2
To Process a Remittance:
Begin by selecting Accounts Payable Remittance.
Note the Customer Group indicators: * = Out of Balance $ = Open Remit
# = Remitted
Accounts Payable Remittance
3
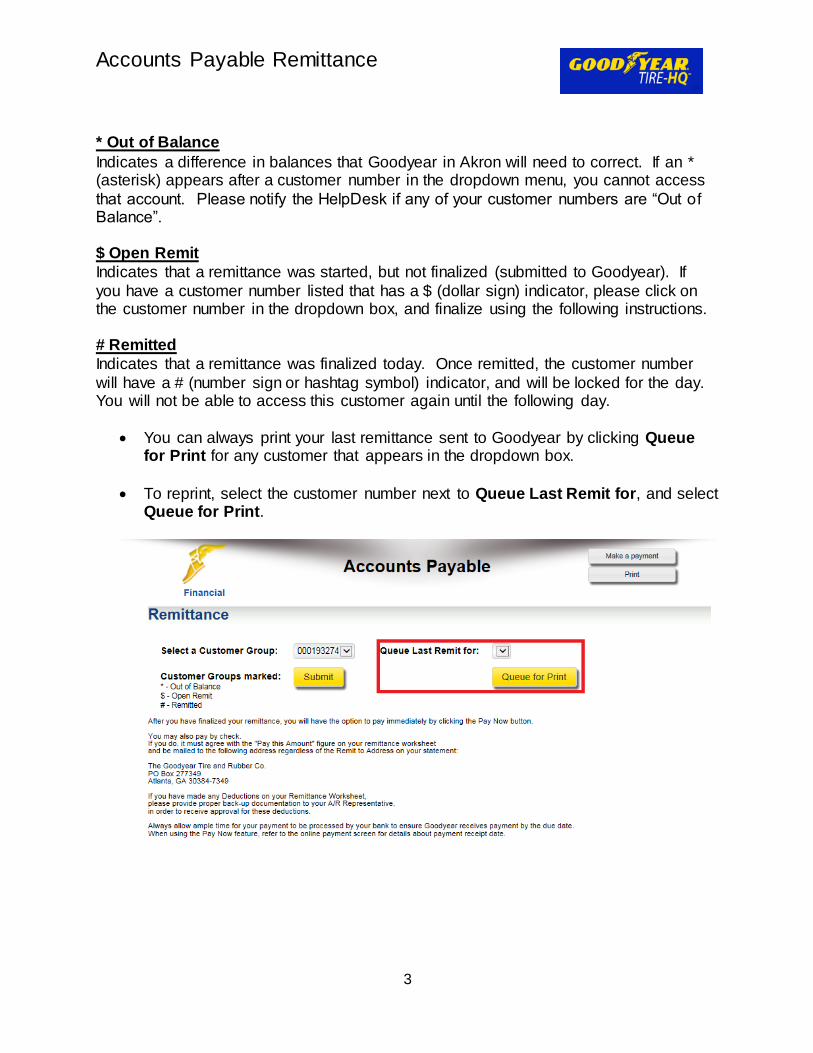
* Out of Balance
Indicates a difference in balances that Goodyear in Akron will need to correct. If an * (asterisk) appears after a customer number in the dropdown menu, you cannot access
that account. Please notify the HelpDesk if any of your customer numbers are “Out of Balance”. $ Open Remit
Indicates that a remittance was started, but not finalized (submitted to Goodyear). If
you have a customer number listed that has a $ (dollar sign) indicator, please click on the customer number in the dropdown box, and finalize using the following instructions. # Remitted
Indicates that a remittance was finalized today. Once remitted, the customer number
will have a # (number sign or hashtag symbol) indicator, and will be locked for the day. You will not be able to access this customer again until the following day.
You can always print your last remittance sent to Goodyear by clicking Queue for Print for any customer that appears in the dropdown box.
To reprint, select the customer number next to Queue Last Remit for, and select
Queue for Print.
Accounts Payable Remittance
4
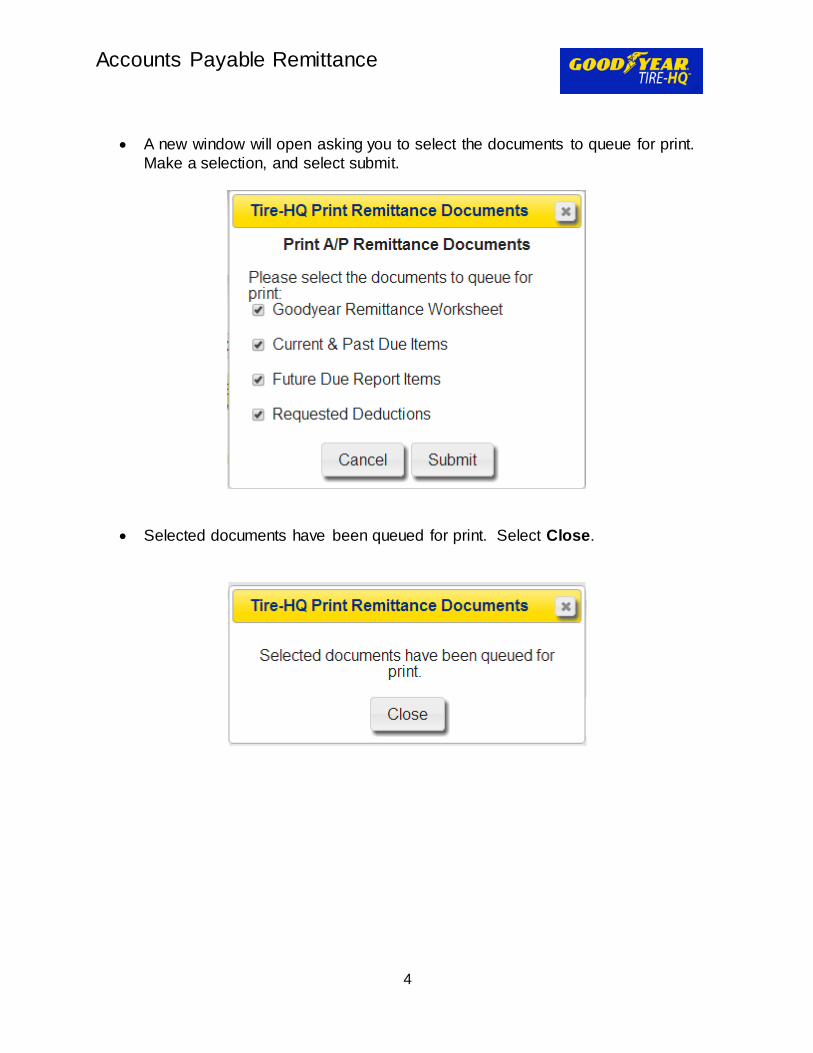
A new window will open asking you to select the documents to queue for print.
Make a selection, and select submit.
Selected documents have been queued for print. Select Close.
Accounts Payable Remittance
5
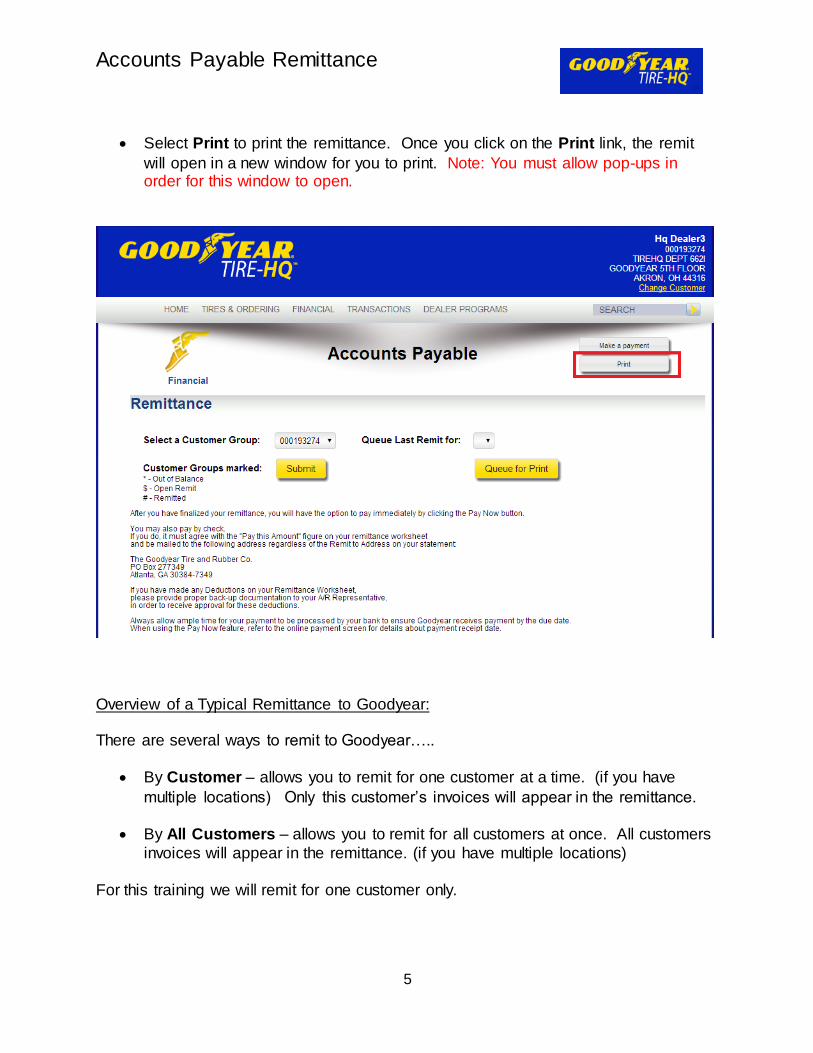
Select Print to print the remittance. Once you click on the Print link, the remit
will open in a new window for you to print. Note: You must allow pop-ups in order for this window to open.
Overview of a Typical Remittance to Goodyear: There are several ways to remit to Goodyear…..
By Customer – allows you to remit for one customer at a time. (if you have
multiple locations) Only this customer’s invoices will appear in the remittance.
By All Customers – allows you to remit for all customers at once. All customers
invoices will appear in the remittance. (if you have multiple locations)
For this training we will remit for one customer only.

Accounts Payable Remittance
6
Start by selecting a customer from the drop down box. Then select Submit.

Accounts Payable Remittance
7
Notice on the Preliminary Worksheet that all amountd are automatically
defaulted to zero (0.00), since no Invoices are flagged to be paid, at this time. The worksheet will re-adjust itself based on selections you make.
The Quick Select area allows you to quickly select many invoices at once.
All Past Due: Flags all past due invoices for payments.
Accounts Payable Remittance
8
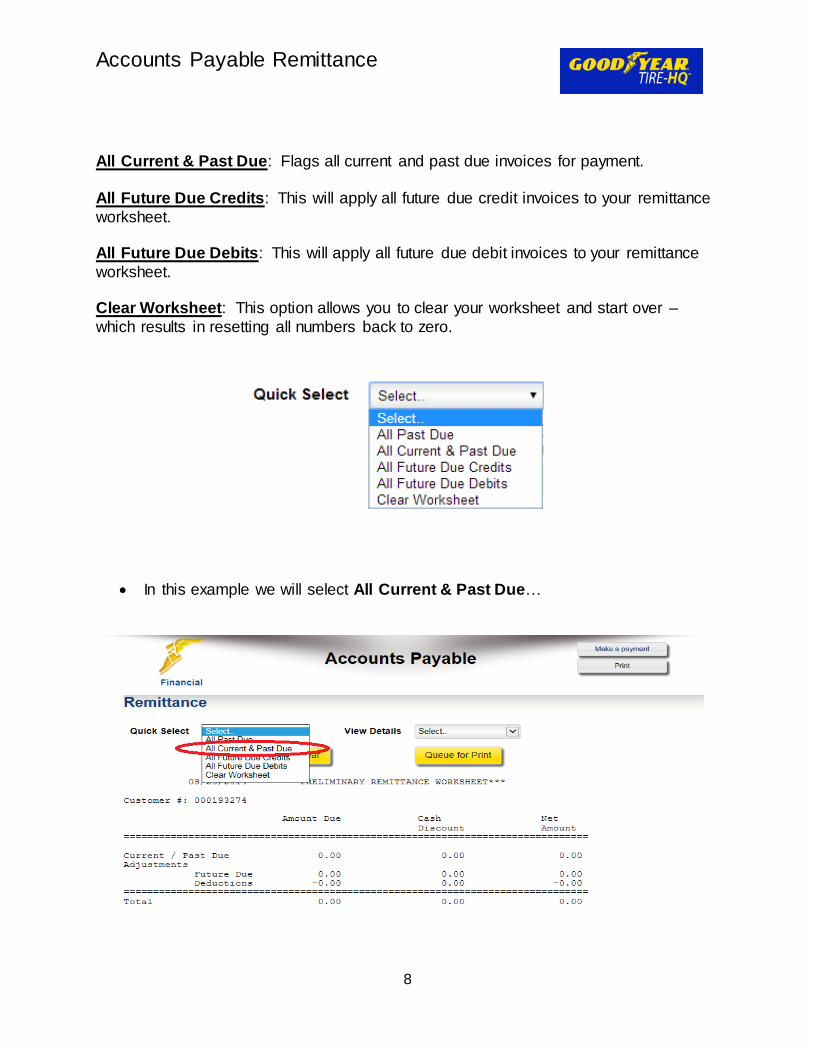
All Current & Past Due: Flags all current and past due invoices for payment.
All Future Due Credits: This will apply all future due credit invoices to your remittance
worksheet. All Future Due Debits: This will apply all future due debit invoices to your remittance
worksheet.
Clear Worksheet: This option allows you to clear your worksheet and start over –
which results in resetting all numbers back to zero.
In this example we will select All Current & Past Due…
Accounts Payable Remittance
9
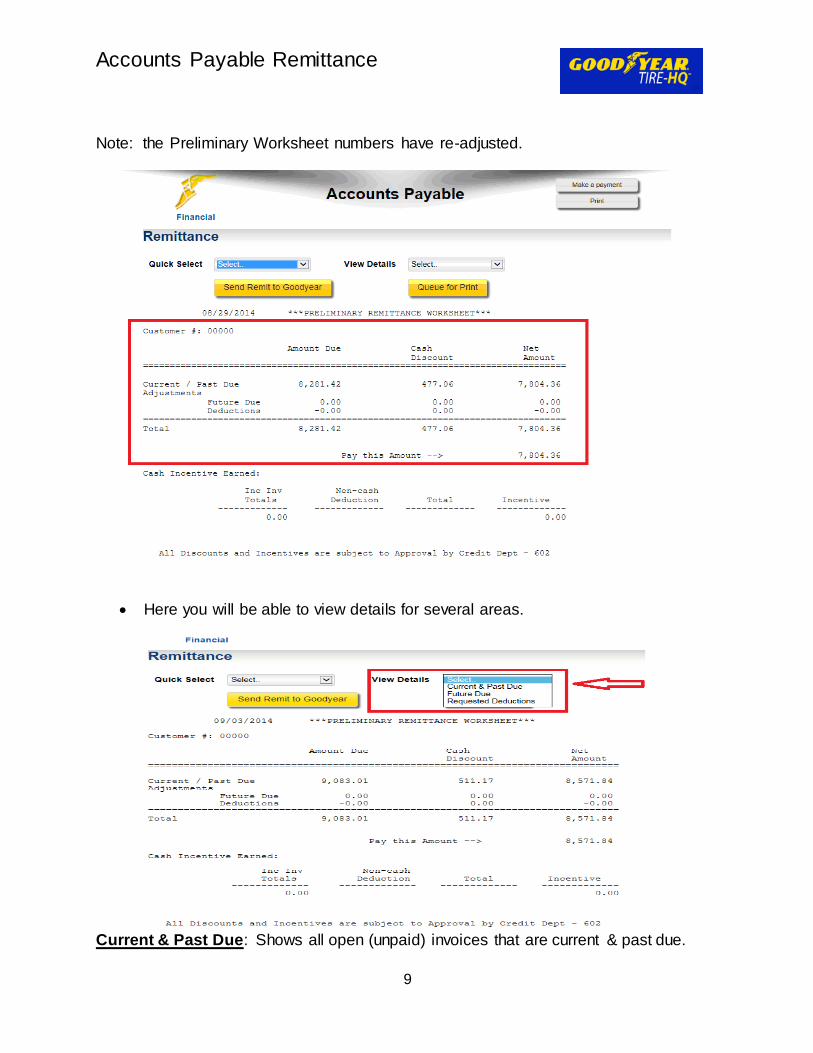
Note: the Preliminary Worksheet numbers have re-adjusted.
Here you will be able to view details for several areas.
Current & Past Due: Shows all open (unpaid) invoices that are current & past due.
Accounts Payable Remittance
10
Future Due: Shows all open (unpaid) invoices that are due at a future date.
Requested Deductions: This area will be utilized upon your credit rep’s instruction.
This will allow you to take a deduction on a disputed invoice. Let’s view the Current & Past Due detail by clicking on Current & Past Due:
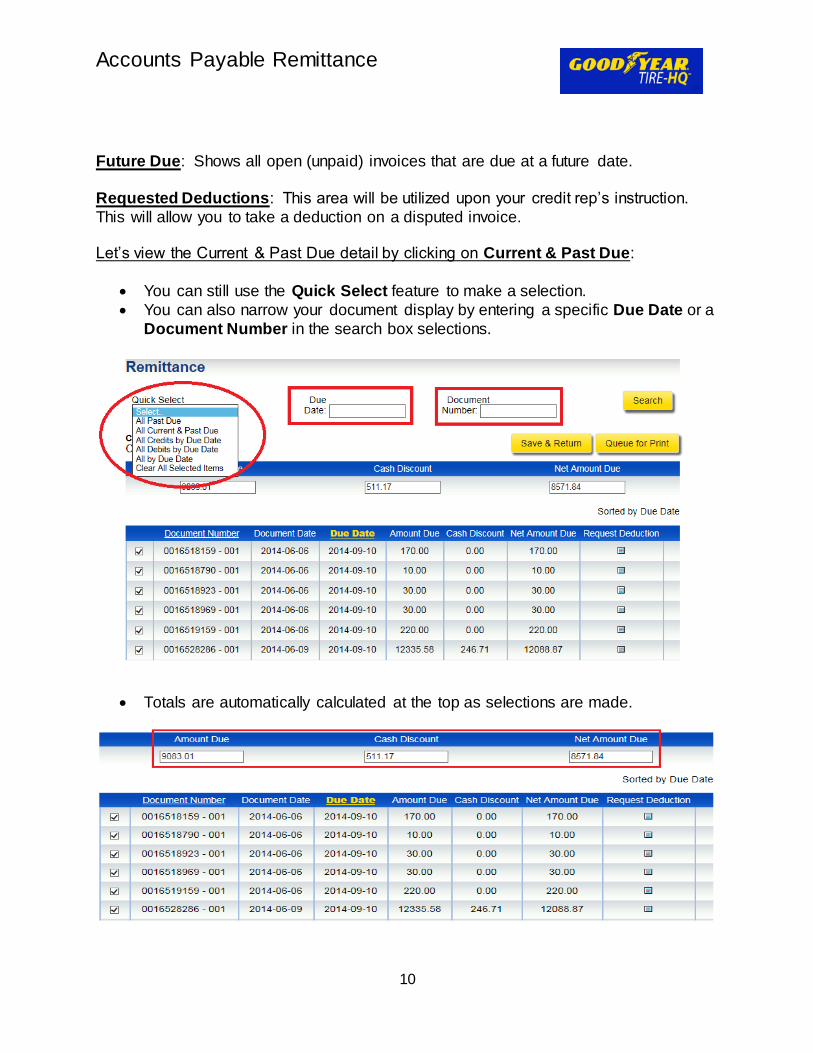
You can still use the Quick Select feature to make a selection.
You can also narrow your document display by entering a specific Due Date or a
Document Number in the search box selections.
Totals are automatically calculated at the top as selections are made.
Accounts Payable Remittance
11
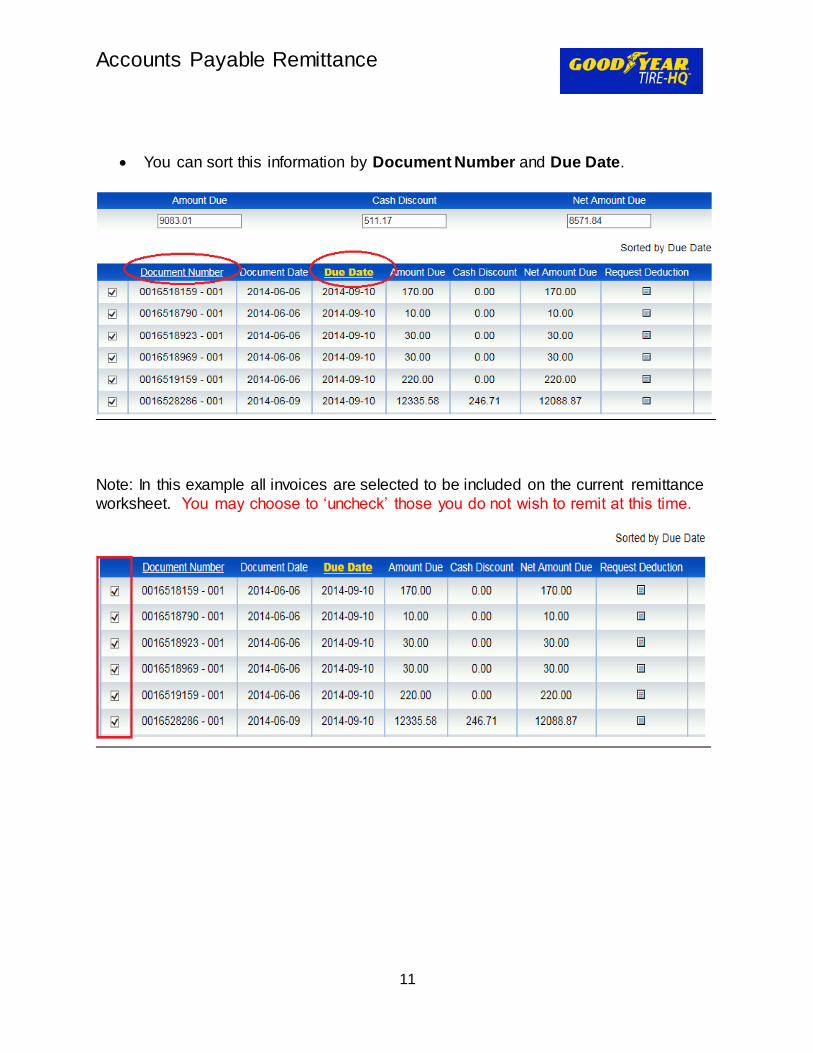
You can sort this information by Document Number and Due Date.
Note: In this example all invoices are selected to be included on the current remittance
worksheet. You may choose to ‘uncheck’ those you do not wish to remit at this time.
Accounts Payable Remittance
12
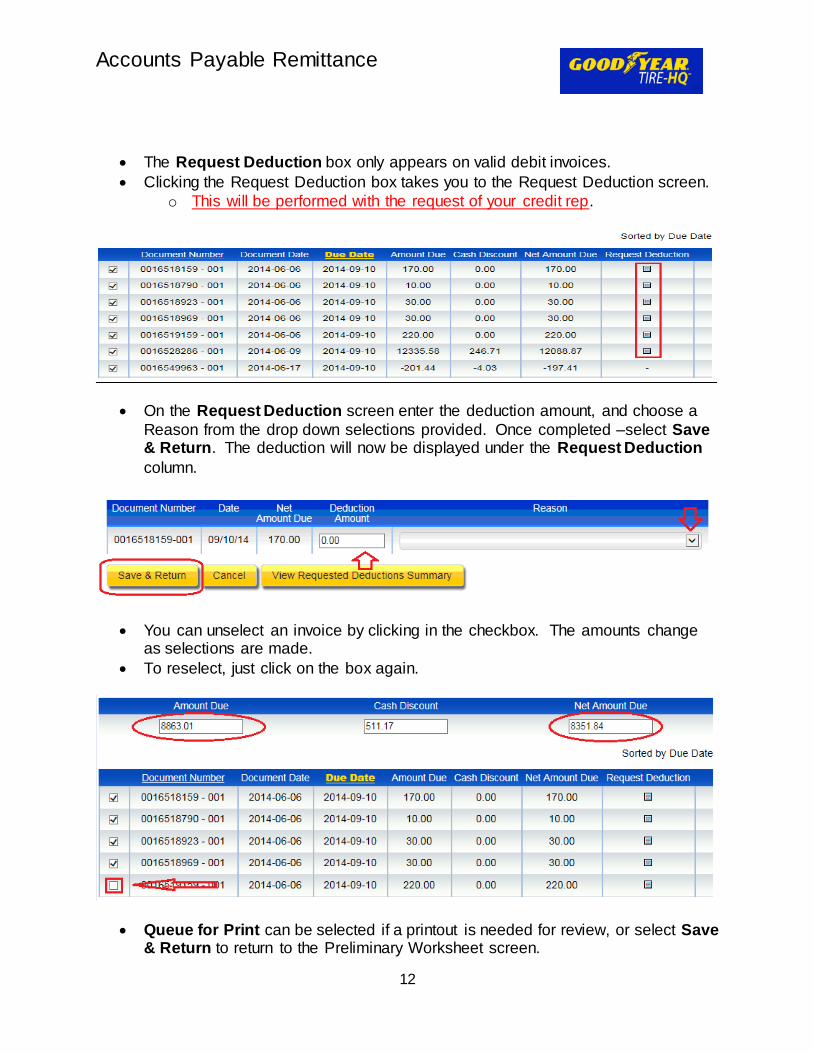
The Request Deduction box only appears on valid debit invoices.
Clicking the Request Deduction box takes you to the Request Deduction screen.
o This will be performed with the request of your credit rep.
On the Request Deduction screen enter the deduction amount, and choose a
Reason from the drop down selections provided. Once completed –select Save & Return. The deduction will now be displayed under the Request Deduction
column.
You can unselect an invoice by clicking in the checkbox. The amounts change as selections are made.
To reselect, just click on the box again.
Queue for Print can be selected if a printout is needed for review, or select Save & Return to return to the Preliminary Worksheet screen.
Accounts Payable Remittance
13
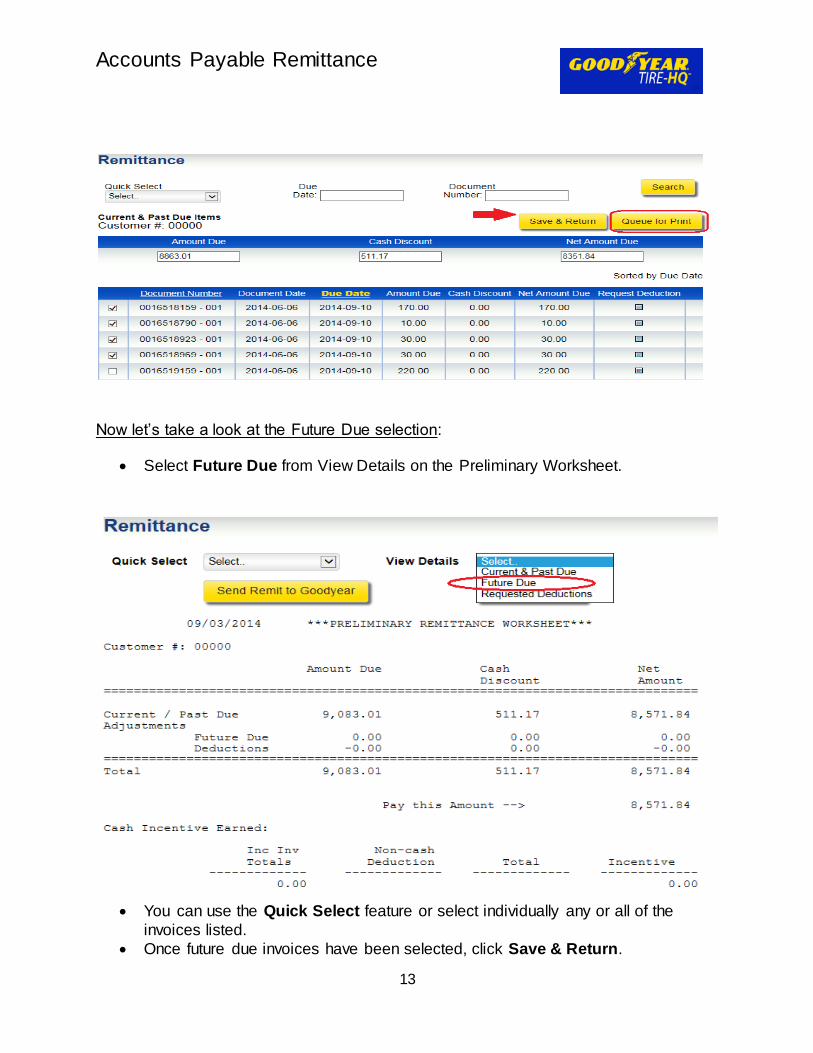
Now let’s take a look at the Future Due selection:
Select Future Due from View Details on the Preliminary Worksheet.
You can use the Quick Select feature or select individually any or all of the
invoices listed.
Once future due invoices have been selected, click Save & Return.
Accounts Payable Remittance
14
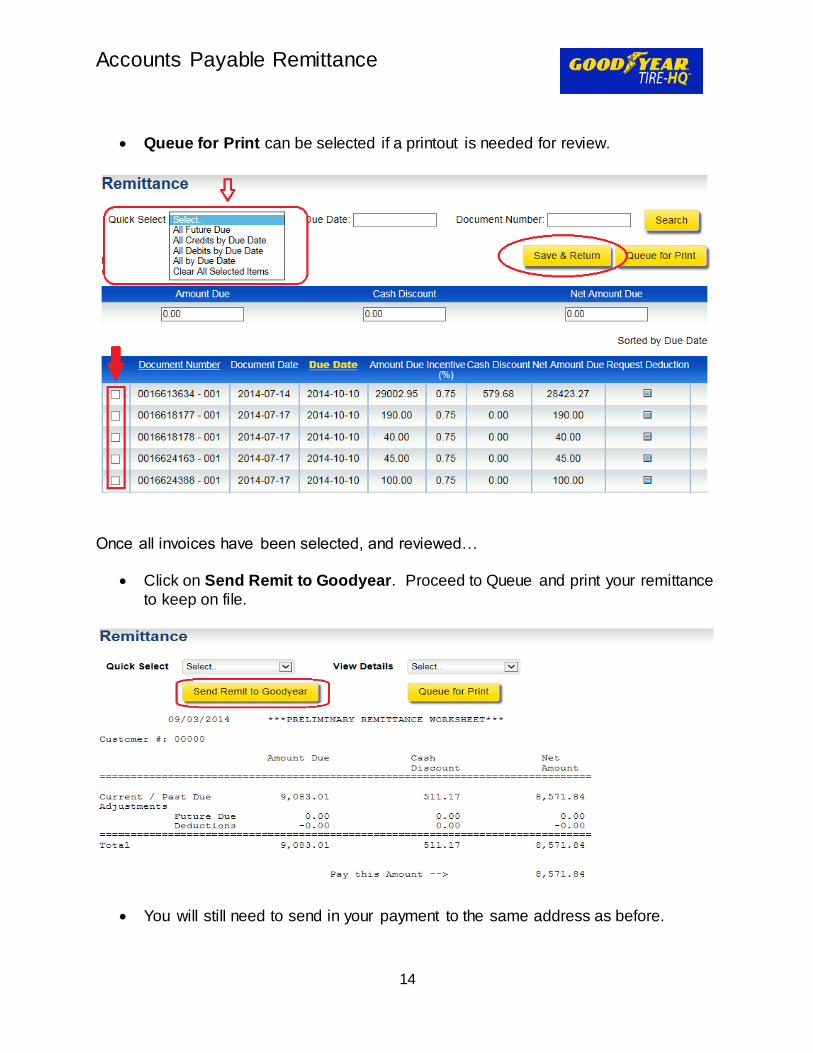
Queue for Print can be selected if a printout is needed for review.
Once all invoices have been selected, and reviewed…
Click on Send Remit to Goodyear. Proceed to Queue and print your remittance
to keep on file.
You will still need to send in your payment to the same address as before.
Accounts Payable Remittance
15
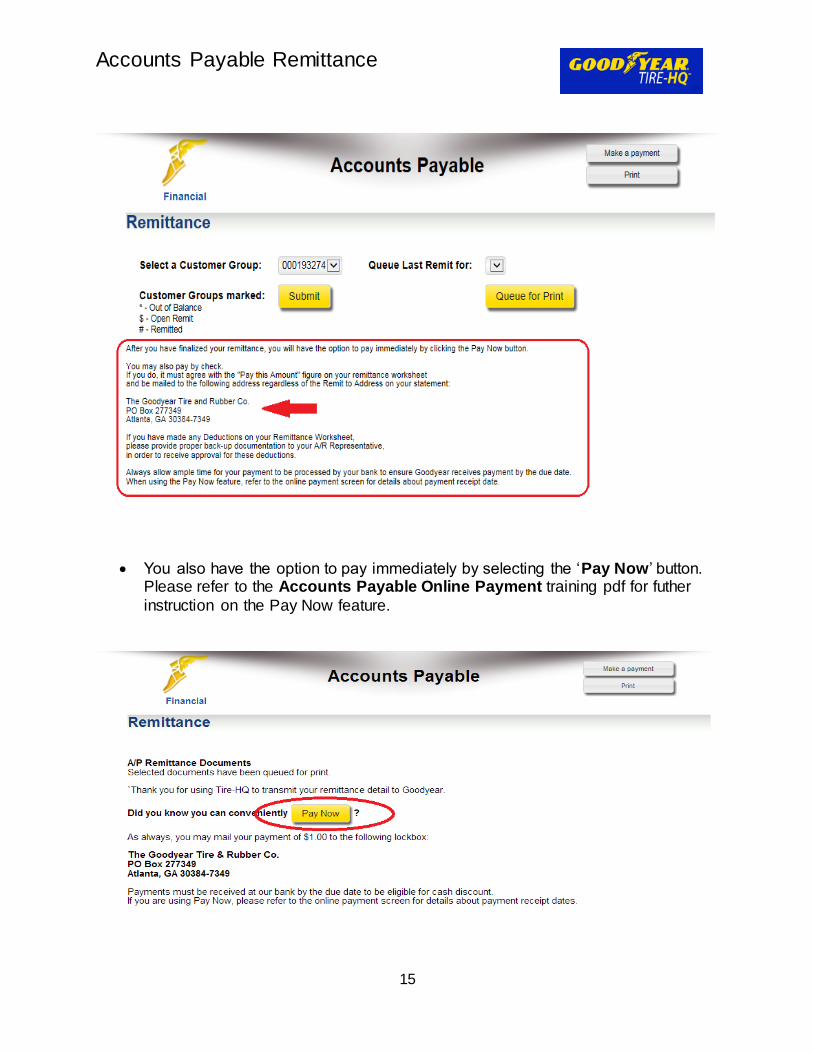
You also have the option to pay immediately by selecting the ‘Pay Now’ button. Please refer to the Accounts Payable Online Payment training pdf for futher
instruction on the Pay Now feature.