Embed Size (px)
Citation preview
Bandwidth Controller Tutorials
The following tutorials provide step-by-step guides for configuring the product for
various uses.
Finding Client IP Addresses
Build a list of addresses for all computers on the network to help with rule creation and
monitoring.
Server-Free Deployment
Give equal bandwidth to each client without the need for a central server using
Distributed Mode.
Speed Limiting
Set a maximum download speeds for a workstation.
Dynamic Rules: Web Server Balancing
Use dynamic rules to distribute bandwidth evenly between remote web site users, whose
IP addresses are not known to the server in advance.
Finding Client IP Addresses
When creating rules it is often important to know the IP address of each computer on the
network. This tutorial demonstrates methods of obtaining the IP address information for each
client, and building a list to be used to help configure the network's bandwidth usage.
IP addresses are values that identify computers on a network. Bandwidth Controller uses
IP addresses extensively for its operation, including rule creation and configuration.
IP addresses are in the form of 'x.x.x.x' where each 'x' is a number ranging from 0 to 255.
Examples of IP addresses on a network are '192.168.0.1', '10.0.0.1' and '207.83.254.67'.
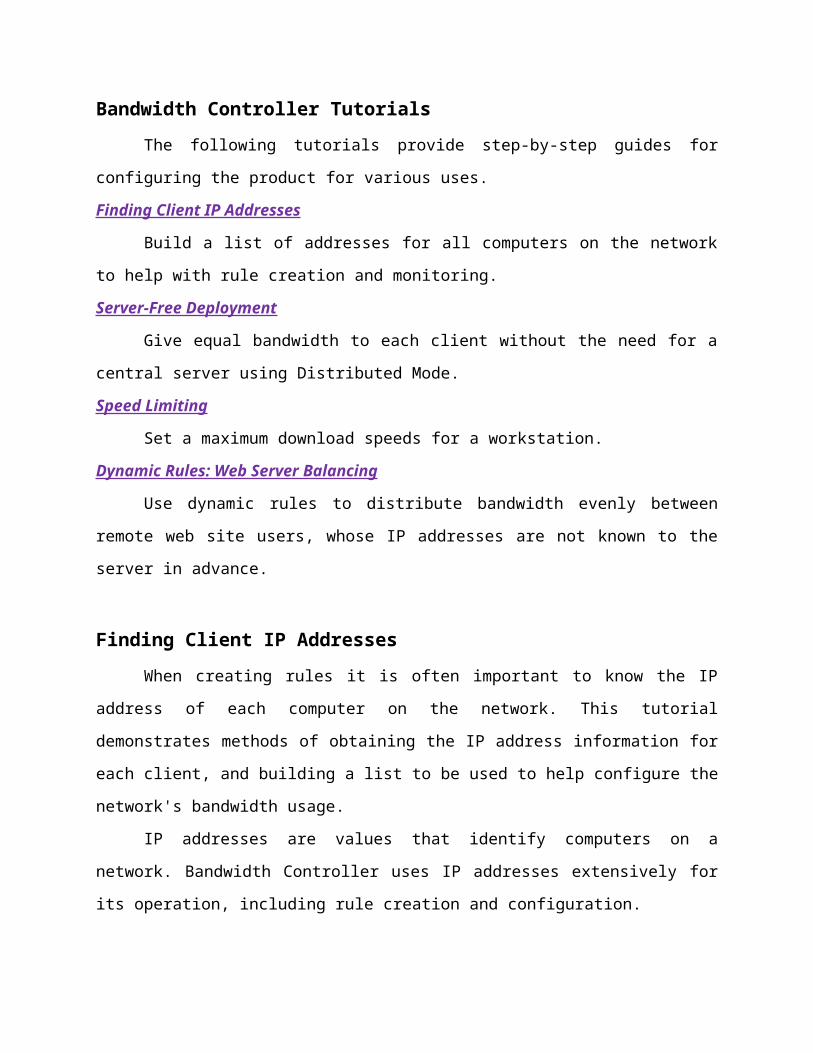
Windows 2000, XP and 2003 Server make it possible to find the IP address of a computer
with a single command called 'ipconfig'. To use this command, go to Start Menu, Run..., type
cmd and click Ok.
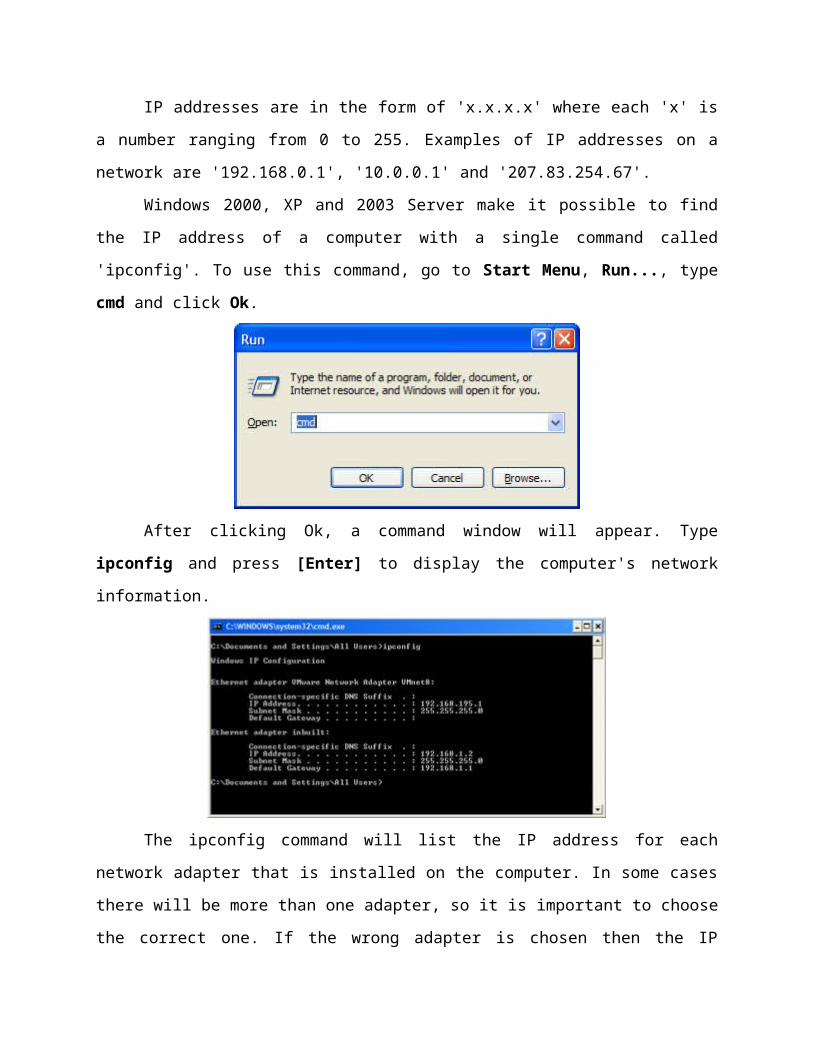
After clicking Ok, a command window will appear. Type ipconfig and press [Enter] to
display the computer's network information.
The ipconfig command will list the IP address for each network adapter that is installed
on the computer. In some cases there will be more than one adapter, so it is important to choose
the correct one. If the wrong adapter is chosen then the IP address will not work when used in
future rules (the rule will have no effect).
In the diagram above, there are two sets for information displayed, one for each adapter
in the system. The first line for each information set shows the name of the adapter, after the
words 'Ethernet adapter'. Choose the adapter that is being used for the client's main network
traffic. In this example the name of the adapter is 'inbuilt', which is the second adapter listed.
It is possible to verify that you have found the correct adapter by checking the list of
adapters in network properties. To do this, right click My Computer and click Properties which
will display all adapters installed on your system.
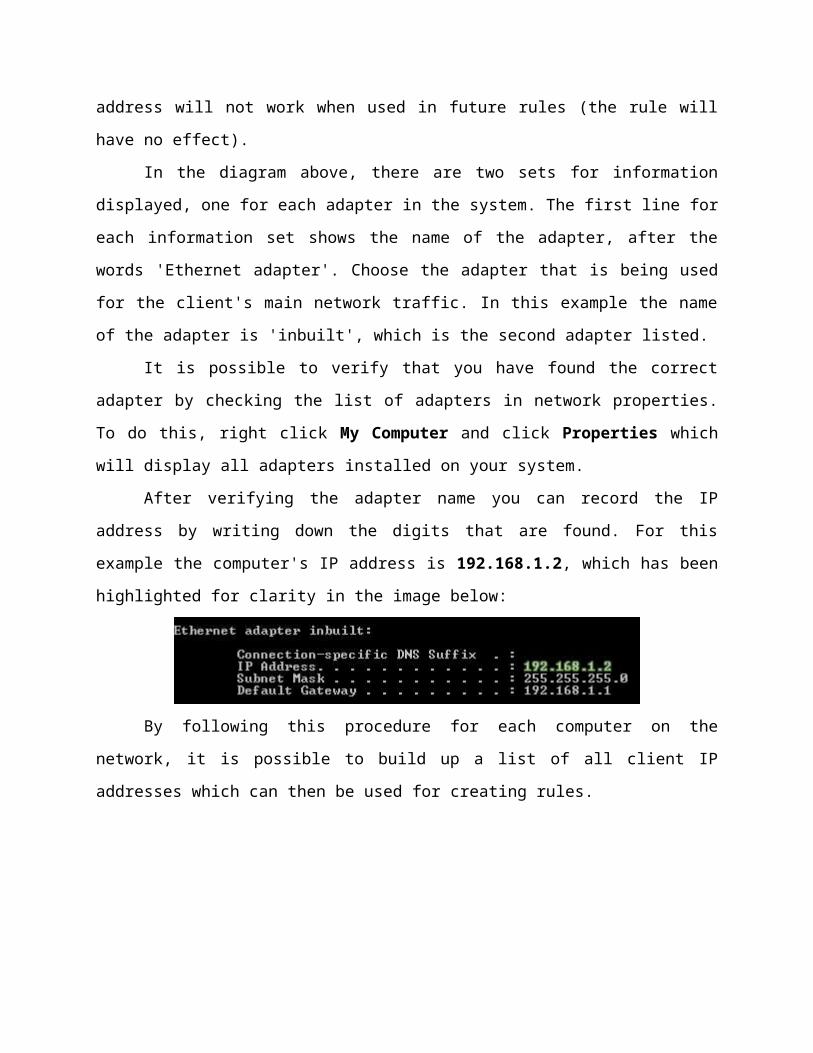
After verifying the adapter name you can record the IP address by writing down the digits
that are found. For this example the computer's IP address is 192.168.1.2, which has been
highlighted for clarity in the image below:
By following this procedure for each computer on the network, it is possible to build up a
list of all client IP addresses which can then be used for creating rules.
Distributed Mode Deployment (Server-Free Deployment)
Overview
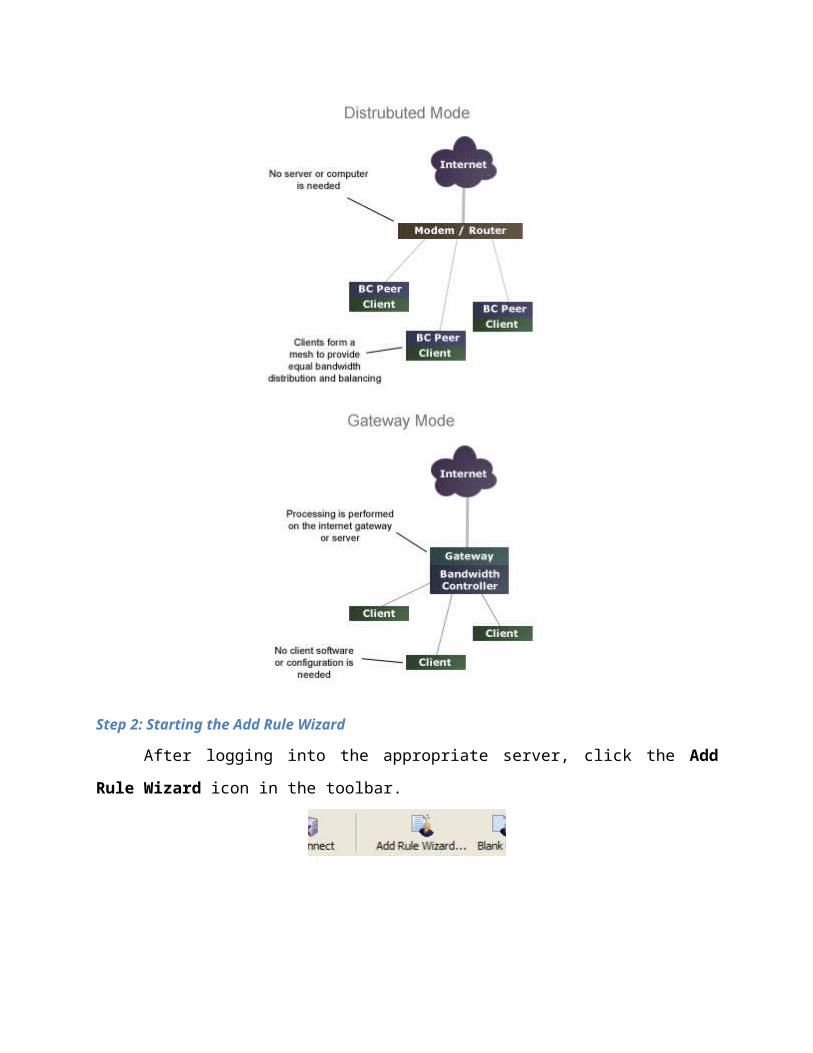
Bandwidth Controller can operate in two unique modes: Distributed Mode or Gateway
Mode. Distributed Mode allows the product to work on networks that have no gateway or server
computer. For these types of networks the clients connect directly to the router that provides the
internet access. Gateway mode, on the other hand, is designed for networks that use a central
computer to provide internet access and related services.
This tutorial explains the steps involved in deploying the product in a distributed mode
environment. It also covers how to prevent users from uninstalling or disabling the distributed
mode server that runs on each workstation. This ensures all computers on the network obey the
bandwidth management rules set by the administrator.
Introduction
Note: Distributed Mode (also known as Server-Free Mode) is only available in Standard
Edition. See the feature comparison table for more information.
Traditionally it has been possible to control network bandwidth in only one of two ways.
The most common method is to send all network traffic to a centralized bandwidth manager that
provides prioritization, rate limiting and other related services. Unfortunately this requires a
separate server which can be expensive for smaller organizations and LANs in terms of cost,
electricity and maintainence.
The other method has been to install a bandwidth manager directly onto the client. The
problem with that type of deployment is that the software can only control the actual client that
it's installed on. There is no coordination of bandwidth flows between each computer on the
network. So while it is possible to set a maximum rate on each client, there is no way to provide
even distribution of bandwidth between a group of clients.
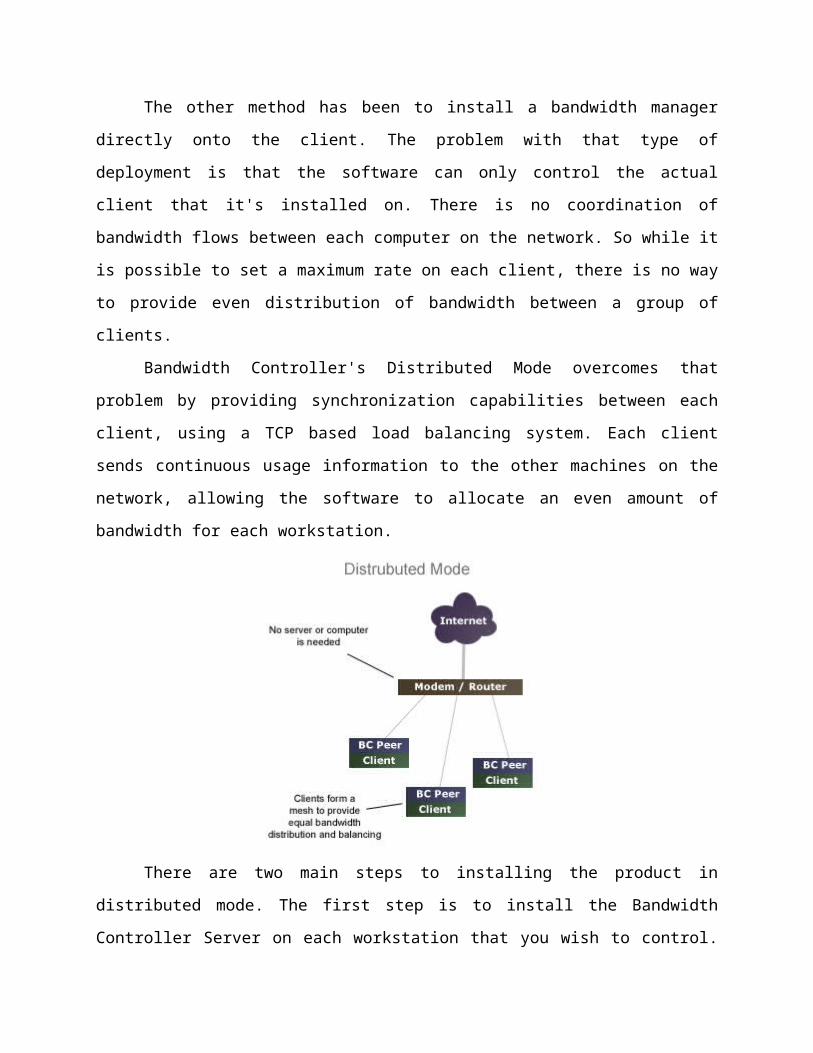
Bandwidth Controller's Distributed Mode overcomes that problem by providing
synchronization capabilities between each client, using a TCP based load balancing system. Each
client sends continuous usage information to the other machines on the network, allowing the
software to allocate an even amount of bandwidth for each workstation.
There are two main steps to installing the product in distributed mode. The first step is to
install the Bandwidth Controller Server on each workstation that you wish to control. The second
step involves setting the privilege level for users to ensure that only the network administrator
has access to the product.
For some networks the second step will be unnecessary if there is no chance the users
will attempt to disable the product on their workstations. Also, some networks will have the user
privilege level already configured with the correct access.
Step 1: Installing with Administrator Privileges
Each workstation on the network must have the server application installed, otherwise it
will receive no traffic shaping. The server is a lightweight service that does not add load the
computer. The only noticable effect it will have is to limit the client's network speed when
necessary, which is by design.
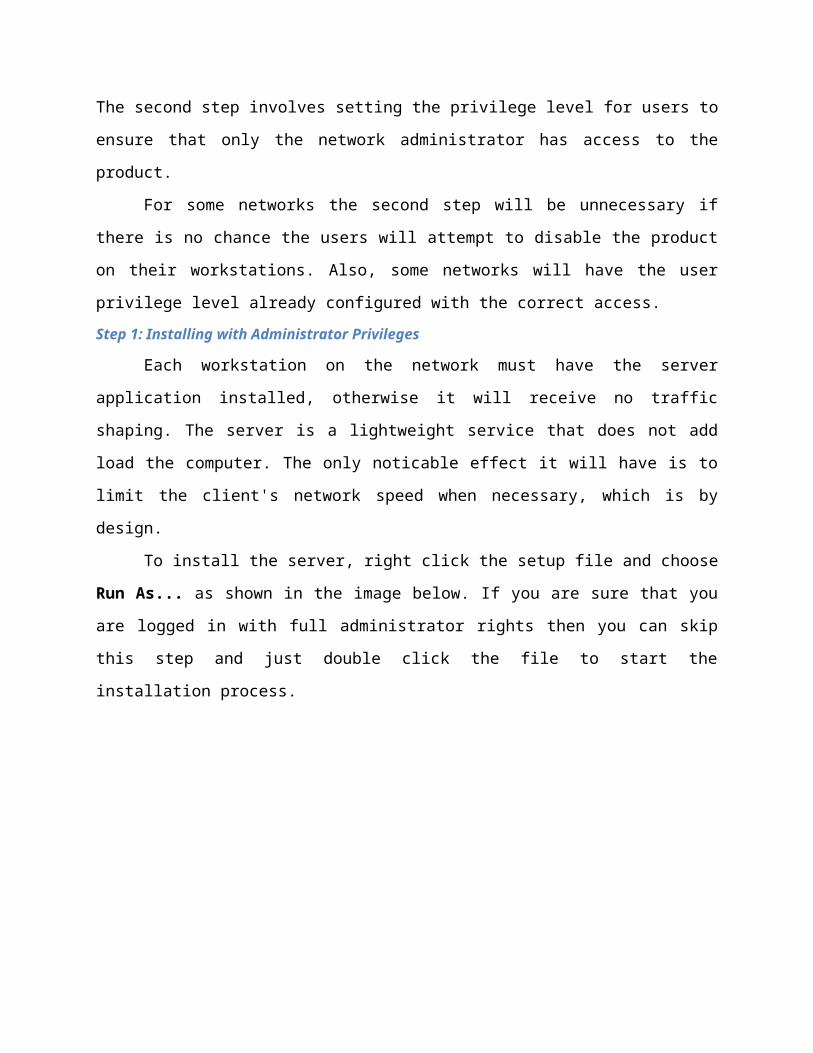
To install the server, right click the setup file and choose Run As... as shown in the
image below. If you are sure that you are logged in with full administrator rights then you can
skip this step and just double click the file to start the installation process.
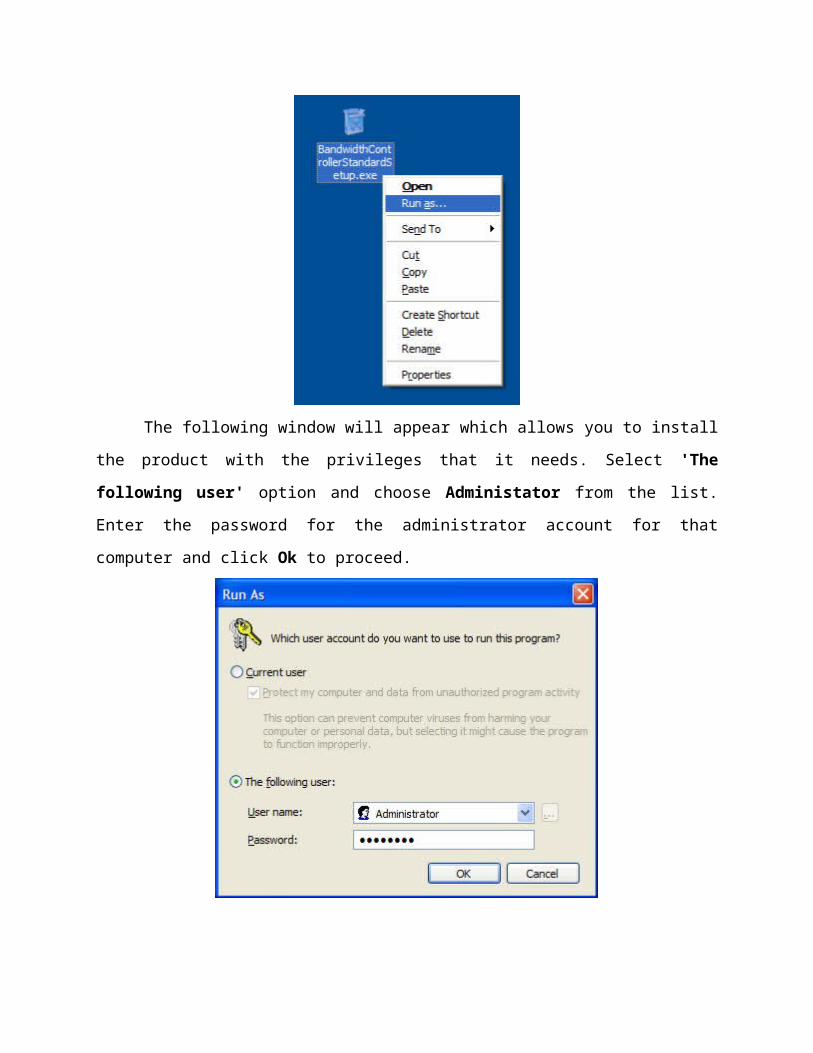
The following window will appear which allows you to install the product with the
privileges that it needs. Select 'The following user' option and choose Administator from the
list. Enter the password for the administrator account for that computer and click Ok to proceed.
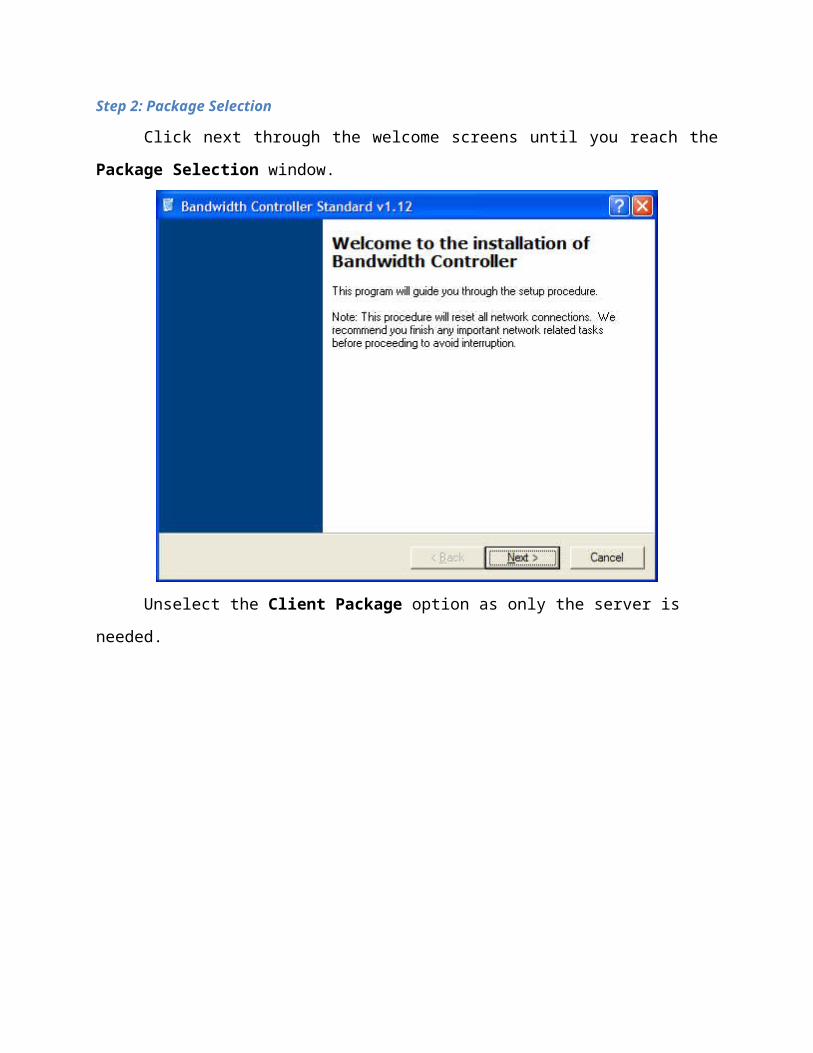
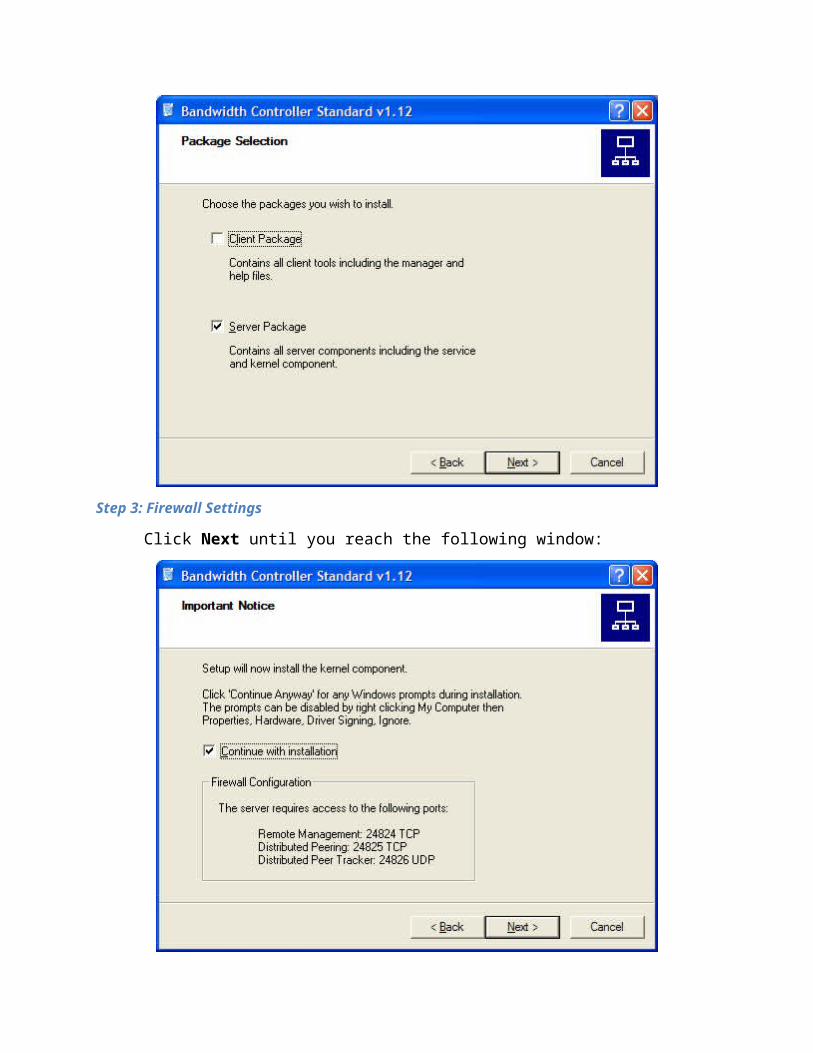
Step 2: Package Selection
Click next through the welcome screens until you reach the Package Selection window.
Unselect the Client Package option as only the server is needed.
Step 3: Firewall Settings
Click Next until you reach the following window:
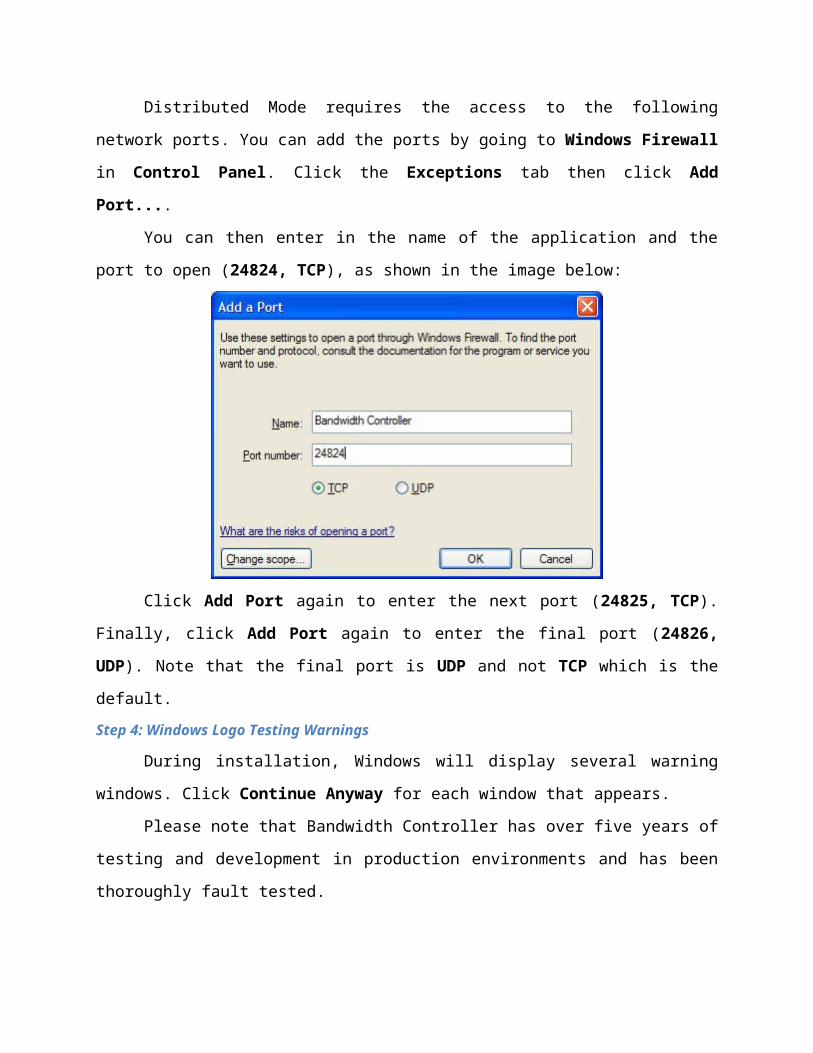
Distributed Mode requires the access to the following network ports. You can add the
ports by going to Windows Firewall in Control Panel. Click the Exceptions tab then click Add
Port....
You can then enter in the name of the application and the port to open (24824, TCP), as
shown in the image below:
Click Add Port again to enter the next port (24825, TCP). Finally, click Add Port again
to enter the final port (24826, UDP). Note that the final port is UDP and not TCP which is the
default.
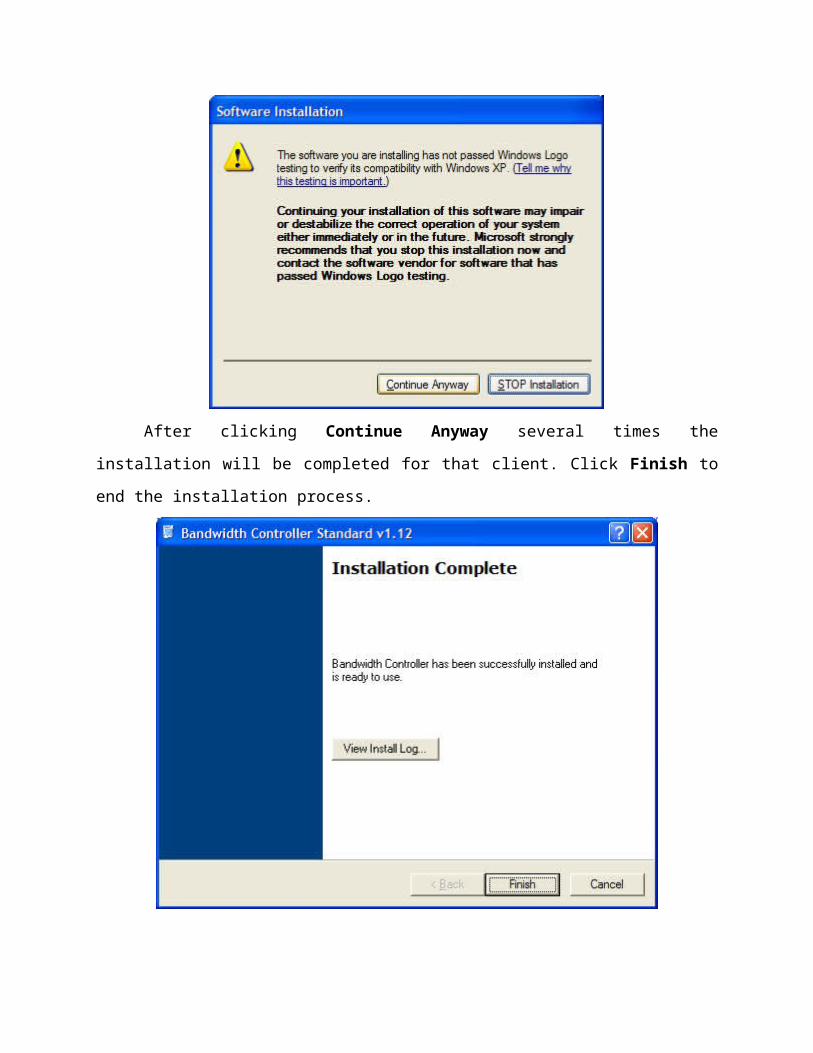
Step 4: Windows Logo Testing Warnings
During installation, Windows will display several warning windows. Click Continue
Anyway for each window that appears.
Please note that Bandwidth Controller has over five years of testing and development in
production environments and has been thoroughly fault tested.
After clicking Continue Anyway several times the installation will be completed for that
client. Click Finish to end the installation process.
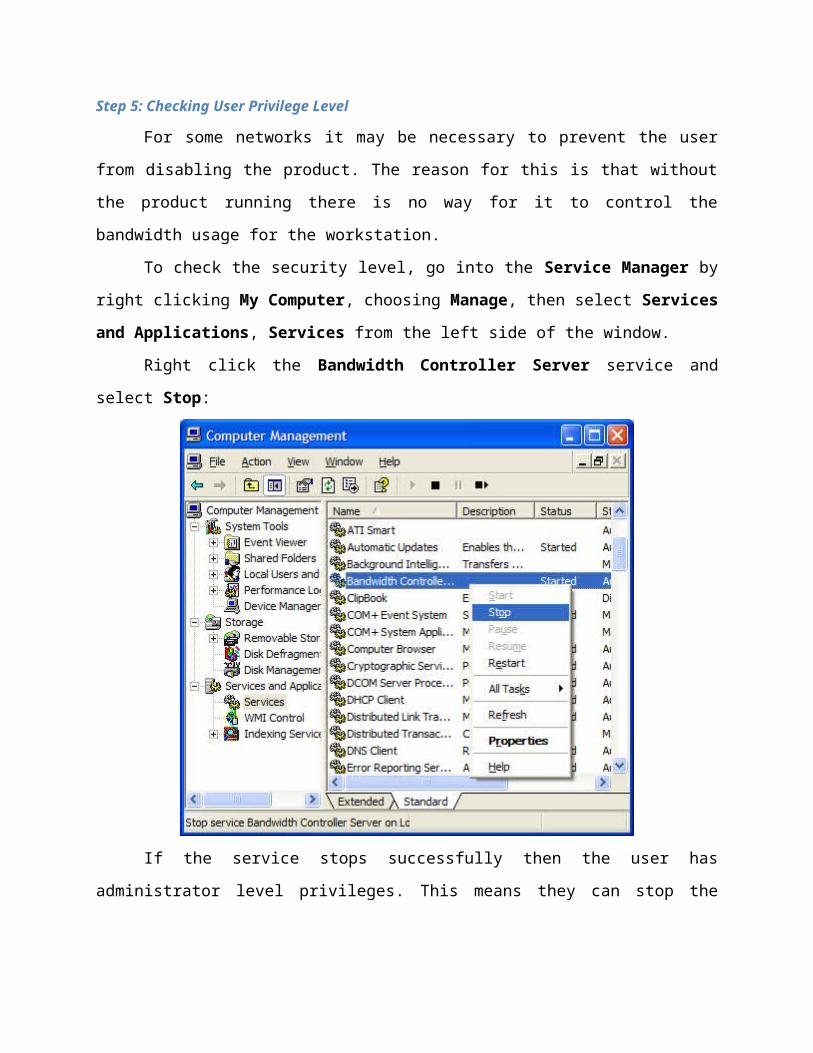
Step 5: Checking User Privilege Level
For some networks it may be necessary to prevent the user from disabling the product.
The reason for this is that without the product running there is no way for it to control the
bandwidth usage for the workstation.
To check the security level, go into the Service Manager by right clicking My
Computer, choosing Manage, then select Services and Applications, Services from the left
side of the window.
Right click the Bandwidth Controller Server service and select Stop:
If the service stops successfully then the user has administrator level privileges. This
means they can stop the server at any time to prevent them from taking part in any traffic shaping
for the network.
If you receive an Access Denied error then the user has the correct privileges and the
installation process is complete. There is no need to continue with the final steps below.
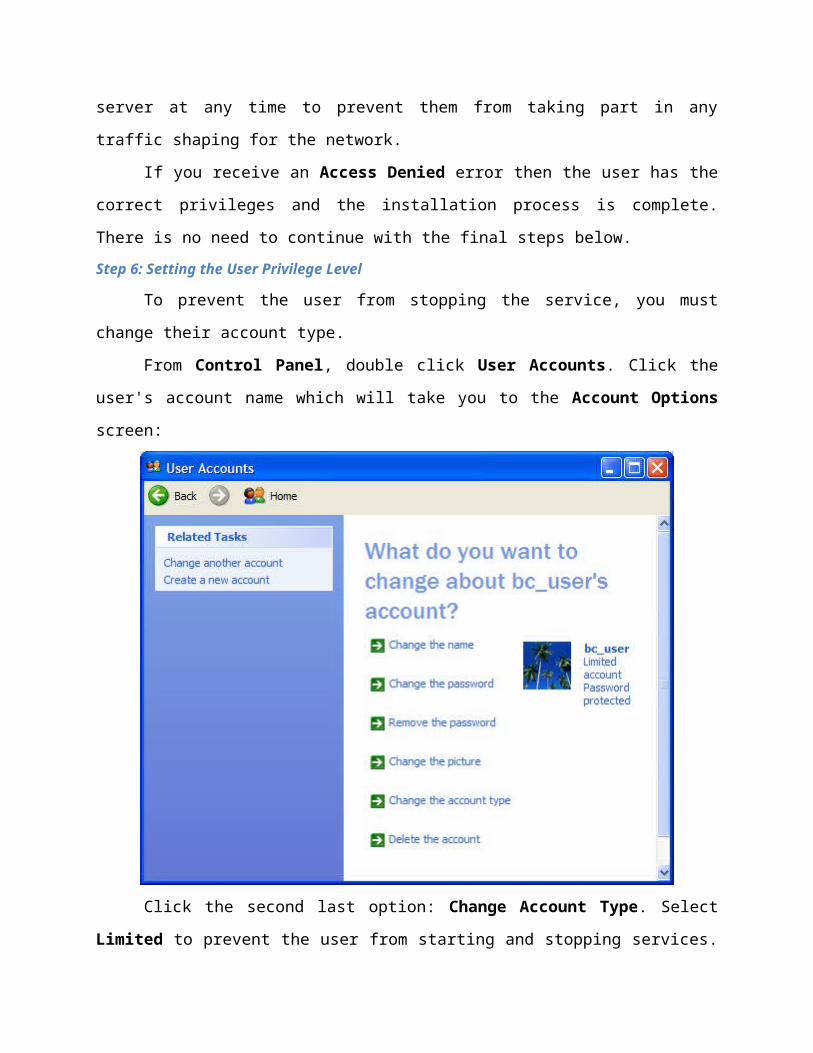
Step 6: Setting the User Privilege Level
To prevent the user from stopping the service, you must change their account type.
From Control Panel, double click User Accounts. Click the user's account name which
will take you to the Account Options screen:
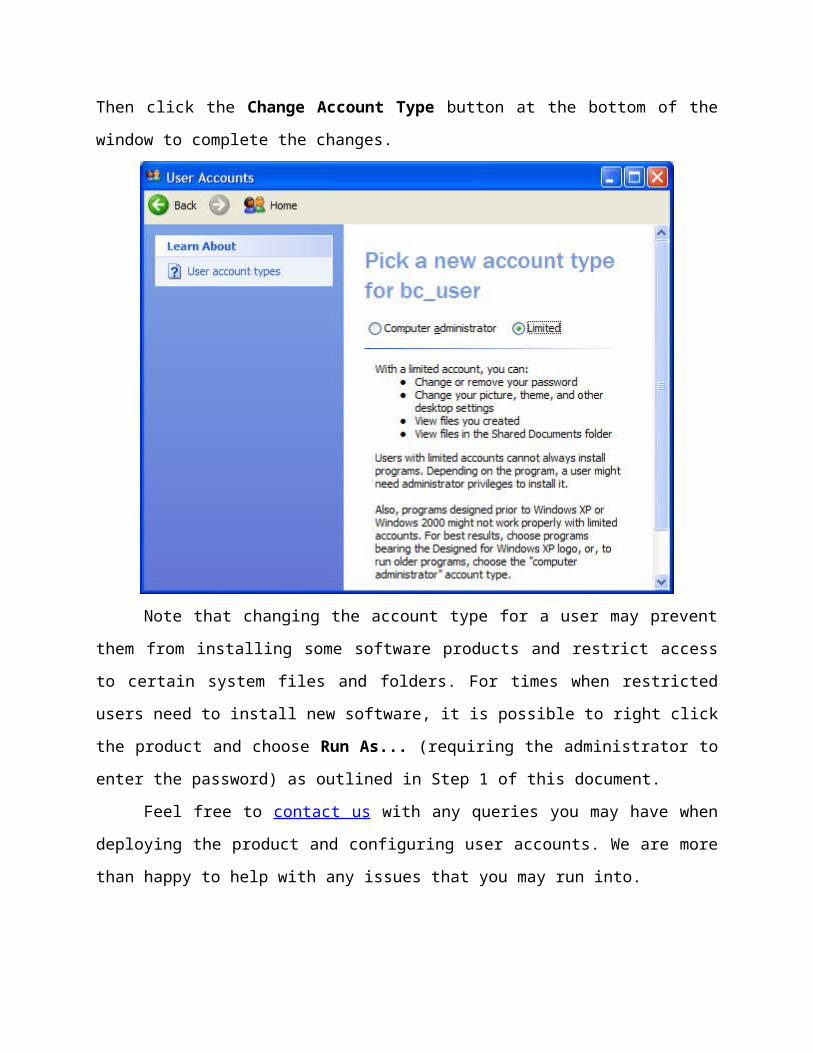
Click the second last option: Change Account Type. Select Limited to prevent the user
from starting and stopping services. Then click the Change Account Type button at the bottom
of the window to complete the changes.
Note that changing the account type for a user may prevent them from installing some
software products and restrict access to certain system files and folders. For times when
restricted users need to install new software, it is possible to right click the product and choose
Run As... (requiring the administrator to enter the password) as outlined in Step 1 of this
document.
Feel free to contact us with any queries you may have when deploying the product and
configuring user accounts. We are more than happy to help with any issues that you may run
into.
Step 7: Configuring the Distributed Mesh
After following this procedure for each computer on the network, the distributed mesh
should be active. Install the client portion of the product on your own computer which will allow
you to monitor the activity of the mesh and make any necessary configuration changes such as
line speed settings.
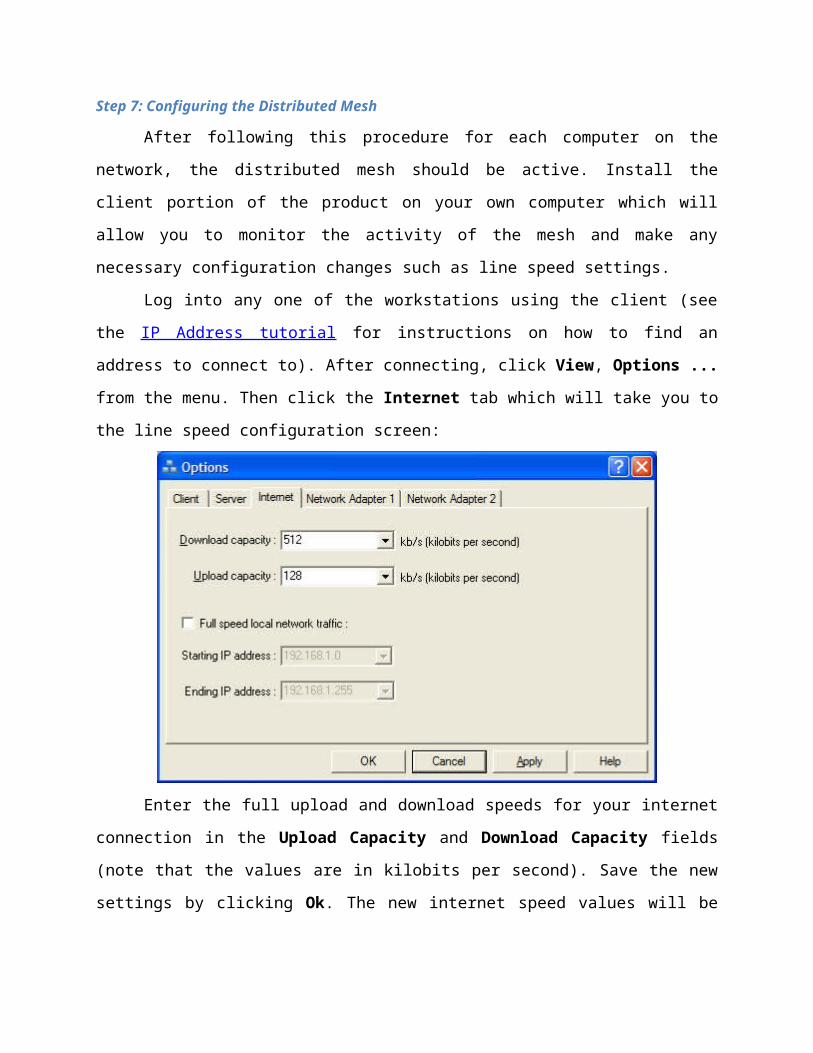
Log into any one of the workstations using the client (see the IP Address tutorial for
instructions on how to find an address to connect to). After connecting, click View, Options ...
from the menu. Then click the Internet tab which will take you to the line speed configuration
screen:
Enter the full upload and download speeds for your internet connection in the Upload
Capacity and Download Capacity fields (note that the values are in kilobits per second). Save
the new settings by clicking Ok. The new internet speed values will be updated for all clients
that are part of the mesh, so you only need to configure this setting on a single workstation.
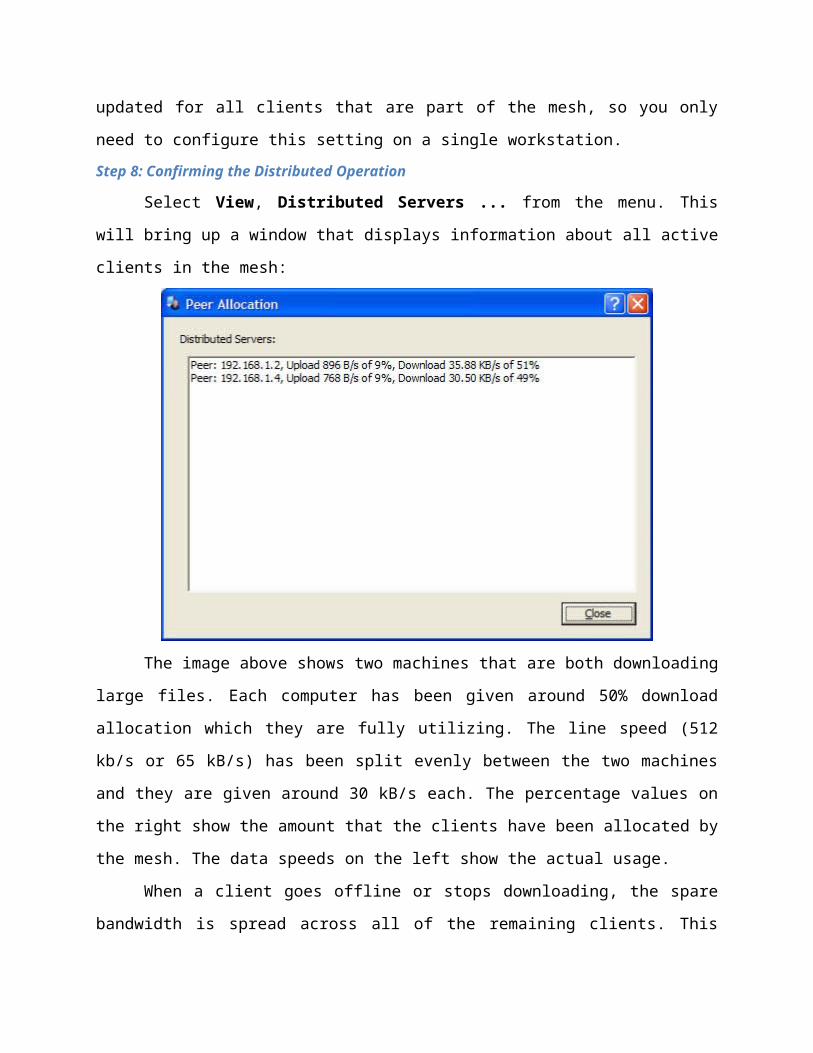
Step 8: Confirming the Distributed Operation
Select View, Distributed Servers ... from the menu. This will bring up a window that
displays information about all active clients in the mesh:
The image above shows two machines that are both downloading large files. Each
computer has been given around 50% download allocation which they are fully utilizing. The
line speed (512 kb/s or 65 kB/s) has been split evenly between the two machines and they are
given around 30 kB/s each. The percentage values on the right show the amount that the clients
have been allocated by the mesh. The data speeds on the left show the actual usage.
When a client goes offline or stops downloading, the spare bandwidth is spread across all
of the remaining clients. This ensures that the internet bandwidth is used with maximum
efficiency at all times.
Conclusion
Distributed Mode gives you the ability to dynamically control bandwidth without the
need for a centralized computer. The distributed mesh makes decisions based on each client's
internet usage and ensures that no single client takes all of the bandwidth, allowing each
computer on the network to receive a fair share of the internet resource.
This type of deployment takes more time than Gateway Mode because it requires
installing the product on each client computer, rather than a central server. But it does have the
advantage of allowing smaller networks to run efficiently without having to purchase and
maintain an internet server.
Please contact us if you require any assistance for product deployment and configuration.
Our support staff will help you set the product up for your particular network environment and
answer any questions you may have regarding installation and operation.
Speed Limiting
Overview
Speed limiting is an integral part of bandwidth management and flow control. It allows
you to set a maximum upload and download rate for users and applications, freeing up network
resources for other uses.
This tutorial shows how to set a speed cap on a particular workstation on the local
network, limiting its download speed to 10,000 B/s.
Introduction
Note: Bandwidth Controller measures transfer speed in bytes per second (B/s). When
configuring rules, it is important to note that speeds are measured in bytes per second and not
bits per second (b/s). To convert B/s to b/s, multiply the value by 8. To convert back from b/s,
divide the value by 8.
Setting the maximum speed for a client computer is quite straightfoward and requires
only two pieces of information: The client's IP address and the speed that you wish to limit it to.
Step 1: Connecting to the Server
When using the product in a server-free environment (i.e. distributed mode), it is
necessary to log into the client computer using the manager application. To do this, run the
Bandwidth Controller Client application from the start menu, and connect to the IP address of the
client that you wish to limit.
For centralized installation (i.e. gateway mode), log into the gateway computer using the
client application. For both distributed and centralized modes the client application can be run
from any computer on the network.
Step 2: Starting the Add Rule Wizard
After logging into the appropriate server, click the Add Rule Wizard icon in the toolbar.
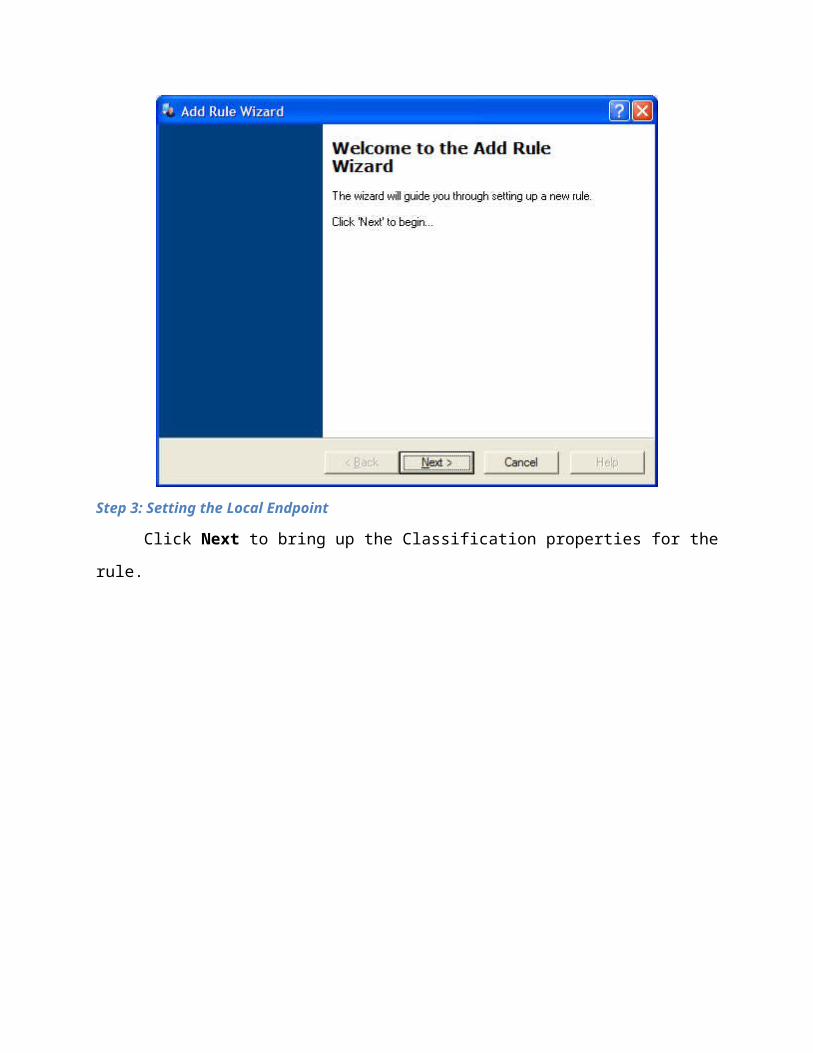
Step 3: Setting the Local Endpoint
Click Next to bring up the Classification properties for the rule.
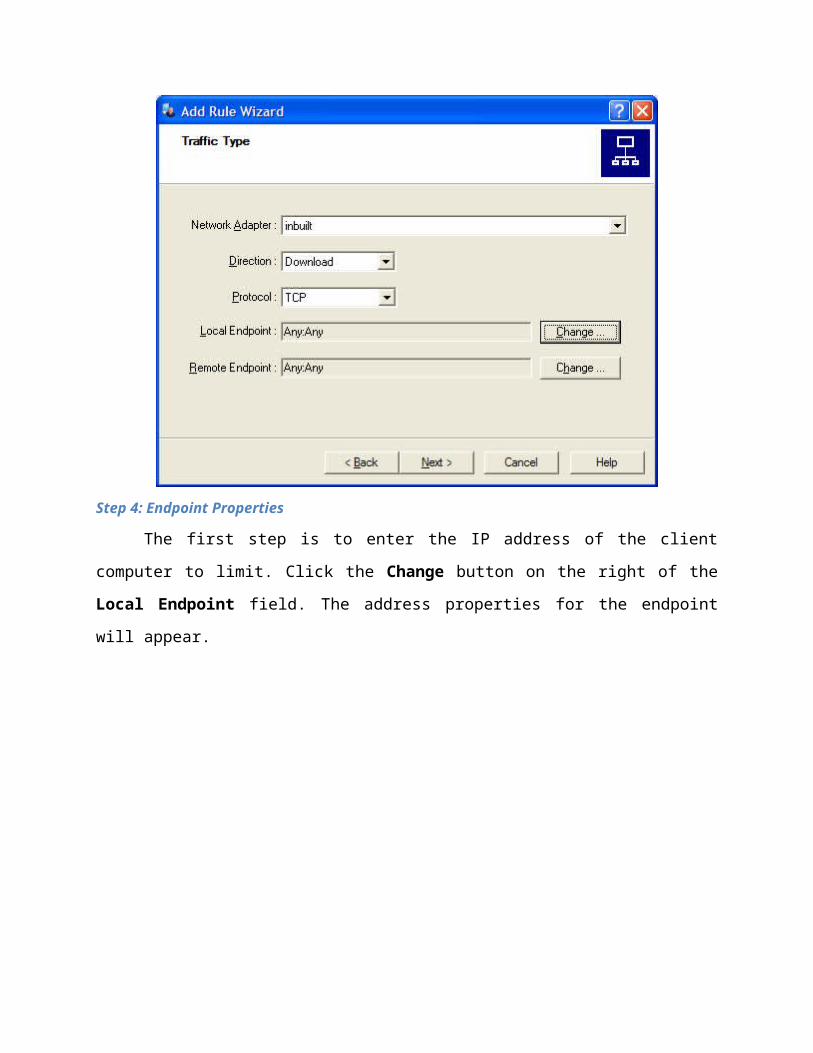
Step 4: Endpoint Properties
The first step is to enter the IP address of the client computer to limit. Click the Change
button on the right of the Local Endpoint field. The address properties for the endpoint will
appear.
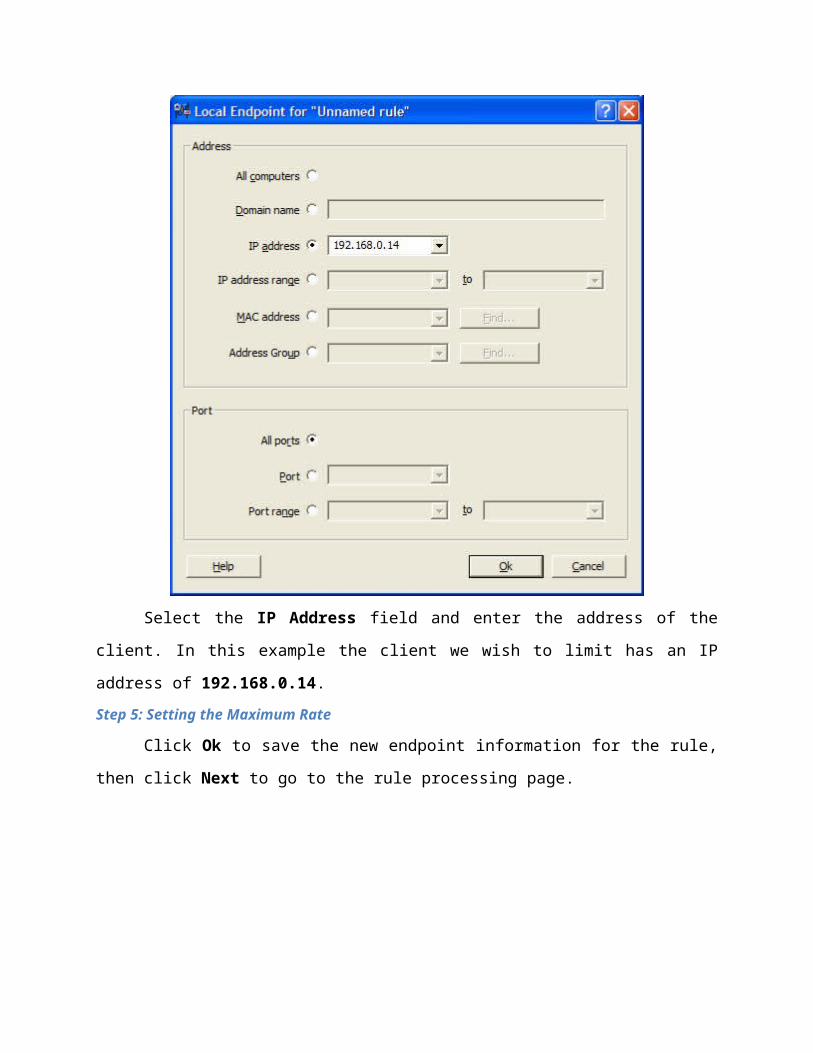
Select the IP Address field and enter the address of the client. In this example the client
we wish to limit has an IP address of 192.168.0.14.
Step 5: Setting the Maximum Rate
Click Ok to save the new endpoint information for the rule, then click Next to go to the
rule processing page.
Enter the value 10,000 in the Limit Speed field. This will set the maximum download
speed to 10,000 B/s for the workstation 192.168.0.14 .
Step 6: Verifiying Rule Properties
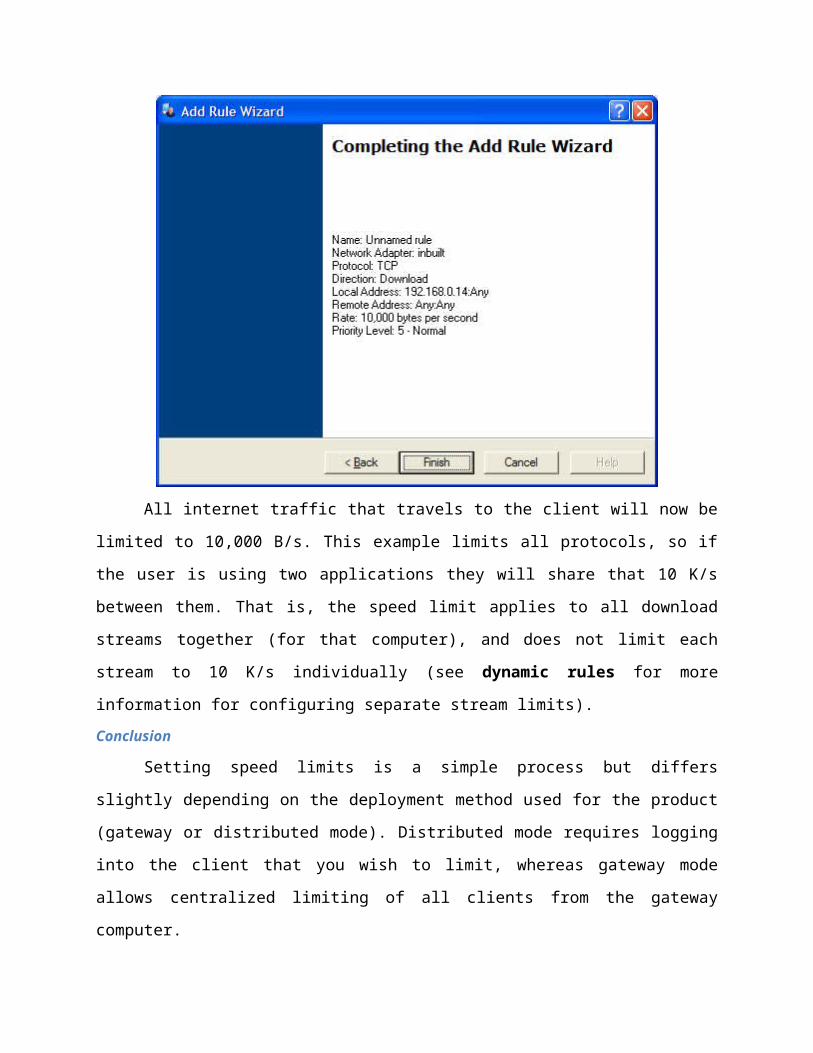
Continue clicking Next until the wizard is completed. The final page shows a summary
of the rule's properties, which allows you to double check the information.
All internet traffic that travels to the client will now be limited to 10,000 B/s. This
example limits all protocols, so if the user is using two applications they will share that 10 K/s
between them. That is, the speed limit applies to all download streams together (for that
computer), and does not limit each stream to 10 K/s individually (see dynamic rules for more
information for configuring separate stream limits).
Conclusion
Setting speed limits is a simple process but differs slightly depending on the deployment
method used for the product (gateway or distributed mode). Distributed mode requires logging
into the client that you wish to limit, whereas gateway mode allows centralized limiting of all
clients from the gateway computer.
Speed limits can also be applied to other traffic types including uploads, protocols and
groups of users. By adjusting the classification properties of the rule you can limit these different
types of traffic with just a few mouse clicks.
Dynamic Rules: Web Server Balancing
Overview
Dynamic rules allow bandwidth management of a group of computers whose IP
addresses are not known in advance. This tutorial explains how to use this feature to distribute
web server bandwidth between all remote users who may connect to it.
Note: Dynamic rules are only available in Bandwidth Controller Enterprise Edition. See
the product feature comparison for more information.
Introduction
A common issue for web servers is that a small group of clients can use up most of the
upstream bandwidth, leaving little for other users who are connected. For intranet services it is
usually possible to create a rule for each local user who will connect to the resource, but for web
server operators this is impractical as the address of each user is effectively random.
The solution is to use dynamic rules which give network administrators the ability to
filter connections without knowing their IP address in advance. Dynamic rules achieve this
functionality by identifying the streams and creating a new virtual rule for each unique IP
address that connects to the server.
The following steps show how to configure Bandwidth Controller to distribute available
bandwidth evenly amongst a group of web server clients. It uses a single rule to perform the
bandwidth load balancing.
Step 1: Creating a New Rule
Click the Add Rule Wizard button on the toolbar along the top of the main manager
window to bring up the wizard.
Click Next to go to the Classification page.
Step 2: Choosing the Traffic Direction
This example distributes the download speed for clients. From the web server's
perspective, this means limiting the upstream or upload direction. Click the Direction field and
choose Upload. The rule will now process all traffic travelling from the web server to the clients
(client download).
Step 3: Selecting HTTP Classification
To limit just HTTP traffic, click the Change button on the right of the Local Endpoint
field. This will bring up the Local Endpoint Properties.

Leave the Address section set to All computers and select the Port field at the bottom of
the window. Enter in 80 to make the rule process only HTTP traffic coming from the web server,
leaving all other traffic untouched.
Click Ok to save the endpoint settings, then click Next twice to go to the Advanced
Processing page.
Step 4: Enabling Dynamic Queueing
Uncheck Use separate queue for each local user to disable dynamic queueing for LAN
clients, and check Use separate queue for each remote site to turn on dynamic queueing for
external users.
Click Next twice to complete the rule creation.
Bandwidth Distribution
Note that in the above diagram the Scale Factor is set to 1. This means any connection
that is filtered by this rule will be given an equal share of bandwidth. Each time a new user
connects to the web server, the distribution will be updated.
For example, if there are 3 users connected then each will receive 33% of available
upstream bandwidth. When another user connects the allocation is changed to 25% each (100%
divided by 4 users).
Dynamic rules also allow for users who are not using their full allocation that they are
given. For example, if 3 users are connected but one of them is using only 10% of the upstream
bandwidth rather than 33%, then the other two users will share the remaining 90% (i.e. 45%
each). Likewise, if a user is connected to the server but not currently downloading anything, they
will not be counted and the other two computers will receive a full 50% each.
Conclusion
Dynamic rules give web server operators a simple way of sharing bandwidth between
clients. But they are useful for more than just the scenario outlined in this tutorial, they also
provide batch rule creation functionality by preventing the need to create a separate rule for each
user on the network.