Embed Size (px)
Citation preview
Beading Tutorials and Patterns by Ellad2
Feel free to share this tutorial as m uch as you want in order to help other
beginners… You can download it at ht tp: / / ellad2.com 1
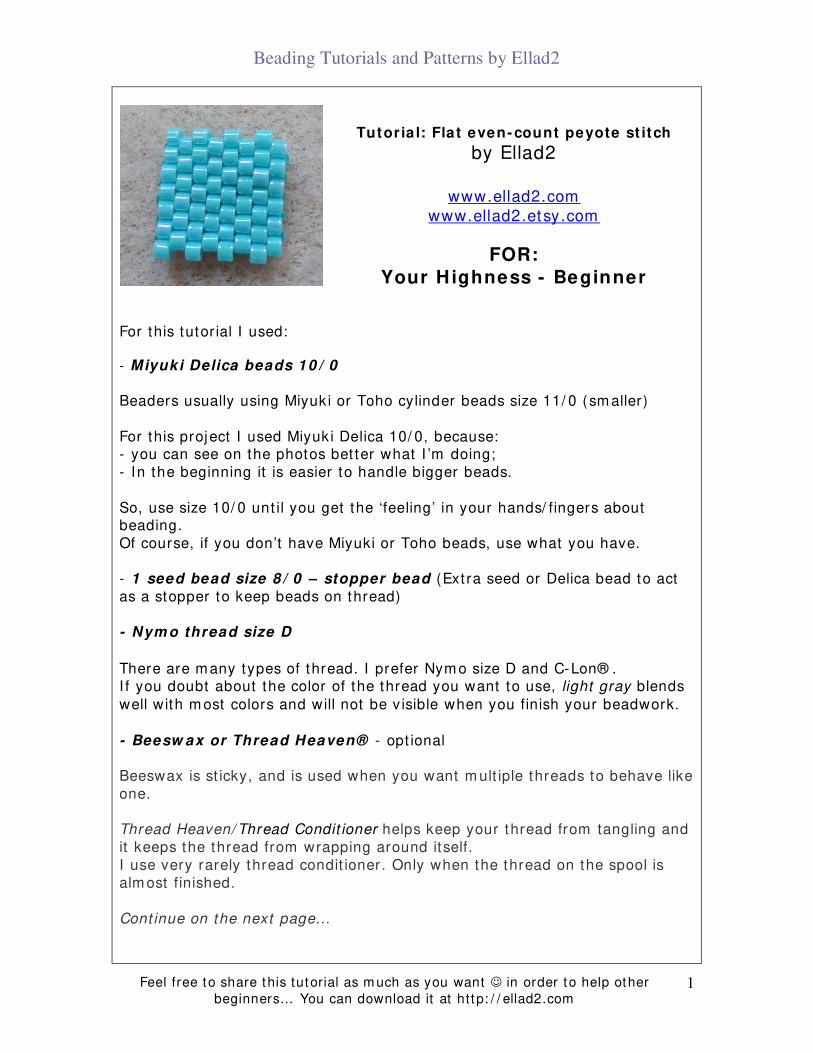
Tutor ia l: Flat even- count peyote st itch
by Ellad2
www.ellad2.com www.ellad2.etsy.com
FOR:
Your Highness - Beginner
For this tutor ial I used:
- Miyuki Delica beads 1 0 / 0 Beaders usually using Miyuk i or Toho cylinder beads size 11/ 0 (sm aller) For this project I used Miyuk i Delica 10/ 0, because: - you can see on the photos bet ter what I ’m doing; - In the beginning it is easier to handle bigger beads. So, use size 10/ 0 unt il you get the ‘feeling’ in your hands/ fingers about beading. Of course, if you don’t have Miyuki or Toho beads, use what you have. - 1 seed bead size 8 / 0 – stopper bead (Ext ra seed or Delica bead to act as a stopper to keep beads on thread) - Nym o thread size D
There are m any types of thread. I prefer Nym o size D and C-Lon® . I f you doubt about the color of the thread you want to use, light gray blends
well with m ost colors and will not be v isible when you finish your beadwork.
- Beesw ax or Thread Heaven® - opt ional Beeswax is st icky, and is used when you want m ult iple threads to behave like one. Thread Heaven/ Thread Condit ioner helps keep your thread from tangling and it keeps the thread from wrapping around itself. I use very rarely thread condit ioner. Only when the thread on the spool is alm ost finished. Cont inue on the next page…
Beading Tutorials and Patterns by Ellad2
Feel free to share this tutorial as m uch as you want in order to help other
beginners… You can download it at ht tp: / / ellad2.com 2
One day, you will probably star t to use FireLine 0.006/ 4lb instead of thread… (FireLine= pre-waxed, braided cord, which is known as the st rongest fiber, per diam eter, ever created) - Beading needle size 1 2
I f you can find Tulip needle size 11 would be great ! Tulip needles are m uch bet ter than any other beading needles I was working with. Tulip needle is sm ooth, difficult to bend or break and resists rust . The gold on the t ip of the needle m akes it easier to see. I 've used them with 15/ 0 seed beads that I had to pass thru several t im es and had no problem s.
For 4 needles you should pay som ething about $ 4.95, but t rust m e, they are worth of it .
- Scissors
Even count flat peyote has an even num ber of beads in each row, and when finished, is a f lat piece.
Beading Tutorials and Patterns by Ellad2
Feel free to share this tutorial as m uch as you want in order to help other
beginners… You can download it at ht tp: / / ellad2.com 3
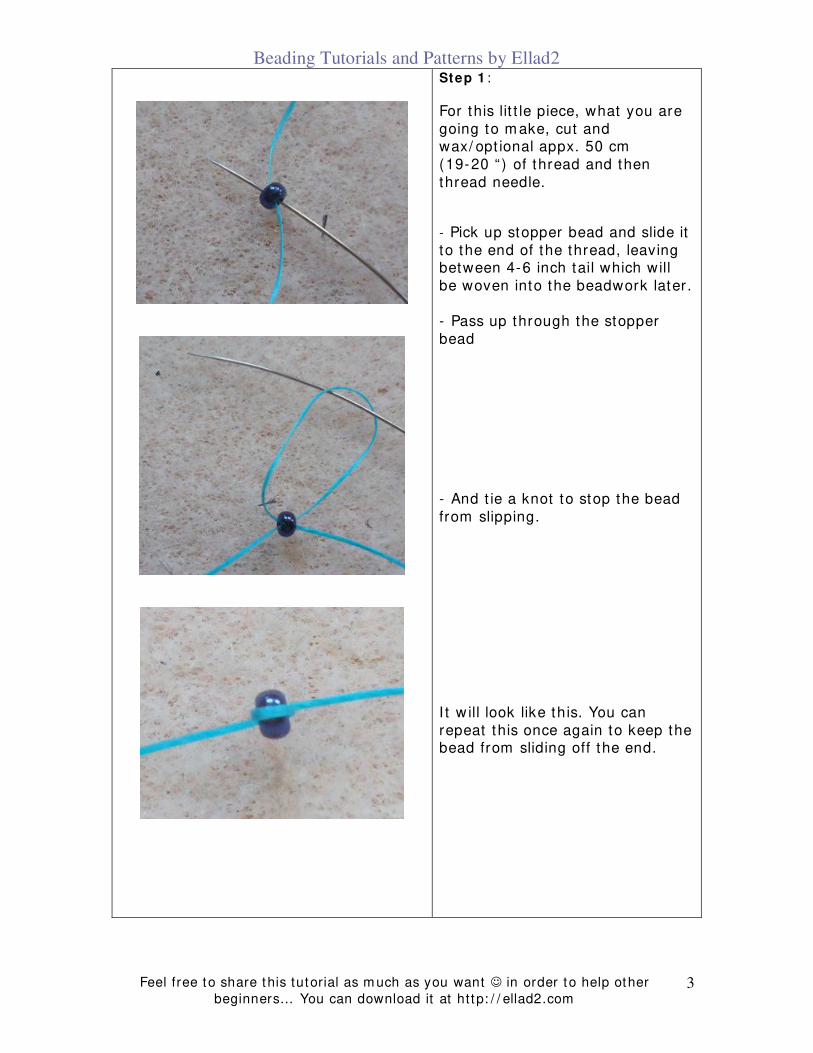
Step 1 :
For this lit t le piece, what you are going to m ake, cut and wax/ opt ional appx. 50 cm (19-20 “ ) of thread and then thread needle.
- Pick up stopper bead and slide it to the end of the thread, leaving between 4-6 inch tail which will be woven into the beadwork later . - Pass up through the stopper bead - And t ie a knot to stop the bead from slipping. I t w ill look like this. You can repeat this once again to keep the bead from sliding off the end.

Beading Tutorials and Patterns by Ellad2
Feel free to share this tutorial as m uch as you want in order to help other
beginners… You can download it at ht tp: / / ellad2.com 4
Step 2 : 1 st and 2 nd row
- Pick up 8 Delica beads and slide them to the stopper bead.
Note : I n peyote st itch these beads
becom e the f irst two rows. About that , I
will tell you in one of the next
tutor ials…Don’t think about that now…
Step 3 : New row / 3 rd row
This row is the m ost uncom fortable… Each row after this one is easy…
- Pick up 1 Delica bead and pass with your needle through the second bead (skip the first bead) . Pull the thread t ight !
You will get this. Let say you’ve got your first ‘up bead’ ‘up bead’
- Pick up again 1 Delica bead, skip one bead and pass through the next bead. Pull the thread t ight .
Cont inue on the next page…
Beading Tutorials and Patterns by Ellad2
Feel free to share this tutorial as m uch as you want in order to help other
beginners… You can download it at ht tp: / / ellad2.com 5
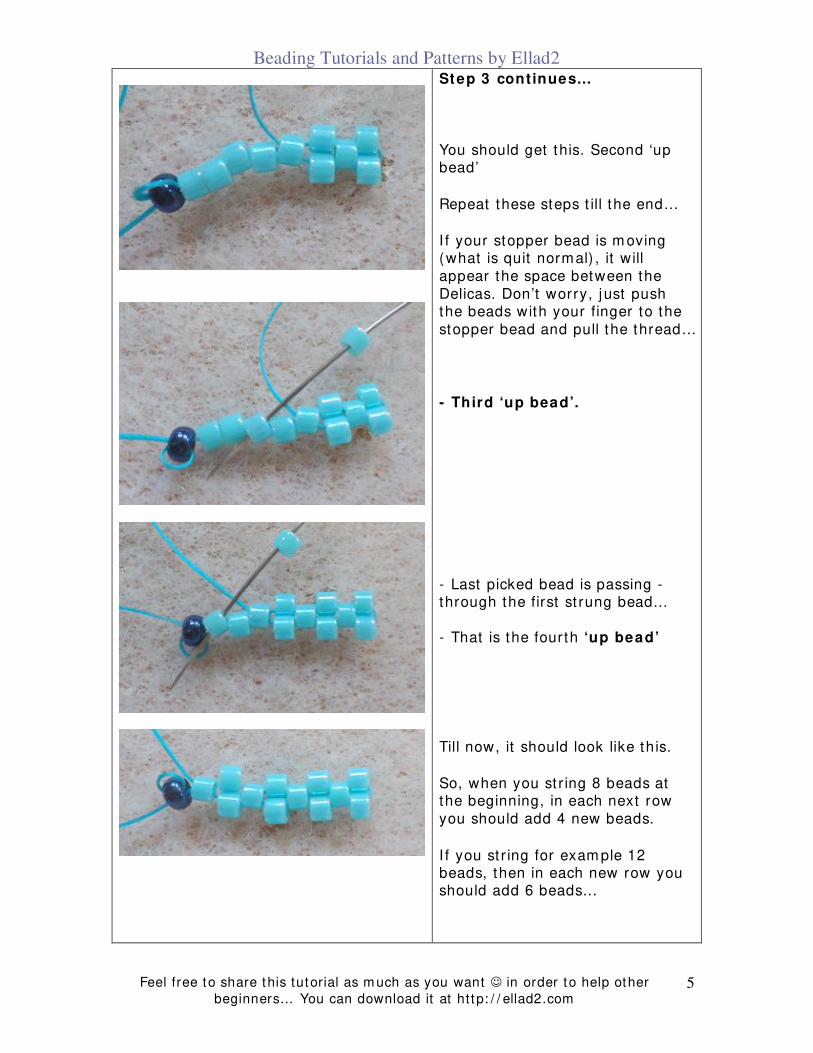
Step 3 continues…
You should get this. Second ‘up bead’
Repeat these steps t ill the end…
I f your stopper bead is m oving (what is quit normal) , it will appear the space between the Delicas. Don’t worry, j ust push the beads with your finger to the stopper bead and pull the thread…
- Third ‘up bead’.
- Last picked bead is passing - through the first st rung bead… - That is the fourth ‘up bead’
Till now, it should look like this.
So, when you st r ing 8 beads at the beginning, in each next row you should add 4 new beads.
I f you st r ing for exam ple 12 beads, then in each new row you should add 6 beads…
Beading Tutorials and Patterns by Ellad2
Feel free to share this tutorial as m uch as you want in order to help other
beginners… You can download it at ht tp: / / ellad2.com 6
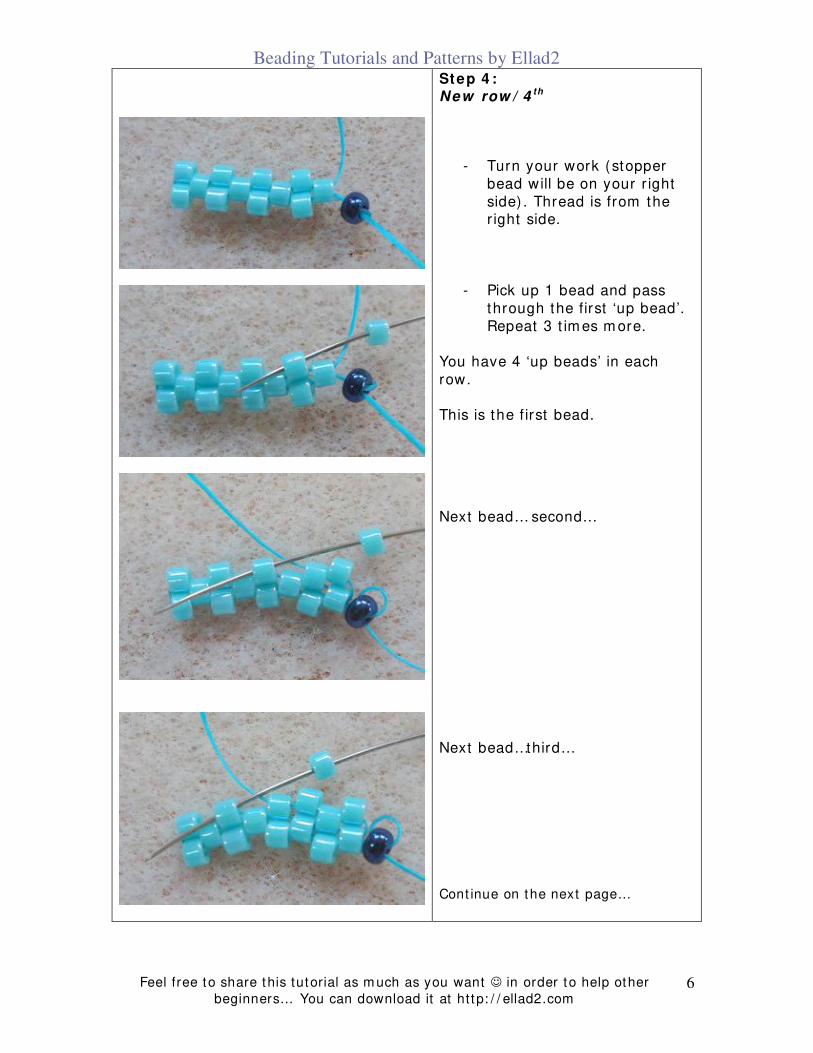
Step 4 : New row / 4 th
- Turn your work (stopper bead will be on your r ight side) . Thread is from the r ight side.
- Pick up 1 bead and pass through the first ‘up bead’. Repeat 3 t im es m ore.
You have 4 ‘up beads’ in each row. This is the f irst bead.
Next bead… second…
Next bead…third… Cont inue on the next page…
Beading Tutorials and Patterns by Ellad2
Feel free to share this tutorial as m uch as you want in order to help other
beginners… You can download it at ht tp: / / ellad2.com 7
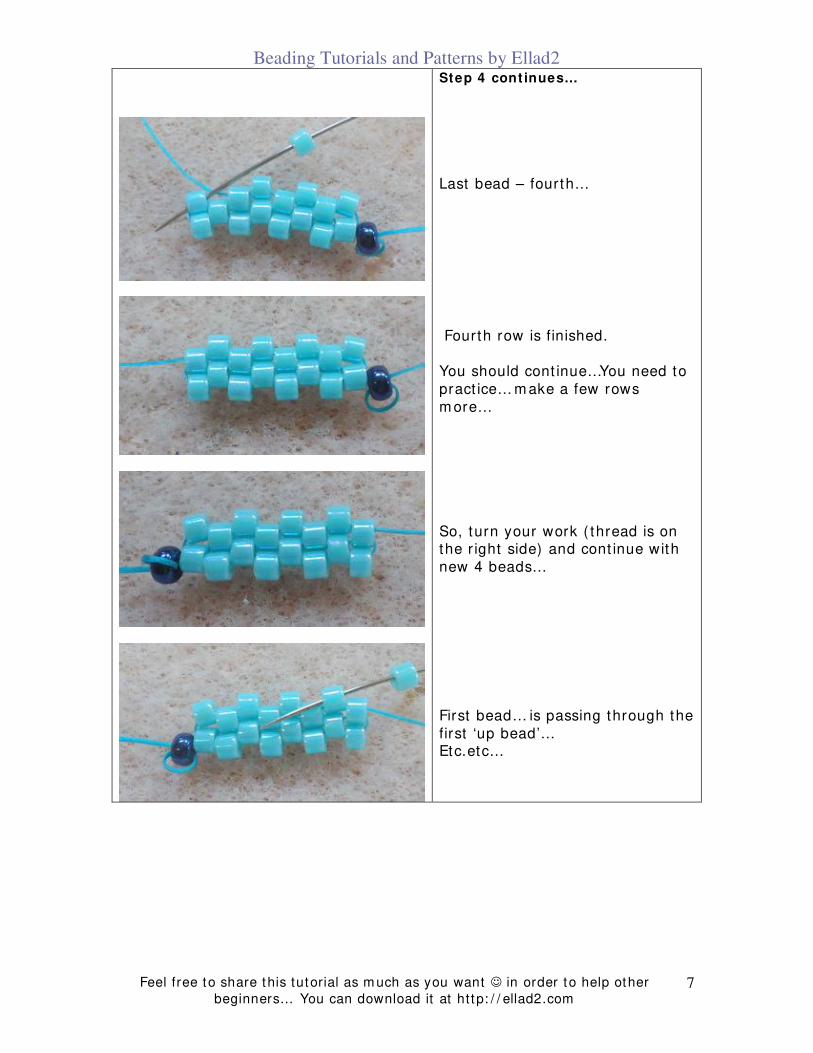
Step 4 cont inues…
Last bead – fourth…
Fourth row is finished. You should cont inue…You need to pract ice… m ake a few rows m ore… So, turn your work ( thread is on the r ight side) and cont inue with new 4 beads…
First bead… is passing through the first ‘up bead’… Etc.etc…
Beading Tutorials and Patterns by Ellad2
Feel free to share this tutorial as m uch as you want in order to help other
beginners… You can download it at ht tp: / / ellad2.com 8
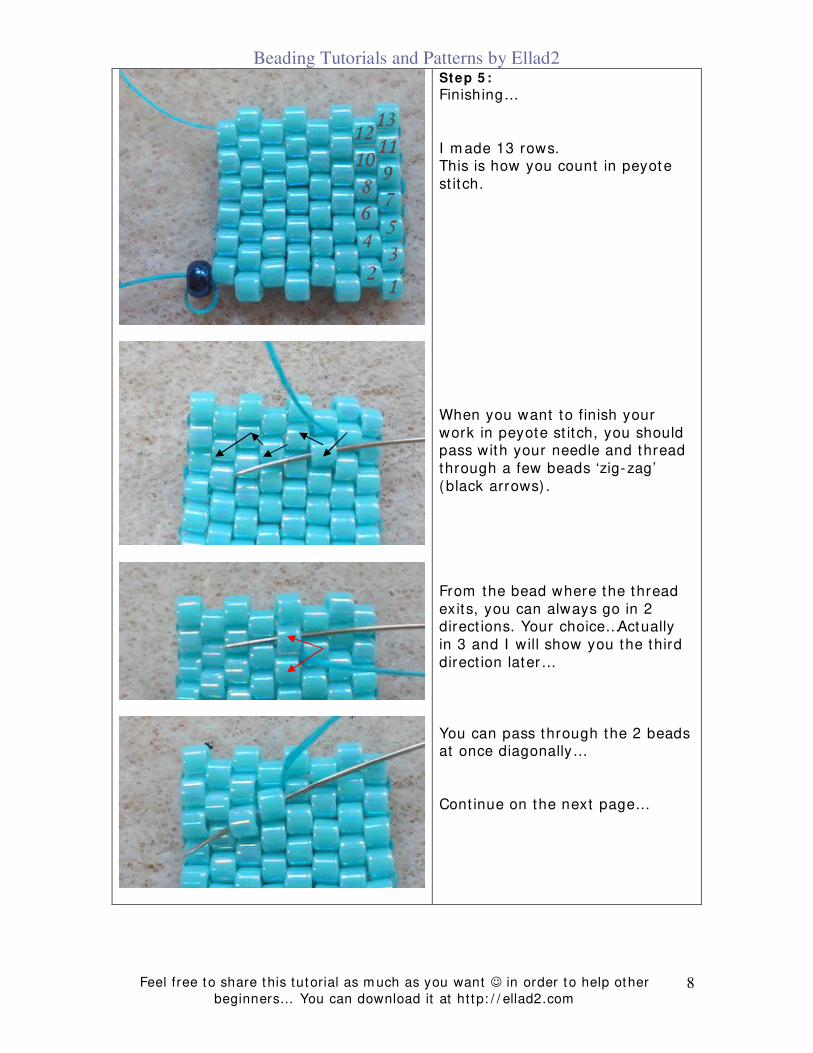
Step 5 :
Finishing… I m ade 13 rows. This is how you count in peyote st itch. When you want to finish your work in peyote st itch, you should pass with your needle and thread through a few beads ‘zig-zag’ (black arrows) .
From the bead where the thread exits, you can always go in 2 direct ions. Your choice…Actually in 3 and I will show you the third direct ion later… You can pass through the 2 beads at once diagonally… Cont inue on the next page…
Beading Tutorials and Patterns by Ellad2
Feel free to share this tutorial as m uch as you want in order to help other
beginners… You can download it at ht tp: / / ellad2.com 9
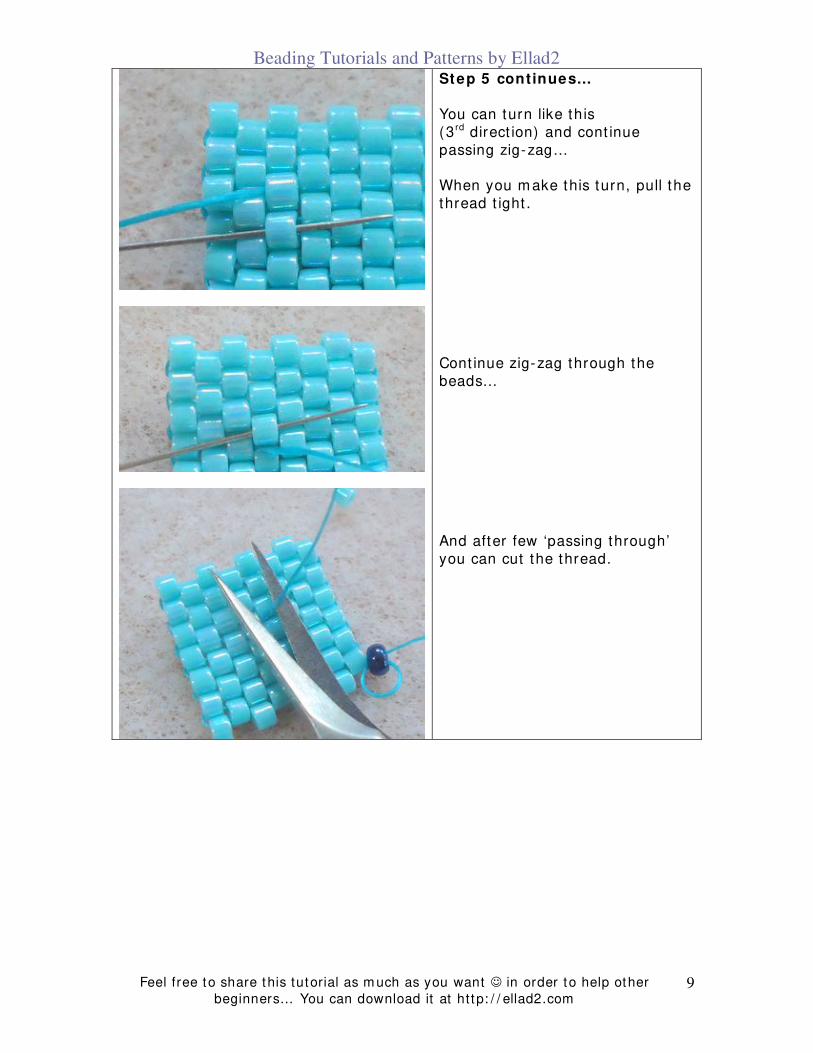
Step 5 continues… You can turn like this (3 rd direct ion) and cont inue passing zig-zag… When you m ake this turn, pull the thread t ight . Cont inue zig-zag through the beads… And after few ‘passing through’ you can cut the thread.
Beading Tutorials and Patterns by Ellad2
Feel free to share this tutorial as m uch as you want in order to help other
beginners… You can download it at ht tp: / / ellad2.com 10
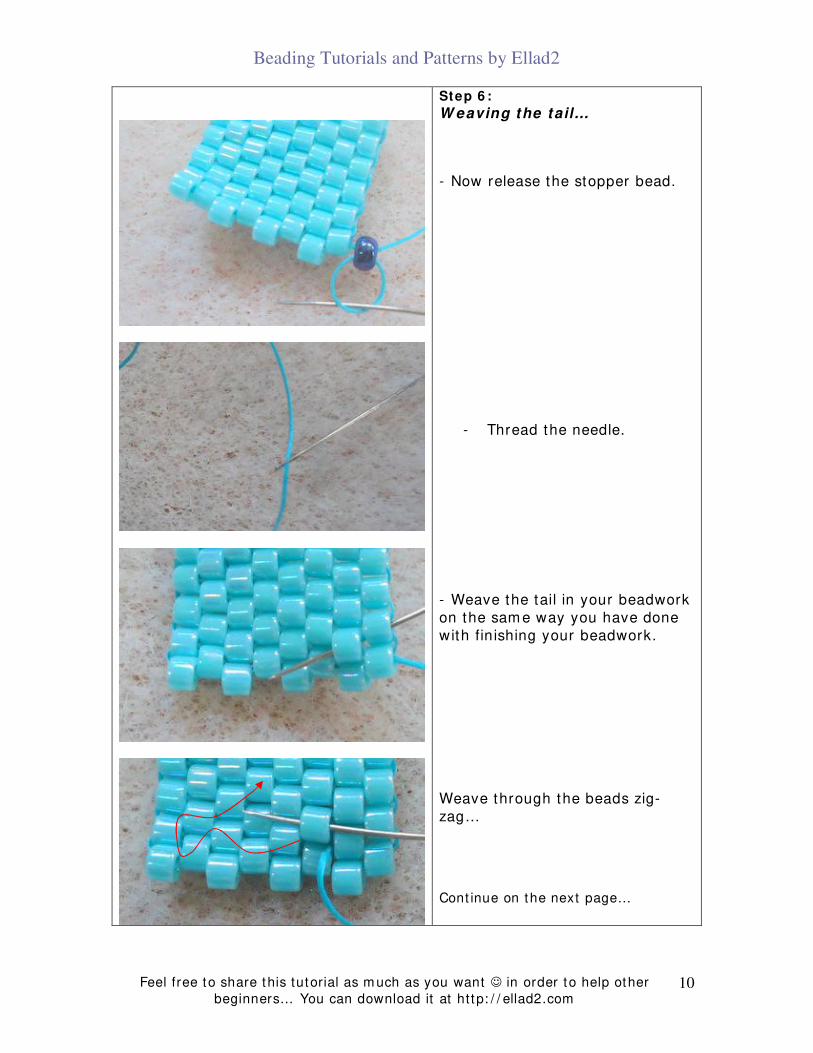
Step 6 :
W eaving the tail…
- Now release the stopper bead.
- Thread the needle.
- Weave the tail in your beadwork on the sam e way you have done with fin ishing your beadwork.
Weave through the beads zig-zag… Cont inue on the next page…

Beading Tutorials and Patterns by Ellad2
Feel free to share this tutorial as m uch as you want in order to help other
beginners… You can download it at ht tp: / / ellad2.com 11
Step 6 cont inues…
Cut the thread….
Beading Tutorials and Patterns by Ellad2
Feel free to share this tutorial as m uch as you want in order to help other
beginners… You can download it at ht tp: / / ellad2.com 12
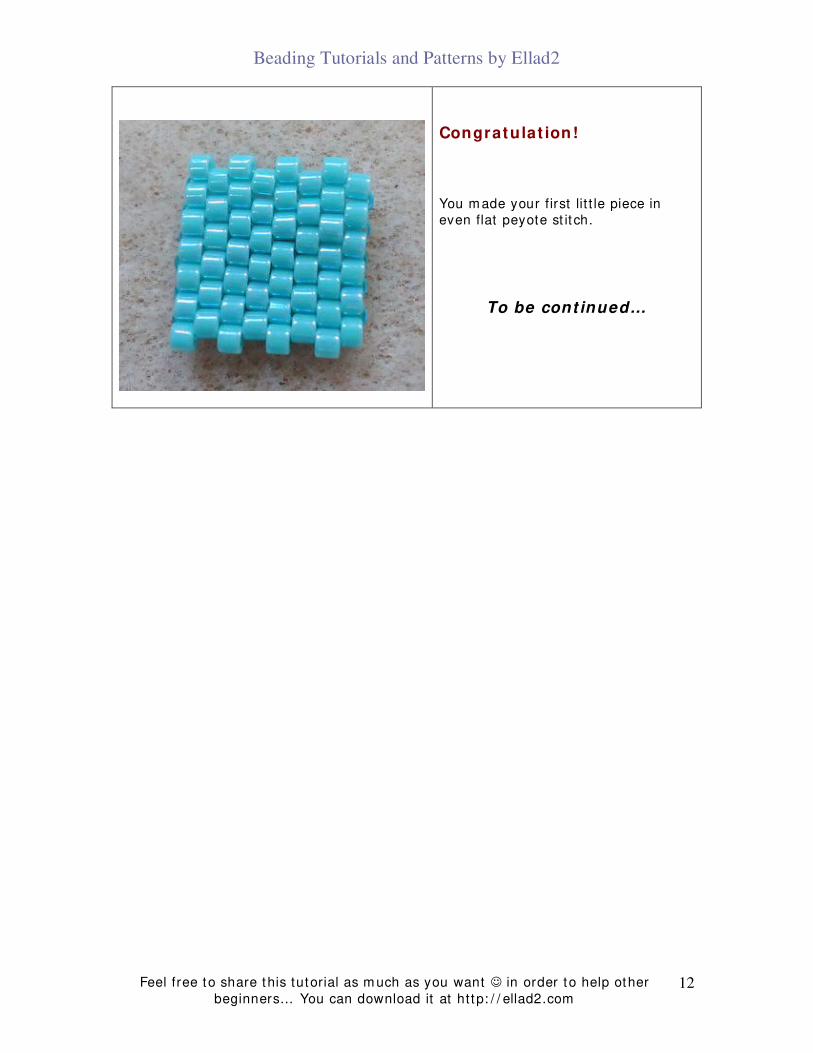
Congratulat ion!
You m ade your first lit t le piece in even flat peyote st it ch.
To be cont inued…