Embed Size (px)
Citation preview
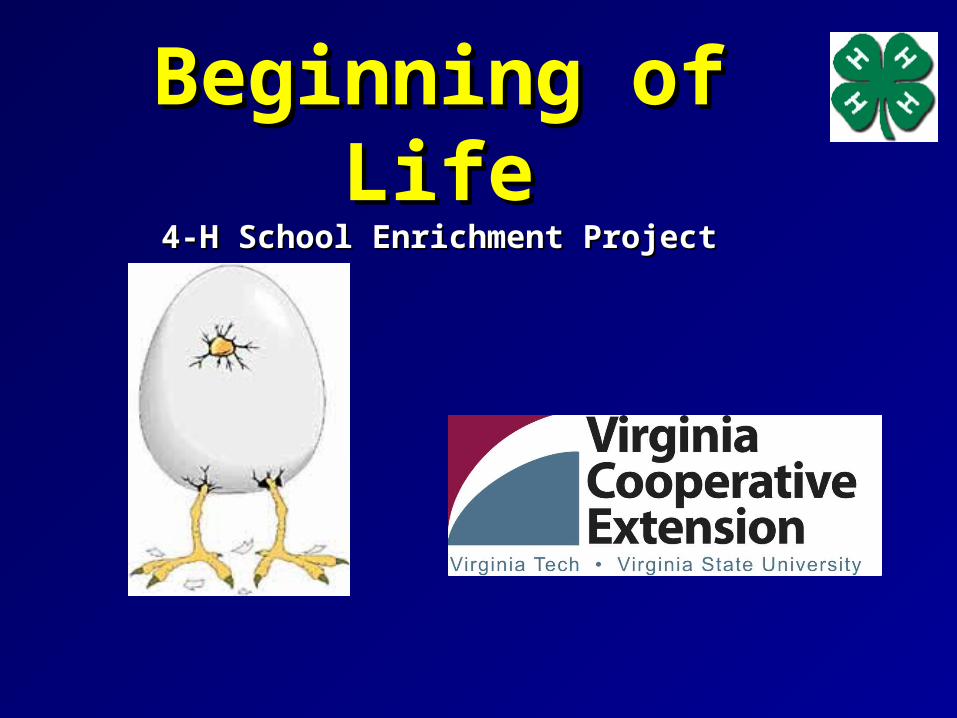
Beginning of LifeBeginning of Life4-H School Enrichment Project4-H School Enrichment Project

About the ProjectAbout the Project
Science Based, Hands-onScience Based, Hands-on
Extension provides educational Extension provides educational resources for the projectresources for the project– Leaders ManualLeaders Manual– Suggested ActivitiesSuggested Activities– Youth Activity sheetsYouth Activity sheets
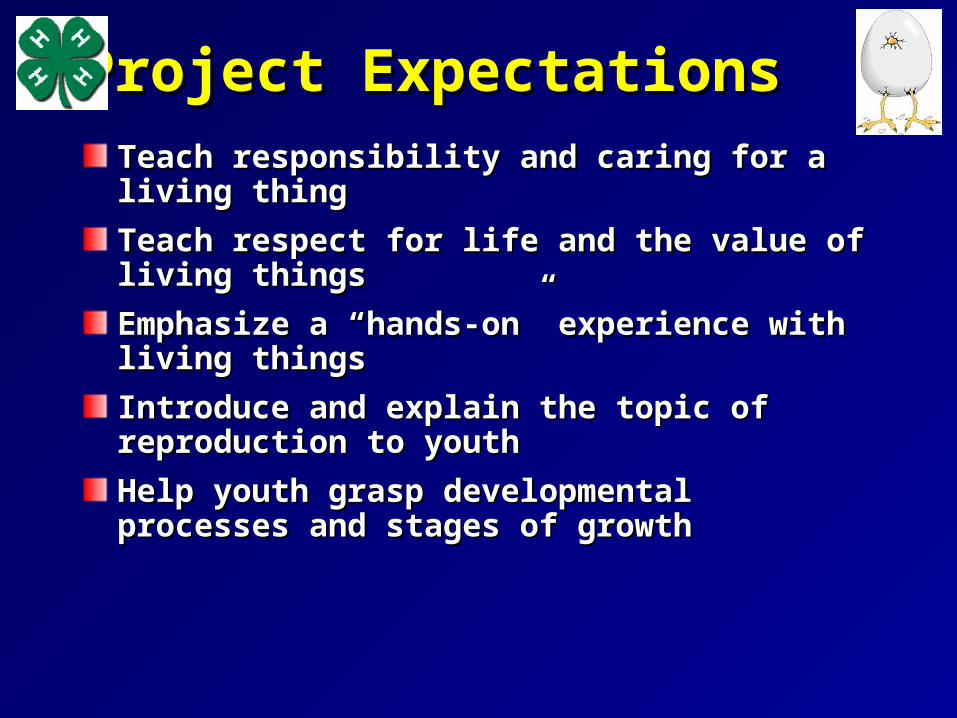
Project ExpectationsProject ExpectationsTeach responsibility and caring for a living thingTeach responsibility and caring for a living thing
Teach respect for life and the value of living Teach respect for life and the value of living thingsthings
Emphasize a “hands-on” experience with living Emphasize a “hands-on” experience with living thingsthings
Introduce and explain the topic of reproduction to Introduce and explain the topic of reproduction to youthyouth
Help youth grasp developmental processes and Help youth grasp developmental processes and stages of growthstages of growth
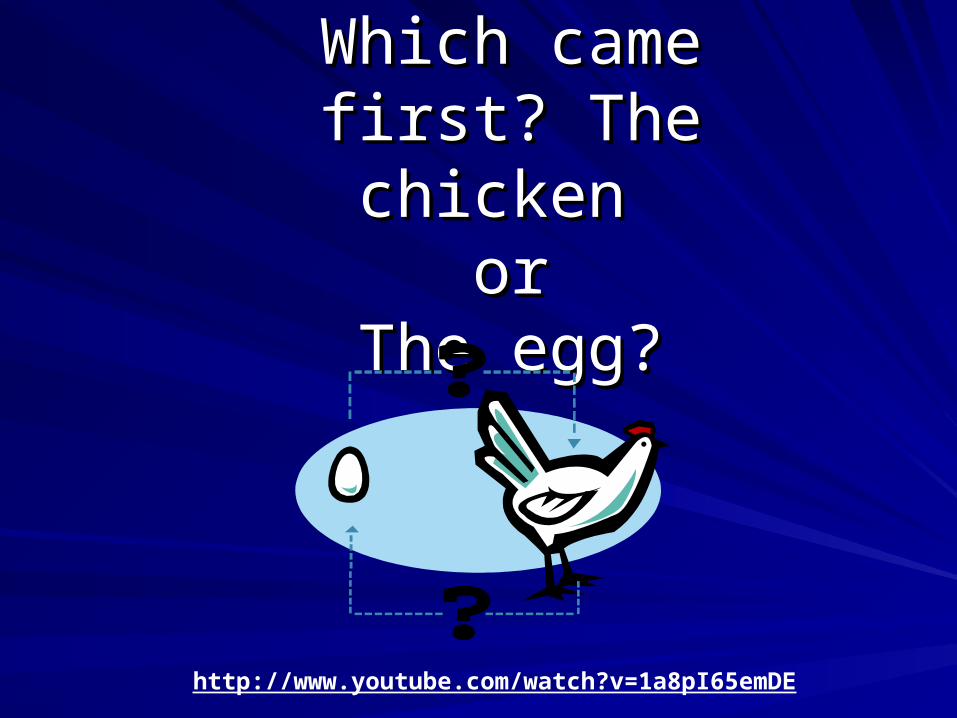
Which came first? Which came first? The chicken The chicken
ororThe egg?The egg?
http://www.youtube.com/watch?v=1a8pI65emDE
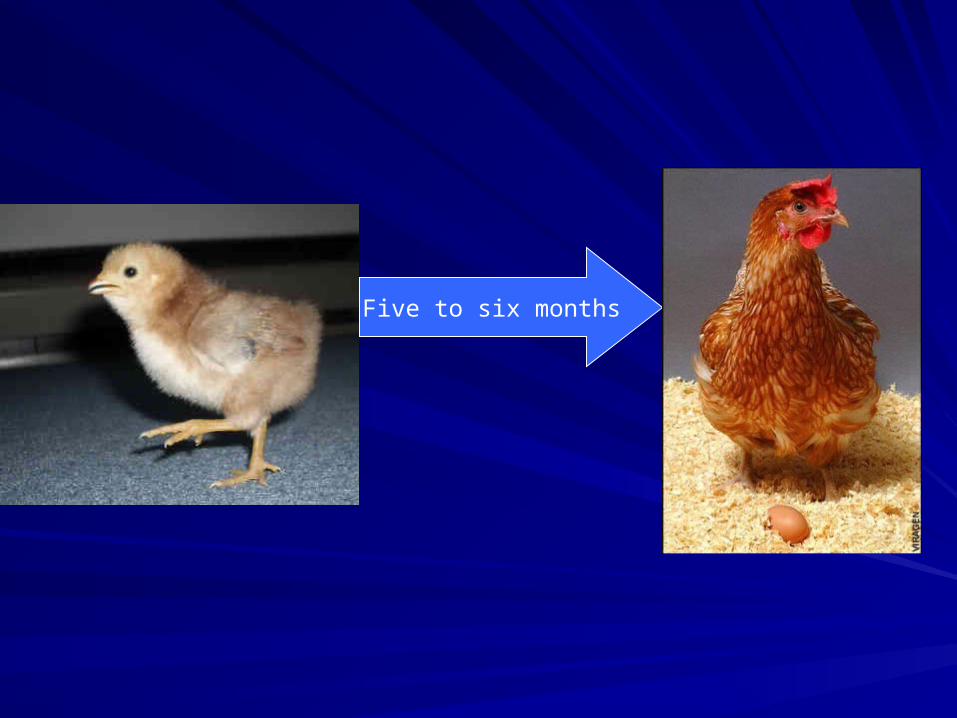
Five to six months
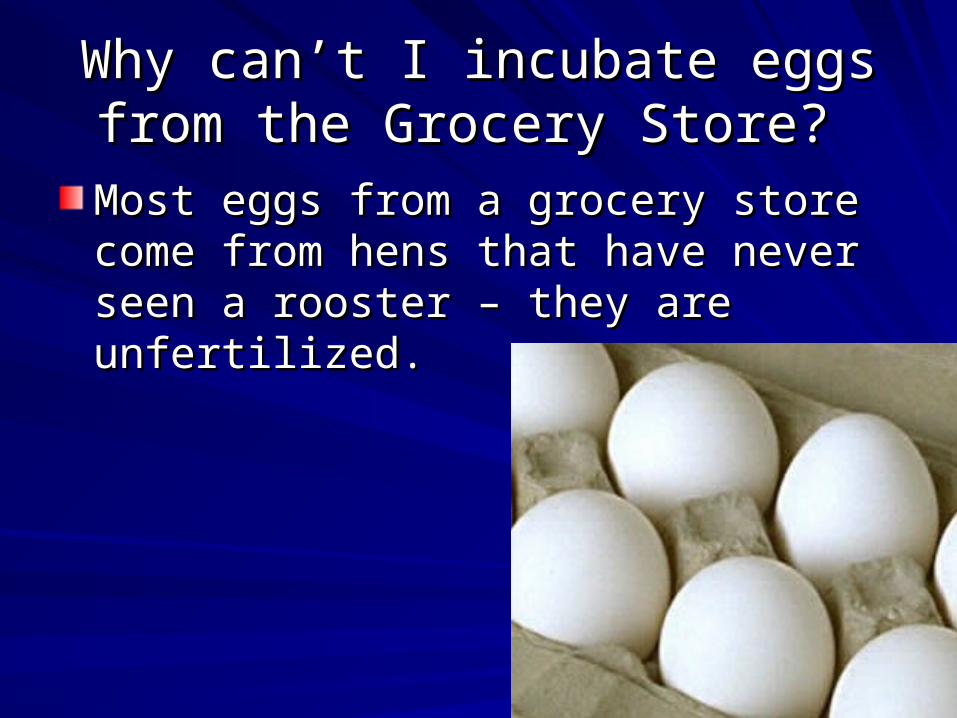
Why can’t I incubate eggs from the Why can’t I incubate eggs from the Grocery Store? Grocery Store?
Most eggs from a grocery store come from Most eggs from a grocery store come from hens that have never seen a rooster – hens that have never seen a rooster – they are unfertilized. they are unfertilized.
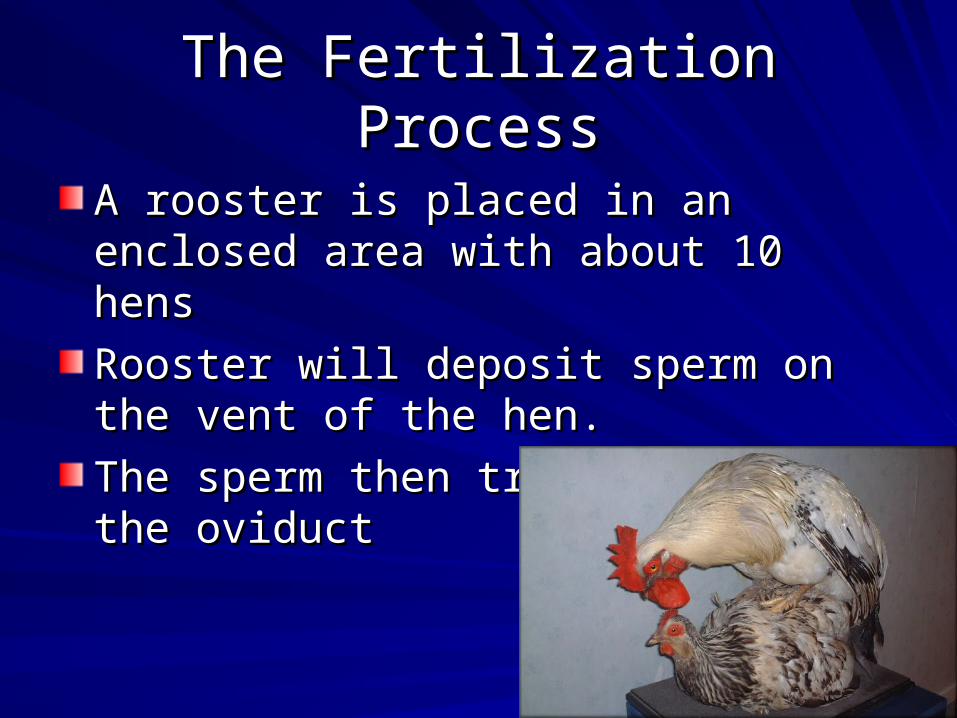
The Fertilization ProcessThe Fertilization Process
A rooster is placed in an enclosed area A rooster is placed in an enclosed area with about 10 henswith about 10 hens
Rooster will deposit sperm on the vent of Rooster will deposit sperm on the vent of the hen. the hen.
The sperm then travels through the The sperm then travels through the oviductoviduct
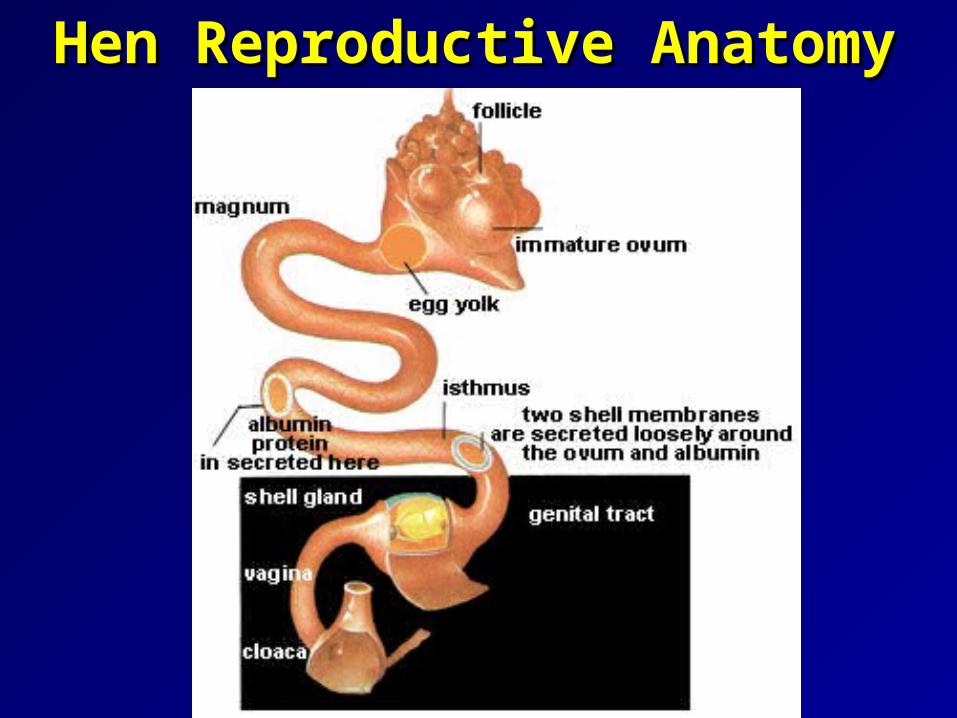
Hen Reproductive AnatomyHen Reproductive Anatomy
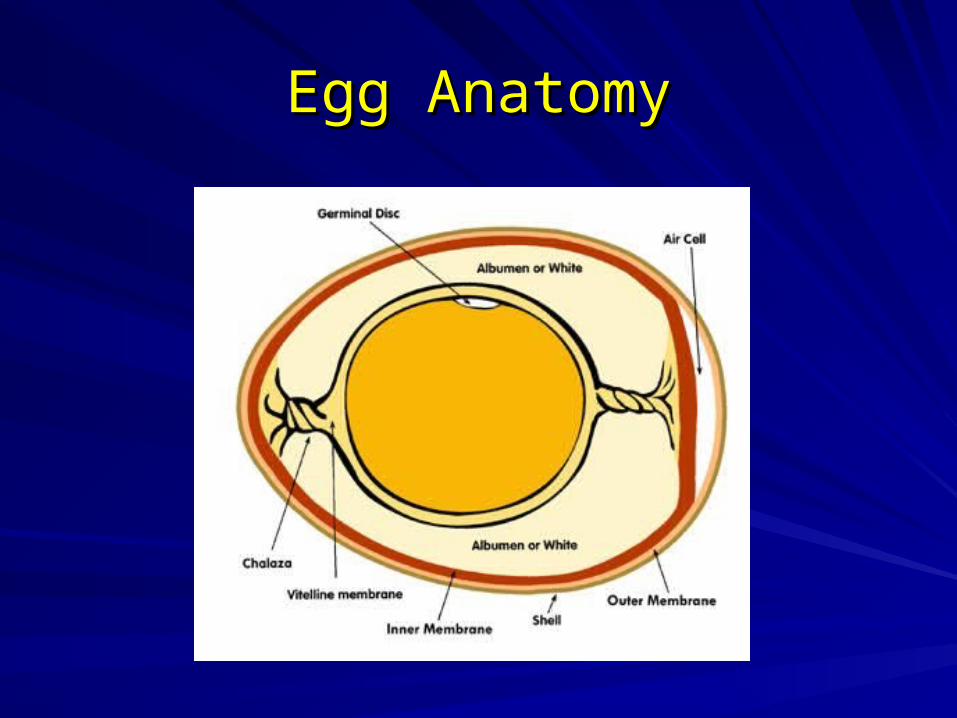
Egg AnatomyEgg Anatomy
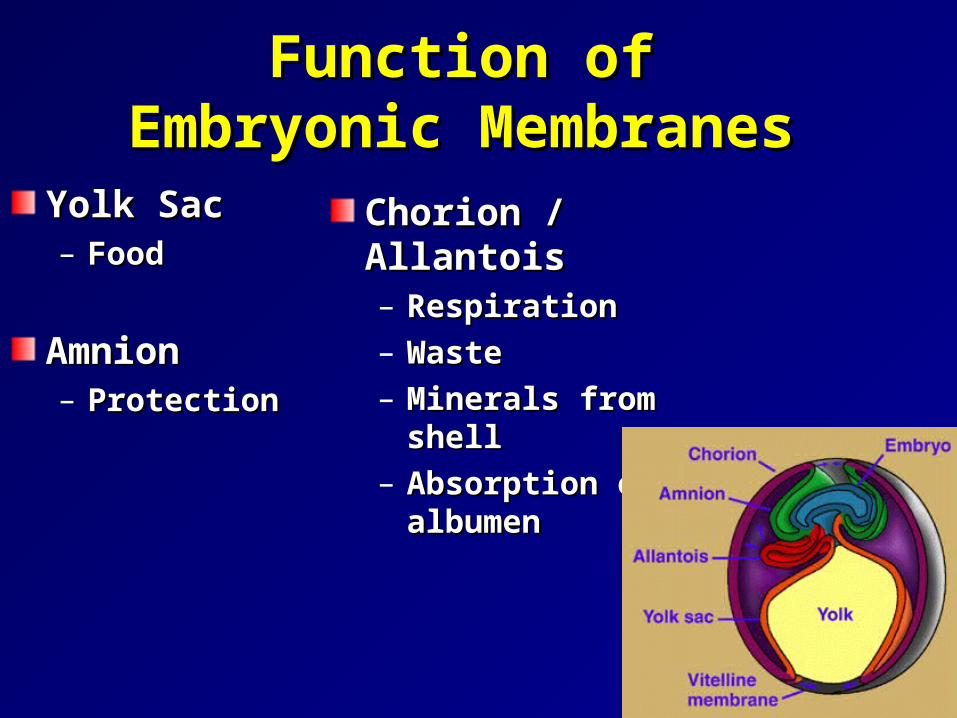
Function of Function of Embryonic MembranesEmbryonic Membranes
Yolk SacYolk Sac– FoodFood
AmnionAmnion– ProtectionProtection
Chorion / AllantoisChorion / Allantois– RespirationRespiration– WasteWaste– Minerals from shellMinerals from shell – Absorption of Absorption of
albumenalbumen

Hens will lay about one egg every other Hens will lay about one egg every other day until they have enough in their clutch day until they have enough in their clutch to start brooding.to start brooding.
The hen’s body temperature is 106 The hen’s body temperature is 106 degrees and when she sits on the clutch, degrees and when she sits on the clutch, she brings the temperature of the eggs up she brings the temperature of the eggs up to 100 degrees.to 100 degrees.
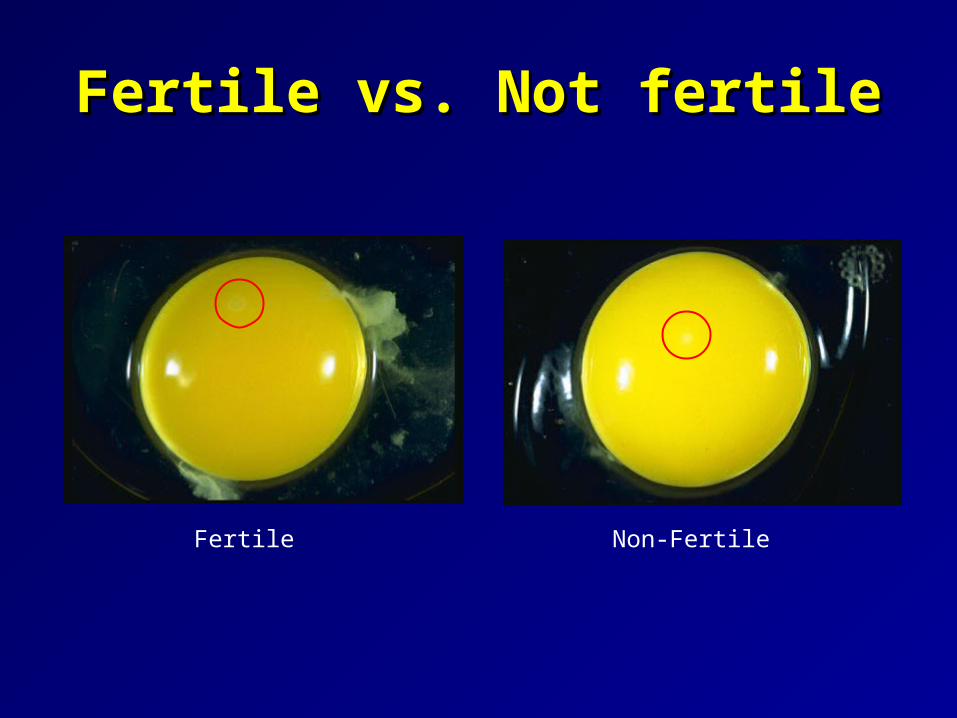
Fertile vs. Not fertileFertile vs. Not fertile
Fertile Non-Fertile
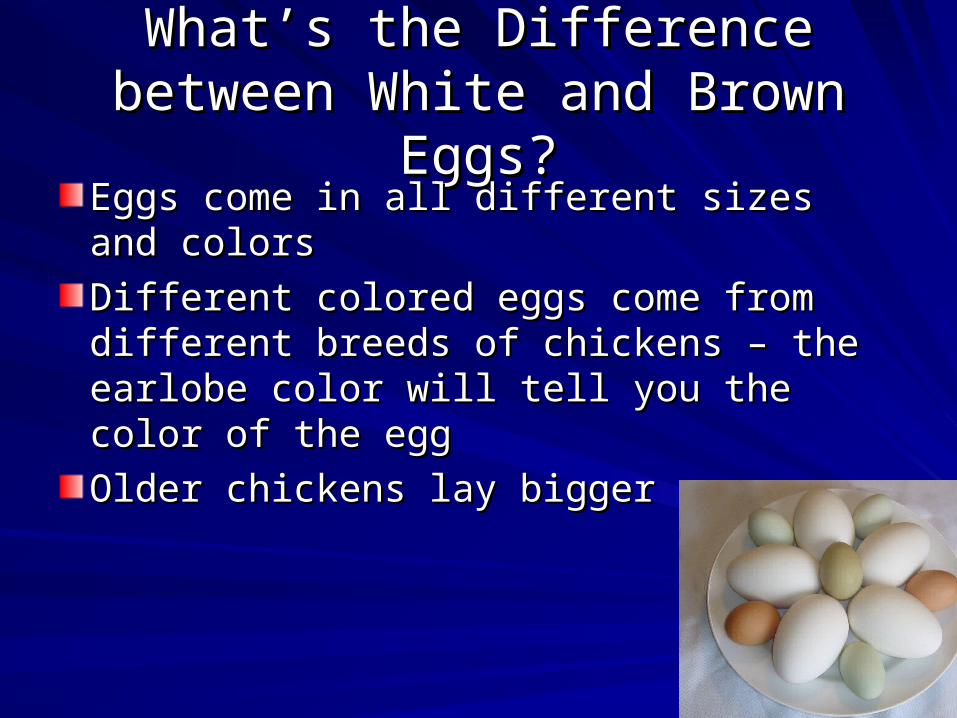
What’s the Difference between What’s the Difference between White and Brown Eggs?White and Brown Eggs?
Eggs come in all different sizes and colorsEggs come in all different sizes and colors
Different colored eggs come from different Different colored eggs come from different breeds of chickens – the earlobe color will breeds of chickens – the earlobe color will tell you the color of the egg tell you the color of the egg
Older chickens lay bigger eggs Older chickens lay bigger eggs
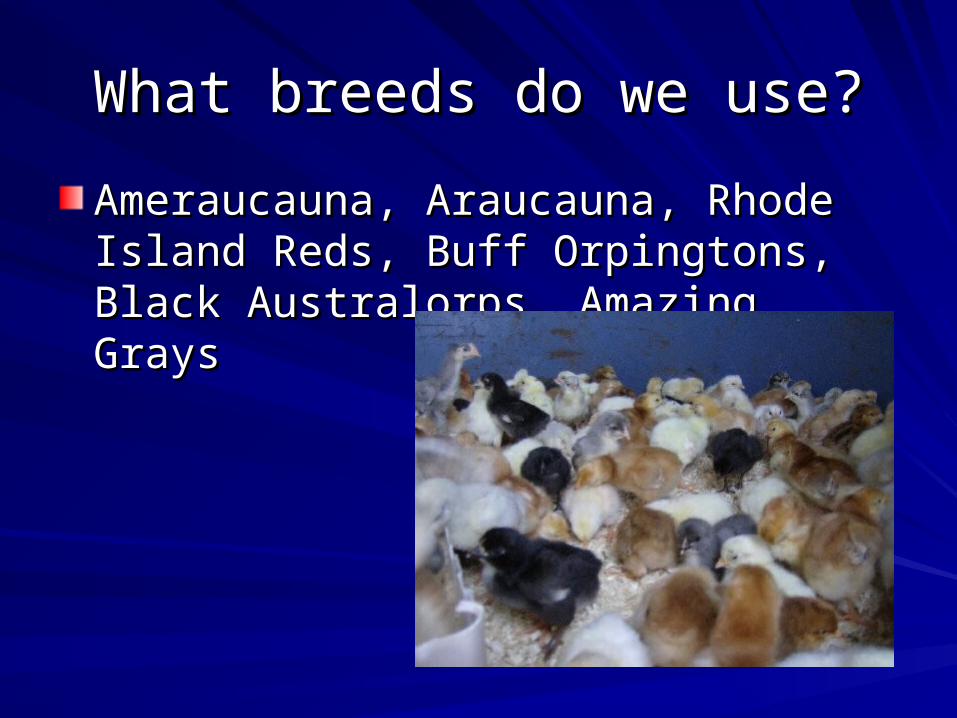
What breeds do we use?What breeds do we use?
Ameraucauna, Araucauna, Rhode Island Ameraucauna, Araucauna, Rhode Island Reds, Buff Orpingtons, Black Australorps, Reds, Buff Orpingtons, Black Australorps, Amazing GraysAmazing Grays

External Chicken AnatomyExternal Chicken Anatomy
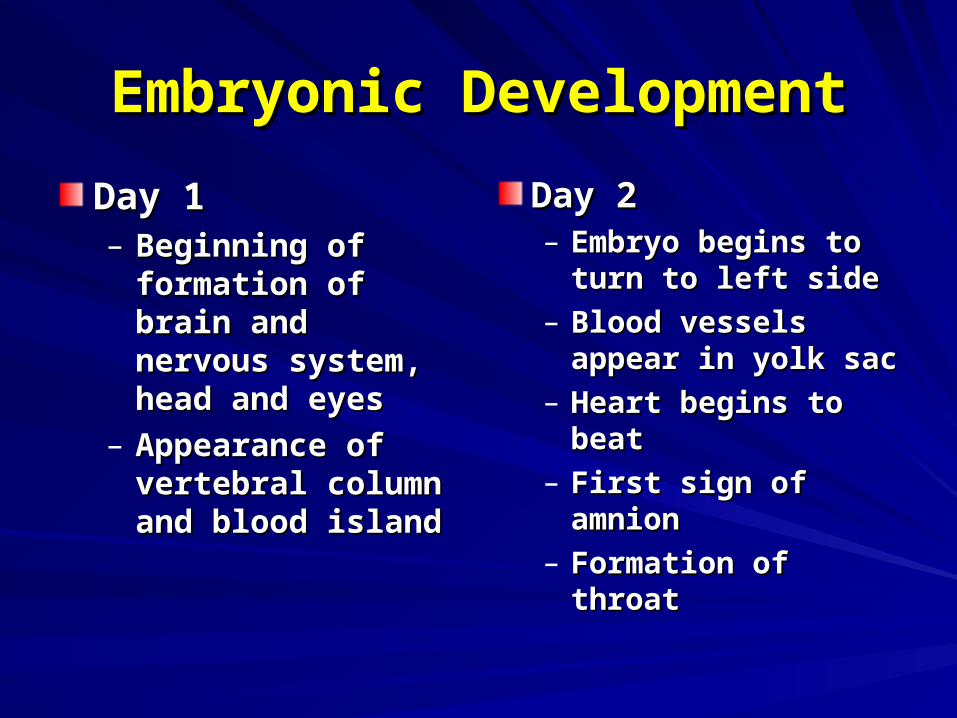
Embryonic DevelopmentEmbryonic Development
Day 1Day 1– Beginning of Beginning of
formation of brain formation of brain and nervous system, and nervous system, head and eyeshead and eyes
– Appearance of Appearance of vertebral column and vertebral column and blood islandblood island
Day 2Day 2– Embryo begins to Embryo begins to
turn to left sideturn to left side– Blood vessels Blood vessels
appear in yolk sacappear in yolk sac– Heart begins to beatHeart begins to beat– First sign of amnionFirst sign of amnion– Formation of throatFormation of throat
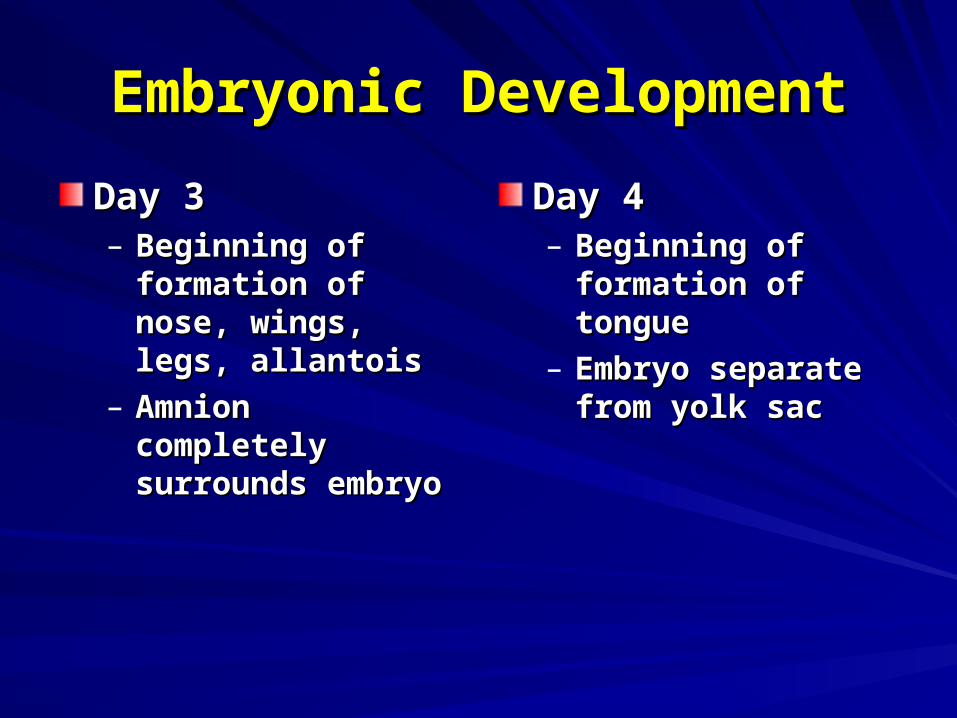
Embryonic DevelopmentEmbryonic Development
Day 3Day 3– Beginning of Beginning of
formation of nose, formation of nose, wings, legs, allantoiswings, legs, allantois
– Amnion completely Amnion completely surrounds embryosurrounds embryo
Day 4Day 4– Beginning of Beginning of
formation of tongueformation of tongue– Embryo separate Embryo separate
from yolk sacfrom yolk sac
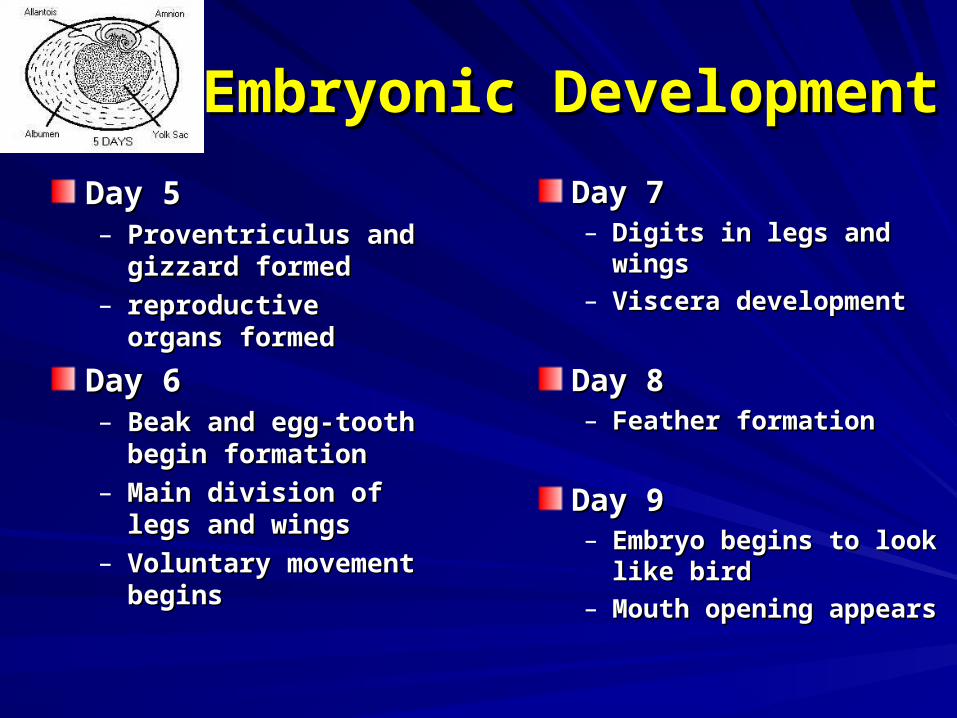
Embryonic DevelopmentEmbryonic Development
Day 5Day 5– Proventriculus and Proventriculus and
gizzard formedgizzard formed– reproductive organs reproductive organs
formedformed
Day 6Day 6– Beak and egg-tooth Beak and egg-tooth
begin formationbegin formation– Main division of legs Main division of legs
and wingsand wings– Voluntary movement Voluntary movement
beginsbegins
Day 7Day 7– Digits in legs and wingsDigits in legs and wings– Viscera developmentViscera development
Day 8Day 8– Feather formationFeather formation
Day 9Day 9– Embryo begins to look Embryo begins to look
like birdlike bird– Mouth opening appearsMouth opening appears
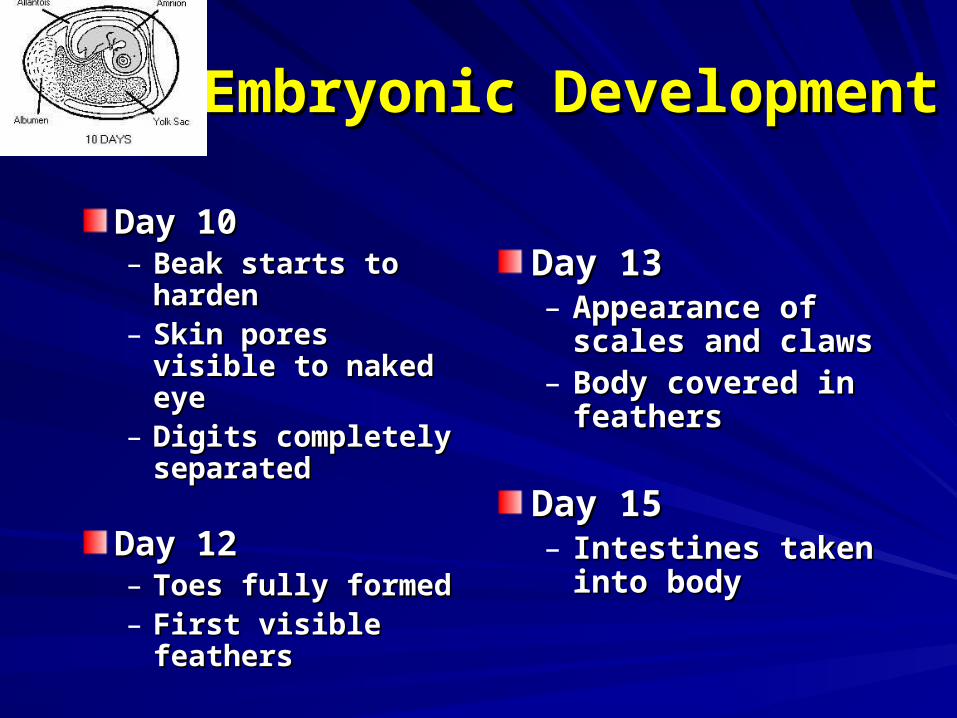
Embryonic DevelopmentEmbryonic Development
Day 10Day 10– Beak starts to Beak starts to
hardenharden– Skin pores visible Skin pores visible
to naked eyeto naked eye– Digits completely Digits completely
separatedseparated
Day 12Day 12– Toes fully formedToes fully formed– First visible First visible
feathersfeathers
Day 13Day 13– Appearance of Appearance of
scales and clawsscales and claws– Body covered in Body covered in
feathersfeathers
Day 15Day 15– Intestines taken Intestines taken
into bodyinto body
Embryonic DevelopmentEmbryonic Development
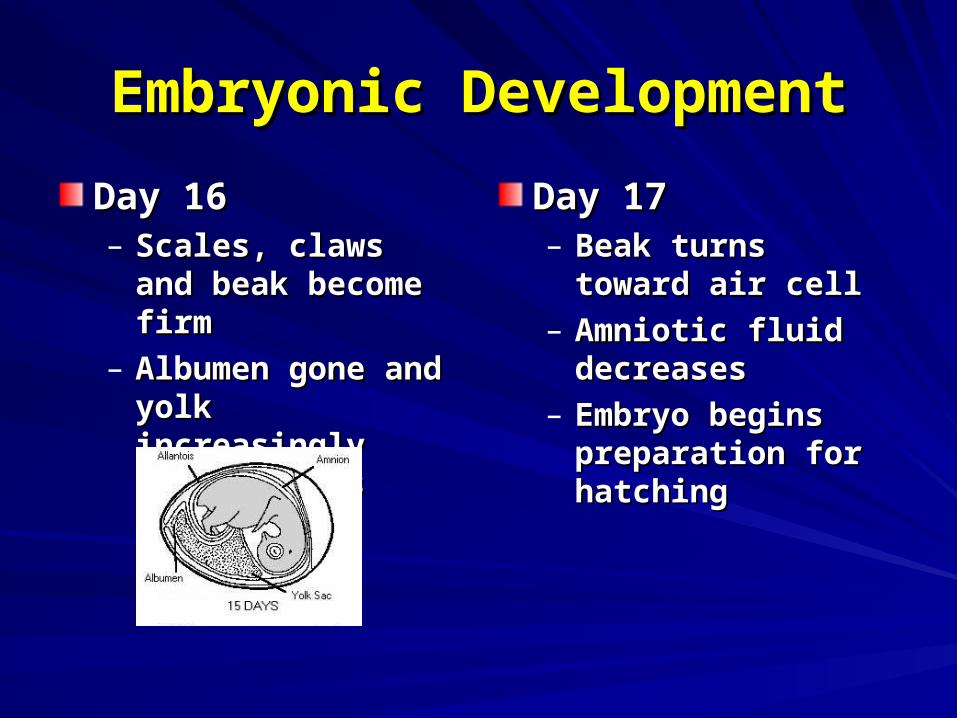
Day 16Day 16– Scales, claws and Scales, claws and
beak become firmbeak become firm– Albumen gone and Albumen gone and
yolk increasingly yolk increasingly important as nutrientimportant as nutrient
Day 17Day 17– Beak turns toward Beak turns toward
air cellair cell– Amniotic fluid Amniotic fluid
decreasesdecreases– Embryo begins Embryo begins
preparation for preparation for hatchinghatching
Embryonic DevelopmentEmbryonic Development
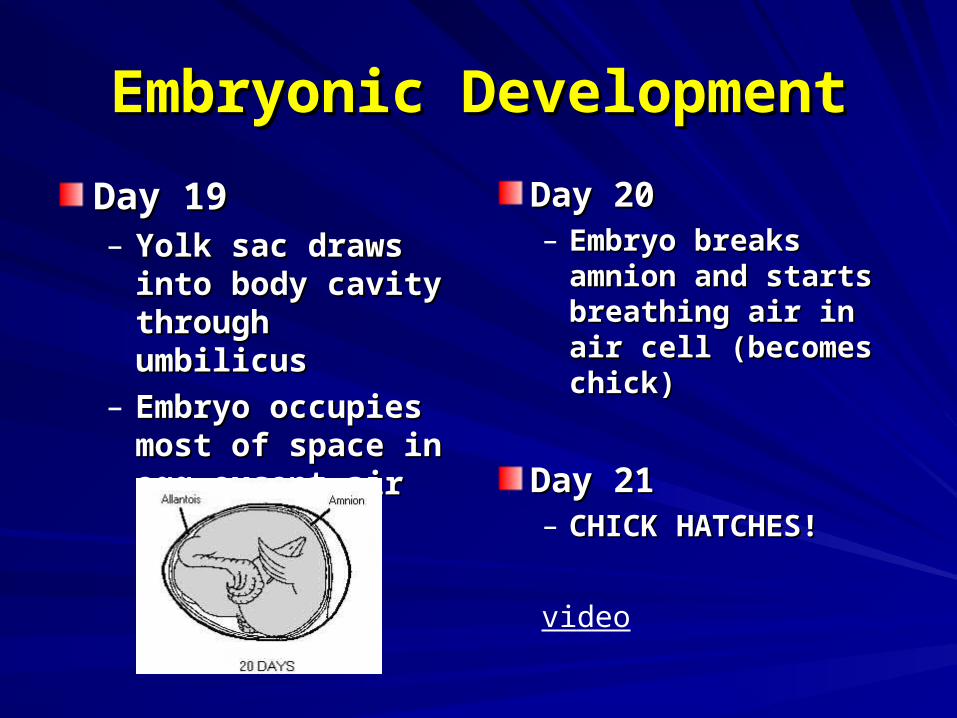
Day 19Day 19– Yolk sac draws into Yolk sac draws into
body cavity through body cavity through umbilicusumbilicus
– Embryo occupies Embryo occupies most of space in egg most of space in egg except air cellexcept air cell
Day 20Day 20– Embryo breaks Embryo breaks
amnion and starts amnion and starts breathing air in air breathing air in air cell (becomes chick)cell (becomes chick)
Day 21Day 21– CHICK HATCHES!CHICK HATCHES!
video
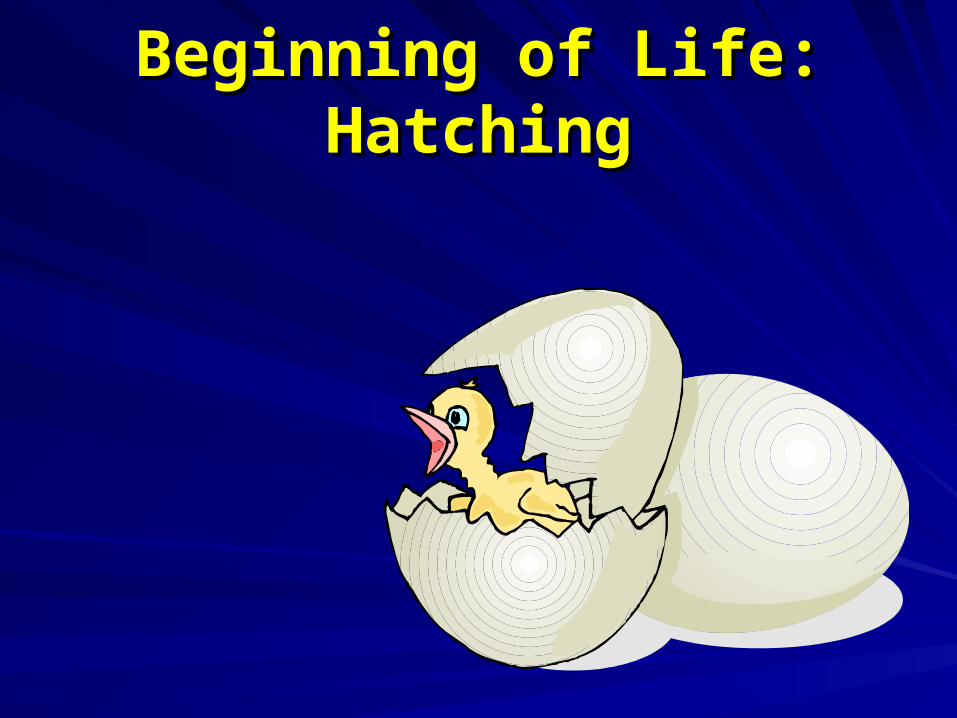
Beginning of Life: HatchingBeginning of Life: Hatching
How do I SuccessfullyHow do I Successfully Hatch Eggs? Hatch Eggs?Proper Preparation Proper Preparation and Planningand Planning
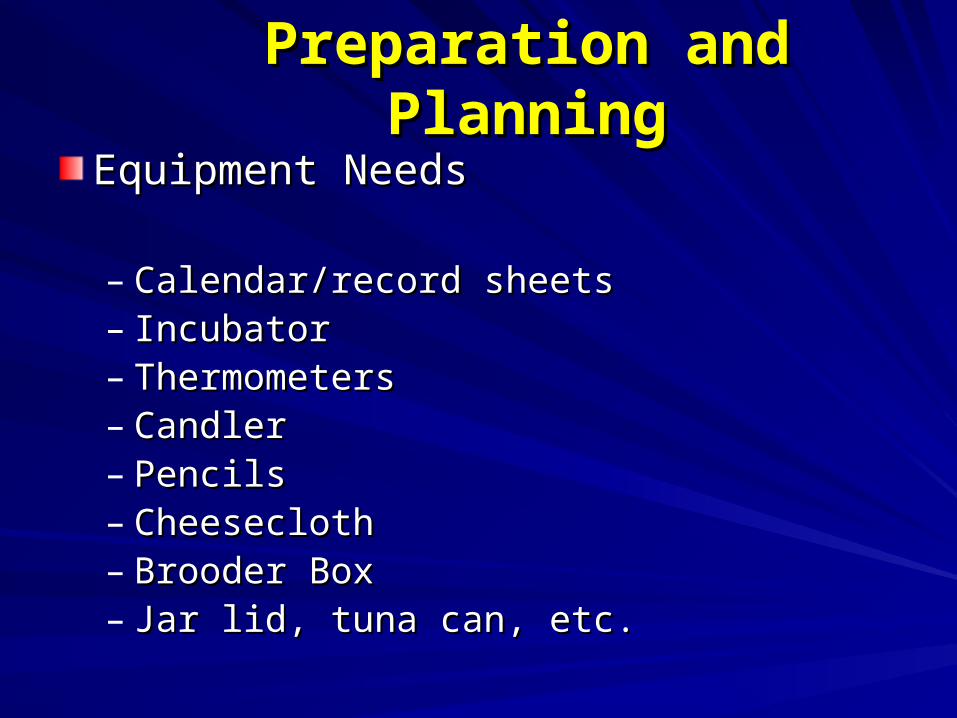
Preparation and PlanningPreparation and Planning
Equipment NeedsEquipment Needs
– Calendar/record sheetsCalendar/record sheets– IncubatorIncubator– ThermometersThermometers– CandlerCandler– PencilsPencils– CheeseclothCheesecloth– Brooder BoxBrooder Box– Jar lid, tuna can, etc.Jar lid, tuna can, etc.
Lesson 1
Lessons 2 and 3
Lesson 4
Lessons 5 and 6
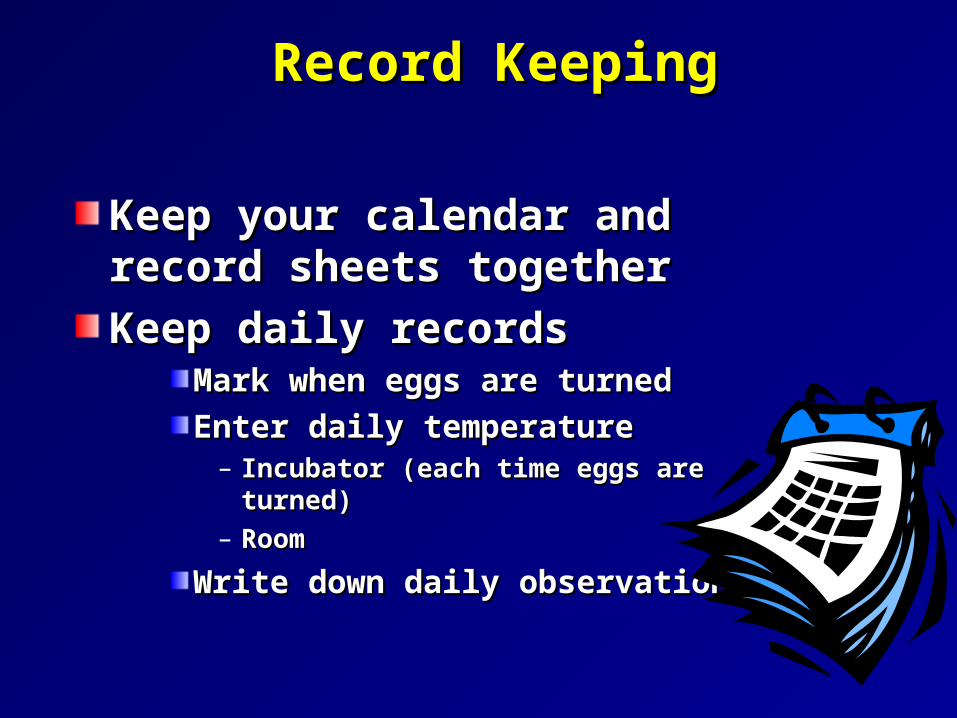
Record KeepingRecord Keeping
Keep your calendar and record Keep your calendar and record sheets togethersheets together
Keep daily recordsKeep daily recordsMark when eggs are turnedMark when eggs are turned
Enter daily temperatureEnter daily temperature– Incubator (each time eggs are turned)Incubator (each time eggs are turned)– RoomRoom
Write down daily observationsWrite down daily observations
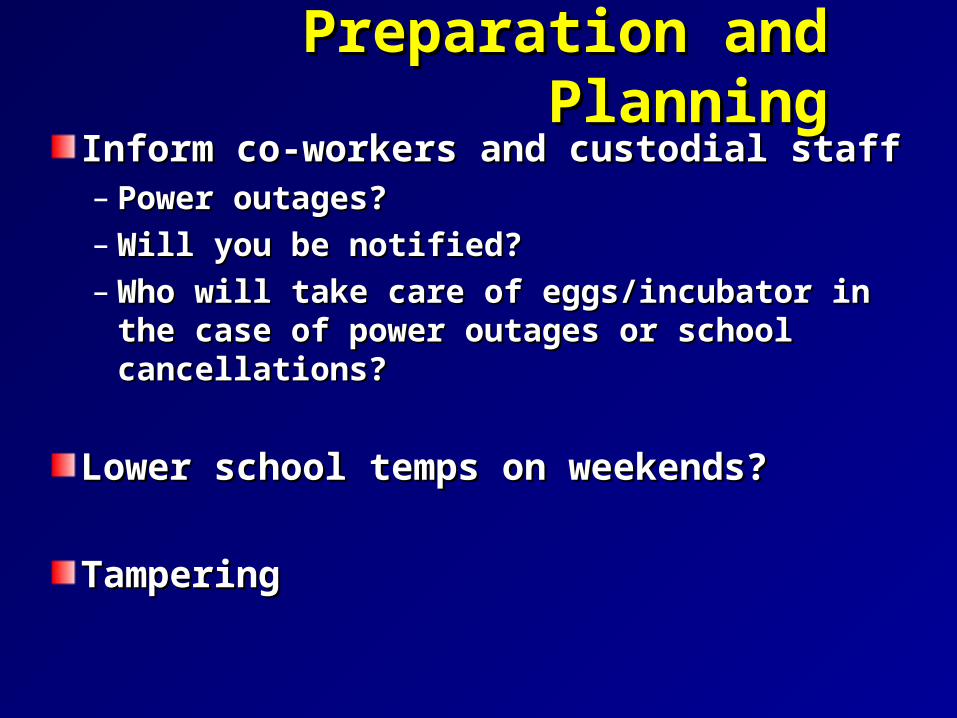
Preparation and PlanningPreparation and PlanningInform co-workers and custodial staffInform co-workers and custodial staff– Power outages?Power outages?– Will you be notified?Will you be notified?– Who will take care of eggs/incubator in the Who will take care of eggs/incubator in the
case of power outages or school case of power outages or school cancellations?cancellations?
Lower school temps on weekends?Lower school temps on weekends?
TamperingTampering
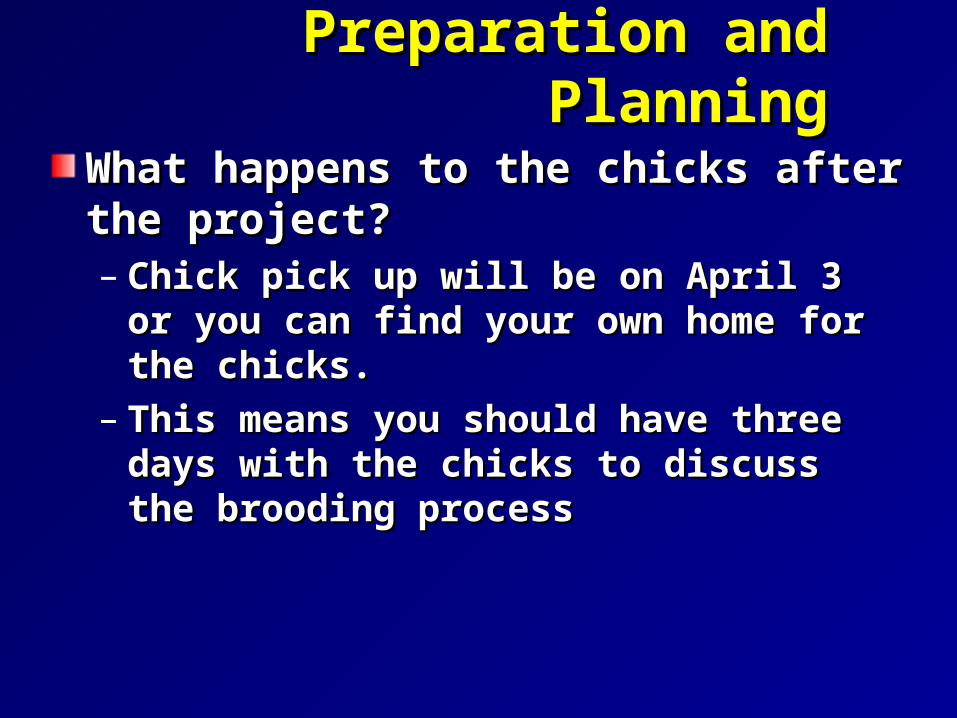
Preparation and PlanningPreparation and Planning
What happens to the chicks after the What happens to the chicks after the project?project?– Chick pick up will be on April 3 or you can Chick pick up will be on April 3 or you can
find your own home for the chicks. find your own home for the chicks. – This means you should have three days This means you should have three days
with the chicks to discuss the brooding with the chicks to discuss the brooding processprocess
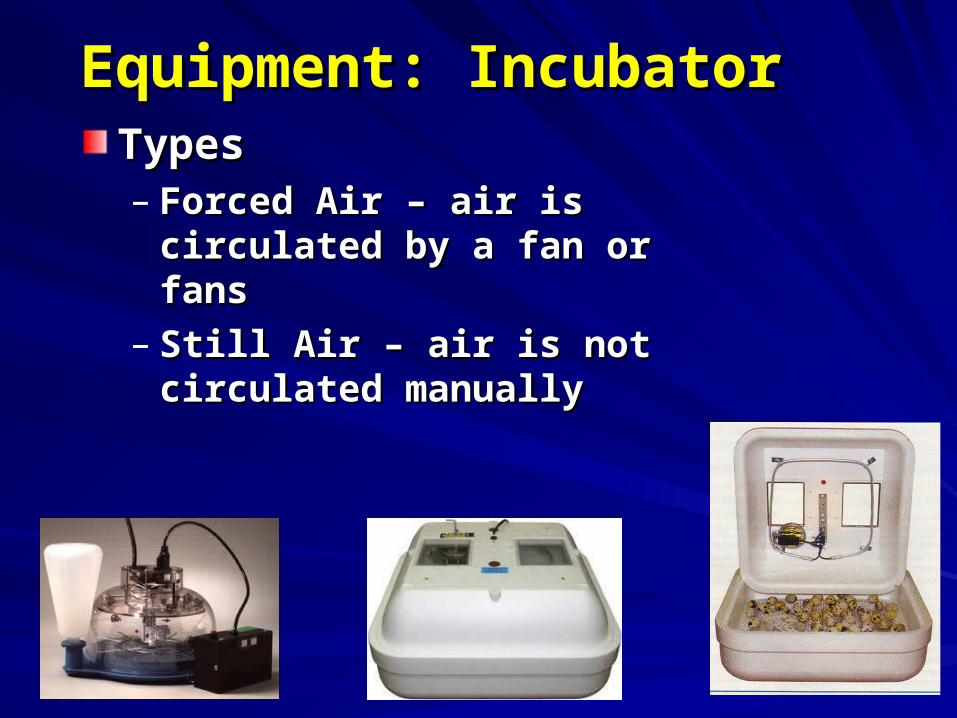
Equipment: IncubatorEquipment: IncubatorTypesTypes– Forced Air – air is circulated Forced Air – air is circulated
by a fan or fansby a fan or fans– Still Air – air is not circulated Still Air – air is not circulated
manuallymanually
Equipment: IncubatorEquipment: IncubatorMake sure has stabilized for at least 24 hours at the Make sure has stabilized for at least 24 hours at the desired temperature before setting eggsdesired temperature before setting eggs
PlacementPlacement– Avoid drafts, direct sunlight, heat & AC outlets Avoid drafts, direct sunlight, heat & AC outlets – Set in room that stays above 65°F (70-80Set in room that stays above 65°F (70-80°°F)F)– Make sure electrical outlet will be “on” 24 hours/dayMake sure electrical outlet will be “on” 24 hours/day– On sturdy, level surfaceOn sturdy, level surface– 6 inches away from edge of surface6 inches away from edge of surface
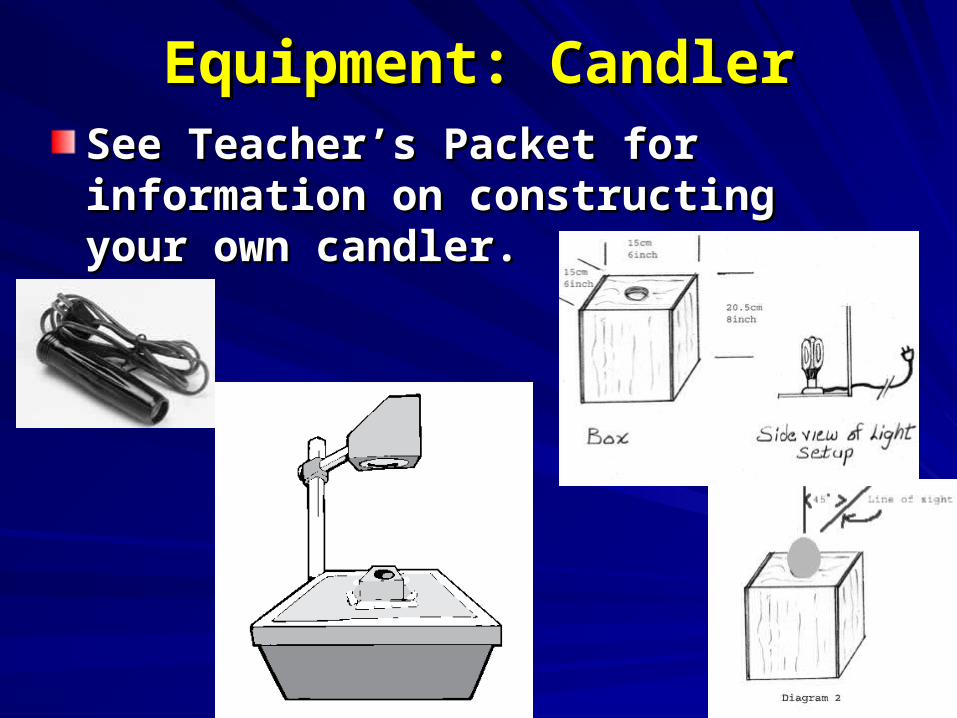
Equipment: CandlerEquipment: CandlerSee Teacher’s Packet for information See Teacher’s Packet for information on constructing your own candler. on constructing your own candler.
How do I SuccessfullyHow do I Successfully Hatch Eggs? Hatch Eggs?Proper Preparation Proper Preparation and Planningand Planning
Quality Fertile EggsQuality Fertile Eggs
Start Up DayStart Up Day
Start Up DayStart Up Day
Have the incubator ready to goHave the incubator ready to go
Prepare eggs for incubatingPrepare eggs for incubating– Allow a couple of hours for eggs to come Allow a couple of hours for eggs to come
to room temperature – approx. 2 hrsto room temperature – approx. 2 hrs– Candle eggs and discard any:Candle eggs and discard any:
Cracked eggsCracked eggs
Double-yolked eggsDouble-yolked eggs
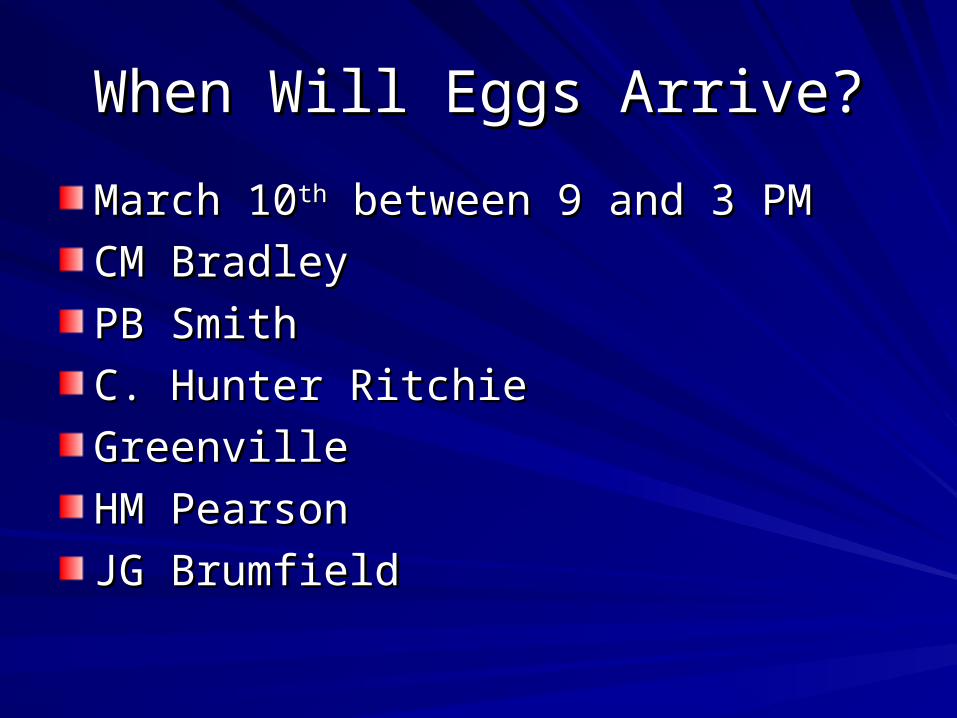
When Will Eggs Arrive?When Will Eggs Arrive?
March 10March 10thth between 9 and 3 PM between 9 and 3 PM
CM BradleyCM Bradley
PB SmithPB Smith
C. Hunter RitchieC. Hunter Ritchie
GreenvilleGreenville
HM PearsonHM Pearson
JG BrumfieldJG Brumfield
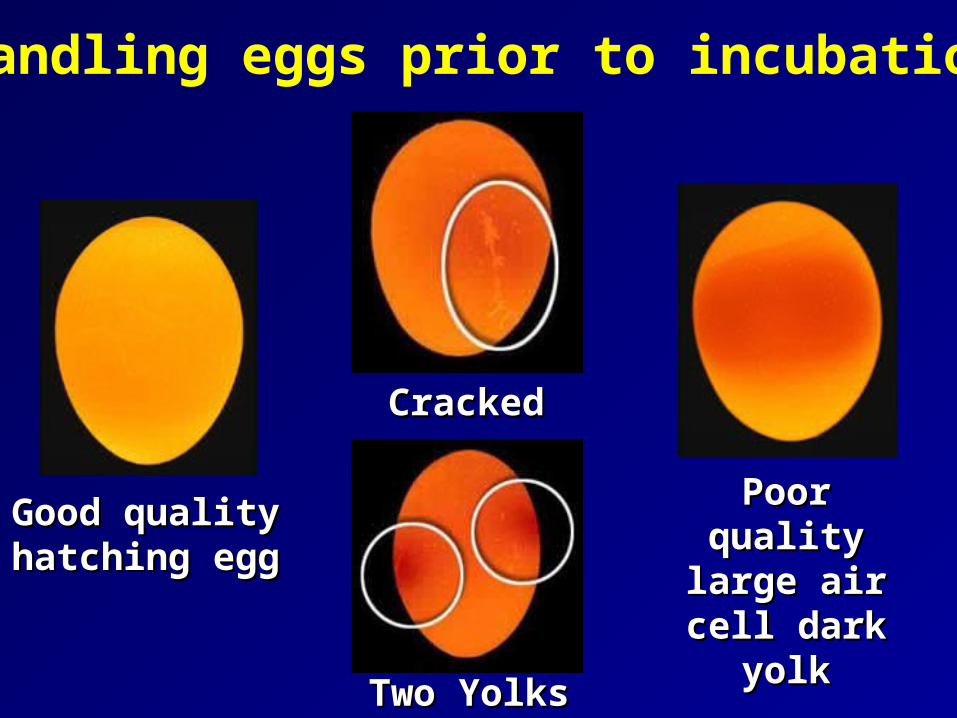
Candling eggs prior to incubation
Good qualityGood qualityhatching egghatching egg
Poor qualityPoor qualitylarge air cell large air cell
dark yolkdark yolk
CrackedCracked
Two YolksTwo Yolks
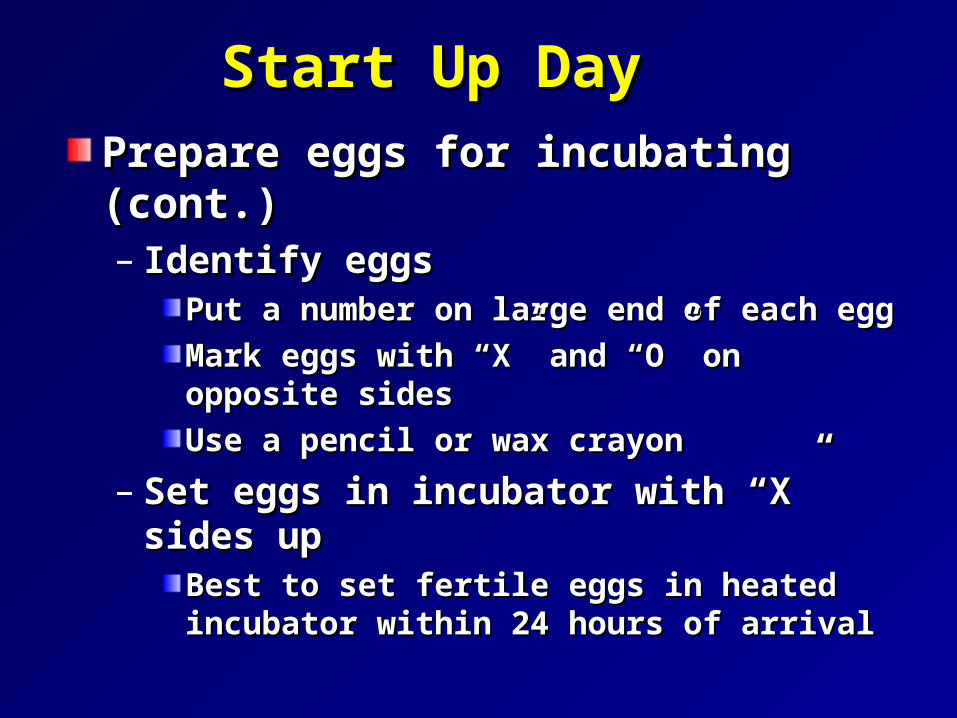
Start Up DayStart Up Day
Prepare eggs for incubating (cont.)Prepare eggs for incubating (cont.)– Identify eggsIdentify eggs
Put a number on large end of each eggPut a number on large end of each egg
Mark eggs with “X” and “O” on opposite sidesMark eggs with “X” and “O” on opposite sides
Use a pencil or wax crayonUse a pencil or wax crayon
– Set eggs in incubator with “X” sides upSet eggs in incubator with “X” sides upBest to set fertile eggs in heated incubator Best to set fertile eggs in heated incubator within 24 hours of arrivalwithin 24 hours of arrival
How do I SuccessfullyHow do I Successfully Hatch Eggs? Hatch Eggs?Proper Preparation Proper Preparation and Planningand Planning
Start Up DayStart Up Day
Good Incubation Good Incubation ManagementManagement
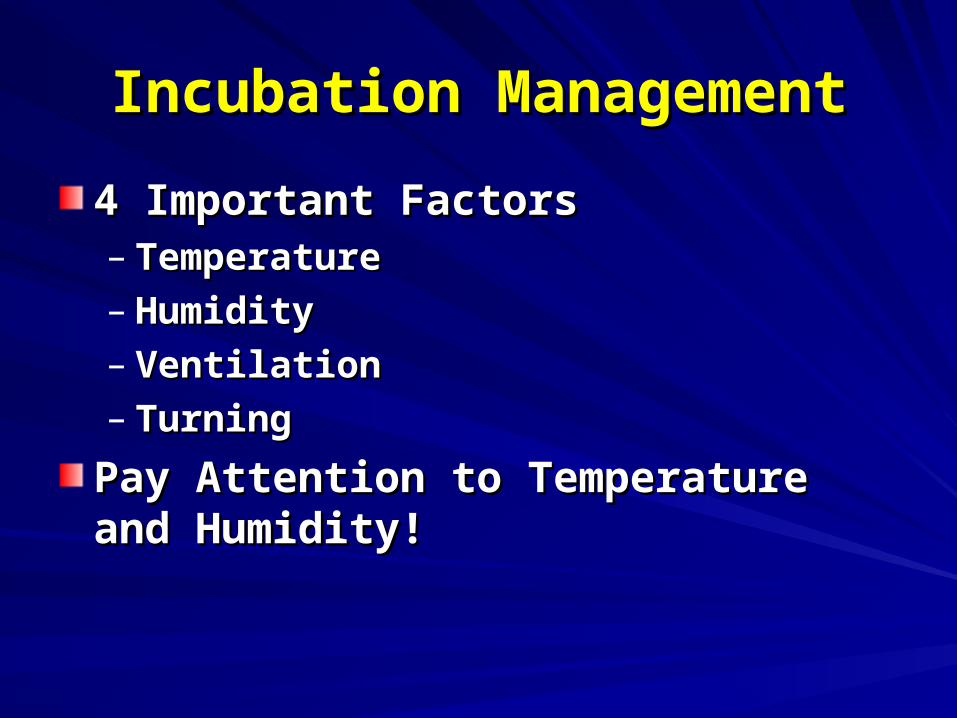
Incubation ManagementIncubation Management
4 Important Factors4 Important Factors– TemperatureTemperature– HumidityHumidity– VentilationVentilation– TurningTurning
Pay Attention to Temperature and Pay Attention to Temperature and Humidity!Humidity!

TemperatureTemperatureThermometerThermometer– Same height as top of eggsSame height as top of eggs– Keep away from the heat sourceKeep away from the heat source– Two makes for a more accurate readingTwo makes for a more accurate reading
Varies by incubator type and turning Varies by incubator type and turning techniquetechnique– Forced AirForced Air
Manual: 99.5 - 100.5°FManual: 99.5 - 100.5°F
– Still Air Still Air Manual: 100.5 - 101.5°FManual: 100.5 - 101.5°F
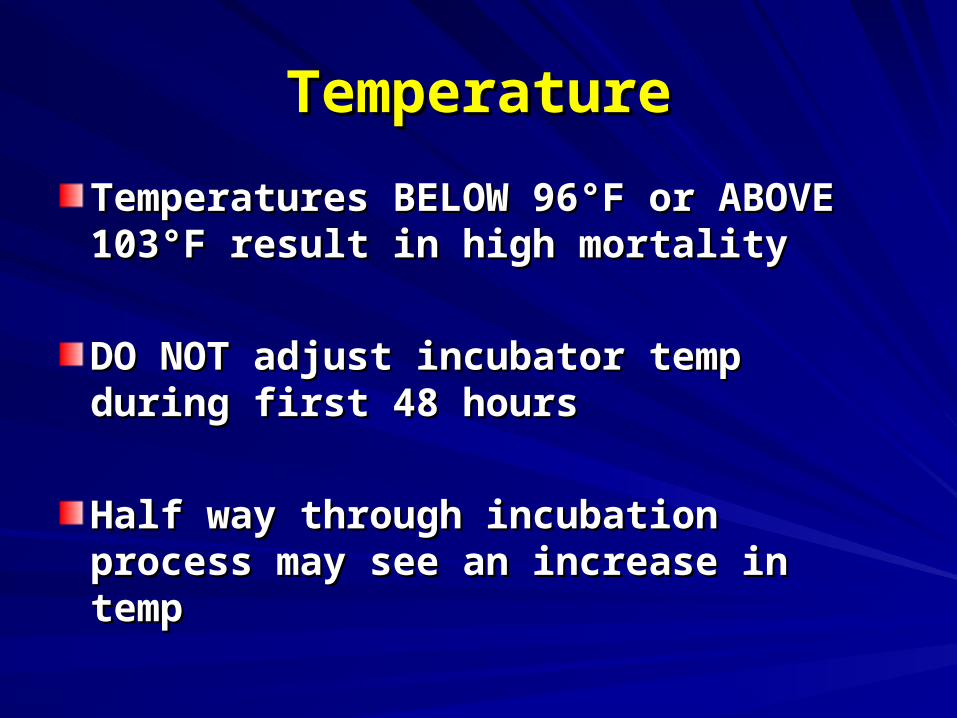
TemperatureTemperature
Temperatures BELOW 96°F or ABOVE Temperatures BELOW 96°F or ABOVE 103°F result in high mortality103°F result in high mortality
DO NOT adjust incubator temp during DO NOT adjust incubator temp during first 48 hoursfirst 48 hours
Half way through incubation process Half way through incubation process may see an increase in tempmay see an increase in temp

Humidity Humidity
Proper humidity is important for chick Proper humidity is important for chick healthhealth– Prevents sticking to shellPrevents sticking to shell– Maintains amnion fluidMaintains amnion fluid– Provides for free embryo exerciseProvides for free embryo exercise– Prevents crippled chicksPrevents crippled chicks
Determine humidity using a wet-bulb Determine humidity using a wet-bulb thermometerthermometer– Wet-bulb and dry-bulb thermometers at same Wet-bulb and dry-bulb thermometers at same
temp = 100% humiditytemp = 100% humidity
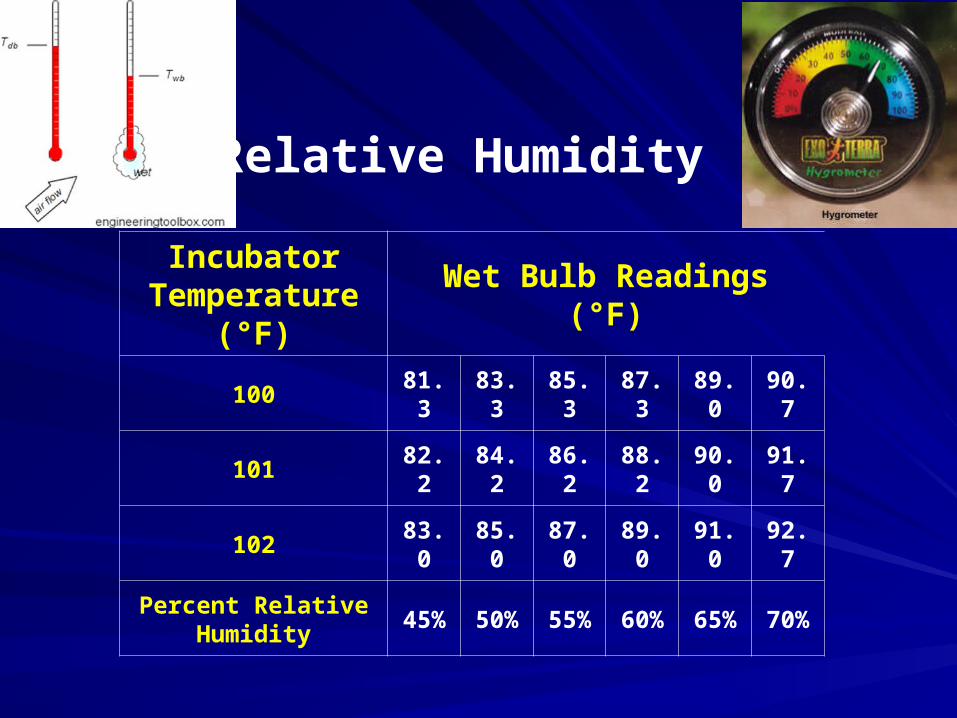
Relative Humidity
Incubator Temperature (°F)
Wet Bulb Readings (°F)
100 81.3 83.3 85.3 87.3 89.0 90.7
101 82.2 84.2 86.2 88.2 90.0 91.7
102 83.0 85.0 87.0 89.0 91.0 92.7
Percent Relative Humidity
45% 50% 55% 60% 65% 70%
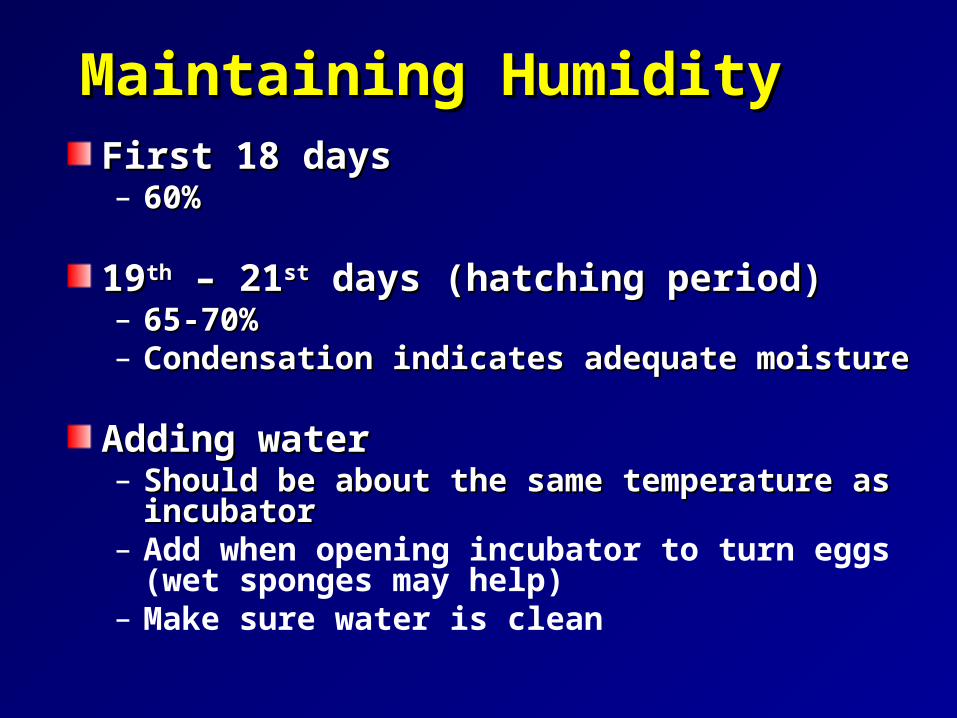
Maintaining HumidityMaintaining HumidityFirst 18 daysFirst 18 days– 60% 60%
1919thth – 21 – 21stst days (hatching period) days (hatching period)– 65-70%65-70%– Condensation indicates adequate moistureCondensation indicates adequate moisture
Adding waterAdding water– Should be about the same temperature as Should be about the same temperature as
incubatorincubator– Add when opening incubator to turn eggs (wet
sponges may help)– Make sure water is clean
VentilationVentilation
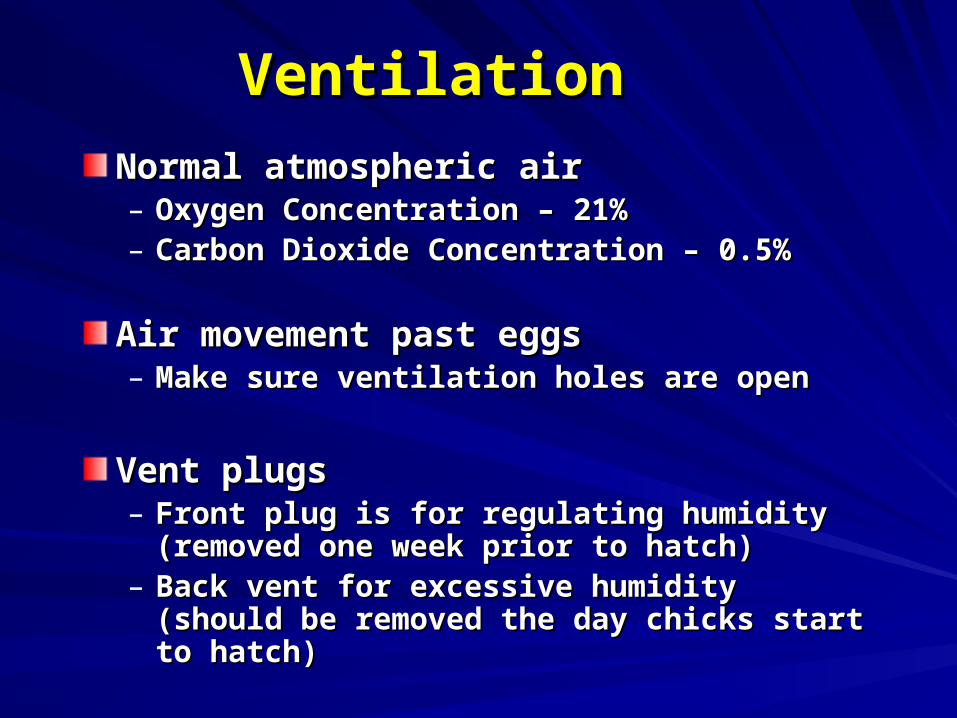
Normal atmospheric airNormal atmospheric air– Oxygen Concentration – 21%Oxygen Concentration – 21%– Carbon Dioxide Concentration – 0.5%Carbon Dioxide Concentration – 0.5%
Air movement past eggs Air movement past eggs – Make sure ventilation holes are openMake sure ventilation holes are open
Vent plugsVent plugs– Front plug is for regulating humidity (removed Front plug is for regulating humidity (removed
one week prior to hatch)one week prior to hatch)– Back vent for excessive humidity (should be Back vent for excessive humidity (should be
removed the day chicks start to hatch)removed the day chicks start to hatch)
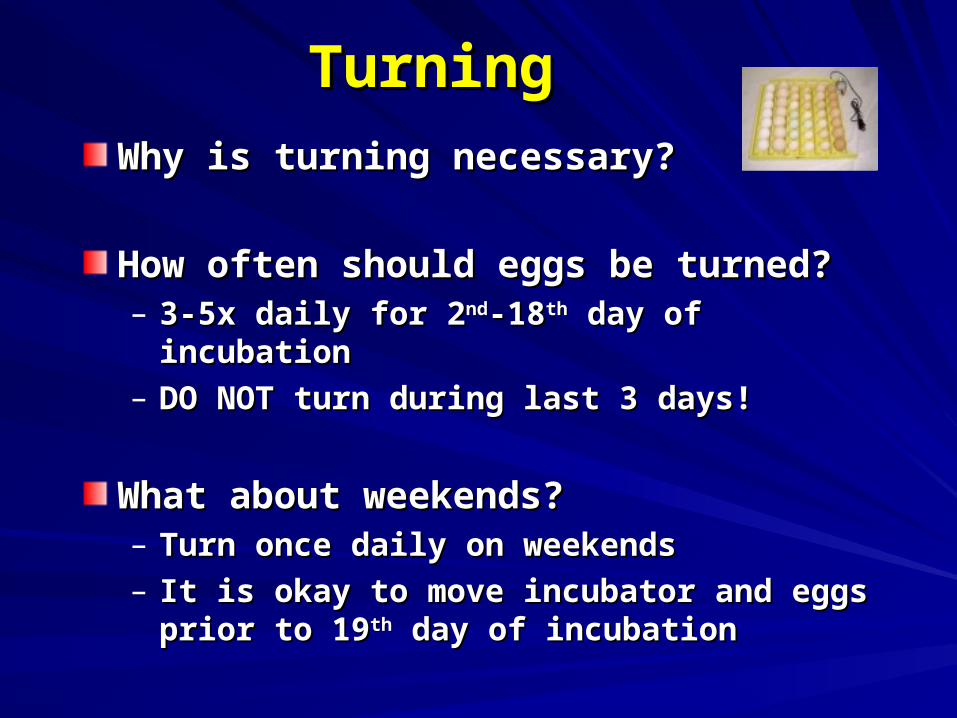
TurningTurning
Why is turning necessary?Why is turning necessary?
How often should eggs be turned?How often should eggs be turned?– 3-5x daily for 23-5x daily for 2ndnd-18-18thth day of incubation day of incubation– DO NOT turn during last 3 days!DO NOT turn during last 3 days!
What about weekends?What about weekends?– Turn once daily on weekendsTurn once daily on weekends– It is okay to move incubator and eggs prior to It is okay to move incubator and eggs prior to
1919thth day of incubation day of incubation
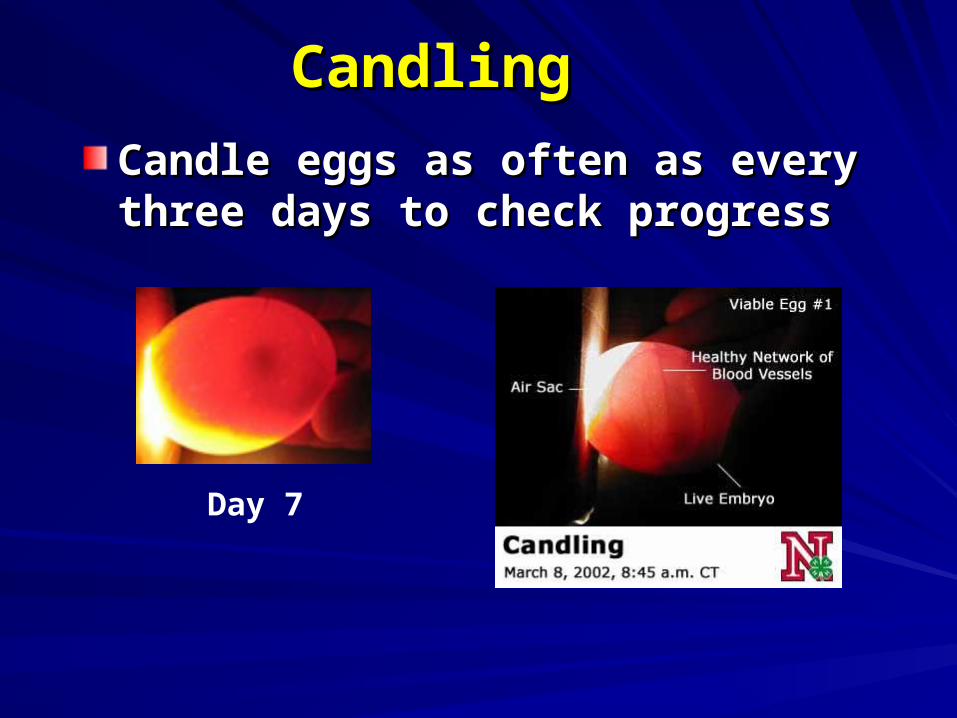
CandlingCandling
Candle eggs as often as every three Candle eggs as often as every three days to check progressdays to check progress
Day 7
Hatching OutHatching Out
Remove automatic turner (if used) and place eggs Remove automatic turner (if used) and place eggs on cheese cloth over wire bottom on day 18on cheese cloth over wire bottom on day 18
Never help the chicks from the shellNever help the chicks from the shell
Remove the chicks from the incubator and place Remove the chicks from the incubator and place them in a warm brooder within 2 to 6 hours after them in a warm brooder within 2 to 6 hours after they hatchthey hatch– 6-12 hours will be okay if they hatch when nobody is 6-12 hours will be okay if they hatch when nobody is
around around
Remove and discard all remaining un-hatched Remove and discard all remaining un-hatched eggs 60 hours after the first chick hatcheseggs 60 hours after the first chick hatches
Clean UpClean UpRemove loose shells and dry matterRemove loose shells and dry matter
Egg trays and water pansEgg trays and water pans– Soak in warm water and scrub off adhering dirtSoak in warm water and scrub off adhering dirt
Wipe plastic clean with soft cloth and glass Wipe plastic clean with soft cloth and glass cleanercleaner
Bottom of incubatorBottom of incubator– No chemical cleanersNo chemical cleaners– Soak in 25% bleach/water solution and wipe Soak in 25% bleach/water solution and wipe
with clothwith cloth
Heating elements and other electric unitsHeating elements and other electric units– DO NOT touch or get element wetDO NOT touch or get element wet– Brush gently with soft brush to remove dustBrush gently with soft brush to remove dust
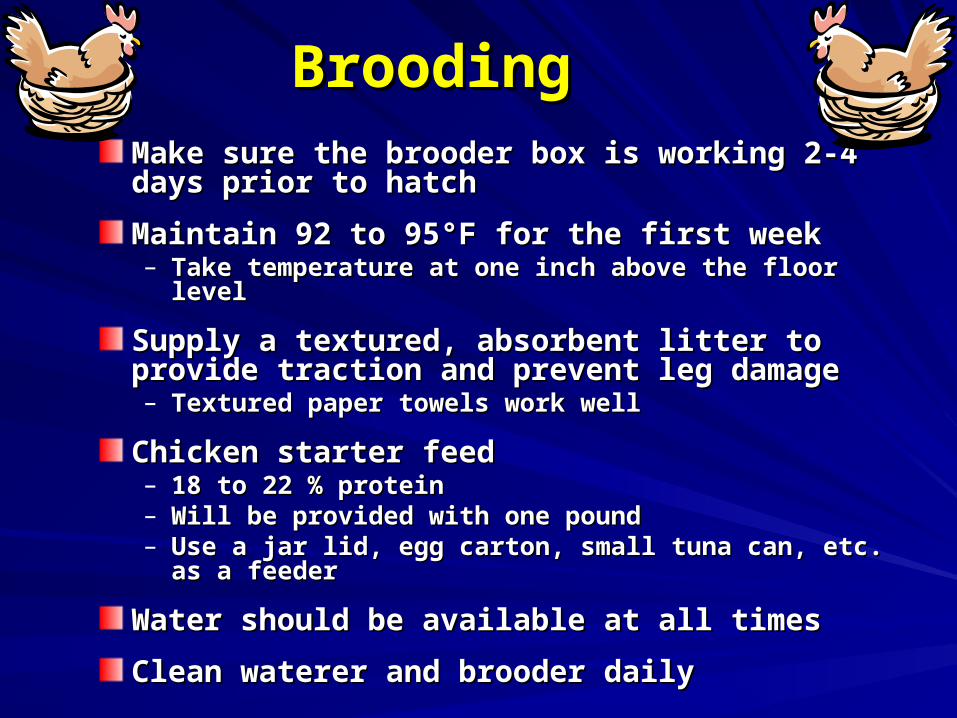
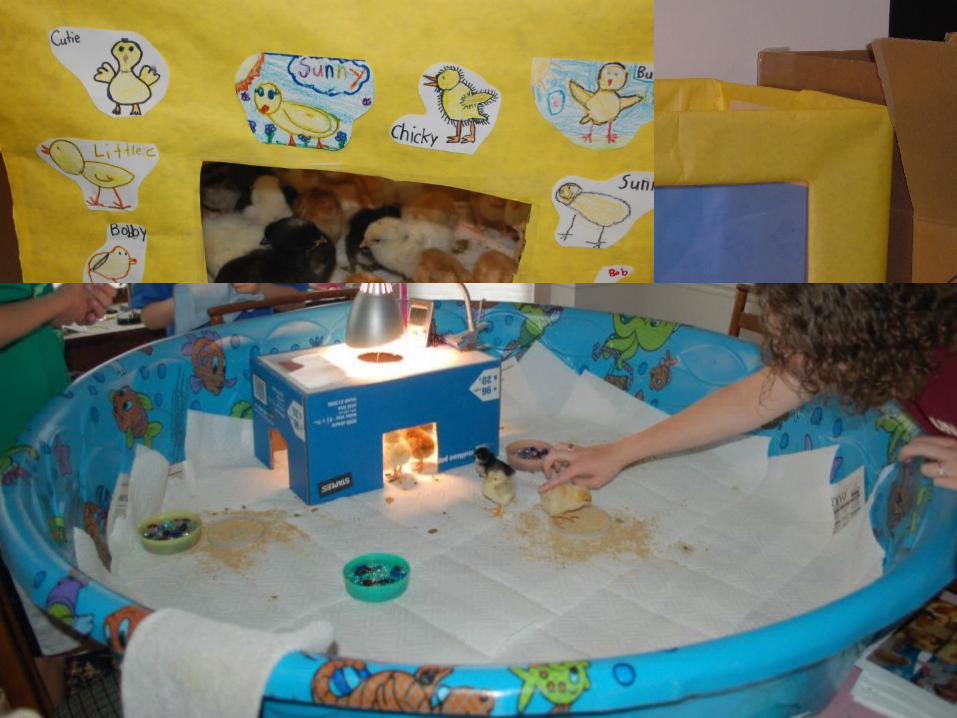
BroodingBroodingMake sure the brooder box is working 2-4 days Make sure the brooder box is working 2-4 days prior to hatchprior to hatch
Maintain 92 to 95°F for the first weekMaintain 92 to 95°F for the first week– Take temperature at one inch above the floor levelTake temperature at one inch above the floor level
Supply a textured, absorbent litter to provide Supply a textured, absorbent litter to provide traction and prevent leg damagetraction and prevent leg damage– Textured paper towels work well Textured paper towels work well
Chicken starter feedChicken starter feed– 18 to 22 % protein18 to 22 % protein– Will be provided with one poundWill be provided with one pound– Use a jar lid, egg carton, small tuna can, etc. as a feederUse a jar lid, egg carton, small tuna can, etc. as a feeder
Water should be available at all timesWater should be available at all times
Clean waterer and brooder dailyClean waterer and brooder daily
Avoiding DiseaseAvoiding Disease
Emphasize the importance of sanitation and Emphasize the importance of sanitation and good hygiene before and after handling any good hygiene before and after handling any animal reduces risk associated with project to animal reduces risk associated with project to almost zeroalmost zero
Troubles Arise ...Troubles Arise ...
The most common problems are The most common problems are associated with improper incubator associated with improper incubator management...management...
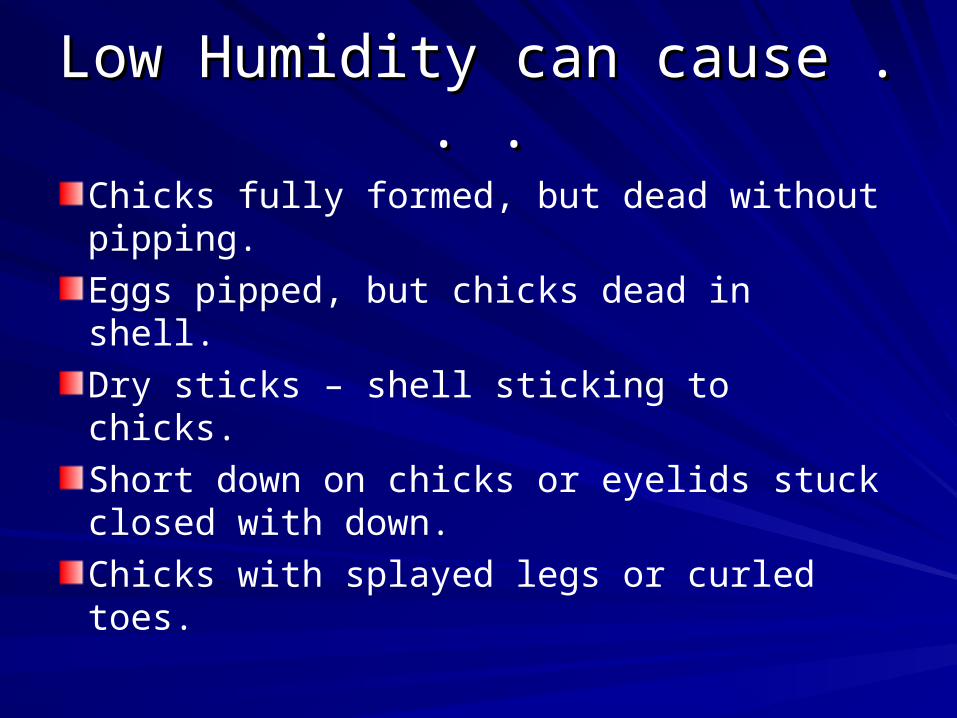
Low Humidity can cause . . .Low Humidity can cause . . .
Chicks fully formed, but dead without pipping.
Eggs pipped, but chicks dead in shell.
Dry sticks – shell sticking to chicks.
Short down on chicks or eyelids stuck closed with down.
Chicks with splayed legs or curled toes.
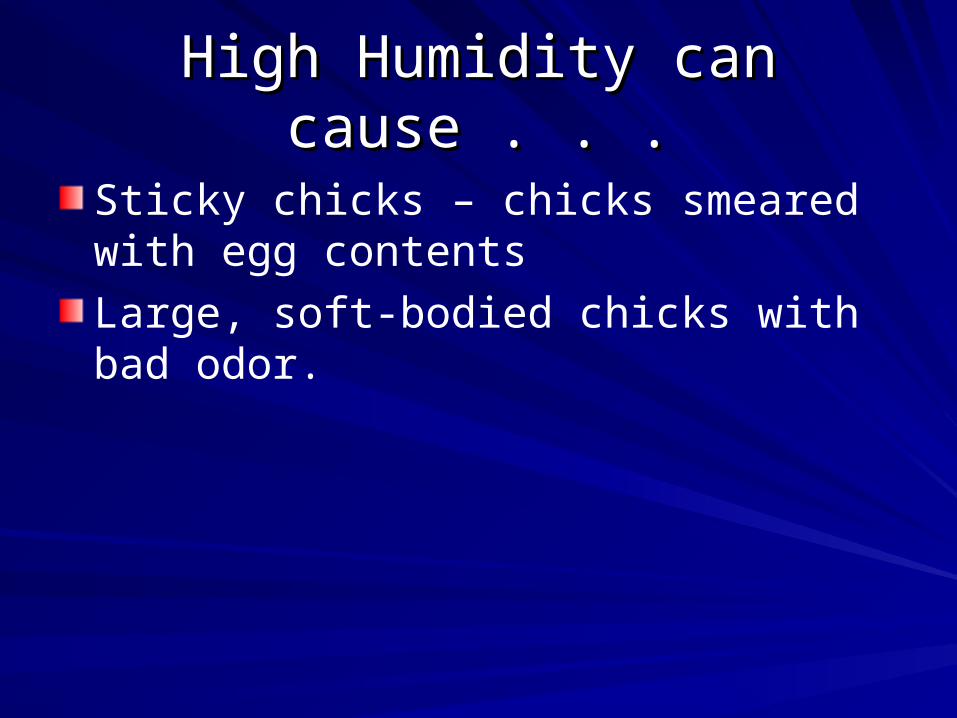
High Humidity can cause . . .High Humidity can cause . . .
Sticky chicks – chicks smeared with egg contents
Large, soft-bodied chicks with bad odor.
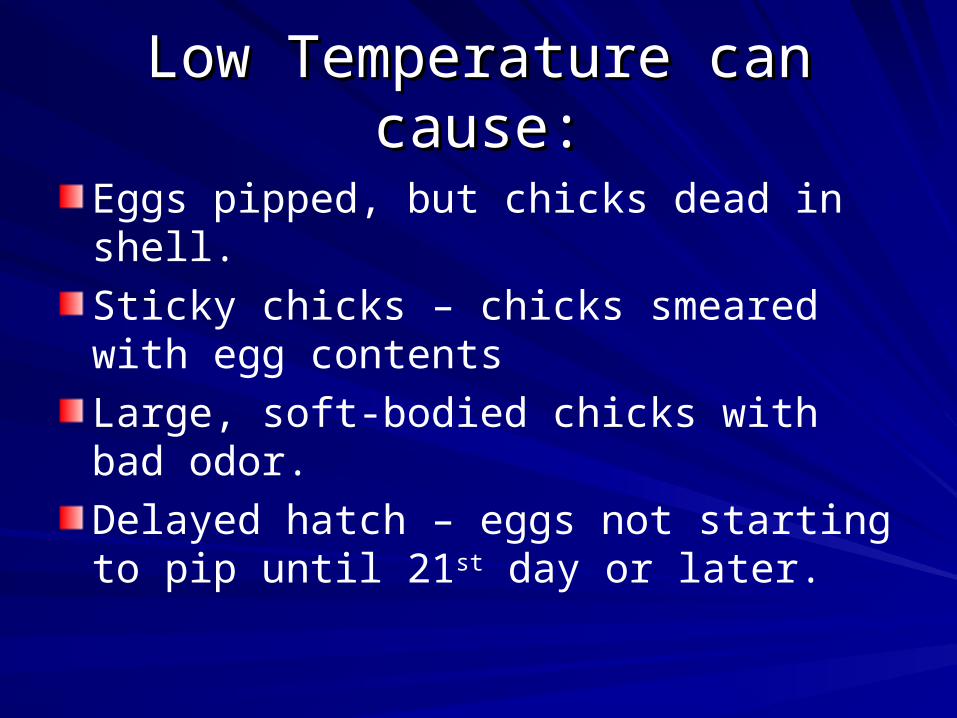
Low Temperature can cause:Low Temperature can cause:
Eggs pipped, but chicks dead in shell.
Sticky chicks – chicks smeared with egg contents
Large, soft-bodied chicks with bad odor.
Delayed hatch – eggs not starting to pip until 21st day or later.
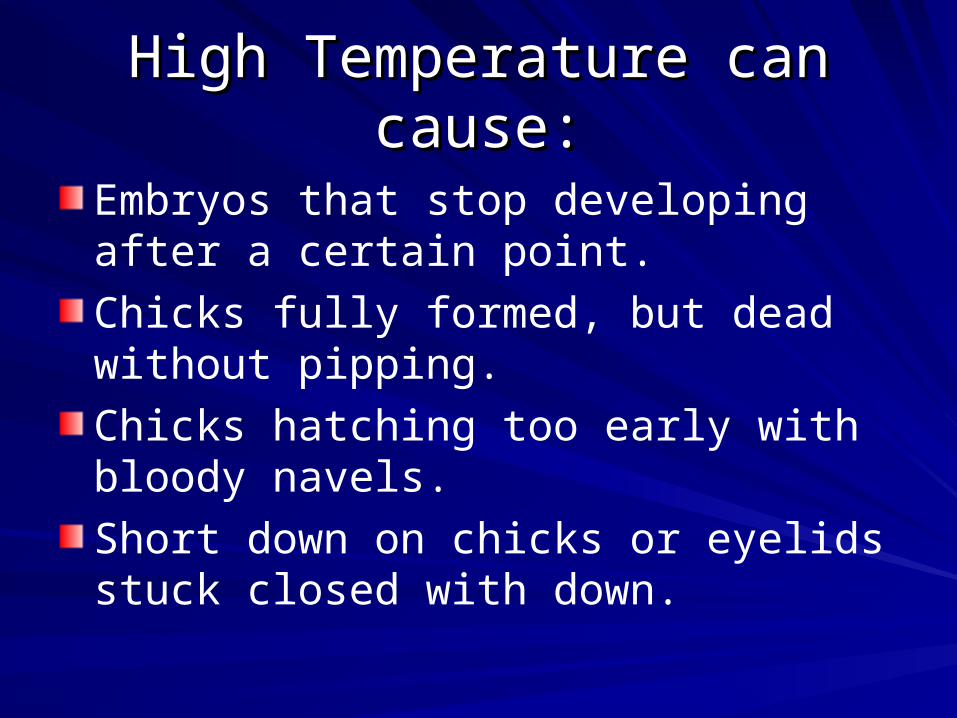
High Temperature can cause:High Temperature can cause:
Embryos that stop developing after a certain point.
Chicks fully formed, but dead without pipping.
Chicks hatching too early with bloody navels.
Short down on chicks or eyelids stuck closed with down.
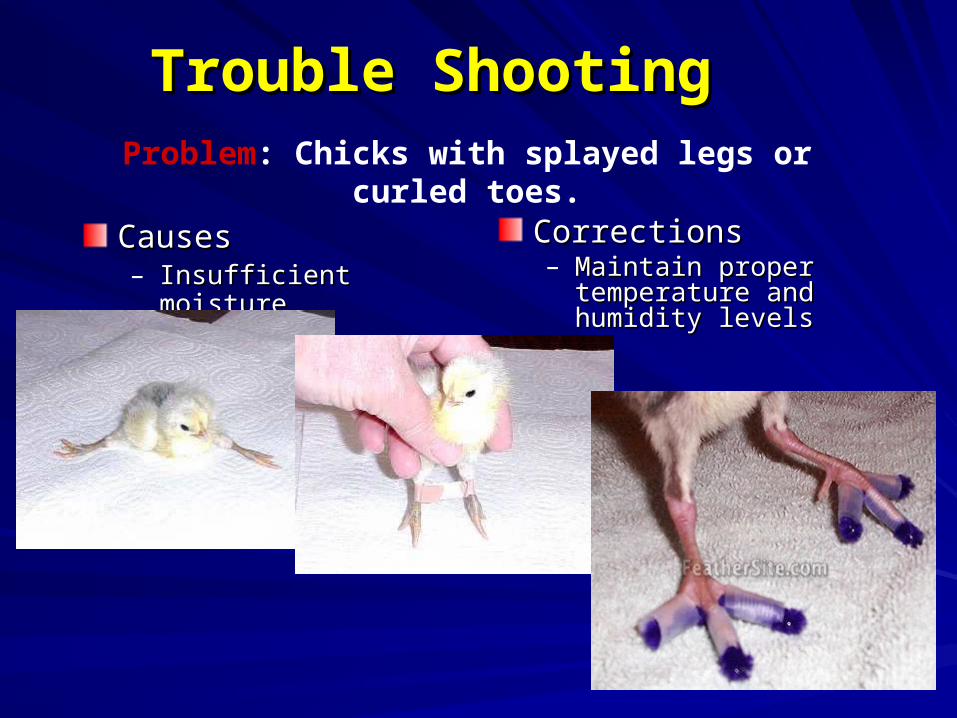
Trouble ShootingTrouble Shooting
CausesCauses– Insufficient moistureInsufficient moisture
CorrectionsCorrections– Maintain proper Maintain proper
temperature and humidity temperature and humidity levelslevels
Problem: Chicks with splayed legs or curled toes.
Other Problems that may OccurOther Problems that may Occur
Sudden losses at any timeSudden losses at any time– Causes: Causes:
Power or equipment failure or overheatingPower or equipment failure or overheating
– Corrections:Corrections:Check incubator temperature at least 2x Check incubator temperature at least 2x dailydaily
Even in the best of conditions . . .Even in the best of conditions . . .
A hatch rate above 50% is considered a success. A hatch rate above 50% is considered a success. Separate unhealthy chicks from the healthy ones Separate unhealthy chicks from the healthy ones In cases of chick death VA DEQ has approved the In cases of chick death VA DEQ has approved the following methods of poultry carcass disposal:following methods of poultry carcass disposal:– Landfill off-site (this means that you could throw the carcass in a Landfill off-site (this means that you could throw the carcass in a
school dumpster)school dumpster)– Follow school dissection projects policies for biohazard wasteFollow school dissection projects policies for biohazard waste
Please don’t forget to consult Please don’t forget to consult these resources...these resources...
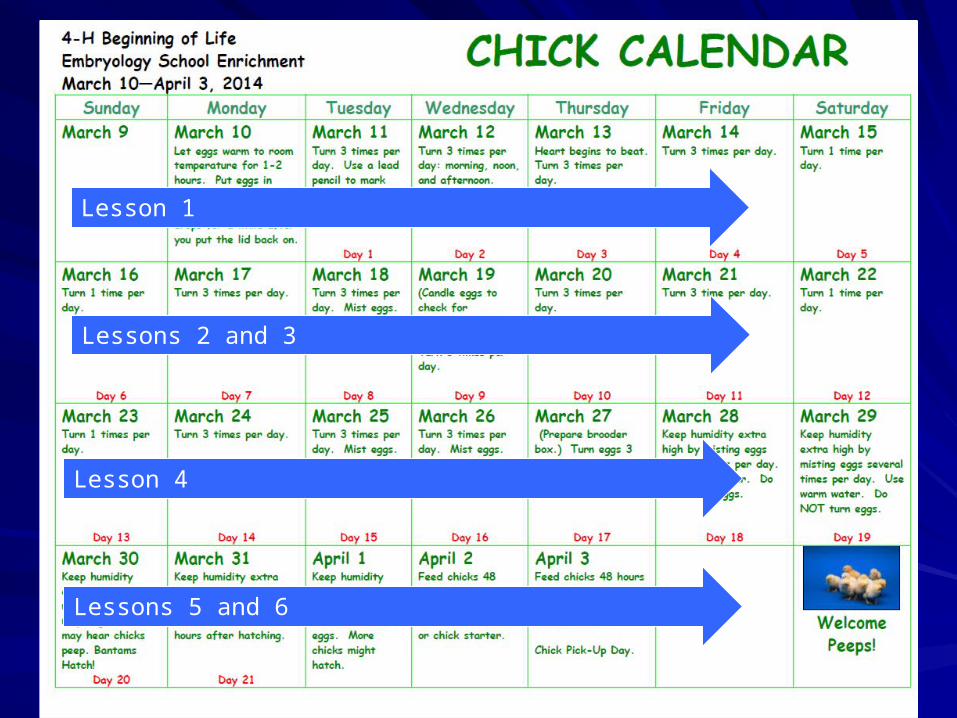
http://offices.ext.vt.edu/fairfax/http://offices.ext.vt.edu/fairfax/programs/4h/Embryologyffx/programs/4h/Embryologyffx/embryology.htmlembryology.htmlChick CalendarChick Calendar
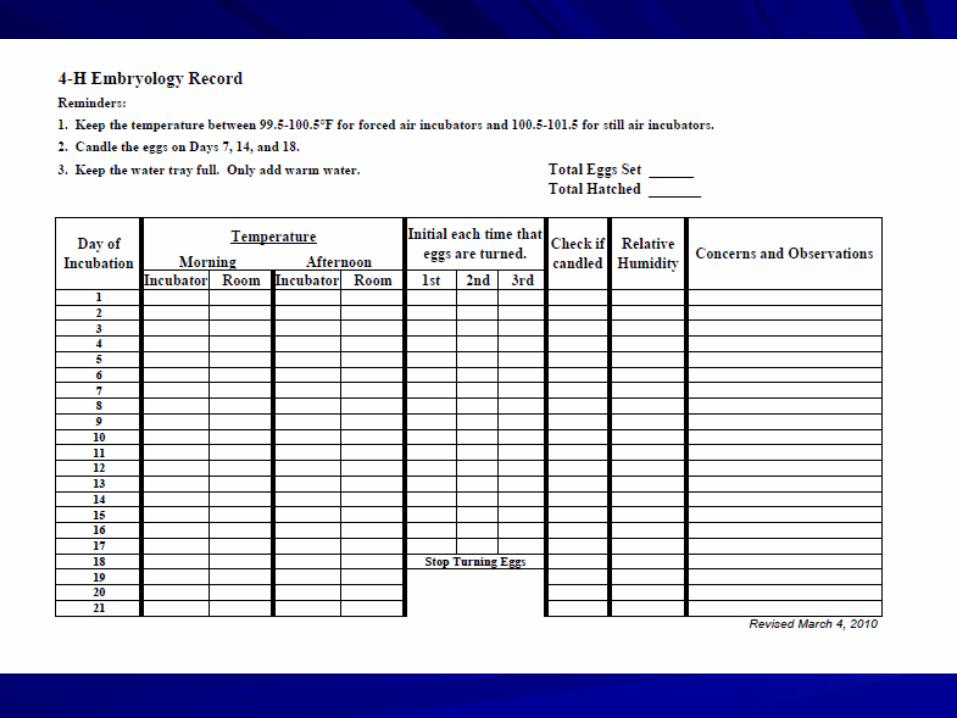
Embryology RecordEmbryology Record
Tip SheetTip Sheet
Teacher’s PacketTeacher’s Packet
Beginning of Life CurriculumBeginning of Life Curriculum
Embryology Record BookEmbryology Record Book

Questions?Questions?