Embed Size (px)
Citation preview
Copyright © Vanja Grundmann @ AmigurumiBB 2013-2014 1
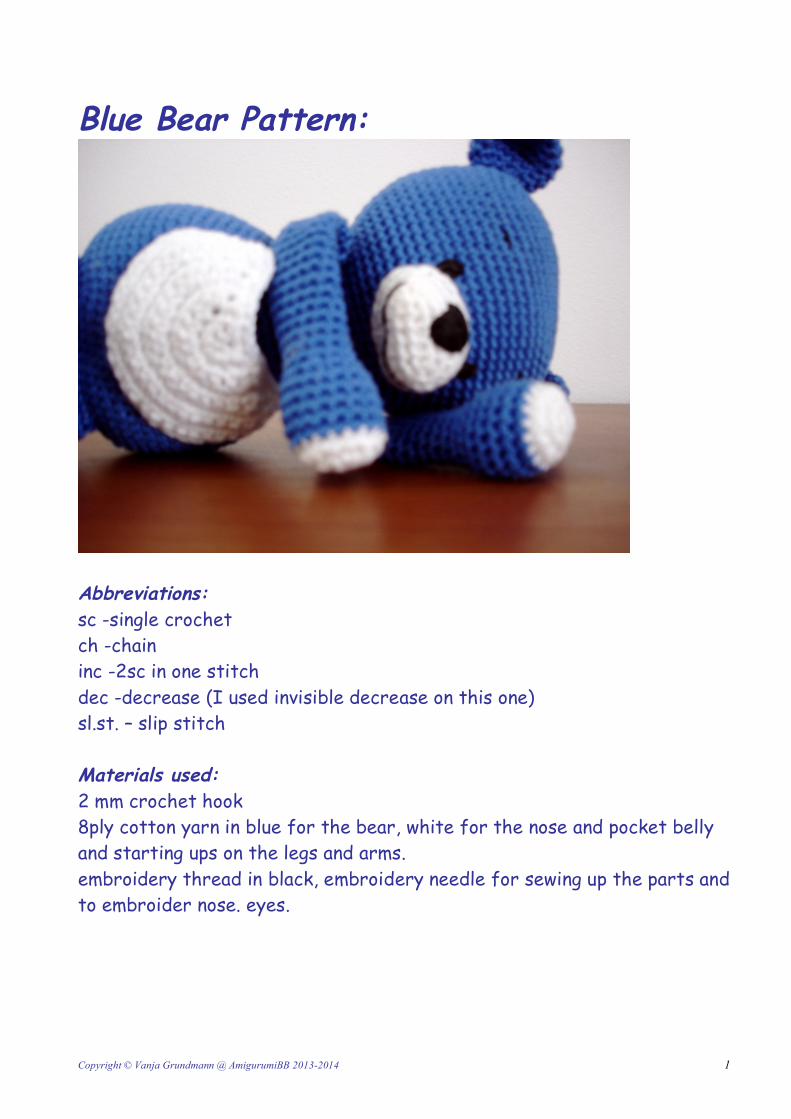
Blue Bear Pattern:
Abbreviations: sc -single crochet ch -chain inc -2sc in one stitch dec -decrease (I used invisible decrease on this one) sl.st. – slip stitch Materials used: 2 mm crochet hook 8ply cotton yarn in blue for the bear, white for the nose and pocket belly and starting ups on the legs and arms. embroidery thread in black, embroidery needle for sewing up the parts and to embroider nose. eyes.
Copyright © Vanja Grundmann @ AmigurumiBB 2013-2014 2
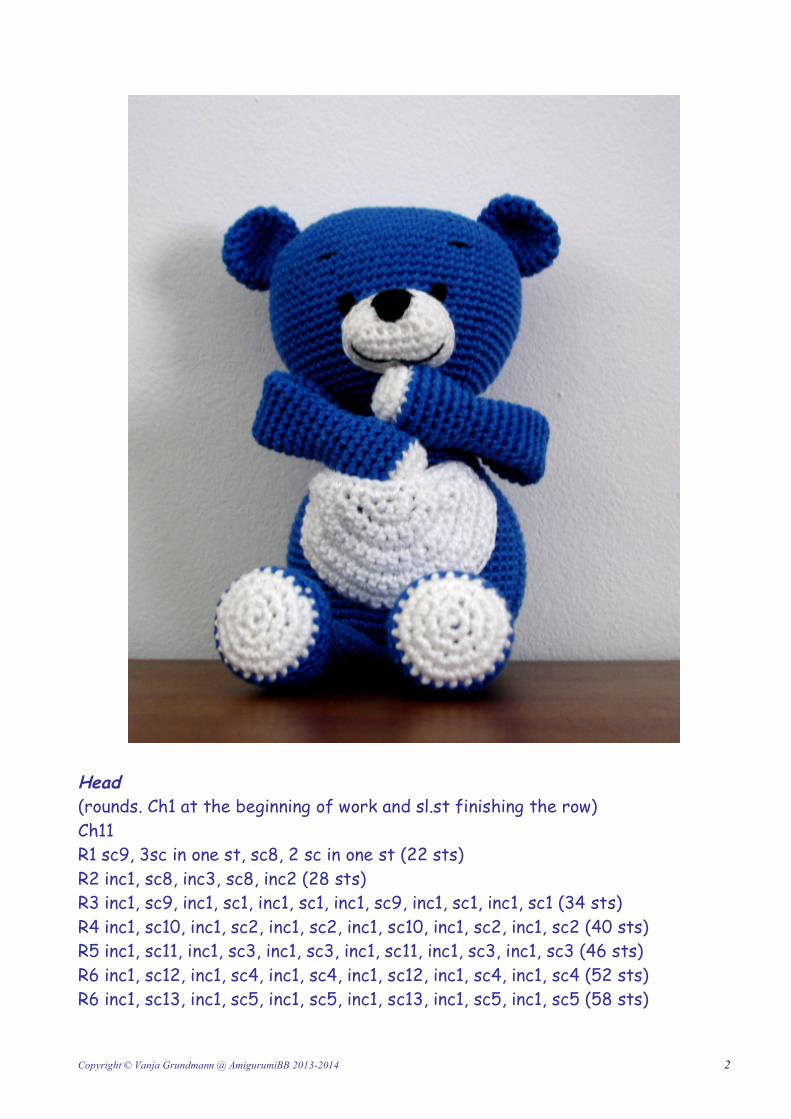
Head (rounds. Ch1 at the beginning of work and sl.st finishing the row) Ch11 R1 sc9, 3sc in one st, sc8, 2 sc in one st (22 sts) R2 inc1, sc8, inc3, sc8, inc2 (28 sts) R3 inc1, sc9, inc1, sc1, inc1, sc1, inc1, sc9, inc1, sc1, inc1, sc1 (34 sts) R4 inc1, sc10, inc1, sc2, inc1, sc2, inc1, sc10, inc1, sc2, inc1, sc2 (40 sts) R5 inc1, sc11, inc1, sc3, inc1, sc3, inc1, sc11, inc1, sc3, inc1, sc3 (46 sts) R6 inc1, sc12, inc1, sc4, inc1, sc4, inc1, sc12, inc1, sc4, inc1, sc4 (52 sts) R6 inc1, sc13, inc1, sc5, inc1, sc5, inc1, sc13, inc1, sc5, inc1, sc5 (58 sts)
Copyright © Vanja Grundmann @ AmigurumiBB 2013-2014 3
R8 inc1, sc14, inc1, sc6, inc1, sc6, inc1, sc14, inc1, sc6, inc1, sc6 (64 sts) R9-R18 sc64 sts R19 dec1, sc14, dec1 sc6, dec1, sc6, dec1, sc14, dec1, sc6, dec1, sc6 (58 sts) R20 sc58 sts R21 dec1, sc13, dec1, sc5, dec1, sc5, dec1, sc13, dec1, sc5, dec1, sc5 (52 sts) R22 sc52 sts R23 dec1, sc12, dec1 sc4, dec1, sc4, dec1, sc12, dec1, sc4, dec1, sc4 (46 sts) R24 dec1, sc11, dec1, sc3, dec1, sc3, dec1, sc11, dec1, sc3, dec1, sc3 (40 sts) R25 dec1, sc10, dec1, sc2, dec1, sc2, dec1, sc10, dec1, sc2, dec1, sc2 (34 sts) R26 dec1, sc9, dec1, sc1, dec1, sc1, dec1, sc9, dec1, sc1, dec1, sc1 (28 sts) Stuff the head well. Tie off, stuff the head nice and firm. Body (rounds. Ch1 at the beginning of work and sl.st finishing the row) Ch11 R1 sc9, 3sc in one st, sc8, 2 sc in one st (22 sts) R2 inc1, sc8, inc3, sc8, inc2 (28 sts) R3 inc1, sc9, inc1, sc1, inc1, sc1, inc1, sc9, inc1, sc1, inc1, sc1 (34 sts) R4 inc1, sc10, inc1, sc2, inc1, sc2, inc1, sc10, inc1, sc2, inc1, sc2 (40 sts) R5 inc1, sc11, inc1, sc3, inc1, sc3, inc1, sc11, inc1, sc3, inc1, sc3 (46 sts) R6 inc1, sc12, inc1, sc4, inc1, sc4, inc1, sc12, inc1, sc4, inc1, sc4 (52 sts) R6 inc1, sc13, inc1, sc5, inc1, sc5, inc1, sc13, inc1, sc5, inc1, sc5 (58 sts) R8 inc1, sc14, inc1, sc6, inc1, sc6, inc1, sc14, inc1, sc6, inc1, sc6 (64 sts) R9-R18 sc64 sts R19 dec1, sc14, dec1 sc6, dec1, sc6, dec1, sc14, dec1, sc6, dec1, sc6 (58 sts) R20 sc58 sts R21 dec1, sc13, dec1, sc5, dec1, sc5, dec1, sc13, dec1, sc5, dec1, sc5 (52 sts) R22 sc52 sts R23 dec1, sc12, dec1 sc4, dec1, sc4, dec1, sc12, dec1, sc4, dec1, sc4 (46 sts) R24 sc46 sts R25 dec1, sc11, dec1, sc3, dec1, sc3, dec1, sc11, dec1, sc3, dec1, sc3 (40 sts) R26 sc40 sts R27 dec1, sc10, dec1, sc2, dec1, sc2, dec1, sc10, dec1, sc2, dec1, sc2 (34 sts) R28 sc34 sts R29 dec1, sc9, dec1, sc1, dec1, sc1, dec1, sc9, dec1, sc1, dec1, sc1 (28 sts) R30 sc28 sts Stuff the body. Stuff it well, but try it to stay nice and soft.
Copyright © Vanja Grundmann @ AmigurumiBB 2013-2014 4
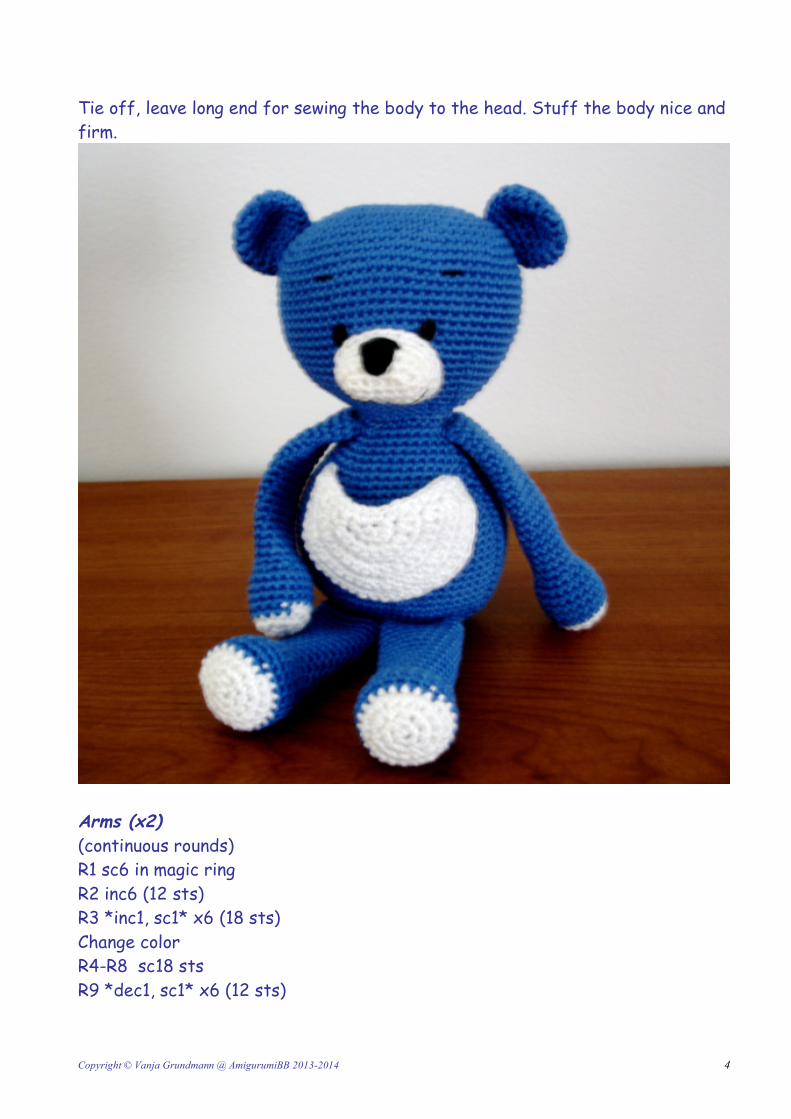
Tie off, leave long end for sewing the body to the head. Stuff the body nice and firm.
Arms (x2) (continuous rounds) R1 sc6 in magic ring R2 inc6 (12 sts) R3 *inc1, sc1* x6 (18 sts) Change color R4-R8 sc18 sts R9 *dec1, sc1* x6 (12 sts)
Copyright © Vanja Grundmann @ AmigurumiBB 2013-2014 5
R10-R27 sc12 sts Stuff the arms softly. Try to push the stuffing only to the bottom of the arms. Leave the rest empty. Tie off leaving long end for sewing the arms to the body. Legs (x2) (continuous rounds) R1 sc6 in magic ring R2 inc6 (12 sts) R3 *inc1, sc1* x6 (18 sts) R4 *inc1, sc2* x6 (24 sts) Change color R5-R9 sc24 sts R10 dec6, sc12 (18 sts) R11-25 sc18 sts Stuff the legs softly. Try to push the stuffing to the bottom of the leags only. Leave the rest empty. Tie off and leave long end for sewing the legs to the body. Ears (x2) (continuous rounds) R1 sc6 in magic ring R2 inc6 (12 sts) R3 *inc1, sc1* x6 (18 sts) R4-R6 sc18 sts R7 *dec1, sc1* x6 (12 sts) R8 sc12 Tie off leaving long end for sewing the ears to the head later. Nose (continuous rounds) Ch6 R1 sc4, 3sc in one st, work around the chain, sc3, in1 (12 sts) R2 inc1, sc3, inc3, sc3, inc2 (18 sts) R3 inc1, sc4, inc1, sc1, inc1, sc1, inc1, sc4, inc1, sc1, inc1, sc1 (24sts) R4-R5 sc24 sts Tie off, leaving long end for sewing later.
Copyright © Vanja Grundmann @ AmigurumiBB 2013-2014 6
Tail R1 sc6 in magic ring R2 *inc1, sc1* x3 (9 sts) R3-R4 sc9 sts Tie off leaving long end for sewing the tail later. Pocket Belly We are working in rows here. Finishing each row, ch1, turn the work and continue as indicated in the patter. R1 sc4 in magic ring R2 inc4 (8sts) R3 *inc1, sc1* x4 (12 sts) R4 *inc1, sc2* x4 (16 sts) R5 *inc1, sc3* x4 (20 sts) R6 *inc1, sc4* x4 (24 sts) R7 *inc1, sc5* x4 (28 sts) R8 *inc1, sc6* x4 (32 sts) R9-R10 sc32 sts When done, chain one and sc through the edge. Make 2sc in the magic ring, continue with 1sc till the end. Tie off and leave long end for sewing the pocket on the body later. Assembling the parts: Sew the head and the body. You should have nice joint of 28 stitches all around. Add some stuffing as you go if needed. Sew on the arms. Flatten them and sew them through both side stitches to the body. Try to leave 11-12 stitches between looking at front side. Before sewing, place them nice, pin them well and sew. Sewing the legs. Sew them between rows 6-7 (looking from the bottom). Flatten the leas, place them close one to another, pin them and sew them nicely through he stitches between row 6 and 7. Now sew the ears. Place them on the sides of the head. Looking from the top of the head, place them on sides starting row4 until row 10. Pin them and sew them nicely. Sew on the tail. Place it right after row 6, in the middle of back side of the body. Sew it nicely.
Copyright © Vanja Grundmann @ AmigurumiBB 2013-2014 7
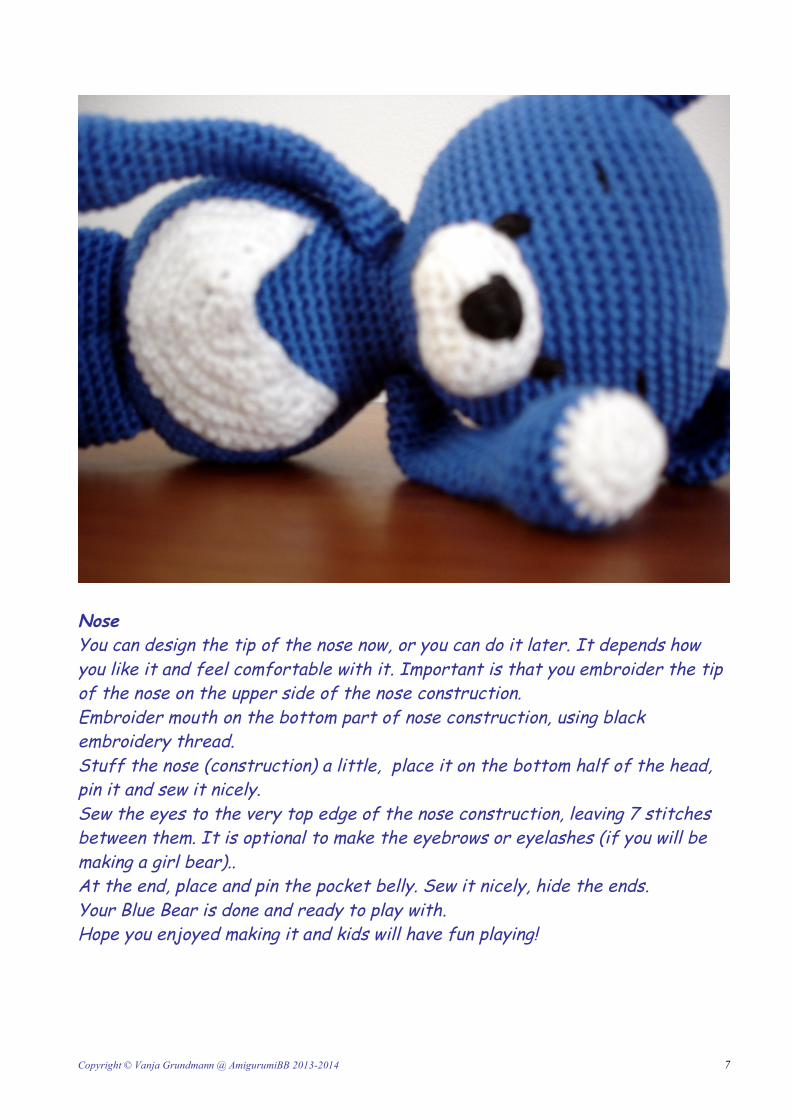
Nose You can design the tip of the nose now, or you can do it later. It depends how you like it and feel comfortable with it. Important is that you embroider the tip of the nose on the upper side of the nose construction. Embroider mouth on the bottom part of nose construction, using black embroidery thread. Stuff the nose (construction) a little, place it on the bottom half of the head, pin it and sew it nicely. Sew the eyes to the very top edge of the nose construction, leaving 7 stitches between them. It is optional to make the eyebrows or eyelashes (if you will be making a girl bear).. At the end, place and pin the pocket belly. Sew it nicely, hide the ends. Your Blue Bear is done and ready to play with. Hope you enjoyed making it and kids will have fun playing!