Embed Size (px)
Citation preview
Botany 330 - Algae - Syllabus 2015
Th, Sep. 3 Introduction to Botany 330 Care and use of microscopes; Project descriptions
Tu, 8 Introduction to the Algae Use of Prescott Keys
Th, 10 Roles of Algae in Biogeochemistry Quantification of phytoplankton: Use of Sedgewick/Rafter cells and inverted microscope
Tu, 15 Algae in Food Webs and other Biotic Quantification of cultured algae: Associations – Student Presentations Use of hemacytometer and electronic particle counter
Th, 17 Technological Applications of Algae Field trip
Tu, 22 Cyanobacteria I Culture methods *W, 23 *Midterm Exam question 1 due Th, 24 Endosymbiosis and the Origin of Eukaryotic Algae Culture methods, continued *Tu, 29 Student Presentations Cyanobacterial diversity *Project decision due
Th, Oct. 1 Euglenoids Cyanobacterial diversity
Tu, 6 Cryptomonads Flagellate diversity
Th, 8 Haptophytes Informatics and Databases- Jennifer Knack, Dept. of Bacteriology *F, 9 *Midterm Exam drafts due Tu, 13 Dinoflagellates Flagellate diversity
Th, 15 Diatoms Diatoms of Lake Wingra
Tu, 20 Other Photosynthetic Stramenopiles More diatoms; xanthophytes *W, 21 *Midterm Exam due Th, 22 Brown Algae Freshwater red algae; Green algal diversity (Prasinophytes)
Tu, 27 DNA extraction and review DNA extraction and review, project time
Th, 29 Red Algae Brown, red, & green seaweeds
Tu, Nov. 3 Lab Exam (no lecture) Midterm Lab Exam: covers specimens from 9/29 – 10/29
Th, 5 Intro. to Greens, Prasinophytes Green algal diversity, cont. (Trebouxiophycean and Ulvophyte cultures) Tu, 10 Trebouxiophyceans Green algal diversity, continued (Chlorophyceans I)
Th, 12 Ulvophyceans Green algal diversity, continued (Chlorophyceans II)
Tu, 17 Chlorophyceans Green algal diversity, continued (Chlorophyceans III)
Th, 19 Streptophyte Algae I Green algal diversity, continued (Streptophyte Algae)
Tu, 24 Streptophyte Algae II Green algal diversity, continued (Streptophyte Algae)
Tu, Dec. 1 Phytoplankton Ecology Using the logistic equations
Th, 3 Phytoplankton Ecology II Periphyton techniques *F, 4 *Final Exam drafts due Tu,8 Marine Ecology Individual project time/lab exam review time
Th, 10 Lab Exam (no lecture) Lab Exam; covers specimens from 11/5 – 11/24
Tu, 15 Oral Project Presentations Oral Project Presentations, *Project Report due
*F, 18 *Final Exam due 7:45 am
If there is a conflict with a course requirement and religious observance, Professor Graham must be notified within the first two weeks of class of the specific date(s) to make arrangements to make up materials.
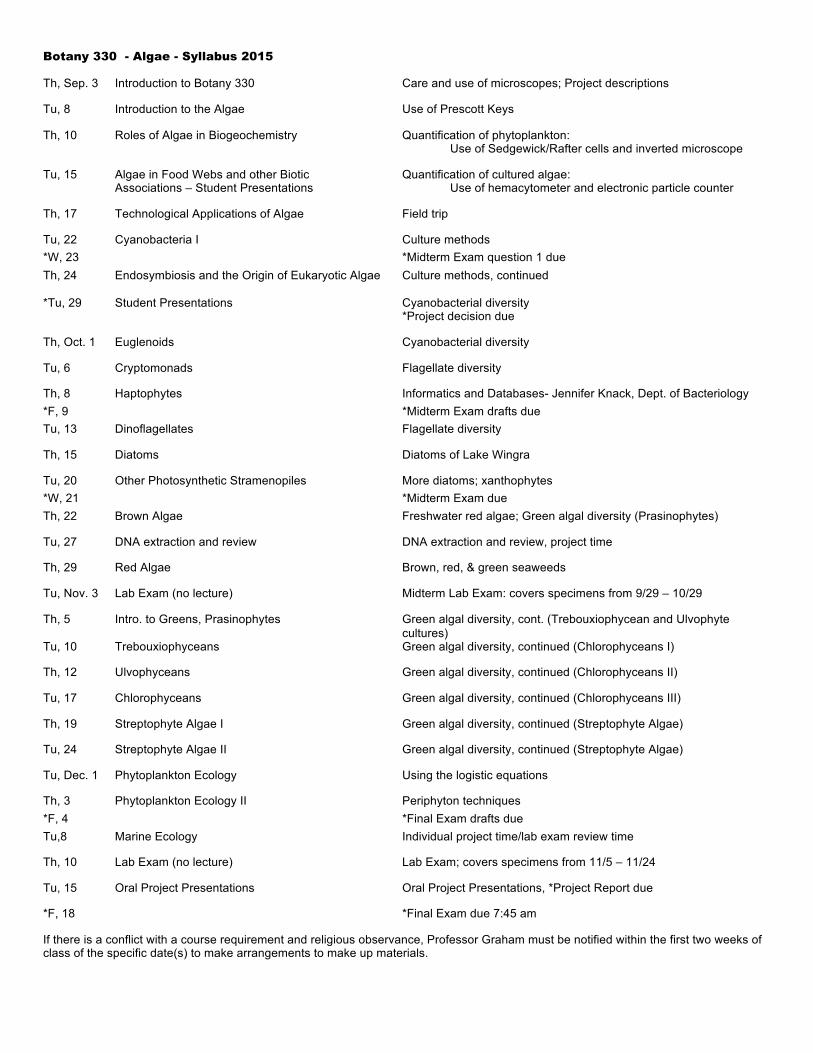
BOTANY 330 — ALGAE http://www.botany.wisc.edu/courses/botany_330/
Lab and Staff Schedule Information Fall 2015
Lecturer Office Phone/email Office Hours Dr. Linda Graham 211 Birge 262-2640 during lab [email protected] & by appointment
Lab Instructor Marie Trest 137 Birge 262-7475 by appointment [email protected]
Course Schedule MON TUES WED THURS FRI 8:50 9:55 11:00 12:05 Lecture-210 Birge Lecture-210 Birge 1:20 Lab-210 Birge Lab-210 Birge 2:25 Lab Lab 3:30 4:35
The lab will be available for independent work outside of regular class time.
Birge Hall hours are M-F 7 AM – 5 PM.

Botany 330 Course Information--Books and Grading We aim to provide a basic background of information and training that should serve the needs of course clients in general. In addition, we will provide opportunities for specialized learning in accordance with individual student interest. We provide instruction in all three of the major learning modes: auditory (lectures), visual (books, slides, videos, and other images), and manipulative ("hands on" exercises). Please let instructors know if accommodation to individual learning style is needed. Textbooks: 1) Algae 3nd edition 2015—Graham, Graham, Cook, and Wilcox. The text supplements lectures, and is also meant to be used in the lab. It is a major source of information for composition of lecture exams, which are in "take-home" essay format. 2) How to Know the Freshwater Algae - Prescott This is the taxonomic key that we will use in the lab for algal identifications to genus. Exams and other Course Requirements: Lecture exams--There will be two exams on lecture material--a mid-term and a final exam. Both exams will consist of 5 or 6, 2-4 page essays, and will be take-home exams to be completed without collaboration. Undergraduates will answer 5 questions from a choice of at least 10. Graduate students will be required to answer one additional question. Please consult the course document “Botany 330 – Editorial Issues” before you begin writing. Pre-grading of exams is required. For pre-grading, receipt of a preliminary draft will be required at specified times prior to final submission deadline. Preliminary drafts will be examined by Dr. Graham, who will provide suggestions for improvement of both scientific content and English expression, if needed, then returned for revision a week prior to the exam due date. Each lecture exam will be worth 100 points. Additional information is available on the exams posted at the course website.

Lab exams--Two 50 point mid-term lab exams will evaluate ability to identify on sight algal genera that were presented in lab, without the use of an identification key. Twenty or so stations will be set up in the lab; these will most often consist of a microscope with specimen on a slide, but could also consist of fossils, macroalgae or herbarium sheets. Stations will not be timed. In addition, students will be asked to use the Prescott key to identify two "unknown" microalgae. Plenty of time is available for completion of both parts of the lab exams. Lab exercises--Five brief written reports related to class lab or field exercises will be worth 40 points each for a total of 200 points. These will be evaluated for both scientific content and English expression. An additional week beyond the first due date will be given to revise reports, if this is recommended. Lab notebooks—Each student will keep a lab notebook of a form specified in class. Notebook content will be evaluated early in the semester, with recommendation for improvement. Notebooks will be graded at the end of the semester: 50 points total. Project reports--A written report describing the results of individual or team field, lab, or library projects will be due at the final exam. Projects will be chosen in consultation with instructors. It is highly desirable for projects to coordinate with other work that students are doing (in research or other coursework). It is fine to submit the same report in Botany 330 and in a concurrent course, if there is substantial algal content, and with instructor approval. Examples of previous reports will be available as models. During the final lab period students will be expected to present a brief oral report (10 min or so) on their project (to be considered as part of the project grade). Pre-grading of final project reports is available and we encourage you to take advantage of this option. Drafts for pre-grading are due at least one week prior to the final exam date, and will be returned for revision no less than three days prior to the final exam date. The project report is due at the time and date of the final exam. Other oral presentations--At least two additional oral presentations will be required and written feedback will be provided (though not graded). Please refer to the course document “Oral presentations in Botany 330”.
Grading: Lecture exams (2) 200 points (100 each) Midterm lab exams (2) 100 points 5 exercise reports 200 points (40 points each) Lab notebook 50 points Project report 100 points ____________ 650 points There is no limit to the number of A, B, etc. grades given. 92-100% =A; 88-91% = AB; 80-87% = B

Botany 330 essays—Editorial issues
The assigned essays were designed to mirror the characteristics of written reports thatyou might provide to peers in a future professional situation. So the comments I’ve madeon your drafts are related to writing for a professional reader. For each essay, I’vecommented on content, length, English usage, and organization. The following numbersrefer to common issues.
1. Avoid the imprecise pronouns “it” or “they,” especially at the beginning of asentence, unless the previous sentence is quite clear about the identity of thesubject.
2. Aim for concise language. You will often be required to express your thoughts ina limited number of words; writing the abstract for an NSF grant proposal wouldbe an example. So don’t use superfluous words when you could use the space toinstead propose even more great ideas. Evaluate the need for each and everyword. Try to construct the most concise language possible.
3. Aim for precise language. Avoid imprecise words like “quite,” “very,” “huge.”Use biological terms (your peers will likely have taken a college bio course), forprecision and economy of expression. One precise term can take the place of along string of words (see #2 above).
4. Closely focus your writing on the question or issue at hand. Don’t addunnecessary material even if you think it will make you appear knowledgeable. Ina professional context, your reader will not appreciate having to read through a lotof introductory material that he/she already knows, or being led away from themain topic.
5. Avoid constructing complex sentences having more than one major point.
6. Don’t mix multiple topics in the same paragraph. Start each paragraph with atopic sentence that alerts the reader to the paragraph’s subject and stick to thatsubject.
7. Define critical terms–those forming the main topic of a paragraph–especially ifthe terms will not be widely understood by your readers.
8. Construct transitional sentences at the ends of paragraphs to link to the next.
9. Use proper singular and plural forms of the words important to our field:bacterium, bacteria (there is no such word as bacterias!); alga, algae (no suchword as algaes!); genus, genera (no such word as generas!); mitochondrion,mitochondria. Use the adjectival form of these words when appropriate: bacterialdecomposition, algal ecology, generic name, mitochondrial genome.
10. Match singular subjects with singular verbs, and match plural subjects with pluralverbs.
11. “Phosphorus” is an unusual word. As the result of its origin, the most appropriateuse for the spelling “phosphorus” is as a noun, and the most appropriate use of thespelling “phosphorous” is as an adjective. Examples: Photosynthetic organismsrequire phosphorus for producing NADP, as well as ATP and DNA. Phosphorousconcentrations can be determined by colorimetric methods.
12. Cite references within the text of your writing.
13. Avoid overly colloquial, informal language. In writing for a professionalaudience, use professional expressions, with few exceptions.
14. Use your word processor’s spell-checker and grammar checker!
15. Try to use active voice more often than passive voice. Passive voice is moreacceptable in professional scientific writing than in general writing, however.
16. “It’s” is a contraction and means only “it is.” “Its” (without an apostrophe) is apossessive; do not use “it’s” as a possessive. Examples of correct use: Theheterokont cell uses its longer, hairy flagellum for propulsion. It’s not possible tosee the hairs on this flagellum without using an electron microscope.
17. “Affect” is a verb (not used as a noun). In contrast, “effect” is mostly used as anoun, though sometimes also as a verb meaning “cause or produce” as in “toeffect a change.” Example of appropriate uses: The concentration of carbondioxide in the water will affect phytoplankton photosynthetic rate. The hurricanehad a devastating effect on coastal wetlands.
18. The appropriate use of “which” and “that” is a common problem. I recommendchecking a reliable usage reference. “Which” typically follows a comma, while“that” does not.
19. Despite the fact that many scientists conflate the terms “theory” and “hypothesis,”these terms are not synonyms. An hypothesis is a tentative explanation (aneducated guess) that requires testing before it can be accepted. A scientific theoryis a broad explanation that is widely accepted among qualified scientists becauseit is strongly supported by experiment and/or observation. For example, the CellTheory (the cell is the basic unit of living things and arises from preexisting cells)is not a hypothesis. It is important not to mistakenly give your reader theimpression that an explanation is widely accepted when it is not by describing anuntested hypothesis as a “theory.”
20. The expression ‘et al.’ means “and others;” al. is short for “alia.” It is thereforeimportant to place a period after ‘al.’(but not after ‘et’).
21. When forming a sentence with several clauses, ensure that they are of the sameform. For example: Algae are defined as organisms that are generallyphotosynthetic, primarily live in aquatic habitats, and are structurally andreproductively simpler than land plants. Test such complex sentences byconsidering each part independently to see if it makes sense: algae are organismsthat are generally photosynthetic; algae are organisms that primarily live inaquatic habitats; algae are organisms that are structurally and reproductivelysimpler than land plants.
22. Be sure to use the terms “population” and “community” appropriately; theseterms are not synonyms. Check the definitions in your general biology/botanytexts if necessary.
23. In evolutionary explanations, use the language of selection and adaptation. Forexample, the sentence “Diatoms produce chitin fibrils in order to stay afloat inwell-lit surface waters” is not quite accurate because individual diatoms can’tconsciously choose to produce the fibrils or not. “Chitin fibrils are adaptationsthat allow diatoms to remain afloat in well-lit surface waters” is more accuratebecause this expression uses the language of selection and adaptation. Anancestral diatom acquired a mutation that allowed it to produce chitin fibrils,which aided photosynthesis, thus fostering reproduction and persistence of themutation in the population.
Oral Presentations in Botany 330.
Because this is a Comm. B course, oral presentations are part of the requirements. Hereare some recommendations based on previous Botany 330 class presentations.
Standing vs sitting presentation position. In some professional settings it may beappropriate to remain seated during your presentation. One example would be if everyonewere sitting around a table; in this case each speaker could be easily seen. However, inour classroom some seated speakers would be hidden from view by others.
In the past, I have noticed that everyone watched speakers who stood at the front of theroom, perhaps because we were conscious that the speaker would notice if we didn’tseem to be paying attention. In contrast, when speakers remained seated, we didn’t allwatch the speaker. This could give the speaker the impression that the audience isn’tpaying attention.
Even in situations where everyone is sitting around a table, you might want to considerstanding for a presentation. This gives you more professional authority and may beespecially helpful for people who don’t have commanding voices. As a listener, whenyou can’t see a speaker, make an effort to shift positions a bit so that you can make eyecontact.
Visual aids. Presenting technical material in a professional setting often involves usingunfamiliar terminology, as is the case for our presentations. If terms are unfamiliar toyou, you can assume that at least some of your professional colleagues having similarbackgrounds also will be unfamiliar with the terms. For this reason, it is always useful towrite key terms or concepts in some way that everyone can see them. Further, some keyterms may need to be defined in written form. This will aid listeners who are taking notesfrom your presentation. Even those who don’t take notes will understand and rememberwhat you said better if you write down key terms and ideas. (If you don’t know how topronounce a term or a person’s name, find out how ahead of time.)
In our case, the chalkboard, signs, handouts, or overhead projector transparency areuseful low-tech visual aid options. These methods have the advantage that they are usefuleven when high technology presentation is not possible or fails. Though you may usePowerpoint and the digital projector for your final oral presentation, the major advantageof projection is that it allows people sitting far away from a speaker in a large room to seethe visual aids. (I use it mainly because the TA usually needs to fill the chalkboard withlab instructions prior to lecture time, and because the powerpoints are useful to studentswho’ve had to miss class.)
I usually have backup low-tech visual aids in case of technology failure. At scientificconferences and other settings, I have noticed that engineers and NASA employees tendto favor overhead transparencies (which can be printed in color from powerpoint files).(Do they know more about frequency of technology failure?) Overhead projectors are
low-cost, versatile, and widely available. For these and other reasons, overheadtransparencies are my choice of backup visual aid. I once had to give an after-dinnerpresentation to hundreds of people in a hotel ballroom that turned out to lack facilities fordigital projection. Fortunately, I had brought along overhead transparencies of myPowerpoint slides, which saved the day (for me, at least).
Capturing and keeping listener attention. People will pay closer attention to yourpresentation if you make eye contact with your audience and show enthusiasm for yoursubject. (Humans seem preadapted—maybe from watching for predators—to payattention to moving objects.) But try not to go overboard with the body motion, unlessyou have designed a theatrical presentation, our next topic.
Under some professional circumstances, and our class is included, it is appropriate to useskits, songs, comedy or other theatrical means to transmit information in an entertainingway. You can be sure that your audience will remember your message! However, prior todesigning a theatrical presentation obtain your supervisor’s approval! Inappropriatelanguage or dress will not be welcome in most science professional settings.
Opening and final words. I recommend starting your presentations with a powerfulopening and/or closing statement. Short, succinct opening and closing statements canreally attract listener attention and aid memory.
ALGAE - BOTANY 330
GENERAL LABORATORY PROCEDURES As you come to lab, check the board for the day's agenda, and instructions. There will generally be a list of samples to study, or class exercises and demonstrations. Sometimes there may be short field expeditions. When these are finished, the time remaining is available for individual projects. Instructors will be present during scheduled lab time to assist you with projects. You are welcome to work in the lab outside of regularly scheduled classtime, but except for scheduled appointments, your instructors may not be available to help you during unscheduled times. Studying microalgal samples: Algal samples may be provided as unialgal cultures (no other algae present), or as mixtures. In the latter case, we will put images of the target alga on the TV screen so that you know which form you are supposed to find and study. Unialgal cultures may occur in liquid media or on the surface of agar in tubes (instructions for sampling these are given below). First, make a slide of one of the specimens; organisms can be observed in any order. Then look it up in the text to read about salient features. Observe the features mentioned in the text and draw the algae for inclusion in lab notebooks. Drawing helps to focus attention upon distinguishing features, and can be a useful aid in studying for the mid-term lab exam. Feel free to ask for instructor help in adjusting microscopes, finding algae, or finding distinguishing characteristics of algal taxa. Second, pretend that you do not know the name of the organism at hand, then try to key it out using the Prescott key, and see if you get the right answer! If not, backtrack from the correct genus in the key to see where you made the wrong choice(s). Feel free to request instructor assistance after you have given it a good try, but before frustration sets in. In this way you will gradually learn to use the identification key for unknown forms. For each organism presented in lab, indicate the list of key choices made in your lab notebook. The lab exams will test your ability to identify unknowns. In order to avoid mass confusion, make special efforts to avoid mixing algae from separate cultures. Do not use the same pipette for more than one sample. If samples are in liquid, use a pipette to remove just a little algae to a slide, and cover with a cover slip. Remove excess liquid with a tissue, so that the cover slip is not floating. If cultures are on agar, heat a loop to glowing cherry red in the flame of an alcohol lamp. Let the loop cool, then retrieve a little algal material and place in a drop of water on a slide, adding cover slip. You may need to tease masses of algae apart with dissecting needles or forceps before adding the cover slip to avoid making preparations that are too thick to see through. Reagents such as ink, nickel sulfate or iodine are usually added before putting the cover slip on, though they may be drawn through a preparation by using a tissue applied to the side of the cover slip opposite to the point at which reagent was added.
Reuse slides--wash with water and dry with a tissue before storing in your drawer. But don't reuse cover slips--they are difficult to clean sufficiently, and may break, causing injury. Dispose of cover slips, pipettes, and other disposable glass in the "glass trash box," not the regular trash. Preparing for lab exams: A list of genera for which you will be responsible will be provided at least one week prior to the lab exams. In the meantime, assume that you are responsible for all of the genera presented in lab. Images of the algae seen in class are available on the lab computer for review. It is not advisable to rely upon web images to study for the lab exam because these are often different species and sometimes misidentified. You are welcome to come to lab outside of regularly scheduled class hours (no other class uses the room). You will be informed of the location of a key to the lab (but be careful to return the key, and to lock up the room before you leave the lab). Things to remember: 1) Bring your copies of Graham, Graham, Wilcox and Cook, and Prescott to lab each time, or leave them in your cabinet. 2) Treat microscopes well. Rotate microscope objectives to low power before removing slides!!! When changing objectives, turn the turret, not the lens barrels!! Use fine adjustment with high power objective lenses!!! Learn to adjust microscopes for best images at differing magnifications--it makes a lot of difference! Clean lenses with lens tissue (not lab tissues) at frequent intervals. 3) Make an effort to avoid mixing samples. Fresh pipettes are cheaper than isolated cultures!
SUMMARY OF WRITTEN LAB EXERCISE REPORTS These exercises were designed to provide 1) instruction in some important techniques useful in studying algae (and other organisms), 2) experience in technical writing, 3) and numeracy practice. You might encounter similar assignments in your future occupation if you are asked to prepare technical reports or grant proposals. Due dates to be announced. Exercise 1. Use of the Sedgewick-Rafter Cell and Inverted Microscope/Settling Chamber (Utermöhl) Techniques for Counting Algae in Mixed Samples. Follow the instructions in I A and I B of "Quantitative Determination of Algal Density and Growth" (with modifications and additional advice supplied in class) to count the algae in the mixed assemblage provided, by two methods. You will have to take turns using the two inverted microscopes available. You can work in pairs, sharing the counting effort, and reporting results as a team. Turn in a written statement of at least a page in length, with counts, and a statement of your perception of the pros/cons of using the Sedgewick-Rafter vs the inverted microscope method for counting algae in mixed assemblages. 40 points. Exercise 2. Comparison of the Use of the Hemacytometer vs Coulter Counter Method for Counting Algal Cells in Unialgal Cultures. Use the instructions in II B in "Quantitative Determination of Algal Density and Growth" to make a hemacytometer count of the algae in a cultured sample that we will provide. You will have to take turns, because we do not have enough chambers for everyone to do this exercise at the same time. Be sure to mix the sample well before removing an aliquot! Do at least 5 replicate counts. Now, with the aid of the instructor, count the same sample, on the same day, with the Coulter Counter--the whole class can use the same 5 replicate counts. Pairs of students may share the counting efforts and preparation of the report. Turn in a statement at least one page in length of the comparative counts (are they significantly different?), and your perception of the pros/cons and potential sources of error for the two methods. 40 points. Exercise 3. Algal Collections from Lake Mendota and Northern WI humic lakes Turn in 5 separate sheets of drawing paper, each with a single large (i.e. fill the whole page) drawing of an identified algal genus from samples from Northern WI humic lakes. Instructors will help with identifications, on request. Label distinguishing characteristics such as chloroplast(s), flagella, trichocysts, mucilaginous sheaths, or heterocytes. The point of this exercise is to foster observational powers and an appreciation of diversity differences in eutrophic and dystrophic waterbodies. Put your name on each sheet and staple the sheets together. Compare with your collection from L. Mendota. Write at least half a page on your impressions of diversity in the two waterbodies. Were any of the
genera you found in other collections also present in L. Mendota and vice versa? 40 points. Exercise 4. Diatoms of Lake Wingra. Read "Sample Preparation, Methods, and Literature for Diatoms." The most effective method for assaying many diatoms from natural collections requires cleaning, because distinctive frustule markings are obscured by cell contents (chloroplast, etc.). The most effective methods for making permanent mounts of diatoms require use of strong acids, which we prefer not to attempt in this course, because of safety considerations. Therefore, we have assembled a collection of permanent slides made from L. Wingra collection for your use. First, examine a fresh collection of L. Wingra diatoms (mostly members of the periphyton associated with water milfoil). Make a list of the genera that you can confidently identify on the basis of cell or colony shape, or presence of stalks (as with Cymbella.). Use the Prescott key to start. Consult other references as needed. Now, examine the prepared slides, and make a list of all the species that you can confidently identify on the basis of frustule shape or ornamentation. You will want to use the notebooks of photos of identified L. Wingra diatoms. The photos were made from the same cleaned preparations that you are using. This exercise should be done individually. Turn in the two lists, together with a brief statement of a page or so comparing the lists and explaining why they might be different. 40 points. Exercise 5. Algal Isolation & Culture Techniques. Read "Isolation and Culture of Algae," and watch demonstrations for: 1) pulling micropipettes, 2) spraying plates, 3) streaking plates, 4) single cell/colony/filament isolation, 5) making algal culture media & use of the autoclave, & 6) function of the algal growth room/chambers. Make sure that you have heard all 6 demonstrations. Now, from a field collection recommended by an instructor, use the media provided to make several single-alga isolations. You can choose to isolate desmids, chrysophytes, cryptomonads, diatoms, or blue-greens. You will need to make a supply of micropipettes. These don't need to be autoclaved because the heat of pulling them sterilizes them, but use a separate pipette for each organism. Also try the spraying technique. You will need to check your isolates for growth and contamination at various points in the semester; you may need to subculture isolates. Turn in at least one unialgal culture, identified to genus, with information on origin, date isolated, and isolator (you) written on the tube/dish with Sharpie. Each individual should turn in at least one culture. The culture should be accompanied by a single page description of the isolation process and interesting aspects of the organism. 40 points.
PRESERVATION OF ALGAL SAMPLES
For the purposes of this course, we recommend that you store algal collections in the glass-doorrefrigerator in the teaching lab as soon as possible after sampling, in lieu of adding chemicalpreservatives. We have found that most algal forms will survive long enough to completeprojects within the scope of a semester, and you will not be exposed to toxic preservatives. Iflarge zooplankton are present, it is a good idea to filter them out so they won’t eat all the algaebefore you get a chance to see them. Cheesecloth works well to filter zooplankton. The rest ofthis document provides preservation information that you may find useful outside this class.
Storage periods require addition of chemicals that reduce bacterial activity and autolysis of algalcells. The major preservatives in use today (formalin, Lugol's solution, and glutaraldehyde) arediscussed in Wetzel & Likens (1990), Limnological Methods, Springer-Verlag, on page 140. Thediscussion below is based on our personal experience in use of these preservatives.
The single best preservative, in terms of cell structure retention, is buffered glutaraldehyde.Wetzel & Likens recommend use of 3% glutaraldehyde, neutralized to pH 7 with NaOH, andsuggest that the glutaraldehyde should be filtered to remove particles. Glutaraldehyde may bepurchased in various grades--if you use high grade 70% glutaraldehyde in ampules, which isdesigned for use in ultrastructure studies, there will be little problem with particles. It is notdesirable to filter glutaraldehyde because it is highly irritating to mucous membranes. Filtration(if done) should occur in a chemical hood. Also, 3% glutaraldehyde is too high in concentrationfor retention of normal cell shape of wall-less flagellates, which may shrivel or disintegratecompletely (0.5% or less is better for these forms). We recommend that you try to match the pHand osmolality of the system sampled by use of appropriate buffer. When you are ready tocount/identify algae that have been preserved in glutaraldehyde, you should wash theglutaraldehyde off with use of a micropore filter apparatus and buffer wash, if you are using afilter-based method for counting/identification. If you are using a settling chamber, merely coverthe chamber with glass so that you are not exposed to glutaraldehyde fumes.
Many published sampling protocols make use of Lugol's solution. You add this preservative inamounts to achieve a 1% final concentration (1 part per 100). To make Lugol's, dissolve 10g I2(pure iodine, which is toxic) and 20g KI in 200 ml distilled water along with 20 ml concentratedglacial acetic acid. Solution should be stored in the dark, preferably in a glass bottle with groundglass stopper. The iodine in Lugol's is effectively bacteriostatic, but it causes a number ofchanges in algal cells. For example, iodine will bind with starch to form a blue-black complex.This reaction is useful in identifying starch, which is present in some algal groups, but not inothers. On the other hand, green algal cells often accumulate so much starch that treatment withLugol's renders the whole chloroplast or whole cell so dark in color that identification is difficultor impossible. Moreover, in our experience, Lugol's solution does not preserve cell structure wellin many cases, making identification difficult. We prefer to preserve in glutaraldehyde, and useLugol's as a reagent to identify starch when necessary. Though formalin is often used to preservecertain marine algae, we do not recommend the use of formalin to preserve freshwater algaebecause cellular features required for identification are often not retained.
Quantitative Determinations of Algal Density and Growth There are four major techniques for counting algae. Two of these are used when counting algae in mixtures, as from field sampling or competition experiments, while the other two are used when counting unialgal samples, such as in growth or bioassay experiments. In each technique pair, one is "high-tech," requiring an expensive instrument, whereas the other is relatively "low-tech" and could be used in remote locations. I. Counting algae in mixed assemblages. A. "Low-tech" method--Sedgewick-Rafter chamber. This chamber is constructed from a thin brass plate from which a precise internal area has been cut; the plate is epoxied to a glass slide. Large, rectangular glass cover slips form the top of the chamber. The chamber's dimensions are 50X20X1 mm, with an area of 1000 mm2, and a volume of 1.0 ml. We have found that the chambers may have a greater depth than 1 mm with the layer of epoxy and hold a greater volume than 1.0 ml; therefore, we will measure the sample added to the chamber. To fill the Sedgewick-Rafter chamber, place the cover slip on top of the chamber, but at an oblique angle, so that the chamber is only partially covered. Watch the instructor's demonstration. Use a pipette to measure 1.2 ml of well-mixed sample and fill the chamber, then gently nudge the cover slip so that it covers the chamber completely. The cover slip should not float, nor should there be any air bubbles; the former results from over-filling, the latter from under-filling the chamber. Now, let the sample settle for at least 15 minutes before beginning to count algae (the time can be used for calibrating the counting grid--see next paragraph). Counts are done with the 4X or the 10X objectives of the compound microscope (depth of field and lens length preclude the use of higher magnification objectives). A Whipple disk is inserted into one of the ocular lenses in order to provide a sample grid. It is necessary to first determine the area (A) of the Whipple field for each set of ocular and objective lenses used. This is accomplished with a stage micrometer. At 4X the width of the grid field is __________mm; the length is _______mm. The area (A) is thus ___________mm. Now place the Sedgewick-Rafter chamber on the microscope stage. Observe 10 randomly-chosen fields, counting every alga within the boundaries of the Whipple grid field and every other alga lying on a boundary line. The average number of cells is N. The density of algae (D = cells/ml) in the original sample is calculated: D = N X A Sedgewick-Rafter/A Whipple Volume Find the average value of D for each alga in the sample provided to you.
For maximum statistical accuracy with the least time expenditure, it has been recommended to count 2 Whipple fields in each of 12 chambers (Woelkerling, et al., 1974. Hydrobiologia 48: 95-107). However, in our case we have streamlined the process due to time constraints. Rinse out your chamber, then refill it with the mixed field sample provided. Do not attempt to count the algae, but note the difficulties involved in trying to accurately identify small cells (since you can't use the 40X objective lens). One strategy for doing this might be to do a preliminary survey of the community from a regular slide, identifying the major taxa (using the 40X or 100X lenses if necessary). Counts could then be done, since you now have a mental catalogue of the small forms. I B. "High-tech"--Inverted microscope method. The expensive component here is the inverted microscope, whose great advantage is that settling chamber depth does not preclude use of high magnification objective lenses. Special "Utermöhl" chambers can be purchased, but they are expensive. Chambers can be constructed from large cover slips, plastic bottle caps, and plastic syringe barrels. If a long focal-length lens is available, chambers may be constructed by gluing syringe barrels to glass slides. A measured volume of sample is added to the chamber and allowed to settle for at least an hour. Time periods as long as 24 hours are preferred, especially if small algae are present in the sample (these will settle only very slowly). A total of 20 random Whipple field should be counted (follow procedures described above for determining the area (A) of the Whipple field for the magnification used, usually 400X). For counting procedures that can be used to achieve increased accuracy, see Sandgren and Robinson (1984), Br. J. Phycol. 19: 67-72. II. Counting unialgal samples (unicells, small colonies, or relatively short filaments). A. "Low-tech" method--hemacytometer. The hematocytometer was developed for counting cells in blood samples (now this is mostly done with electronic paticle counters). There are two delicate, mirrored surfaces that must not be scratched. There are special thick cover slips in the box with hemacytometer; do not throw these away; do not use a regular cover slip with the hemacytometer. Make sure that the mirrored surfaces and special cover slip are clean by wiping them gently with a lens tissue (NOT LAB TISSUES) moistened with water. Now, place the cover slip on top of the two mirrored surfaces, and use a pipette to introduce a drop of well-mixed algal suspension beneath the cover slip. The entire mirrored surface area should be wet, but liquid should not spill into the adjacent channels. Allow to settle at least 15 minutes. Each mirrored surface has a grid etched upon the surface. Each grid is composed on 9 squares, each 1 mm along the sides. These 9 squares are further subdivided into small
areas. See the magnified, printed version posted on the bulletin board. The chamber is 0.1 mm deep. Each 9 mm2 grid holds exactly 0.0009 ml of sample. You have the choice of counting the algae in the entire grid; counting algae in only one of the 9 squares, then multiplying by 9; or counting algae in an even smaller area, and multiplying accordingly. Counts of about 30 cells per unit area are desirable for accuracy. If there are more than 30 cells per unit, you will find it hard to keep track of whether you counted them or not. In this case, dilute the sample, or count algae in a smaller-sized unit and multiply. Repeat the process ten times and determine a mean. If the mean number of cells in the whole grid area were 3 X 10³, then the density of cells in the original sample would be 3.3 X 10⁵ cells/ml. B. "High-tech" method--electronic particle counter (e.g. Coulter counter). In spite of relatively high cost, an electronic particle counter is highly recommended for doing growth or bioassay studies that require many counts and high accuracy. In addition, the instrument will provide particle size/biovolume distributions. The principle of operation is that particles, suspended in an electrolyte solution, are sized and counted by passing them though an aperture having a particular path of current flow for a given length of time. As the particles displace an equal volume of electrolyte in the aperture, they place resistance in the path of the current, resulting in current and voltage changes. The magnitude of the change is directly proportional to the volume of the particle; the number of changes per unit time is proportional to the number of particles in the sample. When opened, the stopcock introduces vacuum into the system, draws sample through the aperture, and unbalances the mercury in the manometer. The mercury flows past the "start" contact and resets the counter to zero. When the stopcock is closed, the mercury starts to return to its balanced position and draws sample through the aperture. As the column of mercury flows past the "stop" position, it initiates electronic counting and when it passes the "stop" contact, the count ceases. The distance traveled by the mercury column can be calibrated to provide a reproducible sample volume. The electrolyte used is 1% NaCl which has been filtered to remove particulates. Samples are dispersed into electrolyte in special sample beakers. The dilution factor is determined experimentally, and is designed to yield the best distribution. The control settings are to be done only by an expert. You should not change the threshold controls, amplification settings, aperture/current setting, bandwidth selector, separate/locked switch, gain control, vacuum control regulator, stirring motor rheostat, or manometer without seeking the assistance of an expert operator. Place the sample to be analyzed on the platform of the sample stand. Open the control stopcock and watch the readout return to zero and the pattern appear on the oscilloscope screen. The unit will count all particles above the size determined with the threshold dial, then display the count on the numeric readout. Write the count down.
Variously-sized aperture tubes are available for use in counting variously-sized particles; the aperture size is chosen to match that of particles. Aperture tubes are quite fragile and expensive. They should be handled only by an expert operator. In using an aperture of 50 um of less to count very small particles, extreme care must be taken to reduce background counts. Electrolyte should be filtered at least 3 times. When large particles are to be counted, care must be taken to reduce error due to settling. III. Growth rate and generation time determinations. In comparing the results of bioassay experiments, or growth of various algae under the same or varying conditions, it is necessary to determine growth rates experimentally. Cell density data are usually obtained with a hemacytometer or electronic particle counter. Growth curves are prepared from data obtained by sampling cultures at intervals, such as once per day, depending upon the growth rate of the alga. Plots of number of cells against time (in days) can be made, and from these curves can be calculated specific growth rate or growth constant (u) and division or generation time (tg). A typical growth curve will show a lag phase, an exponential or log phase, and a stationary or plateau phase, where increase in density has leveled off. In the stationary phase, growth is likely limited by resources such as light or nutrients. Growth rate (u) is calculated with the following equation: u = lnX2 - lnX1
t2-t1 where X1 and X2 are densities at times t1 and t2. Division time (tg) is calculated with the following equation (Guillard, 1973): tg = 0.6931/u Useful references: Schoen, S. 1988. Cell counting. In, Lobban, et al. (eds), Experimental Phycology. A Laboratory Manual. Cambridge University Press, Cambridge, pp. 16-22. Guillard, R.R.L. 1973. Division rates. In, Stein (ed), Handbook of Phycological Methods, V. 1, Cambridge University Press, Cambridge, pp. 289-312.
Periphyton Analysis
Periphyton species diversity and numbers are usually assessed by one of two approaches: 1)scraping, peeling, or using a sticky material to remove algae from a determined area of naturalsubstrate (rocks or plant surfaces) and examining the scrapings microscopically and forchlorophyll or other pigment content, or 2) by placing artifical substrates in the water for laterretrieval, followed by taxonomic and chlorophyll analyses. Commonly used artificial substratesinclude unglazed clay tiles and glass slides. Slides are not thought to represent natural substratesas well as tiles, but they don't need to be scraped (which can damage the algae and disruptcommunity structure) in order to examine them by light microscopy. Non-transparent surfacescan be studied by SEM (which, however, is expensive).
I like to use glass slides because they can easily be mounted in slide holders and anchored atvarious depths in the water. One can also observe ecologically-significant internal features of thealgae, such as parasites or endosymbionts, and see algae at the bottom of a stack or aggregationof cells. Upon retrieval, slides bearing algae can be transported back to the lab in 1%glutaraldehyde; this prevents decomposition or other changes. Back at the lab, slides are rinsed toremove sand and sediment, and algae removed from one side by wiping with a paper towel. Thenthe algae are dehydrated by submerging slides in increasing concentrations of ethanol for 15minutes each, and stained with fast green dissolved in 95% ethanol. Rinsing with 100% ethanolremoves excess stain and completes the dehydration process. Slides should then be submersedbriefly in xylenes in a fume hood, whereupon they are removed and a drop of permount added tothe algae-coated surface. A large cover slip is added at an angle to avoid bubble formation, thenthe slide is left to dry on a slide drier. Addition of a lead weight helps to flatten the preparation.When the permount is hard, excess permount is removed and slides are ready to label, store, andexamine by LM.
Percent cover of species can be estimated in small quadrats marked on the cover slip, or you canuse an ocular grid (Whipple disk) to define areas for analysis. Biovolume can be estimated forvarious species using data provided in Hillebrand, et al. (1999)-- Biovolume calculation forpelagic and benthic microalgae, Journal of Phycology 35:403-424. Algae that were dead whencollected can be recognized by lack of evidence of cytoplasmic contents, which normally stainwell with fast green. This stain also aids in recognition of taxonomically important features suchas chloroplast shape and presence of pyrenoids.
If SEM examination is required, the slides or other substrates are treated as above except thatthey are not stained with fast green. Ethanol-submerged substrates are then critical-point driedand gold-coated prior to examination with the SEM.
Chlorophyll may be extracted from slides or samples scraped from substrates; Dimethylsulfoxide (DMSO) is the best solvent for use with green algae, and is as good a solvent as 90%acetone for diatoms and cyanobacteria (Shoaf and Lium, 1976, Oceanogr. & Limnol. pp 927).Algae are filtered onto a 0.45 micrometer membrane filter that is soluble in DMSO and the filterground in 3-4 ml of DMSO for 3 minutes at room temperature. After grinding, an equal volumeof 90% acetone is added, mixed, then centrifuged for 10 minutes at about 5,000g. Absorbance ofthe supernatant is determined at appropriate wavelengths, 663 nm for chla and 645 nm for chl b.Equations used for acetone extractions are also appropriate for DMSO. Although toxicity ofDMSO is low, it penetrates skin and thus contact with this solvent should be limited.
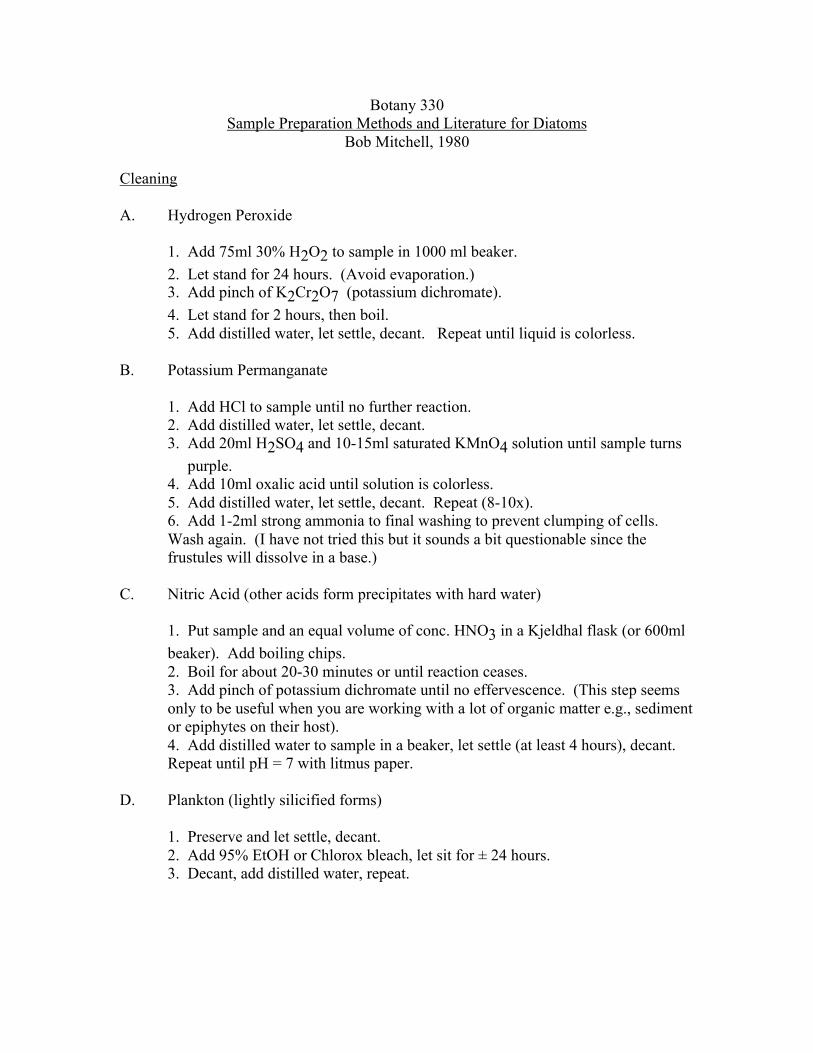
Botany 330Sample Preparation Methods and Literature for Diatoms
Bob Mitchell, 1980
Cleaning
A. Hydrogen Peroxide
1. Add 75ml 30% H2O2 to sample in 1000 ml beaker.
2. Let stand for 24 hours. (Avoid evaporation.)3. Add pinch of K2Cr2O7 (potassium dichromate).
4. Let stand for 2 hours, then boil.5. Add distilled water, let settle, decant. Repeat until liquid is colorless.
B. Potassium Permanganate
1. Add HCl to sample until no further reaction.2. Add distilled water, let settle, decant.3. Add 20ml H2SO4 and 10-15ml saturated KMnO4 solution until sample turns
purple.4. Add 10ml oxalic acid until solution is colorless.5. Add distilled water, let settle, decant. Repeat (8-10x).6. Add 1-2ml strong ammonia to final washing to prevent clumping of cells.Wash again. (I have not tried this but it sounds a bit questionable since thefrustules will dissolve in a base.)
C. Nitric Acid (other acids form precipitates with hard water)
1. Put sample and an equal volume of conc. HNO3 in a Kjeldhal flask (or 600ml
beaker). Add boiling chips.2. Boil for about 20-30 minutes or until reaction ceases.3. Add pinch of potassium dichromate until no effervescence. (This step seemsonly to be useful when you are working with a lot of organic matter e.g., sedimentor epiphytes on their host).4. Add distilled water to sample in a beaker, let settle (at least 4 hours), decant.Repeat until pH = 7 with litmus paper.
D. Plankton (lightly silicified forms)
1. Preserve and let settle, decant.2. Add 95% EtOH or Chlorox bleach, let sit for ± 24 hours.3. Decant, add distilled water, repeat.
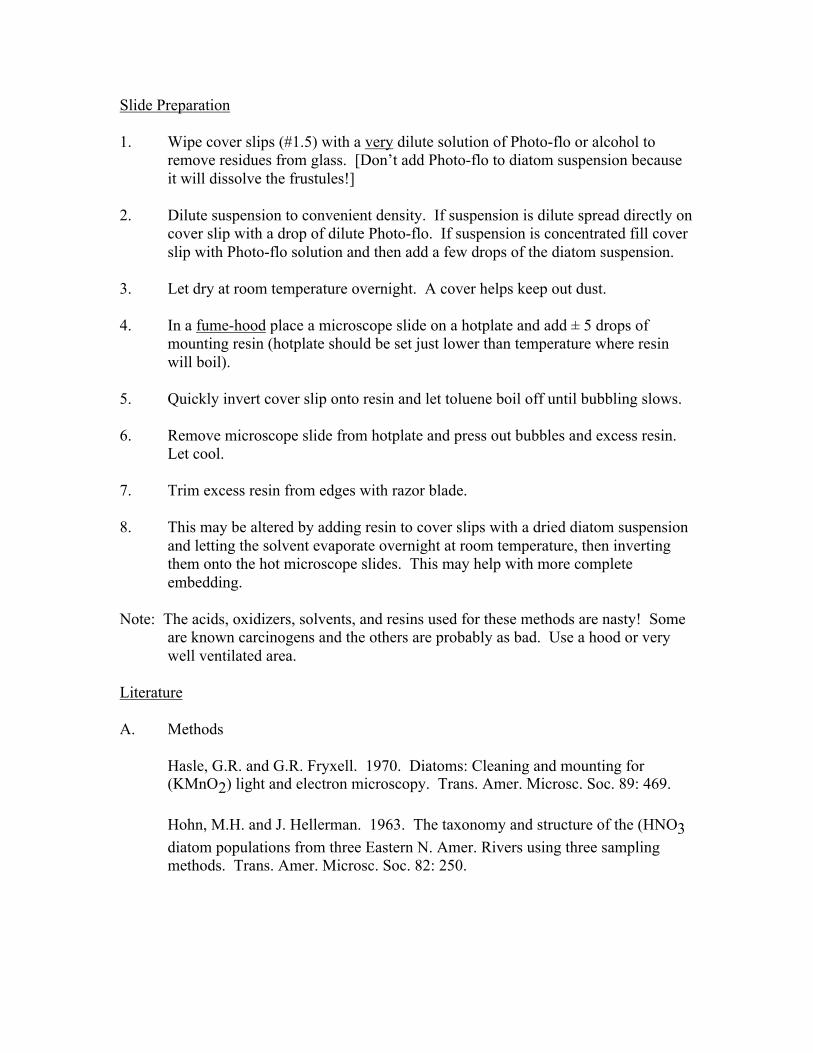
Slide Preparation
1. Wipe cover slips (#1.5) with a very dilute solution of Photo-flo or alcohol toremove residues from glass. [Don’t add Photo-flo to diatom suspension becauseit will dissolve the frustules!]
2. Dilute suspension to convenient density. If suspension is dilute spread directly oncover slip with a drop of dilute Photo-flo. If suspension is concentrated fill coverslip with Photo-flo solution and then add a few drops of the diatom suspension.
3. Let dry at room temperature overnight. A cover helps keep out dust.
4. In a fume-hood place a microscope slide on a hotplate and add ± 5 drops ofmounting resin (hotplate should be set just lower than temperature where resinwill boil).
5. Quickly invert cover slip onto resin and let toluene boil off until bubbling slows.
6. Remove microscope slide from hotplate and press out bubbles and excess resin.Let cool.
7. Trim excess resin from edges with razor blade.
8. This may be altered by adding resin to cover slips with a dried diatom suspensionand letting the solvent evaporate overnight at room temperature, then invertingthem onto the hot microscope slides. This may help with more completeembedding.
Note: The acids, oxidizers, solvents, and resins used for these methods are nasty! Someare known carcinogens and the others are probably as bad. Use a hood or verywell ventilated area.
Literature
A. Methods
Hasle, G.R. and G.R. Fryxell. 1970. Diatoms: Cleaning and mounting for(KMnO2) light and electron microscopy. Trans. Amer. Microsc. Soc. 89: 469.
Hohn, M.H. and J. Hellerman. 1963. The taxonomy and structure of the (HNO3diatom populations from three Eastern N. Amer. Rivers using three samplingmethods. Trans. Amer. Microsc. Soc. 82: 250.
B. Introduction and Terminology
Anonymous. 1975. Proposals for a standardization of diatom terminology anddiagnoses. Nova Hedwigia Beih. 53: 323.
Ross, R. et al. 1979. An amended terminology for the silicious components ofthe diatom cell. Nova Hedwigia Beih. 64:
Fritsch, R.E. 1935. The Structure and Reproduction of the Algae. Vol. 1, Univ.Press, Cambridge.
Patrick, R. and C. Reimer. 1966, 1975. The Diatoms of the U.S. Vol. 1 and 2.Monograph 13. Acad. Nat. Sci. Phil.
C. Taxonomy
Freshwater:
Patrick and Reimer. Vol. 1 and 2.
Hustedt, F. 1930. Bacillariophyta (Diatomeae). In A. Pascher: Die (German)Susswasser-Flora Mitteleuropas. 10.
Marine and Freshwater:
Hustedt, F. 1930-1966. Rabenhorst’s Kryptogamen-Flora von Deutschland,Osterreich und der Schweiz. Band 7. Die Kieselalgen. AkademischeVerlagsgessellschaft m.b.H. Leipizig. [in 3 vol.]. Vol. 1, Centrics; Vol. 2,Araphate forms; Vol. 3, Naviculoid diatoms.
Schmidt, A. Atlas der Diatomaceen-Kunde. Leipzig. O.R. Reisland. [10 vol.480 pl.].
Van Heurck, H. 1896. A treatise of the Diatomaceae. Trans. By W.E. Baxter.William Wesley and Son, London. Diatoms of Belgium. (We don’t have a copyhere.)
Wolle, F. 1890. Diatomaceae of North America. Comenius Press, Bethlehem,PA.
Cleve, P.T. 1894-1895. Synopsis of the Naviculoid Diatoms. Reprint 1965. A.Asher and Co., Amsterdam.
Marine:

Peragallo, H. and M. 1897-1908. Diatomees Marines de France. Reprint. 1965.A Asher and Co., Amsterdam.
Cupp, E.E. 1943. Marine plankton diatoms of the west coast of North America.Bull. Scripps Inst. Oceanogr. 5: 1-237.
Hendey, N.I. 1964. An introductory account of the smaller algae of BritishCoastal Waters. Part 5. Bacillariophyceae. (Diatoms) Ministry of Agriculture,Fisheries and Food. Fishery Investigation Series 4. London: Her Majesty’sStationery Office.
Isolation and Culture of Algae
Algal cultures are essential when conducting competition studies, bioassays, assessment ofzooplankton food preferences, and determination of algal life histories. They are also necessaryfor molecular systematic work. Algal cultures may be "unialgal," which means they contain onlyone kind of alga, usually a clonal population (but which may contain bacteria, fungi, orprotozoa), or cultures may be "axenic," meaning that they contain only one alga and no bacteria,fungi or protozoa. There are four major techniques for obtaining unialgal isolates: streaking,spraying, serial dilution, and single-cell isolations. Streaking and spraying are useful for single-celled, colonial, or filamentous algae that will grow on an agar surface; cultures of someflagellates, such as Chlamydomonas and Cryptomonas may also be obtained by these procedures.Many flagellates, however, as well as other types of algae must be isolated by single-organismisolations or serial-dilution techniques. We will practice spraying and single-organism isolations.
Spraying. In this technique, a stream of compressed air is used to disperse algal cells from amixture onto the surface of a petri plate containing growth medium solidified with agar. Hold apetri plate about 18 inches from the touching tips of two Pasteur pipettes. One of these isattached to an airline via a hose, and mounted onto a ringstand. The other pipette is suspendedtip-up into a container holding the algal mixture. The airflow from the first pipette creates avacuum that draws a stream of algae-containing liquid up from the container through the secondpipette. The airflow also sprays the suspended algae through the air, where they can beintercepted by the agar plate.
Single-cell/colony/filament isolations. The first step in this procedure is to prepare a number of"micropipettes" (very fine-tipped pipettes) from glass Pasteur pipettes. Hold a pipette in bothhands; the tip end is held with a forceps so that the glass near the tip is within the flame of abunsen burner (gas flame). The pipette is held in the flame only until the glass becomes slightlysoft. This is determined by testing for flexibility by moving the tip with the forceps. Then thepipette is removed from the flame and pulled out straight. or at an angle so that there is a bend. Ifyou pull the pipette while it is still in the flame, it will seal up, so don’t do this. Alwaysremove the pipette before pulling it! Use the forceps to break the tip. You can vary the diameterof the finely pulled tip by changing the speed of pulling; the diameter of a slowly-pulled tip willbe greater than that of a rapidly-pulled tip. You would want a narrow diameter tip if you aretrying to isolate very small algae, but a larger diameter tip is required for large cells. Try tomatch the diameter of the pipette tip to the size of the algal cells to be isolated.
Prepare a multiwell plate with sterilized media in each well. Place multiple drops of sterilizedmedia or water onto the inside surface of a sterile petri plate. Attach a micropipette to a length ofrubber tubing, attach a ethanol-sterilized mouthpiece to the the other end of the tubing, and putthe mouthpiece in your mouth. Place a petri dish of algae on the stage of a dissecting microscopeand locate the single cell/colony/filament to be isolated. Then find the tip of the micropipette andmove it to the vicinity of the alga, then suck it up into the pipette tip, then stop the suction. Try toavoid sucking up any other algae. Now remove the pipette from the dish, then blow theliquid+alga into one of the drops of water on a petri plate). Break off and dispose of the portionof the micropipette tip that contained liquid; this has been contaminated. The micropipette cancontinue to be used until all of the pulled portion has been consumed. Now use the micropipette
to transfer the isolated alga from the first drop into a series of fresh drops. This is a washingprocedure that helps remove contaminants. After transfer through 5-10 drops, transfer the algainto a well of the multiwell plate holding liquid growth medium suitable for that particularspecies. Repeat the procedure. Usually several attempts are made because not all isolated algaewill continue to grow, or some may be contaminated with other algal cells.
A particularly effective means of obtaining unialgal cultures is isolation of zoosporesimmediately after they have been released from parental cell walls, but before they stopswimming and attached to a surface. Recently-released zoospores are devoid of contaminants,unlike the surfaces of most algal cells. But catching zoospores requires a steady hand andexperience.
Filaments can be grabbed with a slightly curved pipette tip and dragged through soft agar (lessthan 1%) to remove contaminants. It is best to begin with young branches or filament tips whichhave not yet been extensively epiphytized.
Antibiotics can be added to the growth medium to discourage growth of contaminatingcyanobacteria and other bacteria. Addition of germanium dioxide will inhibit growth of diatoms.
Axenic cultures (beyond the scope of this course) can be obtained by treating isolated algae to anextensive washing procedure, and/or with one or more antibiotics. Resistant stages such aszygotes or akinetes can be treated with bleach to kill epiphytes, then planted on agar forgermination. It is usually necessary to try several different concentrations of bleach and times ofexposure to find a treatment that will kill epiphytes without harming the alga.
Place the tubes/dishes with isolated algae into the culture room and allow growth to occur for 3-4weeks. Examine them with the dissecting scope for signs of growth or contamination.
Freshwater Growth Media used in this class:
1) BBM is Bold's basal medium, chemically defined; good for many green algae.
2) Soil-water is undefined and used for algae whose nutritional requirements are unknown, orwhich will not grow on simple inorganic media. The soil should be loam from a site whereherbicides have not recently been used. Sometimes it is advisable to add a dried pea to themedium before autoclaving.
3) SD11 is a defined medium that is somewhat more complex than BBM; it contains a vitaminmixture. Good for many green algae.
4) DYIII is a defined medium to which vitamins are often added, used for culture ofchrysophytes and cryptomonads as well as some dinoflagellates.
Reference: Stein (ed.) 1973. Handbook of Phycological Methods. Culture methods and growthmeasurements. Cambridge University Press.