Embed Size (px)
Citation preview
CANADIAN HOCKEYOFFICIATING PROGRAM
NEW OFFICIALSOFFICIATING PROGRAMDEVELOPMENT MANUAL
2001 - 2003
New Officials Officiating ProgramDevelopment Manual
This manual should assist all Minor Hockey Associations to better train theirofficials. The “New Officials Officiating Program” gives young hockey players anopportunity to become officials, and better understand and enjoy the game ofhockey, within the guidelines of Fair Play. The Manual is designed to bedistributed to all officials participating in the New Officials Officiating Program.
If you would like this book sent to you in Word format so youcan customize it for your local Officiating program, pleaseemail [email protected] and request it.
This program adheres to the CHA mission statement:
“We dedicate ourselves to the advancement of amateur hockey forall individuals, through progressive leadership, by ensuringmeaningful opportunities and enjoyable experiences, in a safesportsmanlike environment”
Special thanks to Steve Smith for preparing this manual.
For more information please contact:
Steve SmithAssistant Referee-in-Chief, DWMHA
106 Bellevista Dr.Dartmouth, NS
CanadaB2W 2X7
(902) 435 – [email protected]
Table of Contents
Officiating Tips 1
Officials Checklist 3
Qualities of an Official 5
Referee’s are People Too 6
Expectations for Officials 8
Gear Checklist 9
Arena Guidelines 10
Pre-Game Checklist 11
End or Game Checklist 12
Signals 13
2-Man System Positioning 17
End-Zone Positioning 19
2-Man System Guidelines 21
Off-Side 23
Icing 25
Off-Side Pass 26
Face-off Procedure 27
Penalty Procedure 30
Line Change Procedure 32
On-Ice Safety 34
Officiating Tips¬ Linesmen - Ensure you are always at the blue line before the puck crosses
¬ Referees - Come to a full “Stop” when making penalty calls
¬ Do not use the one finger point in any of your signals
¬ When play is on the opposite side, move away from the boards and closertowards the center of the ice to get a better view of the play
¬ Signals should be relaxed, not robotic. A fluid motion is required
¬ Watch to ensure facial expressions and signals on penalties are not overanimated
¬ Indicate player receiving penalty, do not point to box
¬ Use CHA end zone positioning procedures consistently – using “HomeBase”, “Half Piston” and “At the Net” or “Full Piston”
¬ All signals are made with the hand closed and the thumb in tight. Neverspread fingers or stick out thumb
¬ Blow whistle consistently and for all to hear
¬ Don’t throw arms up on stoppages
¬ Do not cross your arms when players come to talk to you
¬ Be prepared to stop at penalty box with signal if timekeepers are not familiarwith the game, or if you have called multiple penalties
¬ Don’t grab at jock
¬ Never lean on boards, lean on your knees, or have your hands in yourpockets
1¬ Work on crisp, clear signals
¬ Eliminate unnecessary gestures!
¬ Referee’s should watch for face-off violators and use verbal warnings fromtime to time
¬ Stand and Skate tall. Avoid leaning over to make calls.
¬ Don’t spend excessive time talking or explaining calls or situations. Keep thegame going
¬ Relax on penalty calls and don’t look away too soon
¬ Avoid a tendency to “over skate” the play
¬ Praise your fellow officials on the ice, but don’t be too obvious
¬ Only put your whistle to your mouth when you are ready to blow it
¬ Eliminate cocky bounce from skating stride
¬ Always watch other official’s work to gain tips for your use
¬ Avoid stops and starts, turn facing play and glide
2
Officials ChecklistBelow are some points to keep in mind when officiating sports at any level. Allofficials must have a good working knowledge of the rules and mechanics. Inaddition to this, very successful officials have an understanding of the humanrelations aspect of their jobs.
Be CompetitiveThe players give maximum effort, so should you. Tell yourself, “I’m not going tolet this game get away from me, I am better than that.” You are hired to makethe calls that control the game – make them!
Have Your Head on RightDon’t think your striped shirt grants you immunity from having to take a littlecriticism. Its part of officiating. Plan on it. Successful officials know how much totake. Ask one when you get the chance.
Get Into the Flow of the GameEach game is different. Good officials can feel this difference. Concentrate onthe reactions of the players. Take note if the tempo of the game changes. Aragged game calls for a different style of officiating from a smooth one.
Don’t BarkIf you don’t like to be shouted at, don’t shout at someone else. Be firm but with anormal relaxed voice. This technique will do wonders in helping you to reducethe pressure. Shouting indicates a loss of control – not only of one’s self, butalso of the game.
Show ConfidenceCockiness has absolutely no place in officiating. You want to exude confidence.Your presence should command respect from the participants. As in any walk oflife, appearance, manner, and voice determine how you are accepted. Try topresent the proper image.
3Forget the FansAs a group, fans usually exhibit three characteristics: ignorance of the rules,highly emotional partisanship and delight in antagonizing the officials. Acceptingthis fact will help you ignore the fans, unless they interrupt the game or stand inthe way of you doing your job.
Answer Reasonable QuestionsTreat coaches and players in a courteous way. If they ask you a questionreasonably, answer them in a polite way. If they get your ear by saying “hey ref Iwant to ask you something” and then start telling you off, interrupt and remindthem of the reason for the discussion. Be firm but relaxed.
Choose Your Words WiselyDon’t obviously threaten a coach or player. This will only put them on thedefensive. More importantly, you will have placed yourself on the spot. If youfeel a situation is serious enough to warrant a threat, then it is serious enough to

penalize, without invoking a threat. Obviously some things you say will be a formof threat but using the proper words can make it suitable.
Stay CoolYour purpose is to establish a calm environment for the game. Fans, coachesand players easily spot nervous or edgy officials alike. Avidly chewing gum,pacing around, or displaying a wide range of emotions prior to or during a gameserves to make you seem vulnerable to the pressure.
4
Qualities of an OfficialKnowledge of RulesFirst and foremost it is important that officials have a strong knowledge of therules (for obvious reasons). You don't want to find yourself in a situation whereplayers and/or coaches and/or fans are questioning you and you don't have ananswer! A strong knowledge of the rules lends to an official’s credibility.
AttitudeAn official’s attitude on and off the ice is very important to development. Anofficial who displays a positive attitude will develop quicker. A positive attitudetowards reffing will also show in your game. Having a positive attitude meansthat you will hustle, show determination, and enthusiasm during the game. Thiswill also show everyone else in the arena that you mean business and that evenif they don't respect your calls at least you are giving a solid effort.
AppearanceOnce again your appearance is important on and off the ice. When you show up
at a rink to officiate a game, you should look respectable. Also on the ice youhave to clean and crisp look. This means clean pants and shirt and alsopolished skates with clean laces. Remember your appearance when you stepon the ice is the first impression that the other people in the rink are going tohave of you.
CommunicationCommunication is another important quality for officials. Not only do you have tocommunicate with the players and coaches but also with your fellow official(s).Officials who develope a good rapport through communication have a decidededge when they are faced with difficult situations. Also you must be able toaccept and give criticism. Having good communication skills makes this aconstructive process.
Reaction under PressureHockey is an intense game and is played with a lot of emotions. This means thatreferee’s are repeatedly placed in pressure situations. Being a referee meansthat you will have to deal with these situations effectively. If you don't react wellunder pressure than don't expect to progress very far in the world of refereeing.Remember that the higher the level, the more there is at stake. This in turnmeans more pressure situations. If you want to progress, learn to deal with it!
5
Referee’s are People TooYou cannot play the game withoutSomeone to call the rulesYet those of us who call themAre often labeled fools.
Every time we do our jobThe fans, they boo and hissWe face the darts thrown by the mobFor calls they think we miss.
They call us names we can’t repeatAnd we try to ignore them,But since with fans we often meetWe’re learning to abhor them!
It’s bad enough they call us namesWhile we try to insistThat “rules is rules” so
“Play the game with hockey sticks not fists!”
These fans, they get the playersAll worked up and riled, too;So now the players hit the iceWith a different attitude:
Whereas they came to play a game,They had a playing will –Instead they’ve got the instinct –“The ref’s no good – Let’s Kill!”
We come to work to call the game,The players’ safety is first.Coaches and parents are to blameFor the players’ vile outbursts.
6A ref is only human,Not a perfect “ref” machine,And humans make mistakesAs some of you have seen.
Humans all have feelingsAnd humans all have prideWhen humans do a good jobYou don’t tell them to “Take a Ride”
A human needs an occasionalPat on the back – some strokesTo keep a human goingTo make him feel like folksInstead of feeling like a dogInstead of feeling blueYou see, a ref is human
Referee’s are People Too

7
Expectations for Officials
Respect all participants of the game.
ϖ
Maintain open and positive communication with players and coaches.
ϖ
Promote the rules of the game to all participants.
ϖ
Maintain professionalism, on and off the ice.

8
Gear Checklistθ Equipment Bag (Large enough to hold all gear)
θ Black helmet with half visor
θ Linesman Jersey
θ Shin pads
θ Elbow Pads
θ Black Pants
θ Athletic protector
θ Skates with white laces
θ Whistle
θ Rule Book

θ Officials Manual
θ Several pens
θ Extra skate laces
θ Visor cleaner
θ Towel
θ Laces to fix net
θ Helmet repair items (Screwdriver, etc.)
θ Water bottle
9
Arena GuidelinesArrive at the rink on time.• It is not appropriate to show up 10 minutes before game time.• Ensure you are at the rink _ hour before game time.• Nothing looks worse then a game being delayed because an official is late.
Do not draw unneeded attention to yourself, on-ice or off-ice.• Standing outside the official’s room, eating an order of fries, before the game
is inappropriate.• Do not wear your official’s jersey around the rink.• Keep your uniform clean and in good repair.
Be polite, courteous and professional when interacting with people in the arena.• Respect is a two way street.• Your presentation can go along way towards earning the respect of a player
or coach, or parent.
When in the “Officials Room” keep the door locked.• It can avoid embarrassing situations.• If someone knocks on the door address him or her in the appropriate manner.• Do not let anyone in the official’s room except other officials or supervisors.• Coaches, parents, family members and friends are not permitted in the room.
10
Pre-Game Checklist“Preparation at Home”
θ Ensure you have all your gear with you, before you leave home.θ Dress appropriately.θ Leave in enough time to arrive at the arena _ hour before game time.
“At the Rink”
θ Obtain “Officials Room” key from rink staff – if necessary.θ Check room conditions, lighting, heating, locking door, etc.θ While in “Officials Room” keep door locked.
“Pre-game Preparation”
θ Stretch & get dressed.θ Discuss upcoming game with other official(s).θ If no one else shows, call the Referee-in-Chief or assignorθ Ensure you have a whistle, extra lace, and room key before going on ice.θ Be on the ice before the players.
“Pre-game Warm-up”
θ Skate hard for 2 – 3 warm-up laps, if possible.θ Inspect and ensure ice surface, boards, glass, and benches are all in good
repair.θ Put nets in place - Inspect mesh, fix if required.θ Ensure pegs are secured, or removed from the net in younger leagues.θ Make sure a timekeeper is present, and warm-up has started.
θ Obtain game report form timekeeper or coach.θ Make sure player / coaches sections on game report are filled out
correctly.θ Fill out info on game report: officials names, # of players / coaches.θ Shake hands with both coachesθ Blow whistle for players to pick up pucks.θ Obtain several pucks from “Home” team.θ Re-check nets to ensure position and damaged mesh.
Ensure goalies, players & officials are in position, clock is set, and start game.
11
End of Game Checklist“On the Ice”
θ Blow whistle when buzzer sounds to end the game.θ Ensure all players go directly to their benches.θ Instruct players / coaches to shake hands.θ Linesmen should stand one on either side of the ice, when players shake
hands.θ Instruct players to leave all gear on, before they go off the ice. (Helmets,
etc.).θ Watch players as they exit the ice.θ Fill-out & sign-off game report, obtain original copy.θ Linesmen move nets for rink attendant.θ Leave ice as a group.
“Off-Ice”
θ Go directly to the “Official’s Room”.θ Discuss game with other officials.θ Assure official’s room is left clean before leaving.
Return room key to rink staff - if necessary.
12
SignalsBoardingStriking the clenched fist of one hand into the open palm of the opposite hand infront of the chest.
Body CheckingOpen palm of the non-whistle hand, with fingers together, comes across bodyon to the opposite shoulder.
Butt-EndingA cross motion of the forearms, one moving under the other. The top hand isopen with the palm down and the bottom hand is a closed fist also palm down.
ChargingRotating clenched fists around one another in front of the chest.
Checking From BehindA forward motion of both arms, with the palms of the hands open and facingaway from the body, fully extended from the chest at shoulder level.
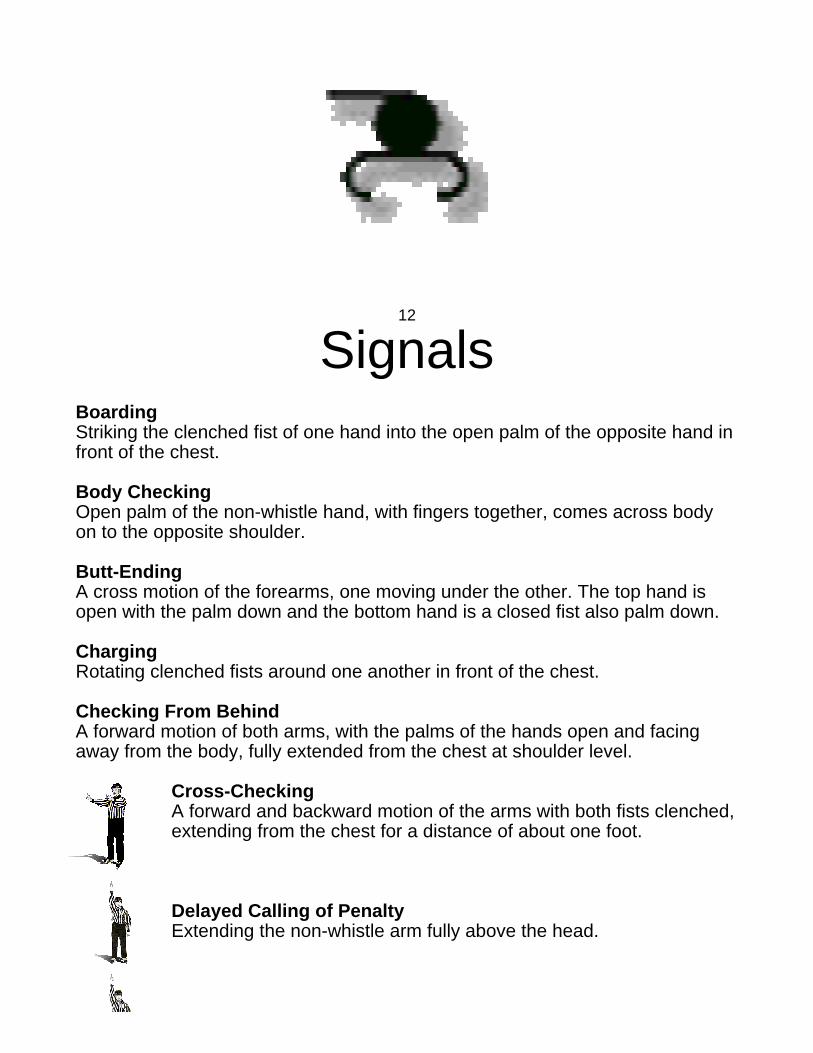
Cross-CheckingA forward and backward motion of the arms with both fists clenched,extending from the chest for a distance of about one foot.
Delayed Calling of PenaltyExtending the non-whistle arm fully above the head.
Delayed Off-SideNon-whistle arm fully extended above the head. To nullify a delayedoff-side the Linesman shall drop the arm to the side.
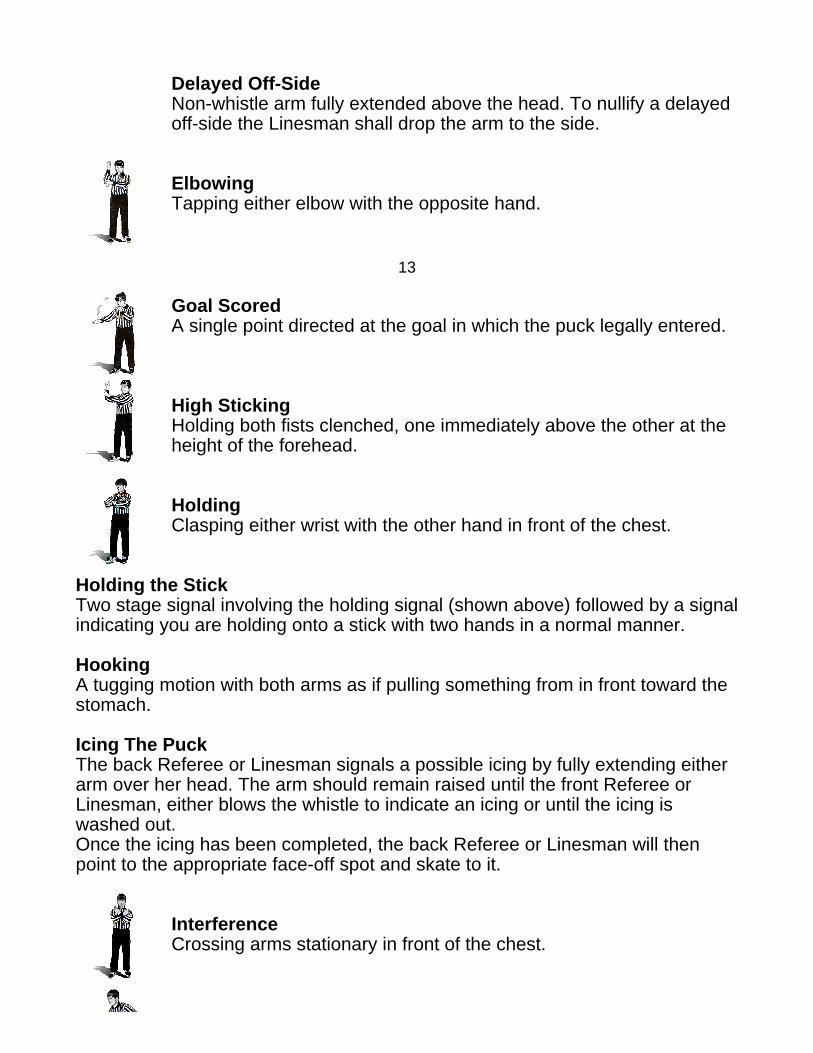
ElbowingTapping either elbow with the opposite hand.
13
Goal ScoredA single point directed at the goal in which the puck legally entered.
High StickingHolding both fists clenched, one immediately above the other at theheight of the forehead.
HoldingClasping either wrist with the other hand in front of the chest.
Holding the StickTwo stage signal involving the holding signal (shown above) followed by a signalindicating you are holding onto a stick with two hands in a normal manner.
HookingA tugging motion with both arms as if pulling something from in front toward thestomach.
Icing The PuckThe back Referee or Linesman signals a possible icing by fully extending eitherarm over her head. The arm should remain raised until the front Referee orLinesman, either blows the whistle to indicate an icing or until the icing iswashed out.Once the icing has been completed, the back Referee or Linesman will thenpoint to the appropriate face-off spot and skate to it.
InterferenceCrossing arms stationary in front of the chest.

KneeingSlapping either knee with the palm of the hand, while keeping bothskates on the ice.
14
Match PenaltyPatting flat of the hand on the top of the head.
MisconductBoth hands on hips.
Penalty ShotArms crossed above the head. Give the signal upon stoppage ofplay.
Red Line Off-Side PassThe back Linesman or Referee who is positioned at or near the blue line willsignal if the pass originated inside the blue line with the following signal: Witharms extended at shoulder level, the official will point toward the centre red line.
RoughingFist clenched and arm extended out to the front or side of the body.
SlashingA chopping motion with the edge of one hand across the oppositeforearm.
SpearingJabbing motion with both hands thrust out immediately in front of thebody and then hands dropped to the side of the body.
TrippingStriking leg with either hand below the knee, keeping both skates onthe ice.
15
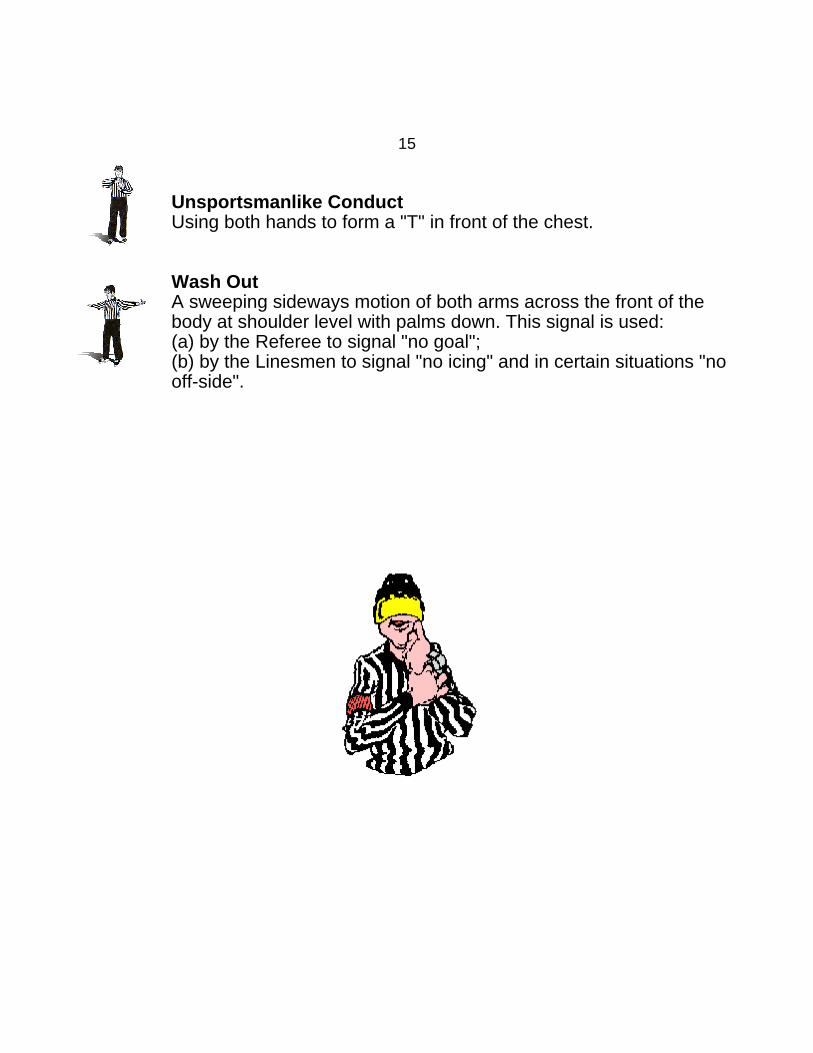
Unsportsmanlike ConductUsing both hands to form a "T" in front of the chest.
Wash OutA sweeping sideways motion of both arms across the front of thebody at shoulder level with palms down. This signal is used:(a) by the Referee to signal "no goal";(b) by the Linesmen to signal "no icing" and in certain situations "nooff-side".
16
2-man System PositioningGeneral
In the 2-man system the ice is divided by the center red line. After offside calls,and most other stoppages, the official who did not blow the whistle will retrievethe puck, skate back and hand it to the other official. Exceptions are when agoal is scored or a penalty is assessed, then the other official will pick up thepuck and conduct the face-off in the appropriate spot.
• This division of the ice is for face-off procedure only. Either official anywhereon the ice where there is an infraction can assess penalties.
• Each official covers two thirds of the total ice surface. This coverage overlapsin the neutral zone.
Never allow the puck to pass you in the neutral zone, and be closer to your blueline than you are. If there is a situation where you are in the path of the playersand the puck in the neutral zone then always move towards your blue line. Thiswill ensure proper positioning.
Another thing that you should never do is climb the boards, If you do, the puckwill pass you, leaving you out of position and being able to call an off-side atyour blue line. Also, being on the boards puts you in a vulnerable position andthe potential for personal injury is much greater.
• Officials should be 2 – 3 feet inside the blue line when calling an off-side for amaximum view of the line.
• When you are the front official you must be at the center red line as the puckapproaches in order to effectively call potential off-side passes and icings.
• Both officials should never be on the same side of the ice.
• Officials should maintain a diagonal position in relation to one another, nofurther than one line apart, while play is in progress.
17
All face-offs shall be conducted at the designated face-off spots as indicated bythe reason for the stoppage, or on a line parallel to the side boards from oneend zone face-off spot to the other end zone face-off spot.
Start of Game
To start the game, or any face-off at center ice, the two officials should bepositioned along the center red line facing each other, The official taking theface-off should be facing the penalty bench so that the timekeeper can start theclock when the puck is dropped.
When the puck is dropped the official not conducting the face-off, must go withthe puck, whether left or right. This will allow the official to be at the blue linebefore the puck.
As the puck moves into the end zone, the front official must implement “EndZone Positioning”. Meanwhile the back official will move up the boards and takea position just outside the blue line, at an appropriate angle to face the play.
18
End Zone Positioning
Landmarks
• “Home Base”:
¬ 15-20 cm off the boards, half way between goal line and face-off circlehash marks.
• “Half Piston”
¬ Half way (generally, in line with the face-off dots) to the net on animaginary line joining home base and the near goal post.
• “At the Net”
¬ Nearer to the net than half piston.
¬ Anywhere (except “no mans land”) to get best view of play.
¬ Can go behind net if forced.
Actions
• Piston action:
¬ Back and forth between home base and the net.
¬ Puck on officials side = Home Base.
¬ Puck on opposite side of ice = Half Piston.
¬ Play at the net = At The Net.
• Pivot:
¬ Used to maintain position while allowing play to pass quickly behind.
¬ Turn 45 degrees towards play, step out from the boards 1-2 meters,pivot through 90 degrees, back up to boards.
19• Bump:
¬ Move (shuffle/slide) along the boards to prevent interfering with theplay.

¬ Bump towards blue line only as far as the hash marks, or as deep asgoal line.
Most Common Mistakes
• Over skating (over reacting).
• Not anticipating movements / failure to get back to home base.
20
2-man System GuidelinesGeneral
When play is in the end zone, the back official should never stand directly on orinside the blue line, but should have both feet approximately just outside theline, ready to move inside the line if a close play happens at the line.
When a player on the ice is injured, the play should be whistled dead, and ateam official signaled to attend to the player. Officials should ensure that theremaining players return to their respective benches.
At the end of each period, the back official should blow the whistle the instantthe time runs out to accompany the buzzer to prevent any confusion regardingclose plays at the net and the sound of the buzzer.
Face-offs
Once all is clear, the official who will conduct the face-off shall go directly to theface-off spot. The other official shall retrieve the puck and hand it off to hispartner. it is permissible for the official who will be conducting the face-off to pickup the puck if it is close by or if the other official is busy monitoring players orretrieving a broken stick, etc.
The official who will conduct the face-off shall ensure that the other official is inposition before dropping the puck.
The official conducting the face-off shall ensure that all players move quickly intoposition for the ensuing face-off.
Working the Line
It is essential that officials be at the blue line prior to the play crossing the line sothat they are in proper position to make the correct call. Officials should workthe line, meaning that they shall be positioned so that they get the best possibleangle to view the play as it crosses the blue line. The circumstancessurrounding every play and the position of the players will determine thedistance inside the line that will be required to make the correct call.
21Face-off Encroachment
This occurs when a player other than the center stands with a skate either insidethe face-off circle, on the face-off circle or in the area between the hash marksprior to the dropping of the puck. It is acceptable for the player’s stick to beinside the face-off circle but not in the area between the hash marks.
22
Off-SideOff-Side Rule
• Puck must proceed attacking players across blue line.
• A player cannot put an opponent off-side.
• All deflections are off-side.
• Delayed off-sides reduce stoppages.
• All players must be clear of the zone to nullify delayed off-side.
• A goal cannot be scored on a delayed off-side shoot-in.
Four Common Off-Side Scenarios
• Puck carried over the blue line with players off-side: Immediate off-sidecall.
• Puck deliberately carried over the blue line with players obviously off-side:Intentional off-side call.
• Puck shot, passed or deflected into attacking zone with players off-side:Delayed off-side call.
• Player deliberately plays the puck during a delayed off-side situation,knowing he/she is off-side: Intentional off-side call.
Immediate Off-Side Procedure
• Blow whistle immediately.
• Point to face-off location (point to offender if required to “sell” the call).
• No delayed signal
• Use voice to enhance signals.
23Delayed Off-Side Procedure
• Raise non-whistle arm.
• Verbal “Off-Side”.
• If all attackers clear zone: Arm down, Verbal “Okay”.
• If attacking player plays the puck – Intentional off-side.
Intentional Off-Side
• Blow whistle immediately.
• Point to offender.
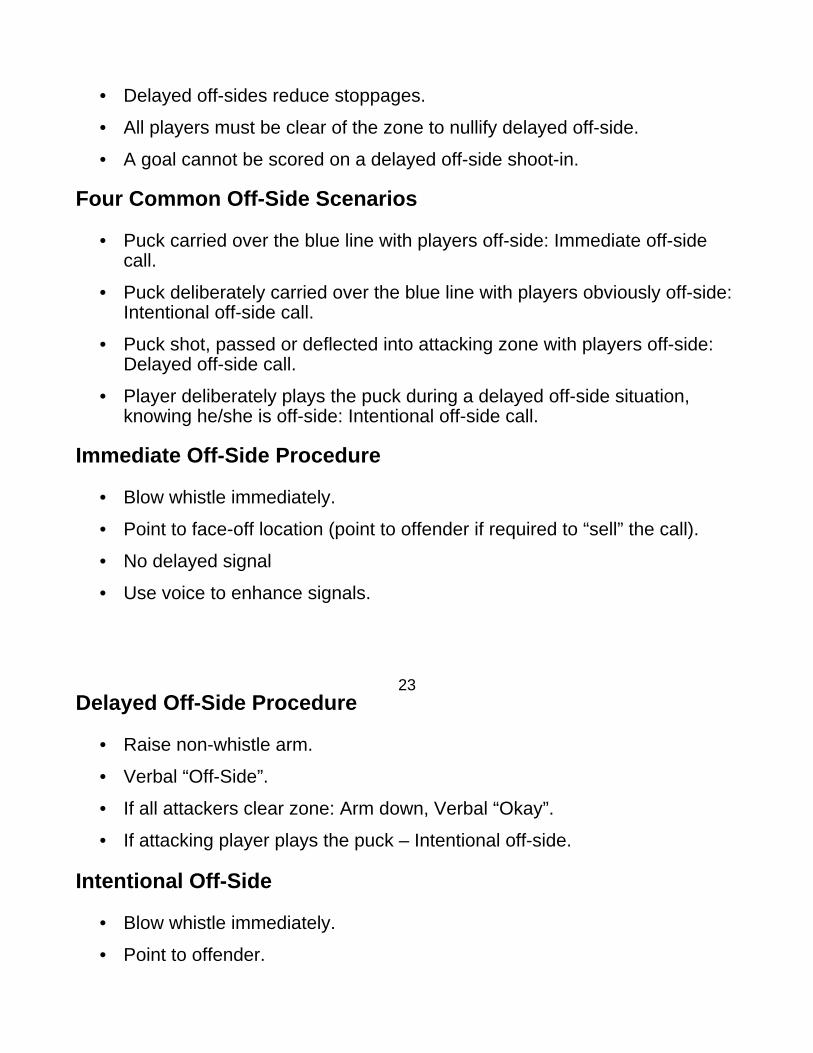
• Front official points to offending team’s end-zone.
• Front official sells the call with “intentional off-side” or “all the way down”(or something similar).
• Front official retrieves the puck; back official goes to face-off location.
24
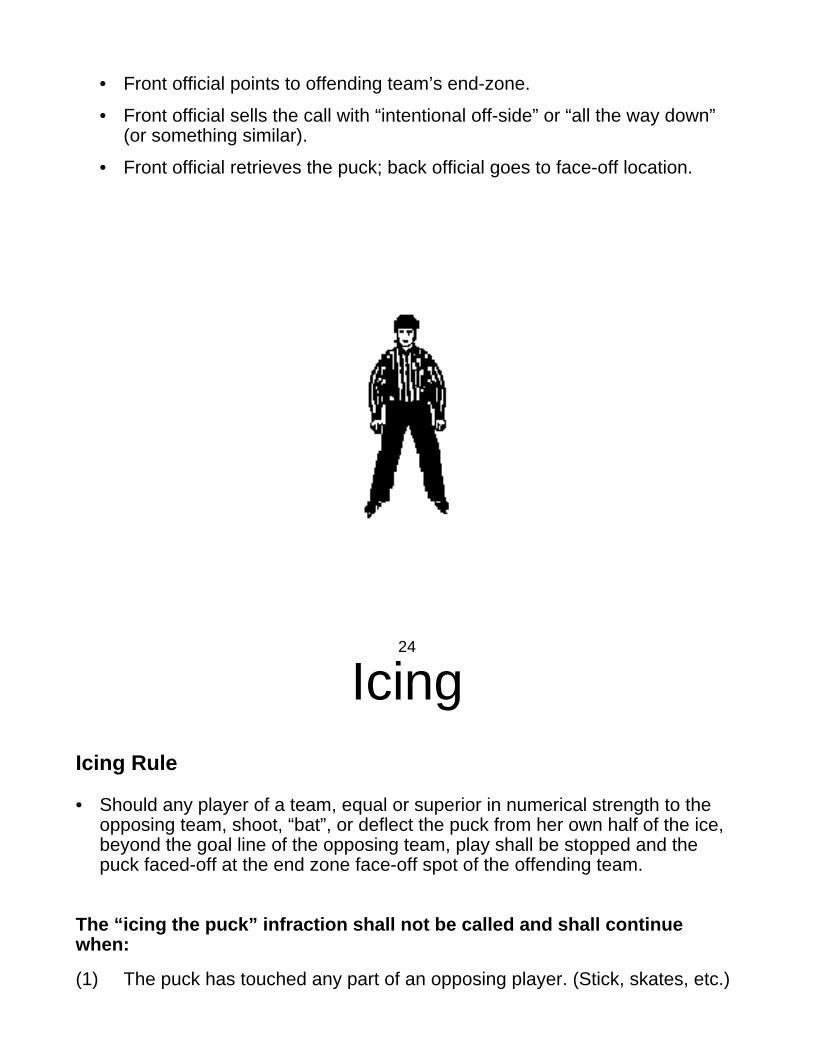
IcingIcing Rule
• Should any player of a team, equal or superior in numerical strength to theopposing team, shoot, “bat”, or deflect the puck from her own half of the ice,beyond the goal line of the opposing team, play shall be stopped and thepuck faced-off at the end zone face-off spot of the offending team.
The “icing the puck” infraction shall not be called and shall continuewhen:
(1) The puck has touched any part of an opposing player. (Stick, skates, etc.)
(2) In the opinion of the Referee or Linesman, a player of the opposing team,except the goaltender, is able to play the puck before it crosses the goalline, but has not done so, the play shall continue and the “icing the puck”rule shall not apply.
Procedure
• Back official:
¬ Signals all potential icings, with non-whistle arm. Uses voice toenhance communication.
• Front official:
¬ If icing occurs: Blow whistle and then raise arm to complete procedure.Proceed to retrieve puck.
¬ If no icing: Washout the icing using the appropriate signal. Use voice toenhance communication.
25
Off-Side PassThree Important Points
• Origin of pass – position of the PUCK when released is the determiningfactor.
• Completion of pass – position of receiver’s SKATES when puck crossesthe red line.
• Off-side players who “tag up” with the center red line are considered on-side
Procedure
• Back official signals all potential off-side passes with arm closest to redline. Uses voice to enhance communication.
• Front official:
¬ If off-side: Points at off-side players (optional) and stops play when off-side pass completed. Points to face-off location.
¬ If not off-side: Gives verbal “Okay”. Reserve washout signal for closeplays only.
26
Face-off ProcedureOfficial’s Stance
• Feet shoulder width apart.
• Knees slightly bent.
• Balls of feet, knees and shoulders in same plane.
• Feet one foot from face-off dot.
• Puck held belt high, in close to body.
• Free hand at side.
Common Stance Faults
• Feet too close together (poor balance) or too wide (poor mobility).
• Not square to dot (not facing directly across the ice).
• Bent over.
• Knees not flexed.
Player’s Position
• Centers:
¬ Feet behind and clear of face-off restraining lines.
¬ Visiting team sets up first.
¬ Toe of stick touching ice in designated area.
¬ Stick not moving (frozen!).
• Other players:
¬ Feet outside circle (or 15 feet).
¬ Body and sticks on-side.
27Encroachment Enforcement Responsibilities
• Front Linesman: Centers and players in front.
• Back Linesman: Players behind partner dropping puck.
Face-off Violations
• Player encroaches circle.
• Player lines up with portion of body or stick offside.
• Center leaves – talks to teammate/coach.
• Center cheats (touching face-off restraining lines, stick an ice, stick not oncircle, stick moving).
• Center commits a false start.
Violation Procedure
• Front Linesman:
1) Verbally eject the center.
2) Hand signal to indicate violating team.
3) Communicate what the violation was.
• Back Linesman:
1) Blow whistle.
2) Hand signal to indicate violating team.
3) Hold position – do not approach circle.
Puck Drop
• Pause after last center “freezes”. Vary the length of pause to preventtelegraphing.
• Out and down in one motion.
• Puck to land flat.
28• Common faults:
¬ Up and over hand motion.
¬ Cueing centers with unconscious thumb, hand or body motion just priorto the drop.
¬ Beginning exit while dropping puck.
¬ Dropping puck too hard or too soft.
Face-off Exit
• Pause to let puck clear, look for clear route then back away towardsboards.
• Move quickly back to blue line along the boards. Keep puck in sight; skatebackwards if puck is near.
• Release partner from your blue line with head nod.
Tips
• Ensure other officials ready (make eye contact with partner(s)) beforedropping puck.
• Be ready prior to arrival of players.
• Encourage players to line up correctly as they arrive.
• Don’t coach players who line up incorrectly back into position.
• Provide no warnings of ejection.
• Eject center of first team guilty of encroachment – not players who followfirst offender.
• Establish standard early and maintain it.
• Be consistent in application of the procedure.
29
Penalty Calling ProcedurePurpose
• To communicate effectively with players, coaches and fans aboutpenalties.
• To display confidence and enhance respect.
Procedure Summary
1. Referee raises arm straight up.
2. Referee blows whistle, stops and pauses.
3. Points to penalized player, indicates players’ number, color and theinfraction while giving penalty signal.
4. Proceeds to penalty box while keeping in sight (skate backwards)
5. Stops at penalty bench. Reports players’ number, color, time (2, 5, etc.)and infraction type. Makes penalty signal while at the penalty box.
Tips
• Know the procedure well. Proper execution of the procedure enhancesrespect.
• Maintain composure. Be professional, not emotional.
• Come to a complete stop and make a distinct pause after whistle. Allowparticipants attention to shift to you before issuing the penalty.
• Treat disrespect with respect.
• Adjust route and timing when going to penalty bench to avoidconfrontations with penalized players.
• At penalty bench:
¬ Make eye contact with penalty timekeeper.
¬ Not mandatory to stop if timekeeper well qualified and simple situation.
30Signals
• Delayed Penalty Signal – Arm straight up, hand open, fingers together.
• Rotate raised arm down to point to penalized player(s).
• Point with open hand (fingers together). Don’t point with one finger.
• Don’t point if penalized player too close (within 3 meters).
• Signal each infraction (two slashing penalties results in two slashingsignals).
• Signal infractions clearly and deliberately. Make them so everyone cansee them.
Verbal Communication
• Use calm, clear voice with neutral tone.
• Don’t include unnecessary words.
• Don’t get personal or engage in “reverse abuse”
Common Faults
• Not stopping before assessing penalty.
• Insufficient delay between whistle and assessment of penalty.
• Not giving two signals if two penalties of the same infraction assessed.
• Coming too close to penalized player on way to or from penalty bench.
• Lack of composure:
¬ Procedure too rushed.
¬ Emotion in voice or body language.
• Using intimidating words, signals or gestures.

• Grandstanding.
• Unassertive voice or signals.
31
Line Change ProcedurePurpose
• To prevent delays.
• To guarantee the home team the advantage of last change.
Procedure Summary
1. Referee assumes normal position for upcoming face-off. Procedure canbe started earlier if situation warrants and to shorten length of stoppages.
2. Looks to visitors’ bench.
3. Gives maximum 5 second count to allow for visitor change.
4. Raise arm in direction of visitors’ bench.
5. Looks to home bench.
6. Gives maximum 5 second count to allow home team to change.
7. Drops arm to indicate that no further changes will be permitted.
Notes
• Cooperation, not confrontation will ensure success.
• May use either hand.
• Make eye contact with coach.
• Two-man system – official dropping the puck does the procedure.
• Perform procedure at every stoppage of play. Start of period and after goalmay be excluded if no problems.
• Get into position for face-off without undue delay. Start procedure promptlywhen in position (even if engaged in discussion) or earlier, if possible.
32Common Faults
• Late to start.
• No eye contact.
• Too nonchalant.
• Too mechanical.
• Incorrect timing.
• Lack of enforcement.
Violation Procedure
• Blow whistle.
• Order players back.
• Warn offending team through captain or alternate.
• Penalize 2nd infraction by the same team.
What Constitutes A Line Change?
• 1 to 5 players.
• No player can come onto the ice and then leave.
• There is a common practice of changing the forwards and defencemenseparately or at slightly different times. As long as they adhere strictly tothe time frame this is perfectly acceptable.
Remember:
• The spirit of the rule is to speed up the game, not to be confrontational.
33
On-Ice SafetyPrepare for all games and clinics with proper warm-up and cool-downroutines.
Always wear full protective equipment, including a CSA approved helmet andvisor, during games and on-ice training sessions.
Carefully check playing surface to ensure that no hazards exist.• Ice Surface• Glass/Wire screens• Boards• Gates and doors
If conditions in the playing area are such that they place undue risks on theparticipants, the game should be suspended unless such conditions can becorrected. The referee is the final authority regarding any decisions to suspenda game due to unsafe playing conditions.
Never climb on the boards or glass in an attempt to get out of the way of theplay - this is a dangerous practice which increases the risk of injury to the officialand the players.
Never turn your back if the possibility of getting hit with the puck or being bodychecked exists. Instead, officials should "TURN, FACE and BRACE":
ϖ TURN towards the puck to maximise the protection your equipment provides.
ϖ FACE the shooter squarely - this will help dissuade the player from shootingthe puck towards you, lets you see the puck better and allows you to movelaterally in both directions if necessary.
ϖ BRACE for impact - use your arms and hands as shock absorbers, set yourfeet shoulder width apart, and flex your knees for better balance and agility.
34