Embed Size (px)
Citation preview
Installing Windows 7
MICROSOFT EXAM OBJECTIVES COVERED IN THIS CHAPTER:
Perform a clean installation.
■ This objective may include but is not limited to: identifying
hardware requirements; setting up as the sole operating
system; setting up as dual boot; installation methods; boot
from the source of installation, preparing the installation
source: USB, CD, network share, WDS.
Upgrade to Windows 7 from previous versions of
Windows.
■ This objective may include but is not limited to: upgrading
from Windows Vista; migrating from Windows XP;
upgrading from one edition of Windows 7 to another edition
of Windows 7.
Migrate user profiles.
■ This objective may include but is not limited to: migrating
from one machine to another; migrating from previous
versions of Windows; side-by-side vs. wipe and load.
Configure updates to Windows 7.
■ This objective may include but is not limited to: configuring
update settings; determining source of updates;
configuring Windows Update policies; reviewing update
history; checking for new updates; rolling back updates.
�
�
�
�
Chapter
1
C01.indd 1C01.indd 1 9/5/11 7:55:49 AM9/5/11 7:55:49 AM
COPYRIG
HTED M
ATERIAL
Before you can master any Microsoft product, you must know how to properly install the product. In this chapter, I will show you how to install Windows 7. This is a straightforward
process that can be highly automated and user friendly.Preparing for the installation of Windows 7 involves making sure your hardware meets
the minimum requirements and is supported by the operating system. Another consideration when installing Windows 7 is whether you are going to upgrade from a previous version of Windows or install a clean copy on your computer. An upgrade attempts to preserve existing settings; a clean install puts a fresh copy of the operating system on your computer. Installation preparation also involves making choices about your system’s confi guration, such as selecting a disk-partitioning scheme.
To complete the Windows 7 installation, you will need to activate the product through Windows Activation. This process is used to reduce software piracy. After Windows 7 is installed, you can keep the operating system up to date with post-installation updates.
When you install Windows 7, you should also consider whether the computer will be used for dual-boot or multiboot purposes. Dual-booting (also called multibooting) allows you to have your computer boot with operating systems other than Windows 7.
Windows Deployment Services (WDS) is an objective listed by Microsoft under the “Perform a Clean Installation” section of the objectives. We will cover WDS is full detail in Chapter 2, “Automating the Windows 7 Installation.”
Introducing Windows 7Microsoft Windows 7 is the newest version of Microsoft’s client operating system software. Windows 7 combines the best of Windows XP and Windows Vista.
Microsoft currently has six different versions of the Windows 7 operating system:
� Windows 7 Starter
� Windows 7 Home Basic
� Windows 7 Home Premium
� Windows 7 Professional
� Windows 7 Enterprise
� Windows 7 Ultimate
C01.indd 2C01.indd 2 9/5/11 7:55:50 AM9/5/11 7:55:50 AM
We will look closer at each of these versions later in this chapter. The Windows 7 hardware requirements are discussed in this chapter, as well as in greater detail in Chapter 2.
Windows 7 has been improved in many of the weak areas plaguing Windows Vista. Windows 7 has a much faster boot time and shutdown compared to Windows Vista. It is also easier to install and confi gure.
The Windows 7 operating system functions are also faster than its previous counterparts. Opening, moving, extracting, compressing, and installing fi les and folders are more effi cient than they were in previous versions of Microsoft’s client operating systems.
Let’s take a look at some of the improvements and features of Windows 7 (this is just an overview of some of the benefi ts to using Windows 7):
We will look closer at these features throughout this book.
Windows Taskbar In the previous versions of Windows, there was a Quick Launch bar on the left-hand side, and on the right-hand side you could see which programs were loaded and running. The Quick Launch bar is now gone and has been replaced by the Windows Taskbar and Jump Lists, which we discuss next.
The Windows Taskbar allows a user to quickly access the programs they use the most. One advantage to having the applications on the Windows Taskbar is fewer icons on the Desktop, thus allowing for a more manageable Desktop environment.
Jump Lists Jump Lists are a new feature to the Windows 7 lineup, and they allow you to quickly access fi les that you have been working on. For example, if you have the Word icon in the Taskbar, you can right-click it to see all the fi les that you have been working with recently. In the case of Internet Explorer, you could view all the websites that you have visited recently. Another advantage to using Jump Lists is that you can preset certain applications, such as Windows Media Player.
New Preview Pane Windows XP and Windows Vista have a preview pane, but Windows 7 has improved on the preview pane by allowing you to view text fi les, music fi les, picture fi les, HTML fi les, and videos. Another new advantage is if you have installed Microsoft Offi ce and Adobe Acrobat Reader, you now have the ability to also view Offi ce fi les and PDF fi les, respectively.
Windows Touch This is one of the coolest features included with Windows 7. Windows Touch allows you to control the operating system and its applications by using a touch screen. For example, you can open a picture and then move it around, make it larger or
Introducing Windows 7 3
C01.indd 3C01.indd 3 9/5/11 7:55:51 AM9/5/11 7:55:51 AM
4 Chapter 1 ■ Installing Windows 7
smaller, or place it anywhere on the Desktop, all with the touch of your fi ngers on the screen. Touch screens are found on laptops, tabletops, GPS devices, phones, tablets, slates, and now on the Windows 7 operating system.
Windows XP Mode Microsoft realizes that many organizations are running Windows XP and older applications on these Windows XP systems. Windows XP Mode allows an organization that chooses to upgrade to Windows 7 to still have the ability to run older Windows XP applications on the Windows 7 operating system. In Windows XP Mode, Windows 7 uses virtualized technology to run a virtual XP operating system to allow the use of the older applications.
Simpler Home Networking Windows 7 networking has been made easier with the improvement of HomeGroups. HomeGroups allow you to easily connect two or more PCs running Windows 7 on your home network. HomeGroups are an easy way to set up a network using Windows 7. Windows 7 searches for your home network, and if one is found, it connects after you enter the HomeGroup password. If a home network is not found, a networking wizard automatically creates a password for the HomeGroup. This password allows you to connect all of your other computers to the same network, and it can be changed anytime after the installation of Windows 7.
Device Stage Device Stage is new to the Windows operating systems family. It allows you to connect a compatible device to your PC and have a picture of the device appear in Control Panel for installation. Using Device Stage, you can easily share fi les between devices and computers. Before Windows 7 Device Stage, when you connected a device to the PC, you might see multiple devices. For example, when you add a multifunction printer (printer, scanner, and copier), it might be added as three separate devices. Device Stage helps resolve this issue. Another feature of Device Stage is that the device vendors can customize the icons for Device Stage so that the same multifunction printer mentioned before can be used to order ink (through the use of a link) from Device Stage.
View Available Networks If you have used a laptop, you have used the View Available Networks feature. When you use a wireless network adapter and you right-click the icon in the system tray, you can choose the wireless network to which you want to connect. Connecting to a wireless network was done through the wireless network adapter. Now that same functionality is built into the Windows 7 operating system.
Windows Internet Explorer 8 At the time of this writing, Windows 7 included Internet Explorer, IE8, which allows a user to work faster and more effi ciently on the Internet because of new search features, address bars, and favorites.
The following list presents some of the new features of IE8:
Instant Search This feature allows you to quickly access search requests without typing in the entire search criteria. As you start typing in the search request, you see suggestions for your search. The advantage to Instant Search is that it uses your
C01.indd 4C01.indd 4 9/5/11 7:55:51 AM9/5/11 7:55:51 AM
browsing history to narrow down the suggestions. If one of the suggestions is what you are looking for, you can choose it without fi nishing the query.
Accelerators This new feature allows you to accelerate actions on Internet services and applications. For example, if you were looking for a street address and you clicked the blue accelerator icon, a map would appear right there on the screen. Microsoft accelerators can be used for email, searching, and so forth. Websites such as eBay and Facebook also offer accelerators for their services.
Web Slices Web Slices are instances on a website that you can access without accessing the site itself. For example, you can get stock quotes, sports scores, or auction items without visiting the respective sites. With Web Slices, as the information that you are watching changes, the updates show immediately.
Choosing an Appropriate Operating System
As an IT consultant, I have clients who want to stay on the leading edge of technology but don’t have the money to replace all of their equipment. This is where I have to convince the client that it is better to slowly migrate their equipment.
Try presenting a timeline to your customers or organization that shows the migration to Windows 7. Your clients will be happy, and you will have the time needed to migrate your organization.
I understand that if you are reading this book, there is the strong likelihood that you are getting ready to install Windows 7 in your organization. But since not all of your machines will be able to run Windows 7, it is important to know the minimum requirements for Windows XP and Vista.
Windows 7 ArchitectureWindows 7 has limited the fi les that load at system startup to help with the core performance of the operating system. Microsoft has also removed many of the fl uff items that Windows Vista used, allowing for better performance.
Windows 7 Architecture 5
C01.indd 5C01.indd 5 9/5/11 7:55:51 AM9/5/11 7:55:51 AM
6 Chapter 1 ■ Installing Windows 7
Microsoft offers both a 32-bit and a 64-bit version of Windows 7. The terms 32-bit and 64-bit refer to the CPU, or processor. The number represents how the data is processed. It is processed either as 232 or 264. The larger the number is, the larger the amount of data that can be processed at any one time.
To get an idea of how 32-bit and 64-bit processors operate, think of a large highway with 32 lanes. Vehicles can travel on those 32 lanes only, so when traffi c gets backed up, the result is delays. Now think of how many more vehicles can travel on a 64-lane highway. The problem here is that a 32-lane highway can’t handle the number of vehicles a 64-lane highway can. You need to have the infrastructure to allow for that volume of vehicles. The same is true for computers. Your computer has to be confi gured to allow you to run a 64-bit processor.
So what does all of this mean to the common user or administrator? It’s all about random access memory, or RAM. A 32-bit operating system can handle up to 4 GB of RAM, and a 64-bit processor can handle up to 16 exabytes of RAM. None of this is new. Although 64-bit processors are just starting to get accepted with Windows systems, other operating systems, such as Apple, have been using 64-bit processors for many years.
Computer processors are typically rated by speed. The speed of the processor, or central processing unit (CPU), is rated by the number of clock cycles that can be performed in 1 second. This measurement is typically expressed in gigahertz (GHz). One GHz is one billion cycles per second. Keep in mind that processor architecture must also be taken into account when considering processor speed. A processor with a more efficient pipeline will be faster than a processor with a less-efficient pipeline at the same CPU speed.
Now that you have seen the new features of Windows 7, let’s look at how to prepare the machine to install Windows 7.
Preparing to Install Windows 7Installing Windows 7 can be relatively simple because of the installation wizard. The installation wizard will walk you through the entire installation of the operating system.
The most diffi cult part of installing Windows 7 is preparing and planning for the installation. One thing I often say to IT professionals is, “An hour of planning will save you days of work.” Planning a Windows 7 rollout is one of the hardest and most important tasks that you will perform when installing Windows 7.
There are many decisions that should be made before you install Windows 7. The fi rst decision is which version of Windows 7 you want to install. As mentioned previously, Microsoft has six different versions of the Windows 7 operating system. This allows an administrator to custom-fi t a user’s hardware and job function to the appropriate version
C01.indd 6C01.indd 6 9/5/11 7:55:52 AM9/5/11 7:55:52 AM
of Windows 7. Many times Microsoft releases multiple editions of the operating system contained within the same Windows 7 media disk. You can choose to unlock the one you want based on the product key you have. Let’s take a closer look at the different versions of Windows 7.
Windows 7 Starter
The Windows 7 Starter edition was designed for netbooks, and it is now available worldwide. Windows 7 Starter edition has some features that work well on netbooks:
� A safe, reliable, and supported operating system
� HomeGroup, which allows a user to easily share media, documents, and printers across multiple PCs in homes or offi ces without the need of a domain
� Improved Windows Taskbar and Jump Lists
� Less disk space than other Windows 7 versions
There are many limitations to using the Windows 7 Starter edition, however. Windows 7 Starter edition does not include the following:
� Aero Glass. You are allowed to use only the Windows Basic or other opaque themes. Also, you do not get to use the Live Taskbar Previews or Aero Peek.
� Personalization features for changing Desktop backgrounds, window colors, and sound schemes.
� The ability to easily switch between users. You must log off to change users.
� Multimonitor support.
� DVD playback or Windows Media Center for watching recorded TV or other media.
� Remote streaming capabilities for streaming your videos, music, and recorded TV from your home computer.
� Domain support for business customers.
� XP Mode for those who want the ability to run legacy Windows XP programs on Windows 7.
Windows 7 Home Basic
The Windows 7 Home Basic edition is limited to emerging markets and is not available in the United States. The Home Basic edition has the following features:
� Broad application and device compatibility with unlimited concurrent applications
� A safe, reliable, and supported operating system
� HomeGroup, which allows a user to easily share media, documents, and printers across multiple PCs in homes or offi ces without the need of a domain
� Improved Taskbar and Jump Lists
Preparing to Install Windows 7 7
C01.indd 7C01.indd 7 9/5/11 7:55:52 AM9/5/11 7:55:52 AM
8 Chapter 1 ■ Installing Windows 7
� Live thumbnail previews and an enhanced visual experience
� Advanced networking support (ad hoc wireless networks and Internet connection sharing)
� Windows Mobility Center
Windows 7 Home Premium
Windows 7 Home Premium is the main operating system for home users. Home Premium offers many features, including these:
� Broad application and device compatibility with unlimited concurrent applications
� A safe, reliable, and supported operating system
� HomeGroup, which allows a user to easily share media, documents, and printers across multiple PCs in homes or offi ces without the need of a domain
� Improved Taskbar and Jump Lists
� Live thumbnail previews and an enhanced visual experience
� Advanced networking support (ad hoc wireless networks and Internet connection sharing)
� Mobility Center
� Windows Aero transparent glass design and advanced Windows navigation
� Easy networking and sharing across all your PCs and devices
� Improved media format support and enhancements to Windows Media Center and media streaming, including Play To
� Multitouch
� Improved handwriting recognition
Windows 7 Professional
Windows 7 Professional is designed for small-business owners. Microsoft designed Windows 7 Professional for users to get more done and safeguard their data. Professional offers the following features:
� Broad application and device compatibility with unlimited concurrent applications
� A safe, reliable, and supported operating system
� HomeGroup, which allows a user to easily share media, documents, and printers across multiple PCs in homes or offi ces without the need of a domain
� Improved Taskbar and Jump Lists
� Live thumbnail previews and an enhanced visual experience
C01.indd 8C01.indd 8 9/5/11 7:55:52 AM9/5/11 7:55:52 AM
� Advanced networking support (ad hoc wireless networks and Internet connection sharing)
� Mobility Center
� Action Center, which makes it easier to resolve many IT issues yourself
� Aero transparent glass design and advanced Windows navigation
� Easy networking and sharing across all your PCs and devices
� Improved media format support and enhancements to Windows Media Center and media streaming, including Play To
� Multitouch
� Improved handwriting recognition
� Domain Join, which enables simple and secure server networking
� Encrypting File System, which protects data with advanced network backup
� Location Aware Printing, which helps fi nd the right printer when moving between the offi ce and home
� Windows XP Mode to enable customers to run many legacy Windows XP productivity applications
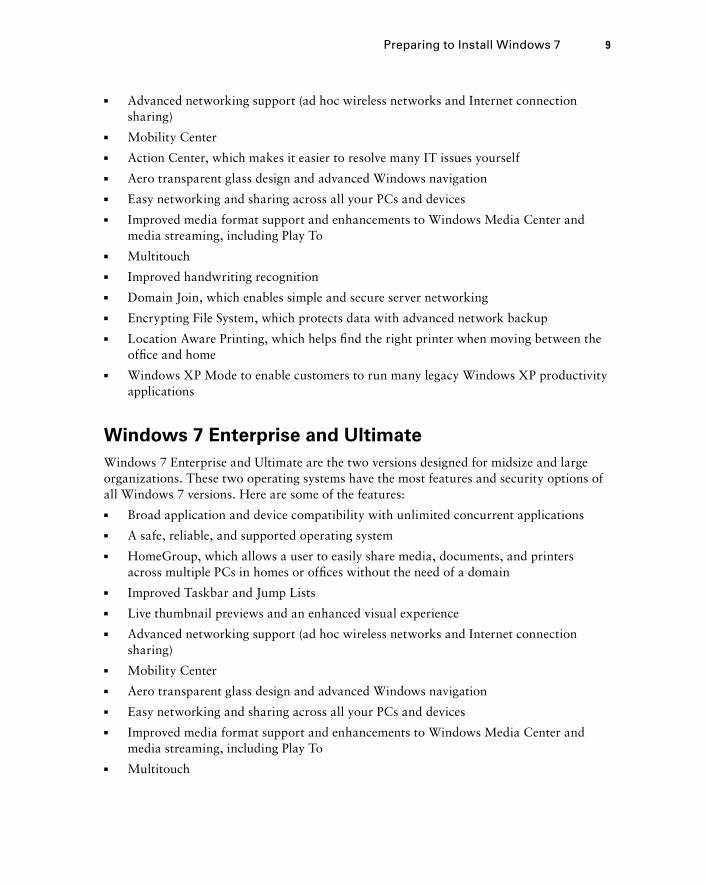
Windows 7 Enterprise and Ultimate
Windows 7 Enterprise and Ultimate are the two versions designed for midsize and large organizations. These two operating systems have the most features and security options of all Windows 7 versions. Here are some of the features:
� Broad application and device compatibility with unlimited concurrent applications
� A safe, reliable, and supported operating system
� HomeGroup, which allows a user to easily share media, documents, and printers across multiple PCs in homes or offi ces without the need of a domain
� Improved Taskbar and Jump Lists
� Live thumbnail previews and an enhanced visual experience
� Advanced networking support (ad hoc wireless networks and Internet connection sharing)
� Mobility Center
� Aero transparent glass design and advanced Windows navigation
� Easy networking and sharing across all your PCs and devices
� Improved media format support and enhancements to Windows Media Center and media streaming, including Play To
� Multitouch
Preparing to Install Windows 7 9
C01.indd 9C01.indd 9 9/5/11 7:55:52 AM9/5/11 7:55:52 AM
10 Chapter 1 ■ Installing Windows 7
� Improved handwriting recognition
� Domain Join, which enables simple and secure server networking
� Encrypting File System, which protects data with advanced network backup
� Location Aware Printing, which helps fi nd the right printer when you are moving between the offi ce and home
� Windows XP Mode, which enables customers to run many legacy Windows XP productivity applications
� BitLocker, which protects data on removable devices
� DirectAccess, which links users to corporate resources from the road without a virtual private network (VPN)
� BranchCache, which makes it faster to open fi les and web pages from a branch offi ce
� AppLocker, which restricts unauthorized software and also enables greater security
Windows 7 Ultimate also includes the multilanguage pack; Windows 7 Enterprise does not.
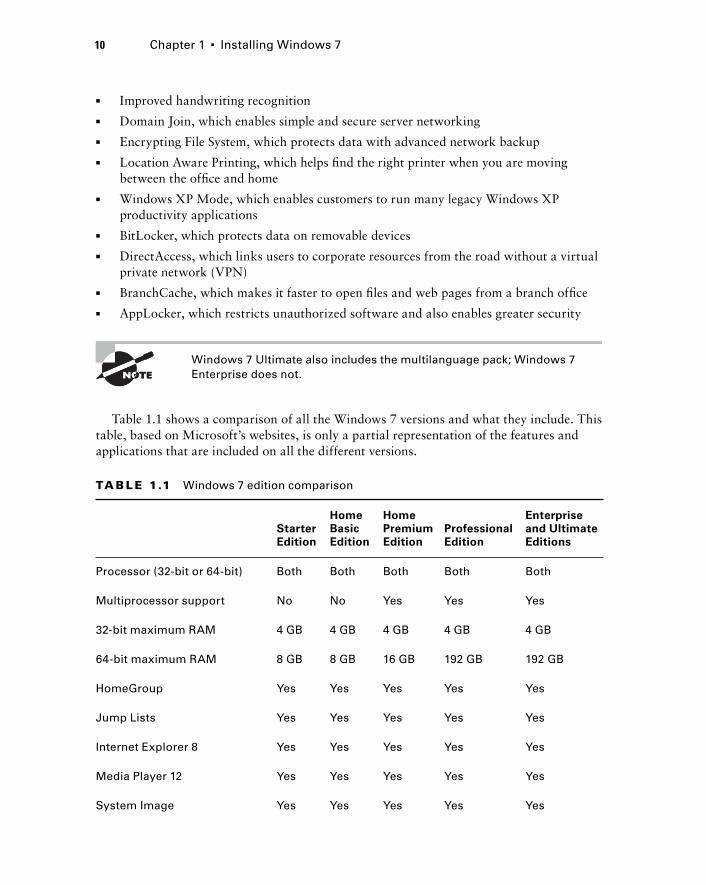
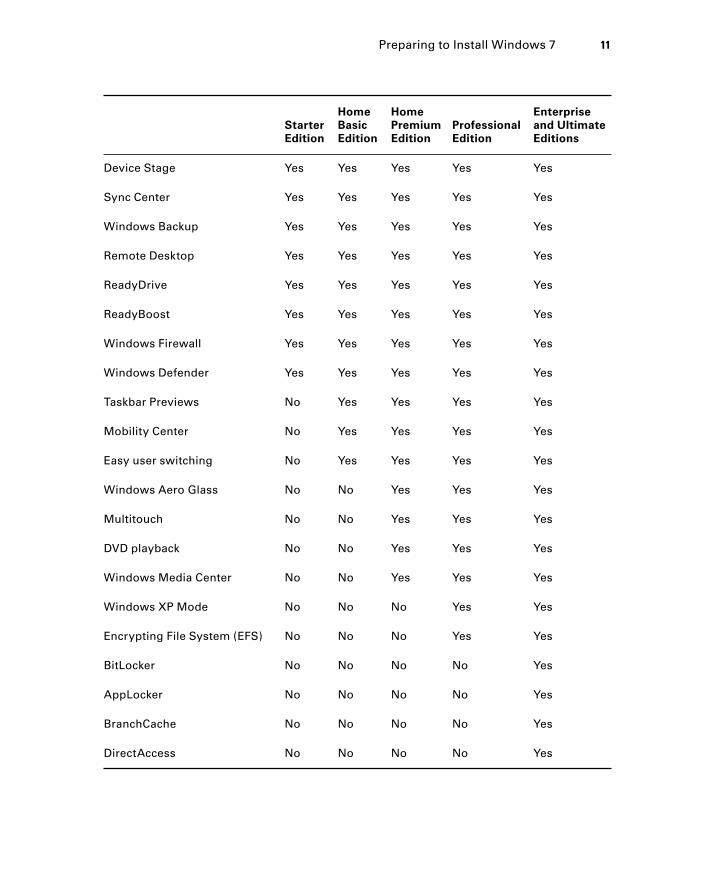
Table 1.1 shows a comparison of all the Windows 7 versions and what they include. This table, based on Microsoft’s websites, is only a partial representation of the features and applications that are included on all the different versions.
TA B LE 1.1 Windows 7 edition comparison
Starter
Edition
Home
Basic
Edition
Home
Premium
Edition
Professional
Edition
Enterprise
and Ultimate
Editions
Processor (32-bit or 64-bit) Both Both Both Both Both
Multiprocessor support No No Yes Yes Yes
32-bit maximum RAM 4 GB 4 GB 4 GB 4 GB 4 GB
64-bit maximum RAM 8 GB 8 GB 16 GB 192 GB 192 GB
HomeGroup Yes Yes Yes Yes Yes
Jump Lists Yes Yes Yes Yes Yes
Internet Explorer 8 Yes Yes Yes Yes Yes
Media Player 12 Yes Yes Yes Yes Yes
System Image Yes Yes Yes Yes Yes
C01.indd 10C01.indd 10 9/5/11 7:55:53 AM9/5/11 7:55:53 AM
Starter
Edition
Home
Basic
Edition
Home
Premium
Edition
Professional
Edition
Enterprise
and Ultimate
Editions
Device Stage Yes Yes Yes Yes Yes
Sync Center Yes Yes Yes Yes Yes
Windows Backup Yes Yes Yes Yes Yes
Remote Desktop Yes Yes Yes Yes Yes
ReadyDrive Yes Yes Yes Yes Yes
ReadyBoost Yes Yes Yes Yes Yes
Windows Firewall Yes Yes Yes Yes Yes
Windows Defender Yes Yes Yes Yes Yes
Taskbar Previews No Yes Yes Yes Yes
Mobility Center No Yes Yes Yes Yes
Easy user switching No Yes Yes Yes Yes
Windows Aero Glass No No Yes Yes Yes
Multitouch No No Yes Yes Yes
DVD playback No No Yes Yes Yes
Windows Media Center No No Yes Yes Yes
Windows XP Mode No No No Yes Yes
Encrypting File System (EFS) No No No Yes Yes
BitLocker No No No No Yes
AppLocker No No No No Yes
BranchCache No No No No Yes
DirectAccess No No No No Yes
Preparing to Install Windows 7 11
C01.indd 11C01.indd 11 9/5/11 7:55:53 AM9/5/11 7:55:53 AM
12 Chapter 1 ■ Installing Windows 7
Hardware Requirements
Before you can install the operating system, you must make sure the machine’s hardware can handle the Windows 7 operating system.
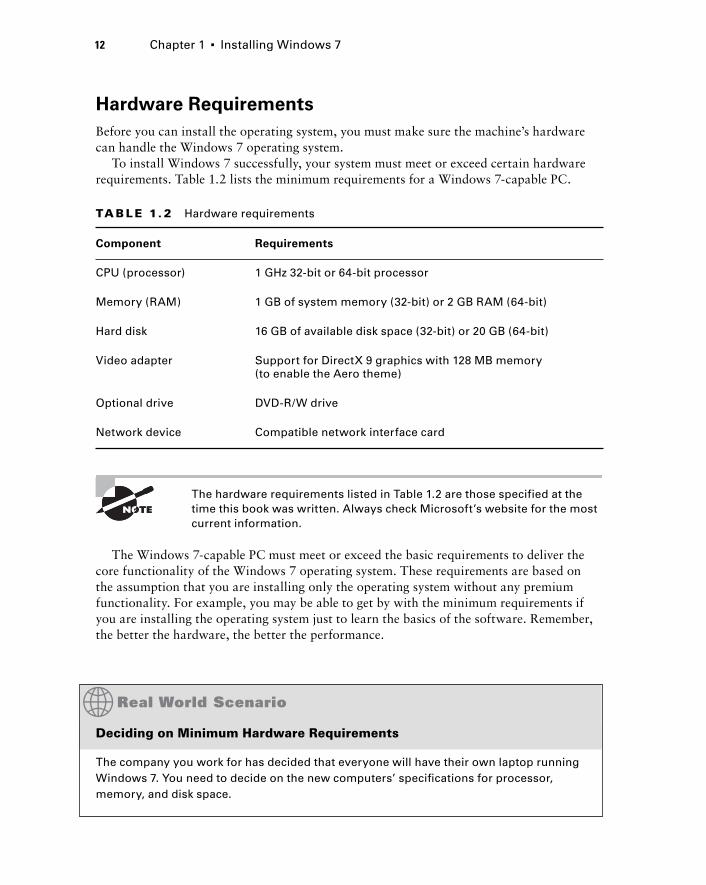
To install Windows 7 successfully, your system must meet or exceed certain hardware requirements. Table 1.2 lists the minimum requirements for a Windows 7-capable PC.
TA B LE 1. 2 Hardware requirements
Component Requirements
CPU (processor) 1 GHz 32-bit or 64-bit processor
Memory (RAM) 1 GB of system memory (32-bit) or 2 GB RAM (64-bit)
Hard disk 16 GB of available disk space (32-bit) or 20 GB (64-bit)
Video adapter Support for DirectX 9 graphics with 128 MB memory (to enable the Aero theme)
Optional drive DVD-R/W drive
Network device Compatible network interface card
The hardware requirements listed in Table 1.2 are those specified at the time this book was written. Always check Microsoft’s website for the most current information.
The Windows 7-capable PC must meet or exceed the basic requirements to deliver the core functionality of the Windows 7 operating system. These requirements are based on the assumption that you are installing only the operating system without any premium functionality. For example, you may be able to get by with the minimum requirements if you are installing the operating system just to learn the basics of the software. Remember, the better the hardware, the better the performance.
Deciding on Minimum Hardware Requirements
The company you work for has decided that everyone will have their own laptop running Windows 7. You need to decide on the new computers’ specifi cations for processor, memory, and disk space.
C01.indd 12C01.indd 12 9/5/11 7:55:53 AM9/5/11 7:55:53 AM
The requirements for the graphics card depend on the resolution at which you want to run. The required amount of memory is as follows:
� 64 MB is required for a single monitor at a resolution of 1,310,720 pixels or less, which is equivalent to a 1280×1024 resolution.
� 128 MB is required for a single monitor at a resolution of 2,304,000 pixels or less, which is equivalent to a 1920×1200 resolution.
� 256 MB is required for a single monitor at a resolution larger than 2,304,000 pixels.
The fi rst step is to determine which applications will be used. Typically, most users will work with an email program, a word processor, a spreadsheet, presentation software, and maybe a drawing or graphics program. Additionally, an antivirus application will probably be used. Under these demands, a 1-GHz Celeron processor and 1 GB of RAM will make for a very slow-running machine. So for this usage, you can assume that the minimum baseline confi guration would be higher than a 1-GHz processor with at least 2 GB of RAM.
Based on your choice of baseline confi guration, you should then fi t a test computer with the applications that will be used on it and test the confi guration in a lab environment simulating normal use. This will give you an idea of whether the RAM and processor calculations you have made for your environment are going to provide a suitable response.
Today’s disk drives have become capable of much larger capacity while dropping drastically in price. So for disk space, the rule of thumb is to buy whatever is the current standard. At the time this book was written, 500-GB drives were commonplace, which is suffi cient for most users. If users plan to store substantial graphics or video fi les, you may need to consider buying larger-than-standard drives.
Also consider what the business requirements will be over the next 12 to 18 months. If you will be implementing applications that are memory or processor intensive, you may want to spec out the computers with hardware suffi cient to support upcoming needs to avoid costly upgrades in the near future.
Measurement Used for Disk Space and Memory
Hard disks are commonly rated by capacity. The following measurements are used for disk space and memory capacity:
� 1 MB (megabyte) = 1,024 KB (kilobytes)
� 1 GB (gigabyte) = 1,024 MB
� 1 TB (terabyte) = 1,024 GB
� 1 PB (petabyte) = 1,024 TB
� 1 EB (exabyte) = 1,024 PB
Preparing to Install Windows 7 13
C01.indd 13C01.indd 13 9/5/11 7:55:54 AM9/5/11 7:55:54 AM

14 Chapter 1 ■ Installing Windows 7
If you are not sure if your machine meets the minimum requirements, Microsoft includes some tools that can help you determine if a machine is Windows 7-compatible, which we will look at in the following sections.
The Hardware Compatibility List
Along with meeting the minimum requirements, whenever possible your hardware should appear on the Hardware Compatibility List (HCL). The HCL is an extensive list of computers and peripheral hardware that have been tested with the Windows 7 operating system. To determine if your computer and peripherals are on the HCL, check the most up-to-date list at http://www.microsoft.com/windows/compatibility/windows-7/en-us/default.aspx.
The Windows 7 operating system requires control of the hardware for stability, effi ciency, and security. The hardware and supported drivers on the HCL have been put through rigorous tests to ensure their compatibility with Windows 7. Microsoft guarantees that the items on the list meet the requirements for Windows 7 and do not have any incompatibilities that could affect the stability of the operating system.
If you call Microsoft for support, the fi rst thing a Microsoft support engineer will ask about is your confi guration. If you have any hardware that is not on the HCL, you may not be able to get support from Microsoft.
BIOS Compatibility
Before you install Windows 7, you should verify that your computer has the most current BIOS. This is especially important if your current BIOS does not include support for Advanced Confi guration and Power Interface (ACPI) functionality. ACPI functionality is required for Windows 7 to function properly. Check the computer vendor’s website for the latest BIOS version information.
Driver Requirements
To successfully install Windows 7, you must have the critical device drivers for your computer, such as the hard drive device driver. The Windows 7 media come with an extensive list of drivers. If your computer’s device drivers are not on the Windows 7 installation media, you should check the device manufacturer’s website. If you can’t fi nd the device driver on the manufacturer’s website and no other compatible driver exists, you may be out of luck, because Windows 7 will not recognize devices that don’t have Windows 7 drivers.
New Install or Upgrade?
Once you’ve determined that your hardware meets the minimum requirements, you need to decide whether you want to do an upgrade or a clean install. An upgrade allows you to retain your existing operating system’s applications, settings, and fi les. If you currently have a computer with Windows Vista, you are eligible to use an upgrade copy of Windows 7.
The bad news is that if you are moving from Windows XP or earlier versions of Windows to Windows 7, you generally must perform a clean install. (You can, however, use the
C01.indd 14C01.indd 14 9/5/11 7:55:54 AM9/5/11 7:55:54 AM
Windows Easy Transfer utility to migrate fi les and settings from Windows XP to Windows 7 on the same computer.) Another possibility is to upgrade your Windows XP machine to Windows Vista and then upgrade the new Vista operating system to Windows 7.
The steps for using Windows Easy Transfer will be shown later in this chapter.
You can perform an upgrade to Windows 7 if the following conditions are true:
� You are running Windows Vista.
� You want to keep your existing applications and preferences.
� You want to preserve any local users and groups you’ve created.
You must perform a clean install of Windows 7 if any of the following conditions are true:
� There is no operating system currently installed.
� You have an operating system installed that does not support an in-place upgrade to Windows 7 (such as DOS, Windows 9x, Windows NT, Windows Me, Windows 2000 Professional, or Windows XP).
� You want to start from scratch, without keeping any existing preferences.
� You want to be able to dual-boot between Windows 7 and your previous operating system.
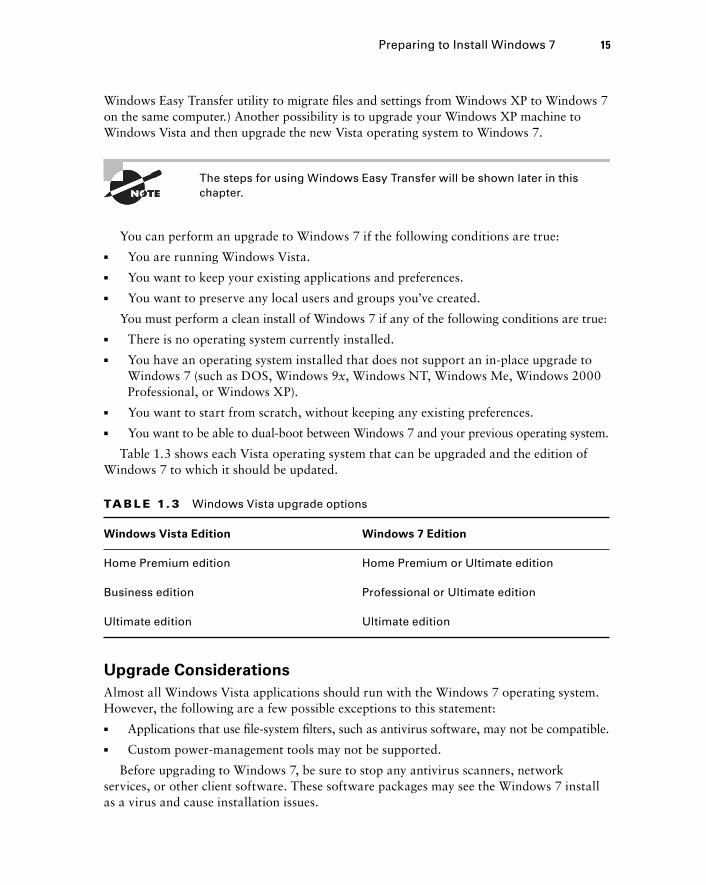
Table 1.3 shows each Vista operating system that can be upgraded and the edition of Windows 7 to which it should be updated.
TA B LE 1. 3 Windows Vista upgrade options
Windows Vista Edition Windows 7 Edition
Home Premium edition Home Premium or Ultimate edition
Business edition Professional or Ultimate edition
Ultimate edition Ultimate edition
Upgrade Considerations
Almost all Windows Vista applications should run with the Windows 7 operating system. However, the following are a few possible exceptions to this statement:
� Applications that use fi le-system fi lters, such as antivirus software, may not be compatible.
� Custom power-management tools may not be supported.
Before upgrading to Windows 7, be sure to stop any antivirus scanners, network services, or other client software. These software packages may see the Windows 7 install as a virus and cause installation issues.
Preparing to Install Windows 7 15
C01.indd 15C01.indd 15 9/5/11 7:55:54 AM9/5/11 7:55:54 AM
16 Chapter 1 ■ Installing Windows 7
If you are performing a clean install to the same partition as an existing version of Windows, the contents of the existing Users (or Documents and Settings), Program Files, and Windows directories will be placed in a directory named Windows.old, and the old operating system will no longer be available.
Hardware Compatibility Issues
You need to ensure that you have Windows 7 device drivers for your hardware. If you have a video driver without a Windows 7-compatible driver, the Windows 7 upgrade will install the Standard VGA driver, which will display the video with an 800×600 resolution. Once you get the Windows 7 driver for your video, you can install it and adjust video properties accordingly.
Application Compatibility Issues
Not all applications that were written for earlier versions of Windows will work with Windows 7. After the upgrade, if you have application problems, you can address the problems in any of the following ways:
� If the application is compatible with Windows 7, reinstall the application after the upgrade is complete.
� If the application uses dynamic-link libraries (DLLs), and there are migration DLLs for the application, apply the migration DLLs.
� Use the Microsoft Application Compatibility Toolkit (ACT) to determine the compatibility of your current applications with Windows 7. ACT will determine which applications are installed, identify any applications that may be affected by Windows updates, and identify any potential compatibility problems with User Account Control and Internet Explorer. Reports can be exported for detailed analysis.
� If applications were written for earlier versions of Windows but are incompatible with Windows 7, use the Windows 7 Program Compatibility Wizard. From Control Panel, click the Programs icon and then click the Run Programs From Previous Versions link to start the Program Compatibility Wizard. If the application is not compatible with Windows 7, upgrade your application to a Windows 7-compliant version.
Windows 7 Upgrade Advisor
To assist you in the upgrade process, the Windows 7 Setup program can check the compatibility of your system, devices, and installed applications and then provide the results to you. You can then analyze these results to determine whether your hardware or software applications will port properly from previous Windows versions to Windows 7.
You can download the Windows 7 Upgrade Advisor from Microsoft’s website at www.microsoft.com/downloads. The Windows 7 Upgrade Advisor is compatible with Windows 7, Windows Vista, and Windows XP with Service Pack 2 or higher.
When you are running the Upgrade Advisor on a machine running Windows XP, if you do not have the .NET Framework 2.0, you will be asked to download and install it. After the .NET Framework is installed, you can restart the Upgrade Advisor installation.
After your computer is scanned, the Upgrade Advisor will determine whether any incompatibilities exist between your computer and Windows 7. It will also tell you which
C01.indd 16C01.indd 16 9/5/11 7:55:55 AM9/5/11 7:55:55 AM
edition of Windows 7 seems to be best for your computer. However, you are by no means limited to upgrading to the recommended edition. The Upgrade Advisor compatibility reports are broken up into three categories:
System Requirements The System Requirements report will alert you to any shortcomings your system might have when running certain editions of Windows 7. For example, my lab computer should have no problems accessing all the features of Windows 7 Enterprise but it won’t be able to access all of the features of Windows 7 Home Premium or Windows 7 Ultimate because it doesn’t have a TV tuner card.
Devices The Devices report will alert you to any potential Windows 7 driver issues. Each device in your system will be listed in this section as either a device to be reviewed or a device that should automatically work after Windows 7 is installed. You will need a driver for the network card after Windows 7 is installed.
Programs The Programs report will alert you to any potential application compatibility issues.
You can also save or print a task list that tells you the most compatible Windows 7 edition, your current system confi guration, and the steps you need to take before and after installing Windows 7.
In Exercise 1.1, I will walk you through how to use the Windows 7 Upgrade Advisor.
E X E R C I S E 1 .1
Using the Windows 7 Upgrade Advisor
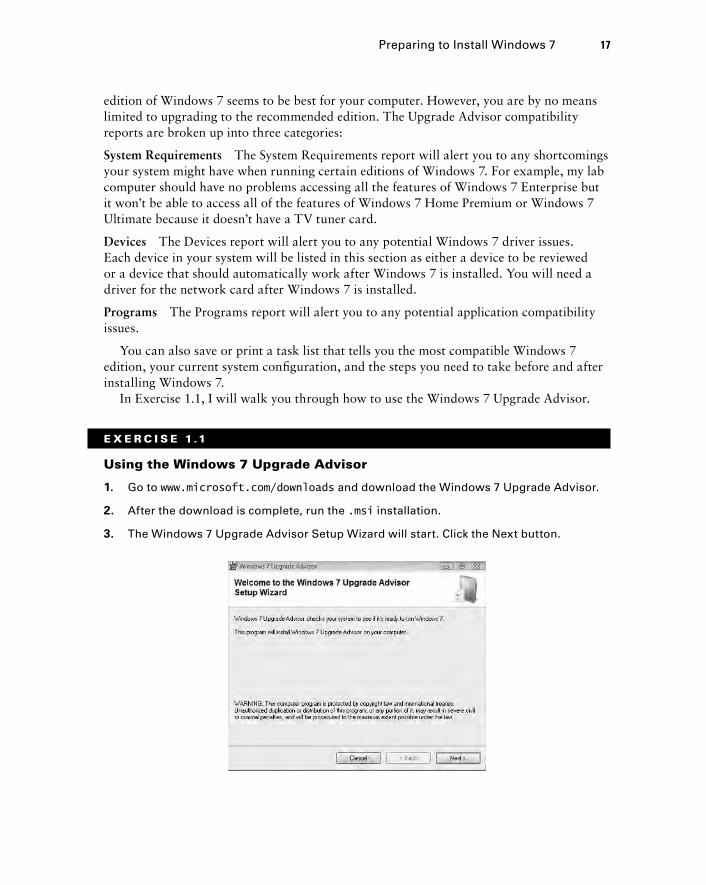
1. Go to www.microsoft.com/downloads and download the Windows 7 Upgrade Advisor.
2. After the download is complete, run the .msi installation.
3. The Windows 7 Upgrade Advisor Setup Wizard will start. Click the Next button.
Preparing to Install Windows 7 17
C01.indd 17C01.indd 17 9/5/11 7:55:55 AM9/5/11 7:55:55 AM
18 Chapter 1 ■ Installing Windows 7
E X E R C I S E 1 .1 ( c ont i nue d )
4. At the License screen, click the I Accept The License Terms check box and click Next.
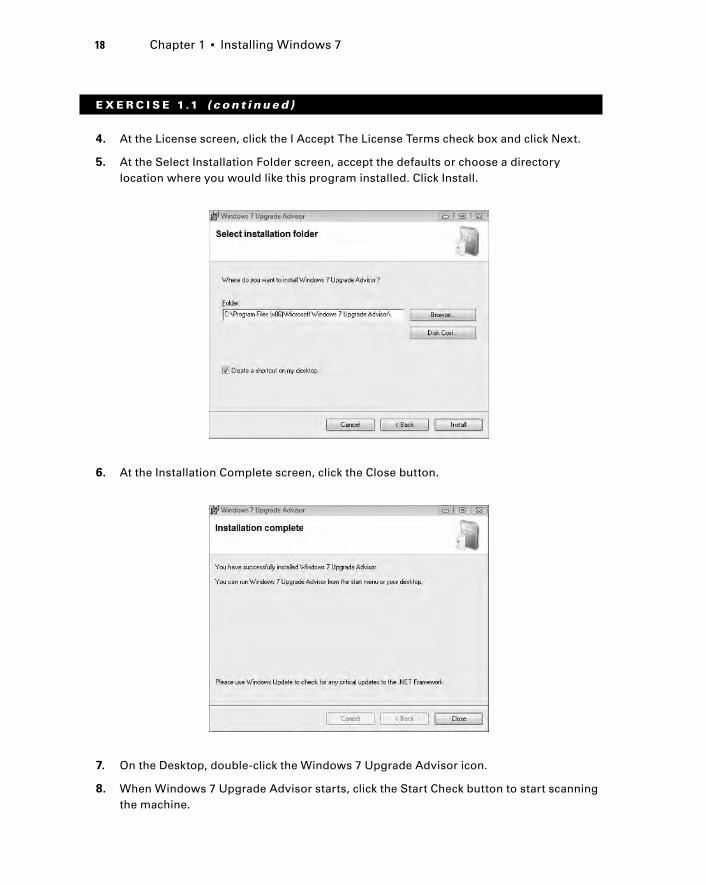
5. At the Select Installation Folder screen, accept the defaults or choose a directory location where you would like this program installed. Click Install.
6. At the Installation Complete screen, click the Close button.
7. On the Desktop, double-click the Windows 7 Upgrade Advisor icon.
8. When Windows 7 Upgrade Advisor starts, click the Start Check button to start scanning the machine.
C01.indd 18C01.indd 18 9/5/11 7:55:55 AM9/5/11 7:55:55 AM
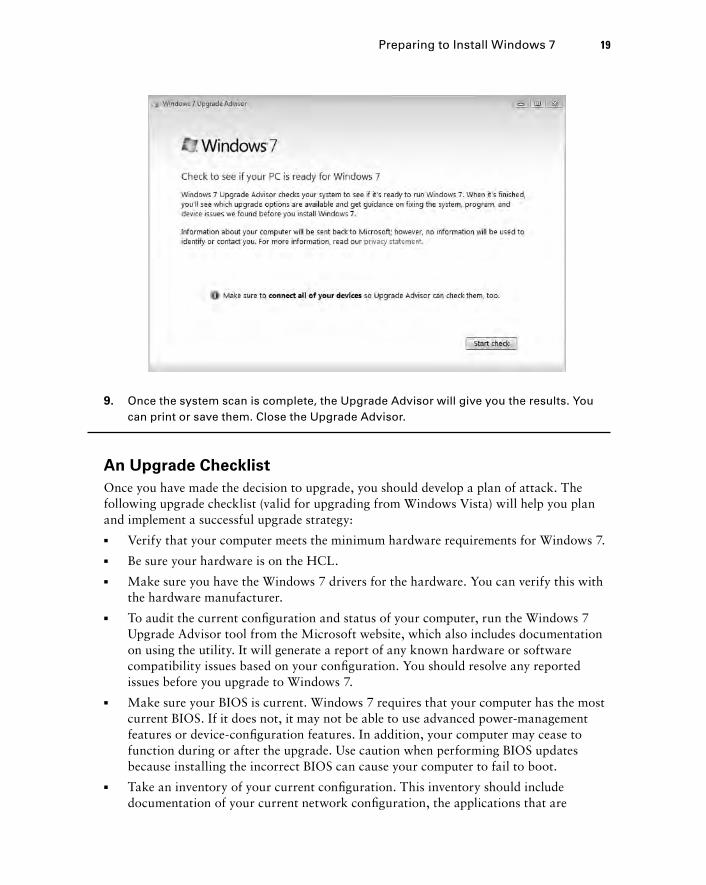
9. Once the system scan is complete, the Upgrade Advisor will give you the results. You can print or save them. Close the Upgrade Advisor.
An Upgrade Checklist
Once you have made the decision to upgrade, you should develop a plan of attack. The following upgrade checklist (valid for upgrading from Windows Vista) will help you plan and implement a successful upgrade strategy:
� Verify that your computer meets the minimum hardware requirements for Windows 7.
� Be sure your hardware is on the HCL.
� Make sure you have the Windows 7 drivers for the hardware. You can verify this with the hardware manufacturer.
� To audit the current confi guration and status of your computer, run the Windows 7 Upgrade Advisor tool from the Microsoft website, which also includes documentation on using the utility. It will generate a report of any known hardware or software compatibility issues based on your confi guration. You should resolve any reported issues before you upgrade to Windows 7.
� Make sure your BIOS is current. Windows 7 requires that your computer has the most current BIOS. If it does not, it may not be able to use advanced power-management features or device-confi guration features. In addition, your computer may cease to function during or after the upgrade. Use caution when performing BIOS updates because installing the incorrect BIOS can cause your computer to fail to boot.
� Take an inventory of your current confi guration. This inventory should include documentation of your current network confi guration, the applications that are
Preparing to Install Windows 7 19
C01.indd 19C01.indd 19 9/5/11 7:55:56 AM9/5/11 7:55:56 AM
20 Chapter 1 ■ Installing Windows 7
installed, the hardware items and their confi guration, the services that are running, and any profi le and policy settings.
� Back up your data and confi guration fi les. Before you make any major changes to your computer’s confi guration, you should back up your data and confi guration fi les and then verify that you can successfully restore your backup. Chances are, if you have a valid backup, you won’t have any problems. Likewise, if you don’t have a valid backup, you will likely have problems.
� Delete any unnecessary fi les or applications, and clean up any program groups or program items you don’t use. Theoretically, you want to delete all the junk on your computer before you upgrade. Think of this as the spring-cleaning step.
� Verify that there are no existing problems with your hard drive prior to the upgrade. Perform a disk scan, a current virus scan, and defragmentation. These, too, are spring-cleaning chores. This step just prepares your hard drive for the upgrade.
� Perform the upgrade. In this step, you upgrade from the Windows Vista operating system to Windows 7.
� Verify your confi guration. After Windows 7 has been installed, use the inventory to compare and test each element that was inventoried prior to the upgrade to verify that the upgrade was successful.
Handling an Upgrade Failure
Before you upgrade, you should have a contingency plan in place. Your plan should assume the worst-case scenario. For example, what happens if you upgrade and the computer doesn’t work anymore? It is possible that, after checking your upgrade list and verifying that everything should work, your attempt at the actual upgrade may not work. If this happens, you may want to return your computer to the original, working confi guration.
Indeed, I have made these plans, created my backups (two, just in case), verifi ed them, and then had a failed upgrade anyway—only to discover that I had no clue where to fi nd the original operating system CD. A day later, with the missing CD located, I was able to get up and running again. My problem was an older BIOS, and the manufacturer of my computer did not have an updated BIOS.
Disk Partitioning
Disk partitioning is the act of taking the physical hard drive and creating logical partitions. A logical drive is how space is allocated to the drive’s primary and logical partitions. For example, if you have a 500-GB hard drive, you might partition it into three logical drives: a C: drive,
C01.indd 20C01.indd 20 9/5/11 7:55:56 AM9/5/11 7:55:56 AM
which might be 200 GB; a D: drive, which might be 150 GB; and an E: drive, which might be 150 GB.
The following sections detail some of the major considerations for disk partitioning:
Partition Size One important consideration in your disk-partitioning scheme is determining the partition size. You need to consider the amount of space taken up by your operating system, the applications that will be installed, and the amount of stored data. It is also important to consider the amount of space required in the future.
Microsoft recommends that you allocate at least 16 GB of disk space for Windows 7. This allows room for the operating system fi les and for future growth in terms of upgrades and installation fi les that are placed with the operating system fi les.
The System and Boot Partitions When you install Windows 7, fi les will be stored in two locations: the system partition and the boot partition. The system partition and the boot partition can be the same partition.
The system partition contains the fi les needed to boot the Windows 7 operating system. The system partition contains the Master Boot Record (MBR) and boot sector of the active drive partition. It is often the fi rst physical hard drive in the computer and normally contains the necessary fi les to boot the computer. The fi les stored on the system partition do not take any signifi cant disk space. The active partition is the system partition that is used to start your computer. The C: drive is usually the active partition.
The boot partition contains the Windows 7 operating system fi les. By default, the Windows operating system fi les are located in a folder named Windows.
Special Disk Configurations Windows 7 supports several disk confi gurations. Options include simple, spanned, and striped volumes. These confi guration options are covered in detail in Chapter 3, “Managing Disks.”
Disk Partition Configuration Utilities If you are partitioning your disk prior to installation, you can use several utilities, such as the DOS or Windows FDISK program, or a third-party utility, such as Norton’s Partition Magic. You can also confi gure the disks during the installation of the Windows 7 operating system.
You might want to create only the fi rst partition where Windows 7 will be installed. You can then use the Disk Management utility in Windows 7 to create any other partitions you need. The Windows 7 Disk Management utility is covered in Chapter 3.
Language and Locale
Language and locale settings determine the language the computer will use. Windows 7 supports many languages for the operating system interface and utilities.
Locale settings are for confi guring the format for items such as numbers, currencies, times, and dates. For example, English for the United States specifi es a short date as mm/dd/yyyy (month/day/year), while English for South Africa specifi es a short date as yyyy/mm/dd (year/month/day).
Preparing to Install Windows 7 21
C01.indd 21C01.indd 21 9/5/11 7:55:56 AM9/5/11 7:55:56 AM

22 Chapter 1 ■ Installing Windows 7
Installing Windows 7You can install Windows 7 either from the bootable DVD or through a network installation using fi les that have been copied to a network share point or USB device. You can also launch the setup.exe fi le from within the Windows 7 operating system to upgrade your operating system.
To start the installation, you simply restart your computer and boot to the DVD. The installation process will begin automatically. You will walk through the steps of performing a clean install of Windows 7 from the DVD in Exercise 1.2.
If you are installing Windows 7 from the network, you need a distribution server and a computer with a network connection. A distribution server is a server that has the Windows 7 distribution fi les copied to a shared folder. The following steps are used to install Windows 7 over the network:
1. Boot the target computer.
2. Attach to the distribution server and access the share that has the fi les copied to it.
3. Launch setup.exe.
4. Complete the Windows 7 installation using either the clean install method or the upgrade method. These methods are discussed in detail in the following sections.
Performing a Clean Install of Windows 7
On any installation of Windows 7, there are three stages to the installation.
Collecting Information During the collection phase of the installation, Windows 7 gathers the information necessary to complete the installation. This is where Windows 7 gathers your local time, location, keyboard, license agreement, installation type, and installation disk partition information.
Installing Windows This section of the installation is where your Windows 7 fi les are copied to the hard disk and the installation is completed. This phase takes the longest because the fi les are installed.
Setting Up Windows In this phase, you set up a username, computer name, password, product key, and security settings and review the date and time. Once this is fi nished, your installation will be complete.
As explained earlier, you can run the installation from the optical media, USB, or over a network. The only difference in the installation procedure is your starting point: from your optical drive, USB, or a network share. The steps in Exercises 1.2 and 1.3 assume you are using the Windows 7 DVD to install Windows 7.
C01.indd 22C01.indd 22 9/5/11 7:55:56 AM9/5/11 7:55:56 AM
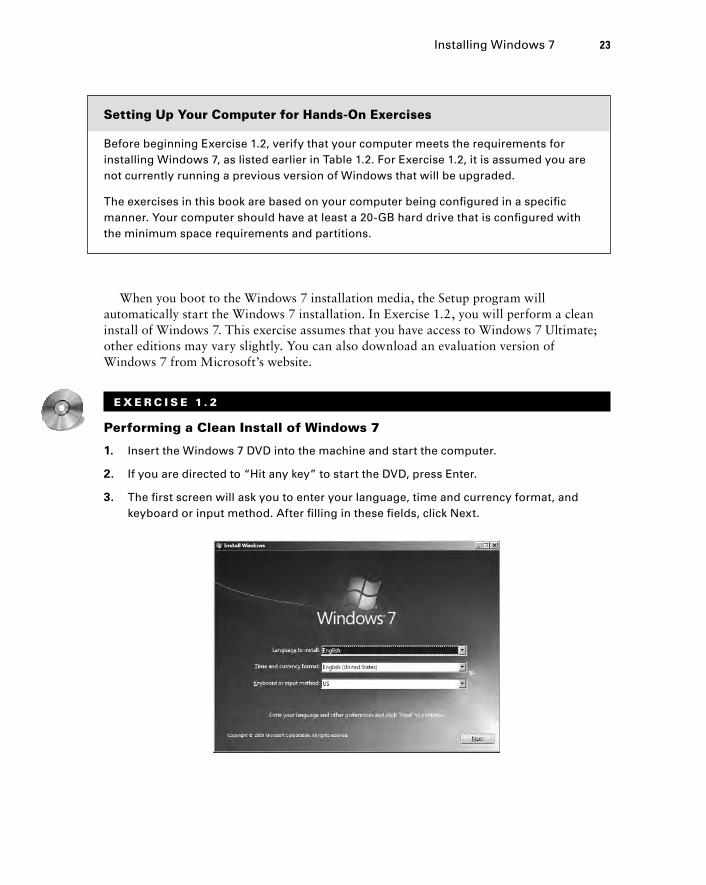
When you boot to the Windows 7 installation media, the Setup program will automatically start the Windows 7 installation. In Exercise 1.2, you will perform a clean install of Windows 7. This exercise assumes that you have access to Windows 7 Ultimate; other editions may vary slightly. You can also download an evaluation version of Windows 7 from Microsoft’s website.
E X E R C I S E 1 . 2
Performing a Clean Install of Windows 7
1. Insert the Windows 7 DVD into the machine and start the computer.
2. If you are directed to “Hit any key” to start the DVD, press Enter.
3. The fi rst screen will ask you to enter your language, time and currency format, and keyboard or input method. After fi lling in these fi elds, click Next.
Setting Up Your Computer for Hands-On Exercises
Before beginning Exercise 1.2, verify that your computer meets the requirements for installing Windows 7, as listed earlier in Table 1.2. For Exercise 1.2, it is assumed you are not currently running a previous version of Windows that will be upgraded.
The exercises in this book are based on your computer being confi gured in a specifi c manner. Your computer should have at least a 20-GB hard drive that is confi gured with the minimum space requirements and partitions.
Installing Windows 7 23
C01.indd 23C01.indd 23 9/5/11 7:55:57 AM9/5/11 7:55:57 AM
24 Chapter 1 ■ Installing Windows 7
E X E R C I S E 1 . 2 ( c ont i nue d )
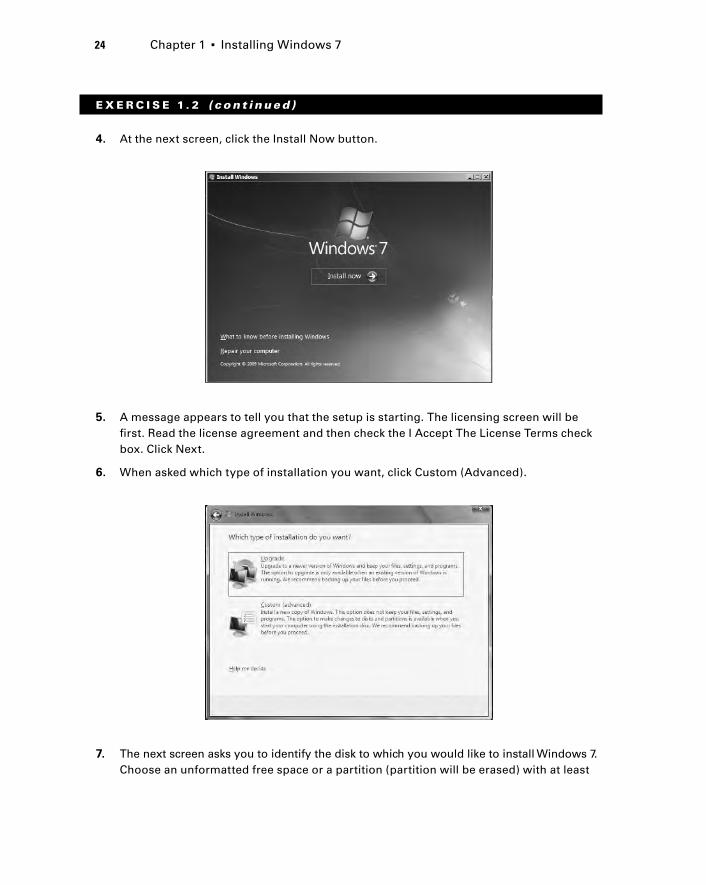
4. At the next screen, click the Install Now button.
5. A message appears to tell you that the setup is starting. The licensing screen will be fi rst. Read the license agreement and then check the I Accept The License Terms check box. Click Next.
6. When asked which type of installation you want, click Custom (Advanced).
7. The next screen asks you to identify the disk to which you would like to install Windows 7. Choose an unformatted free space or a partition (partition will be erased) with at least
C01.indd 24C01.indd 24 9/5/11 7:55:57 AM9/5/11 7:55:57 AM
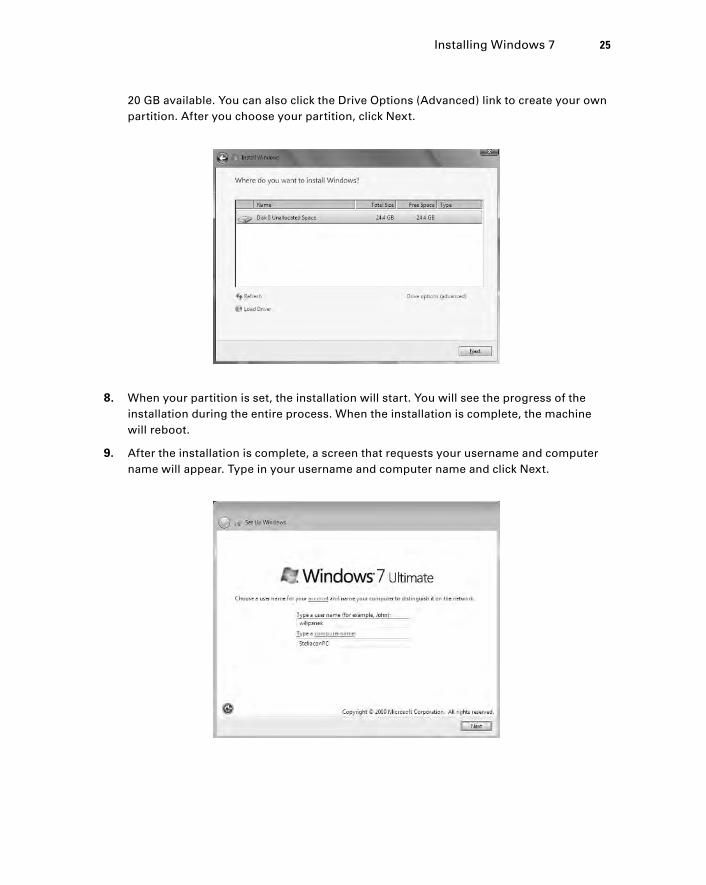
20 GB available. You can also click the Drive Options (Advanced) link to create your own partition. After you choose your partition, click Next.
8. When your partition is set, the installation will start. You will see the progress of the installation during the entire process. When the installation is complete, the machine will reboot.
9. After the installation is complete, a screen that requests your username and computer name will appear. Type in your username and computer name and click Next.
Installing Windows 7 25
C01.indd 25C01.indd 25 9/5/11 7:55:58 AM9/5/11 7:55:58 AM


![[MS-INDEXDB]: Microsoft Edge / Internet Explorer Indexed ... · Windows Internet Explorer 10 Internet Explorer 11 Internet Explorer 11 for Windows 10 Microsoft Edge Each browser version](https://img.pdfslide.net/doc/110x75/5f6247bba7b60d5e1c2cdd91/ms-indexdb-microsoft-edge-internet-explorer-indexed-windows-internet-explorer.jpg)