Embed Size (px)
Citation preview
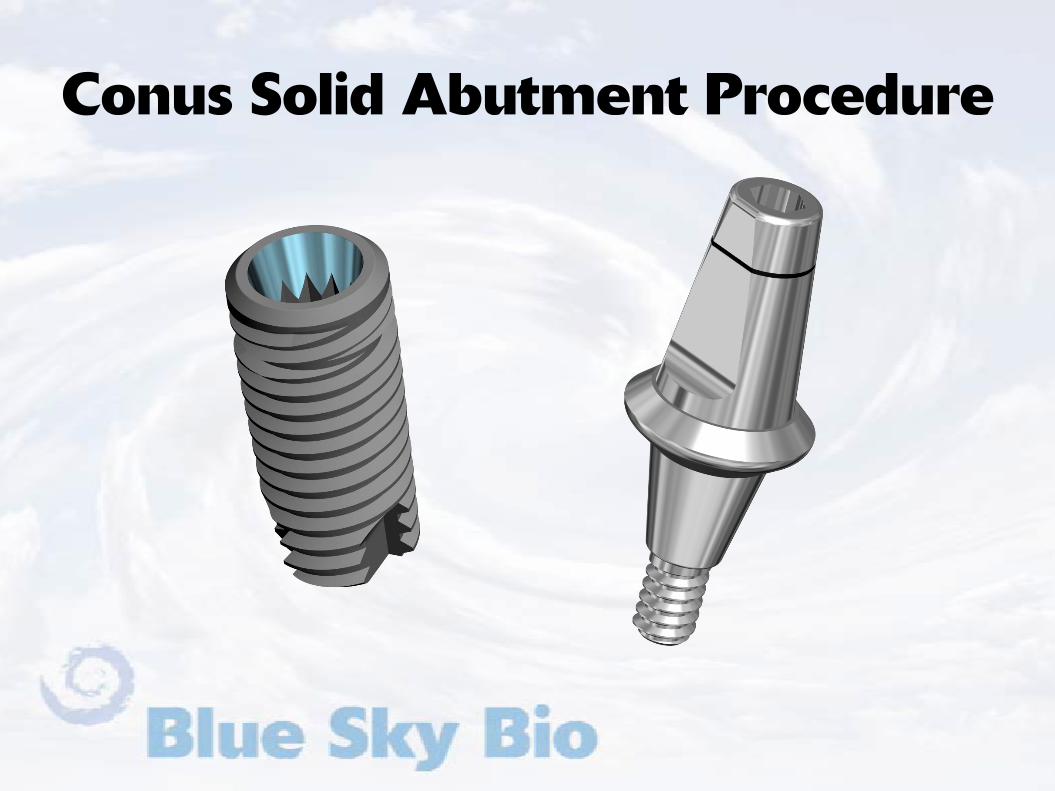
Conus Solid Abutment Procedure
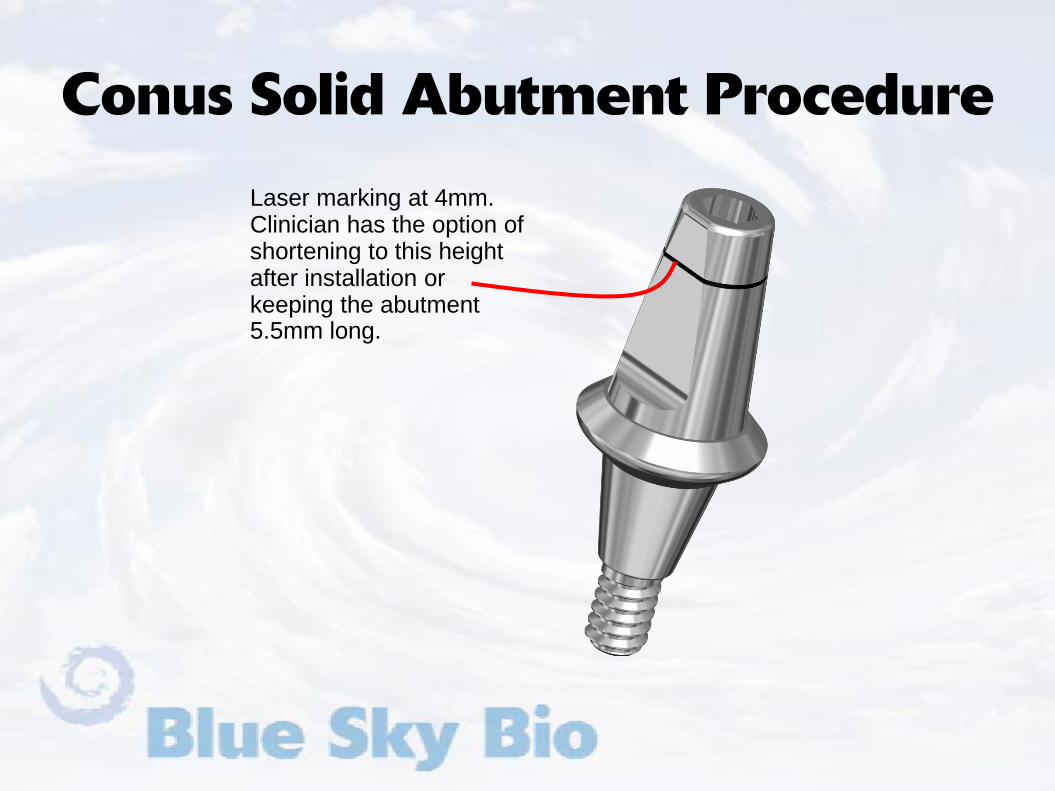
Conus Solid Abutment ProcedureLaser marking at 4mm. Clinician has the option of shortening to this height after installation or keeping the abutment 5.5mm long.
Conus Solid Abutment Procedure
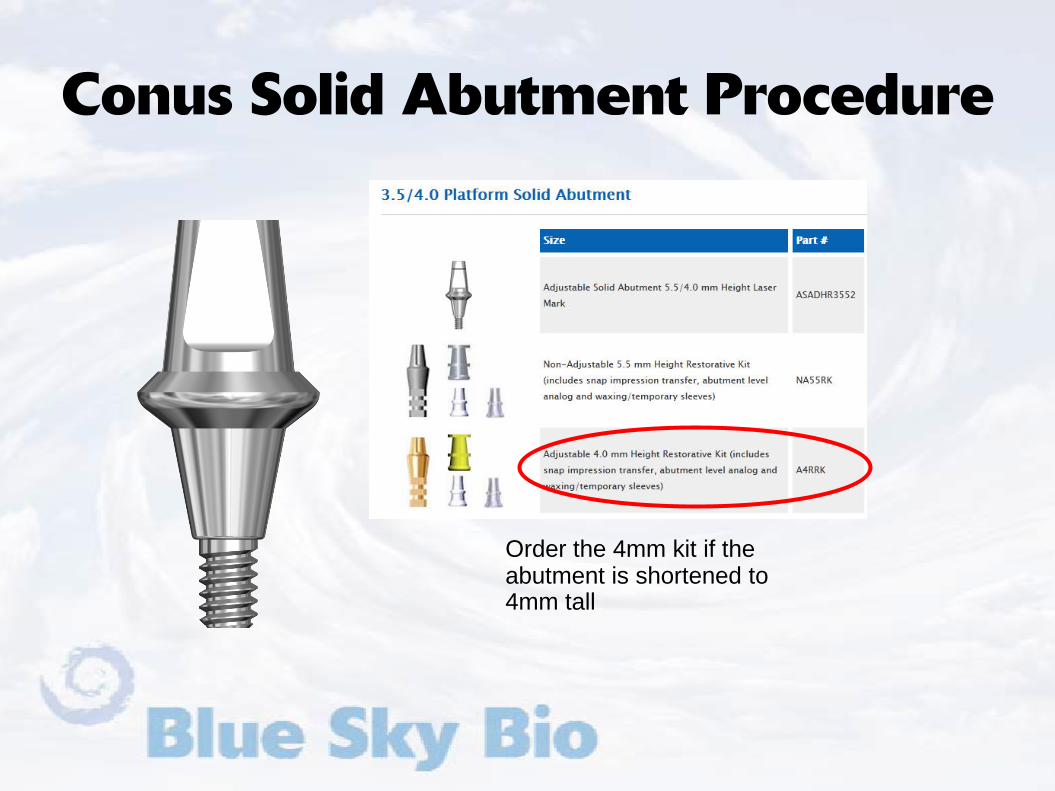
Order the 4mm kit if the abutment is shortened to 4mm tall

Conus Solid Abutment Procedure
Order the 5.5mm kit if the abutment is not reduced in height

Prosthetic instruments needed
Conus Solid Abutment Procedure

The presentation that follows lists only one combination of parts. Obviously the clinical situation may call for substitution of another part on this slide
Cover screw in place
Conus Solid Abutment Procedure

Remove healing Abutment from implantAssemble screw
driver with Thumb Knob
Conus Solid Abutment Procedure
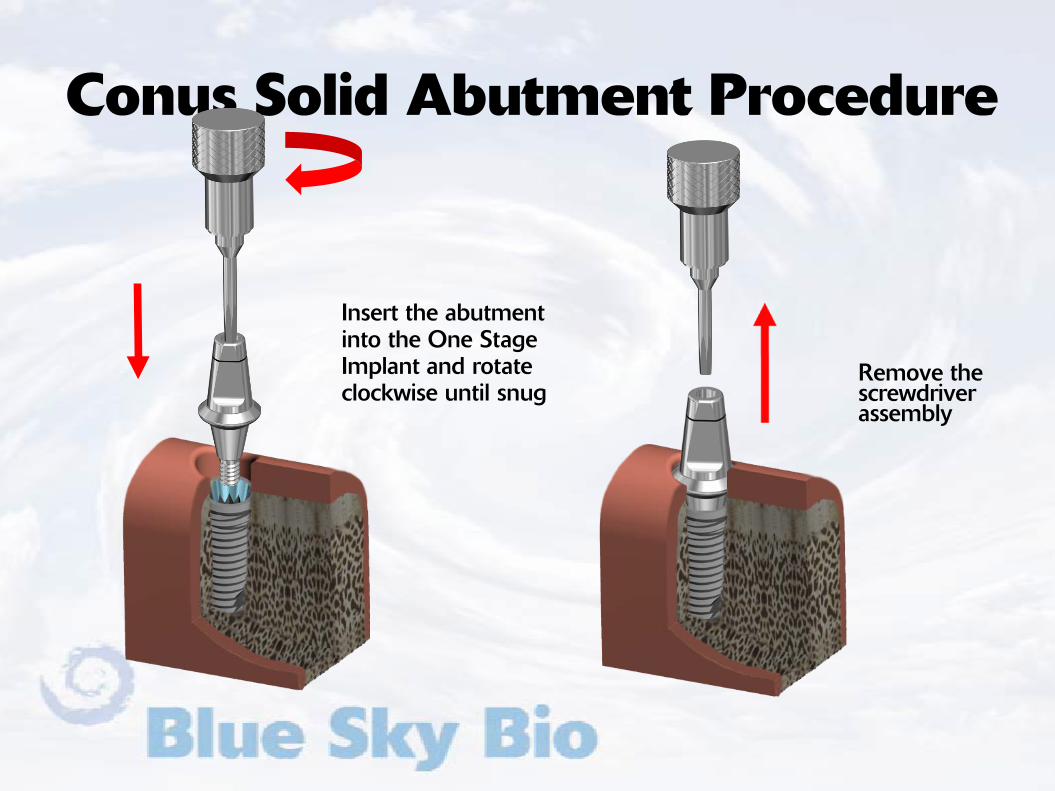
Insert the abutment into the One Stage Implant and rotate clockwise until snug
Remove the screwdriver assembly
Conus Solid Abutment Procedure

Insert driver into abutment and turn torque ratchet clockwise until torque of 30 Ncm is reached and the head of the ratchet releases
Insert the Hex Driver within the 30Ncm torque ratchet
Conus Solid Abutment Procedure
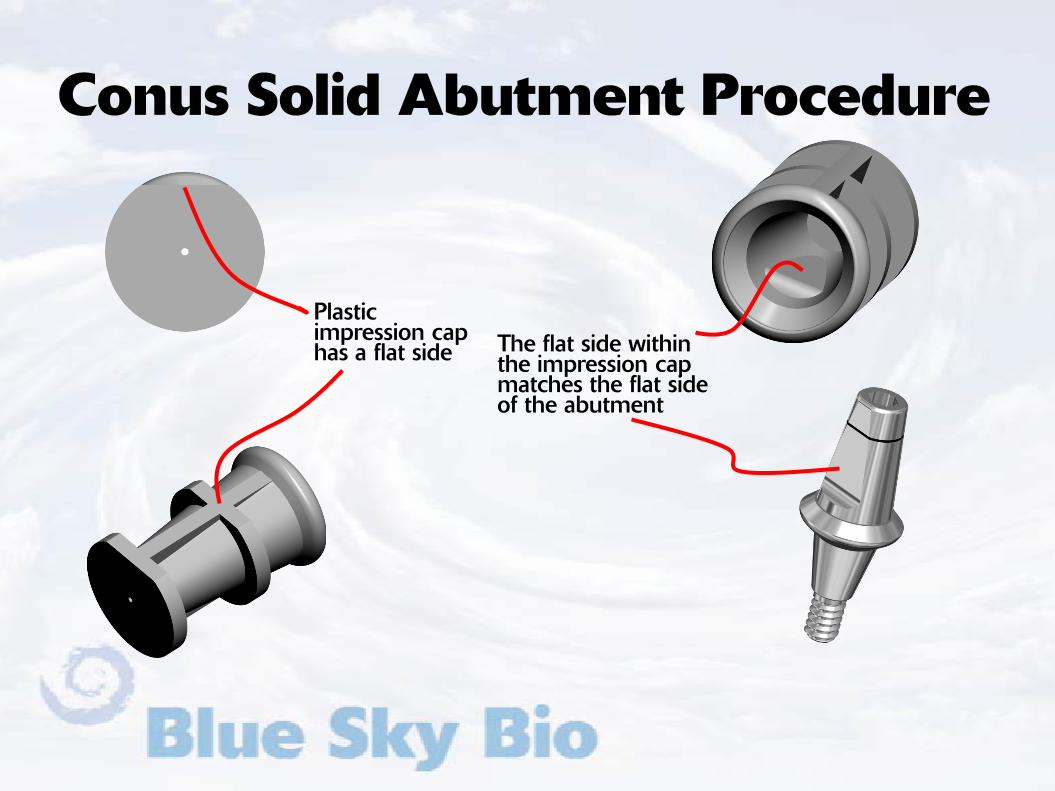
Plastic impression cap has a flat side The flat side within
the impression cap matches the flat side of the abutment
Conus Solid Abutment Procedure
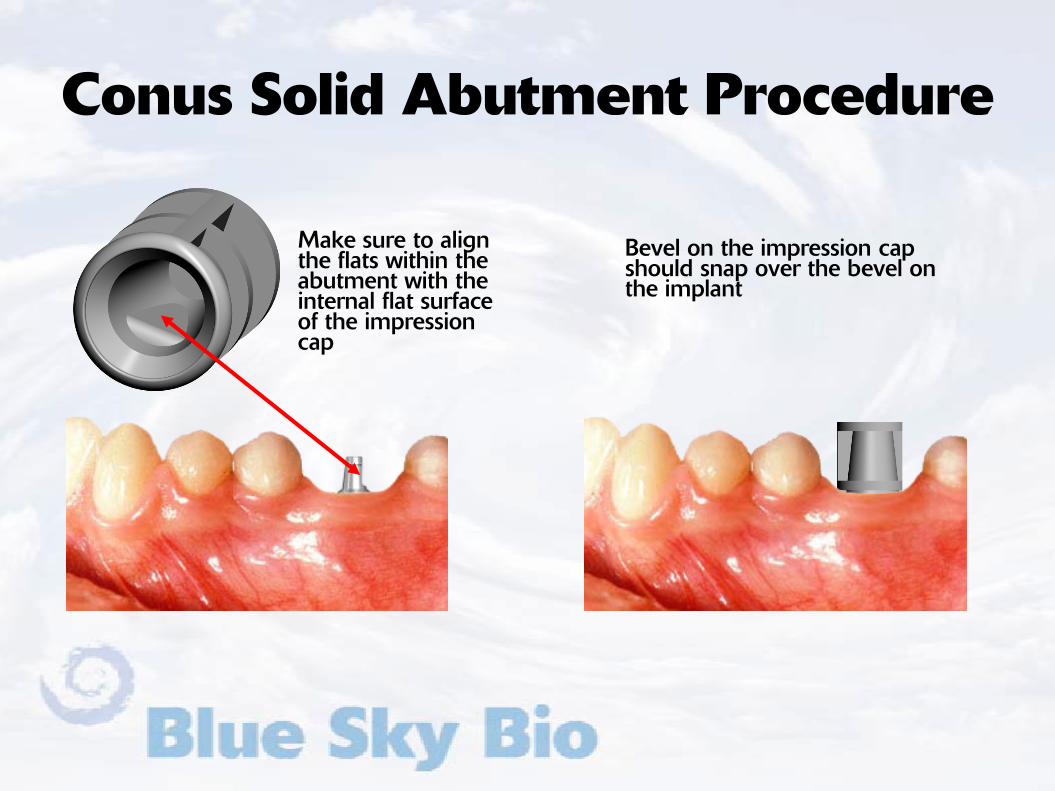
Make sure to align the flats within the abutment with the internal flat surface of the impression cap
Bevel on the impression cap should snap over the bevel on the implant
Conus Solid Abutment Procedure
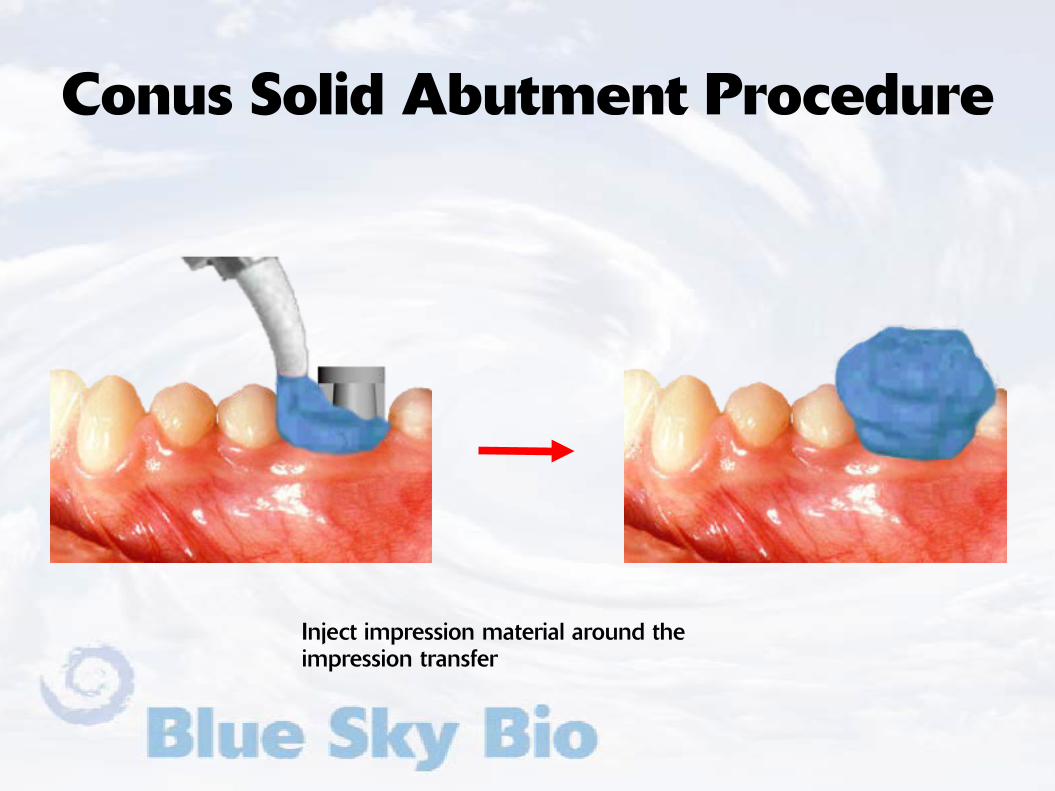
Inject impression material around the impression transfer
Conus Solid Abutment Procedure

Insert tray with impression material
Seated impression to capture dental arch
Conus Solid Abutment Procedure

The impression cap will be removed with the impression tray.
Remove the impression from the mouth when material has set
Conus Solid Abutment Procedure

Use a crown form to reline over the temporary coping to create a custom provisional restoration
Seat the temporary coping over the abutment and cut to appropriate height
Conus Solid Abutment Procedure

Impression snap is captured and picked up within the impression
The laboratory abutment analog is inserted into the plastic impression coping
Make sure to match the flat side on the abutment analog to the flat of the impression
Conus Solid Abutment Procedure

Apply soft tissue replica material around abutment level analog
Pour dental stone Straight into the impression
Conus Solid Abutment Procedure
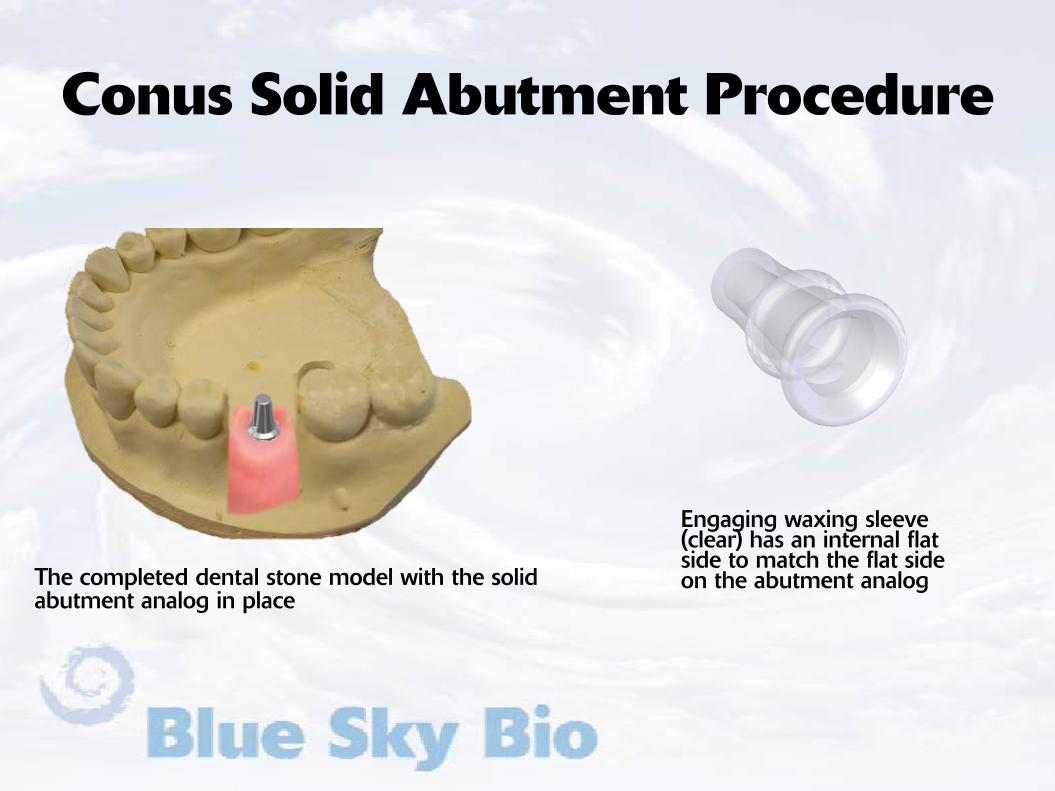
The completed dental stone model with the solid abutment analog in place
Engaging waxing sleeve (clear) has an internal flat side to match the flat side on the abutment analog
Conus Solid Abutment Procedure
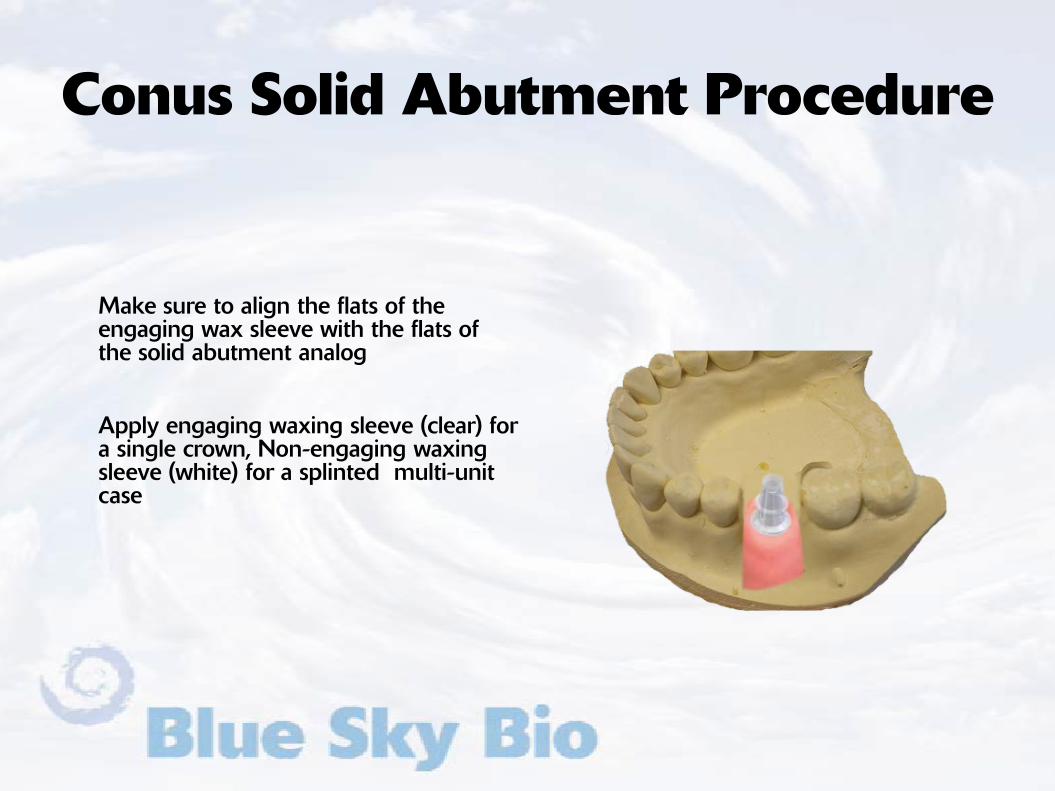
Apply engaging waxing sleeve (clear) for a single crown, Non-engaging waxing sleeve (white) for a splinted multi-unit case
Make sure to align the flats of the engaging wax sleeve with the flats of the solid abutment analog
Conus Solid Abutment Procedure
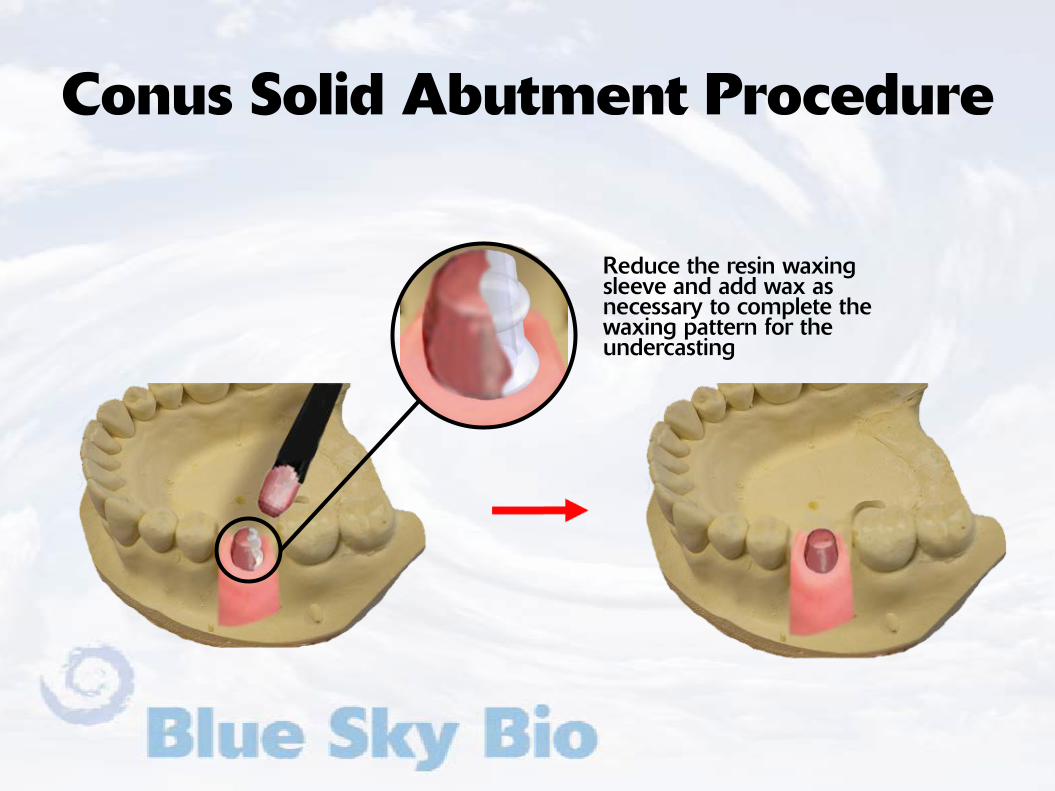
Reduce the resin waxing sleeve and add wax as necessary to complete the waxing pattern for the undercasting
Conus Solid Abutment Procedure

Cast wax up in usual manner and complete the metal casting
Stack and fire the ceramic in the usual manner and complete the restoration
Conus Solid Abutment Procedure
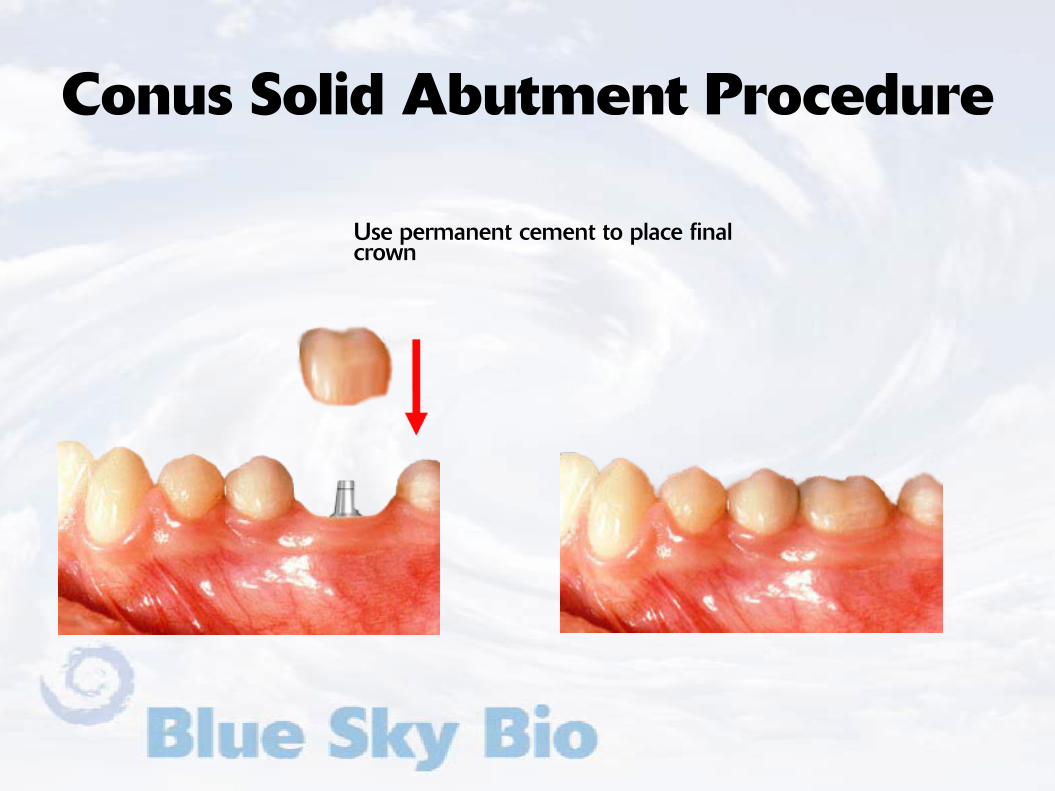
Use permanent cement to place final crown
Conus Solid Abutment Procedure


![Internal - Luciano Chinellato · AnyOne® Internal è -P_[\YL 3L]LS 7YVZ[OLZPZ EZ Post Milling Abutment Angled Abutment CCM Abutment Temporary Abutment [Titanium] Temporary Abutment](https://img.pdfslide.net/doc/110x75/5c038f7909d3f2156d8cd7fd/internal-luciano-anyone-internal-e-pyl-3lls-7yvzolzpz-ez-post-milling.jpg)