Embed Size (px)
Citation preview
Convertible Mustang Styling Bar (05-11 Convertible) - Installation Instructions
The below installation instructions work for the following products:
Convertible Mustang Styling Bar (05-11 Convertible)
Please read through the instructions carefully before starting this project. Take the time to get all the materials together as
well as all the safety equipment.
Tools
3/8” Drive Ratchet with Extension
10mm Sockets
13mm Sockets
1/4” Allen Wrenches
3/16” Allen Wrenches
T50 Torx Bit
Handheld Drill
1/8” Drill Bits
5/16” Drill Bits
2” Hole Saw Bit
Installation:
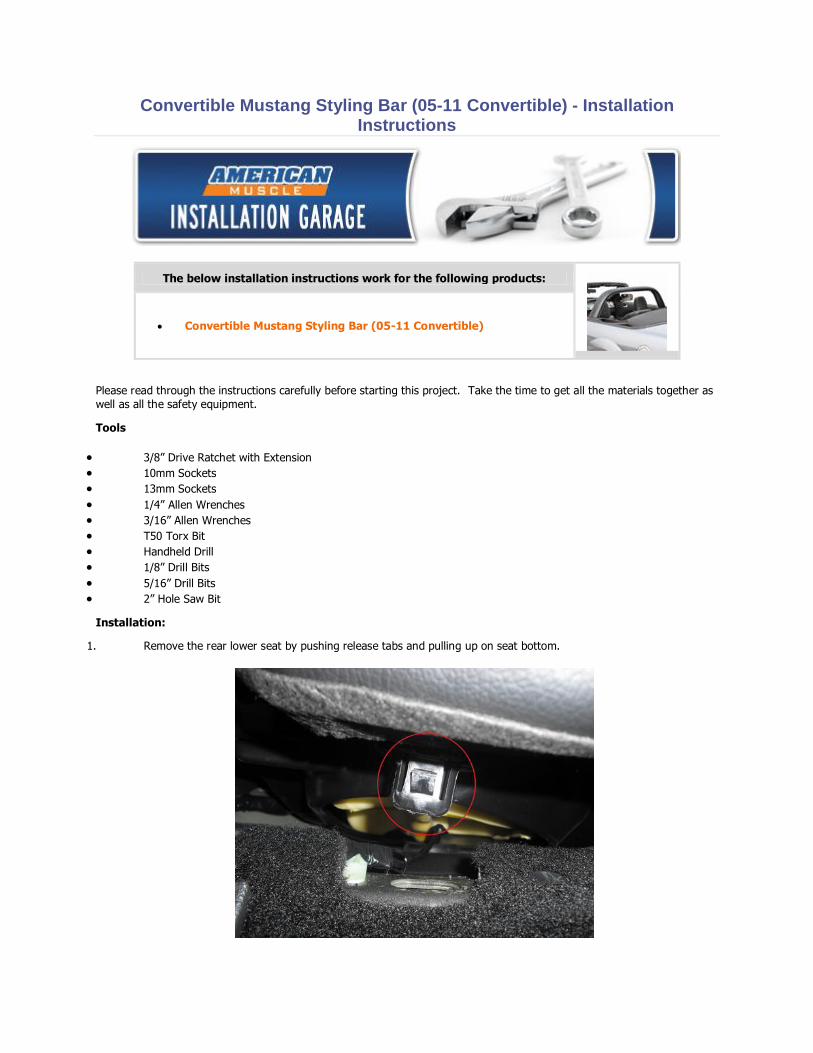
1. Remove the rear lower seat by pushing release tabs and pulling up on seat bottom.
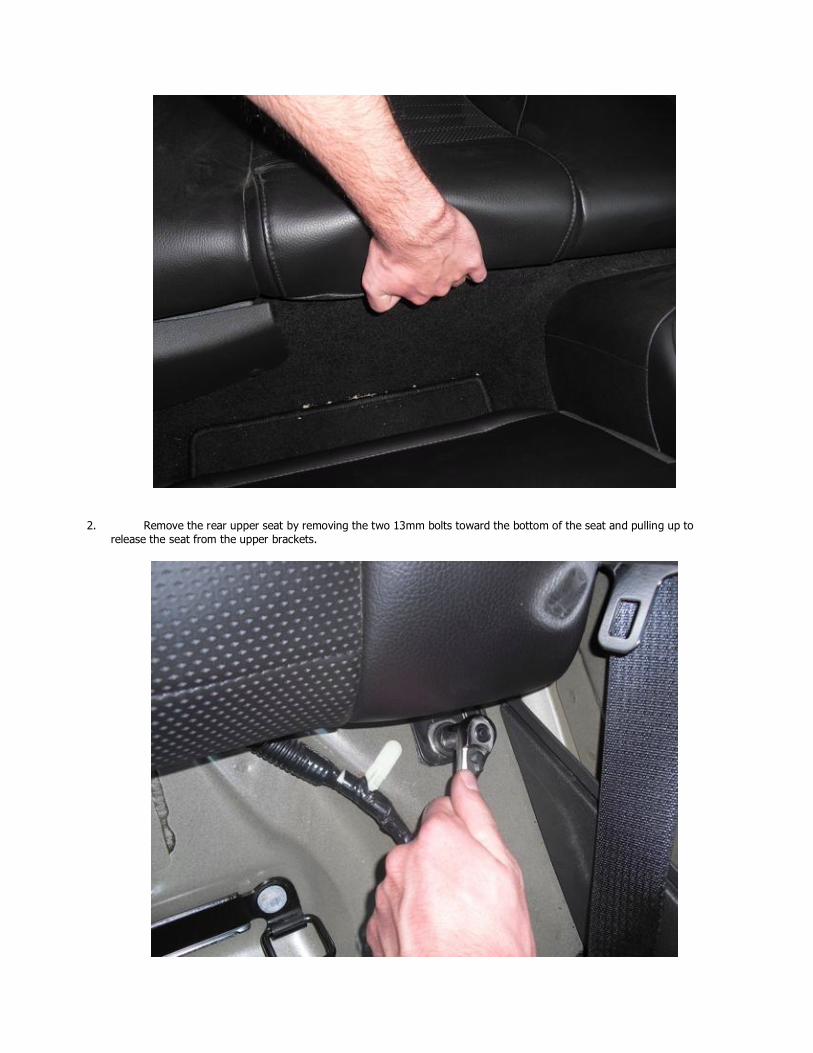
2. Remove the rear upper seat by removing the two 13mm bolts toward the bottom of the seat and pulling up to
release the seat from the upper brackets.
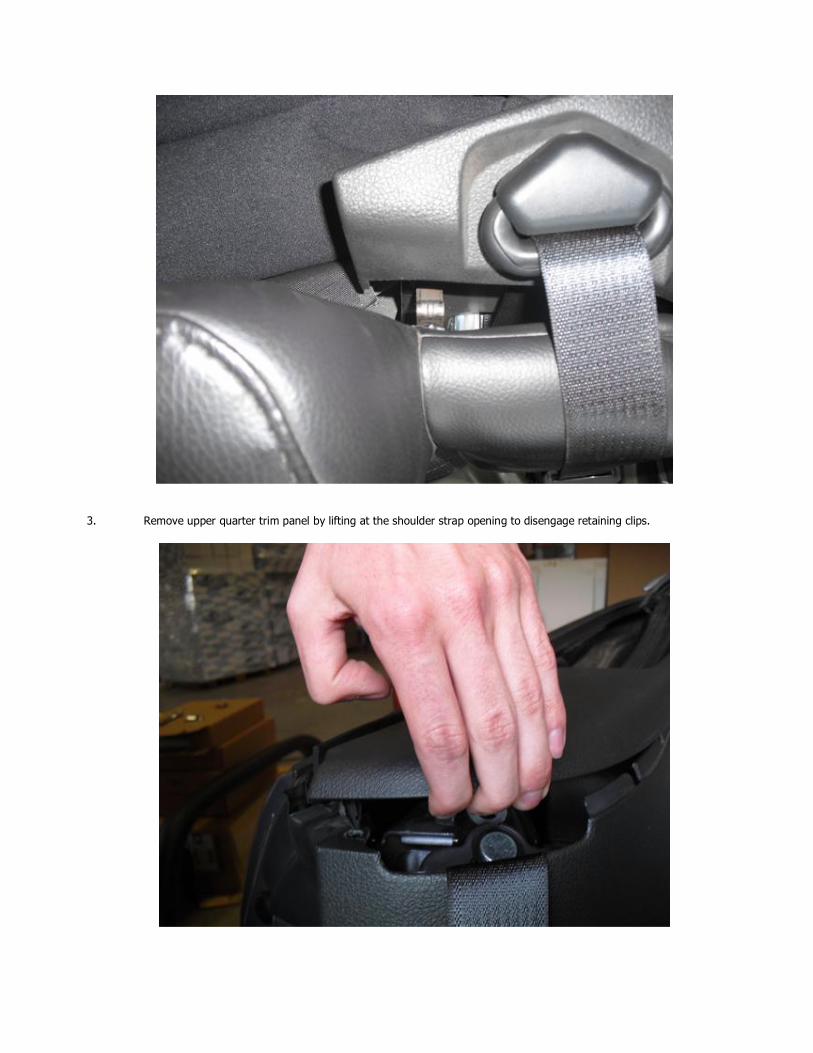
3. Remove upper quarter trim panel by lifting at the shoulder strap opening to disengage retaining clips.
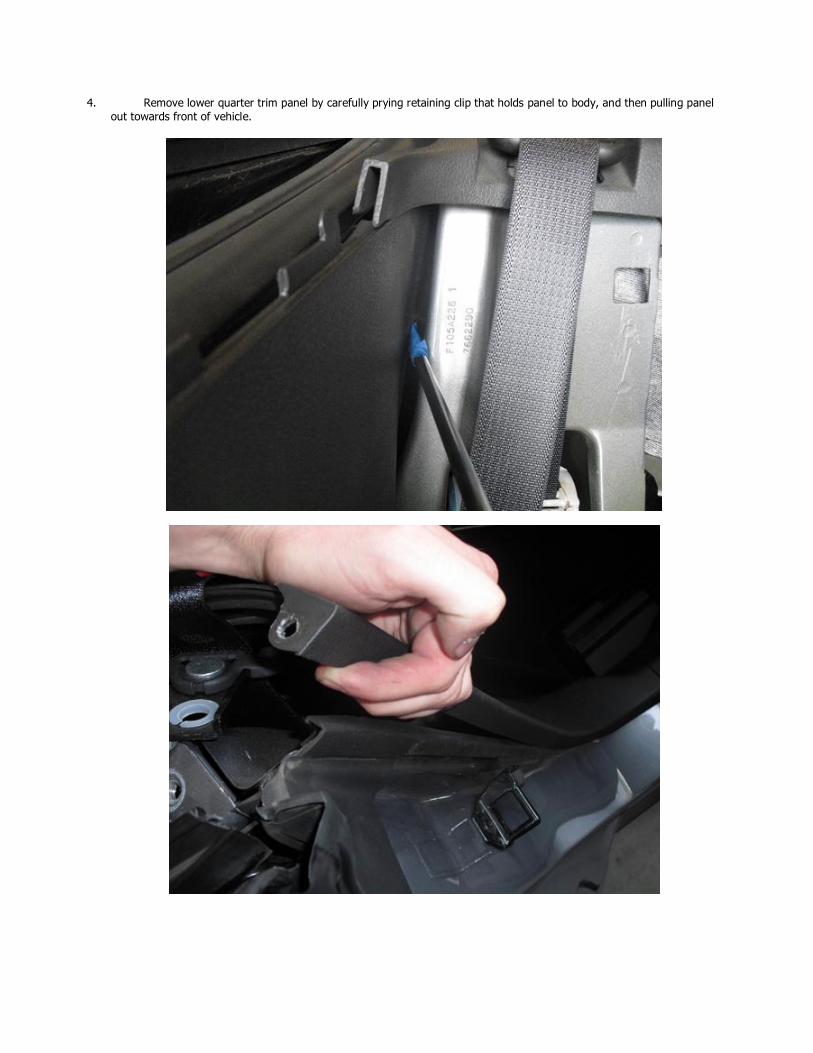
4. Remove lower quarter trim panel by carefully prying retaining clip that holds panel to body, and then pulling panel
out towards front of vehicle.
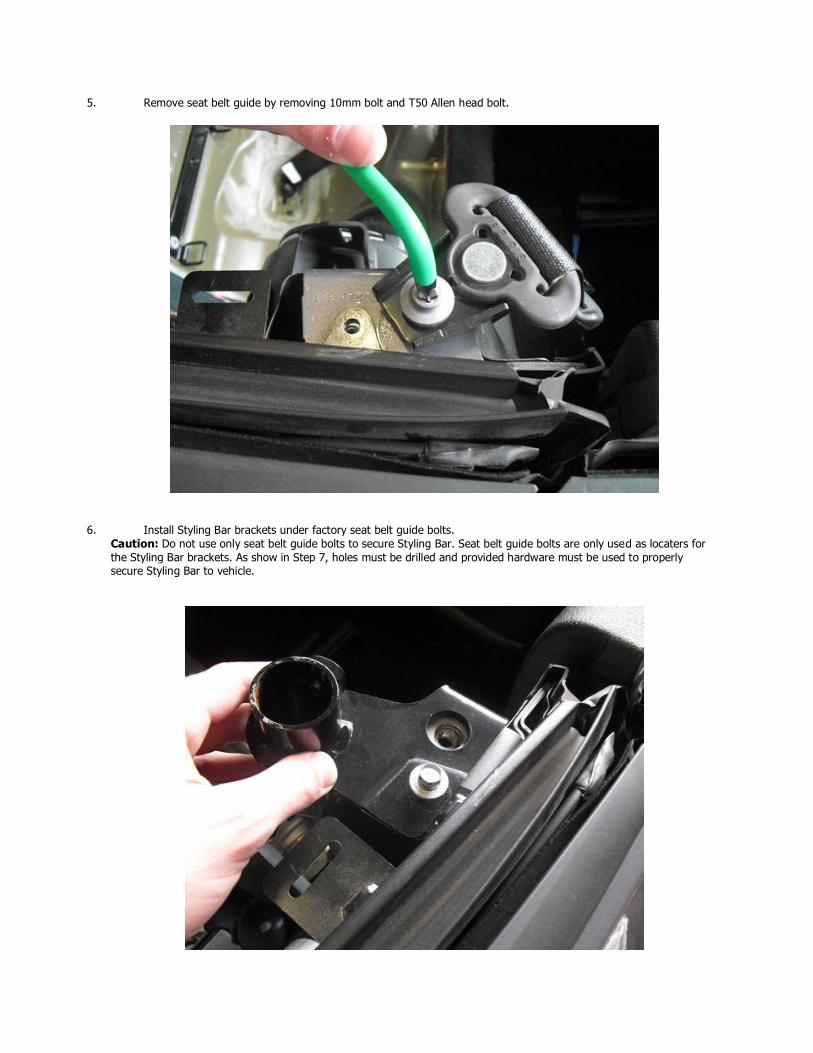
5. Remove seat belt guide by removing 10mm bolt and T50 Allen head bolt.
6. Install Styling Bar brackets under factory seat belt guide bolts.
Caution: Do not use only seat belt guide bolts to secure Styling Bar. Seat belt guide bolts are only used as locaters for
the Styling Bar brackets. As show in Step 7, holes must be drilled and provided hardware must be used to properly secure Styling Bar to vehicle.
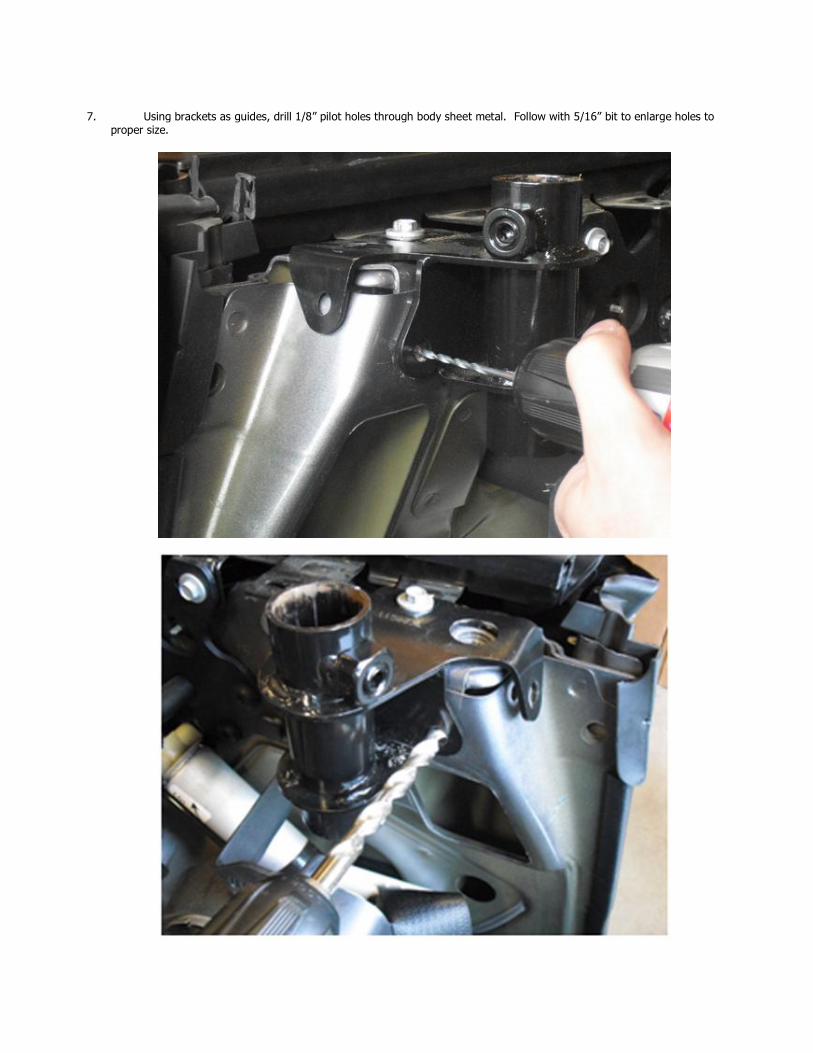
7. Using brackets as guides, drill 1/8” pilot holes through body sheet metal. Follow with 5/16” bit to enlarge holes to proper size.
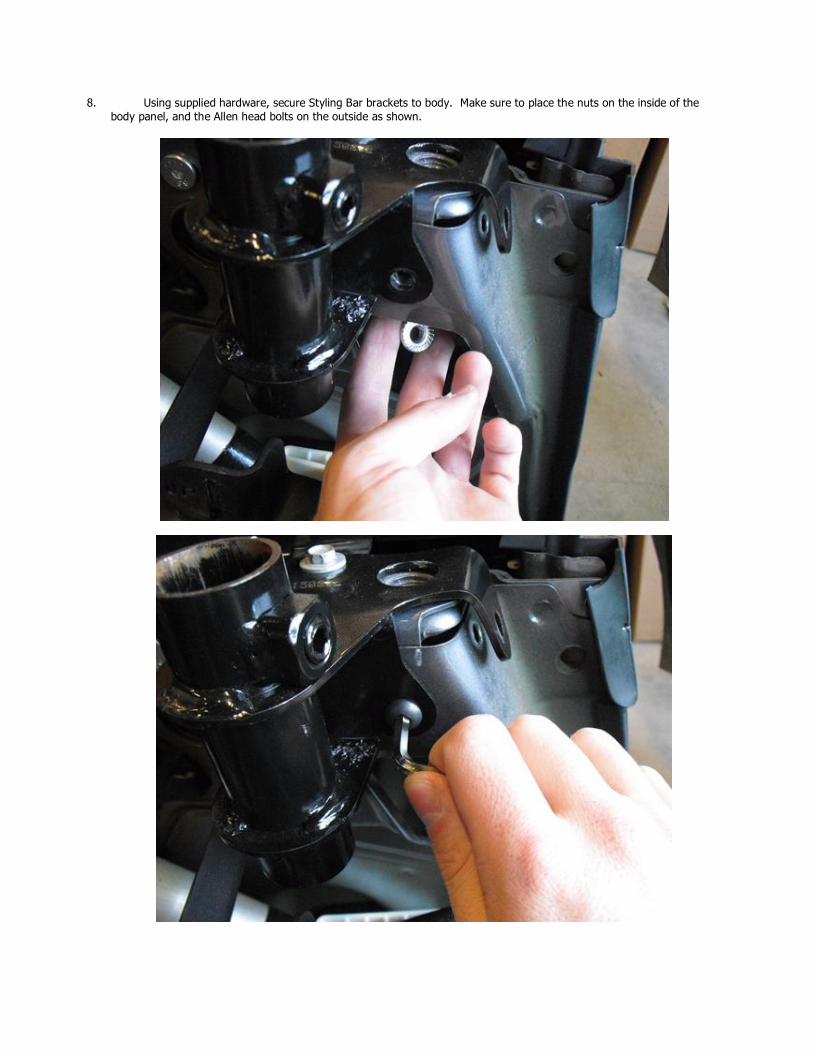
8. Using supplied hardware, secure Styling Bar brackets to body. Make sure to place the nuts on the inside of the
body panel, and the Allen head bolts on the outside as shown.
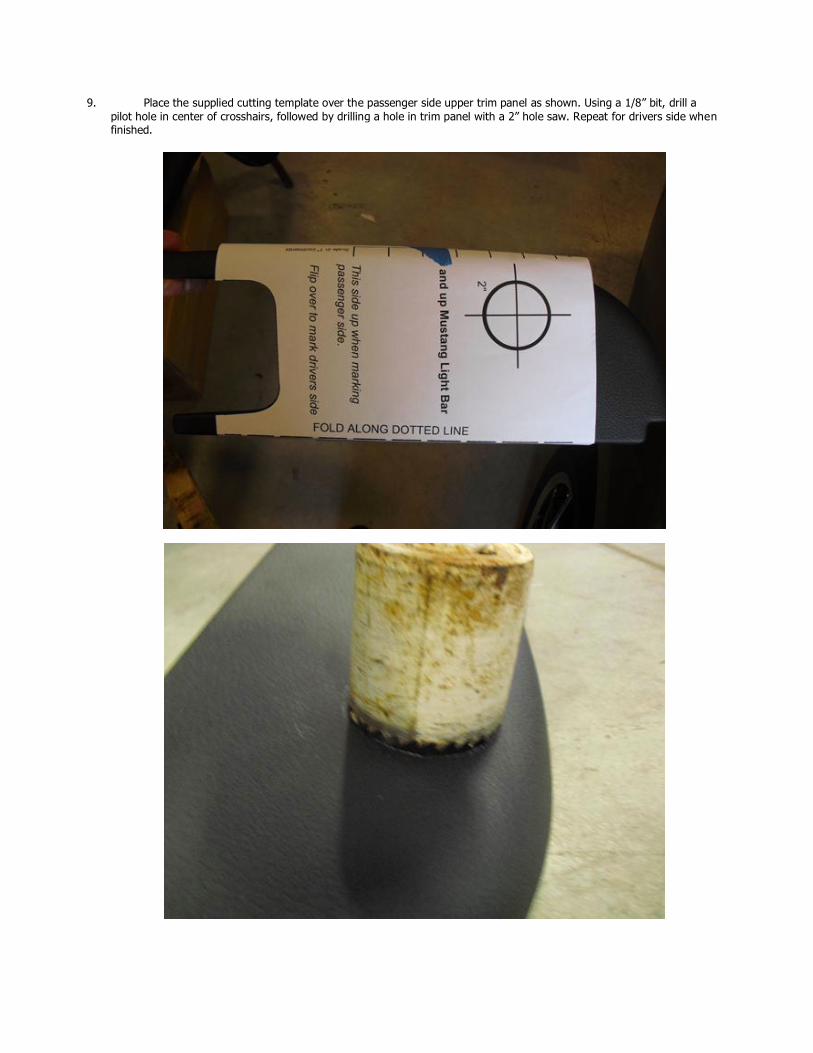
9. Place the supplied cutting template over the passenger side upper trim panel as shown. Using a 1/8” bit, drill a
pilot hole in center of crosshairs, followed by drilling a hole in trim panel with a 2” hole saw. Repeat for drivers side when finished.
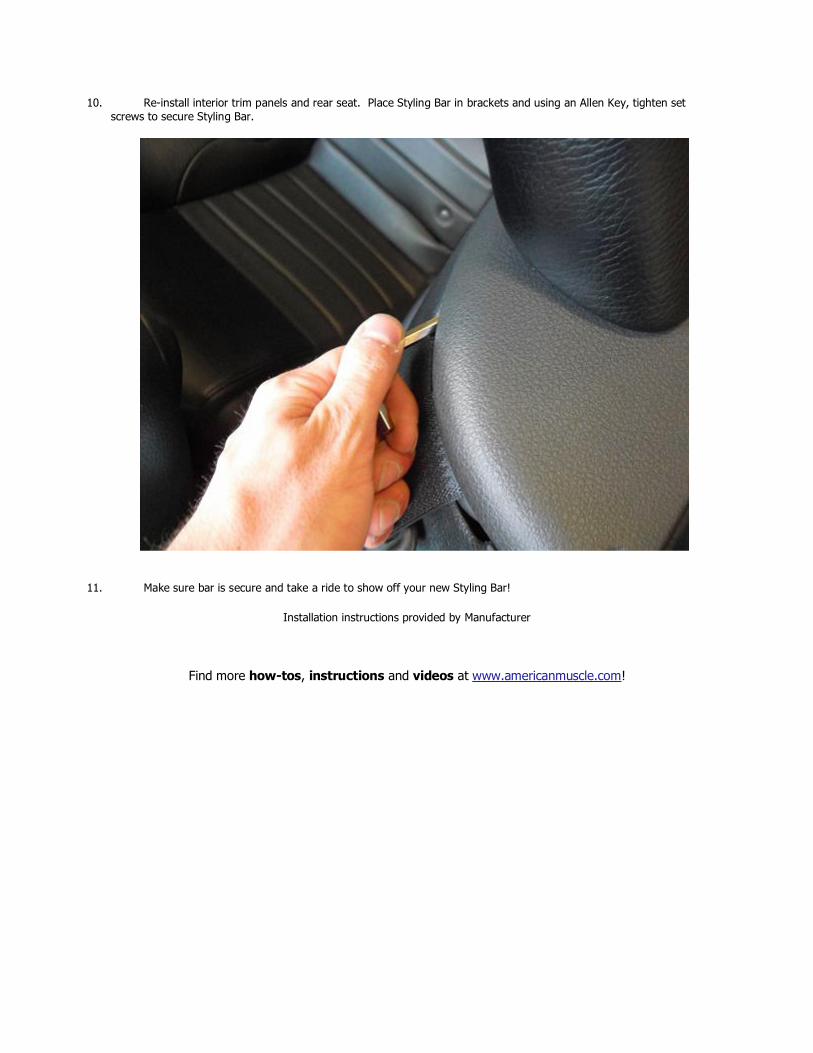
10. Re-install interior trim panels and rear seat. Place Styling Bar in brackets and using an Allen Key, tighten set
screws to secure Styling Bar.
11. Make sure bar is secure and take a ride to show off your new Styling Bar!
Installation instructions provided by Manufacturer
Find more how-tos, instructions and videos at www.americanmuscle.com!
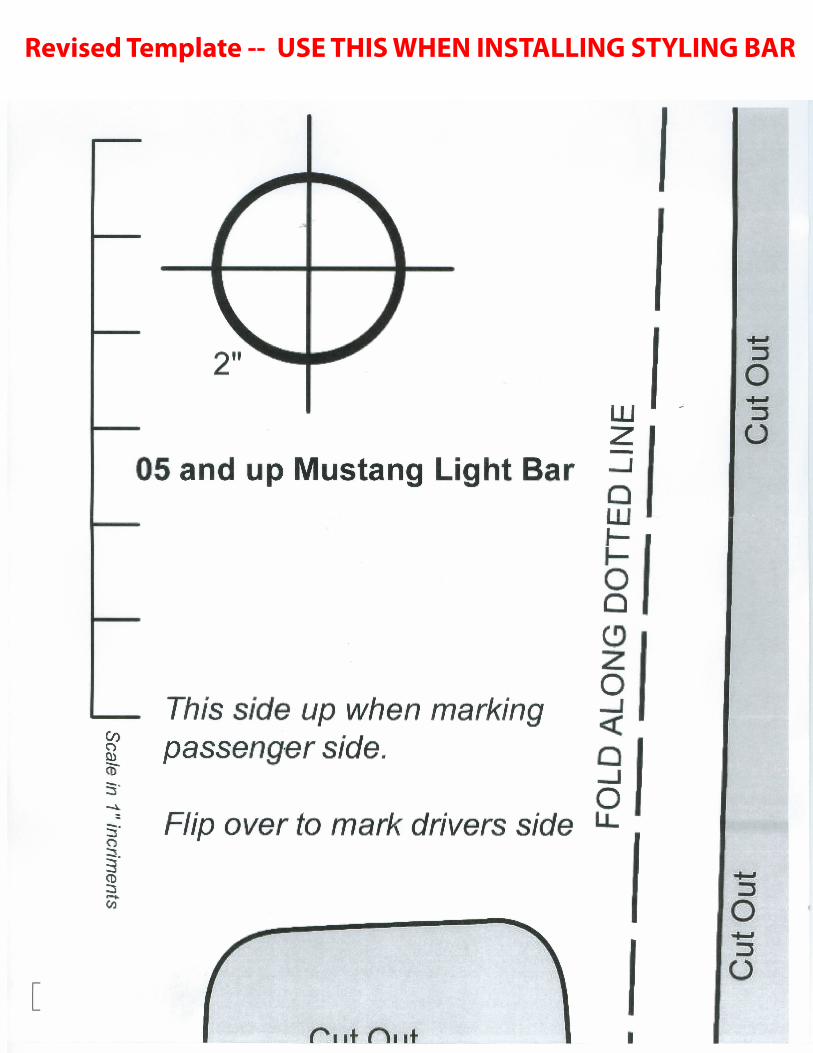
Revised Template -- USE THIS WHEN INSTALLING STYLING BAR