Embed Size (px)
Citation preview
Cozy Crock Pot Carrier
Cozy Crock Pot Carrier
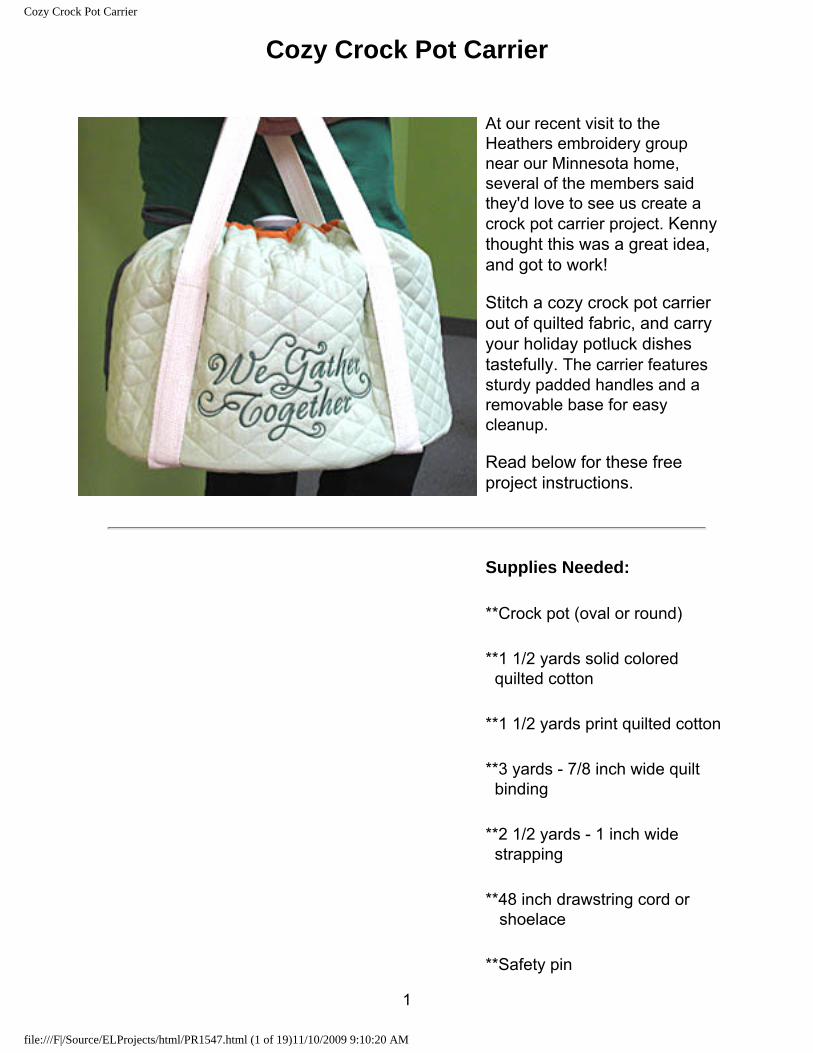
At our recent visit to the Heathers embroidery group near our Minnesota home, several of the members said they'd love to see us create a crock pot carrier project. Kenny thought this was a great idea, and got to work!
Stitch a cozy crock pot carrier out of quilted fabric, and carry your holiday potluck dishes tastefully. The carrier features sturdy padded handles and a removable base for easy cleanup.
Read below for these free project instructions.
Supplies Needed:
**Crock pot (oval or round)
**1 1/2 yards solid colored quilted cotton
**1 1/2 yards print quilted cotton
**3 yards - 7/8 inch wide quilt binding
**2 1/2 yards - 1 inch wide strapping
**48 inch drawstring cord or shoelace
**Safety pin
file:///F|/Source/ELProjects/html/PR1547.html (1 of 19)11/10/2009 9:10:20 AM
1
Cozy Crock Pot Carrier
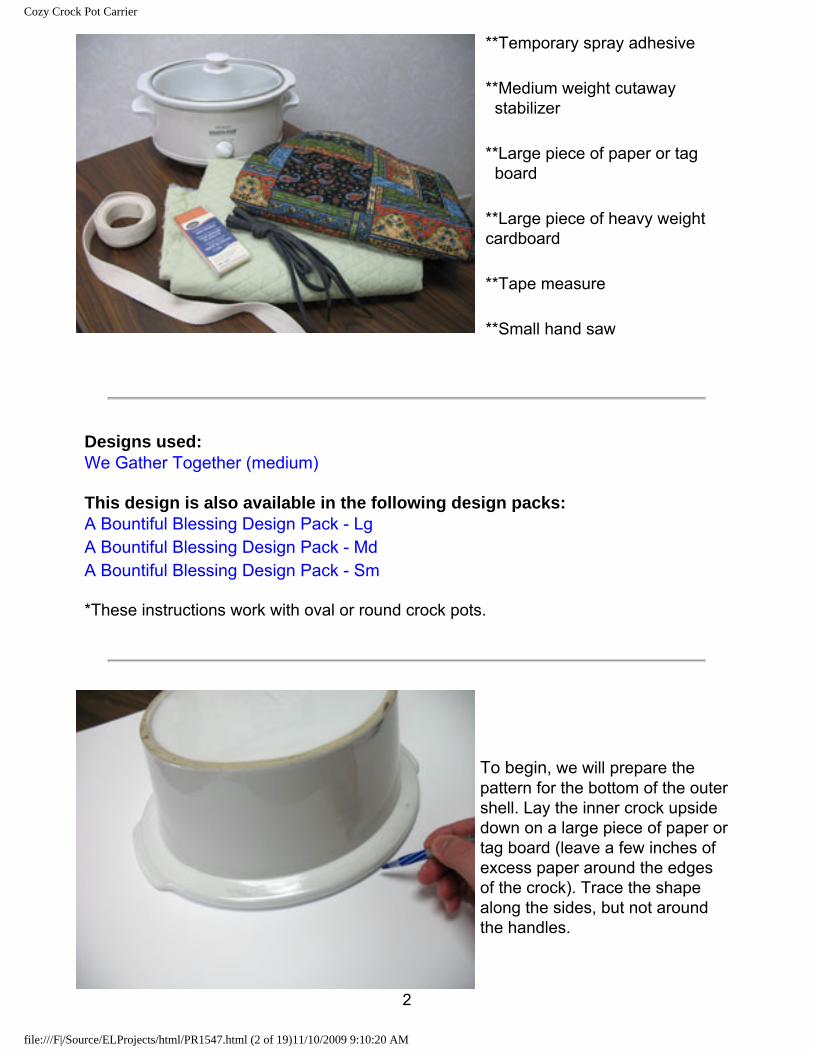
**Temporary spray adhesive
**Medium weight cutaway stabilizer
**Large piece of paper or tag board
**Large piece of heavy weight cardboard
**Tape measure
**Small hand saw
Designs used: We Gather Together (medium)
This design is also available in the following design packs: A Bountiful Blessing Design Pack - LgA Bountiful Blessing Design Pack - MdA Bountiful Blessing Design Pack - Sm
*These instructions work with oval or round crock pots.
To begin, we will prepare the pattern for the bottom of the outer shell. Lay the inner crock upside down on a large piece of paper or tag board (leave a few inches of excess paper around the edges of the crock). Trace the shape along the sides, but not around the handles.
file:///F|/Source/ELProjects/html/PR1547.html (2 of 19)11/10/2009 9:10:20 AM
2
Cozy Crock Pot Carrier
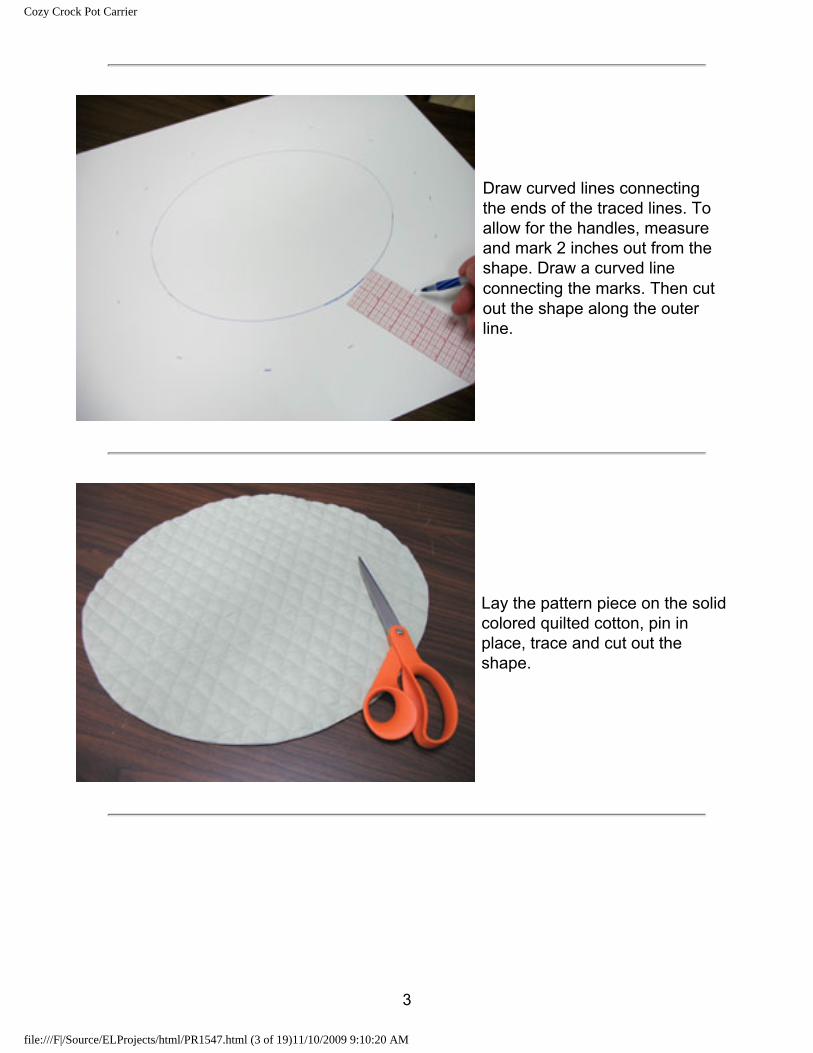
Draw curved lines connecting the ends of the traced lines. To allow for the handles, measure and mark 2 inches out from the shape. Draw a curved line connecting the marks. Then cut out the shape along the outer line.
Lay the pattern piece on the solid colored quilted cotton, pin in place, trace and cut out the shape.
file:///F|/Source/ELProjects/html/PR1547.html (3 of 19)11/10/2009 9:10:20 AM
3
Cozy Crock Pot Carrier
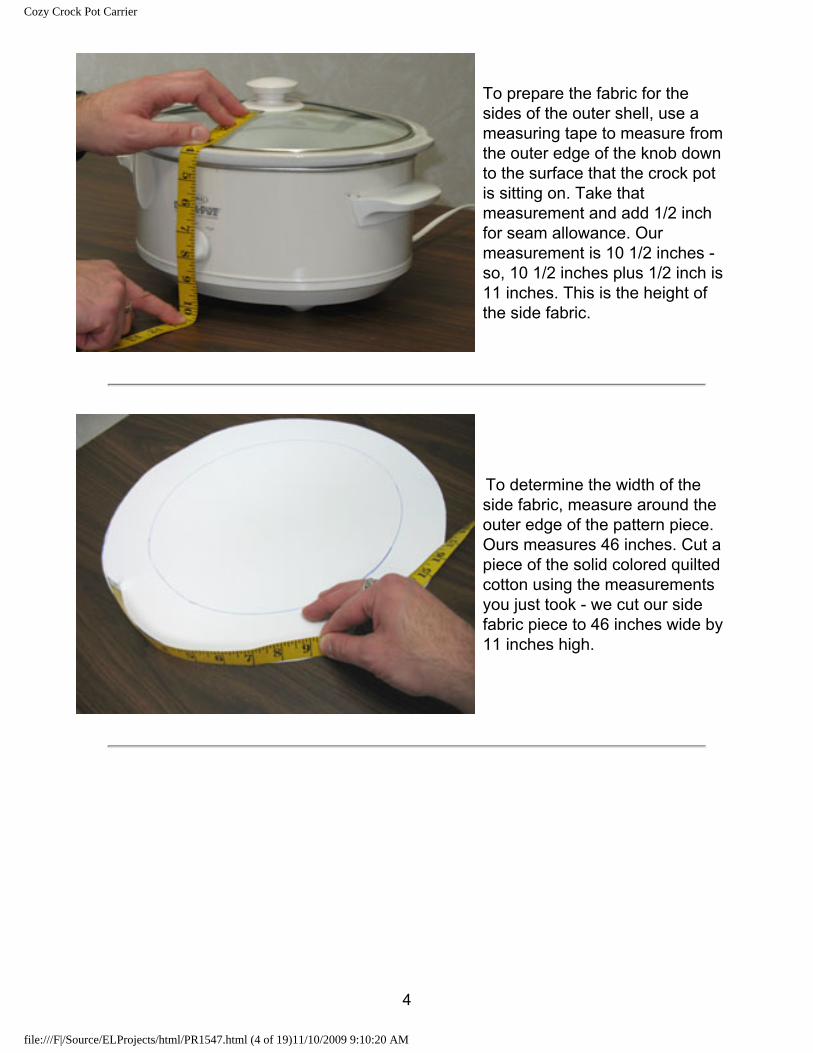
To prepare the fabric for the sides of the outer shell, use a measuring tape to measure from the outer edge of the knob down to the surface that the crock pot is sitting on. Take that measurement and add 1/2 inch for seam allowance. Our measurement is 10 1/2 inches - so, 10 1/2 inches plus 1/2 inch is 11 inches. This is the height of the side fabric.
To determine the width of the side fabric, measure around the outer edge of the pattern piece. Ours measures 46 inches. Cut a piece of the solid colored quilted cotton using the measurements you just took - we cut our side fabric piece to 46 inches wide by 11 inches high.
file:///F|/Source/ELProjects/html/PR1547.html (4 of 19)11/10/2009 9:10:20 AM
4
Cozy Crock Pot Carrier
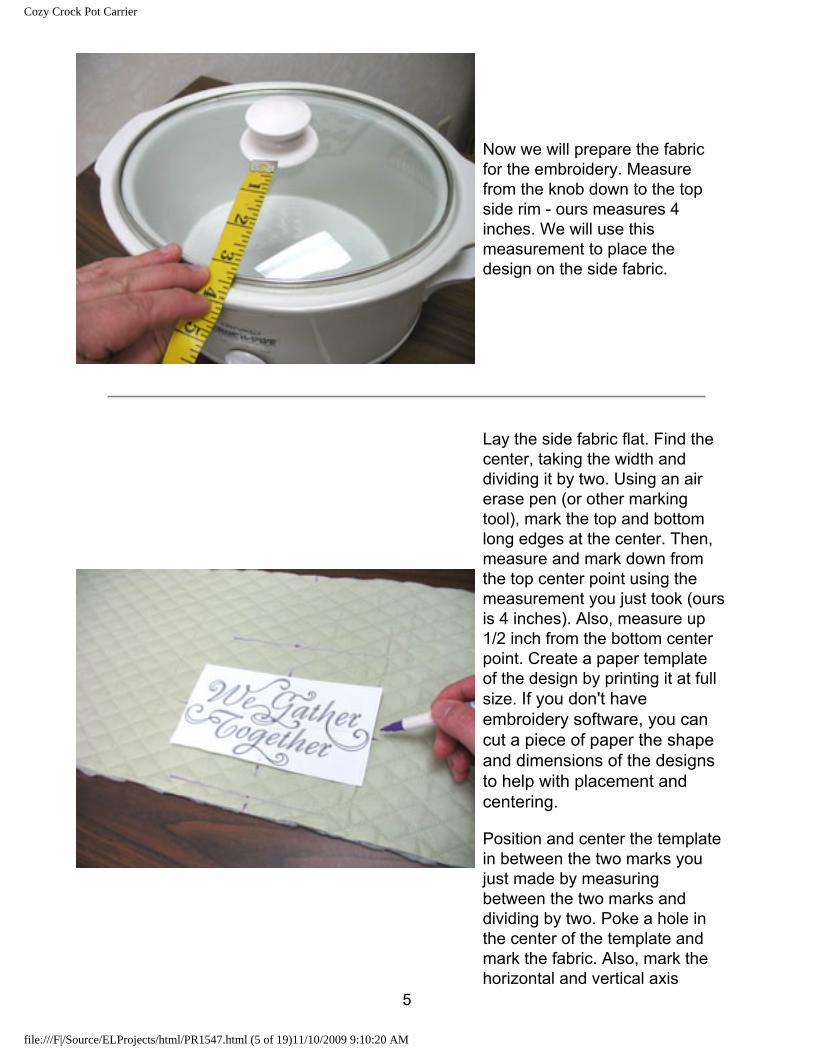
Now we will prepare the fabric for the embroidery. Measure from the knob down to the top side rim - ours measures 4 inches. We will use this measurement to place the design on the side fabric.
Lay the side fabric flat. Find the center, taking the width and dividing it by two. Using an air erase pen (or other marking tool), mark the top and bottom long edges at the center. Then, measure and mark down from the top center point using the measurement you just took (ours is 4 inches). Also, measure up 1/2 inch from the bottom center point. Create a paper template of the design by printing it at full size. If you don't have embroidery software, you can cut a piece of paper the shape and dimensions of the designs to help with placement and centering.
Position and center the template in between the two marks you just made by measuring between the two marks and dividing by two. Poke a hole in the center of the template and mark the fabric. Also, mark the horizontal and vertical axis
file:///F|/Source/ELProjects/html/PR1547.html (5 of 19)11/10/2009 9:10:20 AM
5
Cozy Crock Pot Carrier
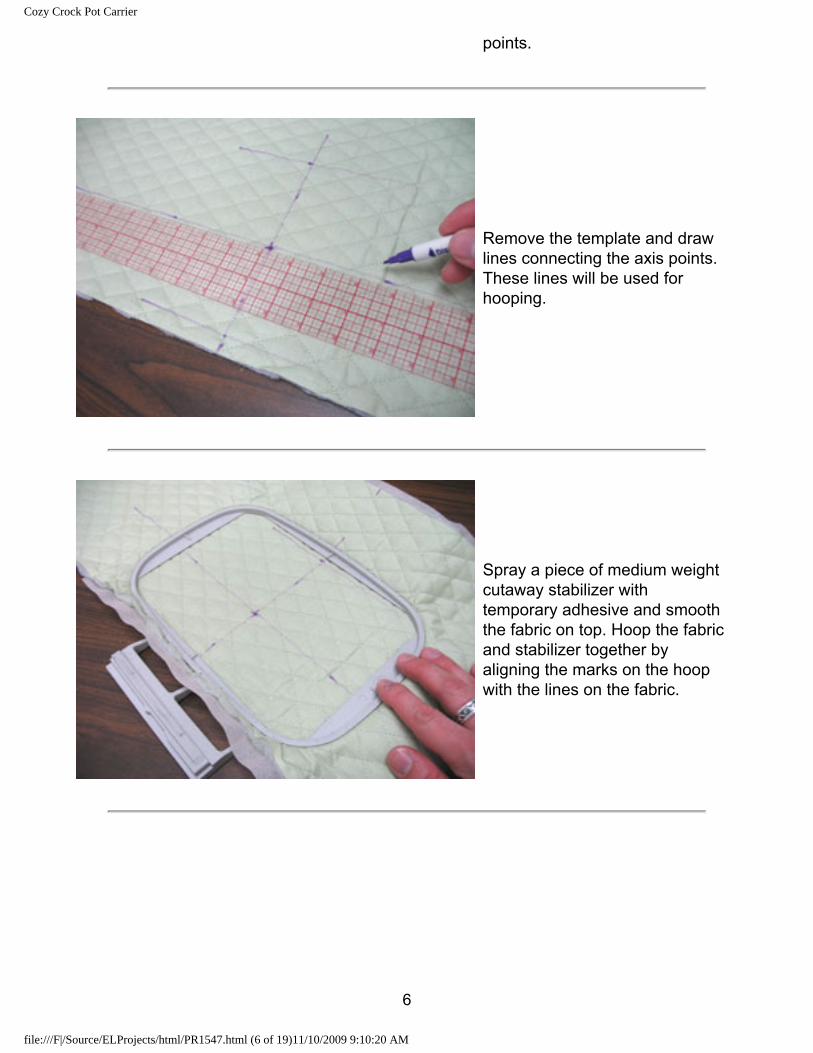
points.
Remove the template and draw lines connecting the axis points. These lines will be used for hooping.
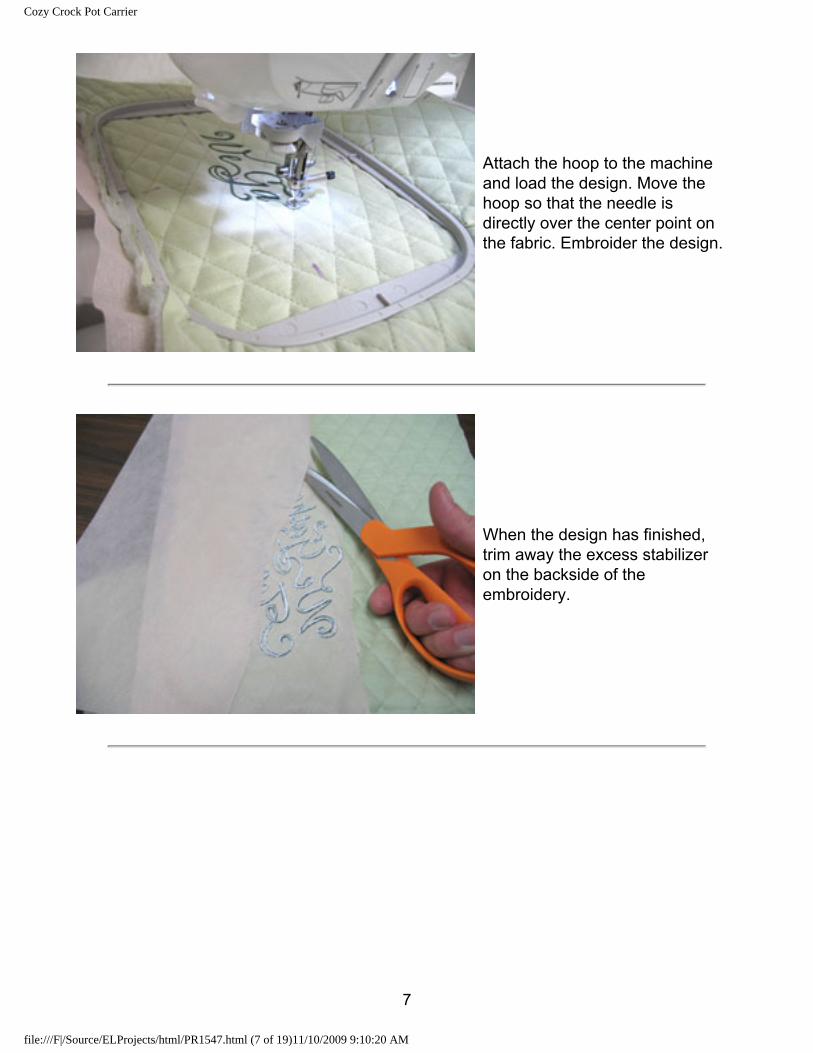
Spray a piece of medium weight cutaway stabilizer with temporary adhesive and smooth the fabric on top. Hoop the fabric and stabilizer together by aligning the marks on the hoop with the lines on the fabric.
file:///F|/Source/ELProjects/html/PR1547.html (6 of 19)11/10/2009 9:10:20 AM
6
Cozy Crock Pot Carrier
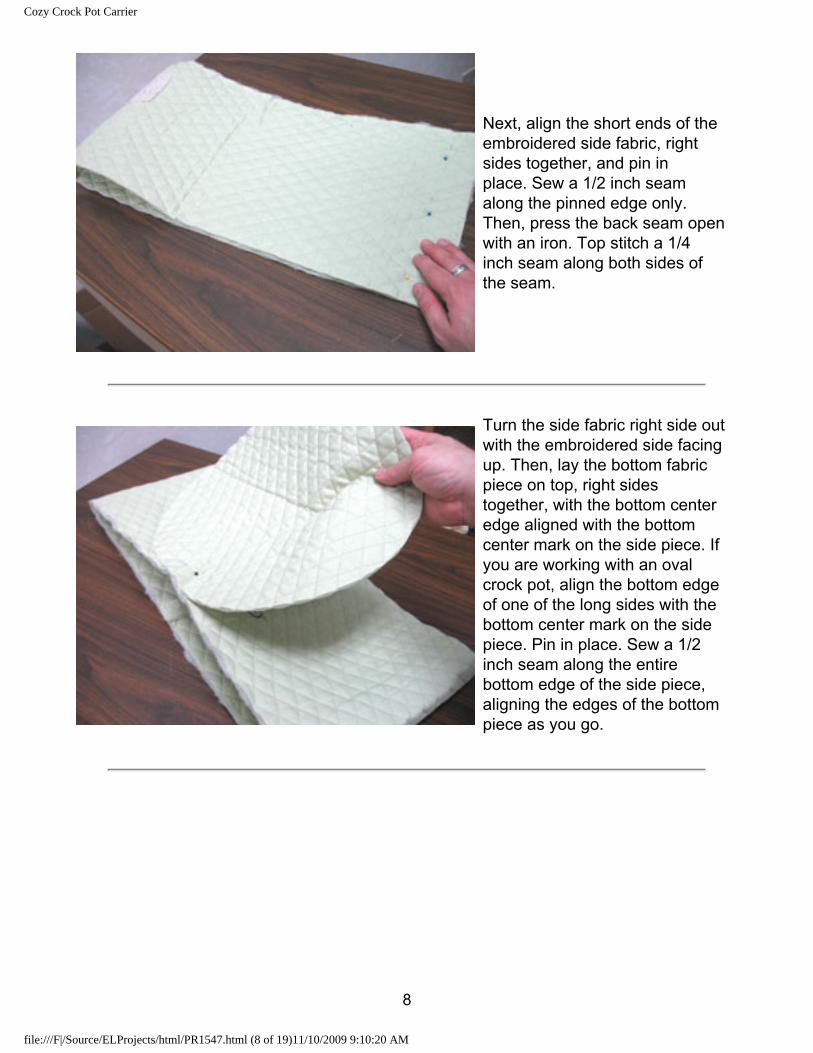
Attach the hoop to the machine and load the design. Move the hoop so that the needle is directly over the center point on the fabric. Embroider the design.
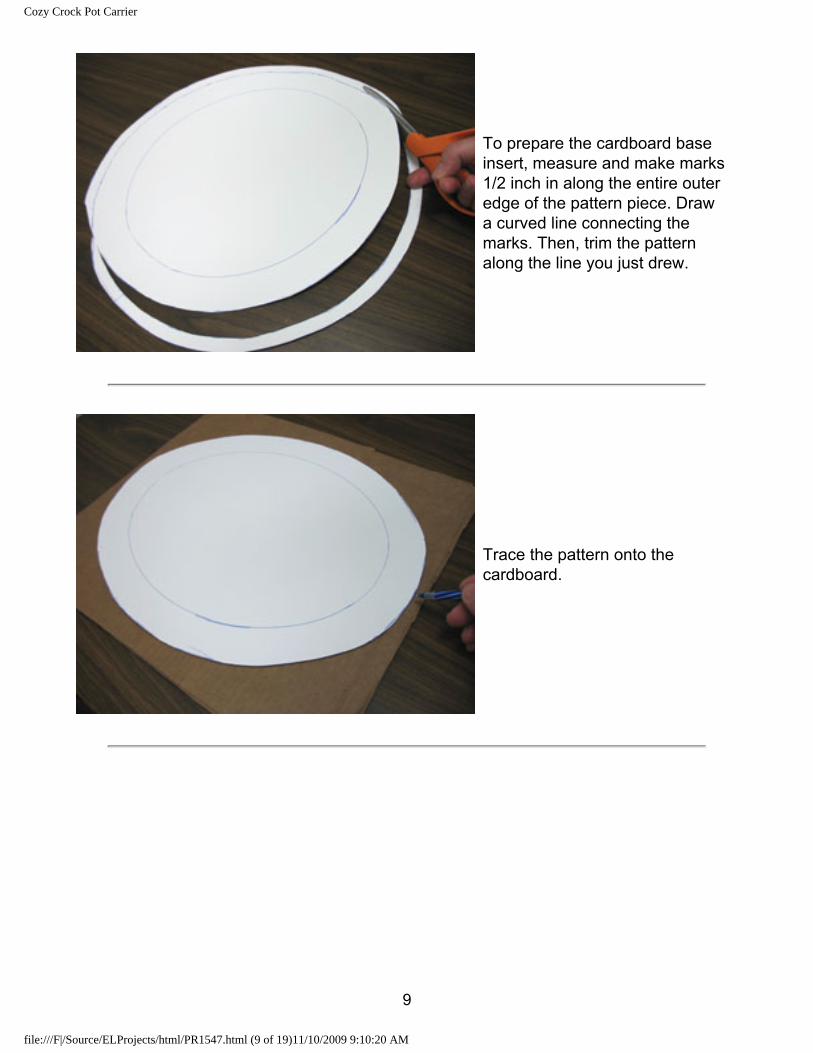
When the design has finished, trim away the excess stabilizer on the backside of the embroidery.
file:///F|/Source/ELProjects/html/PR1547.html (7 of 19)11/10/2009 9:10:20 AM
7
Cozy Crock Pot Carrier
Next, align the short ends of the embroidered side fabric, right sides together, and pin in place. Sew a 1/2 inch seam along the pinned edge only. Then, press the back seam open with an iron. Top stitch a 1/4 inch seam along both sides of the seam.
Turn the side fabric right side out with the embroidered side facing up. Then, lay the bottom fabric piece on top, right sides together, with the bottom center edge aligned with the bottom center mark on the side piece. If you are working with an oval crock pot, align the bottom edge of one of the long sides with the bottom center mark on the side piece. Pin in place. Sew a 1/2 inch seam along the entire bottom edge of the side piece, aligning the edges of the bottom piece as you go.
file:///F|/Source/ELProjects/html/PR1547.html (8 of 19)11/10/2009 9:10:20 AM
8
Cozy Crock Pot Carrier
To prepare the cardboard base insert, measure and make marks 1/2 inch in along the entire outer edge of the pattern piece. Draw a curved line connecting the marks. Then, trim the pattern along the line you just drew.
Trace the pattern onto the cardboard.
file:///F|/Source/ELProjects/html/PR1547.html (9 of 19)11/10/2009 9:10:20 AM
9

Cozy Crock Pot Carrier
Cut out the shape. We used permanent spray adhesive to glue two pieces of light weight cardboard together to make a sturdy piece. Then, we used a small hand saw to cut out the shape.
To add the straps, turn the outer shell right side out. Add the cardboard insert inside the outer shell, then, add the crock pot. Cut two 46 inch lengths of 1 inch wide strapping. Then, tuck the straps underneath the outer shell about 3 inches in from each side. Pull the straps up and even them out by matching the ends. Pin the straps in place on the front and the back of the outer shell. We pinned our straps about 1/2 inch from either side of the embroidered design on the front. Then, remove the crock pot and the cardboard insert.
file:///F|/Source/ELProjects/html/PR1547.html (10 of 19)11/10/2009 9:10:20 AM
10
Cozy Crock Pot Carrier
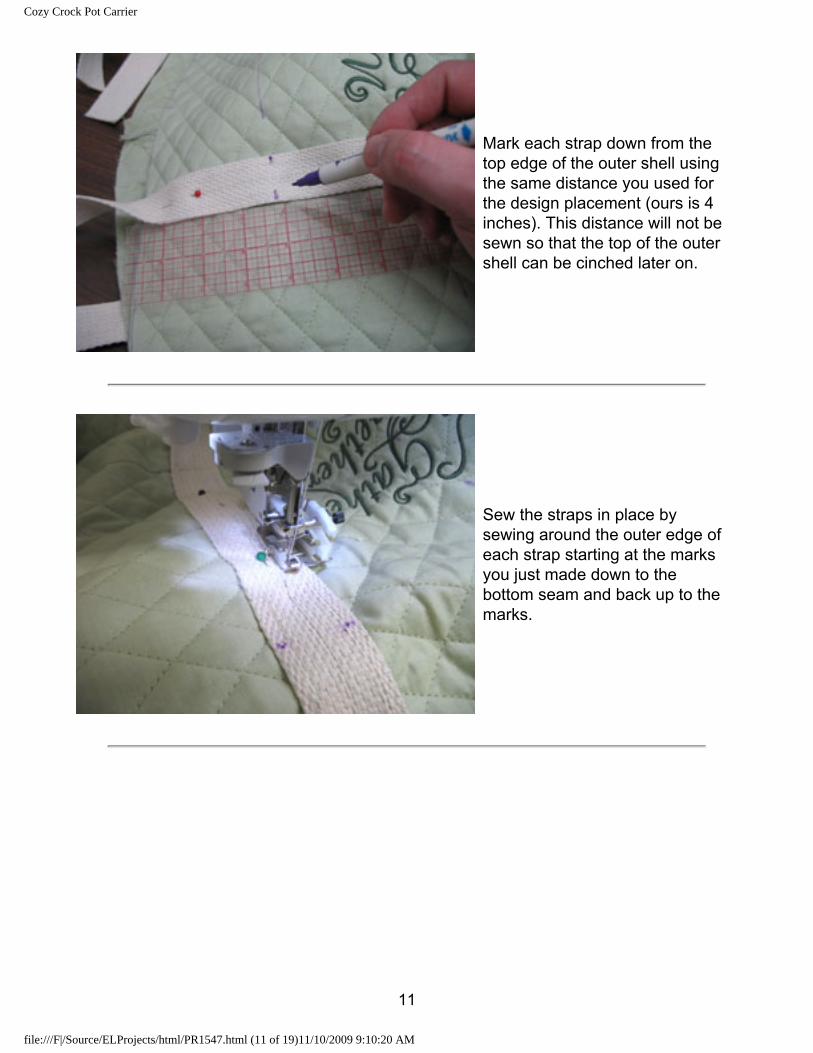
Mark each strap down from the top edge of the outer shell using the same distance you used for the design placement (ours is 4 inches). This distance will not be sewn so that the top of the outer shell can be cinched later on.
Sew the straps in place by sewing around the outer edge of each strap starting at the marks you just made down to the bottom seam and back up to the marks.
file:///F|/Source/ELProjects/html/PR1547.html (11 of 19)11/10/2009 9:10:20 AM
11
Cozy Crock Pot Carrier
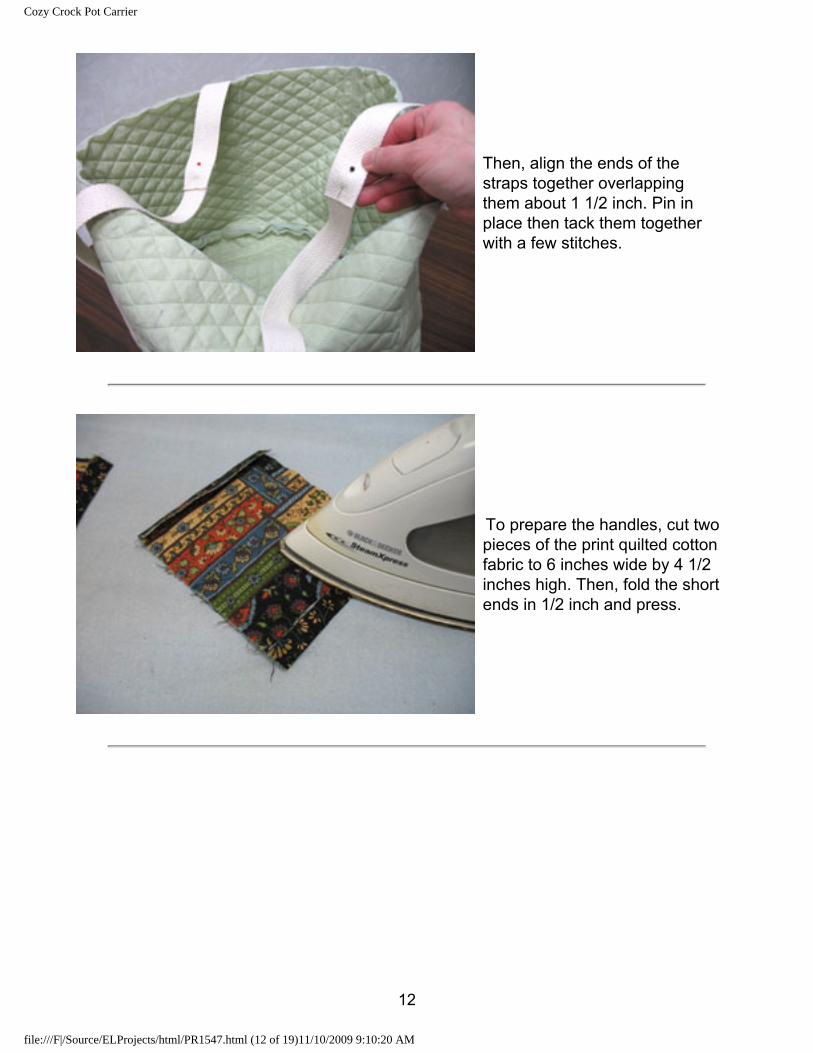
Then, align the ends of the straps together overlapping them about 1 1/2 inch. Pin in place then tack them together with a few stitches.
To prepare the handles, cut two pieces of the print quilted cotton fabric to 6 inches wide by 4 1/2 inches high. Then, fold the short ends in 1/2 inch and press.
file:///F|/Source/ELProjects/html/PR1547.html (12 of 19)11/10/2009 9:10:20 AM
12
Cozy Crock Pot Carrier
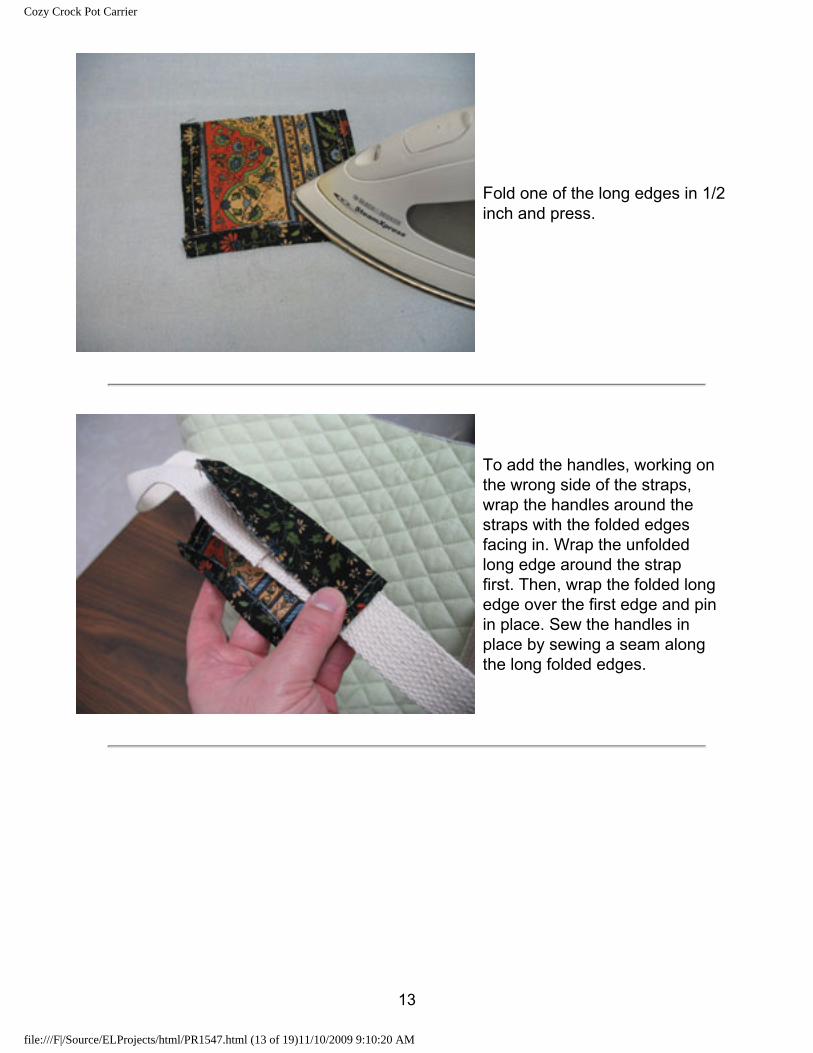
Fold one of the long edges in 1/2 inch and press.
To add the handles, working on the wrong side of the straps, wrap the handles around the straps with the folded edges facing in. Wrap the unfolded long edge around the strap first. Then, wrap the folded long edge over the first edge and pin in place. Sew the handles in place by sewing a seam along the long folded edges.
file:///F|/Source/ELProjects/html/PR1547.html (13 of 19)11/10/2009 9:10:20 AM
13

Cozy Crock Pot Carrier
To prepare the inner lining, trim away about 1/3 of the pattern piece. If you are using an oval crock pot, trim away about 1/3 of the pattern piece along one of the long sides.
Use the remaining large section of the pattern piece to cut out two pieces of the print quilted cotton - trace and cut out the first piece, then, flip the pattern piece over and trace and cut the second piece.
file:///F|/Source/ELProjects/html/PR1547.html (14 of 19)11/10/2009 9:10:20 AM
14
Cozy Crock Pot Carrier
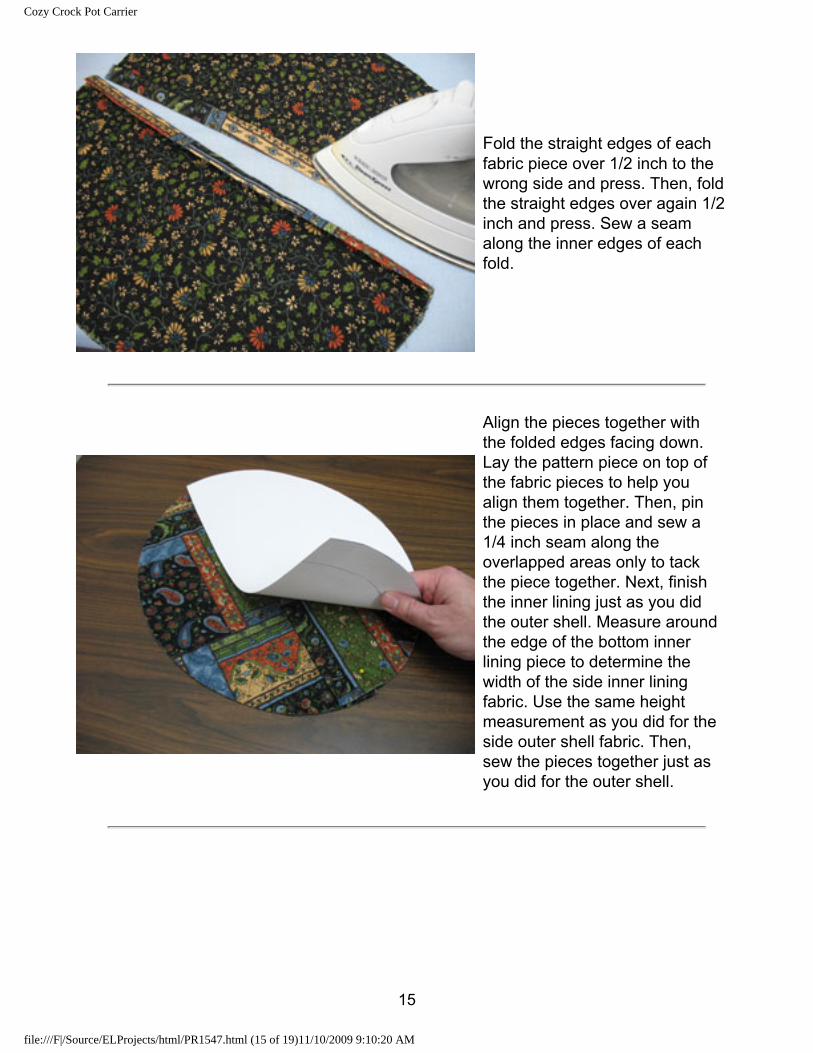
Fold the straight edges of each fabric piece over 1/2 inch to the wrong side and press. Then, fold the straight edges over again 1/2 inch and press. Sew a seam along the inner edges of each fold.
Align the pieces together with the folded edges facing down. Lay the pattern piece on top of the fabric pieces to help you align them together. Then, pin the pieces in place and sew a 1/4 inch seam along the overlapped areas only to tack the piece together. Next, finish the inner lining just as you did the outer shell. Measure around the edge of the bottom inner lining piece to determine the width of the side inner lining fabric. Use the same height measurement as you did for the side outer shell fabric. Then, sew the pieces together just as you did for the outer shell.
file:///F|/Source/ELProjects/html/PR1547.html (15 of 19)11/10/2009 9:10:20 AM
15

Cozy Crock Pot Carrier
Insert the inner lining inside the outer shell with the wrong sides together. Pin the layers together at the front, back, and both sides (the outer shell fabric will be a bit loose). Then, create pleats above each strap by pinching the outer shell fabric about 1/2 inch. Pin in place and sew a 1/4 inch seam around the entire top edge of the caddy.
Now we will add the quilt binding to the top of the caddy. This finishes the top edge and creates a pocket for the drawstring. Cut a 3 inch piece of quilt binding, fold the ends over 1/2 inch to the wrong side and press. Then, wrap the binding around one of the sides of the top edge of the caddy. Pin in place and sew a seam around the side and bottom edges - this binding finishes off the area where the ends of the drawstring pocket will lie.
file:///F|/Source/ELProjects/html/PR1547.html (16 of 19)11/10/2009 9:10:20 AM
16
Cozy Crock Pot Carrier
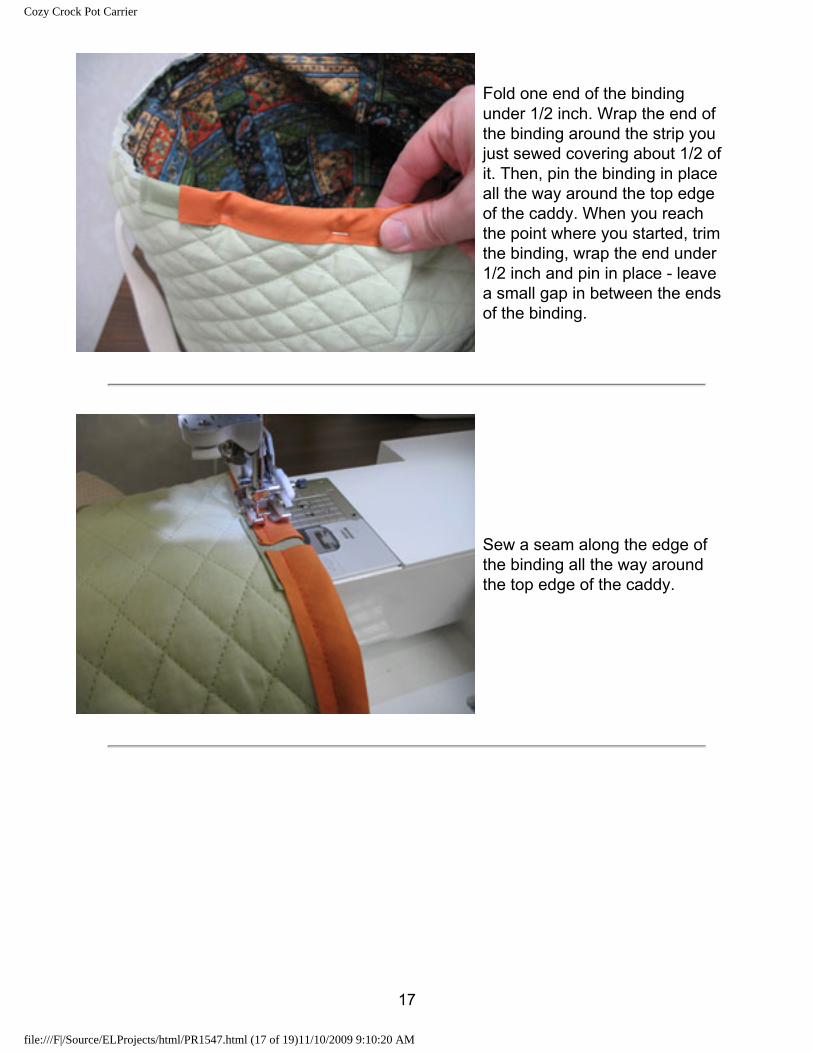
Fold one end of the binding under 1/2 inch. Wrap the end of the binding around the strip you just sewed covering about 1/2 of it. Then, pin the binding in place all the way around the top edge of the caddy. When you reach the point where you started, trim the binding, wrap the end under 1/2 inch and pin in place - leave a small gap in between the ends of the binding.
Sew a seam along the edge of the binding all the way around the top edge of the caddy.
file:///F|/Source/ELProjects/html/PR1547.html (17 of 19)11/10/2009 9:10:20 AM
17
Cozy Crock Pot Carrier
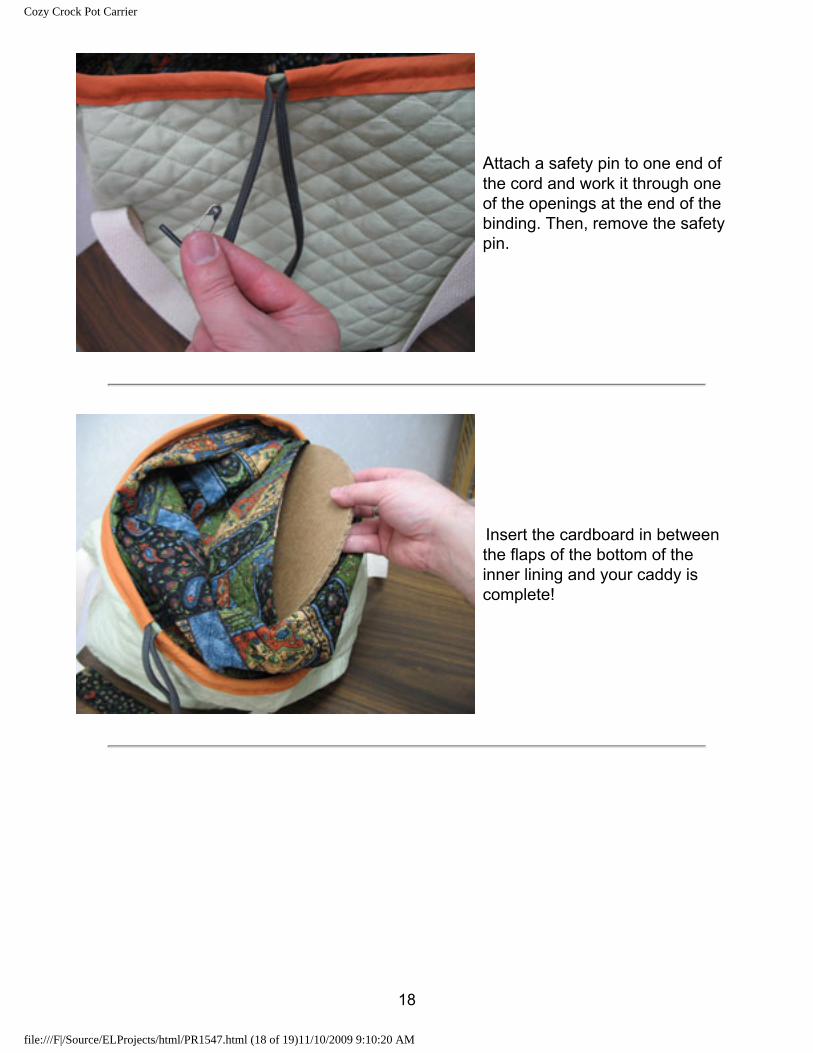
Attach a safety pin to one end of the cord and work it through one of the openings at the end of the binding. Then, remove the safety pin.
Insert the cardboard in between the flaps of the bottom of the inner lining and your caddy is complete!
file:///F|/Source/ELProjects/html/PR1547.html (18 of 19)11/10/2009 9:10:20 AM
18
Cozy Crock Pot Carrier
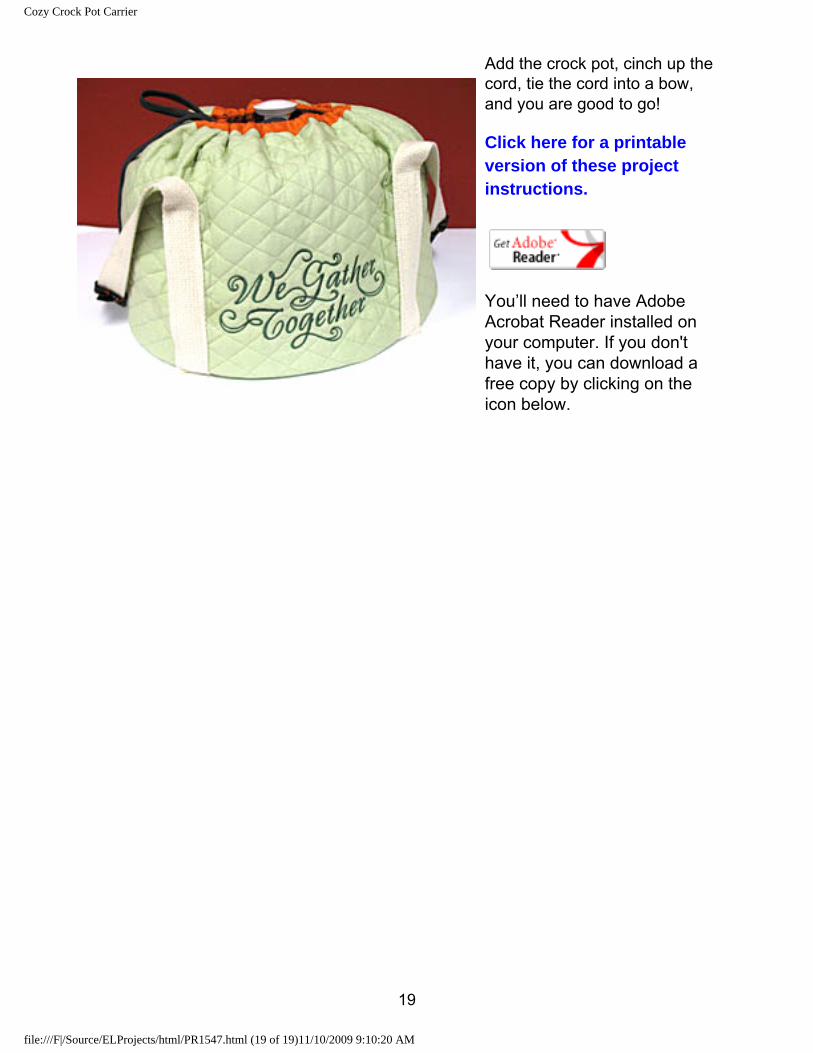
Add the crock pot, cinch up the cord, tie the cord into a bow, and you are good to go!
Click here for a printable version of these project instructions.
You’ll need to have Adobe Acrobat Reader installed on your computer. If you don't have it, you can download a free copy by clicking on the icon below.
file:///F|/Source/ELProjects/html/PR1547.html (19 of 19)11/10/2009 9:10:20 AM
19