Embed Size (px)
Citation preview
Crafts & Activities
FUN BOOK
A Publication of Macaroni KidNovember 2014
© 2014 Macaroni Kid llc,
Contents
2
Introduction
“Anytime” CraftsCraft 1: Craft Stick BookmarksCraft 2: Dancing RibbonsCraft 3: Easy Soap Making for KidsCraft 4: Explorer’s BinocularsCraft 5: Gel BoardsCraft 6: Kool-Aid® Play DoughCraft 7: A Mail-Able HugCraft 8: Morning ChecklistCraft 9: Ocean in a BottleCraft 10: Pencil MagnetsCraft 11: Pirate ShipCraft 12: Raised Salt PaintingCraft 13: Recycled CrayonsCraft 14: School Paper Holder
A Macaroni Kid Publication www.macaronikid.com
Contents
3
“Winter” CraftsCraft 15: Black and White Crayon ResistCraft 16: Footprint PenguinCraft 17: Handmade Hand WarmersCraft 18: Homemade Snow GlobeCraft 19: Handprint MenorahCraft 20: Make Your Own SnowflakesCraft 21: Marble Magnet ValentinesCraft 22: Melted Crayon OrnamentCraft 23: Peppermint OrnamentCraft 24: Snow DoughCraft 25: Snowman Greeting Card
“Spring” CraftsCraft 26: Bubble WandsCraft 27: Easter Bunny BasketCraft 28: Egg Garland
A Macaroni Kid Publication www.macaronikid.com
Contents
4
“Spring” Crafts continuedCraft 29: Felt FlowersCraft 30: Gutter GardenCraft 31: Springtime ButterflyCraft 32: Super Bubbles
“Summer” CraftsCraft 33: DIY SprinklerCraft 34: Fourth of July NoisemakerCraft 35: Hand-Colored ShoesCraft 36: Patriotic PlacematsCraft 37: Sandcastle ArtCraft 38: Summer Memories Book
A Macaroni Kid Publication www.macaronikid.com

Contents
5
“Fall” CraftsCraft 39: Apple Core CraftCraft 40: Apple-Stamped ButterfliesCraft 41: Egg Carton SpidersCraft 42: Fall Leaf Candle JarCraft 43: “Hand”-made Halloween Treat BagsCraft 44: Pilgrim Hat Utensil HolderCraft 45: Pumpkin Scented Play DoughCraft 46: Recycled Plastic Bag GhostsCraft 47: Tennis Ball Leaf PaintingCraft 48: Toilet Paper Roll Owls
A Macaroni Kid Publication www.macaronikid.com
IntroductionAt Macaroni Kid, we want to make it easy for you to plan family time, whether you’re on-the-go or at home. That’s why we are so excited to share this Fun Book with you. It’s perfect for those days you just want to spend at home –whether you are looking for something to fill the time on a rainy afternoon, a project to share with friends during a play date, or a new holiday-themed creation.
Macaroni Kid Publishers from across the country have shared their favorite projects and we’ve compiled them here into one, easy-to-use book. Each craft includes pictures and step-by-step instructions, making it a breeze for you and your kids to recreate each one. As an added bonus, most are made with easy-to-find, inexpensive supplies, many of which you probably already have at home! And even though you can complete any of these crafts at any time, we’ve categorized them into seasons - “Anytime,” “Winter,” “Spring,” “Summer,” and “Fall.”
So what are you waiting for? Gather up the supplies, collect your kids and get crafting – because sometimes the best family times happen right around the kitchen table!
6
“Creativity is inventing,
experimenting, growing, taking
risks, breaking rules, making
mistakes, and having fun.
- Mary Lou Cook
“You don’t have to be great to start,
but you have to start to be great.”
- Zig Ziglar -
7
ANYTIME CRAFTS
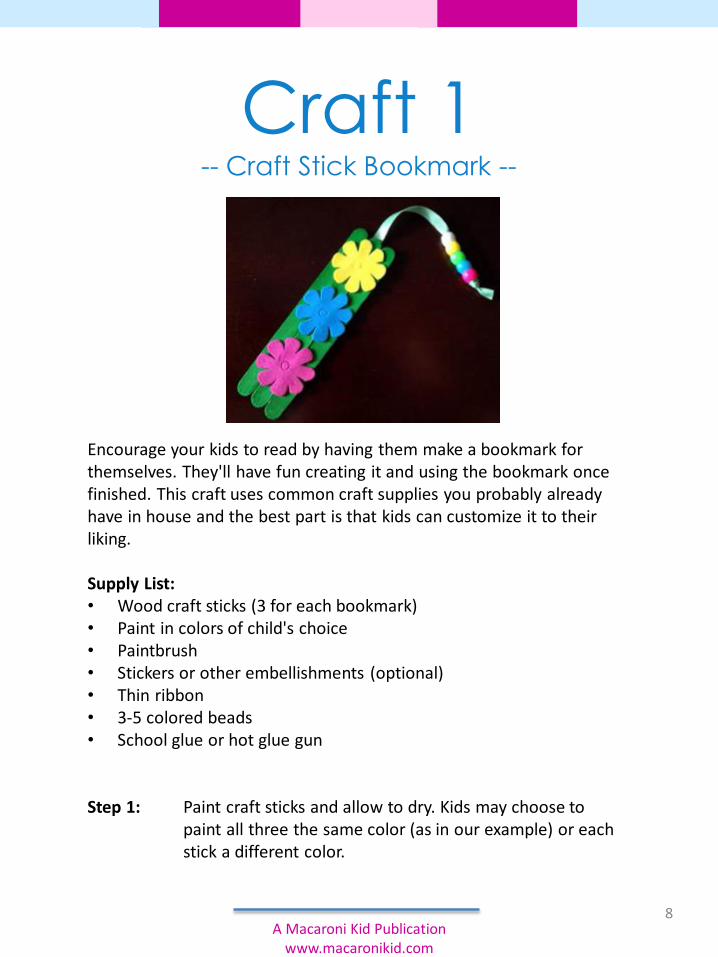
Craft 1-- Craft Stick Bookmark --
Encourage your kids to read by having them make a bookmark for themselves. They'll have fun creating it and using the bookmark once finished. This craft uses common craft supplies you probably already have in house and the best part is that kids can customize it to their liking.
Supply List:• Wood craft sticks (3 for each bookmark)• Paint in colors of child's choice• Paintbrush• Stickers or other embellishments (optional)• Thin ribbon• 3-5 colored beads• School glue or hot glue gun
Step 1: Paint craft sticks and allow to dry. Kids may choose to paint all three the same color (as in our example) or each stick a different color.
8A Macaroni Kid Publication
www.macaronikid.com
Craft 1-- Craft Stick Bookmark –
(continued)
Step 2: Glue the sticks together side by side. Decorate with stickers or embellishments to child's liking.
Step 3: String beads onto the ribbon and tie off one end so beads don't slide off. Glue the other end to the back of the bookmark. We covered the spot with another sticker.
Ready, set, read!
Tips & Hints:•I found school glue worked better than a hot glue gun to glue the sticks together.•I often use clothespins to hold items in place while the glue dries.
Shared by Anna Hall
9A Macaroni Kid Publication
www.macaronikid.com
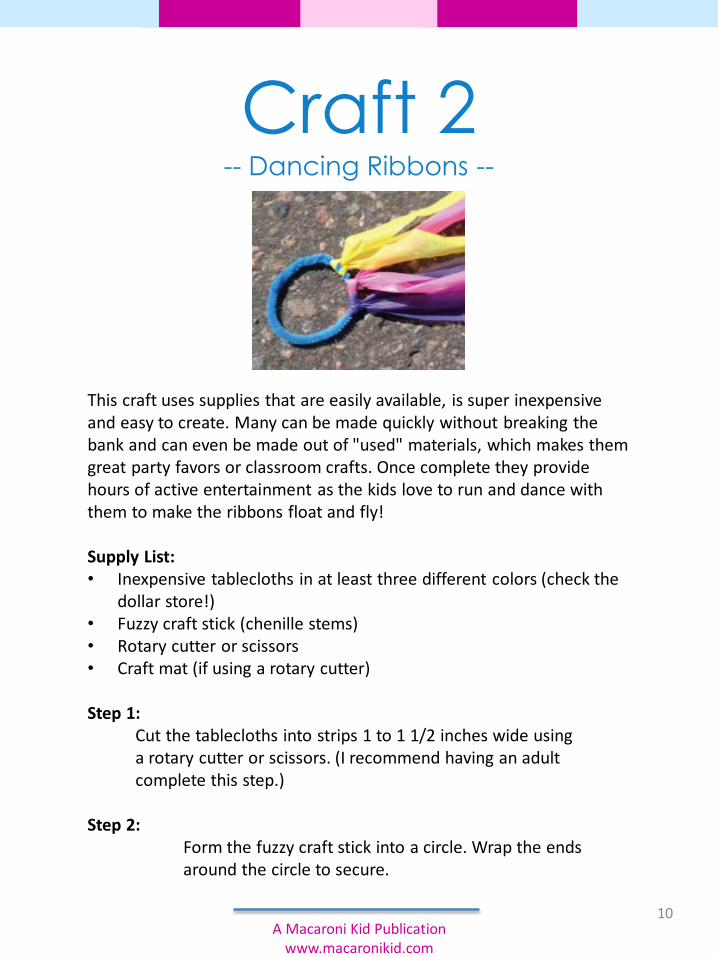
Craft 2-- Dancing Ribbons --
This craft uses supplies that are easily available, is super inexpensive and easy to create. Many can be made quickly without breaking the bank and can even be made out of "used" materials, which makes them great party favors or classroom crafts. Once complete they provide hours of active entertainment as the kids love to run and dance with them to make the ribbons float and fly!
Supply List:• Inexpensive tablecloths in at least three different colors (check the
dollar store!)• Fuzzy craft stick (chenille stems)• Rotary cutter or scissors• Craft mat (if using a rotary cutter)
Step 1:Cut the tablecloths into strips 1 to 1 1/2 inches wide using a rotary cutter or scissors. (I recommend having an adult complete this step.)
Step 2:Form the fuzzy craft stick into a circle. Wrap the ends around the circle to secure.
10A Macaroni Kid Publication
www.macaronikid.com
Craft 2-- Dancing Ribbons –
(continued)
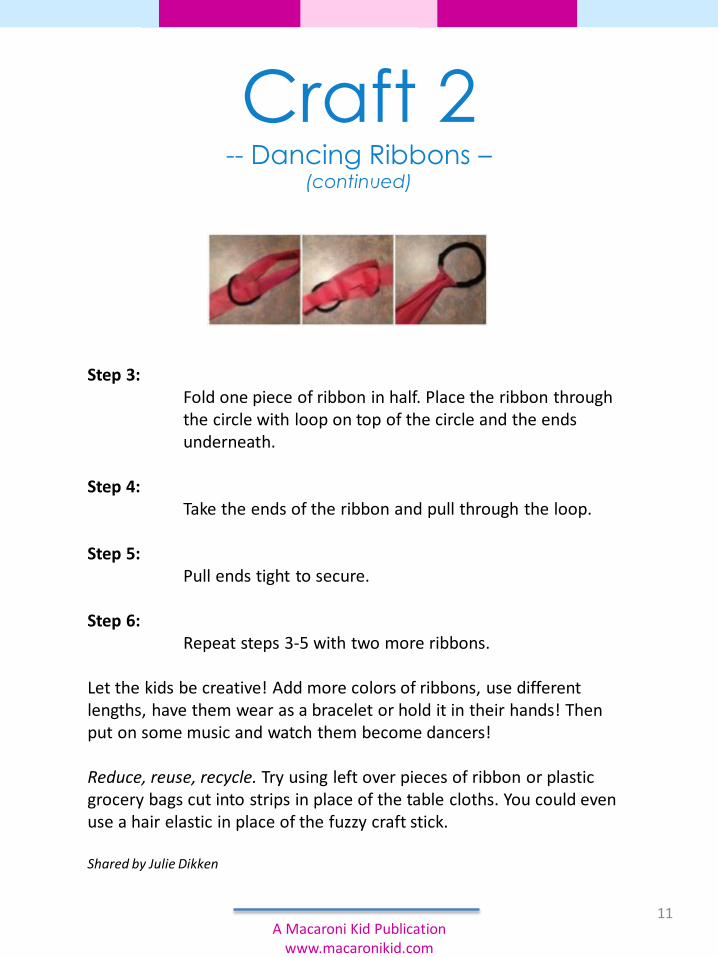
Step 3:Fold one piece of ribbon in half. Place the ribbon through the circle with loop on top of the circle and the ends underneath.
Step 4:Take the ends of the ribbon and pull through the loop.
Step 5:Pull ends tight to secure.
Step 6:Repeat steps 3-5 with two more ribbons.
Let the kids be creative! Add more colors of ribbons, use different lengths, have them wear as a bracelet or hold it in their hands! Then put on some music and watch them become dancers!
Reduce, reuse, recycle. Try using left over pieces of ribbon or plastic grocery bags cut into strips in place of the table cloths. You could even use a hair elastic in place of the fuzzy craft stick.
Shared by Julie Dikken
11A Macaroni Kid Publication
www.macaronikid.com
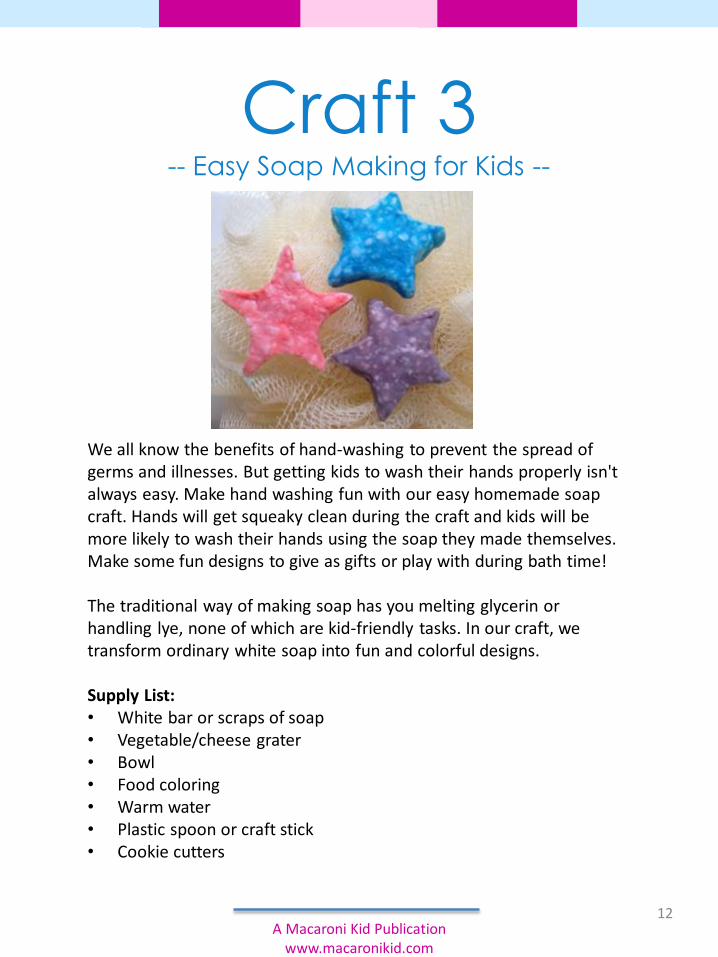
Craft 3-- Easy Soap Making for Kids --
We all know the benefits of hand-washing to prevent the spread of germs and illnesses. But getting kids to wash their hands properly isn't always easy. Make hand washing fun with our easy homemade soap craft. Hands will get squeaky clean during the craft and kids will be more likely to wash their hands using the soap they made themselves. Make some fun designs to give as gifts or play with during bath time!
The traditional way of making soap has you melting glycerin or handling lye, none of which are kid-friendly tasks. In our craft, we transform ordinary white soap into fun and colorful designs.
Supply List:• White bar or scraps of soap• Vegetable/cheese grater• Bowl• Food coloring• Warm water• Plastic spoon or craft stick• Cookie cutters
12A Macaroni Kid Publication
www.macaronikid.com
Craft 3-- Easy Soap Making for Kids --
(continued)
Step 1: Grate the soap into a bowl using a vegetable/cheese grater. Depending on the size of cookie cutters you are using, you will need about 1/4 cup of shavings for each small bar of soap.
Step 2: Splash a few drops of warm water onto the shavings. Stir the mixture; add enough water for it to become the consistency of play-dough. You can work the mixture with your hands. Be careful not to add too much water.
Step 3: Add a few drops of liquid food coloring and mix with a plastic spoon or craft stick to achieve the desired color.
Step 4: Work the mixture with your fingers to shape it or use cookie cutters to cut out the desired shape for your bar of soap (note: coat the cutters with cooking spray to prevent the soap mixture from sticking). They will pop out of the cutters more easily after they have dried some or stick the mold into the freezer for about 10 minutes before removingfrom the mold.
Step 5: Store in a cool, dry place for a few days to harden and dry thoroughly.
Shared by Anna Hall
13A Macaroni Kid Publication
www.macaronikid.com
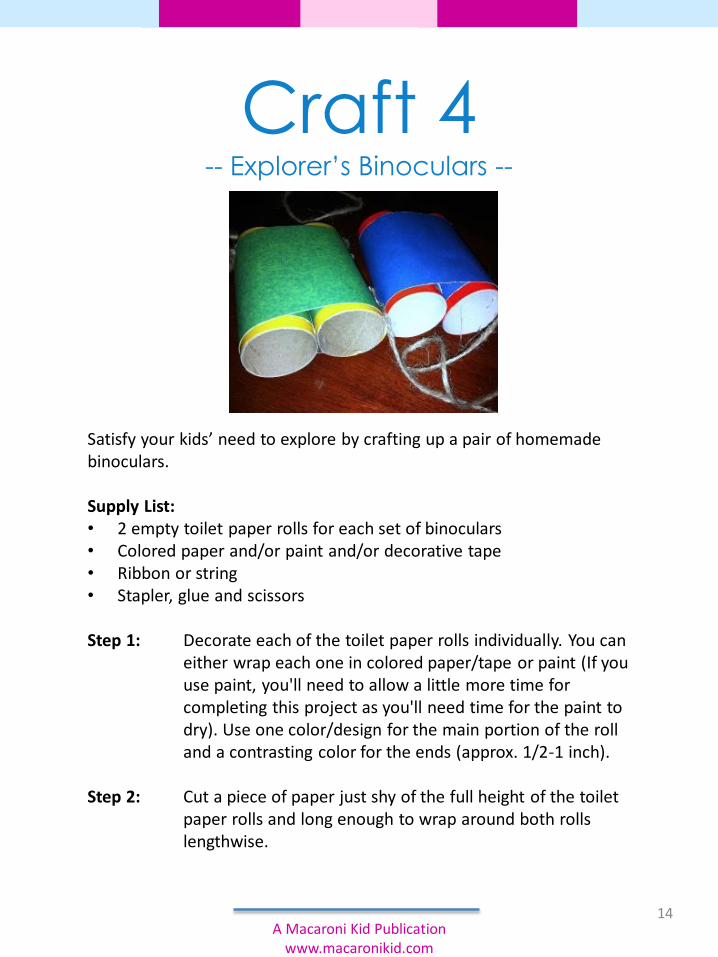
Craft 4-- Explorer’s Binoculars --
Satisfy your kids’ need to explore by crafting up a pair of homemade binoculars.
Supply List:• 2 empty toilet paper rolls for each set of binoculars• Colored paper and/or paint and/or decorative tape• Ribbon or string• Stapler, glue and scissors
Step 1: Decorate each of the toilet paper rolls individually. You can either wrap each one in colored paper/tape or paint (If you use paint, you'll need to allow a little more time for completing this project as you'll need time for the paint to dry). Use one color/design for the main portion of the roll and a contrasting color for the ends (approx. 1/2-1 inch).
Step 2: Cut a piece of paper just shy of the full height of the toilet paper rolls and long enough to wrap around both rolls lengthwise.
14A Macaroni Kid Publication
www.macaronikid.com
Craft 4-- Explorer’s Binoculars –
(continued)
Step 3: Wrap the paper around both rolls and secure with glue and/or staples.
Step 4: Cut a piece of ribbon or string for the "strap." Ours were approx. 1 yard long (36 inches). You can adjust the length based on the size of your child. It will need to fit over his/her head and still allow the binoculars to hang.
Step 5: Attach the string to outside of each of the rolls. We found that staples worked best here. Cover up any exposed staples on the inside of the rolls with decorative tape.
Now head out to explore nd see what you discover!
Shared by Melissa Hucal
15A Macaroni Kid Publication
www.macaronikid.com
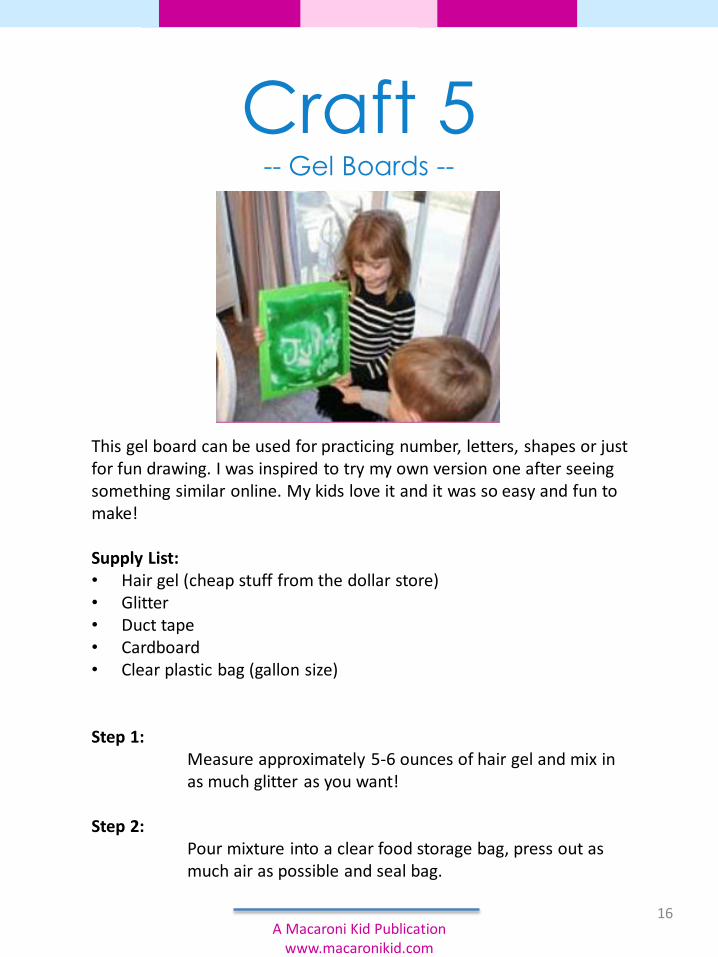
Craft 5-- Gel Boards --
This gel board can be used for practicing number, letters, shapes or just for fun drawing. I was inspired to try my own version one after seeing something similar online. My kids love it and it was so easy and fun to make!
Supply List:• Hair gel (cheap stuff from the dollar store)• Glitter• Duct tape• Cardboard• Clear plastic bag (gallon size)
Step 1:Measure approximately 5-6 ounces of hair gel and mix in as much glitter as you want!
Step 2:Pour mixture into a clear food storage bag, press out as much air as possible and seal bag.
16A Macaroni Kid Publication
www.macaronikid.com
Craft 5-- Gel Boards –
(continued)
Step 3:Measure piece of cardboard and cut (carefully) to fit bag on top.
Step 4:Affix the bag to the cardboard with duct tape.
Shared by Christine LaGrosse
17A Macaroni Kid Publication
www.macaronikid.com
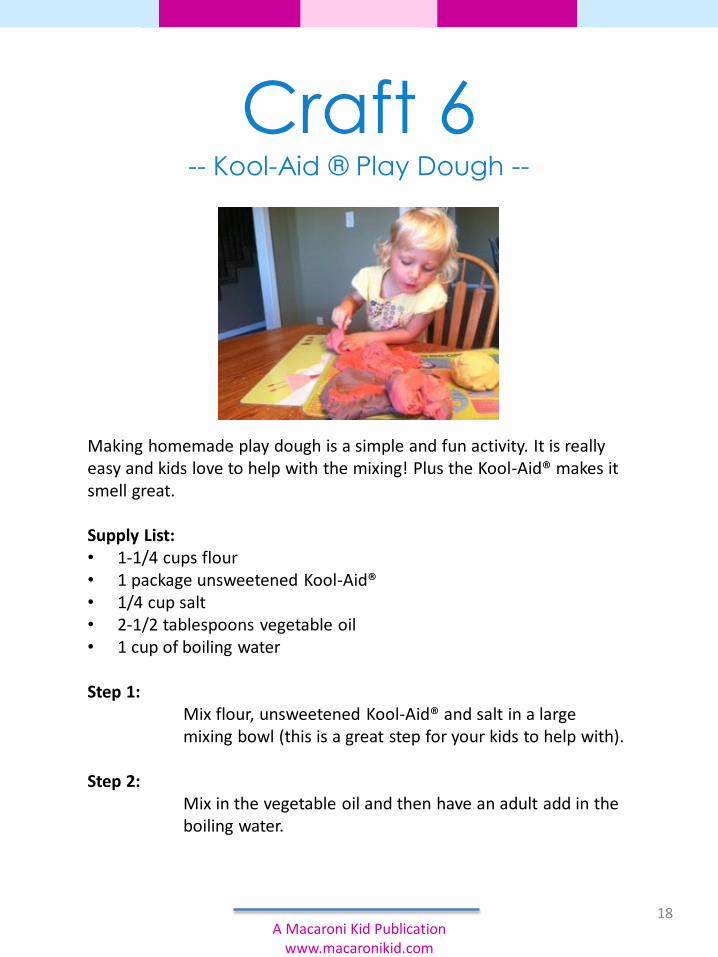
Craft 6-- Kool-Aid ® Play Dough --
Making homemade play dough is a simple and fun activity. It is really easy and kids love to help with the mixing! Plus the Kool-Aid® makes it smell great.
Supply List:• 1-1/4 cups flour• 1 package unsweetened Kool-Aid®• 1/4 cup salt• 2-1/2 tablespoons vegetable oil• 1 cup of boiling water
Step 1:Mix flour, unsweetened Kool-Aid® and salt in a large mixing bowl (this is a great step for your kids to help with).
Step 2:Mix in the vegetable oil and then have an adult add in the boiling water.
18A Macaroni Kid Publication
www.macaronikid.com
Craft 6-- Kool-Aid ® Play Dough –
(continued)
Step 3:Continue mixing until all ingredients are thoroughly incorporated. Don't worry, the Kool-Aid® won't come off on your hands when you play with it. Keep the flour out and add a little bit at a time if it seems too sticky.
Step 4:When you are all done, you can play!
Shared by Colleen Lunn Scholer
19A Macaroni Kid Publication
www.macaronikid.com
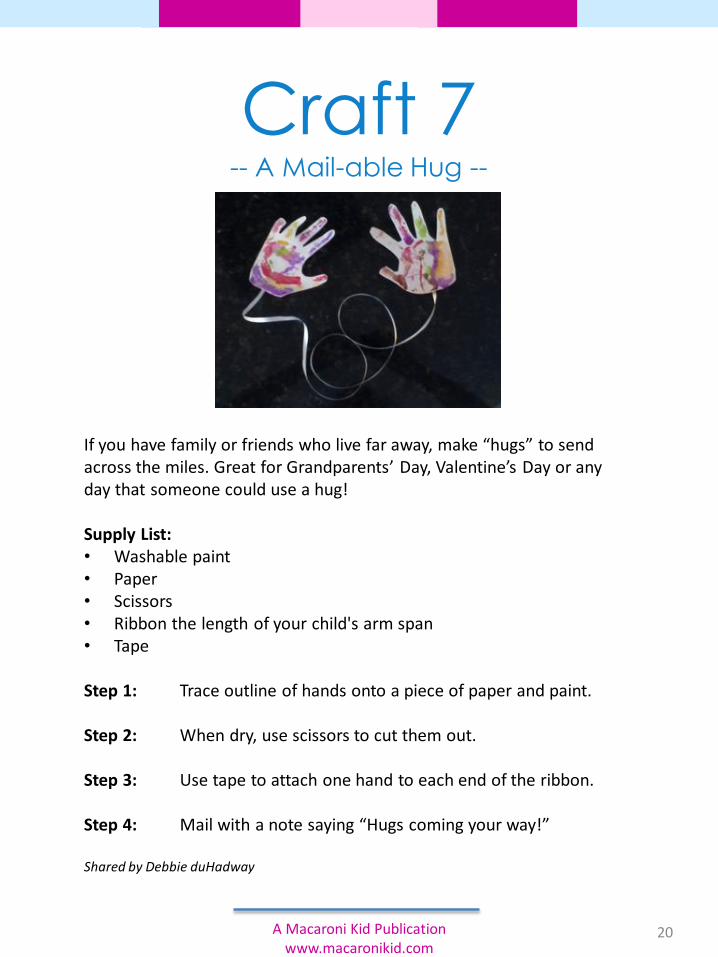
Craft 7-- A Mail-able Hug --
If you have family or friends who live far away, make “hugs” to send across the miles. Great for Grandparents’ Day, Valentine’s Day or any day that someone could use a hug!
Supply List:• Washable paint• Paper• Scissors• Ribbon the length of your child's arm span• Tape
Step 1: Trace outline of hands onto a piece of paper and paint.
Step 2: When dry, use scissors to cut them out.
Step 3: Use tape to attach one hand to each end of the ribbon.
Step 4: Mail with a note saying “Hugs coming your way!”
Shared by Debbie duHadway
20A Macaroni Kid Publication www.macaronikid.com
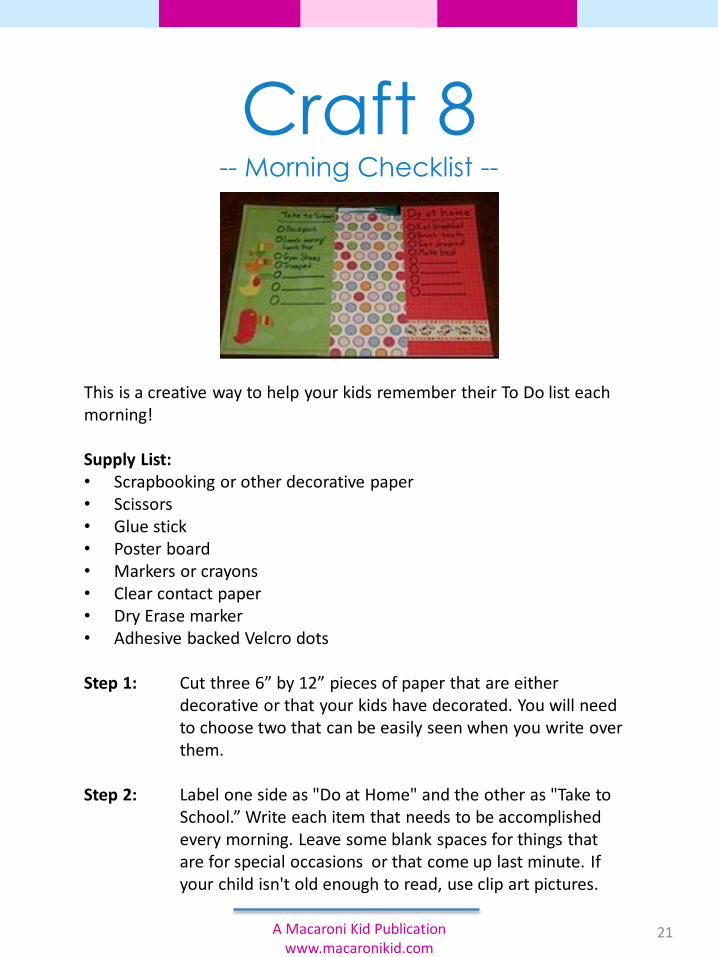
Craft 8-- Morning Checklist --
This is a creative way to help your kids remember their To Do list each morning!
Supply List:• Scrapbooking or other decorative paper• Scissors• Glue stick• Poster board• Markers or crayons• Clear contact paper• Dry Erase marker• Adhesive backed Velcro dots
Step 1: Cut three 6” by 12” pieces of paper that are either decorative or that your kids have decorated. You will need to choose two that can be easily seen when you write over them.
Step 2: Label one side as "Do at Home" and the other as "Take to School.” Write each item that needs to be accomplished every morning. Leave some blank spaces for things that are for special occasions or that come up last minute. If your child isn't old enough to read, use clip art pictures.
21A Macaroni Kid Publication www.macaronikid.com
Craft 8-- Morning Checklist --
(continued)
Step 3: Use glue to attach all three strips to a poster board. Trim edges if necessary.
Step 4: Cover poster in clear Con-Tact paper or take it to an office supply location to have it laminated.
Step 5: Affix a dry erase marker to the top with a piece of Velcro so your child can easily mark everything that has been completed!
Shared by Christine LaGrosse
22A Macaroni Kid Publication www.macaronikid.com
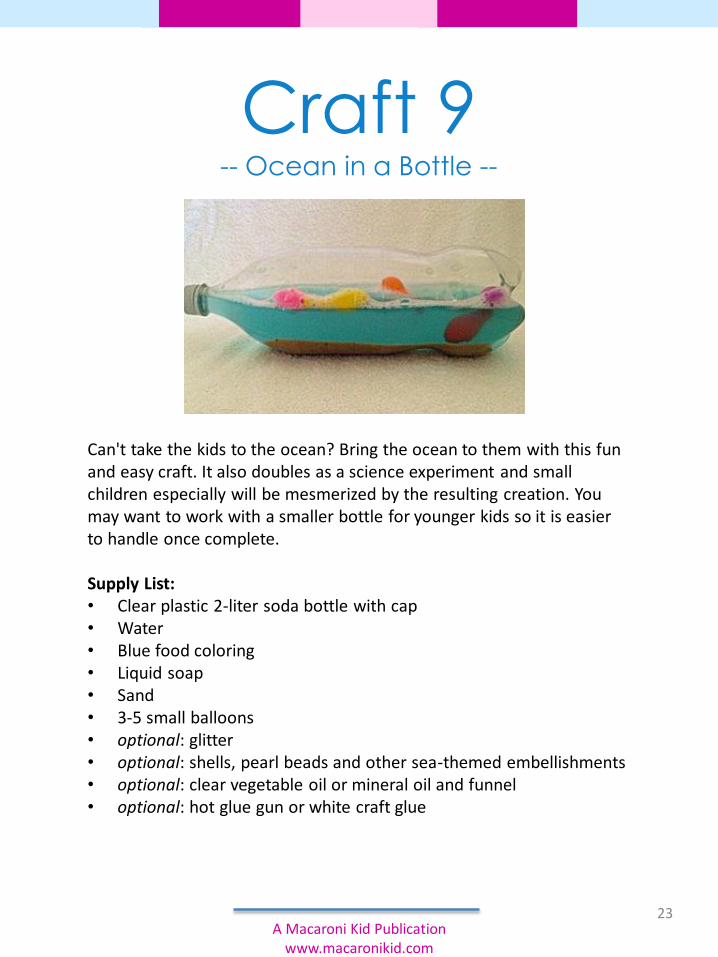
Craft 9-- Ocean in a Bottle --
Can't take the kids to the ocean? Bring the ocean to them with this fun and easy craft. It also doubles as a science experiment and small children especially will be mesmerized by the resulting creation. You may want to work with a smaller bottle for younger kids so it is easier to handle once complete.
Supply List:• Clear plastic 2-liter soda bottle with cap• Water• Blue food coloring• Liquid soap• Sand• 3-5 small balloons• optional: glitter• optional: shells, pearl beads and other sea-themed embellishments• optional: clear vegetable oil or mineral oil and funnel• optional: hot glue gun or white craft glue
23A Macaroni Kid Publication
www.macaronikid.com
Craft 9-- Ocean in a Bottle --
(continued)
Step 1: Empty and rinse soda bottle and remove the label.
Step 2: Fill bottle half-way with tap water. Add 1-2 drops of blue food coloring to create desired ocean water color and a small drop of liquid soap or dish detergent.
Step 3: Pour in sand to cover the bottom of the bottle when laid on its side. Add small amount of glitter and desired embellishments, if using.
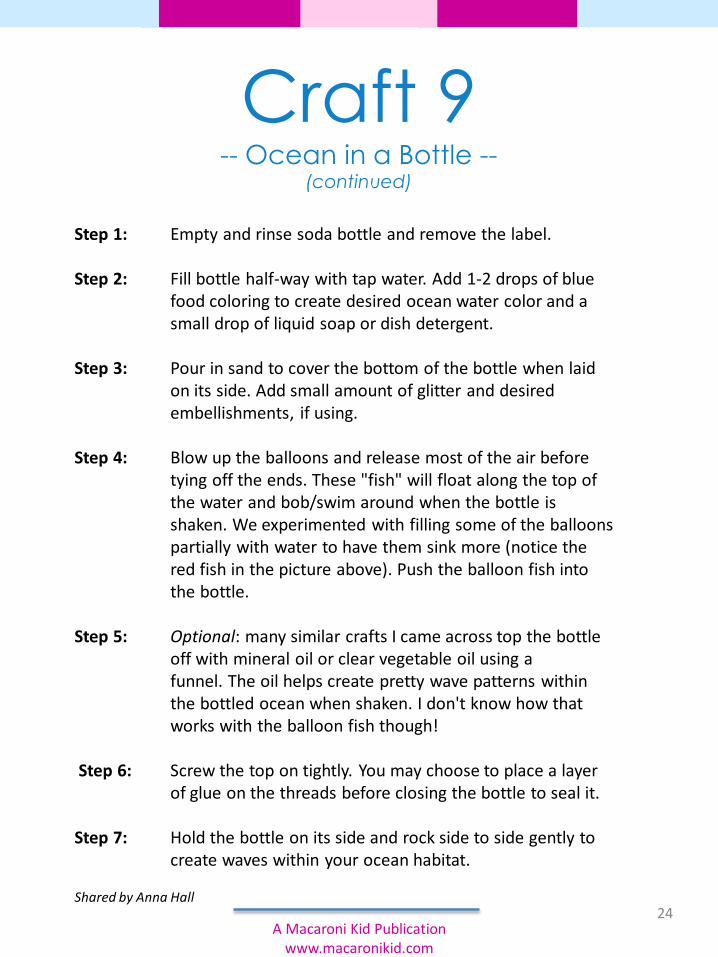
Step 4: Blow up the balloons and release most of the air before tying off the ends. These "fish" will float along the top of the water and bob/swim around when the bottle is shaken. We experimented with filling some of the balloons partially with water to have them sink more (notice the red fish in the picture above). Push the balloon fish into the bottle.
Step 5: Optional: many similar crafts I came across top the bottle off with mineral oil or clear vegetable oil using a funnel. The oil helps create pretty wave patterns within the bottled ocean when shaken. I don't know how that works with the balloon fish though!
Step 6: Screw the top on tightly. You may choose to place a layer of glue on the threads before closing the bottle to seal it.
Step 7: Hold the bottle on its side and rock side to side gently to create waves within your ocean habitat.
Shared by Anna Hall24
A Macaroni Kid Publication www.macaronikid.com
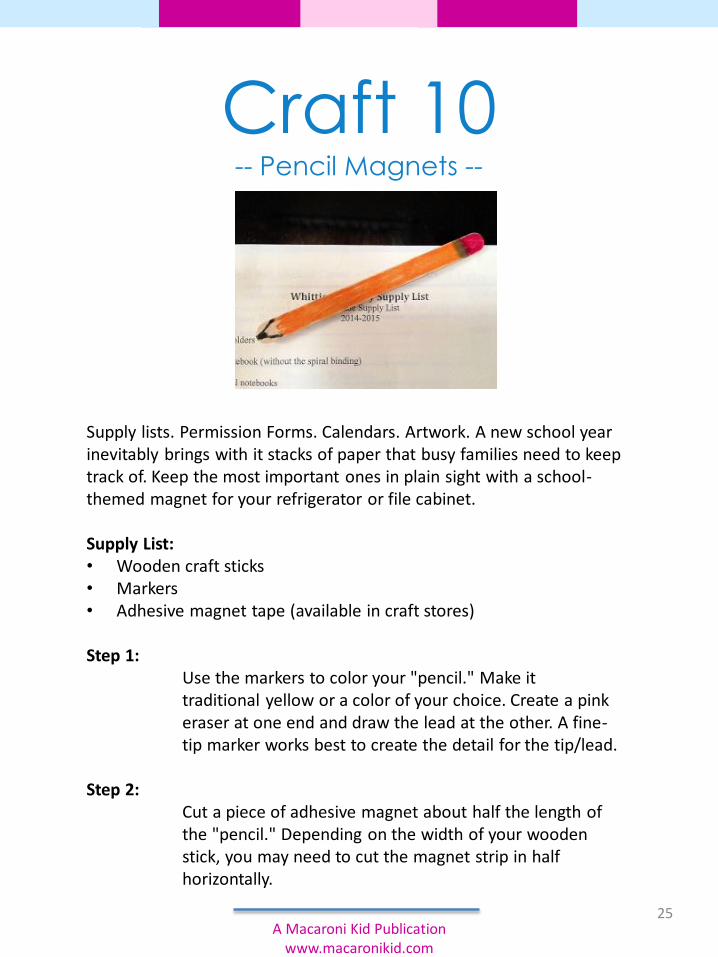
Craft 10-- Pencil Magnets --
Supply lists. Permission Forms. Calendars. Artwork. A new school year inevitably brings with it stacks of paper that busy families need to keep track of. Keep the most important ones in plain sight with a school-themed magnet for your refrigerator or file cabinet.
Supply List:• Wooden craft sticks• Markers• Adhesive magnet tape (available in craft stores)
Step 1:Use the markers to color your "pencil." Make ittraditional yellow or a color of your choice. Create a pink eraser at one end and draw the lead at the other. A fine-tip marker works best to create the detail for the tip/lead.
Step 2:Cut a piece of adhesive magnet about half the length of the "pencil." Depending on the width of your wooden stick, you may need to cut the magnet strip in half horizontally.
25A Macaroni Kid Publication
www.macaronikid.com
Craft 10-- Pencil Magnets –
(continued)
Step 3:Remove the paper and adhere the magnet to the back of the craft stick.
Step 4:Place the magnet on the refrigerator (without holding any papers yet) to help the magnet to flatten and "cure." This will create a strong bond ready for holding papers in just a few hours.
Shared by Melissa Hucal
26A Macaroni Kid Publication
www.macaronikid.com
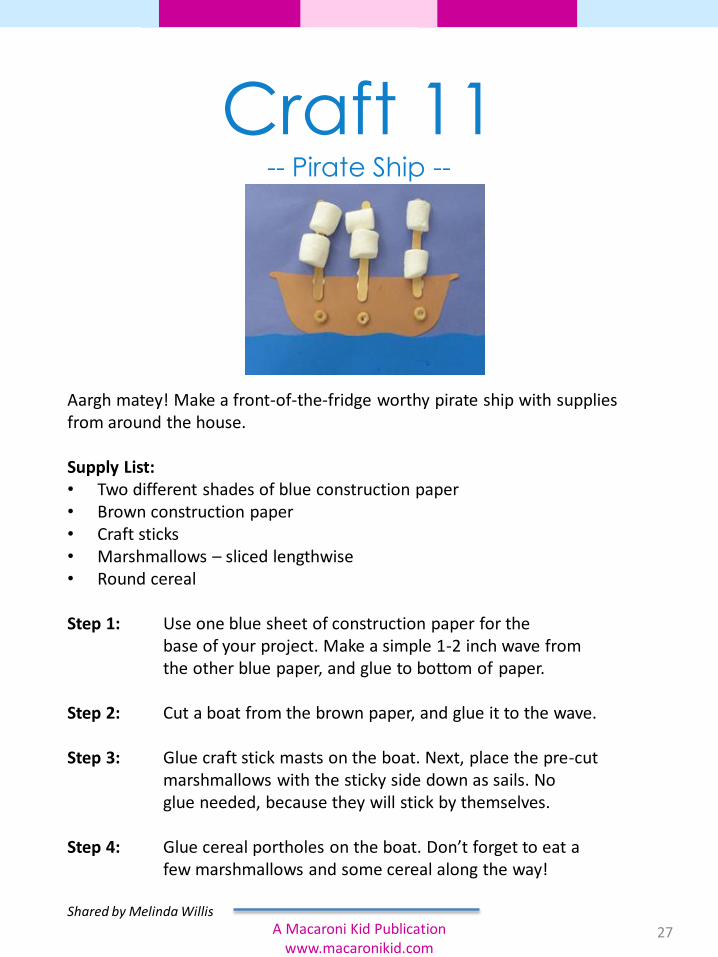
Craft 11-- Pirate Ship --
Aargh matey! Make a front-of-the-fridge worthy pirate ship with supplies from around the house.
Supply List:• Two different shades of blue construction paper• Brown construction paper• Craft sticks• Marshmallows – sliced lengthwise • Round cereal
Step 1: Use one blue sheet of construction paper for the base of your project. Make a simple 1-2 inch wave from the other blue paper, and glue to bottom of paper.
Step 2: Cut a boat from the brown paper, and glue it to the wave.
Step 3: Glue craft stick masts on the boat. Next, place the pre-cut marshmallows with the sticky side down as sails. No glue needed, because they will stick by themselves.
Step 4: Glue cereal portholes on the boat. Don’t forget to eat a few marshmallows and some cereal along the way!
Shared by Melinda Willis
27A Macaroni Kid Publication www.macaronikid.com
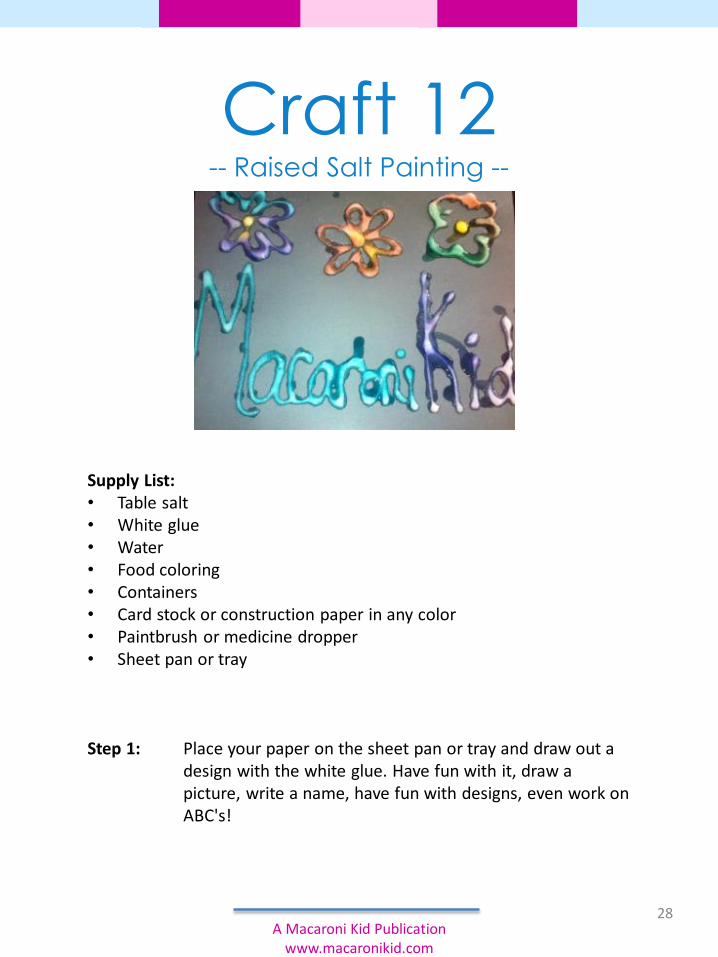
Craft 12-- Raised Salt Painting --
Supply List:• Table salt• White glue• Water• Food coloring• Containers• Card stock or construction paper in any color• Paintbrush or medicine dropper• Sheet pan or tray
Step 1: Place your paper on the sheet pan or tray and draw out a design with the white glue. Have fun with it, draw a picture, write a name, have fun with designs, even work on ABC's!
28A Macaroni Kid Publication
www.macaronikid.com
Craft 12-- Raised Salt Painting --
(continued)
Step 2: Pour the salt all over the glue picture. You want to be generous with the salt. Once covered, just like you would with glitter, shake off the excess salt. We dumped ours in a cup so that we could reuse it for the next picture.
Step 3: Mix the food coloring into the water. We made 6 different colors. Take your medicine dropper and fill it with the color of choice, or dip your paintbrush into the colored water and drop a little of color onto the salt. Please note you only need a little color and you want to try to avoid brushing the salt with your brush. And here's where the fun and magic begins, the color will run along the lines of the salt.
This activity is NOT a keepsake because when it dries, the salt begins to fall off, but it sure is a fun process getting there and will keep you entertained indoors! Love that! Happy Painting!
Shared by Shayna Mills
29A Macaroni Kid Publication
www.macaronikid.com
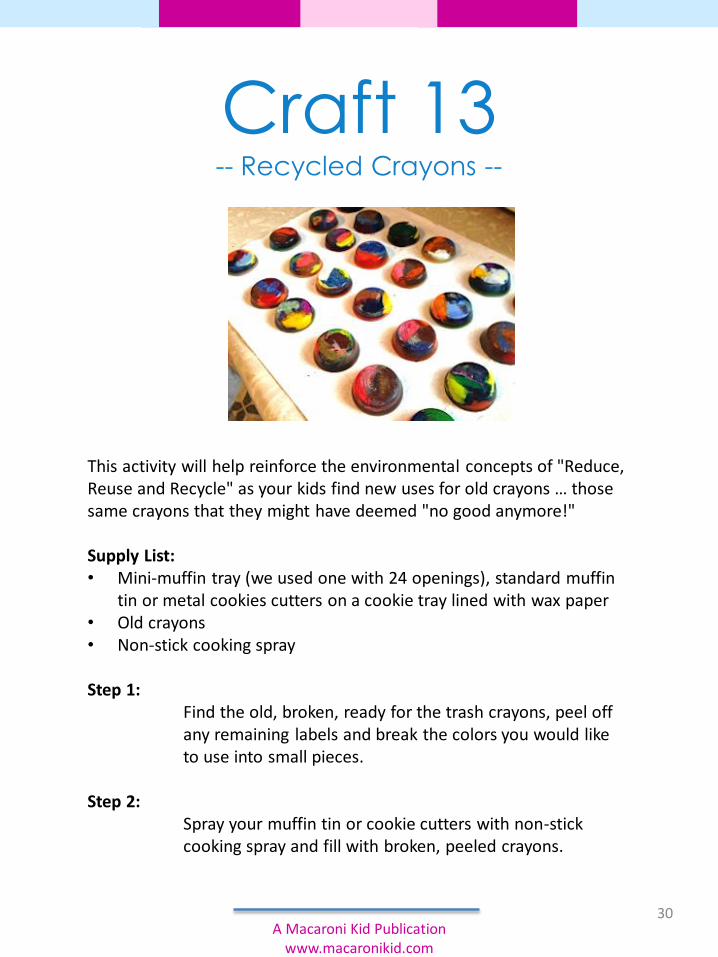
Craft 13-- Recycled Crayons --
This activity will help reinforce the environmental concepts of "Reduce, Reuse and Recycle" as your kids find new uses for old crayons … those same crayons that they might have deemed "no good anymore!"
Supply List:• Mini-muffin tray (we used one with 24 openings), standard muffin
tin or metal cookies cutters on a cookie tray lined with wax paper• Old crayons• Non-stick cooking spray
Step 1:Find the old, broken, ready for the trash crayons, peel off any remaining labels and break the colors you would like to use into small pieces.
Step 2:Spray your muffin tin or cookie cutters with non-stick cooking spray and fill with broken, peeled crayons.
30A Macaroni Kid Publication
www.macaronikid.com
Craft 13-- Recycled Crayons –
(continued)
Step 3:Put in the oven (pre-heated to 275 degrees) for about 8 minutes. Some generic crayons will take longer to melt but keep an eye on them as it won't take long.
Step 4:Once melted remove from the oven and let cool. Use a toothpick to swirl the colors if you want or leave alone to cool as is. You can place in the refrigerator or freezer to speed up the process.
Step 5:Once cooled, flip the pan over and remove the new crayons. If you choose the cookie cutter method, just peel off the wax paper after the crayons are cooked and pop out of the mold.
These "new" crayons will be an instant hit in your house and you'll have helped reduce waste and reuse/recycle in the process!
Shared by Tracy Gallagher
31A Macaroni Kid Publication
www.macaronikid.com
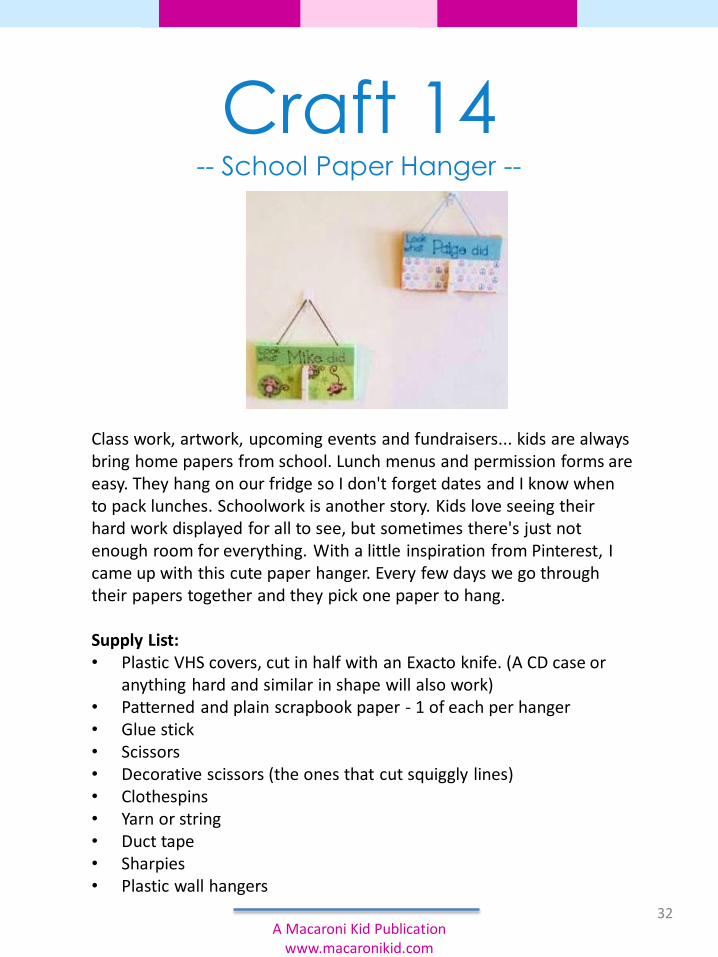
Craft 14-- School Paper Hanger --
Class work, artwork, upcoming events and fundraisers... kids are always bring home papers from school. Lunch menus and permission forms are easy. They hang on our fridge so I don't forget dates and I know when to pack lunches. Schoolwork is another story. Kids love seeing their hard work displayed for all to see, but sometimes there's just not enough room for everything. With a little inspiration from Pinterest, I came up with this cute paper hanger. Every few days we go through their papers together and they pick one paper to hang.
Supply List:• Plastic VHS covers, cut in half with an Exacto knife. (A CD case or
anything hard and similar in shape will also work)• Patterned and plain scrapbook paper - 1 of each per hanger• Glue stick• Scissors• Decorative scissors (the ones that cut squiggly lines)• Clothespins• Yarn or string• Duct tape• Sharpies• Plastic wall hangers
32A Macaroni Kid Publication
www.macaronikid.com
Craft 14-- School Paper Hanger --
(continued)
Step 1:Cut the patterned paper to fit the front of the case.
Step 2:Cut a 2-inch strip of the plain colored paper. Write your message on this strip. Glue to the top of the patterned paper.
Step 3:Glue the paper to the front of the case.
Step 4:Glue a clothespin on the front, towards the bottom so you don't cover your message.
Step 5:Cut a piece of string or yarn to your desired length. Duct tape it to the back of the case.
Step 6:Pick a spot on your wall where you want to display your child's work. Hang your wall hanger. I used the Command brand micro hooks. If you use these, wait at least an hour before you hang anything from them.
When your child brings home work that's worthy of displaying, you can proudly hang it on the wall for everyone to see.
Shared by Evonne Umbel
33A Macaroni Kid Publication
www.macaronikid.com

“Others have seen what is and have asked why.
I have seen what could be and asked why not.”
- Pablo Picasso
34
WINTER CRAFTS
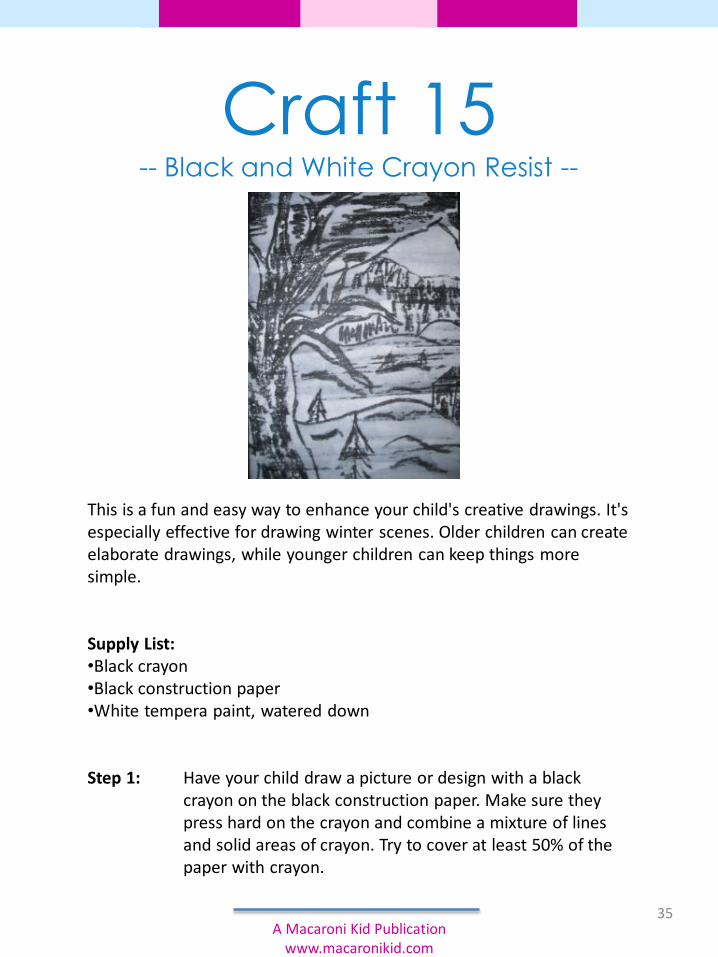
Craft 15-- Black and White Crayon Resist --
This is a fun and easy way to enhance your child's creative drawings. It's especially effective for drawing winter scenes. Older children can create elaborate drawings, while younger children can keep things more simple.
Supply List:•Black crayon•Black construction paper•White tempera paint, watered down
Step 1: Have your child draw a picture or design with a black crayon on the black construction paper. Make sure they press hard on the crayon and combine a mixture of lines and solid areas of crayon. Try to cover at least 50% of the paper with crayon.
35A Macaroni Kid Publication
www.macaronikid.com
Craft 15-- Black and White Crayon Resist --
(continued)
Step 2: Water down the white tempera paint so it is thin enough to resist the crayon markings.
Step 3: Brush the white tempera paint lightly over the entire paper, but do not over brush!! Any places that were not crayoned will accept the white paint, but the crayoned areas will resist the white paint.
Step 4: Allow to thoroughly dry before putting it on display.
Hint: Other color combinations can be used, but the black & white extreme seems to work best.
Shared by Linda Rice
36A Macaroni Kid Publication
www.macaronikid.com
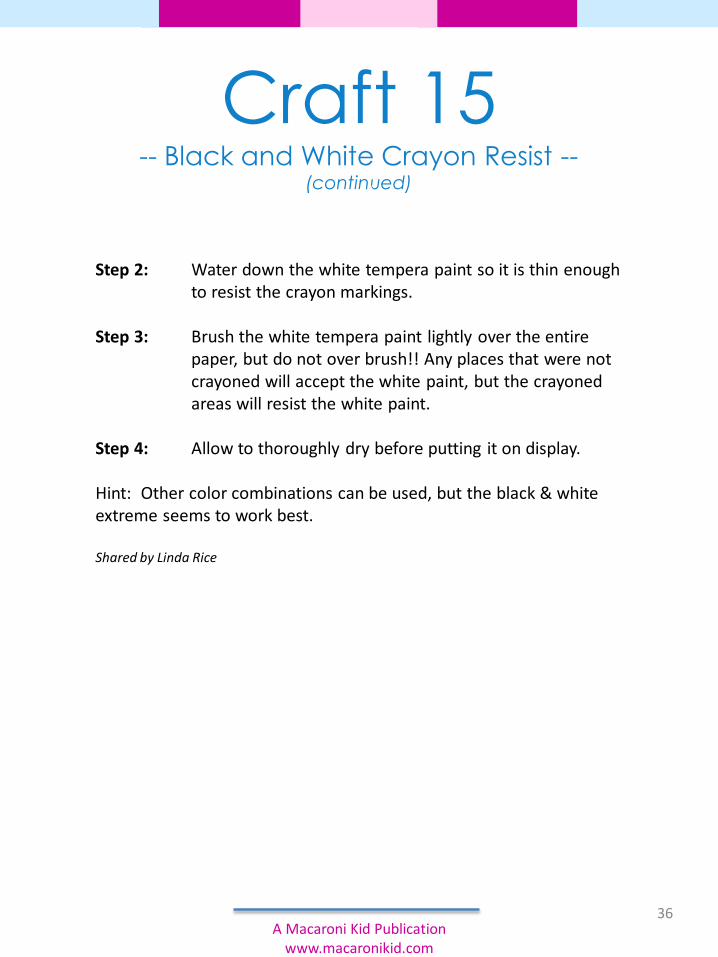
Craft 16-- Footprint Penguin --
Penguins make a cute craft, especially in the winter because they usually live in snowy regions. Creating a footprint penguin is a super easy craft for you and your kids.
Supply List:• Construction paper (light colors work best)• Black and white paint• Paintbrush• Black and orange markers
Step 1: Paint your child's foot black with a paint brush or spread some paint on newspaper and have them step in it.
Step 2: Stamp a footprint on the construction paper. The toes will be the bottom of the penguin and the heel is the head.
Step 3: When the black paint has dried, paint the inner area white.
Step 4: Once the white paint has dried, use markers to draw eyes and a beak. You can also add wings and other details.
37A Macaroni Kid Publication
www.macaronikid.com
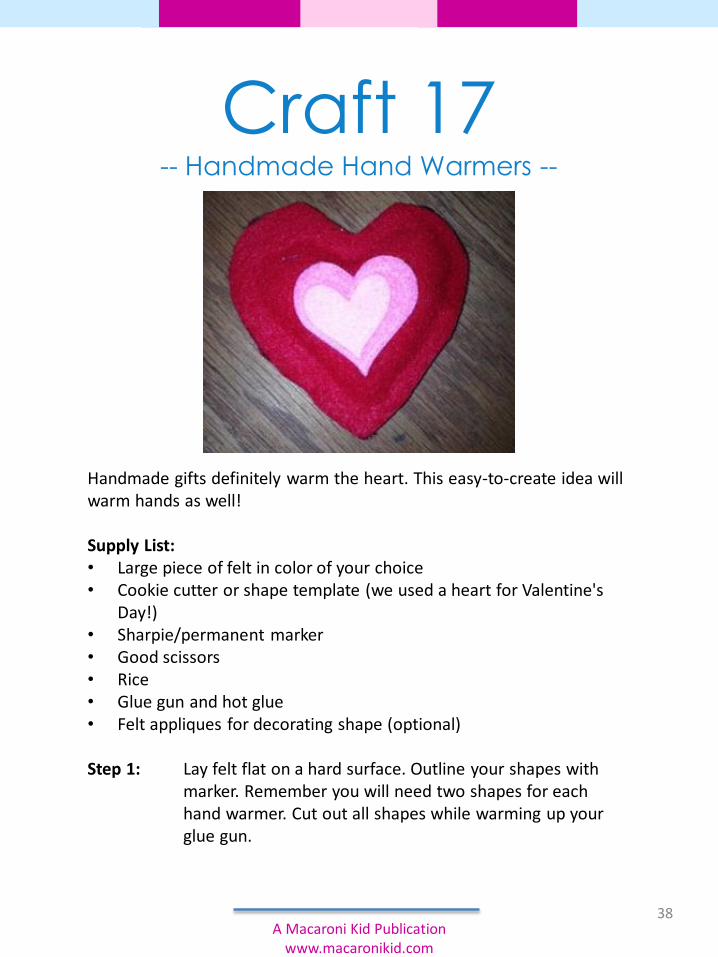
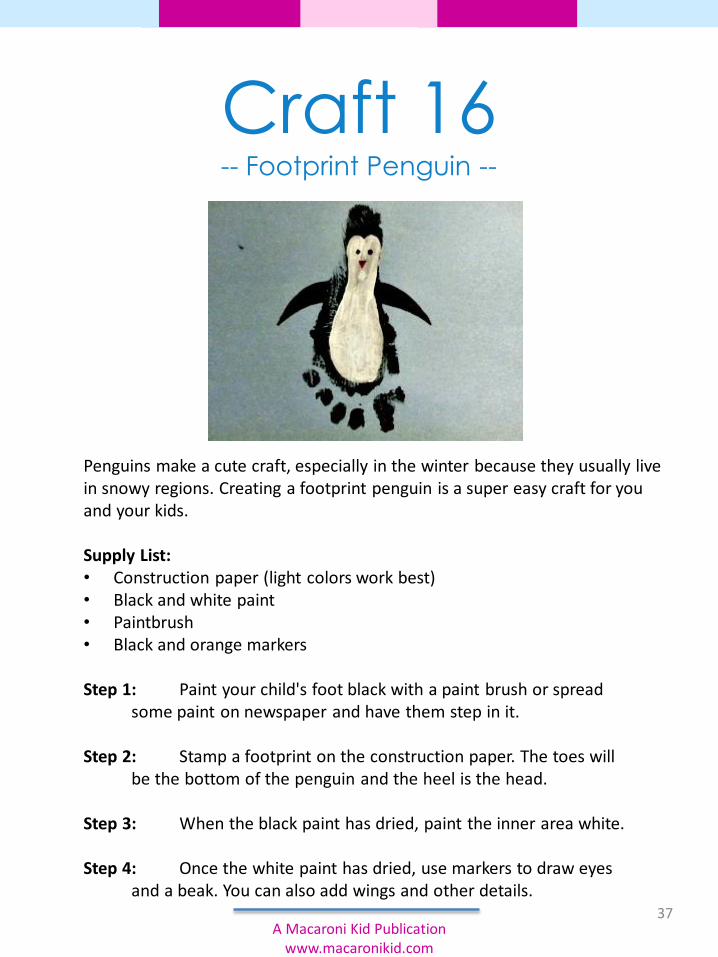
Craft 17-- Handmade Hand Warmers --
Handmade gifts definitely warm the heart. This easy-to-create idea will warm hands as well!
Supply List:• Large piece of felt in color of your choice• Cookie cutter or shape template (we used a heart for Valentine's
Day!)• Sharpie/permanent marker• Good scissors• Rice• Glue gun and hot glue• Felt appliques for decorating shape (optional)
Step 1: Lay felt flat on a hard surface. Outline your shapes with marker. Remember you will need two shapes for each hand warmer. Cut out all shapes while warming up your glue gun.
38A Macaroni Kid Publication
www.macaronikid.com
Craft 17-- Handmade Hand Warmers –
(continued)
Step 2: Once all the felt has been cut and the glue gun warmed up, make a thick line of glue along the edges of ¾ of one of the
shapes. Place a second shape on top and hold for a few seconds to secure. It will now look like a pouch. The opening left is where you will add the rice with a small spoon.
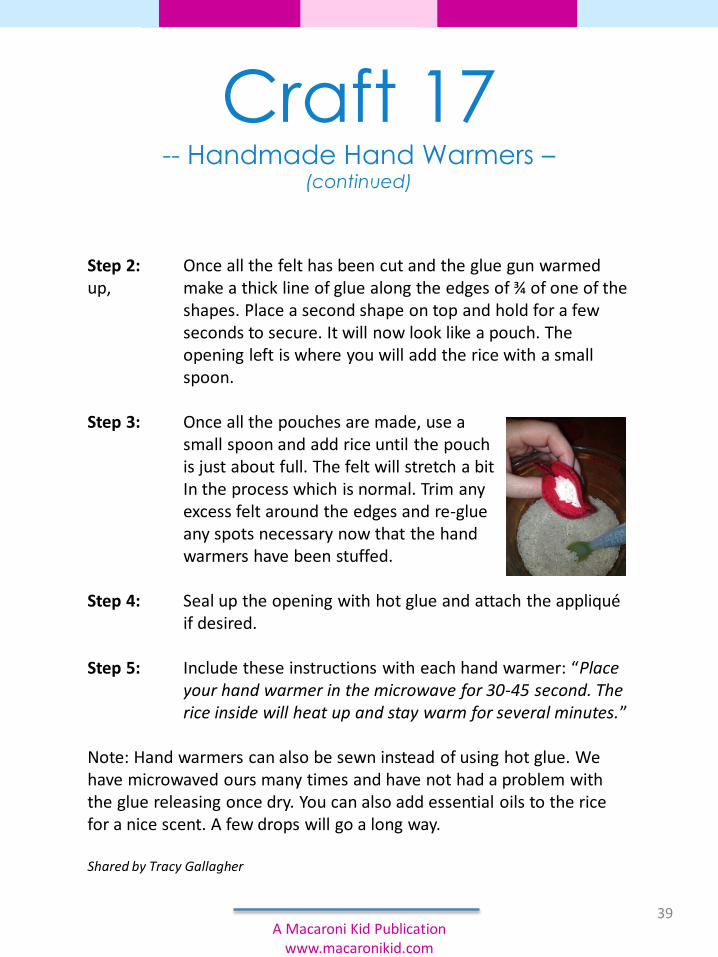
Step 3: Once all the pouches are made, use a small spoon and add rice until the pouchis just about full. The felt will stretch a bitIn the process which is normal. Trim any excess felt around the edges and re-glueany spots necessary now that the hand warmers have been stuffed.
Step 4: Seal up the opening with hot glue and attach the appliqué if desired.
Step 5: Include these instructions with each hand warmer: “Place your hand warmer in the microwave for 30-45 second. The rice inside will heat up and stay warm for several minutes.”
Note: Hand warmers can also be sewn instead of using hot glue. We have microwaved ours many times and have not had a problem with the glue releasing once dry. You can also add essential oils to the rice for a nice scent. A few drops will go a long way.
Shared by Tracy Gallagher
39A Macaroni Kid Publication
www.macaronikid.com
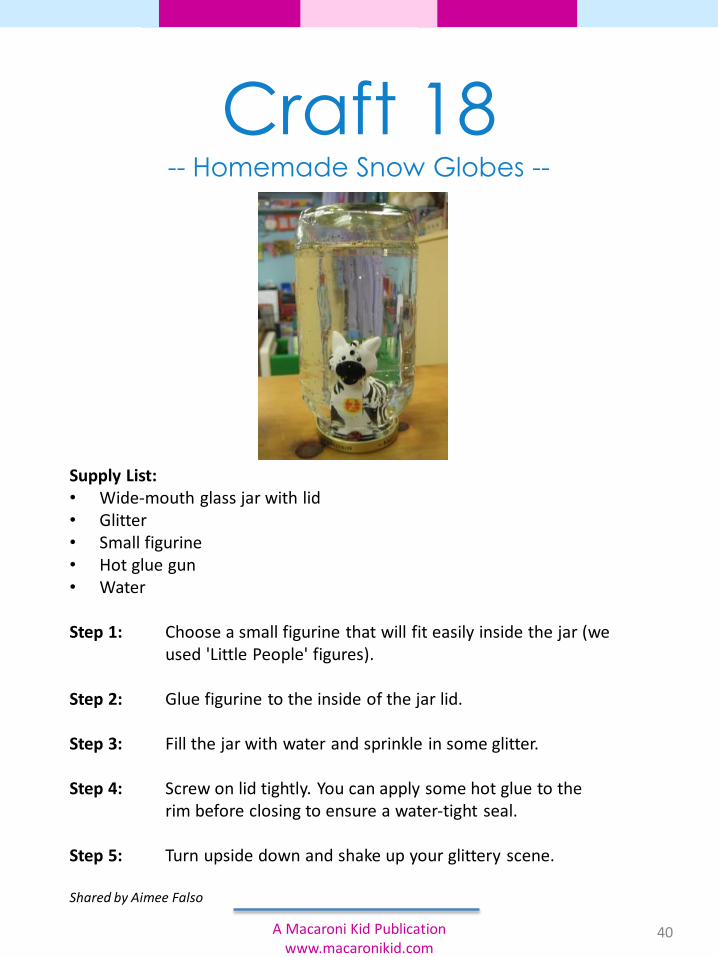
Craft 18-- Homemade Snow Globes --
Supply List:• Wide-mouth glass jar with lid• Glitter• Small figurine• Hot glue gun• Water
Step 1: Choose a small figurine that will fit easily inside the jar (we used 'Little People' figures).
Step 2: Glue figurine to the inside of the jar lid.
Step 3: Fill the jar with water and sprinkle in some glitter.
Step 4: Screw on lid tightly. You can apply some hot glue to the rim before closing to ensure a water-tight seal.
Step 5: Turn upside down and shake up your glittery scene.
Shared by Aimee Falso
40A Macaroni Kid Publication www.macaronikid.com
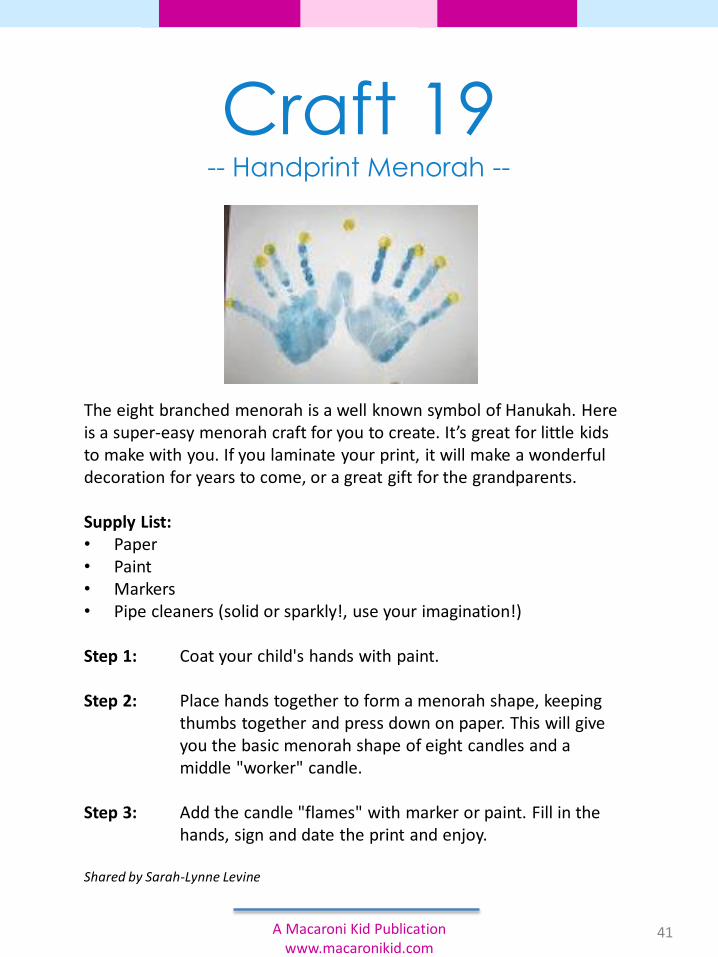
Craft 19-- Handprint Menorah --
The eight branched menorah is a well known symbol of Hanukah. Here is a super-easy menorah craft for you to create. It’s great for little kids to make with you. If you laminate your print, it will make a wonderful decoration for years to come, or a great gift for the grandparents.
Supply List:• Paper• Paint• Markers• Pipe cleaners (solid or sparkly!, use your imagination!)
Step 1: Coat your child's hands with paint.
Step 2: Place hands together to form a menorah shape, keeping thumbs together and press down on paper. This will give you the basic menorah shape of eight candles and a middle "worker" candle.
Step 3: Add the candle "flames" with marker or paint. Fill in the hands, sign and date the print and enjoy.
Shared by Sarah-Lynne Levine
41A Macaroni Kid Publication www.macaronikid.com
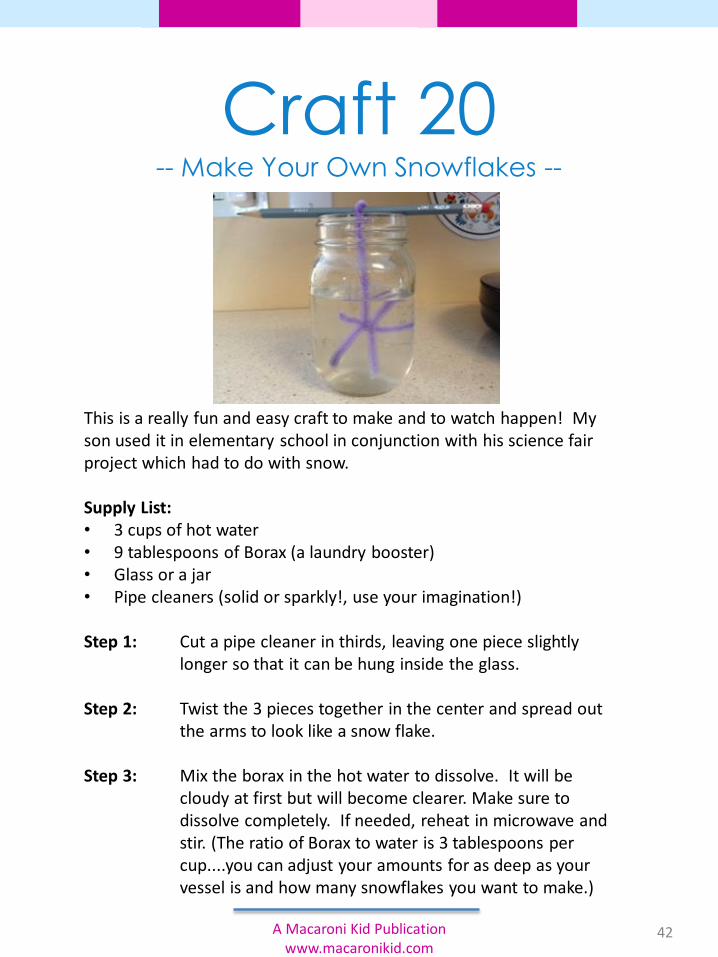
Craft 20-- Make Your Own Snowflakes --
This is a really fun and easy craft to make and to watch happen! My son used it in elementary school in conjunction with his science fair project which had to do with snow.
Supply List:• 3 cups of hot water• 9 tablespoons of Borax (a laundry booster)• Glass or a jar• Pipe cleaners (solid or sparkly!, use your imagination!)
Step 1: Cut a pipe cleaner in thirds, leaving one piece slightly longer so that it can be hung inside the glass.
Step 2: Twist the 3 pieces together in the center and spread out the arms to look like a snow flake.
Step 3: Mix the borax in the hot water to dissolve. It will be cloudy at first but will become clearer. Make sure to dissolve completely. If needed, reheat in microwave and stir. (The ratio of Borax to water is 3 tablespoons per cup....you can adjust your amounts for as deep as your vessel is and how many snowflakes you want to make.)
42A Macaroni Kid Publication www.macaronikid.com
Craft 20-- Make Your Own Snowflakes --
(continued)
Step 4: Loop the long end of the pipe cleaner over a pencil and lower the snowflake into the mixture.
Step 5: Let snowflake sit for several hours or overnight without touching it. You should begin to see crystals forming in a few hours! You can see them beginning to form in the jar!
Why does this happen? As the water cools, the bond between the Borax and the water breaks and the Borax attaches to the bottom of the jar and the pipe cleaner!
Shared by Julie Follansbee
43A Macaroni Kid Publication www.macaronikid.com

Craft 21-- Marble Magnet Valentines --
I've seen these cute marble magnets in a few places thought they would make a quick, inexpensive Valentine gift for teachers and grandparents.
Supply List:• Valentine themed stickers or paper • Mod Podge• Foam brush• Flat, clear glass marbles (You can find these in the floral section of
craft stores. We bought two different sizes.)• Sturdy, flat magnets. (Also available at craft stores. We adhered
ours with a hot glue gun, although they do have the self-adhesive type, too, which may work.)
Step 1: Cut out small pictures from your Valentine themed paper.
We found that sticking stickers on plain or colored piece of paper and then cutting them out worked well.
44A Macaroni Kid Publication
www.macaronikid.com
Craft 21-- Marble Magnet Valentines --
(continued)
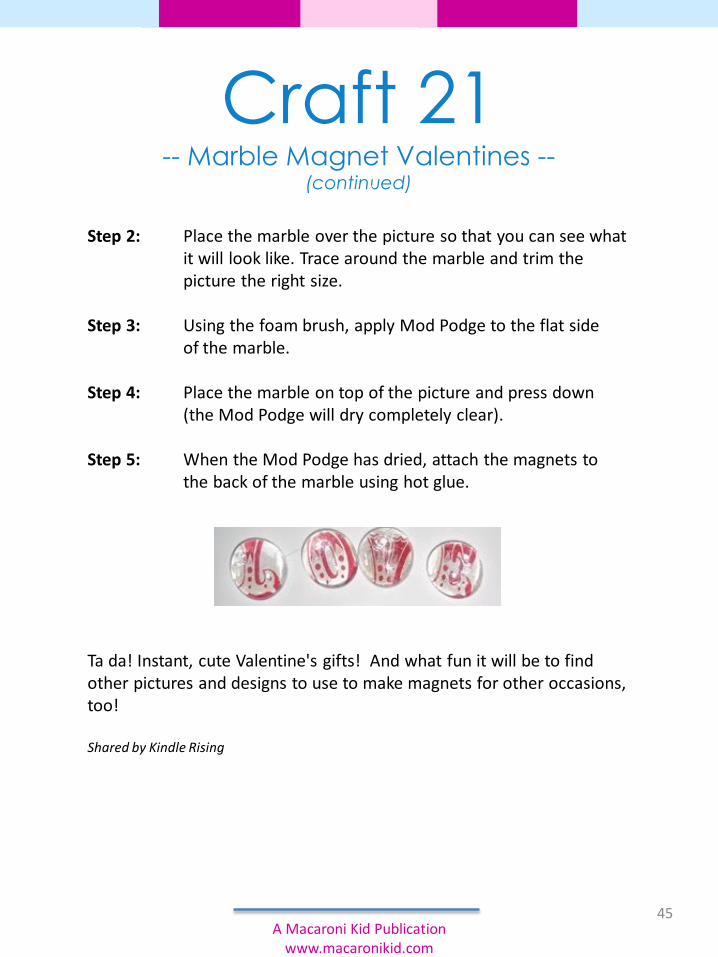
Step 2: Place the marble over the picture so that you can see what it will look like. Trace around the marble and trim the picture the right size.
Step 3: Using the foam brush, apply Mod Podge to the flat side of the marble.
Step 4: Place the marble on top of the picture and press down (the Mod Podge will dry completely clear).
Step 5: When the Mod Podge has dried, attach the magnets to the back of the marble using hot glue.
Ta da! Instant, cute Valentine's gifts! And what fun it will be to find other pictures and designs to use to make magnets for other occasions, too!
Shared by Kindle Rising
45A Macaroni Kid Publication
www.macaronikid.com
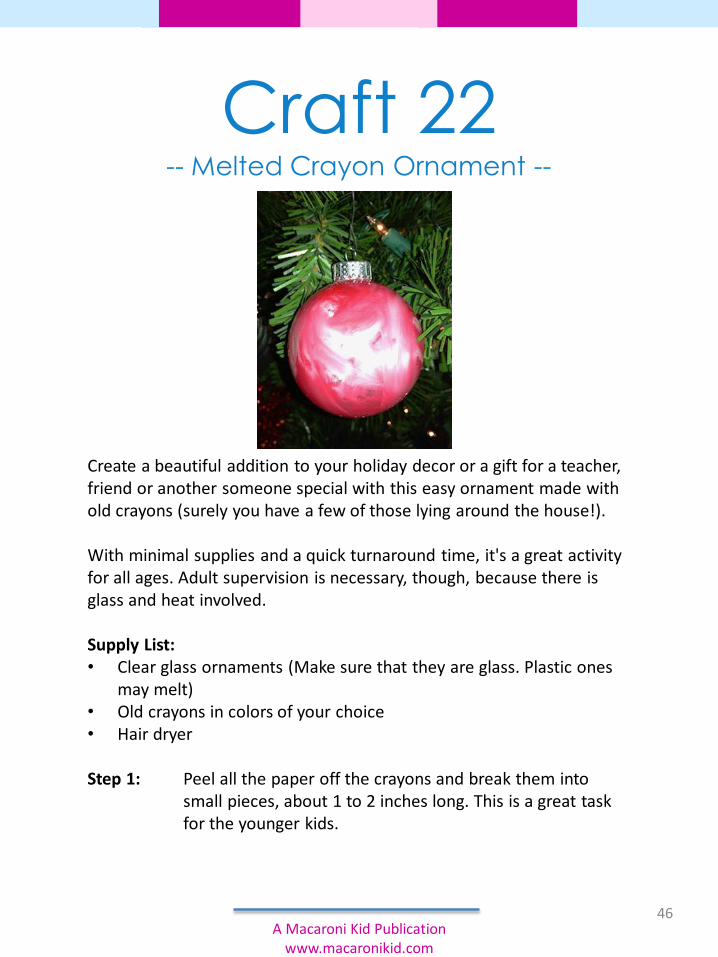
Craft 22-- Melted Crayon Ornament --
Create a beautiful addition to your holiday decor or a gift for a teacher, friend or another someone special with this easy ornament made with old crayons (surely you have a few of those lying around the house!).
With minimal supplies and a quick turnaround time, it's a great activity for all ages. Adult supervision is necessary, though, because there is glass and heat involved.
Supply List:• Clear glass ornaments (Make sure that they are glass. Plastic ones
may melt)• Old crayons in colors of your choice• Hair dryer
Step 1: Peel all the paper off the crayons and break them into small pieces, about 1 to 2 inches long. This is a great task for the younger kids.
46A Macaroni Kid Publication
www.macaronikid.com
Craft 22-- Melted Crayon Ornament –
(continued)
�Step 2:
Remove the top of the ornament and drop a few crayon pieces inside. The number depends on how "covered" you want the glass. For full coverage, 4-5 crayon pieces work well.
Step 3: Use the hair dryer to direct heat onto the glass ornament to melt the crayons. The glass does get hot, so it's best if an adult does this part.
Step 4:As the crayons melt, swirl the ornament so that the wax spreads and sticks to the ornament.
Step 5:Allow to dry and hang on your tree!
One of the fun things about this project is that you are never sure what the results will be. Once the crayons start to melt and swirl, you have little control of the outcome except to know that it will be beautiful!
Shared by Melissa Hucal
47A Macaroni Kid Publication
www.macaronikid.com
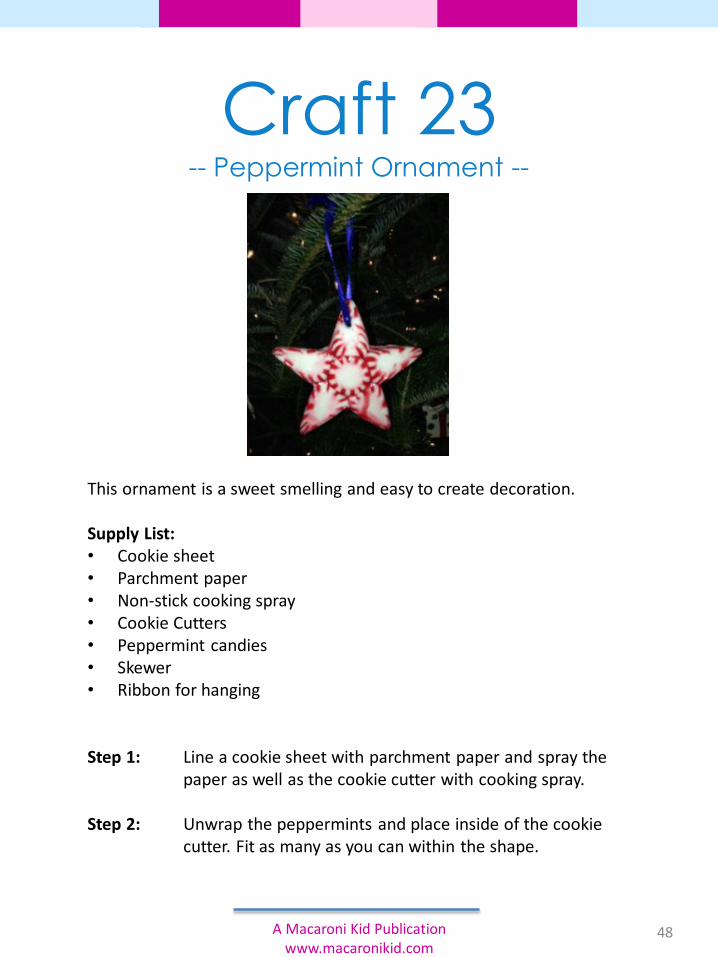
Craft 23-- Peppermint Ornament --
This ornament is a sweet smelling and easy to create decoration.
Supply List:• Cookie sheet• Parchment paper• Non-stick cooking spray• Cookie Cutters• Peppermint candies• Skewer• Ribbon for hanging
Step 1: Line a cookie sheet with parchment paper and spray the paper as well as the cookie cutter with cooking spray.
Step 2: Unwrap the peppermints and place inside of the cookie cutter. Fit as many as you can within the shape.
48A Macaroni Kid Publication www.macaronikid.com
Craft 23-- Peppermint Ornament --
(continued)
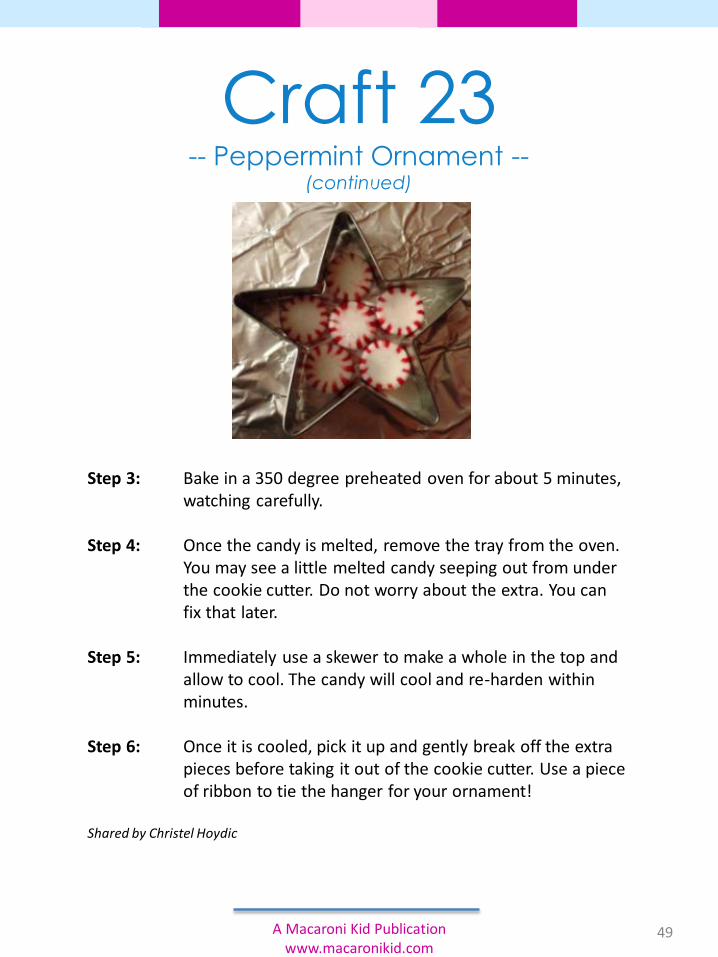
Step 3: Bake in a 350 degree preheated oven for about 5 minutes, watching carefully.
Step 4: Once the candy is melted, remove the tray from the oven. You may see a little melted candy seeping out from under the cookie cutter. Do not worry about the extra. You canfix that later.
Step 5: Immediately use a skewer to make a whole in the top and allow to cool. The candy will cool and re-harden within minutes.
Step 6: Once it is cooled, pick it up and gently break off the extra pieces before taking it out of the cookie cutter. Use a piece of ribbon to tie the hanger for your ornament!
Shared by Christel Hoydic
49A Macaroni Kid Publication www.macaronikid.com
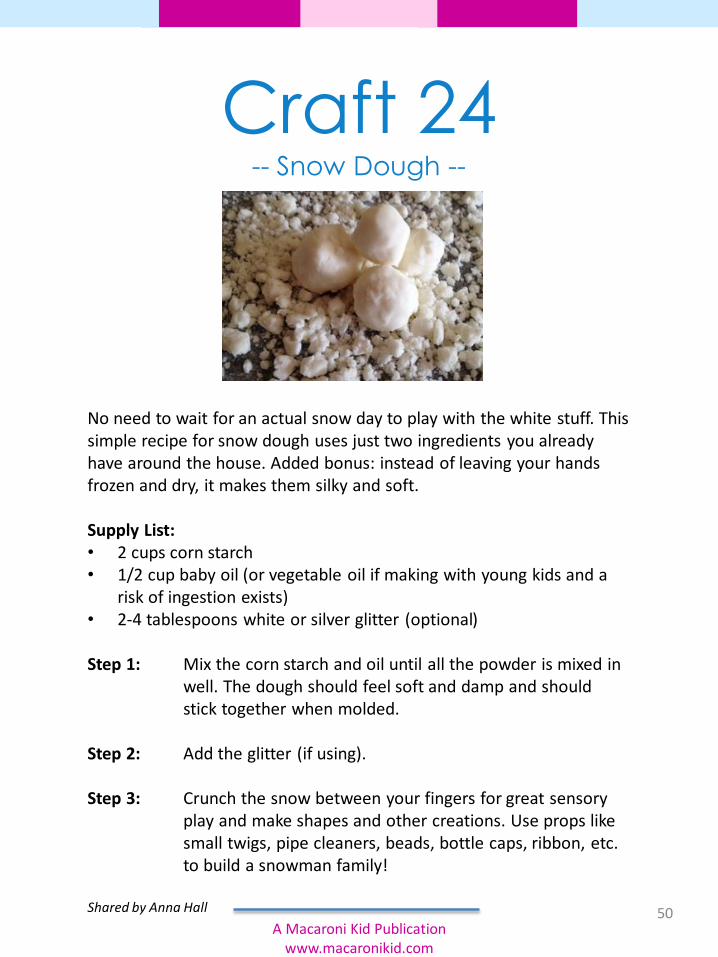
Craft 24-- Snow Dough --
No need to wait for an actual snow day to play with the white stuff. This simple recipe for snow dough uses just two ingredients you already have around the house. Added bonus: instead of leaving your hands frozen and dry, it makes them silky and soft.
Supply List:• 2 cups corn starch• 1/2 cup baby oil (or vegetable oil if making with young kids and a
risk of ingestion exists)• 2-4 tablespoons white or silver glitter (optional)
Step 1: Mix the corn starch and oil until all the powder is mixed in well. The dough should feel soft and damp and should stick together when molded.
Step 2: Add the glitter (if using).
Step 3: Crunch the snow between your fingers for great sensory play and make shapes and other creations. Use props like small twigs, pipe cleaners, beads, bottle caps, ribbon, etc. to build a snowman family!
Shared by Anna Hall 50A Macaroni Kid Publication
www.macaronikid.com
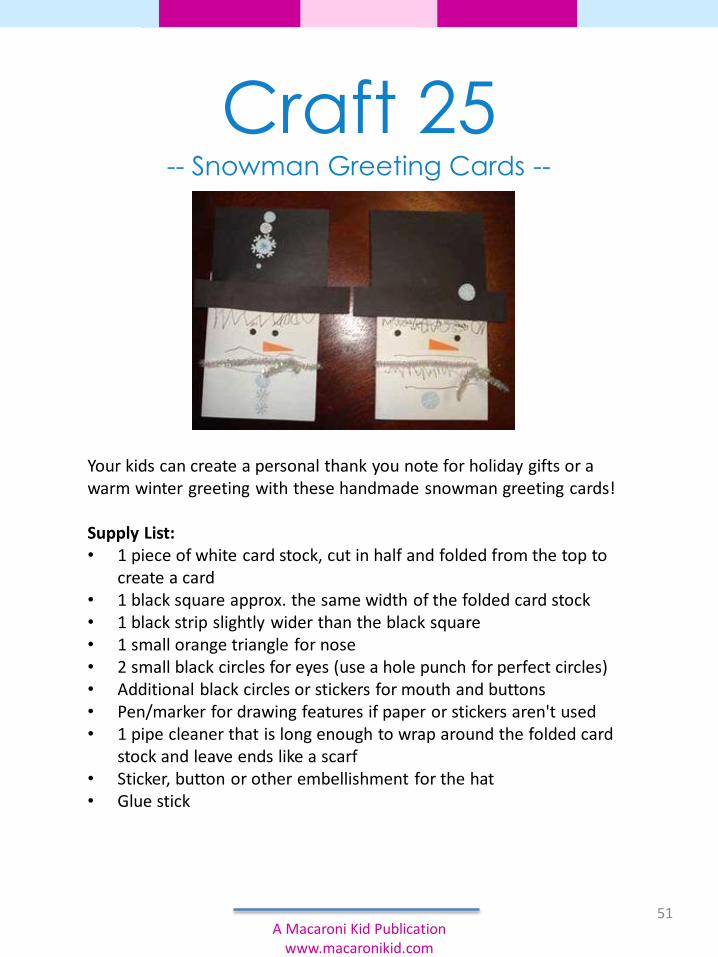
Craft 25-- Snowman Greeting Cards --
Your kids can create a personal thank you note for holiday gifts or a warm winter greeting with these handmade snowman greeting cards!
Supply List:• 1 piece of white card stock, cut in half and folded from the top to
create a card• 1 black square approx. the same width of the folded card stock• 1 black strip slightly wider than the black square• 1 small orange triangle for nose• 2 small black circles for eyes (use a hole punch for perfect circles)• Additional black circles or stickers for mouth and buttons• Pen/marker for drawing features if paper or stickers aren't used• 1 pipe cleaner that is long enough to wrap around the folded card
stock and leave ends like a scarf• Sticker, button or other embellishment for the hat• Glue stick
51A Macaroni Kid Publication
www.macaronikid.com
Craft 25-- Snowman Greeting Cards –
(continued)
Step 1: Use the photo above as a guide or encourage your kids to use their imaginations to create a snowman face on the front of the card using paper pieces, stickers and/or markers. Make sure they understand that they should glue the parts to the front of the card only and not glue the card shut.�
Step 2: Write your sentiment inside.
Step 3: Wrap the pipe cleaner around the card, bringing the ends to the front, then twist to close.
Step 4: Mail or give to family and friends.
Shared by Laura Miller
52A Macaroni Kid Publication
www.macaronikid.com
“Imagination is everything.”
- Albert Einstein
53
SPRING CRAFTS
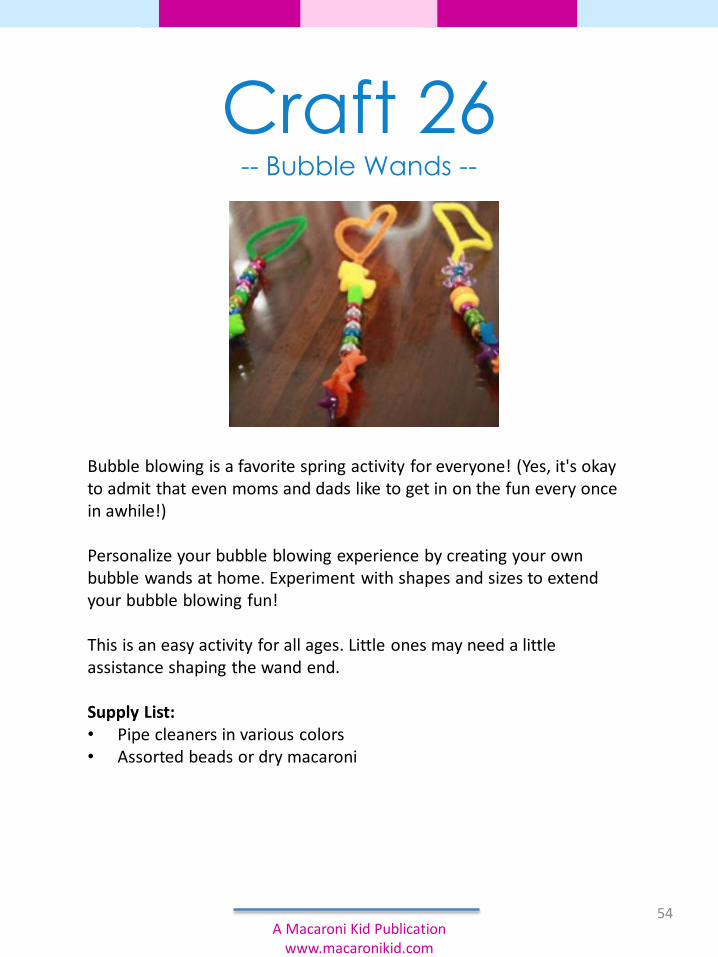
Craft 26-- Bubble Wands --
Bubble blowing is a favorite spring activity for everyone! (Yes, it's okay to admit that even moms and dads like to get in on the fun every once in awhile!)
Personalize your bubble blowing experience by creating your own bubble wands at home. Experiment with shapes and sizes to extend your bubble blowing fun!
This is an easy activity for all ages. Little ones may need a little assistance shaping the wand end.
Supply List:• Pipe cleaners in various colors• Assorted beads or dry macaroni
54A Macaroni Kid Publication
www.macaronikid.com
Craft 26-- Bubble Wands –
(continued)
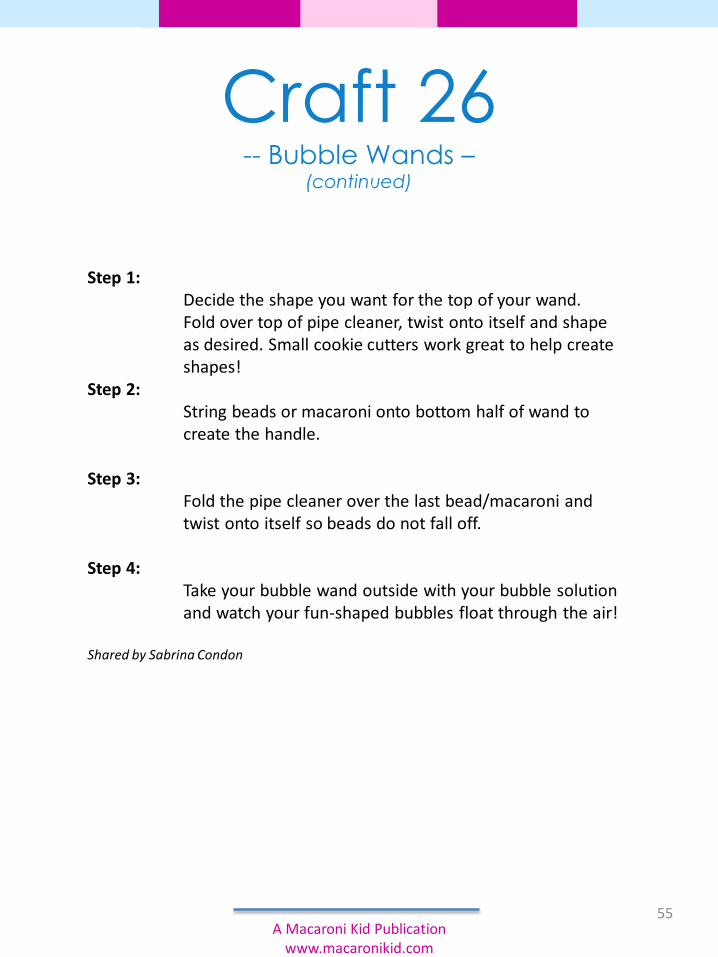
Step 1:Decide the shape you want for the top of your wand.Fold over top of pipe cleaner, twist onto itself and shape as desired. Small cookie cutters work great to help create shapes!
Step 2:String beads or macaroni onto bottom half of wand to create the handle.
Step 3:Fold the pipe cleaner over the last bead/macaroni and twist onto itself so beads do not fall off.
Step 4:Take your bubble wand outside with your bubble solution and watch your fun-shaped bubbles float through the air!
Shared by Sabrina Condon
55A Macaroni Kid Publication
www.macaronikid.com
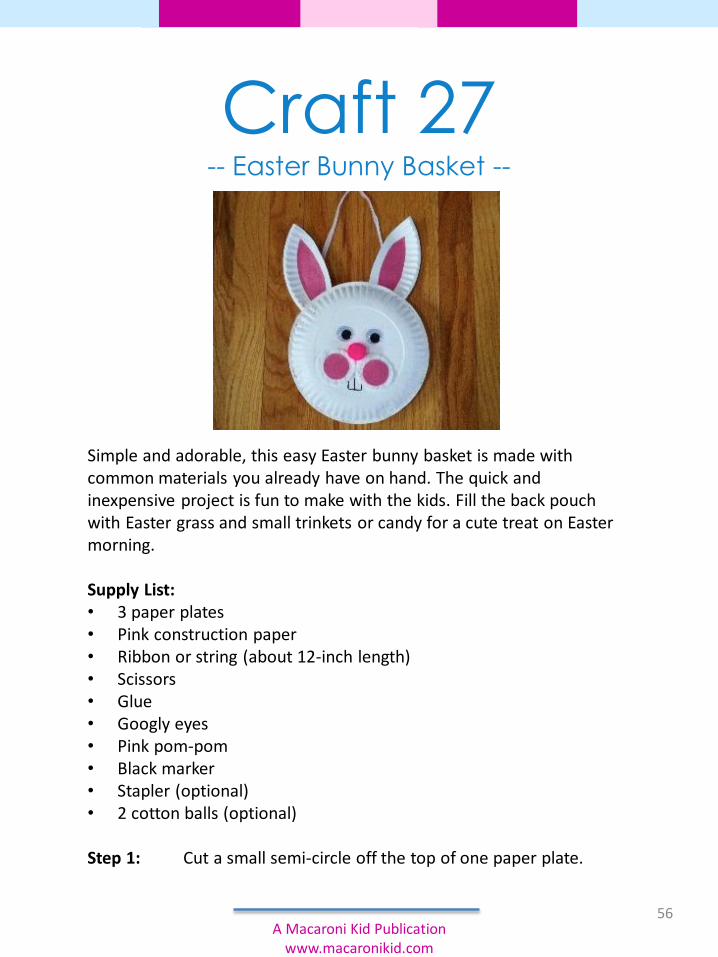
Craft 27-- Easter Bunny Basket --
Simple and adorable, this easy Easter bunny basket is made with common materials you already have on hand. The quick and inexpensive project is fun to make with the kids. Fill the back pouch with Easter grass and small trinkets or candy for a cute treat on Easter morning.
Supply List:• 3 paper plates• Pink construction paper• Ribbon or string (about 12-inch length)• Scissors• Glue• Googly eyes• Pink pom-pom• Black marker• Stapler (optional)• 2 cotton balls (optional)
Step 1: Cut a small semi-circle off the top of one paper plate.
56A Macaroni Kid Publication
www.macaronikid.com
Craft 27-- Easter Bunny Basket –
(continued)
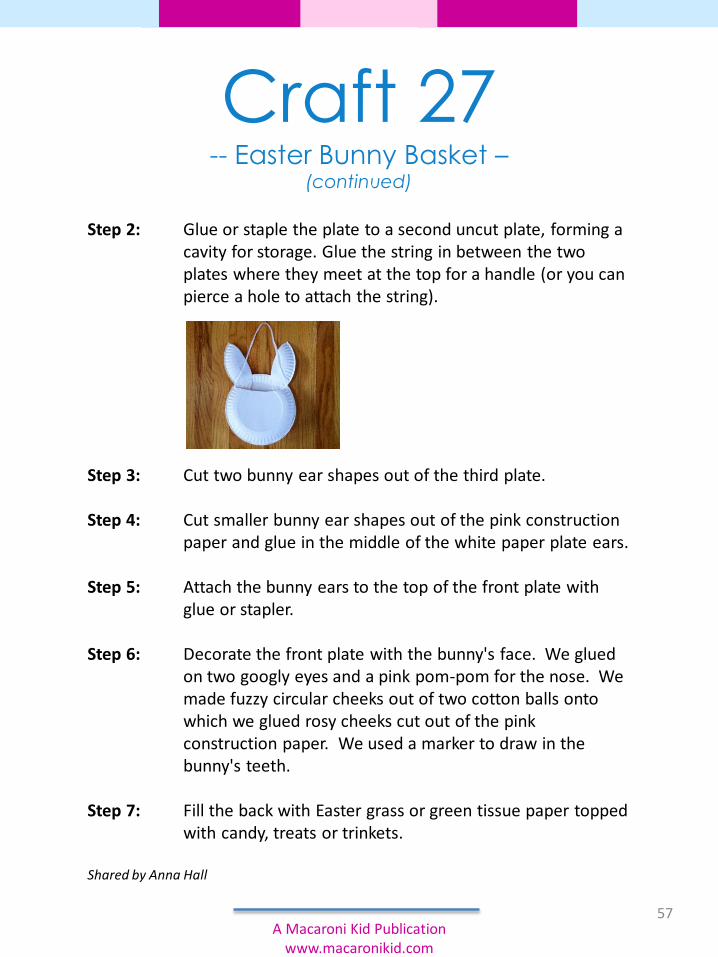
Step 2: Glue or staple the plate to a second uncut plate, forming a cavity for storage. Glue the string in between the two plates where they meet at the top for a handle (or you can pierce a hole to attach the string).
Step 3: Cut two bunny ear shapes out of the third plate.
Step 4: Cut smaller bunny ear shapes out of the pink construction paper and glue in the middle of the white paper plate ears.
Step 5: Attach the bunny ears to the top of the front plate with glue or stapler.
Step 6: Decorate the front plate with the bunny's face. We glued on two googly eyes and a pink pom-pom for the nose. We made fuzzy circular cheeks out of two cotton balls onto which we glued rosy cheeks cut out of the pink construction paper. We used a marker to draw in the bunny's teeth.
Step 7: Fill the back with Easter grass or green tissue paper topped with candy, treats or trinkets.
Shared by Anna Hall
57A Macaroni Kid Publication
www.macaronikid.com
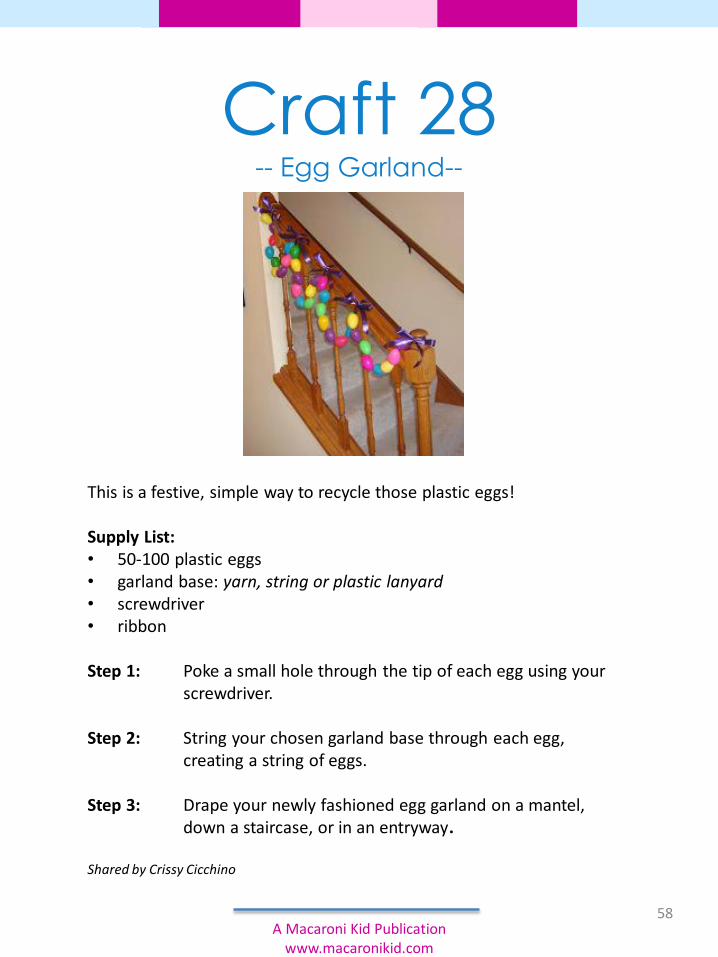
Craft 28-- Egg Garland--
This is a festive, simple way to recycle those plastic eggs!
Supply List:• 50-100 plastic eggs• garland base: yarn, string or plastic lanyard• screwdriver• ribbon
Step 1: Poke a small hole through the tip of each egg using your screwdriver.
Step 2: String your chosen garland base through each egg, creating a string of eggs.
Step 3: Drape your newly fashioned egg garland on a mantel, down a staircase, or in an entryway.
Shared by Crissy Cicchino
58A Macaroni Kid Publication
www.macaronikid.com
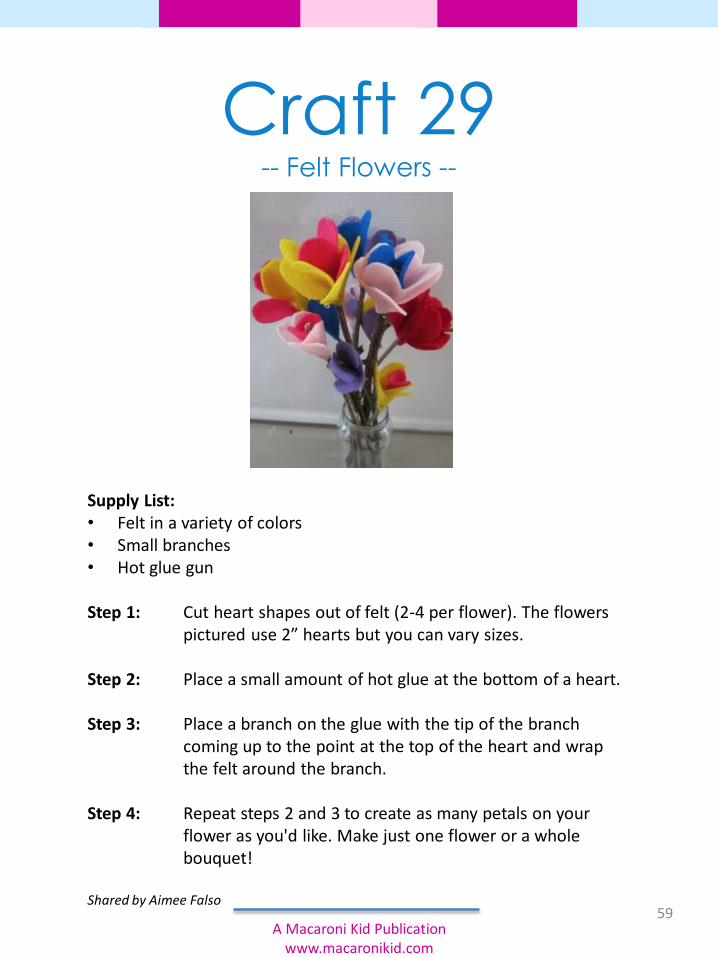
Craft 29-- Felt Flowers --
Supply List:• Felt in a variety of colors• Small branches• Hot glue gun
Step 1: Cut heart shapes out of felt (2-4 per flower). The flowers pictured use 2” hearts but you can vary sizes.
Step 2: Place a small amount of hot glue at the bottom of a heart.
Step 3: Place a branch on the glue with the tip of the branchcoming up to the point at the top of the heart and wrap the felt around the branch.
Step 4: Repeat steps 2 and 3 to create as many petals on your flower as you'd like. Make just one flower or a whole bouquet!
Shared by Aimee Falso59
A Macaroni Kid Publication www.macaronikid.com
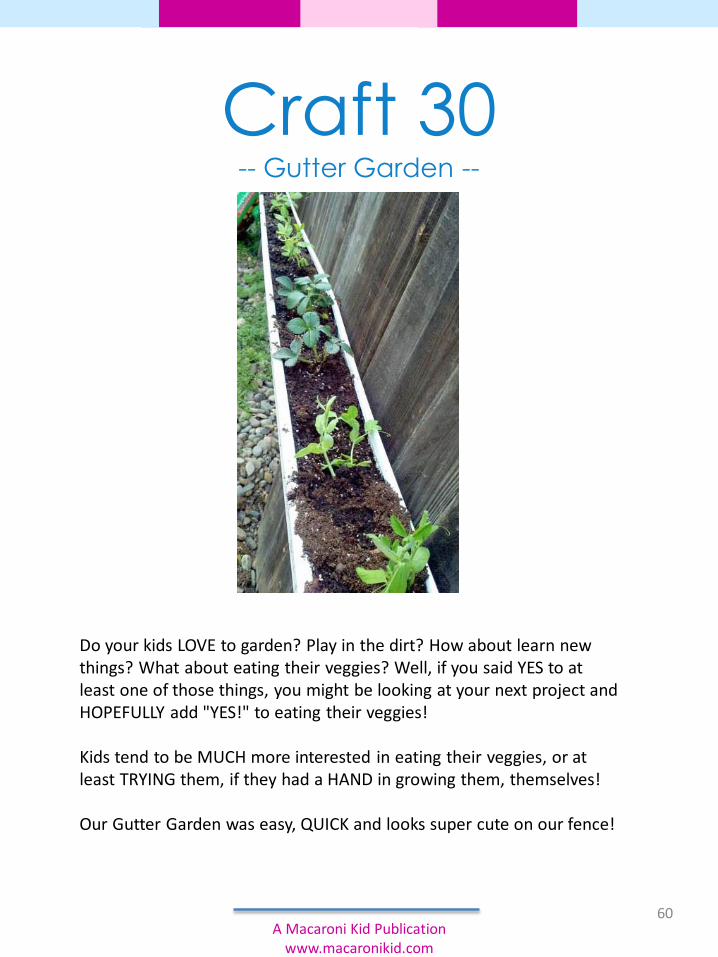
Craft 30-- Gutter Garden --
Do your kids LOVE to garden? Play in the dirt? How about learn new things? What about eating their veggies? Well, if you said YES to at least one of those things, you might be looking at your next project and HOPEFULLY add "YES!" to eating their veggies!
Kids tend to be MUCH more interested in eating their veggies, or at least TRYING them, if they had a HAND in growing them, themselves!
Our Gutter Garden was easy, QUICK and looks super cute on our fence!
60A Macaroni Kid Publication
www.macaronikid.com
Craft 30-- Gutter Garden --
(continued)
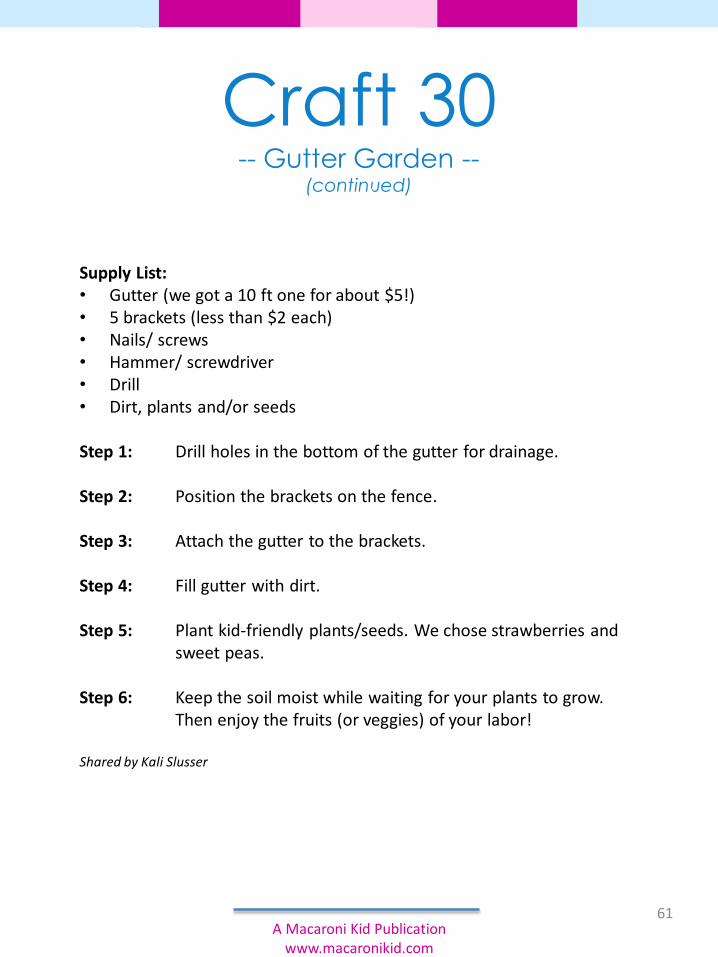
Supply List:• Gutter (we got a 10 ft one for about $5!)• 5 brackets (less than $2 each)• Nails/ screws• Hammer/ screwdriver• Drill• Dirt, plants and/or seeds
Step 1: Drill holes in the bottom of the gutter for drainage.
Step 2: Position the brackets on the fence.
Step 3: Attach the gutter to the brackets.
Step 4: Fill gutter with dirt.
Step 5: Plant kid-friendly plants/seeds. We chose strawberries and sweet peas.
Step 6: Keep the soil moist while waiting for your plants to grow. Then enjoy the fruits (or veggies) of your labor!
Shared by Kali Slusser
61A Macaroni Kid Publication
www.macaronikid.com
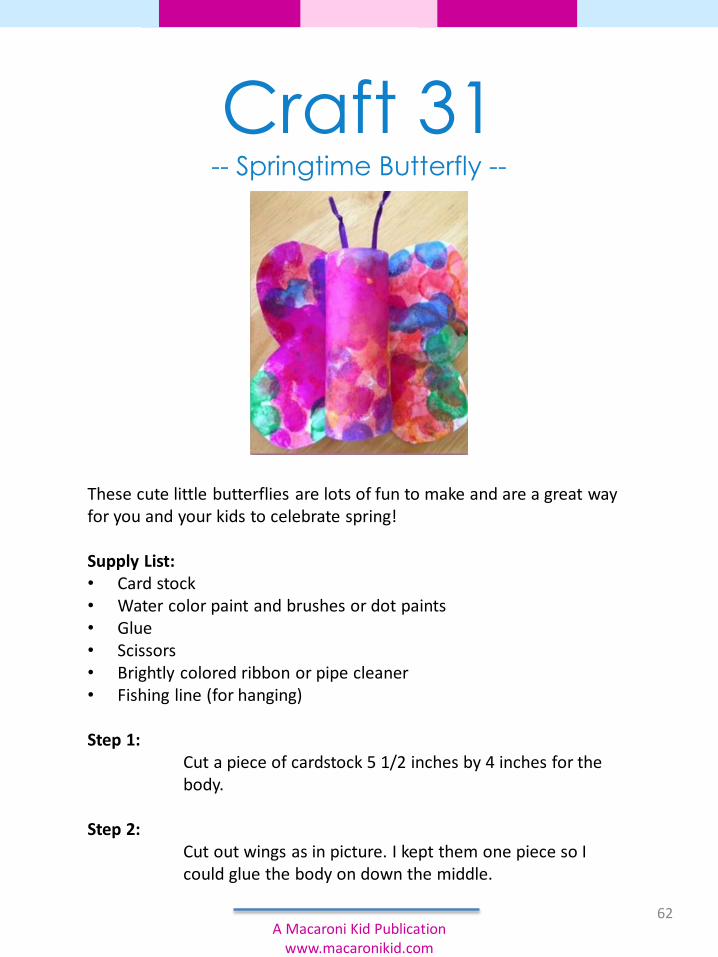
Craft 31-- Springtime Butterfly --
These cute little butterflies are lots of fun to make and are a great way for you and your kids to celebrate spring!
Supply List:• Card stock• Water color paint and brushes or dot paints• Glue• Scissors• Brightly colored ribbon or pipe cleaner• Fishing line (for hanging)
Step 1:Cut a piece of cardstock 5 1/2 inches by 4 inches for the body.
Step 2:Cut out wings as in picture. I kept them one piece so I could glue the body on down the middle.
62A Macaroni Kid Publication
www.macaronikid.com
Craft 31-- Springtime Butterfly –
(continued)
Step 3:Have the kids paint each piece, the body and the wings.
Step 4:Once the paint has dried, glue the rectangular piece into a cylinder.
Step 5:Glue the cylinder on the middle of the wings.
Step 6:Cut 2 pieces of ribbon or pipe cleaner and knot or twist one end of each. These will be the antennae.
Step 7:Glue the antennae on your butterfly with the knotted end up.
Step 8:Attach fishing line and hang so your butterflies will fly!
Be creative with whatever supplies you have. You could use glitter glue, sequins, or whatever else to enhance the butterfly.
Shared by Jodi Lorence
63A Macaroni Kid Publication
www.macaronikid.com
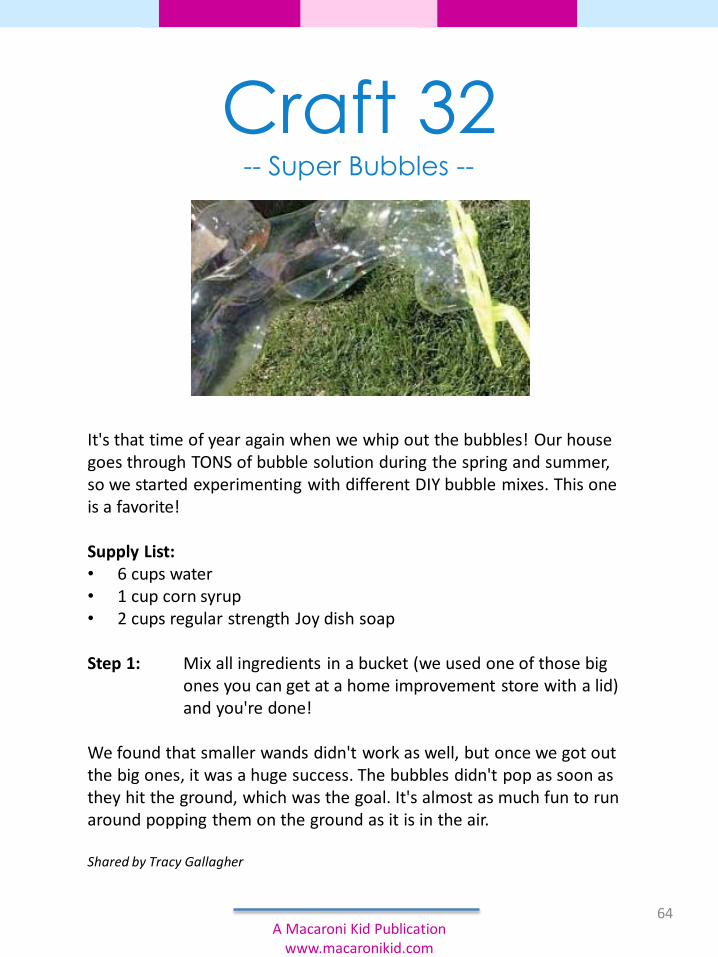
Craft 32-- Super Bubbles --
It's that time of year again when we whip out the bubbles! Our house goes through TONS of bubble solution during the spring and summer, so we started experimenting with different DIY bubble mixes. This one is a favorite!
Supply List:• 6 cups water• 1 cup corn syrup• 2 cups regular strength Joy dish soap
Step 1: Mix all ingredients in a bucket (we used one of those big ones you can get at a home improvement store with a lid) and you're done!
We found that smaller wands didn't work as well, but once we got out the big ones, it was a huge success. The bubbles didn't pop as soon as they hit the ground, which was the goal. It's almost as much fun to run around popping them on the ground as it is in the air.
Shared by Tracy Gallagher
64A Macaroni Kid Publication
www.macaronikid.com
“You can't use up creativity.
The more you use, the more you have.”
- Maya Angelou
65
SUMMER CRAFTS
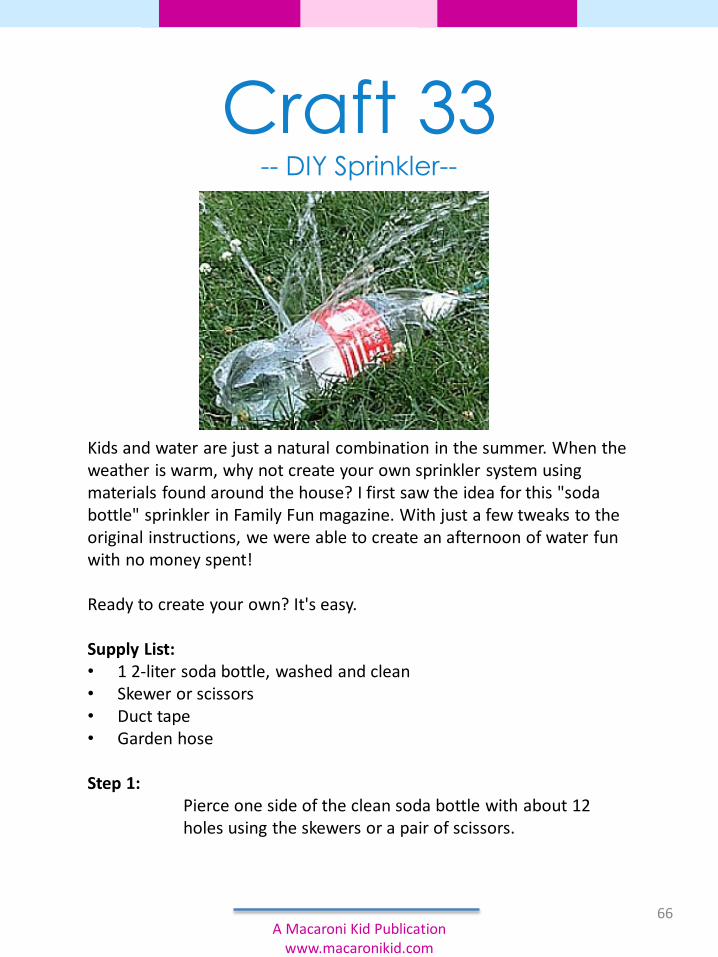
Craft 33-- DIY Sprinkler--
Kids and water are just a natural combination in the summer. When the weather is warm, why not create your own sprinkler system using materials found around the house? I first saw the idea for this "soda bottle" sprinkler in Family Fun magazine. With just a few tweaks to the original instructions, we were able to create an afternoon of water fun with no money spent!
Ready to create your own? It's easy.
Supply List:• 1 2-liter soda bottle, washed and clean• Skewer or scissors• Duct tape• Garden hose
Step 1:Pierce one side of the clean soda bottle with about 12 holes using the skewers or a pair of scissors.
66A Macaroni Kid Publication
www.macaronikid.com
Craft 33-- DIY Sprinkler –
(continued)
Step 2:The original directions said to buy a 3/4 inch female by 3/4 inch female swivel hose adapter, BUT with me being the crafty person I am, I just used duct tape to secure the bottle to the hose and saved a few dollars! After all I wanted to keep it green by recycling and not spending any green.
Step 3:Once the bottle is attached with the adapters or duct tape, turn the water on full blast! The more water pressure you have the higher it will squirt out.
When the kids have finished playing with the sprinkler, it is perfect for watering the veggie garden or flowers.
Shared by Tracy Gallagher
67A Macaroni Kid Publication
www.macaronikid.com
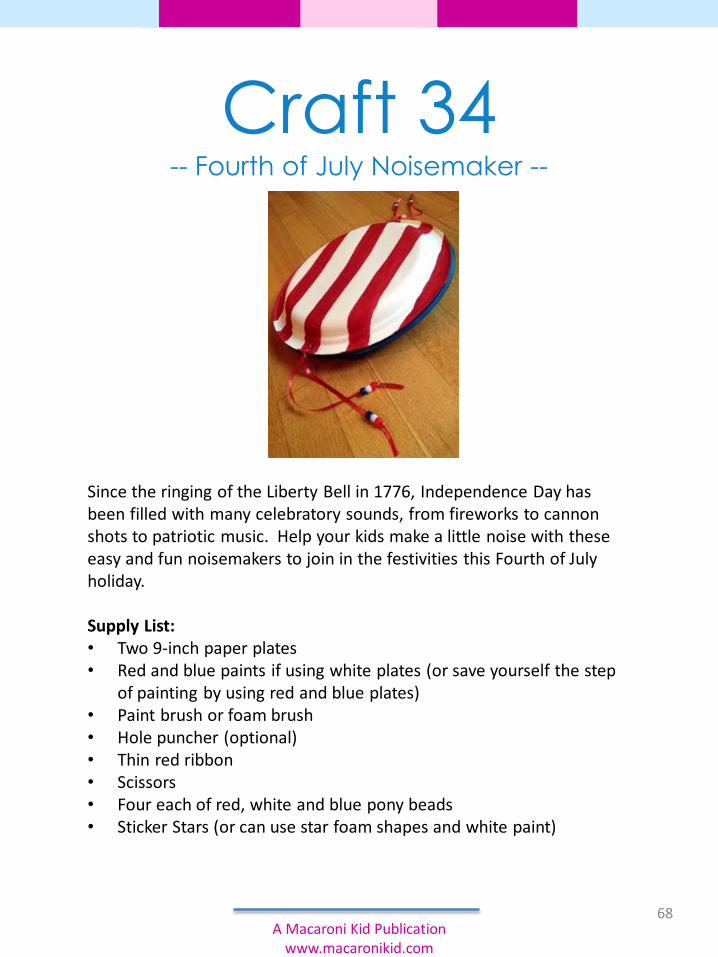
Craft 34-- Fourth of July Noisemaker --
Since the ringing of the Liberty Bell in 1776, Independence Day has been filled with many celebratory sounds, from fireworks to cannon shots to patriotic music. Help your kids make a little noise with these easy and fun noisemakers to join in the festivities this Fourth of July holiday.
Supply List:• Two 9-inch paper plates• Red and blue paints if using white plates (or save yourself the step
of painting by using red and blue plates)• Paint brush or foam brush • Hole puncher (optional)• Thin red ribbon• Scissors• Four each of red, white and blue pony beads• Sticker Stars (or can use star foam shapes and white paint)
68A Macaroni Kid Publication
www.macaronikid.com
Craft 34-- Fourth of July Noisemaker --
(continued)
Step 1:Paint and decorate bottoms of two plates in patriotic colors and patterns. I painted one white plate with red stripes and the other plate solid blue and had my daughter cover with star stickers.
Step 2:Align the two plates together with the bottoms facing outward. Punch or poke a hole through both plates on opposite sides.
Step 3:Cut two 20-inch pieces of red ribbon. Thread each through the holes to tie the plates together on opposite sides.
Step 4:Thread a red, white and blue pony bead on each ribbon. Tie a large knot at the end of the ribbon so beads don't slide off.
Step 5:Shake the noisemaker back and forth so that it makes noise as the beads hit the plates.
Shared by Anna Hall
69A Macaroni Kid Publication
www.macaronikid.com
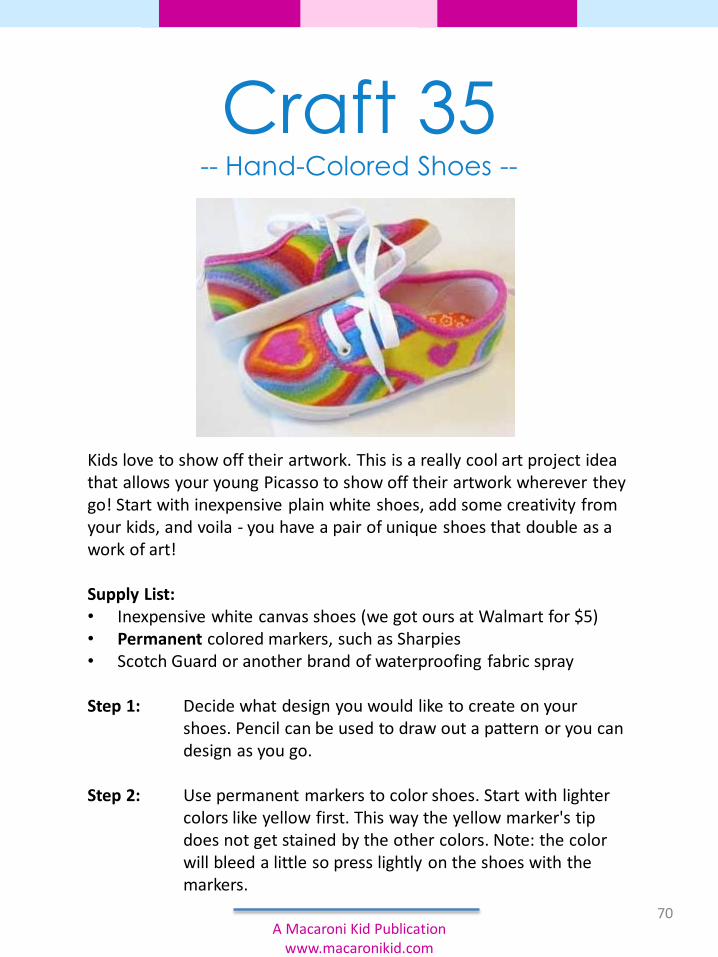
Craft 35-- Hand-Colored Shoes --
Kids love to show off their artwork. This is a really cool art project idea that allows your young Picasso to show off their artwork wherever they go! Start with inexpensive plain white shoes, add some creativity from your kids, and voila - you have a pair of unique shoes that double as a work of art!
Supply List:• Inexpensive white canvas shoes (we got ours at Walmart for $5)• Permanent colored markers, such as Sharpies• Scotch Guard or another brand of waterproofing fabric spray
Step 1: Decide what design you would like to create on your shoes. Pencil can be used to draw out a pattern or you can design as you go.
Step 2: Use permanent markers to color shoes. Start with lighter colors like yellow first. This way the yellow marker's tip does not get stained by the other colors. Note: the color will bleed a little so press lightly on the shoes with the markers.
70A Macaroni Kid Publication
www.macaronikid.com
Craft 35-- Hand-Colored Shoes --
(continued)
Step 3: Let the finished shoes dry according to Scotch Guard directions.
Step 4: Spray very lightly with scotch guard. If you spray too heavily, the colors will bleed! Let the scotch guard dry for a few hours then spray again and let dry overnight.
Step 5: Wear your shoe art with pride!
Shared by Melissa Alcorn
71A Macaroni Kid Publication
www.macaronikid.com

Craft 36-- Patriotic Placemats --
Memorial Day, Flag Day, and the Fourth of July! Craft table decorations that let the red, white and blue colors fly for summer holidays.
Supply List:• 1 sheet of red, white and blue paper for each placemat (8.5x11)• Embellishments (ribbon, stickers, star cutouts, etc.)
Step 1: Cut the red and blue papers into 1-inch strips.
Step 2: Mark a one inch border on all sides of the white paper and cut vertical strips at 1-inch intervals within the border.
Step 3: Weave the red and blue strips through the white paper, alternating colors or creating a pattern of your choice. Tape or glue strips on the back of the white paper.
Step 4: Use embellishments to decorate around the edges. For added durability, cover in clear contact paper.
Now set the table for a fun and festive celebration!
Shared by Melissa Hucal72
A Macaroni Kid Publication www.macaronikid.com
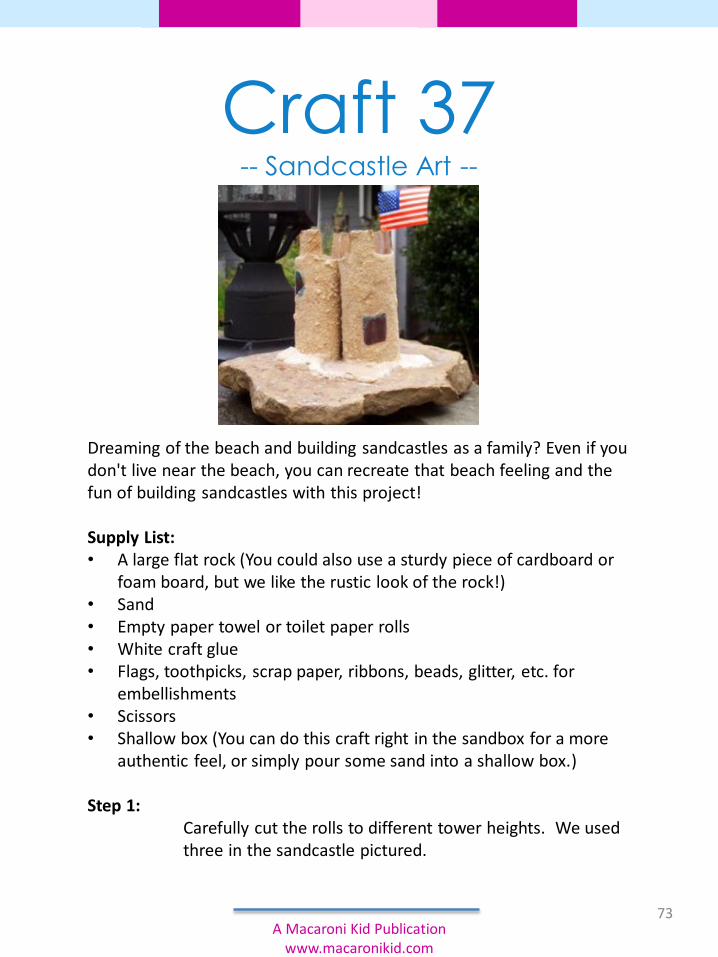
Craft 37-- Sandcastle Art --
Dreaming of the beach and building sandcastles as a family? Even if you don't live near the beach, you can recreate that beach feeling and the fun of building sandcastles with this project!
Supply List:• A large flat rock (You could also use a sturdy piece of cardboard or
foam board, but we like the rustic look of the rock!)• Sand• Empty paper towel or toilet paper rolls• White craft glue• Flags, toothpicks, scrap paper, ribbons, beads, glitter, etc. for
embellishments• Scissors• Shallow box (You can do this craft right in the sandbox for a more
authentic feel, or simply pour some sand into a shallow box.)
Step 1:Carefully cut the rolls to different tower heights. We used three in the sandcastle pictured.
73A Macaroni Kid Publication
www.macaronikid.com

Craft 37-- Sandcastle Art –
(continued)
Step 2:Cut notches to make turrets in the top of each roll.
Step 3:Cut slits about 3/4 of an inch deep in the bottom of each roll, about seven in all. These will become the "feet" to glue to your rock.
Step 4:Draw windows or doors, being careful not to go below the bottom slits.
Step 5:Apply glue to the entire roll, everywhere except to windows and doors and roll it in the sand. For some added "bling," sprinkle some glitter in the sand!
Step 6:Fold the slits toward the outside on the bottom. Apply glue to bottom and affix to rock.
Step 7:Spread lots of glue around the base of your castle and pour sand on it. Finish by embellishing your castle with flags, ribbon, beads, etc.
Ahhh! Can't you feel the ocean breeze and hear the seagulls now?
Shared by Julie Follansbee
74A Macaroni Kid Publication
www.macaronikid.com
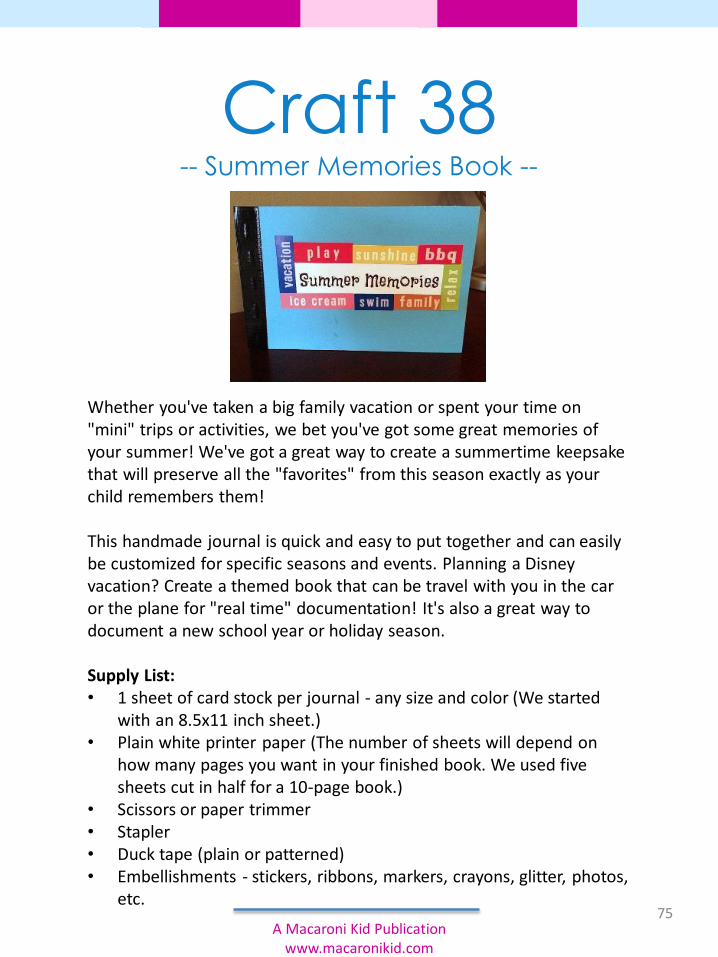
Craft 38-- Summer Memories Book --
Whether you've taken a big family vacation or spent your time on "mini" trips or activities, we bet you've got some great memories of your summer! We've got a great way to create a summertime keepsake that will preserve all the "favorites" from this season exactly as your child remembers them!
This handmade journal is quick and easy to put together and can easily be customized for specific seasons and events. Planning a Disney vacation? Create a themed book that can be travel with you in the car or the plane for "real time" documentation! It's also a great way to document a new school year or holiday season.
Supply List:• 1 sheet of card stock per journal - any size and color (We started
with an 8.5x11 inch sheet.)• Plain white printer paper (The number of sheets will depend on
how many pages you want in your finished book. We used five sheets cut in half for a 10-page book.)
• Scissors or paper trimmer• Stapler• Duck tape (plain or patterned)• Embellishments - stickers, ribbons, markers, crayons, glitter, photos,
etc.75
A Macaroni Kid Publication www.macaronikid.com
Craft 38-- Summer Memories Book –
(continued)
Step 1: First, determine the size of your book. We kept it simple and made our "half-sheet" size. Using scissors or a paper trimmer, cut your paper accordingly. You'll need two equal-sized pieces of card stock for the front and back covers and several white sheets cut slightly smaller (approx. 1/4 inch) for the inner pages.
Step 2: Next, fold each of your covers about 1/2 inch in on one side. This will create the "spine" of your book. Now stack all the inner pages between the two covers, flush with the ends that you folded.
Step 3: Staple all the pages together. We used four staples on our 10-page book. Cover the staples by wrapping and securing a piece of duck tape along the spine.
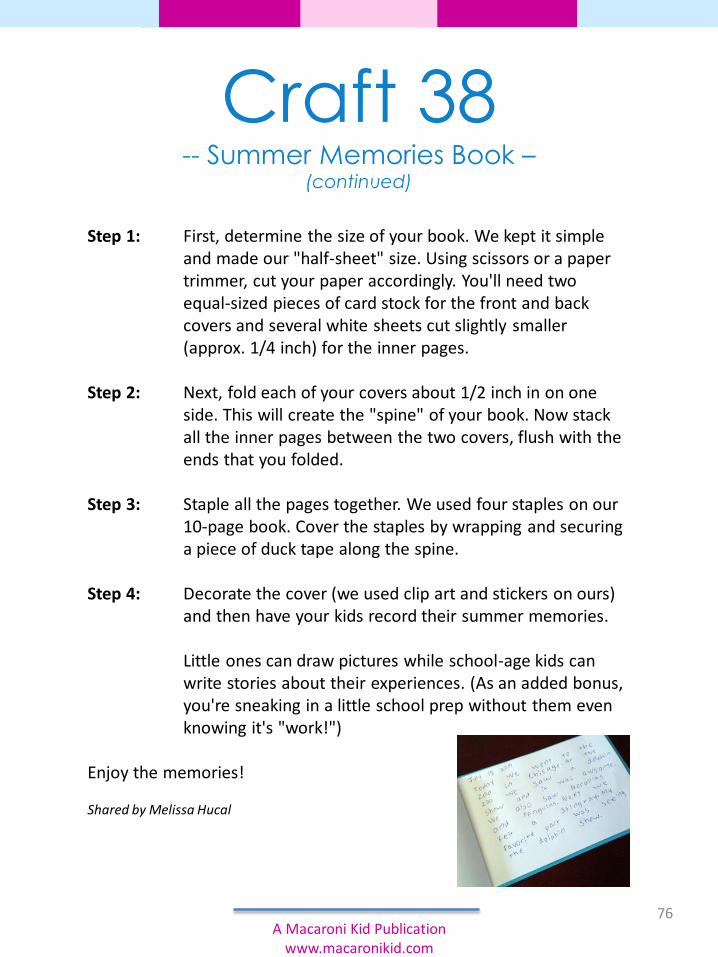
Step 4: Decorate the cover (we used clip art and stickers on ours) and then have your kids record their summer memories.
Little ones can draw pictures while school-age kids can write stories about their experiences. (As an added bonus, you're sneaking in a little school prep without them even knowing it's "work!")
Enjoy the memories!
Shared by Melissa Hucal
76A Macaroni Kid Publication
www.macaronikid.com
“The world is but a canvas to the imagination.”
- Henry David Thoreau
77
FALL CRAFTS
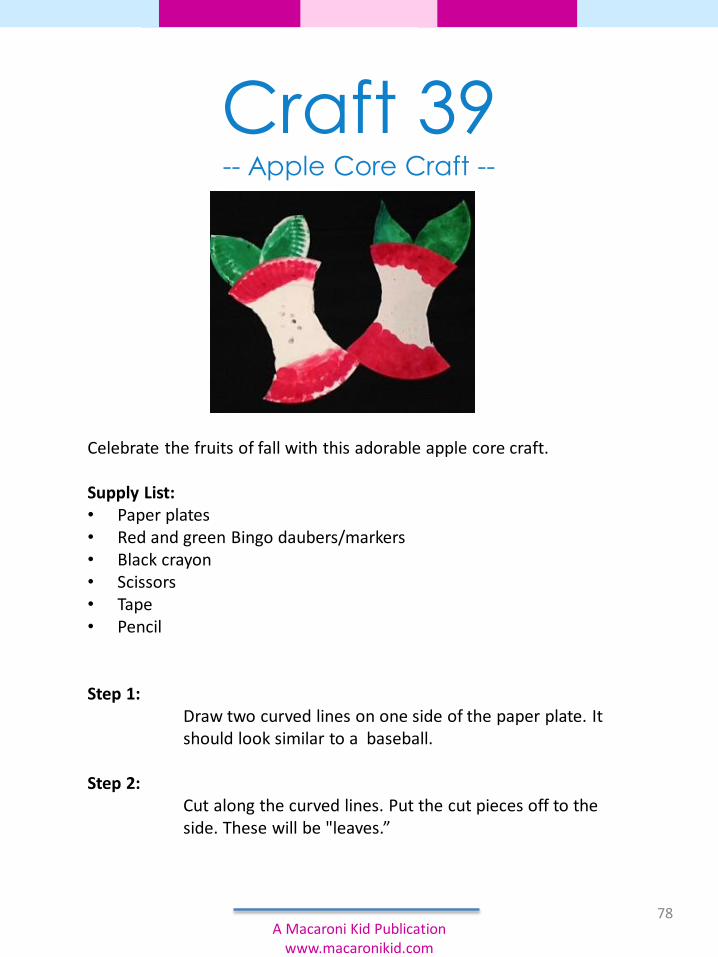
Craft 39-- Apple Core Craft --
Celebrate the fruits of fall with this adorable apple core craft.
Supply List:• Paper plates• Red and green Bingo daubers/markers• Black crayon• Scissors• Tape• Pencil
Step 1:Draw two curved lines on one side of the paper plate. It should look similar to a baseball.
Step 2:Cut along the curved lines. Put the cut pieces off to the side. These will be "leaves.”
78A Macaroni Kid Publication
www.macaronikid.com
Craft 39-- Apple Core Craft –
(continued)
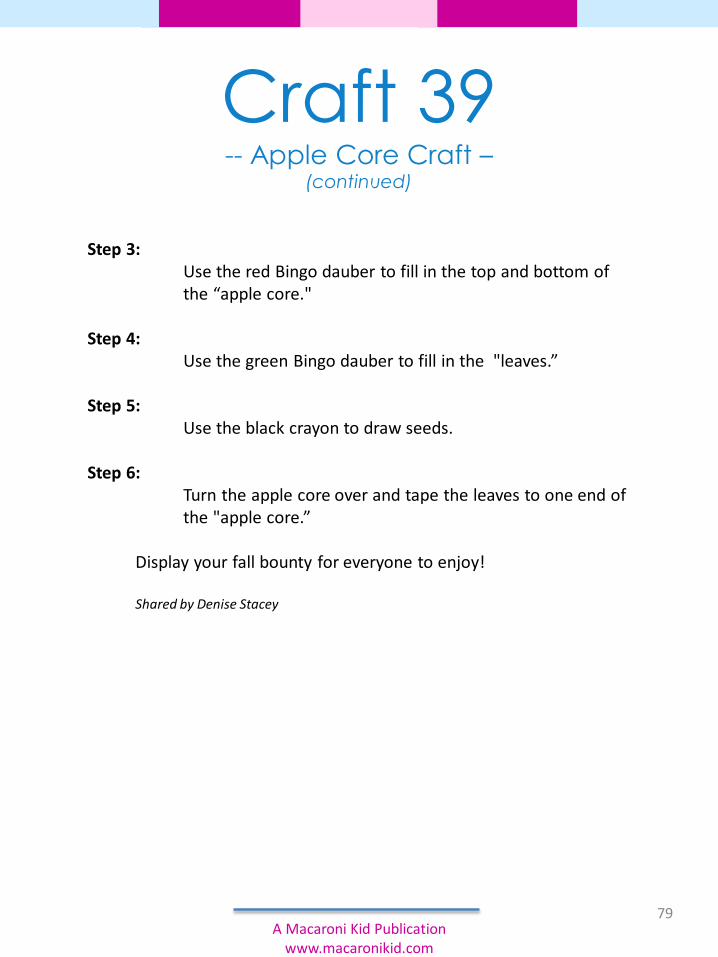
Step 3:Use the red Bingo dauber to fill in the top and bottom of the “apple core."
Step 4:Use the green Bingo dauber to fill in the "leaves.”
Step 5:Use the black crayon to draw seeds.
Step 6:Turn the apple core over and tape the leaves to one end of the "apple core.”
Display your fall bounty for everyone to enjoy!
Shared by Denise Stacey
79A Macaroni Kid Publication
www.macaronikid.com
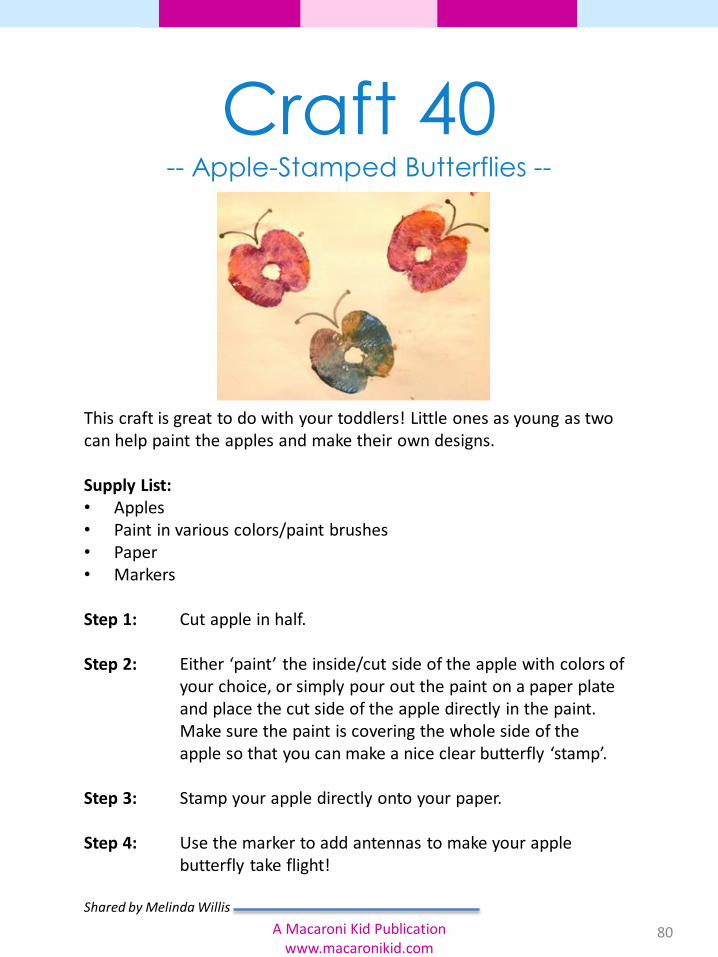
Craft 40-- Apple-Stamped Butterflies --
This craft is great to do with your toddlers! Little ones as young as two can help paint the apples and make their own designs.
Supply List:• Apples• Paint in various colors/paint brushes• Paper• Markers
Step 1: Cut apple in half.
Step 2: Either ‘paint’ the inside/cut side of the apple with colors of your choice, or simply pour out the paint on a paper plate and place the cut side of the apple directly in the paint. Make sure the paint is covering the whole side of the apple so that you can make a nice clear butterfly ‘stamp’.
Step 3: Stamp your apple directly onto your paper.
Step 4: Use the marker to add antennas to make your apple butterfly take flight!
Shared by Melinda Willis
80A Macaroni Kid Publication www.macaronikid.com
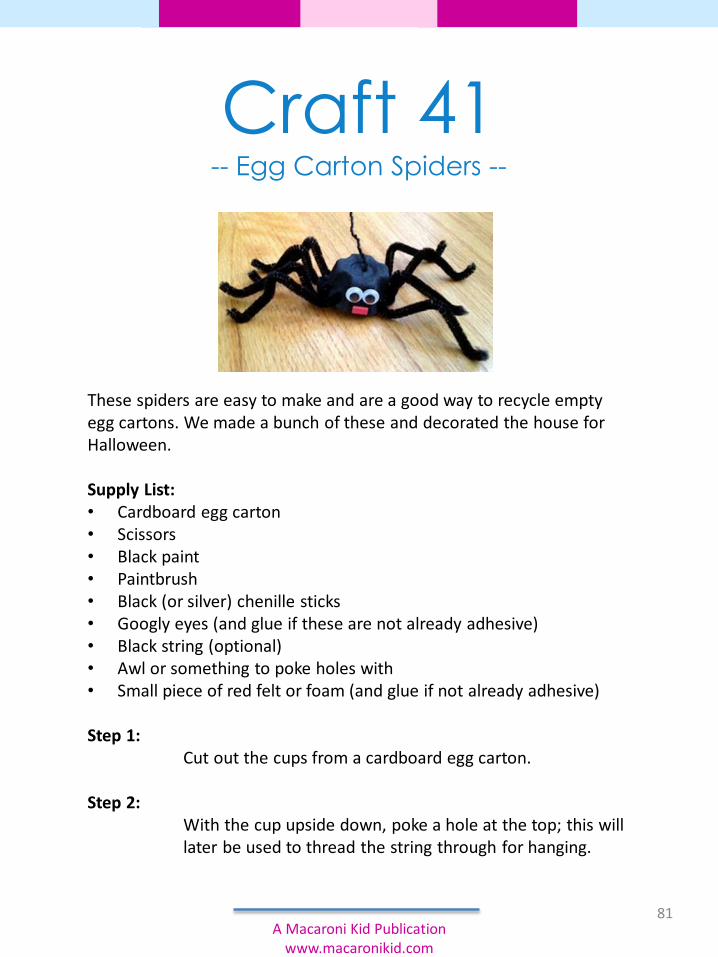
Craft 41-- Egg Carton Spiders --
These spiders are easy to make and are a good way to recycle empty egg cartons. We made a bunch of these and decorated the house for Halloween.
Supply List:• Cardboard egg carton• Scissors• Black paint• Paintbrush• Black (or silver) chenille sticks• Googly eyes (and glue if these are not already adhesive)• Black string (optional)• Awl or something to poke holes with• Small piece of red felt or foam (and glue if not already adhesive)
Step 1:Cut out the cups from a cardboard egg carton.
Step 2:With the cup upside down, poke a hole at the top; this will later be used to thread the string through for hanging.
81A Macaroni Kid Publication
www.macaronikid.com
Craft 41-- Egg Carton Spiders –
(continued)
Step 3:Poke four holes on the right bottom edge and four on the left for the legs.
Step 4:Paint the entire cup black and allow to dry.
Step 5:Cut the chenille sticks into eight shorter pieces for the legs. I found that cutting each stick in three pieces made the legs the correct length. The other option is to cut the pipe cleaner in half and later thread the piece in through a hole on one side and out the corresponding hole on the other side.
Step 6:Attach the legs and bend to shape.
Step 7:Add googly eyes to the front of the spider and small piece of red material for the mouth.
Step 8:Thread black string through the hole on top and secure in place if hanging your spiders.
Shared by Anna Hall
82A Macaroni Kid Publication
www.macaronikid.com
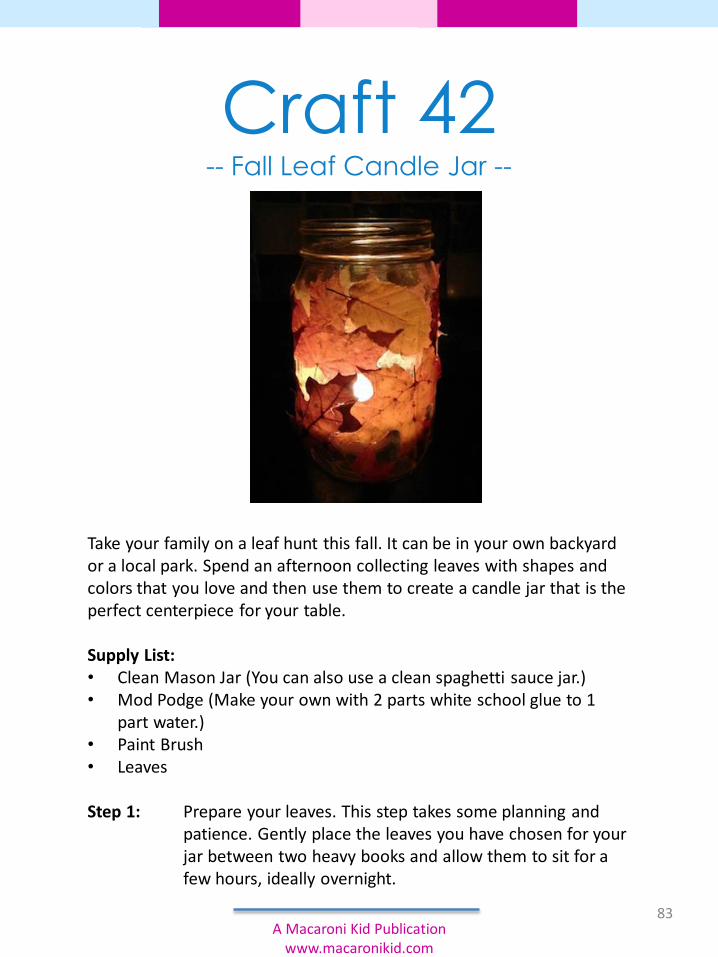
Craft 42-- Fall Leaf Candle Jar --
Take your family on a leaf hunt this fall. It can be in your own backyard or a local park. Spend an afternoon collecting leaves with shapes and colors that you love and then use them to create a candle jar that is the perfect centerpiece for your table.
Supply List:• Clean Mason Jar (You can also use a clean spaghetti sauce jar.)• Mod Podge (Make your own with 2 parts white school glue to 1
part water.) • Paint Brush• Leaves
Step 1: Prepare your leaves. This step takes some planning and patience. Gently place the leaves you have chosen for your jar between two heavy books and allow them to sit for a few hours, ideally overnight.
83A Macaroni Kid Publication
www.macaronikid.com
Craft 42-- Fall Leaf Candle Jar –
(continued)
Step 2: Once the leaves are pressed flat, coat your jar with a layer of Mod Podge. This will help your leaves stick to the jar
Step 3: Arrange the leaves onto the jar in any manner you choose. You can even overlap the leaves.
Step 4: Paint the Mod Podge in a thick layer over the leaves and allow to dry. (Remember, the Mod Podge will dry clear.)Now set the table for a fun and festive celebration!
Step 5: Once dry, place a small votive candle or tea light inside and light!
Shared by Christel Hoydic
84A Macaroni Kid Publication
www.macaronikid.com
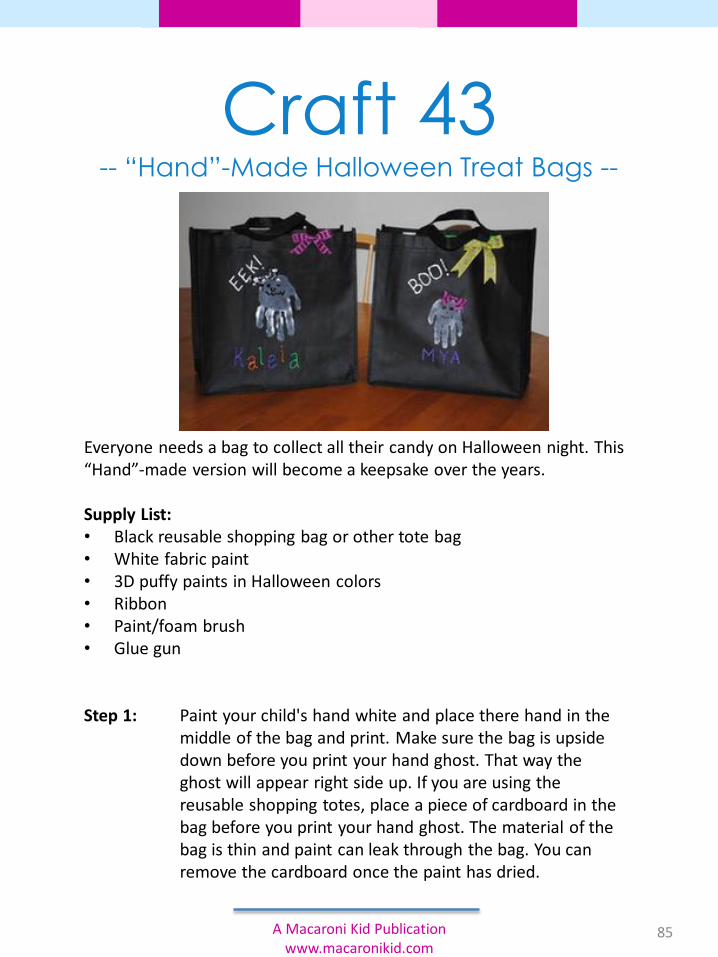
Craft 43-- “Hand”-Made Halloween Treat Bags --
Everyone needs a bag to collect all their candy on Halloween night. This “Hand”-made version will become a keepsake over the years.
Supply List:• Black reusable shopping bag or other tote bag• White fabric paint• 3D puffy paints in Halloween colors• Ribbon• Paint/foam brush• Glue gun
Step 1: Paint your child's hand white and place there hand in the middle of the bag and print. Make sure the bag is upside down before you print your hand ghost. That way the ghost will appear right side up. If you are using thereusable shopping totes, place a piece of cardboard in the bag before you print your hand ghost. The material of the bag is thin and paint can leak through the bag. You can remove the cardboard once the paint has dried.
85A Macaroni Kid Publication www.macaronikid.com
Craft 43-- “Hand”-Made Halloween Treat Bags –
(continued)
Step 2: Draw a face on the ghost with black 3D puffy paints. Then write "BOO!" or "EEK!” in the corner of the bags and your child’s name on the bottom of the bag.
Step 3: Once the paint has dried, tie ribbon bows and glue them on girl ghosts heads or at the neck of the boy ghosts as abow tie. You can use ribbon to embellish the bag straps, too!
Shared by Diane Kehm
86A Macaroni Kid Publication www.macaronikid.com
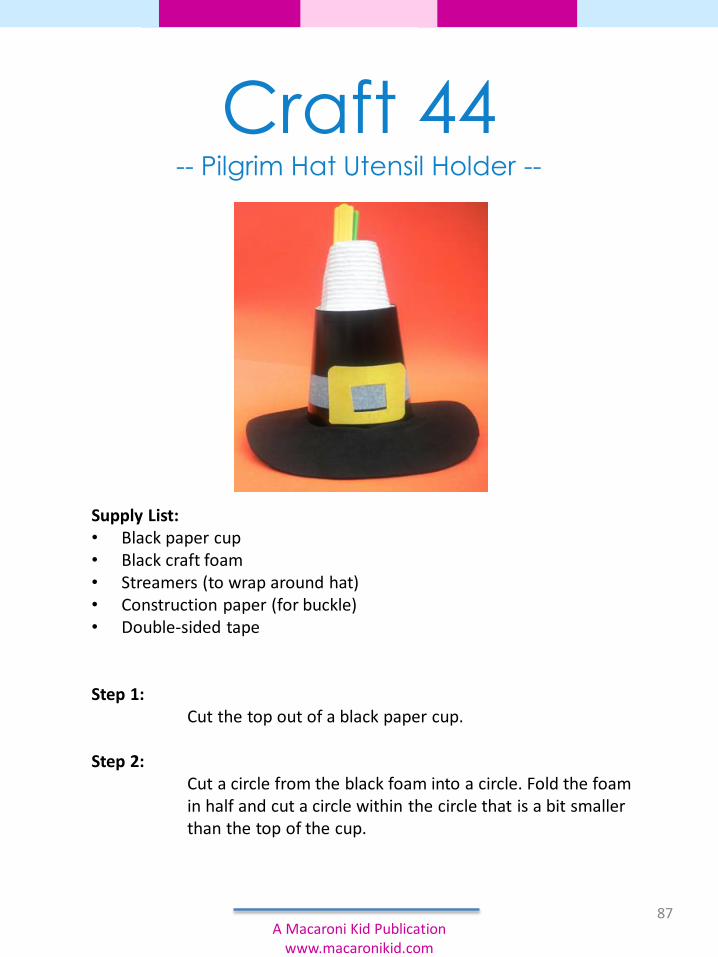
Craft 44-- Pilgrim Hat Utensil Holder --
Supply List:• Black paper cup• Black craft foam• Streamers (to wrap around hat)• Construction paper (for buckle)• Double-sided tape
Step 1:Cut the top out of a black paper cup.
Step 2:Cut a circle from the black foam into a circle. Fold the foam in half and cut a circle within the circle that is a bit smaller than the top of the cup.
87A Macaroni Kid Publication
www.macaronikid.com

Craft 44-- Pilgrim Hat Utensil Holder --
(continued)
Step 3:Place the top of the cup into the hole in the foam. If you made your circle smaller than the size of the top of the cup, you can squeeze the cup so that it fits without using any glue.
Step 4:Cut a circle from the black foam into a circle. Fold the foam in half and cut a circle within the circle that is a bit smaller than the top of the cup.
Step 5:Use streamers and construction paper to embellish the pilgrim hat. Use double-stick tape as your adhesive.
We placed a napkin inside, which holds our utensils. We then used a piece of double sided tape on the back of the napkin to hold it in place.
You could also use this as a place to keep small treasures, Thanksgiving treats, or crayons.
Shared by Michelle Melnik
88A Macaroni Kid Publication
www.macaronikid.com
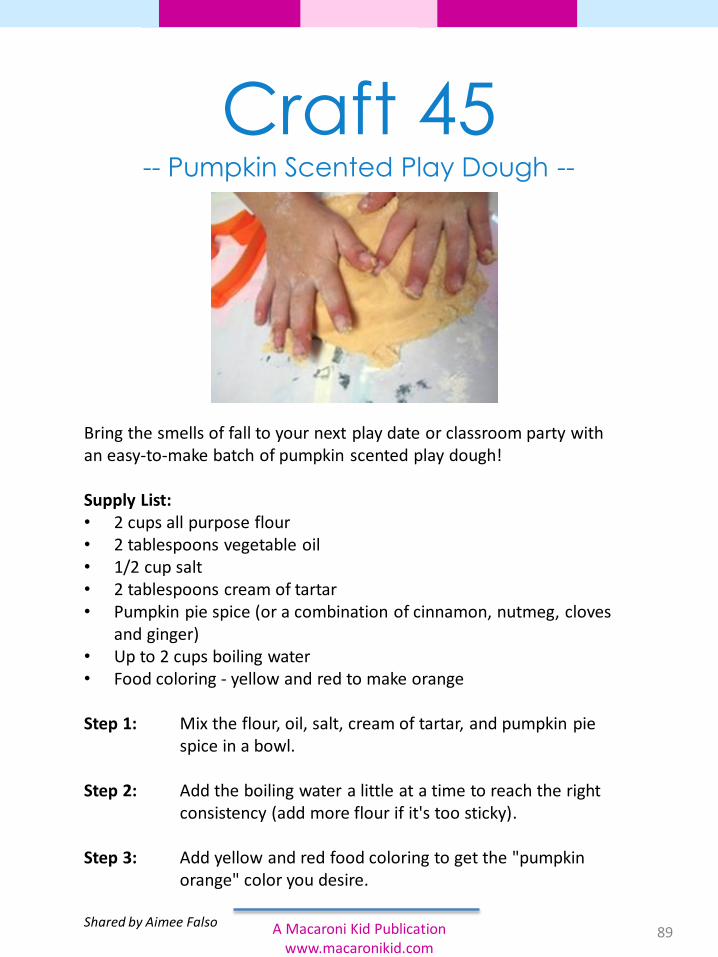
Craft 45-- Pumpkin Scented Play Dough --
Bring the smells of fall to your next play date or classroom party with an easy-to-make batch of pumpkin scented play dough!
Supply List:• 2 cups all purpose flour• 2 tablespoons vegetable oil• 1/2 cup salt• 2 tablespoons cream of tartar• Pumpkin pie spice (or a combination of cinnamon, nutmeg, cloves
and ginger)• Up to 2 cups boiling water• Food coloring - yellow and red to make orange
Step 1: Mix the flour, oil, salt, cream of tartar, and pumpkin pie spice in a bowl.
Step 2: Add the boiling water a little at a time to reach the right consistency (add more flour if it's too sticky).
Step 3: Add yellow and red food coloring to get the "pumpkin orange" color you desire.
Shared by Aimee Falso89A Macaroni Kid Publication
www.macaronikid.com

Craft 46-- Recycled Plastic Bag Ghosts --
I really DO try to remember my re-usable bags when I go shopping. But for all the times I pop into Target or Walgreens without planning ahead, I have several bags stashed under my cupboard, waiting to be recycled.
This Halloween I came up with a great use for the white plastic menaces: Plastic bag ghosts! You can re-use every part of the bag with this easy, weather-proof craft, and then store them for use again next year.
Supply List:• White plastic shopping bags (Be sure use bags with the store logo
only on one side. You can also use bags without a logo.)• Scissors• Permanent marker• Fishing line or thread• Needle
90A Macaroni Kid Publication
www.macaronikid.com
Craft 46-- Recycled Plastic Bag Ghosts --
(continued)
Step 1:Use two bags per ghost. Cut out the store logos from the sides of each bag and set aside.
Step 2:Cut off the bag handles. Set aside.
Step 3:Trim the remainder of the bags so they lie flat (the more ragged the cut, the better).
Step 4:Place the cut bags on top of each other, one going vertical and the other horizontal.
Step 5:Wad up the sections of the bag you cut out (with the logos) and place in the center of the flat bags. This is your ghost's head.
Step 6:Use the handles you cut off to tie around the ghost's neck and secure the head.
Step 7:Thread fishing line or thread onto a large needle and thread through the ghost's head (make sure it goes through the bags stuffed inside, so it doesn't tear the plastic). Remove the needle and knot. This is what you'll hang your ghost with.
91A Macaroni Kid Publication
www.macaronikid.com
Craft 46-- Recycled Plastic Bag Ghosts --
(continued)
Step 8:Make the ghost's face using a permanent marker. This is a great step to have the little ones help with!
Step 9:Hang indoors or out! We made about 10 ghosts and hung them from a tree out front. We've had so many comments from neighbors about our cute ghosts!
Shared by Kindle Rising
92A Macaroni Kid Publication
www.macaronikid.com
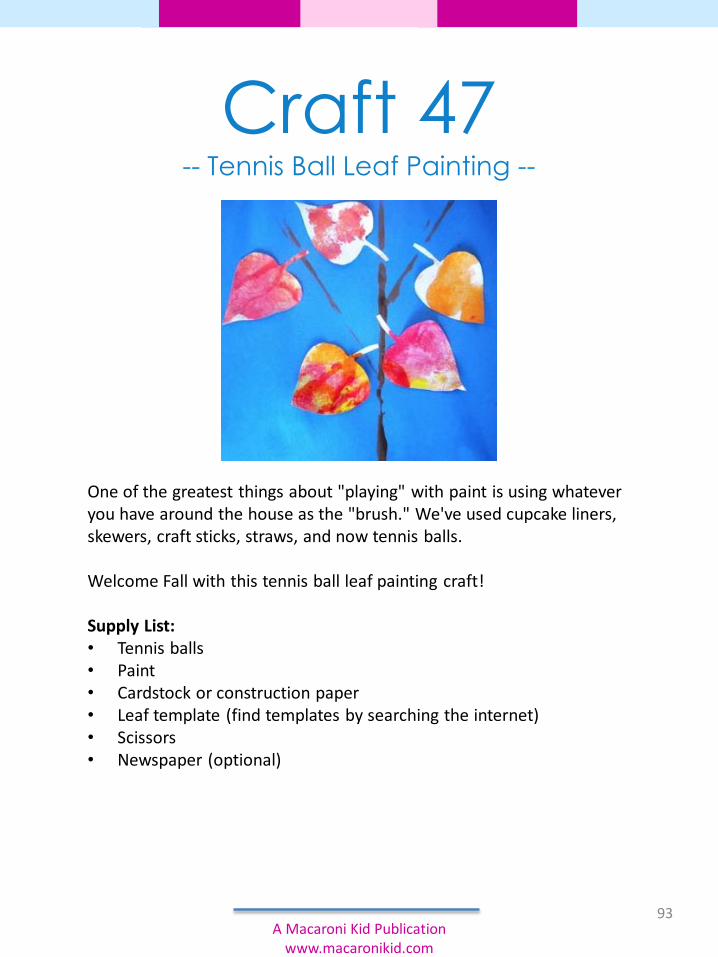
Craft 47-- Tennis Ball Leaf Painting --
One of the greatest things about "playing" with paint is using whatever you have around the house as the "brush." We've used cupcake liners, skewers, craft sticks, straws, and now tennis balls.
Welcome Fall with this tennis ball leaf painting craft!
Supply List:• Tennis balls• Paint• Cardstock or construction paper• Leaf template (find templates by searching the internet)• Scissors• Newspaper (optional)
93A Macaroni Kid Publication
www.macaronikid.com
Craft 47-- Tennis Ball Leaf Painting --
(continued)
Step 1:Draw a leaf shape or use a template to trace a leaf on cardstock or construction paper. If your child is old enough, have them cut out multiple leaves. Have different colored paints available for your child to use. We used orange, red, and yellow.
Step 2:Pour a small amount of paint on a piece of newspaper, then let children dip the tennis ball in any color (or multiple colors at the same time) and paint their leaves. We enjoyed rolling the tennis ball around the leaves, but you can also press the tennis ball into the leaf.
Step 3:Once the leaves dry, you can use them to make a Fall wreath with a paper plate, a Fall bulletin board, or (like we did) a Fall tree. My original plan was to use pipe cleaners to paint the tree, but we didn't have any pipe cleaners, so I "art-provised" and we used straws. We rolled the straws in brown paint and used it to "stamp" a tree on a piece of paper.
What I love most about this project is the creative freedom that children have with it. They can use any colors. They can mix colors. They can roll or stamp the ball. And the end result is beautiful, yet different for each artist.
Shared by Michelle Melnik
94A Macaroni Kid Publication
www.macaronikid.com

Craft 48-- Toilet Paper Roll Owls --
Owls are certainly trendy – from fashion to home decor to crafting, we're seeing these wise birds pop up everywhere! Here's an easy way to create your own parliament of owls with readily accessible supplies.
Supply List:• Empty toilet paper rolls• Paint and paintbrushes• Scrapbook or construction paper scraps (including yellow or orange
for beaks)• Googly eyes (or black and white paper to create owl eyes)
Step 1: Remove all of the excess toilet paper from the rolls.
Step 2: Prepare to paint! Cover the table and put on your painting smocks or old t-shirts.
95A Macaroni Kid Publication
www.macaronikid.com

Craft 48-- Toilet Paper Roll Owls –
(continued)
Step 3: Choose your method and paint your toilet paper roll.The brush approach: Pour your paint colors into old egg cartons, or a similar container. The egg cartons are easy because they separate small amounts of different colors for each child, but don’t require any clean up after the project is done.The roll approach: Fill a shallow container with the paint and roll the toilet paper rolls in it. This was much more effective in spreading the paint over the entire toilet paper roll quickly! You can always touch up the paint with a paint brush after rolling it.
Step 4: Create your embellishments. While the toilet paper rolls are drying have kids pick out the paper they want to use for the wings and beaks. Left over scrapbooking paper or construction paper works great! Cut out leaf-like shapes out for the owl's wings. Cut out yellow or orange, triangles for the beaks. Pick a pair of googly eyes or cut white and black circles for the eyes.
Step 5: Assemble your owl. When the toilet paper rolls are dry, fold down the top of the toilet paper roll, then fold the other side on top so that it creates horn-like feather like on a Great Horned Owl. Use a little glue to keep it down, if needed. Then glue on the eyes, beak and wings.
Step 6: Find a perch for your new feathered friend!
Shared by Kristen Pietro
96A Macaroni Kid Publication
www.macaronikid.com
97A Macaroni Kid Publication
www.macaronikid.com
Macaroni Kid Publishes hyper-local e-newsletters and websites designed to enrich communities and families.
Click HERE to subscribe and receive our free weekly newsletter with all the great happenings in your area.
What? No Macaroni Kid in your community? Click HERE to learn a bit more about joining our fantastic family of
Publishers.