Embed Size (px)
Citation preview
353
chapter
IN THIS CHAPTER
22
Creating and Modifying Master Pages (Backgrounds)
• How Master Pages Work . . . . . . . . . . . . . . . . . . . . . . . . . . . . . . . . . . . . . . . . page 354• Applying an Existing Master Page to a Slide . . . . . . . . . . . . . . . . . . . . . . . . . page 355• Creating and Modifying Master Pages . . . . . . . . . . . . . . . . . . . . . . . . . . . . . . page 357• Importing and Applying a Master Page From Another Presentation . . . . . . . page 361
354 Chapter 22 Creating and Modifying Master Pages (Backgrounds)
How Master Pages WorkMaster pages affect nearly everything about your presentation except the content. The master page is like a template of styles for the slide it’s applied to. It’s a great, timesaving way to apply formatting to your presentation. You can have a different master page for every slide in your presentation, though you typically don’t want to.
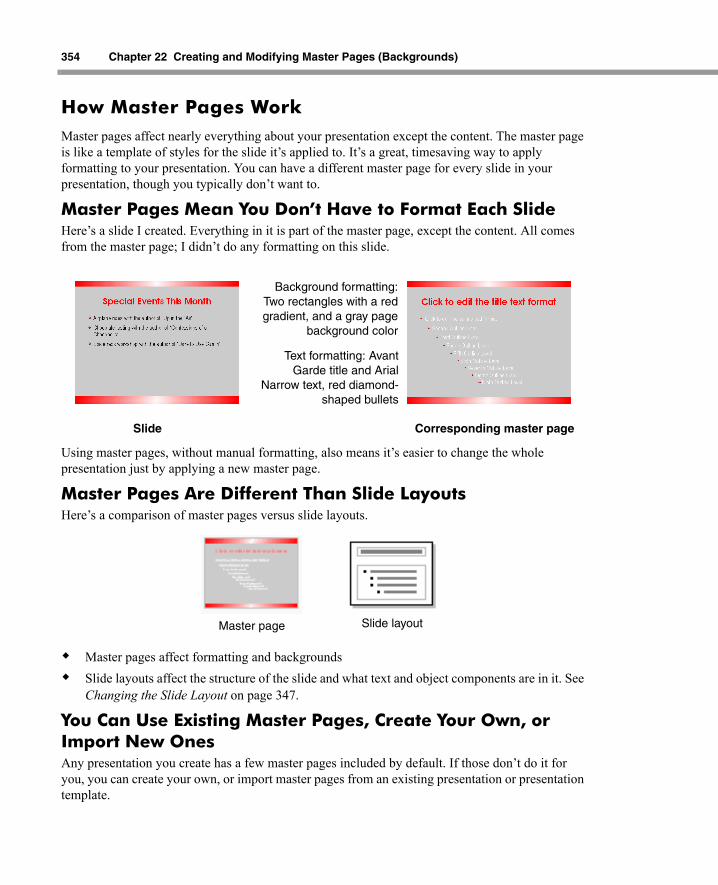
Master Pages Mean You Don’t Have to Format Each SlideHere’s a slide I created. Everything in it is part of the master page, except the content. All comes from the master page; I didn’t do any formatting on this slide.
Using master pages, without manual formatting, also means it’s easier to change the whole presentation just by applying a new master page.
Master Pages Are Different Than Slide Layouts Here’s a comparison of master pages versus slide layouts.
Master pages affect formatting and backgroundsSlide layouts affect the structure of the slide and what text and object components are in it. See Changing the Slide Layout on page 347.
You Can Use Existing Master Pages, Create Your Own, or Import New OnesAny presentation you create has a few master pages included by default. If those don’t do it for you, you can create your own, or import master pages from an existing presentation or presentation template.
Slide Corresponding master page
Background formatting:Two rectangles with a redgradient, and a gray page
background color
Text formatting: AvantGarde title and Arial
Narrow text, red diamond-shaped bullets
Master page Slide layout
Applying an Existing Master Page to a Slide 355
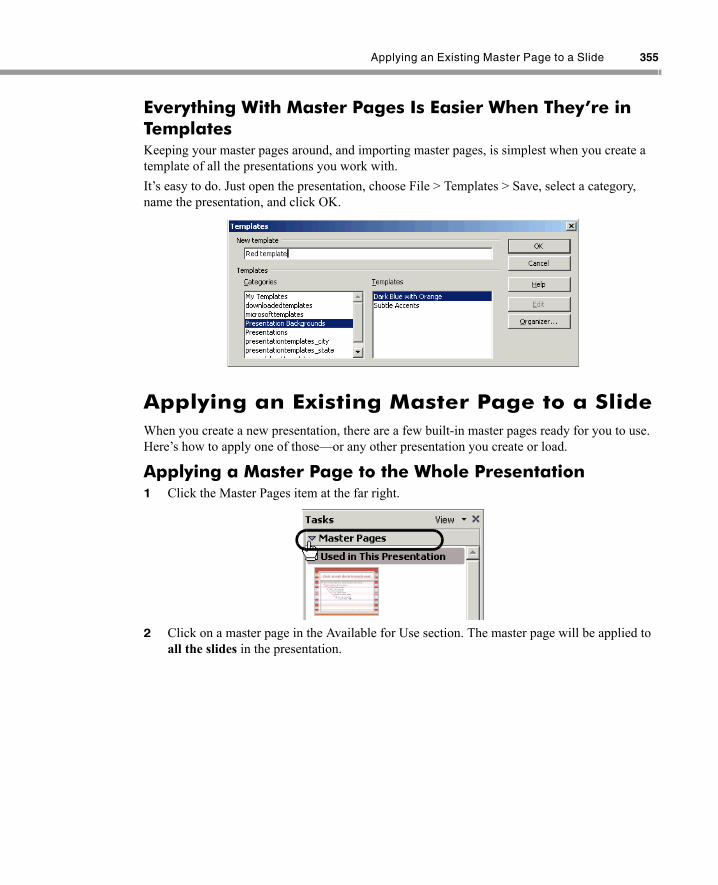
Everything With Master Pages Is Easier When They’re in TemplatesKeeping your master pages around, and importing master pages, is simplest when you create a template of all the presentations you work with. It’s easy to do. Just open the presentation, choose File > Templates > Save, select a category, name the presentation, and click OK.
Applying an Existing Master Page to a SlideWhen you create a new presentation, there are a few built-in master pages ready for you to use. Here’s how to apply one of those—or any other presentation you create or load.
Applying a Master Page to the Whole Presentation1 Click the Master Pages item at the far right.
2 Click on a master page in the Available for Use section. The master page will be applied to all the slides in the presentation.
356 Chapter 22 Creating and Modifying Master Pages (Backgrounds)
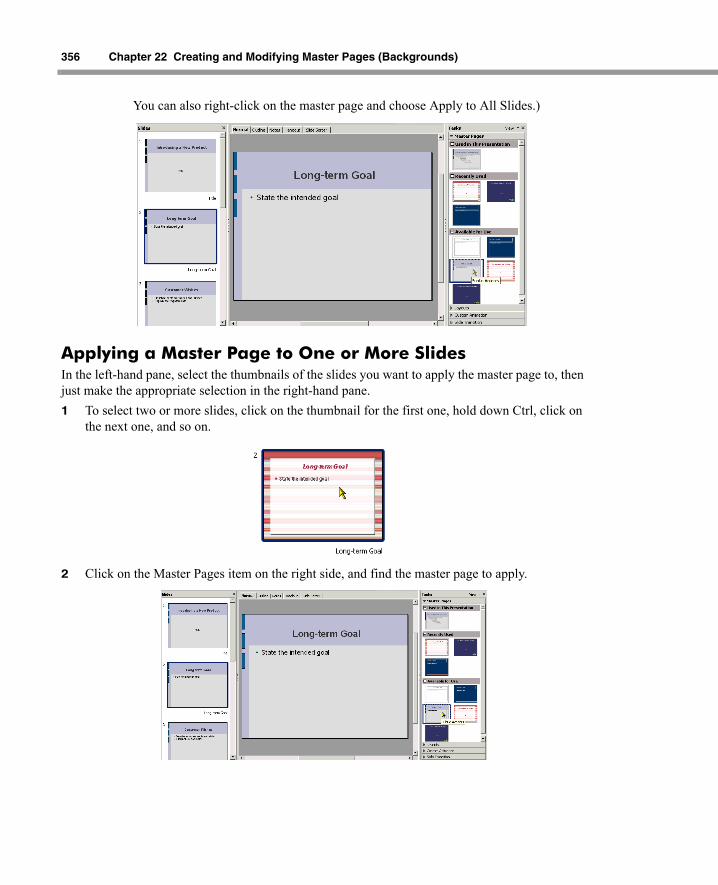
You can also right-click on the master page and choose Apply to All Slides.)
Applying a Master Page to One or More SlidesIn the left-hand pane, select the thumbnails of the slides you want to apply the master page to, then just make the appropriate selection in the right-hand pane.1 To select two or more slides, click on the thumbnail for the first one, hold down Ctrl, click on
the next one, and so on.
2 Click on the Master Pages item on the right side, and find the master page to apply.
Creating and Modifying Master Pages 357
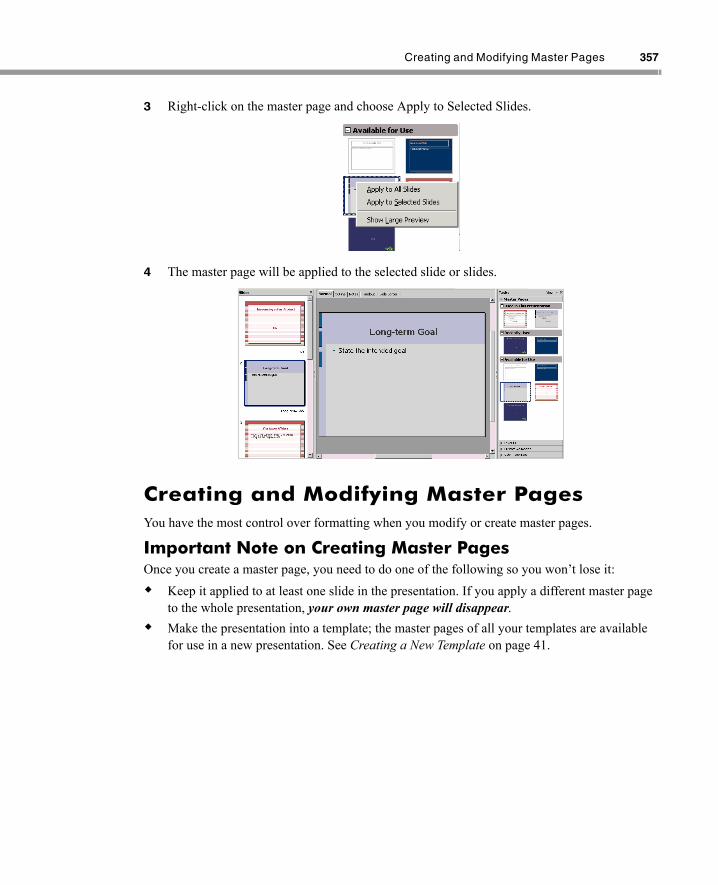
3 Right-click on the master page and choose Apply to Selected Slides.
4 The master page will be applied to the selected slide or slides.
Creating and Modifying Master PagesYou have the most control over formatting when you modify or create master pages.
Important Note on Creating Master PagesOnce you create a master page, you need to do one of the following so you won’t lose it:
Keep it applied to at least one slide in the presentation. If you apply a different master page to the whole presentation, your own master page will disappear. Make the presentation into a template; the master pages of all your templates are available for use in a new presentation. See Creating a New Template on page 41.
358 Chapter 22 Creating and Modifying Master Pages (Backgrounds)
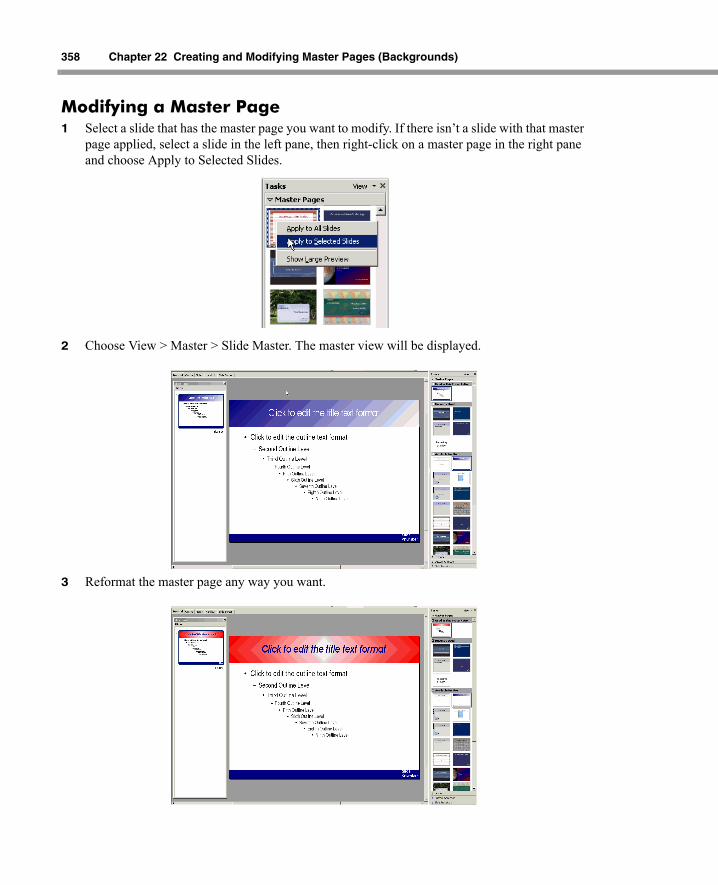
Modifying a Master Page1 Select a slide that has the master page you want to modify. If there isn’t a slide with that master
page applied, select a slide in the left pane, then right-click on a master page in the right pane and choose Apply to Selected Slides.
2 Choose View > Master > Slide Master. The master view will be displayed.
3 Reformat the master page any way you want.
Creating and Modifying Master Pages 359
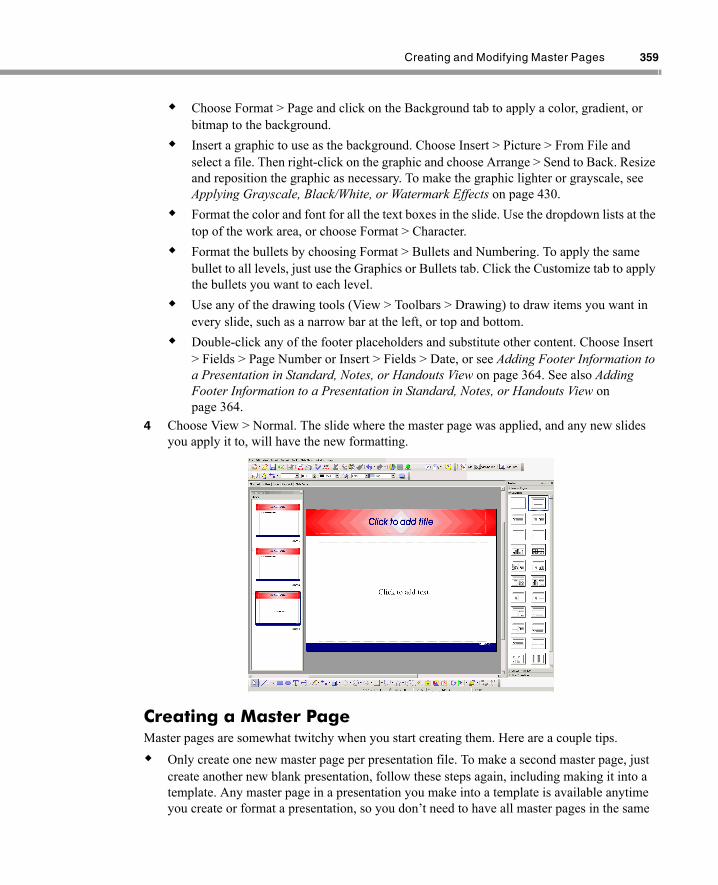
Choose Format > Page and click on the Background tab to apply a color, gradient, or bitmap to the background.Insert a graphic to use as the background. Choose Insert > Picture > From File and select a file. Then right-click on the graphic and choose Arrange > Send to Back. Resize and reposition the graphic as necessary. To make the graphic lighter or grayscale, see Applying Grayscale, Black/White, or Watermark Effects on page 430.Format the color and font for all the text boxes in the slide. Use the dropdown lists at the top of the work area, or choose Format > Character. Format the bullets by choosing Format > Bullets and Numbering. To apply the same bullet to all levels, just use the Graphics or Bullets tab. Click the Customize tab to apply the bullets you want to each level.Use any of the drawing tools (View > Toolbars > Drawing) to draw items you want in every slide, such as a narrow bar at the left, or top and bottom.Double-click any of the footer placeholders and substitute other content. Choose Insert > Fields > Page Number or Insert > Fields > Date, or see Adding Footer Information to a Presentation in Standard, Notes, or Handouts View on page 364. See also Adding Footer Information to a Presentation in Standard, Notes, or Handouts View on page 364.
4 Choose View > Normal. The slide where the master page was applied, and any new slides you apply it to, will have the new formatting.
Creating a Master Page Master pages are somewhat twitchy when you start creating them. Here are a couple tips.
Only create one new master page per presentation file. To make a second master page, just create another new blank presentation, follow these steps again, including making it into a template. Any master page in a presentation you make into a template is available anytime you create or format a presentation, so you don’t need to have all master pages in the same
360 Chapter 22 Creating and Modifying Master Pages (Backgrounds)
template. If you do want to load multiple master pages into the same presentation, see Importing and Applying a Master Page From Another Presentation on page 361.Sometimes the formatting dropdown lists will become dimmed and unavailable when you’re formatting a master page. As an alternative, just use the windows available under the Format menu: Format > Character, Format > Bullets and Numbering, etc.
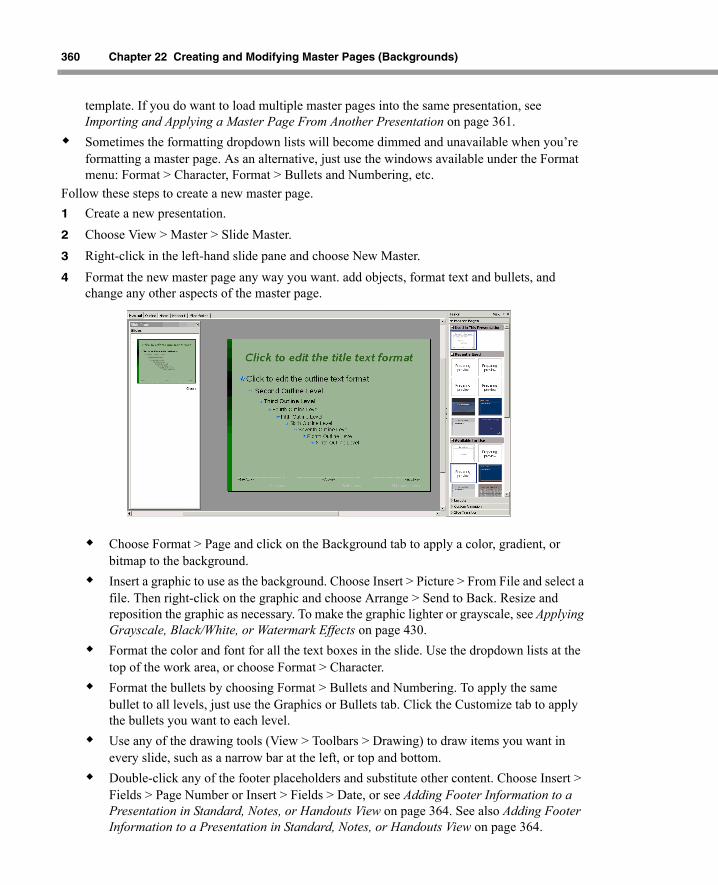
Follow these steps to create a new master page.1 Create a new presentation.2 Choose View > Master > Slide Master.3 Right-click in the left-hand slide pane and choose New Master.4 Format the new master page any way you want. add objects, format text and bullets, and
change any other aspects of the master page.
Choose Format > Page and click on the Background tab to apply a color, gradient, or bitmap to the background.Insert a graphic to use as the background. Choose Insert > Picture > From File and select a file. Then right-click on the graphic and choose Arrange > Send to Back. Resize and reposition the graphic as necessary. To make the graphic lighter or grayscale, see Applying Grayscale, Black/White, or Watermark Effects on page 430.Format the color and font for all the text boxes in the slide. Use the dropdown lists at the top of the work area, or choose Format > Character. Format the bullets by choosing Format > Bullets and Numbering. To apply the same bullet to all levels, just use the Graphics or Bullets tab. Click the Customize tab to apply the bullets you want to each level.Use any of the drawing tools (View > Toolbars > Drawing) to draw items you want in every slide, such as a narrow bar at the left, or top and bottom.Double-click any of the footer placeholders and substitute other content. Choose Insert > Fields > Page Number or Insert > Fields > Date, or see Adding Footer Information to a Presentation in Standard, Notes, or Handouts View on page 364. See also Adding Footer Information to a Presentation in Standard, Notes, or Handouts View on page 364.

Importing and Applying a Master Page From Another Presentation 361
5 Choose File > Templates > Save. 6 In the window that appears, select a category, type a name for the master page, and click
OK.
7 Choose View > Normal to go back to standard mode. 8 Your master page will be available in the presentation where you created it, as well as in all
new presentations. The page might not be displayed immediately, but it will be available immediately in the presentation creation wizard in the category you selected, and in the Available for Use section of any presentation, soon (either immediately or after a restart).
9 To create another master page, repeat these steps.
Importing and Applying a Master Page From Another PresentationLet’s say you’ve been told to use the master page from another presentation on the presentation you’ve already started. Here’s how.1 Open the source presentation containing the master page you
want to use, and make it into a template. See Creating a New Template on page 41.
2 Open the presentation that you want to import that master page into.
3 Choose Format > Slide Design.
362 Chapter 22 Creating and Modifying Master Pages (Backgrounds)
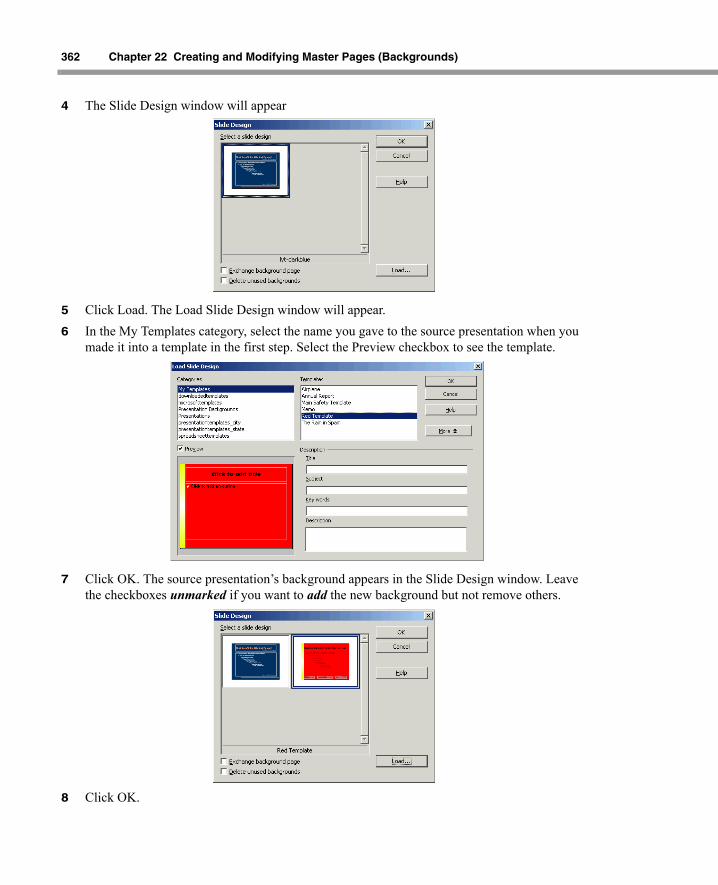
4 The Slide Design window will appear
5 Click Load. The Load Slide Design window will appear.6 In the My Templates category, select the name you gave to the source presentation when you
made it into a template in the first step. Select the Preview checkbox to see the template.
7 Click OK. The source presentation’s background appears in the Slide Design window. Leave the checkboxes unmarked if you want to add the new background but not remove others.
8 Click OK.
Importing and Applying a Master Page From Another Presentation 363
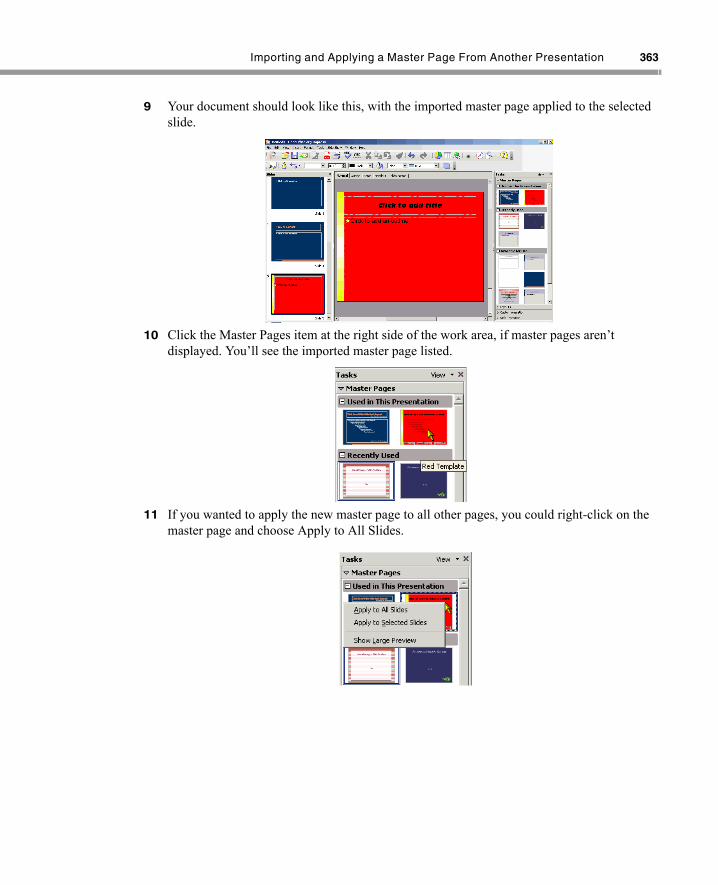
9 Your document should look like this, with the imported master page applied to the selected slide.
10 Click the Master Pages item at the right side of the work area, if master pages aren’t displayed. You’ll see the imported master page listed.
11 If you wanted to apply the new master page to all other pages, you could right-click on the master page and choose Apply to All Slides.
364 Chapter 22 Creating and Modifying Master Pages (Backgrounds)
Adding Footer Information to a Presentation in Standard, Notes, or Handouts ViewYou can add information like dates, page numbers, plain text, and so on, to presentations in multiple ways.
Using Text Boxes and FieldsYou can go to the Notes View or Handouts View, and simply use the text box tool to add whatever content you want. Choose View > Master > Slide Master for normal view; choose View > Master > Notes Master or for the handouts view; or simply put the text straight into the normal view. For more information about using text boxes and inserting fields, see Adding Page Numbers and Text to Handouts on page 370.
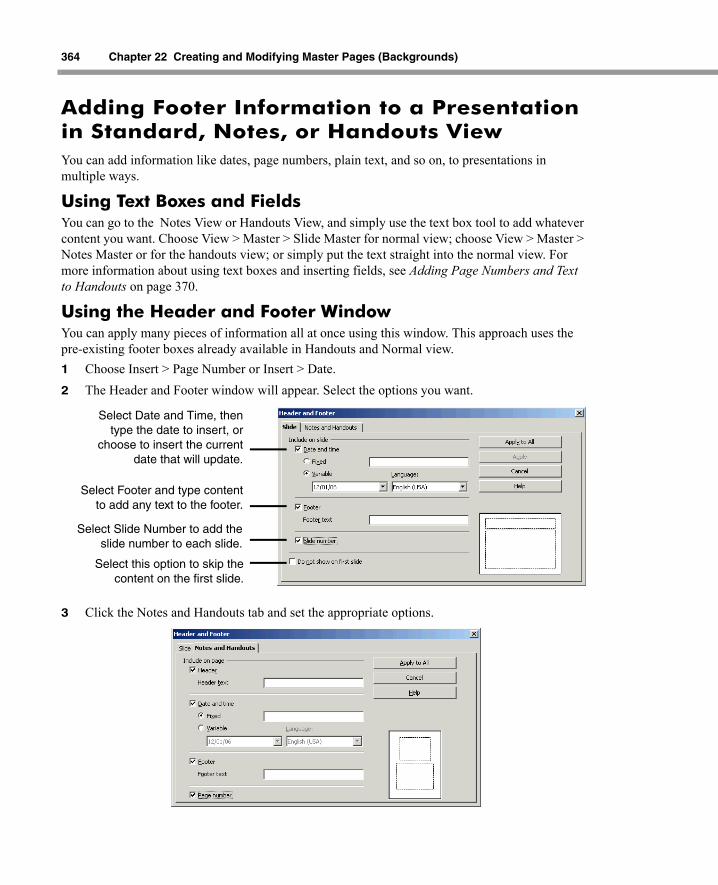
Using the Header and Footer WindowYou can apply many pieces of information all at once using this window. This approach uses the pre-existing footer boxes already available in Handouts and Normal view.1 Choose Insert > Page Number or Insert > Date. 2 The Header and Footer window will appear. Select the options you want.
3 Click the Notes and Handouts tab and set the appropriate options.
Select Date and Time, thentype the date to insert, or
choose to insert the currentdate that will update.
Select Footer and type contentto add any text to the footer.
Select Slide Number to add theslide number to each slide.
Select this option to skip thecontent on the first slide.
Adding Footer Information to a Presentation in Standard, Notes, or Handouts View 365
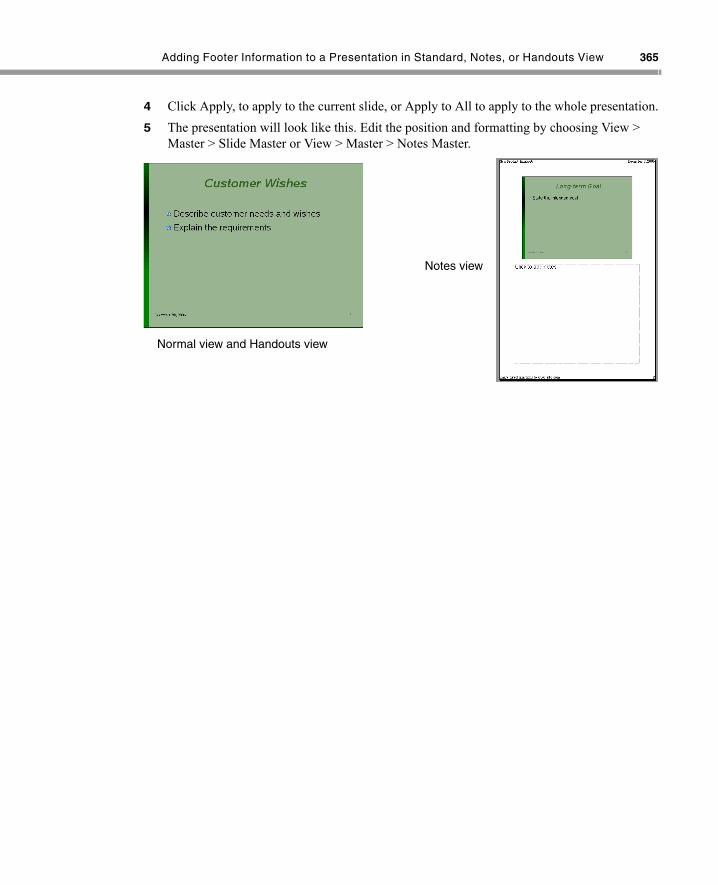
4 Click Apply, to apply to the current slide, or Apply to All to apply to the whole presentation.5 The presentation will look like this. Edit the position and formatting by choosing View >
Master > Slide Master or View > Master > Notes Master.
Normal view and Handouts view
Notes view