Embed Size (px)
Citation preview
» Crochet pattern «
Butterfly garland
Butterfly garland pattern © Saraphir Qaa-Rishi 2016 www.saraphir.com
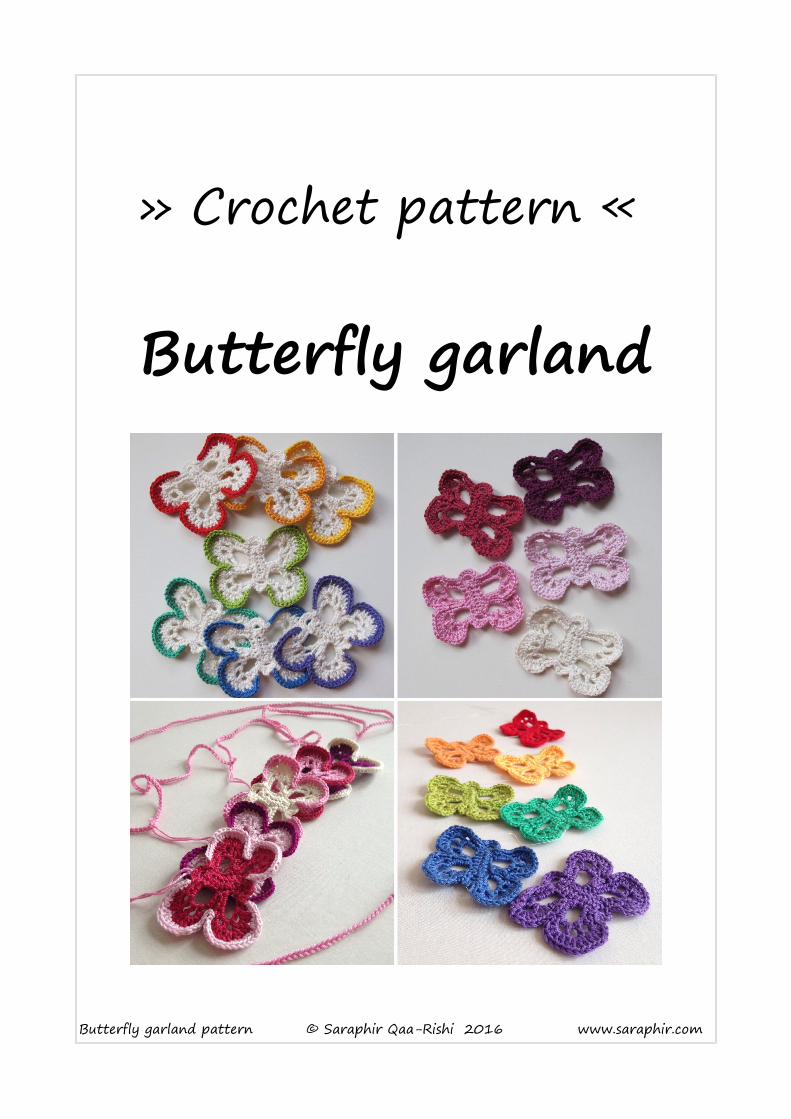
Thank you for downloading this free pattern. With this pattern you can make 2 variations of butterfly in endless variations of colours and uses. The pattern describesin detail how to make both versions of butterfly as well as how to make to cord for the garland if that's what you're making.
I make my butterflies with Patons 4 ply 100% cotton yarn (2.5 mm hook) or Scheepjes Catona 4-ply 100% cotton yarn (2.75mm hook), but any yarn can be used, just adjust the size of the hook to fit the yarn. I did try to make them with wool, but I found they become too floppy and a bit too furry for my liking, so I would recommend using cotton or linen or another shiny, firmer yarn.
You are welcome to sell what you make with this pattern, but please credit me as the designer or, if you sell online, post a link to my pattern. You may not sell or redistribute this pattern in any way or pass it off as your own work.
This pattern is in UK crochet terms. See below for translation into US terms.
Abbreviationsch: chainch sp: chain spacest: stitchss: slip stitchdc: double crochethtr: half trebletr: trebledtr: double treble
UK to USchain – chainchain space – chain spacestitch - stitchslip stitch – slip stitchdouble crochet – single crochethalf treble – half doubletreble – doubledouble treble - treble
Butterfly garland pattern © Saraphir Qaa-Rishi 2016 www.saraphir.com
The butterfly pattern● 9 chain● Round 1: dc in 2nd ch from hook, 1 dc in 1 ch, 1 htr in 4 ch, 1 dc in 1 ch,
(1 dc, 1 ch, 1dc) in last ch, 1 dc in 1 ch, 1 htr in 4 ch, 1 dc in 2 ch, 1ch, Ssin first dc.
● Round 2: 1 ss in 1 dc, 10 ch, ss in 3 htr, 10 ch, skip 1 htr, Ss in 2 dc and ch sp, 4 ch, ss in 2 dc and 1 htr, 10 ch, skip 1 htr, ss in 2 htr and 1 dc, 10 ch, ss in 1 dc, 3 ch, Skip rest of st and ss in 1st ss.
● Round 3: In 10 ch sp: (1 dc, 1ch, 1 tr, (2ch, 1tr) x 3, 1 ch, 3 dc). Skip 1 ss,ss in 1 ss, skip 1 ss. In 10 ch sp: (3 dc, 3 ch, 1 tr, 2 ch, 1 dtr, 2 ch, 1 tr, 3 ch, 3 dc). Skip 1 ss, ss in 2 ss, 6 dc in 4ch sp, ss in 2 ss, skip 1 ss. In 10 ch sp: (3 dc, 3 ch, 1 tr, 2 ch, 1 dtr, 2 ch, 1 tr, 3 ch, 3 dc). Skip 1 ss, ss in 1 ss,skip 1 ss. In 10 ch sp: (3 dc, 1 ch, (1 tr, 2 ch) x 3, 1 tr, 1 ch, 1 dc). ss in 1 ss, 5 dc in 3 ch sp, ss in ss
● Round 4:○ Lower wing: 1 dc in dc and ch sp, 2 ch, (2 tr, 1ch, 2 tr) in 2 ch sp x 3, 1
ch, ss in ch sp. Skip 3 dc and ss.○ Upper wing: skip 3 dc. (1 ss, 1 dc, 1 htr) in 3 ch sp, (2 tr, 1 ch, 2 tr) in
2 ch sp x 2, (2 htr, 1 dc) in 3 ch sp, 1 dc in 3 dc.○ Head: skip 1 ss. Ss in ss, 6 dc and ss. Skip 1 ss.○ Upper wing: 1 dc in 3 dc, (1 dc, 2 htr) in 3 ch sp, (2 tr, 1 ch, 2 tr) in 2
ch sp x 2, (1 htr, 1 dc, 1 ss) in 3 ch sp. Skip 3 dc and ss.○ Lower wing: skip 3 dc, ss in ch sp, 1 ch, (2 tr, 1 ch, 2 tr) in 2 ch sp x 3,
2 ch, 1 dc in ch sp and dc. ○ Abdomen: ss in ss and 3 dc, 2 ch, ss in 2 dc and ss. Fasten off.
● Second colour○ Start left upper wing: attach in 2nd dc from body. 1 dc in 2 dc and 2 htr,
1 htr in 2 tr, 3 tr in ch sp, 1 tr in 4 tr, 2 tr in ch sp, 1 htr in 2 tr, 1 dcin 1 htr and 1 dc, ss in 2 ss and ch sp, 1 dc in 2 tr, 2 htr in ch sp, (1 htrin 4 tr. 2 htr in ch sp) x 2, 1 dc in 2 tr, 2 dc in 2 ch sp, 1 dc in dc, ss in 1 dc. Fasten off.
○ Start bottom right wing: attach in 2nd dc from body, 2 dc in 2 ch sp, 1 dc in 2 tr, (2 htr in ch sp, 1 htr in 4 tr) x 2, 2 htr in ch sp, 1 dc in 2 tr,ss in ch sp and 2 ss, 1 dc in 1dc and 1 htr, 1 htr in 2 tr, 2 tr in ch sp, 1
Butterfly garland pattern © Saraphir Qaa-Rishi 2016 www.saraphir.com
tr in 4 tr, 3 tr in ch sp, 1 htr in 2 tr, 1 dc in 2 htr and 3 dc, ss in 1 dc. Fasten off and sew in all ends.
You will maybe have noticed that both the main pattern and the 2nd colour edging isnot quite symmetrically done. This is because of how the stitches work – when I made the pattern completely symmetrical it looked wonky, so the only way of getting it straight was to make the pattern slightly asymmetrical.
Attaching new colours: I have worked out two ways of attaching a new colour when you are not actually changing colours during the round or row. One way is to make a loop around the hook with a knot in the same way as when starting the chains and inserting it through the stitch and make a slip stitch. The other is to pull the yarn through the stitch from the back to form a loop and make a chain. Both work.
The Garland
● 6 ch. Ss in 1st ch to form a ring.● 1 ch. 12 dc in ring. Ss in 1st ch. ● make a chain as long as is needed for the butterflies to hang well. For 5
butterflies I make a chain that is 1.5 meters long. ● When the chain is long enough make another 7 chains and ss in the first of
these 7 chains. Move the thread under the chain.● 12 dc in ring. Ss in 1st dc. Fasten off and sew in ends.
Now you can attach the butterflies with a bit of string to selected chains in the cordor make them into a string or mobile.
I hope you have fun making!
Butterfly garland pattern © Saraphir Qaa-Rishi 2016 www.saraphir.com