Embed Size (px)
Citation preview
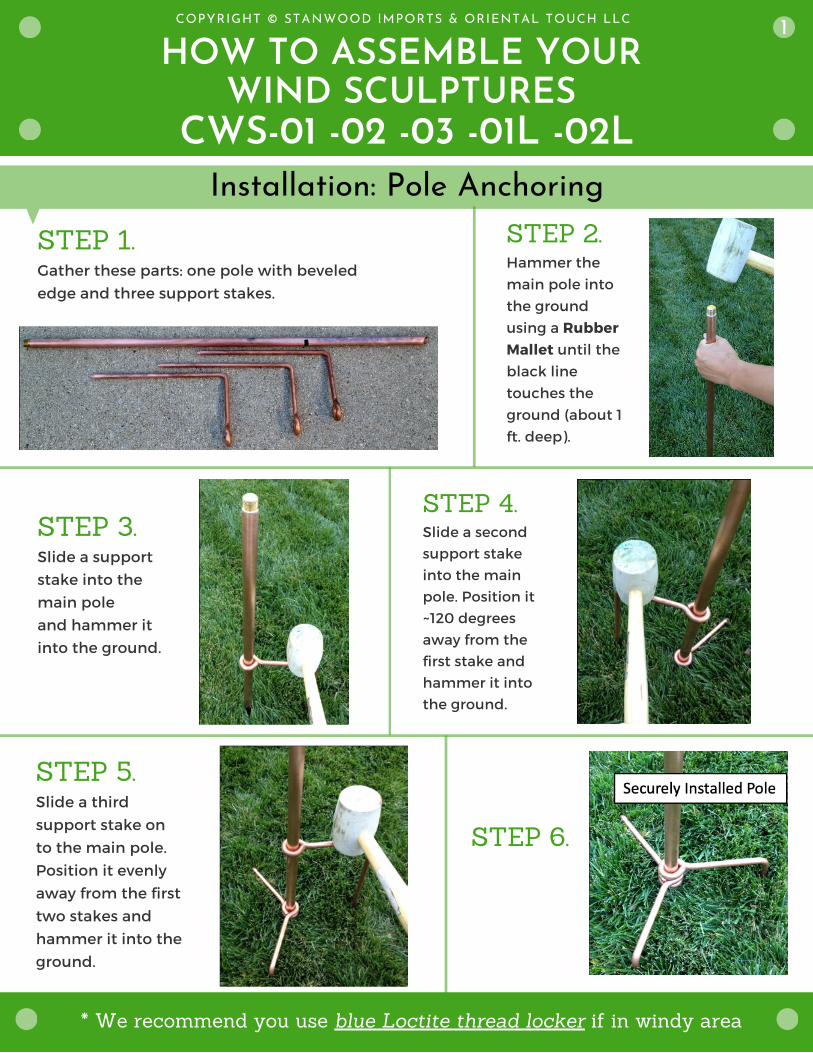
HOW TO ASSEMBLE YOUR WIND SCULPTURES
CWS-01 -02 -03 -01L -02L
COPYRIGHT © STANWOOD IMPORTS & ORIENTAL TOUCH LLC
STEP 1.Gather these parts: one pole with beveled
edge and three support stakes.
STEP 2.Hammer the
main pole into
the ground
using a Rubber
Mallet until the
black line
touches the
ground (about 1
ft. deep).
Installation: Pole Anchoring
* We recommend you use blue Loctite thread locker if in windy area
1
STEP 3.Slide a support
stake into the
main pole
and hammer it
into the ground.
STEP 4.Slide a second
support stake
into the main
pole. Position it
~120 degrees
away from the
first stake and
hammer it into
the ground.
STEP 5.Slide a third
support stake on
to the main pole.
Position it evenly
away from the first
two stakes and
hammer it into the
ground.
STEP 6.
COPYRIGHT © STANWOOD IMPORTS & ORIENTAL TOUCH LLC
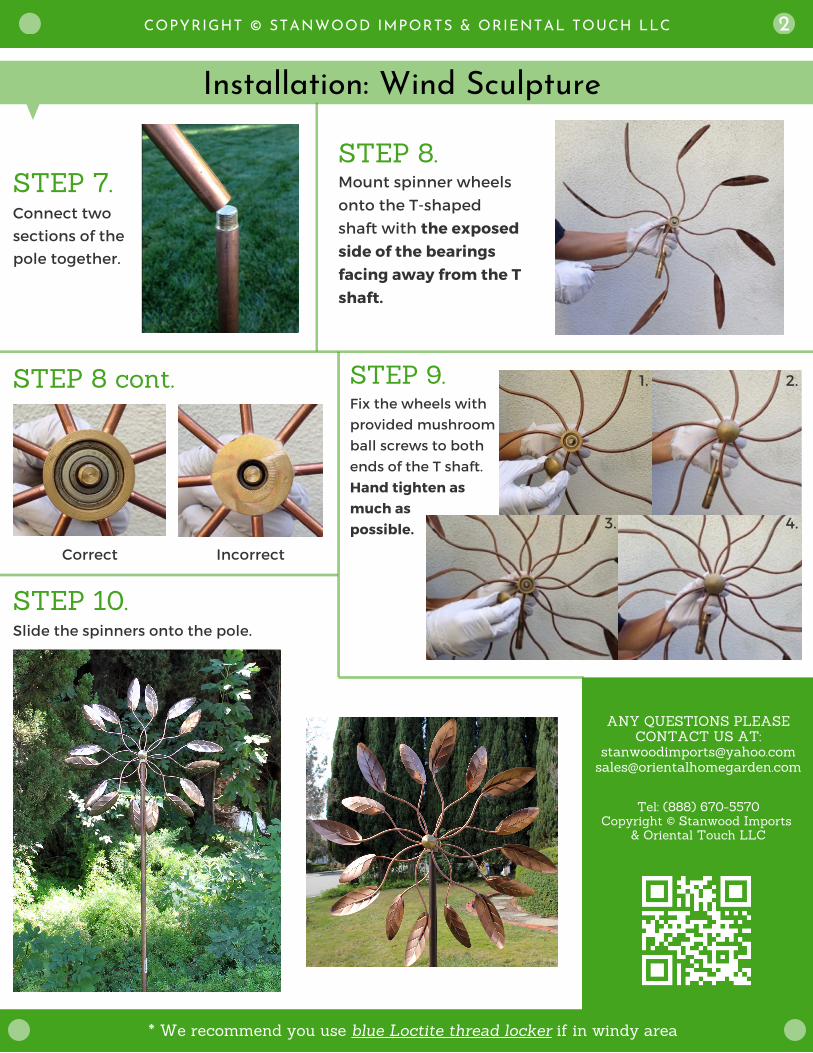
STEP 7.Connect two
sections of the
pole together.
Installation: Wind Sculpture
STEP 8.Mount spinner wheels
onto the T-shaped
shaft with the exposed
side of the bearings
facing away from the T
shaft.
* We recommend you use blue Loctite thread locker if in windy area
STEP 8 cont.
2
Correct Incorrect
ANY QUESTIONS PLEASECONTACT US AT:
[email protected]@orientalhomegarden.com
Tel: (888) 670-5570Copyright © Stanwood Imports
& Oriental Touch LLC
STEP 9.Fix the wheels with
provided mushroom
ball screws to both
ends of the T shaft.
Hand tighten as
much as
possible.
1. 2.
3. 4.
STEP 10.Slide the spinners onto the pole.