Embed Size (px)
Citation preview

DATA IMPORTING
2014 v1.02014 v1.0
2
DATA IMPORTING
About Data Import
3
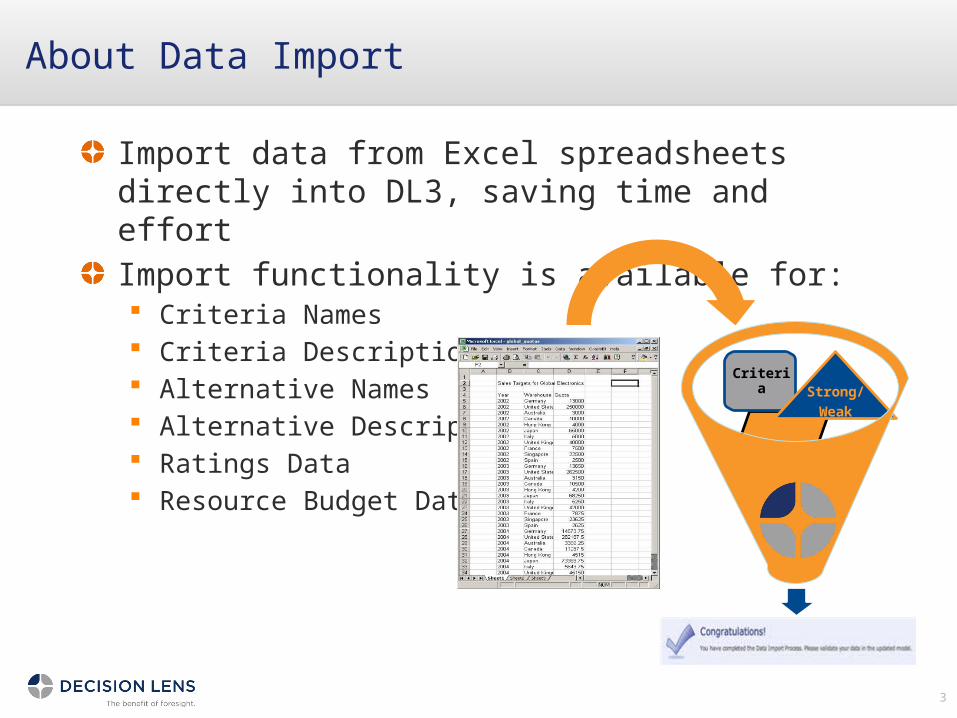
Import data from Excel spreadsheets directly into DL3, saving time and effort
Import functionality is available for: Criteria Names Criteria Descriptions Alternative Names Alternative Descriptions Ratings Data Resource Budget Data
Data
CriteriaStrong/
Weak

Getting Started
4
A few helpful tips in getting your spreadsheet ready for import:
Save worksheets in Excel 97-2003 format (“xls”) – “.xlsx” files cannot be imported
Remove formulas, copy the spreadsheet; paste special – values
Remove duplicates – ensure the elements you are importing are unique
Use one spreadsheet – the import wizard will enable you to migrate between worksheets without returning to the model
Initiate Data Import
5
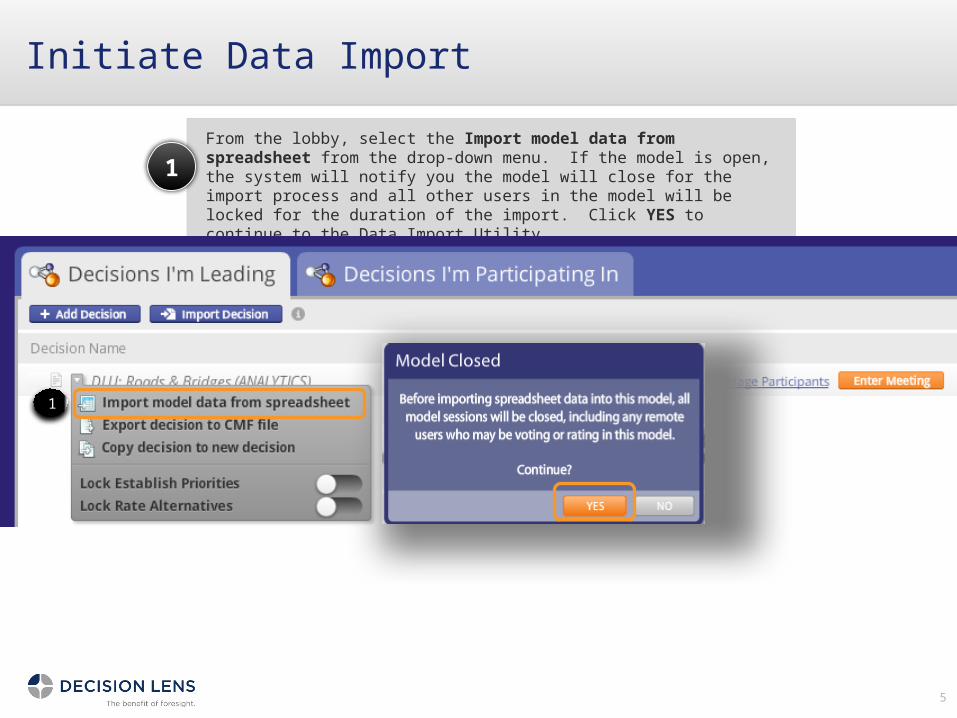
From the lobby, select the Import model data from spreadsheet from the drop-down menu. If the model is open, the system will notify you the model will close for the import process and all other users in the model will be locked for the duration of the import. Click YES to continue to the Data Import Utility
From the lobby, select the Import model data from spreadsheet from the drop-down menu. If the model is open, the system will notify you the model will close for the import process and all other users in the model will be locked for the duration of the import. Click YES to continue to the Data Import Utility
1
1
1
Select the Spreadsheet
6
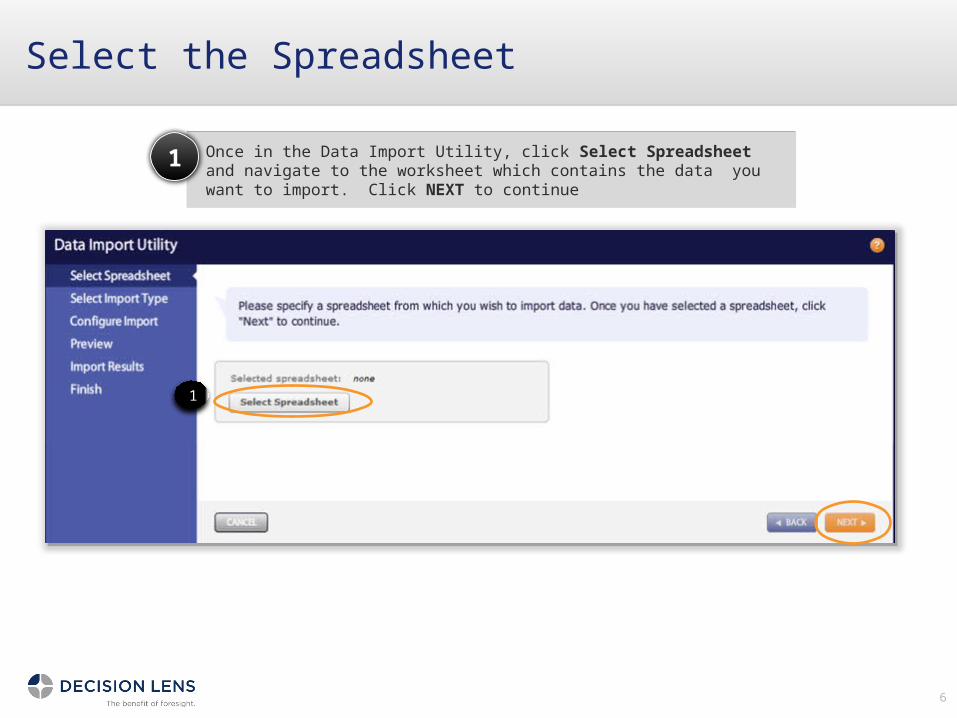
Once in the Data Import Utility, click Select Spreadsheet and navigate to the worksheet which contains the data you want to import. Click NEXT to continueOnce in the Data Import Utility, click Select Spreadsheet and navigate to the worksheet which contains the data you want to import. Click NEXT to continue
1
1
Initiate Data Import
7
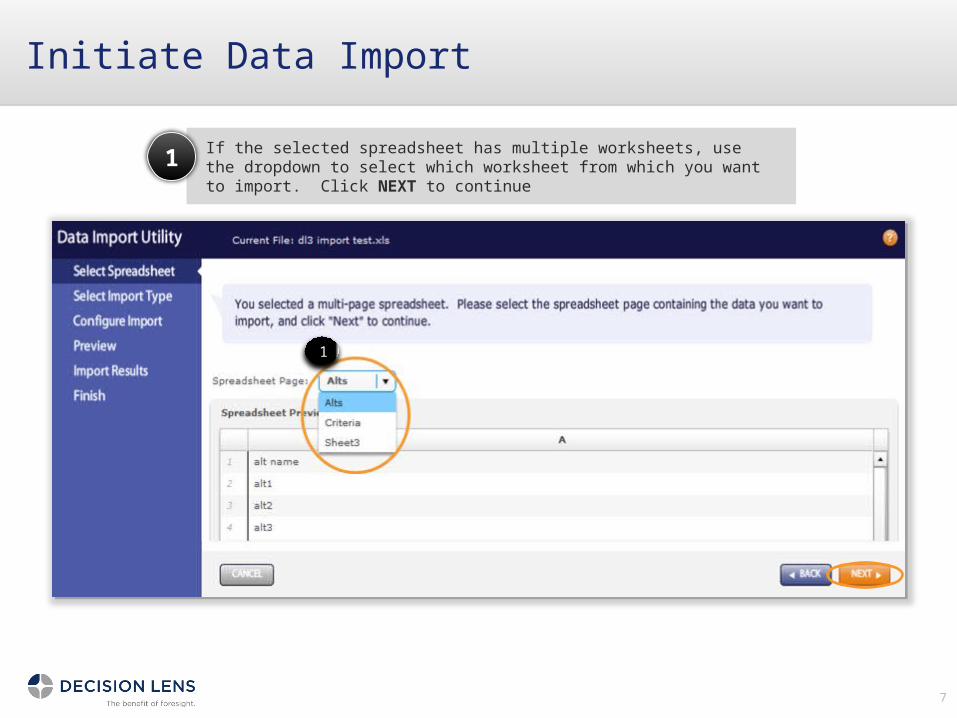
If the selected spreadsheet has multiple worksheets, use the dropdown to select which worksheet from which you want to import. Click NEXT to continueIf the selected spreadsheet has multiple worksheets, use the dropdown to select which worksheet from which you want to import. Click NEXT to continue1
1
Identify the Type of Data to Import
8
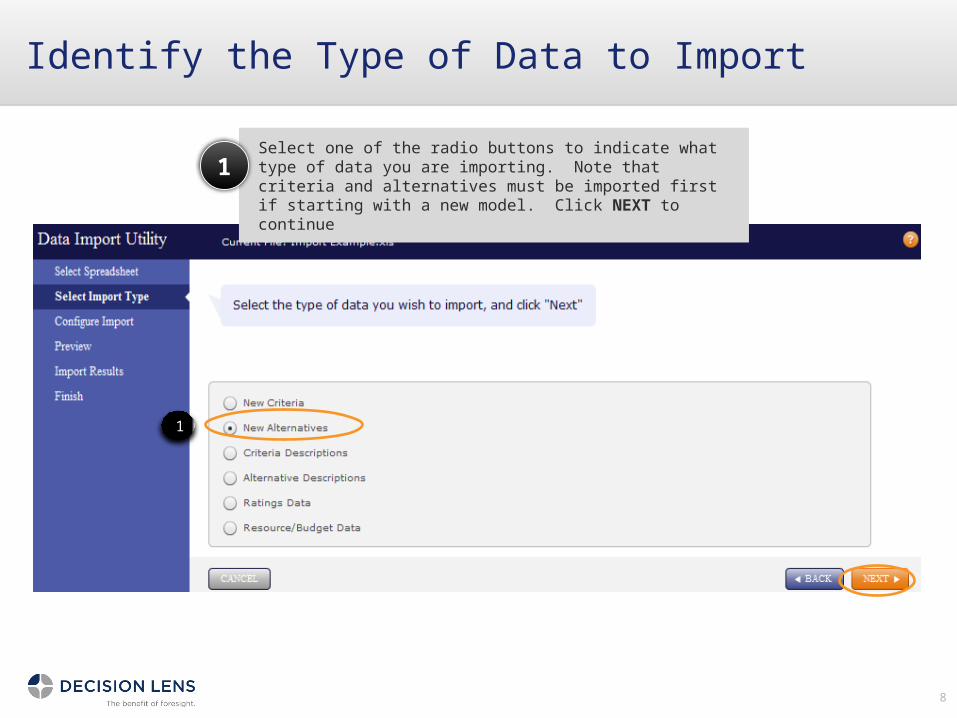
Select one of the radio buttons to indicate what type of data you are importing. Note that criteria and alternatives must be imported first if starting with a new model. Click NEXT to continue
Select one of the radio buttons to indicate what type of data you are importing. Note that criteria and alternatives must be imported first if starting with a new model. Click NEXT to continue
1
1

Select the Data Import
9
Highlight the rows that contain the data you want to import. Note you can use SHIFT to select groups of rows, or CTRL to select multiple individual rows. ALT can be used to advanced selection options. Click NEXT to continueHighlight the rows that contain the data you want to import. Note you can use SHIFT to select groups of rows, or CTRL to select multiple individual rows. ALT can be used to advanced selection options. Click NEXT to continue1
Note: If your columns and rows are flipped-flopped, you can set them straight by clicking TRANSPOSE DATA
Note: If your columns and rows are flipped-flopped, you can set them straight by clicking TRANSPOSE DATA
1
Select and Map Spreadsheet Columns
10
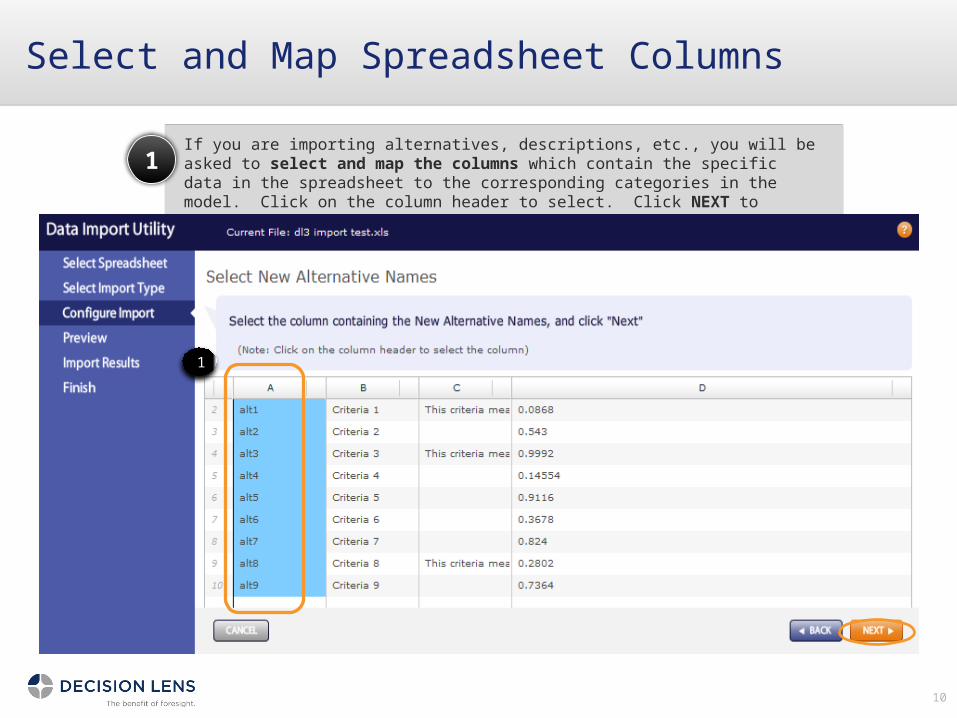
If you are importing alternatives, descriptions, etc., you will be asked to select and map the columns which contain the specific data in the spreadsheet to the corresponding categories in the model. Click on the column header to select. Click NEXT to continue
If you are importing alternatives, descriptions, etc., you will be asked to select and map the columns which contain the specific data in the spreadsheet to the corresponding categories in the model. Click on the column header to select. Click NEXT to continue
1
1
Preview Data
11
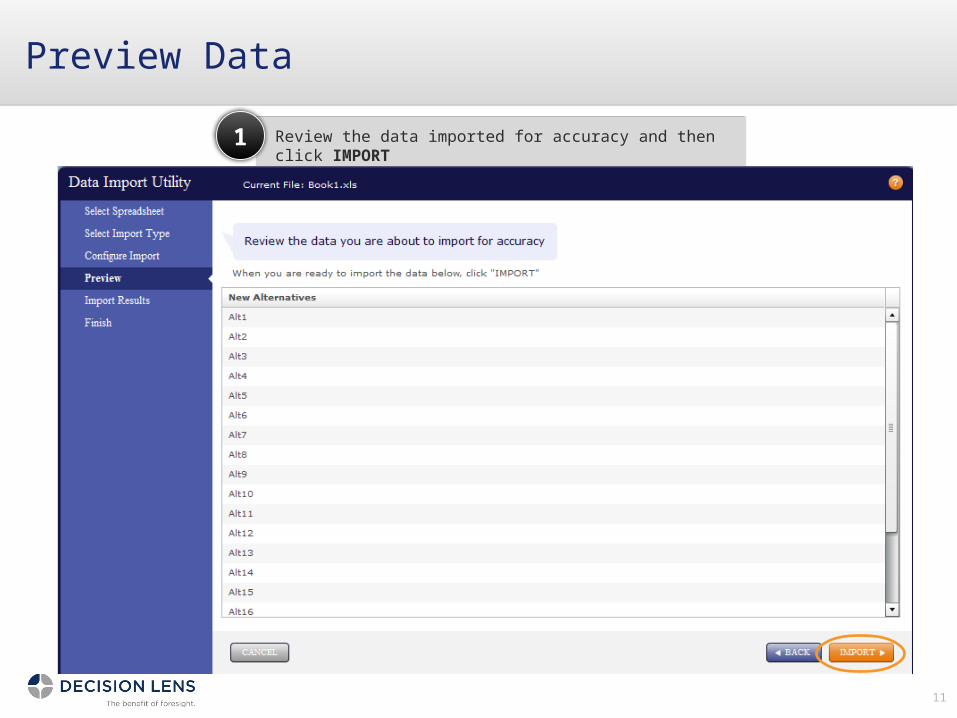
Review the data imported for accuracy and then click IMPORTReview the data imported for accuracy and then click IMPORT1
1
Resolve Errors
12
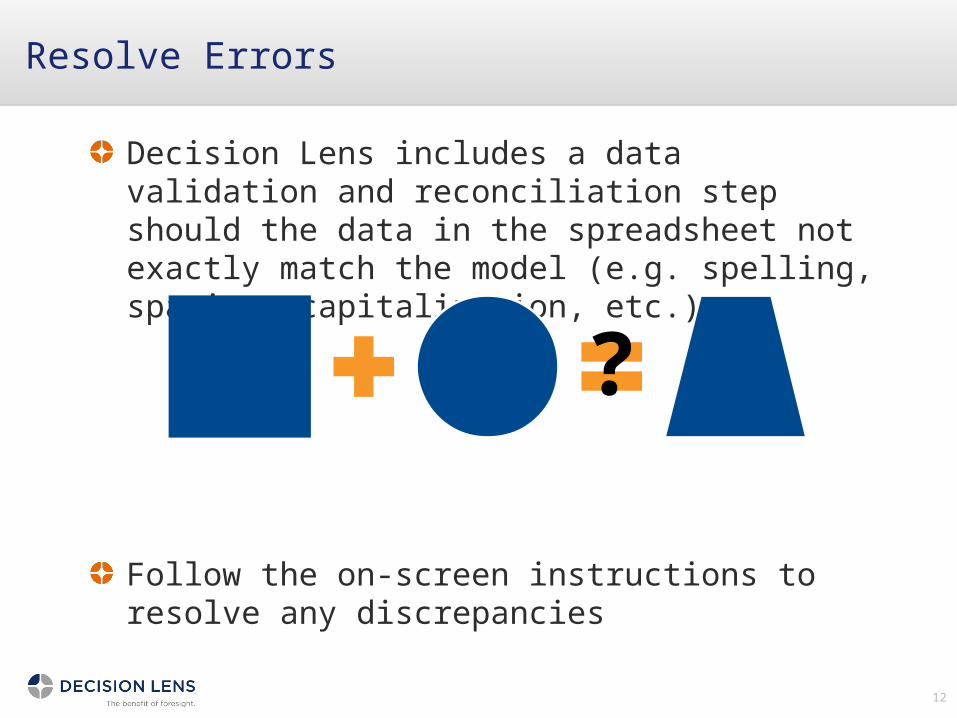
Decision Lens includes a data validation and reconciliation step should the data in the spreadsheet not exactly match the model (e.g. spelling, spacing, capitalization, etc.).
Follow the on-screen instructions to resolve any discrepancies
?
Review Data
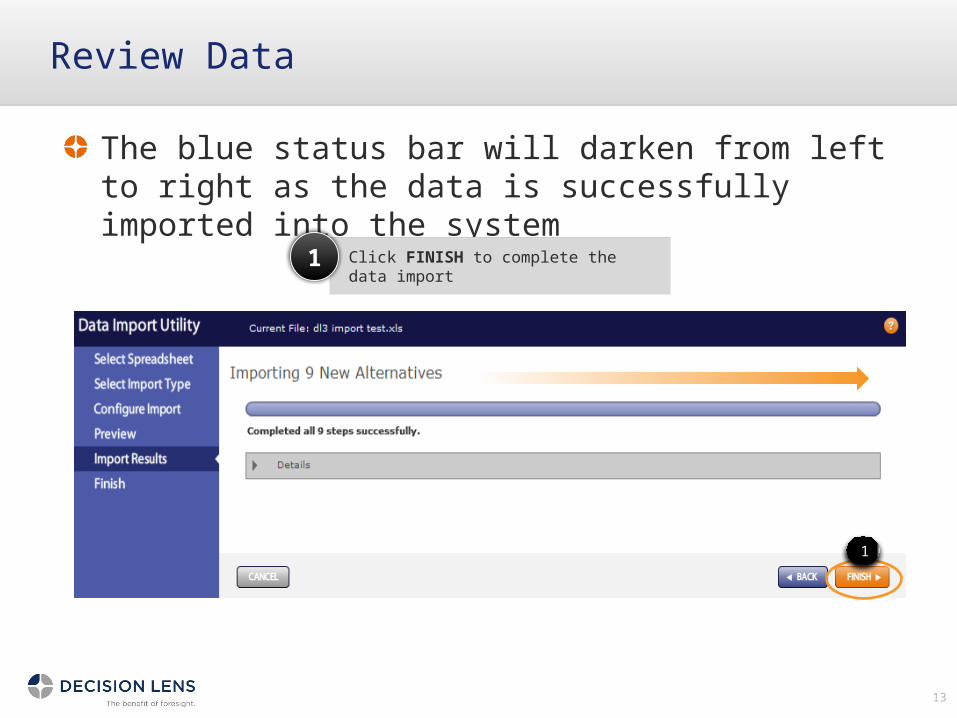
The blue status bar will darken from left to right as the data is successfully imported into the system
13
Click FINISH to complete the data importClick FINISH to complete the data import1
1

Complete an Import
Once you are finished, you may continue to import data either from the same spreadsheet or another spreadsheet or launch the model
14
Special - Importing Ratings Data
15
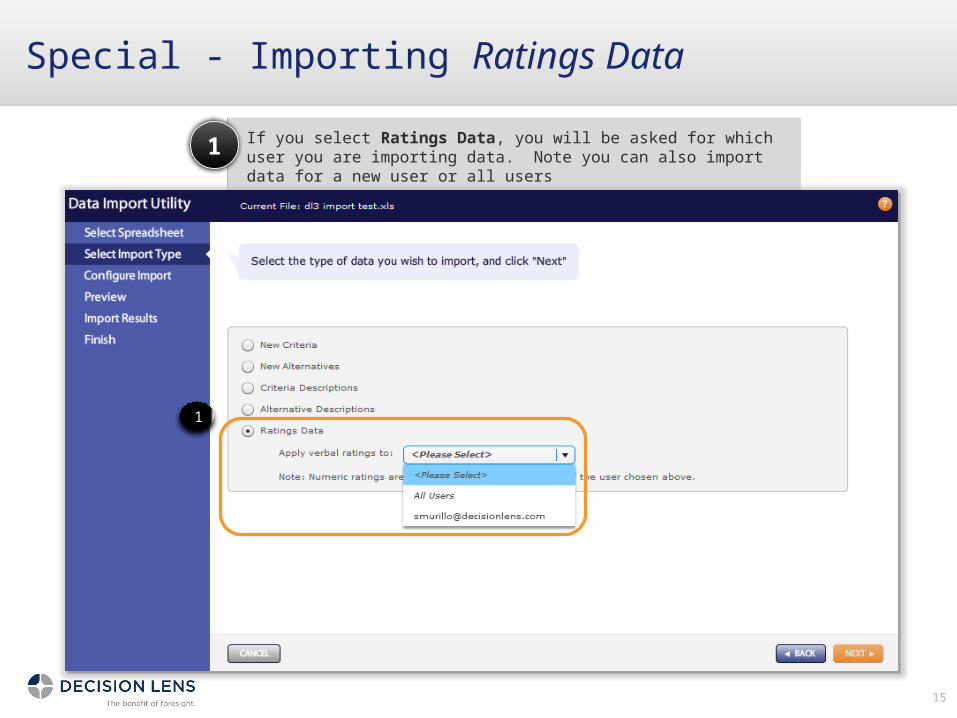
If you select Ratings Data, you will be asked for which user you are importing data. Note you can also import data for a new user or all users If you select Ratings Data, you will be asked for which user you are importing data. Note you can also import data for a new user or all users 1
1
Importing Ratings DataSelect and Map Spreadsheet Columns
16
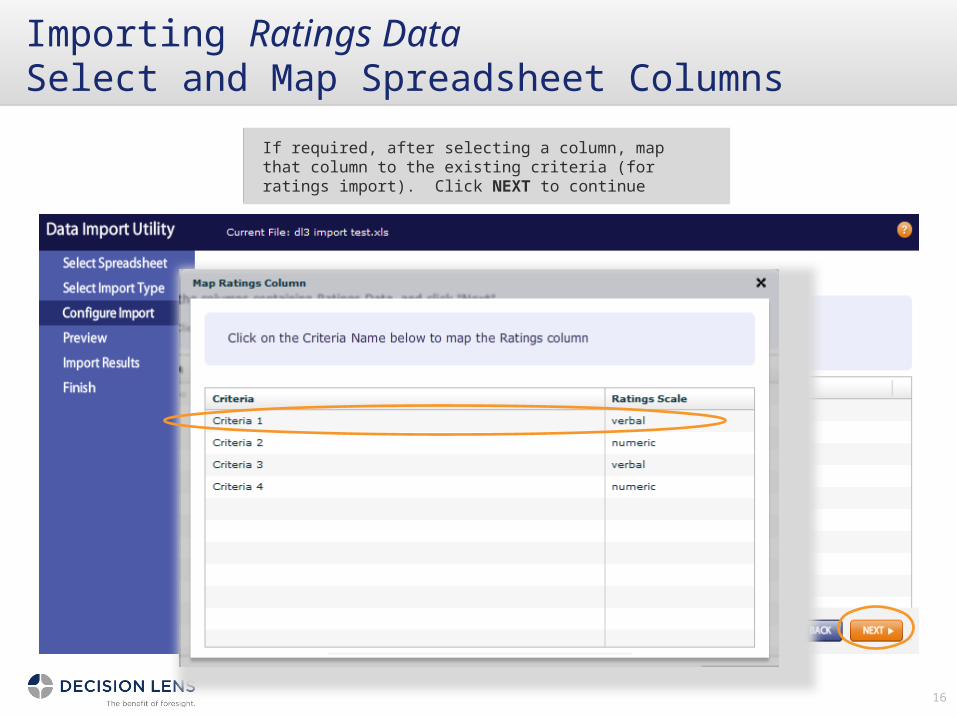
If required, after selecting a column, map that column to the existing criteria (for ratings import). Click NEXT to continueIf required, after selecting a column, map that column to the existing criteria (for ratings import). Click NEXT to continue
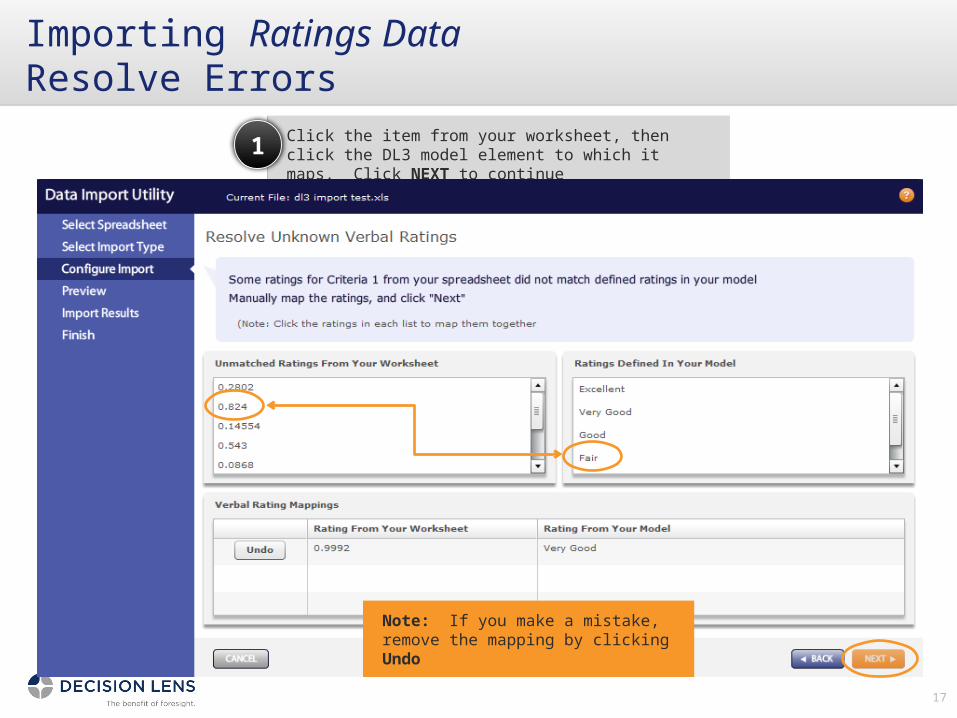
Importing Ratings DataResolve Errors
17
Click the item from your worksheet, then click the DL3 model element to which it maps. Click NEXT to continueClick the item from your worksheet, then click the DL3 model element to which it maps. Click NEXT to continue1
Note: If you make a mistake, remove the mapping by clicking UndoNote: If you make a mistake, remove the mapping by clicking Undo
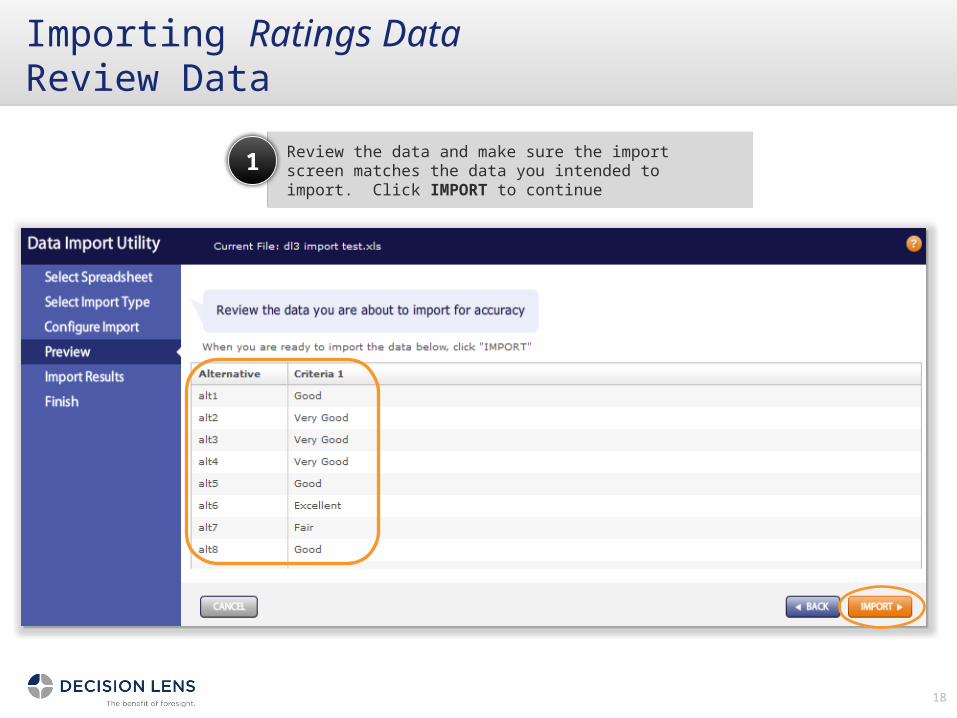
Importing Ratings DataReview Data
18
Review the data and make sure the import screen matches the data you intended to import. Click IMPORT to continueReview the data and make sure the import screen matches the data you intended to import. Click IMPORT to continue1

Learn more atDLU.decisionlens.com