Embed Size (px)
DESCRIPTION
Data Protection Tape Backup and Recovery Guide
Citation preview

Data ONTAP® 8.1 7-ModeData ProtectionTape Backup and Recovery Guide
NetApp Inc.495 East Java DriveSunnyvale, CA 94089 USATelephone: +1 (408) 822-6000Fax: +1 (408) 822-4501Support telephone: +1 (888) 4-NETAPPDocumentation comments: [email protected] Web: http://www.netapp.com
Part number 210-04571_A0August 2011

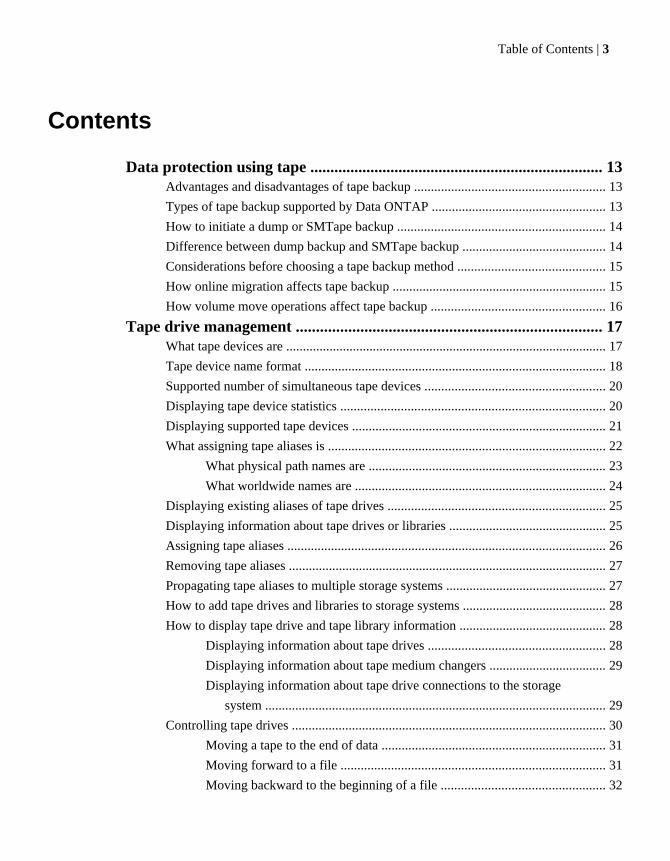
Contents
Data protection using tape ......................................................................... 13Advantages and disadvantages of tape backup ......................................................... 13
Types of tape backup supported by Data ONTAP .................................................... 13
How to initiate a dump or SMTape backup .............................................................. 14
Difference between dump backup and SMTape backup ........................................... 14
Considerations before choosing a tape backup method ............................................ 15
How online migration affects tape backup ................................................................ 15
How volume move operations affect tape backup .................................................... 16
Tape drive management ............................................................................ 17What tape devices are ................................................................................................ 17
Tape device name format .......................................................................................... 18
Supported number of simultaneous tape devices ...................................................... 20
Displaying tape device statistics ............................................................................... 20
Displaying supported tape devices ............................................................................ 21
What assigning tape aliases is ................................................................................... 22
What physical path names are ....................................................................... 23
What worldwide names are ........................................................................... 24
Displaying existing aliases of tape drives ................................................................. 25
Displaying information about tape drives or libraries ............................................... 25
Assigning tape aliases ............................................................................................... 26
Removing tape aliases ............................................................................................... 27
Propagating tape aliases to multiple storage systems ................................................ 27
How to add tape drives and libraries to storage systems ........................................... 28
How to display tape drive and tape library information ............................................ 28
Displaying information about tape drives ..................................................... 28
Displaying information about tape medium changers ................................... 29
Displaying information about tape drive connections to the storage
system ...................................................................................................... 29
Controlling tape drives .............................................................................................. 30
Moving a tape to the end of data ................................................................... 31
Moving forward to a file ............................................................................... 31
Moving backward to the beginning of a file ................................................. 32
Table of Contents | 3
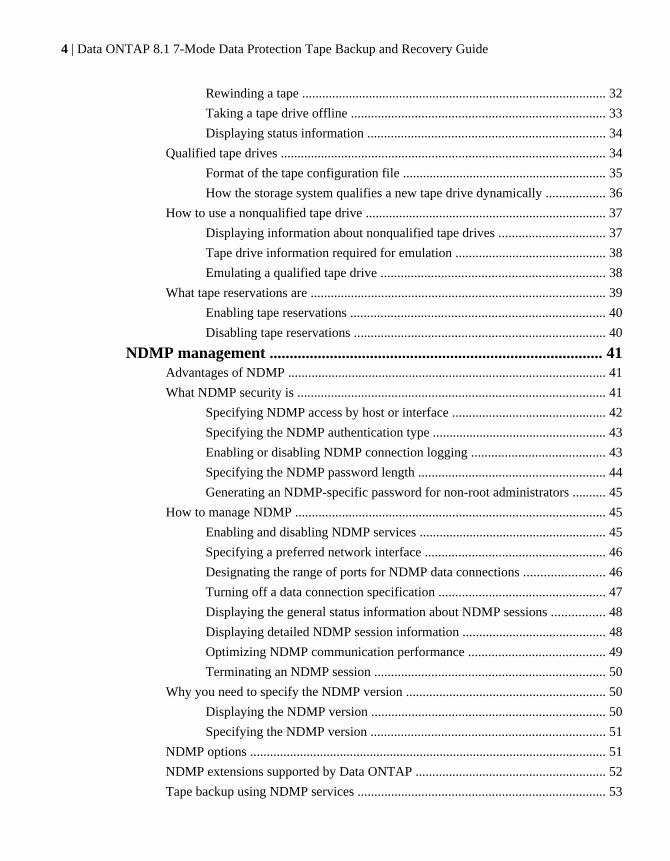
Rewinding a tape ........................................................................................... 32
Taking a tape drive offline ............................................................................ 33
Displaying status information ....................................................................... 34
Qualified tape drives ................................................................................................. 34
Format of the tape configuration file ............................................................. 35
How the storage system qualifies a new tape drive dynamically .................. 36
How to use a nonqualified tape drive ........................................................................ 37
Displaying information about nonqualified tape drives ................................ 37
Tape drive information required for emulation ............................................. 38
Emulating a qualified tape drive ................................................................... 38
What tape reservations are ........................................................................................ 39
Enabling tape reservations ............................................................................ 40
Disabling tape reservations ........................................................................... 40
NDMP management ................................................................................... 41Advantages of NDMP ............................................................................................... 41
What NDMP security is ............................................................................................ 41
Specifying NDMP access by host or interface .............................................. 42
Specifying the NDMP authentication type .................................................... 43
Enabling or disabling NDMP connection logging ........................................ 43
Specifying the NDMP password length ........................................................ 44
Generating an NDMP-specific password for non-root administrators .......... 45
How to manage NDMP ............................................................................................. 45
Enabling and disabling NDMP services ........................................................ 45
Specifying a preferred network interface ...................................................... 46
Designating the range of ports for NDMP data connections ........................ 46
Turning off a data connection specification .................................................. 47
Displaying the general status information about NDMP sessions ................ 48
Displaying detailed NDMP session information ........................................... 48
Optimizing NDMP communication performance ......................................... 49
Terminating an NDMP session ..................................................................... 50
Why you need to specify the NDMP version ............................................................ 50
Displaying the NDMP version ...................................................................... 50
Specifying the NDMP version ...................................................................... 51
NDMP options ........................................................................................................... 51
NDMP extensions supported by Data ONTAP ......................................................... 52
Tape backup using NDMP services .......................................................................... 53
4 | Data ONTAP 8.1 7-Mode Data Protection Tape Backup and Recovery Guide
Common NDMP tape backup topologies ...................................................... 53
Considerations when using NDMP ............................................................... 54
Tape devices and configurations you can use with the storage system ........ 54
Preparing for basic NDMP backup application management ....................... 55
What environment variables do ..................................................................... 56
Data backup to tape using the dump engine ............................................ 59How a dump backup works ....................................................................................... 59
What the dump engine backs up ............................................................................... 60
What increment chains are ........................................................................................ 61
How to specify tape devices for the backup .............................................................. 62
What the /etc/dumpdates file is ................................................................................. 62
What the blocking factor is ....................................................................................... 63
Considerations before using the dump backup ......................................................... 64
Determining the amount of backup data ....................................................... 64
Estimating the number of tapes for the backup ............................................. 64
When to restart a dump backup ................................................................................. 65
How a dump restore works ........................................................................................ 66
What the dump engine restores ................................................................................. 66
Considerations before restoring data ......................................................................... 67
How to prepare the destination for a dump restore ................................................... 68
How to perform a dump backup and restore using NDMP services ......................... 68
Environment variables supported for dump .................................................. 68
Enabling or disabling enhanced DAR functionality ..................................... 79
What the ndmpcopy command does ............................................................. 80
Displaying file history statistics .................................................................... 85
How to perform a dump backup using the CLI ......................................................... 86
What the dump command syntax is .............................................................. 86
Where to enter the dump command .............................................................. 88
Specifying the backup level .......................................................................... 89
Improving incremental dump performance ................................................... 90
Updating the /etc/dumpdates file ................................................................... 90
Specifying a local tape device ....................................................................... 91
Specifying a tape device on a remote storage system ................................... 92
Specifying the dump path .............................................................................. 93
Specifying a list of files for backup .............................................................. 94
Backing up all data that is not in a qtree ....................................................... 95
Table of Contents | 5

Excluding specified files and directories ...................................................... 96
Omitting ACLs from a backup ...................................................................... 97
Specifying a name for a backup .................................................................... 98
Specifying a blocking factor ......................................................................... 99
Specifying the tape file size ........................................................................ 100
Appending backups to tapes ........................................................................ 101
Verifying the files backed up by a dump command backup ....................... 101
Checking the status of a dump backup ........................................................ 101
Finding out whether a backup has to be restarted ....................................... 104
How to get details about a specific backup ................................................. 105
Restarting a dump command backup .......................................................... 106
Deleting restartable dump command backups ............................................ 107
How to perform a dump restore using the CLI ....................................................... 107
Restore command syntax ............................................................................ 107
What restore types are ................................................................................. 107
What modifiers are ...................................................................................... 108
Where to enter the restore command ........................................................... 109
Executing a restore command ..................................................................... 110
Restoring incremental backups ................................................................... 110
Restoring each volume backed up as separate subtrees or qtrees ............... 111
Restoring individual files and directories .................................................... 111
Specifying a full restore .............................................................................. 112
What a table-of-contents restore is .............................................................. 112
Specifying a resume restore ........................................................................ 113
Specifying tape devices in the restore command ........................................ 114
Specifying a single tape file on a multifile tape .......................................... 115
Specifying the restore destination ............................................................... 116
Specifying the blocking factor during restore ............................................. 117
Displaying detailed status output ................................................................ 117
Ignoring inode limitations ........................................................................... 118
Specifying automatic confirmations ............................................................ 119
Specifying no ACLs to be restored ............................................................. 120
Specifying not to restore qtree information ................................................. 120
Specifying a test restore .............................................................................. 121
Restore examples: Restoring using a remote tape drive ............................. 122
Restore examples: Multiple tape restores .................................................... 123
6 | Data ONTAP 8.1 7-Mode Data Protection Tape Backup and Recovery Guide
Data backup to tape using the SMTape engine ..................................... 125How SMTape backup works ................................................................................... 125
What tape seeding is ................................................................................................ 126
Features of SMTape ................................................................................................ 126
Limitations of SMTape ........................................................................................... 126
How to perform an SMTape backup and restore using NDMP services ................ 127
Environment variables supported for SMTape ........................................... 127
How to back up and restore using the SMTape commands .................................... 128
Backing up data to tape using SMTape ....................................................... 128
Displaying the volume geometry of a traditional volume ........................... 130
Displaying the image header of a tape ........................................................ 130
Restoring data from tape using SMTape ..................................................... 131
Aborting a backup or restore operation using smtape abort command ....... 132
Continuing a backup or restore after reaching the end of tape .................... 133
Displaying the status of backup and restore operations .............................. 133
When to remove the SnapMirror status entries ........................................... 134
Enabling or disabling concurrent volume SnapMirror and SMTape backup
operations .......................................................................................................... 137
What event logging is ............................................................................... 139What the dump and restore event log message format is ........................................ 139
What logging events are .............................................................................. 140
What dump events are ................................................................................. 140
What restore events are ............................................................................... 141
What the SMTape event log message format is ...................................................... 143
What SMTape CLI backup and restore events are ...................................... 143
What SMTape backup events are ................................................................ 144
What SMTape restore events are ................................................................ 145
Enabling or disabling event logging ........................................................................ 146
Error messages for tape backup and restore ......................................... 147Backup and restore error messages ......................................................................... 147
Resource limitation: no available thread ..................................................... 147
Duplicated tape drive (tape_drive) specified in the tape argument list ....... 147
Invalid tape drive tape_drive in tape argument list ..................................... 147
Tape reservation preempted ........................................................................ 148
Could not initialize media ........................................................................... 148
Too many concurrent backups running ....................................................... 148
Table of Contents | 7
Media error on tape write ............................................................................ 148
Tape write failed .......................................................................................... 149
Tape write failed - new tape encountered media error ................................ 149
Tape write failed - new tape is broken or write protected ........................... 149
Tape write failed - new tape is already at the end of media ........................ 149
Tape write error ........................................................................................... 149
Media error on tape read ............................................................................. 149
Tape read error ............................................................................................ 150
Already at the end of tape ........................................................................... 150
Tape record size is too small. Try a larger size. .......................................... 150
Tape record size should be block_size1 and not block_size2 ..................... 150
Tape record size must be in the range between 4KB and 256KB ............... 150
NDMP error messages ............................................................................................ 151
Network communication error .................................................................... 151
Message from Read Socket: error_string .................................................... 151
Message from Write Direct: error_string .................................................... 151
Read Socket received EOF .......................................................................... 151
ndmpd invalid version number: version_number ........................................ 152
Error: Unable to retrieve session information ............................................. 152
ndmpd session session_ID not active .......................................................... 152
No such user user_name .............................................................................. 152
Cannot generate NDMP password .............................................................. 152
The specified operation could not be completed as the volume is moving . 152
Could not obtain vol ref for Volume volume_name ................................... 153
ndmpcopy error messages ....................................................................................... 153
Ndmpcopy: Socket connection to host_name failed ................................... 153
Ndmpcopy: Error opening NDMP connection ............................................ 153
Ndmpcopy: Client authentication request failed ......................................... 153
Ndmpcopy: Authentication failed for source .............................................. 154
Ndmpcopy: Authentication failed for destination ....................................... 154
Ndmpcopy: Failed to start dump on source ................................................ 154
Ndmpcopy: Failed to start restore on destination ........................................ 154
Ndmpcopy: Error in getting extension list .................................................. 154
Error getting local hostname ....................................................................... 155
Ndmpcopy: Connection setup for transfer failed ........................................ 155
CONNECT: Connection refused ................................................................. 155
8 | Data ONTAP 8.1 7-Mode Data Protection Tape Backup and Recovery Guide
Invalid name. Source filer name does not resolve to the specified
address mode ......................................................................................... 155
Invalid name. Destination filer name does not resolve to the specified
address mode ......................................................................................... 156
Dump error messages .............................................................................................. 156
No default tape device list ........................................................................... 156
Invalid/offline volume ................................................................................. 156
Unable to lock a snapshot needed by dump ................................................ 156
Failed to determine snapshot type ............................................................... 156
Volume is temporarily in a transitional state .............................................. 157
Unable to locate bitmap files ....................................................................... 157
Failed to locate the specified restartable dump ........................................... 157
Dump context created from NDMP. Cannot restart dump .......................... 157
Unable to locate snapshot ............................................................................ 157
Invalid inode specified on restart ................................................................ 158
Invalid restart context. Cannot restart dump ............................................... 158
Failed to retrieve saved info for the restartable dump ................................. 158
Destination volume is read-only ................................................................. 158
Destination qtree is read-only ..................................................................... 158
IB restore in progress .................................................................................. 158
Could not access volume in path: volume_name ........................................ 159
No files were created ................................................................................... 159
SMTape error messages .......................................................................................... 159
Internal assertion ......................................................................................... 159
Job aborted due to shutdown ....................................................................... 159
Job not found ............................................................................................... 159
Job aborted due to Snapshot autodelete ...................................................... 160
Invalid volume path ..................................................................................... 160
UNIX style RMT tape drive is not supported ............................................. 160
Volume is currently in use by other operations ........................................... 160
Volume offline ............................................................................................ 160
Volume not restricted .................................................................................. 160
Tape is currently in use by other operations ............................................... 161
Invalid input tape ......................................................................................... 161
Too many active jobs .................................................................................. 161
Failed to allocate memory ........................................................................... 161
Table of Contents | 9
Failed to get data buffer .............................................................................. 161
Failed to create job UUID ........................................................................... 161
Failed to create snapshot ............................................................................. 162
Failed to find snapshot ................................................................................ 162
Failed to lock snapshot ................................................................................ 162
Failed to access the named snapshot ........................................................... 162
Failed to softlock qtree snapshots ............................................................... 162
Failed to delete softlock .............................................................................. 163
Failed to delete snapshot ............................................................................. 163
Image header missing or corrupted ............................................................. 163
Chunks out of order ..................................................................................... 163
Tapes out of order ....................................................................................... 163
Already read volume_name tape_number ................................................... 163
Mismatch in backup set ID .......................................................................... 164
Aborting: Destination volume, volume_name, is too small ........................ 164
Aborting: Destination volume, volume_name, is a clone ........................... 164
Aborting: Source has 32-bit format and destination has 64-bit format ....... 164
Source volume size is greater than maximum supported SIS volume size
on this platform. Aborting ..................................................................... 165
Incompatible SnapMirror or copy source Version. Aborting ..................... 165
Transfers from volume volume_name are temporarily disabled ................ 165
Too many active transfers at once, aborting ............................................... 165
Invalid contents in destination volume geometry string
volume_geometry_string, aborting ........................................................ 166
Cannot init input, aborting .......................................................................... 166
Source volume is not a flexible volume. Aborting ...................................... 166
Source volume is a flexible volume. Aborting ............................................ 166
Destination is not an aggregate. Aborting ................................................... 166
Source is not an aggregate. Aborting .......................................................... 167
Source is not a hybrid aggregate. Aborting ................................................. 167
Invalid checksum for the chunk descriptor ................................................. 167
Received VBN header with invalid checksum error_string, aborting
transfer on volume volume_name ......................................................... 168
Duplicate VBN VBN_number received for volume volume_name,
aborting transfer ..................................................................................... 168
10 | Data ONTAP 8.1 7-Mode Data Protection Tape Backup and Recovery Guide
Bad block in read stream. VBN = VBN_number, max_VBN =
max_VBN_number ................................................................................ 168
Invalid checksum found for one of the data block, where VBN number
is VBN_number ..................................................................................... 169
Block for VBN VBN_number failed checksum verification, aborting the
current transfer on volume volume_name ............................................. 169
Language setting for the Snapshot is not found .......................................... 170
Volume is currently under migration .......................................................... 170
Failed to get latest snapshot ........................................................................ 170
Failed to load new tape ................................................................................ 170
Remote tape not supported .......................................................................... 170
Failed to initialize tape ................................................................................ 170
Failed to initialize restore stream ................................................................ 171
Failed to read backup image ........................................................................ 171
Invalid backup image magic number .......................................................... 171
Chunk format not supported ........................................................................ 172
Invalid backup image checksum ................................................................. 172
Mismatch in backup level number .............................................................. 172
Mismatch in backup time stamp .................................................................. 172
Volume read-only ........................................................................................ 172
Invalid source path: /vol/newvol/ ................................................................ 172
Copyright information ............................................................................. 175Trademark information ........................................................................... 177How to send your comments .................................................................... 179Index ........................................................................................................... 181
Table of Contents | 11

12 | Data ONTAP 8.1 7-Mode Data Protection Tape Backup and Recovery Guide

Data protection using tape
You use tape backup and recovery to create tape archives and to retrieve data from tape archives.
You back up data from disk to tape for the following reasons:
• You can store the backup tapes at an off-site archive to protect the data against natural disasters.• You can restore data from tape if an application or a user inadvertently corrupts or deletes files
that cannot be recovered using the Snapshot copy feature.• You can restore data from tape after you reinstall the file system on the storage system (for
example, when migrating to larger disks or converting a single-volume storage system to amultivolume storage system).
Advantages and disadvantages of tape backupData backed up to tape requires fewer resources to maintain. However, restoring data from tapemight take a long time.
Following are the advantages of tape backup over online storage:
• Tape backups require fewer resources to maintain.• You can place the archives in a more secure place than you can place a storage system.• You can recover data from any release of Data ONTAP.
Following are the disadvantages of tape archives over online storage:
• Restoring data from tape takes a long time.• Finding a particular file or directory on tape is time consuming.
Types of tape backup supported by Data ONTAPData ONTAP supports two types of tape backup: the dump backup and the SMTape backup.
Tape backup using dump
Dump is a Snapshot copy-based backup to tape, in which your file system data is backed up to tape.The Data ONTAP dump engine backs up files, directories, and the applicable ACL information totape. Dump supports level-0, differential, and incremental backups.
Tape backup using SMTape
SMTape is a Snapshot copy-based high performance disaster recovery solution that backs up blocksof data to tape. You can use SMTape to perform volume backups to tapes. However, you cannot
13
perform a backup at the qtree or subtree level. Also, you can perform only a level-0 backup and notincremental or differential backups.
Related concepts
Data backup to tape using the dump engine on page 59
Data backup to tape using the SMTape engine on page 125
Difference between dump backup and SMTape backup on page 14
How to initiate a dump or SMTape backupYou can initiate a dump or SMTape backup by using the Data ONTAP CLI commands or throughNDMP-compliant backup applications.
When you use a backup application to back up your data, you must choose the backup type wheninitiating a backup.
You can perform a CLI-based dump backup or restore using the Data ONTAP dump and restorecommands.
Similarly, you can perform a CLI-based SMTape backup or restore using the Data ONTAP smtapebackup and smtape restore commands.
Related concepts
Data backup to tape using the dump engine on page 59
Data backup to tape using the SMTape engine on page 125
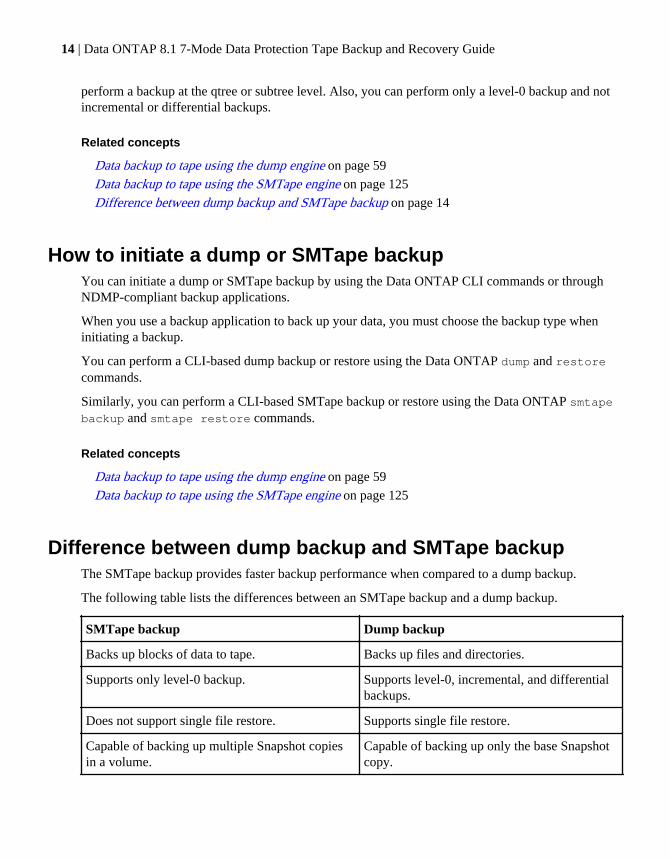
Difference between dump backup and SMTape backupThe SMTape backup provides faster backup performance when compared to a dump backup.
The following table lists the differences between an SMTape backup and a dump backup.
SMTape backup Dump backup
Backs up blocks of data to tape. Backs up files and directories.
Supports only level-0 backup. Supports level-0, incremental, and differentialbackups.
Does not support single file restore. Supports single file restore.
Capable of backing up multiple Snapshot copiesin a volume.
Capable of backing up only the base Snapshotcopy.
14 | Data ONTAP 8.1 7-Mode Data Protection Tape Backup and Recovery Guide

SMTape backup Dump backup
Preserves deduplication while backing up andrestoring data.
Does not preserve deduplication while backingup data.
Considerations before choosing a tape backup methodYou must consider your business requirements before choosing a tape backup method.
You should use dump backup and restore if you want the following features:
• A backup and recovery solution that helps you to
• Perform direct access recovery (DAR) of files and directories.• Back up some, but not all, subdirectories or files in a specific path.• Exclude specific files and directories during a backup.
• To perform incremental and differential backups and restores.• Preserve your backups for several years.
You should use SMTape backup and restore, if you want the following features:
• A disaster recovery solution that provides high performance.• To use tape backup to perform an initial full-volume transfer of a source SnapMirror volume to a
remote destination storage system and then perform incremental transfers over the network.In such cases, you can perform an SMTape backup of the SnapMirror volume to a tape, ship thetape to the remote location and restore the contents to a target volume, and set up a SnapMirrorrelationship. Once the SnapMirror relationship is established, the incremental backups areperformed over the network. You can also use this method to establish a SnapMirror relationshipbetween source and destination storage systems over a low-bandwidth connection.
• To preserve the deduplication on the backed up data during the restore operation.• To back up large volumes.
If you use the dump engine to back up volumes with a large number of small files, your backupperformance might be affected. This is because, the dump engine performs a file system levelbackup and has to traverse through the files and directories to backup the volumes. Thesevolumes can be more efficiently backed up to tape using SMTape.
How online migration affects tape backupYou cannot perform a tape backup or restore of a vFiler volume during the cutover phase of onlinemigration.
Online migration affects tape backup in the following ways:
• Backup or restore of a vFiler volume during the cutover phase of online migration results in thefollowing error:
Data protection using tape | 15
volume is currently under migration
• During the cutover phase of online migration, transfer of file system data using the ndmpcopycommand results in a failure.
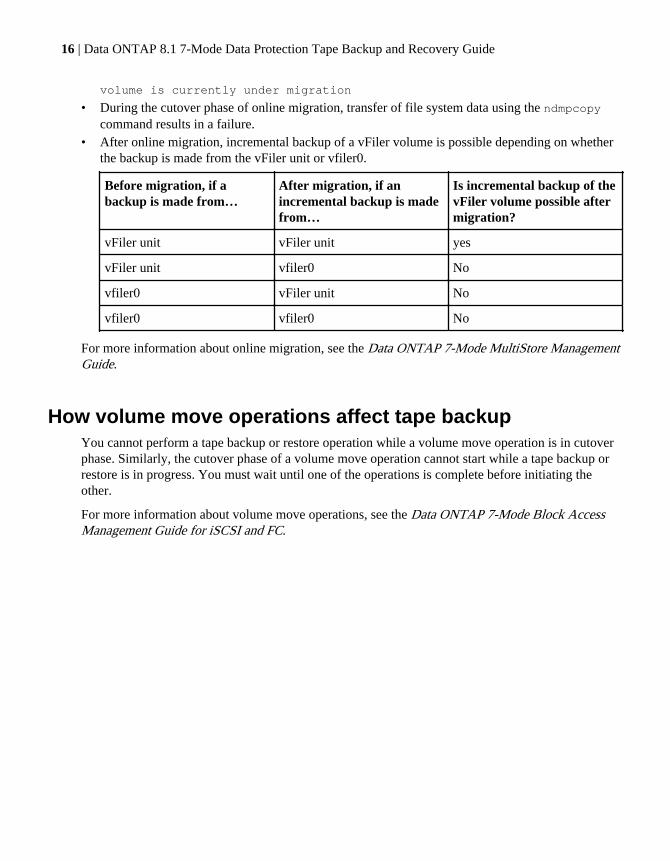
• After online migration, incremental backup of a vFiler volume is possible depending on whetherthe backup is made from the vFiler unit or vfiler0.
Before migration, if abackup is made from…
After migration, if anincremental backup is madefrom…
Is incremental backup of thevFiler volume possible aftermigration?
vFiler unit vFiler unit yes
vFiler unit vfiler0 No
vfiler0 vFiler unit No
vfiler0 vfiler0 No
For more information about online migration, see the Data ONTAP 7-Mode MultiStore ManagementGuide.
How volume move operations affect tape backupYou cannot perform a tape backup or restore operation while a volume move operation is in cutoverphase. Similarly, the cutover phase of a volume move operation cannot start while a tape backup orrestore is in progress. You must wait until one of the operations is complete before initiating theother.
For more information about volume move operations, see the Data ONTAP 7-Mode Block AccessManagement Guide for iSCSI and FC.
16 | Data ONTAP 8.1 7-Mode Data Protection Tape Backup and Recovery Guide
Tape drive management
You need to manage tape drives when you back up data from the storage system to tape and whenyou restore data from tape to the storage system.
When you back up data to tape, the data is stored in tape files. File marks separate the tape files, andthe files have no names. You specify a tape file by its position on the tape. You write a tape file usinga tape device. When you read the tape file, you must specify a device that has the same compressiontype that you used to write that tape file.
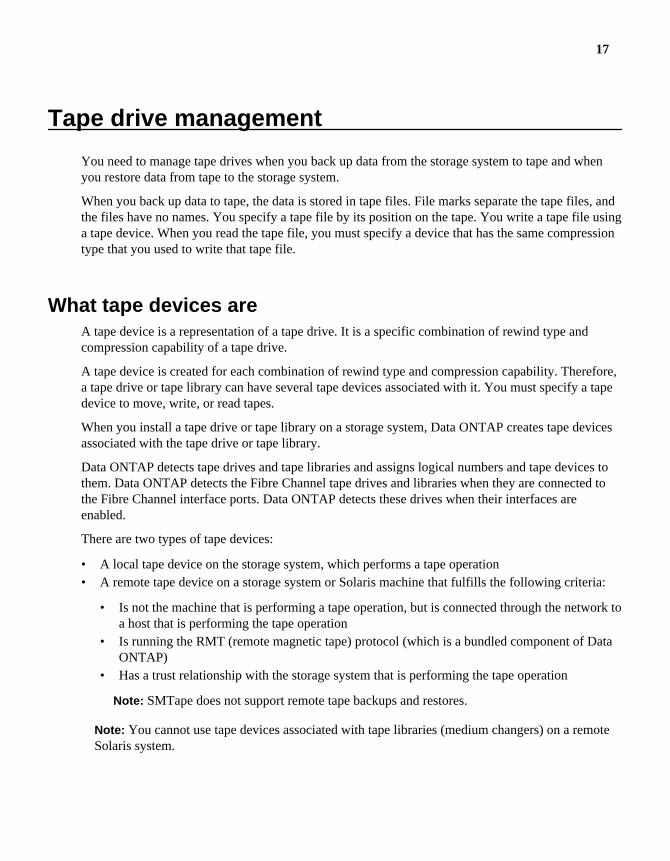
What tape devices areA tape device is a representation of a tape drive. It is a specific combination of rewind type andcompression capability of a tape drive.
A tape device is created for each combination of rewind type and compression capability. Therefore,a tape drive or tape library can have several tape devices associated with it. You must specify a tapedevice to move, write, or read tapes.
When you install a tape drive or tape library on a storage system, Data ONTAP creates tape devicesassociated with the tape drive or tape library.
Data ONTAP detects tape drives and tape libraries and assigns logical numbers and tape devices tothem. Data ONTAP detects the Fibre Channel tape drives and libraries when they are connected tothe Fibre Channel interface ports. Data ONTAP detects these drives when their interfaces areenabled.
There are two types of tape devices:
• A local tape device on the storage system, which performs a tape operation• A remote tape device on a storage system or Solaris machine that fulfills the following criteria:
• Is not the machine that is performing a tape operation, but is connected through the network toa host that is performing the tape operation
• Is running the RMT (remote magnetic tape) protocol (which is a bundled component of DataONTAP)
• Has a trust relationship with the storage system that is performing the tape operation
Note: SMTape does not support remote tape backups and restores.
Note: You cannot use tape devices associated with tape libraries (medium changers) on a remoteSolaris system.
17
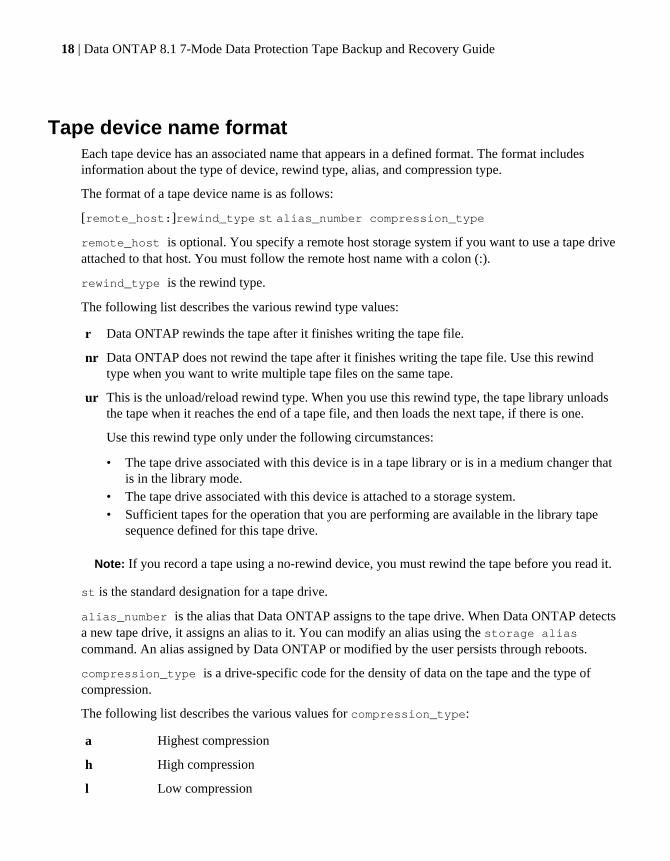
Tape device name formatEach tape device has an associated name that appears in a defined format. The format includesinformation about the type of device, rewind type, alias, and compression type.
The format of a tape device name is as follows:
[remote_host:]rewind_type st alias_number compression_type
remote_host is optional. You specify a remote host storage system if you want to use a tape driveattached to that host. You must follow the remote host name with a colon (:).
rewind_type is the rewind type.
The following list describes the various rewind type values:
r Data ONTAP rewinds the tape after it finishes writing the tape file.
nr Data ONTAP does not rewind the tape after it finishes writing the tape file. Use this rewindtype when you want to write multiple tape files on the same tape.
ur This is the unload/reload rewind type. When you use this rewind type, the tape library unloadsthe tape when it reaches the end of a tape file, and then loads the next tape, if there is one.
Use this rewind type only under the following circumstances:
• The tape drive associated with this device is in a tape library or is in a medium changer thatis in the library mode.
• The tape drive associated with this device is attached to a storage system.• Sufficient tapes for the operation that you are performing are available in the library tape
sequence defined for this tape drive.
Note: If you record a tape using a no-rewind device, you must rewind the tape before you read it.
st is the standard designation for a tape drive.
alias_number is the alias that Data ONTAP assigns to the tape drive. When Data ONTAP detectsa new tape drive, it assigns an alias to it. You can modify an alias using the storage aliascommand. An alias assigned by Data ONTAP or modified by the user persists through reboots.
compression_type is a drive-specific code for the density of data on the tape and the type ofcompression.
The following list describes the various values for compression_type:
a Highest compression
h High compression
l Low compression
18 | Data ONTAP 8.1 7-Mode Data Protection Tape Backup and Recovery Guide
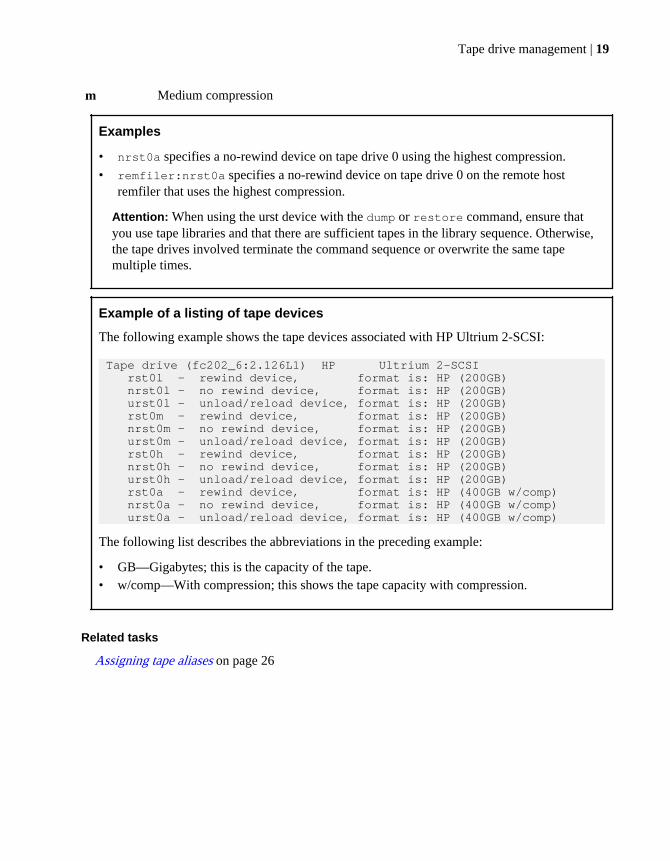
m Medium compression
Examples
• nrst0a specifies a no-rewind device on tape drive 0 using the highest compression.• remfiler:nrst0a specifies a no-rewind device on tape drive 0 on the remote host
remfiler that uses the highest compression.
Attention: When using the urst device with the dump or restore command, ensure thatyou use tape libraries and that there are sufficient tapes in the library sequence. Otherwise,the tape drives involved terminate the command sequence or overwrite the same tapemultiple times.
Example of a listing of tape devices
The following example shows the tape devices associated with HP Ultrium 2-SCSI:
Tape drive (fc202_6:2.126L1) HP Ultrium 2-SCSI rst0l - rewind device, format is: HP (200GB) nrst0l - no rewind device, format is: HP (200GB) urst0l - unload/reload device, format is: HP (200GB) rst0m - rewind device, format is: HP (200GB) nrst0m - no rewind device, format is: HP (200GB) urst0m - unload/reload device, format is: HP (200GB) rst0h - rewind device, format is: HP (200GB) nrst0h - no rewind device, format is: HP (200GB) urst0h - unload/reload device, format is: HP (200GB) rst0a - rewind device, format is: HP (400GB w/comp) nrst0a - no rewind device, format is: HP (400GB w/comp) urst0a - unload/reload device, format is: HP (400GB w/comp)
The following list describes the abbreviations in the preceding example:
• GB—Gigabytes; this is the capacity of the tape.• w/comp—With compression; this shows the tape capacity with compression.
Related tasks
Assigning tape aliases on page 26
Tape drive management | 19
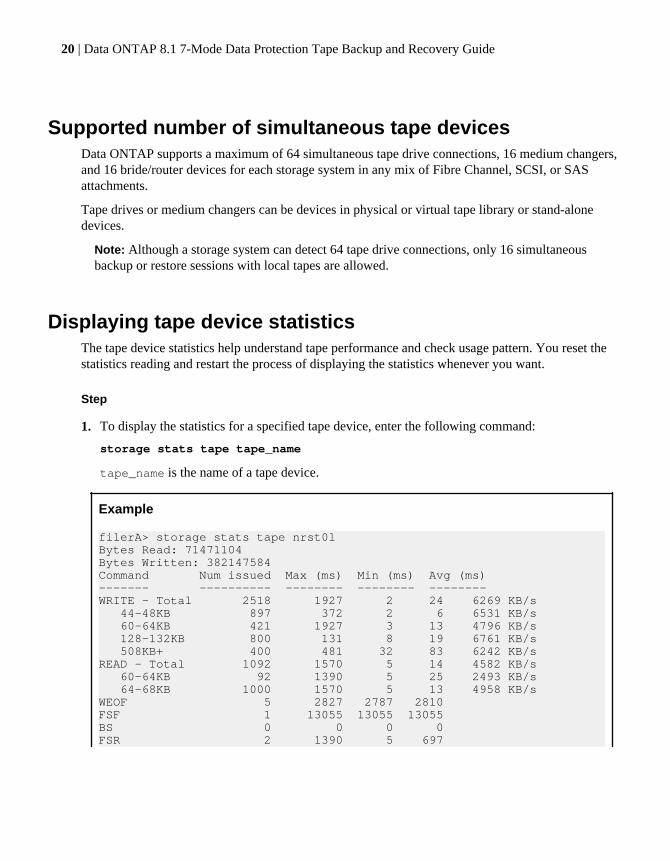
Supported number of simultaneous tape devicesData ONTAP supports a maximum of 64 simultaneous tape drive connections, 16 medium changers,and 16 bride/router devices for each storage system in any mix of Fibre Channel, SCSI, or SASattachments.
Tape drives or medium changers can be devices in physical or virtual tape library or stand-alonedevices.
Note: Although a storage system can detect 64 tape drive connections, only 16 simultaneousbackup or restore sessions with local tapes are allowed.
Displaying tape device statisticsThe tape device statistics help understand tape performance and check usage pattern. You reset thestatistics reading and restart the process of displaying the statistics whenever you want.
Step
1. To display the statistics for a specified tape device, enter the following command:
storage stats tape tape_name
tape_name is the name of a tape device.
Example
filerA> storage stats tape nrst0lBytes Read: 71471104Bytes Written: 382147584Command Num issued Max (ms) Min (ms) Avg (ms)------- ---------- -------- -------- --------WRITE - Total 2518 1927 2 24 6269 KB/s 44-48KB 897 372 2 6 6531 KB/s 60-64KB 421 1927 3 13 4796 KB/s 128-132KB 800 131 8 19 6761 KB/s 508KB+ 400 481 32 83 6242 KB/sREAD - Total 1092 1570 5 14 4582 KB/s 60-64KB 92 1390 5 25 2493 KB/s 64-68KB 1000 1570 5 13 4958 KB/sWEOF 5 2827 2787 2810FSF 1 13055 13055 13055BS 0 0 0 0FSR 2 1390 5 697
20 | Data ONTAP 8.1 7-Mode Data Protection Tape Backup and Recovery Guide
BSR 1 23 23 23REWIND 9 67606 94 22260
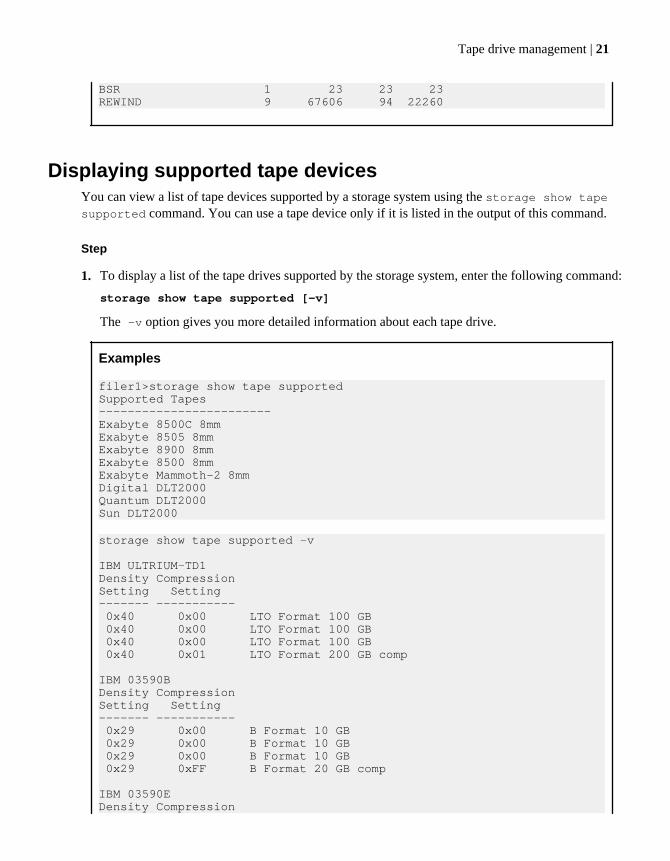
Displaying supported tape devicesYou can view a list of tape devices supported by a storage system using the storage show tapesupported command. You can use a tape device only if it is listed in the output of this command.
Step
1. To display a list of the tape drives supported by the storage system, enter the following command:
storage show tape supported [-v]
The -v option gives you more detailed information about each tape drive.
Examples
filer1>storage show tape supportedSupported Tapes------------------------Exabyte 8500C 8mmExabyte 8505 8mmExabyte 8900 8mmExabyte 8500 8mmExabyte Mammoth-2 8mmDigital DLT2000Quantum DLT2000Sun DLT2000
storage show tape supported -v
IBM ULTRIUM-TD1Density CompressionSetting Setting------- ----------- 0x40 0x00 LTO Format 100 GB 0x40 0x00 LTO Format 100 GB 0x40 0x00 LTO Format 100 GB 0x40 0x01 LTO Format 200 GB comp
IBM 03590BDensity CompressionSetting Setting------- ----------- 0x29 0x00 B Format 10 GB 0x29 0x00 B Format 10 GB 0x29 0x00 B Format 10 GB 0x29 0xFF B Format 20 GB comp
IBM 03590EDensity Compression
Tape drive management | 21
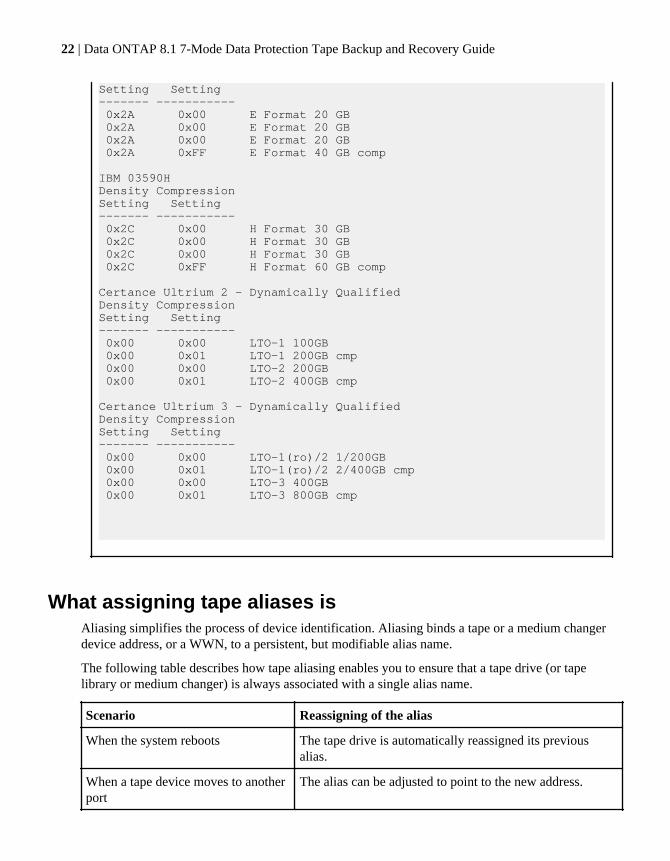
Setting Setting------- ----------- 0x2A 0x00 E Format 20 GB 0x2A 0x00 E Format 20 GB 0x2A 0x00 E Format 20 GB 0x2A 0xFF E Format 40 GB comp
IBM 03590HDensity CompressionSetting Setting------- ----------- 0x2C 0x00 H Format 30 GB 0x2C 0x00 H Format 30 GB 0x2C 0x00 H Format 30 GB 0x2C 0xFF H Format 60 GB comp
Certance Ultrium 2 - Dynamically QualifiedDensity CompressionSetting Setting------- ----------- 0x00 0x00 LTO-1 100GB 0x00 0x01 LTO-1 200GB cmp 0x00 0x00 LTO-2 200GB 0x00 0x01 LTO-2 400GB cmp
Certance Ultrium 3 - Dynamically QualifiedDensity CompressionSetting Setting------- ----------- 0x00 0x00 LTO-1(ro)/2 1/200GB 0x00 0x01 LTO-1(ro)/2 2/400GB cmp 0x00 0x00 LTO-3 400GB 0x00 0x01 LTO-3 800GB cmp
What assigning tape aliases isAliasing simplifies the process of device identification. Aliasing binds a tape or a medium changerdevice address, or a WWN, to a persistent, but modifiable alias name.
The following table describes how tape aliasing enables you to ensure that a tape drive (or tapelibrary or medium changer) is always associated with a single alias name.
Scenario Reassigning of the alias
When the system reboots The tape drive is automatically reassigned its previousalias.
When a tape device moves to anotherport
The alias can be adjusted to point to the new address.
22 | Data ONTAP 8.1 7-Mode Data Protection Tape Backup and Recovery Guide
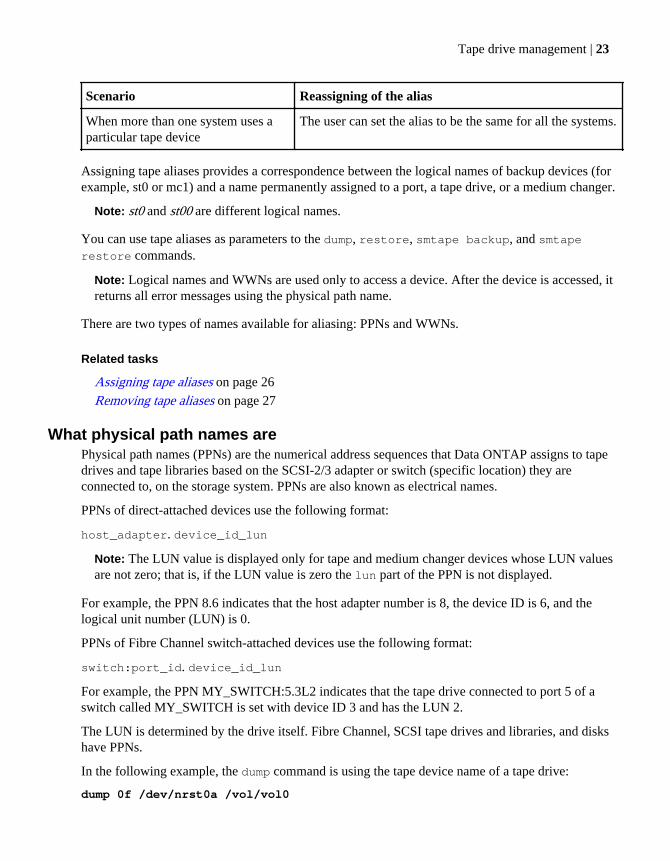
Scenario Reassigning of the alias
When more than one system uses aparticular tape device
The user can set the alias to be the same for all the systems.
Assigning tape aliases provides a correspondence between the logical names of backup devices (forexample, st0 or mc1) and a name permanently assigned to a port, a tape drive, or a medium changer.
Note: st0 and st00 are different logical names.
You can use tape aliases as parameters to the dump, restore, smtape backup, and smtaperestore commands.
Note: Logical names and WWNs are used only to access a device. After the device is accessed, itreturns all error messages using the physical path name.
There are two types of names available for aliasing: PPNs and WWNs.
Related tasks
Assigning tape aliases on page 26
Removing tape aliases on page 27
What physical path names arePhysical path names (PPNs) are the numerical address sequences that Data ONTAP assigns to tapedrives and tape libraries based on the SCSI-2/3 adapter or switch (specific location) they areconnected to, on the storage system. PPNs are also known as electrical names.
PPNs of direct-attached devices use the following format:
host_adapter. device_id_lun
Note: The LUN value is displayed only for tape and medium changer devices whose LUN valuesare not zero; that is, if the LUN value is zero the lun part of the PPN is not displayed.
For example, the PPN 8.6 indicates that the host adapter number is 8, the device ID is 6, and thelogical unit number (LUN) is 0.
PPNs of Fibre Channel switch-attached devices use the following format:
switch:port_id. device_id_lun
For example, the PPN MY_SWITCH:5.3L2 indicates that the tape drive connected to port 5 of aswitch called MY_SWITCH is set with device ID 3 and has the LUN 2.
The LUN is determined by the drive itself. Fibre Channel, SCSI tape drives and libraries, and diskshave PPNs.
In the following example, the dump command is using the tape device name of a tape drive:
dump 0f /dev/nrst0a /vol/vol0
Tape drive management | 23
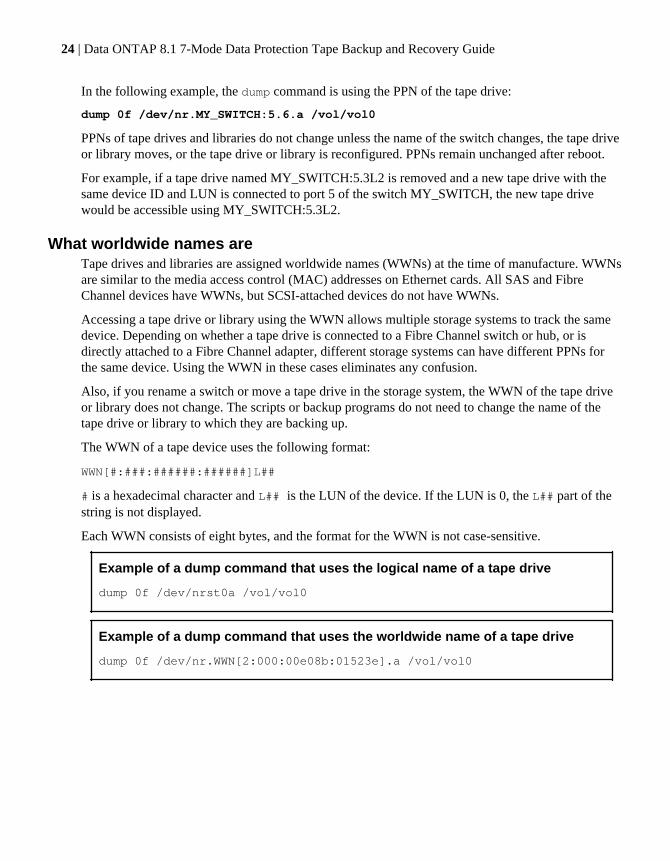
In the following example, the dump command is using the PPN of the tape drive:
dump 0f /dev/nr.MY_SWITCH:5.6.a /vol/vol0
PPNs of tape drives and libraries do not change unless the name of the switch changes, the tape driveor library moves, or the tape drive or library is reconfigured. PPNs remain unchanged after reboot.
For example, if a tape drive named MY_SWITCH:5.3L2 is removed and a new tape drive with thesame device ID and LUN is connected to port 5 of the switch MY_SWITCH, the new tape drivewould be accessible using MY_SWITCH:5.3L2.
What worldwide names areTape drives and libraries are assigned worldwide names (WWNs) at the time of manufacture. WWNsare similar to the media access control (MAC) addresses on Ethernet cards. All SAS and FibreChannel devices have WWNs, but SCSI-attached devices do not have WWNs.
Accessing a tape drive or library using the WWN allows multiple storage systems to track the samedevice. Depending on whether a tape drive is connected to a Fibre Channel switch or hub, or isdirectly attached to a Fibre Channel adapter, different storage systems can have different PPNs forthe same device. Using the WWN in these cases eliminates any confusion.
Also, if you rename a switch or move a tape drive in the storage system, the WWN of the tape driveor library does not change. The scripts or backup programs do not need to change the name of thetape drive or library to which they are backing up.
The WWN of a tape device uses the following format:
WWN[#:###:######:######]L##
# is a hexadecimal character and L## is the LUN of the device. If the LUN is 0, the L## part of thestring is not displayed.
Each WWN consists of eight bytes, and the format for the WWN is not case-sensitive.
Example of a dump command that uses the logical name of a tape drive
dump 0f /dev/nrst0a /vol/vol0
Example of a dump command that uses the worldwide name of a tape drive
dump 0f /dev/nr.WWN[2:000:00e08b:01523e].a /vol/vol0
24 | Data ONTAP 8.1 7-Mode Data Protection Tape Backup and Recovery Guide
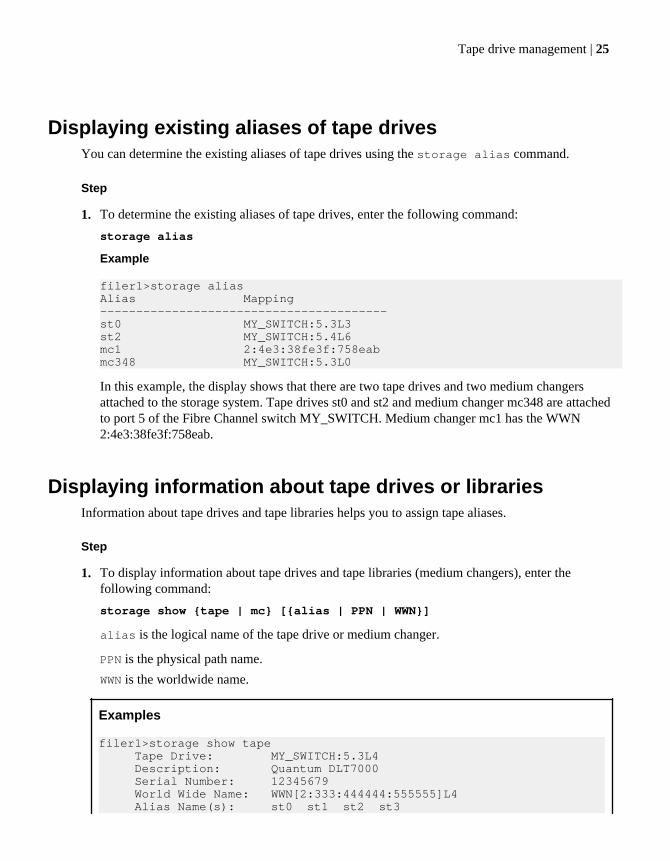
Displaying existing aliases of tape drivesYou can determine the existing aliases of tape drives using the storage alias command.
Step
1. To determine the existing aliases of tape drives, enter the following command:
storage alias
Example
filer1>storage aliasAlias Mapping----------------------------------------st0 MY_SWITCH:5.3L3st2 MY_SWITCH:5.4L6mc1 2:4e3:38fe3f:758eabmc348 MY_SWITCH:5.3L0
In this example, the display shows that there are two tape drives and two medium changersattached to the storage system. Tape drives st0 and st2 and medium changer mc348 are attachedto port 5 of the Fibre Channel switch MY_SWITCH. Medium changer mc1 has the WWN2:4e3:38fe3f:758eab.
Displaying information about tape drives or librariesInformation about tape drives and tape libraries helps you to assign tape aliases.
Step
1. To display information about tape drives and tape libraries (medium changers), enter thefollowing command:
storage show {tape | mc} [{alias | PPN | WWN}]
alias is the logical name of the tape drive or medium changer.
PPN is the physical path name.
WWN is the worldwide name.
Examples
filer1>storage show tape Tape Drive: MY_SWITCH:5.3L4 Description: Quantum DLT7000 Serial Number: 12345679 World Wide Name: WWN[2:333:444444:555555]L4 Alias Name(s): st0 st1 st2 st3
Tape drive management | 25
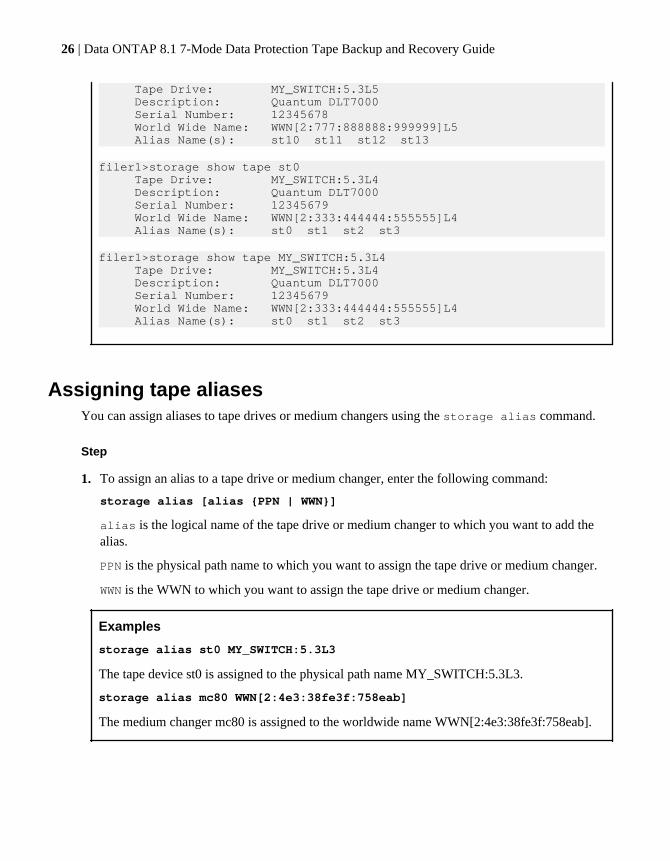
Tape Drive: MY_SWITCH:5.3L5 Description: Quantum DLT7000 Serial Number: 12345678 World Wide Name: WWN[2:777:888888:999999]L5 Alias Name(s): st10 st11 st12 st13
filer1>storage show tape st0 Tape Drive: MY_SWITCH:5.3L4 Description: Quantum DLT7000 Serial Number: 12345679 World Wide Name: WWN[2:333:444444:555555]L4 Alias Name(s): st0 st1 st2 st3
filer1>storage show tape MY_SWITCH:5.3L4 Tape Drive: MY_SWITCH:5.3L4 Description: Quantum DLT7000 Serial Number: 12345679 World Wide Name: WWN[2:333:444444:555555]L4 Alias Name(s): st0 st1 st2 st3
Assigning tape aliasesYou can assign aliases to tape drives or medium changers using the storage alias command.
Step
1. To assign an alias to a tape drive or medium changer, enter the following command:
storage alias [alias {PPN | WWN}]
alias is the logical name of the tape drive or medium changer to which you want to add thealias.
PPN is the physical path name to which you want to assign the tape drive or medium changer.
WWN is the WWN to which you want to assign the tape drive or medium changer.
Examples
storage alias st0 MY_SWITCH:5.3L3
The tape device st0 is assigned to the physical path name MY_SWITCH:5.3L3.
storage alias mc80 WWN[2:4e3:38fe3f:758eab]
The medium changer mc80 is assigned to the worldwide name WWN[2:4e3:38fe3f:758eab].
26 | Data ONTAP 8.1 7-Mode Data Protection Tape Backup and Recovery Guide
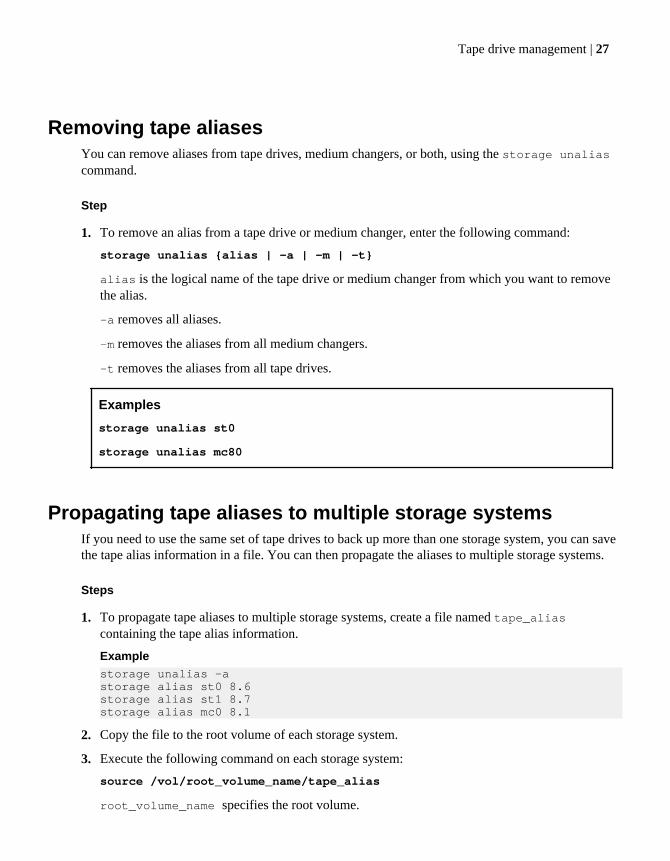
Removing tape aliasesYou can remove aliases from tape drives, medium changers, or both, using the storage unaliascommand.
Step
1. To remove an alias from a tape drive or medium changer, enter the following command:
storage unalias {alias | -a | -m | -t}
alias is the logical name of the tape drive or medium changer from which you want to removethe alias.
-a removes all aliases.
-m removes the aliases from all medium changers.
-t removes the aliases from all tape drives.
Examples
storage unalias st0
storage unalias mc80
Propagating tape aliases to multiple storage systemsIf you need to use the same set of tape drives to back up more than one storage system, you can savethe tape alias information in a file. You can then propagate the aliases to multiple storage systems.
Steps
1. To propagate tape aliases to multiple storage systems, create a file named tape_aliascontaining the tape alias information.
Examplestorage unalias -a storage alias st0 8.6 storage alias st1 8.7 storage alias mc0 8.1
2. Copy the file to the root volume of each storage system.
3. Execute the following command on each storage system:
source /vol/root_volume_name/tape_alias
root_volume_name specifies the root volume.
Tape drive management | 27
All the storage systems contain the same configuration information.
Note: To ensure that multiple storage systems assign the same alias to a tape drive or mediumchanger, you can type the same set of storage alias commands on each storage system.
How to add tape drives and libraries to storage systemsYou can add tape drives and libraries to storage systems dynamically (without taking the storagesystems offline).
When you add a new medium changer, the storage system detects its presence and adds it to theconfiguration. If the medium changer is already referenced in the alias information, no new logicalnames are created. If the library is not referenced, the storage system creates a new alias for themedium changer.
How to display tape drive and tape library informationYou can view information about tape drives, tape medium changers, and tape drive connections tothe storage system.
You can use this information to verify that the storage system detects the tape drive associated withthe tape device. You can also verify the available tape device names associated with the tape drive.You can view information about qualified and nonqualified tape drives, tape libraries, and tape driveconnections to the storage system.
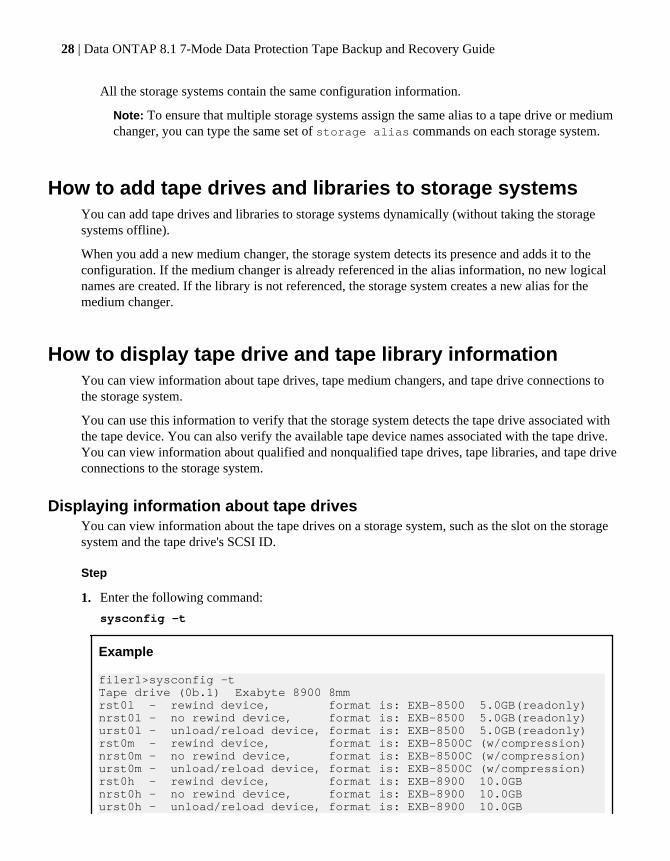
Displaying information about tape drivesYou can view information about the tape drives on a storage system, such as the slot on the storagesystem and the tape drive's SCSI ID.
Step
1. Enter the following command:
sysconfig -t
Example
filer1>sysconfig -tTape drive (0b.1) Exabyte 8900 8mm rst0l - rewind device, format is: EXB-8500 5.0GB(readonly)nrst0l - no rewind device, format is: EXB-8500 5.0GB(readonly)urst0l - unload/reload device, format is: EXB-8500 5.0GB(readonly)rst0m - rewind device, format is: EXB-8500C (w/compression)nrst0m - no rewind device, format is: EXB-8500C (w/compression)urst0m - unload/reload device, format is: EXB-8500C (w/compression)rst0h - rewind device, format is: EXB-8900 10.0GB nrst0h - no rewind device, format is: EXB-8900 10.0GB urst0h - unload/reload device, format is: EXB-8900 10.0GB
28 | Data ONTAP 8.1 7-Mode Data Protection Tape Backup and Recovery Guide
rst0a - rewind device, format is: EXB-8900C (w/compression)nrst0a - no rewind device, format is: EXB-8900C (w/compression)urst0a - unload/reload device, format is: EXB-8900C (w/compression)
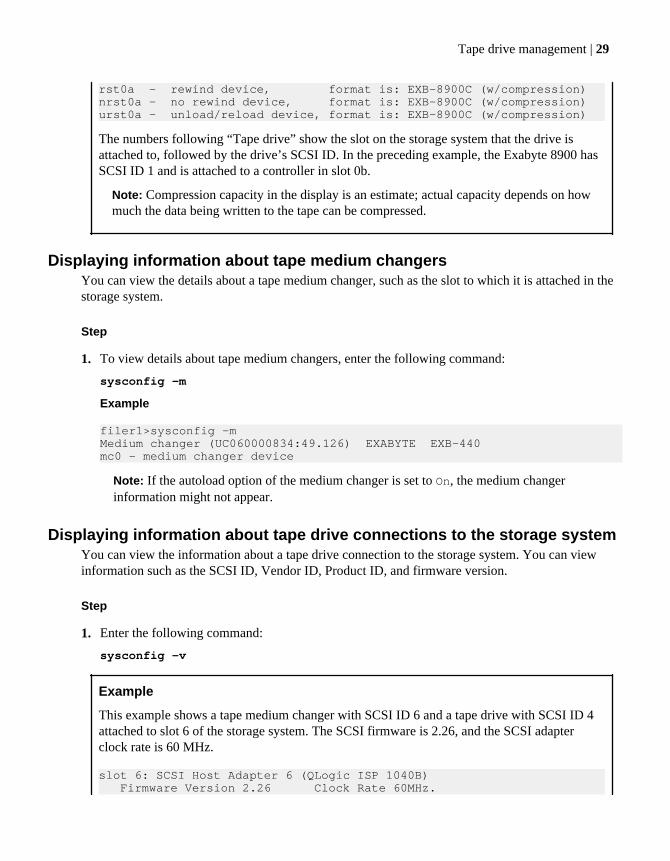
The numbers following “Tape drive” show the slot on the storage system that the drive isattached to, followed by the drive’s SCSI ID. In the preceding example, the Exabyte 8900 hasSCSI ID 1 and is attached to a controller in slot 0b.
Note: Compression capacity in the display is an estimate; actual capacity depends on howmuch the data being written to the tape can be compressed.
Displaying information about tape medium changersYou can view the details about a tape medium changer, such as the slot to which it is attached in thestorage system.
Step
1. To view details about tape medium changers, enter the following command:
sysconfig -m
Example
filer1>sysconfig -mMedium changer (UC060000834:49.126) EXABYTE EXB-440mc0 - medium changer device
Note: If the autoload option of the medium changer is set to On, the medium changerinformation might not appear.
Displaying information about tape drive connections to the storage systemYou can view the information about a tape drive connection to the storage system. You can viewinformation such as the SCSI ID, Vendor ID, Product ID, and firmware version.
Step
1. Enter the following command:
sysconfig -v
Example
This example shows a tape medium changer with SCSI ID 6 and a tape drive with SCSI ID 4attached to slot 6 of the storage system. The SCSI firmware is 2.26, and the SCSI adapterclock rate is 60 MHz.
slot 6: SCSI Host Adapter 6 (QLogic ISP 1040B) Firmware Version 2.26 Clock Rate 60MHz.
Tape drive management | 29
6: BHTi Quad 7 1.41 4: QUANTUM DLT7000 1B41
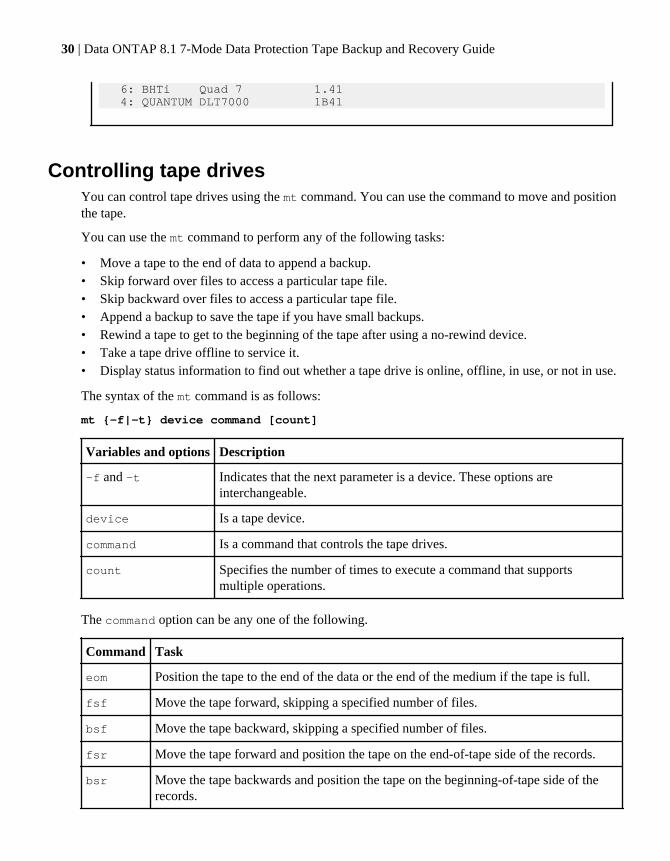
Controlling tape drivesYou can control tape drives using the mt command. You can use the command to move and positionthe tape.
You can use the mt command to perform any of the following tasks:
• Move a tape to the end of data to append a backup.• Skip forward over files to access a particular tape file.• Skip backward over files to access a particular tape file.• Append a backup to save the tape if you have small backups.• Rewind a tape to get to the beginning of the tape after using a no-rewind device.• Take a tape drive offline to service it.• Display status information to find out whether a tape drive is online, offline, in use, or not in use.
The syntax of the mt command is as follows:
mt {-f|-t} device command [count]
Variables and options Description
-f and -t Indicates that the next parameter is a device. These options areinterchangeable.
device Is a tape device.
command Is a command that controls the tape drives.
count Specifies the number of times to execute a command that supportsmultiple operations.
The command option can be any one of the following.
Command Task
eom Position the tape to the end of the data or the end of the medium if the tape is full.
fsf Move the tape forward, skipping a specified number of files.
bsf Move the tape backward, skipping a specified number of files.
fsr Move the tape forward and position the tape on the end-of-tape side of the records.
bsr Move the tape backwards and position the tape on the beginning-of-tape side of therecords.
30 | Data ONTAP 8.1 7-Mode Data Protection Tape Backup and Recovery Guide
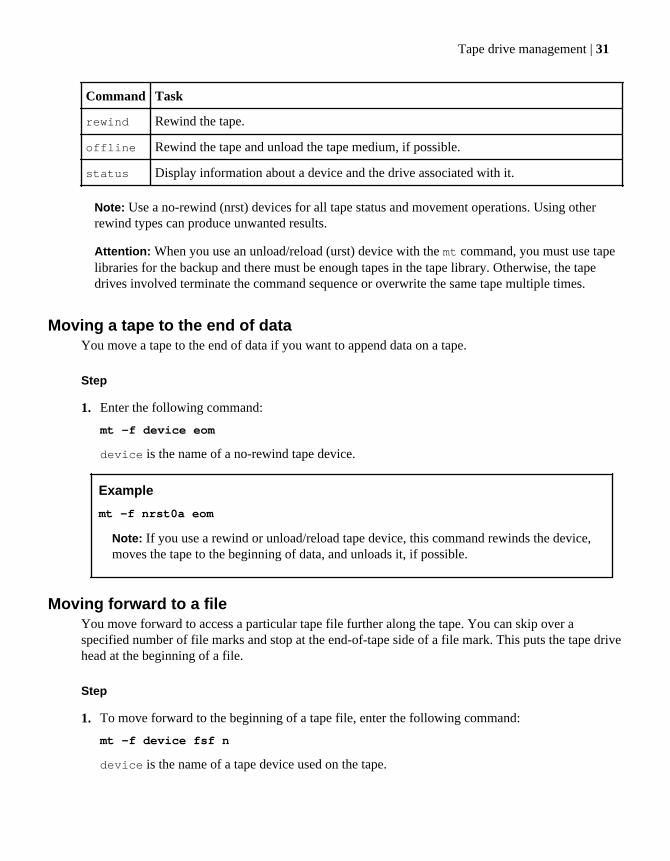
Command Task
rewind Rewind the tape.
offline Rewind the tape and unload the tape medium, if possible.
status Display information about a device and the drive associated with it.
Note: Use a no-rewind (nrst) devices for all tape status and movement operations. Using otherrewind types can produce unwanted results.
Attention: When you use an unload/reload (urst) device with the mt command, you must use tapelibraries for the backup and there must be enough tapes in the tape library. Otherwise, the tapedrives involved terminate the command sequence or overwrite the same tape multiple times.
Moving a tape to the end of dataYou move a tape to the end of data if you want to append data on a tape.
Step
1. Enter the following command:
mt -f device eom
device is the name of a no-rewind tape device.
Example
mt -f nrst0a eom
Note: If you use a rewind or unload/reload tape device, this command rewinds the device,moves the tape to the beginning of data, and unloads it, if possible.
Moving forward to a fileYou move forward to access a particular tape file further along the tape. You can skip over aspecified number of file marks and stop at the end-of-tape side of a file mark. This puts the tape drivehead at the beginning of a file.
Step
1. To move forward to the beginning of a tape file, enter the following command:
mt -f device fsf n
device is the name of a tape device used on the tape.
Tape drive management | 31
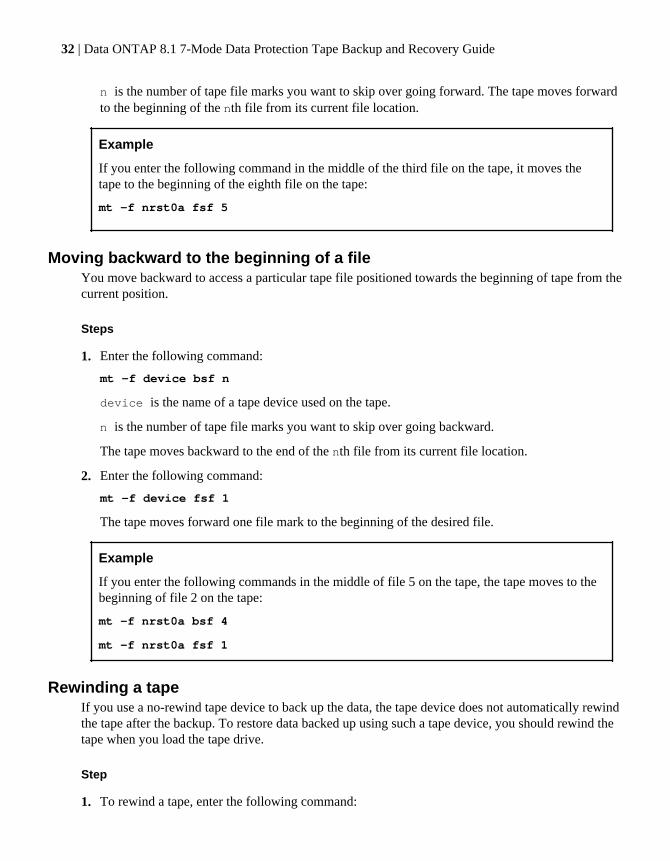
n is the number of tape file marks you want to skip over going forward. The tape moves forwardto the beginning of the nth file from its current file location.
Example
If you enter the following command in the middle of the third file on the tape, it moves thetape to the beginning of the eighth file on the tape:
mt -f nrst0a fsf 5
Moving backward to the beginning of a fileYou move backward to access a particular tape file positioned towards the beginning of tape from thecurrent position.
Steps
1. Enter the following command:
mt -f device bsf n
device is the name of a tape device used on the tape.
n is the number of tape file marks you want to skip over going backward.
The tape moves backward to the end of the nth file from its current file location.
2. Enter the following command:
mt -f device fsf 1
The tape moves forward one file mark to the beginning of the desired file.
Example
If you enter the following commands in the middle of file 5 on the tape, the tape moves to thebeginning of file 2 on the tape:
mt -f nrst0a bsf 4
mt -f nrst0a fsf 1
Rewinding a tapeIf you use a no-rewind tape device to back up the data, the tape device does not automatically rewindthe tape after the backup. To restore data backed up using such a tape device, you should rewind thetape when you load the tape drive.
Step
1. To rewind a tape, enter the following command:
32 | Data ONTAP 8.1 7-Mode Data Protection Tape Backup and Recovery Guide
mt -f device rewind
device is the name of a tape device used on the tape.
Example
mt -f nrst0a rewind
Related concepts
Tape device name format on page 18
Taking a tape drive offlineYou take a drive offline to remove or change the tape cartridge. This operation rewinds the tapecartridge and ejects it from the tape drive. The device is still available to the system, but is not readyfor I/O or tape movement.
About this task
You use a urst tape device to unload and reload a tape cartridge during a backup or restore operation.When you use a urst device, Data ONTAP waits for you to insert the new cartridge before continuingthe operation. However, when you want to remove the current cartridge when no other operation isongoing, you must use the mt offline command with an nrst tape device.
Step
1. To rewind the tape and take the tape drive offline by unloading the tape, enter the followingcommand:
mt -f device offline
device is the name of a tape device.
Example
mt -f nrst0a offline
Related concepts
Tape device name format on page 18
Tape drive management | 33
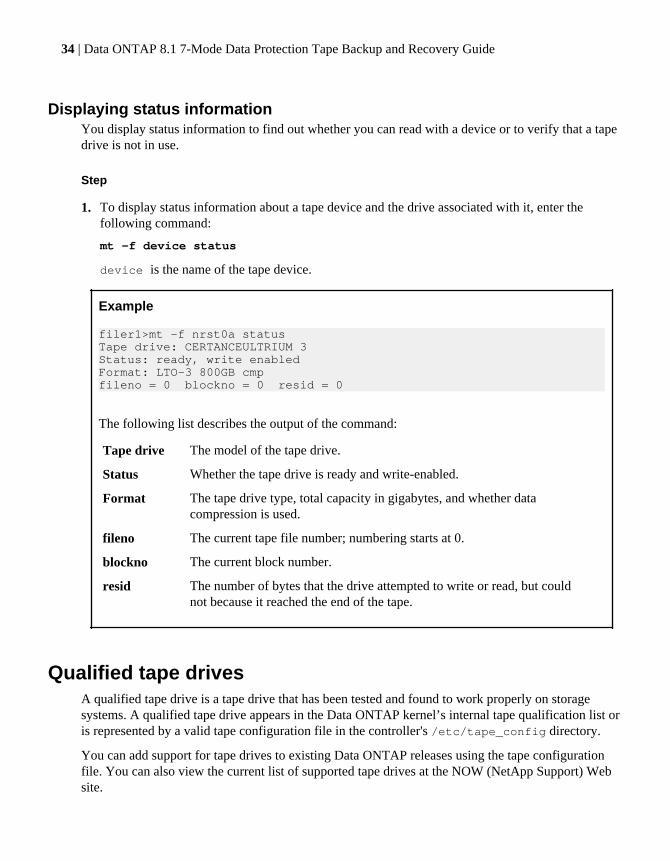
Displaying status informationYou display status information to find out whether you can read with a device or to verify that a tapedrive is not in use.
Step
1. To display status information about a tape device and the drive associated with it, enter thefollowing command:
mt -f device status
device is the name of the tape device.
Example
filer1>mt -f nrst0a statusTape drive: CERTANCEULTRIUM 3Status: ready, write enabledFormat: LTO-3 800GB cmpfileno = 0 blockno = 0 resid = 0
The following list describes the output of the command:
Tape drive The model of the tape drive.
Status Whether the tape drive is ready and write-enabled.
Format The tape drive type, total capacity in gigabytes, and whether datacompression is used.
fileno The current tape file number; numbering starts at 0.
blockno The current block number.
resid The number of bytes that the drive attempted to write or read, but couldnot because it reached the end of the tape.
Qualified tape drivesA qualified tape drive is a tape drive that has been tested and found to work properly on storagesystems. A qualified tape drive appears in the Data ONTAP kernel’s internal tape qualification list oris represented by a valid tape configuration file in the controller's /etc/tape_config directory.
You can add support for tape drives to existing Data ONTAP releases using the tape configurationfile. You can also view the current list of supported tape drives at the NOW (NetApp Support) Website.
34 | Data ONTAP 8.1 7-Mode Data Protection Tape Backup and Recovery Guide
To add support to Data ONTAP for a tape drive that was qualified after the release of the DataONTAP version you are using, copy the corresponding tape configuration file into thecontroller's /etc/tape_config directory.
Only qualified tape drives are listed in the tape qualification list. The tape libraries are not listed. Forexample, the tape library IBM TS3500 is not listed. However, the IBM LTO 4 tape drives that theIBM TS3500 contains are listed.
You can display information about qualified and nonqualified tape drives, tape libraries, and tapedrive connections to the storage system.
Related information
www.netapp.com/us/solutions/a-z/data-protection-devices.htmlnow.netapp.com/NOW/download/tools/tape_config/
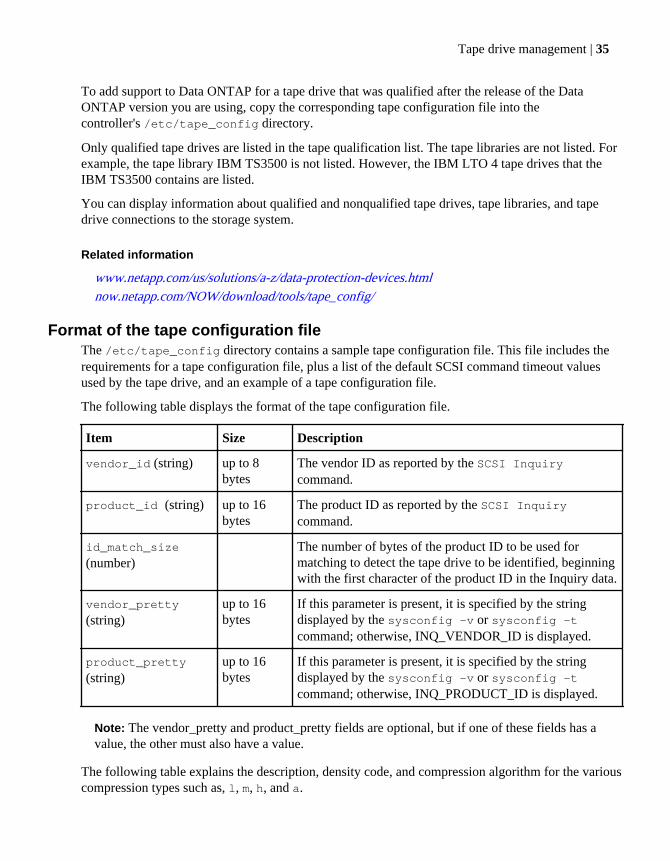
Format of the tape configuration fileThe /etc/tape_config directory contains a sample tape configuration file. This file includes therequirements for a tape configuration file, plus a list of the default SCSI command timeout valuesused by the tape drive, and an example of a tape configuration file.
The following table displays the format of the tape configuration file.
Item Size Description
vendor_id (string) up to 8bytes
The vendor ID as reported by the SCSI Inquirycommand.
product_id (string) up to 16bytes
The product ID as reported by the SCSI Inquirycommand.
id_match_size
(number)The number of bytes of the product ID to be used formatching to detect the tape drive to be identified, beginningwith the first character of the product ID in the Inquiry data.
vendor_pretty
(string)up to 16bytes
If this parameter is present, it is specified by the stringdisplayed by the sysconfig -v or sysconfig -tcommand; otherwise, INQ_VENDOR_ID is displayed.
product_pretty
(string)up to 16bytes
If this parameter is present, it is specified by the stringdisplayed by the sysconfig -v or sysconfig -tcommand; otherwise, INQ_PRODUCT_ID is displayed.
Note: The vendor_pretty and product_pretty fields are optional, but if one of these fields has avalue, the other must also have a value.
The following table explains the description, density code, and compression algorithm for the variouscompression types such as, l, m, h, and a.
Tape drive management | 35
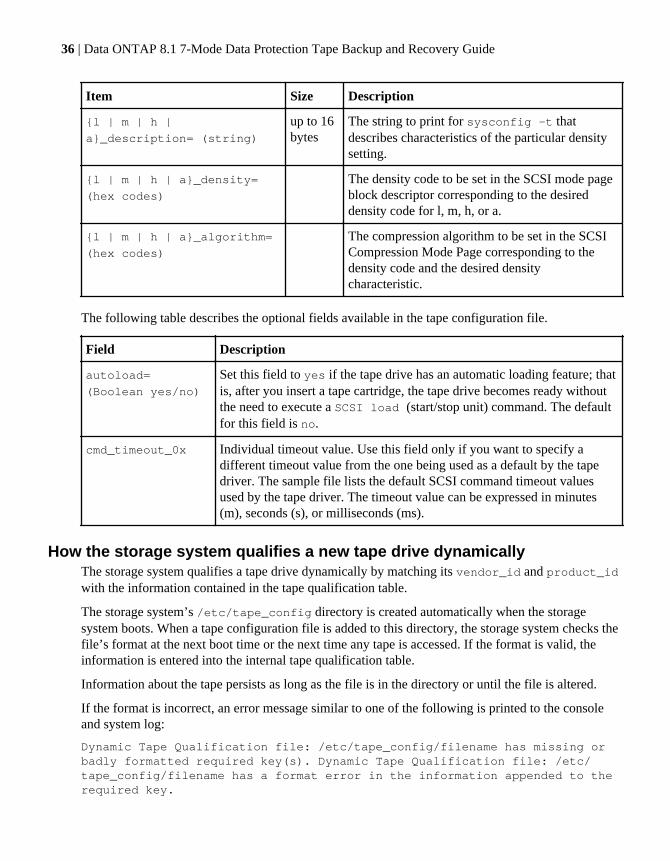
Item Size Description
{l | m | h |
a}_description= (string)
up to 16bytes
The string to print for sysconfig -t thatdescribes characteristics of the particular densitysetting.
{l | m | h | a}_density=
(hex codes)
The density code to be set in the SCSI mode pageblock descriptor corresponding to the desireddensity code for l, m, h, or a.
{l | m | h | a}_algorithm=
(hex codes)
The compression algorithm to be set in the SCSICompression Mode Page corresponding to thedensity code and the desired densitycharacteristic.
The following table describes the optional fields available in the tape configuration file.
Field Description
autoload=
(Boolean yes/no)
Set this field to yes if the tape drive has an automatic loading feature; thatis, after you insert a tape cartridge, the tape drive becomes ready withoutthe need to execute a SCSI load (start/stop unit) command. The defaultfor this field is no.
cmd_timeout_0x Individual timeout value. Use this field only if you want to specify adifferent timeout value from the one being used as a default by the tapedriver. The sample file lists the default SCSI command timeout valuesused by the tape driver. The timeout value can be expressed in minutes(m), seconds (s), or milliseconds (ms).
How the storage system qualifies a new tape drive dynamicallyThe storage system qualifies a tape drive dynamically by matching its vendor_id and product_idwith the information contained in the tape qualification table.
The storage system’s /etc/tape_config directory is created automatically when the storagesystem boots. When a tape configuration file is added to this directory, the storage system checks thefile’s format at the next boot time or the next time any tape is accessed. If the format is valid, theinformation is entered into the internal tape qualification table.
Information about the tape persists as long as the file is in the directory or until the file is altered.
If the format is incorrect, an error message similar to one of the following is printed to the consoleand system log:
Dynamic Tape Qualification file: /etc/tape_config/filename has missing orbadly formatted required key(s). Dynamic Tape Qualification file: /etc/tape_config/filename has a format error in the information appended to therequired key.
36 | Data ONTAP 8.1 7-Mode Data Protection Tape Backup and Recovery Guide
When you connect a tape drive to the storage system, the storage system looks for a vendor_id andproduct_id match between information obtained during the tape discovery process andinformation contained in the internal tape qualification table. If the storage system discovers a match,it marks the tape drive as qualified and can access the tape drive. If the storage system cannot find amatch, the tape drive remains in the unqualified state and is not accessed.
How to use a nonqualified tape driveYou can use a nonqualified tape drive (one that is not on the list of qualified tape drives) on a storagesystem if it can emulate a qualified tape drive. It is then treated as though it were a qualified tapedrive.
For a nonqualified tape drive to emulate a qualified tape drive, you must enter the nonqualified tapedrive information in the /etc/cloned_tapes file. This file enables the storage system to registerthe drive as a clone of a qualified drive.
Displaying information about nonqualified tape drivesTo use a nonqualified tape drive, you must first determine whether it emulates any of the qualifiedtape drives.
Steps
1. If the storage system has accessed the tape drive through the dump or mt command, go directly toStep 3. If the storage system has not accessed the tape drive through the dump or mt command, goto Step 2.
2. To access the tape drive, enter the following command:
mt -f device status
device is any device that contains the tape drive number that you think is assigned to the tapedrive.
Example
mt -f nrst1a status
3. Enter the following command:
sysconfig -t
If the storage system has registered a tape drive as emulating a qualified tape drive, it displays amessage similar to the following:Tape drive (6.5) DLT9000 emulates Digital DLT7000.
If the storage system has not registered a tape drive as emulating a qualified tape drive, it displaysa message similar to the following:Tape drive (6.5) DLTXXXX (Non-qualified tape drive)
Tape drive management | 37
Tape drive information required for emulationTo emulate a qualified tape drive, you must know certain specific information about yournonqualified tape drive.
The required information is as follows:
• Which qualified tape drive the nonqualified tape drive can emulate.• The vendor ID string, which is a SCSI string and should be in the SCSI section of your tape drive
manual.• The product ID string, which is a SCSI string and should be in the SCSI section of your tape drive
manual.
Emulating a qualified tape driveYou can use a nonqualified tape drive by making it emulate a qualified tape drive.
Steps
1. Ensure that you have a tape adapter available on the storage system.
2. Disable the adapter port to which the tape drive will be attached.
3. Connect the tape drive to the storage system according the tape drive manufacturer’s instructions.
4. Turn on the tape drive and wait for the tape drive to complete its power-on activities.
5. Enable the adapter interface.
When the adapter is enabled, it will discover the device.
An error message is displayed, which tells you that the tape drive is unsupported.
6. Enter the following command:
sysconfig -t
This command creates the /etc/cloned_tapes file, if it does not exist already. Observe thevendor ID and product ID of the nonqualified devices.
Note: The cloned tapes emulation method cannot be used if the product ID contains spaces.For example, the product ID Ultrium 4-SCSI cannot be used for cloning because it has a spacebetween Ultrium and 4. In such a case, you must use a configuration file.
7. Open the storage system’s /etc/cloned_tapes file in a text editor on a client that can access it.
8. For each nonqualified tape drive, create a line with the following format in the /etc/cloned_tapes file:
[clone_vendor_ID] clone_product_ID EMULATES [vendor_ID] product_ID
clone_vendor_ID is the vendor of the nonqualified tape drive.
38 | Data ONTAP 8.1 7-Mode Data Protection Tape Backup and Recovery Guide
clone_product_ID is the model number of the nonqualified tape drive.
vendor_ID is the vendor of a qualified tape drive that you want the nonqualified tape drive toemulate.
product_ID is the model number of a qualified tape drive that you want the nonqualified tapedrive to emulate.
ExampleThe following entry in the /etc/cloned_tapes file enables the storage system to treat thenonqualified Quantum DLT9000 tape drive as a clone of the qualified Quantum DLT7000 tapedrive:QUANTUM DLT9000 EMULATES QUANTUM DLT7000
9. Enter the following command:
sysconfig -t
The system reads the cloned_tapes file and puts emulation into effect. Verify that the newdevice appears as an emulated device.
Related concepts
Qualified tape drives on page 34
What tape reservations areMultiple storage systems can share access to tape drives, medium changers, bridges, or tape libraries.Tape reservations ensure that only one storage system accesses a device at any particular time byenabling either the SCSI Reserve/Release mechanism or SCSI Persistent Reservations for all tapedrives, medium changers, bridges, and tape libraries.
Note: All the systems that share devices in a library, whether switches are involved or not, mustuse the same reservation method.
The SCSI Reserve/Release mechanism for reserving devices works well under normal conditions.However, during the interface error recovery procedures, the reservations can be lost. If this happens,initiators other than the reserved owner can access the device.
Reservations made with SCSI Persistent Reservations are not affected by error recovery mechanisms,such as loop reset or target reset; however, not all devices implement SCSI Persistent Reservationscorrectly.
Tape drive management | 39
Enabling tape reservationsYou can enable tape reservation using the options tape.reservations command. By default,tape reservation is turned off.
Step
1. To use either the SCSI Reserve/Release mechanism or SCSI Persistent Reservations, enter thefollowing command:
options tape.reservations {scsi | persistent}
scsi selects the SCSI Reserve/Release mechanism.
persistent selects SCSI Persistent Reservations.
Disabling tape reservationsEnabling the tape reservations option can cause problems if tape drives, medium changers, bridges,or libraries do not work properly. If tape commands report that the device is reserved when no otherstorage systems are using the device, this option should be disabled.
Step
1. To turn off tape reservations, enter the following command:
options tape.reservations off
40 | Data ONTAP 8.1 7-Mode Data Protection Tape Backup and Recovery Guide
NDMP management
The Network Data Management Protocol (NDMP) is a standardized protocol for controlling backup,recovery, and other types of data transfer between primary and secondary storage devices, such asstorage systems and tape libraries.
By enabling NDMP protocol support on a storage system, you enable that storage system to carry outcommunications with NDMP-enabled commercial network-attached backup applications (also calledData Management Applications or DMAs), data servers, and tape servers participating in backup orrecovery operations. NDMP also provides low-level control of tape drives and medium changers.
Advantages of NDMPAccessing data protection services through backup applications that support NDMP offers a numberof advantages.
• NDMP backup applications provide sophisticated scheduling of data protection operations acrossmultiple storage systems.
• They also provide media management and tape inventory management services to eliminate orminimize manual tape handling during data protection operations.
• NDMP backup applications support data cataloging services that simplify the process of locatingspecific recovery data.Direct access recovery (DAR) optimizes the access of specific data from large backup tape sets.
• NDMP supports multiple topology configurations, allowing efficient sharing of secondary storage(tape library) resources through the use of three-way network data connections.
• NDMP backup applications typically provide user-friendly interfaces that simplify themanagement of data protection services.
What NDMP security isData ONTAP provides features for preventing or monitoring unauthorized use of NDMP connectionsto your storage system.
You can restrict the set of backup application hosts permitted to start NDMP sessions on a storagesystem. You can specify the authentication method to use (text or challenge) in order to allow NDMPrequests. You can enable or disable monitoring of NDMP connection requests.
All non-root NDMP users on the root vFiler unit and all NDMP users on vFiler units are required touse NDMP passwords that are distinct from the password of the user. This password can begenerated using the ndmpd password userid command.
NDMP users must have the login-ndmp capability to be able to successfully authenticate NDMPsessions. A predefined role named backup, by default, has the login-ndmp capability. To provide a
41
user with the login-ndmp capability, the backup role can be assigned to the group to which the userbelongs. However, when a group is assigned the backup role, all users within the group get the login-ndmp capability. Therefore, it is best to group all NDMP users in a single group that has the backuprole.
Data ONTAP also generates an NDMP-specific password for administrators who do not have rootprivilege on the target storage system.
Data ONTAP provides a set of commands that enable you to manage and monitor the security ofNDMP connections to the storage system.
The following are the commands that monitor the security of NDMP connections to storage systems.
• The options ndmpd.access command enables you to restrict which hosts can run NDMPsessions with the storage system.
• The options ndmpd.authtype command enables you to specify the authentication method(plaintext, challenge, or both) through which users are allowed to start NDMP sessions with thestorage system.
• The options ndmpd.connectlog command allows you to enable or disable logging of NDMPconnections attempts with the storage system.
• The options ndmpd.password_length command allows you specify an 8- or 16-characterNDMP password.
• The ndmpd password command generates a secure NDMP password for administrators who donot have root privileges on the storage system.This password allows them to carry out NDMP operations through an NDMP-compliant backupapplication. For the NDMP password to be generated, the NDMP user must have the login-ndmp capability.
Specifying NDMP access by host or interfaceYou can use the options ndmpd.access command to specify the hosts or interfaces throughwhich NDMP sessions are permitted. Conversely, you can also specify hosts or interfaces to blockfrom NDMP sessions.
Steps
1. Start a console session on the storage system to which you want to restrict NDMP access.
2. Enter the following command:
options ndmpd.access {all|legacy|host[!]=hosts|if[!]=interfaces}
all is the default value, which permits NDMP sessions with any host.
legacy restores previous values in effect before a Data ONTAP version upgrade.
Note: In the case of Data ONTAP 6.2, the legacy value is equal to all.
42 | Data ONTAP 8.1 7-Mode Data Protection Tape Backup and Recovery Guide
host=hosts is a parameter string that allows a specified host or a comma-separated list of hoststo run NDMP sessions on this storage system. The hosts can be specified by either the host nameor by an IPv4 or IPv6 address.
host!=hosts is a parameter string that blocks a specified host or a comma-separated list ofhosts from running NDMP sessions on this storage system. The hosts can be specified by eitherthe host name or by an IPv4 or IPv6 address.
if=interfaces is a parameter string that allows NDMP sessions through a specified interfaceor a comma-separated list of interfaces on this storage system.
if!=interfaces is a parameter string that blocks NDMP sessions through a specified interfaceor a comma-separated list of interfaces on this storage system.
Specifying the NDMP authentication typeData ONTAP supports two methods for authenticating NDMP access to a storage system: plaintextand challenge. You can use the options ndmpd.authtype command to specify whether a storagesystem will accept plaintext, challenge, or both to authenticate NDMP session requests.
Steps
1. Start a console session on the storage system whose NDMP authentication method you want tospecify.
2. Enter the following command:
options ndmpd.authtype {challenge|plaintext|plaintext,challenge}
challenge sets the challenge authentication method, generally the preferred and more secureauthentication method.
plaintext sets the plaintext authentication method, in which the login password is transmittedas clear text.
plaintext,challenge sets both challenge and plaintext authentication methods.
Note: If you are carrying out NDMP operations through a backup application, theauthentication type or types you specify on this command line must include the types supportedby that backup application.
Enabling or disabling NDMP connection loggingData ONTAP can log NDMP connection attempts in the /etc/messages file. These entries enablean administrator to determine whether and when authorized or unauthorized individuals areattempting to start NDMP sessions. The default is off.
Steps
1. Start a console session on the storage system on which you want to enable or disable NDMPconnection monitoring.
NDMP management | 43
2. Enter the following command:
options ndmpd.connectlog.enabled {on|off}
Note: The value you set for this option will persist across storage system reboots.
3. If you want to check attempted NDMP connection activity, use your UNIX or Windows Adminhost to view your storage system’s /etc/messages file.
Entries recording attempted NDMP connections or operations will display the following fields:
• Time• Thread• NDMP request and action (allow or refuse)• NDMP version• Session ID• Source IPv4 or IPv6 address (address from where the NDMP request originated)• Destination IPv4 or IPv6 address (address of the storage system receiving the NDMP request)• Source port (through which the NDMP request was transmitted)• Storage system port (through which the NDMP request was received)
Example
Thu Apr 15 09:27:00 GMT Apr 15 09:27:00
[host1:ndmp.connection.accept:info]: ndmpd.access allowed for version
= 4, sessionId = 2922, from src ip = 10.10.0.1, dst ip = 10.10.0.2,
src port = 41855, dst port = 10000
Specifying the NDMP password lengthAdministrators who have an account on a storage system but do not have root status on that storagesystem must input a special NDMP-specific password when carrying out NDMP-related operationson the storage system. This password is a system-generated string derived from that administrator’sregular storage system account password.
About this task
The NDMP password can be either 8 or 16 characters long. The default value is 16 characters.
Step
1. To specify the NDMP password length, enter the following command on the storage systemconsole:
options ndmpd.password_length length
length is either 8 or 16. If you enter a value other than 8 or 16, the storage system prompts youwith the following message:
44 | Data ONTAP 8.1 7-Mode Data Protection Tape Backup and Recovery Guide
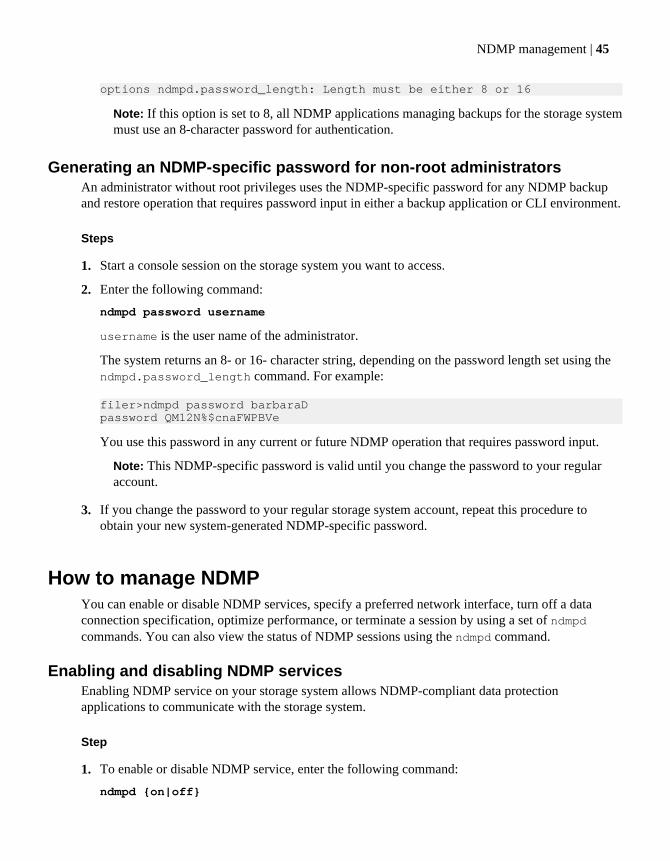
options ndmpd.password_length: Length must be either 8 or 16
Note: If this option is set to 8, all NDMP applications managing backups for the storage systemmust use an 8-character password for authentication.
Generating an NDMP-specific password for non-root administratorsAn administrator without root privileges uses the NDMP-specific password for any NDMP backupand restore operation that requires password input in either a backup application or CLI environment.
Steps
1. Start a console session on the storage system you want to access.
2. Enter the following command:
ndmpd password username
username is the user name of the administrator.
The system returns an 8- or 16- character string, depending on the password length set using thendmpd.password_length command. For example:
filer>ndmpd password barbaraDpassword QM12N%$cnaFWPBVe
You use this password in any current or future NDMP operation that requires password input.
Note: This NDMP-specific password is valid until you change the password to your regularaccount.
3. If you change the password to your regular storage system account, repeat this procedure toobtain your new system-generated NDMP-specific password.
How to manage NDMPYou can enable or disable NDMP services, specify a preferred network interface, turn off a dataconnection specification, optimize performance, or terminate a session by using a set of ndmpdcommands. You can also view the status of NDMP sessions using the ndmpd command.
Enabling and disabling NDMP servicesEnabling NDMP service on your storage system allows NDMP-compliant data protectionapplications to communicate with the storage system.
Step
1. To enable or disable NDMP service, enter the following command:
ndmpd {on|off}
NDMP management | 45
Use on to enable NDMP.
Use off to disable NDMP.
After you disable the NDMP service, the storage system continues processing all requests onalready established sessions, but rejects new sessions.
Note: This setting is persistent across reboots.
Specifying a preferred network interfaceYou can specify the preferred storage system network interface to be used when establishing anNDMP data connection to another storage system.
About this task
By default, an NDMP data connection uses the same network interface as the NDMP controlconnection established by the NDMP backup application. However, to establish a data connectionbetween NDMP-enabled storage systems over an alternate network, you need to specify the storagesystem’s interface through which the alternate network will be accessed.
For example, a UNIX or NT resident NDMP backup application and multiple storage systems can beinterconnected through a corporate network. The same storage systems can also be interconnectedthrough an isolated private network. To minimize load on the corporate network, the optionsndmpd.preferred_interface command can be used to direct all NDMP data connections overthe isolated private network.
Step
1. To specify the preferred network interface to be used for NDMP data connections, enter thefollowing command:
options ndmpd.preferred_interface interface
interface identifies the network interface to be used for all NDMP data connections. Anynetwork interface providing TCP/IP access can be specified. If no parameter is specified, thecommand returns the name of the interface currently configured for data connections. If nointerface is currently set, it reports disable.
You can find the available network interfaces by using the ifconfig -a command.
Note: The preferred network interfaces that are set using the optionsndmpd.preferred_interface command are persistent across storage system reboots.
Designating the range of ports for NDMP data connectionsData ONTAP supports a designated range of TCP/IP ports that can be used for NDMP dataconnections in response to NDMP_DATA_LISTEN and NDMP_MOVER_LISTEN operations.
About this task
Data ONTAP 8.0 7-Mode and earlier versions do not support data migration by using the ndmpcopycommand and three-way tape backups in environments where the source and destination networks
46 | Data ONTAP 8.1 7-Mode Data Protection Tape Backup and Recovery Guide
are separated by a firewall. This is because the data or mover port that is used in a data transfer isunpredictable.
Starting with Data ONTAP 8.0.1, administrators can designate range of ports that can be used forNDMP data connections in response to NDMP_DATA_LISTEN and NDMP_MOVER_LISTENoperations. Therefore, Data ONTAP enables you to perform data migration by using ndmpcopycommand and 3-way tape backups even in environments where the source and destination networksare separated by a firewall.
Step
1. To enable the data port range, enter the following command:
options ndmpd.data_port_range {start_port-end_port}
The ndmpd.data_port_range option allows administrators to specify a port range on whichthe NDMP server can listen for data connections.
The start_port and end_port indicate the range of ports designated for data connection andcan have values between 1024 and 65535; start_port must be less than or equal to end_port.
If a valid range is specified, NDMP uses a port within that range to listen for incoming dataconnections. A listen request fails if no ports in the specified range are free.
The default value for ndmpd.data_port_range option is all. The all implies that anyavailable port can be used to listen for data connections.
Note: The ndmpd.data_port_range option is persistent across reboots.
Example
Filer1> options ndmpd.data_port_range 1024-2048
Turning off a data connection specificationYou can disable a preferred network interface specification and force the NDMP default interface tobe used for data connections.
Step
1. To disable a preferred network interface specification and force the NDMP default interface to beused for data connections, enter the following command:
options ndmpd.preferred_interface disable
Note: The default value is disable.
NDMP management | 47
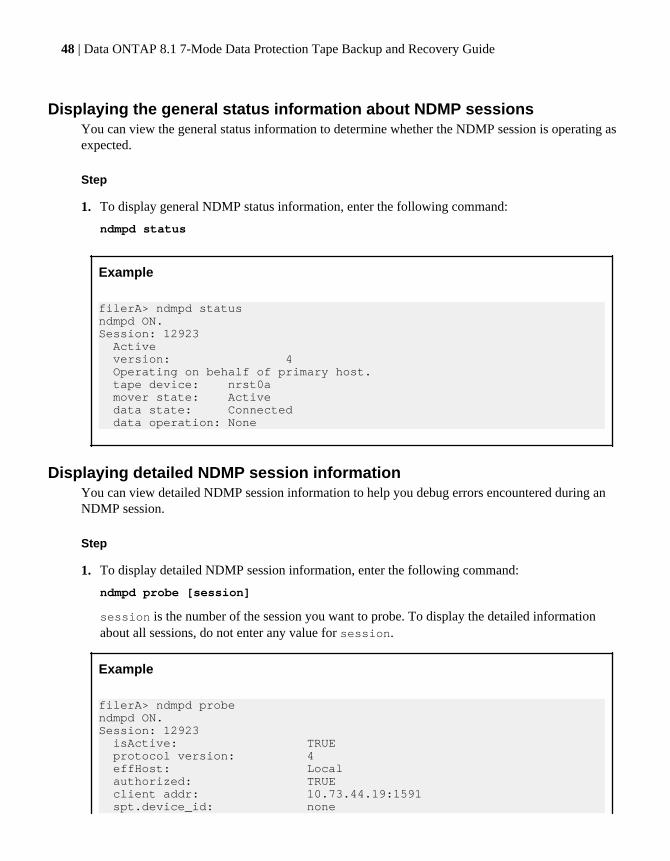
Displaying the general status information about NDMP sessionsYou can view the general status information to determine whether the NDMP session is operating asexpected.
Step
1. To display general NDMP status information, enter the following command:
ndmpd status
Example
filerA> ndmpd status ndmpd ON.Session: 12923 Active version: 4 Operating on behalf of primary host. tape device: nrst0a mover state: Active data state: Connected data operation: None
Displaying detailed NDMP session informationYou can view detailed NDMP session information to help you debug errors encountered during anNDMP session.
Step
1. To display detailed NDMP session information, enter the following command:
ndmpd probe [session]
session is the number of the session you want to probe. To display the detailed informationabout all sessions, do not enter any value for session.
Example
filerA> ndmpd probe ndmpd ON.Session: 12923 isActive: TRUE protocol version: 4 effHost: Local authorized: TRUE client addr: 10.73.44.19:1591 spt.device_id: none
48 | Data ONTAP 8.1 7-Mode Data Protection Tape Backup and Recovery Guide
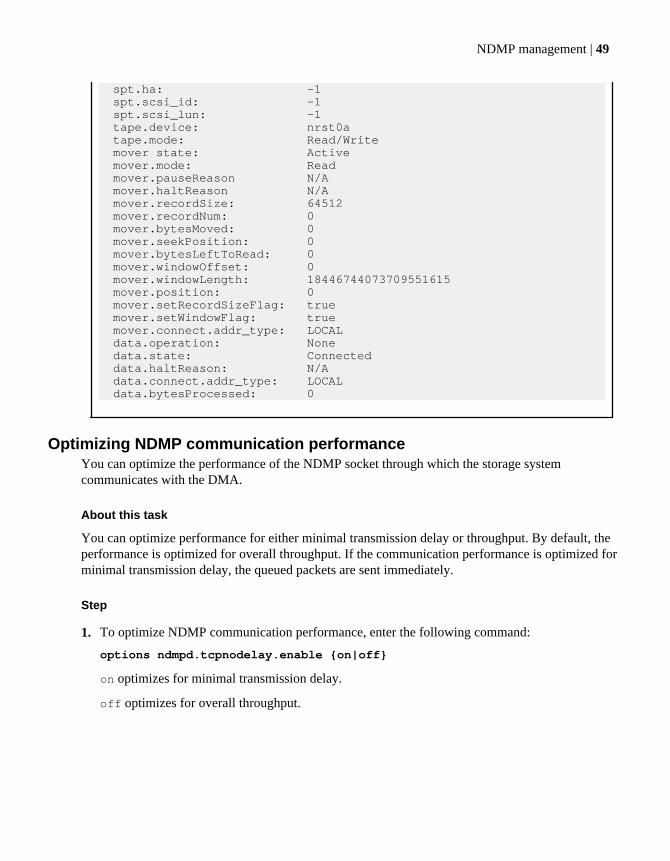
spt.ha: -1 spt.scsi_id: -1 spt.scsi_lun: -1 tape.device: nrst0a tape.mode: Read/Write mover state: Active mover.mode: Read mover.pauseReason N/A mover.haltReason N/A mover.recordSize: 64512 mover.recordNum: 0 mover.bytesMoved: 0 mover.seekPosition: 0 mover.bytesLeftToRead: 0 mover.windowOffset: 0 mover.windowLength: 18446744073709551615 mover.position: 0 mover.setRecordSizeFlag: true mover.setWindowFlag: true mover.connect.addr_type: LOCAL data.operation: None data.state: Connected data.haltReason: N/A data.connect.addr_type: LOCAL data.bytesProcessed: 0
Optimizing NDMP communication performanceYou can optimize the performance of the NDMP socket through which the storage systemcommunicates with the DMA.
About this task
You can optimize performance for either minimal transmission delay or throughput. By default, theperformance is optimized for overall throughput. If the communication performance is optimized forminimal transmission delay, the queued packets are sent immediately.
Step
1. To optimize NDMP communication performance, enter the following command:
options ndmpd.tcpnodelay.enable {on|off}
on optimizes for minimal transmission delay.
off optimizes for overall throughput.
NDMP management | 49
Terminating an NDMP sessionIf an NDMP session is not responding, you can terminate it using the ndmpd kill command. Thendmp kill command allows nonresponding sessions to be cleared without the need for a reboot.
Step
1. To terminate an NDMP session, enter the following command:
ndmpd kill session
session is the specific NDMP session you want to terminate.
Note: If you want to terminate all NDMP sessions, use the ndmpd killall command.
Why you need to specify the NDMP versionData ONTAP provides full support for NDMP versions 3 and 4. Data ONTAP is shipped with theNDMP version set to 4, as both the default version and the maximum version. The storage systemand the backup application must agree on a version of NDMP to be used for each NDMP session.
When the backup application connects to the storage system, the storage system sends the defaultversion back. The application can choose to use that default version and continue with the session.However, if the backup application uses an earlier version, it begins version negotiation, asking ifeach version is supported, to which the storage system responds with a yes or a no.
Displaying the NDMP versionThe ndmp version command displays the highest version of NDMP that the storage system iscurrently set to use.
Step
1. Enter the following command:
ndmpd version
The highest version that NDMP currently allows you to use is displayed.
50 | Data ONTAP 8.1 7-Mode Data Protection Tape Backup and Recovery Guide
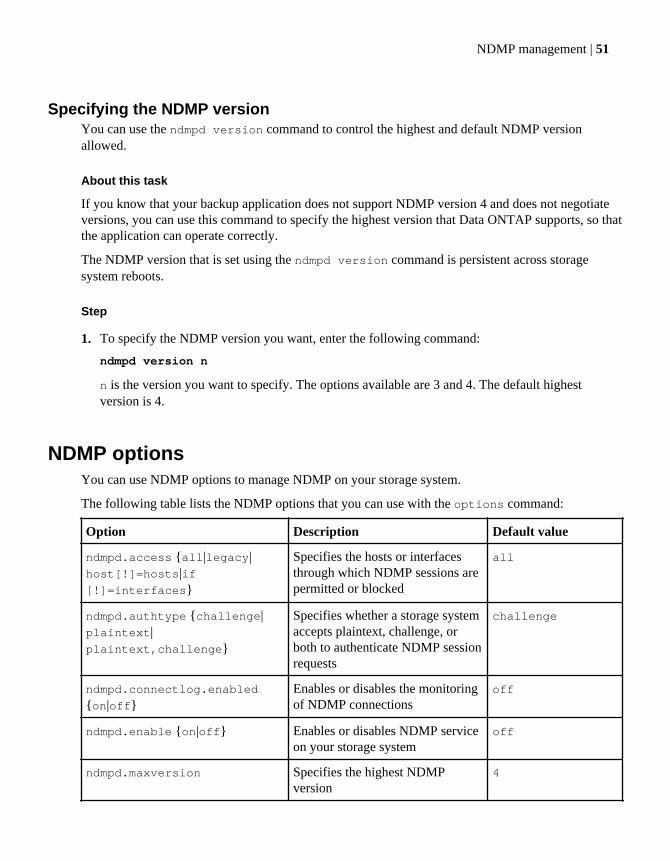
Specifying the NDMP versionYou can use the ndmpd version command to control the highest and default NDMP versionallowed.
About this task
If you know that your backup application does not support NDMP version 4 and does not negotiateversions, you can use this command to specify the highest version that Data ONTAP supports, so thatthe application can operate correctly.
The NDMP version that is set using the ndmpd version command is persistent across storagesystem reboots.
Step
1. To specify the NDMP version you want, enter the following command:
ndmpd version n
n is the version you want to specify. The options available are 3 and 4. The default highestversion is 4.
NDMP optionsYou can use NDMP options to manage NDMP on your storage system.
The following table lists the NDMP options that you can use with the options command:
Option Description Default value
ndmpd.access {all|legacy|host[!]=hosts|if[!]=interfaces}
Specifies the hosts or interfacesthrough which NDMP sessions arepermitted or blocked
all
ndmpd.authtype {challenge|plaintext|plaintext,challenge}
Specifies whether a storage systemaccepts plaintext, challenge, orboth to authenticate NDMP sessionrequests
challenge
ndmpd.connectlog.enabled
{on|off}Enables or disables the monitoringof NDMP connections
off
ndmpd.enable {on|off} Enables or disables NDMP serviceon your storage system
off
ndmpd.maxversion Specifies the highest NDMPversion
4
NDMP management | 51
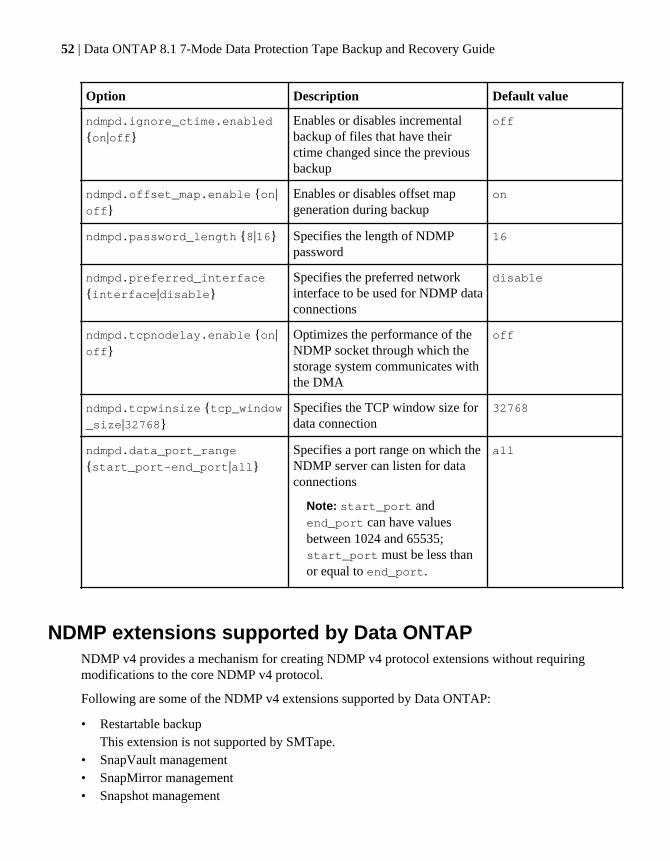
Option Description Default value
ndmpd.ignore_ctime.enabled
{on|off}Enables or disables incrementalbackup of files that have theirctime changed since the previousbackup
off
ndmpd.offset_map.enable {on|off}
Enables or disables offset mapgeneration during backup
on
ndmpd.password_length {8|16} Specifies the length of NDMPpassword
16
ndmpd.preferred_interface
{interface|disable}Specifies the preferred networkinterface to be used for NDMP dataconnections
disable
ndmpd.tcpnodelay.enable {on|off}
Optimizes the performance of theNDMP socket through which thestorage system communicates withthe DMA
off
ndmpd.tcpwinsize {tcp_window_size|32768}
Specifies the TCP window size fordata connection
32768
ndmpd.data_port_range
{start_port-end_port|all}Specifies a port range on which theNDMP server can listen for dataconnections
Note: start_port andend_port can have valuesbetween 1024 and 65535;start_port must be less thanor equal to end_port.
all
NDMP extensions supported by Data ONTAPNDMP v4 provides a mechanism for creating NDMP v4 protocol extensions without requiringmodifications to the core NDMP v4 protocol.
Following are some of the NDMP v4 extensions supported by Data ONTAP:
• Restartable backupThis extension is not supported by SMTape.
• SnapVault management• SnapMirror management• Snapshot management
52 | Data ONTAP 8.1 7-Mode Data Protection Tape Backup and Recovery Guide
• CAE (Connection Address Extension) for IPv6 support
To benefit from these NDMP v4 extensions, the NDMP backup applications must support theseextensions.
Related information
www.ndmp.org
Tape backup using NDMP servicesYou can use NDMP-enabled commercial backup applications to perform network-based tape backupand recovery.
Common NDMP tape backup topologiesNDMP supports a number of topologies and configurations between backup applications and storagesystems or other NDMP servers providing data (file systems) and tape services.
Storage system-to-local-tape
In the simplest configuration, a backup application backs up data from a storage system to a tapesubsystem attached to the storage system. The NDMP control connection exists across the networkboundary. The NDMP data connection that exists within the storage system between the data andtape services is called an NDMP local configuration.
Storage system-to-tape attached to another storage system
A backup application can also back up data from a storage system to a tape library (a mediumchanger with one or more tape drives) attached to another storage system. In this case, the NDMPdata connection between the data and tape services is provided by a TCP/IP network connection.This is called an NDMP three-way storage system-to-storage system configuration.
Storage system-to-network-attached tape library
NDMP-enabled tape libraries provide a variation of the three-way configuration. In this case, the tapelibrary attaches directly to the TCP/IP network and communicates with the backup application andthe storage system through an internal NDMP server.
Storage system-to-data server-to-tape or data server-to-storage system-to-tape
NDMP also supports storage system-to-data-server and data-server-to-storage system three-wayconfigurations, although these variants are less widely deployed. Storage system-to-server allowsstorage system data to be backed up to a tape library attached to the backup application host or toanother data server system. The server-to-storage system configuration allows server data to bebacked up to a storage system-attached tape library.
NDMP management | 53
Considerations when using NDMPYou have to take into account a list of considerations when starting the NDMP service on yourstorage system.
• Data ONTAP supports a maximum of 16 concurrent backups, restores, or both on a local tapedrive.This includes backups initiated by NDMP as well as by the dump, restore, and smtapecommands. However, a storage system supports a maximum of 32 dump or smtape sessions overa TCP/IP network.
• NDMP backup applications require specification of a target system password.To enable successful authentication by NDMP services on the storage system, you must useeither the storage system’s root password or a system-generated NDMP-specific password (toauthenticate a non-root user or administrator).
• NDMP services can generate file history data at the request of NDMP backup applications.File history is used by backup applications to enable optimized recovery of selected subsets ofdata from a backup image. File history generation and processing might be time-consuming andCPU-intensive for both the storage system and the backup application.
Note: SMTape does not support file history.
If your data protection needs are limited to disaster recovery, where the entire backup image willbe recovered, you can disable file history generation to reduce backup time. See your backupapplication documentation to determine if it is possible to disable NDMP file history generation.
Note: When your data protection needs are limited to disaster recovery, it is recommended thatyou use SMTape to back up data.
• When a SnapMirror destination is backed up to tape, only the data on the volume is backed up.The SnapMirror relationships and the associated metadata are not backed to tape. Therefore,during restore, only the data on that volume is restored and the associated SnapMirrorrelationships are not restored.
Tape devices and configurations you can use with the storage systemYou can use different types of tape devices and configurations on your storage system.
The storage system can read from or write to these devices when using NDMP:
• Stand-alone tape drives or tapes within a tape library attached to the storage system• Tape drives or tape libraries attached to the workstation that runs the backup application• Tape drives or tape libraries attached to a workstation or storage system on your network• NDMP-enabled tape libraries attached to your network
When you use NDMP to back up the storage system to attached tape libraries, you need to set thetape library autoload setting to Off. If the autoload setting is On, the storage system uses the tapelibrary the same way it uses a stand-alone tape drive and does not allow medium changer operationsto be controlled by the NDMP backup application.
54 | Data ONTAP 8.1 7-Mode Data Protection Tape Backup and Recovery Guide
Naming conventions for tape libraries
Historically, the following names were always used to refer to tape libraries:
• mcn or /dev/mcn• sptn or /dev/sptn
In a specific tape library name, n is a number. For example, mc0, spt0, /dev/mc0, and /dev/spt0 allrefer to the same library.
Now, tape libraries can also be aliased to WWNs.
To view the tape libraries recognized by your system, use the sysconfig -m command on thestorage system console. To see what names are currently assigned to any libraries, use the storageshow mc command on the storage system. Tape aliasing is also used to refer to tape drives, and youcan see the aliases of tape drives using the storage show tape command.
Examples
The following is an example of an output from the storage show mc command:
filerA> storage show mcMedia Changer: 2.3Description: SPECTRA 10000Serial Number: 7030290500World Wide Name: WWN[2:000:0090a5:00011c]Alias Name(s): mc0Device State: available (does not support reservations)
Preparing for basic NDMP backup application managementTo enable a storage system for basic management by a commercial NDMP backup application, youmust enable the storage system’s NDMP support and specify the backup application’s configuredNDMP version, host IP address, and authentication method.
About this task
If an operator without root privileges to the storage system is using a backup application, that usermust use a storage system-generated NDMP-specific password to carry out backup operations on thatstorage system.
Steps
1. To enable NDMP, enter the following command at the console command line of the targetstorage system:
ndmpd on
2. To specify the NDMP version to support on your storage system, enter the following command:
ndmpd version {3|4}
NDMP management | 55

Note: The version must match the version configured for your NDMP backup application.
3. To specify a restricted set of NDMP backup application hosts that can connect to the storagesystem, enter the following command:
options ndmpd.access hosts
hosts is a comma-separated list of host names or IP addresses of nodes permitted to start NDMPsessions with the storage system.
Note: By default, all hosts have NDMP access.
4. Specify the authentication type (plaintext, challenge, or plaintext and challenge) required for anNDMP connection to this storage system. For example:
options ndmpd authtype plaintext,challenge
This setting must include the authentication type supported by the NDMP backup application.
Note: The challenge authentication type is the default for this option.
5. If operators without root privilege on the storage system are carrying out tape backup operationsthrough the NDMP backup application, make sure they have a user administration account on thestorage system.
a. If the operator does not have a user administration account on the storage system, enter thefollowing command:
useradmin useradd username
b. If you want to know the system-generated NDMP-specific password, enter the followingcommand:
ndmpd password username
Use this user name and password to connect to the storage system to carry out NDMP backup andrestore operations.
Related tasks
Enabling and disabling NDMP services on page 45
Specifying a preferred network interface on page 46
Specifying NDMP access by host or interface on page 42
Specifying the NDMP authentication type on page 43
Generating an NDMP-specific password for non-root administrators on page 45
What environment variables doEnvironment variables are used to communicate information about a backup or restore operationbetween an NDMP-enabled backup application and a storage system.
For example, if a user specifies that a backup application should back up /vol/vol0/etc, thebackup application sets the FILESYSTEM environment variable to /vol/vol0/etc. Similarly, if a
56 | Data ONTAP 8.1 7-Mode Data Protection Tape Backup and Recovery Guide
user specifies that a backup should be a level 1 backup, the backup application sets the LEVELenvironment variable to 1 (one).
Note: The setting and examining of environment variables are typically transparent to backupadministrators; that is, the backup application sets them automatically.
A backup administrator rarely specifies environment variables; however, you might want to changethe value of an environment variable from that set by the backup application to characterize or workaround a functional or performance problem. For example, an administrator might want totemporarily disable file history generation to determine if the backup application's processing of filehistory information is contributing to performance issues or functional problems.
Many backup applications provide a means to override or modify environment variables or to specifyadditional environment variables. For information, see your backup application documentation.
Related concepts
Environment variables supported for dump on page 68
Environment variables supported for SMTape on page 127
NDMP management | 57

58 | Data ONTAP 8.1 7-Mode Data Protection Tape Backup and Recovery Guide
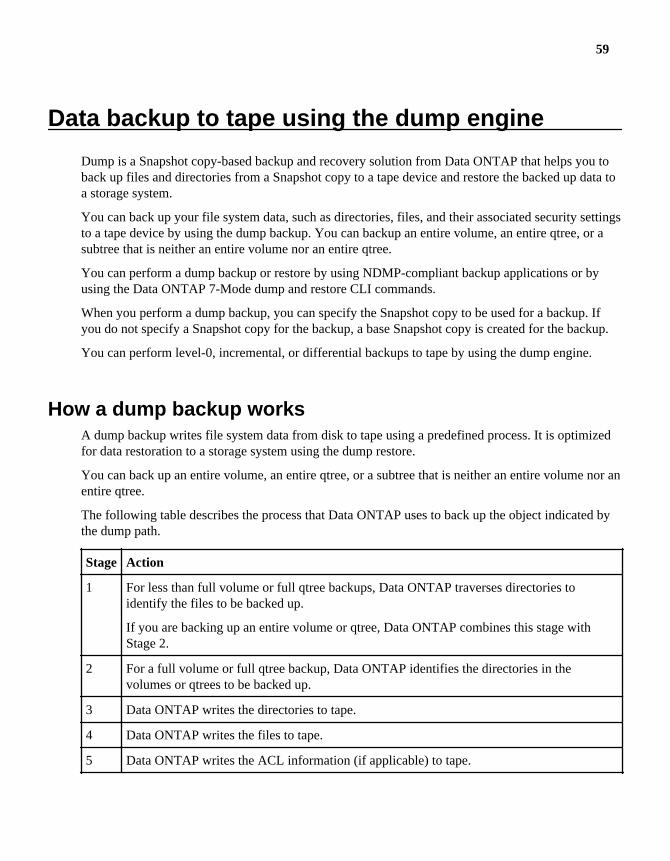
Data backup to tape using the dump engine
Dump is a Snapshot copy-based backup and recovery solution from Data ONTAP that helps you toback up files and directories from a Snapshot copy to a tape device and restore the backed up data toa storage system.
You can back up your file system data, such as directories, files, and their associated security settingsto a tape device by using the dump backup. You can backup an entire volume, an entire qtree, or asubtree that is neither an entire volume nor an entire qtree.
You can perform a dump backup or restore by using NDMP-compliant backup applications or byusing the Data ONTAP 7-Mode dump and restore CLI commands.
When you perform a dump backup, you can specify the Snapshot copy to be used for a backup. Ifyou do not specify a Snapshot copy for the backup, a base Snapshot copy is created for the backup.
You can perform level-0, incremental, or differential backups to tape by using the dump engine.
How a dump backup worksA dump backup writes file system data from disk to tape using a predefined process. It is optimizedfor data restoration to a storage system using the dump restore.
You can back up an entire volume, an entire qtree, or a subtree that is neither an entire volume nor anentire qtree.
The following table describes the process that Data ONTAP uses to back up the object indicated bythe dump path.
Stage Action
1 For less than full volume or full qtree backups, Data ONTAP traverses directories toidentify the files to be backed up.
If you are backing up an entire volume or qtree, Data ONTAP combines this stage withStage 2.
2 For a full volume or full qtree backup, Data ONTAP identifies the directories in thevolumes or qtrees to be backed up.
3 Data ONTAP writes the directories to tape.
4 Data ONTAP writes the files to tape.
5 Data ONTAP writes the ACL information (if applicable) to tape.
59
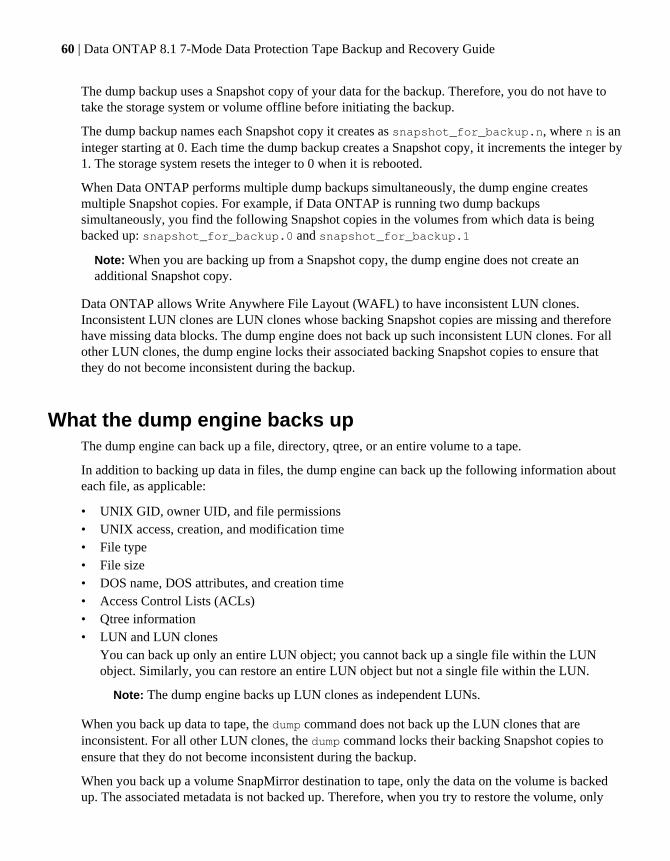
The dump backup uses a Snapshot copy of your data for the backup. Therefore, you do not have totake the storage system or volume offline before initiating the backup.
The dump backup names each Snapshot copy it creates as snapshot_for_backup.n, where n is aninteger starting at 0. Each time the dump backup creates a Snapshot copy, it increments the integer by1. The storage system resets the integer to 0 when it is rebooted.
When Data ONTAP performs multiple dump backups simultaneously, the dump engine createsmultiple Snapshot copies. For example, if Data ONTAP is running two dump backupssimultaneously, you find the following Snapshot copies in the volumes from which data is beingbacked up: snapshot_for_backup.0 and snapshot_for_backup.1
Note: When you are backing up from a Snapshot copy, the dump engine does not create anadditional Snapshot copy.
Data ONTAP allows Write Anywhere File Layout (WAFL) to have inconsistent LUN clones.Inconsistent LUN clones are LUN clones whose backing Snapshot copies are missing and thereforehave missing data blocks. The dump engine does not back up such inconsistent LUN clones. For allother LUN clones, the dump engine locks their associated backing Snapshot copies to ensure thatthey do not become inconsistent during the backup.
What the dump engine backs upThe dump engine can back up a file, directory, qtree, or an entire volume to a tape.
In addition to backing up data in files, the dump engine can back up the following information abouteach file, as applicable:
• UNIX GID, owner UID, and file permissions• UNIX access, creation, and modification time• File type• File size• DOS name, DOS attributes, and creation time• Access Control Lists (ACLs)• Qtree information• LUN and LUN clones
You can back up only an entire LUN object; you cannot back up a single file within the LUNobject. Similarly, you can restore an entire LUN object but not a single file within the LUN.
Note: The dump engine backs up LUN clones as independent LUNs.
When you back up data to tape, the dump command does not back up the LUN clones that areinconsistent. For all other LUN clones, the dump command locks their backing Snapshot copies toensure that they do not become inconsistent during the backup.
When you back up a volume SnapMirror destination to tape, only the data on the volume is backedup. The associated metadata is not backed up. Therefore, when you try to restore the volume, only
60 | Data ONTAP 8.1 7-Mode Data Protection Tape Backup and Recovery Guide
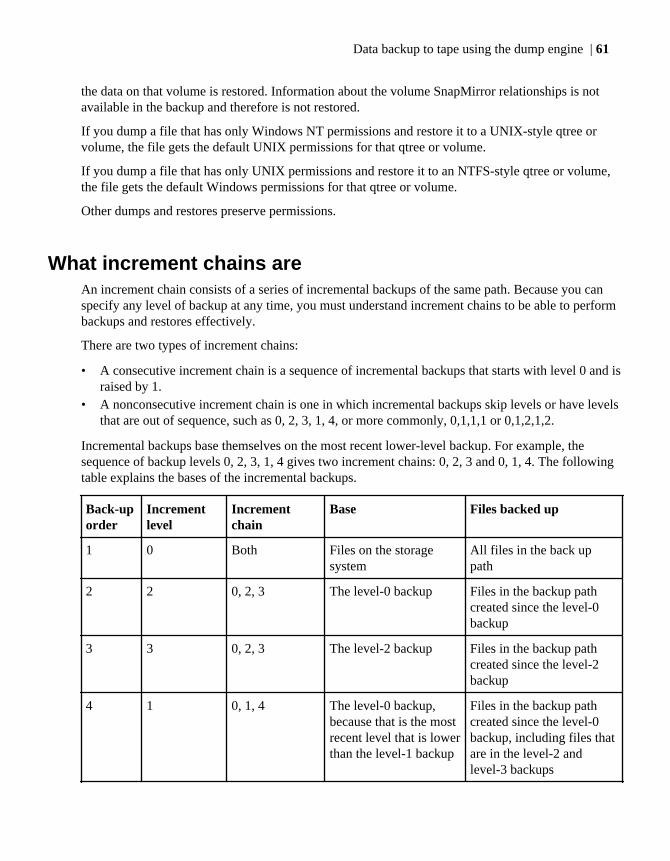
the data on that volume is restored. Information about the volume SnapMirror relationships is notavailable in the backup and therefore is not restored.
If you dump a file that has only Windows NT permissions and restore it to a UNIX-style qtree orvolume, the file gets the default UNIX permissions for that qtree or volume.
If you dump a file that has only UNIX permissions and restore it to an NTFS-style qtree or volume,the file gets the default Windows permissions for that qtree or volume.
Other dumps and restores preserve permissions.
What increment chains areAn increment chain consists of a series of incremental backups of the same path. Because you canspecify any level of backup at any time, you must understand increment chains to be able to performbackups and restores effectively.
There are two types of increment chains:
• A consecutive increment chain is a sequence of incremental backups that starts with level 0 and israised by 1.
• A nonconsecutive increment chain is one in which incremental backups skip levels or have levelsthat are out of sequence, such as 0, 2, 3, 1, 4, or more commonly, 0,1,1,1 or 0,1,2,1,2.
Incremental backups base themselves on the most recent lower-level backup. For example, thesequence of backup levels 0, 2, 3, 1, 4 gives two increment chains: 0, 2, 3 and 0, 1, 4. The followingtable explains the bases of the incremental backups.
Back-uporder
Incrementlevel
Incrementchain
Base Files backed up
1 0 Both Files on the storagesystem
All files in the back uppath
2 2 0, 2, 3 The level-0 backup Files in the backup pathcreated since the level-0backup
3 3 0, 2, 3 The level-2 backup Files in the backup pathcreated since the level-2backup
4 1 0, 1, 4 The level-0 backup,because that is the mostrecent level that is lowerthan the level-1 backup
Files in the backup pathcreated since the level-0backup, including files thatare in the level-2 andlevel-3 backups
Data backup to tape using the dump engine | 61
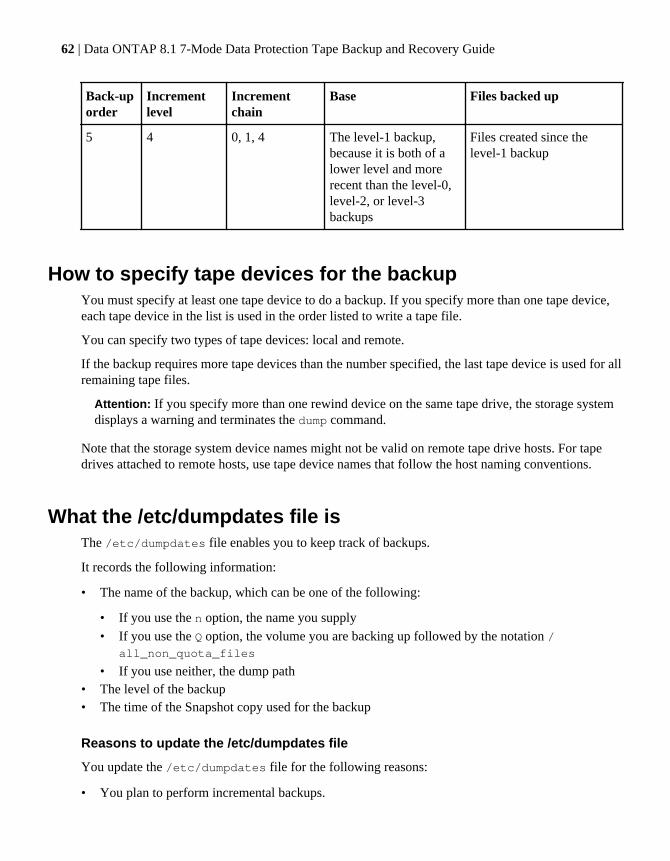
Back-uporder
Incrementlevel
Incrementchain
Base Files backed up
5 4 0, 1, 4 The level-1 backup,because it is both of alower level and morerecent than the level-0,level-2, or level-3backups
Files created since thelevel-1 backup
How to specify tape devices for the backupYou must specify at least one tape device to do a backup. If you specify more than one tape device,each tape device in the list is used in the order listed to write a tape file.
You can specify two types of tape devices: local and remote.
If the backup requires more tape devices than the number specified, the last tape device is used for allremaining tape files.
Attention: If you specify more than one rewind device on the same tape drive, the storage systemdisplays a warning and terminates the dump command.
Note that the storage system device names might not be valid on remote tape drive hosts. For tapedrives attached to remote hosts, use tape device names that follow the host naming conventions.
What the /etc/dumpdates file isThe /etc/dumpdates file enables you to keep track of backups.
It records the following information:
• The name of the backup, which can be one of the following:
• If you use the n option, the name you supply• If you use the Q option, the volume you are backing up followed by the notation /
all_non_quota_files
• If you use neither, the dump path• The level of the backup• The time of the Snapshot copy used for the backup
Reasons to update the /etc/dumpdates file
You update the /etc/dumpdates file for the following reasons:
• You plan to perform incremental backups.
62 | Data ONTAP 8.1 7-Mode Data Protection Tape Backup and Recovery Guide
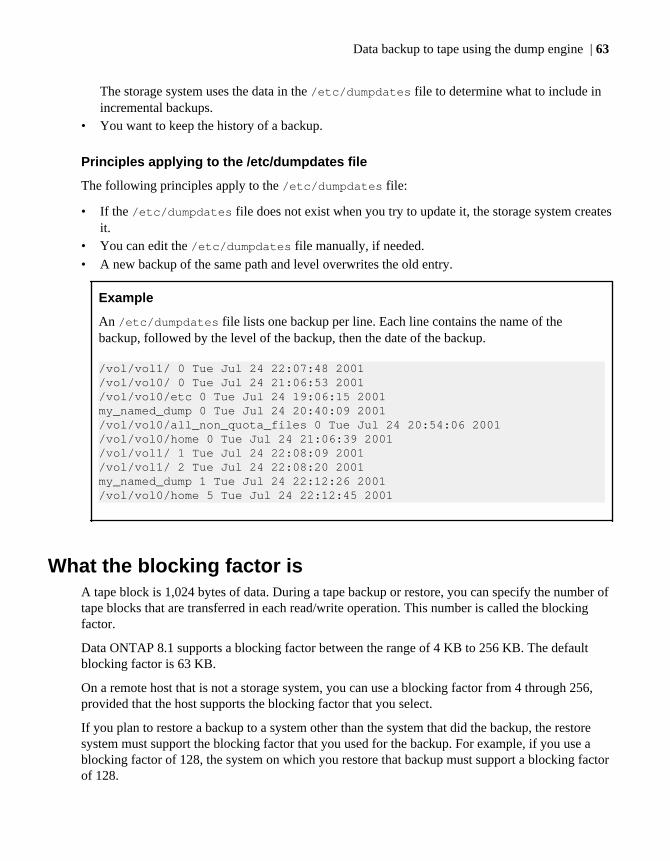
The storage system uses the data in the /etc/dumpdates file to determine what to include inincremental backups.
• You want to keep the history of a backup.
Principles applying to the /etc/dumpdates file
The following principles apply to the /etc/dumpdates file:
• If the /etc/dumpdates file does not exist when you try to update it, the storage system createsit.
• You can edit the /etc/dumpdates file manually, if needed.• A new backup of the same path and level overwrites the old entry.
Example
An /etc/dumpdates file lists one backup per line. Each line contains the name of thebackup, followed by the level of the backup, then the date of the backup.
/vol/vol1/ 0 Tue Jul 24 22:07:48 2001 /vol/vol0/ 0 Tue Jul 24 21:06:53 2001 /vol/vol0/etc 0 Tue Jul 24 19:06:15 2001 my_named_dump 0 Tue Jul 24 20:40:09 2001 /vol/vol0/all_non_quota_files 0 Tue Jul 24 20:54:06 2001 /vol/vol0/home 0 Tue Jul 24 21:06:39 2001 /vol/vol1/ 1 Tue Jul 24 22:08:09 2001 /vol/vol1/ 2 Tue Jul 24 22:08:20 2001 my_named_dump 1 Tue Jul 24 22:12:26 2001 /vol/vol0/home 5 Tue Jul 24 22:12:45 2001
What the blocking factor isA tape block is 1,024 bytes of data. During a tape backup or restore, you can specify the number oftape blocks that are transferred in each read/write operation. This number is called the blockingfactor.
Data ONTAP 8.1 supports a blocking factor between the range of 4 KB to 256 KB. The defaultblocking factor is 63 KB.
On a remote host that is not a storage system, you can use a blocking factor from 4 through 256,provided that the host supports the blocking factor that you select.
If you plan to restore a backup to a system other than the system that did the backup, the restoresystem must support the blocking factor that you used for the backup. For example, if you use ablocking factor of 128, the system on which you restore that backup must support a blocking factorof 128.
Data backup to tape using the dump engine | 63
During an NDMP backup, the MOVER_RECORD_SIZE determines the blocking factor. DataONTAP allows a maximum value of 256 KB for MOVER_RECORD_SIZE.
Related information
www.ndmp.org
Considerations before using the dump backupBefore backing up data using the dump command, you must have a clear idea of how much data youwill be backing up and how many tapes you will need to store the data.
Determining the amount of backup dataBefore you enter the dump command, it is helpful to estimate the amount of backup data so that youcan determine the number of tape files and the number of tapes required for the backup.
Step
1. For each item that you want to back up, enter the following command:
df path_name
path_name is the name of the path.
Note: For multiple items, such as multiple volumes, add the data for each item to determine thetotal amount of data to be backed up.
Estimating the number of tapes for the backupYou must estimate the number of tapes required for the backup before executing the dump command.This estimate helps you to ensure that the dump command does not fail because it runs out of tapes. Italso helps you to load the required number of tapes in the tape drives or libraries in advance for anunattended backup.
About this task
If you initiate the dump command from the console and have not loaded enough tapes, Data ONTAPprompts you to load additional tapes. However, if you initiate the dump command from a RemoteShell connection and have not loaded enough tapes, you do not see the prompts from Data ONTAPand the dump command terminates.
Steps
1. Determine the capacity of the tape device you are using for the backup by entering the followingcommand:
sysconfig -t
64 | Data ONTAP 8.1 7-Mode Data Protection Tape Backup and Recovery Guide
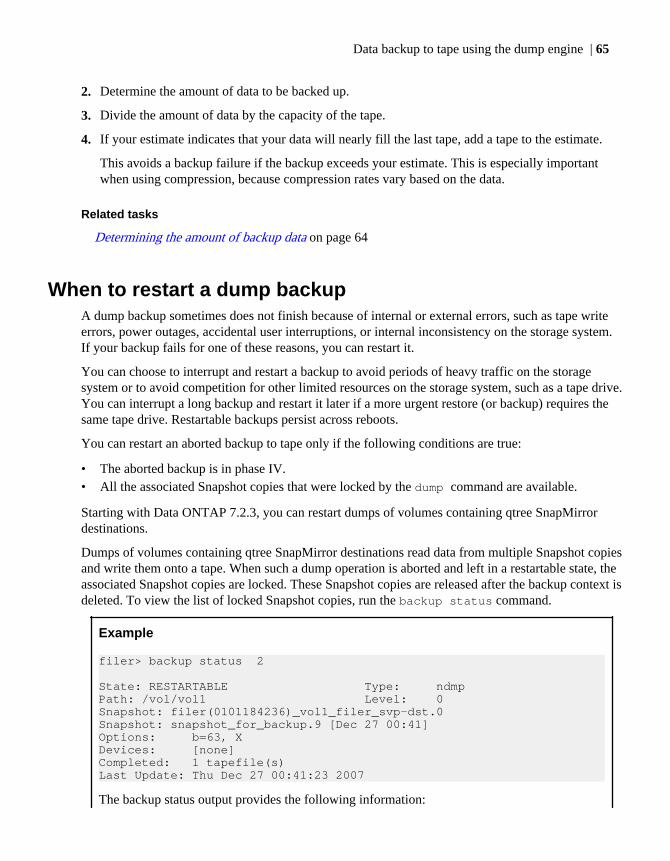
2. Determine the amount of data to be backed up.
3. Divide the amount of data by the capacity of the tape.
4. If your estimate indicates that your data will nearly fill the last tape, add a tape to the estimate.
This avoids a backup failure if the backup exceeds your estimate. This is especially importantwhen using compression, because compression rates vary based on the data.
Related tasks
Determining the amount of backup data on page 64
When to restart a dump backupA dump backup sometimes does not finish because of internal or external errors, such as tape writeerrors, power outages, accidental user interruptions, or internal inconsistency on the storage system.If your backup fails for one of these reasons, you can restart it.
You can choose to interrupt and restart a backup to avoid periods of heavy traffic on the storagesystem or to avoid competition for other limited resources on the storage system, such as a tape drive.You can interrupt a long backup and restart it later if a more urgent restore (or backup) requires thesame tape drive. Restartable backups persist across reboots.
You can restart an aborted backup to tape only if the following conditions are true:
• The aborted backup is in phase IV.• All the associated Snapshot copies that were locked by the dump command are available.
Starting with Data ONTAP 7.2.3, you can restart dumps of volumes containing qtree SnapMirrordestinations.
Dumps of volumes containing qtree SnapMirror destinations read data from multiple Snapshot copiesand write them onto a tape. When such a dump operation is aborted and left in a restartable state, theassociated Snapshot copies are locked. These Snapshot copies are released after the backup context isdeleted. To view the list of locked Snapshot copies, run the backup status command.
Example
filer> backup status 2 State: RESTARTABLE Type: ndmpPath: /vol/vol1 Level: 0Snapshot: filer(0101184236)_vol1_filer_svp-dst.0Snapshot: snapshot_for_backup.9 [Dec 27 00:41]Options: b=63, XDevices: [none]Completed: 1 tapefile(s)Last Update: Thu Dec 27 00:41:23 2007
The backup status output provides the following information:
Data backup to tape using the dump engine | 65

State The state of the dump: ACTIVE or RESTARTABLE.
Type The type of invocation of dump: CLI or NDMP.
Path The dump path.
Level The level of the dump (0 through 9).
Snapshot The Snapshot copies of the path that is being backed up.
Options All the options specified for the backup and their respective parameters.
Devices The current device to which the dump is writing.
Completed The number tape files that have already been copied.
Last Update The time and date of the last completed update.
Related tasks
Restarting a dump command backup on page 106
How a dump restore worksA dump restore writes file system data from tape to disk using a predefined process.
The process in the following table shows how the dump restore works.
Stage Action
1 Data ONTAP catalogs the files that need to be extracted from the tape.
2 Data ONTAP creates directories and empty files.
3 Data ONTAP reads a file from tape, writes it to disk, and sets the permissions (includingACLs) on it.
4 Data ONTAP repeats stages 2 and 3 until all the specified files are copied from the tape.
What the dump engine restoresThe dump engine enables you to recover all the information that you backed up.
The dump engine can recover the following data:
• Contents of files and directories• UNIX file permissions• ACLs
66 | Data ONTAP 8.1 7-Mode Data Protection Tape Backup and Recovery Guide
If you restore a file that has only UNIX file permissions into an NTFS qtree or volume, the filehas no Windows NT ACLs. The storage system uses only the UNIX file permissions on this fileuntil you create a Windows NT ACL on it.
Attention: Data ONTAP 7.3 and later releases support more than 192 Access Control Entries(ACEs) per ACL, whereas earlier versions support only a maximum of 192. Therefore, anydata migration from Data ONTAP 7.3 or later releases to an earlier release will result in loss ofACLs.
• Qtree informationQtree information is used only if a qtree is restored to the root of a volume. Qtree information isnot used if a qtree is restored to a lower directory, such as /vol/vol0/subdir/lowerdir, andit ceases to be a qtree.
• All other file and directory attributes• Windows NT streams• LUNs
• A LUN must be restored to a volume level or a qtree level for it to remain as a LUN. If it isrestored to a directory, it is restored as a file because it does not contain any valid metadata.
• Cluster-Mode volume can be restored to a 7-Mode volume.• SnapLock volumes are restored as normal read/write volumes.
You can restore data from previous versions of Data ONTAP using the dump engine. If you want toperform an incremental restore to a storage system running Data ONTAP 6.2 or later using databacked up from a storage system running a version of Data ONTAP earlier than 6.2, you can do oneof the following:
• Perform a level 0 restore and incremental restores before you upgrade to Data ONTAP 6.2 orlater.
• Perform a level 0 restore and incremental restores after you upgrade to Data ONTAP 6.2 or later.
Performing a level 0 restore, upgrading Data ONTAP software, and then performing incrementalrestores will not restore the incremental backups because the data is in a different format from thelevel 0 restore. In such a case, you have to repeat the level 0 restore before you can restoreincremental backups.
Considerations before restoring dataBefore performing a dump restore, you need to ensure that you have the required information andprepare the destination for the restore.
Before restoring data, you must have the following information:
• The level of the restore• The tape device you used for each tape file in the backup that you are restoring• The path into which you are restoring the material• The blocking factor used during the backup
Data backup to tape using the dump engine | 67
Required tape drives and tapes
You must meet the following requirements for the restore operation to be successful:
• If you are doing an incremental restore, you require all the tapes in the backup chain.• You require a tape drive that is available and compatible with the tape to be restored from.
Required space on the destination storage system
You need about 100 MB more space on the destination storage system than the amount of data to berestored.
Attention: The restore operation will not start if there are insufficient inodes and space available.If you use the F option to force a restore to occur, the restore operation will fill up the availablespace and then abort.
How to prepare the destination for a dump restoreIf you are restoring the backup to its original path, you do not need to prepare the target volume,qtree, or subtree. If you are restoring the backup to a different destination, you must prepare thelocation.
If you are restoring a volume, you must create a new volume. If you are restoring a qtree or adirectory, you must rename or move files that are likely to have the same names as files you arerestoring.
Attention: If a restored file has the same name as an existing file, the existing file is overwrittenby the restored file. However, the directories are not overwritten.
How to perform a dump backup and restore using NDMPservices
You can perform a dump backup or restore by using NDMP-compliant backup applications.
Data ONTAP provides a set of environment variables that enable you to perform a tape backup andrestore using NDMP services. The dump engine-based restore using NDMP also supports enhanceddirect access recovery (DAR), which enables directory DAR and DAR of files with NT streams.
You can also transfer file system data between storage systems by using the ndmpcopy command.
Environment variables supported for dumpData ONTAP supports environment variables for dump, which have an associated default value.However, you can manually modify these default values.
If you manually modify the values set by the backup application, the application might behaveunpredictably. This is because the dump or restore operations might not be doing what the backup
68 | Data ONTAP 8.1 7-Mode Data Protection Tape Backup and Recovery Guide
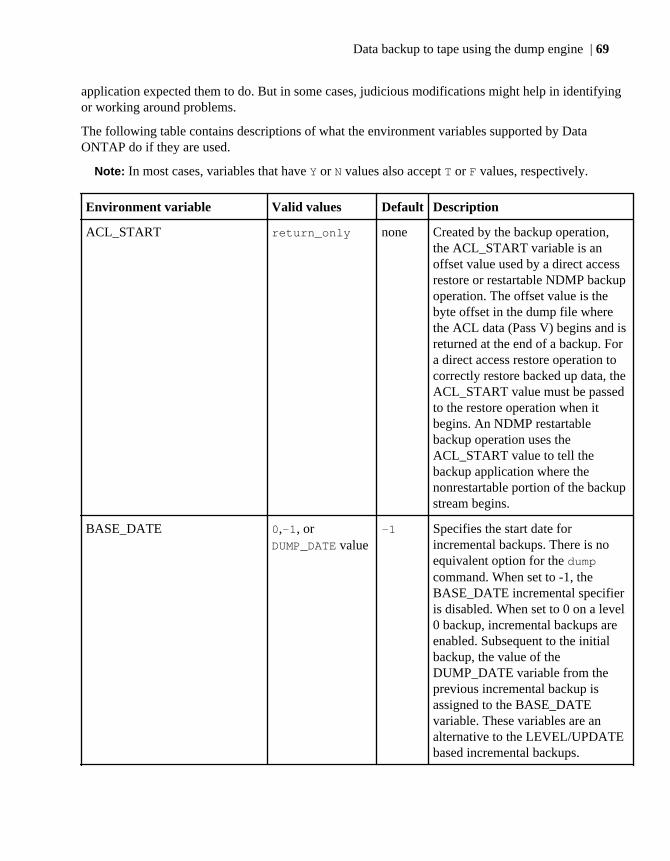
application expected them to do. But in some cases, judicious modifications might help in identifyingor working around problems.
The following table contains descriptions of what the environment variables supported by DataONTAP do if they are used.
Note: In most cases, variables that have Y or N values also accept T or F values, respectively.
Environment variable Valid values Default Description
ACL_START return_only none Created by the backup operation,the ACL_START variable is anoffset value used by a direct accessrestore or restartable NDMP backupoperation. The offset value is thebyte offset in the dump file wherethe ACL data (Pass V) begins and isreturned at the end of a backup. Fora direct access restore operation tocorrectly restore backed up data, theACL_START value must be passedto the restore operation when itbegins. An NDMP restartablebackup operation uses theACL_START value to tell thebackup application where thenonrestartable portion of the backupstream begins.
BASE_DATE 0,-1, orDUMP_DATE value
-1 Specifies the start date forincremental backups. There is noequivalent option for the dumpcommand. When set to -1, theBASE_DATE incremental specifieris disabled. When set to 0 on a level0 backup, incremental backups areenabled. Subsequent to the initialbackup, the value of theDUMP_DATE variable from theprevious incremental backup isassigned to the BASE_DATEvariable. These variables are analternative to the LEVEL/UPDATEbased incremental backups.
Data backup to tape using the dump engine | 69
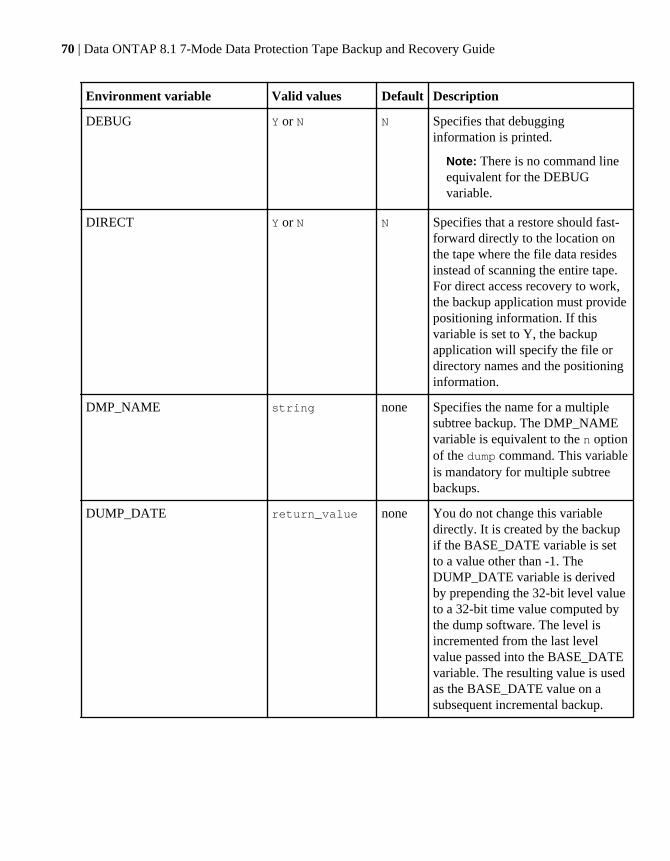
Environment variable Valid values Default Description
DEBUG Y or N N Specifies that debugginginformation is printed.
Note: There is no command lineequivalent for the DEBUGvariable.
DIRECT Y or N N Specifies that a restore should fast-forward directly to the location onthe tape where the file data residesinstead of scanning the entire tape.For direct access recovery to work,the backup application must providepositioning information. If thisvariable is set to Y, the backupapplication will specify the file ordirectory names and the positioninginformation.
DMP_NAME string none Specifies the name for a multiplesubtree backup. The DMP_NAMEvariable is equivalent to the n optionof the dump command. This variableis mandatory for multiple subtreebackups.
DUMP_DATE return_value none You do not change this variabledirectly. It is created by the backupif the BASE_DATE variable is setto a value other than -1. TheDUMP_DATE variable is derivedby prepending the 32-bit level valueto a 32-bit time value computed bythe dump software. The level isincremented from the last levelvalue passed into the BASE_DATEvariable. The resulting value is usedas the BASE_DATE value on asubsequent incremental backup.
70 | Data ONTAP 8.1 7-Mode Data Protection Tape Backup and Recovery Guide
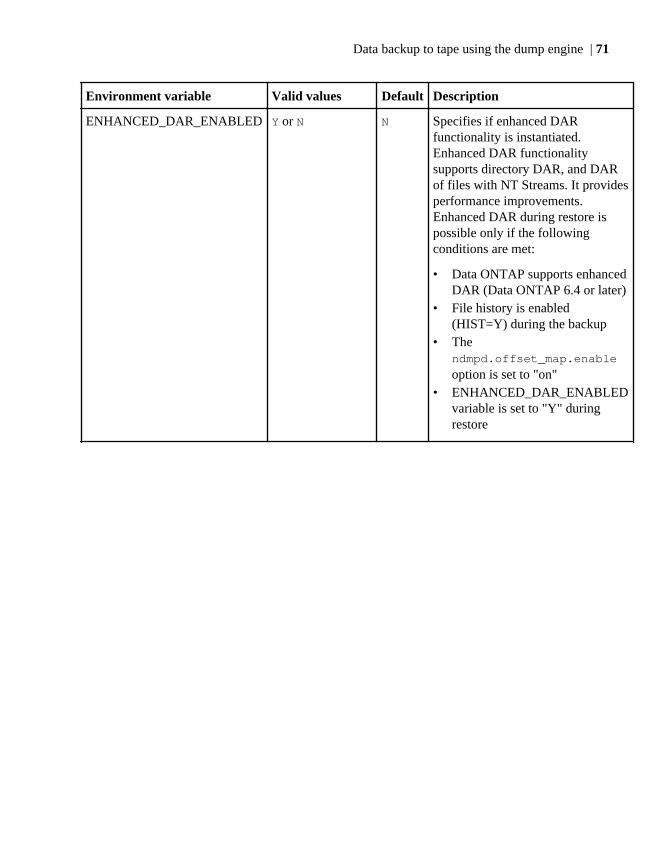
Environment variable Valid values Default Description
ENHANCED_DAR_ENABLED Y or N N Specifies if enhanced DARfunctionality is instantiated.Enhanced DAR functionalitysupports directory DAR, and DARof files with NT Streams. It providesperformance improvements.Enhanced DAR during restore ispossible only if the followingconditions are met:
• Data ONTAP supports enhancedDAR (Data ONTAP 6.4 or later)
• File history is enabled(HIST=Y) during the backup
• Thendmpd.offset_map.enable
option is set to "on"• ENHANCED_DAR_ENABLED
variable is set to "Y" duringrestore
Data backup to tape using the dump engine | 71
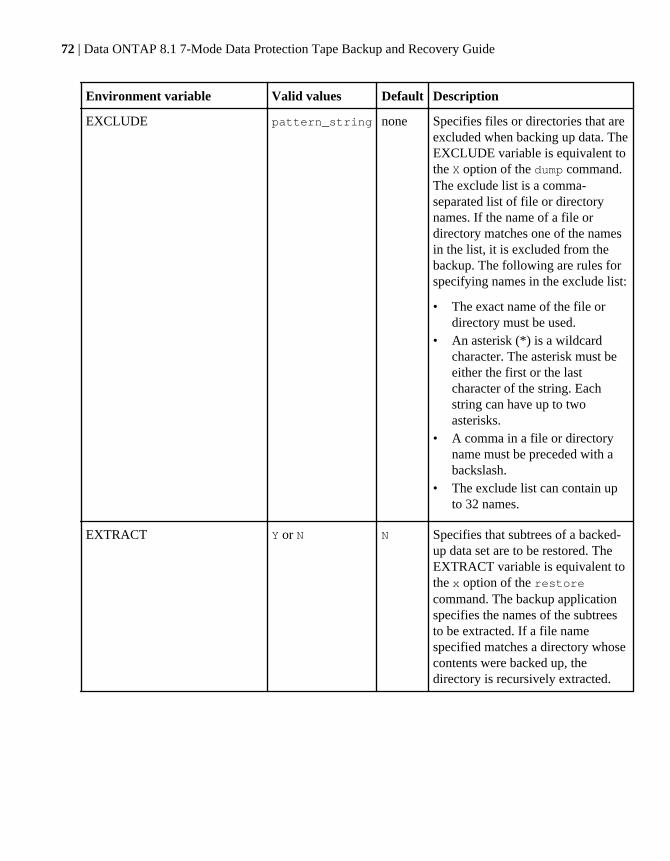
Environment variable Valid values Default Description
EXCLUDE pattern_string none Specifies files or directories that areexcluded when backing up data. TheEXCLUDE variable is equivalent tothe X option of the dump command.The exclude list is a comma-separated list of file or directorynames. If the name of a file ordirectory matches one of the namesin the list, it is excluded from thebackup. The following are rules forspecifying names in the exclude list:
• The exact name of the file ordirectory must be used.
• An asterisk (*) is a wildcardcharacter. The asterisk must beeither the first or the lastcharacter of the string. Eachstring can have up to twoasterisks.
• A comma in a file or directoryname must be preceded with abackslash.
• The exclude list can contain upto 32 names.
EXTRACT Y or N N Specifies that subtrees of a backed-up data set are to be restored. TheEXTRACT variable is equivalent tothe x option of the restorecommand. The backup applicationspecifies the names of the subtreesto be extracted. If a file namespecified matches a directory whosecontents were backed up, thedirectory is recursively extracted.
72 | Data ONTAP 8.1 7-Mode Data Protection Tape Backup and Recovery Guide
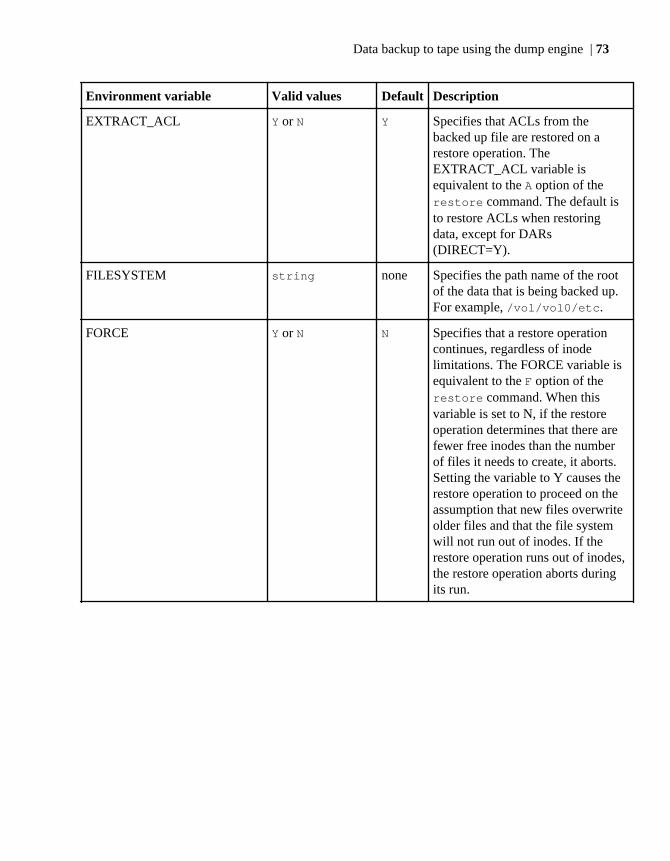
Environment variable Valid values Default Description
EXTRACT_ACL Y or N Y Specifies that ACLs from thebacked up file are restored on arestore operation. TheEXTRACT_ACL variable isequivalent to the A option of therestore command. The default isto restore ACLs when restoringdata, except for DARs(DIRECT=Y).
FILESYSTEM string none Specifies the path name of the rootof the data that is being backed up.For example, /vol/vol0/etc.
FORCE Y or N N Specifies that a restore operationcontinues, regardless of inodelimitations. The FORCE variable isequivalent to the F option of therestore command. When thisvariable is set to N, if the restoreoperation determines that there arefewer free inodes than the numberof files it needs to create, it aborts.Setting the variable to Y causes therestore operation to proceed on theassumption that new files overwriteolder files and that the file systemwill not run out of inodes. If therestore operation runs out of inodes,the restore operation aborts duringits run.
Data backup to tape using the dump engine | 73
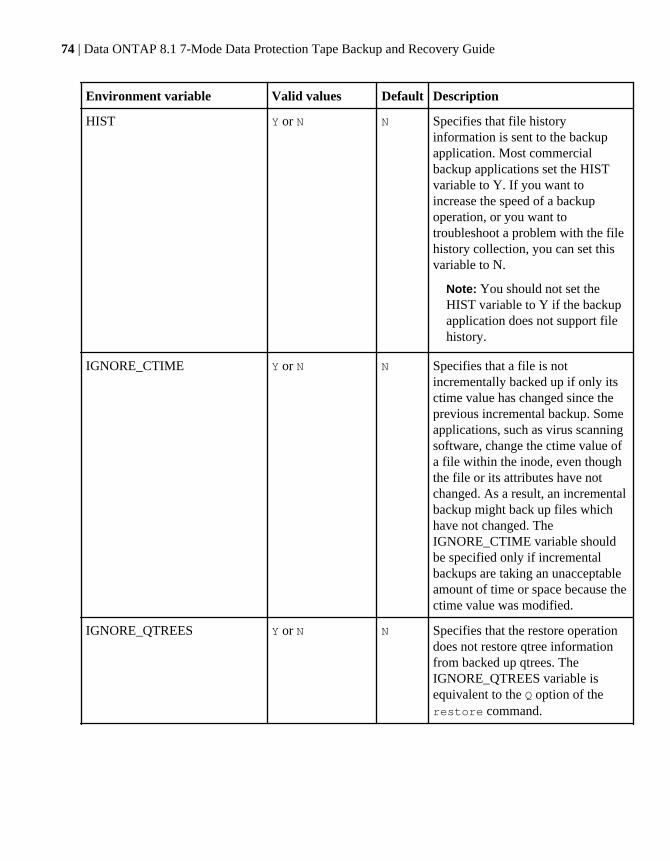
Environment variable Valid values Default Description
HIST Y or N N Specifies that file historyinformation is sent to the backupapplication. Most commercialbackup applications set the HISTvariable to Y. If you want toincrease the speed of a backupoperation, or you want totroubleshoot a problem with the filehistory collection, you can set thisvariable to N.
Note: You should not set theHIST variable to Y if the backupapplication does not support filehistory.
IGNORE_CTIME Y or N N Specifies that a file is notincrementally backed up if only itsctime value has changed since theprevious incremental backup. Someapplications, such as virus scanningsoftware, change the ctime value ofa file within the inode, even thoughthe file or its attributes have notchanged. As a result, an incrementalbackup might back up files whichhave not changed. TheIGNORE_CTIME variable shouldbe specified only if incrementalbackups are taking an unacceptableamount of time or space because thectime value was modified.
IGNORE_QTREES Y or N N Specifies that the restore operationdoes not restore qtree informationfrom backed up qtrees. TheIGNORE_QTREES variable isequivalent to the Q option of therestore command.
74 | Data ONTAP 8.1 7-Mode Data Protection Tape Backup and Recovery Guide
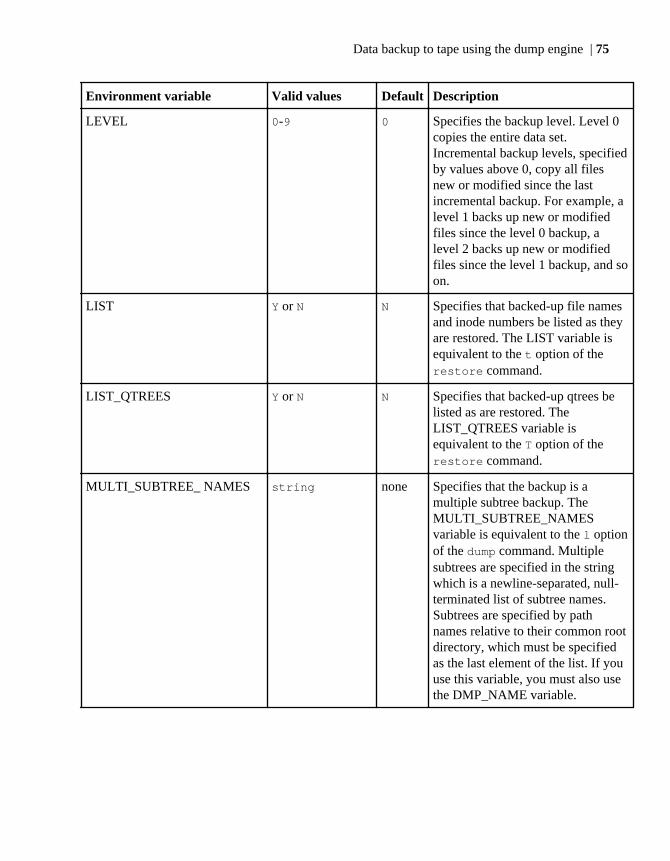
Environment variable Valid values Default Description
LEVEL 0-9 0 Specifies the backup level. Level 0copies the entire data set.Incremental backup levels, specifiedby values above 0, copy all filesnew or modified since the lastincremental backup. For example, alevel 1 backs up new or modifiedfiles since the level 0 backup, alevel 2 backs up new or modifiedfiles since the level 1 backup, and soon.
LIST Y or N N Specifies that backed-up file namesand inode numbers be listed as theyare restored. The LIST variable isequivalent to the t option of therestore command.
LIST_QTREES Y or N N Specifies that backed-up qtrees belisted as are restored. TheLIST_QTREES variable isequivalent to the T option of therestore command.
MULTI_SUBTREE_ NAMES string none Specifies that the backup is amultiple subtree backup. TheMULTI_SUBTREE_NAMESvariable is equivalent to the l optionof the dump command. Multiplesubtrees are specified in the stringwhich is a newline-separated, null-terminated list of subtree names.Subtrees are specified by pathnames relative to their common rootdirectory, which must be specifiedas the last element of the list. If youuse this variable, you must also usethe DMP_NAME variable.
Data backup to tape using the dump engine | 75
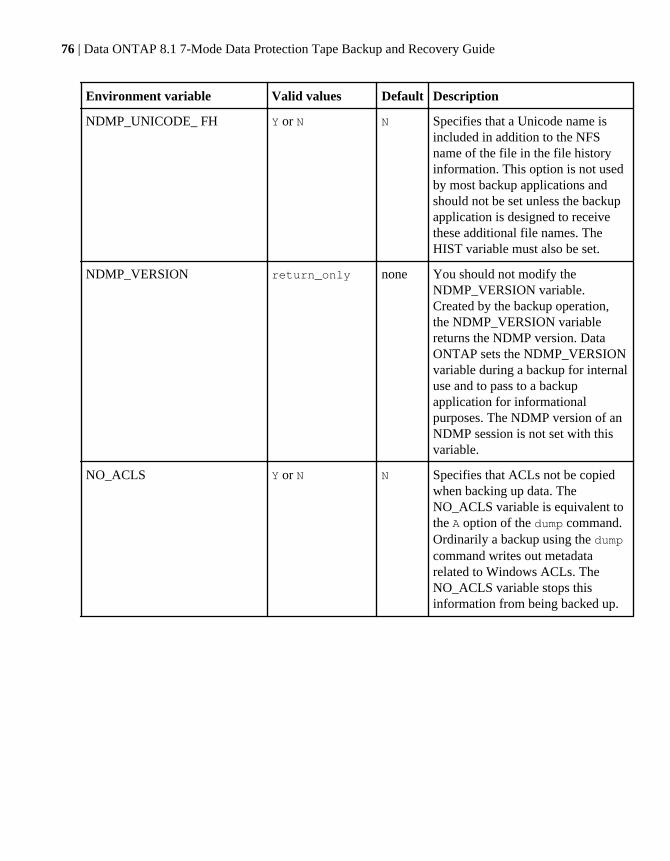
Environment variable Valid values Default Description
NDMP_UNICODE_ FH Y or N N Specifies that a Unicode name isincluded in addition to the NFSname of the file in the file historyinformation. This option is not usedby most backup applications andshould not be set unless the backupapplication is designed to receivethese additional file names. TheHIST variable must also be set.
NDMP_VERSION return_only none You should not modify theNDMP_VERSION variable.Created by the backup operation,the NDMP_VERSION variablereturns the NDMP version. DataONTAP sets the NDMP_VERSIONvariable during a backup for internaluse and to pass to a backupapplication for informationalpurposes. The NDMP version of anNDMP session is not set with thisvariable.
NO_ACLS Y or N N Specifies that ACLs not be copiedwhen backing up data. TheNO_ACLS variable is equivalent tothe A option of the dump command.Ordinarily a backup using the dumpcommand writes out metadatarelated to Windows ACLs. TheNO_ACLS variable stops thisinformation from being backed up.
76 | Data ONTAP 8.1 7-Mode Data Protection Tape Backup and Recovery Guide

Environment variable Valid values Default Description
NON_QUOTA_TREE Y or N N Specifies that files and directories inqtrees be ignored when backing updata. The NON_QUOTA_TREEvariable is equivalent to the Q optionof the dump command. When set toY, items in qtrees in the data setspecified by the FILESYSTEMvariable are not backed up. Thisvariable has an effect only if theFILESYSTEM variable specifies anentire volume. TheNON_QUOTA_TREE variable onlyworks on a level-0 backup and doesnot work if theMULTI_SUBTREE_NAMESvariable is specified.
NOWRITE Y or N N Specifies that the restore operationnot write data to the disk. TheNOWRITE variable is equivalent tothe N option of the restorecommand. This variable is used fordebugging.
Data backup to tape using the dump engine | 77
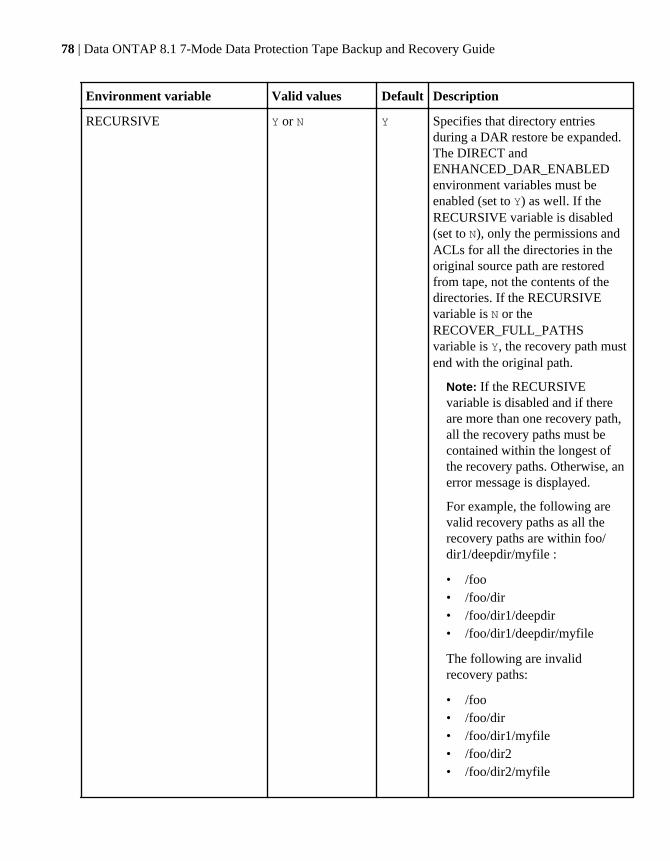
Environment variable Valid values Default Description
RECURSIVE Y or N Y Specifies that directory entriesduring a DAR restore be expanded.The DIRECT andENHANCED_DAR_ENABLEDenvironment variables must beenabled (set to Y) as well. If theRECURSIVE variable is disabled(set to N), only the permissions andACLs for all the directories in theoriginal source path are restoredfrom tape, not the contents of thedirectories. If the RECURSIVEvariable is N or theRECOVER_FULL_PATHSvariable is Y, the recovery path mustend with the original path.
Note: If the RECURSIVEvariable is disabled and if thereare more than one recovery path,all the recovery paths must becontained within the longest ofthe recovery paths. Otherwise, anerror message is displayed.
For example, the following arevalid recovery paths as all therecovery paths are within foo/dir1/deepdir/myfile :
• /foo• /foo/dir• /foo/dir1/deepdir• /foo/dir1/deepdir/myfile
The following are invalidrecovery paths:
• /foo• /foo/dir• /foo/dir1/myfile• /foo/dir2• /foo/dir2/myfile
78 | Data ONTAP 8.1 7-Mode Data Protection Tape Backup and Recovery Guide
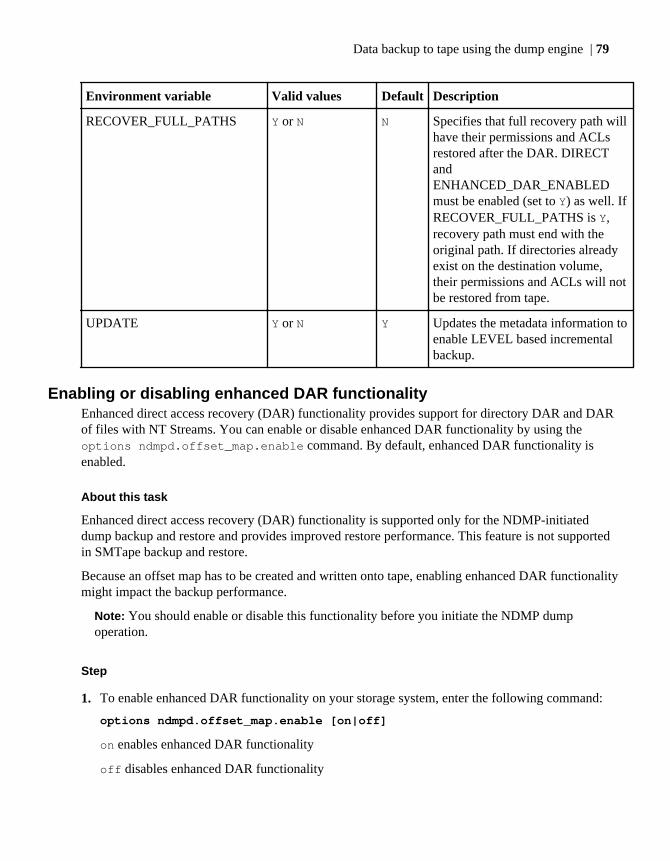
Environment variable Valid values Default Description
RECOVER_FULL_PATHS Y or N N Specifies that full recovery path willhave their permissions and ACLsrestored after the DAR. DIRECTandENHANCED_DAR_ENABLEDmust be enabled (set to Y) as well. IfRECOVER_FULL_PATHS is Y,recovery path must end with theoriginal path. If directories alreadyexist on the destination volume,their permissions and ACLs will notbe restored from tape.
UPDATE Y or N Y Updates the metadata information toenable LEVEL based incrementalbackup.
Enabling or disabling enhanced DAR functionalityEnhanced direct access recovery (DAR) functionality provides support for directory DAR and DARof files with NT Streams. You can enable or disable enhanced DAR functionality by using theoptions ndmpd.offset_map.enable command. By default, enhanced DAR functionality isenabled.
About this task
Enhanced direct access recovery (DAR) functionality is supported only for the NDMP-initiateddump backup and restore and provides improved restore performance. This feature is not supportedin SMTape backup and restore.
Because an offset map has to be created and written onto tape, enabling enhanced DAR functionalitymight impact the backup performance.
Note: You should enable or disable this functionality before you initiate the NDMP dumpoperation.
Step
1. To enable enhanced DAR functionality on your storage system, enter the following command:
options ndmpd.offset_map.enable [on|off]
on enables enhanced DAR functionality
off disables enhanced DAR functionality
Data backup to tape using the dump engine | 79
Related concepts
Considerations when using NDMP on page 54
What the ndmpcopy command doesThe ndmpcopy command enables you to transfer file system data between storage systems thatsupport NDMP v3 or v4 and the UFS dump format.
The ndmpcopy command functions as a simple NDMP data management application (backupapplication) that performs data transfers by initiating a backup operation on the source storagesystem and a recovery operation on the destination storage system. The command establishes controlconnections to the storage systems and facilitates data connection establishment. After connectionsare established, it facilitates data transfer. You can use host names or IPv4 addresses of source anddestination storage systems in the ndmpcopy command.
Starting with Data ONTAP 7.3.3, the ndmpcopy command supports IPv6 addresses of storagesystems also. You can use IPv6 addresses to establish control connections to source and destinationstorage systems and can request the ndmpcopy command to use an IPv6 address mode to establishthe data connection.
Using the ndmpcopy command, you can perform both full and incremental data transfers; however,incremental transfers are limited to a maximum of two levels (one full and up to two incrementalbackups). You can transfer full or partial volumes, qtrees, directories, or individual files.
You cannot perform a block-level transfer using the ndmpcopy command.
Copying data using ndmpcopy
You can run the ndmpcopy command at the command line of the source storage system, thedestination storage system, or a storage system that is neither the source nor the destination of thedata transfer. You can also run ndmpcopy on a single storage system that is both the source and thedestination of the data transfer.
Step
1. To copy data within a storage system or between storage systems using ndmpcopy, enter thefollowing command:
ndmpcopy [options][source_filer:]source_path[destination_filer:]destination_path [-mcs {inet|inet6}][-mcd {inet|inet6}][-md {inet|inet6}]
• You can specify one or more options in the ndmpcopy command. The following table lists theavailable options:
80 | Data ONTAP 8.1 7-Mode Data Protection Tape Backup and Recovery Guide
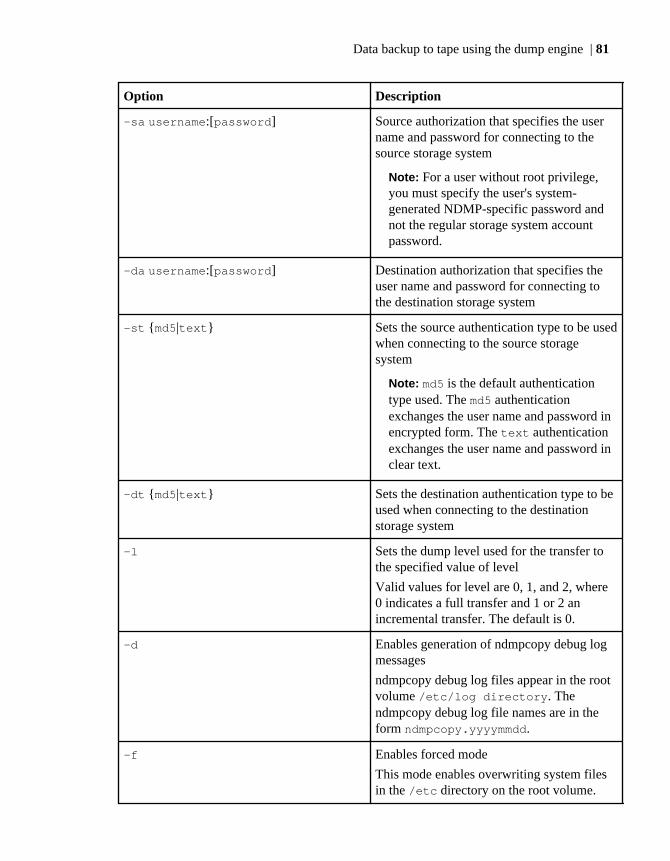
Option Description
-sa username:[password] Source authorization that specifies the username and password for connecting to thesource storage system
Note: For a user without root privilege,you must specify the user's system-generated NDMP-specific password andnot the regular storage system accountpassword.
-da username:[password] Destination authorization that specifies theuser name and password for connecting tothe destination storage system
-st {md5|text} Sets the source authentication type to be usedwhen connecting to the source storagesystem
Note: md5 is the default authenticationtype used. The md5 authenticationexchanges the user name and password inencrypted form. The text authenticationexchanges the user name and password inclear text.
-dt {md5|text} Sets the destination authentication type to beused when connecting to the destinationstorage system
-l Sets the dump level used for the transfer tothe specified value of level
Valid values for level are 0, 1, and 2, where0 indicates a full transfer and 1 or 2 anincremental transfer. The default is 0.
-d Enables generation of ndmpcopy debug logmessages
ndmpcopy debug log files appear in the rootvolume /etc/log directory. Thendmpcopy debug log file names are in theform ndmpcopy.yyyymmdd.
-f Enables forced mode
This mode enables overwriting system filesin the /etc directory on the root volume.
Data backup to tape using the dump engine | 81

Option Description
-h Prints the help message
-p Prompts you to enter the password for sourceand destination authorization
This password overrides the passwordspecified for -sa and -da options.
Note: You can use this option only whenthe command is running in an interactiveconsole.
-exclude Excludes specified files or directories fromthe path specified for data transfer
The value can be a comma-separated list ofdirectory or file names such as "*.pst" or"*.txt".
• source_filer and destination_filer can be host names or IP addresses.The ndmpcopy command determines the address mode for control connections as follows:
• When an IP address (IPv4 or IPv6) is specified instead of the host name, the addressingmode for the control connection is the corresponding IP address type.
• When a host name is specified and it resolves to both IPv6 and IPv4 addresses, IPv6addressing mode is used.
You can override these rules by using the -mcs and -mcd options.• source_path and destination_path are the absolute path names of the directories to be
used during the data transfer.• -mcs specifies the preferred addressing mode for the control connection to the source storage
system.inet indicates an IPv4 address mode and inet6 indicates an IPv6 address mode.
• -mcd specifies the preferred addressing mode for the control connection to the destinationstorage system.inet indicates an IPv4 address mode and inet6 indicates an IPv6 address mode.
• -md specifies the preferred addressing mode for communication between the source and thedestination storage systems.inet indicates an IPv4 address mode and inet6 indicates an IPv6 address mode.If you do not use the -md option in the ndmpcopy command, the addressing mode for the dataconnection is determined as follows:
• If either of the addresses specified for the control connections is an IPv6 address, theaddress mode for the data connection is IPv6.
• If both the addresses specified for the control connections are IPv4 addresses, thendmpcopy command first attempts an IPv6 address mode for the data connection.
82 | Data ONTAP 8.1 7-Mode Data Protection Tape Backup and Recovery Guide
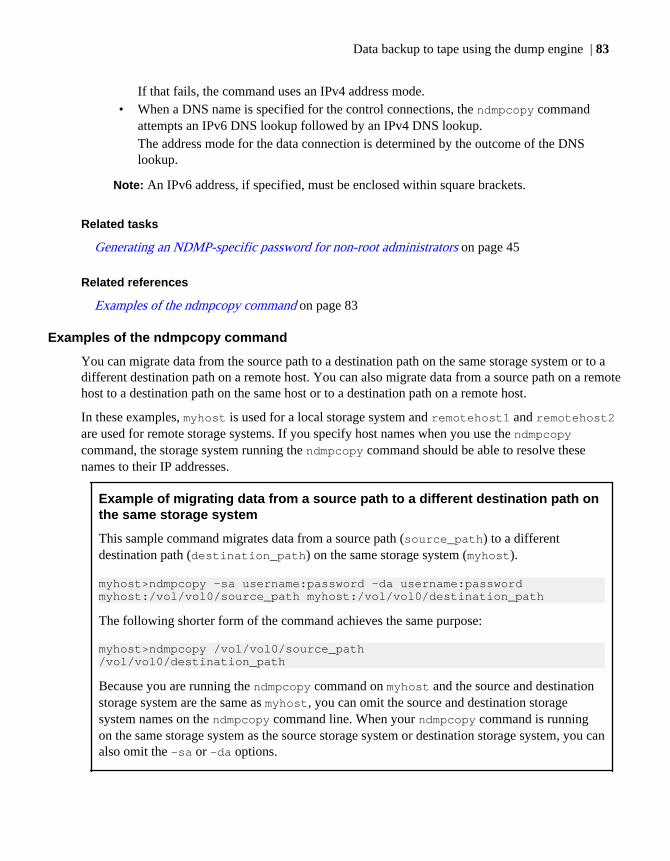
If that fails, the command uses an IPv4 address mode.• When a DNS name is specified for the control connections, the ndmpcopy command
attempts an IPv6 DNS lookup followed by an IPv4 DNS lookup.The address mode for the data connection is determined by the outcome of the DNSlookup.
Note: An IPv6 address, if specified, must be enclosed within square brackets.
Related tasks
Generating an NDMP-specific password for non-root administrators on page 45
Related references
Examples of the ndmpcopy command on page 83
Examples of the ndmpcopy command
You can migrate data from the source path to a destination path on the same storage system or to adifferent destination path on a remote host. You can also migrate data from a source path on a remotehost to a destination path on the same host or to a destination path on a remote host.
In these examples, myhost is used for a local storage system and remotehost1 and remotehost2are used for remote storage systems. If you specify host names when you use the ndmpcopycommand, the storage system running the ndmpcopy command should be able to resolve thesenames to their IP addresses.
Example of migrating data from a source path to a different destination path onthe same storage system
This sample command migrates data from a source path (source_path) to a differentdestination path (destination_path) on the same storage system (myhost).
myhost>ndmpcopy -sa username:password -da username:password myhost:/vol/vol0/source_path myhost:/vol/vol0/destination_path
The following shorter form of the command achieves the same purpose:
myhost>ndmpcopy /vol/vol0/source_path/vol/vol0/destination_path
Because you are running the ndmpcopy command on myhost and the source and destinationstorage system are the same as myhost, you can omit the source and destination storagesystem names on the ndmpcopy command line. When your ndmpcopy command is runningon the same storage system as the source storage system or destination storage system, you canalso omit the -sa or -da options.
Data backup to tape using the dump engine | 83
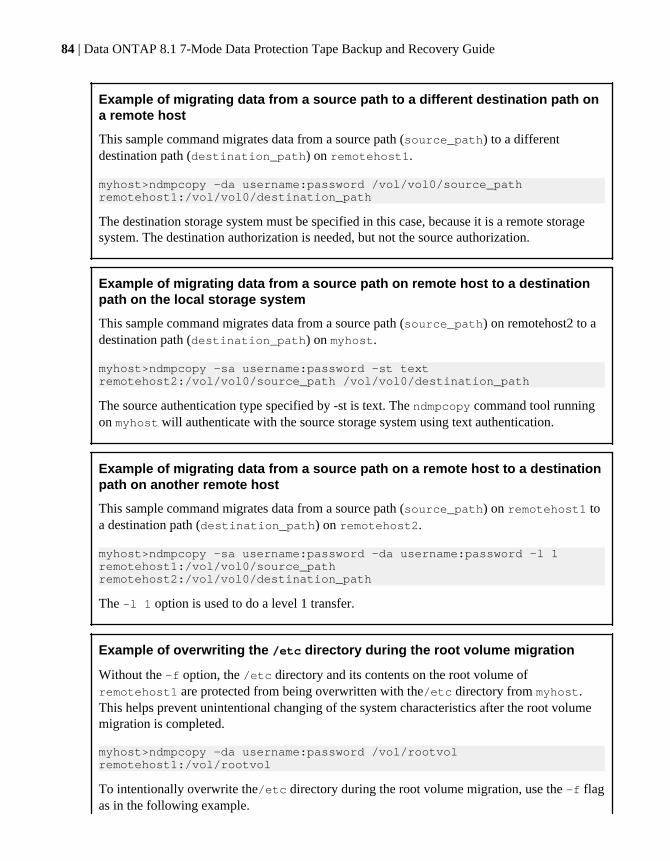
Example of migrating data from a source path to a different destination path ona remote host
This sample command migrates data from a source path (source_path) to a differentdestination path (destination_path) on remotehost1.
myhost>ndmpcopy -da username:password /vol/vol0/source_path remotehost1:/vol/vol0/destination_path
The destination storage system must be specified in this case, because it is a remote storagesystem. The destination authorization is needed, but not the source authorization.
Example of migrating data from a source path on remote host to a destinationpath on the local storage system
This sample command migrates data from a source path (source_path) on remotehost2 to adestination path (destination_path) on myhost.
myhost>ndmpcopy -sa username:password -st text remotehost2:/vol/vol0/source_path /vol/vol0/destination_path
The source authentication type specified by -st is text. The ndmpcopy command tool runningon myhost will authenticate with the source storage system using text authentication.
Example of migrating data from a source path on a remote host to a destinationpath on another remote host
This sample command migrates data from a source path (source_path) on remotehost1 toa destination path (destination_path) on remotehost2.
myhost>ndmpcopy -sa username:password -da username:password -l 1 remotehost1:/vol/vol0/source_path remotehost2:/vol/vol0/destination_path
The -l 1 option is used to do a level 1 transfer.
Example of overwriting the /etc directory during the root volume migration
Without the -f option, the /etc directory and its contents on the root volume ofremotehost1 are protected from being overwritten with the/etc directory from myhost.This helps prevent unintentional changing of the system characteristics after the root volumemigration is completed.
myhost>ndmpcopy -da username:password /vol/rootvol remotehost1:/vol/rootvol
To intentionally overwrite the/etc directory during the root volume migration, use the -f flagas in the following example.
84 | Data ONTAP 8.1 7-Mode Data Protection Tape Backup and Recovery Guide

myhost>ndmpcopy -da username:password -f /vol/rootvol remotehost1:/vol/rootvol
Example of the ndmpcopy command where the address modes are explicitlyset to IPv6
This sample command explicitly sets the control connections and the data connection to useIPv6 address mode. In this command remotehost1 is the host name that resolves to an IPv6address.
myhost>ndmpcopy -sa username:password -da username:password -l 0 -mcs inet6 -mcd inet6 -md inet6 remotehost1:/vol/vol0/source_path [2001:0db8::10]:/vol/vol0/destination_path
Displaying file history statisticsYou can view detailed statistics about file history performance of currently active dump sessionsusing the stats show ndmp command. SMTape does not support file history and thereforeSMTape initiated backups do not have any file history statistics associated with them.
Step
1. Enter the following command:
stats show ndmp
The output of the stats show ndmp command includes the following statistics:
• Total number of directory file history entries generated• Total number of normal file history entries generated• Total number of messages sent to the file history thread• Minimum, maximum, and average delay times for adding file history entries• Minimum, maximum, and average delay times for the file history thread to send messages to
the NDMP thread• Total number of file history flush calls• Minimum, maximum, and average flush times• Total number of times the dump thread had to block because of slow processing by the file
history thread• Maximum number of outstanding buffers to the file history thread
Sample output of the stat show ndmp command
filer*> stats show ndmp
ndmp:Session 01:dir_buffers_sent:19ndmp:Session 01:node_buffers_sent:0ndmp:Session 01:dir_send_was_blocked:2ndmp:Session 01:node_send_was_blocked:0
Data backup to tape using the dump engine | 85
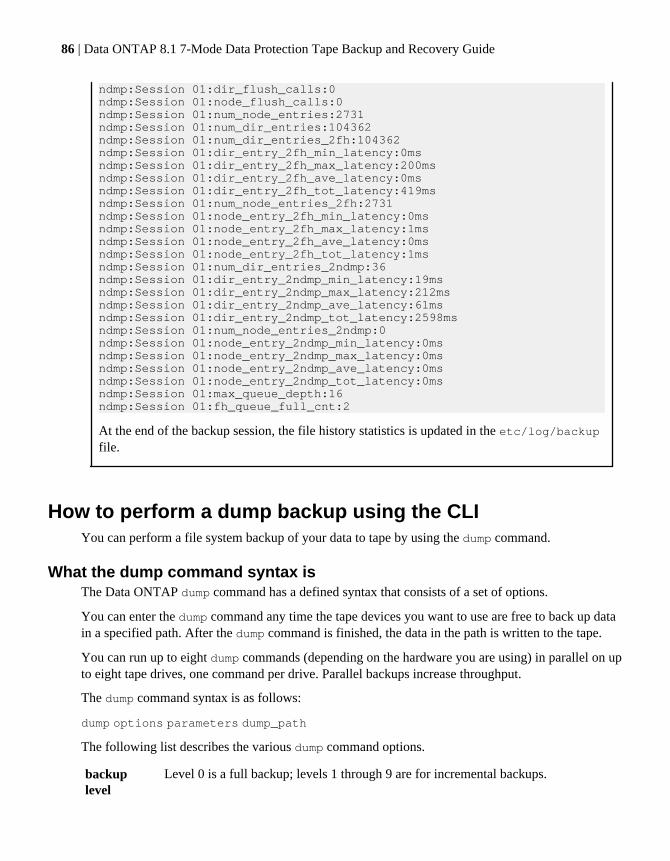
ndmp:Session 01:dir_flush_calls:0ndmp:Session 01:node_flush_calls:0ndmp:Session 01:num_node_entries:2731ndmp:Session 01:num_dir_entries:104362ndmp:Session 01:num_dir_entries_2fh:104362ndmp:Session 01:dir_entry_2fh_min_latency:0msndmp:Session 01:dir_entry_2fh_max_latency:200msndmp:Session 01:dir_entry_2fh_ave_latency:0msndmp:Session 01:dir_entry_2fh_tot_latency:419msndmp:Session 01:num_node_entries_2fh:2731ndmp:Session 01:node_entry_2fh_min_latency:0msndmp:Session 01:node_entry_2fh_max_latency:1msndmp:Session 01:node_entry_2fh_ave_latency:0msndmp:Session 01:node_entry_2fh_tot_latency:1msndmp:Session 01:num_dir_entries_2ndmp:36ndmp:Session 01:dir_entry_2ndmp_min_latency:19msndmp:Session 01:dir_entry_2ndmp_max_latency:212msndmp:Session 01:dir_entry_2ndmp_ave_latency:61msndmp:Session 01:dir_entry_2ndmp_tot_latency:2598msndmp:Session 01:num_node_entries_2ndmp:0ndmp:Session 01:node_entry_2ndmp_min_latency:0msndmp:Session 01:node_entry_2ndmp_max_latency:0msndmp:Session 01:node_entry_2ndmp_ave_latency:0msndmp:Session 01:node_entry_2ndmp_tot_latency:0msndmp:Session 01:max_queue_depth:16ndmp:Session 01:fh_queue_full_cnt:2
At the end of the backup session, the file history statistics is updated in the etc/log/backupfile.
How to perform a dump backup using the CLIYou can perform a file system backup of your data to tape by using the dump command.
What the dump command syntax isThe Data ONTAP dump command has a defined syntax that consists of a set of options.
You can enter the dump command any time the tape devices you want to use are free to back up datain a specified path. After the dump command is finished, the data in the path is written to the tape.
You can run up to eight dump commands (depending on the hardware you are using) in parallel on upto eight tape drives, one command per drive. Parallel backups increase throughput.
The dump command syntax is as follows:
dump options parameters dump_path
The following list describes the various dump command options.
backuplevel
Level 0 is a full backup; levels 1 through 9 are for incremental backups.
86 | Data ONTAP 8.1 7-Mode Data Protection Tape Backup and Recovery Guide
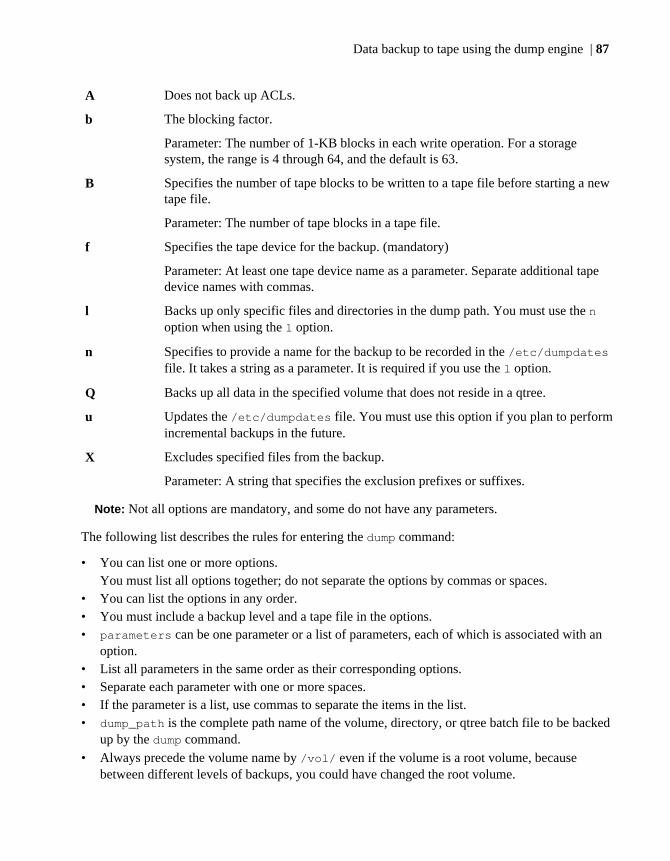
A Does not back up ACLs.
b The blocking factor.
Parameter: The number of 1-KB blocks in each write operation. For a storagesystem, the range is 4 through 64, and the default is 63.
B Specifies the number of tape blocks to be written to a tape file before starting a newtape file.
Parameter: The number of tape blocks in a tape file.
f Specifies the tape device for the backup. (mandatory)
Parameter: At least one tape device name as a parameter. Separate additional tapedevice names with commas.
l Backs up only specific files and directories in the dump path. You must use the noption when using the l option.
n Specifies to provide a name for the backup to be recorded in the /etc/dumpdatesfile. It takes a string as a parameter. It is required if you use the l option.
Q Backs up all data in the specified volume that does not reside in a qtree.
u Updates the /etc/dumpdates file. You must use this option if you plan to performincremental backups in the future.
X Excludes specified files from the backup.
Parameter: A string that specifies the exclusion prefixes or suffixes.
Note: Not all options are mandatory, and some do not have any parameters.
The following list describes the rules for entering the dump command:
• You can list one or more options.You must list all options together; do not separate the options by commas or spaces.
• You can list the options in any order.• You must include a backup level and a tape file in the options.• parameters can be one parameter or a list of parameters, each of which is associated with an
option.• List all parameters in the same order as their corresponding options.• Separate each parameter with one or more spaces.• If the parameter is a list, use commas to separate the items in the list.• dump_path is the complete path name of the volume, directory, or qtree batch file to be backed
up by the dump command.• Always precede the volume name by /vol/ even if the volume is a root volume, because
between different levels of backups, you could have changed the root volume.
Data backup to tape using the dump engine | 87
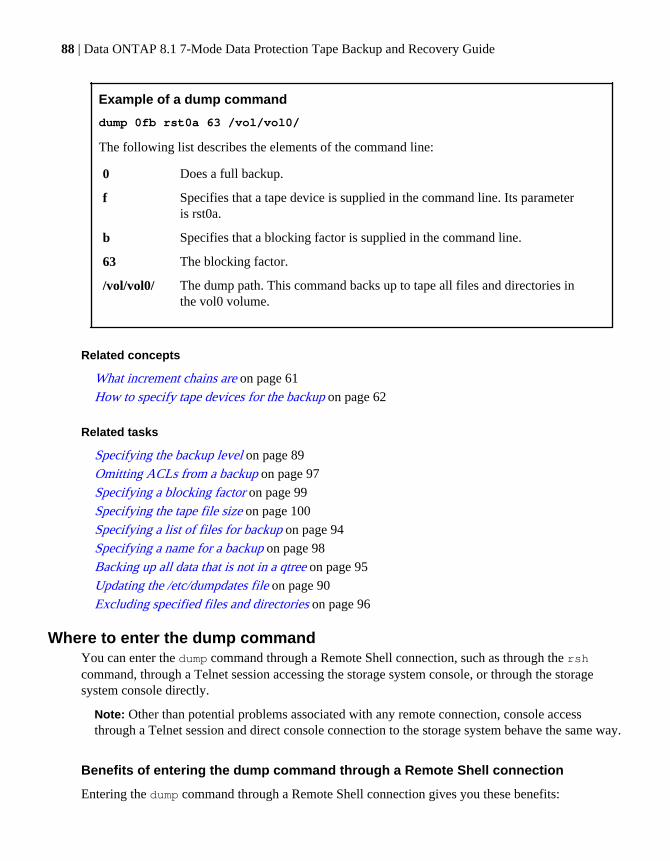
Example of a dump command
dump 0fb rst0a 63 /vol/vol0/
The following list describes the elements of the command line:
0 Does a full backup.
f Specifies that a tape device is supplied in the command line. Its parameteris rst0a.
b Specifies that a blocking factor is supplied in the command line.
63 The blocking factor.
/vol/vol0/ The dump path. This command backs up to tape all files and directories inthe vol0 volume.
Related concepts
What increment chains are on page 61
How to specify tape devices for the backup on page 62
Related tasks
Specifying the backup level on page 89
Omitting ACLs from a backup on page 97
Specifying a blocking factor on page 99
Specifying the tape file size on page 100
Specifying a list of files for backup on page 94
Specifying a name for a backup on page 98
Backing up all data that is not in a qtree on page 95
Updating the /etc/dumpdates file on page 90
Excluding specified files and directories on page 96
Where to enter the dump commandYou can enter the dump command through a Remote Shell connection, such as through the rshcommand, through a Telnet session accessing the storage system console, or through the storagesystem console directly.
Note: Other than potential problems associated with any remote connection, console accessthrough a Telnet session and direct console connection to the storage system behave the same way.
Benefits of entering the dump command through a Remote Shell connection
Entering the dump command through a Remote Shell connection gives you these benefits:
88 | Data ONTAP 8.1 7-Mode Data Protection Tape Backup and Recovery Guide
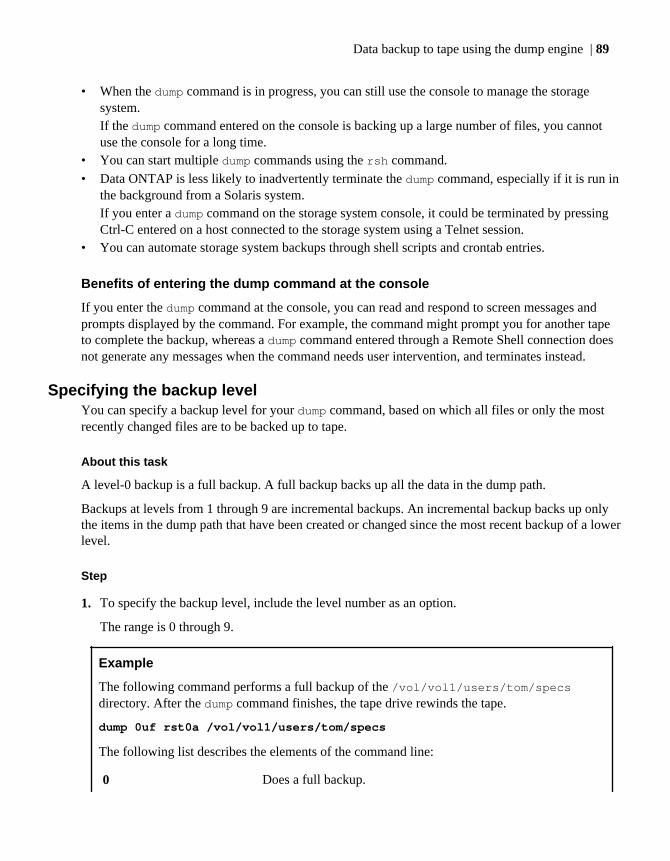
• When the dump command is in progress, you can still use the console to manage the storagesystem.If the dump command entered on the console is backing up a large number of files, you cannotuse the console for a long time.
• You can start multiple dump commands using the rsh command.• Data ONTAP is less likely to inadvertently terminate the dump command, especially if it is run in
the background from a Solaris system.If you enter a dump command on the storage system console, it could be terminated by pressingCtrl-C entered on a host connected to the storage system using a Telnet session.
• You can automate storage system backups through shell scripts and crontab entries.
Benefits of entering the dump command at the console
If you enter the dump command at the console, you can read and respond to screen messages andprompts displayed by the command. For example, the command might prompt you for another tapeto complete the backup, whereas a dump command entered through a Remote Shell connection doesnot generate any messages when the command needs user intervention, and terminates instead.
Specifying the backup levelYou can specify a backup level for your dump command, based on which all files or only the mostrecently changed files are to be backed up to tape.
About this task
A level-0 backup is a full backup. A full backup backs up all the data in the dump path.
Backups at levels from 1 through 9 are incremental backups. An incremental backup backs up onlythe items in the dump path that have been created or changed since the most recent backup of a lowerlevel.
Step
1. To specify the backup level, include the level number as an option.
The range is 0 through 9.
Example
The following command performs a full backup of the /vol/vol1/users/tom/specsdirectory. After the dump command finishes, the tape drive rewinds the tape.
dump 0uf rst0a /vol/vol1/users/tom/specs
The following list describes the elements of the command line:
0 Does a full backup.
Data backup to tape using the dump engine | 89
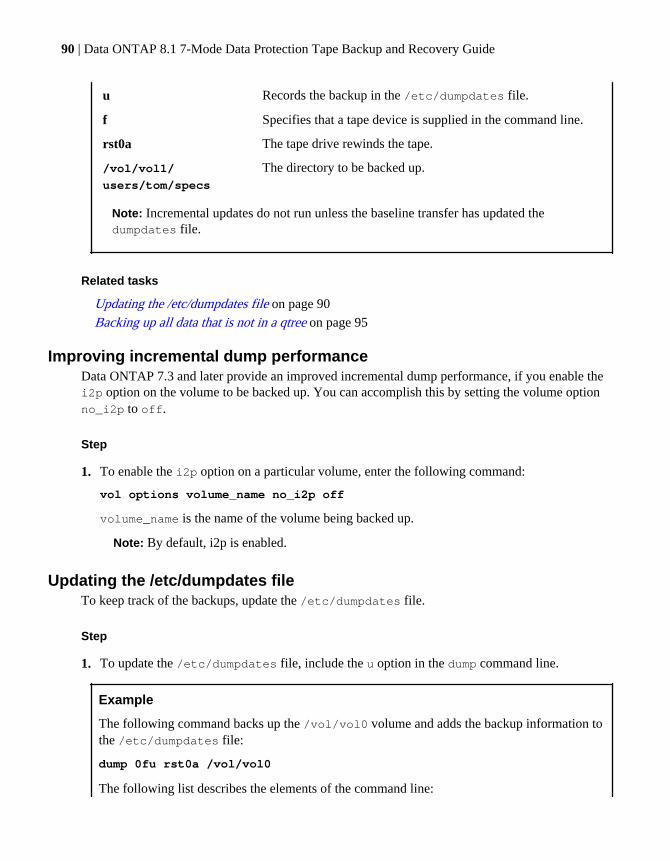
u Records the backup in the /etc/dumpdates file.
f Specifies that a tape device is supplied in the command line.
rst0a The tape drive rewinds the tape.
/vol/vol1/
users/tom/specs
The directory to be backed up.
Note: Incremental updates do not run unless the baseline transfer has updated thedumpdates file.
Related tasks
Updating the /etc/dumpdates file on page 90
Backing up all data that is not in a qtree on page 95
Improving incremental dump performanceData ONTAP 7.3 and later provide an improved incremental dump performance, if you enable thei2p option on the volume to be backed up. You can accomplish this by setting the volume optionno_i2p to off.
Step
1. To enable the i2p option on a particular volume, enter the following command:
vol options volume_name no_i2p off
volume_name is the name of the volume being backed up.
Note: By default, i2p is enabled.
Updating the /etc/dumpdates fileTo keep track of the backups, update the /etc/dumpdates file.
Step
1. To update the /etc/dumpdates file, include the u option in the dump command line.
Example
The following command backs up the /vol/vol0 volume and adds the backup information tothe /etc/dumpdates file:
dump 0fu rst0a /vol/vol0
The following list describes the elements of the command line:
90 | Data ONTAP 8.1 7-Mode Data Protection Tape Backup and Recovery Guide
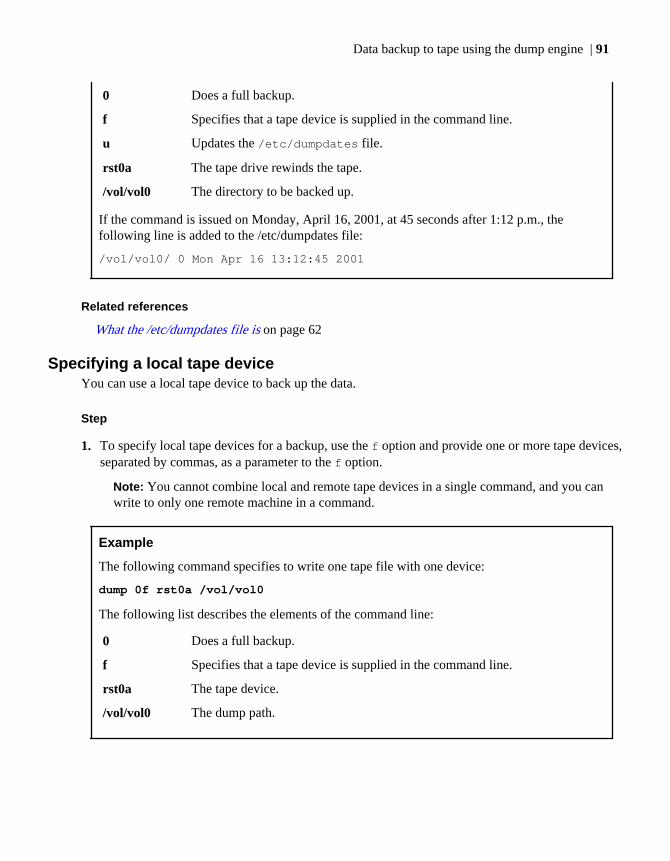
0 Does a full backup.
f Specifies that a tape device is supplied in the command line.
u Updates the /etc/dumpdates file.
rst0a The tape drive rewinds the tape.
/vol/vol0 The directory to be backed up.
If the command is issued on Monday, April 16, 2001, at 45 seconds after 1:12 p.m., thefollowing line is added to the /etc/dumpdates file:
/vol/vol0/ 0 Mon Apr 16 13:12:45 2001
Related references
What the /etc/dumpdates file is on page 62
Specifying a local tape deviceYou can use a local tape device to back up the data.
Step
1. To specify local tape devices for a backup, use the f option and provide one or more tape devices,separated by commas, as a parameter to the f option.
Note: You cannot combine local and remote tape devices in a single command, and you canwrite to only one remote machine in a command.
Example
The following command specifies to write one tape file with one device:
dump 0f rst0a /vol/vol0
The following list describes the elements of the command line:
0 Does a full backup.
f Specifies that a tape device is supplied in the command line.
rst0a The tape device.
/vol/vol0 The dump path.
Data backup to tape using the dump engine | 91
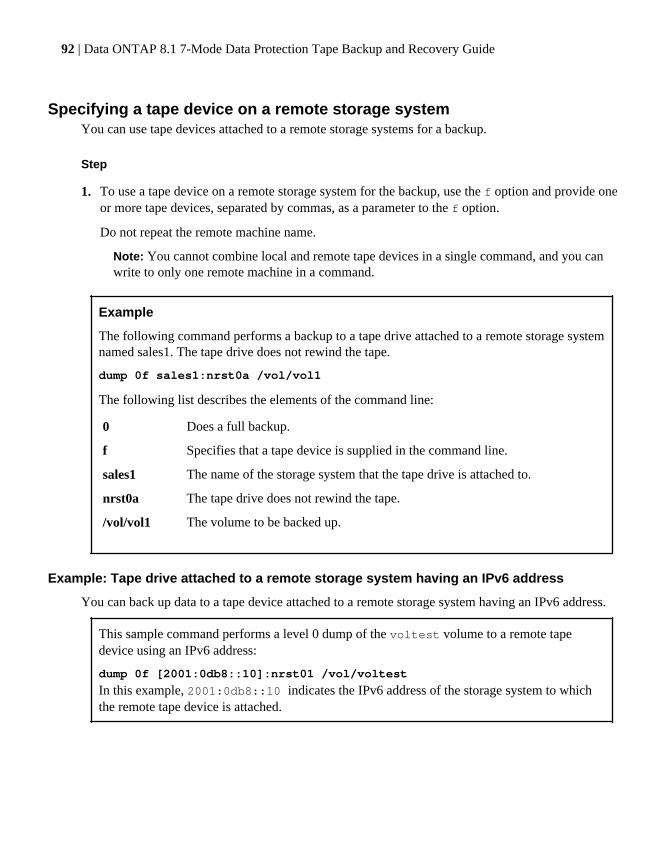
Specifying a tape device on a remote storage systemYou can use tape devices attached to a remote storage systems for a backup.
Step
1. To use a tape device on a remote storage system for the backup, use the f option and provide oneor more tape devices, separated by commas, as a parameter to the f option.
Do not repeat the remote machine name.
Note: You cannot combine local and remote tape devices in a single command, and you canwrite to only one remote machine in a command.
Example
The following command performs a backup to a tape drive attached to a remote storage systemnamed sales1. The tape drive does not rewind the tape.
dump 0f sales1:nrst0a /vol/vol1
The following list describes the elements of the command line:
0 Does a full backup.
f Specifies that a tape device is supplied in the command line.
sales1 The name of the storage system that the tape drive is attached to.
nrst0a The tape drive does not rewind the tape.
/vol/vol1 The volume to be backed up.
Example: Tape drive attached to a remote storage system having an IPv6 address
You can back up data to a tape device attached to a remote storage system having an IPv6 address.
This sample command performs a level 0 dump of the voltest volume to a remote tapedevice using an IPv6 address:
dump 0f [2001:0db8::10]:nrst01 /vol/voltest
In this example, 2001:0db8::10 indicates the IPv6 address of the storage system to whichthe remote tape device is attached.
92 | Data ONTAP 8.1 7-Mode Data Protection Tape Backup and Recovery Guide
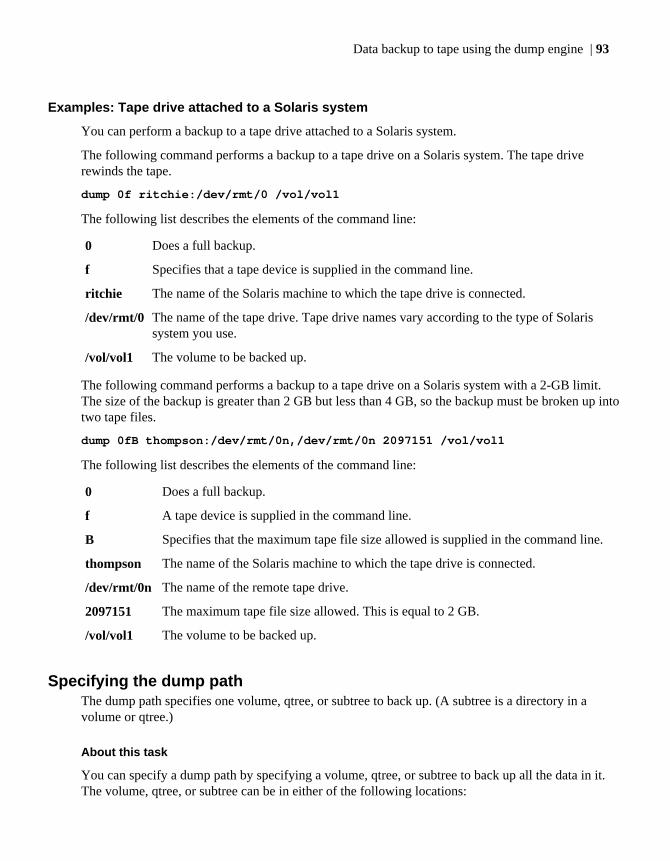
Examples: Tape drive attached to a Solaris system
You can perform a backup to a tape drive attached to a Solaris system.
The following command performs a backup to a tape drive on a Solaris system. The tape driverewinds the tape.
dump 0f ritchie:/dev/rmt/0 /vol/vol1
The following list describes the elements of the command line:
0 Does a full backup.
f Specifies that a tape device is supplied in the command line.
ritchie The name of the Solaris machine to which the tape drive is connected.
/dev/rmt/0 The name of the tape drive. Tape drive names vary according to the type of Solarissystem you use.
/vol/vol1 The volume to be backed up.
The following command performs a backup to a tape drive on a Solaris system with a 2-GB limit.The size of the backup is greater than 2 GB but less than 4 GB, so the backup must be broken up intotwo tape files.
dump 0fB thompson:/dev/rmt/0n,/dev/rmt/0n 2097151 /vol/vol1
The following list describes the elements of the command line:
0 Does a full backup.
f A tape device is supplied in the command line.
B Specifies that the maximum tape file size allowed is supplied in the command line.
thompson The name of the Solaris machine to which the tape drive is connected.
/dev/rmt/0n The name of the remote tape drive.
2097151 The maximum tape file size allowed. This is equal to 2 GB.
/vol/vol1 The volume to be backed up.
Specifying the dump pathThe dump path specifies one volume, qtree, or subtree to back up. (A subtree is a directory in avolume or qtree.)
About this task
You can specify a dump path by specifying a volume, qtree, or subtree to back up all the data in it.The volume, qtree, or subtree can be in either of the following locations:
Data backup to tape using the dump engine | 93
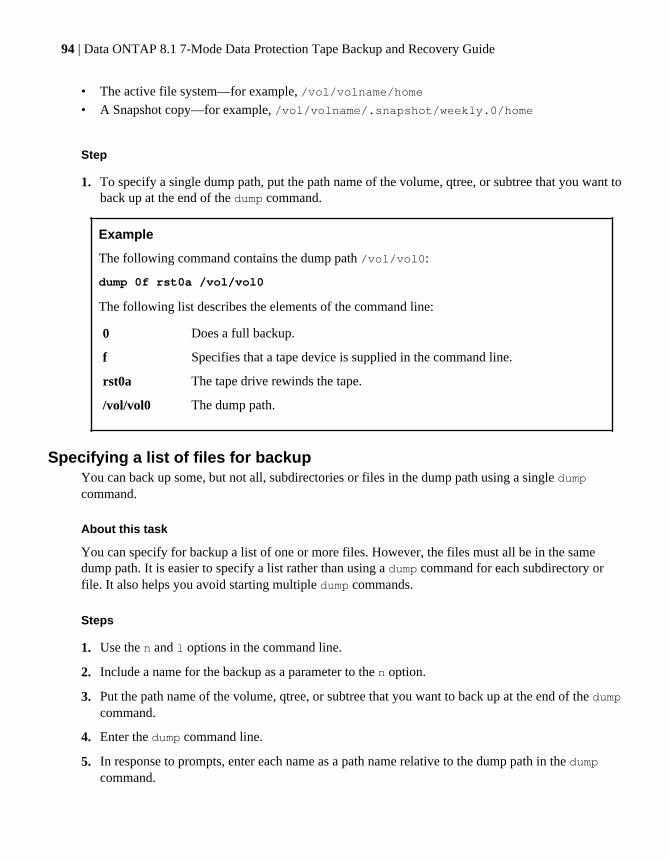
• The active file system—for example, /vol/volname/home• A Snapshot copy—for example, /vol/volname/.snapshot/weekly.0/home
Step
1. To specify a single dump path, put the path name of the volume, qtree, or subtree that you want toback up at the end of the dump command.
Example
The following command contains the dump path /vol/vol0:
dump 0f rst0a /vol/vol0
The following list describes the elements of the command line:
0 Does a full backup.
f Specifies that a tape device is supplied in the command line.
rst0a The tape drive rewinds the tape.
/vol/vol0 The dump path.
Specifying a list of files for backupYou can back up some, but not all, subdirectories or files in the dump path using a single dumpcommand.
About this task
You can specify for backup a list of one or more files. However, the files must all be in the samedump path. It is easier to specify a list rather than using a dump command for each subdirectory orfile. It also helps you avoid starting multiple dump commands.
Steps
1. Use the n and l options in the command line.
2. Include a name for the backup as a parameter to the n option.
3. Put the path name of the volume, qtree, or subtree that you want to back up at the end of the dumpcommand.
4. Enter the dump command line.
5. In response to prompts, enter each name as a path name relative to the dump path in the dumpcommand.
94 | Data ONTAP 8.1 7-Mode Data Protection Tape Backup and Recovery Guide
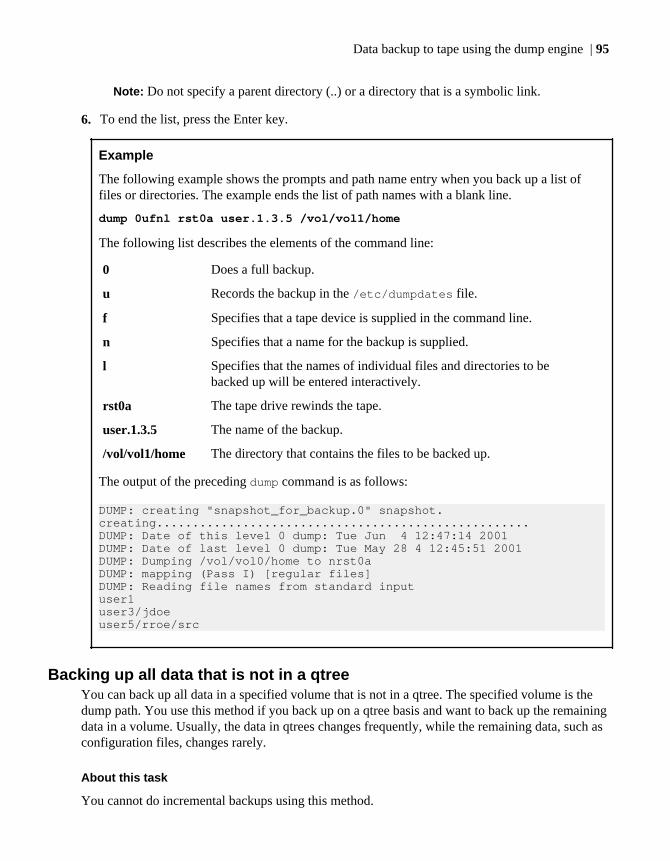
Note: Do not specify a parent directory (..) or a directory that is a symbolic link.
6. To end the list, press the Enter key.
Example
The following example shows the prompts and path name entry when you back up a list offiles or directories. The example ends the list of path names with a blank line.
dump 0ufnl rst0a user.1.3.5 /vol/vol1/home
The following list describes the elements of the command line:
0 Does a full backup.
u Records the backup in the /etc/dumpdates file.
f Specifies that a tape device is supplied in the command line.
n Specifies that a name for the backup is supplied.
l Specifies that the names of individual files and directories to bebacked up will be entered interactively.
rst0a The tape drive rewinds the tape.
user.1.3.5 The name of the backup.
/vol/vol1/home The directory that contains the files to be backed up.
The output of the preceding dump command is as follows:
DUMP: creating "snapshot_for_backup.0" snapshot.creating....................................................DUMP: Date of this level 0 dump: Tue Jun 4 12:47:14 2001DUMP: Date of last level 0 dump: Tue May 28 4 12:45:51 2001DUMP: Dumping /vol/vol0/home to nrst0aDUMP: mapping (Pass I) [regular files]DUMP: Reading file names from standard inputuser1user3/jdoeuser5/rroe/src
Backing up all data that is not in a qtreeYou can back up all data in a specified volume that is not in a qtree. The specified volume is thedump path. You use this method if you back up on a qtree basis and want to back up the remainingdata in a volume. Usually, the data in qtrees changes frequently, while the remaining data, such asconfiguration files, changes rarely.
About this task
You cannot do incremental backups using this method.
Data backup to tape using the dump engine | 95
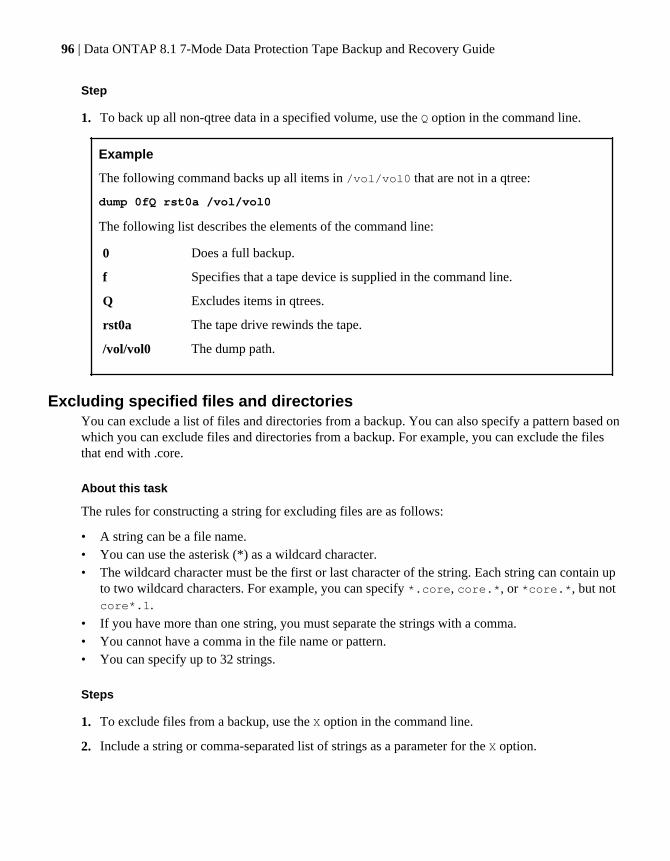
Step
1. To back up all non-qtree data in a specified volume, use the Q option in the command line.
Example
The following command backs up all items in /vol/vol0 that are not in a qtree:
dump 0fQ rst0a /vol/vol0
The following list describes the elements of the command line:
0 Does a full backup.
f Specifies that a tape device is supplied in the command line.
Q Excludes items in qtrees.
rst0a The tape drive rewinds the tape.
/vol/vol0 The dump path.
Excluding specified files and directoriesYou can exclude a list of files and directories from a backup. You can also specify a pattern based onwhich you can exclude files and directories from a backup. For example, you can exclude the filesthat end with .core.
About this task
The rules for constructing a string for excluding files are as follows:
• A string can be a file name.• You can use the asterisk (*) as a wildcard character.• The wildcard character must be the first or last character of the string. Each string can contain up
to two wildcard characters. For example, you can specify *.core, core.*, or *core.*, but notcore*.1.
• If you have more than one string, you must separate the strings with a comma.• You cannot have a comma in the file name or pattern.• You can specify up to 32 strings.
Steps
1. To exclude files from a backup, use the X option in the command line.
2. Include a string or comma-separated list of strings as a parameter for the X option.
96 | Data ONTAP 8.1 7-Mode Data Protection Tape Backup and Recovery Guide
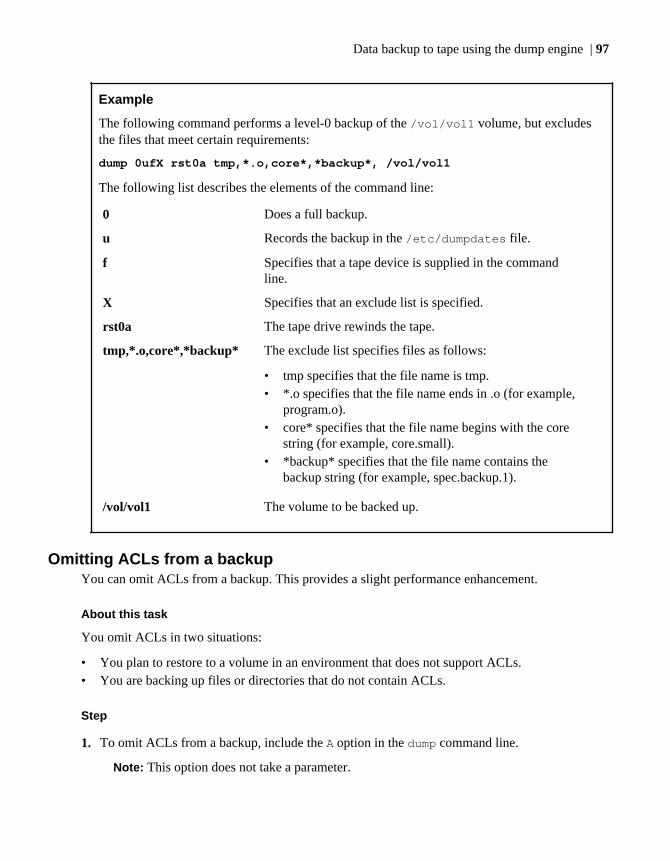
Example
The following command performs a level-0 backup of the /vol/vol1 volume, but excludesthe files that meet certain requirements:
dump 0ufX rst0a tmp,*.o,core*,*backup*, /vol/vol1
The following list describes the elements of the command line:
0 Does a full backup.
u Records the backup in the /etc/dumpdates file.
f Specifies that a tape device is supplied in the commandline.
X Specifies that an exclude list is specified.
rst0a The tape drive rewinds the tape.
tmp,*.o,core*,*backup* The exclude list specifies files as follows:
• tmp specifies that the file name is tmp.• *.o specifies that the file name ends in .o (for example,
program.o).• core* specifies that the file name begins with the core
string (for example, core.small).• *backup* specifies that the file name contains the
backup string (for example, spec.backup.1).
/vol/vol1 The volume to be backed up.
Omitting ACLs from a backupYou can omit ACLs from a backup. This provides a slight performance enhancement.
About this task
You omit ACLs in two situations:
• You plan to restore to a volume in an environment that does not support ACLs.• You are backing up files or directories that do not contain ACLs.
Step
1. To omit ACLs from a backup, include the A option in the dump command line.
Note: This option does not take a parameter.
Data backup to tape using the dump engine | 97

Example
The following command performs a level-0 backup of the /vol/vol1 volume. The A optionmeans that the backup does not include any ACL information.
dump 0Af rst0a /vol/vol1
The following list describes the elements of the command line:
0 Does a full backup.
A Specifies not to back up ACLs.
f Specifies that a tape device is supplied in the command line.
rst0a The tape drive rewinds the tape.
/vol/vol1 The volume to be backed up.
Specifying a name for a backupYou can name a backup using the n. You can record this backup name in the /etc/dumpdatesusing the u option.
About this task
You specify a name for a backup in two situations:
• You are specifying a list of directories or files in the backup with the l option.• You want to monitor the backup history.
Steps
1. To specify a name for the backup, include the n option in the dump command line.
2. Include a name for the backup as a parameter to the n option.
Example
The following command gives the name thisbackup to a backup:
dump 0fn rst0a thisbackup /vol/vol0
The following list describes the elements of the command line:
0 Does a full backup.
f Specifies that a tape device is supplied in the command line.
n Specifies to name this backup.
rst0a The tape drive rewinds the tape.
98 | Data ONTAP 8.1 7-Mode Data Protection Tape Backup and Recovery Guide
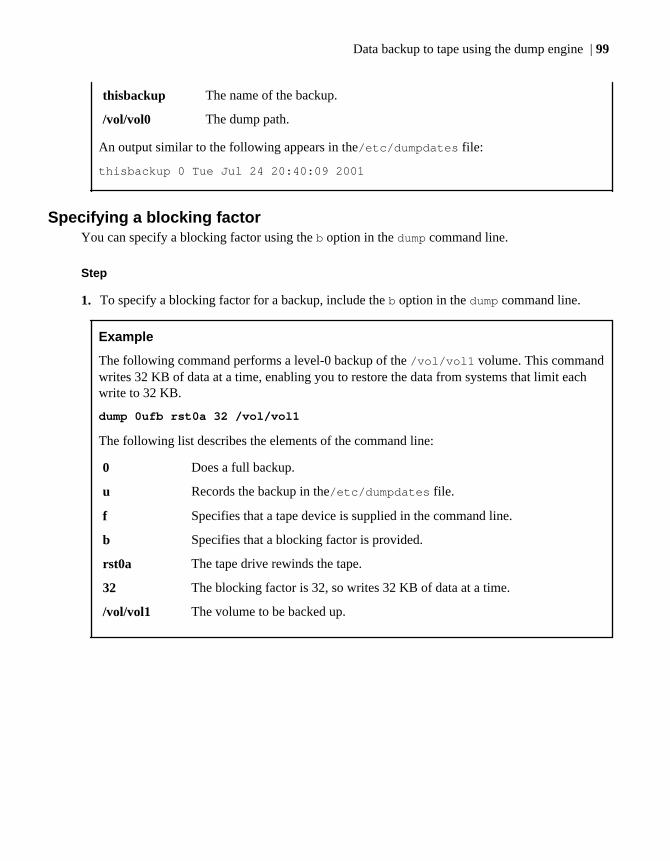
thisbackup The name of the backup.
/vol/vol0 The dump path.
An output similar to the following appears in the/etc/dumpdates file:
thisbackup 0 Tue Jul 24 20:40:09 2001
Specifying a blocking factorYou can specify a blocking factor using the b option in the dump command line.
Step
1. To specify a blocking factor for a backup, include the b option in the dump command line.
Example
The following command performs a level-0 backup of the /vol/vol1 volume. This commandwrites 32 KB of data at a time, enabling you to restore the data from systems that limit eachwrite to 32 KB.
dump 0ufb rst0a 32 /vol/vol1
The following list describes the elements of the command line:
0 Does a full backup.
u Records the backup in the/etc/dumpdates file.
f Specifies that a tape device is supplied in the command line.
b Specifies that a blocking factor is provided.
rst0a The tape drive rewinds the tape.
32 The blocking factor is 32, so writes 32 KB of data at a time.
/vol/vol1 The volume to be backed up.
Data backup to tape using the dump engine | 99
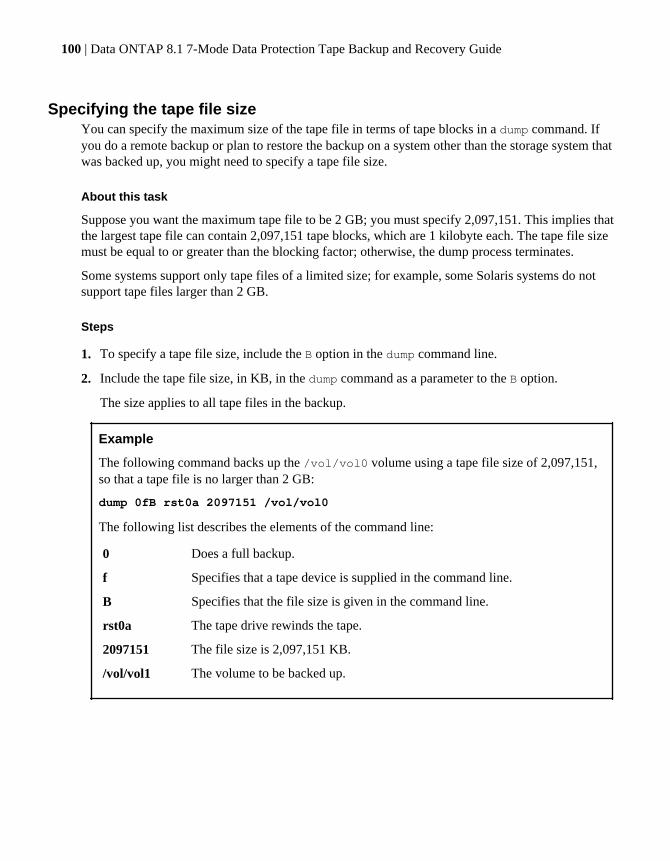
Specifying the tape file sizeYou can specify the maximum size of the tape file in terms of tape blocks in a dump command. Ifyou do a remote backup or plan to restore the backup on a system other than the storage system thatwas backed up, you might need to specify a tape file size.
About this task
Suppose you want the maximum tape file to be 2 GB; you must specify 2,097,151. This implies thatthe largest tape file can contain 2,097,151 tape blocks, which are 1 kilobyte each. The tape file sizemust be equal to or greater than the blocking factor; otherwise, the dump process terminates.
Some systems support only tape files of a limited size; for example, some Solaris systems do notsupport tape files larger than 2 GB.
Steps
1. To specify a tape file size, include the B option in the dump command line.
2. Include the tape file size, in KB, in the dump command as a parameter to the B option.
The size applies to all tape files in the backup.
Example
The following command backs up the /vol/vol0 volume using a tape file size of 2,097,151,so that a tape file is no larger than 2 GB:
dump 0fB rst0a 2097151 /vol/vol0
The following list describes the elements of the command line:
0 Does a full backup.
f Specifies that a tape device is supplied in the command line.
B Specifies that the file size is given in the command line.
rst0a The tape drive rewinds the tape.
2097151 The file size is 2,097,151 KB.
/vol/vol1 The volume to be backed up.
100 | Data ONTAP 8.1 7-Mode Data Protection Tape Backup and Recovery Guide
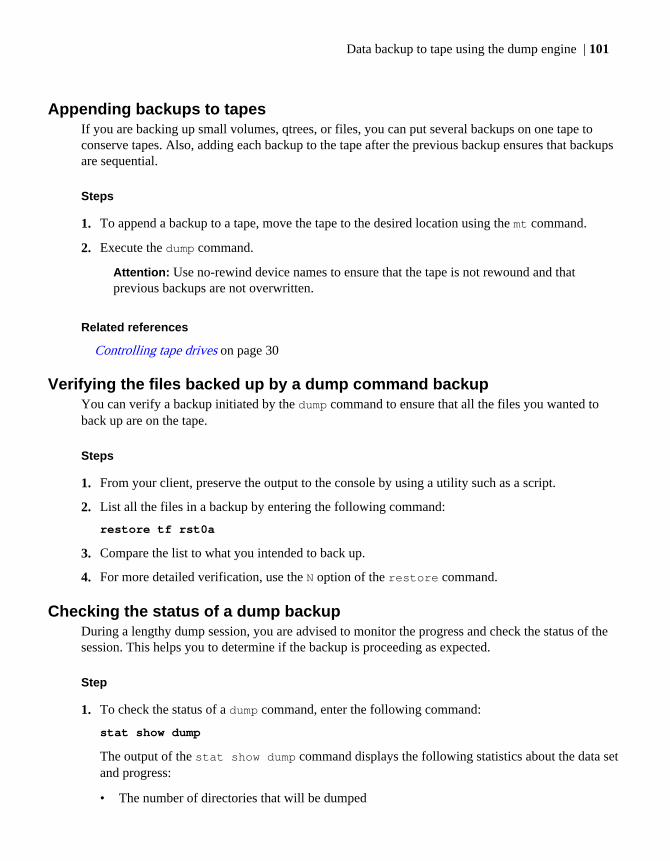
Appending backups to tapesIf you are backing up small volumes, qtrees, or files, you can put several backups on one tape toconserve tapes. Also, adding each backup to the tape after the previous backup ensures that backupsare sequential.
Steps
1. To append a backup to a tape, move the tape to the desired location using the mt command.
2. Execute the dump command.
Attention: Use no-rewind device names to ensure that the tape is not rewound and thatprevious backups are not overwritten.
Related references
Controlling tape drives on page 30
Verifying the files backed up by a dump command backupYou can verify a backup initiated by the dump command to ensure that all the files you wanted toback up are on the tape.
Steps
1. From your client, preserve the output to the console by using a utility such as a script.
2. List all the files in a backup by entering the following command:
restore tf rst0a
3. Compare the list to what you intended to back up.
4. For more detailed verification, use the N option of the restore command.
Checking the status of a dump backupDuring a lengthy dump session, you are advised to monitor the progress and check the status of thesession. This helps you to determine if the backup is proceeding as expected.
Step
1. To check the status of a dump command, enter the following command:
stat show dump
The output of the stat show dump command displays the following statistics about the data setand progress:
• The number of directories that will be dumped
Data backup to tape using the dump engine | 101
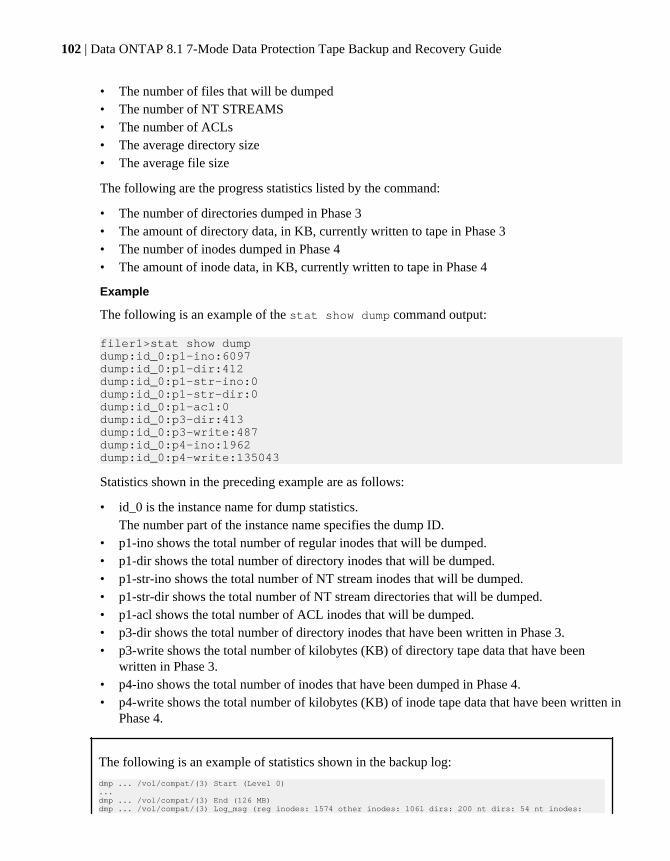
• The number of files that will be dumped• The number of NT STREAMS• The number of ACLs• The average directory size• The average file size
The following are the progress statistics listed by the command:
• The number of directories dumped in Phase 3• The amount of directory data, in KB, currently written to tape in Phase 3• The number of inodes dumped in Phase 4• The amount of inode data, in KB, currently written to tape in Phase 4
Example
The following is an example of the stat show dump command output:
filer1>stat show dumpdump:id_0:p1-ino:6097dump:id_0:p1-dir:412dump:id_0:p1-str-ino:0dump:id_0:p1-str-dir:0dump:id_0:p1-acl:0dump:id_0:p3-dir:413dump:id_0:p3-write:487dump:id_0:p4-ino:1962dump:id_0:p4-write:135043
Statistics shown in the preceding example are as follows:
• id_0 is the instance name for dump statistics.The number part of the instance name specifies the dump ID.
• p1-ino shows the total number of regular inodes that will be dumped.• p1-dir shows the total number of directory inodes that will be dumped.• p1-str-ino shows the total number of NT stream inodes that will be dumped.• p1-str-dir shows the total number of NT stream directories that will be dumped.• p1-acl shows the total number of ACL inodes that will be dumped.• p3-dir shows the total number of directory inodes that have been written in Phase 3.• p3-write shows the total number of kilobytes (KB) of directory tape data that have been
written in Phase 3.• p4-ino shows the total number of inodes that have been dumped in Phase 4.• p4-write shows the total number of kilobytes (KB) of inode tape data that have been written in
Phase 4.
The following is an example of statistics shown in the backup log:
dmp ... /vol/compat/(3) Start (Level 0)...dmp ... /vol/compat/(3) End (126 MB)dmp ... /vol/compat/(3) Log_msg (reg inodes: 1574 other inodes: 1061 dirs: 200 nt dirs: 54 nt inodes:
102 | Data ONTAP 8.1 7-Mode Data Protection Tape Backup and Recovery Guide
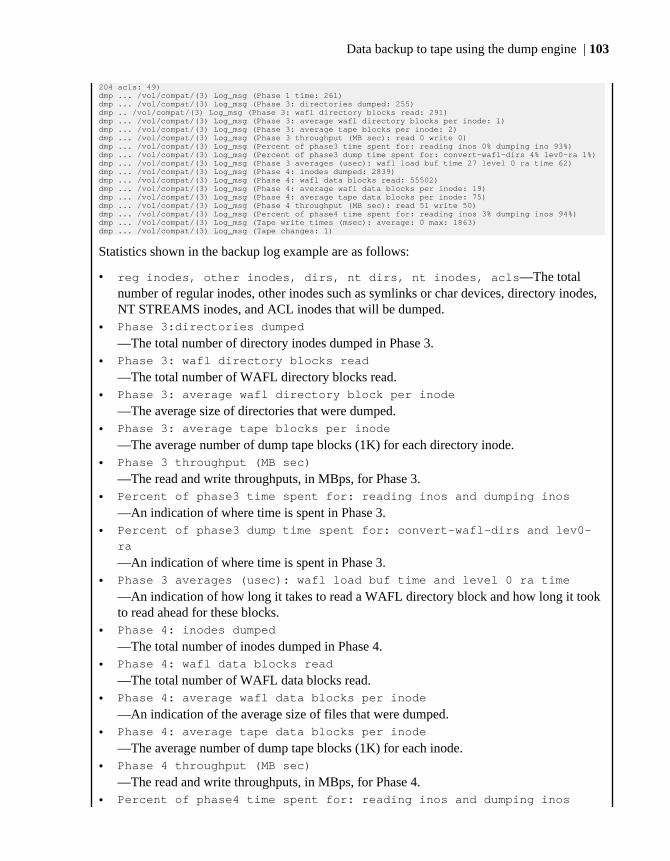
204 acls: 49)dmp ... /vol/compat/(3) Log_msg (Phase 1 time: 261)dmp ... /vol/compat/(3) Log_msg (Phase 3: directories dumped: 255)dmp .. /vol/compat/(3) Log_msg (Phase 3: wafl directory blocks read: 291)dmp ... /vol/compat/(3) Log_msg (Phase 3: average wafl directory blocks per inode: 1)dmp ... /vol/compat/(3) Log_msg (Phase 3: average tape blocks per inode: 2)dmp ... /vol/compat/(3) Log_msg (Phase 3 throughput (MB sec): read 0 write 0)dmp ... /vol/compat/(3) Log_msg (Percent of phase3 time spent for: reading inos 0% dumping ino 93%)dmp ... /vol/compat/(3) Log_msg (Percent of phase3 dump time spent for: convert-wafl-dirs 4% lev0-ra 1%)dmp ... /vol/compat/(3) Log_msg (Phase 3 averages (usec): wafl load buf time 27 level 0 ra time 62)dmp ... /vol/compat/(3) Log_msg (Phase 4: inodes dumped: 2839)dmp ... /vol/compat/(3) Log_msg (Phase 4: wafl data blocks read: 55502)dmp ... /vol/compat/(3) Log_msg (Phase 4: average wafl data blocks per inode: 19)dmp ... /vol/compat/(3) Log_msg (Phase 4: average tape data blocks per inode: 75)dmp ... /vol/compat/(3) Log_msg (Phase 4 throughput (MB sec): read 51 write 50)dmp ... /vol/compat/(3) Log_msg (Percent of phase4 time spent for: reading inos 3% dumping inos 94%)dmp ... /vol/compat/(3) Log_msg (Tape write times (msec): average: 0 max: 1863)dmp ... /vol/compat/(3) Log_msg (Tape changes: 1)
Statistics shown in the backup log example are as follows:
• reg inodes, other inodes, dirs, nt dirs, nt inodes, acls—The totalnumber of regular inodes, other inodes such as symlinks or char devices, directory inodes,NT STREAMS inodes, and ACL inodes that will be dumped.
• Phase 3:directories dumped
—The total number of directory inodes dumped in Phase 3.• Phase 3: wafl directory blocks read
—The total number of WAFL directory blocks read.• Phase 3: average wafl directory block per inode
—The average size of directories that were dumped.• Phase 3: average tape blocks per inode
—The average number of dump tape blocks (1K) for each directory inode.• Phase 3 throughput (MB sec)
—The read and write throughputs, in MBps, for Phase 3.• Percent of phase3 time spent for: reading inos and dumping inos
—An indication of where time is spent in Phase 3.• Percent of phase3 dump time spent for: convert-wafl-dirs and lev0-
ra
—An indication of where time is spent in Phase 3.• Phase 3 averages (usec): wafl load buf time and level 0 ra time
—An indication of how long it takes to read a WAFL directory block and how long it tookto read ahead for these blocks.
• Phase 4: inodes dumped
—The total number of inodes dumped in Phase 4.• Phase 4: wafl data blocks read
—The total number of WAFL data blocks read.• Phase 4: average wafl data blocks per inode
—An indication of the average size of files that were dumped.• Phase 4: average tape data blocks per inode
—The average number of dump tape blocks (1K) for each inode.• Phase 4 throughput (MB sec)
—The read and write throughputs, in MBps, for Phase 4.• Percent of phase4 time spent for: reading inos and dumping inos
Data backup to tape using the dump engine | 103
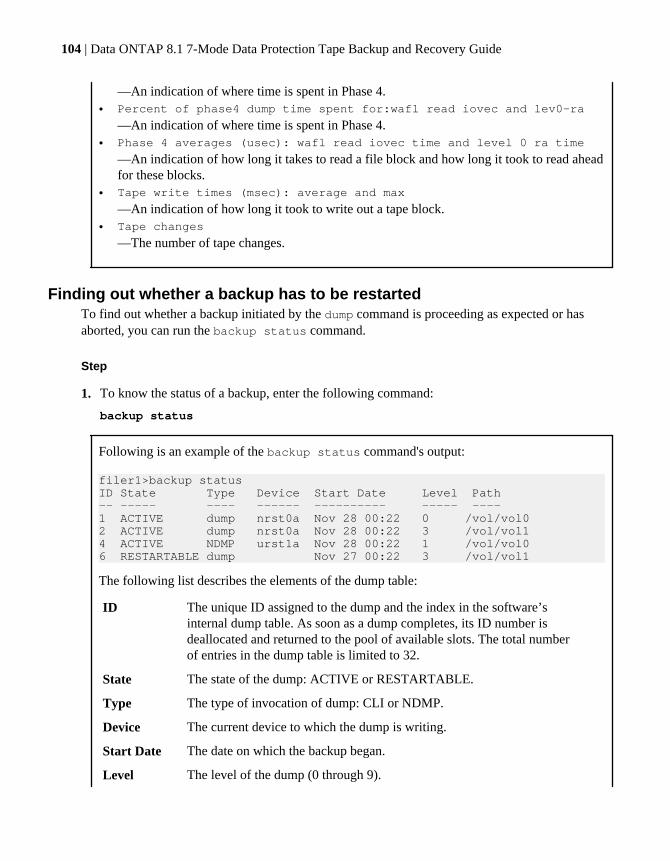
—An indication of where time is spent in Phase 4.• Percent of phase4 dump time spent for:wafl read iovec and lev0-ra
—An indication of where time is spent in Phase 4.• Phase 4 averages (usec): wafl read iovec time and level 0 ra time
—An indication of how long it takes to read a file block and how long it took to read aheadfor these blocks.
• Tape write times (msec): average and max
—An indication of how long it took to write out a tape block.• Tape changes
—The number of tape changes.
Finding out whether a backup has to be restartedTo find out whether a backup initiated by the dump command is proceeding as expected or hasaborted, you can run the backup status command.
Step
1. To know the status of a backup, enter the following command:
backup status
Following is an example of the backup status command's output:
filer1>backup statusID State Type Device Start Date Level Path -- ----- ---- ------ ---------- ----- ----1 ACTIVE dump nrst0a Nov 28 00:22 0 /vol/vol02 ACTIVE dump nrst0a Nov 28 00:22 3 /vol/vol14 ACTIVE NDMP urst1a Nov 28 00:22 1 /vol/vol06 RESTARTABLE dump Nov 27 00:22 3 /vol/vol1
The following list describes the elements of the dump table:
ID The unique ID assigned to the dump and the index in the software’sinternal dump table. As soon as a dump completes, its ID number isdeallocated and returned to the pool of available slots. The total numberof entries in the dump table is limited to 32.
State The state of the dump: ACTIVE or RESTARTABLE.
Type The type of invocation of dump: CLI or NDMP.
Device The current device to which the dump is writing.
Start Date The date on which the backup began.
Level The level of the dump (0 through 9).
104 | Data ONTAP 8.1 7-Mode Data Protection Tape Backup and Recovery Guide

Path The dump path.
How to get details about a specific backupTo get more detailed information about a specific backup initiated by the dump command, you cansupply the dump ID at the end of the backup status command.
Following are the examples of the backup status command.
Example 1
filer> backup status 2 State: ACTIVE Type: dump Path: /vol/vol0/src Level: 0 Options: b=63, uDevices: rst1a,rst2a,rst3aCompleted: 3 tape filesLast Update: Mon Nov 26 00:14:35 2001
The following list describes the output of the command:
Options All the options specified for the backup and their respective parameters.
Completed The number of tape files that have already been copied.
Last Update The time and date of the last completed update.
Example 2
filer> backup status 2State: RESTARTABLE Type: ndmpPath: /vol/vol1 Level: 0Snapshot: filer(0101184236)_vol1_filer_svp-dst.0Snapshot: snapshot_for_backup.9 [Dec 27 00:41]Options: b=63, XDevices: [none]Completed: 1 tapefile(s)Last Update: Thu Dec 27 00:41:23 2007
The preceding example displays the following additional information:
Snapshot The Snapshot copies of the path that is being backed up.
Data backup to tape using the dump engine | 105
Restarting a dump command backupTo restart an aborted backup, you must use the R option in the dump command.
Step
1. To restart a dump process that has been shown to be restartable, enter the following commandfrom the storage system:
dump R[f comma-separated_device-list] {path |ID}
f is an option that enables you to supply a device list.
comma-separated_device-list lets you direct the dump stream to output devices other thanthose originally designated in the failed dump. A restarted dump process uses this device list inthe same way a regular dump would. Any device list that is valid to a regular dump will be validin this case.
If a device list is not specified, the command defaults to the remainder of the devices listed butnot yet consumed by the failed dump.
For example, suppose the following device list was supplied to the previous dump, which failedwhile writing to rst2a: rst0a,rst1a,rst2a,rst3a,rst4a.
The command will use rst3a,rst4a to complete the backup. However, if the original device listcontained any non-rewinding (nrst) devices or any devices not supported, users are required tosupply a new device list at the restart of the dump.
path is the path that is listed in the dump table (the output of the backup status command). Ifthere are multiple entries (that is, entries with exactly the same path) the command prompts youto use the ID to restart the backup.
ID is the unique ID displayed by the backup status command.
You can use either path or ID in most cases.
Result
The command starts rewriting the dump stream from the beginning of the tape file in which theprevious dump was interrupted.
Related tasks
Checking the status of a dump backup on page 101
106 | Data ONTAP 8.1 7-Mode Data Protection Tape Backup and Recovery Guide
Deleting restartable dump command backupsYou can delete a restartable dump using the dump ID.
Step
1. To delete a restartable backup, enter the following command:
backup terminate ID
ID is the unique ID in the dump table that the backup status command displays.
To prevent restartable backups from accumulating on a storage system and taking upunreasonable amounts of disk space, the dump command automatically checks the snap reserveevery 10 minutes. If the snap reserve is over 100 percent, the oldest restartable backups aredeleted until snap reserve usage drops below 100 percent or until there are no more restartablebackups to delete.
How to perform a dump restore using the CLIYou can use the restore command to restore data backed up to tape using the dump backup.
Restore command syntaxThe restore command consists of a set of options that include the restore types and the modifiers.
There are a set of rules that you have to follow when you enter the restore command:
• Specify only one restore type.• Specify multiple options without intervening spaces.• Enter the parameters for each option in the order that you specify the options. Separate each
parameter from the next with a space.• If the destination for each file is the same as the location from which it was backed up, you do not
need to explicitly specify a destination.
The restore command syntax is as follows:
restore options [parameters] [files ...]
options can be one restore type with modifiers.
What restore types areA restore type specifies the type of restore you are performing.
For a restore from tape, you must specify only one restore type. The following table summarizes therestore types.
Data backup to tape using the dump engine | 107
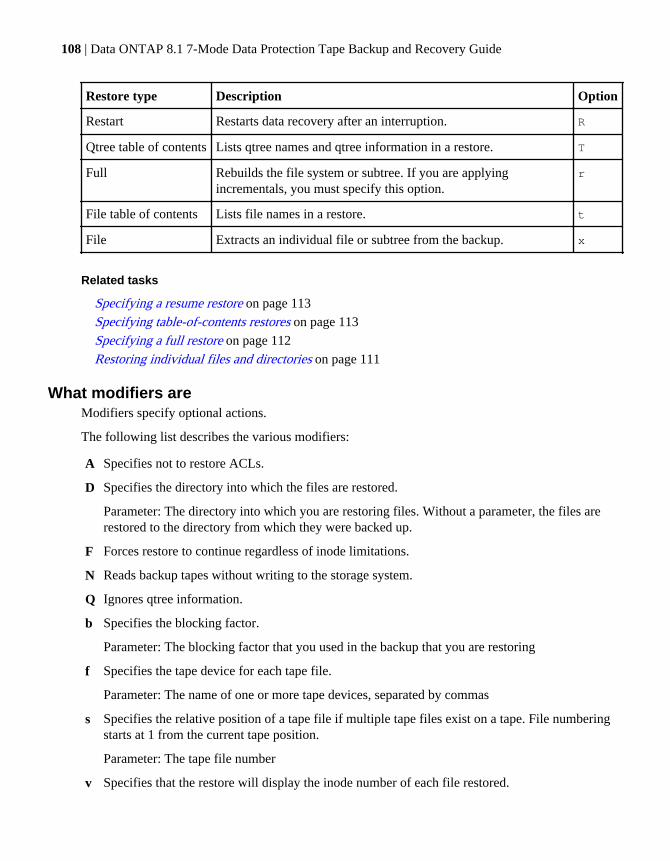
Restore type Description Option
Restart Restarts data recovery after an interruption. R
Qtree table of contents Lists qtree names and qtree information in a restore. T
Full Rebuilds the file system or subtree. If you are applyingincrementals, you must specify this option.
r
File table of contents Lists file names in a restore. t
File Extracts an individual file or subtree from the backup. x
Related tasks
Specifying a resume restore on page 113
Specifying table-of-contents restores on page 113
Specifying a full restore on page 112
Restoring individual files and directories on page 111
What modifiers areModifiers specify optional actions.
The following list describes the various modifiers:
A Specifies not to restore ACLs.
D Specifies the directory into which the files are restored.
Parameter: The directory into which you are restoring files. Without a parameter, the files arerestored to the directory from which they were backed up.
F Forces restore to continue regardless of inode limitations.
N Reads backup tapes without writing to the storage system.
Q Ignores qtree information.
b Specifies the blocking factor.
Parameter: The blocking factor that you used in the backup that you are restoring
f Specifies the tape device for each tape file.
Parameter: The name of one or more tape devices, separated by commas
s Specifies the relative position of a tape file if multiple tape files exist on a tape. File numberingstarts at 1 from the current tape position.
Parameter: The tape file number
v Specifies that the restore will display the inode number of each file restored.
108 | Data ONTAP 8.1 7-Mode Data Protection Tape Backup and Recovery Guide
y Specifies that the restore will not prompt the user if it encounters an error.
Related tasks
Specifying no ACLs to be restored on page 120
Specifying the restore destination on page 116
Ignoring inode limitations on page 118
Specifying a test restore on page 121
Specifying not to restore qtree information on page 120
Specifying the blocking factor during restore on page 117
Specifying tape devices in the restore command on page 114
Specifying a single tape file on a multifile tape on page 115
Displaying detailed status output on page 117
Specifying automatic confirmations on page 119
Where to enter the restore commandYou can enter the restore command through a Remote Shell connection, such as RSH, or on theconsole.
Benefits of entering the restore command through a Remote Shell
Entering the restore command through a Remote Shell connection gives you the followingbenefits:
• When the restore command is in progress, you can still use the console to manage the storagesystem.
• You can start multiple restore commands through a Remote Shell connection if other tapedrives are available.
• It is less likely that someone will inadvertently terminate the restore command, especially if itis run in the background from a UNIX system.However, if you enter the restore command on the console, it could be terminated by pressingCtrl-C on a host connected to the storage system using Telnet.
Benefit of entering the restore command on the console
The benefit of entering the restore command on the console is that you can read and respond toscreen messages displayed by the command. For example, the command might prompt you foranother tape to complete the recovery.
Data backup to tape using the dump engine | 109
Executing a restore commandYou have to perform a series of steps to execute a restore command.
Steps
1. Place the tape containing the first tape file of the backup in the tape drive that you specify.
2. Enter the restore command.
3. If prompted, insert the next tape of the backup that you are restoring into the appropriate tapedrive.
4. Repeat Step 3 until the restore is complete.
Restoring incremental backupsIncremental restores build on each other the way incremental backups build on the initial level-0backup. Therefore, to restore an incremental backup, you need all the backup tapes from the level-0backup through the last backup that you want to restore.
About this task
If you attempt an incremental restore to a storage system running Data ONTAP 6.2 or later from astorage system running a version earlier than Data ONTAP 6.2, the restore will fail. This is becausethere is a formatting code change between the two code releases. You need to run the full backupagain after you have upgraded to Data ONTAP 6.2 or later.
Steps
1. Restore the level-0 backup.
2. Follow the prompts.
You might be asked to remove or insert tapes.
3. Restore each incremental backup in the increment chain that you want to restore, starting with thelowest-level backup and going to the last backup that you want to restore.
Attention: During an incremental restore operation, a temporary directorylabeled .restore_do_not_touch_xxxxxxx will appear in the active file system. Do not editor delete this directory. The system will delete this directory after the current incrementalrestore operation is completed.
4. After all the incremental restores are completed, delete the restore_symboltable file from theroot of the destination directory.
Note: The restore_symboltable file contains information required to perform incrementalrestores. If you intend to perform incremental restores, ensure that this file is not deleted untilall the incremental restores are completed.
110 | Data ONTAP 8.1 7-Mode Data Protection Tape Backup and Recovery Guide
Related concepts
What increment chains are on page 61
Related tasks
Specifying the backup level on page 89
Restoring each volume backed up as separate subtrees or qtreesYou can restore an entire storage system even if you used separate dump commands to back up files,directories, and qtrees that make up each volume.
Steps
1. To restore each volume backed up as separate subtrees or qtrees, create the desired volumes.
2. Restore each backup to the appropriate volume.
Restoring individual files and directoriesYou can restore one or more directories or files from a backup.
Steps
1. Use the X option in the restore command line.
2. At the end of the command line, include the path names relative to the dump path of the files ordirectories that you want to restore.
Separate path names with a space.
Note: If you do not have a path in the command line, the restore command restores all dataon the tape.
Example
The following command restores the /src directory and puts it in the location from which itwas backed up:
restore Xf rst0a /src
The following list describes the elements of the command line:
X Restores a specified file.
f Specifies that a tape device is supplied in the command line.
rst0a The tape device.
/src The directory to be restored.
Data backup to tape using the dump engine | 111
Specifying a full restoreA full restore rebuilds the file system, qtree, or subtree that was in the backup that a tape filecontains.
Step
1. To specify a full restore, use the r option in the restore command line.
Example
The following command performs a full restore to the original location.
restore rf rst0a
The following list describes the elements of the command line:
r Performs a full restore.
f Specifies that a tape device is supplied in the command line.
rst0a The tape device.
What a table-of-contents restore isYou can display a table of contents of the files or qtrees in a tape file. This is useful in determiningwhat files or qtrees are on a tape and their locations. For qtrees, the restore lists the qtree properties.
A table-of-contents restore takes much less time than a full restore because only the list of files in thebackup is read. However, it uses a lot of CPU time because of the extensive output produced.
Why Remote Shell is preferred for a table-of-contents restore
In general, you should run a table-of-contents restore from a Remote Shell connection because anenormous output is generated. Usually, you can control the output more easily when it is sent to aclient console rather than to the storage system console. Also, client consoles are more flexible andenable you to save the output.
Also, you rarely need to change tapes with a table-of-contents restore. The command needs to readonly the directory information from the tape and none of the files or qtrees. Because directoryinformation tends to constitute a small part of a backup, it is almost always located on one tape. Also,table-of-contents restores work with multiple tape files specified on the command line.
Types of table-of-contents restores
You can specify two types of tables of contents: file and qtree. These are explained in the followingtable.
112 | Data ONTAP 8.1 7-Mode Data Protection Tape Backup and Recovery Guide
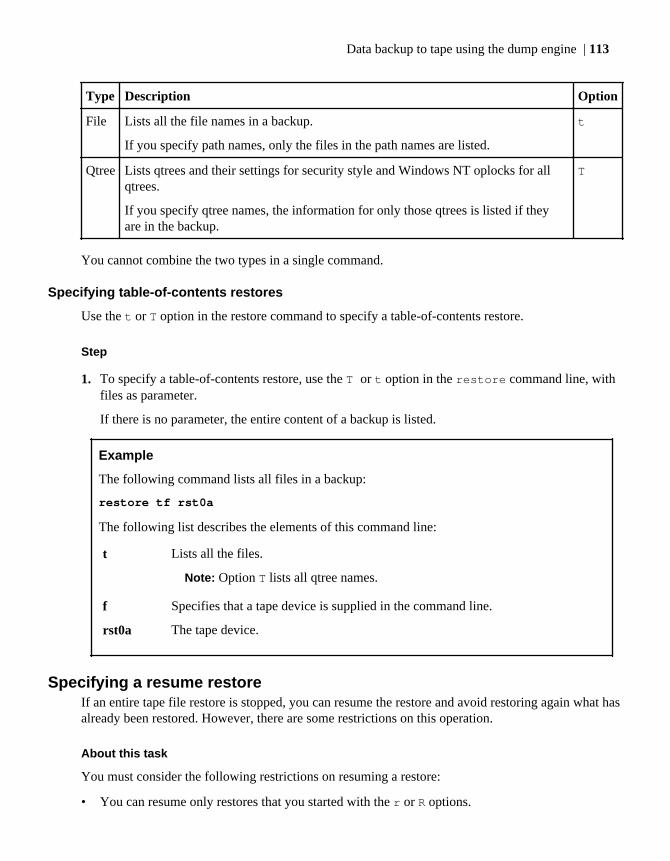
Type Description Option
File Lists all the file names in a backup.
If you specify path names, only the files in the path names are listed.
t
Qtree Lists qtrees and their settings for security style and Windows NT oplocks for allqtrees.
If you specify qtree names, the information for only those qtrees is listed if theyare in the backup.
T
You cannot combine the two types in a single command.
Specifying table-of-contents restores
Use the t or T option in the restore command to specify a table-of-contents restore.
Step
1. To specify a table-of-contents restore, use the T or t option in the restore command line, withfiles as parameter.
If there is no parameter, the entire content of a backup is listed.
Example
The following command lists all files in a backup:
restore tf rst0a
The following list describes the elements of this command line:
t Lists all the files.
Note: Option T lists all qtree names.
f Specifies that a tape device is supplied in the command line.
rst0a The tape device.
Specifying a resume restoreIf an entire tape file restore is stopped, you can resume the restore and avoid restoring again what hasalready been restored. However, there are some restrictions on this operation.
About this task
You must consider the following restrictions on resuming a restore:
• You can resume only restores that you started with the r or R options.
Data backup to tape using the dump engine | 113
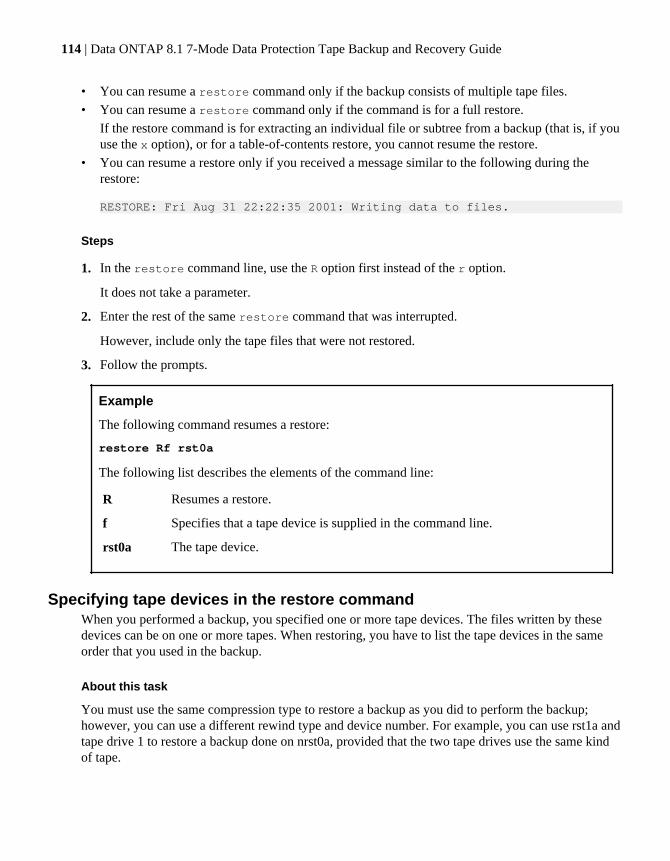
• You can resume a restore command only if the backup consists of multiple tape files.• You can resume a restore command only if the command is for a full restore.
If the restore command is for extracting an individual file or subtree from a backup (that is, if youuse the x option), or for a table-of-contents restore, you cannot resume the restore.
• You can resume a restore only if you received a message similar to the following during therestore:
RESTORE: Fri Aug 31 22:22:35 2001: Writing data to files.
Steps
1. In the restore command line, use the R option first instead of the r option.
It does not take a parameter.
2. Enter the rest of the same restore command that was interrupted.
However, include only the tape files that were not restored.
3. Follow the prompts.
Example
The following command resumes a restore:
restore Rf rst0a
The following list describes the elements of the command line:
R Resumes a restore.
f Specifies that a tape device is supplied in the command line.
rst0a The tape device.
Specifying tape devices in the restore commandWhen you performed a backup, you specified one or more tape devices. The files written by thesedevices can be on one or more tapes. When restoring, you have to list the tape devices in the sameorder that you used in the backup.
About this task
You must use the same compression type to restore a backup as you did to perform the backup;however, you can use a different rewind type and device number. For example, you can use rst1a andtape drive 1 to restore a backup done on nrst0a, provided that the two tape drives use the same kindof tape.
114 | Data ONTAP 8.1 7-Mode Data Protection Tape Backup and Recovery Guide
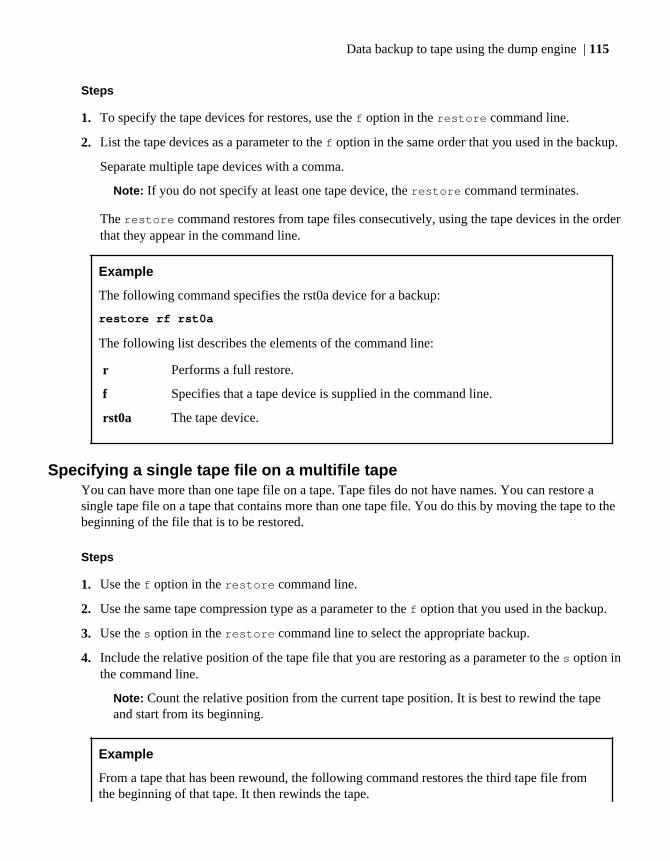
Steps
1. To specify the tape devices for restores, use the f option in the restore command line.
2. List the tape devices as a parameter to the f option in the same order that you used in the backup.
Separate multiple tape devices with a comma.
Note: If you do not specify at least one tape device, the restore command terminates.
The restore command restores from tape files consecutively, using the tape devices in the orderthat they appear in the command line.
Example
The following command specifies the rst0a device for a backup:
restore rf rst0a
The following list describes the elements of the command line:
r Performs a full restore.
f Specifies that a tape device is supplied in the command line.
rst0a The tape device.
Specifying a single tape file on a multifile tapeYou can have more than one tape file on a tape. Tape files do not have names. You can restore asingle tape file on a tape that contains more than one tape file. You do this by moving the tape to thebeginning of the file that is to be restored.
Steps
1. Use the f option in the restore command line.
2. Use the same tape compression type as a parameter to the f option that you used in the backup.
3. Use the s option in the restore command line to select the appropriate backup.
4. Include the relative position of the tape file that you are restoring as a parameter to the s option inthe command line.
Note: Count the relative position from the current tape position. It is best to rewind the tapeand start from its beginning.
Example
From a tape that has been rewound, the following command restores the third tape file fromthe beginning of that tape. It then rewinds the tape.
Data backup to tape using the dump engine | 115
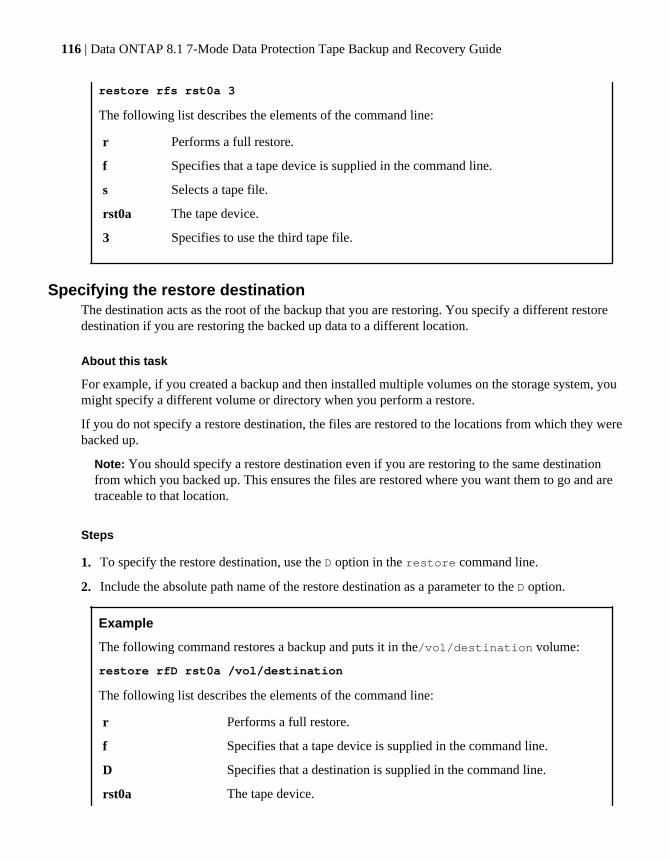
restore rfs rst0a 3
The following list describes the elements of the command line:
r Performs a full restore.
f Specifies that a tape device is supplied in the command line.
s Selects a tape file.
rst0a The tape device.
3 Specifies to use the third tape file.
Specifying the restore destinationThe destination acts as the root of the backup that you are restoring. You specify a different restoredestination if you are restoring the backed up data to a different location.
About this task
For example, if you created a backup and then installed multiple volumes on the storage system, youmight specify a different volume or directory when you perform a restore.
If you do not specify a restore destination, the files are restored to the locations from which they werebacked up.
Note: You should specify a restore destination even if you are restoring to the same destinationfrom which you backed up. This ensures the files are restored where you want them to go and aretraceable to that location.
Steps
1. To specify the restore destination, use the D option in the restore command line.
2. Include the absolute path name of the restore destination as a parameter to the D option.
Example
The following command restores a backup and puts it in the/vol/destination volume:
restore rfD rst0a /vol/destination
The following list describes the elements of the command line:
r Performs a full restore.
f Specifies that a tape device is supplied in the command line.
D Specifies that a destination is supplied in the command line.
rst0a The tape device.
116 | Data ONTAP 8.1 7-Mode Data Protection Tape Backup and Recovery Guide
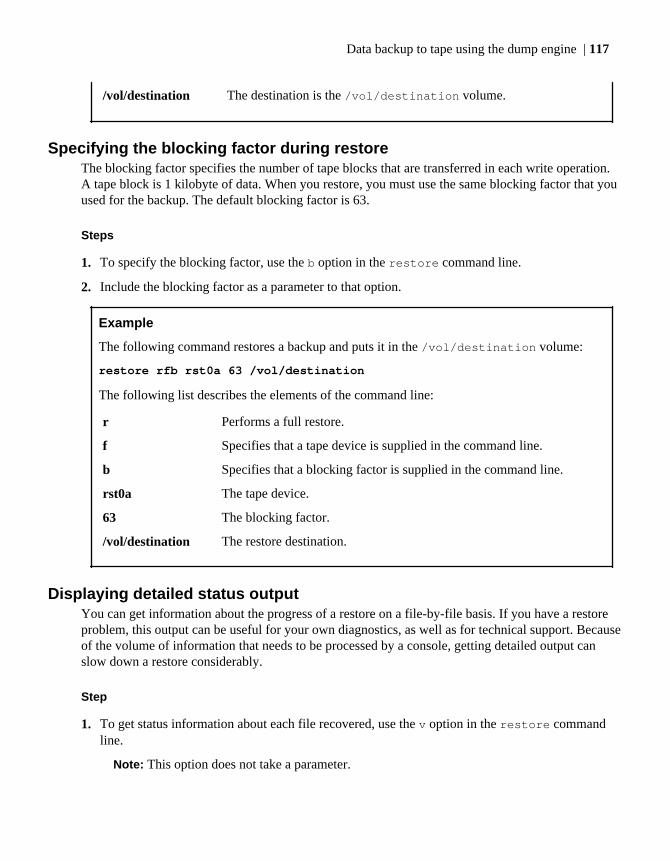
/vol/destination The destination is the /vol/destination volume.
Specifying the blocking factor during restoreThe blocking factor specifies the number of tape blocks that are transferred in each write operation.A tape block is 1 kilobyte of data. When you restore, you must use the same blocking factor that youused for the backup. The default blocking factor is 63.
Steps
1. To specify the blocking factor, use the b option in the restore command line.
2. Include the blocking factor as a parameter to that option.
Example
The following command restores a backup and puts it in the /vol/destination volume:
restore rfb rst0a 63 /vol/destination
The following list describes the elements of the command line:
r Performs a full restore.
f Specifies that a tape device is supplied in the command line.
b Specifies that a blocking factor is supplied in the command line.
rst0a The tape device.
63 The blocking factor.
/vol/destination The restore destination.
Displaying detailed status outputYou can get information about the progress of a restore on a file-by-file basis. If you have a restoreproblem, this output can be useful for your own diagnostics, as well as for technical support. Becauseof the volume of information that needs to be processed by a console, getting detailed output canslow down a restore considerably.
Step
1. To get status information about each file recovered, use the v option in the restore commandline.
Note: This option does not take a parameter.
Data backup to tape using the dump engine | 117
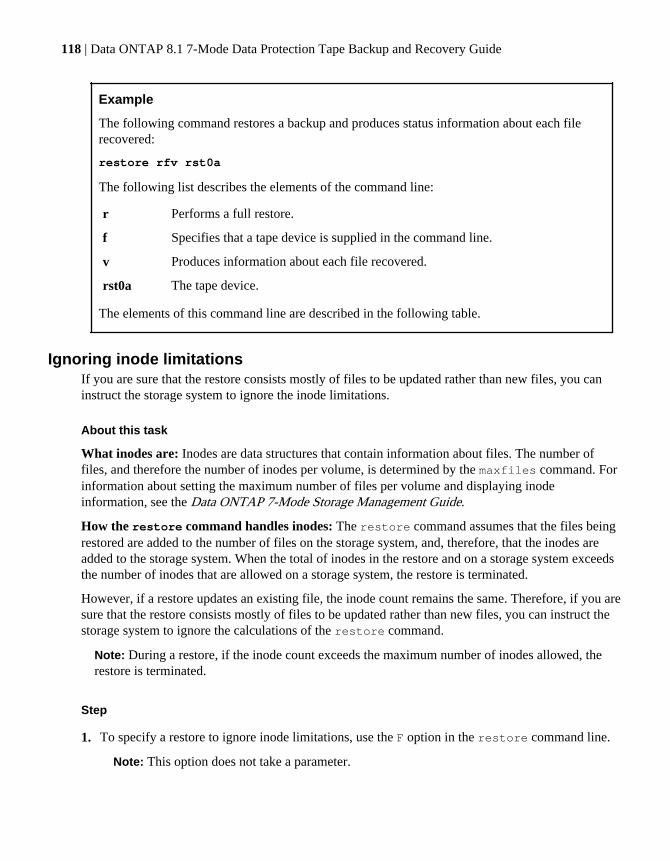
Example
The following command restores a backup and produces status information about each filerecovered:
restore rfv rst0a
The following list describes the elements of the command line:
r Performs a full restore.
f Specifies that a tape device is supplied in the command line.
v Produces information about each file recovered.
rst0a The tape device.
The elements of this command line are described in the following table.
Ignoring inode limitationsIf you are sure that the restore consists mostly of files to be updated rather than new files, you caninstruct the storage system to ignore the inode limitations.
About this task
What inodes are: Inodes are data structures that contain information about files. The number offiles, and therefore the number of inodes per volume, is determined by the maxfiles command. Forinformation about setting the maximum number of files per volume and displaying inodeinformation, see the Data ONTAP 7-Mode Storage Management Guide.
How the restore command handles inodes: The restore command assumes that the files beingrestored are added to the number of files on the storage system, and, therefore, that the inodes areadded to the storage system. When the total of inodes in the restore and on a storage system exceedsthe number of inodes that are allowed on a storage system, the restore is terminated.
However, if a restore updates an existing file, the inode count remains the same. Therefore, if you aresure that the restore consists mostly of files to be updated rather than new files, you can instruct thestorage system to ignore the calculations of the restore command.
Note: During a restore, if the inode count exceeds the maximum number of inodes allowed, therestore is terminated.
Step
1. To specify a restore to ignore inode limitations, use the F option in the restore command line.
Note: This option does not take a parameter.
118 | Data ONTAP 8.1 7-Mode Data Protection Tape Backup and Recovery Guide
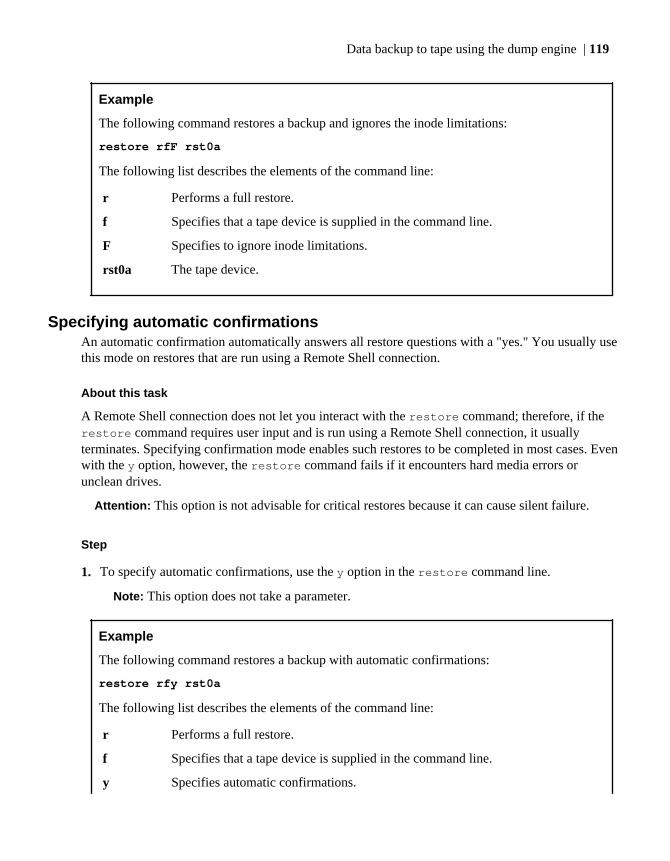
Example
The following command restores a backup and ignores the inode limitations:
restore rfF rst0a
The following list describes the elements of the command line:
r Performs a full restore.
f Specifies that a tape device is supplied in the command line.
F Specifies to ignore inode limitations.
rst0a The tape device.
Specifying automatic confirmationsAn automatic confirmation automatically answers all restore questions with a "yes." You usually usethis mode on restores that are run using a Remote Shell connection.
About this task
A Remote Shell connection does not let you interact with the restore command; therefore, if therestore command requires user input and is run using a Remote Shell connection, it usuallyterminates. Specifying confirmation mode enables such restores to be completed in most cases. Evenwith the y option, however, the restore command fails if it encounters hard media errors orunclean drives.
Attention: This option is not advisable for critical restores because it can cause silent failure.
Step
1. To specify automatic confirmations, use the y option in the restore command line.
Note: This option does not take a parameter.
Example
The following command restores a backup with automatic confirmations:
restore rfy rst0a
The following list describes the elements of the command line:
r Performs a full restore.
f Specifies that a tape device is supplied in the command line.
y Specifies automatic confirmations.
Data backup to tape using the dump engine | 119
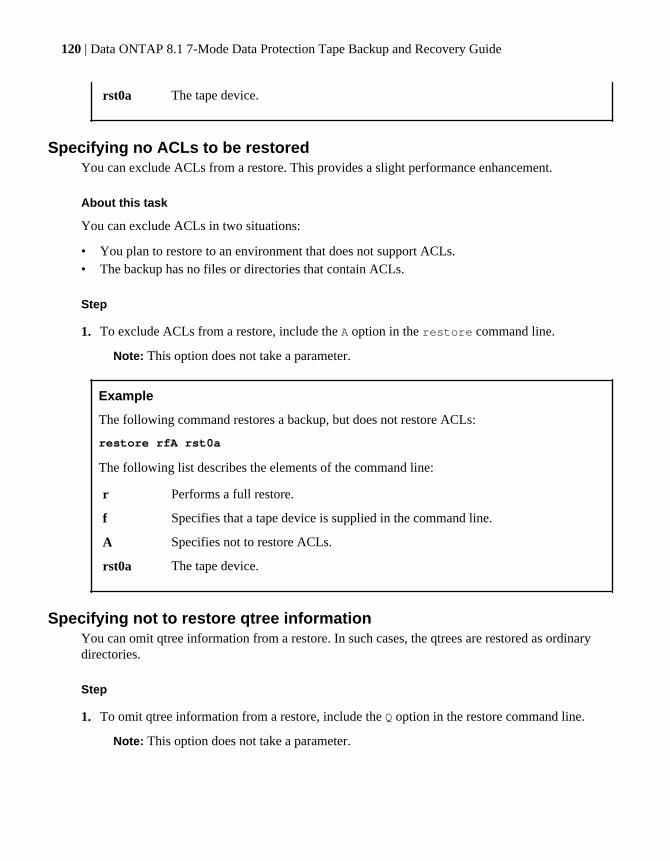
rst0a The tape device.
Specifying no ACLs to be restoredYou can exclude ACLs from a restore. This provides a slight performance enhancement.
About this task
You can exclude ACLs in two situations:
• You plan to restore to an environment that does not support ACLs.• The backup has no files or directories that contain ACLs.
Step
1. To exclude ACLs from a restore, include the A option in the restore command line.
Note: This option does not take a parameter.
Example
The following command restores a backup, but does not restore ACLs:
restore rfA rst0a
The following list describes the elements of the command line:
r Performs a full restore.
f Specifies that a tape device is supplied in the command line.
A Specifies not to restore ACLs.
rst0a The tape device.
Specifying not to restore qtree informationYou can omit qtree information from a restore. In such cases, the qtrees are restored as ordinarydirectories.
Step
1. To omit qtree information from a restore, include the Q option in the restore command line.
Note: This option does not take a parameter.
120 | Data ONTAP 8.1 7-Mode Data Protection Tape Backup and Recovery Guide
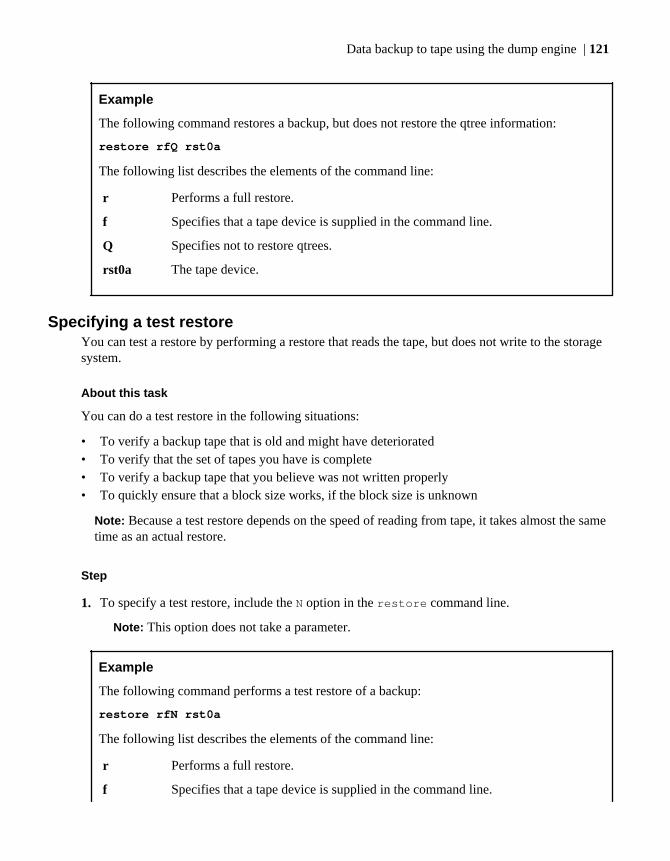
Example
The following command restores a backup, but does not restore the qtree information:
restore rfQ rst0a
The following list describes the elements of the command line:
r Performs a full restore.
f Specifies that a tape device is supplied in the command line.
Q Specifies not to restore qtrees.
rst0a The tape device.
Specifying a test restoreYou can test a restore by performing a restore that reads the tape, but does not write to the storagesystem.
About this task
You can do a test restore in the following situations:
• To verify a backup tape that is old and might have deteriorated• To verify that the set of tapes you have is complete• To verify a backup tape that you believe was not written properly• To quickly ensure that a block size works, if the block size is unknown
Note: Because a test restore depends on the speed of reading from tape, it takes almost the sametime as an actual restore.
Step
1. To specify a test restore, include the N option in the restore command line.
Note: This option does not take a parameter.
Example
The following command performs a test restore of a backup:
restore rfN rst0a
The following list describes the elements of the command line:
r Performs a full restore.
f Specifies that a tape device is supplied in the command line.
Data backup to tape using the dump engine | 121
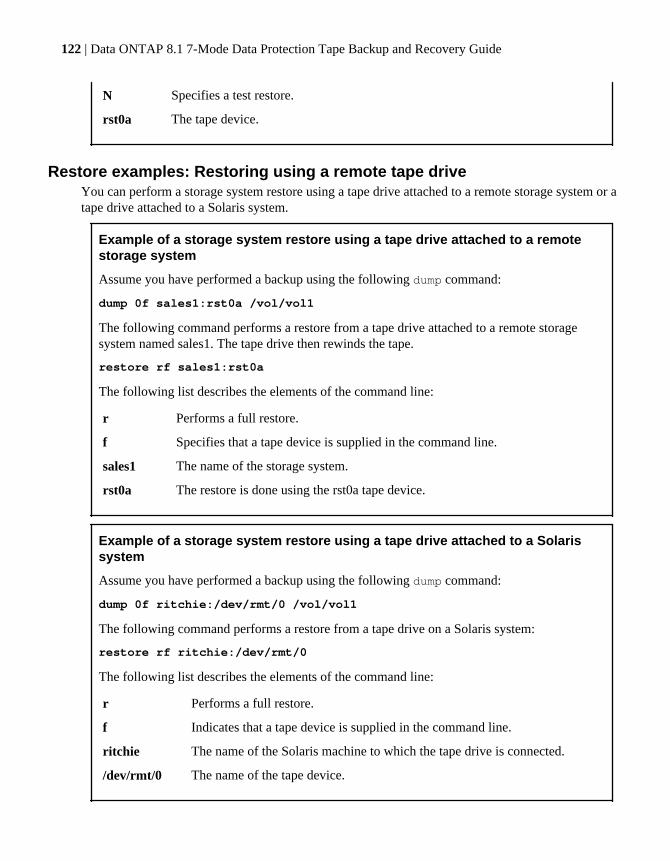
N Specifies a test restore.
rst0a The tape device.
Restore examples: Restoring using a remote tape driveYou can perform a storage system restore using a tape drive attached to a remote storage system or atape drive attached to a Solaris system.
Example of a storage system restore using a tape drive attached to a remotestorage system
Assume you have performed a backup using the following dump command:
dump 0f sales1:rst0a /vol/vol1
The following command performs a restore from a tape drive attached to a remote storagesystem named sales1. The tape drive then rewinds the tape.
restore rf sales1:rst0a
The following list describes the elements of the command line:
r Performs a full restore.
f Specifies that a tape device is supplied in the command line.
sales1 The name of the storage system.
rst0a The restore is done using the rst0a tape device.
Example of a storage system restore using a tape drive attached to a Solarissystem
Assume you have performed a backup using the following dump command:
dump 0f ritchie:/dev/rmt/0 /vol/vol1
The following command performs a restore from a tape drive on a Solaris system:
restore rf ritchie:/dev/rmt/0
The following list describes the elements of the command line:
r Performs a full restore.
f Indicates that a tape device is supplied in the command line.
ritchie The name of the Solaris machine to which the tape drive is connected.
/dev/rmt/0 The name of the tape device.
122 | Data ONTAP 8.1 7-Mode Data Protection Tape Backup and Recovery Guide
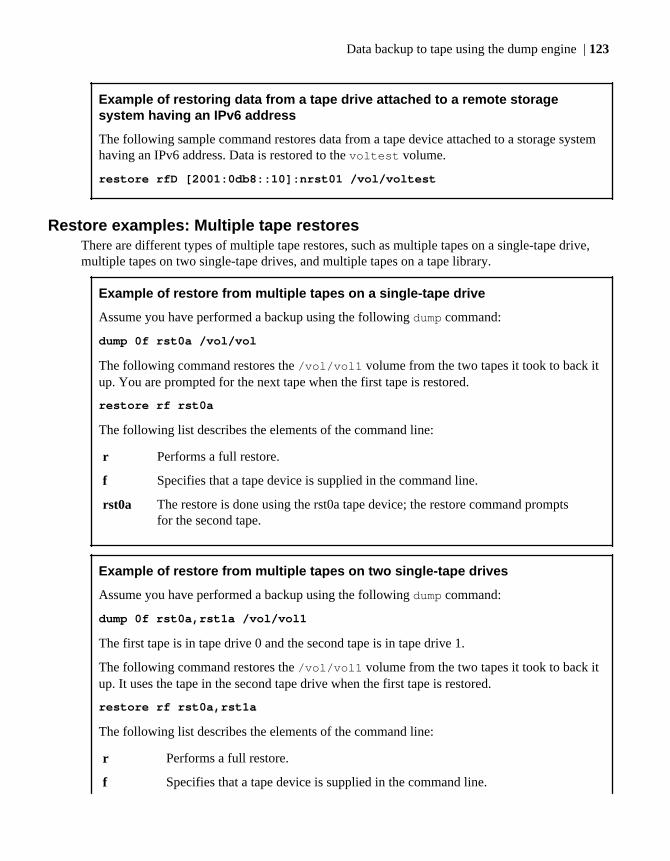
Example of restoring data from a tape drive attached to a remote storagesystem having an IPv6 address
The following sample command restores data from a tape device attached to a storage systemhaving an IPv6 address. Data is restored to the voltest volume.
restore rfD [2001:0db8::10]:nrst01 /vol/voltest
Restore examples: Multiple tape restoresThere are different types of multiple tape restores, such as multiple tapes on a single-tape drive,multiple tapes on two single-tape drives, and multiple tapes on a tape library.
Example of restore from multiple tapes on a single-tape drive
Assume you have performed a backup using the following dump command:
dump 0f rst0a /vol/vol
The following command restores the /vol/vol1 volume from the two tapes it took to back itup. You are prompted for the next tape when the first tape is restored.
restore rf rst0a
The following list describes the elements of the command line:
r Performs a full restore.
f Specifies that a tape device is supplied in the command line.
rst0a The restore is done using the rst0a tape device; the restore command promptsfor the second tape.
Example of restore from multiple tapes on two single-tape drives
Assume you have performed a backup using the following dump command:
dump 0f rst0a,rst1a /vol/vol1
The first tape is in tape drive 0 and the second tape is in tape drive 1.
The following command restores the /vol/vol1 volume from the two tapes it took to back itup. It uses the tape in the second tape drive when the first tape is restored.
restore rf rst0a,rst1a
The following list describes the elements of the command line:
r Performs a full restore.
f Specifies that a tape device is supplied in the command line.
Data backup to tape using the dump engine | 123
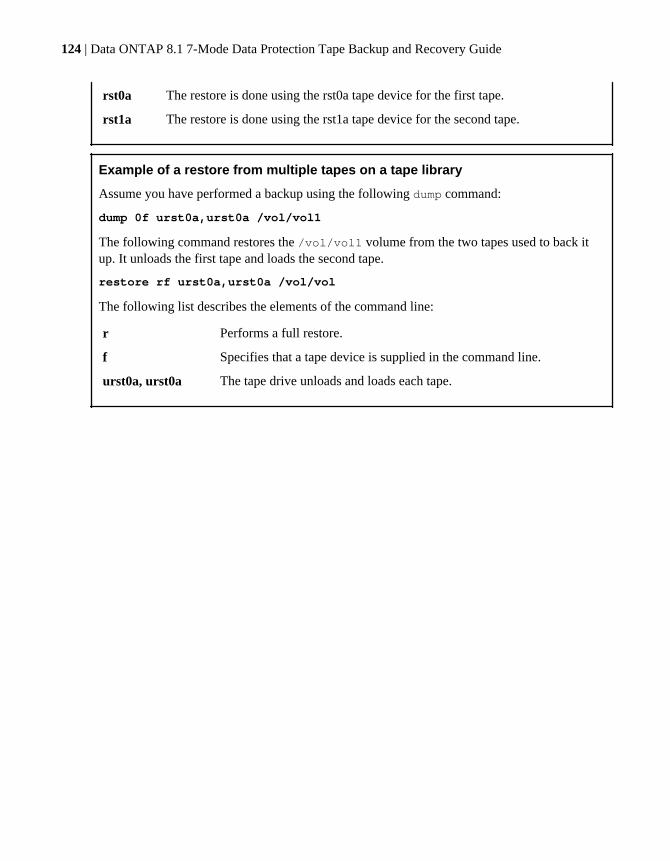
rst0a The restore is done using the rst0a tape device for the first tape.
rst1a The restore is done using the rst1a tape device for the second tape.
Example of a restore from multiple tapes on a tape library
Assume you have performed a backup using the following dump command:
dump 0f urst0a,urst0a /vol/vol1
The following command restores the /vol/vol1 volume from the two tapes used to back itup. It unloads the first tape and loads the second tape.
restore rf urst0a,urst0a /vol/vol
The following list describes the elements of the command line:
r Performs a full restore.
f Specifies that a tape device is supplied in the command line.
urst0a, urst0a The tape drive unloads and loads each tape.
124 | Data ONTAP 8.1 7-Mode Data Protection Tape Backup and Recovery Guide
Data backup to tape using the SMTape engine
SMTape is a high performance disaster recovery solution from Data ONTAP that backs up blocks ofdata to tape. It is Snapshot copy-based backup to tape feature. This feature is available only in theData ONTAP 7-Mode or later releases.
You can use SMTape to perform volume backups to tapes. However, you cannot perform a backup atthe qtree or subtree level. Also, you can perform only a level-0 backup and not incremental backups.
When you perform an SMTape backup, you can specify the name of the Snapshot copy to be backedup to tape. When you specify a Snapshot copy for the backup, all the Snapshot copies older than thespecified Snapshot copy are also backed up to tape.
If you do not specify a Snapshot copy for the backup, the following happens:
• If the volume is read-writeable, an auto Snapshot copy is created.That Snapshot copy and all older Snapshot copies are backed up to tape.
• If the volume is read-only, all the Snapshot copies till the latest Snapshot copy are backed up totape.Any new Snapshot copies created after the backup has started will not be backed up.
You can perform an SMTape backup and restore using NDMP-compliant backup applications orusing the Data ONTAP 7-Mode smtape backup and smtape restore CLI commands.
These commands replace the snapmirror store and snapmirror retrieve commands ofearlier releases of Data ONTAP.
How SMTape backup worksSMTape backup writes blocks of data to tape in a predefined process.
The following table describes the process that SMTape uses to back up data to tape.
Stage Action
1 Data ONTAP creates a base Snapshot copy for the backup.
If a Snapshot copy name is provided, Data ONTAP uses this Snapshot copy as the baseSnapshot copy.
2 Data ONTAP begins transferring blocks of data to tape.
125
What tape seeding isTape seeding is an SMTape functionality that helps you initialize the destination storage system in avolume SnapMirror relationship.
Consider a scenario in which you want to establish a SnapMirror relationship between a sourcesystem and a destination system over a low-bandwidth connection. Incremental mirroring ofSnapshot copies from the source to the destination is feasible over a lowband width connection.However, an initial mirroring of the base Snapshot copy would take a long time over a low-bandwidth connection. In such a case, you can perform an SMTape backup of the source volume to atape and use the tape to transfer the initial base Snapshot copy to the destination. You can then set upincremental SnapMirror updates to the destination system using the low-bandwidth connection.
Features of SMTapeSMTape supports certain features that help you optimize your tape backup and restore.
The following are the features of SMTape:
• Provides a high performance disaster recovery solution• Does not require a license• Supports tape seeding• Supports concurrent volume SnapMirror and SMTape backup operations when backing up
SnapMirror destination to tape• Supports backup of Snapshot copies• Supports deduplicated volumes and preserves deduplication on the restored volumes• Supports blocking factor in multiples of 4 KB, in the range of 4 KB to 256 KB• Supports backup of large aggregate volumes• Supports backup of compressed volumes
Limitations of SMTapeThere are certain limitations when you use SMTape to back up your data.
The following are the limitations of SMTape:
• Restore of a volume from a different aggregate type is not allowed.The backup image of a regular aggregate cannot be restored to a volume in a larger aggregate.Similarly, the backup image of a larger aggregate cannot be restored to a volume of a regularaggregate.
• SMTape supports only level-0 backup and restore.• Target volume must be restricted before starting a restore.
126 | Data ONTAP 8.1 7-Mode Data Protection Tape Backup and Recovery Guide
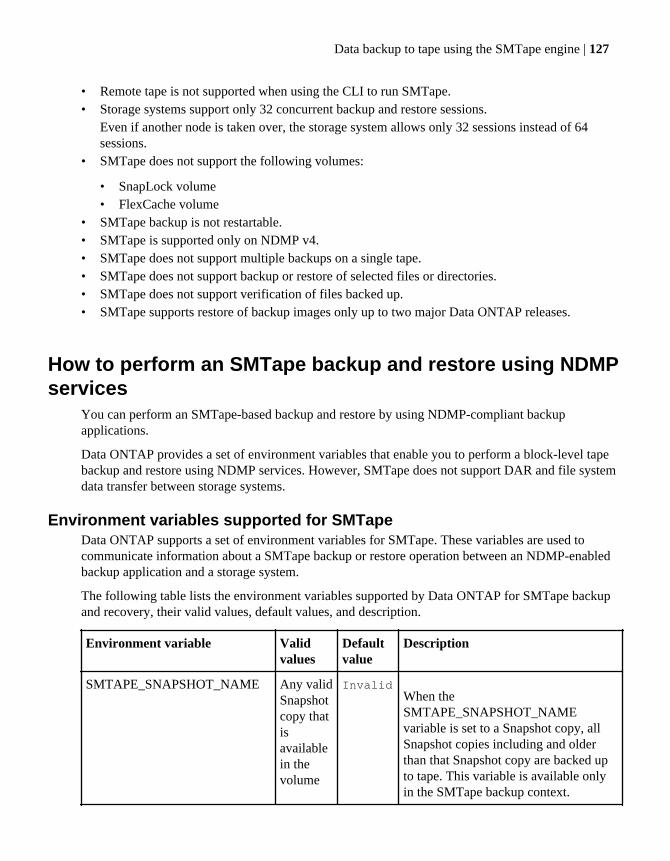
• Remote tape is not supported when using the CLI to run SMTape.• Storage systems support only 32 concurrent backup and restore sessions.
Even if another node is taken over, the storage system allows only 32 sessions instead of 64sessions.
• SMTape does not support the following volumes:
• SnapLock volume• FlexCache volume
• SMTape backup is not restartable.• SMTape is supported only on NDMP v4.• SMTape does not support multiple backups on a single tape.• SMTape does not support backup or restore of selected files or directories.• SMTape does not support verification of files backed up.• SMTape supports restore of backup images only up to two major Data ONTAP releases.
How to perform an SMTape backup and restore using NDMPservices
You can perform an SMTape-based backup and restore by using NDMP-compliant backupapplications.
Data ONTAP provides a set of environment variables that enable you to perform a block-level tapebackup and restore using NDMP services. However, SMTape does not support DAR and file systemdata transfer between storage systems.
Environment variables supported for SMTapeData ONTAP supports a set of environment variables for SMTape. These variables are used tocommunicate information about a SMTape backup or restore operation between an NDMP-enabledbackup application and a storage system.
The following table lists the environment variables supported by Data ONTAP for SMTape backupand recovery, their valid values, default values, and description.
Environment variable Validvalues
Defaultvalue
Description
SMTAPE_SNAPSHOT_NAME Any validSnapshotcopy thatisavailablein thevolume
InvalidWhen theSMTAPE_SNAPSHOT_NAMEvariable is set to a Snapshot copy, allSnapshot copies including and olderthan that Snapshot copy are backed upto tape. This variable is available onlyin the SMTape backup context.
Data backup to tape using the SMTape engine | 127
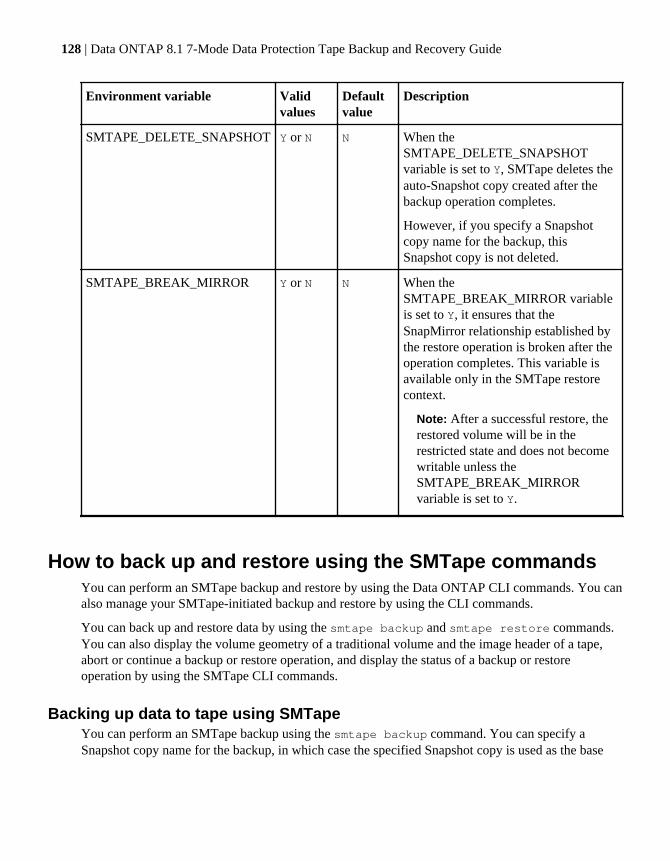
Environment variable Validvalues
Defaultvalue
Description
SMTAPE_DELETE_SNAPSHOT Y or N N When theSMTAPE_DELETE_SNAPSHOTvariable is set to Y, SMTape deletes theauto-Snapshot copy created after thebackup operation completes.
However, if you specify a Snapshotcopy name for the backup, thisSnapshot copy is not deleted.
SMTAPE_BREAK_MIRROR Y or N N When theSMTAPE_BREAK_MIRROR variableis set to Y, it ensures that theSnapMirror relationship established bythe restore operation is broken after theoperation completes. This variable isavailable only in the SMTape restorecontext.
Note: After a successful restore, therestored volume will be in therestricted state and does not becomewritable unless theSMTAPE_BREAK_MIRRORvariable is set to Y.
How to back up and restore using the SMTape commandsYou can perform an SMTape backup and restore by using the Data ONTAP CLI commands. You canalso manage your SMTape-initiated backup and restore by using the CLI commands.
You can back up and restore data by using the smtape backup and smtape restore commands.You can also display the volume geometry of a traditional volume and the image header of a tape,abort or continue a backup or restore operation, and display the status of a backup or restoreoperation by using the SMTape CLI commands.
Backing up data to tape using SMTapeYou can perform an SMTape backup using the smtape backup command. You can specify aSnapshot copy name for the backup, in which case the specified Snapshot copy is used as the base
128 | Data ONTAP 8.1 7-Mode Data Protection Tape Backup and Recovery Guide
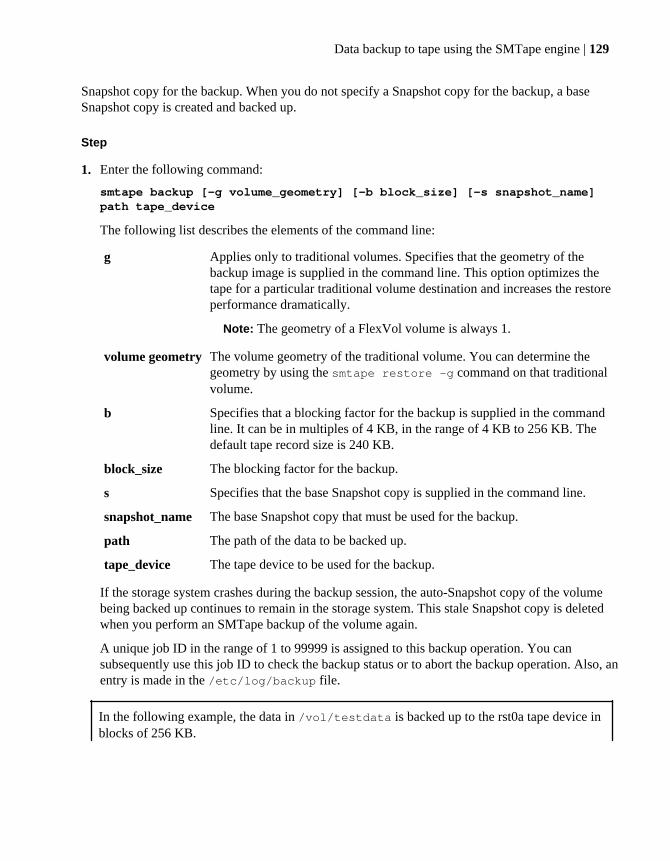
Snapshot copy for the backup. When you do not specify a Snapshot copy for the backup, a baseSnapshot copy is created and backed up.
Step
1. Enter the following command:
smtape backup [-g volume_geometry] [-b block_size] [-s snapshot_name]path tape_device
The following list describes the elements of the command line:
g Applies only to traditional volumes. Specifies that the geometry of thebackup image is supplied in the command line. This option optimizes thetape for a particular traditional volume destination and increases the restoreperformance dramatically.
Note: The geometry of a FlexVol volume is always 1.
volume geometry The volume geometry of the traditional volume. You can determine thegeometry by using the smtape restore -g command on that traditionalvolume.
b Specifies that a blocking factor for the backup is supplied in the commandline. It can be in multiples of 4 KB, in the range of 4 KB to 256 KB. Thedefault tape record size is 240 KB.
block_size The blocking factor for the backup.
s Specifies that the base Snapshot copy is supplied in the command line.
snapshot_name The base Snapshot copy that must be used for the backup.
path The path of the data to be backed up.
tape_device The tape device to be used for the backup.
If the storage system crashes during the backup session, the auto-Snapshot copy of the volumebeing backed up continues to remain in the storage system. This stale Snapshot copy is deletedwhen you perform an SMTape backup of the volume again.
A unique job ID in the range of 1 to 99999 is assigned to this backup operation. You cansubsequently use this job ID to check the backup status or to abort the backup operation. Also, anentry is made in the /etc/log/backup file.
In the following example, the data in /vol/testdata is backed up to the rst0a tape device inblocks of 256 KB.
Data backup to tape using the SMTape engine | 129
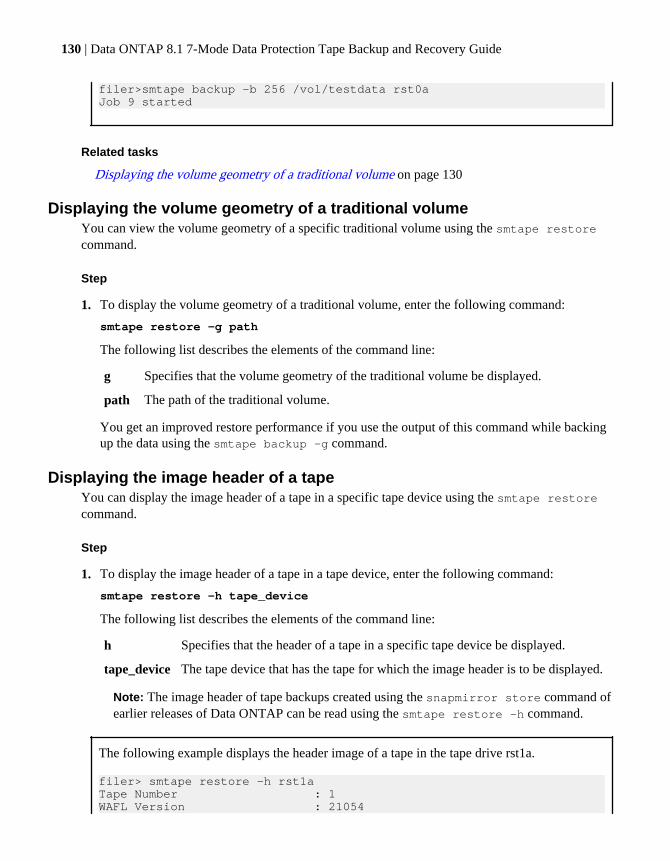
filer>smtape backup -b 256 /vol/testdata rst0aJob 9 started
Related tasks
Displaying the volume geometry of a traditional volume on page 130
Displaying the volume geometry of a traditional volumeYou can view the volume geometry of a specific traditional volume using the smtape restorecommand.
Step
1. To display the volume geometry of a traditional volume, enter the following command:
smtape restore -g path
The following list describes the elements of the command line:
g Specifies that the volume geometry of the traditional volume be displayed.
path The path of the traditional volume.
You get an improved restore performance if you use the output of this command while backingup the data using the smtape backup -g command.
Displaying the image header of a tapeYou can display the image header of a tape in a specific tape device using the smtape restorecommand.
Step
1. To display the image header of a tape in a tape device, enter the following command:
smtape restore -h tape_device
The following list describes the elements of the command line:
h Specifies that the header of a tape in a specific tape device be displayed.
tape_device The tape device that has the tape for which the image header is to be displayed.
Note: The image header of tape backups created using the snapmirror store command ofearlier releases of Data ONTAP can be read using the smtape restore -h command.
The following example displays the header image of a tape in the tape drive rst1a.
filer> smtape restore -h rst1aTape Number : 1WAFL Version : 21054
130 | Data ONTAP 8.1 7-Mode Data Protection Tape Backup and Recovery Guide
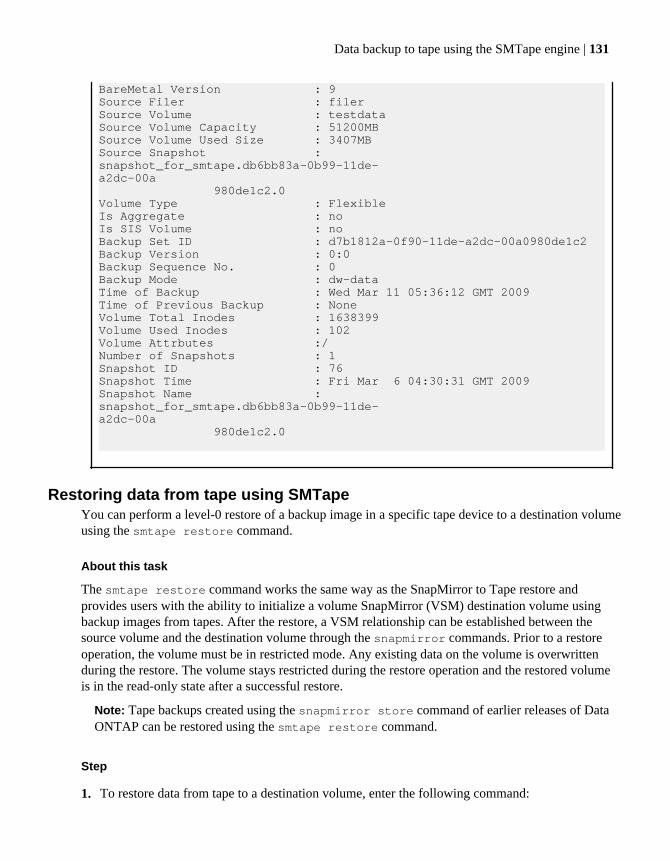
BareMetal Version : 9Source Filer : filerSource Volume : testdataSource Volume Capacity : 51200MBSource Volume Used Size : 3407MBSource Snapshot : snapshot_for_smtape.db6bb83a-0b99-11de-a2dc-00a 980de1c2.0Volume Type : FlexibleIs Aggregate : noIs SIS Volume : noBackup Set ID : d7b1812a-0f90-11de-a2dc-00a0980de1c2Backup Version : 0:0Backup Sequence No. : 0Backup Mode : dw-dataTime of Backup : Wed Mar 11 05:36:12 GMT 2009Time of Previous Backup : NoneVolume Total Inodes : 1638399Volume Used Inodes : 102Volume Attrbutes :/Number of Snapshots : 1Snapshot ID : 76Snapshot Time : Fri Mar 6 04:30:31 GMT 2009Snapshot Name : snapshot_for_smtape.db6bb83a-0b99-11de-a2dc-00a 980de1c2.0
Restoring data from tape using SMTapeYou can perform a level-0 restore of a backup image in a specific tape device to a destination volumeusing the smtape restore command.
About this task
The smtape restore command works the same way as the SnapMirror to Tape restore andprovides users with the ability to initialize a volume SnapMirror (VSM) destination volume usingbackup images from tapes. After the restore, a VSM relationship can be established between thesource volume and the destination volume through the snapmirror commands. Prior to a restoreoperation, the volume must be in restricted mode. Any existing data on the volume is overwrittenduring the restore. The volume stays restricted during the restore operation and the restored volumeis in the read-only state after a successful restore.
Note: Tape backups created using the snapmirror store command of earlier releases of DataONTAP can be restored using the smtape restore command.
Step
1. To restore data from tape to a destination volume, enter the following command:
Data backup to tape using the SMTape engine | 131
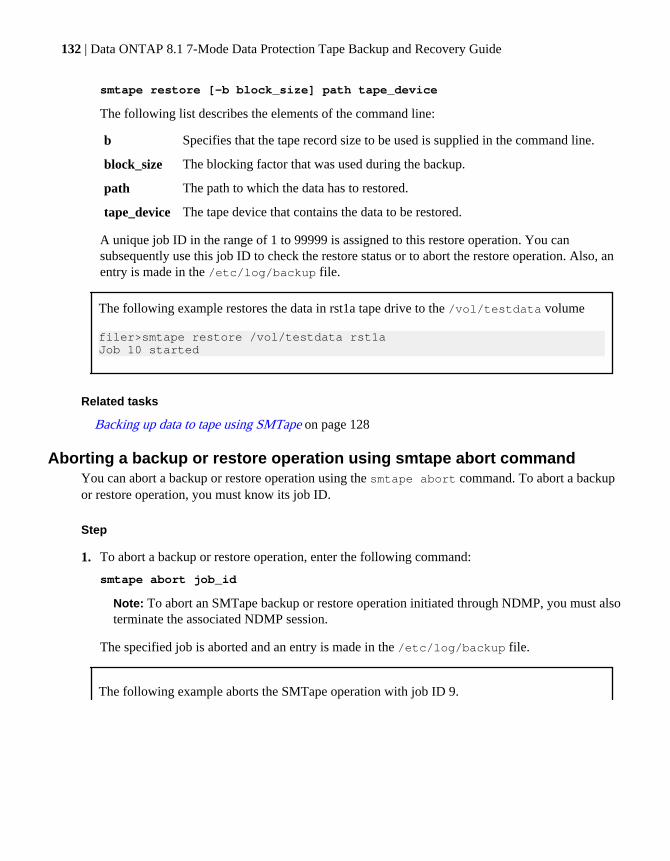
smtape restore [-b block_size] path tape_device
The following list describes the elements of the command line:
b Specifies that the tape record size to be used is supplied in the command line.
block_size The blocking factor that was used during the backup.
path The path to which the data has to restored.
tape_device The tape device that contains the data to be restored.
A unique job ID in the range of 1 to 99999 is assigned to this restore operation. You cansubsequently use this job ID to check the restore status or to abort the restore operation. Also, anentry is made in the /etc/log/backup file.
The following example restores the data in rst1a tape drive to the /vol/testdata volume
filer>smtape restore /vol/testdata rst1aJob 10 started
Related tasks
Backing up data to tape using SMTape on page 128
Aborting a backup or restore operation using smtape abort commandYou can abort a backup or restore operation using the smtape abort command. To abort a backupor restore operation, you must know its job ID.
Step
1. To abort a backup or restore operation, enter the following command:
smtape abort job_id
Note: To abort an SMTape backup or restore operation initiated through NDMP, you must alsoterminate the associated NDMP session.
The specified job is aborted and an entry is made in the /etc/log/backup file.
The following example aborts the SMTape operation with job ID 9.
132 | Data ONTAP 8.1 7-Mode Data Protection Tape Backup and Recovery Guide
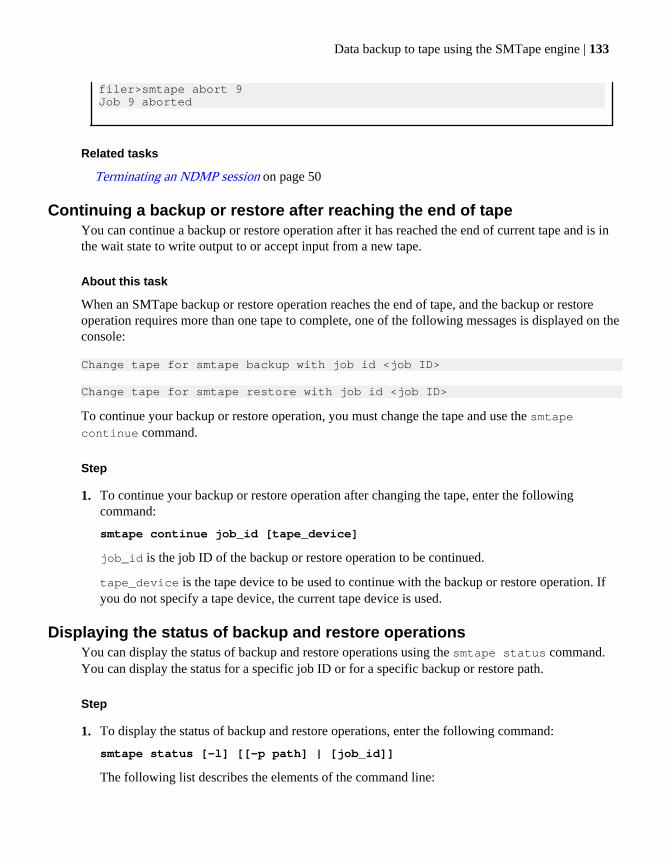
filer>smtape abort 9Job 9 aborted
Related tasks
Terminating an NDMP session on page 50
Continuing a backup or restore after reaching the end of tapeYou can continue a backup or restore operation after it has reached the end of current tape and is inthe wait state to write output to or accept input from a new tape.
About this task
When an SMTape backup or restore operation reaches the end of tape, and the backup or restoreoperation requires more than one tape to complete, one of the following messages is displayed on theconsole:
Change tape for smtape backup with job id <job ID>
Change tape for smtape restore with job id <job ID>
To continue your backup or restore operation, you must change the tape and use the smtapecontinue command.
Step
1. To continue your backup or restore operation after changing the tape, enter the followingcommand:
smtape continue job_id [tape_device]
job_id is the job ID of the backup or restore operation to be continued.
tape_device is the tape device to be used to continue with the backup or restore operation. Ifyou do not specify a tape device, the current tape device is used.
Displaying the status of backup and restore operationsYou can display the status of backup and restore operations using the smtape status command.You can display the status for a specific job ID or for a specific backup or restore path.
Step
1. To display the status of backup and restore operations, enter the following command:
smtape status [-l] [[-p path] | [job_id]]
The following list describes the elements of the command line:
Data backup to tape using the SMTape engine | 133

l Specifies to display a detailed status.
p Specifies to display the status of a specific path.
path The path for which the status must be displayed.
job_id The job ID for which the status must be displayed.
The following example displays the status of current backup and restore jobs.
filer>smtape statusJob ID Seq No Type Status Path Device Progress 1 0 Backup Active /vol/vol0/ urst0a 240 MB 2 0 Restore Active /vol/vol1/ urst1a 201 MB
The following example displays a detailed status for the backup job ID 3.
filer>smtape status -l 3Job ID: 3Sequence No: 0Type: BackupStatus: ActivePath: /vol/testdataDevice: rst1aProgress: 1243360 KBJob Begin: Wed Mar 11 06:08:01 GMT 2009Job End: -Last Update Time: Wed Mar 11 06:08:14 GMT 2009
When to remove the SnapMirror status entriesWhen you perform an SMTape backup or restore, a SnapMirror status entry is created in the storagesystem. If you do not want to use SMTape backup for tape seeding, you must remove the SnapMirrorstatus entries after the backup or restore completes.
How to remove the SnapMirror status entries created during backup
After a successful SMTape backup, the base Snapshot copy and the SnapMirror status entry areretained in the volume, which can be used to initialize a volume SnapMirror relationship.
Note: In case of a failed backup, the base Snapshot copy is automatically deleted. However, theSnapMirror status entry is retained.
You can delete a SnapMirror status entry by using the snapmirror release command or bydeleting the Snapshot copy.
How to remove the SnapMirror status entries created during restore
After a successful SMTape restore, a SnapMirror status entry is created in the storage system. ThisSnapMirror status entry lists the restored volume and the the base Snapshot copy name that is used tosynchronize the SnapMirror source and destination volumes during tape seeding. To remove this
134 | Data ONTAP 8.1 7-Mode Data Protection Tape Backup and Recovery Guide

SnapMirror status entry, you must make the restored volume writable and then delete the baseSnapshot copy. Once the snapshot is deleted, the SnapMirror status entry is automatically removed.
Removing the SnapMirror status entry after an SMTape backup
You can remove the SnapMirror status entry corresponding to the volume you backed up.
Steps
1. To list the SnapMirror status entries, enter the following command:
snapmirror status vol_name
vol_name is the name of the volume that you backed up.
The SnapMirror status of the volume is displayed. In case of a successful SMTape backup, thesource is the volume being backed up and the destination is a Snapshot copy. This Snapshot copyhas a name in the snapmirror_tape_hexchar format, in which hexchar is a set ofhexadecimal characters specific to the Snapshot copy. In case of a failed SMTape backup, thesource is the volume being backed up and the destination is a tape name.
2. To remove the SnapMirror status entry by releasing the SnapMirror relationship, enter one of thefollowing commands:
If the backup... Then enter the following commands:
Succeeded snapmirror release vol_namesnapmirror_tape_hexadecimal_char
Failed snapmirror release vol_name filer_name:tape_device
vol_name is the volume being backed up.
filer_name is the name of the storage system to which the tape device is attached.
tape_device is the tape device to which the volume is backed up.
The following example removes the SnapMirror status entry for the testdata volume that wassuccessfully backed up.
filer1>snapmirror status testdata
Snapmirror is on.Source Destination State Lag Statusfiler1:testdata snapmirror_tape_2b8da4a4-1fa9-11de-842e-000c29d658dc Source 0:02:31 Idle
filer1>snapmirror release testdata snapmirror_tape_2b8da4a4-1fa9-11de-842e-000c29d658dc
The following example removes the SnapMirror status entry for the testdata2 volume thatfailed during the backup.
filer1>snapmirror status testdata2Snapmirror is on.Source Destination State Lag Statusfiler1:testdata2 filer1:rst1a Source - Idle
Data backup to tape using the SMTape engine | 135
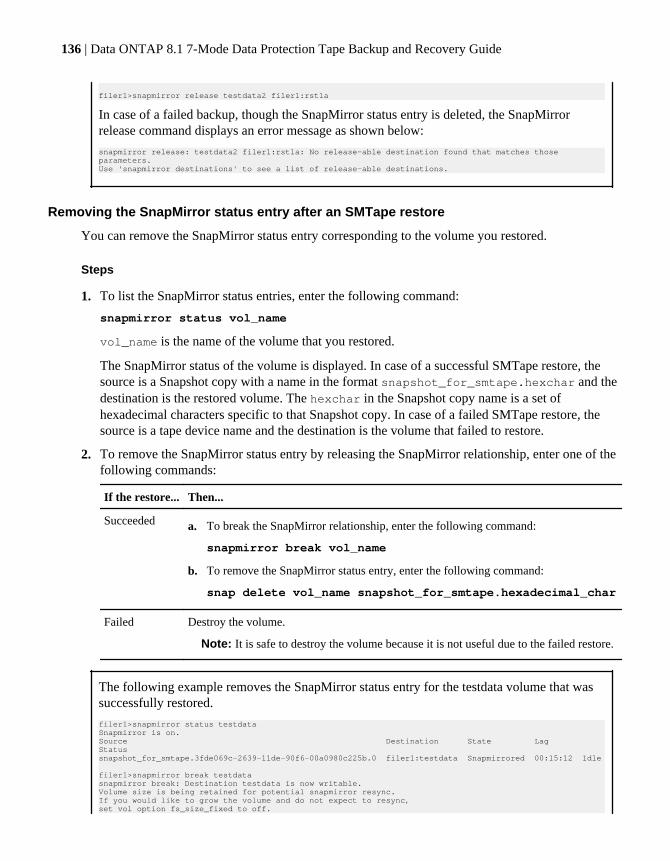
filer1>snapmirror release testdata2 filer1:rst1a
In case of a failed backup, though the SnapMirror status entry is deleted, the SnapMirrorrelease command displays an error message as shown below:
snapmirror release: testdata2 filer1:rst1a: No release-able destination found that matches those parameters. Use 'snapmirror destinations' to see a list of release-able destinations.
Removing the SnapMirror status entry after an SMTape restore
You can remove the SnapMirror status entry corresponding to the volume you restored.
Steps
1. To list the SnapMirror status entries, enter the following command:
snapmirror status vol_name
vol_name is the name of the volume that you restored.
The SnapMirror status of the volume is displayed. In case of a successful SMTape restore, thesource is a Snapshot copy with a name in the format snapshot_for_smtape.hexchar and thedestination is the restored volume. The hexchar in the Snapshot copy name is a set ofhexadecimal characters specific to that Snapshot copy. In case of a failed SMTape restore, thesource is a tape device name and the destination is the volume that failed to restore.
2. To remove the SnapMirror status entry by releasing the SnapMirror relationship, enter one of thefollowing commands:
If the restore... Then...
Succeeded a. To break the SnapMirror relationship, enter the following command:
snapmirror break vol_name
b. To remove the SnapMirror status entry, enter the following command:
snap delete vol_name snapshot_for_smtape.hexadecimal_char
Failed Destroy the volume.
Note: It is safe to destroy the volume because it is not useful due to the failed restore.
The following example removes the SnapMirror status entry for the testdata volume that wassuccessfully restored.
filer1>snapmirror status testdataSnapmirror is on.Source Destination State Lag Statussnapshot_for_smtape.3fde069c-2639-11de-90f6-00a0980c225b.0 filer1:testdata Snapmirrored 00:15:12 Idle
filer1>snapmirror break testdatasnapmirror break: Destination testdata is now writable.Volume size is being retained for potential snapmirror resync. If you would like to grow the volume and do not expect to resync, set vol option fs_size_fixed to off.
136 | Data ONTAP 8.1 7-Mode Data Protection Tape Backup and Recovery Guide
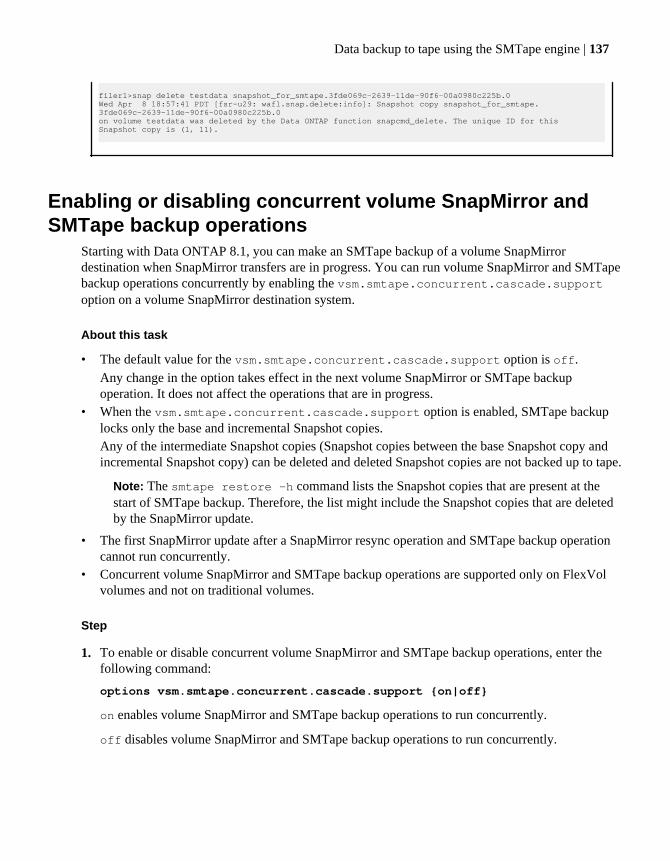
filer1>snap delete testdata snapshot_for_smtape.3fde069c-2639-11de-90f6-00a0980c225b.0 Wed Apr 8 18:57:41 PDT [fsr-u29: wafl.snap.delete:info]: Snapshot copy snapshot_for_smtape.3fde069c-2639-11de-90f6-00a0980c225b.0on volume testdata was deleted by the Data ONTAP function snapcmd_delete. The unique ID for this Snapshot copy is (1, 11).
Enabling or disabling concurrent volume SnapMirror andSMTape backup operations
Starting with Data ONTAP 8.1, you can make an SMTape backup of a volume SnapMirrordestination when SnapMirror transfers are in progress. You can run volume SnapMirror and SMTapebackup operations concurrently by enabling the vsm.smtape.concurrent.cascade.supportoption on a volume SnapMirror destination system.
About this task
• The default value for the vsm.smtape.concurrent.cascade.support option is off.Any change in the option takes effect in the next volume SnapMirror or SMTape backupoperation. It does not affect the operations that are in progress.
• When the vsm.smtape.concurrent.cascade.support option is enabled, SMTape backuplocks only the base and incremental Snapshot copies.Any of the intermediate Snapshot copies (Snapshot copies between the base Snapshot copy andincremental Snapshot copy) can be deleted and deleted Snapshot copies are not backed up to tape.
Note: The smtape restore -h command lists the Snapshot copies that are present at thestart of SMTape backup. Therefore, the list might include the Snapshot copies that are deletedby the SnapMirror update.
• The first SnapMirror update after a SnapMirror resync operation and SMTape backup operationcannot run concurrently.
• Concurrent volume SnapMirror and SMTape backup operations are supported only on FlexVolvolumes and not on traditional volumes.
Step
1. To enable or disable concurrent volume SnapMirror and SMTape backup operations, enter thefollowing command:
options vsm.smtape.concurrent.cascade.support {on|off}
on enables volume SnapMirror and SMTape backup operations to run concurrently.
off disables volume SnapMirror and SMTape backup operations to run concurrently.
Data backup to tape using the SMTape engine | 137

138 | Data ONTAP 8.1 7-Mode Data Protection Tape Backup and Recovery Guide
What event logging is
Data ONTAP automatically logs significant events and the times at which they occur during dumpand restore operations. All dump and restore events are recorded in a log file named backup inthe /etc/log/ directory. By default, event logging is set to on.
You might want to view event log files for the following reasons:
• To find out whether a nightly backup was successful• To gather statistics on backup operations• To use information contained in past event log files to help diagnose problems with dump and
restore operations
Log file rotation
Once every week, the log files are rotated. The /etc/log/backup file is copied to /etc/log/backup.0, the /etc/log/backup.0 file is copied to /etc/log/backup.1, and so on. Thesystem saves the log files for up to six weeks; therefore, you can have up to seven message files(/etc/log/backup.0 through /etc/log/backup.5 and the current /etc/log/backup file).
Event log files in takeover mode
If a takeover occurs in an active/active configuration, the set of backup log files for the takeoverstorage system remains separate from the backup log files for the failed storage system.
What the dump and restore event log message format isFor each dump and restore event, a message is written to the backup log file.
The format of the dump and restore event log message is as follows:
type timestamp identifier event (event_info)
The following list describes the fields in the event log message format.
• Each log message begins with one of the type indicators described in the following table.
Type Description
log Logging event
dmp Dump event
rst Restore event
• timestamp shows the date and time of the event.
139
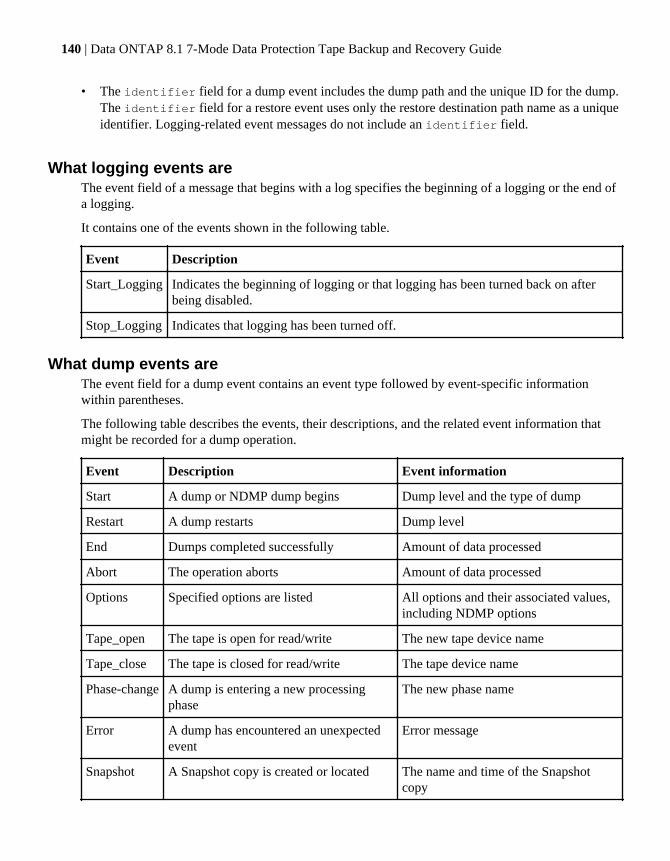
• The identifier field for a dump event includes the dump path and the unique ID for the dump.The identifier field for a restore event uses only the restore destination path name as a uniqueidentifier. Logging-related event messages do not include an identifier field.
What logging events areThe event field of a message that begins with a log specifies the beginning of a logging or the end ofa logging.
It contains one of the events shown in the following table.
Event Description
Start_Logging Indicates the beginning of logging or that logging has been turned back on afterbeing disabled.
Stop_Logging Indicates that logging has been turned off.
What dump events areThe event field for a dump event contains an event type followed by event-specific informationwithin parentheses.
The following table describes the events, their descriptions, and the related event information thatmight be recorded for a dump operation.
Event Description Event information
Start A dump or NDMP dump begins Dump level and the type of dump
Restart A dump restarts Dump level
End Dumps completed successfully Amount of data processed
Abort The operation aborts Amount of data processed
Options Specified options are listed All options and their associated values,including NDMP options
Tape_open The tape is open for read/write The new tape device name
Tape_close The tape is closed for read/write The tape device name
Phase-change A dump is entering a new processingphase
The new phase name
Error A dump has encountered an unexpectedevent
Error message
Snapshot A Snapshot copy is created or located The name and time of the Snapshotcopy
140 | Data ONTAP 8.1 7-Mode Data Protection Tape Backup and Recovery Guide
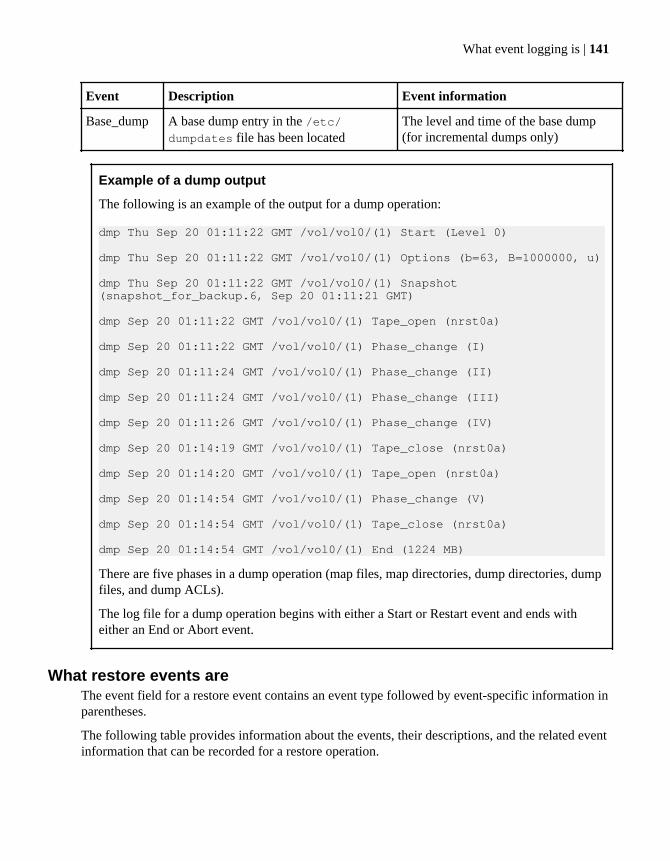
Event Description Event information
Base_dump A base dump entry in the /etc/dumpdates file has been located
The level and time of the base dump(for incremental dumps only)
Example of a dump output
The following is an example of the output for a dump operation:
dmp Thu Sep 20 01:11:22 GMT /vol/vol0/(1) Start (Level 0)
dmp Thu Sep 20 01:11:22 GMT /vol/vol0/(1) Options (b=63, B=1000000, u)
dmp Thu Sep 20 01:11:22 GMT /vol/vol0/(1) Snapshot (snapshot_for_backup.6, Sep 20 01:11:21 GMT)
dmp Sep 20 01:11:22 GMT /vol/vol0/(1) Tape_open (nrst0a)
dmp Sep 20 01:11:22 GMT /vol/vol0/(1) Phase_change (I)
dmp Sep 20 01:11:24 GMT /vol/vol0/(1) Phase_change (II)
dmp Sep 20 01:11:24 GMT /vol/vol0/(1) Phase_change (III)
dmp Sep 20 01:11:26 GMT /vol/vol0/(1) Phase_change (IV)
dmp Sep 20 01:14:19 GMT /vol/vol0/(1) Tape_close (nrst0a)
dmp Sep 20 01:14:20 GMT /vol/vol0/(1) Tape_open (nrst0a)
dmp Sep 20 01:14:54 GMT /vol/vol0/(1) Phase_change (V)
dmp Sep 20 01:14:54 GMT /vol/vol0/(1) Tape_close (nrst0a)
dmp Sep 20 01:14:54 GMT /vol/vol0/(1) End (1224 MB)
There are five phases in a dump operation (map files, map directories, dump directories, dumpfiles, and dump ACLs).
The log file for a dump operation begins with either a Start or Restart event and ends witheither an End or Abort event.
What restore events areThe event field for a restore event contains an event type followed by event-specific information inparentheses.
The following table provides information about the events, their descriptions, and the related eventinformation that can be recorded for a restore operation.
What event logging is | 141
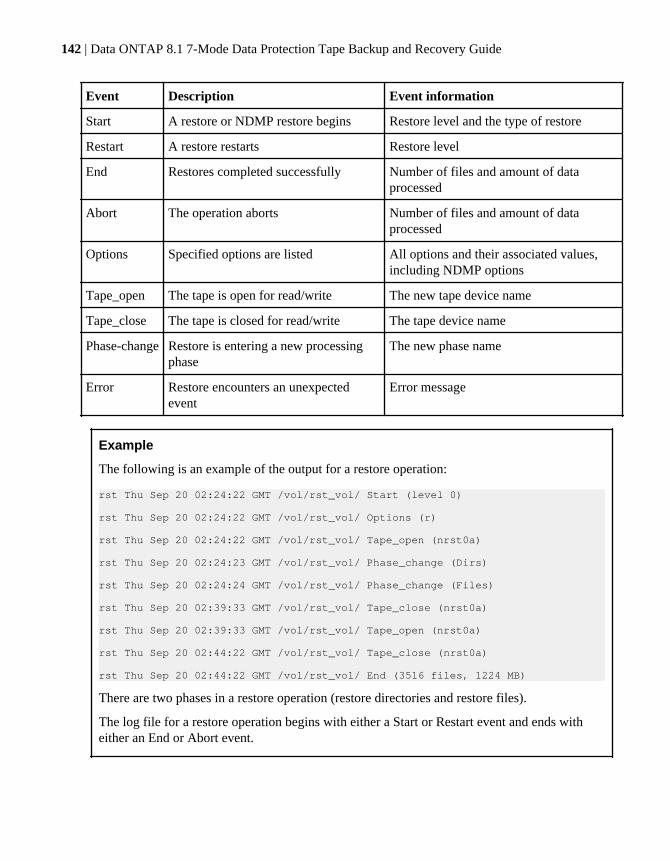
Event Description Event information
Start A restore or NDMP restore begins Restore level and the type of restore
Restart A restore restarts Restore level
End Restores completed successfully Number of files and amount of dataprocessed
Abort The operation aborts Number of files and amount of dataprocessed
Options Specified options are listed All options and their associated values,including NDMP options
Tape_open The tape is open for read/write The new tape device name
Tape_close The tape is closed for read/write The tape device name
Phase-change Restore is entering a new processingphase
The new phase name
Error Restore encounters an unexpectedevent
Error message
Example
The following is an example of the output for a restore operation:
rst Thu Sep 20 02:24:22 GMT /vol/rst_vol/ Start (level 0)
rst Thu Sep 20 02:24:22 GMT /vol/rst_vol/ Options (r)
rst Thu Sep 20 02:24:22 GMT /vol/rst_vol/ Tape_open (nrst0a)
rst Thu Sep 20 02:24:23 GMT /vol/rst_vol/ Phase_change (Dirs)
rst Thu Sep 20 02:24:24 GMT /vol/rst_vol/ Phase_change (Files)
rst Thu Sep 20 02:39:33 GMT /vol/rst_vol/ Tape_close (nrst0a)
rst Thu Sep 20 02:39:33 GMT /vol/rst_vol/ Tape_open (nrst0a)
rst Thu Sep 20 02:44:22 GMT /vol/rst_vol/ Tape_close (nrst0a)
rst Thu Sep 20 02:44:22 GMT /vol/rst_vol/ End (3516 files, 1224 MB)
There are two phases in a restore operation (restore directories and restore files).
The log file for a restore operation begins with either a Start or Restart event and ends witheither an End or Abort event.
142 | Data ONTAP 8.1 7-Mode Data Protection Tape Backup and Recovery Guide
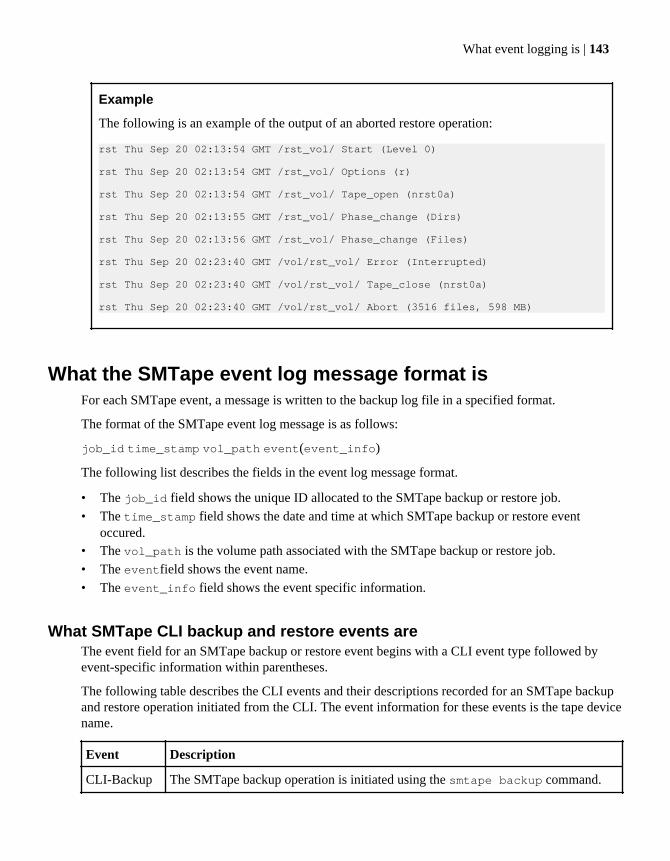
Example
The following is an example of the output of an aborted restore operation:
rst Thu Sep 20 02:13:54 GMT /rst_vol/ Start (Level 0)
rst Thu Sep 20 02:13:54 GMT /rst_vol/ Options (r)
rst Thu Sep 20 02:13:54 GMT /rst_vol/ Tape_open (nrst0a)
rst Thu Sep 20 02:13:55 GMT /rst_vol/ Phase_change (Dirs)
rst Thu Sep 20 02:13:56 GMT /rst_vol/ Phase_change (Files)
rst Thu Sep 20 02:23:40 GMT /vol/rst_vol/ Error (Interrupted)
rst Thu Sep 20 02:23:40 GMT /vol/rst_vol/ Tape_close (nrst0a)
rst Thu Sep 20 02:23:40 GMT /vol/rst_vol/ Abort (3516 files, 598 MB)
What the SMTape event log message format isFor each SMTape event, a message is written to the backup log file in a specified format.
The format of the SMTape event log message is as follows:
job_id time_stamp vol_path event(event_info)
The following list describes the fields in the event log message format.
• The job_id field shows the unique ID allocated to the SMTape backup or restore job.• The time_stamp field shows the date and time at which SMTape backup or restore event
occured.• The vol_path is the volume path associated with the SMTape backup or restore job.• The eventfield shows the event name.• The event_info field shows the event specific information.
What SMTape CLI backup and restore events areThe event field for an SMTape backup or restore event begins with a CLI event type followed byevent-specific information within parentheses.
The following table describes the CLI events and their descriptions recorded for an SMTape backupand restore operation initiated from the CLI. The event information for these events is the tape devicename.
Event Description
CLI-Backup The SMTape backup operation is initiated using the smtape backup command.
What event logging is | 143
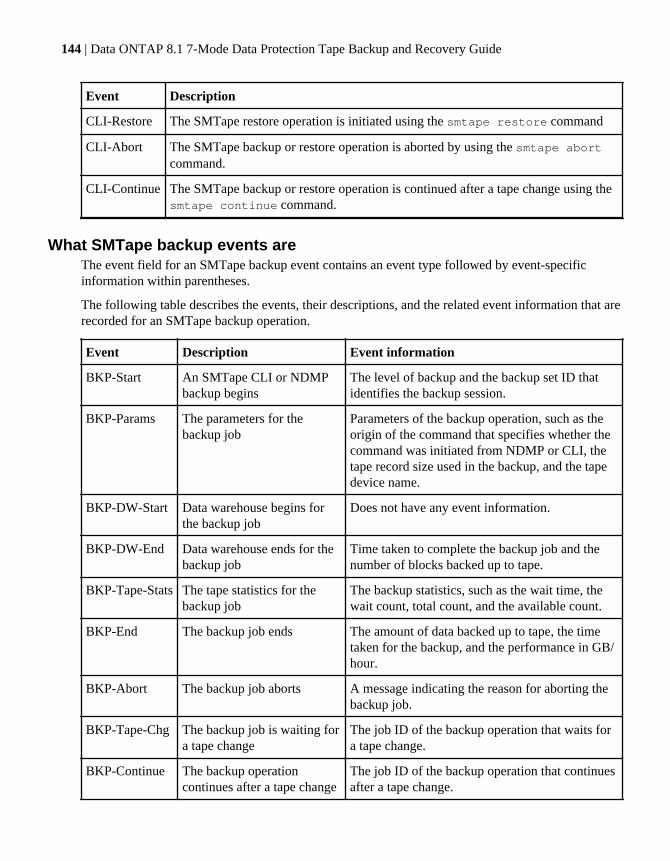
Event Description
CLI-Restore The SMTape restore operation is initiated using the smtape restore command
CLI-Abort The SMTape backup or restore operation is aborted by using the smtape abortcommand.
CLI-Continue The SMTape backup or restore operation is continued after a tape change using thesmtape continue command.
What SMTape backup events areThe event field for an SMTape backup event contains an event type followed by event-specificinformation within parentheses.
The following table describes the events, their descriptions, and the related event information that arerecorded for an SMTape backup operation.
Event Description Event information
BKP-Start An SMTape CLI or NDMPbackup begins
The level of backup and the backup set ID thatidentifies the backup session.
BKP-Params The parameters for thebackup job
Parameters of the backup operation, such as theorigin of the command that specifies whether thecommand was initiated from NDMP or CLI, thetape record size used in the backup, and the tapedevice name.
BKP-DW-Start Data warehouse begins forthe backup job
Does not have any event information.
BKP-DW-End Data warehouse ends for thebackup job
Time taken to complete the backup job and thenumber of blocks backed up to tape.
BKP-Tape-Stats The tape statistics for thebackup job
The backup statistics, such as the wait time, thewait count, total count, and the available count.
BKP-End The backup job ends The amount of data backed up to tape, the timetaken for the backup, and the performance in GB/hour.
BKP-Abort The backup job aborts A message indicating the reason for aborting thebackup job.
BKP-Tape-Chg The backup job is waiting fora tape change
The job ID of the backup operation that waits fora tape change.
BKP-Continue The backup operationcontinues after a tape change
The job ID of the backup operation that continuesafter a tape change.
144 | Data ONTAP 8.1 7-Mode Data Protection Tape Backup and Recovery Guide
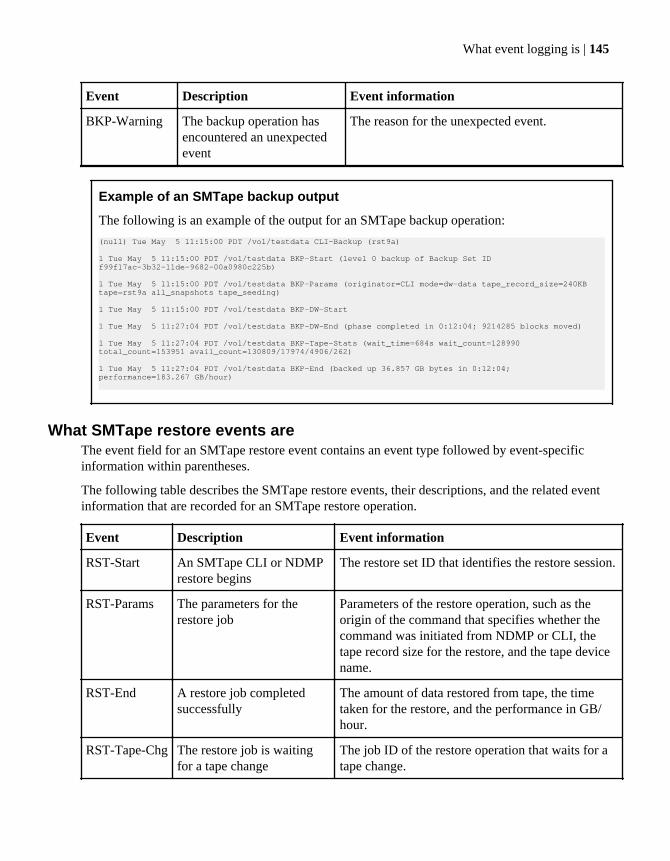
Event Description Event information
BKP-Warning The backup operation hasencountered an unexpectedevent
The reason for the unexpected event.
Example of an SMTape backup output
The following is an example of the output for an SMTape backup operation:
(null) Tue May 5 11:15:00 PDT /vol/testdata CLI-Backup (rst9a)
1 Tue May 5 11:15:00 PDT /vol/testdata BKP-Start (level 0 backup of Backup Set ID f99f17ac-3b32-11de-9682-00a0980c225b)
1 Tue May 5 11:15:00 PDT /vol/testdata BKP-Params (originator=CLI mode=dw-data tape_record_size=240KB tape=rst9a all_snapshots tape_seeding)
1 Tue May 5 11:15:00 PDT /vol/testdata BKP-DW-Start
1 Tue May 5 11:27:04 PDT /vol/testdata BKP-DW-End (phase completed in 0:12:04; 9214285 blocks moved)
1 Tue May 5 11:27:04 PDT /vol/testdata BKP-Tape-Stats (wait_time=684s wait_count=128990 total_count=153951 avail_count=130809/17974/4906/262)
1 Tue May 5 11:27:04 PDT /vol/testdata BKP-End (backed up 36.857 GB bytes in 0:12:04; performance=183.267 GB/hour)
What SMTape restore events areThe event field for an SMTape restore event contains an event type followed by event-specificinformation within parentheses.
The following table describes the SMTape restore events, their descriptions, and the related eventinformation that are recorded for an SMTape restore operation.
Event Description Event information
RST-Start An SMTape CLI or NDMPrestore begins
The restore set ID that identifies the restore session.
RST-Params The parameters for therestore job
Parameters of the restore operation, such as theorigin of the command that specifies whether thecommand was initiated from NDMP or CLI, thetape record size for the restore, and the tape devicename.
RST-End A restore job completedsuccessfully
The amount of data restored from tape, the timetaken for the restore, and the performance in GB/hour.
RST-Tape-Chg The restore job is waitingfor a tape change
The job ID of the restore operation that waits for atape change.
What event logging is | 145
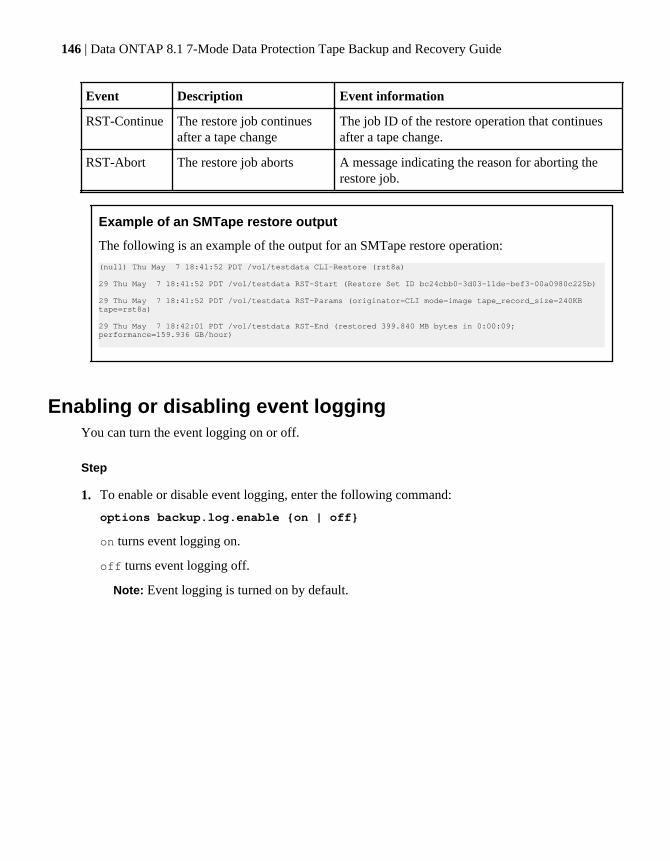
Event Description Event information
RST-Continue The restore job continuesafter a tape change
The job ID of the restore operation that continuesafter a tape change.
RST-Abort The restore job aborts A message indicating the reason for aborting therestore job.
Example of an SMTape restore output
The following is an example of the output for an SMTape restore operation:
(null) Thu May 7 18:41:52 PDT /vol/testdata CLI-Restore (rst8a)
29 Thu May 7 18:41:52 PDT /vol/testdata RST-Start (Restore Set ID bc24cbb0-3d03-11de-bef3-00a0980c225b)
29 Thu May 7 18:41:52 PDT /vol/testdata RST-Params (originator=CLI mode=image tape_record_size=240KB tape=rst8a)
29 Thu May 7 18:42:01 PDT /vol/testdata RST-End (restored 399.840 MB bytes in 0:00:09; performance=159.936 GB/hour)
Enabling or disabling event loggingYou can turn the event logging on or off.
Step
1. To enable or disable event logging, enter the following command:
options backup.log.enable {on | off}
on turns event logging on.
off turns event logging off.
Note: Event logging is turned on by default.
146 | Data ONTAP 8.1 7-Mode Data Protection Tape Backup and Recovery Guide
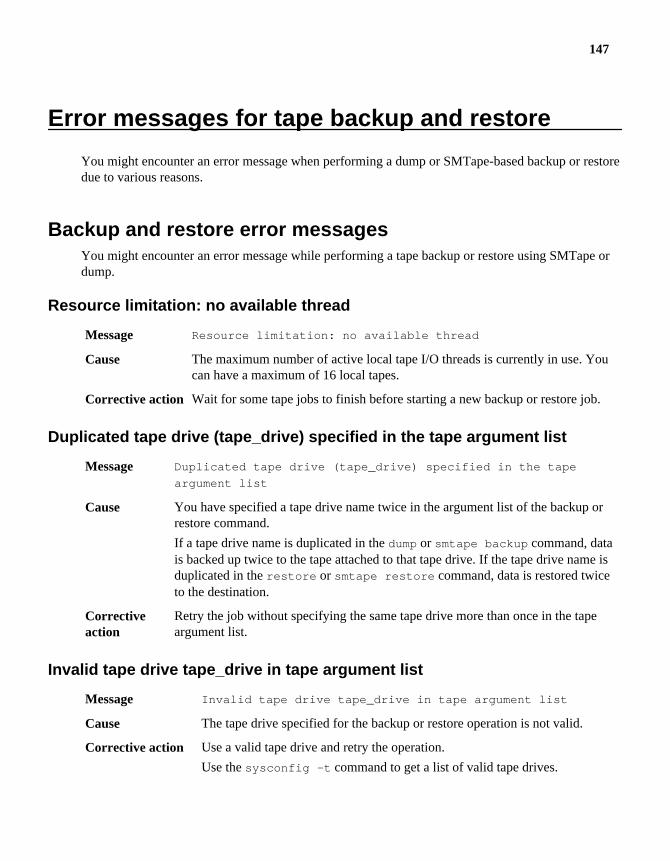
Error messages for tape backup and restore
You might encounter an error message when performing a dump or SMTape-based backup or restoredue to various reasons.
Backup and restore error messagesYou might encounter an error message while performing a tape backup or restore using SMTape ordump.
Resource limitation: no available thread
Message Resource limitation: no available thread
Cause The maximum number of active local tape I/O threads is currently in use. Youcan have a maximum of 16 local tapes.
Corrective action Wait for some tape jobs to finish before starting a new backup or restore job.
Duplicated tape drive (tape_drive) specified in the tape argument list
Message Duplicated tape drive (tape_drive) specified in the tape
argument list
Cause You have specified a tape drive name twice in the argument list of the backup orrestore command.
If a tape drive name is duplicated in the dump or smtape backup command, datais backed up twice to the tape attached to that tape drive. If the tape drive name isduplicated in the restore or smtape restore command, data is restored twiceto the destination.
Correctiveaction
Retry the job without specifying the same tape drive more than once in the tapeargument list.
Invalid tape drive tape_drive in tape argument list
Message Invalid tape drive tape_drive in tape argument list
Cause The tape drive specified for the backup or restore operation is not valid.
Corrective action Use a valid tape drive and retry the operation.
Use the sysconfig -t command to get a list of valid tape drives.
147
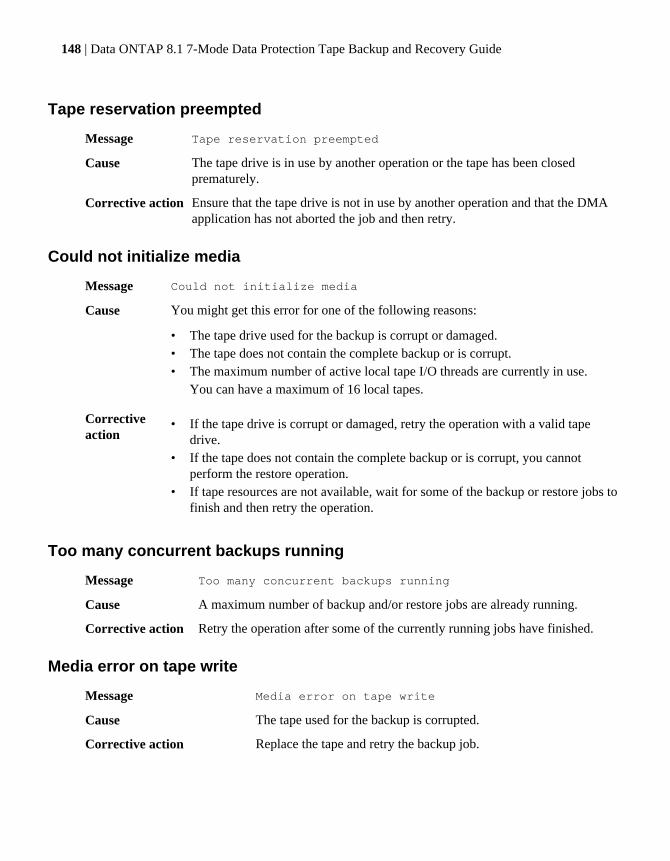
Tape reservation preempted
Message Tape reservation preempted
Cause The tape drive is in use by another operation or the tape has been closedprematurely.
Corrective action Ensure that the tape drive is not in use by another operation and that the DMAapplication has not aborted the job and then retry.
Could not initialize media
Message Could not initialize media
Cause You might get this error for one of the following reasons:
• The tape drive used for the backup is corrupt or damaged.• The tape does not contain the complete backup or is corrupt.• The maximum number of active local tape I/O threads are currently in use.
You can have a maximum of 16 local tapes.
Correctiveaction
• If the tape drive is corrupt or damaged, retry the operation with a valid tapedrive.
• If the tape does not contain the complete backup or is corrupt, you cannotperform the restore operation.
• If tape resources are not available, wait for some of the backup or restore jobs tofinish and then retry the operation.
Too many concurrent backups running
Message Too many concurrent backups running
Cause A maximum number of backup and/or restore jobs are already running.
Corrective action Retry the operation after some of the currently running jobs have finished.
Media error on tape write
Message Media error on tape write
Cause The tape used for the backup is corrupted.
Corrective action Replace the tape and retry the backup job.
148 | Data ONTAP 8.1 7-Mode Data Protection Tape Backup and Recovery Guide

Tape write failed
Message Tape write failed
Cause The tape used for the backup is corrupted.
Corrective action Replace the tape and retry the backup job.
Tape write failed - new tape encountered media error
Message Tape write failed - new tape encountered media error
Cause The tape used for the backup is corrupted.
Corrective action Replace the tape and retry the backup.
Tape write failed - new tape is broken or write protected
Message Tape write failed - new tape is broken or write protected
Cause The tape used for the backup is corrupted or write-protected.
Corrective action Replace the tape and retry the backup.
Tape write failed - new tape is already at the end of media
Message Tape write failed - new tape is already at the end of media
Cause There is not enough space on the tape to complete the backup.
Corrective action Replace the tape and retry the backup.
Tape write error
Message Tape write error - The previous tape had less than the
required minimum capacity, size MB, for this tape
operation, The operation should be restarted from the
beginning
Cause The tape capacity is insufficient to contain the backup data.
Corrective action Use tapes with larger capacity and retry the backup job.
Media error on tape read
Message Media error on tape read
Error messages for tape backup and restore | 149
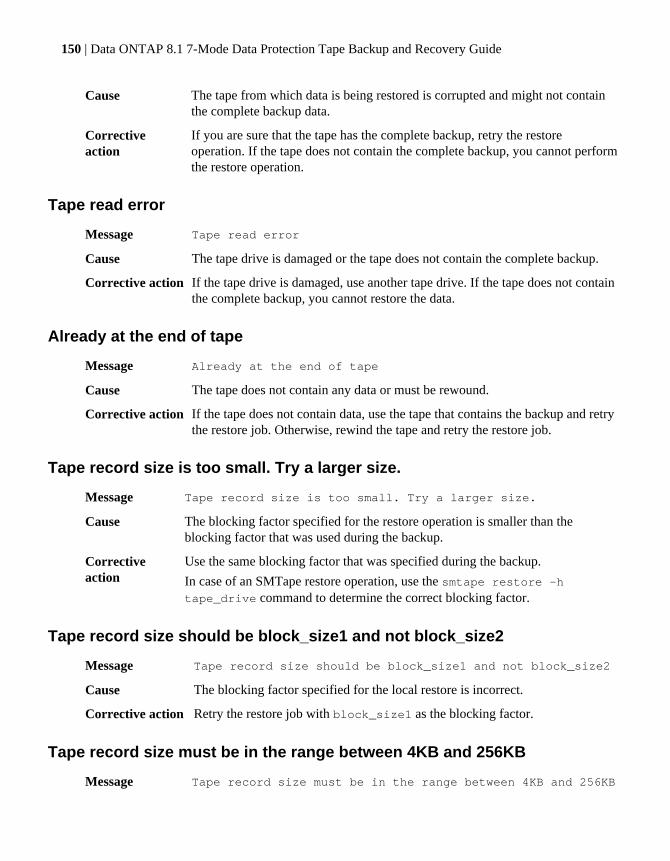
Cause The tape from which data is being restored is corrupted and might not containthe complete backup data.
Correctiveaction
If you are sure that the tape has the complete backup, retry the restoreoperation. If the tape does not contain the complete backup, you cannot performthe restore operation.
Tape read error
Message Tape read error
Cause The tape drive is damaged or the tape does not contain the complete backup.
Corrective action If the tape drive is damaged, use another tape drive. If the tape does not containthe complete backup, you cannot restore the data.
Already at the end of tape
Message Already at the end of tape
Cause The tape does not contain any data or must be rewound.
Corrective action If the tape does not contain data, use the tape that contains the backup and retrythe restore job. Otherwise, rewind the tape and retry the restore job.
Tape record size is too small. Try a larger size.
Message Tape record size is too small. Try a larger size.
Cause The blocking factor specified for the restore operation is smaller than theblocking factor that was used during the backup.
Correctiveaction
Use the same blocking factor that was specified during the backup.
In case of an SMTape restore operation, use the smtape restore -htape_drive command to determine the correct blocking factor.
Tape record size should be block_size1 and not block_size2
Message Tape record size should be block_size1 and not block_size2
Cause The blocking factor specified for the local restore is incorrect.
Corrective action Retry the restore job with block_size1 as the blocking factor.
Tape record size must be in the range between 4KB and 256KB
Message Tape record size must be in the range between 4KB and 256KB
150 | Data ONTAP 8.1 7-Mode Data Protection Tape Backup and Recovery Guide
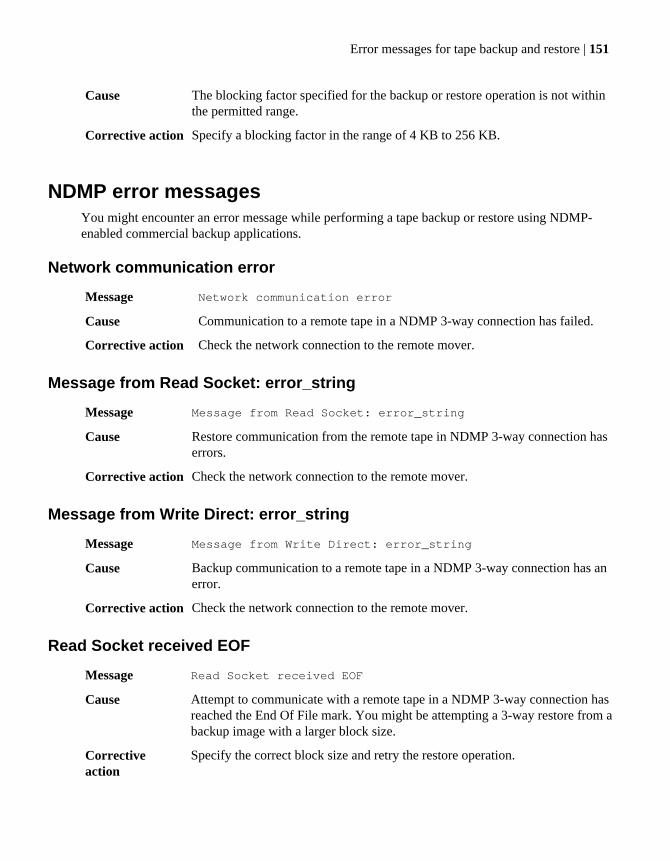
Cause The blocking factor specified for the backup or restore operation is not withinthe permitted range.
Corrective action Specify a blocking factor in the range of 4 KB to 256 KB.
NDMP error messagesYou might encounter an error message while performing a tape backup or restore using NDMP-enabled commercial backup applications.
Network communication error
Message Network communication error
Cause Communication to a remote tape in a NDMP 3-way connection has failed.
Corrective action Check the network connection to the remote mover.
Message from Read Socket: error_string
Message Message from Read Socket: error_string
Cause Restore communication from the remote tape in NDMP 3-way connection haserrors.
Corrective action Check the network connection to the remote mover.
Message from Write Direct: error_string
Message Message from Write Direct: error_string
Cause Backup communication to a remote tape in a NDMP 3-way connection has anerror.
Corrective action Check the network connection to the remote mover.
Read Socket received EOF
Message Read Socket received EOF
Cause Attempt to communicate with a remote tape in a NDMP 3-way connection hasreached the End Of File mark. You might be attempting a 3-way restore from abackup image with a larger block size.
Correctiveaction
Specify the correct block size and retry the restore operation.
Error messages for tape backup and restore | 151
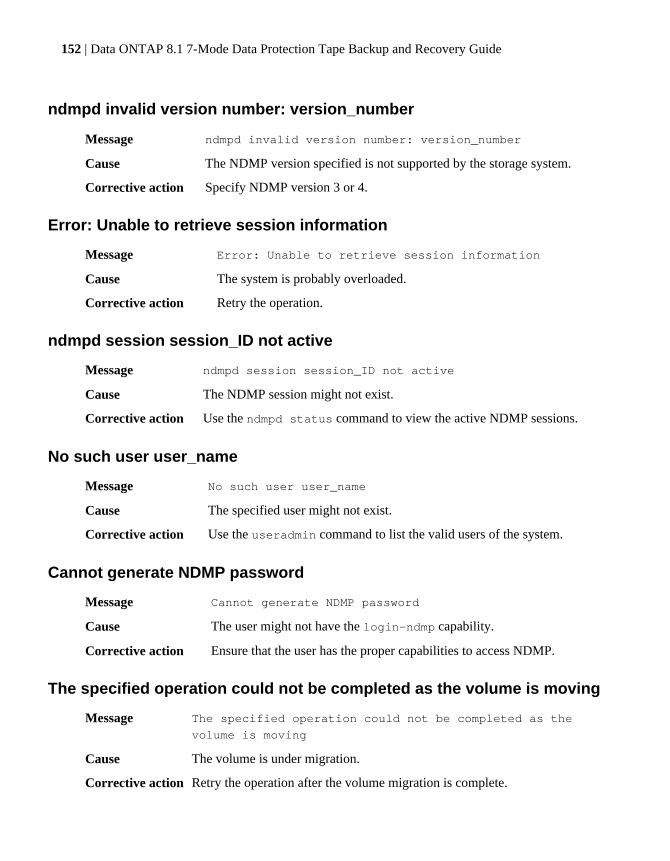
ndmpd invalid version number: version_number
Message ndmpd invalid version number: version_number
Cause The NDMP version specified is not supported by the storage system.
Corrective action Specify NDMP version 3 or 4.
Error: Unable to retrieve session information
Message Error: Unable to retrieve session information
Cause The system is probably overloaded.
Corrective action Retry the operation.
ndmpd session session_ID not active
Message ndmpd session session_ID not active
Cause The NDMP session might not exist.
Corrective action Use the ndmpd status command to view the active NDMP sessions.
No such user user_name
Message No such user user_name
Cause The specified user might not exist.
Corrective action Use the useradmin command to list the valid users of the system.
Cannot generate NDMP password
Message Cannot generate NDMP password
Cause The user might not have the login-ndmp capability.
Corrective action Ensure that the user has the proper capabilities to access NDMP.
The specified operation could not be completed as the volume is moving
Message The specified operation could not be completed as the
volume is moving
Cause The volume is under migration.
Corrective action Retry the operation after the volume migration is complete.
152 | Data ONTAP 8.1 7-Mode Data Protection Tape Backup and Recovery Guide
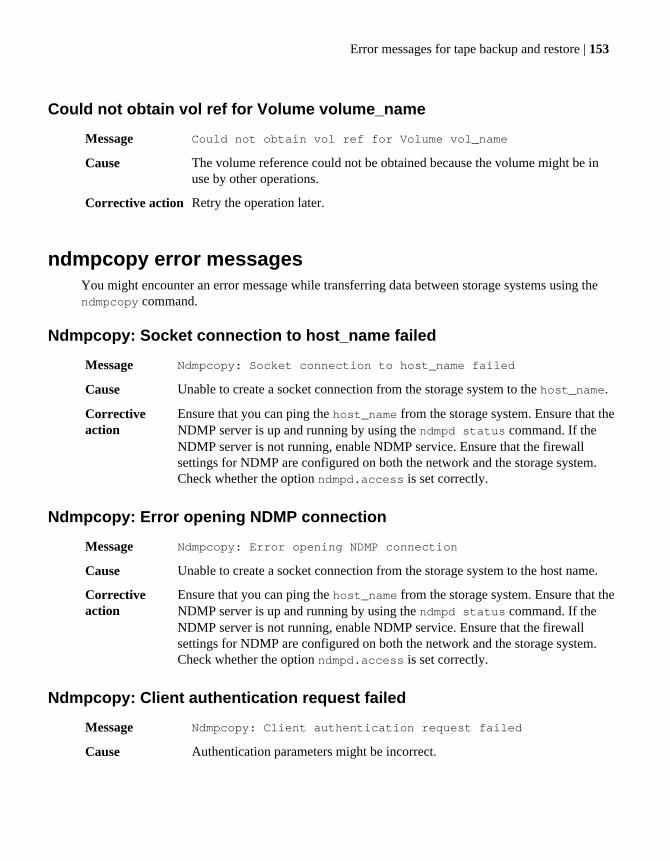
Could not obtain vol ref for Volume volume_name
Message Could not obtain vol ref for Volume vol_name
Cause The volume reference could not be obtained because the volume might be inuse by other operations.
Corrective action Retry the operation later.
ndmpcopy error messagesYou might encounter an error message while transferring data between storage systems using thendmpcopy command.
Ndmpcopy: Socket connection to host_name failed
Message Ndmpcopy: Socket connection to host_name failed
Cause Unable to create a socket connection from the storage system to the host_name.
Correctiveaction
Ensure that you can ping the host_name from the storage system. Ensure that theNDMP server is up and running by using the ndmpd status command. If theNDMP server is not running, enable NDMP service. Ensure that the firewallsettings for NDMP are configured on both the network and the storage system.Check whether the option ndmpd.access is set correctly.
Ndmpcopy: Error opening NDMP connection
Message Ndmpcopy: Error opening NDMP connection
Cause Unable to create a socket connection from the storage system to the host name.
Correctiveaction
Ensure that you can ping the host_name from the storage system. Ensure that theNDMP server is up and running by using the ndmpd status command. If theNDMP server is not running, enable NDMP service. Ensure that the firewallsettings for NDMP are configured on both the network and the storage system.Check whether the option ndmpd.access is set correctly.
Ndmpcopy: Client authentication request failed
Message Ndmpcopy: Client authentication request failed
Cause Authentication parameters might be incorrect.
Error messages for tape backup and restore | 153
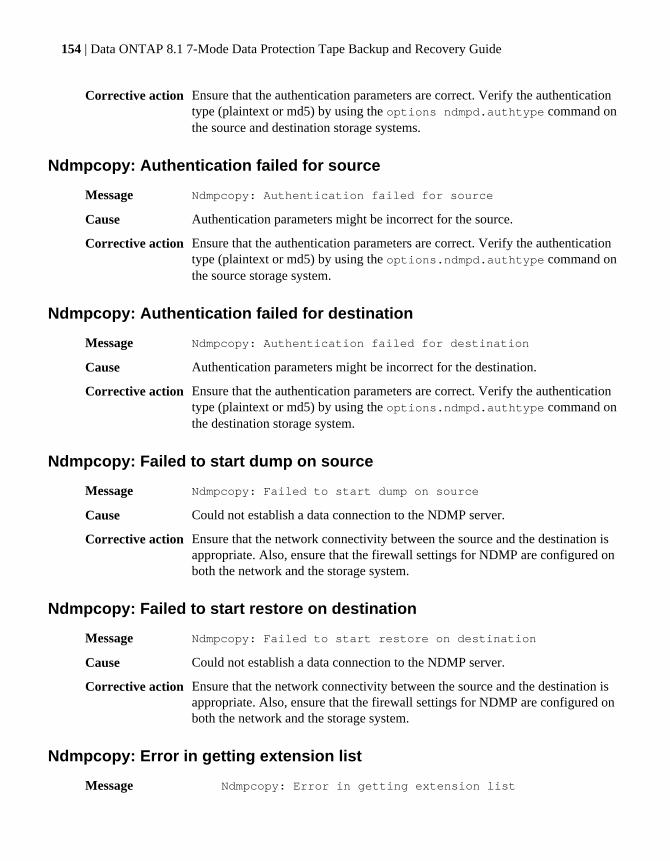
Corrective action Ensure that the authentication parameters are correct. Verify the authenticationtype (plaintext or md5) by using the options ndmpd.authtype command onthe source and destination storage systems.
Ndmpcopy: Authentication failed for source
Message Ndmpcopy: Authentication failed for source
Cause Authentication parameters might be incorrect for the source.
Corrective action Ensure that the authentication parameters are correct. Verify the authenticationtype (plaintext or md5) by using the options.ndmpd.authtype command onthe source storage system.
Ndmpcopy: Authentication failed for destination
Message Ndmpcopy: Authentication failed for destination
Cause Authentication parameters might be incorrect for the destination.
Corrective action Ensure that the authentication parameters are correct. Verify the authenticationtype (plaintext or md5) by using the options.ndmpd.authtype command onthe destination storage system.
Ndmpcopy: Failed to start dump on source
Message Ndmpcopy: Failed to start dump on source
Cause Could not establish a data connection to the NDMP server.
Corrective action Ensure that the network connectivity between the source and the destination isappropriate. Also, ensure that the firewall settings for NDMP are configured onboth the network and the storage system.
Ndmpcopy: Failed to start restore on destination
Message Ndmpcopy: Failed to start restore on destination
Cause Could not establish a data connection to the NDMP server.
Corrective action Ensure that the network connectivity between the source and the destination isappropriate. Also, ensure that the firewall settings for NDMP are configured onboth the network and the storage system.
Ndmpcopy: Error in getting extension list
Message Ndmpcopy: Error in getting extension list
154 | Data ONTAP 8.1 7-Mode Data Protection Tape Backup and Recovery Guide

Cause Either the source or the destination does not support IPv6.
Corrective action Retry the operation using IPv4.
Error getting local hostname
Message Error getting local hostname
Cause Local machine might not have a valid host name.
Corrective action Ensure that the local machine has a valid host name.
Ndmpcopy: Connection setup for transfer failed
Message Ndmpcopy: Connection setup for transfer failed
Cause The ndmpcopy command failed to establish a data connection between thesource and the destination.
Correctiveaction
Ensure that the network connectivity between the source and the destination isappropriate. Also, ensure that the firewall settings for NDMP are configured onboth the network and the storage system.
CONNECT: Connection refused
Message CONNECT: Connection refused
Cause The NDMP server refuses connections in the following scenarios:
• The NDMP connections running on the server has reached the maximumlimit.
• The NDMP server is shutting down.
Corrective action Retry the NDMP connection later.
Invalid name. Source filer name does not resolve to the specified addressmode
Message Invalid name. Source filer name does not resolve to the
specified address mode
Cause The storage system name does not resolve to the specified address mode (IPv4or IPv6).
Corrective action Retry the operation using the appropriate address mode.
Error messages for tape backup and restore | 155
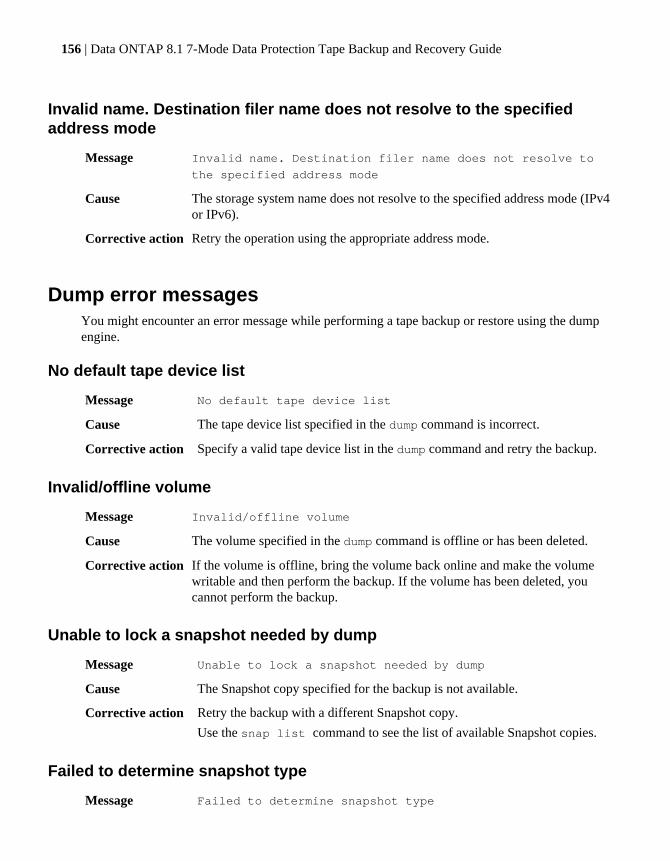
Invalid name. Destination filer name does not resolve to the specifiedaddress mode
Message Invalid name. Destination filer name does not resolve to
the specified address mode
Cause The storage system name does not resolve to the specified address mode (IPv4or IPv6).
Corrective action Retry the operation using the appropriate address mode.
Dump error messagesYou might encounter an error message while performing a tape backup or restore using the dumpengine.
No default tape device list
Message No default tape device list
Cause The tape device list specified in the dump command is incorrect.
Corrective action Specify a valid tape device list in the dump command and retry the backup.
Invalid/offline volume
Message Invalid/offline volume
Cause The volume specified in the dump command is offline or has been deleted.
Corrective action If the volume is offline, bring the volume back online and make the volumewritable and then perform the backup. If the volume has been deleted, youcannot perform the backup.
Unable to lock a snapshot needed by dump
Message Unable to lock a snapshot needed by dump
Cause The Snapshot copy specified for the backup is not available.
Corrective action Retry the backup with a different Snapshot copy.
Use the snap list command to see the list of available Snapshot copies.
Failed to determine snapshot type
Message Failed to determine snapshot type
156 | Data ONTAP 8.1 7-Mode Data Protection Tape Backup and Recovery Guide
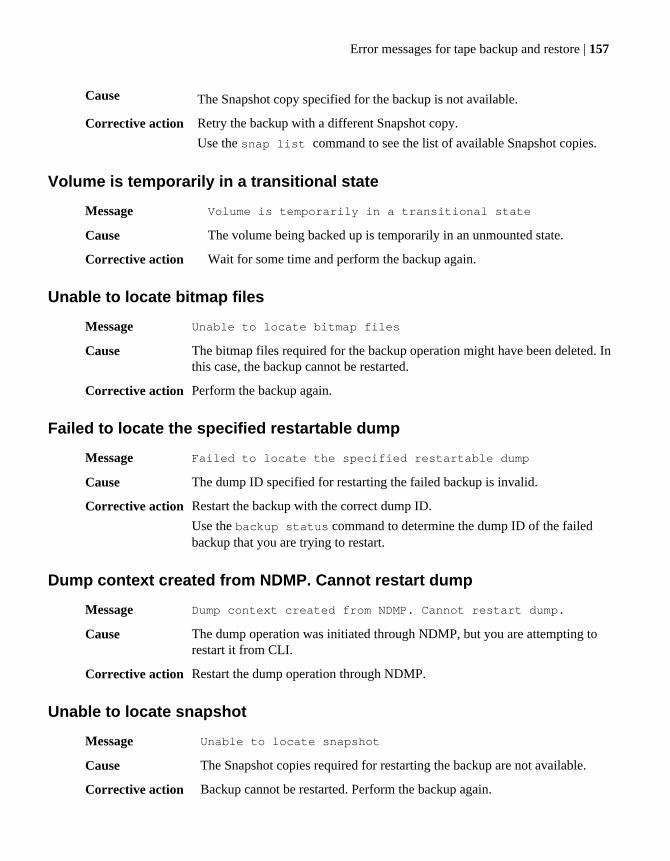
Cause The Snapshot copy specified for the backup is not available.
Corrective action Retry the backup with a different Snapshot copy.
Use the snap list command to see the list of available Snapshot copies.
Volume is temporarily in a transitional state
Message Volume is temporarily in a transitional state
Cause The volume being backed up is temporarily in an unmounted state.
Corrective action Wait for some time and perform the backup again.
Unable to locate bitmap files
Message Unable to locate bitmap files
Cause The bitmap files required for the backup operation might have been deleted. Inthis case, the backup cannot be restarted.
Corrective action Perform the backup again.
Failed to locate the specified restartable dump
Message Failed to locate the specified restartable dump
Cause The dump ID specified for restarting the failed backup is invalid.
Corrective action Restart the backup with the correct dump ID.
Use the backup status command to determine the dump ID of the failedbackup that you are trying to restart.
Dump context created from NDMP. Cannot restart dump
Message Dump context created from NDMP. Cannot restart dump.
Cause The dump operation was initiated through NDMP, but you are attempting torestart it from CLI.
Corrective action Restart the dump operation through NDMP.
Unable to locate snapshot
Message Unable to locate snapshot
Cause The Snapshot copies required for restarting the backup are not available.
Corrective action Backup cannot be restarted. Perform the backup again.
Error messages for tape backup and restore | 157
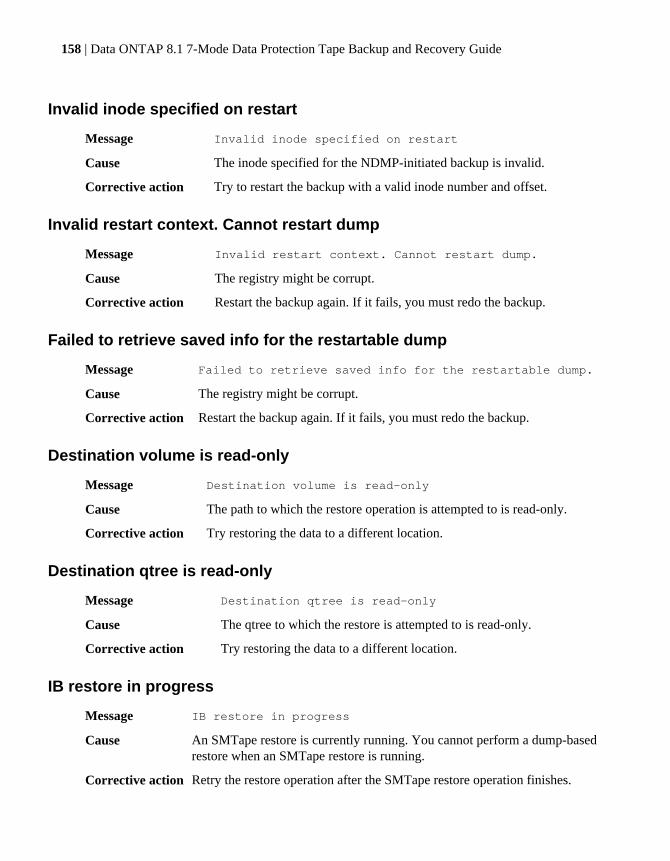
Invalid inode specified on restart
Message Invalid inode specified on restart
Cause The inode specified for the NDMP-initiated backup is invalid.
Corrective action Try to restart the backup with a valid inode number and offset.
Invalid restart context. Cannot restart dump
Message Invalid restart context. Cannot restart dump.
Cause The registry might be corrupt.
Corrective action Restart the backup again. If it fails, you must redo the backup.
Failed to retrieve saved info for the restartable dump
Message Failed to retrieve saved info for the restartable dump.
Cause The registry might be corrupt.
Corrective action Restart the backup again. If it fails, you must redo the backup.
Destination volume is read-only
Message Destination volume is read-only
Cause The path to which the restore operation is attempted to is read-only.
Corrective action Try restoring the data to a different location.
Destination qtree is read-only
Message Destination qtree is read-only
Cause The qtree to which the restore is attempted to is read-only.
Corrective action Try restoring the data to a different location.
IB restore in progress
Message IB restore in progress
Cause An SMTape restore is currently running. You cannot perform a dump-basedrestore when an SMTape restore is running.
Corrective action Retry the restore operation after the SMTape restore operation finishes.
158 | Data ONTAP 8.1 7-Mode Data Protection Tape Backup and Recovery Guide
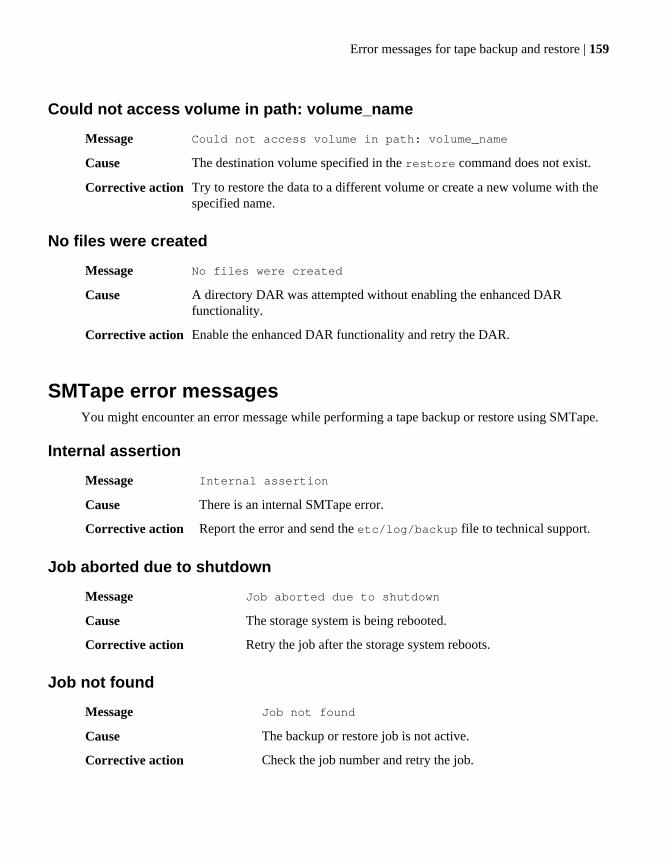
Could not access volume in path: volume_name
Message Could not access volume in path: volume_name
Cause The destination volume specified in the restore command does not exist.
Corrective action Try to restore the data to a different volume or create a new volume with thespecified name.
No files were created
Message No files were created
Cause A directory DAR was attempted without enabling the enhanced DARfunctionality.
Corrective action Enable the enhanced DAR functionality and retry the DAR.
SMTape error messagesYou might encounter an error message while performing a tape backup or restore using SMTape.
Internal assertion
Message Internal assertion
Cause There is an internal SMTape error.
Corrective action Report the error and send the etc/log/backup file to technical support.
Job aborted due to shutdown
Message Job aborted due to shutdown
Cause The storage system is being rebooted.
Corrective action Retry the job after the storage system reboots.
Job not found
Message Job not found
Cause The backup or restore job is not active.
Corrective action Check the job number and retry the job.
Error messages for tape backup and restore | 159
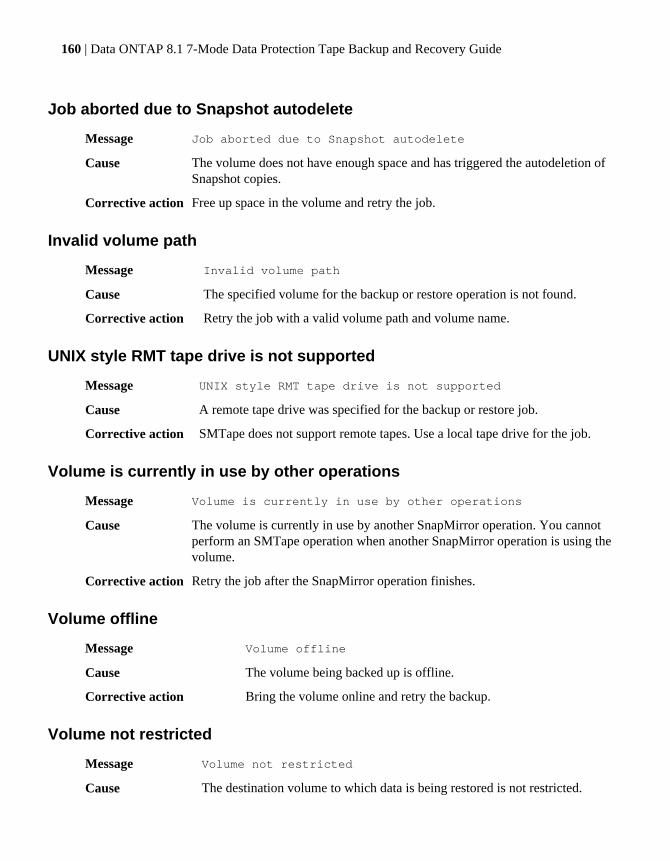
Job aborted due to Snapshot autodelete
Message Job aborted due to Snapshot autodelete
Cause The volume does not have enough space and has triggered the autodeletion ofSnapshot copies.
Corrective action Free up space in the volume and retry the job.
Invalid volume path
Message Invalid volume path
Cause The specified volume for the backup or restore operation is not found.
Corrective action Retry the job with a valid volume path and volume name.
UNIX style RMT tape drive is not supported
Message UNIX style RMT tape drive is not supported
Cause A remote tape drive was specified for the backup or restore job.
Corrective action SMTape does not support remote tapes. Use a local tape drive for the job.
Volume is currently in use by other operations
Message Volume is currently in use by other operations
Cause The volume is currently in use by another SnapMirror operation. You cannotperform an SMTape operation when another SnapMirror operation is using thevolume.
Corrective action Retry the job after the SnapMirror operation finishes.
Volume offline
Message Volume offline
Cause The volume being backed up is offline.
Corrective action Bring the volume online and retry the backup.
Volume not restricted
Message Volume not restricted
Cause The destination volume to which data is being restored is not restricted.
160 | Data ONTAP 8.1 7-Mode Data Protection Tape Backup and Recovery Guide
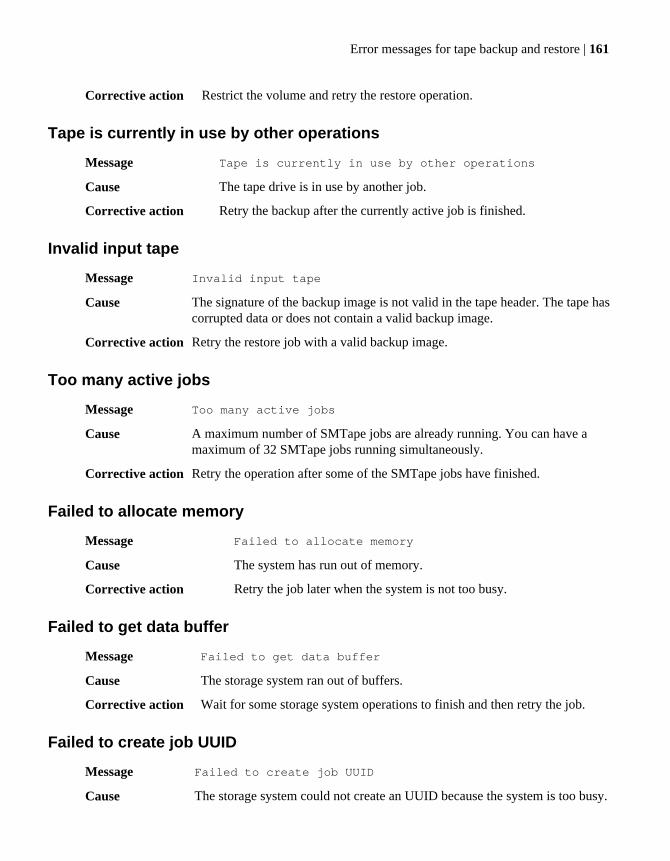
Corrective action Restrict the volume and retry the restore operation.
Tape is currently in use by other operations
Message Tape is currently in use by other operations
Cause The tape drive is in use by another job.
Corrective action Retry the backup after the currently active job is finished.
Invalid input tape
Message Invalid input tape
Cause The signature of the backup image is not valid in the tape header. The tape hascorrupted data or does not contain a valid backup image.
Corrective action Retry the restore job with a valid backup image.
Too many active jobs
Message Too many active jobs
Cause A maximum number of SMTape jobs are already running. You can have amaximum of 32 SMTape jobs running simultaneously.
Corrective action Retry the operation after some of the SMTape jobs have finished.
Failed to allocate memory
Message Failed to allocate memory
Cause The system has run out of memory.
Corrective action Retry the job later when the system is not too busy.
Failed to get data buffer
Message Failed to get data buffer
Cause The storage system ran out of buffers.
Corrective action Wait for some storage system operations to finish and then retry the job.
Failed to create job UUID
Message Failed to create job UUID
Cause The storage system could not create an UUID because the system is too busy.
Error messages for tape backup and restore | 161
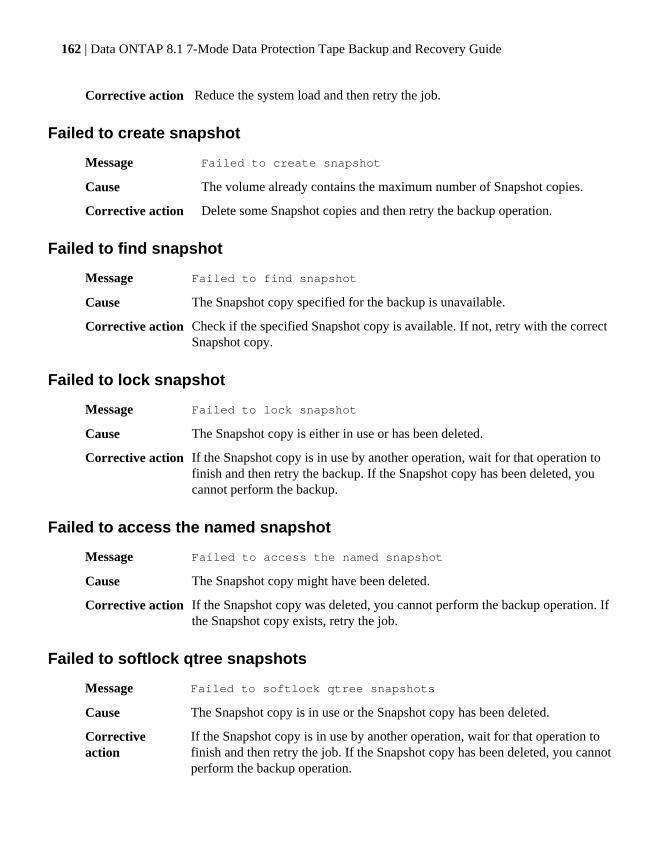
Corrective action Reduce the system load and then retry the job.
Failed to create snapshot
Message Failed to create snapshot
Cause The volume already contains the maximum number of Snapshot copies.
Corrective action Delete some Snapshot copies and then retry the backup operation.
Failed to find snapshot
Message Failed to find snapshot
Cause The Snapshot copy specified for the backup is unavailable.
Corrective action Check if the specified Snapshot copy is available. If not, retry with the correctSnapshot copy.
Failed to lock snapshot
Message Failed to lock snapshot
Cause The Snapshot copy is either in use or has been deleted.
Corrective action If the Snapshot copy is in use by another operation, wait for that operation tofinish and then retry the backup. If the Snapshot copy has been deleted, youcannot perform the backup.
Failed to access the named snapshot
Message Failed to access the named snapshot
Cause The Snapshot copy might have been deleted.
Corrective action If the Snapshot copy was deleted, you cannot perform the backup operation. Ifthe Snapshot copy exists, retry the job.
Failed to softlock qtree snapshots
Message Failed to softlock qtree snapshots
Cause The Snapshot copy is in use or the Snapshot copy has been deleted.
Correctiveaction
If the Snapshot copy is in use by another operation, wait for that operation tofinish and then retry the job. If the Snapshot copy has been deleted, you cannotperform the backup operation.
162 | Data ONTAP 8.1 7-Mode Data Protection Tape Backup and Recovery Guide
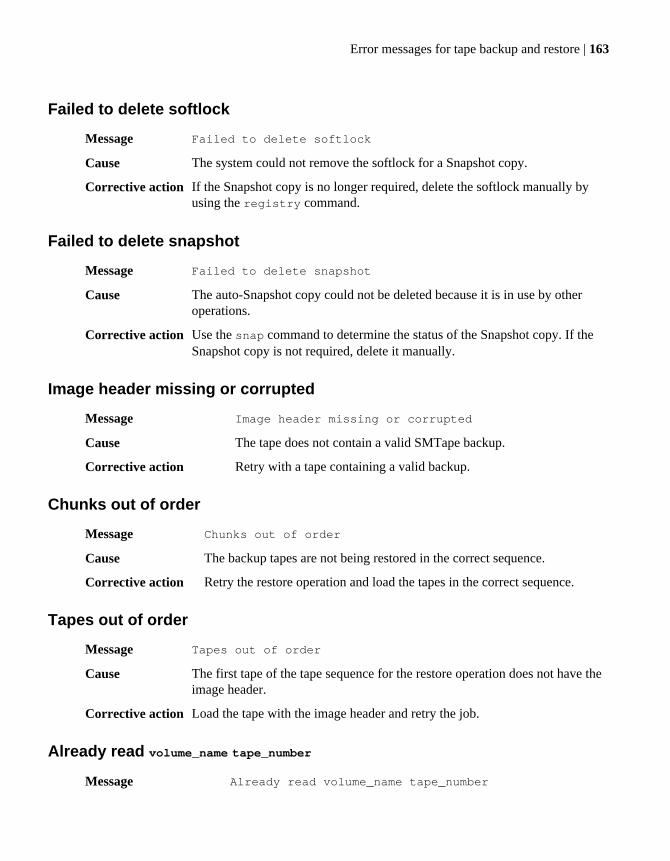
Failed to delete softlock
Message Failed to delete softlock
Cause The system could not remove the softlock for a Snapshot copy.
Corrective action If the Snapshot copy is no longer required, delete the softlock manually byusing the registry command.
Failed to delete snapshot
Message Failed to delete snapshot
Cause The auto-Snapshot copy could not be deleted because it is in use by otheroperations.
Corrective action Use the snap command to determine the status of the Snapshot copy. If theSnapshot copy is not required, delete it manually.
Image header missing or corrupted
Message Image header missing or corrupted
Cause The tape does not contain a valid SMTape backup.
Corrective action Retry with a tape containing a valid backup.
Chunks out of order
Message Chunks out of order
Cause The backup tapes are not being restored in the correct sequence.
Corrective action Retry the restore operation and load the tapes in the correct sequence.
Tapes out of order
Message Tapes out of order
Cause The first tape of the tape sequence for the restore operation does not have theimage header.
Corrective action Load the tape with the image header and retry the job.
Already read volume_name tape_number
Message Already read volume_name tape_number
Error messages for tape backup and restore | 163
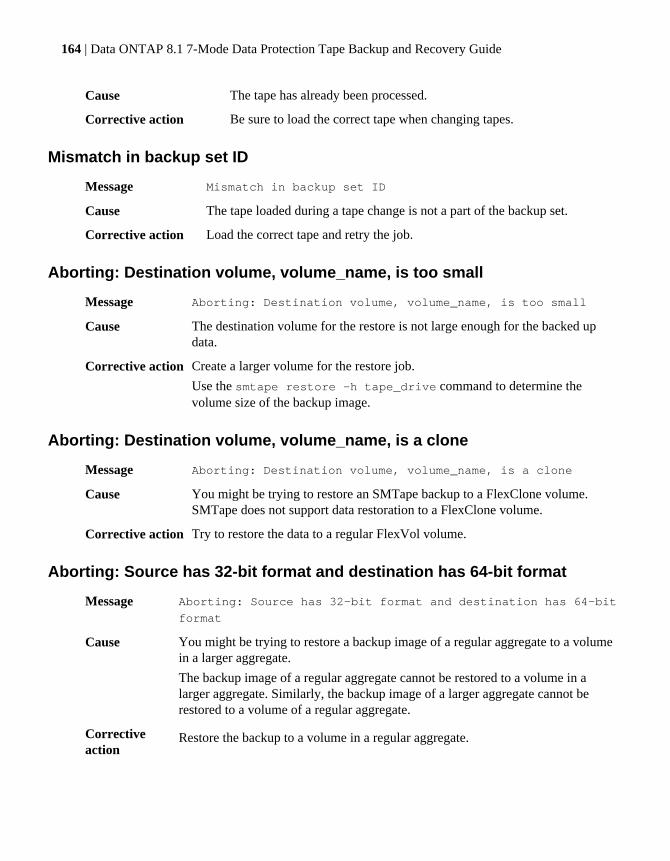
Cause The tape has already been processed.
Corrective action Be sure to load the correct tape when changing tapes.
Mismatch in backup set ID
Message Mismatch in backup set ID
Cause The tape loaded during a tape change is not a part of the backup set.
Corrective action Load the correct tape and retry the job.
Aborting: Destination volume, volume_name, is too small
Message Aborting: Destination volume, volume_name, is too small
Cause The destination volume for the restore is not large enough for the backed updata.
Corrective action Create a larger volume for the restore job.
Use the smtape restore -h tape_drive command to determine thevolume size of the backup image.
Aborting: Destination volume, volume_name, is a clone
Message Aborting: Destination volume, volume_name, is a clone
Cause You might be trying to restore an SMTape backup to a FlexClone volume.SMTape does not support data restoration to a FlexClone volume.
Corrective action Try to restore the data to a regular FlexVol volume.
Aborting: Source has 32-bit format and destination has 64-bit format
Message Aborting: Source has 32-bit format and destination has 64-bit
format
Cause You might be trying to restore a backup image of a regular aggregate to a volumein a larger aggregate.
The backup image of a regular aggregate cannot be restored to a volume in alarger aggregate. Similarly, the backup image of a larger aggregate cannot berestored to a volume of a regular aggregate.
Correctiveaction
Restore the backup to a volume in a regular aggregate.
164 | Data ONTAP 8.1 7-Mode Data Protection Tape Backup and Recovery Guide
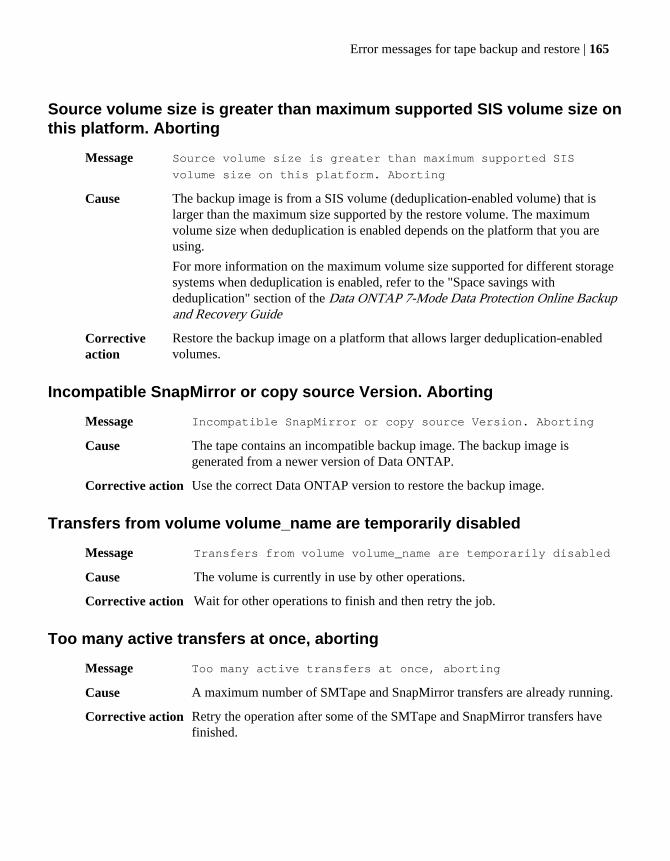
Source volume size is greater than maximum supported SIS volume size onthis platform. Aborting
Message Source volume size is greater than maximum supported SIS
volume size on this platform. Aborting
Cause The backup image is from a SIS volume (deduplication-enabled volume) that islarger than the maximum size supported by the restore volume. The maximumvolume size when deduplication is enabled depends on the platform that you areusing.
For more information on the maximum volume size supported for different storagesystems when deduplication is enabled, refer to the "Space savings withdeduplication" section of the Data ONTAP 7-Mode Data Protection Online Backupand Recovery Guide
Correctiveaction
Restore the backup image on a platform that allows larger deduplication-enabledvolumes.
Incompatible SnapMirror or copy source Version. Aborting
Message Incompatible SnapMirror or copy source Version. Aborting
Cause The tape contains an incompatible backup image. The backup image isgenerated from a newer version of Data ONTAP.
Corrective action Use the correct Data ONTAP version to restore the backup image.
Transfers from volume volume_name are temporarily disabled
Message Transfers from volume volume_name are temporarily disabled
Cause The volume is currently in use by other operations.
Corrective action Wait for other operations to finish and then retry the job.
Too many active transfers at once, aborting
Message Too many active transfers at once, aborting
Cause A maximum number of SMTape and SnapMirror transfers are already running.
Corrective action Retry the operation after some of the SMTape and SnapMirror transfers havefinished.
Error messages for tape backup and restore | 165
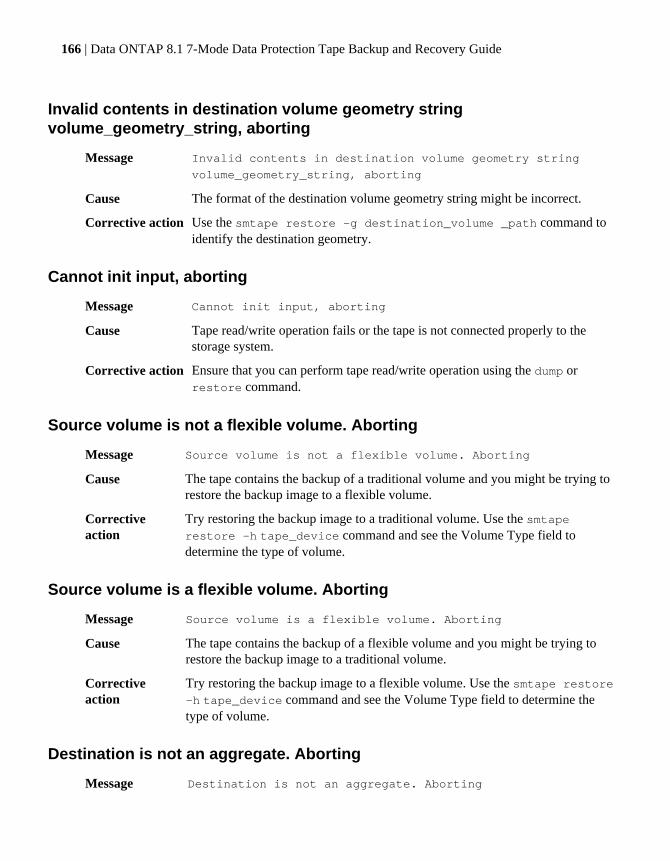
Invalid contents in destination volume geometry stringvolume_geometry_string, aborting
Message Invalid contents in destination volume geometry string
volume_geometry_string, aborting
Cause The format of the destination volume geometry string might be incorrect.
Corrective action Use the smtape restore -g destination_volume _path command toidentify the destination geometry.
Cannot init input, aborting
Message Cannot init input, aborting
Cause Tape read/write operation fails or the tape is not connected properly to thestorage system.
Corrective action Ensure that you can perform tape read/write operation using the dump orrestore command.
Source volume is not a flexible volume. Aborting
Message Source volume is not a flexible volume. Aborting
Cause The tape contains the backup of a traditional volume and you might be trying torestore the backup image to a flexible volume.
Correctiveaction
Try restoring the backup image to a traditional volume. Use the smtaperestore -h tape_device command and see the Volume Type field todetermine the type of volume.
Source volume is a flexible volume. Aborting
Message Source volume is a flexible volume. Aborting
Cause The tape contains the backup of a flexible volume and you might be trying torestore the backup image to a traditional volume.
Correctiveaction
Try restoring the backup image to a flexible volume. Use the smtape restore-h tape_device command and see the Volume Type field to determine thetype of volume.
Destination is not an aggregate. Aborting
Message Destination is not an aggregate. Aborting
166 | Data ONTAP 8.1 7-Mode Data Protection Tape Backup and Recovery Guide
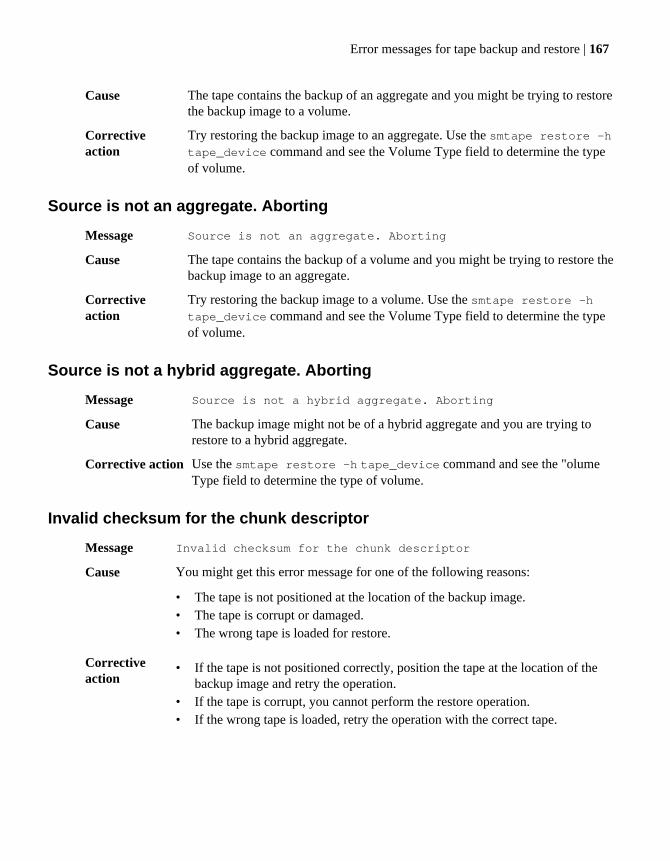
Cause The tape contains the backup of an aggregate and you might be trying to restorethe backup image to a volume.
Correctiveaction
Try restoring the backup image to an aggregate. Use the smtape restore -htape_device command and see the Volume Type field to determine the typeof volume.
Source is not an aggregate. Aborting
Message Source is not an aggregate. Aborting
Cause The tape contains the backup of a volume and you might be trying to restore thebackup image to an aggregate.
Correctiveaction
Try restoring the backup image to a volume. Use the smtape restore -htape_device command and see the Volume Type field to determine the typeof volume.
Source is not a hybrid aggregate. Aborting
Message Source is not a hybrid aggregate. Aborting
Cause The backup image might not be of a hybrid aggregate and you are trying torestore to a hybrid aggregate.
Corrective action Use the smtape restore -h tape_device command and see the "olumeType field to determine the type of volume.
Invalid checksum for the chunk descriptor
Message Invalid checksum for the chunk descriptor
Cause You might get this error message for one of the following reasons:
• The tape is not positioned at the location of the backup image.• The tape is corrupt or damaged.• The wrong tape is loaded for restore.
Correctiveaction
• If the tape is not positioned correctly, position the tape at the location of thebackup image and retry the operation.
• If the tape is corrupt, you cannot perform the restore operation.• If the wrong tape is loaded, retry the operation with the correct tape.
Error messages for tape backup and restore | 167
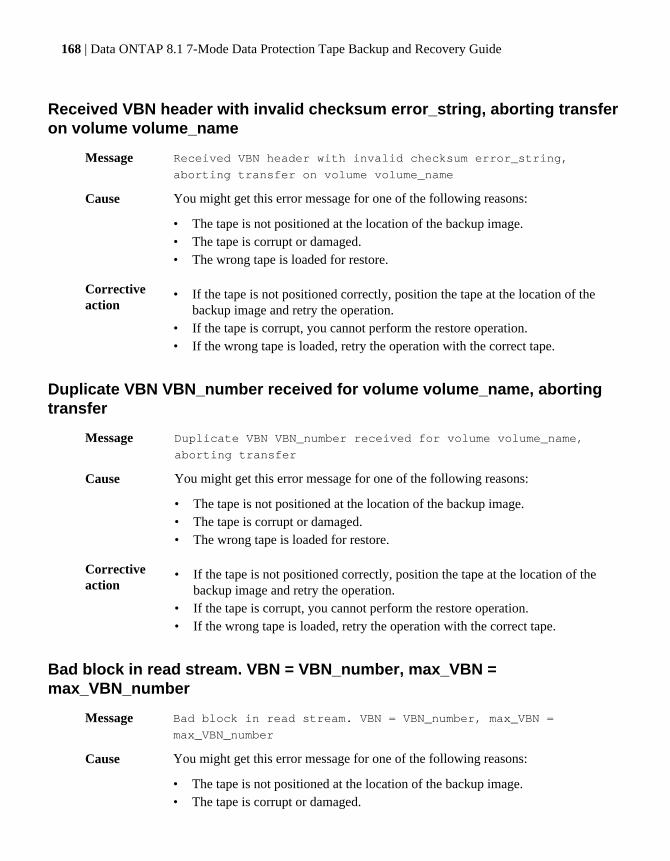
Received VBN header with invalid checksum error_string, aborting transferon volume volume_name
Message Received VBN header with invalid checksum error_string,
aborting transfer on volume volume_name
Cause You might get this error message for one of the following reasons:
• The tape is not positioned at the location of the backup image.• The tape is corrupt or damaged.• The wrong tape is loaded for restore.
Correctiveaction
• If the tape is not positioned correctly, position the tape at the location of thebackup image and retry the operation.
• If the tape is corrupt, you cannot perform the restore operation.• If the wrong tape is loaded, retry the operation with the correct tape.
Duplicate VBN VBN_number received for volume volume_name, abortingtransfer
Message Duplicate VBN VBN_number received for volume volume_name,
aborting transfer
Cause You might get this error message for one of the following reasons:
• The tape is not positioned at the location of the backup image.• The tape is corrupt or damaged.• The wrong tape is loaded for restore.
Correctiveaction
• If the tape is not positioned correctly, position the tape at the location of thebackup image and retry the operation.
• If the tape is corrupt, you cannot perform the restore operation.• If the wrong tape is loaded, retry the operation with the correct tape.
Bad block in read stream. VBN = VBN_number, max_VBN =max_VBN_number
Message Bad block in read stream. VBN = VBN_number, max_VBN =
max_VBN_number
Cause You might get this error message for one of the following reasons:
• The tape is not positioned at the location of the backup image.• The tape is corrupt or damaged.
168 | Data ONTAP 8.1 7-Mode Data Protection Tape Backup and Recovery Guide
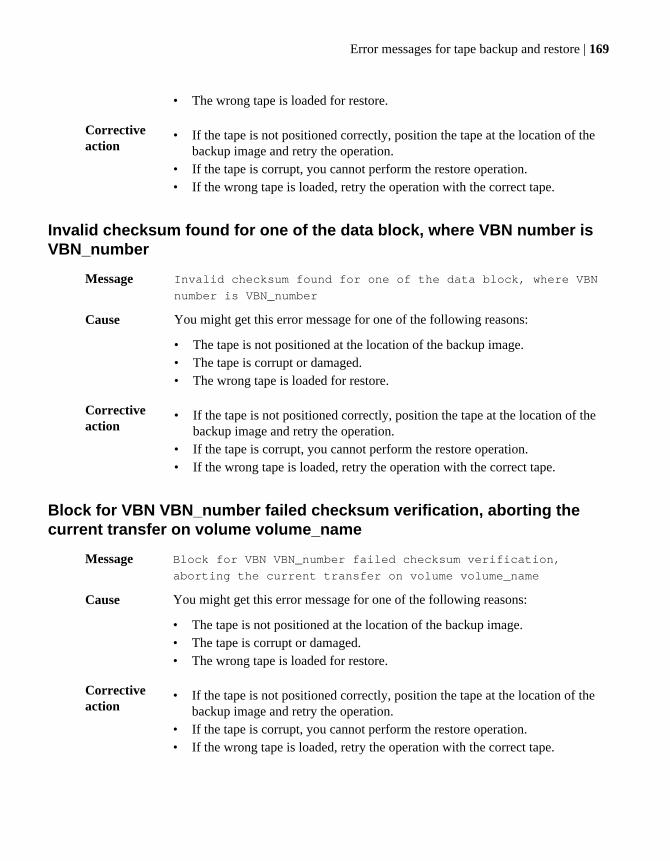
• The wrong tape is loaded for restore.
Correctiveaction
• If the tape is not positioned correctly, position the tape at the location of thebackup image and retry the operation.
• If the tape is corrupt, you cannot perform the restore operation.• If the wrong tape is loaded, retry the operation with the correct tape.
Invalid checksum found for one of the data block, where VBN number isVBN_number
Message Invalid checksum found for one of the data block, where VBN
number is VBN_number
Cause You might get this error message for one of the following reasons:
• The tape is not positioned at the location of the backup image.• The tape is corrupt or damaged.• The wrong tape is loaded for restore.
Correctiveaction
• If the tape is not positioned correctly, position the tape at the location of thebackup image and retry the operation.
• If the tape is corrupt, you cannot perform the restore operation.• If the wrong tape is loaded, retry the operation with the correct tape.
Block for VBN VBN_number failed checksum verification, aborting thecurrent transfer on volume volume_name
Message Block for VBN VBN_number failed checksum verification,
aborting the current transfer on volume volume_name
Cause You might get this error message for one of the following reasons:
• The tape is not positioned at the location of the backup image.• The tape is corrupt or damaged.• The wrong tape is loaded for restore.
Correctiveaction
• If the tape is not positioned correctly, position the tape at the location of thebackup image and retry the operation.
• If the tape is corrupt, you cannot perform the restore operation.• If the wrong tape is loaded, retry the operation with the correct tape.
Error messages for tape backup and restore | 169
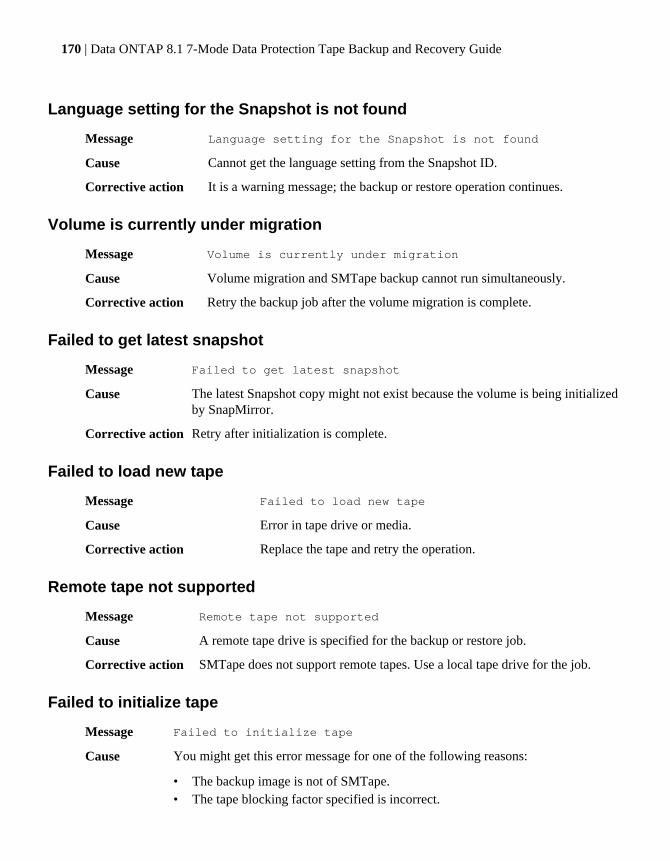
Language setting for the Snapshot is not found
Message Language setting for the Snapshot is not found
Cause Cannot get the language setting from the Snapshot ID.
Corrective action It is a warning message; the backup or restore operation continues.
Volume is currently under migration
Message Volume is currently under migration
Cause Volume migration and SMTape backup cannot run simultaneously.
Corrective action Retry the backup job after the volume migration is complete.
Failed to get latest snapshot
Message Failed to get latest snapshot
Cause The latest Snapshot copy might not exist because the volume is being initializedby SnapMirror.
Corrective action Retry after initialization is complete.
Failed to load new tape
Message Failed to load new tape
Cause Error in tape drive or media.
Corrective action Replace the tape and retry the operation.
Remote tape not supported
Message Remote tape not supported
Cause A remote tape drive is specified for the backup or restore job.
Corrective action SMTape does not support remote tapes. Use a local tape drive for the job.
Failed to initialize tape
Message Failed to initialize tape
Cause You might get this error message for one of the following reasons:
• The backup image is not of SMTape.• The tape blocking factor specified is incorrect.
170 | Data ONTAP 8.1 7-Mode Data Protection Tape Backup and Recovery Guide
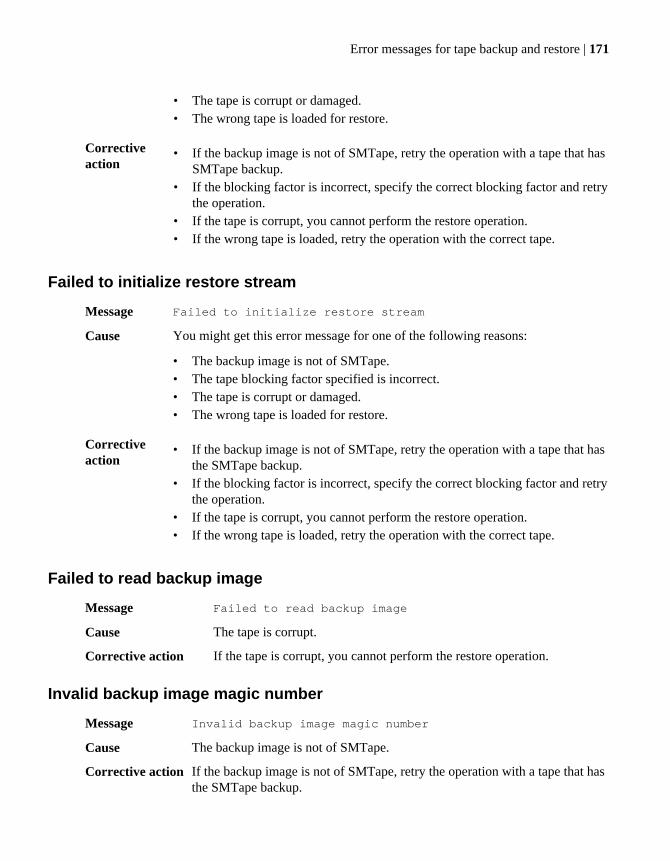
• The tape is corrupt or damaged.• The wrong tape is loaded for restore.
Correctiveaction
• If the backup image is not of SMTape, retry the operation with a tape that hasSMTape backup.
• If the blocking factor is incorrect, specify the correct blocking factor and retrythe operation.
• If the tape is corrupt, you cannot perform the restore operation.• If the wrong tape is loaded, retry the operation with the correct tape.
Failed to initialize restore stream
Message Failed to initialize restore stream
Cause You might get this error message for one of the following reasons:
• The backup image is not of SMTape.• The tape blocking factor specified is incorrect.• The tape is corrupt or damaged.• The wrong tape is loaded for restore.
Correctiveaction
• If the backup image is not of SMTape, retry the operation with a tape that hasthe SMTape backup.
• If the blocking factor is incorrect, specify the correct blocking factor and retrythe operation.
• If the tape is corrupt, you cannot perform the restore operation.• If the wrong tape is loaded, retry the operation with the correct tape.
Failed to read backup image
Message Failed to read backup image
Cause The tape is corrupt.
Corrective action If the tape is corrupt, you cannot perform the restore operation.
Invalid backup image magic number
Message Invalid backup image magic number
Cause The backup image is not of SMTape.
Corrective action If the backup image is not of SMTape, retry the operation with a tape that hasthe SMTape backup.
Error messages for tape backup and restore | 171
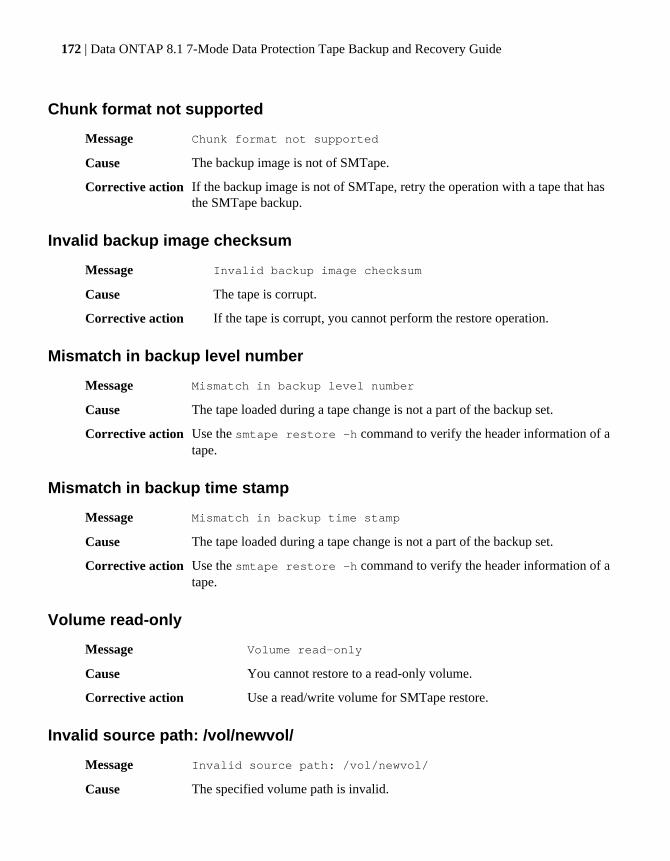
Chunk format not supported
Message Chunk format not supported
Cause The backup image is not of SMTape.
Corrective action If the backup image is not of SMTape, retry the operation with a tape that hasthe SMTape backup.
Invalid backup image checksum
Message Invalid backup image checksum
Cause The tape is corrupt.
Corrective action If the tape is corrupt, you cannot perform the restore operation.
Mismatch in backup level number
Message Mismatch in backup level number
Cause The tape loaded during a tape change is not a part of the backup set.
Corrective action Use the smtape restore -h command to verify the header information of atape.
Mismatch in backup time stamp
Message Mismatch in backup time stamp
Cause The tape loaded during a tape change is not a part of the backup set.
Corrective action Use the smtape restore -h command to verify the header information of atape.
Volume read-only
Message Volume read-only
Cause You cannot restore to a read-only volume.
Corrective action Use a read/write volume for SMTape restore.
Invalid source path: /vol/newvol/
Message Invalid source path: /vol/newvol/
Cause The specified volume path is invalid.
172 | Data ONTAP 8.1 7-Mode Data Protection Tape Backup and Recovery Guide

Corrective action Volume path should not be terminating with the "/" character; use /vol/newvol.
Error messages for tape backup and restore | 173

174 | Data ONTAP 8.1 7-Mode Data Protection Tape Backup and Recovery Guide

Copyright information
Copyright © 1994–2011 NetApp, Inc. All rights reserved. Printed in the U.S.A.
No part of this document covered by copyright may be reproduced in any form or by any means—graphic, electronic, or mechanical, including photocopying, recording, taping, or storage in anelectronic retrieval system—without prior written permission of the copyright owner.
Software derived from copyrighted NetApp material is subject to the following license anddisclaimer:
THIS SOFTWARE IS PROVIDED BY NETAPP "AS IS" AND WITHOUT ANY EXPRESS ORIMPLIED WARRANTIES, INCLUDING, BUT NOT LIMITED TO, THE IMPLIEDWARRANTIES OF MERCHANTABILITY AND FITNESS FOR A PARTICULAR PURPOSE,WHICH ARE HEREBY DISCLAIMED. IN NO EVENT SHALL NETAPP BE LIABLE FOR ANYDIRECT, INDIRECT, INCIDENTAL, SPECIAL, EXEMPLARY, OR CONSEQUENTIALDAMAGES (INCLUDING, BUT NOT LIMITED TO, PROCUREMENT OF SUBSTITUTEGOODS OR SERVICES; LOSS OF USE, DATA, OR PROFITS; OR BUSINESSINTERRUPTION) HOWEVER CAUSED AND ON ANY THEORY OF LIABILITY, WHETHERIN CONTRACT, STRICT LIABILITY, OR TORT (INCLUDING NEGLIGENCE OROTHERWISE) ARISING IN ANY WAY OUT OF THE USE OF THIS SOFTWARE, EVEN IFADVISED OF THE POSSIBILITY OF SUCH DAMAGE.
NetApp reserves the right to change any products described herein at any time, and without notice.NetApp assumes no responsibility or liability arising from the use of products described herein,except as expressly agreed to in writing by NetApp. The use or purchase of this product does notconvey a license under any patent rights, trademark rights, or any other intellectual property rights ofNetApp.
The product described in this manual may be protected by one or more U.S.A. patents, foreignpatents, or pending applications.
RESTRICTED RIGHTS LEGEND: Use, duplication, or disclosure by the government is subject torestrictions as set forth in subparagraph (c)(1)(ii) of the Rights in Technical Data and ComputerSoftware clause at DFARS 252.277-7103 (October 1988) and FAR 52-227-19 (June 1987).
175

176 | Data ONTAP 8.1 7-Mode Data Protection Tape Backup and Recovery Guide
Trademark information
NetApp, the NetApp logo, Network Appliance, the Network Appliance logo, Akorri,ApplianceWatch, ASUP, AutoSupport, BalancePoint, BalancePoint Predictor, Bycast, CampaignExpress, ComplianceClock, Cryptainer, CryptoShred, Data ONTAP, DataFabric, DataFort, Decru,Decru DataFort, DenseStak, Engenio, Engenio logo, E-Stack, FAServer, FastStak, FilerView,FlexCache, FlexClone, FlexPod, FlexScale, FlexShare, FlexSuite, FlexVol, FPolicy, GetSuccessful,gFiler, Go further, faster, Imagine Virtually Anything, Lifetime Key Management, LockVault,Manage ONTAP, MetroCluster, MultiStore, NearStore, NetCache, NOW (NetApp on the Web),Onaro, OnCommand, ONTAPI, OpenKey, PerformanceStak, RAID-DP, ReplicatorX, SANscreen,SANshare, SANtricity, SecureAdmin, SecureShare, Select, Service Builder, Shadow Tape,Simplicity, Simulate ONTAP, SnapCopy, SnapDirector, SnapDrive, SnapFilter, SnapLock,SnapManager, SnapMigrator, SnapMirror, SnapMover, SnapProtect, SnapRestore, Snapshot,SnapSuite, SnapValidator, SnapVault, StorageGRID, StoreVault, the StoreVault logo, SyncMirror,Tech OnTap, The evolution of storage, Topio, vFiler, VFM, Virtual File Manager, VPolicy, WAFL,Web Filer, and XBB are trademarks or registered trademarks of NetApp, Inc. in the United States,other countries, or both.
IBM, the IBM logo, and ibm.com are trademarks or registered trademarks of International BusinessMachines Corporation in the United States, other countries, or both. A complete and current list ofother IBM trademarks is available on the Web at www.ibm.com/legal/copytrade.shtml.
Apple is a registered trademark and QuickTime is a trademark of Apple, Inc. in the U.S.A. and/orother countries. Microsoft is a registered trademark and Windows Media is a trademark of MicrosoftCorporation in the U.S.A. and/or other countries. RealAudio, RealNetworks, RealPlayer,RealSystem, RealText, and RealVideo are registered trademarks and RealMedia, RealProxy, andSureStream are trademarks of RealNetworks, Inc. in the U.S.A. and/or other countries.
All other brands or products are trademarks or registered trademarks of their respective holders andshould be treated as such.
NetApp, Inc. is a licensee of the CompactFlash and CF Logo trademarks.
NetApp, Inc. NetCache is certified RealSystem compatible.
177

178 | Data ONTAP 8.1 7-Mode Data Protection Tape Backup and Recovery Guide

How to send your comments
You can help us to improve the quality of our documentation by sending us your feedback.
Your feedback is important in helping us to provide the most accurate and high-quality information.If you have suggestions for improving this document, send us your comments by e-mail to [email protected]. To help us direct your comments to the correct division, include in thesubject line the product name, version, and operating system.
You can also contact us in the following ways:
• NetApp, Inc., 495 East Java Drive, Sunnyvale, CA 94089• Telephone: +1 (408) 822-6000• Fax: +1 (408) 822-4501• Support Telephone: +1 (888) 4-NETAPP
179

180 | Data ONTAP 8.1 7-Mode Data Protection Tape Backup and Recovery Guide
Index/etc/tape_config files 34
A
ACLs (access control lists)excluding from tape restores 120including in tape backups 59
aliases, tapeon multiple storage systems 27
appending backups to tapes 101
B
backup and restore using NDMP servicesdump 68SMTape 127
backupscopying from tape with restore command 110creating snapshot_for_backup file for 59nonconsecutive, contents of 61parallel 86
backups to tape (dump command)benefits of entering at console 88, 89benefits of using Remote Shell 88, 89estimating tapes required for 64rules for excluding files from 96syntax 86unattended 64where to enter the command 88, 89
backups to tape (dump)simultaneous dump 59
C
commandsstorage alias (displays tape aliases) 25storage show (displays tape drive information) 25
compression typespecifying in restores from tape 114
considerationsbefore choosing a tape backup method 15before using the dump command 64
D
DAR functionality 79
data backup to tapeusing the dump engine 59
dump and SMTape backupdifferences 14
dump backupCIFS attributes, not backed up by 60leaving volumes online for 59use of Snapshot copies 59
dump commandbackup levels, defined 89deleting a restartable dump 107maximum tape blocks per tape file 100order of tape devices specified by 62specifying a blocking factor 99specifying a dump path 93specifying backup names 98specifying files and directories 94specifying local tape device names 91specifying tape blocks per tape file 100specifying to omit ACLs 97
dump engineData ONTAP version compatibility 66data that can be restored 66
dump error messagescould not access volume in path:volume_name 159destination qtree is read-only 158destination volume is read-only 158dump context created from NDMP. Cannot restart
dump. 157failed to determine snapshot type 156failed to locate the specified restartable dump 157failed to retrieve saved info for the restartable
dump. 158IB restore in progress 158invalid inode specified on restart 158invalid restart context. Cannot restart dump. 158invalid/offline volume 156no default tape device list 156no files were created 159unable to locate bitmap files 157unable to locate snapshot 157unable to lock a snapshot needed by dump 156volume is temporarily in a transitional state 157
dump events 140dump restart command (restarts interrupted backup) 106dumpdates file
Index | 181
principles applying to dumpdates file 62, 63purpose 62, 63reasons to update 62, 63
E
emulating a qualified tape drive 38environment variables
ACL_START 68BASE_DATE 68DATA_BLOCK_SIZE 68DEBUG 68DIRECT 68DMP_NAME 68DUMP_DATE 68ENHANCED_DAR_ENABLED 68EXCLUDE 68EXTRACT 68EXTRACT_ACL 68FILESYSTEM 68FORCE 68HIST 68IGNORE_CTIME 68IGNORE_QTREES 68LEVEL 68LIST 68LIST_QTREES 68MULTI_SUBTREE_ NAMES 68NDMP_UNICODE_ FH 68NDMP_VERSION 68NO_ACLS 68NON_QUOTA_TREE 68NOWRITE 68RECOVER_FULL_PATH 68RECURSIVE 68SMTAPE_BREAK_MIRROR 127SMTAPE_DELETE_SNAPSHOT 127SMTAPE_SNAPSHOT_NAME 127UPDATE 68uses 56
error messages related to, example 36event log files
effect of takeover mode on 139viewing, reasons for 139
event log messagesdump and restore
event field 139format
dump and restore 139SMTape 143
identifier fielddump and restore 139
job_id fieldSMTape 143
SMTapeevent field 143vol_path field 143
start and stop logging events 140timestamp field
dump and restore 139SMTape 143
type fielddump and restore 139
event loggingenabling or disabling 146
examplesevent log
dump 140restore 141SMTape backup 144SMTape restore 145
examples of ndmpcopy commandmigrating data from a source path on a remote host
to a destination path on another remotehost 83
migrating data from a source path on remote host toa destination path on the local storagesystem 83
migrating data from a source path to a differentdestination path on a remote host 83
migrating data from a source path to a differentdestination path on the same storagesystem 83
overwriting the /etc directory during the rootvolume migration 83
F
filesbacking up using dump 60excluding data from backup 96excluding from dump command 96
I
image header of a tapedisplay 130
increment chains, of backups 61initiate a tape backup
how to 14
182 | Data ONTAP 8.1 7-Mode Data Protection Tape Backup and Recovery Guide
inodesignoring limits when restoring files 118
L
levels of backups 89log files
for backup and restore events 139LUN (logical unit number) 23
M
manage NDMPhow to 45
maximum number of simultaneous tape devices 20mt command syntax 30
N
NDMPadvantages of 41considerations 54copying with local tool (ndmpcopy) 80defined 41disabling preferred network interface 47displaying file history performance 85enabling or disabling service (ndmpd on|off) 45firewall policy 54killing sessions (ndmpd kill command) 50ndmpcopy command 54options 51preparing a storage system for basic management
55range of ports for data connections, designating 46session information
displaying detailed status (ndmpd probe) 48displaying status (ndmpd status command) 48
setting preferred network interface 46showing max version supported (ndmpd version
command) 50tape backup topologies
Storage system-to-data server-to-tape 53Storage system-to-local-tape 53Storage system-to-network attached tape
library 53Storage system-to-tape attached to another
storage system 53tape devices used with 54, 55using with tape libraries 54, 55
version, need to specify 50NDMP commands
ndmp on 45ndmpcopy (uses local copy tool) 80ndmpd kill (terminates NDMP session) 50ndmpd on|off (enabling or disabling service) 45ndmpd probe (displays detailed status) 48ndmpd status (displays status) 48ndmpd version (shows max version supported) 50
NDMP error messagescannot generate NDMP password 152could not obtain vol ref for Volume volume_name
153error:Unable to retrieve session information 152message from Read Socket:error_string 151message from Write Direct:error_string 151ndmpd invalid version number:version_number
152ndmpd session session_ID not active. 152network communication error 151no such user user_name 152read Socket received EOF 151the specified operation could not be completed as
the volume is moving 152ndmpcopy command
examples 83ndmpcopy error messages
CONNECT:Connection refused 155error getting local hostname 155invalid name. Destination filer name does not
resolve to the specified address mode 156invalid name. Source filer name does not resolve to
the specified address mode 155ndmpcopy:Authentication failed for destination 154ndmpcopy:Authentication failed for source 154ndmpcopy:Client authentication request failed 153ndmpcopy:Connection setup for transfer failed 155ndmpcopy:Error in getting extension list 154ndmpcopy:Error opening NDMP connection 153ndmpcopy:Failed to start dump on source 154ndmpcopy:Failed to start restore on destination 154ndmpcopy:Socket connection to host_name failed
153
O
optionsbackup.log.enable (turns event logging on or off)
146concurrent operations
Index | 183
volume SnapMirror and SMTape backupenabling or disabling 137
ndmp.preferred_interface (sets preferred network )46
ndmpd.data_port_range 46ndmpd.offset_map.enable 79vsm.smtape.concurrent.cascade.support 137
P
physical path names (PPNs)format 23
Q
qtreesexcluding data from backup 95omitting data from dump command 95
qualified tape drives, defined 34
R
remote hosts 18Remote Shell
using to display table of contents for restores fromtape 112
restartable backupsdeleting automatically 107qualifications 65
restoreincremental backups 110
restore commanddisk space required for 67, 68information required for using 67, 68options 108restoring individual files 111specifying a full restore 112specifying a resume restore 113specifying a single tape file on a multifile tape 115specifying a test restore 121specifying automatic confirmations 119specifying no qtree information 120specifying table-of-contents restore 113specifying tape devices 114specifying the blocking factor 117specifying to exclude ACLs 120specifying to ignore inode limitations 118syntax 107types of restores 107
using with Remote Shell 109restore command, executing 110restore events 141restoring data from tapes 66rewind type, specifying for tape devices 18rules
for restore command 107for specifying a resume restore 113
S
SMTapeaborting a backup or restore job 132backup and restore using CLI commands 128backup to tape using smtape backup command 128continuing a backup or restore 133displaying the status of a backup or restore
operation 133features and limitations 126removing the snapmirror status entry
after a backup operation 135after a restore operation 136
restoring data from tape 131what is 125
SMTape backuphow it works 125
smtape commandssmtape abort 132smtape backup 128smtape continue 133smtape restore 131smtape restore -h 130smtape status 133
SMTape error messagesaborting:Destination volume, volume_name, is a
clone 164aborting:Destination volume, volume_name, is too
small 164aborting:Source has 32-bit format and destination
has 64-bit format 164already read volume_name tape_number 163bad block in read stream. VBN = VBN_number,
max_VBN = max_VBN_number 168block for VBN VBN_number failed checksum
verification, aborting the current transferon volume volume_name 169
cannot init input, aborting 166chunk format not supported 172chunks out of order 163destination is not an aggregate. Aborting 166
184 | Data ONTAP 8.1 7-Mode Data Protection Tape Backup and Recovery Guide
duplicate VBN VBN_number received for volumevolume_name, aborting transfer 168
failed to access the named snapshot 162Failed to allocate memory 161failed to create job UUID 161failed to create snapshot 162failed to delete snapshot 163failed to delete softlock 163failed to find snapshot 162failed to get data buffer 161failed to get latest snapshot 170failed to initialize restore stream 171failed to initialize tape 170failed to load new tape 170failed to lock snapshot 162failed to read backup image 171failed to softlock qtree snapshots 162image header missing or corrupted 163incompatible SnapMirror or copy source Version.
Aborting 165internal assertion 159invalid backup image checksum 172invalid backup image magic number 171invalid checksum for the chunk descriptor 167Invalid checksum found for one of the data block,
where VBN number is VBN_number 169invalid contents in destination volume geometry
string volume_geometry_string, aborting166
invalid input tape 161invalid source path:/vol/newvol/ 172invalid volume path 160job aborted due to shutdown 159job aborted due to Snapshot autodelete 160job not found 159language setting for the Snapshot is not found 170mismatch in backup level number 172mismatch in backup set ID 164mismatch in backup time stamp 172received VBN header with invalid checksum
error_string, aborting transfer on volumevolume_name 168
remote tape not supported 170source is not a hybrid aggregate. Aborting 167source is not an aggregate. Aborting 167source volume is a flexible volume. Aborting 166source volume is not a flexible volume. Aborting
166
source volume size is greater than maximumsupported SIS volume size on thisplatform. Aborting 165
tape is currently in use by other operations 161tapes out of order 163too many active jobs 161too many active transfers at once, aborting 165transfers from volume volume_name are
temporarily disabled 165UNIX style RMT tape drive is not supported 160volume is currently in use by other operations 160volume is currently under migration 170volume not restricted 160volume offline 160volume read-only 172
SMTape eventsCLI backup and restore 143backup events 144restore events 145
SnapMirror status entrieshow to handle 134removing entries
after a backup 135after a restore 136
storage (aliasing) commandsstorage alias (assigns tape alias) 26storage unalias (removes tape alias) 27
storage systemsadding Fiber Channel-attached drives dynamically
28displaying information about tape drive
connections to 29subtrees, defined 93sysconfig -m command (shows information about tape
medium changers) 29sysconfig -v command (shows tape drive connections to
storage system) 29
T
tape aliasesdefinition 22
tape backup and restore error messagesalready at the end of tape 150could not initialize media 148duplicated tape drive (tape_drive) specified in the
tape argument list 147invalid tape drive tape_drive in tape argument list
147media error on tape read 149
Index | 185
media error on tape write 148resource limitation:no available thread 147tape read error 150tape record size is too smal 150tape record size must be in the range between 4KB
and 256KB 150tape record size should be block_size1 and not
block_size2 150tape reservation preempted 148tape write error 149tape write failed 149tape write failed - new tape encountered media
error 149tape write failed - new tape is already at the end of
media 149tape write failed - new tape is broken or write
protected 149too many concurrent backups running 148
tape configuration fileshow the storage system uses 36what are 35
tape deviceslocal, defined 17on remote Solaris systems 17remote, defined 17specifying compression type of 18what are 17
tape drivesin tape libraries, listing qualified 34nonqualified
displaying information 37
using 37showing status (mt -status) 34tape medium changers, displaying information
about 29unloading tape after rewind (mt -offline) 33
tape librariesshowing names assigned to 55
tape reservationswhat are 39
tape restoresdisplaying a table of contents (files) 112displaying detailed status output 117running a test restore 121specifying a restore destination 116specifying automatic confirmations 119specifying tape devices 114
tape seeding 126types of tape backup 13
V
volume geometry of a traditional volumedisplay 130smtape commands
smtape restore -g 130
W
worldwide names (WWNs) 24
186 | Data ONTAP 8.1 7-Mode Data Protection Tape Backup and Recovery Guide