Embed Size (px)
Citation preview
DESIGN ANDTECHNOLOGY IN THEPRIMARY SCHOOL
The inclusion of technology among the National Curriculum foundation subjects isan exciting but at the same time daunting challenge for primary teachers. Thisseries of case-studies shows how teachers across the primary age-range have putdesign and technology into practice as a focus for their topic work. Through theseexamples Hind Makiya and Margaret Rogers show what is meant by design andtechnology in the primary school and how practical problem-solving activities canbe used to fulfil the requirements of the National Curriculum across several subjects.Useful appendices summarize the technology requirements of the National Cur-riculum and give extra guidance in common areas of difficulty, such as the introduc-tion of electricity and the use of Technical Lego.
Hind Makiya is a technology inspector for Lewisham LEA. She has beeen in-volved in design and technology education as a teacher in secondary schools and asan advisory teacher for primary schools in Haringey.Margaret Rogers is a lecturer in design and technology and art professionalstudies at Goldsmith’s College, University of London.

Subjects in the Primary SchoolSeries editor: Professor John Eggleston
English in the Primary School Tricia EvansGeography in the Primary School John BaleSciencein the Primary School Yvonne GarsonMathematics in the Primary School Richard R. SkempArt in the Primary School John Lancaster
The present trend in English primary education is to have teachers who are subjectspecialists as well as general class teachers. The books in this series are intended tosupport this specialist approach. Other volumes cover Art, Geography, English,Mathematics and Science, and a volume on History is forthcoming.
DESIGN ANDTECHNOLOGY INTHE PRIMARYSCHOOL
CASE STUDIES FORTEACHERS
HIND MAKIYA ANDMARGARET ROGERS
London and New York
First published 1992by Routledge11 New Fetter Lane, London EC4P 4EE
Simultaneously published in the USA and Canadaby Routledge29 West 35th Street, New York, NY 10001
This edition published in the Taylor & Francis e-Library, 2001.
© 1992 Hind Makiya and Margaret Rogers
All rights reserved. No part of this book may be reprinted or reproduced orutilized in any form or by any electronic, mechanical, or other means, nowknown or hereafter invented, including photocopying and recording, or in anyinformation storage and retrieval system, without permission in writing fromthe publishers.
British Library Cataloguing in Publication DataA catalogue record for this book is available from the British Library.
ISBN 0–415–08089–4 (Print Edition)0–415–03240–7 pbk
Library of Congress Cataloging-in-Publication Data
Makitya, Hind, 1952–Design and technology in the primary school/Hind Makiya and Margaret
Rogers.p. cm.
Includes bibliographical references and index.ISBN 0–415–08089–4 (Print Edition). – – ISBN 0–415–03240–7 (pbk.)1. Technology—Study and Teaching (Elementary) —Great Britain.
I. Rogers. Margaret, 1945– . II. Title.T107.M34 1992
372.3′58′0941—dc20 91–48095 CIP
ISBN 0-203-03598-4 Master e-book ISBNISBN 0-203-19341-5 (Glassbook Format)
v
Contents
Plates viiFigures viiiAcknowledgements ix
1 Design and technology in the primary curriculum 1What are design and technology activities? 2Where do design and technology activities fit into the
primary curriculum, and what do they offer pupils? 3Is there a place for teaching design and technology across
the curriculum in the National Curriculum? 9What is the gender dimension of design and technology? 10Where is the cultural dimension of design and technology? 12The potential of design and technology in the primary
curriculum 14
2 The early years 16Topic: ‘Ourselves’ 17Project 1: making masks 17Project 2: making puppets 21Project 3: where we live 22Summary of the three projects 23Other infant work 25
3 Starting in the classroom 28Topic: ‘Farms’ 29Topic: The two dragons 32Topic: ‘Dragons’ 33Topic: Chinese New Year 37
4 Links with mathematics 45Topic: ‘Masks’: 45Topic: ‘The environment’; measurements and scaling 53
vi
Contents
5 Science and technology 57Topic: ‘Mechanical toys’ 61Topic: ‘The transport problem’ 67Topic: ‘Water’ 72
6 Links with information technology 78Topic: ‘The environment’ 80Topic: ‘Myths and legends’ 85Topic: ‘Robots’ 87
7 Whole school development 90Design and technology as a focus for language work 91Individual classroom topic plans of activities 97Design and technology as a focus for curriculum
development 109
8 Topic planning 114
Conclusion 130
Appendix 132Resources 132
References 146Index 148
vii
Plates
1 The buggy 52 A helping hand builds confidence in using tools 183 Masks made by Reception pupils 194 Map made by Reception pupils showing each child’s
home 24
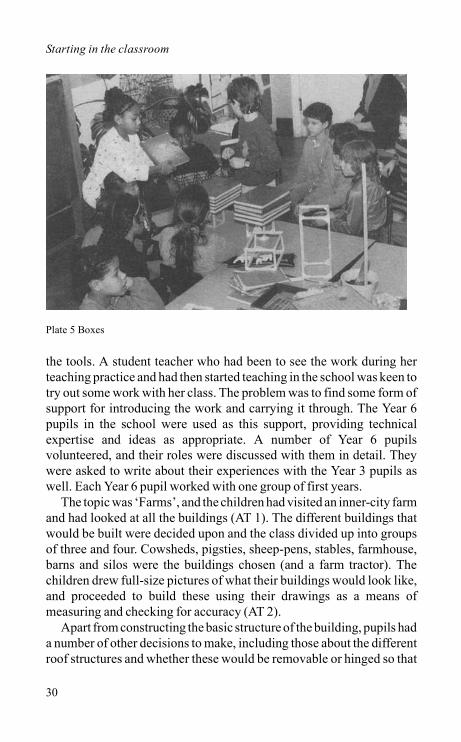
5 Boxes 306 Drawings of tools 407 Dragons 428 Making masks 479 Robot masks 52
10 (a) Panda 64(b) Birds 64(c) Animal with young 65
11 Testing boats in water 7312 Soldering connections 8213 A nine-headed hydra 86
viii
Figures
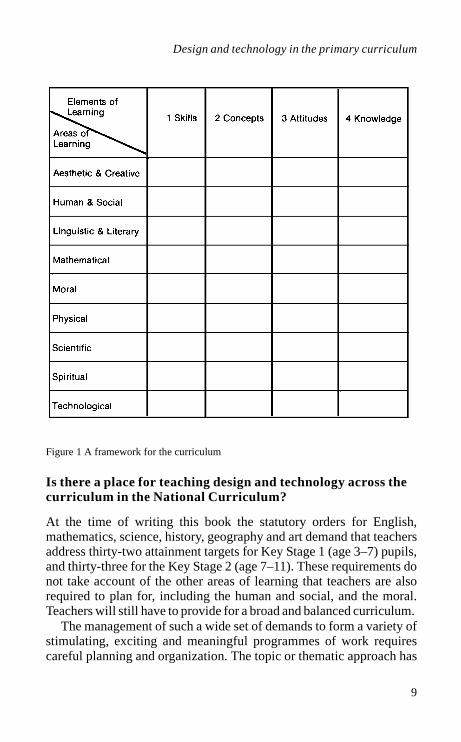
1 A framework for the curriculum 92 Possible applications of the Jinks box 943 Common activities throughout the school 954 Breakdown of classroom activities planned for a topic
‘Our town’ 99
5 Breakdown of classroom activities planned for a topic on ‘Growth’
101
6 Breakdown of classroom activities planned for a topic on ‘Theatres’
102
7 Breakdown of classroom activities planned for a topic on ‘Colour’
104
8 Breakdown of classroom activities planned for a topic on ‘Machines’
106
9 Breakdown of classroom activities planned for a topic on ‘Boxes’
107
10 Brainstorming of ideas 11611 Outline of scheme of work (masks) 11812 Breakdown of curriculum areas from scheme of work
(masks) 119
13 School strategy for topic planning 12114 Topic planning grid 12215 An example of a curriculum analysis 12416 Monitoring grid 12717 Aspects of different materials: a sample chart 13718 Activity sheet: starting points for mechanical paper
engineering projects 140
19 Activity sheet: introduction to electrical circuits 14120 Activity sheet: pneumatics and hydraulics 142
ix
Acknowledgements
Our thanks go to: Keith Wheeldon, HMI, formerly Art and CDT Adviserfor Haringey, for making all the work described possible and forsupporting us in the process of writing this book; John Eggleston, SeriesEditor, for giving us the opportunity to record our experiences andthoughts in this form, and for his patience and help in seeing it throughto the end; Helen Fletcher, Martin Grant and Jacky Plaster, who havegiven so freely of their time, thoughts and ideas; Margaret Shaw, SueToogood and Christine Watson for introducing Hind Makiya to the verybest examples of good primary practice in their own classrooms;Jeannette Campbell and Peter Clarke, who have worked closely withHind Makiya in realizing ideas and developing them further; AndyLambert (IT Inspector in Haringey), Richard Martin (IT AdvisoryTeacher in Haringey) and Alan Vallis, for help in the production of someof the illustrations in the book; Alan Vallis and Joel Xhaard, for theirpatience and support throughout; and all teachers and headteachers,named and unnamed, who have worked with us in the last four years –this book would not be here without them.
Hind MakiyaMargaret Rogers

1
1
Design and technology in the primary curriculum
The incorporation of design and technology in the National Curriculumis one of the most exciting developments in primary education in recentyears. Pupils thrive on the types of activities that are involved, and theimpact of this involvement and excitement is quick to reach the home,as a parent commented when a school organized a ‘Design andTechnology Workshop Evening’ for parents: ‘Sharon never talks aboutwhat she does in school – now all I hear is Design and Technology thisand Design and Technology that. Do they do anything else in school, andwhat is this Design and Technology?’ In fact, primary schools have beeninvolving their pupils in design and technology activities for a long time.However, there is a need to make these activities more explicit and to co-ordinate them so that they can be used more effectively to draw outdifferent curricular areas. This factor, together with the excitementpupils feel through engaging in design and technology activities, leavesus in no doubt that the subject has to be placed more centrally in teachers’plans of work. One of the main aims of this book is to demonstrate howdesign and technology activity can be used to draw out the other areas ofthe curriculum.
The introduction of new tools, materials and areas of technology andthe need for teachers to familiarize themselves with these whilstengaging in practical problem-solving activities are paramount.However, whilst pupils are excited by the work that is developing inschools, many teachers are worried about their own training andconfidence to handle the skills and concepts they associate with the area.We hope this book will both provide teachers with a variety ofsuggestions for organizing the classroom, including different methodsof introducing the work, and stimulate them to develop a wider range ofpossibilities than those outlined in the case-studies.
Design and technology in the primary curriculum
2
Before describing the work in this book, we feel it is important to raisea number of questions and issues that teachers need to consider whenthey are involved in work described as ‘design and technological’ innature.
• What are design and technology activities? • Where do design and technology activities fit into the primary
curriculum and what do they offer pupils? • Is there a place for teaching design and technology across the
curriculum in the National Curriculum? • What is the gender dimension of design and technology? • Where is the cultural dimension of design and technology?
What are design and technology activities?
In the Interim Report of the National Curriculum Design andTechnology Working Group (1988) it is argued that design andtechnology:
Is always purposeful (i.e. developed in response to perceived needs or opportunities, as opposed to being undertaken for its own sake), takes place within a context of specific constraints (e.g. deadlines, cash limits, ergonomic and environmental requirements as opposed to Blue-sky research) and depends upon value judgments at almost every stage.
(p. 4, para.1.11)
Design and technology activity is seen as the process of satisfying needsby solving practical problems that involve pupils in working in a varietyof materials. These materials include clay, paint, wood, metal, plastics,fabrics, leather and many others.
In this book we concentrate on a narrower range of materials,processes and techniques, because teachers are concerned about howthey can be used in classrooms and across the age ranges. We alsoinclude concepts, such as mechanical movements, electricity, energyand control, that many primary teachers have not been familiar with. Allthe projects described in the book were done by classroom teachersbefore the publication of any of the National Curriculum documents ondesign and technology. We believe, however, that the methods ofworking and the philosophy behind them are consistent with all the
Design and technology in the primary curriculum
3
attainment targets and statutory orders of the design and technologyprofile component (i.e. profile component 1: design and technology. SeeFigure 17).
Where do design and technology activities fit into theprimary curriculum and what do they offer pupils?
Design and technology is regarded as a foundation subject in theNational Curriculum. Its inclusion into every primary classroom is nowstatutory. The technology document has been published, indicatingattainment targets and appropriate programmes of study for design andtechnology at different levels. The emphasis of the report is on theprocesses particular to design and technology activities: namely thedesign processes which involve solving practical problems withincontexts that have meaning and relevance to pupils, and according totheir abilities and experiences. The phrase ‘problem solving’ not onlyhas several meanings, it is becoming an over-used expression and, inmany instances, it is no longer clear what type of problem solving onerefers to. In this book we hope to distinguish between three types ofproblem solving:
Puzzle problems
These refer to problems where teacher and children are aware that aspecific answer is required and the teacher looks at ways to arrive at thecorrect answers. These are often referred to as ‘closed problems’ and theprocess is often immaterial. Examples can be seen in ‘sums’ inarithmetic, or punctuation exercises in English, or such questions as‘what is a square?’, ‘what is the name of this tool?’ These problems are‘fact’-based and are used by teachers to check the understanding ofpupils in a particular area. Many tests, such as comprehension tests andmathematics tests, are examples of these. The onus is on the pupil toanswer the questions correctly. The process by which the pupil has comeup with an answer is often not important.
Technical and investigative problems
In this situation, although there may be a series of solutions, the criteriafor judging these are objective enough for participants to realize that
Design and technology in the primary curriculum
4
some solutions are better than others. However, the process by whichpupils have solved the problems is paramount. These problems tend tobe subject-specific, i.e. mathematical investigations, scienceinvestigation including the design of fair tests, and technical problems.One example is the investigation into which materials float or sink(chapter 5); another, calculating the amount of wood used in aconstruction (chapters 2 and 7).
The processes by which these problems are ‘solved’ are veryimportant. Science method, which accounts for 50 per cent of theassessment at the age of eleven (Science AT 1), is concerned with theskills of hypothesis, carry out tests and monitoring and recordingmethods leading to a particular evaluative statement– skills which areessential to the development of scientific rigour, as well as the fairnessof the tests.
A mathematical investigation, such as finding the area of the schoolplayground, may require pupils to discuss this in small groups, devise amethod and then apply the method to find the result, either individuallyor in partnership groups. The decisions about how to proceed with themeasurements are of greatest interest in analysing the pupils’understanding of the particular mathematical concepts. The actualmeasuring and following recording enables the teacher to monitorapplication skills of measurement, pupils’ use of computation skills,estimation and concepts of accuracy.
Building the fastest moving buggy to cross a particular distance is anexample of a technical problem, where the criteria are also specific andit is possible to judge and evaluate the most successful solution.
For the teacher, it is possible when devising these problems to plancarefully a series of activities that enable particular attainment targets tobe addressed across the different areas of the curriculum.
Open-ended problems
These are also referred to as ‘design problems’. They are morecomplex. The criteria for evaluating the work involve objective criteria(such as: how does it serve a particular function? how well is it made?),as well as subjective criteria (how does it look? is it appropriate for thatparticular need? how ingenious or ‘appropriate’ is the solution?) Itopens up a debate about what is ‘good’ design and what is ‘bad’

Design and technology in the primary curriculum
5
design, about who makes these value judgements and what these valuesare based on.
The pupils will be involved in a process of compromise between thesesubjective and objective criteria. The process of compromise anddecision making becomes important in discussing and evaluating the
Plate 1 The buggy
Design and technology in the primary curriculum
6
solutions. The evaluation process is more complex, and it is not alwaysclear which is the ‘best’ solution. Open-ended problems have many‘good’ solutions. They also reflect the reality of many daily problems,as well as those faced by designers, architects and economists. Theyraise issues of value, choice, and social, cultural and ethical decisionmaking. They are particulary useful in raising debate amongst pupils aspart of the process of resolving differences in perception. The emphaseson making value judgements and helping pupils build a sense ofpersonal aesthetic and design philosophy have been considered ascentral to these types of problems.
A problem set in a social context can inspire pupils and give them agreater sense of purpose and reason. As a result, the work involvingtechnology, science, maths and language that has been planned andlinked to the project becomes integral to solving the problem.
The differentiation between these three types of problem solving cannotbe seen as rigid. They are described to highlight many issues that arecentral to design and technology activity and to show where design andtechnology fits into the primary curriculum. Design and technology ismore than a distinct subject area in the curriculum (such as mathematicsor science). The requirements for design and technology requireteachers to involve their pupils in situations that enable them to engagein the following:
• solving problems with some form of meaning to the pupils • responding to a variety of needs • thinking divergently and convergently • making use of resources to solve the problems • manipulating and using a variety of materials and media • exchanging ideas • evaluating ideas and products
The responsibility for teachers is to devise activities and makeopportunities for the pupils to develop skills of divergent thinking aswell as convergent thinking, and to help pupils develop appropriatecommunication skills; for example three-dimensional drawing,speaking to a group or responding to ideas. These are not innate skills,but ones that require consideration and planning. The pupils’ love of the
Design and technology in the primary curriculum
7
work is clearly linked to the practical nature of it, and the opportunitiespupils are given to think and solve problems with some purpose behindthem. The purpose and setting of the problems can never beunderestimated. They provide pupils with the meaning and incentive forthe work. They also have cultural and gender implications.
In primary schools, these problems are set in the context of topicwork. The teacher or pupil, according to circumstances, focuses on anaspect of the topic and sets the scenario for a design and technologyactivity or problem. This scenario provides the ‘context’ for theproblem. The planning, resourcing and build-up of this context isessential for the following success of the work. It also enables the teacherto build on pupils’ experiences and widen them. The following are someexamples of contexts picked out by some teachers:
Example 1
‘A number of small creatures have lost their homes as a result of thestorms. They need to find new ones that will be comfortable and safefrom foxes and squirrels that could attack them. Many treestumpsremain after the storm. Use these stumps to devise a home for these tinycreatures. You must work out a way for them to get up into their homes,as well as coming down, and being safe from predators.’
The pupils had to build part trees with papier mâché techniques. Thevarious results reflected the different concerns of the pupils. There werea number of ingenious and very different solutions, appropriate to theproblem and the particular creature the pupils had developed (this waspart of the problem to solve). Through this project, the pupils hadproduced environments (the home) as well as designing systems (to getup and down).
Example 2
Making pop-up cards using different paper engineering methodsprovided the focus for design and technology activity within the topic offestivals. Pupils were asked to bring in the cards, purchased in high streetshops, that they received for various festivals. The lack of appropriatecards for many different festivals and the mono-cultural nature of the
Design and technology in the primary curriculum
8
cards brought in were highlighted as issues for discussion. Pupils wereasked to choose a festival or celebratory event and design and make anappropriate card for a chosen friend.
In National Curriculum terms, the context was the community as wellas business and industry. The pupils devised different systems for 2-Dmovements and produced artefacts in the form of finished cards.
Example 3
The topic was hats, and the teacher wished to introduce a further themeto the hats that pupils would be designing and making. She decided tochoose ‘movement’. Pupils were asked to design a hat that wouldincorporate either a hand-operated mechanical movement, or anelectrical or pneumatic movement.
The examples listed above are also good examples of open-endedproblems. Teachers may be hesitant about embarking on these open-ended problems, because of the fear that they may encounter questionsfrom the pupils that they cannot answer or resolve. In our experienceteachers have engaged in more complex problem solving as theirconfidence grows with the use of tools and knowledge of materials andprocesses. As there are no ‘wrong’ answers but many possible solutions,the challenge is as exciting for the teacher as it is for the pupils who aredeveloping and refining their work. One teacher recently described hersituation by saying ‘I have developed the confidence to say to thechildren, “I don’t know. Let us go and find out.” She added, “I also knowmore about where to go to find out.”
The skills, concepts and attitudes that are developed through aninvolvement in open-ended problem-solving activities cannot beunderestimated. The list of elements of learning central to open-endedproblem solving, shown in Figure 1, is offered as an aid to teachersconsidering these activities. It sets out the skills, concepts andknowledge that are required through design and technology activitieswith the attitudes developed as a result of trying out solutions – forexample, perserverance and self-confidence. The chart is by no meansexhaustive, but it has been used by teachers to plan for progression inskills and concepts in order to work with open-ended problems and isbased on the HMI framework for the curriculum 5–16.
Design and technology in the primary curriculum
9
Is there a place for teaching design and technology across the curriculum in the National Curriculum?
At the time of writing this book the statutory orders for English,mathematics, science, history, geography and art demand that teachersaddress thirty-two attainment targets for Key Stage 1 (age 3–7) pupils,and thirty-three for the Key Stage 2 (age 7–11). These requirements donot take account of the other areas of learning that teachers are alsorequired to plan for, including the human and social, and the moral.Teachers will still have to provide for a broad and balanced curriculum.
The management of such a wide set of demands to form a variety ofstimulating, exciting and meaningful programmes of work requirescareful planning and organization. The topic or thematic approach has
Figure 1 A framework for the curriculum
Design and technology in the primary curriculum
10
been used as a means of showing how knowledge can be interrelated. Weargue that this approach is even more important now, so that teachers canplan to address the wide scope of attainment targets by the careful choiceof activities that can bring together seemingly diverse areas ofknowledge. However, this planning process has to be structured andrecorded in a manner that will enable parents, headteachers and othermembers of staff to understand the scope covered, so that there is someform of monitoring progression and continuity in the school.
All the case-studies described in this book have been planned as partof a topic. Teachers have devised projects for pupils to design and make.Around the projects, they have devised a series of activities, linked to thework, and have used these as a means of addressing different curricularareas. In chapter 8, we will return to the issue of topic planning and offerteachers a model for planning work that may be used and adapted to suittheir needs. We will show how teachers, through skilful intervention andthe provision of appropriate starting points for the learning process, canuse their considerable expertise in devising projects to introduce designand technology activity to their pupils.
What is the gender dimension of design and technology?
Gender becomes an issue every time the pupils pick up tools, switch onthe computer or reach for the Lego, and at whatever stage the pupils arein their primary education. Design and technology in primary schools isproviding both educationists in general and the design and technologycommunity with an exciting challenge. Girls are proving their abilitiesand their love of the work. The primary workforce, with a large majorityof women, is challenging the traditional stereotypes associated withdesign and technology and providing pupils, and girls in particular, withlong-needed role models. Pupils, of both sexes, are using tools at an everearlier age and engaging in technological activity that would formerlyhave been introduced to 13-, 14-, and 15-year-old pupils.
There is much research carried out about the different notions oftechnology and the gender differences between these. It is not ourintention to discuss these here. However, it may be useful to raise someissues that are particularly relevant to the types of activities that teacherswould consider in their classrooms and the possible gender implicationsof these.
Design and technology in the primary curriculum
11
First, access to tools, materials, construction kits and computers, aswell as opportunities to explain projects and offer suggestions, are twovery important issues for teachers to consider. Whilst traditional rolesare being challenged in the classroom, pupils come to school withdifferent past experiences and role models (they may or may not haveLego or tool kits at home). It is important that experiences are recordedand issues of access discussed and monitored. Most of the workdescribed in this book has been carried out with small groups of pupilsworking together. Teachers have choices to make when grouping pupils.It may be possible to have girls working together, so that there is lesslikelihood of ‘tool hogging’. However, experience has also shown thatit is important to change groups so that girls work with boys and actuallyconfront any issues arising from the sharing of tools or lack ofexperience of working together.
Second, the choice of project and types of problems we ask girls andboys to engage in are very important. These can be used to challengestereotypes and highlight gender issues. Their careful choice can alsobroaden pupils’ perceptions of what is technology. Teachers can askthemselves a series of questions at the start of their classroom planningprocess with regard to the types of situations they make available to theirpupils, and what they hope to draw out from them:
1 Why am I choosing this particular problem/investigation? Does itraise any particular gender bias? Are there any alternatives, equallysuitable and more widely appealing? Example: it is possible toengage pupils in finding out about wheeled vehicles without havingto make cars. The examples of the wheeled dragons in chapter 3, thecarnival floats, machinery or roundabouts are some of thealternatives.
2 Can I use the work to tackle positively issues of gender? Example:puppet plays provide pupils with the opportunity to act out theirattitudes and experiences and confront stereotypical images oftenraised in fairy tales.
3 Can I use the work with the tools to raise questions, such as, who usestools? what do we mean by tools?
4 How can the teacher discuss what pupils associate with ‘technology’and broaden these notions? Example: what would constructing adress pattern and making the garment be called?
Design and technology in the primary curriculum
12
Third, research has shown that girls are more interested in tackling open-ended problems where there are value judgments to be made anddifferent needs to be responded to. (Grant and Harding 1984). Projectssuch as the fastest/slowest buggy leave many pupils at the back of theclassroom unenthused by the seemingly arbitrary challenge. Onceagain, the choice of work and an identified sense of purpose to theproject are very important considerations for the teacher.
Finally, primary women teachers also have a duty and responsibilityto ensure that they participate fully in this aspect of the curriculum andnot leave the work to keen male colleagues. There are many national andlocal INSET courses available across the LEAs, and women teachersneed to insist on attending these so that they are able to build theconfidence of all colleagues within the school. The importance ofavoiding stereotyping and tackling sexist prejudices and practicescannot be overstated.
Where is the cultural dimension of design and technology?
The need to involve more girls in all aspects of technological educationhas been receiving greater recognition on a national scale. It is also ofparamount importance that technological education at primary andsecondary levels should address the concerns of all pupils and that thiseducation reflects the multi-cultural contributions to design andtechnological achievement across the world.
The issues we address above should be regarded as important in termsof race as they are in terms of gender, for it may be feasible to developwork that is anti-sexist in nature whilst being racist, if it is based on abiased cultural perspective. In the National Curriculum Design andTechnology Working Group’s Proposals, Design and Technology forages 5 to 16 it is stated:
It is important that teachers take a positive approach to a mixed range of cultural backgrounds in their pupils, rather than an approach which concentrates on the problems that some pupils may have in coping with, for example, the language of design and technology. The variety of cultural backgrounds of pupils can broaden the insight they all have into the range of appropriate, alternative solutions to perceived problems. There are rich
Design and technology in the primary curriculum
13
opportunities here to demonstrate that no one culture has a monopoly of achievements in design and technology.
(p. 7, para. 1.46)
Similar questions can be asked about the relevance of the work, andwhether it can be used as a focus for challenging stereotypes. Otherquestions that are particularly relevant in this instance would include:Who decides what is good design? How can we develop in pupils a senseof aesthetic awareness without imposing our own values of ‘gooddesign’?
Technological development and innovation has a major impact on allthe world today. This innovation can change a cultural identity, and suchchanges are open to debate with regard to their positive and negativeeffects. It is important to engage pupils in such issues through carefulplanning and preparation. For example, recent debates about modernarchitecture in Britain can be paralleled in the Middle East: how can wedevelop a changing architecture that is based on some understanding ofthe historical background, geographic circumstances and culturalheritage of a particular area?
Much of our modern art and design stems from African and Asianinspiration. The source of designers’ influences need to be highlightedto pupils, since they widen their perspectives. The wood and highlypolished stainless steel sculptures of Brancusi are directly influenced byearly African tribal sculpture. It is possible to draw many examples ofinspiration from many other countries as further examples. The historyof technological innovation also shows the various technologicalachievements from other cultures. Teachers should question whetherthey are including these aspects in their work.
Since the design and technology profile component has such a strongemphasis on evaluation (AT 4) and identifying and satisfying humanneed (AT 1), and because value judgements are very strong aspects ofboth these areas, it is necessary for teachers to consider how pupils buildthese value judgements and the factors that influence these. Gender andculture are two of these factors. Culture can also include peer culture,and social and economic cultures apart from historic and geographicfactors.
Design and technology in the primary curriculum
14
The potential of design and technology in the primary curriculum
Several issues have been raised in this introductory chapter in the hopeof exciting the reader with the potential and challenge of design andtechnology and in particular its potential in the primary curriculum. Wealso hope they show how much further work needs to be developed inthis area. One of the main objectives of this book will be to demonstrate,through examples of project work, that design and technology activitiesare central to the primary curriculum.We believe that they should be thefocus of the work in the classroom. This will be shown by examples ofthat work.
All the work has been done by classroom teachers with minimalexternal assistance in their classrooms. Many teachers have attended in-service training organized by the local education authority, aimed atdeveloping their confidence to engage in handling a wide range ofmaterials, techniques and a few simple tools.
Case-studies are presented indicating the topic and age of pupils.Experience has shown that pupils can engage in constructional work ata very early age. It is possible to use any of the ideas described anddevelop them for the appropriate year and Key Stage. All the projectsdiscussed in this book use design and technology activities as a focus forthe topic chosen. This has proven very successful, from both pupils’ andteachers’ points of view.
Chapters 2–7 are set out as a series of case-studies, showing workwith pupils in Reception, Key Stage 1 and Key Stage 2, how they areintroduced to tools and ways of organizing the classroom. The projectscan be developed and adapted to different ages, depending on theobjectives of the teacher and the particular circumstances. The levels ofachievement of the Reception class can be seen as inspiration forplanning progression through the infant years. We hope they also raisethe question, ‘If this is what they are able to do at the age of 4–5, whatwill they be able to do by the age of 11 or 12 given continuity andprogression?’ The cross-curricular nature of design-and-make activitiesis also drawn out through a series of case-studies in chapters 4 and 5,where projects have been planned to engage pupils in mathematical andscientific skills and concepts.
The recent rate of change and curriculum development in schools hasmeant teachers are no longer able to concentrate on their own classes, but
Design and technology in the primary curriculum
15
are also part of a wider team. In-service courses, curriculum innovation,and school planning and change become the focus for development.School development and topic planning are looked at in chapters 7 and 8.
In clarifying what design and technology activities are, we havedescribed the three types of problem solving which also demonstratelinks with science and mathematics (technical and investigativeproblems) and make possible the bringing together of science,technology, mathematics and language work to develop pupils’ attitudesand values in open-ended problem solving. We favour the latter becauseof the opportunities offered to tackle gender and cultural issues, whichwe see as central to all the projects described in subsequent chapters. Webegin and end this book with topic planning. The National Curriculumand specific attainment targets for design and technology are referred toin the relevant chapters. The Attainment Targets for the Design andTechnology Capability Profile Component are: � AT1: identifying needs and opportunities � AT2: generating a design proposal � AT3: planning and making � AT4: evaluating whilst Attainment Target 5: information technology, is a crosscurricularactivity and is specifically referred to in chapter 6.
16
2
The early years
Pupils of nursery and lower infant ages come to school with expertise insolving problems, manipulating found objects, finding meanings intheir surroundings and making choices, and with massively enquiringminds. The role of the teacher is to use these design and technologycapabilities and build upon them, as well as introduce them to a varietyof new techniques and skills that will extend and widen theseexperiences.
In this chapter, we focus on examples of work with Key Stage 1pupils. We describe a series of projects undertaken by a Reception classto illustrate ways in which design and technology activities can beorganized with the younger age-ranges and within the context of thetopic ‘Ourselves’. Through a series of planned activities, pupils areintroduced to tools and different working techniques. Readers will beable to see how this project work supports and is supported by other areasof the curriculum, for example language, mathematics and drama.
One of the problems that faced the Design and Technology WorkingGroup was the lack of sufficient recorded evidence of the capabilities of7-year-olds who had been engaged in design and technology activitiesin a systematic manner that had incorporated progression, and who hadstarted at the age of four or five.
We have therefore chosen to focus on the work of a Reception class(4–5-year-olds). Whilst the statutory orders of the National Curriculumwould not apply to the majority of the class for their first two terms atschool, we have shown the potential of the work in terms of attainmenttargets that can be addressed through these activities. The work alsoshows how it is possible to plan for a series of experiences thatincorporate progression and diversity of experience.
The early years
17
Topic: ‘Ourselves’
School: Rokesly Infant School Teachers: Ms Christine Watson and Ms Annie Stotesbury Age-range: Reception (4–5-year-olds)
Aims and objectives
The class teacher had decided to work on the topic ‘Ourselves’throughout the year, in order to record the children’s first year at school.By the end of the year each child would leave with a book aboutthemselves, with examples of work and photographs of themselves atschool.
This description concentrates on the practical parts of the overallclasswork and on a choice of three projects in particular. These havebeen chosen because they show how the teacher had planned for a seriesof objectives to be met through the work:
• introducing pupils to a series of tools and developing their confidencein using them (paint-brushes, saws, vices, abraders, drills, scissors)
• acquainting pupils with different materials, reflecting on where theyare found and what they are called (waste materials, resistentmaterials)
• introducing a number of techniques for working the tools andmaterials, including joining and gluing methods, as well as simplefinishing techniques
• giving the pupils opportunities to plan, make choices and implementthem
• using the activities above as a means of engaging pupils in practicalscience, mathematics, drama and art activities
• using the work as a means for making class reading books
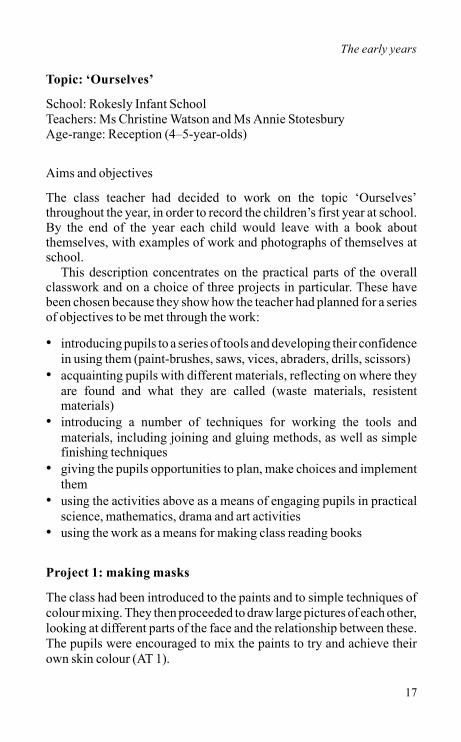
Project 1: making masks
The class had been introduced to the paints and to simple techniques ofcolour mixing. They then proceeded to draw large pictures of each other,looking at different parts of the face and the relationship between these.The pupils were encouraged to mix the paints to try and achieve theirown skin colour (AT 1).
The early years
18
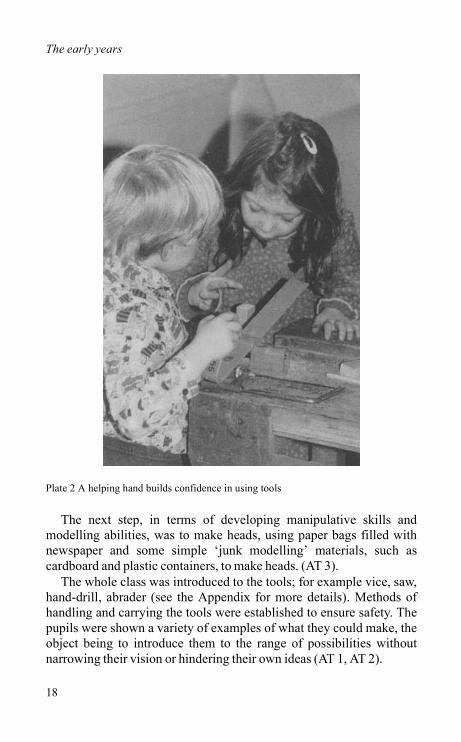
The next step, in terms of developing manipulative skills andmodelling abilities, was to make heads, using paper bags filled withnewspaper and some simple ‘junk modelling’ materials, such ascardboard and plastic containers, to make heads. (AT 3).
The whole class was introduced to the tools; for example vice, saw,hand-drill, abrader (see the Appendix for more details). Methods ofhandling and carrying the tools were established to ensure safety. Thepupils were shown a variety of examples of what they could make, theobject being to introduce them to the range of possibilities withoutnarrowing their vision or hindering their own ideas (AT 1, AT 2).
Plate 2 A helping hand builds confidence in using tools
The early years
19
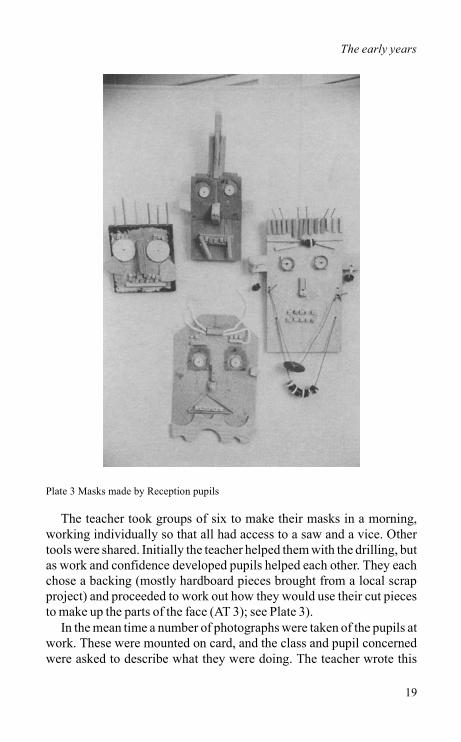
The teacher took groups of six to make their masks in a morning,working individually so that all had access to a saw and a vice. Othertools were shared. Initially the teacher helped them with the drilling, butas work and confidence developed pupils helped each other. They eachchose a backing (mostly hardboard pieces brought from a local scrapproject) and proceeded to work out how they would use their cut piecesto make up the parts of the face (AT 3); see Plate 3).
In the mean time a number of photographs were taken of the pupils atwork. These were mounted on card, and the class and pupil concernedwere asked to describe what they were doing. The teacher wrote this
Plate 3 Masks made by Reception pupils
The early years
20
down. These cards were then laminated and made into a book for generaluse in the classroom. Other simple introductory writing activitiesinvolved the pupils in copying the teacher’s writing of a simplestatement that they had made about their work, or about theirobservational drawings of the masks. These sheets were put into eachpupil’s individual book (AT 3, AT 4).
Year 1 pupils in another school were able further to extend the projectby producing a ‘cutting list’. This is a list in the form of a chart, whichindicates the part or component (e.g. ‘the nose’), the material used andits measurements. Cutting lists are normally made out before making anobject to help in costing the work and clarifying sizes and types ofmaterials. In primary schools, they can be used to help pupils in theclassification of materials as well as measuring. Key Stage 2 pupilscould also carry out costing exercises.
Through this initial collage project, the teacher had introduced theclass and each pupil to the safe use of the tools. They had constructedtwo- and three-dimensional masks using different materials. They hadto plan their simple faces, thereby making choices and decisions. Theyhad to explain why they had used the different pieces, and what theywere (to the teacher and the class). They had engaged in some simplerecording of the work, written, drawn and photographed. Pupils weredesigning and making artefacts. They had reflected on the processes andthey had followed and evaluated their work in a series of ‘show and tell’discussions in the classroom.
All the language attainment targets were addressed in this project andthrough the work of the pupils. They had been involved in making a classbook and building up their own personal book. They were engaged insimple writing exercises, to enable them to draw simple letter shapes andconvey their expressed ideas. They had to work together andindividually. They had to show and explain in their small groups whatthey had done.
In terms of science, they were starting to address the processes ofobservation, planning and recording. Other science attainment targetsthat were being addressed were highlighted through the discussion oncolour pigmentation, the parts of the face, the use and naming of thedifferent materials.
In terms of mathematics, they were introduced to the concepts of twoand three dimensions, as they worked with the paper and paints and then
The early years
21
made three-dimensional masks. When they were cutting their pieces,they were encouraged to cut long and short pieces, as well as pieceswhich were ‘the same as’ others. Simple counting exercises weredevised, based on what they had made, and the classification ofmaterials into different categories was used to highlight differentmathematical areas of shape, number and measurement.
Project 2: making puppets
Now that the pupils had experienced the use of tools, the aim of thesecond project was to introduce a greater element of planning andforecasting. The theme of the project was puppets. A discussion aboutthe parts of the body and the joints in the body helped the pupils to thinkabout knee, elbow and ankle joints. Once again they were shown avariety of simple wooden puppets with different jointing methods: forexample, twisted wire, threading, screw eyes, staples, card and materialhinges. (AT 1, AT 4).
The children used simple shapes found in the mathematics corner(Logi Blocks) to draw the parts of their puppets. The main geometricshapes were highlighted and the pupils drew around these on large sheetsof paper. Then they looked for pieces of wood that would be suitable tomake their shapes. They had to saw and shape these to match their drawnshapes. They could then choose the most suitable method for joiningtheir pieces to make the puppets. The puppets were finally strung up ontwo crossbars, and the children decorated these with a wide variety ofmaterials, applying paints and simple decorative finishes (AT 2, AT 3).
The pupils worked on their puppets individually, but wereencouraged to ask each other questions first. The project took theequivalent of one and a half school days to complete, with groups of sixchildren working together at a time (AT 4).
The teacher’s main concerns in this project, were to observe how thepupils used the tools, given their previous experience, and how theyattempted to mark out pieces that were the same as those they had drawn;to look at the degree of accuracy of each pupil’s work, whilst talking tothem about their work and observing their use of language in terms ofknowledge of the names of materials, tools and the shapes they werecutting. Other areas not included previously were joining techniques for
The early years
22
the different joints of the body, in order to achieve some form ofmovement and control.
Familiarizing the children with basic geometric shapes, as well astrying to reproduce them, were excellent exercises in shape recognitionas well as further development work on the comparative measurementsbuilt up from the previous project. Pupils were using and applyingmathematics. Number work was encouraged through the questionspupils were asked; for example ‘how many pieces of plastic did youuse?’ or ‘how many circle shapes do you have in your puppet?’
The pupils were also encouraged to estimate how many pieces wereused for the teeth in a particular face, and then to check their results bycounting. The different materials used and the classification of these wasa theme throughout the year, and this involved mathematical concepts ofsorting, as well as scientific concepts of understanding and classifyingmaterials and finding out about their properties. In addition to this, thepupils were extending their knowledge of the different parts of the bodyand hypothesizing on how they are connected.
Puppets can be used in a variety of language situations to encouragethe pupils to make their own plays. In this instance the puppet design andmaking activities served as a focus for the drama work and characterbuilding that followed and made use of the pupils’ puppets.
Project 3: where we live
This project describes one of the other activities carried out by the sameclass further on in the year. The class were introduced to a simpleelectricity kit (Middlesex Polytechnic kit). This kit can be used with agroup of pupils (working in twos) to enable them to explore theprinciples of circuits. Success is easily achieved, whilst children areallowed to investigate and develop the circuits, raise hypotheses and testthem out, sharing ideas with each other. The kit is easy to use, and thepupils need not worry about connections. They can try out their ideas andget immediate results. Teachers have used it successfully to introducethe concepts of an electrical circuit, a power source, connectors,switches, conductive and non-conductive materials.
It was important to draw out the scientific knowledge specific toelectrical circuits, as the pupils used the kit. Using this method means a
The early years
23
sharing of information with others. In this case, the class were dividedinto pairs to work together, and a rota was set up for access to theelectricity kit. Sharing and discussing the work and using terminologysuch as ‘circuit’ and ‘battery’ were activities that were highlightedduring group discussion time, when each group reported back. Theywere asked to make predictions before testing and then find out if theirpredictions were right.
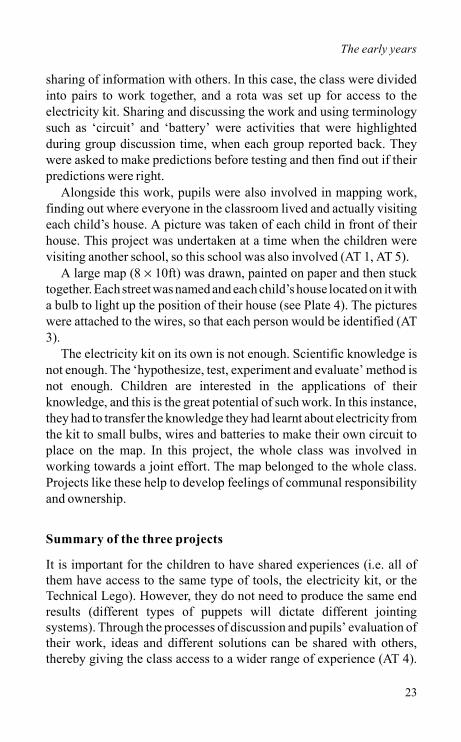
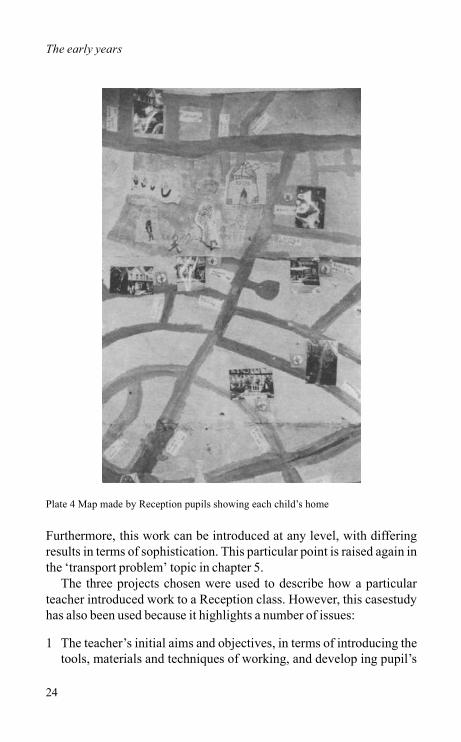
Alongside this work, pupils were also involved in mapping work,finding out where everyone in the classroom lived and actually visitingeach child’s house. A picture was taken of each child in front of theirhouse. This project was undertaken at a time when the children werevisiting another school, so this school was also involved (AT 1, AT 5).
A large map (8 × 10ft) was drawn, painted on paper and then stucktogether. Each street was named and each child’s house located on it witha bulb to light up the position of their house (see Plate 4). The pictureswere attached to the wires, so that each person would be identified (AT3).
The electricity kit on its own is not enough. Scientific knowledge isnot enough. The ‘hypothesize, test, experiment and evaluate’ method isnot enough. Children are interested in the applications of theirknowledge, and this is the great potential of such work. In this instance,they had to transfer the knowledge they had learnt about electricity fromthe kit to small bulbs, wires and batteries to make their own circuit toplace on the map. In this project, the whole class was involved inworking towards a joint effort. The map belonged to the whole class.Projects like these help to develop feelings of communal responsibilityand ownership.
Summary of the three projects
It is important for the children to have shared experiences (i.e. all ofthem have access to the same type of tools, the electricity kit, or theTechnical Lego). However, they do not need to produce the same endresults (different types of puppets will dictate different jointingsystems). Through the processes of discussion and pupils’ evaluation oftheir work, ideas and different solutions can be shared with others,thereby giving the class access to a wider range of experience (AT 4).
The early years
24
Furthermore, this work can be introduced at any level, with differingresults in terms of sophistication. This particular point is raised again inthe ‘transport problem’ topic in chapter 5.
The three projects chosen were used to describe how a particularteacher introduced work to a Reception class. However, this casestudyhas also been used because it highlights a number of issues:
1 The teacher’s initial aims and objectives, in terms of introducing thetools, materials and techniques of working, and develop ing pupil’s
Plate 4 Map made by Reception pupils showing each child’s home
The early years
25
competence in handling these, are all possible with pupils of a veryearly age.
2 We have shown how these projects can be used to satisfy the fourattainment targets in the design and technology profile component.We have also indicated those particular skills and areas listed in thedetailed programmes of study.
3 The importance of linking these activities to the overall topic, so as todraw out as many other curricular areas as possible. The design andtechnology activities and projects can be used as a basis for livelypupil-centred language, science and mathematical activities.However, these activities need to be planned carefully if they are toaddress specific attainment targets in other areas. In this instance, theteacher has carefully located what she wishes to draw out of theproject.
4 The teacher has very carefully looked at the issue of progression.Progression in these projects can be mapped in terms of:
• the use of tools • expanding the range of materials • planning skills • the type and complexity of the projects chosen, which included two-
and three-dimensional work. • using the projects to extend the number of subject areas involved
following the work • organizing and planning activities that develop individual work and
group work, including pairs of pupils, small teams and the wholeclass. The development of group work is done gradually and byencouraging pupils to discuss their constructional techniques witheach other
In this respect, pupils slowly develop an understanding of a particularconcept (e.g. electrical circuits, mapping, shapes, joining methods) bycontinuously engaging in activities that require them to apply skillslearnt and ‘tinker’ with the concept involved.
Other infant work
There are many more ideas that can combine different materials andareas of the curriculum. In the same school, with another class of the
The early years
26
same age-range, every pupil designed and made a symmetri calnecklace, using various materials and shapes. This project was verysuccessful, because it combined aspects of planning and decisionmaking, as well as the task of making a second piece ‘the same as’ thefirst piece. Comparative measurement became a very real problem. Thepupils had to thread their work. They were also involved in looking atsymmetrical and asymmetrical patterns in general.
It is also possible for children to transfer from modelling with the useof construction kits to modelling with found materials from a very earlyage. Kits enable them quickly to build, test and modify without havingto commit themselves to lengthy making processes. When success isassumed, appropriate materials such as wood, card and plastic waste canbe used to construct a permanent model.
In another school, older pupils (Years 1 and 2) used their classroomconstruction kits (Basic Lego, Technical Lego, Stickle Bricks, ReoClick and others) to design and build simple moving toys. They wereasked to work in pairs and jointly decide what they would like to makeand construct it.
Pupils enjoy making models from the kits they are accustomed to.They are confident in handling these and building models to fulfilvarious functions. The kits are easy to use and ideas can be tested outquickly. However, it is also important that the pupils are able to translatethese ideas into their own products, so that they encounter the problemsof adapting, constructing and manipulating materials. When they hadcompleted their toys, they were asked to draw these in detail, so that theycould develop their three-dimensional drawing skills. (For notes on theuse of kits and Lego in particular, see the Appendix).
The pupils were asked to discuss what they thought about theirmodels. Since another group would be doing the same work, theproblem of breaking up these toys was discussed. This provided thepupils with the incentive to realize their ideas in more permanent forms.The next step was to ask them to consider how they would make theirmodels using timber, dowel, wooden wheels, corks and various othermaterials.
They had been shown how to handle the tools. It was amazing to seehow easily they translated the work from the kit to other materials. Asother pupils saw this happening, the next models were even better. Atone stage, the teacher could see one of the pupils using gears, and she
The early years
27
advised the pupils that these might be too difficult to construct in wood,suggesting pulleys as alternatives. However, the pupil insisted, andproceeded to saw out teeth for the gears from the wooden wheels. Theresults were excellent and the gears meshed.
In this project the kits were used as a means of looking at how thingsmoved and how they could also be controlled, as well as to generateideas quickly and communicate these in simple forms. The pupils werebuilding structures using an established kit system. Whilst the kits aregood for drawing and planning, nothing can replace the satisfactionpupils gain from making their own individual model, which they canshow to peers and parents. The need to break down the toys created aneed for actually making the toys in other materials (AT 1). Such projectsengage pupils in all the attainment targets particular to design andtechnology, and address many aspects of the programmes of study aswell.
The projects described in this chapter can be and have been used byteachers in all the other years of Key Stages 1 and 2. In each case, theteacher has planned the work and the supporting activities to achieveparticular ends and to be appropriate to the age and abilities of the pupils.The projects described in the next chapters are equally applicable to theyounger age-range. Teachers continuously show how it is possible forever younger pupils to engage in more complex work, provided it isplanned and adapted to the particular age-range and placed in a contextthat has some relevance to the pupil.
28
3
Starting in the classroom
All three projects in this chapter describe work with first year juniorclasses (Key Stage 2: Year 3) in different schools. Our intention is not todescribe the projects in any detail, but to look at possible classroomorganizational methods for initiating work with tools. Since writingthese case-studies, other teachers have used similar techniques withyounger pupils, demonstrating the unknown limlits and capabilities ofpupils to do this work, given the motivation and love of practicalactivities as driving forces.
The first project is based on a farm topic. The second and third arebased on a dragon project started at the time of the Chinese New Year.Each of these shows a different form of classroom organization:
1 Use of Year 6 pupils, who have previous experience as facilitators forYear 3 groups.
2 The teacher shows two groups of two pupils how to make a box. Theyare then each responsible for showing another pair of pupils themethod.
3 The teacher makes use of another adult to help initiate the whole classto the use of tools at the same time.
The two dragon projects illustrate how it is possible to approach thesame topic in different ways, also highlighting how a class project canraise valuable lessons on democratic decision making processes in theclassroom. Both projects are based on building an articulated wheeleddragon. Such projects can be used to include a lot of work on wheelswithout having to resort to making cars or buggies, which are becomingpopular ‘technology’ projects in many primary schools.
All three teachers have decided to use a prescriptive technique as astarting-point to the work. Reference is made to a frame or box
Starting in the classroom
29
construction often known as the ‘Jinks’ frame or box. This technique ofgluing square-sectioned wood and reinforcing the joint with cardtriangles was described by Williams and Jinks (1985). It was developedas the result of work in a primary school, where the frustrations childrenexperienced with traditional methods of joining affected the potential ofthe work to develop.
A major feature of this method of construction is that it is possible tobuild light-framed structures, using simple tools and with littleexperience of their use. This gives confidence not only to the pupils butalso to the teachers embarking on this work for the first time. There areother very successful methods of joining that have been developed byothers in the field of primary design and technology. Garden canes andelastic bands have been recorded by Paul Shallcross (1985). Doweljoints are used by Jim Flood (1986). All these techniques are simple andhave an in-built element of success. However, they are not the onlymethods available, and it is important to encourage pupils to use themappropriately, otherwise they become as restrictive as the traditionalconstruction techniques they replaced, and they can end up determiningthe outcome of the project.
It is important that primary design and technology is not equated witha particular technique. None of the initiators of these techniques wouldwish that to be the case. However, it is possible to use such a techniqueas a means to introduce the tools in the classroom, as well as a means bywhich to engage in other curricular areas. Chapter 7 looks at how a wholeschool approached the issue of introducing the tools using the ‘Jinksmethod’. This prescriptive method was used as a means of achieving anumber of specific school objectives and as an interim measure to moreopen-ended problem solving.
Topic: ‘Farms’
School: Rokesly Junior School First Year Junior (Key Stage 2: Year 3)
In this school, some teachers had been on training courses on the use oftools, and the Year 5 and Year 6 classes had already engaged in excitingand challenging work (see chapters 5 and 6). There was considerableenthusiasm and excitement amongst other pupils about the work theyhad seen. However, there was a great deal of fear and lack of confidenceamong the teachers, who had not had the training and experience with
Starting in the classroom
30
the tools. A student teacher who had been to see the work during herteaching practice and had then started teaching in the school was keen totry out some work with her class. The problem was to find some form ofsupport for introducing the work and carrying it through. The Year 6pupils in the school were used as this support, providing technicalexpertise and ideas as appropriate. A number of Year 6 pupilsvolunteered, and their roles were discussed with them in detail. Theywere asked to write about their experiences with the Year 3 pupils aswell. Each Year 6 pupil worked with one group of first years.
The topic was ‘Farms’, and the children had visited an inner-city farmand had looked at all the buildings (AT 1). The different buildings thatwould be built were decided upon and the class divided up into groupsof three and four. Cowsheds, pigsties, sheep-pens, stables, farmhouse,barns and silos were the buildings chosen (and a farm tractor). Thechildren drew full-size pictures of what their buildings would look like,and proceeded to build these using their drawings as a means ofmeasuring and checking for accuracy (AT 2).
Apart from constructing the basic structure of the building, pupils hada number of other decisions to make, including those about the differentroof structures and whether these would be removable or hinged so that
Plate 5 Boxes
Starting in the classroom
31
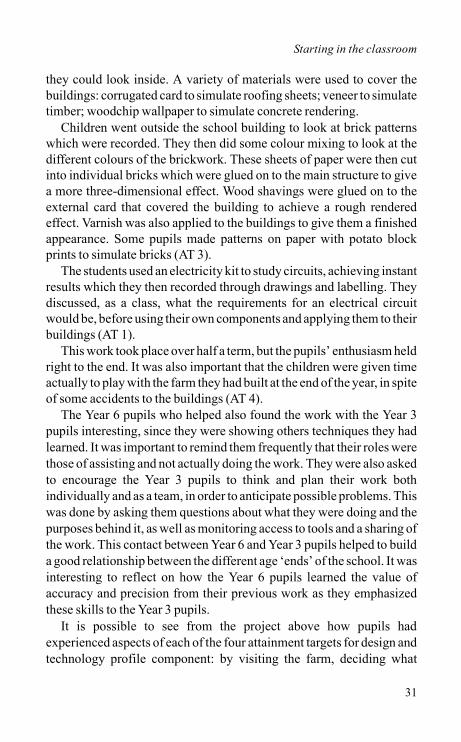
they could look inside. A variety of materials were used to cover thebuildings: corrugated card to simulate roofing sheets; veneer to simulatetimber; woodchip wallpaper to simulate concrete rendering.
Children went outside the school building to look at brick patternswhich were recorded. They then did some colour mixing to look at thedifferent colours of the brickwork. These sheets of paper were then cutinto individual bricks which were glued on to the main structure to givea more three-dimensional effect. Wood shavings were glued on to theexternal card that covered the building to achieve a rough renderedeffect. Varnish was also applied to the buildings to give them a finishedappearance. Some pupils made patterns on paper with potato blockprints to simulate bricks (AT 3).
The students used an electricity kit to study circuits, achieving instantresults which they then recorded through drawings and labelling. Theydiscussed, as a class, what the requirements for an electrical circuitwould be, before using their own components and applying them to theirbuildings (AT 1).
This work took place over half a term, but the pupils’ enthusiasm heldright to the end. It was also important that the children were given timeactually to play with the farm they had built at the end of the year, in spiteof some accidents to the buildings (AT 4).
The Year 6 pupils who helped also found the work with the Year 3pupils interesting, since they were showing others techniques they hadlearned. It was important to remind them frequently that their roles werethose of assisting and not actually doing the work. They were also askedto encourage the Year 3 pupils to think and plan their work bothindividually and as a team, in order to anticipate possible problems. Thiswas done by asking them questions about what they were doing and thepurposes behind it, as well as monitoring access to tools and a sharing ofthe work. This contact between Year 6 and Year 3 pupils helped to builda good relationship between the different age ‘ends’ of the school. It wasinteresting to reflect on how the Year 6 pupils learned the value ofaccuracy and precision from their previous work as they emphasizedthese skills to the Year 3 pupils.
It is possible to see from the project above how pupils hadexperienced aspects of each of the four attainment targets for design andtechnology profile component: by visiting the farm, deciding what
Starting in the classroom
32
buildings their own farm would include (AT 1/AT 4), planning what theywould look like, and drawing different elevations of these (AT 2); byworking to their drawings and making their buildings, encountering‘sub-problems’ of construction, such as roofs, doors and windows (AT3); investigating different materials in greater depth to attempt tosimulate building materials, by having to make choices about whichwould be the most appropriate, and by using and playing with their farm,thereby evaluating it constantly through use (AT 4).
Topic: The two dragons
If teachers are exploring festivals and celebrations for their topic,January is the time when they often choose the Chinese New Year. Thisopens up a tremendous potential for colourful and eyecatching displaysof both two- and three-dimensional work. This topic can be approachedin a number of ways, involving discussions and exploratory work withother new year celebrations, such as the Nawruz New Year (where thefirst day of spring marks the beginning of the year) as well as January 1stcelebrations that will have just passed.
The Chinese New Year can be used to explore exciting aesthetic andcreative work through a study of the celebrations and dance that takeplace. It can be used to look at other aspects of Chinese culture, historyand geography by focusing on China. China could be introduced as acountry with both geographic and ethnic diversity, and, by comparingsizes in terms of area, population and cultural diversity with Britain,interesting activities can be devised to highlight issues particular to theteacher’s plans, access to resources and possible visits, as well as thepupils’ own experiences.
The following two accounts show how two teachers from differentschools approached making a dragon for the new year celebrations.Through using the same topic we highlight the following two issues:
1 The importance of individual approaches to the same topic. Although using the same starting-points for the topic and sharing
similar aims and objectives, individual results can be very different.These differences highlight the potential for adapting ideas fromother schools to suit particular teachers.
Starting in the classroom
33
2 How a teacher’s own areas of expertise and concerns are reflected inthe outcome of the work.
The question that is consequently raised is: how can a school use anindividual teacher’s knowledge and expertise across the school? Welook at this question in greater detail in chapters 7 and 8.
Before enlarging on how each teacher tackled the project, it is useful tolook at some of the common objectives of the teachers involved.
Both teachers had attended in-service courses and were starting off intheir classes for the first time. The pupils had no other role models in theschool from which to understand what might be expected. The teachershad set themselves specific objectives for the project:
• Cope, personally, with starting this work in the classroom for the firsttime.
• Introduce every pupil to the use of tools and materials and to safeworking procedures.
• Develop group work to enable the class to work co-operatively ingroups of two.
• Involve the pupils in some elements of technical problem solving. • Using the prescriptive construction technique as a means to develop
sequential writing for producing instructions on how to make a box,or frame.
• Asking pupils to make detailed observational drawings of the toolsthey had used.
• Asking pupils to record their structures before covering them. • To make a class book.
Topic: ‘Dragons’
School: South Haringey Junior Teacher: Ms Jeannette Chapman (Key Stage 2: Year 3)
The class teacher had, at that time, recently been appointed withresponsibility for overseeing science in the school and had taken on thetask of studying the relationship between science and design and
Starting in the classroom
34
technology activities. The whole school was engaged in design andtechnology curriculum development. The activities were seen as a focusfor the topic work in every classroom. (The school is discussed inchapter 7). The initial focus of the work was the Chinese New Year.However, as the project developed, it moved towards dragons indifferent mythologies with the pupils reading dragon story-books andfinally rewriting these. Additional objectives particular to this projectinclude:
• To focus on the particular science skills and processes that arise fromthis work.
• To make a study of the different materials used in this project andthroughout the school, in order to develop a coherent school policy onmaterials, their use, storage and access.
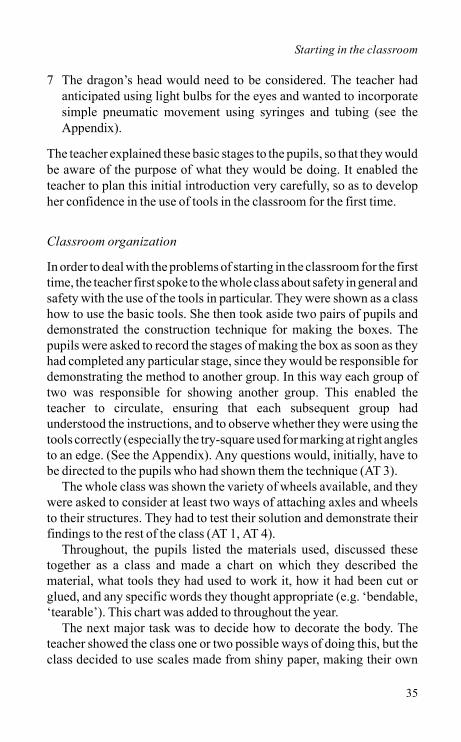
During classroom discussion, the teacher explained to the pupils thatthey would be using tools for the first time to make simple boxstructures. These would be used as segments of a long articulateddragon.
After discussing what a box structure was called, the dragon wasknown as the ‘Cuboid Segmented Articulated Dragon’. The teacherdecided to organize the work in the following stages:
1 Pupils would be grouped in two to work together. Each partnershipwould make one cuboid structure, thinking about sizes beforestarting.
2 Each group would have to work out how many wheels were neededand at least two methods to attach wheels and axles to the structure
3 These wheeled structures would be placed in size order, and the twoadjoining pairs of pupils would be asked to work out how they wouldjoin their two structures together.
4 The whole class, after testing and evaluating the results of the above,would decide a method for joining the pairs of boxes together.
5 During the above processes, they would cover their structures withcard. Pupils were introduced to the notion of area, and were asked towork out how much card they had used.
6 A decision would be taken about the decoration of the linked dragonsegments.
Starting in the classroom
35
7 The dragon’s head would need to be considered. The teacher hadanticipated using light bulbs for the eyes and wanted to incorporatesimple pneumatic movement using syringes and tubing (see theAppendix).
The teacher explained these basic stages to the pupils, so that they wouldbe aware of the purpose of what they would be doing. It enabled theteacher to plan this initial introduction very carefully, so as to developher confidence in the use of tools in the classroom for the first time.
Classroom organization
In order to deal with the problems of starting in the classroom for the firsttime, the teacher first spoke to the whole class about safety in general andsafety with the use of the tools in particular. They were shown as a classhow to use the basic tools. She then took aside two pairs of pupils anddemonstrated the construction technique for making the boxes. Thepupils were asked to record the stages of making the box as soon as theyhad completed any particular stage, since they would be responsible fordemonstrating the method to another group. In this way each group oftwo was responsible for showing another group. This enabled theteacher to circulate, ensuring that each subsequent group hadunderstood the instructions, and to observe whether they were using thetools correctly (especially the try-square used for marking at right anglesto an edge. (See the Appendix). Any questions would, initially, have tobe directed to the pupils who had shown them the technique (AT 3).
The whole class was shown the variety of wheels available, and theywere asked to consider at least two ways of attaching axles and wheelsto their structures. They had to test their solution and demonstrate theirfindings to the rest of the class (AT 1, AT 4).
Throughout, the pupils listed the materials used, discussed thesetogether as a class and made a chart on which they described thematerial, what tools they had used to work it, how it had been cut orglued, and any specific words they thought appropriate (e.g. ‘bendable,‘tearable’). This chart was added to throughout the year.
The next major task was to decide how to decorate the body. Theteacher showed the class one or two possible ways of doing this, but theclass decided to use scales made from shiny paper, making their own
Starting in the classroom
36
templates and sticking the scales on to the covered structuresindividually. It became clear that this was a time-consuming task, andmany suggestions were offered to resolve this, including ‘payingsomeone else to do it’. The suggestion that was finally adopted was thatthe scales would be mass produced by the class. The operation wassubdivided into smaller tasks (i.e. drawing around the templates ondifferent coloured sheets, cutting the drawn shapes, gluing on to largesheets of card). The class split up into different tables to perform theirpart of the whole operation. All segments were soon covered withmulticoloured shiny scales. The result was an articulated, segmentedand very colourful dragon body, with fins attached along the spine foradded effect (AT 2, AT 3).
All the class were introduced to some basic electrical circuits. Onegroup constructed the head using papier mâché, and another used theirknowledge of circuits to put bulbs in the eyes. The experimentation withsyringes provided the pupils with an idea for using them in the head. Thetop jaw moved up and down (AT 2, AT 3).
Alongside this work, the teacher was developing a series of activitiesin anticipation of the planned dragon book. These included a number ofpaper engineering problems where pupils worked in card and with leversto make moving pictures. Pop-up and paper engineering books werebrought in, read and experimented with. (Some starting points aresuggested in notes for teachers in the Appendix).
Other language work was carried out around the theme of dragons.Dragons in mythology were studied, and the varied significances ofdragons in different cultures were compared. Dragon stories were readand rewritten. Issues of stereotyping were raised and discussed and thepupils were confronted with a series of different dilemmas:
• Why should it always be princesses who are saved from dragons byprinces?
• What if the dragon that had to be slain was the last dragon in theworld? Do we not have a duty to protect it?
• Are all dragons seen as evil? How different is the Chinese dragonfrom the Welsh one? One parent argued that their child should not beinvolved in a project on dragons, since their personal religious beliefs
Starting in the classroom
37
stated that the dragon was a symbol of evil. This moral/ethicaldilemma was discussed in the class and the social issues addressed.
The pupils worked on their own stories and entered these into thecomputer, so that they could edit them. The final versions went into aclass book on dragon stories alongside their moving pictures.
The description of the project highlights how the teacher was able toachieve the particular classroom activities she set herself initially, andhow, at the same time, she was able to organize the introduction of thetools in a systematic manner that proved educationally useful byencouraging listening and speaking activities for a particular purpose.
The project was also used to raise a number of moral and socialdilemmas, through the choice of stories read, issues raised andconsequent rewriting. The ways in which dragons were depicted raiseddifferent cultural interpretations of the dragon.
The materials chart that the teacher initiated with this project andcontinued throughout the year enabled the pupils to add new materials,methods of working them, gluing them, describing and classifyingthem. The Appendix includes a possible framework for organizingmaterials within the class and the school. The work on materials in theproject links with science work. In terms of science process skills, pupilshad to carry out detailed recording, solve technical problems (attachwheels, joint structures, paper engineering), experience problems offriction and spacing. They had to discuss these problems in groups oftwos, fours and as a whole class. They had to test their solutions andreport their findings (AT 4).
Specific areas of knowledge included: electricity; properties of air;pneumatics; force; energy; mechanical movement; and materials. InChapter 5 the relationship between science and technology is discussedin greater detail.
Topic: Chinese New Year
School: Alexandra Junior School Teacher: Ms Jacqueline Buxton (Key Stage 2: Year 3)
In a school quite separate from South Haringey Junior School, and notknowing that another dragon was being put together in another Year 3
Starting in the classroom
38
class, this teacher had decided to initiate the project of making a dragonwith her class on the occasion of the Chinese New Year. The ChineseNew Year was to be part of work on China in general. Whilst MsChapman had responsibility for science, Ms Buxton was the Art andCraft Co-ordinator. Her additional objectives for this project wererestricted by the limited time available to do the work, and were mainlyconcerned with highlighting the different graphical recording and artactivities that could be developed from the work.
The construction stages planned for this project can be summarizedas follows:
1 Show the pupils how to make a simple rectangular frame. The classwere divided into friendship groups of two, and they wereencouraged to decide their own sizes, given a maximum length andwidth.
2 Ask them to devise a method for attaching wheels and axles. 3 Place these in order of size and work out, as a class, how they would
link these. The largest would be kept for the head, and the smallest forthe tail.
4 Agree, as a class, a method to make up the body, and then build thison the frames.
5 Each pupil would draw their ideas of how either the head or the tailshould look. These drawings would be discussed, and a designselected in the light of what emerged from the work.
6 All supporting material would be placed in a large class book (1.50 ×0.75m).
7 Decide on a front cover for the book that would involve every pupilcontributing to it. (The teacher had planned to introduce the class topotato prints and had hoped to use this technique for the front coverin some way.)
Classroom organization
Once again, the biggest concern of the teacher was introducing the classto the use of the tools. They were very enthusiastic and keen to start, andthe teacher was the first to initiate the work in the school, though she hadnot had any class experience of working with tools beforehand. In thiscase, however, the teacher was able to call on the support of an additionaladult. She decided to borrow some more tools and introduce the whole
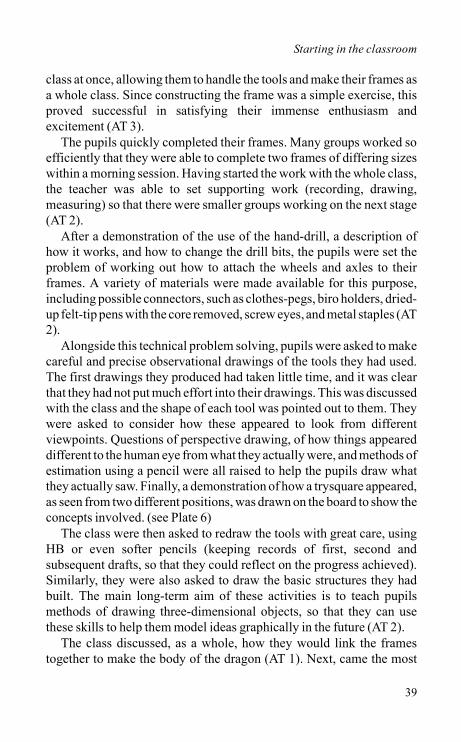
Starting in the classroom
39
class at once, allowing them to handle the tools and make their frames asa whole class. Since constructing the frame was a simple exercise, thisproved successful in satisfying their immense enthusiasm andexcitement (AT 3).
The pupils quickly completed their frames. Many groups worked soefficiently that they were able to complete two frames of differing sizeswithin a morning session. Having started the work with the whole class,the teacher was able to set supporting work (recording, drawing,measuring) so that there were smaller groups working on the next stage(AT 2).
After a demonstration of the use of the hand-drill, a description ofhow it works, and how to change the drill bits, the pupils were set theproblem of working out how to attach the wheels and axles to theirframes. A variety of materials were made available for this purpose,including possible connectors, such as clothes-pegs, biro holders, dried-up felt-tip pens with the core removed, screw eyes, and metal staples (AT2).
Alongside this technical problem solving, pupils were asked to makecareful and precise observational drawings of the tools they had used.The first drawings they produced had taken little time, and it was clearthat they had not put much effort into their drawings. This was discussedwith the class and the shape of each tool was pointed out to them. Theywere asked to consider how these appeared to look from differentviewpoints. Questions of perspective drawing, of how things appeareddifferent to the human eye from what they actually were, and methods ofestimation using a pencil were all raised to help the pupils draw whatthey actually saw. Finally, a demonstration of how a trysquare appeared,as seen from two different positions, was drawn on the board to show theconcepts involved. (see Plate 6)
The class were then asked to redraw the tools with great care, usingHB or even softer pencils (keeping records of first, second andsubsequent drafts, so that they could reflect on the progress achieved).Similarly, they were also asked to draw the basic structures they hadbuilt. The main long-term aim of these activities is to teach pupilsmethods of drawing three-dimensional objects, so that they can usethese skills to help them model ideas graphically in the future (AT 2).
The class discussed, as a whole, how they would link the framestogether to make the body of the dragon (AT 1). Next, came the most
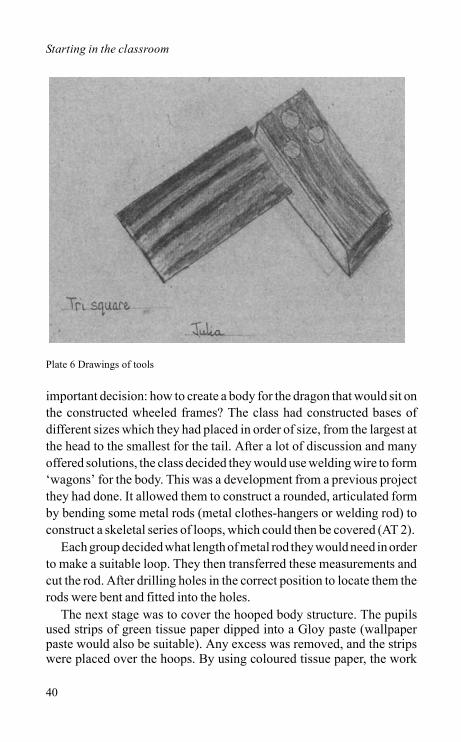
Starting in the classroom
40
important decision: how to create a body for the dragon that would sit onthe constructed wheeled frames? The class had constructed bases ofdifferent sizes which they had placed in order of size, from the largest atthe head to the smallest for the tail. After a lot of discussion and manyoffered solutions, the class decided they would use welding wire to form‘wagons’ for the body. This was a development from a previous projectthey had done. It allowed them to construct a rounded, articulated formby bending some metal rods (metal clothes-hangers or welding rod) toconstruct a skeletal series of loops, which could then be covered (AT 2).
Each group decided what length of metal rod they would need in orderto make a suitable loop. They then transferred these measurements andcut the rod. After drilling holes in the correct position to locate them therods were bent and fitted into the holes.
The next stage was to cover the hooped body structure. The pupilsused strips of green tissue paper dipped into a Gloy paste (wallpaperpaste would also be suitable). Any excess was removed, and the stripswere placed over the hoops. By using coloured tissue paper, the work
Plate 6 Drawings of tools
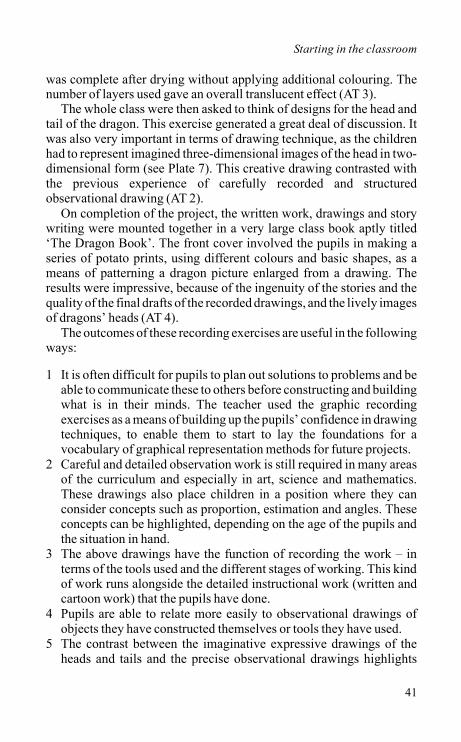
Starting in the classroom
41
was complete after drying without applying additional colouring. Thenumber of layers used gave an overall translucent effect (AT 3).
The whole class were then asked to think of designs for the head andtail of the dragon. This exercise generated a great deal of discussion. Itwas also very important in terms of drawing technique, as the childrenhad to represent imagined three-dimensional images of the head in two-dimensional form (see Plate 7). This creative drawing contrasted withthe previous experience of carefully recorded and structuredobservational drawing (AT 2).
On completion of the project, the written work, drawings and storywriting were mounted together in a very large class book aptly titled‘The Dragon Book’. The front cover involved the pupils in making aseries of potato prints, using different colours and basic shapes, as ameans of patterning a dragon picture enlarged from a drawing. Theresults were impressive, because of the ingenuity of the stories and thequality of the final drafts of the recorded drawings, and the lively imagesof dragons’ heads (AT 4).
The outcomes of these recording exercises are useful in the followingways:
1 It is often difficult for pupils to plan out solutions to problems and beable to communicate these to others before constructing and buildingwhat is in their minds. The teacher used the graphic recordingexercises as a means of building up the pupils’ confidence in drawingtechniques, to enable them to start to lay the foundations for avocabulary of graphical representation methods for future projects.
2 Careful and detailed observation work is still required in many areasof the curriculum and especially in art, science and mathematics.These drawings also place children in a position where they canconsider concepts such as proportion, estimation and angles. Theseconcepts can be highlighted, depending on the age of the pupils andthe situation in hand.
3 The above drawings have the function of recording the work – interms of the tools used and the different stages of working. This kindof work runs alongside the detailed instructional work (written andcartoon work) that the pupils have done.
4 Pupils are able to relate more easily to observational drawings ofobjects they have constructed themselves or tools they have used.
5 The contrast between the imaginative expressive drawings of theheads and tails and the precise observational drawings highlights
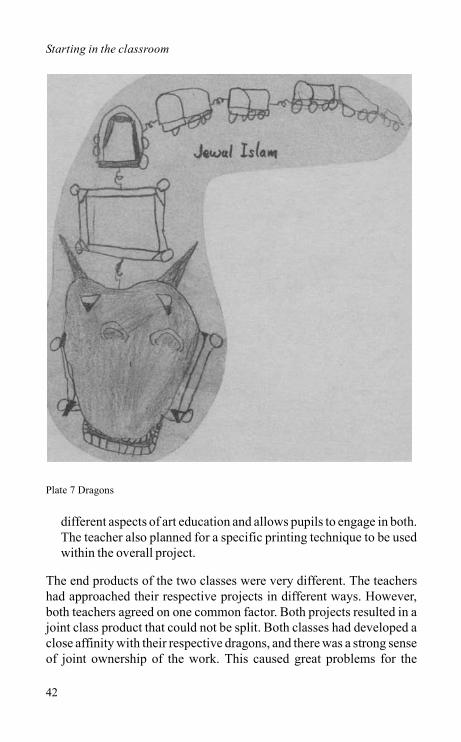
Starting in the classroom
42
different aspects of art education and allows pupils to engage in both.The teacher also planned for a specific printing technique to be usedwithin the overall project.
The end products of the two classes were very different. The teachershad approached their respective projects in different ways. However,both teachers agreed on one common factor. Both projects resulted in ajoint class product that could not be split. Both classes had developed aclose affinity with their respective dragons, and there was a strong senseof joint ownership of the work. This caused great problems for the
Plate 7 Dragons
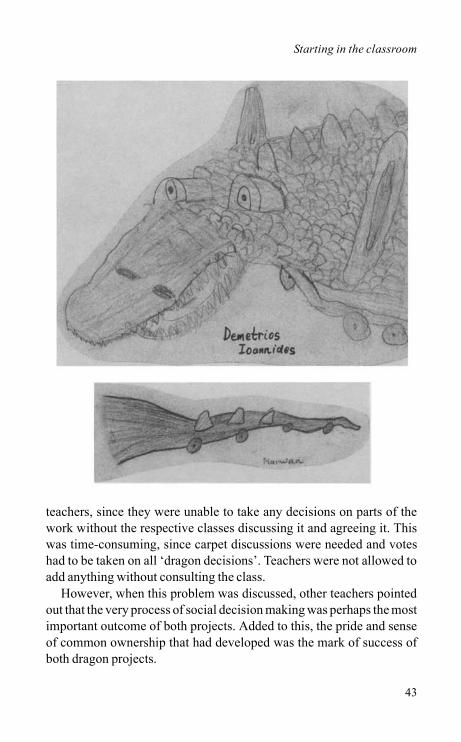
Starting in the classroom
43
teachers, since they were unable to take any decisions on parts of thework without the respective classes discussing it and agreeing it. Thiswas time-consuming, since carpet discussions were needed and voteshad to be taken on all ‘dragon decisions’. Teachers were not allowed toadd anything without consulting the class.
However, when this problem was discussed, other teachers pointedout that the very process of social decision making was perhaps the mostimportant outcome of both projects. Added to this, the pride and senseof common ownership that had developed was the mark of success ofboth dragon projects.
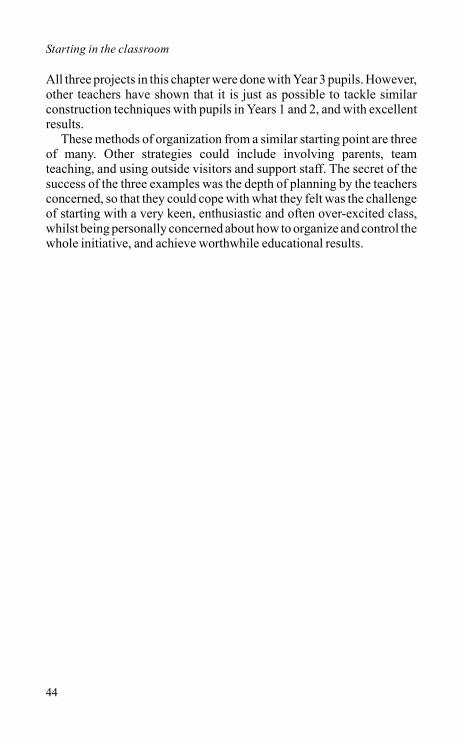
Starting in the classroom
44
All three projects in this chapter were done with Year 3 pupils. However,other teachers have shown that it is just as possible to tackle similarconstruction techniques with pupils in Years 1 and 2, and with excellentresults.
These methods of organization from a similar starting point are threeof many. Other strategies could include involving parents, teamteaching, and using outside visitors and support staff. The secret of thesuccess of the three examples was the depth of planning by the teachersconcerned, so that they could cope with what they felt was the challengeof starting with a very keen, enthusiastic and often over-excited class,whilst being personally concerned about how to organize and control thewhole initiative, and achieve worthwhile educational results.
45
4
Links with mathematics
In this chapter, two design and technology projects are described thathighlight specific mathematical concepts and knowledge. The first ispart of a wider topic on masks, and involves pupils in designing andconstructing nets to make masks. The second is building a scaled versionof the school staffroom.
All the case-studies described in this book involve pupils inmeasuring, estimating, hypothesizing, and handling mathematical datain practical situations. The practical problems offer pupils realistic andmeaningful contexts in which to handle a variety of mathematicalconcepts. Pupils quickly realize the importance of measuring, precisionand accuracy in order to ensure successful results.
The main objective in this chapter is to show how it is possible todevelop design and technology projects that serve to highlight particularareas of mathematics (e.g. nets, use of scales for enlargement andreduction, concepts of length, area and volume), whilst continuing toaddress attainment targets and programmes of study in design andtechnology, science and language.
Topic: ‘Masks’
School: South Haringey Junior School Teacher: Ms Maria Theodosiou (Key Stage 2: Year 4) The activities described in this project are part of a broader scheme ofwork which is shown in chapter 8. The class were asked to design three-dimensional masks using simple three-dimensional shapes. The maskswould sit over their heads. Each mask would incorporate a mechanicalmovement or an electrical circuit using bulbs and/or motors. The pupilswere encouraged to look at robots for inspiration.
Links with mathematics
46
The teacher’s objectives were as follows:
• Develop the pupils’ knowledge of two- and three-dimensionalshapes.
• Develop their understanding and use of nets. • Enable the pupils to decide a shape and design the net necessary for
it. The teacher was experimenting to see how far this would bepossible.
• Enable pupils to classify shapes (2D and 3D) according to commonlyagreed criteria.
• Encourage the use of appropriate technical terminology. • Ask the pupils to record their processes, and list the materials they
used. • To assess their understanding of 2D shapes, and their knowledge of
the properties of these shapes. • To explore the applications of nets in the pupils’ environments.
The class had had significant previous experience in construction withtimber, as well as other materials. They had handled the tools and wereconfident in using them to solve practical problems.
The teacher also wanted the pupils to develop the ability to plan andpredict some of their projects before actually making them, so that theywould start to work towards achieving specific goals. They had to beable to plan out their masks in terms of shapes as well as size beforestarting to make them.
A series of activities were devised to introduce the specificmathematical concepts:
1 The pupils were given two nets to construct that had been drawn up in2-D.
2 They had also been engaged in pattern making, using basic shapes(square, triangle, hexagon), using a computer program.
Before commencing the main work with the pupils, the teacherreviewed the pupils’ knowledge and grasp of the properties of two-dimensional shapes (e.g. triangles, quadrilaterals, squares, rectangles,heptagon, hexagon, octagon). Greek-speaking pupils kept remindingothers of the correct terms. The teacher used the feedback anddiscussion sessions as a means of developing a common understanding
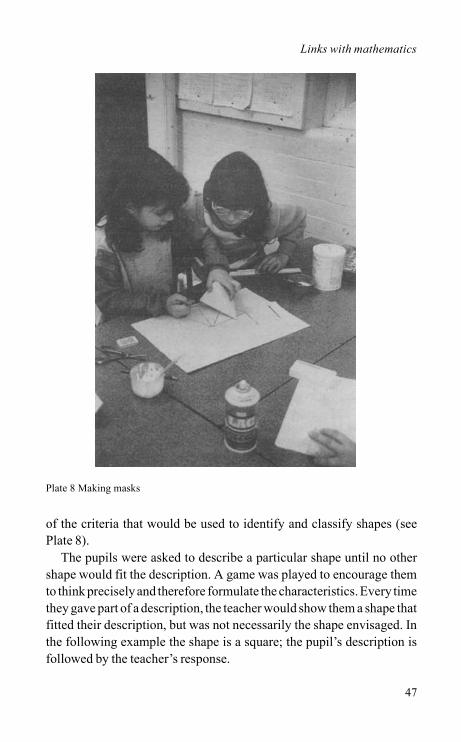
Links with mathematics
47
of the criteria that would be used to identify and classify shapes (seePlate 8).
The pupils were asked to describe a particular shape until no othershape would fit the description. A game was played to encourage themto think precisely and therefore formulate the characteristics. Every timethey gave part of a description, the teacher would show them a shape thatfitted their description, but was not necessarily the shape envisaged. Inthe following example the shape is a square; the pupil’s description isfollowed by the teacher’s response.
Plate 8 Making masks
Links with mathematics
48
• has four sides/edges – draw a quadrilateral • has four corners – draw a rhombus • the corners are ‘straight’ (after questioning, it became clear that they
meant right-angled) – draw a rectangle • the sides are equal – draw a square
Extra work was done on diagonals and the number of internal angles.There was also discussion on whether a shape was regular or irregular.
The class used the three-dimensional solids from mathematical kitsto identify and describe the properties of the solids. They were also askedto construct a net for these solids. The teacher had anticipated this wouldbe a lengthy process, but was amazed to find some pupils had worked outthe nets of pyramids by turning the shapes on paper in less than fiveminutes. They were asked to produce two samples so that the work couldbe mounted flat and as a constructed net. The intention was to build awhole series of these, so that the class could hypothesize on the rules forconstructing a net of one’s own choice.
The next activity involved the pupils in identifying the simple solidshapes in a variety of objects brought into the classroom. Some of thesewere basic three-dimensional shapes (e.g. drinks cans); some(compound shapes) were made from a variety of shapes (e.g. winebottle). Different packaging examples were brought in (pyramids andprisms, papier mâché boxes in the shape of a heart, and similarcontainers were made available).
There are many ways of classifying three-dimensional shapes, andthese were discussed. Pupils were introduced to the technical terms thatarose from their descriptions. A discussion followed as to whatconstituted a prism, and what constituted a pyramid. Through a processof discussion and elimination, pupils were able to highlight a number ofcharacteristics, as in the following examples.
A Prism:
• is a three-dimensional object • it had a bottom which we called a base • it had edges coming up from the base corners • these edges were parallel to each other • if the above edges came up ‘straight’/perpendicularly/at right angles
to the base, the prism was called a ‘right prism’
Links with mathematics
49
• the prism was named according to the shape of the base; i.e. if the basewas a triangle, it was called a ‘triangular prism’; if it was a square, itwas called a ‘square prism’; if it was a quadrilateral, it would be calleda ‘quadrilateral prism’; if it were a hexagon, it would be called a‘hexagonal prism’
• if it seemed that a slice was ‘lopped off’ it was called a ‘truncatedprism’.
Similarly, pyramids were defined as:
• a three dimensional object • it had a bottom which we called a ‘base’ • it had edges coming up from the base corners • these edges went up towards a point which we called an ‘apex’ • if the apex was directly over the middle of the base, it was called a
‘right pyramid’ • similarly, a pyramid was named according to the shape of its base • similarly, if it was ‘chopped off’, it was called a ‘truncated pyramid’
The second activity, pattern making using the computer, resulted inrepetitive patterns around a central axis. This was a useful exercise fordeveloping the notion that a circle was a many-sided shape. Through thisactivity pupils had been introduced to the notion of infinity, and the ideathat a circle was a shape with an infinite number of edges. Thus, acylinder was a special case of a prism where the base was a circle.Similarly, the pupils were able to identify the cone as a special case of apyramid. They used the formulas they had devised to define a cylinder:as a circular prism, as well as an infinite sided prism.
Each group of two pupils was given a variety of objects, and asked tosee what three-dimensional shapes they could identify and name,explaining why. The build-up work proved very valuable in thisinstance. It was also interesting to note how they had used the ‘rules ofclassification’ to build up the names of the objects they had been given.Those who finished classifying their objects were given others, morecomplex, or involving compound shapes.
When the class came together to classify their shapes, everyone hadsomething to offer. Squeezy bottles were classified as ‘right cylinders’:a box of Maltesers was classified as a ‘right regular hexagonal prism’: abox of chocolates was described as a ‘right truncated rectangular
Links with mathematics
50
pyramid’. A discussion ensued when one group took a constructed netthat had no labels and called it a ‘rectangular prism’, whilst anothergroup called it a ‘square prism’. The differences arose depending on howpupils had actually held the object, and according to what they decidedconstituted the base. One pupil asked if a fifty-pence piece was apentagonal prism or simply a pentagonal shape. She finally decided itwas a pentagonal prism with a very small height. The highlight wasreached when the pupils decided that the papier mâché box in the shapeof a heart was called a ‘right heartical prism’. Often the pupils wouldforget one of the terms (‘truncated’ being the most frequent, and theteacher would motion to indicate an elephant’s trunk as a reminder).
At this stage pupils were asked to consider what use they could findfor constructing nets. The first response was sweet boxes. Packagingwas discussed to some extent, and the various shapes they had seen wererecalled. Pupils found it difficult to think about other ideas. They wereasked to consider the packaging they wore to come to school. Attemptscan be made to classify these shapes (a sleeve is a truncated cylinder).The manufacture of tins is also done from sheet metals. The use of ‘reallife’ examples proved useful in stimulating them to look around forfurther examples.
The nets they had constructed from their mathematical blocks werelooked at and reviewed. The aim was to show pupils the similaritiesbetween the nets of prisms on the whole and how these differed from netsof pyramids. The class would be able to devise certain rules forconstructing nets.
The exercises above had been seen as an introduction to designingtheir own nets and to their choice of sizes. The play with technicalterminology and rules of classification had fascinated the pupils to suchan extent that work developed in this area. Visualization games wereplayed, where pupils had to see the image in their head and answerquestions like ‘how many sides does a hexagonal prism with top andbase have?’ ‘how many edges do you get in a square pyramid?’ They haddone so much work with three-dimensional shapes that it was possiblefor them to spend a short time visualizing the object and coming up withan answer, not based on guesswork.
The class was divided into groups of twos, and they discussed the taskof designing and making their robot masks. They were given options ofwhat materials they might wish to use and were introduced to corrugated
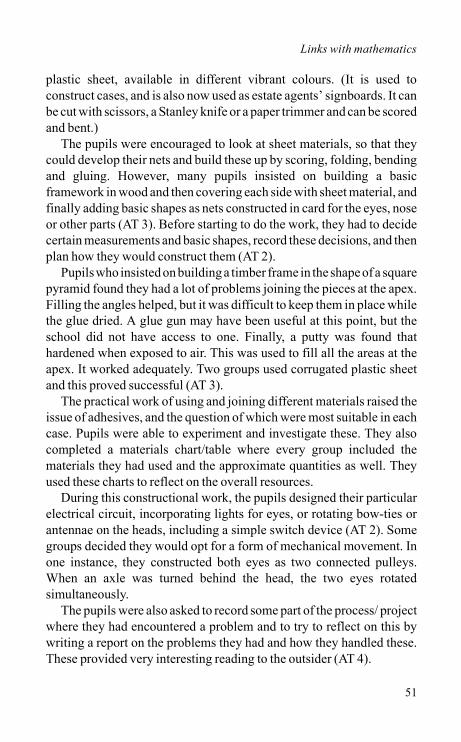
Links with mathematics
51
plastic sheet, available in different vibrant colours. (It is used toconstruct cases, and is also now used as estate agents’ signboards. It canbe cut with scissors, a Stanley knife or a paper trimmer and can be scoredand bent.)
The pupils were encouraged to look at sheet materials, so that theycould develop their nets and build these up by scoring, folding, bendingand gluing. However, many pupils insisted on building a basicframework in wood and then covering each side with sheet material, andfinally adding basic shapes as nets constructed in card for the eyes, noseor other parts (AT 3). Before starting to do the work, they had to decidecertain measurements and basic shapes, record these decisions, and thenplan how they would construct them (AT 2).
Pupils who insisted on building a timber frame in the shape of a squarepyramid found they had a lot of problems joining the pieces at the apex.Filling the angles helped, but it was difficult to keep them in place whilethe glue dried. A glue gun may have been useful at this point, but theschool did not have access to one. Finally, a putty was found thathardened when exposed to air. This was used to fill all the areas at theapex. It worked adequately. Two groups used corrugated plastic sheetand this proved successful (AT 3).
The practical work of using and joining different materials raised theissue of adhesives, and the question of which were most suitable in eachcase. Pupils were able to experiment and investigate these. They alsocompleted a materials chart/table where every group included thematerials they had used and the approximate quantities as well. Theyused these charts to reflect on the overall resources.
During this constructional work, the pupils designed their particularelectrical circuit, incorporating lights for eyes, or rotating bow-ties orantennae on the heads, including a simple switch device (AT 2). Somegroups decided they would opt for a form of mechanical movement. Inone instance, they constructed both eyes as two connected pulleys.When an axle was turned behind the head, the two eyes rotatedsimultaneously.
The pupils were also asked to record some part of the process/ projectwhere they had encountered a problem and to try to reflect on this bywriting a report on the problems they had and how they handled these.These provided very interesting reading to the outsider (AT 4).
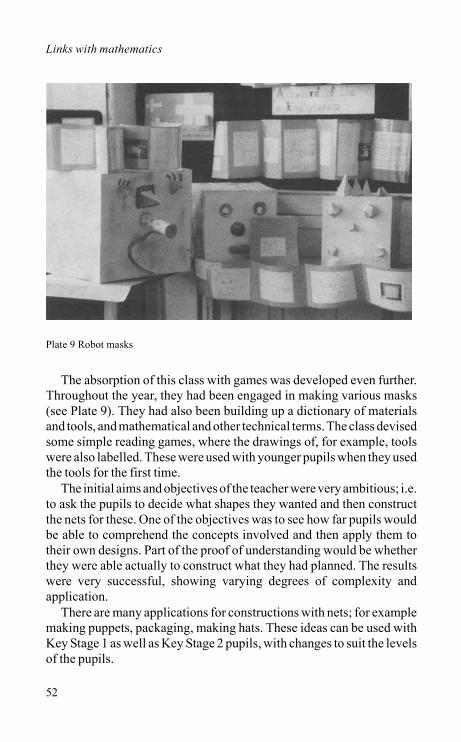
Links with mathematics
52
The absorption of this class with games was developed even further.Throughout the year, they had been engaged in making various masks(see Plate 9). They had also been building up a dictionary of materialsand tools, and mathematical and other technical terms. The class devisedsome simple reading games, where the drawings of, for example, toolswere also labelled. These were used with younger pupils when they usedthe tools for the first time.
The initial aims and objectives of the teacher were very ambitious; i.e.to ask the pupils to decide what shapes they wanted and then constructthe nets for these. One of the objectives was to see how far pupils wouldbe able to comprehend the concepts involved and then apply them totheir own designs. Part of the proof of understanding would be whetherthey were able actually to construct what they had planned. The resultswere very successful, showing varying degrees of complexity andapplication.
There are many applications for constructions with nets; for examplemaking puppets, packaging, making hats. These ideas can be used withKey Stage 1 as well as Key Stage 2 pupils, with changes to suit the levelsof the pupils.
Plate 9 Robot masks
Links with mathematics
53
Throughout this project the class were aware of the purpose of thevariety of activities; i.e. to work towards a knowledge and understandingof two- and three-dimensional shapes. It is useful to reflect on the overallactivities, in terms of mathematics attainment. Table 1 on page 54highlights the main ones tackled.
Topic: ‘The environment’; measurements and scaling
School: Rokesly Junior School (Key Stage 2: Year 5)
The topic was the environment, in a Year 5 class. They had previousexperience with the use of tools and working in groups to solve technicalconstructional problems. The tools were part of the classroomequipment, and pupils had access to them as and when the need arose.
The aim of this project was to broaden the nature of the work theywere involved in, and to develop more open-ended problem solvingopportunities for the pupils. The class was divided into different groupstackling different projects around the school environment. This projectarose out of the desire of the staff to consider changing the staffroom andreorganizing it. This was put to a group as a problem they could tackle.A model of the staffroom was needed in order to try out different plans,and get a sense of the overall atmosphere (AT 1).
Three pupils went and drew up all elevations in the staffroom as wellas a plan. They had to devise a variety of means to work out the height ofmany objects. They designed their own measuring instruments, such asone metre measure sliding inside another so that the device could beextended to reach the ceiling or other out-of-reach objects. Thesemeasurements were transferred on to large sheets of sugar paper.
The pupils then had to decide the sizes of the model, and the conceptof scaling was introduced. They chose the scale they would work to bya process of elimination. Half-size would be too big: similarly, quarter-size would not be able to be carried through the door. So, finally ‘half aquarter-an eighth’ was decided. Whilst the teacher tried to direct themto a tenth scale, they did not want to do this since, having tried out twomeasurements, they thought the model might end up too small. Theythen had to divide all their measurements by eight. They started to
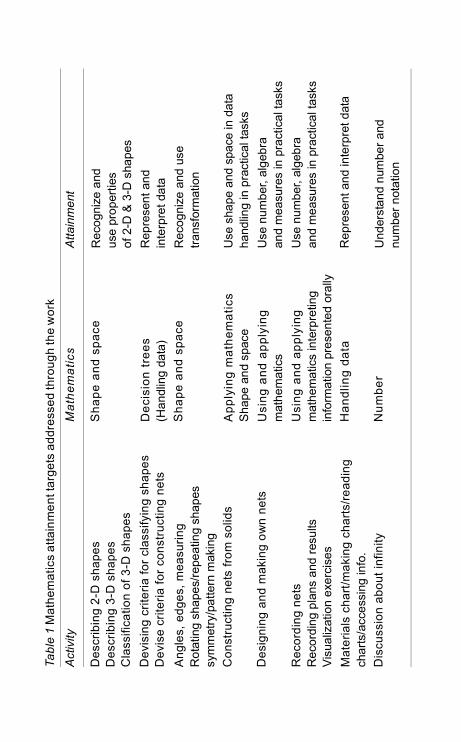
Tabl
e 1
Mat
hem
atic
s at
tain
men
t tar
gets
add
ress
ed th
roug
h th
e w
ork
Activ
ity
Mat
hem
atic
s At
tain
men
t
Des
crib
ing
2-D
sha
pes
Des
crib
ing
3-D
sha
pes
Cla
ssifi
catio
n of
3-D
sha
pes
Sha
pe a
nd s
pace
R
ecog
nize
and
us
e pr
oper
ties
of 2
-D &
3-D
sha
pes
Dev
isin
g cr
iteria
for c
lass
ifyin
g sh
apes
D
evis
e cr
iteria
for c
onst
ruct
ing
nets
D
ecis
ion
tree
s (H
andl
ing
data
) R
epre
sent
and
in
terp
ret d
ata
Ang
les,
edg
es, m
easu
ring
Rot
atin
g sh
apes
/repe
atin
g sh
apes
sy
mm
etry
/pat
tern
mak
ing
Sha
pe a
nd s
pace
R
ecog
nize
and
use
tra
nsfo
rmat
ion
Con
stru
ctin
g ne
ts fr
om s
olid
s A
pply
ing
mat
hem
atic
s Sh
ape
and
spac
e U
se s
hape
and
spa
ce in
dat
a ha
ndlin
g in
pra
ctic
al ta
sks
Des
igni
ng a
nd m
akin
g ow
n ne
ts
Usi
ng a
nd a
pply
ing
mat
hem
atic
s U
se n
umbe
r, al
gebr
a an
d m
easu
res
in p
ract
ical
task
s R
ecor
ding
net
s R
ecor
ding
pla
ns a
nd re
sults
Vi
sual
izat
ion
exer
cise
s
Usi
ng a
nd a
pply
ing
mat
hem
atic
s in
terp
retin
g in
form
atio
n pr
esen
ted
oral
ly
Use
num
ber,
alge
bra
and
mea
sure
s in
pra
ctic
al ta
sks
Mat
eria
ls c
hart/
mak
ing
char
ts/re
adin
g ch
arts
/acc
essi
ng in
fo.
Han
dlin
g da
ta
Rep
rese
nt a
nd in
terp
ret d
ata
Dis
cuss
ion
abou
t inf
inity
N
umbe
r U
nder
stan
d nu
mbe
r and
nu
mbe
r not
atio
n
Links with mathematics
55
do this by long division, but soon realized that a calculator would bemuch faster. The measurements were placed next to the full-sizemeasurements on their drawings but in another colour (in order todistinguish clearly). They were asked to check that these measurementsseemed correct by approximating the answers. They were usingfractions, estimating results, using a calculator and working in decimals(AT 2). They then proceeded to build the basic framework with windowsand doors to scale. They reinforced the structure in places and coveredthe walls with card (AT 3).
The decision was then made for the wallpaper design for one wall.This they showed to some members of staff who refused to accept thedesign. A discussion followed on the role of a designer in leading thedesign process and providing a variety of options and finally devising ameans of evaluating the response. So they proceeded to draw fivedifferent designs and find out the preferences of the staff. They werequestioned and their preferences were placed in order. The pupilscollated this information to find out which design had the greatestnumber of points (AT 2).
The project continued with finding methods to print these wallpaperdesigns to full scale, and looking at some printing methods (polystyreneshapes cut and mounted on card as stamps, simple screen-printingtechniques). The pupils also built the furniture to the appropriate scale(AT 3).
A very important element of all this work is the time spent gatheringaround and describing the work done, the problems faced and possiblesolutions. This also enables other pupils to offer solutions that the groupmay not have considered. On one of these occasions, this group had builtthe framework of the staffroom and covered it in card, and theyexplained that this was a model of the staffroom ‘an eighth its size’. Oneperson said that it could not be an eigth of the size of the staffroom. Thewhole group were asked to consider this and decide individually if thiswas the case or not. A vote was taken. The pupil who had voiced doubtexplained why ‘if you put eight of those staffrooms in a line you wouldnot get the size of the staffroom’. The pupils whose project it was werevery quick to answer that you would need to place eight staffrooms alongthe width and upwards, i.e. that every measurement had to be repeatedeight times over. The group worked out how many models they would
Links with mathematics
56
need to fill the staffroom ( 8 × 8 × 8 ). The teacher then directed the pupilsto consider how many model windows would be needed to make up theactual windows and the whole group considered these questions.
Through the process of discussing and showing others, veryimportant concepts were being explored; i.e. scaling, area and volume.What was particularly interesting was that the class had actually done alot of work on these concepts with boxes and cubes, using mathematicalblocks from the maths corner earlier on in the year. The three pupils whoparticipated in this project were able to understand these concepts in avery practical manner. The girls who made the staffroom were confidentthat they had scaled down the staffroom and were able to substantiatethis to the rest of the class (AT 4).
It is clear that a project involving pupils in making scaled models of aroom or building, for the purpose of redesigning or planning furniture,would also involve pupils in a great deal of practical mathematicalapplication, dealing with number, measurements and handling data andinformation, as well as applying mathematics.
We have described two case-studies that have taken specific areas ofmathematical knowledge (nets and scaling) to show how it is possible todevise work that is design and technology orientated, while addressinggeneral mathematics attainment targets (such as handling data, usingand applying mathematics and measuring) as well as the specifics of theparticualr projects.
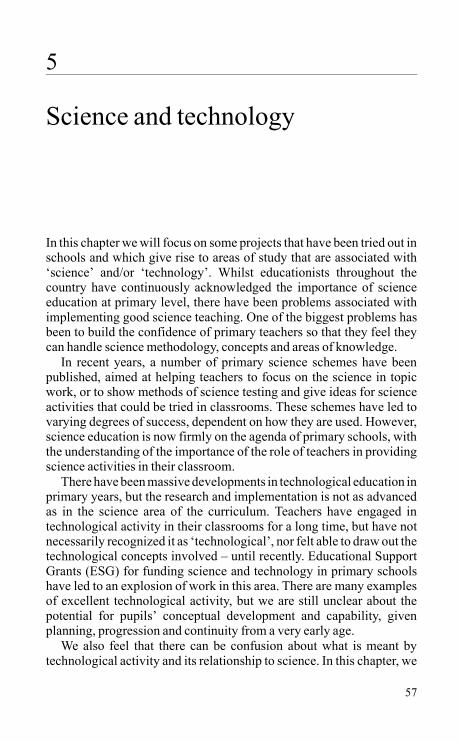
57
5
Science and technology
In this chapter we will focus on some projects that have been tried out inschools and which give rise to areas of study that are associated with‘science’ and/or ‘technology’. Whilst educationists throughout thecountry have continuously acknowledged the importance of scienceeducation at primary level, there have been problems associated withimplementing good science teaching. One of the biggest problems hasbeen to build the confidence of primary teachers so that they feel theycan handle science methodology, concepts and areas of knowledge.
In recent years, a number of primary science schemes have beenpublished, aimed at helping teachers to focus on the science in topicwork, or to show methods of science testing and give ideas for scienceactivities that could be tried in classrooms. These schemes have led tovarying degrees of success, dependent on how they are used. However,science education is now firmly on the agenda of primary schools, withthe understanding of the importance of the role of teachers in providingscience activities in their classroom.
There have been massive developments in technological education inprimary years, but the research and implementation is not as advancedas in the science area of the curriculum. Teachers have engaged intechnological activity in their classrooms for a long time, but have notnecessarily recognized it as ‘technological’, nor felt able to draw out thetechnological concepts involved – until recently. Educational SupportGrants (ESG) for funding science and technology in primary schoolshave led to an explosion of work in this area. There are many examplesof excellent technological activity, but we are still unclear about thepotential for pupils’ conceptual development and capability, givenplanning, progression and continuity from a very early age.
We also feel that there can be confusion about what is meant bytechnological activity and its relationship to science. In this chapter, we
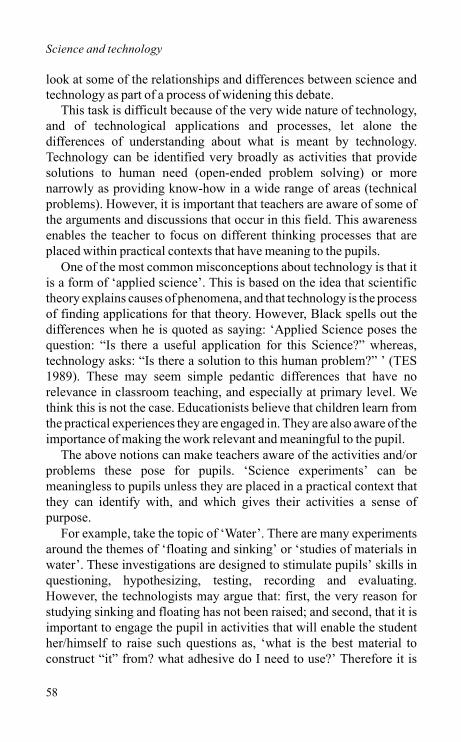
Science and technology
58
look at some of the relationships and differences between science andtechnology as part of a process of widening this debate.
This task is difficult because of the very wide nature of technology,and of technological applications and processes, let alone thedifferences of understanding about what is meant by technology.Technology can be identified very broadly as activities that providesolutions to human need (open-ended problem solving) or morenarrowly as providing know-how in a wide range of areas (technicalproblems). However, it is important that teachers are aware of some ofthe arguments and discussions that occur in this field. This awarenessenables the teacher to focus on different thinking processes that areplaced within practical contexts that have meaning to the pupils.
One of the most common misconceptions about technology is that itis a form of ‘applied science’. This is based on the idea that scientifictheory explains causes of phenomena, and that technology is the processof finding applications for that theory. However, Black spells out thedifferences when he is quoted as saying: ‘Applied Science poses thequestion: “Is there a useful application for this Science?” whereas,technology asks: “Is there a solution to this human problem?” ’ (TES1989). These may seem simple pedantic differences that have norelevance in classroom teaching, and especially at primary level. Wethink this is not the case. Educationists believe that children learn fromthe practical experiences they are engaged in. They are also aware of theimportance of making the work relevant and meaningful to the pupil.
The above notions can make teachers aware of the activities and/orproblems these pose for pupils. ‘Science experiments’ can bemeaningless to pupils unless they are placed in a practical context thatthey can identify with, and which gives their activities a sense ofpurpose.
For example, take the topic of ‘Water’. There are many experimentsaround the themes of ‘floating and sinking’ or ‘studies of materials inwater’. These investigations are designed to stimulate pupils’ skills inquestioning, hypothesizing, testing, recording and evaluating.However, the technologists may argue that: first, the very reason forstudying sinking and floating has not been raised; and second, that it isimportant to engage the pupil in activities that will enable the studenther/himself to raise such questions as, ‘what is the best material toconstruct “it” from? what adhesive do I need to use?’ Therefore it is
Science and technology
59
important to engage the pupil in a problem-solving situation that thepupil can identify with and recognize as problematic, as well as havinga desire to resolve it. This engagement and stimulation will lead thepupils to solve the technological problem through a series ofexperiments, such as devising fair tests.
Another danger of science experiments, or investigation simplytaken from work-cards, is that they often do not take into accountchildren’s own sense of ‘know-how’. It was surprising to see the amountof ‘knowledge’ displayed by a group of top infants whose current topichappened to be ‘Water’. They were set the task of making boats theywould use in their school pool. When questioned about the shape, theywere adamant that the boat had to be pointed at the front in order to ‘makeit easier to cut through the water’. They substantiated this by bringing infurther examples that they had thought about from their swimminglessons to prove the point. Is it necessary for the pupils of this class toengage in a ‘fair test’ experiment or investigation that would provewhich boat-hull shape in balsa wood is the most efficient?
The pupils arrive at school with an existing language expertise. Therole of the teacher is to work on widening pupils’ experiences in order tobuild on their capability. This is similarly true with technology andtechnological problem solving. Pupils had existing expertise ofbuilding, changing and constructing, using the materials around them. Itis the role of the teacher to recognize, identify and build upon thattechnological know-how.
What we hope the above will raise is a series of questions that relateto the importance of starting points, stimulating the pupils’ interests andputting them in situations where they can start to provide answers to theirown questions and highlight the role of technological activities withinthe framework of the primary curriculum. Sparkes discusses thesimilarities and differences between science and technology, andanalyses some of the processes inherent to both:
Both fields (science and technology) use mathematics in order to make progress in their respective fields. Both are creative – though in different senses. Both theorise, though technological theories (information theory, control theory, network theory, etc) are theories about effective ‘doing’, rather than theories about causes and reality. And, of course, technology makes use
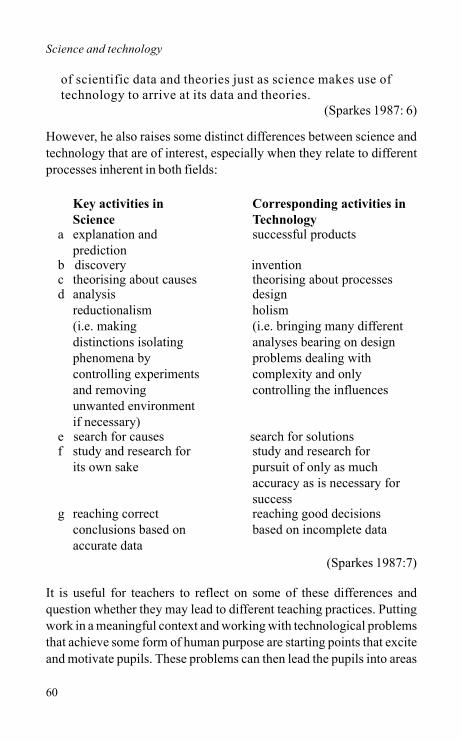
Science and technology
60
of scientific data and theories just as science makes use of technology to arrive at its data and theories.
(Sparkes 1987: 6)
However, he also raises some distinct differences between science andtechnology that are of interest, especially when they relate to differentprocesses inherent in both fields:
(Sparkes 1987:7)
It is useful for teachers to reflect on some of these differences andquestion whether they may lead to different teaching practices. Puttingwork in a meaningful context and working with technological problemsthat achieve some form of human purpose are starting points that exciteand motivate pupils. These problems can then lead the pupils into areas
Key activities in Science
Corresponding activities in Technology
a explanation and prediction
successful products
b discovery invention c theorising about causes theorising about processes d analysis
reductionalism (i.e. making distinctions isolating phenomena by controlling experiments and removing unwanted environment if necessary)
design holism (i.e. bringing many different analyses bearing on design problems dealing with complexity and only controlling the influences
e search for causes search for solutions f study and research for
its own sake study and research for pursuit of only as much accuracy as is necessary for success
g reaching correct conclusions based on accurate data
reaching good decisions based on incomplete data
Science and technology
61
of knowledge and methodological scientific processes that challengethem. The result of such an approach is that it is no longer necessary toset fairly arbitrary ‘science investigations’ and ask the pupils tohypothesize, predict, test, record and evaluate investigations they maynot relate to or see the point of. This is an important concern for teacherswhen the tasks are laid out for assessment at the ages of 7 and 11. It ismuch more challenging to ask the pupils to devise a fair test within theproject they are involved in, and then look at the degree of ‘fairness’, theplanning and the method involved in carrying out the task.
A lot of work has been carried out on the development of good sciencepractice in schools. The study of the practical implications of thetheoretical differences discussed is still relatively new. However, it is arapidly expanding area of the primary curriculum. These discussions arepart of the process of debate on the relationships between science andtechnology. The next three projects have been chosen to show somedifferent topics that have been used to draw out particular areas oftechnology as a focus for the work.
Every one of the projects illustrated involves pupils in ScAT 1,relating to the exploration of science, which accounts for 50 per centtesting at Key Stages 1 and 2. They also involve pupils in a study andmanipulation of materials, where pupils can be investigating theirproperties. Many of the projects involve pupils in studies of differentforms of energy, electricity and magnetism. The precise subject-matterof the topic can raise other science attainment targets, such as thosedealing with sound and music (if making musical instruments), earthand atmosphere (if involved in a project on designing and makingweather measurement instruments), and so on.
Topic: ‘Mechanical toys’
School: Rokesly Junior School (Key Stage 2: Year 6)
‘Toys and toy making’ can be a very wide topic that could be used to raisemany issues for pupils. New toys and old toys; toys and the genderimplications involved; toys from all over the world; surveys of toypreferences and asking why some are preferred to others; what is the
Science and technology
62
function of toys? different types of toys – water toys, moving toys, pushalong, pull along, toys that make sounds, electrical toys, mechanical toys– the list is endless.
Many different toy projects have been carried out by teachersinvolving widely differing design-and-make activities for pupils ofdifferent ages. We have used this example from Rokesly Junior Schoolto illustrate an attempt to map progression in a particular class that haddone considerable work with tools in the year previously, and wherethere was a specific attempt to look at the group dynamics andinteractions arising from different situations.
With many of the projects we have used in this book, group dynamicshave been a consideration for teachers at the project planning stages.With this particular project the class had fewer girls than boys and manyof the pupils had worked in friendship groups in Year 5. This had resultedin separate gender groups where girls and boys had tended to workseparately in groups of two. The plan with this project was to createmixed groups and to study the interaction of boys and girls and, ifnecessary, to develop assertiveness amongst those who needed it.Special attention would be focused on who had access to the kits andmaterials, and how the groups discussed and shared ideas.
The group of pupils had considerable experience in handling toolsand an involvement in open-ended problem solving in Year 5. The mainobjectives in setting this project were to:
1 Look at progression (in terms of construction methods, applicationsof previous experiences, recording methods and similar skills).
2 Look at group interactions and dynamics with special interest ingender observations.
3 Develop in the pupils’ planning and research skills prior to makingthings in order to anticipate possible problems. The purpose of thiswas to encourage them to locate possible design and constructionalproblems before embarking on the work, and to use their developedobservational drawing skills to predict shapes and forms.
4 To develop pupils’ knowledge and understanding of mechanicalmovement in relation to pulleys, gears, ratios, direction of movement,cams and followers, and control.
5 To establish log-books and diaries to record progress of the work, aswell as recording particular experiences.
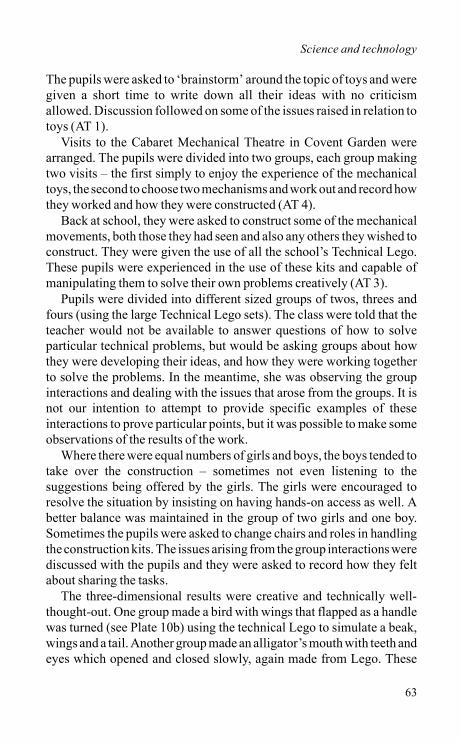
Science and technology
63
The pupils were asked to ‘brainstorm’ around the topic of toys and weregiven a short time to write down all their ideas with no criticismallowed. Discussion followed on some of the issues raised in relation totoys (AT 1).
Visits to the Cabaret Mechanical Theatre in Covent Garden werearranged. The pupils were divided into two groups, each group makingtwo visits – the first simply to enjoy the experience of the mechanicaltoys, the second to choose two mechanisms and work out and record howthey worked and how they were constructed (AT 4).
Back at school, they were asked to construct some of the mechanicalmovements, both those they had seen and also any others they wished toconstruct. They were given the use of all the school’s Technical Lego.These pupils were experienced in the use of these kits and capable ofmanipulating them to solve their own problems creatively (AT 3).
Pupils were divided into different sized groups of twos, threes andfours (using the large Technical Lego sets). The class were told that theteacher would not be available to answer questions of how to solveparticular technical problems, but would be asking groups about howthey were developing their ideas, and how they were working togetherto solve the problems. In the meantime, she was observing the groupinteractions and dealing with the issues that arose from the groups. It isnot our intention to attempt to provide specific examples of theseinteractions to prove particular points, but it was possible to make someobservations of the results of the work.
Where there were equal numbers of girls and boys, the boys tended totake over the construction – sometimes not even listening to thesuggestions being offered by the girls. The girls were encouraged toresolve the situation by insisting on having hands-on access as well. Abetter balance was maintained in the group of two girls and one boy.Sometimes the pupils were asked to change chairs and roles in handlingthe construction kits. The issues arising from the group interactions werediscussed with the pupils and they were asked to record how they feltabout sharing the tasks.
The three-dimensional results were creative and technically well-thought-out. One group made a bird with wings that flapped as a handlewas turned (see Plate 10b) using the technical Lego to simulate a beak,wings and a tail. Another group made an alligator’s mouth with teeth andeyes which opened and closed slowly, again made from Lego. These
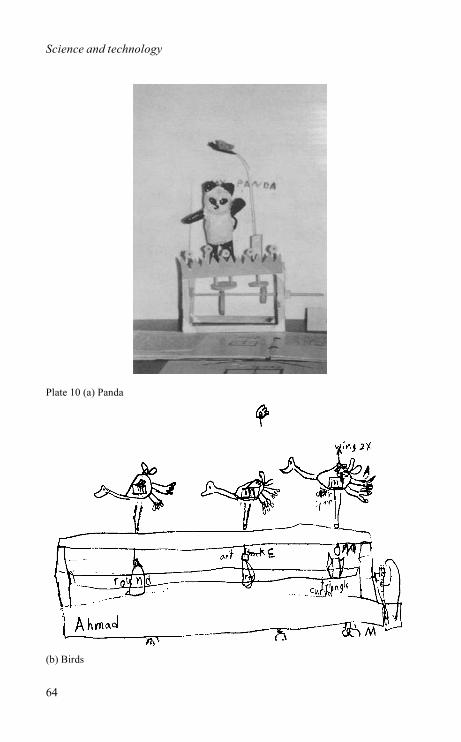
Science and technology
64
Plate 10 (a) Panda
(b) Birds
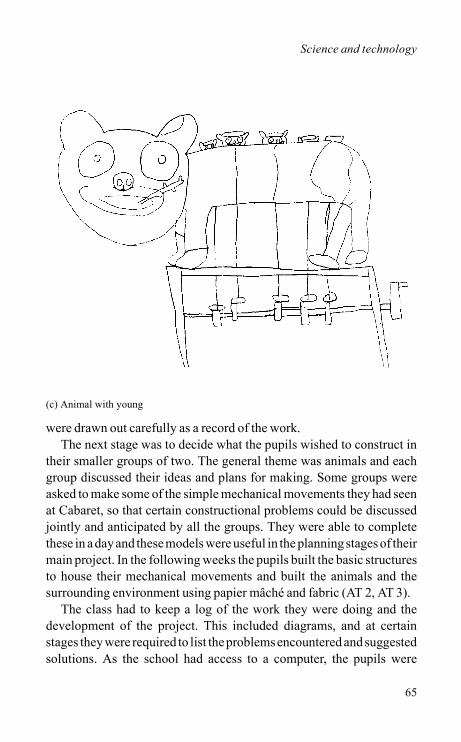
Science and technology
65
were drawn out carefully as a record of the work. The next stage was to decide what the pupils wished to construct in
their smaller groups of two. The general theme was animals and eachgroup discussed their ideas and plans for making. Some groups wereasked to make some of the simple mechanical movements they had seenat Cabaret, so that certain constructional problems could be discussedjointly and anticipated by all the groups. They were able to completethese in a day and these models were useful in the planning stages of theirmain project. In the following weeks the pupils built the basic structuresto house their mechanical movements and built the animals and thesurrounding environment using papier mâché and fabric (AT 2, AT 3).
The class had to keep a log of the work they were doing and thedevelopment of the project. This included diagrams, and at certainstages they were required to list the problems encountered and suggestedsolutions. As the school had access to a computer, the pupils were
(c) Animal with young
Science and technology
66
introduced to word processing and worked in their groups with thecomputer to produce their reports. Each group of two showed the nexttwo how to use the word processor (AT 5).
Although the project took a long time to complete, the importance ofthe experience cannot be overestimated: it involved planning, problemsolving, the enrichment of speaking and listening skills, as well as theskills of graphical communication and the quality of class ‘report backs’at the end of the day was particularly high. The pupils had gained theopportunity to clarify their thoughts, to develop their confidence tospeak in a group, and to develop their ideas as problems were shared andsolutions presented. By the end of the project the class were confident inthe use of terms such as ‘cams’, ‘followers’, ‘pulleys’, ‘gears’, ‘gearingdown’, ‘gearing up’, ‘cranks’ and ‘axles’. Two of the groups worked onadding electrical circuits operated by the movement of the handles.Their previous experience of working with circuits and switches hadgiven them the understanding of these concepts and the confidence totransfer this knowledge to the current project.
The teacher also felt that it was a learning experience for her in termsof the practical problems of making some of the mechanical movementsinvolved. It is important not to underestimate the time needed to plan,construct, redesign and reconstruct, let alone the frustrations when workdoes not go according to plans. However, it was also important tocomplete the work and stand back and view it in order to have pride in it.
Alongside this work with timber, card, papier mâché and fabrics, theclass has been fascinated by some of the card models seen at Cabaret.Several of them had bought models and made them up. With othermodels bought by the teacher, they did some work on basic nets anddeveloped this work to make articulated puppets from card.
Problem solving in this project was largely of a practical nature – withmanipulation of kits and materials to achieve the idea, in this case toproduce a mechanical toy. The project itself had enough input of ideasand suggestions, simply by using the visit to Cabaret as a starting pointto determine, to some extent, the result. It is possible to approach a topicon toys in many different ways and we hope this will provide the readerwith an insight for projects or topics that could look at ‘wheels’,‘mechanical movement’ or other areas of science and technology fromdifferent viewpoints.
Science and technology
67
Topic: ‘The transport problem’
School: Rokesly Junior School (Key Stage 2: Year 5)
The following situation was put to a group of third year juniors engagedin a topic on transport.
A group of people living on an oasis have discovered that their supplyof water is diminishing. As an interim solution, they decide to send aMorse code message to friends living on an island with its own fresh-water well. They ask them to send a tank of water as quickly as possible(AT 1). The friends need to bring the water up and fill a tank (the scaleddown version is a Fairy Liquid bottle). This tank needs to be transportedthrough a variety of terrains. The class is divided into groups to devise ameans of lifting the water and transporting the tank across the listedgeographical terrains. The groups were divided as follows:
1 lifting the water out of the well 2 crossing the sea 3 going across beaches and general terrain 4 through a river 5 through rocky areas 6 up a hill 7 across a ravine 8 and finally through the desert to their friends.
(Variations can be: through windy grasslands, across mountain ranges,down tunnels, across ice and snow).
This was the second project by the class involving the use of tools andgeneral resistant materials. The first project was an introduction to thetools, by building simple chassis (similar to the base of the dragons inchapter 3,) working out how to attach wheels and then completing theconstruction by building transporters of various kinds (buses, racers,cars, land yachts, caravans and trains). The pupils had workedindividually in the earlier projects, but were divided into groups for thisproject.
The main objectives that were planned for this project were asfollows:
1 To develop some more open-ended problem solving whereby theclass would be involved with a variety of sub-projects along the
Science and technology
68
theme of transport. The projects would come together for a particularpurpose.
2 To investigate the skills and concepts, as well as attitudes, that wouldbe encouraged through open-ended problem solving.
3 The different projects would raise a wide number of differentinvestigations and areas of science and technology. How can theteaching situation be organized to make use of the differentinvestigations? How can the teaching situation be managed to drawthe common threads (e.g. use of different materials to suit differentpurposes, different forms of energy, the process of scientific fairtesting)?
4 To study the different methods pupils employ for designing andsolving practical three-dimensional problems.
5 To monitor group work. 6 The pupils in each team or group would be required to produce a
group report. 7 The diversity of projects and the varying nature of the solutions
would be used to encourage pupils to develop their research skills. 8 To look at methods of reporting back on progress. 9 To map progression from previous work, in terms of design methods,
planning procedures and practical construction skills.
The first group, the well group, built a model of a well and proceeded todesign a mechanical method for bringing up buckets of water to thesurface. They had done some previous work with electric motors andwanted to motorize their designs. They were advised to try this out inLego before proceeding to construct and change their models. Theysoon faced the problems associated with using a string on a fast runningmotor, when everything got tangled. They then had to spend some timecoming to terms with some of the concepts involved in slowing downmotors and gearing. They then had to transfer these concepts, learntthrough the use of constructional kits, into a model made with foundmaterials that would actually work (AT 2, AT 3).
The sea crossing involved experimenting with materials that wouldfloat and sink. Resource books gave them some good ideas, but they hadto translate these into their own situation. None of the ideas in the booksincluded carrying a container full of water. They also had to discuss howtheir container would cross the sea. They finally decided to use sail
Science and technology
69
power. Designing the sails, methods of fixing them, and steeringmechanisms were some of the other challenges the group had to tackle.
Other groups faced general and specific challenges, such as: howsturdy did the machine that crossed over rocky beaches have to be? howcan we protect the tank of water from possible damage along its voyage?what type of wheels would be needed for each terrain? what forms ofenergy would be suitable to power the vehicles?
The river group initially shared ideas with the sea group, buteventually decided that the problems were different. Rivers werenarrower than the wide open sea. Different materials were used thatraised their own problems. The adhesive they first used wasinappropriate in water. Their model fell apart. Sails were inappropriate,and a decision was made to use paddles. Finally, elastic bands were usedto power the paddles.
Another group had to consider the types of wheels they would needto help their transporter climb hills and mountains. How do we stopslippage backwards as the transporter goes up? What form of energy isneeded to get the transporter up? How do we ensure the tank does not falloff? After a great deal of trial and error, they decided to motorize thevehicle as well as add a hook that could be thrown and hooked tosomething at the top of the incline. This would be part of a mechanicalwinch attached onto the transporter.
Moon climbing buggies and science fiction films were the initialinspiration for the first ideas of the group tackling the ravine crossing.They soon realized that it was very difficult to transfer these ideas intosolutions they could make, given the materials and resources available.They then decided to resort to more simplistic solutions, whereby theywould use gravity and angled ropes to send the tank from one side to theother. When trialling out these ideas, they found they were givingthemselves further problems and had to devise solutions to the inevitablecrash as the tank of water arrived on the other side. First-aid carriers werethen discussed. The work of the water-well group and some research intoother sources enabled this group to adapt their later solution and designa motorized cable car device.
It was fortunate that the pupils in the last group had the actualexperience of someone whose car had got stuck in the desert sand, andwho had had a lot of trouble bringing it back onto the road surface. Thewheels became a dominant feature of the design of this vehicle.
Science and technology
70
Protecting the water from the extreme heat was another one of thechallenges they faced. Wide wheels, made from drink cans which werealso sprayed proved the most successful in the end.
It will be clear to the reader that all involved enjoyed the breadth andchallenge of this particular project. There was a great sense of funthroughout the hard work. It is also clear that the organization of thework, the preparation of resources, as well as coping with theimaginative ideas of pupils and helping them to translate these intopractical success, is a major feat. Different groups covered differentareas of knowledge, but shared common processes. However, the rangeof solutions and breadth of knowledge (water testing, sail designs,motorizing, wheels, friction, pulleys, steering) enabled them to be awareof how wide the possibilities are.
Observation of the different design methods used by the pupilsproved, to the teachers concerned, that there is no one way of designing,and that they, as teachers, should be looking at the methods oforganization they need in order to facilitate these different methods.
Many pupils designed by constructing models. These models were‘thinking models’. They lacked any rigidity, precision, durability, or, inmany cases, any aesthetic consideration. Some may argue that standardsof construction and the final product are not important considerations insuch a situation, but that the thinking processes are more important. Theproduct is important to the pupils. Feelings of achievement and successare paramount in building their self confidence. If they are able toimprove on a model, then they need to develop their work further froma ‘thinking model’ to a final design. The teacher is the professional whois best able to decide the limits for her/his particular pupils. It is alsopossible to develop concepts of precision and accuracy by showingpupils the need for these in the context of the particular project and thedemands for quality of production. Therefore, it is necessary for thesemodels to be rigid, precisely made and well constructed, with specialconsideration given to the types of finishes suitable to each design. Inthis project progression in constructional techniques and standards wasone of the objectives of the work.
The ‘thinking models’ were discussed with the different groups.Different testing methods were used, including discussion about thelikely points of weakness: dropping the work a distance; putting weightson or pressure at certain points. Where necessary, groups had to rebuild
Science and technology
71
their models. The management of these sessions proved very important.They were used to show pupils how they may proceed from the ‘thinkingmodel’ stage to the next production stage, using skills that had been builtup before drawing their models, planning the reconstruction procedureand sharing the tasks.
These briefing sessions were used to develop the group or teamidentity. Records of these were kept to be used in the final team report.Tasks were divided so that the report would be shared. A structure wasprovided for the possible layout of the report. A simple one is offeredbelow:
• Group members. • What was the overall problem? • What was your sub-problem? • How did you solve it? Explain with as many drawings as necessary. • What materials did you use? Draw these. • What problems did you have along the way, with planning and
construction? • How did you test your ideas and final solution? • How did you work together? How did you share the tasks? • What did you enjoy most about the work? • What did you enjoy least about the work? • What do you think of the finished model?
After the pupils had completed the work and produced all thedocumentation, the headteacher interviewed some of the groups. Theseinterviews were taped and the recordings were used in an exhibitionalongside the work to explain to parents and other visitors what they haddone (AT 4).
Since this project, other teachers have used similar ideas for work,based on the theme of ‘travel’ and alongside work on The Hobbitwhereby two young children are engaged in an imaginative trip acrossmany lands. Their encounters and descriptions of the lands theytravelled through provide the basis for a mass of creative writing,drawing and storytelling.
Science and technology
72
Topic: ‘Water’
School: Coleraine Park JMI Teacher: Ms Jenny Gaden (Key Stage 1: Year 2)
The class had had some experience with the use of the tools. They hadused timber and PVA wood glue. The teacher had been involved in anINSET course, where she was involved in open-ended problem solving,using the tools that would be available in the classroom. She had decidedon the topic of ‘water’, and had anticipated it lasting a long time, so thatthe pupils could be involved in some in-depth study.
It was decided to set the pupils the problem of building boats. Theclass was divided into groups of twos. They were allowed to choose theirpartners, so that there could be a development of confidence. The pupilsbrought in lots of materials that are found generally: tops of boxes, meattrays, boxes of different sizes and other ‘scrap materials’, pieces oftimber, some pieces of plastic, Fairy Liquid bottles. The teacher was alsoinvolved in finding appropriate waste materials. They had many booksavailable with pictures of different forms of water transport, as well asother books on water in general.
They were asked to design and make some simple boats. They werealso warned that these boats would then be tested in the sink to see howthey floated and moved. The pupils would also carry on till they hadproduced boats that could float, and would be tested in a smallswimming pool that the school had easy access to (see Plate 11). Therewould be a race to see which boat went the longest distance or the fastestacross the pool.
The results they produced used different bases as the bottoms of theboats, and they built these up to simulate different parts of the boats. It isinteresting to reflect on some of these bases. Some were polystyrenemeat trays found in supermarkets; others were fairly solid tops ofcardboard boxes – some where the glue was used to join and constructthe top, others where the corners had been stapled together. Some of thepupils added pieces of timber to simulate different parts of boats.
Their boats were then tested in the sink and other large containers.Initially, they generally floated. However, they were left in the water forthe weekend to test properly. On Monday morning, the pupils were eager
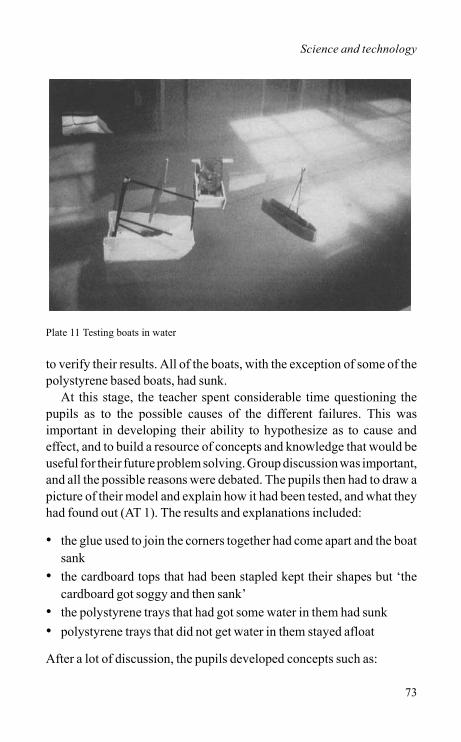
Science and technology
73
to verify their results. All of the boats, with the exception of some of thepolystyrene based boats, had sunk.
At this stage, the teacher spent considerable time questioning thepupils as to the possible causes of the different failures. This wasimportant in developing their ability to hypothesize as to cause andeffect, and to build a resource of concepts and knowledge that would beuseful for their future problem solving. Group discussion was important,and all the possible reasons were debated. The pupils then had to draw apicture of their model and explain how it had been tested, and what theyhad found out (AT 1). The results and explanations included:
• the glue used to join the corners together had come apart and the boatsank
• the cardboard tops that had been stapled kept their shapes but ‘thecardboard got soggy and then sank’
• the polystyrene trays that had got some water in them had sunk • polystyrene trays that did not get water in them stayed afloat
After a lot of discussion, the pupils developed concepts such as:
Plate 11 Testing boats in water
Science and technology
74
• we need to build the boats from materials that do not sink, and theymust be tested for a long time
• the glue we use must be glue that does not come apart in the water • the shape of the sides must be such that water does not easily get in
When questioned about the shapes of their own ‘waste material’ boatsas compared with the other boats, they seemed very clear that a boatneeded to be ‘pointed’ at the front, ‘so that it could cut through the waterand go forward’. They had made their boats with what was available, andthat was generally rectangular (AT 4).
They were able to list, at this stage, what materials would sink andwhich ones would float. However, some of them wanted to test someother materials, particularly wood, since they hoped to build their nextmodel in timber, using the ‘wood glue’. They felt sure the ‘wood glue’would be ‘stronger’ and stay together in water. For this purpose, theywent about testing their hypotheses. They tried out different pieces oftimber in water. They glued some pieces together, and then put them inwater. A few other materials were also tested, and corrugated plastic wasintroduced at this stage.
It is important at this stage that the teacher is aware of notions of massand density and some of the criteria that affect floating and sinking, sothat she or he is prepared to direct children’s questioning so that certainconcepts are developed. Some of the pieces of timber they had used werefairly heavy. Some sank quickly. Others sank overnight.
At the end of their particular experiment the pupils were able toascertain a number of points:
• heavy wood sank quickly • wood also got soggy, then heavy, and sank • the wood glue they used came apart in the water as well • certain materials did not sink generally, unless water got into them
and made them sink
The next stage of the project was to get pupils to think about their boatsagain, and help them construct shapes that might make their boat easierto move in water, as well as to make them out of materials that wouldfloat, and to use adhesives or constructional methods that would avoid
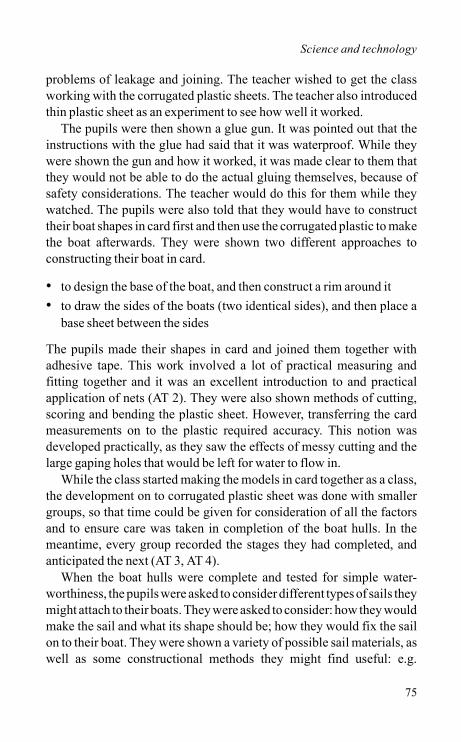
Science and technology
75
problems of leakage and joining. The teacher wished to get the classworking with the corrugated plastic sheets. The teacher also introducedthin plastic sheet as an experiment to see how well it worked.
The pupils were then shown a glue gun. It was pointed out that theinstructions with the glue had said that it was waterproof. While theywere shown the gun and how it worked, it was made clear to them thatthey would not be able to do the actual gluing themselves, because ofsafety considerations. The teacher would do this for them while theywatched. The pupils were also told that they would have to constructtheir boat shapes in card first and then use the corrugated plastic to makethe boat afterwards. They were shown two different approaches toconstructing their boat in card.
• to design the base of the boat, and then construct a rim around it • to draw the sides of the boats (two identical sides), and then place a
base sheet between the sides
The pupils made their shapes in card and joined them together withadhesive tape. This work involved a lot of practical measuring andfitting together and it was an excellent introduction to and practicalapplication of nets (AT 2). They were also shown methods of cutting,scoring and bending the plastic sheet. However, transferring the cardmeasurements on to the plastic required accuracy. This notion wasdeveloped practically, as they saw the effects of messy cutting and thelarge gaping holes that would be left for water to flow in.
While the class started making the models in card together as a class,the development on to corrugated plastic sheet was done with smallergroups, so that time could be given for consideration of all the factorsand to ensure care was taken in completion of the boat hulls. In themeantime, every group recorded the stages they had completed, andanticipated the next (AT 3, AT 4).
When the boat hulls were complete and tested for simple water-worthiness, the pupils were asked to consider different types of sails theymight attach to their boats. They were asked to consider: how they wouldmake the sail and what its shape should be; how they would fix the sailon to their boat. They were shown a variety of possible sail materials, aswell as some constructional methods they might find useful: e.g.
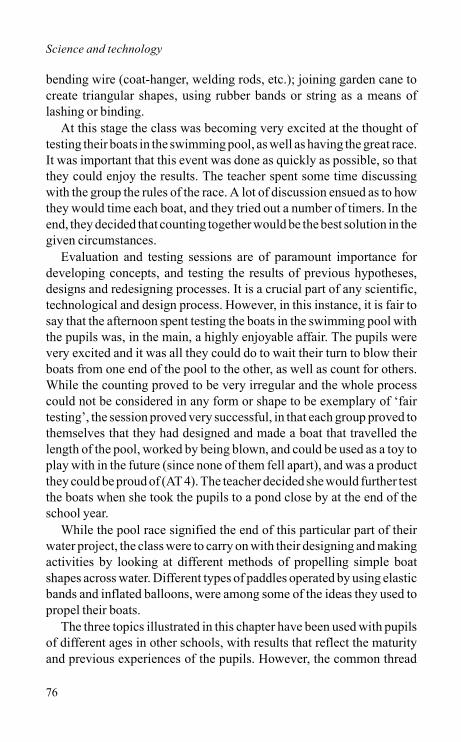
Science and technology
76
bending wire (coat-hanger, welding rods, etc.); joining garden cane tocreate triangular shapes, using rubber bands or string as a means oflashing or binding.
At this stage the class was becoming very excited at the thought oftesting their boats in the swimming pool, as well as having the great race.It was important that this event was done as quickly as possible, so thatthey could enjoy the results. The teacher spent some time discussingwith the group the rules of the race. A lot of discussion ensued as to howthey would time each boat, and they tried out a number of timers. In theend, they decided that counting together would be the best solution in thegiven circumstances.
Evaluation and testing sessions are of paramount importance fordeveloping concepts, and testing the results of previous hypotheses,designs and redesigning processes. It is a crucial part of any scientific,technological and design process. However, in this instance, it is fair tosay that the afternoon spent testing the boats in the swimming pool withthe pupils was, in the main, a highly enjoyable affair. The pupils werevery excited and it was all they could do to wait their turn to blow theirboats from one end of the pool to the other, as well as count for others.While the counting proved to be very irregular and the whole processcould not be considered in any form or shape to be exemplary of ‘fairtesting’, the session proved very successful, in that each group proved tothemselves that they had designed and made a boat that travelled thelength of the pool, worked by being blown, and could be used as a toy toplay with in the future (since none of them fell apart), and was a productthey could be proud of (AT 4). The teacher decided she would further testthe boats when she took the pupils to a pond close by at the end of theschool year.
While the pool race signified the end of this particular part of theirwater project, the class were to carry on with their designing and makingactivities by looking at different methods of propelling simple boatshapes across water. Different types of paddles operated by using elasticbands and inflated balloons, were among some of the ideas they used topropel their boats.
The three topics illustrated in this chapter have been used with pupilsof different ages in other schools, with results that reflect the maturityand previous experiences of the pupils. However, the common thread

Science and technology
77
throughout these is to develop pupils’ self-confidence to plan, decide,execute, record and assess the work they have done throughout thewhole project and any sub-problems the teacher has decided to locateand concentrate on, in order to highlight particular skills or areas ofknowledge – scientific, mathematical or linguistic.

78
6
Links with information technology
The information technology (IT) profile component in the TechnologyStatutory Orders clearly states that IT capability should be developedthrough activities which arise in different curricular areas, and in thissense, IT applications are truly cross-curricular in nature. The editingand printing facilities of word processing packages and printers are oneapplication for the English Statutory Orders; databases andmeasurement sensors are applications listed in the Science Orders;spreadsheets and simple programming are listed in the MathematicsOrders.
The educational potential of the use of computers across all KeyStages is developing very fast and it is often difficult to keep up to datewith these developments. The aim of this chapter is to introduce thereader to some of the general applications of information technologywithin the design and technology profile component, and to one area inparticular, namely measurement and control. We choose this applicationbecause of the excitement pupils get from working in this area, its linkswith the practical aspects of designing and making, and how theconceptual and manipulative skills involved can be further developedand applied.
It is possible to connect a variety of hardware devices to the computerthat can be used to measure time, temperature or humidity. A buggy,known as a ‘turtle’, is one control application often used for work inmathematics. This turtle will move according to simple programmedinstructions devised by pupils. It is also possible to use other hardware,referred to as control boxes, together with appropriate softwareprogrammes, to connect lights, buzzers, electrical motors and cassetteplayers, controlling them in a series of simply sequenced programmes.
The main aim of this chapter is to illustrate ways of approachingcomputer control projects within a topic approach. There are many
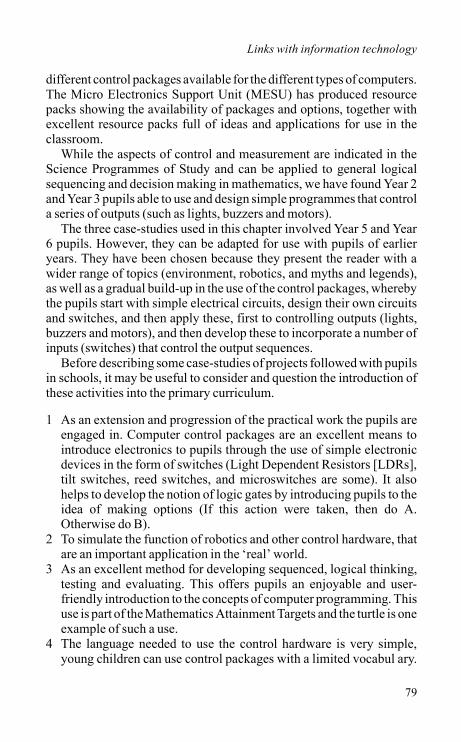
Links with information technology
79
different control packages available for the different types of computers.The Micro Electronics Support Unit (MESU) has produced resourcepacks showing the availability of packages and options, together withexcellent resource packs full of ideas and applications for use in theclassroom.
While the aspects of control and measurement are indicated in theScience Programmes of Study and can be applied to general logicalsequencing and decision making in mathematics, we have found Year 2and Year 3 pupils able to use and design simple programmes that controla series of outputs (such as lights, buzzers and motors).
The three case-studies used in this chapter involved Year 5 and Year6 pupils. However, they can be adapted for use with pupils of earlieryears. They have been chosen because they present the reader with awider range of topics (environment, robotics, and myths and legends),as well as a gradual build-up in the use of the control packages, wherebythe pupils start with simple electrical circuits, design their own circuitsand switches, and then apply these, first to controlling outputs (lights,buzzers and motors), and then develop these to incorporate a number ofinputs (switches) that control the output sequences.
Before describing some case-studies of projects followed with pupilsin schools, it may be useful to consider and question the introduction ofthese activities into the primary curriculum.
1 As an extension and progression of the practical work the pupils areengaged in. Computer control packages are an excellent means tointroduce electronics to pupils through the use of simple electronicdevices in the form of switches (Light Dependent Resistors [LDRs],tilt switches, reed switches, and microswitches are some). It alsohelps to develop the notion of logic gates by introducing pupils to theidea of making options (If this action were taken, then do A.Otherwise do B).
2 To simulate the function of robotics and other control hardware, thatare an important application in the ‘real’ world.
3 As an excellent method for developing sequenced, logical thinking,testing and evaluating. This offers pupils an enjoyable and user-friendly introduction to the concepts of computer programming. Thisuse is part of the Mathematics Attainment Targets and the turtle is oneexample of such a use.
4 The language needed to use the control hardware is very simple,young children can use control packages with a limited vocabul ary.
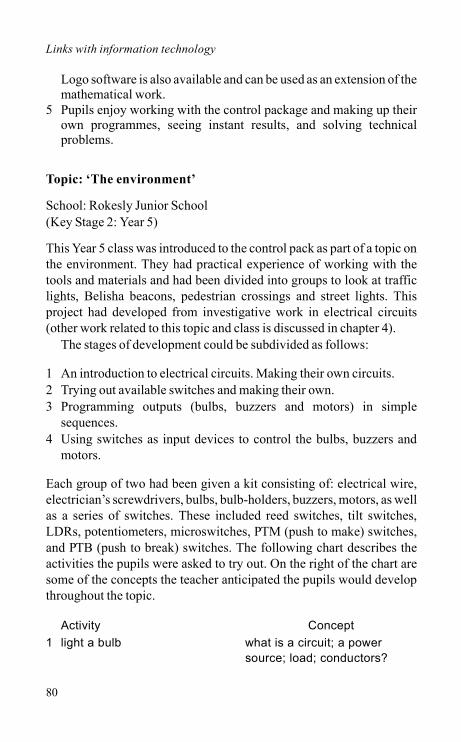
Links with information technology
80
Logo software is also available and can be used as an extension of themathematical work.
5 Pupils enjoy working with the control package and making up theirown programmes, seeing instant results, and solving technicalproblems.
Topic: ‘The environment’
School: Rokesly Junior School (Key Stage 2: Year 5)
This Year 5 class was introduced to the control pack as part of a topic onthe environment. They had practical experience of working with thetools and materials and had been divided into groups to look at trafficlights, Belisha beacons, pedestrian crossings and street lights. Thisproject had developed from investigative work in electrical circuits(other work related to this topic and class is discussed in chapter 4).
The stages of development could be subdivided as follows:
1 An introduction to electrical circuits. Making their own circuits. 2 Trying out available switches and making their own. 3 Programming outputs (bulbs, buzzers and motors) in simple
sequences. 4 Using switches as input devices to control the bulbs, buzzers and
motors.
Each group of two had been given a kit consisting of: electrical wire,electrician’s screwdrivers, bulbs, bulb-holders, buzzers, motors, as wellas a series of switches. These included reed switches, tilt switches,LDRs, potentiometers, microswitches, PTM (push to make) switches,and PTB (push to break) switches. The following chart describes theactivities the pupils were asked to try out. On the right of the chart aresome of the concepts the teacher anticipated the pupils would developthroughout the topic.
Activity Concept1 light a bulb what is a circuit; a power
source; load; conductors?
Links with information technology
81
After an initial ‘hands-on’ session, the work was recorded on the chalkboard. This involved drawing the results of each electrical experimentaccurately and writing comments. The purpose of this activity was tomake the pupils aware, quickly, of the tedious nature of such a detailedmethod of recording, thus illustrating and introducing the need forabbreviations and symbols in circuit diagrams. Pupils used symbols torecord future experiments.
The purpose of the above activity was to immerse the pupils inelectrical circuitry and to illustrate the type and variety of problems theywere likely to encounter. A substantial time was allowed for each groupto explain to the rest of the class their particular findings and designs forswitches or any interesting observations they had made. Good electricalconnections proved to be very important to the success of some of theirexperiments and soon the whole class had been shown and had used asoldering iron (see Plate 12).
Having immersed themselves in electrical circuitry, the pupils thenapproached their chosen design task. Many designs for streetlamps werethought out and built. Table-tennis balls and Smartie tubes proved to
2 switch on a buzzer the buzzers work when the current goes in one direction and not the other: concept of polarity
3 make the motor turn 4 reverse direction of motor polarity needs to be reversed 5 try the various switches what a switch is; the range of
different switches; electrical resistance
6 make a break in your circuit and try different materials across the break
conductive; non-conductive; semi-conductive materials
7 make your own switches application of 5 and 6: introduction of soldering techniques
8 make a reversing switch technical problem solving 9 light two bulbs circuits in series; circuits in
parallel(See Electricity Resource Sheet, The Appendix)
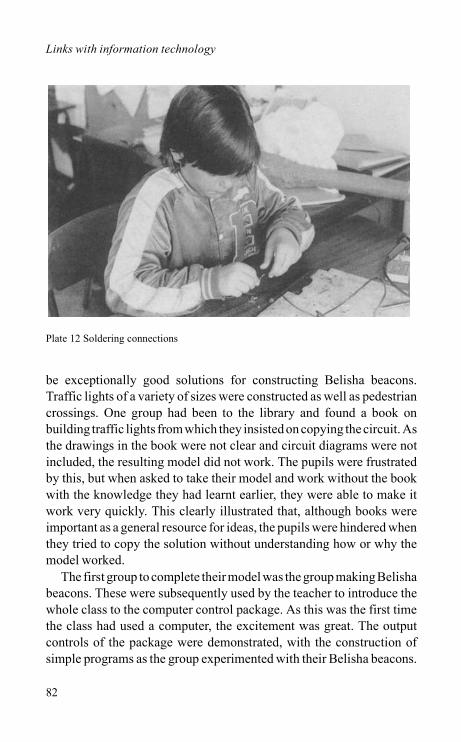
Links with information technology
82
be exceptionally good solutions for constructing Belisha beacons.Traffic lights of a variety of sizes were constructed as well as pedestriancrossings. One group had been to the library and found a book onbuilding traffic lights from which they insisted on copying the circuit. Asthe drawings in the book were not clear and circuit diagrams were notincluded, the resulting model did not work. The pupils were frustratedby this, but when asked to take their model and work without the bookwith the knowledge they had learnt earlier, they were able to make itwork very quickly. This clearly illustrated that, although books wereimportant as a general resource for ideas, the pupils were hindered whenthey tried to copy the solution without understanding how or why themodel worked.
The first group to complete their model was the group making Belishabeacons. These were subsequently used by the teacher to introduce thewhole class to the computer control package. As this was the first timethe class had used a computer, the excitement was great. The outputcontrols of the package were demonstrated, with the construction ofsimple programs as the group experimented with their Belisha beacons.
Plate 12 Soldering connections
Links with information technology
83
The language used in the control program was very similar to Logo.These were some of the processes:
1 Switching on and off a series of outputs. 2 (a) Building a sequence, (b) ending a sequence. 3 Repeating a sequence. 4 Making a sequence recursive. 5 Testing a sequence. 6 Editing a sequence. 7 Naming and saving a sequence.
It was obvious that the desire for ‘hands-on’ experience was great, and,since this was the first time the school had had the use of a computer,there was some apprehension as to how it would be shared and used bythe class. It was decided to take two groups of pupils, show them how tohandle the computer, how to load the program and repeat instructions forusing the control software. They then had the opportunity to familiarizethemselves, before showing the next group all these procedures. Withcareful management of the groups with regards to time, and occasionalteacher intervention to boost the information, all the pupils had anopportunity for hands-on experience of simple programming.
In the mean time, the pupils working on the lights and beacons hadcompleted their models and worked on simple procedures on thecomputer. The procedures were thoroughly discussed, with some pupilsacting as lights following given instructions.
Next, the pupils needed to use input devices. A series of switcheswere plugged into the input control sockets, enabling pupils to make‘conditional statements’. An example would be:
• if input on 1 then switch off 1 • if input off 1 then switch on 1
A tilt switch is plugged into input socket no.1 and a bulb is plugged intooutput socket no.1; i.e. ‘if the tilt input is on, then switch the light outputoff and if the tilt output is off, then switch on the light output’.
This part of computer control work involved pupils in more complexprogramming, with greater discussion on procedures and involvementin evaluating success or failure of those procedures. Programming
Links with information technology
84
mistakes are more likely to occur and more difficult for the pupils to find.Hence, the language used between the pupils involved in the work ismuch more interesting. Listening skills become paramount. Making useof group problem-sharing is interesting and fruitful. In this situation, agroup of pupils from the class assemble around the computer and thefault is explained. Often the solution is obvious to someone else notinvolved in the project. While the teacher may manage such instancesinitially, as time develops the pupils get used to the idea of going over toask someone else to help them.
It is impossible to overstate the importance of these methods ofworking. They simulate real planning situations. They also highlight theimportance of working in different ways: the divergent modes ofthinking are very important in approaching a problem; convergentmethods are needed for refining. However, it is absolutely necessary tobe able to look openly and divergently at the situation throughout thestages. It is important we assist pupils in finding means to do so.Sometimes an insistence on going out to play and then coming back toresume work is one method of doing this. At other times, looking at theproblem and discussing it with a partner for a period of time, withoutacting on any decisions, is another.
The types of problems solved with the use of control hardware weretechnical in nature, and it may be possible to list some of the areas ofconceptual development and techniques needed and covered at thisstage:
1 Using one program within another. 2 Building conditional statements. 3 Solving the technical programming problems that arise in the
experiment/finding faults. 4 More complex programming.
The students were able, after a lot of work, to complete the following:
1 Sequence the Belisha beacons. 2 Sequence a number of different sets of traffic lights. 3 Sequence the pedestrian crossing (this program was later built into
one of the traffic light sequences). 4 Light the street lamps in the dark.
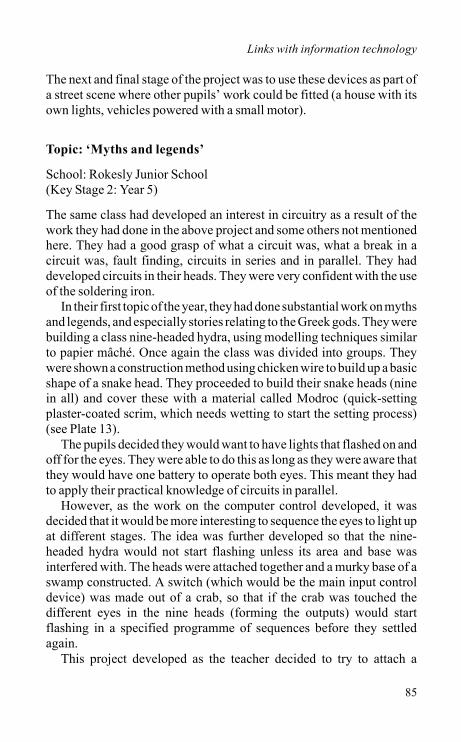
Links with information technology
85
The next and final stage of the project was to use these devices as part ofa street scene where other pupils’ work could be fitted (a house with itsown lights, vehicles powered with a small motor).
Topic: ‘Myths and legends’
School: Rokesly Junior School (Key Stage 2: Year 5)
The same class had developed an interest in circuitry as a result of thework they had done in the above project and some others not mentionedhere. They had a good grasp of what a circuit was, what a break in acircuit was, fault finding, circuits in series and in parallel. They haddeveloped circuits in their heads. They were very confident with the useof the soldering iron.
In their first topic of the year, they had done substantial work on mythsand legends, and especially stories relating to the Greek gods. They werebuilding a class nine-headed hydra, using modelling techniques similarto papier mâché. Once again the class was divided into groups. Theywere shown a construction method using chicken wire to build up a basicshape of a snake head. They proceeded to build their snake heads (ninein all) and cover these with a material called Modroc (quick-settingplaster-coated scrim, which needs wetting to start the setting process)(see Plate 13).
The pupils decided they would want to have lights that flashed on andoff for the eyes. They were able to do this as long as they were aware thatthey would have one battery to operate both eyes. This meant they hadto apply their practical knowledge of circuits in parallel.
However, as the work on the computer control developed, it wasdecided that it would be more interesting to sequence the eyes to light upat different stages. The idea was further developed so that the nine-headed hydra would not start flashing unless its area and base wasinterfered with. The heads were attached together and a murky base of aswamp constructed. A switch (which would be the main input controldevice) was made out of a crab, so that if the crab was touched thedifferent eyes in the nine heads (forming the outputs) would startflashing in a specified programme of sequences before they settledagain.
This project developed as the teacher decided to try to attach a
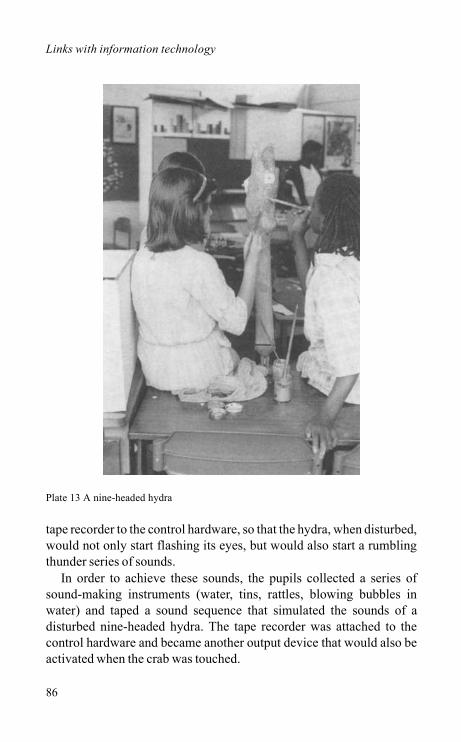
Links with information technology
86
tape recorder to the control hardware, so that the hydra, when disturbed,would not only start flashing its eyes, but would also start a rumblingthunder series of sounds.
In order to achieve these sounds, the pupils collected a series ofsound-making instruments (water, tins, rattles, blowing bubbles inwater) and taped a sound sequence that simulated the sounds of adisturbed nine-headed hydra. The tape recorder was attached to thecontrol hardware and became another output device that would also beactivated when the crab was touched.
Plate 13 A nine-headed hydra
Links with information technology
87
The whole programme was put together quickly, and it workedrelatively well. There were problems with changing the eyeball bulbs,fitting them in and checking circuits. What amazed the teachers was thepersistence of the pupils in being able to locate these faults and find waysto resolve them.
The nine-headed hydra went to a series of exhibitions in the borough,and finally came back to the school. What proved particularlyinteresting was the future use it was put to. It was used as a way ofintroducing pupils to the computer control output package. Pupils wouldwork in twos, decide on a sequence for the different heads to light up, andthen work on achieving that sequence. It was easy to make up asequence, since the heads were coloured in different ways, and wereeasily distinguishable.
Topic: ‘Robots’
School: Rokesly Junior School (Key Stage 2: Year 6)
At Rokesly Junior School there has been a lot of work done throughoutthe year groups with Technical Lego. There is a policy to develop italongside the Basic Lego in the lower years. The pupils are alwaysencouraged to show their work and explain how they did it, both atassembly time and often to another class. The Lego sets are well lookedafter, and each class has access to a number of sets. (See notes on use ofLego in the Appendix).
The MEP (Micro Electronics Project), now superseded by theMESU, gives, as examples, a variety of control project ideas. UsingTechnical Lego or cheap motors with tin cans and various other types ofpulleys, pupils can build motorized buggies, which can be developed byattaching them to control packs and sequencing different movementpatterns.
While pupils enjoy using kits to construct models, it is important thatthey are able to transfer some of their understanding into other materials,and simulate the same mechanisms in models of their ownconstructions. This transference of concepts into other media ensures athorough comprehension of these concepts and their differentapplications. The Year 6 class at Rokesly had had considerable
Links with information technology
88
experience with the tools, and had been involved in a number of design-and-make projects. Their topic was ‘robots’.
There were many other areas of the curriculum that the pupils werecovering within such a topic, apart from the obvious technologicalimplications. The most interesting were the number of robotic dancesthat they had devised. The joint work, co-ordination and partnershipsinvolved could be the subject of a chapter on their own.
Alongside this work, the pupils were given a number of technicalproblems to solve using the Technical Lego kits. Lego I and Lego II kitswere available, and one group had access to a pneumatic Lego kit. Theywere given a series of mechanical movements to try to build: an armgoing around slowly; a robot moving backwards and forwards; pincermovements; movements simulating cranes; barrier movements, andmany others. The teacher set these movements to pairs of pupils, andwaited to see the response. The aim was to introduce the pupils to the useof the motor, the need to slow the motor down by use of gears and pulleysand simulate different motorized movements.
The pupils also brought in their own toys from home: especially spacebuggies with motors; transformers of all varieties; and other kits, eitherwith good examples of mechanical movements or with some aspect thatwas motorized. This inspired their projects, so that the rotating armbecame a camera carrier moving in all directions, and the vehiclesbecame part of a space buggy.
Using their Lego models, they devised a series of programs for theirrobots to move in a variety of sequences using the control equipment.These were shown to the others, and the programs explained. Themajority of pupils were more interested in transferring their kit ideas intoprojects that could be taken home, rather than going on to use the inputsto any degree of sophistication. However, the outputs were used fully,with flashing lights and buzzer sequences to accompany their variousmodels.
The principle of gearing down was quickly established, and the pupilsbecame fairly adept at understanding the functions of gears and cogs.Some used pulleys to slow their motor down. Positioning the motors wasfound to be an important factor in their designs.
Other activities during this period included keeping a log of the workin progress. This was completed every time the pupils spent a session on
Links with information technology
89
their robotics project. The log included: a review of what had beenachieved; personal comments about the progress; sketches of therelevant details; and finally an idea of the next stage.
It is possible to use the control hardware and software for manydifferent projects, such as sequencing motorized machines in thefairground or looking at different machinery that may need to besequenced. A sequence from a play or nursery rhyme can be built. Theteacher who is interested will find the resource packs that are availablewithin their LEAs and Colleges of Education very useful and helpful.Some ideas, used with teachers, are shown in the Appendix.
90
7
Whole school development
The previous chapters have shown a variety of case-studies which haveincluded different methods of starting out with the use of the tools. Manyteachers had been on in-service training (INSET), aimed at developingtheir personal self-confidence in tackling open-ended practicalproblems, involving handling the tools and areas of technology theymight not have experienced before.
One of the recurring comments of teachers on the courses is that theyfear starting projects which tend to be open-ended in nature. They areconcerned about their possible inability to answer practical questionsthat may be raised by pupils. This worry is compounded by the manyorganizational problems arising out of the use of tools in the classroomfor the first time.
The aim of this chapter is to look at some of these concerns andaddress some of the issues involved. Once again, two case-studies areused to illustrate how school staff decided to work collaboratively toovercome some of the fears, and to work towards building a schoolpolicy based on the teachers’ experiences of curriculum development inthe area.
The first example shows how one school (Down Lane Junior School)embarked on curriculum development with a clear strategy thataccounted for the need to develop staff confidence whilst addressing theeducational needs of the pupils in the school. The second schoolexample (South Haringey Junior School) shows how a school started totackle the issues of developing a school policy where work had beengoing on for two years.
Many concerns are raised by teachers embarking on the use of thetools for the first time in their schools. It is possible to identify some ofthese, which tend to be organizational in nature:
Whole school development
91
1 Working with tools and materials in general.2 Starting to use these with pupils in the classroom situation for the first
time. 3 Coping and making use of the immense enthusiasm that is generated
by starting this work with the pupils who have had no previousclassroom experience.
4 Dealing with the issues of safety. 5 Choosing starting-points and challenges that are relevant to the
classroom topic and are considered appropriate design andtechnology activities.
6 Planning a balance of time allocation for the design and technologyactivities, to ensure that other curricular activities are addressed.
Chapter 3 showed possible ways of organizing pupil groupings,resources and support to initiate practical work in the classroom, usinga particular constructional technique to build frames and boxes that wereincorporated into the class topics (‘dragons’ and ‘farms’). Chapter 2showed how a teacher introduced a reception class to the tools andmaterials, using collages as a theme. Each teacher will finally devisesome particular organizational starting-point that is best suited to her/hiscircumstances and needs.
The case-study below aims to demonstrate the usefulness of workingtogether as a school staff, and to show how a co-operative effort couldreap far wider benefits for staff and pupils. It also demonstrates that,while design and technology activities can be time-consuming, they canalso act as a focus for many other areas of the curriculum.
Design and technology as a focus for language work
School: Down Lane Junior School Headteacher: Ms Irene Lomas
Down Lane Junior School has ten classes in its school. Its pupils comefrom a variety of cultural backgrounds and twenty-six communitylanguages are spoken throughout the school. At the beginning of theyear, seven of the eleven members of staff were relatively new to theschool: four probationers, one teacher who had just completed aprobationary year, a new deputy headteacher, and another experiencedteacher new to the school.
Whole school development
92
The staff of the school had decided that they needed to concentrate onreviewing the language policy in the school. Through discussions withlanguage advisory teachers, they decided that the best means of studyinglanguage development was through a policy of ‘design and technology’,since they believed that these activities could give rise to a variety ofdifferent types of language activities that could be seen to have a ‘real’sense of purpose for the pupils. A study of these different languageactivities would be made following the work.
The plan of action involved two members of staff attending INSETcourses. They would be responsible for initiating work in theirrespective classrooms, so that they could act as role models for others toobserve and question. This period would also be accompanied by staffworkshops for the whole staff, to introduce the tools and discuss some ofthe practical problems. Other curriculum meetings highlightedlanguage issues arising from the work.
The second stage would be to involve every member of staff in the useof tools in her/his classroom. This stage is described in this chapter. Thisperiod would be assessed and would lead to a development of moreopen-ended problem solving as the confidence and expertise of the staffdeveloped.
After the initial workshop sessions the staff decided to try out frameconstructions in their classrooms. They felt this was the easiest and moststructured way of starting the work, and a method they felt they couldhandle. The main aims of this school exercise were as follows:
1 To introduce pupils throughout the school to the use of the tools in asafe and organized manner.
2 To enable this introduction to be shared amongst all the pupils in theschool.
3 To give teachers a common experience that would enable them toshare ideas and discuss these relative to their particular classes. Thiswould initiate collaboration and discussion.
4 To decide some common language activities that could be developedthroughout the school.
5 This initial work would be seen as the first step towards developingmore open-ended problem solving. While the box constructioninvolved no designing, there would be some technical problemsolving involved.
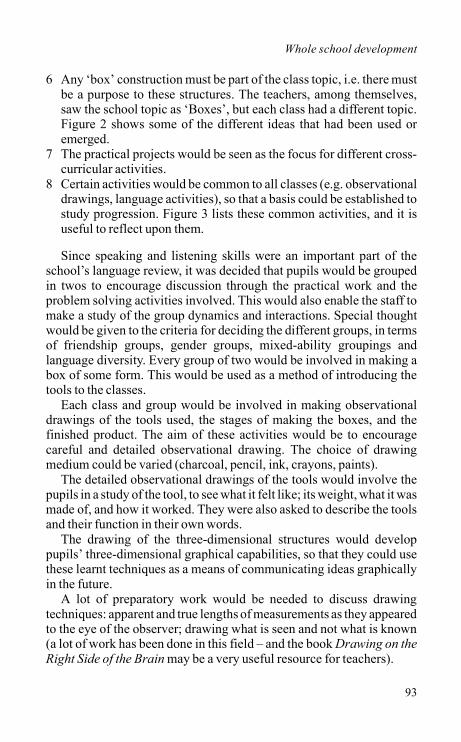
Whole school development
93
6 Any ‘box’ construction must be part of the class topic, i.e. there mustbe a purpose to these structures. The teachers, among themselves,saw the school topic as ‘Boxes’, but each class had a different topic.Figure 2 shows some of the different ideas that had been used oremerged.
7 The practical projects would be seen as the focus for different cross-curricular activities.
8 Certain activities would be common to all classes (e.g. observationaldrawings, language activities), so that a basis could be established tostudy progression. Figure 3 lists these common activities, and it isuseful to reflect upon them.
Since speaking and listening skills were an important part of theschool’s language review, it was decided that pupils would be groupedin twos to encourage discussion through the practical work and theproblem solving activities involved. This would also enable the staff tomake a study of the group dynamics and interactions. Special thoughtwould be given to the criteria for deciding the different groups, in termsof friendship groups, gender groups, mixed-ability groupings andlanguage diversity. Every group of two would be involved in making abox of some form. This would be used as a method of introducing thetools to the classes.
Each class and group would be involved in making observationaldrawings of the tools used, the stages of making the boxes, and thefinished product. The aim of these activities would be to encouragecareful and detailed observational drawing. The choice of drawingmedium could be varied (charcoal, pencil, ink, crayons, paints).
The detailed observational drawings of the tools would involve thepupils in a study of the tool, to see what it felt like; its weight, what it wasmade of, and how it worked. They were also asked to describe the toolsand their function in their own words.
The drawing of the three-dimensional structures would developpupils’ three-dimensional graphical capabilities, so that they could usethese learnt techniques as a means of communicating ideas graphicallyin the future.
A lot of preparatory work would be needed to discuss drawingtechniques: apparent and true lengths of measurements as they appearedto the eye of the observer; drawing what is seen and not what is known(a lot of work has been done in this field – and the book Drawing on theRight Side of the Brain may be a very useful resource for teachers).
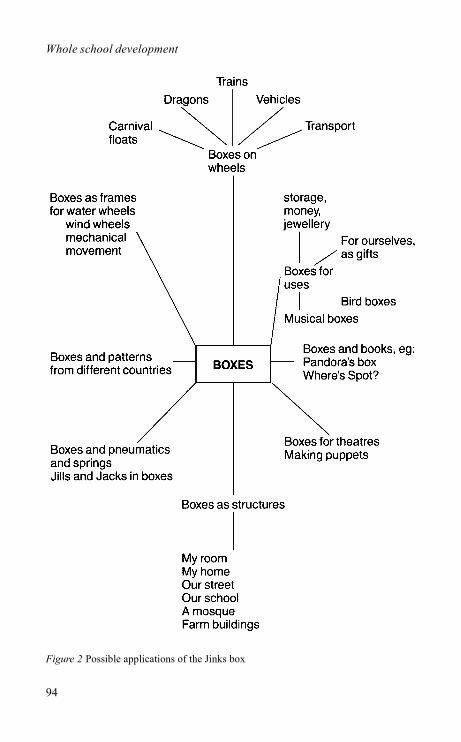
Whole school development
94
Figure 2 Possible applications of the Jinks box
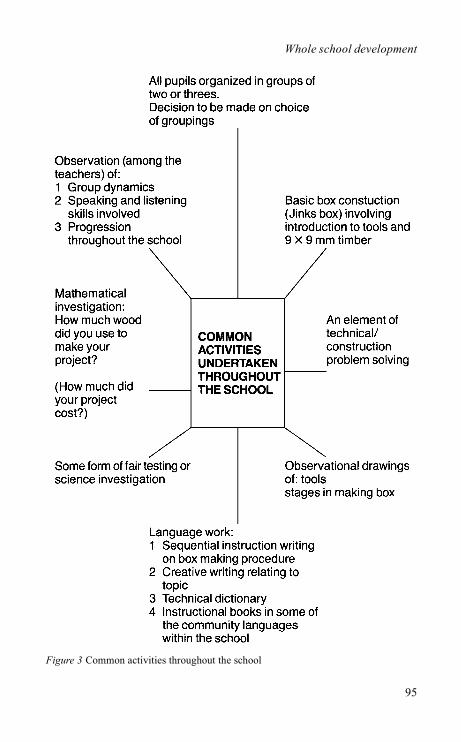
Whole school development
95
Figure 3 Common activities throughout the school
Whole school development
96
Language work
1 Given the rather prescriptive nature of making the box, it was decidedto ask pupils to produce sets of instructions to be given to others onhow they made the box. This would involve them in logical sequencewriting, adding diagrams to illustrate the process. A variety of readeraudiences were planned for these instructions: Martians coming toearth; pupils in other classes – older, younger, or the same age; parentsand adults. These would be tested on the other classes for theiraccuracy. (Some of them were also tested at a parents evening whena workshop was held for one hundred parents.)
2 Pupils would be asked to describe the tools and write out a descriptionthat would include comments on their function. The descriptionwould be included in the technical dictionary.
3 A technical dictionary would be developed of all the terms the pupilscame across. This dictionary would include: the word; a small sketch,where appropriate; and the pupil’s own description. It is possible todevelop this idea so that pupils work through school, building thisdictionary over the years. Words used to describe the drawing ofcorner card triangles, such as horizontal, vertical, diagonal, squareand parallel, would also be included.
4 Given the wealth of community languages spoken in the school, someattempt would be made to make instruction booklets in some of these.This would either involve the pupils directly (those who could speakand write another language) or also involve the parents in acollaborative project with pupils.
5 Every class would be involved in some form of creative writing thatwas appropriate to its topic.
6 Books and resources that related to the topic in hand would becollected prior to work. These would include fiction and non-fiction.
Other types of work
Every classroom topic should involve some aspect of technical problemsolving: how things are joined; how they move; how to fix an item orobject; finishing the work. The pupils would resolve these in theirgroups.
Every project should also include some form of science investigationor fair testing. The whole school would be involved in a practical
Whole school development
97
mathematical investigation that answered the question: how much wooddid we use in our project? Some classes would be able to respond to: howmuch did it cost? This exercise was important for the school to decidehow much timber it would need for the following year. The aim of theexercise was to involve all the pupils in the school with a joint task thathad a useful function. Compiling cutting lists and pricing designproducts are activities that have a ‘real’ function. This project wouldinvolve pupils in measuring and costing exercises with a purpose. It wasalso important that these exercises took account of progression inmeasuring.
In order to do this, it was proposed that Year 3 pupils would use someunit of measurement, and measure accordingly. There would be a greatdeal of discussion beforehand, leading up to the concept of a ‘unit ofmeasurement’. The Year 4 pupils would be encouraged to look at theruler as a tool for measurement. The Year 5 pupils would also measuretheir timber accurately, but would have to make some effort to work outhow many lengths of timber they used. This would include looking at thescrap pieces left over. The Year 6 pupils would conduct a similarexercise to Year 5, and be responsible for collating all the information inthe school.
Teachers have tried different and equally successful organizationalmethods to conduct such an investigation. It is possible to ask pupils todiscuss and decide on the method by which they will calculate theamounts and then to work on the problem independently, thus providinga means of cross-checking. On the other hand, it is also possible to havethe group work together throughout the exercise, and have it cross-checked by the teacher or another group.
Individual classroom topic plans of activities
After a lot of deliberation, a number of topic plans emerged. Thefollowing pages describe some of the topics, together with a very briefdescription of the planned activities, as well as those activities thatemerged through the development of the work itself. Additionalactivities that could be incorporated have also been included. The firsttopic includes the common activities which have been abbreviated in thefollowing plans.
Whole school development
98
The aim of the plans together with the very brief descriptions is tohighlight how design and technological activity in primary schools isnot only justified and essential, in its own right, to a pupil’sdevelopment, but can also be used as a focus for the topic work, in orderto plan relevant and challenging activities in other areas of thecurriculum.
‘Ourselves’/‘Our town’
The pupils had been engaged in considerable work on their families,themselves, and their homes. As a group they were asked to considerwhat type of a town they would live in (for the variety of classroomactivities generated, see Figure 4).
After establishing the types of buildings this small town would need,each group of two pupils was asked to take on responsibility for thedesign and building of a model for one of them. They drew what theythought the structures would look like. Alongside this work, theyconstructed some three-dimensional forms using waste materials.
They were shown the constructional technique for building theframes. The measurements from their temporary models weretransferred into the timber using a variety of measuring methods:comparative measurement; use of Unifix cubes; string and rulers. Theysoon found out why accuracy was important, and methods of achievingthis were discussed.
They had to work out how they would cut the timber for their roofsand attach these to their existing structures. They had to work out howthey might enable their doors to open and close. In this respect, they allhad some specific technical problems to solve in their individualconstructions. Those groups that had larger buildings soon found outthat they required strengthening struts, and many small problems arosewhich the pupils had to resolve themselves.
This class spent a major part of their time finding materials tosimulate building fabrics, and great care and detail was placed on thefinishes to their various building structures, involving them in marblingtechniques, colour mixing and brick patternwork, as well asinvestigating textures in a wide range of materials.
‘Growth’
In this project, the class had been planting seeds and bulbs and observing
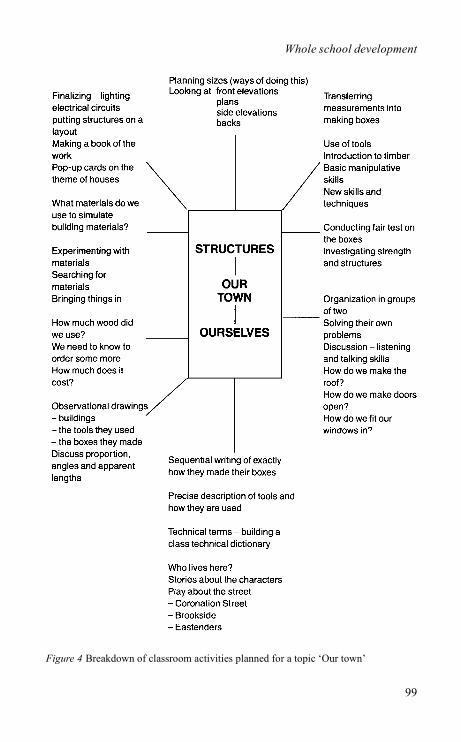
Whole school development
99
Figure 4 Breakdown of classroom activities planned for a topic ‘Our town’
Whole school development
100
their growth. Alongside this work, they would make boxes with flowerspopping out using simple syringes (for classroom activities see Figure5).
While the pupils were constructing different sized boxes, the teachernoticed that many were forgetting to add the strengthening card corners.Following a discussion on the function of these corners, the class wereasked to prove the hypothesis that they increased the strength of theboxes. Two identical boxes were made, one with card on the corners, theother without, and the tests were carried out the next day. It took theweight of one of the three heaviest pupils in the class to break the boxwithout strengtheners, whilst the teacher (approx. 11 st.) plus tenencyclopaedias broke the other. Needless to say the testing caused greatexcitement, and a lot of discussion for many days to come. The processwas recorded, photographed, weights noted, and a book was made,describing the afternoon’s activities.
The pupils were shown the syringes, and many questions were asked;e.g. what is being pushed? how do they work? Many questions wereraised that highlight specific science concepts (see pneumatics andhydraulics resource sheet in the Appendix). In order to demonstrate thestrength of the air pressure, pupils put their thumbs on one syringe, whilethe teacher pushed at the other end. Different sizes of syringes wereintroduced to look at relative movement.
In the mean time, the pupils had to work out how they would hold thesyringes in place and how to construct the flowers from different typesof paper to ensure the maximum effect of the flowers coming out andthen back into the boxes. This involved careful investigation of differentpapers, their thicknesses and properties (news-sheet, tissue paper, sugarpaper and others).
‘Puppets and puppet theatres’
The main objective was to make puppet theatres and puppets. However,the teacher was keen to get the pupils to handle the tools and experimentby making small boxes first. These would be used to make scenery andparts of bodies for string puppets (which were put together at a parentsevening aimed at involving parents in the processes of design andtechnology activity).
The consequent building of the theatres involved pupils in planningsizes and considering certain functional details, such as
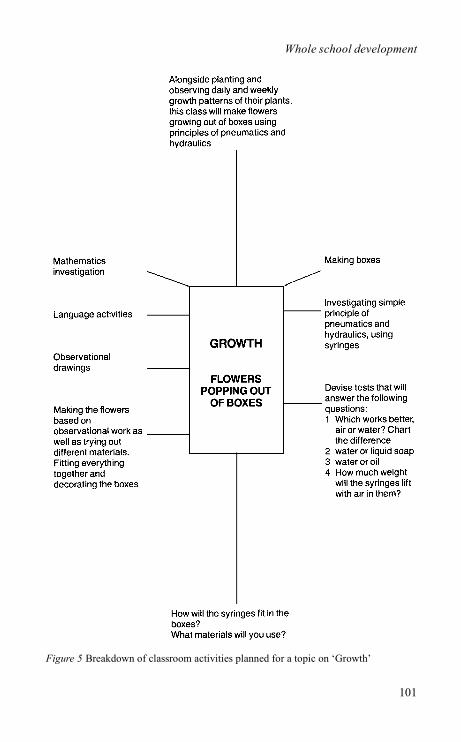
Whole school development
101
Figure 5 Breakdown of classroom activities planned for a topic on ‘Growth’
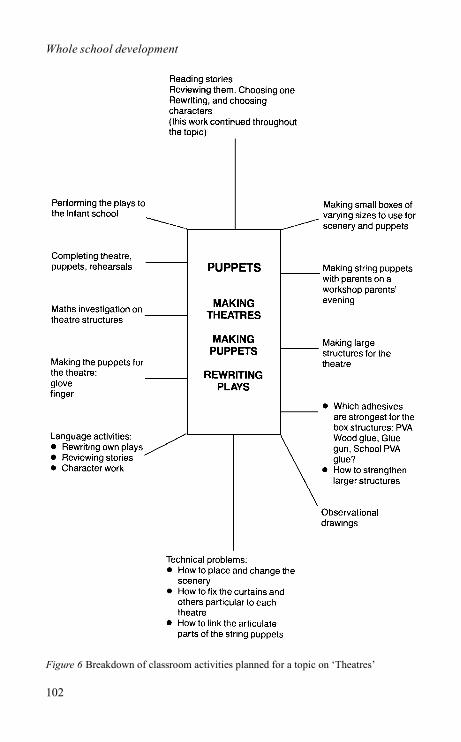
Whole school development
102
Figure 6 Breakdown of classroom activities planned for a topic on ‘Theatres’
Whole school development
103
changes of scenery, stage design and opening and closing the frontcurtains. The theatres were to be used for glove and finger puppets inscales appropriate to their size.
The pupils noted that the teacher had brought a different PVA glue(Resin W PVA) from the one they generally used in school. They askedwhether there was a difference. The investigation conducted by Year 5pupils was reported to this Year 3 class, and they were able to conducttheir own investigations relating to the different adhesives used forjoining timber.
Such a project involved the class in story reading, reviewing andchoosing their favourites, and finally writing these down in the form ofplays. The work included visits to theatres and museums, as well as thepractical work of deciding on characters and making glove or fingerpuppets. A number of art techniques were incorporated, as well as textileprinting and fabric construction. Throughout the topic, the pupils wereable to build a folder that described the materials they used. Finally, theyperformed their shows to an audience of infant pupils.
‘Colour’
This Year 5 class had previous experience of the use of tools. They hadalso written precise sequencing instructions on how to make some paperengineering cards and applied these techniques to book making (seepaper engineering resource sheet in the Appendix). It was important,therefore, to set them a more challenging situation that would furthertheir capabilities. The topic was ‘Colour’. Having read about anddiscussed the significance and traditions associated with the Hinducolour festival of ‘Holi’, the pupils considered what a colour festival inHaringey would celebrate and who it would involve. They were askedto design mechanical carnival floats for such an occasion.
The pupils visited Cabaret Mechanical Theatre in Covent Garden,London, for ideas. A number of visual examples were brought in from alocal secondary school. They drew these and made observations andrecommendations on improving them. They also used Technical Legosets to simulate these movements.
They made simple box structures on wheels, that would containmechanical movements to operate the figures and scenes on the topsof their floats. The technical problems and ideas were very similar tothose discussed in chapter 5, and the pupils worked out different
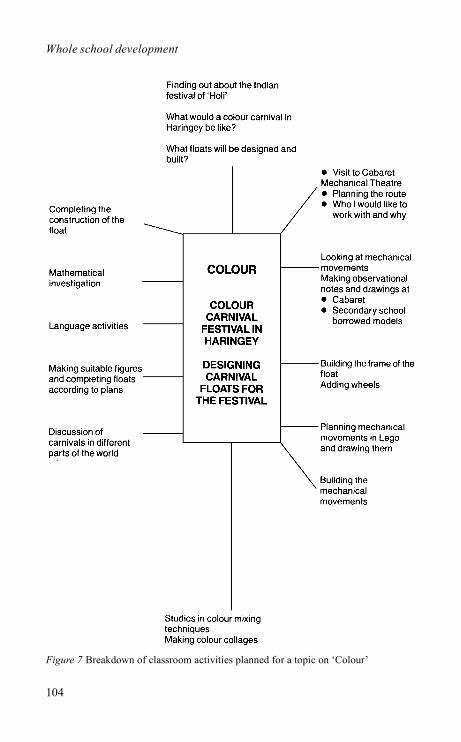
Whole school development
104
Figure 7 Breakdown of classroom activities planned for a topic on ‘Colour’
Whole school development
105
methods for making gears, cams and pulleys. Other language activities specific to this project included mapping
out the journey, reporting on the day out, writing down who they wouldlike to work with and why, and filling in a log of the work done on theproject and the progress of it, including decisions, mistakes and howthey felt about the work. They studied and experimented with colourmixing, colour pigmentation and tone, as well as engaging in other workassociated with carnivals, festivals, dance and music.
‘Transport and machines’
This class were introduced to tools by constructing a rectangular base asa chassis and attaching wheels (as described in chapter 3). These werethen used as bases to construct some form of moving machine. Thepupils experimented with wheels and then proceeded to test the varietyof methods they had devised for attaching wheels and axles on the floorand on ramps. The latter proved useful for measuring distance and timeand finally introducing the idea of speed.
Having tested their chassis and made some decisions on efficiency,they proceeded to build these up into a series of machines they hadchosen as part of their topic (cranes, vehicles, lorries, buses). Resourcebooks were useful to give ideas about construction and function of thedifferent machine parts.
It is possible to develop this project in a number of ways; for example,as an energy project, whereby the pupils are given the further problem ofpropelling their machines a certain distance or up a ramp using a numberof sources of power (air, water, elastic band power, electricity). (It ispossible also to use clockwork wind-up mechanisms and cheap electricmotors.) On the other hand, interesting work on journeys, terrains andadventures across different lands can be used as a basis for a projectsimilar to that described in chapter 5.
‘Boxes’
A number of classes made simple boxes as containers, studying specificaspects of these. The major technical problems shared were how to fitthe lids on and what types of lids they wished to design. The choices arenumerous, and many boxes were brought in to study: removable lids;
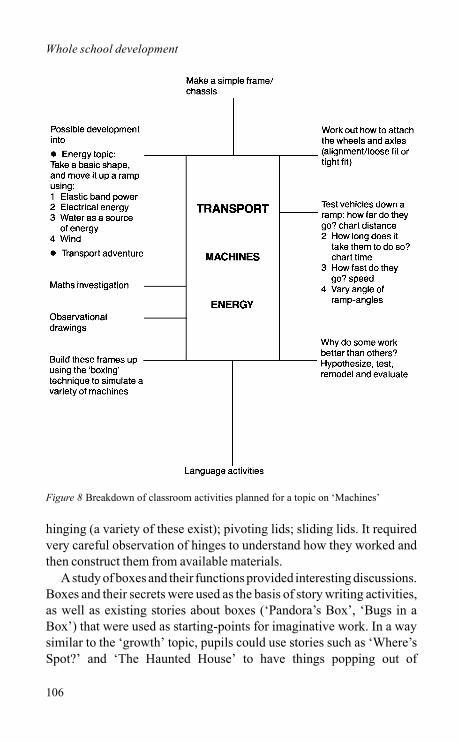
Whole school development
106
hinging (a variety of these exist); pivoting lids; sliding lids. It requiredvery careful observation of hinges to understand how they worked andthen construct them from available materials.
A study of boxes and their functions provided interesting discussions.Boxes and their secrets were used as the basis of story writing activities,as well as existing stories about boxes (‘Pandora’s Box’, ‘Bugs in aBox’) that were used as starting-points for imaginative work. In a waysimilar to the ‘growth’ topic, pupils could use stories such as ‘Where’sSpot?’ and ‘The Haunted House’ to have things popping out of
Figure 8 Breakdown of classroom activities planned for a topic on ‘Machines’
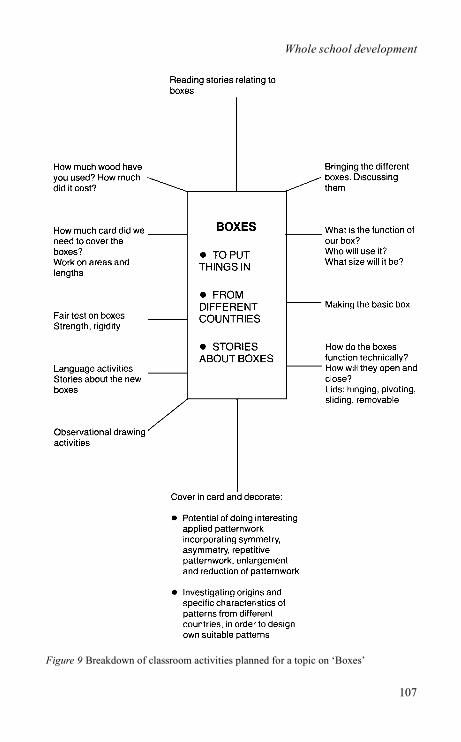
Whole school development
107
Figure 9 Breakdown of classroom activities planned for a topic on ‘Boxes’
Whole school development
108
different structures. One class made bird boxes and had to pay specialattention to waterproof glues and the choice of materials used to coverthem.
By carefully removing the electronic parts of musical cards (availablefrom most stationers), and placing them in the lids and sides of boxes, itis possible to make musical boxes.
The different sizes of the boxes provided many additionalmathematical activities, including measuring the area of card requiredto cover the box.
A study of patternwork and symbolism was used as a means ofdesigning boxes from different countries around the world. Islamicpatternwork, African mask designs, Egyptian hieroglyphics andJapanese designs were all used as a stimulus for the study of pattern,symmetry, asymmetry, enlarging and reducing these, repeating themand finally applying the designs to cover the boxes. Thin veneer cut tothe shapes and stuck on to card was used by one group of pupils inanother school to produce very rich and sturdy looking containers thatwere finally varnished.
The school experiment at Down Lane Junior School proved verysuccessful. It brought the pupils together, and many classes describedtheir work to the rest of the school at assemblies (‘Show and Tell’).Classes visited others to see how the work progressed. Visitors arrivingto the school would be given full descriptions of what each class wasdoing before they went into the class, and there was a constant supply ofpupils keen to describe their work and show it off.
It proved a positive way of bringing the staff together in a practicalway, to share the problems, frustrations, and, most importantly, thesuccesses. It built up the confidence of the staff to tackle more open-ended problems and to make design and technology activities a morefamiliar part of the general class topic and the tools part of the overallclass equipment.
The second case-study in this chapter is that of a school whichdeveloped the work over a period of two years, and developed a methodfor recording the work in order to build up a workable school policy.
Whole school development
109
Design and technology as a focus for curriculum development
School: South Haringey Junior School Headteacher: Mr James Shepherd
At South Haringey Junior School, curriculum development in designand technology was seen as central to topic work in the classroom, andevery topic would have practical problem-solving activities as a majorfeature of the topic work, giving rise to work in all other areas of thecurriculum. We describe the developments over the two-year period.
The first year
The headteacher had planned for design and technology to be the majorfocus of development in the school, thus devoting a considerableamount of the school’s capitation to initiating and resourcing the schoolwith necessary tools and materials.
Four members of staff were encouraged to attend in-service trainingaimed at developing their confidence in handling the tools. Theseteachers were located because they had different interests and areas ofresponsibility: science and technology, art and design, language,English as a second language. They also taught Year 3 and 4 classes inthe school, and could therefore start the work with the youngest pupilsto enable progression to be mapped in later years as the work spreadthroughout the school. The first year of curriculum development wasspent developing the following:
1 The experience and confidence of the teachers concerned, so that theymight assist others in the future.
2 Building a stock of tools, resources and materials for the future. 3 Ensuring these activities were a focus for general curriculum
development and central to the topic work in the classrooms. 4 An exhibition of the work at the end of the year would be used as a
means of encouraging other teachers and explaining the work toparents.
5 The teachers concerned would bring their different sets of expertiseand interest to bear on their particular projects, in order to showbreadth of possibilities across the different areas of the curriculum.
Whole school development
110
6 Studying the effects of these activities on the learning developmentsof the pupils.
The work by the end of the year was impressive. The teachers hadintroduced pupils to the tools and developed the work further. They hadused a number of ideas from LEA exhibitions and adapted them to theirown requirements, topics and interests. The work in the lower years hadspread to the older classes through the enthusiasm of the pupils.
The teachers were able to develop particular aspects of the work intheir classrooms and study the links of design and technology to theirparticular curriculum responsibility, focusing on their interests andparticular expertise to enable the pupils to produce work of exceptionalquality, demonstrating the potential that is capable of being produced bythe whole ability range of a class. Many of the ideas for activitiessuggested throughout this book were developed during this intensiveprocess.
The second year
The main objectives for the second year of development in the schoolcould be listed:
1 To spread design and technology in all the classes and involving allstaff.
2 To reflect on the work of the previous year, record it and build upon it. 3 To study the place of design and technology activities in the primary
curriculum and classroom. 4 To develop a workable and practical school policy for design and
technology.
Further tools and resources were brought in, so that every teacher hadeasy access to a simple tool kit. Other teachers were encouraged to attendcourses, and workshops were held in the school. Each of the teacherswith previous experience was teamed up with other teachers and spreadthroughout the age groups. One teacher was able to work alongsideteachers in their classrooms, with the support of the headteacher.
In order to develop a policy, it was important to start to recorddevelopment to date and to generalize from the previous year’sexperiences. The school had adopted a GRIDS (Guidelines for Review
Whole school development
111
and Internal Development in Schools) process to monitor and plan thisdevelopment.
The principles of this process are based on a collective developmentand sharing of ideas to develop the work throughout its stages. Thestages involved are:
1 Decide where the school is now. 2 Decide where the school wants to go. 3 Decide how it will get there.
The first stage of the process involved the whole staff, working togetherto record the work in the previous year, and to monitor ongoingdevelopments. In order to have some form of structure, it was decided tobreak up into four working parties. The staff would subdivide into threesub-groups: Language, Creative and Aesthetic, Science andTechnology. The whole staff would work together on the mathematicsreview.
Each of these groups would be responsible for gathering all theinformation particular to their area. The aim was to ask every member ofstaff what particular language, science, mathematical or other activitieshad arisen from the projects they had been involved in. These would bedescribed and placed in context. The skills, concepts and attitudesdeveloped would be recorded. Each working party would collate theinformation, and then report to a whole staff meeting for the purpose ofdiscussion and further modification. This process was a lengthy one,taking two terms to complete. It revealed possible common activitiesthat could be developed throughout the school and showed the potentialof the work as a cross-curricular tool. This period also included a reviewof the materials and resources the school was using, and how they werebeing used and accessed by staff and pupils.
The second stage was for the staff to decide how they hoped todevelop the work and in what direction they would be developing. Atthis stage the staff carried out a review of the books, posters, videos andother resources available on the market, as well as recent relevantpublications. Discussions followed on how these might be used todevelop a policy for the continuation and development of the work.
The staff developed a series of questionnaires that they wouldcirculate among themselves to be used as a checklist to ensure
Whole school development
112
agreement, continuity and progression throughout the school and to listthe following:
• The processes involved in design and technology • The materials used • The techniques and practical skills covered • The areas of technological knowledge arising out of the problem-
solving process
Topic planning was central to the work in South Haringey Junior School.At the time of going to print, some work had been done in this area, andthis is recorded, in part, in chapter 8. The work has since been used anddeveloped in other schools.
The areas of discussion, the processes and pointers for thedevelopment of a school policy are included in the Appendix. Separatesheets are included on the types of materials that may be used in designand technology activities, and the sorts of questions a school staff maywish to address when developing a policy for use and resourcing ofmaterials.
The second stage of this GRIDS review also involved importantdecision making regarding where the next step for the developmentwould be.
The school had initiated change and development using design andtechnology activities as a focus for a wide-reaching cross-curricularreview. The aim was to carry on with the cycle of inservice, classroomimplementation, discussion and review, but to narrow and focus futuredevelopment on specific curriculum areas (the next, in their case, beingscience and technology). The policies and methodologies that the schoolhad developed through a study of design and technology across thecurriculum provided a guiding basis for the individual curriculum areas.In future years, mathematics, language and other curricular areas wouldbe reviewed.
This chapter has shown how it is possible for a school to focus on anarea for curriculum development in a collective manner. The process ofco-operation strengthens the impact of the development on pupils andstaff. Monitoring and recording the changes and their effects can be away of developing a coherent workable policy for the particular school.
Whole school development
113
It has not been our intention to record the specific policy outcomes, butto concentrate on the method used to arrive at them, and to providepointers that teachers in other schools may find useful while developingtheir own approaches.
In both cases, involvement of pupils, staff and parents was importantto the success of the work. The tripartite relationship ensured thecontinuity of the work. (At Down Lane Junior School, the workshop fora hundred parents was particularly successful, since it used the pupils toorganize the evening and activities.)
The two schools have also been chosen because they both decided touse design and technology as a means for developing two differentcurricular foci: language, and cross-curricular topic work. In both cases,curriculum development was planned to a realistic timescale, to enablechange to happen and then reflection on the nature of that change.
Throughout the book, we have argued that the methodology andprocesses of design and technology activities are essential in their ownright as worthwhile educational activities that develop pupils’ problem-solving capabilities and their understanding of their environment, andgive them a sense of being able to effect change. We also argue by meansof case-studies that these design and technology activities are cross-curricular in nature. However, it is important that the activities are wellplanned, organized and resourced to ensure the success of such anintegrated topic approach. The next and final chapter provides aframework to help organize topic work.
114
8
Topic planning
In chapters 2–7 we have shown, through examples of work, howdifferent teachers have tackled design and technology activities in theirclassrooms with different ages of children and in a variety of ways.Throughout, the work has always been incorporated into a topic. Theprojects have been used to engage pupils in technical and investigativeproblem solving, and often include open-ended problem solving. Theprojects and activities have also been used to address language, science,art, human and social areas of the curriculum.
However, we have not shown any of the detailed preparation thatoften accompanied these activities. In most cases, the teachers were alsotackling the use of tools in the classroom for the first time. Organizationand planning was of paramount importance to the success of eachventure.
In chapter 4 we described in detail the activities of a Year 4 class aspart of their topic ‘Masks’. In this chapter we show how those activitiesfitted into an overall scheme of work and the type of planning thatpreceded the work in the classroom. We use this method of planning todevelop a model that can be used and adapted by teachers in general.
After brainstorming the idea of masks and planning a wide range ofactivities, the teacher decided to focus on a more restricted scheme ofwork. This scheme of work is recorded as a series of sequenced projects(see Figure 11). Each of these projects included a series of tasks that wereplanned to draw out different skills, concepts and attitudes particular toareas of the curriculum. The teacher listed these and ticked off theappropriate areas (two of these sheets are shown as examples in Figure12).
When the teacher was asked why she had completed this breakdown,her answer was that she would be able to look at her ‘ticks’ and have an
Topic planning
115
overall view of what she had missed out. She would then plan her nexttopic to have greater focus on those areas she felt the pupils had notexperienced to the same depth that she hoped for.
The National Curriculum focuses teachers’ attentions on what theyteach in terms of breadth, balance and appropriateness. The choice ofrelevant work that draws on the different attainment targets in thestatutory orders is essential. Some teachers may argue that the NationalCurriculum documents force them to teach separate subjects so that theycan ‘cover’ the requirements. The topic approach remains, however, themost effective teaching and learning strategy that draws on the differentareas of knowledge, because it provides pupils with the links that givemeaning to the diverse areas of knowledge that we call ‘subjects’. Usingthe topic can also ensure breadth and balance incorporating core andfoundation areas.
One of the greatest concerns of teachers is the method of recordingand monitoring work to ensure that attainment targets are beingaddressed in a systematic way. There are excellent methods ofmonitoring skills and concepts in each of the core areas. These are allvery useful for a school that is focusing on one curriculum area andstudying that area in depth for the purposes of staff and curriculumdevelopment. However, there is a need for models which address allareas of the curriculum across the topic work. These methods need to beeasy to use, the least timeconsuming possible and helpful for planning,recording and monitoring achievement.
We offer the reader one model that has been used as part of the topicapproach. It starts with web diagrams of ideas and develops them to adetailed scheme of activity of teachers’ plans. This is translated intoclassroom charts to monitor the work. Some schools have developed thisfurther by recording outcomes in a pupil’s individual record ofachievement or profile.
The main advantage is that the teacher can plan a detailed series ofactivities, and use these to highlight the attainment targets that are goingto be tackled. This gives a clear picture of what is missing, so that theseareas can be incorporated in another topic or additional activities thatfocus on those attainment targets.
There is a growing trend, reflected in changes in teacher training, forteachers to have expertise in particular curriculum areas. Curricularresponsibilities are shared among the staff of the primary school. Theschool consists of a team of teachers who work in a common way in their
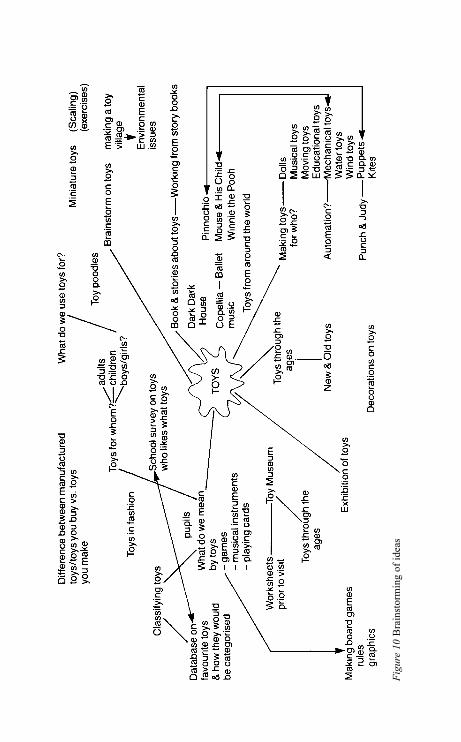
Figu
re 1
0 B
rain
stor
min
g of
idea
s
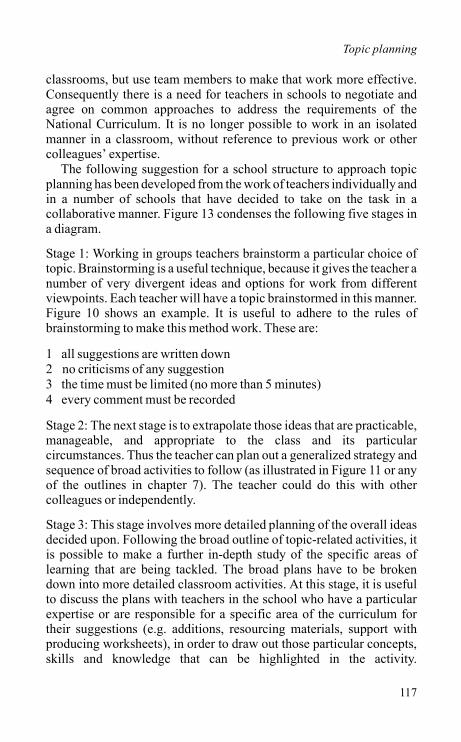
Topic planning
117
classrooms, but use team members to make that work more effective.Consequently there is a need for teachers in schools to negotiate andagree on common approaches to address the requirements of theNational Curriculum. It is no longer possible to work in an isolatedmanner in a classroom, without reference to previous work or othercolleagues’ expertise.
The following suggestion for a school structure to approach topicplanning has been developed from the work of teachers individually andin a number of schools that have decided to take on the task in acollaborative manner. Figure 13 condenses the following five stages ina diagram.
Stage 1: Working in groups teachers brainstorm a particular choice oftopic. Brainstorming is a useful technique, because it gives the teacher anumber of very divergent ideas and options for work from differentviewpoints. Each teacher will have a topic brainstormed in this manner.Figure 10 shows an example. It is useful to adhere to the rules ofbrainstorming to make this method work. These are:
1 all suggestions are written down 2 no criticisms of any suggestion 3 the time must be limited (no more than 5 minutes) 4 every comment must be recorded
Stage 2: The next stage is to extrapolate those ideas that are practicable,manageable, and appropriate to the class and its particularcircumstances. Thus the teacher can plan out a generalized strategy andsequence of broad activities to follow (as illustrated in Figure 11 or anyof the outlines in chapter 7). The teacher could do this with othercolleagues or independently.
Stage 3: This stage involves more detailed planning of the overall ideasdecided upon. Following the broad outline of topic-related activities, itis possible to make a further in-depth study of the specific areas oflearning that are being tackled. The broad plans have to be brokendown into more detailed classroom activities. At this stage, it is usefulto discuss the plans with teachers in the school who have a particularexpertise or are responsible for a specific area of the curriculum fortheir suggestions (e.g. additions, resourcing materials, support withproducing worksheets), in order to draw out those particular concepts,skills and knowledge that can be highlighted in the activity.
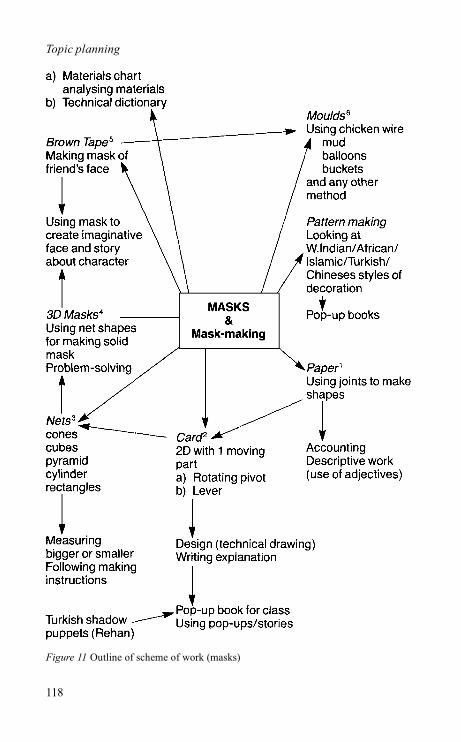
Topic planning
118
Figure 11 Outline of scheme of work (masks)

Act
ivity
Language
Maths
Science Art & Craft
Social Studies
CDT
Skill
s
1Pa
per m
asks
U
sing
sug
ar p
aper
&
sci
ssor
s/jo
ints
√ √
√ √
√
Free
Des
ign
– te
chni
cal d
raw
ing
skill
sy
mm
etry
A
ccou
nt o
f met
hod
√
√
√ D
escr
iptie
lang
uage
D
escr
ibe
mas
k √
D
iscu
ssio
n Pa
intin
g of
mas
k (f
ree)
√
√ M
anua
l ski
lls fo
r mix
ing
pain
t 2
Car
d m
ask
Usi
ng 1
she
et o
f car
d. F
lat m
ask
with
1
mov
ing
part
Rot
atin
g pi
vot l
ever
√
√ √
√
√ Pr
oble
m s
olvi
ng T
echn
ical
dra
win
g lo
okin
g at
mas
k de
sign
s –
inte
rpre
ting
patte
rns
Des
ign
mas
k (te
chni
cal d
raw
ing)
Writ
e ex
plan
atio
n us
e fe
lt tip
s/cr
ayon
s et
c
√
√
Dis
cuss
ion
wor
k A
ccou
nts
of w
ork
– lo
gica
l ord
erin
g 3
Net
s fr
om te
mpl
ates
√
√
cone
s/py
ram
ids
cube
s/cy
linde
r re
ctan
gle
M
easu
ring
Follo
win
g in
stru
ctio
n M
anua
l ski
lls fo
r fitt
ing
shap
e to
geth
er
Figu
re 1
2 B
reak
dow
n of
cur
ricul
um a
reas
from
sch
eme
of w
ork
(mas
ks)
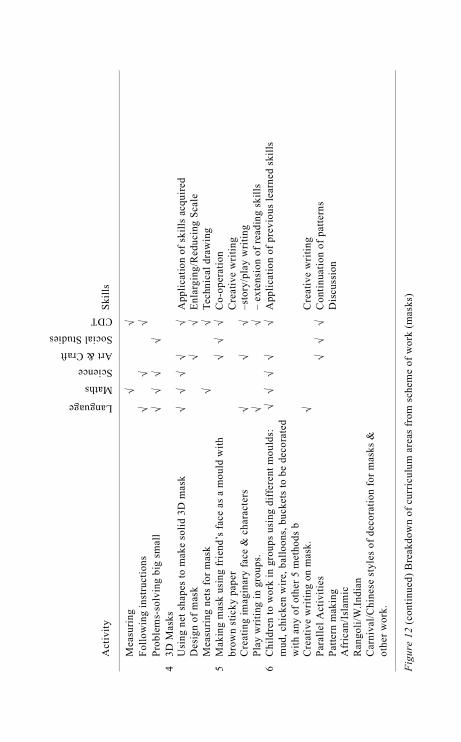
Act
ivity
Language
Maths Science Art & Craft Social Studies
CDT
Skill
s
Mea
surin
g
√
√
Follo
win
g in
stru
ctio
ns
√
√
√
Prob
lem
s-so
lvin
g bi
g sm
all
√ √
√
√
43D
Mas
ks
U
sing
net
sha
pes
to m
ake
solid
3D
mas
k √
√ √
√
√ A
pplic
atio
n of
ski
lls a
cqui
red
Des
ign
of m
ask
√
√
Enla
rgin
g/R
educ
ing
Scal
e M
easu
ring
nets
for m
ask
√
√
Tech
nica
l dra
win
g 5
Mak
ing
mas
k us
ing
frie
nd’s
face
as
a m
ould
with
br
own
stic
ky p
aper
√ √
√ C
o-op
erat
ion
Cre
ativ
e w
ritin
g C
reat
ing
imag
inar
y fa
ce &
cha
ract
ers
√
√ √
–sto
ry/p
lay
wri
ting
Play
writ
ing
in g
roup
s.
√
√ –
exte
nsio
n of
read
ing
skill
s 6
Chi
ldre
n to
wor
k in
gro
ups
usin
g di
ffer
ent m
ould
s:
mud
, chi
cken
wire
, bal
loon
s, b
ucke
ts to
be
deco
rate
d w
ith a
ny o
f oth
er 5
met
hods
b
√
√ √
√
√ A
pplic
atio
n of
pre
viou
s le
arne
d sk
ills
Cre
ativ
e w
ritin
g on
mas
k.
√
Cre
ativ
e w
ritin
g Pa
ralle
l Act
iviti
es
√
√ √
Con
tinua
tion
of p
atte
rns
Patte
rn m
akin
g
Dis
cuss
ion
Afr
ican
/Isl
amic
R
ango
li/W
.Indi
an
Car
niva
l/Chi
nese
sty
les
of d
ecor
atio
n fo
r mas
ks &
ot
her w
ork.
Figu
re 1
2 (c
ontin
ued)
Bre
akdo
wn
of c
urric
ulum
are
as fr
om s
chem
e of
wor
k (m
asks
)
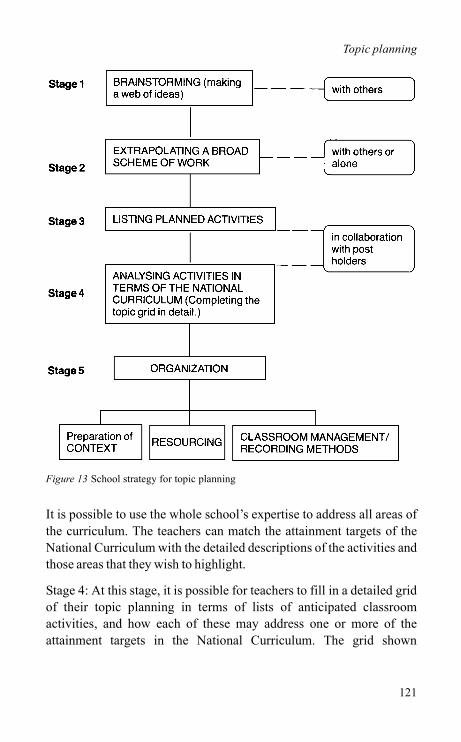
Topic planning
121
It is possible to use the whole school’s expertise to address all areas ofthe curriculum. The teachers can match the attainment targets of theNational Curriculum with the detailed descriptions of the activities andthose areas that they wish to highlight.
Stage 4: At this stage, it is possible for teachers to fill in a detailed gridof their topic planning in terms of lists of anticipated classroomactivities, and how each of these may address one or more of theattainment targets in the National Curriculum. The grid shown
Figure 13 School strategy for topic planning
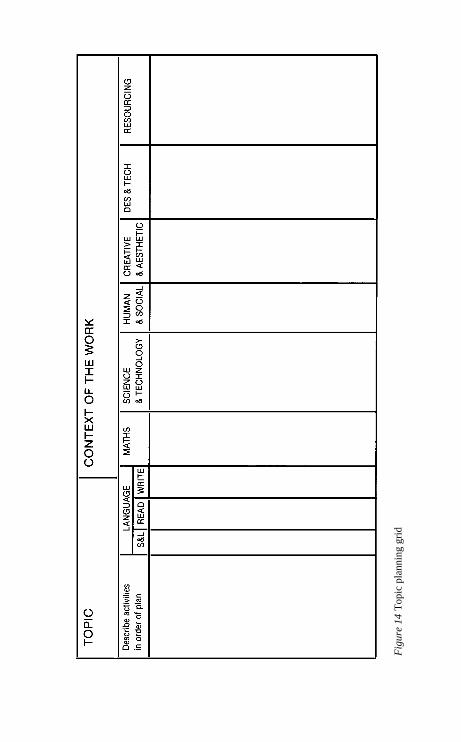
Figu
re 1
4 To
pic
plan
ning
grid
Topic planning
123
in Figure 14, has been designed over a period of time, and after manytrials for this purpose. Teachers have enlarged it to A3 for ease of use. Ithas also been adapted to suit the school’s particular circumstances. In theterms of the grid, ‘Context’ answers questions such as:
• Why choose this topic? • How does it apply to the pupils’ world? • Can it lead to a broadening of pupils’ experiences by widening their
perspectives? • What learning outcomes can be gained from it?
This enables the teacher to put the work in a wider perspective so that heor she may use the pupils’ own experiences as a starting-point and thenwiden their horizons by making them aware of related issues outsidetheir immediate surroundings. Preparation of the context for the topicenables the teacher to highlight a number of the human, social and moralareas of the topic. Many of the issues raised in chapter 1 can be addressedby the teacher at this stage.
Teachers can record separate language activities: speaking andlistening (S & L), reading (‘Read’) and writing (‘Write’). This enablesteachers to differentiate and record the following speaking and listeningactivities:
• between pairs of pupils • small groups of pupils • pupil with adult • small group/large group with adult.
The activities listed on the left (such as verbal report to class on progress,working in groups of five to discuss a problem, reading a particularbook) describe the particular circumstances for the differentiatedlanguage work. Teachers can list the particular learning outcomes theyhope to achieve from the particular reading or writing activity as well(completed log of recorded work, sequencing instructions, projectevaluation, completed cutting list, or evidence of research, notes fromnon-fiction reading).
‘Human and social’ refers to the areas of learning associated withsocial studies, history and geography. The ‘creative and aesthetic’ areasof the curriculum include the performing and expressive arts (e.g. art,
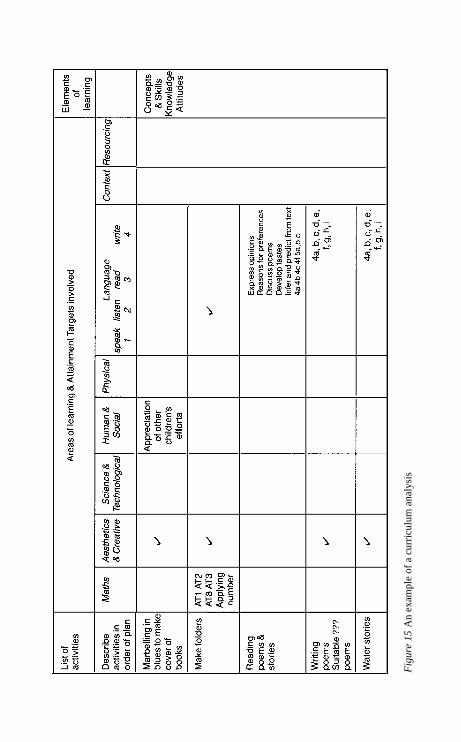
Figu
re 1
5 A
n ex
ampl
e of
a c
urric
ulum
ana
lysi
s
Topic planning
125
music, dance and drama). A separate column has been added for designand technology, so that teachers can tick off appropriate programmes ofstudy covered by the activities.
Stage 5: The following method is particularly successful when it isplanned one term in advance, thereby allowing the teacher to preparewell in advance for any trips, outside visitors, books, resources, orpersonal reading-up to familiarize themselves with a particular aspectthey are not sure of. The fifth stage would enable the teacher to:
1 Find and collect resources. The importance of these resources cannotbe overstated. Teachers can look for appropriate reading: fiction orpoems that relate to a topic can be found, as well as non-fiction sourcematerials for open-ended problem solving. The choice of materialswill also enable teachers to highlight a worldwide perspective to theirwork. Examples of different cultural representations of dragons(Chinese, Welsh, George and the Dragon) can greatly enrich pupils’images.
2 Plan any trips, visitors or videos that will stimulate the topic and bringthe work into a context of some relevance to the pupils.
3 Enable the teacher to prepare for the topic in terms of reading, anynecessary skills they wish to develop.
4 Decide and prepare for the different forms of classroom organizationand recording necessary.
While this general topic planning model has taken into account methodsfor planning classroom work, it is also important to devise instrumentsfor monitoring the progress of the plans in the classroom. Figure 16shows an example developed and used by teachers from North HaringeyJunior School. The teachers have used this grid to ensure that the modelproposed has been adapted to suit the schools’ particular purposes.Teachers have adopted the topic grid for their own planning purposes. Inmany cases, teachers have decided to adopt the model in a series ofstages:
1 Use it initially as a tool to reflect on what has already happened in theclassroom, thereby getting used to filling it in.
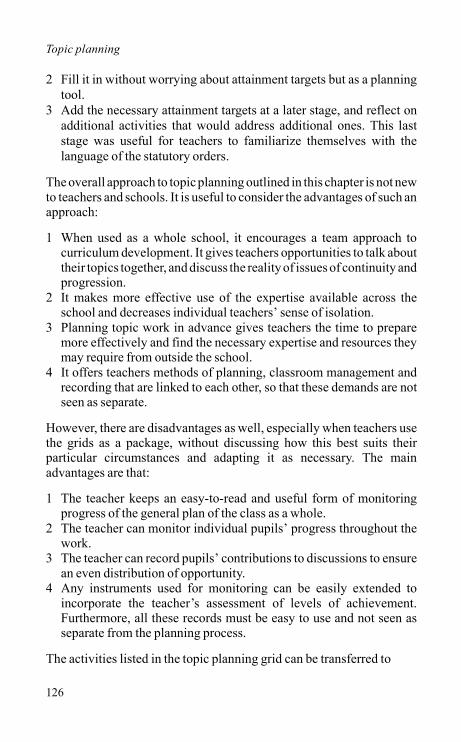
Topic planning
126
2 Fill it in without worrying about attainment targets but as a planningtool.
3 Add the necessary attainment targets at a later stage, and reflect onadditional activities that would address additional ones. This laststage was useful for teachers to familiarize themselves with thelanguage of the statutory orders.
The overall approach to topic planning outlined in this chapter is not newto teachers and schools. It is useful to consider the advantages of such anapproach:
1 When used as a whole school, it encourages a team approach tocurriculum development. It gives teachers opportunities to talk abouttheir topics together, and discuss the reality of issues of continuity andprogression.
2 It makes more effective use of the expertise available across theschool and decreases individual teachers’ sense of isolation.
3 Planning topic work in advance gives teachers the time to preparemore effectively and find the necessary expertise and resources theymay require from outside the school.
4 It offers teachers methods of planning, classroom management andrecording that are linked to each other, so that these demands are notseen as separate.
However, there are disadvantages as well, especially when teachers usethe grids as a package, without discussing how this best suits theirparticular circumstances and adapting it as necessary. The mainadvantages are that:
1 The teacher keeps an easy-to-read and useful form of monitoringprogress of the general plan of the class as a whole.
2 The teacher can monitor individual pupils’ progress throughout thework.
3 The teacher can record pupils’ contributions to discussions to ensurean even distribution of opportunity.
4 Any instruments used for monitoring can be easily extended toincorporate the teacher’s assessment of levels of achievement.Furthermore, all these records must be easy to use and not seen asseparate from the planning process.
The activities listed in the topic planning grid can be transferred to
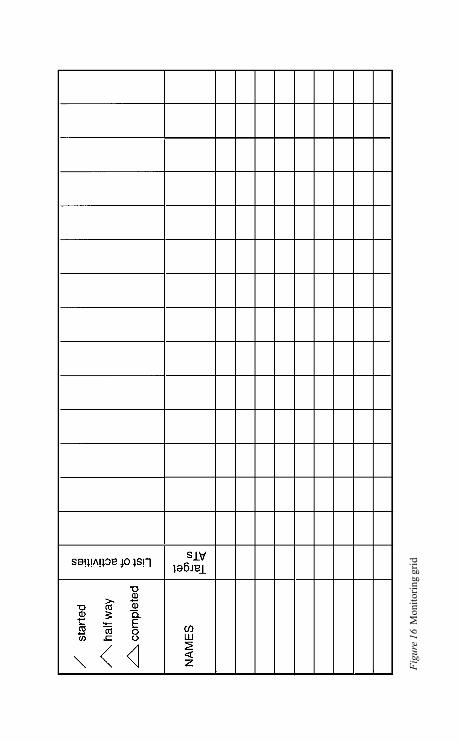
Figu
re 1
6 M
onito
ring
grid
Topic planning
128
the top of this grid. Pupils fill in the chart, following consultation withthe teacher. The triangle could be extended to a square. The pupil startsthe shape when the activity is first started. If a piece of written work islisted, as an example, the teacher may decide to ask pupils to draft andredraft. At an appropriate stage, the teacher will ask the pupil tocomplete the second side. When the written piece is complete, the shapeis finished off. Attainment targets can be added at the top of the gridunder each activity.
When the grid is complete, it is removed and teachers can insert thelevels of attainment achieved (where they wish to do so). In this wayteachers can see, at a glance, not only how the work is progressing, butalso the levels which pupils have reached and the particular activitiesthat were used to assess the level of attainment (that particular piece ofwork can be kept for future reference, if possible). This information canbe transferred to some form of pupil profiling. The added advantage ofsuch a grid is that pupils are aware of the range of work they will beengaged in and can also monitor their own progress.
The topic planning and classroom management grids can also be usedto plan and monitor non-topic-related activities.
Key Stage 1 teachers have adapted this grid by using symbols in theplace of written activities (e.g. a book for reading, an ear and mouth forcarpet discussions, numbers for mathematical activities, and others).
Throughout the book we have shown examples of how teachers haveused a theme or topic as a means of focusing on a particular design andtechnology project. The definition of this project and the activities thatare associated with the practical project, such as report writing or solvingtechnical problems, engage pupils in practical applications of science,mathematics, language and art skills and concepts. In chapter 7, wedescribed the process by which two schools focused on design andtechnology development as a whole school. The chapter highlighted theimportance of developing a spirit of teamwork and a common sense ofdirection. Both schools had identified a series of stages to enablecurriculum development to occur. In this chapter, we emphasize thenecessity for teamwork in helping teachers develop their planning workin individual classrooms. The model for topic planning uses teachers’expertise across the school to ensure that the activities that are plannedin relation to design and technology projects can be used more
Topic planning
129
effectively to focus on other areas of the curriculum. We hope that,through these examples and methods of recording, teachers willcontinue to work in the integrated manner that has proved so successfulin the past.
130
Conclusion
‘Sharon never talks about what she does in school – now all I hear isDesign and Technology this and Design and Technology that. Do theydo anything else in school, and what is this Design and Technology?’
This parent’s remarks highlighted fundamental questions aboutdesign and technology in the primary school classroom.
• What is design and technology? • Why are the children doing it? • Where does it fit into the curriculum? • What about the other areas of the curriculum?
We have used a series of case-studies to describe what we mean bydesign and technology in primary schools. Through a series ofstatements we have attempted to clarify what is most important aboutthese activities. This can be summarized as follows.
Design and technology is concerned with problem solving generally.The wider the scope of the problems, and the more open-ended they are,the more design and technology activities are possible. If theyconcentrate on how things work or are made, they are moretechnological. In nature, open-ended problems respond to needs. Theproblems are set within a framework that pupils can relate to. Theirexperiences and the stories they read can be used as starting-points forthese activities.
Pupils are engaged in these activities to gain control over theirenvironment, to improve their environment, to make sense of the worldin which they live, and actively to participate in it. In specificeducational terms, design and technology activities give a focus for thedevelopment of other areas of the curriculum; for example, as a focus for
Conclusion
131
language recording as shown in chapter 7. Design and technologyproblem-solving activities require pupils to communicate – to showwhat has been done, and to communicate instructions, results, ideas andunderstanding to others.
Design and technology can integrate and focus the curriculum as itdraws on other areas of knowledge. This was seen very clearly inchapters 4 and 5, where mathematical and scientific knowledge andprocesses were drawn out of mask making (nets), an environmentproject (measuring and scaling), making mechanical toys(mechanisms), a transport problem (problem solving) and a waterproject (materials and sinking and floating).
A further question is asked by those who are new to design andtechnology activities, and that is ‘how do we introduce it?’ Eachclassroom teacher whose work is described in this book has drawn ontheir knowledge of related activities. We have looked at the concerns andneeds of those teachers to provide a framework within which design andtechnology can be embarked upon with excitement, not apprehension.
What seems to be crucial to the success of these activities in theprimary classroom is the use of a topic approach, so that the context hasmeaning for pupils and teachers alike. In chapter 7 we related theexperience of two schools in introducing design and technology throughthis approach. The topic approach is also supported by therecommendations of the Design and Technology Working Group for theNational Curriculum, and in chapter 8 we offer a model for introducingdesign and technology within a topic. Also in this chapter we haveshown how attainment targets and programmes of study, across the coresubjects, can be planned for, monitored, recorded and achieved.
The implications for design and technology in the NationalCurriculum are various. In-service training for classroom teachers,facilities and equipment, provision of hardware for informationtechnology, implications for equal opportunities – these are issueswhich will be addressed over the years to come. Initially, however,teachers will be using and developing skills and expertise they have beenso successful with in the past to embrace, integrate and enhance designand technology in their classrooms. We hope that this book will supportand encourage teachers to participate in the development of this excitingarea of the primary curriculum.
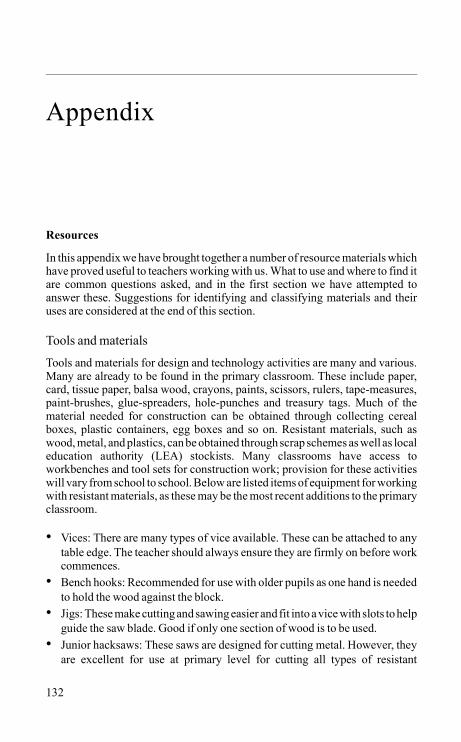
132
Appendix
Resources
In this appendix we have brought together a number of resource materials whichhave proved useful to teachers working with us. What to use and where to find itare common questions asked, and in the first section we have attempted toanswer these. Suggestions for identifying and classifying materials and theiruses are considered at the end of this section.
Tools and materials
Tools and materials for design and technology activities are many and various.Many are already to be found in the primary classroom. These include paper,card, tissue paper, balsa wood, crayons, paints, scissors, rulers, tape-measures,paint-brushes, glue-spreaders, hole-punches and treasury tags. Much of thematerial needed for construction can be obtained through collecting cerealboxes, plastic containers, egg boxes and so on. Resistant materials, such aswood, metal, and plastics, can be obtained through scrap schemes as well as localeducation authority (LEA) stockists. Many classrooms have access toworkbenches and tool sets for construction work; provision for these activitieswill vary from school to school. Below are listed items of equipment for workingwith resistant materials, as these may be the most recent additions to the primaryclassroom.
• Vices: There are many types of vice available. These can be attached to anytable edge. The teacher should always ensure they are firmly on before workcommences.
• Bench hooks: Recommended for use with older pupils as one hand is neededto hold the wood against the block.
• Jigs: These make cutting and sawing easier and fit into a vice with slots to helpguide the saw blade. Good if only one section of wood is to be used.
• Junior hacksaws: These saws are designed for cutting metal. However, theyare excellent for use at primary level for cutting all types of resistant

Appendix
133
materials, such as timber, plastics and metals There are many different types,and different LEAs will recommend certain types whilst positivelydiscouraging others. Generally, it is safer to have one with an enclosed handleso that children are not in danger of hitting their knuckles.
• Abraders: These are useful tools for sanding the ends of cut timber and forsimple shaping. The varieties of abraders available are increasing. They mayseem expensive, but are worth the cost in the long run.
• Hand-drills and drill bits: These can be costly, some brands especially so.There are some especially designed for primary use. However, it is importantto check that they are sturdy enough and will withstand a lot of use. Drill bitsshould be high-speed steel (HSS) and a variety of sizes are advisable (3, 4, 5and 6 mm).
• Bradawl: This is useful when drilling to start the hole. Use the type with aflattened point.
• Hammer: It is best to purchase lightweight hammers (2.5 oz Warringtonhammer). Do not use toy hammers.
• Try-square: This is unnecessary for young pupils, but it may prove useful forteachers to mark timber accurately. It is a tool used to mark a line at rightangles across a piece of timber, as well as checking if a sawn piece has beensawn squarely.
• Pliers: Used for bending wire, as well as cutting thin wire. • Straight edges: These are used for drawing straight lines on timber. Rulers
would suffice. • Electrician’s screwdrivers: These are used for attaching wires on to bulb
holders.
A class set of tools
The following set of tools represents a basic set used by many schools startingout on designing and making activities:
Where to buy tools
Several education authorities provide their own service for the purchase of tools,with particular items for use in primary schools. Check with your local authority/
5 junior hacksaws and spare blades 5 table vices 1 hammer 1 hand-drill drill bits (3,4,5, 6 mm plus several 2 mm) 3 try-squares 3 abraders 1 bradawl metal safety rules craft knives nylon cutting mats
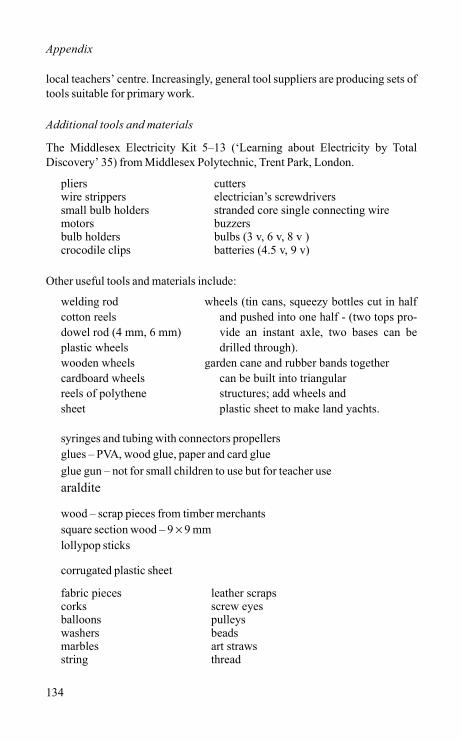
Appendix
134
local teachers’ centre. Increasingly, general tool suppliers are producing sets oftools suitable for primary work.
Additional tools and materials
The Middlesex Electricity Kit 5–13 (‘Learning about Electricity by TotalDiscovery’ 35) from Middlesex Polytechnic, Trent Park, London.
Other useful tools and materials include:
syringes and tubing with connectors propellers glues – PVA, wood glue, paper and card glue glue gun – not for small children to use but for teacher use araldite
wood – scrap pieces from timber merchants square section wood – 9 × 9 mm lollypop sticks
corrugated plastic sheet
pliers cutters wire strippers electrician’s screwdrivers small bulb holders stranded core single connecting wire motors buzzers bulb holders bulbs (3 v, 6 v, 8 v ) crocodile clips batteries (4.5 v, 9 v)
welding rod cotton reels dowel rod (4 mm, 6 mm) plastic wheels wooden wheels cardboard wheels reels of polythenesheet
wheels (tin cans, squeezy bottles cut in halfand pushed into one half - (two tops pro-vide an instant axle, two bases can bedrilled through).
garden cane and rubber bands together can be built into triangular structures; add wheels and plastic sheet to make land yachts.
fabric pieces leather scraps corks screw eyes balloons pulleys washers beads marbles art strawsstring thread
Appendix
135
soldering iron – for use with third year juniors upwards
Where to look for support, information and materials
membership of scrap projects – tremendous value surplus buying agencies local authority teachers centres – for information local polytechnic and further education colleges technical suppliers local secondary schools – D & T, Art departments
SATRO’S (Science and Technology Regional Organizations) Association for Science Education National Association for Design Education Design Council Design and Technology Association
Questions to consider about the use of materials in schools
1 What materials are used in the classrooms? What type of activities have youused them for? Make a list as a record.
2 How are they sorted, categorized and stored? 3 Who has access to them? Do the pupils have access? 4 How often are they used? 5 How are these materials used? Are pupils shown specific techniques for
using them, (e.g. slab, coil or thumb pot techniques in clay work)? 6 Do the class generally use the material on the same project (i.e. all make a coil
pot)? Does every pupil have the opportunity to handle the material?
How is this monitored? 7 List the types of techniques you associate with each of the different materials. 8 Are the materials available for use on other projects where the teacher does
not anticipate their use? If so, how are the materials made accessible to thepupils?
staplers paper fasteners paper clips parcel tape
squeezy bottles yoghurt pots plastic containers paper plates paper cups plastic spoons water containers (plastic)
Appendix
136
9 Have pupils been involved in testing the materials? – their properties, suchas malleability, strength, rigidity and structure etc., their source andclassification, the nature of any changes in water at different temperaturesetc.
10 Have the pupils been involved in testing various adhesives appropriate to therespective materials?
11 Are the pupils aware of the different methods of working the materials (e.g.joining, cutting, shaping and fabricating techniques)?
12 Are they aware of how these materials are used in other parts of the world? 13 What are the ecological implications of the material? 14 Are there any historical points of interest about the material? Are there any
particularly interesting uses of the materials in different parts of the world?
Figure 17 shows the different types of materials that may be considered, and listsaspects of each of these for consideration.
Construction kits
Construction kits are an important resource for design and technology activities,and we have selected one, Technical Lego, as an example of using such kits inthe classroom.
Notes on the use of technical kits in the classroom
The suggestions in these notes can be used to assist teachers in the organizationand management of technical construction kits in general, and Technical Legoin particular.
1 Pupils come to school with different previous experiences of constructionkits. These experiences are very important in building confidence, sincepupils have had time to ‘tinker’ and experiment. Pupils with little or no accessat home need to be given greater opportunities to do so in school. There aremany types of Lego sets on the market: Basic Lego (BL), Technical Legowithout motors (TL1), and Lego sets with motors (TL2).
2 Teachers in a school need to decide how construction kits will be used in theclassroom, as a choice ‘play’ activity during wet breaks and lunchtimes, or aspart of the basic educational equipment in the classroom, in the same way asmathematics or science equipment. Any possible gender associations can betackled by treating the use of construction kits as an educational rather thanan optional ‘play’ activity.
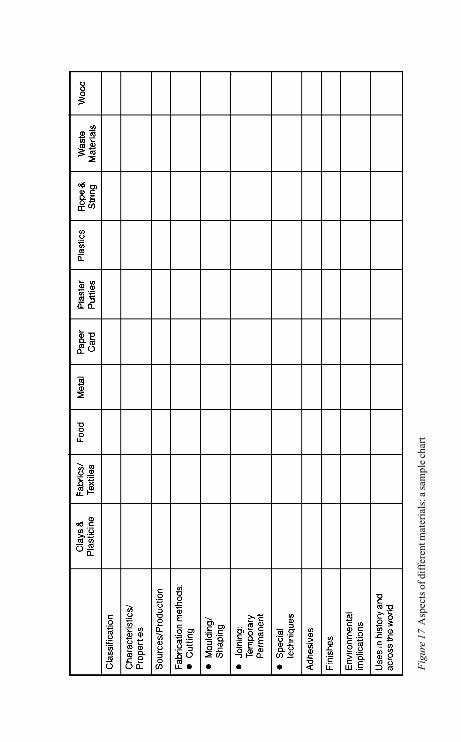
Figu
re 1
7 A
spec
ts o
f diff
eren
t mat
eria
ls: a
sam
ple c
hart
Appendix
138
3 Working in groups of twos with the Lego sets is a very useful activity forlanguage development. It can be used to encourage team effort and co-operation. Teachers need to consider these groupings very carefully. This willbe partly dependent on the class dynamics. Some teachers have found ituseful to start with friendship groups to ensure greater chance of equal‘hands-on’ experience. Mixing the groups at a later stage is equallyimportant, to encourage pupils to learn to share and think about how theywork together. Monitoring these group interactions is important, so that theteacher can observe if one pupil is constantly handling the Lego whilst theother is observing and can then suggest a change of roles.
4 Many construction kits come with workcards showing pupils how to buildmodels. The Lego workcards show the principles of mechanical movementswith examples of everyday applications. Some teachers find these a veryuseful introduction to the kits. However, it is important to note that pupilsshould be encouraged to use the construction kits as a tool to solve their owntechnical problems.
5 Constructing pupils’ own models can be used as an excellent vehicle forobservational drawing work, to encourage pupils to keep a record of whatthey have built. A drawing is one way of doing this. A useful suggestion is toask each group to build their own model, produce instructional drawings foranother group on how to build it, and pass it on to yet another group who willtest their instructions before attempting their own.
Ideas for projects using Lego 2 or any other technical construction kit with a motor
The following problems can be incorporated into a variety of topics. The firstproblem is to construct the slowest moving motorized transporter. This problemenables the user to understand the concepts of gears and pulleys and their use forchanging speeds. All the problems can also be adapted to computer controlprojects.
1 A slow moving transporter. Pupils can attach lights, buzzers and sequence themovements.
2 Construct a crane mechanism that lifts and drops a weight as carefully aspossible. This can be part of a number of machines on a factory system ofconveyor belts, or part of a group of machines.
3 Design and build a sliding door similar to those found in supermarkets. Aseries of sensors can be used to activate the doors and count the number ofcustomers entering.
4 Build a motorized buggy that can go left and right as well as forwards andbackwards. The class can sequence their own turtle.
Appendix
139
5 Design and build a lift system. This can respond to calls from the differentfloors.
6 A barrier similar to those found in car parks or at railway junctions. Thesewill be activated by the presence of a car. Counting the maximum number ofcars in the car park and indicating whether the car park is full or empty.Otherwise it can be part of a railway system, including the train itself and aseries of signals.
7 Different methods of lifting bridges to allow boats through. 8 A ski lift. This can be extended to allow skiers to get off before it moves on.
It can be built as individual seats or as carriages to hold a number of skiers. 9 Motorized water-well.
10 Motorized portcullis or garage door. 11 A rotating display for a precious Fabergé egg (Easter egg is a good model).
Pupils will have to design a system to protect the egg while it is on publicdisplay.
12 A robot arm. Many different actions and movements occur in these. Chooseone and build it.
Activity sheets
Experience of constructing mechanisms can be introduced through paperengineering, and Figure 18 shows an activity sheet which addresses the conceptsand processes involved. Activity sheets for introducing paper engineering,electricity, and pneumatics and hydraulics are shown in Figures 18, 19 and 20.
Curriculum development in design and technology: writing a school policy
In chapter 7 we addressed whole school development, giving as examples case-studies of two schools, where, with different focuses, design and technologyactivities were introduced and whole school policies developed. In this finalsection of appendix 2 we have outlined suggestions for forming a whole schoolpolicy for design and technology. We have included a possible methodologybased on the experiences of the schools we have worked with. We also offerpoints for consideration when discussing and writing up the policy document.Finally we pose some questions to help address the relationship of design andtechnology to other areas of the curriculum.
Methodology
1 What is the focus of design and technology curriculum development in ourschool?
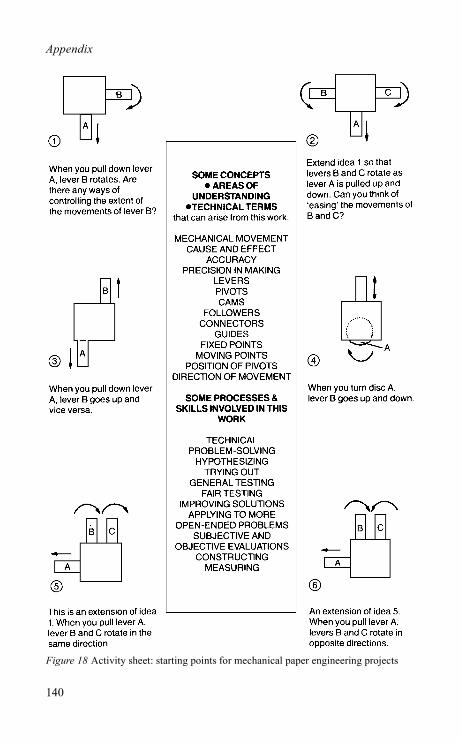
Appendix
140
Figure 18 Activity sheet: starting points for mechanical paper engineering projects
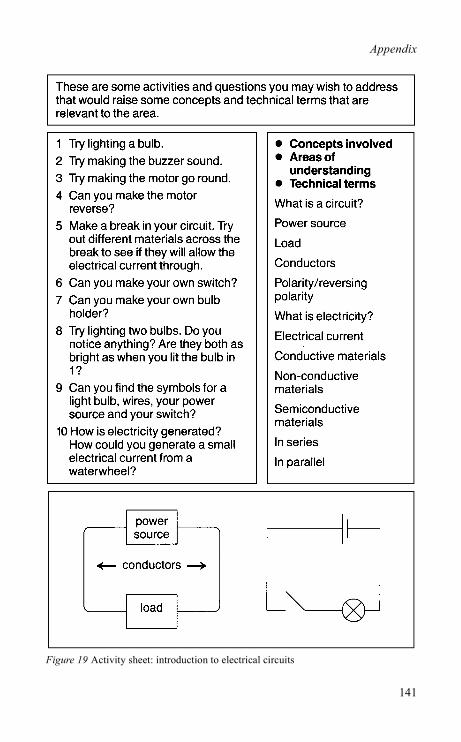
Appendix
141
Figure 19 Activity sheet: introduction to electrical circuits
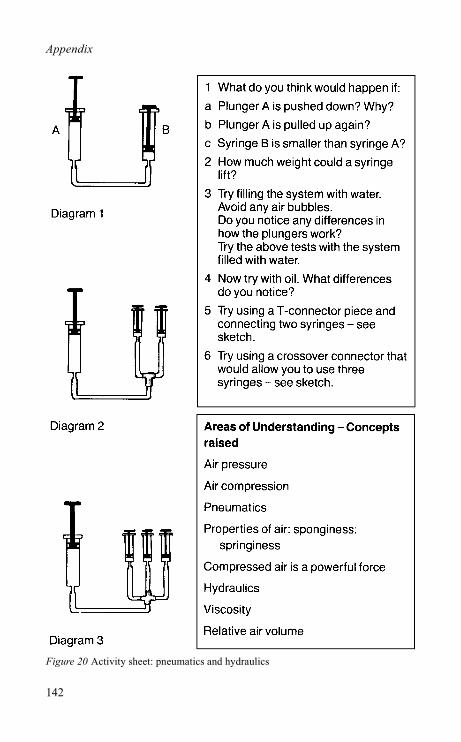
Appendix
142
Figure 20 Activity sheet: pneumatics and hydraulics
Appendix
143
Examples: • in relation to topic work • in relation to problem solving • in the National Curriculum • in relation to language, science, mathematics, aesthetic and creative areas • Equal opportunities Discussion and agreement among staff as to the needs of in-service trainingand development and the focus of it within the school.
2 Design a general plan of action for school development. • staff attending in-service • LEA inspectors and advisory teachers support and advice • visiting other schools • initial resources and materials • responsibility for overseeing work • responsibility for recording and monitoring overall process (inset co-
ordinator?) • programme of staff workshops • programme of staff discussions on issues arising • programme for implementation in the classrooms
3 Period of implementing the above programmes and structures. • monitoring and recording the process • periodic reviews of the work • discussions on emerging issues (see below)
4 Review process, involving discussion on the initial implementation,recording work in classrooms, reflecting on the work. • dissemination of successful applications • review of problematic areas • discussions on issues arising
5 Writing a school policy based on the above experiences. 6 What sort of policy do we want to write, what is its function? Who is it for?
How will it be reviewed? 7 How will new members of staff be introduced to the practicalities of the
school policy?
Points for consideration in a school policy for design and technology
1 Where do design and technology activities fit in the primary curriculum?Where do they fit into our school policies?
2 What do we mean by design and technology? How do we define the subject?Can we list all the types of design and technology activities that teachers havebeen involved in.
Appendix
144
What materials did we need for these? How did we approach them? 3 What is their relationship to topic or theme work or project work?
General and specific comments. What decisions do we wish to make relatingto this?
4 How do we incorporate design and technology activities in our work, monitortheir implementation, and record progress in terms of the NationalCurriculum?
5 What do we mean by problem solving? What are our aims in regard todeveloping problem-solving activities throughout the school?
6 What documents, booklets, reports have we found useful and pertinent to thispolicy (so that a newcomer may refer to these)? Are there any we feel everymember of staff should have?
7 Are there any specific recommendations/approaches that we have decidedupon in the light of the above? Are there particular activities or methods ofworking that we wish to encourage?
8 How do we ensure that equal opportunity policies are implemented withregard to the use and access to tools, materials, construction kits, as well astypes of projects, classroom grouping, resources (books, posters, visual aids,videos), both in terms of gender and culture?
Other areas of consideration include skills, techniques and useful resources. Theprocess of design and make activities in schools has meant the acquisition ofcertain skills and techniques by members of staff on INSET courses. Is it worthrecording these to have a shared knowledge that can be continuously built upon?
• paper engineering • specific methods of construction • three-dimensional modelling techniques • use of tools (which tools? how and where are they stored? who is responsible?
what about safety recommendations? which tools are shared and whichremain in classrooms, are there any issues of security?)
• wheels, pulleys, gears (construction, purpose and function) • electrical circuits • use of materials • principles of mechanical movement • motorizing • energy (forms of, topics related to concepts involved) • computer control • construction kits (how do we use them, store them, how do they fit into
general work, how can we relate to other materials, advantages and possibledisadvantages of working with kits? see notes and ideas for Technical Lego)
Appendix
145
Relationship to other areas of the curriculum
1 Science. What common methods and processes exist? How can design andtechnology activities enhance scientific processes and knowledge?
2 Language development. List all the different language activities that arisefrom this form of work as has been carried out in the past. Can the staff makeany recommendations with regard to these and the development of a schoolpolicy?
3 Mathematics. Similar to language and science and technology: list all themathematical activities/investigations/concepts engaged in throughout theprojects. Can the school make any recommendations that will relate to linkswith mathematics that can be incorporated into an agreed school policy?
4 Social studies. What context was the work put into? Does this give a historicaland/or geographic perspective? Are pupils aware of the social issues andvalues that underlie the work? List projects and see how they link or can beadapted to include these links. How can we devise situations that give rise tomore open-ended problems that involve pupils in handling these concepts?
5 Environmental studies. 6 Aesthetic and creative. What skills, techniques and materials can be
introduced and incorporated into a design and technology policy so that weare not repeating unnecessarily, and are maintaining continuity? And whichof these require specific consideration separately?
7 Information technology.
146
References
Department of Education and Science (1989a) English in the NationalCurriculum, London: HMSO.
—— (1989b) Mathematics in the National Curriculum, London: HMSO. —— (1989c) Science in the National Curriculum, London: HMSO. —— (1990) Technology in the National Curriculum, London: HMSO. Design Council Report (1987) Design and Primary Education, London: Design
Council. Fisher, S. and Hicks, D. (1985) World Studies 8–13, London: Oliver & Boyd. Flood, J. (1986) Tools for Technology, Ely Resource and Technology Centre. Grant, M. and Harding, J. (1984) Presenting Design and Technology to Girls
(Girls and Technology Education Report 84:2), London: Chelsea College. H.M.I. (1987a) Craft, Design and Technology 5–16 (Curriculum Matters 9),
London: HMSO. —— (1987b) The Curriculum from 5 to 16, 6th imp., London: HMSO. McInnes, Ovetta (1987) Recommendations for Teachers, Haringey: Multi
Cultural Support Group. Myers, K. (ed.) (1987) Gender Watch: Self-assessment Schedules for use in
Schools, London: School Curriculum Development Committee Publication. National Curriculum Council (1990) Design and Technology: Non-statutory
Guidance for Design and Technology, London: HMSO. National Curriculum Design and Technology Working Group 1988 The Design
and Technology Interim Report, London: HMSO. —— (1989) Design and Technology for Ages 5–16: Proposals for the Secretary
of State for Education and the Secretary of State for Wales. Polyani, M. (1973) Personal Knowledge: Towards a Post-critical Philosophy,
3rd repr., London: Routledge & Kegan Paul. Shallcross, P. (1985) Starting Technology: The Simple Approach, London:
Arnold.
References
147
Sparkes, J. (1987) ‘Technological Education’, in Living with Technology: ACourse for Teachers, Milton Keynes: Open University Press.
Williams, P. and Jinks, D. (1985) Design and Technology 5–12, London: FalmerPress.
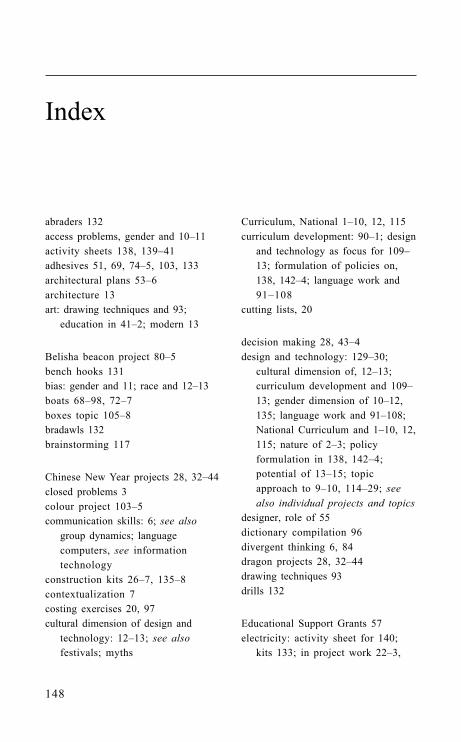
148
abraders 132access problems, gender and 10–11activity sheets 138, 139–41adhesives 51, 69, 74–5, 103, 133architectural plans 53–6architecture 13art: drawing techniques and 93;
education in 41–2; modern 13
Belisha beacon project 80–5bench hooks 131bias: gender and 11; race and 12–13boats 68–98, 72–7boxes topic 105–8bradawls 132brainstorming 117
Chinese New Year projects 28, 32–44closed problems 3colour project 103–5communication skills: 6; see also
group dynamics; languagecomputers, see informationtechnology
construction kits 26–7, 135–8contextualization 7costing exercises 20, 97cultural dimension of design and
technology: 12–13; see alsofestivals; myths
Curriculum, National 1–10, 12, 115curriculum development: 90–1; design
and technology as focus for 109–13; formulation of policies on,138, 142–4; language work and91–108
cutting lists, 20
decision making 28, 43–4design and technology: 129–30;
cultural dimension of, 12–13;curriculum development and 109–13; gender dimension of 10–12,135; language work and 91–108;National Curriculum and 1–10, 12,115; nature of 2–3; policyformulation in 138, 142–4;potential of 13–15; topicapproach to 9–10, 114–29; seealso individual projects and topics
designer, role of 55dictionary compilation 96divergent thinking 6, 84dragon projects 28, 32–44drawing techniques 93drills 132
Educational Support Grants 57electricity: activity sheet for 140;
kits 133; in project work 22–3,
Index
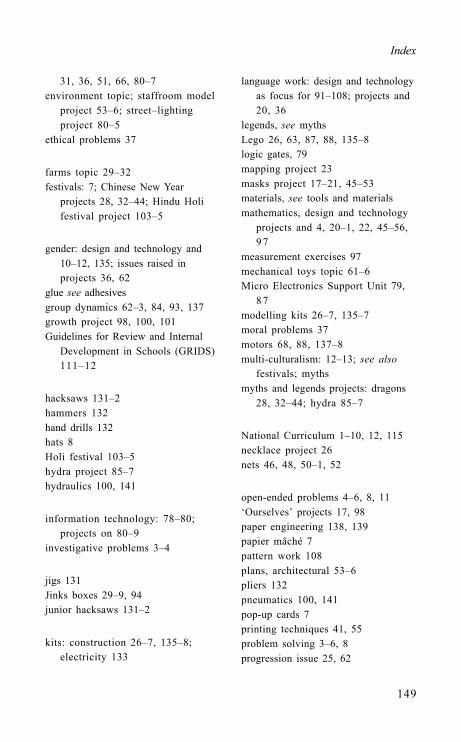
Index
149
31, 36, 51, 66, 80–7environment topic; staffroom model
project 53–6; street–lightingproject 80–5
ethical problems 37
farms topic 29–32festivals: 7; Chinese New Year
projects 28, 32–44; Hindu Holifestival project 103–5
gender: design and technology and10–12, 135; issues raised inprojects 36, 62
glue see adhesivesgroup dynamics 62–3, 84, 93, 137growth project 98, 100, 101Guidelines for Review and Internal
Development in Schools (GRIDS)111–12
hacksaws 131–2hammers 132hand drills 132hats 8Holi festival 103–5hydra project 85–7hydraulics 100, 141
information technology: 78–80;projects on 80–9
investigative problems 3–4
jigs 131Jinks boxes 29–9, 94junior hacksaws 131–2
kits: construction 26–7, 135–8;electricity 133
language work: design and technologyas focus for 91–108; projects and20, 36
legends, see mythsLego 26, 63, 87, 88, 135–8logic gates, 79mapping project 23masks project 17–21, 45–53materials, see tools and materialsmathematics, design and technology
projects and 4, 20–1, 22, 45–56,97
measurement exercises 97mechanical toys topic 61–6Micro Electronics Support Unit 79,
87modelling kits 26–7, 135–7moral problems 37motors 68, 88, 137–8multi-culturalism: 12–13; see also
festivals; mythsmyths and legends projects: dragons
28, 32–44; hydra 85–7
National Curriculum 1–10, 12, 115necklace project 26nets 46, 48, 50–1, 52
open-ended problems 4–6, 8, 11‘Ourselves’ projects 17, 98paper engineering 138, 139papier mâché 7pattern work 108plans, architectural 53–6pliers 132pneumatics 100, 141pop-up cards 7printing techniques 41, 55problem solving 3–6, 8progression issue 25, 62
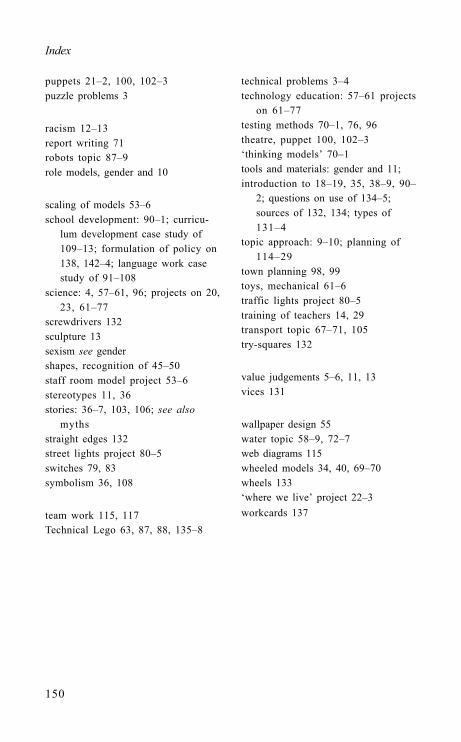
Index
150
puppets 21–2, 100, 102–3puzzle problems 3
racism 12–13report writing 71robots topic 87–9role models, gender and 10
scaling of models 53–6school development: 90–1; curricu-
lum development case study of109–13; formulation of policy on138, 142–4; language work casestudy of 91–108
science: 4, 57–61, 96; projects on 20,23, 61–77
screwdrivers 132sculpture 13sexism see gendershapes, recognition of 45–50staff room model project 53–6stereotypes 11, 36stories: 36–7, 103, 106; see also
mythsstraight edges 132street lights project 80–5switches 79, 83symbolism 36, 108
team work 115, 117Technical Lego 63, 87, 88, 135–8
technical problems 3–4technology education: 57–61 projects
on 61–77testing methods 70–1, 76, 96theatre, puppet 100, 102–3‘thinking models’ 70–1tools and materials: gender and 11;introduction to 18–19, 35, 38–9, 90–
2; questions on use of 134–5;sources of 132, 134; types of131–4
topic approach: 9–10; planning of114–29
town planning 98, 99toys, mechanical 61–6traffic lights project 80–5training of teachers 14, 29transport topic 67–71, 105try-squares 132
value judgements 5–6, 11, 13vices 131
wallpaper design 55water topic 58–9, 72–7web diagrams 115wheeled models 34, 40, 69–70wheels 133‘where we live’ project 22–3workcards 137