Embed Size (px)
Citation preview

Dimensioning
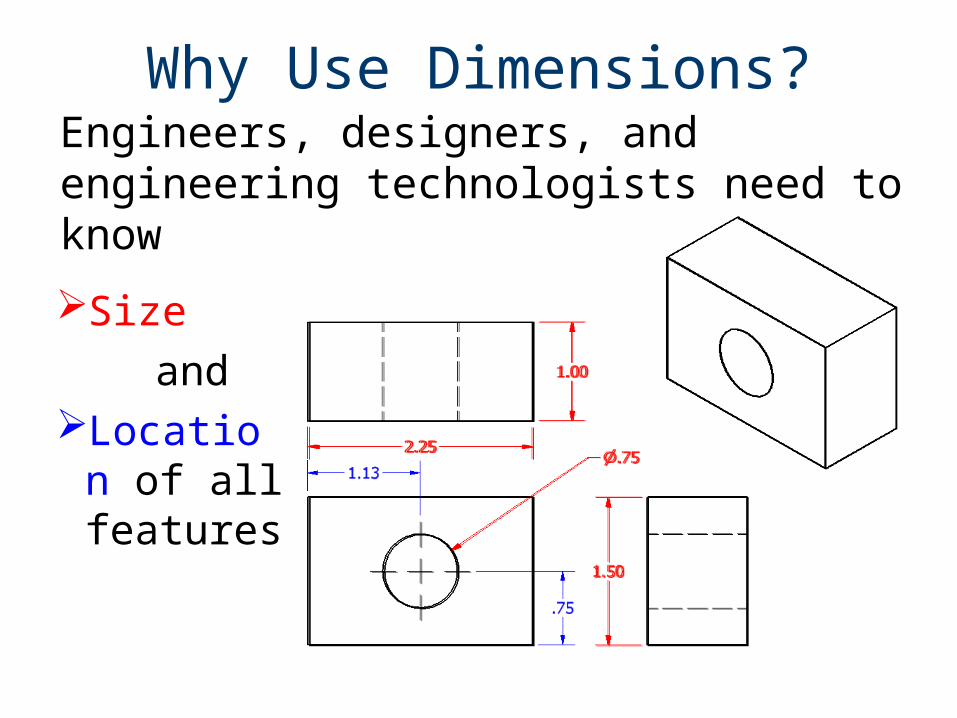
Why Use Dimensions?
Size
andLocation
of all features
Engineers, designers, and engineering technologists need to know
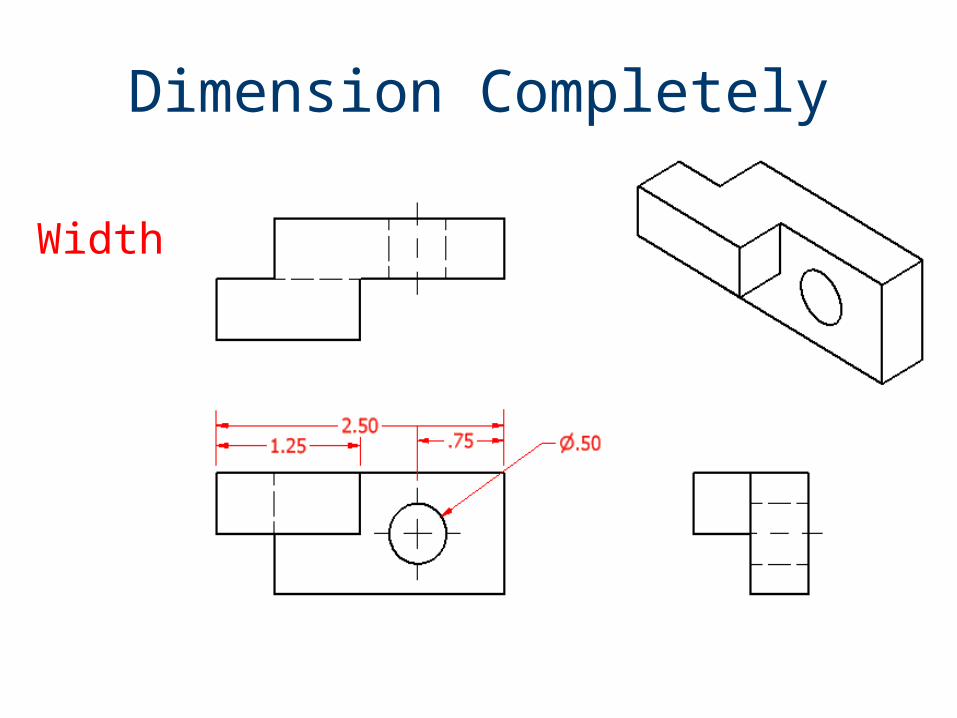
Dimension Completely
Width
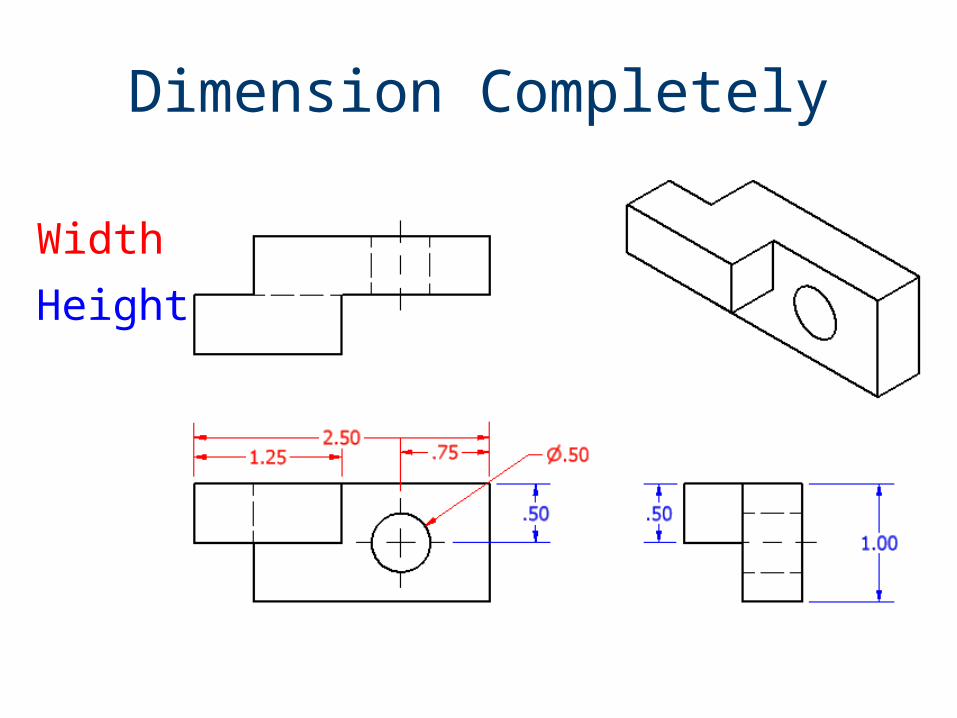
Dimension Completely
Height
Width
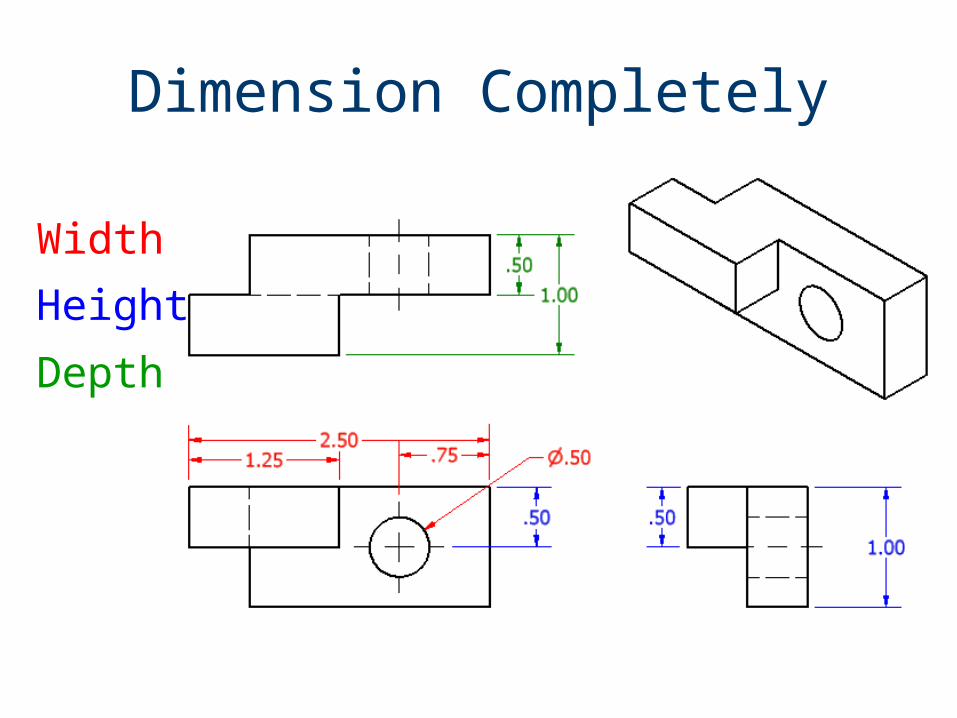
Dimension Completely
Depth
Width
Height
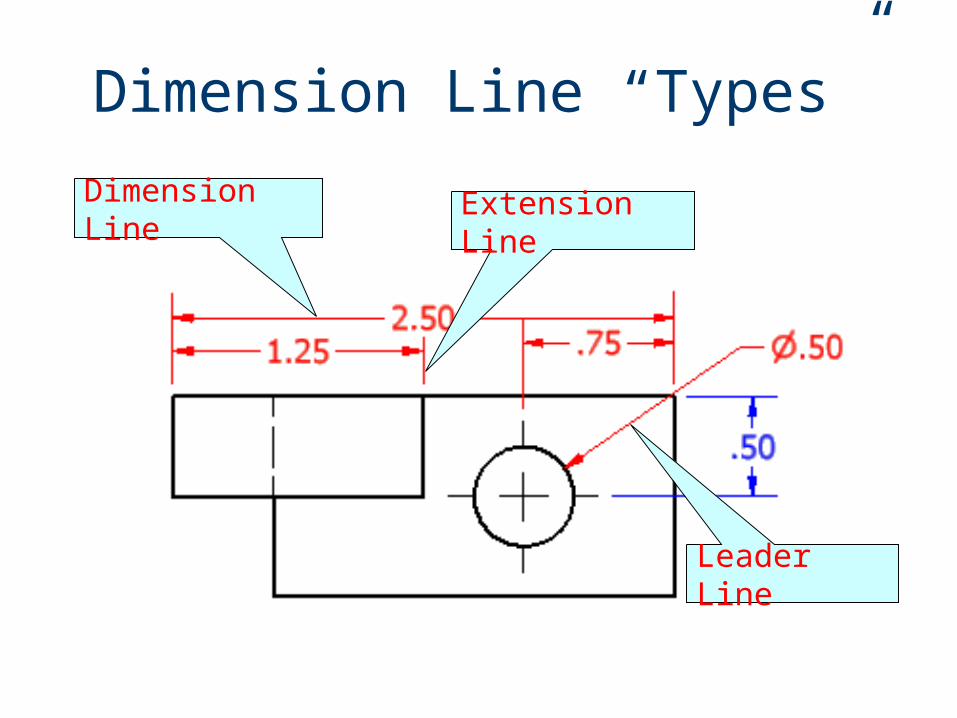
Dimension Line “Types”
Dimension Line Extension Line
Leader Line
Next:Dimensioning Guidelines (Rules)
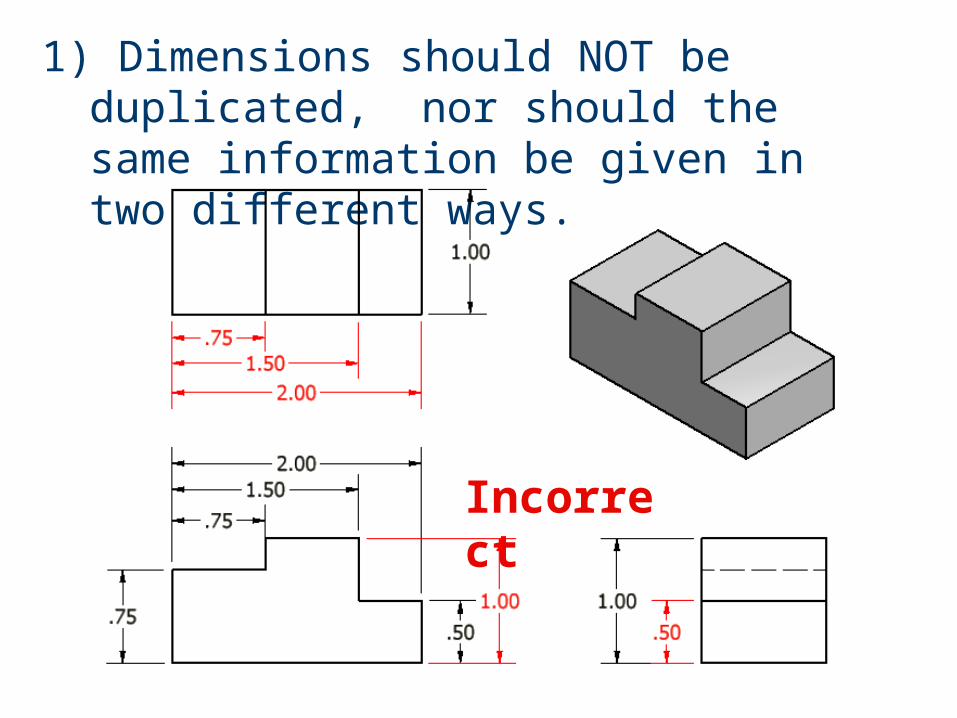
1) Dimensions should NOT be duplicated, nor should the same information be given in two different ways.
Incorrect
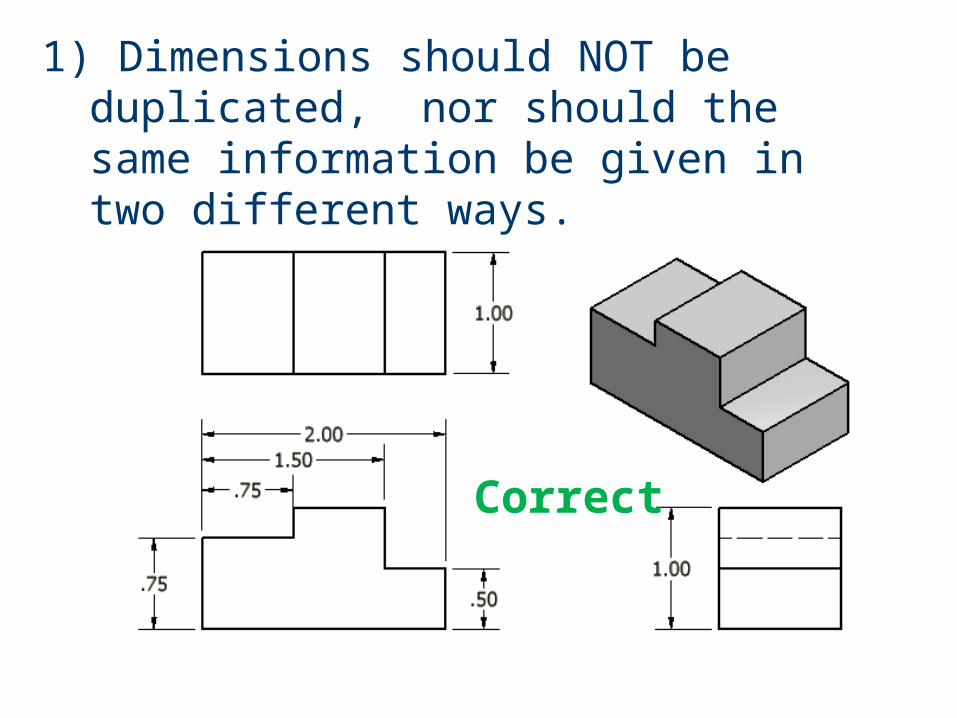
1) Dimensions should NOT be duplicated, nor should the same information be given in two different ways.
Correct
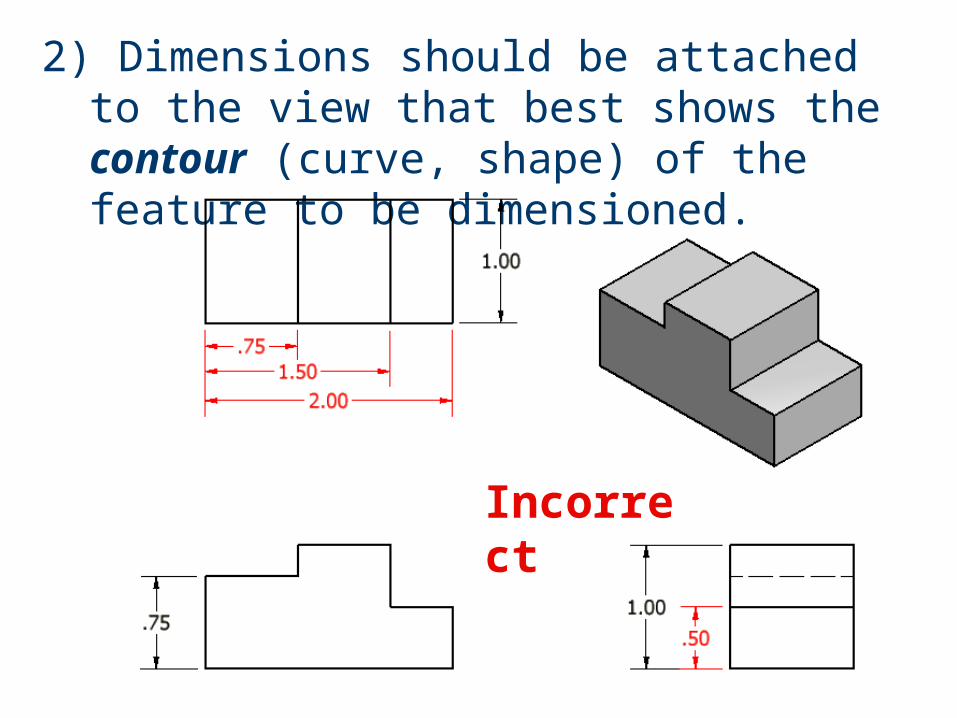
2) Dimensions should be attached to the view that best shows the contour (curve, shape) of the feature to be dimensioned.
Incorrect
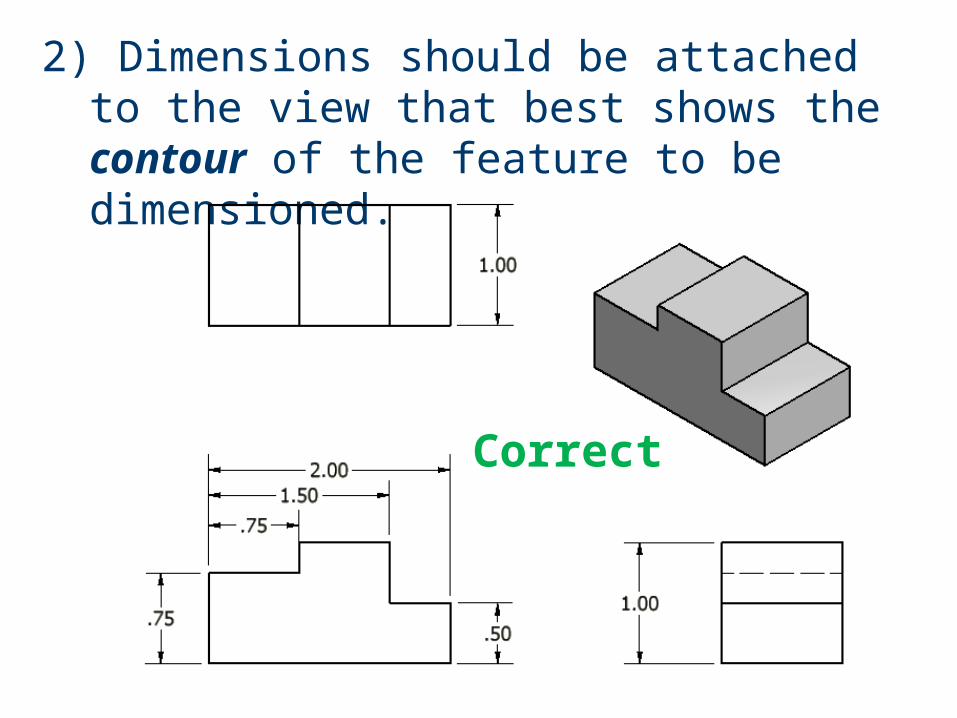
2) Dimensions should be attached to the view that best shows the contour of the feature to be dimensioned.
Correct
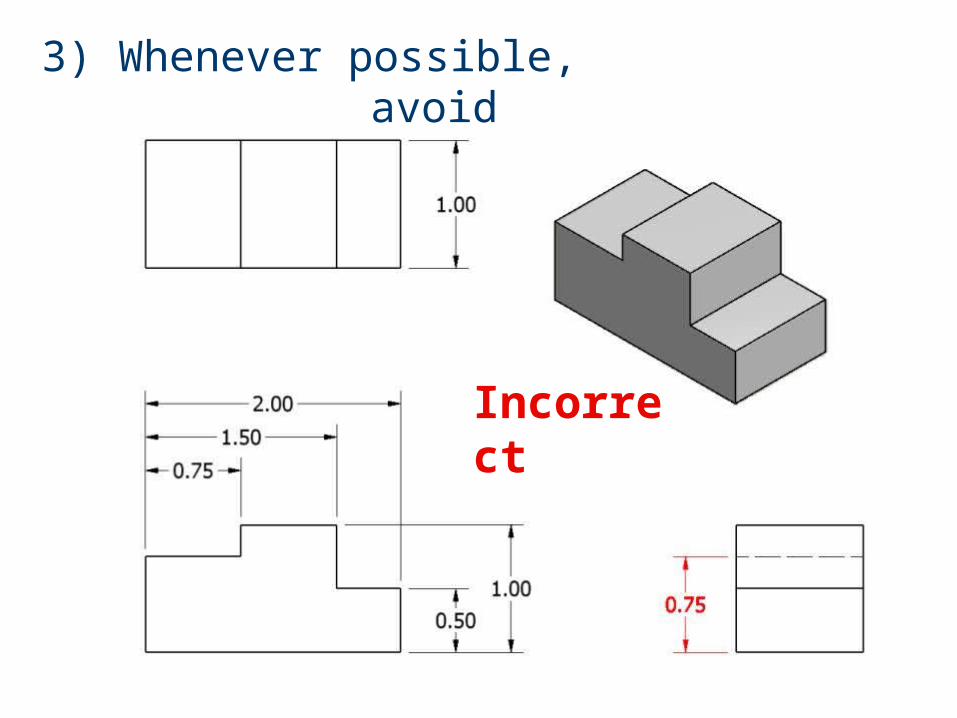
3) Whenever possible, avoid dimensioning to hidden lines.
Incorrect
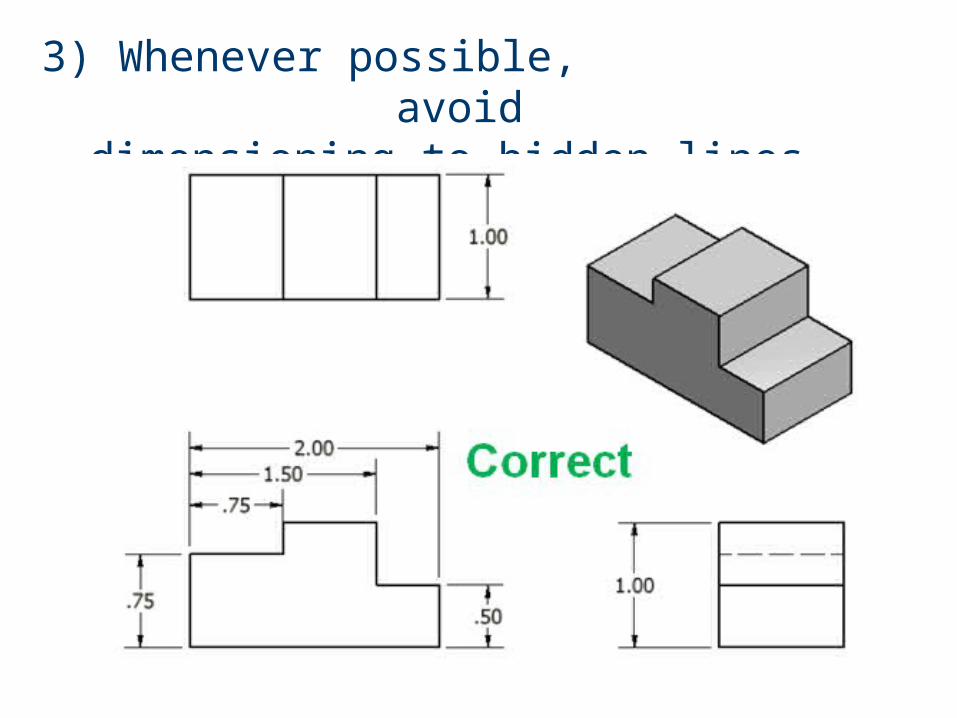
3) Whenever possible, avoid dimensioning to hidden lines.

4) Avoid dimensioning over or through the object.
Incorrect
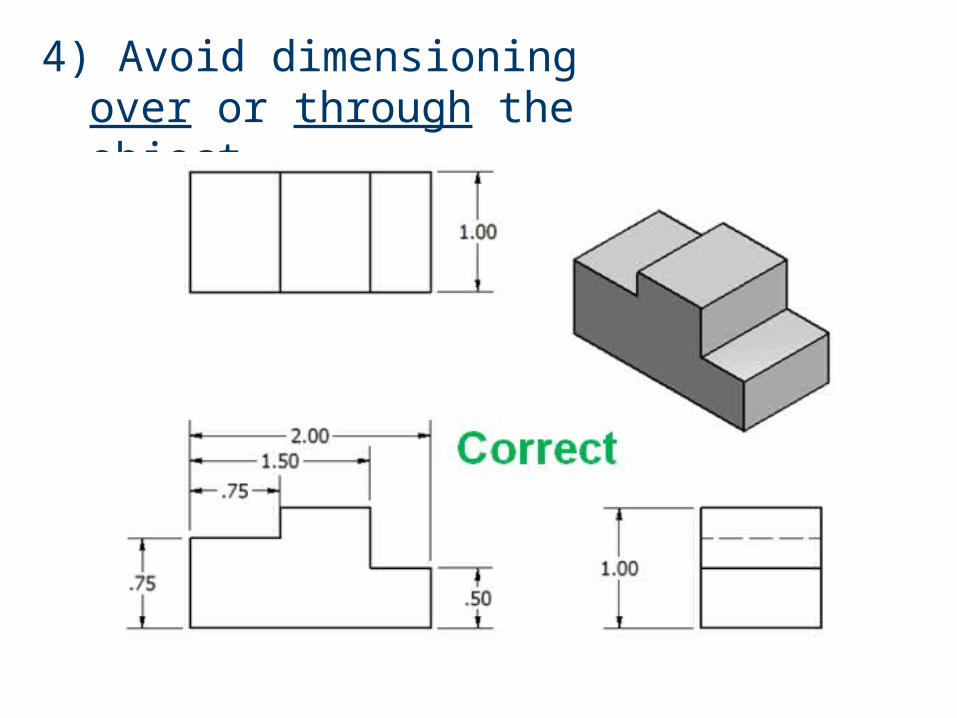
4) Avoid dimensioning over or through the object.

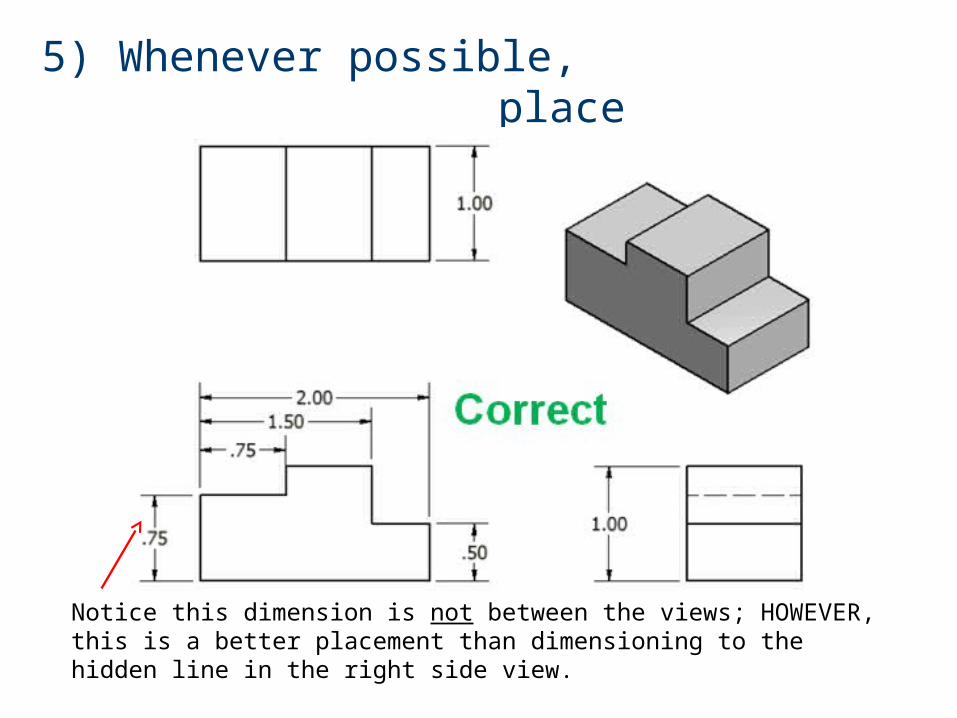
5) Whenever possible, place dimensions between adjacent views.
Incorrect
5) Whenever possible, place dimensions between adjacent views.
Notice this dimension is not between the views; HOWEVER, this is a better placement than dimensioning to the hidden line in the right side view.
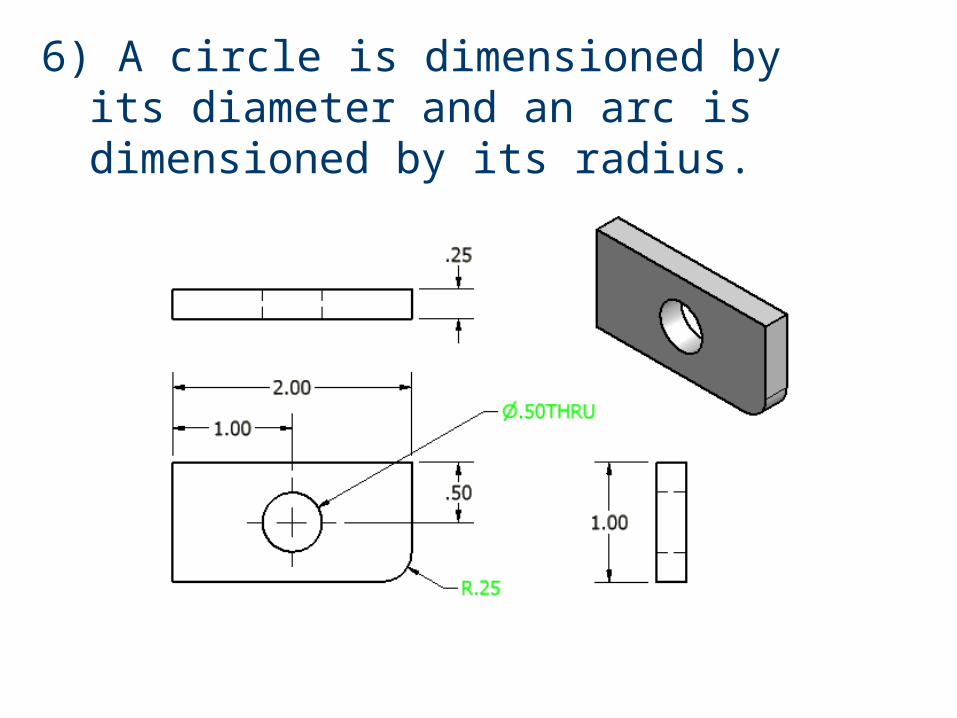
6) A circle is dimensioned by its diameter and an arc is dimensioned by its radius.
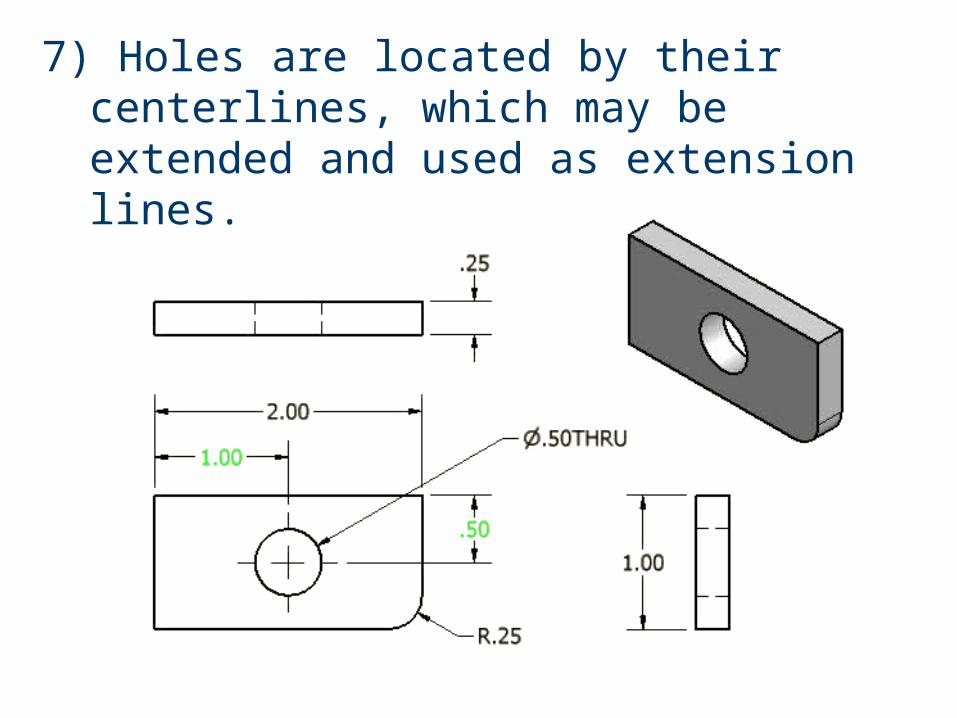
7) Holes are located by their centerlines, which may be extended and used as extension lines.
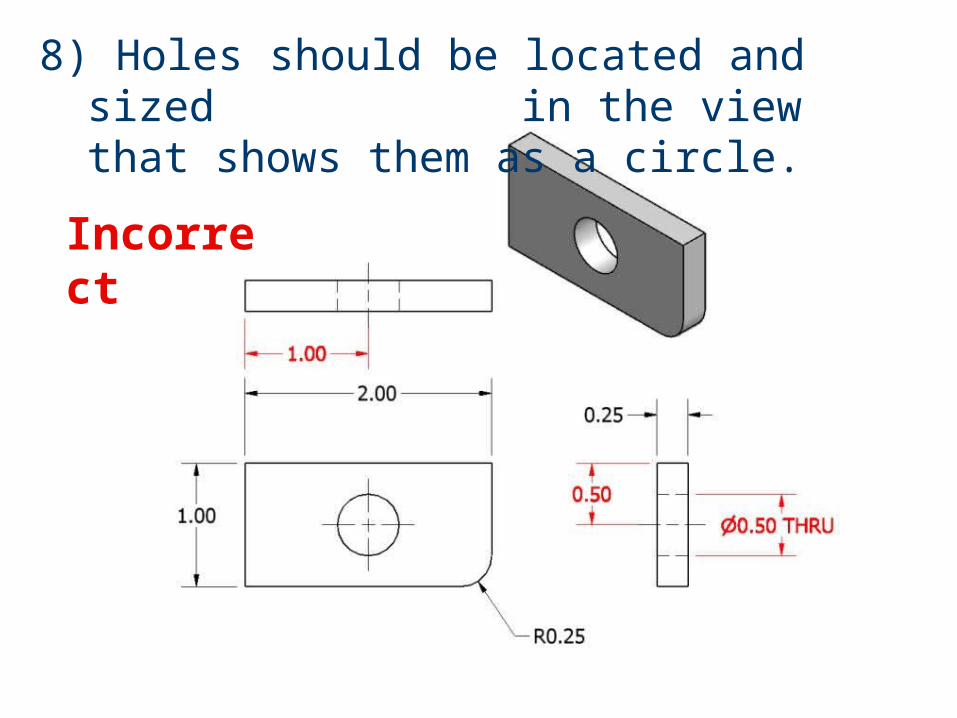
Incorrect
8) Holes should be located and sized in the view that shows them as a circle.
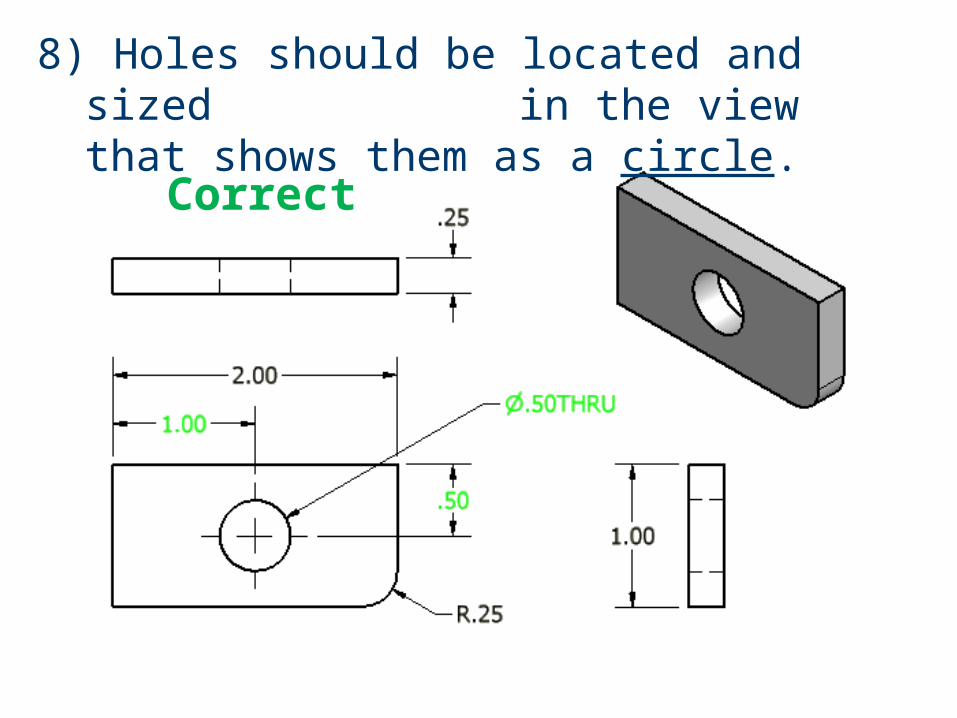
Correct
8) Holes should be located and sized in the view that shows them as a circle.
Directions for next two pages:
• Next, for each isometric sketch on the next few pages you will need to create orthographic drawings (front view, top view, and side view)
…and dimension them.
You will complete three examples.
…more…
• Make sure you place the front view in the lower left corner, the top view directly above the front view in the upper left corner, and the right side view to the right of the front view in the lower right corner.
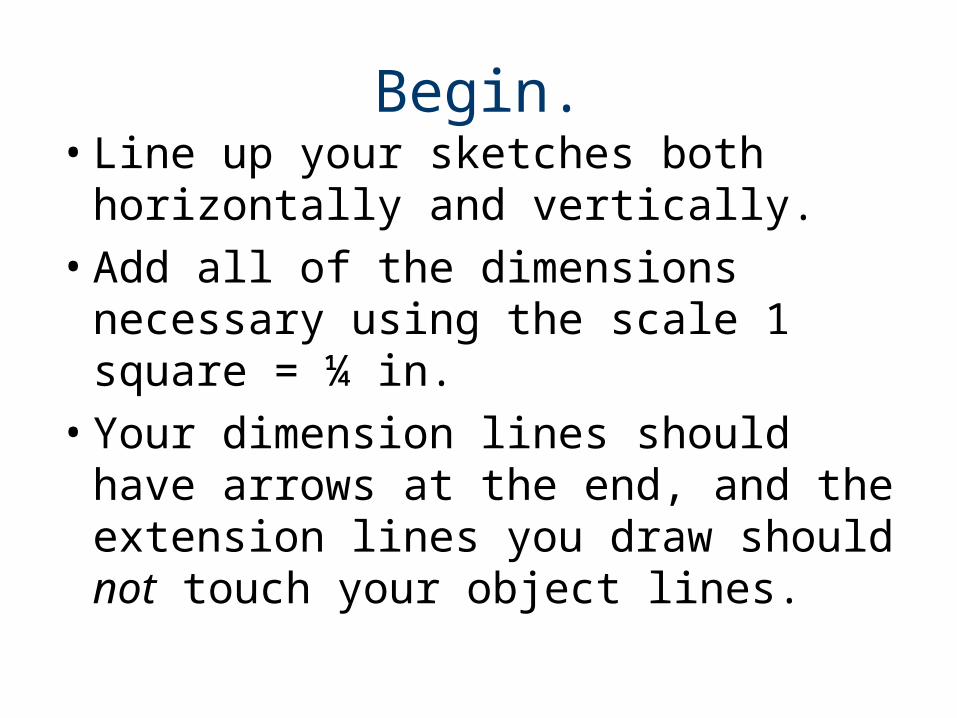
Begin.• Line up your sketches both
horizontally and vertically.
• Add all of the dimensions necessary using the scale 1 square = ¼ in.
• Your dimension lines should have arrows at the end, and the extension lines you draw should not touch your object lines.
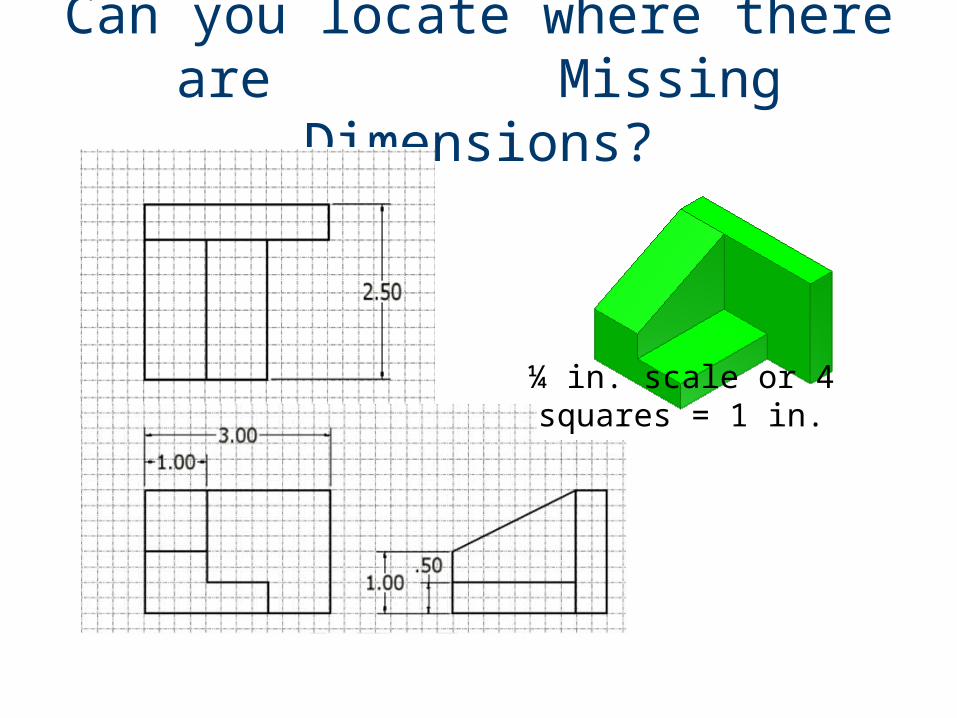
Can you locate where there are Missing Dimensions?
¼ in. scale or 4 squares = 1 in.
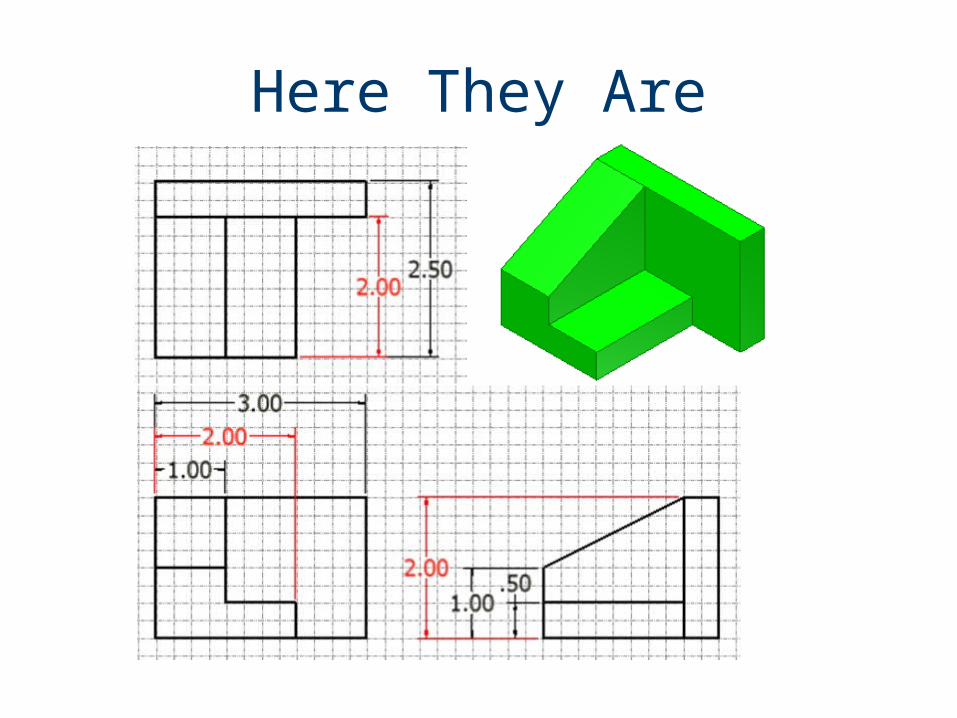
Here They Are
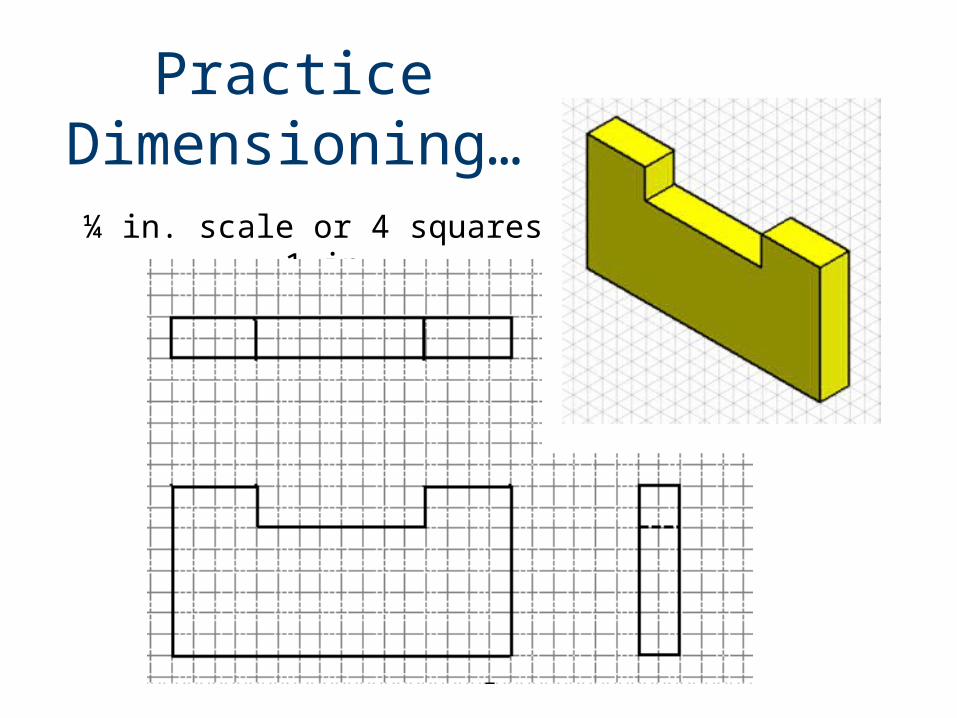
Practice Dimensioning…¼ in. scale or 4 squares = 1 in.
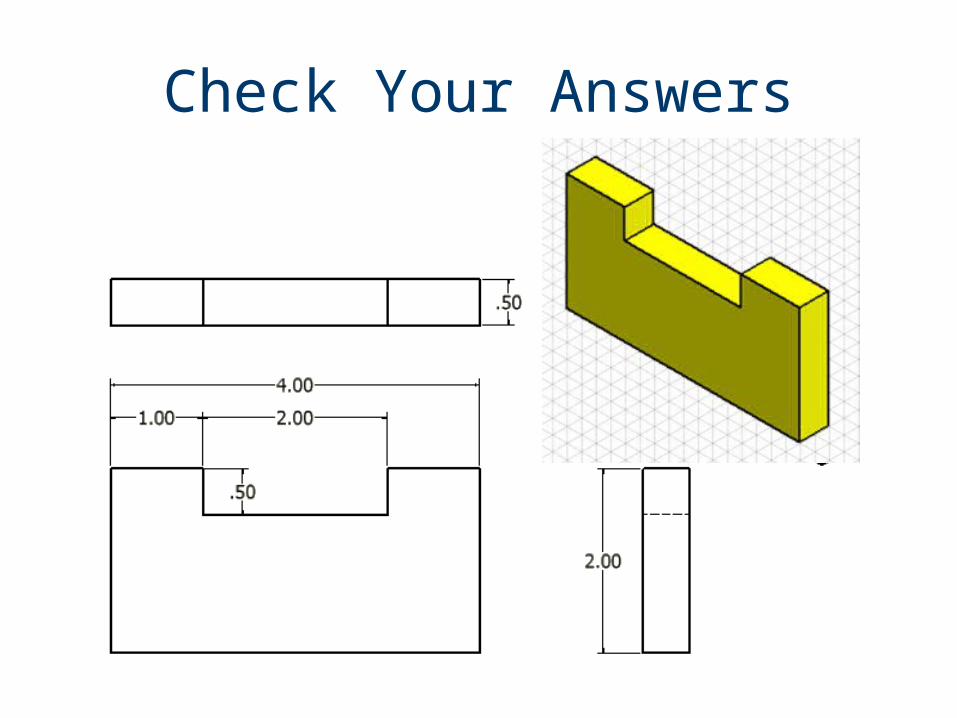
Check Your Answers
Homework?
• Work on these orthographic drawings for the remainder of class.
• Unless your instructor tells you differently, anything you do not finish is homework.
• DO NOT LOSE THIS ASSIGNMENT.
• Do the best you can and good luck.