Embed Size (px)
DESCRIPTION
Gameclip
Citation preview
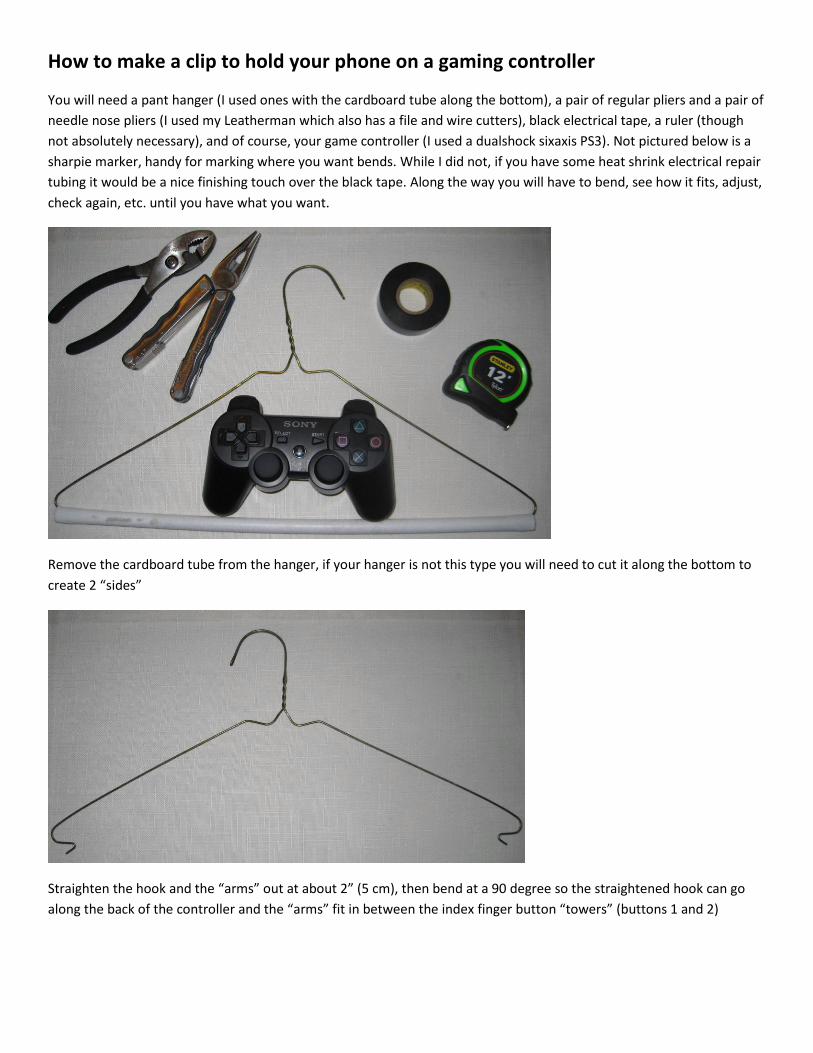
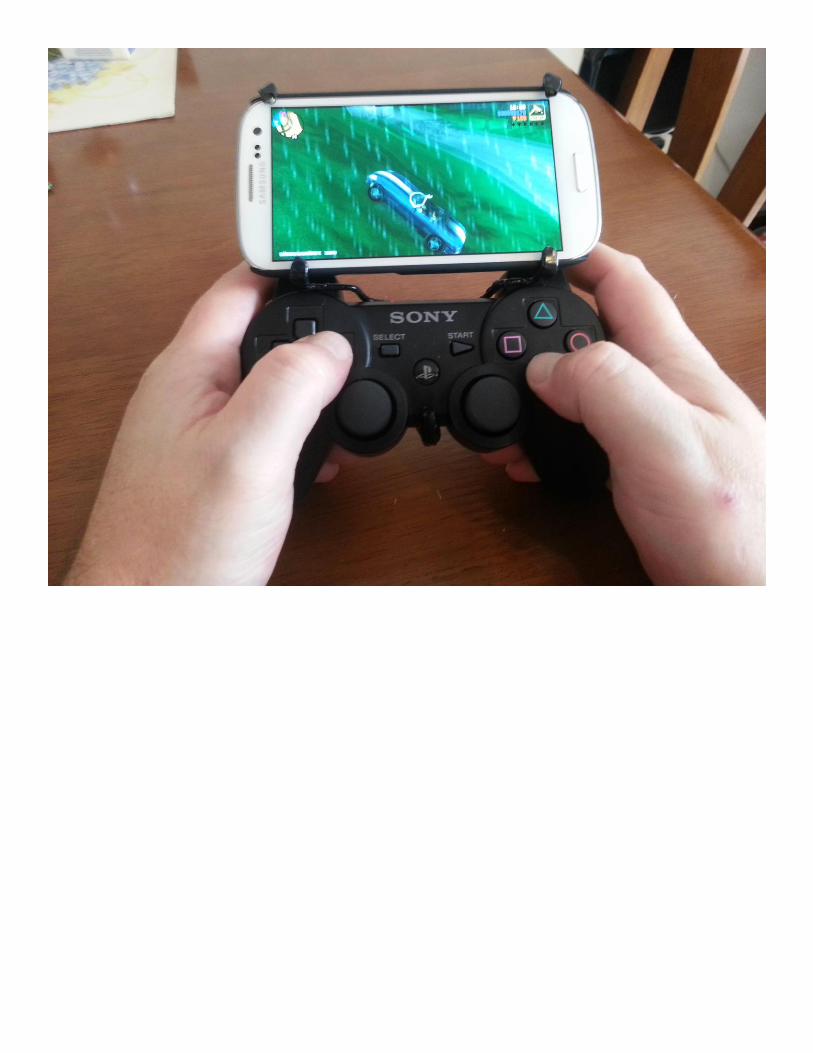
How to make a clip to hold your phone on a gaming controller
You will need a pant hanger (I used ones with the cardboard tube along the bottom), a pair of regular pliers and a pair of
needle nose pliers (I used my Leatherman which also has a file and wire cutters), black electrical tape, a ruler (though
not absolutely necessary), and of course, your game controller (I used a dualshock sixaxis PS3). Not pictured below is a
sharpie marker, handy for marking where you want bends. While I did not, if you have some heat shrink electrical repair
tubing it would be a nice finishing touch over the black tape. Along the way you will have to bend, see how it fits, adjust,
check again, etc. until you have what you want.
Remove the cardboard tube from the hanger, if your hanger is not this type you will need to cut it along the bottom to
create 2 “sides”
Straighten the hook and the “arms” out at about 2” (5 cm), then bend at a 90 degree so the straightened hook can go
along the back of the controller and the “arms” fit in between the index finger button “towers” (buttons 1 and 2)
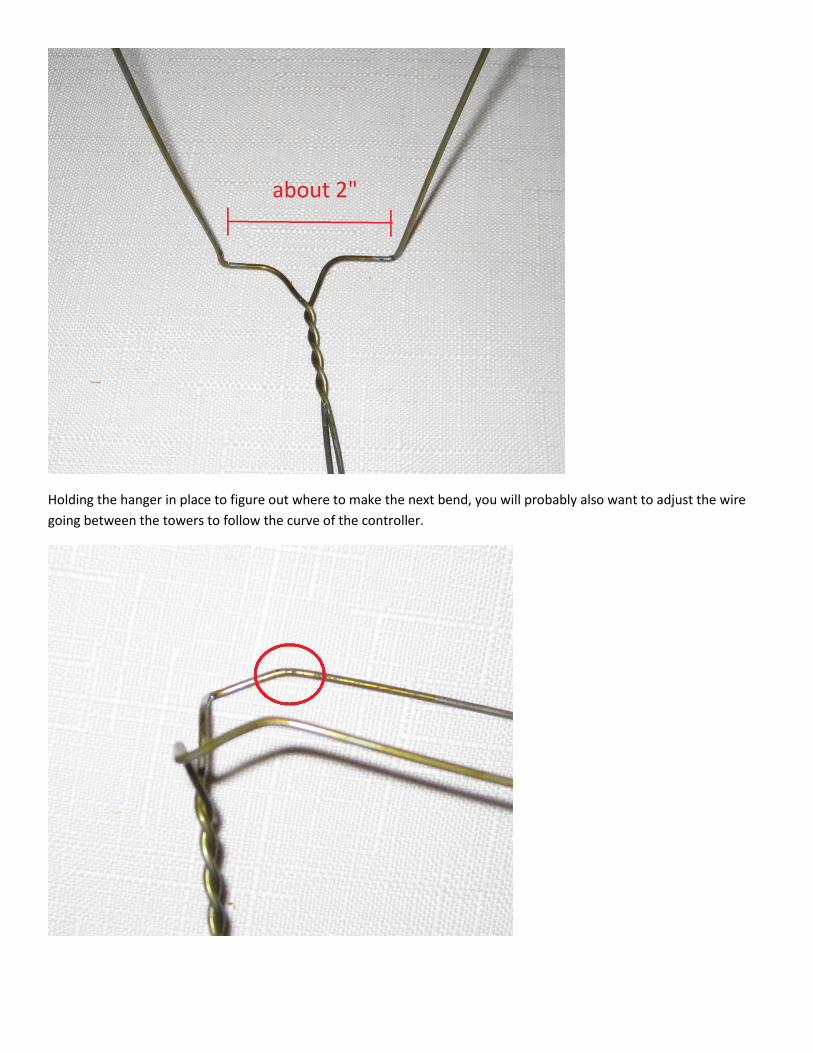
Holding the hanger in place to figure out where to make the next bend, you will probably also want to adjust the wire
going between the towers to follow the curve of the controller.
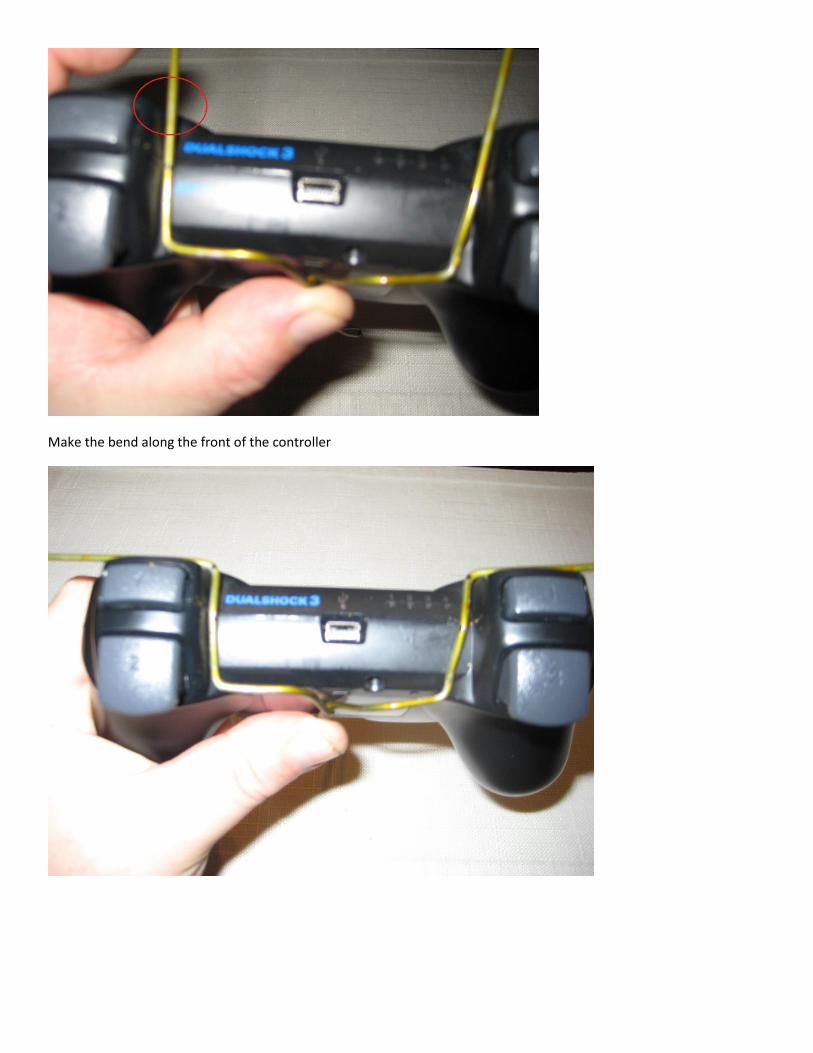
Make the bend along the front of the controller
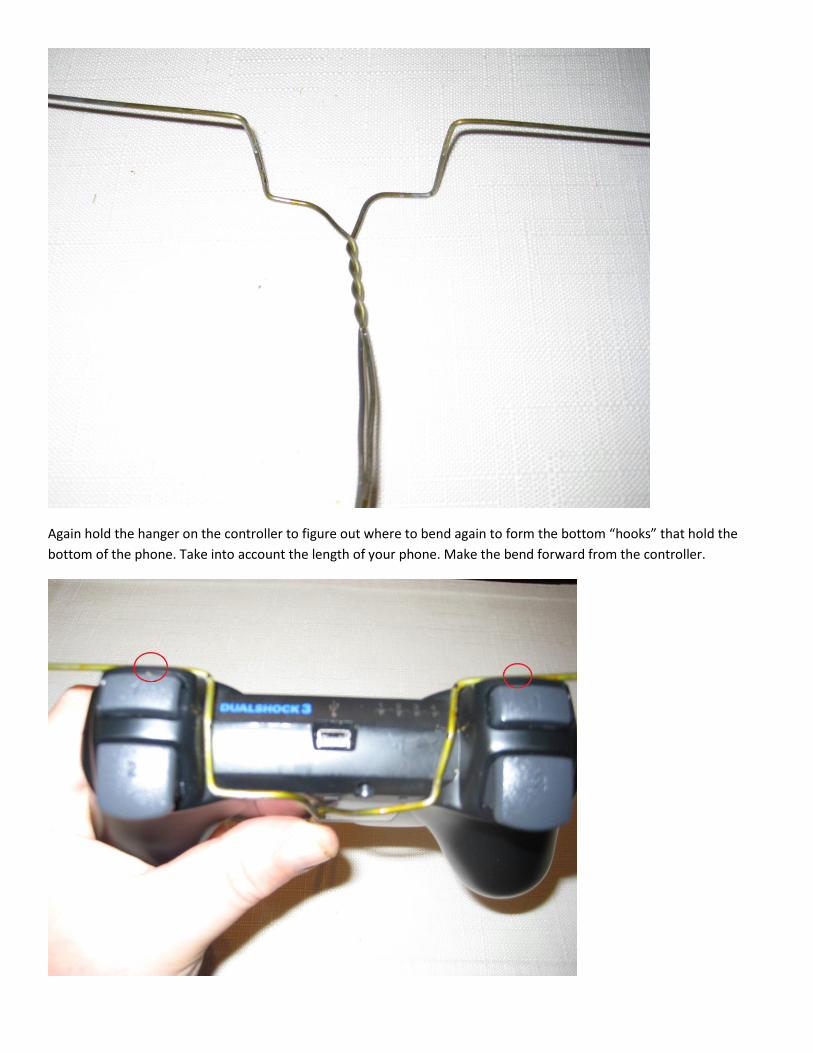
Again hold the hanger on the controller to figure out where to bend again to form the bottom “hooks” that hold the
bottom of the phone. Take into account the length of your phone. Make the bend forward from the controller.
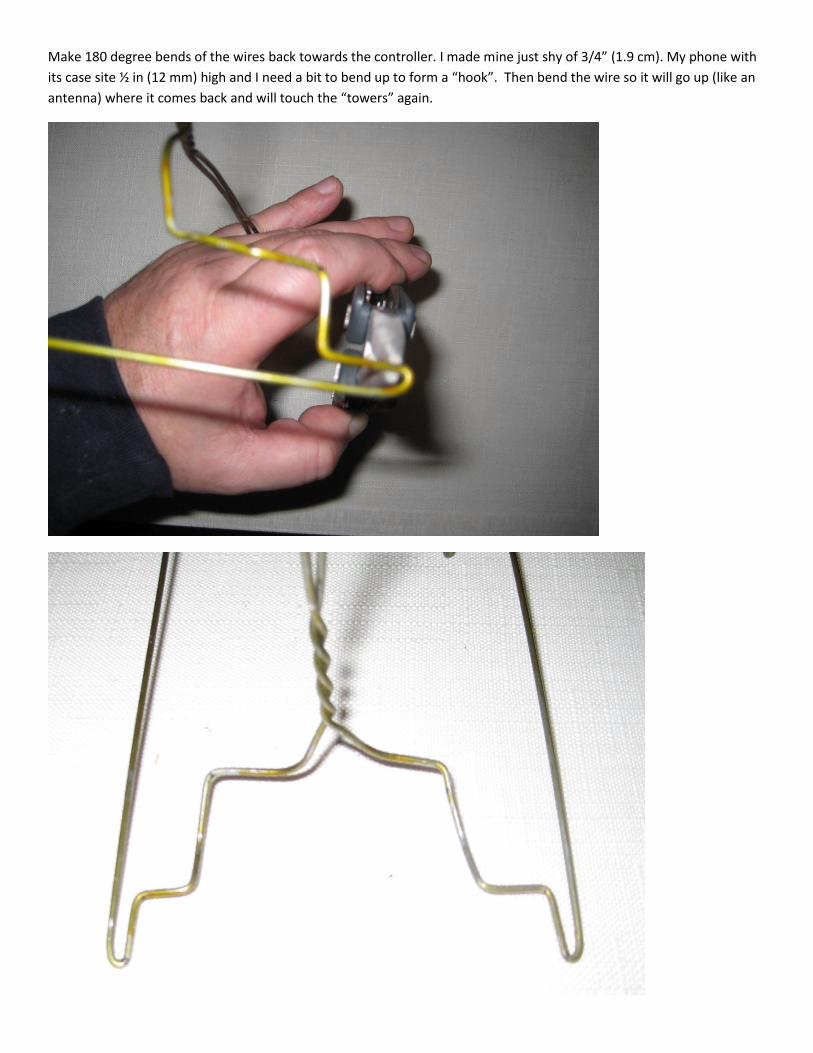
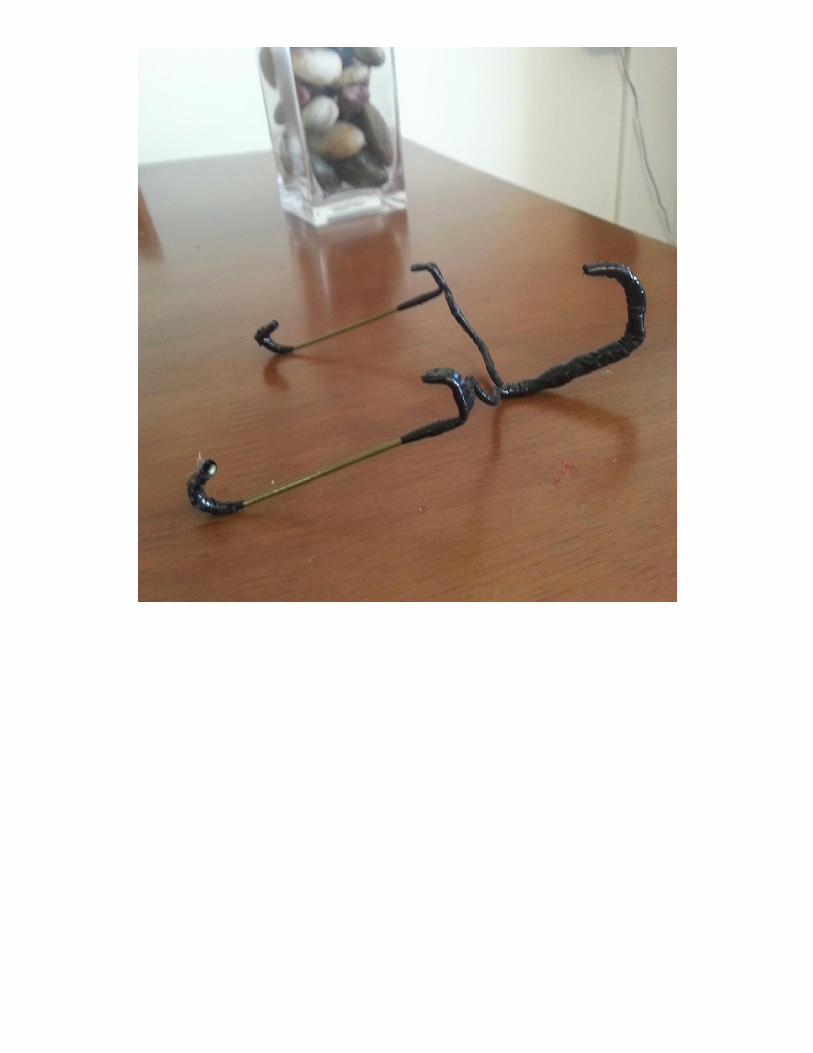
Make 180 degree bends of the wires back towards the controller. I made mine just shy of 3/4” (1.9 cm). My phone with
its case site ½ in (12 mm) high and I need a bit to bend up to form a “hook”. Then bend the wire so it will go up (like an
antenna) where it comes back and will touch the “towers” again.
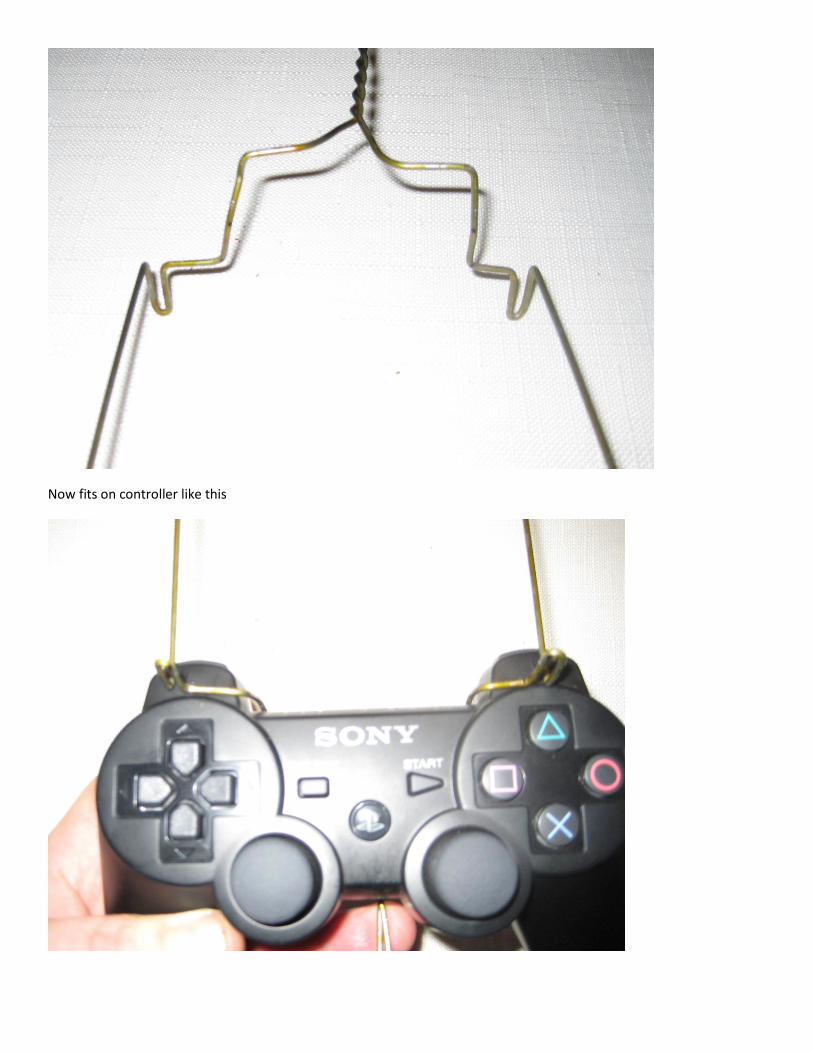
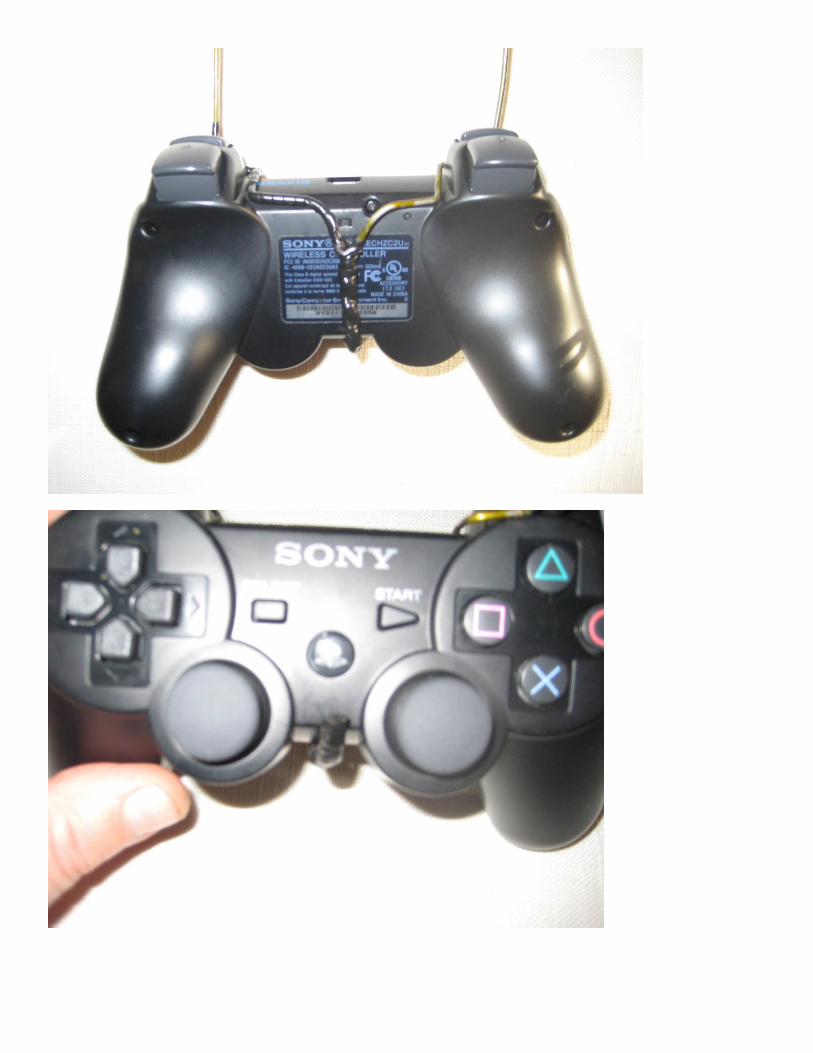
Now fits on controller like this
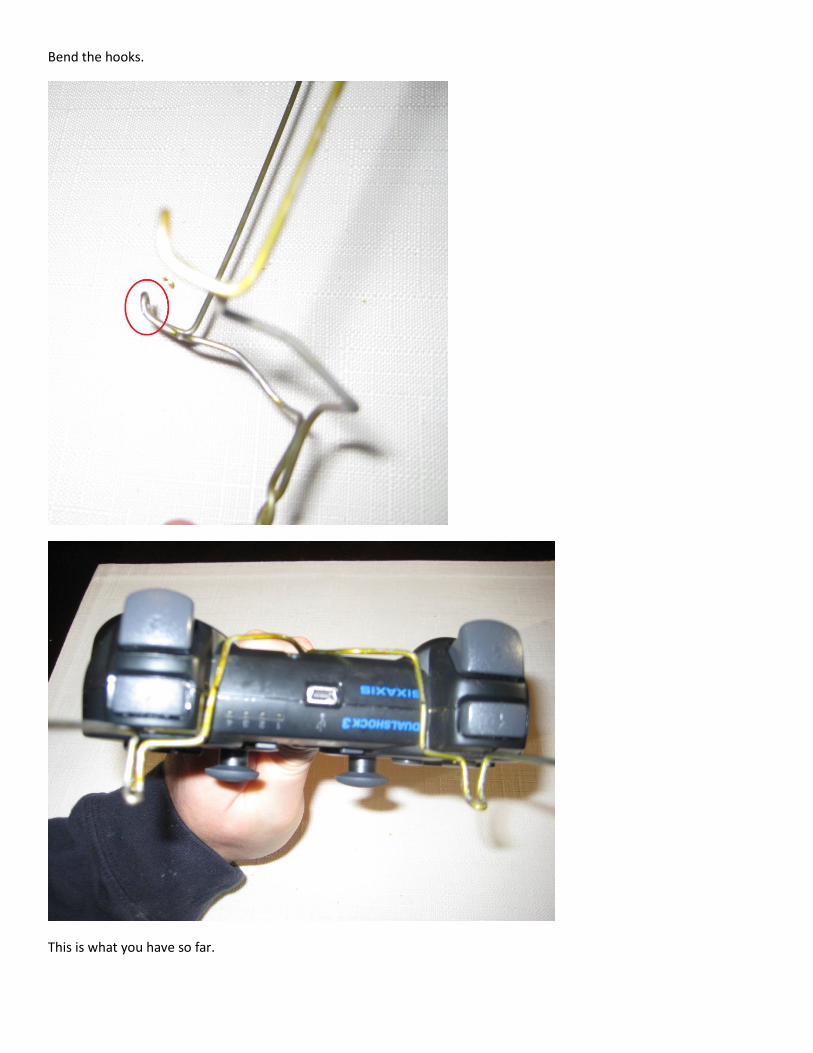
Bend the hooks.
This is what you have so far.
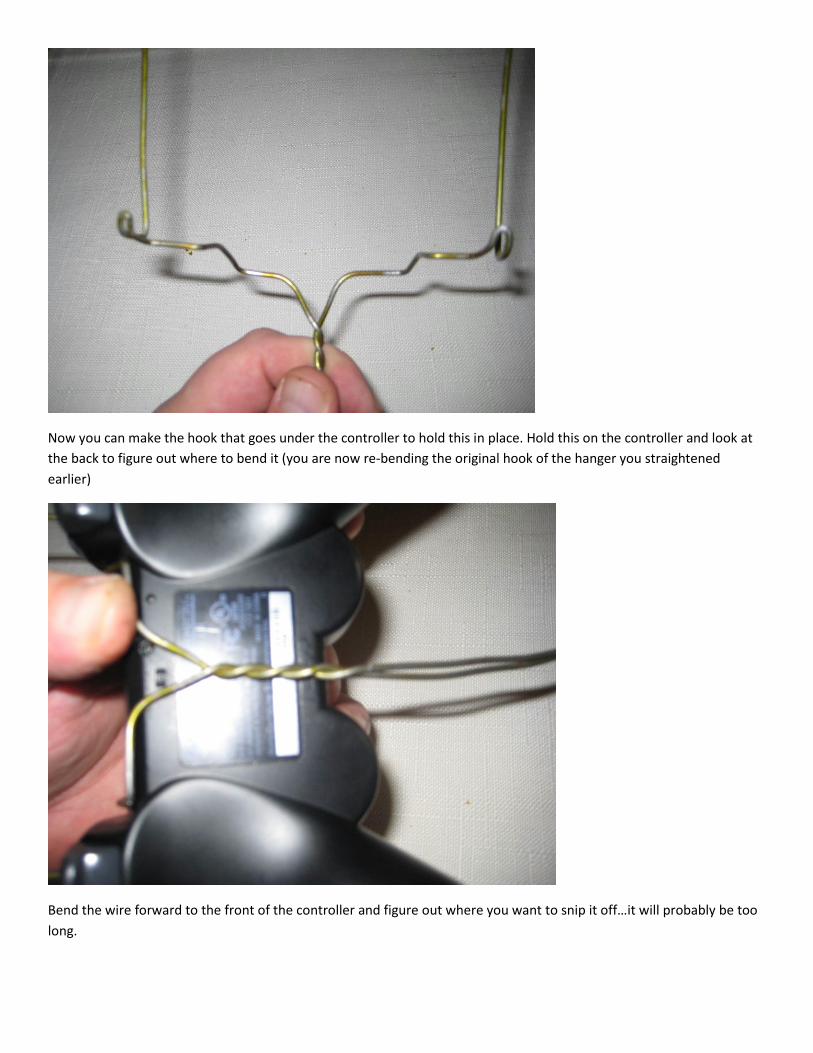
Now you can make the hook that goes under the controller to hold this in place. Hold this on the controller and look at
the back to figure out where to bend it (you are now re-bending the original hook of the hanger you straightened
earlier)
Bend the wire forward to the front of the controller and figure out where you want to snip it off…it will probably be too
long.
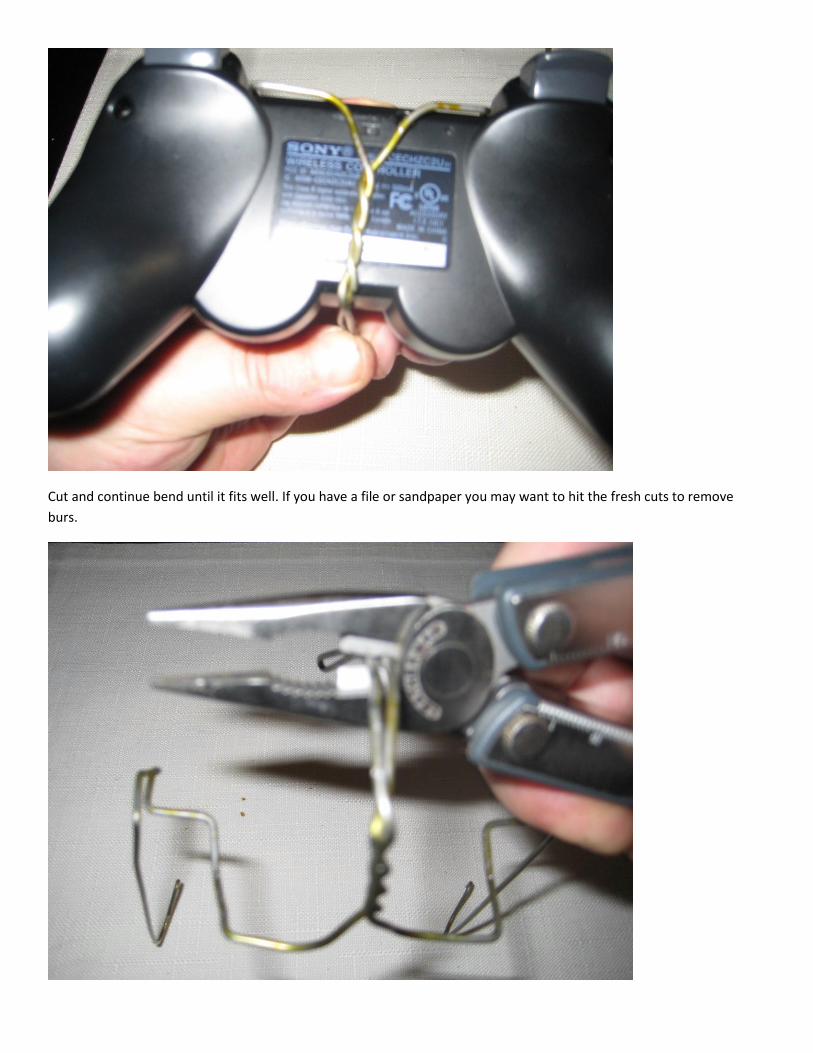
Cut and continue bend until it fits well. If you have a file or sandpaper you may want to hit the fresh cuts to remove
burs.

Get the black tape, slice it in half down the center, and wrap it around the hanger. You can continue to bend as
necessary but this will protect your controller and sturdy the wound part of the wires .
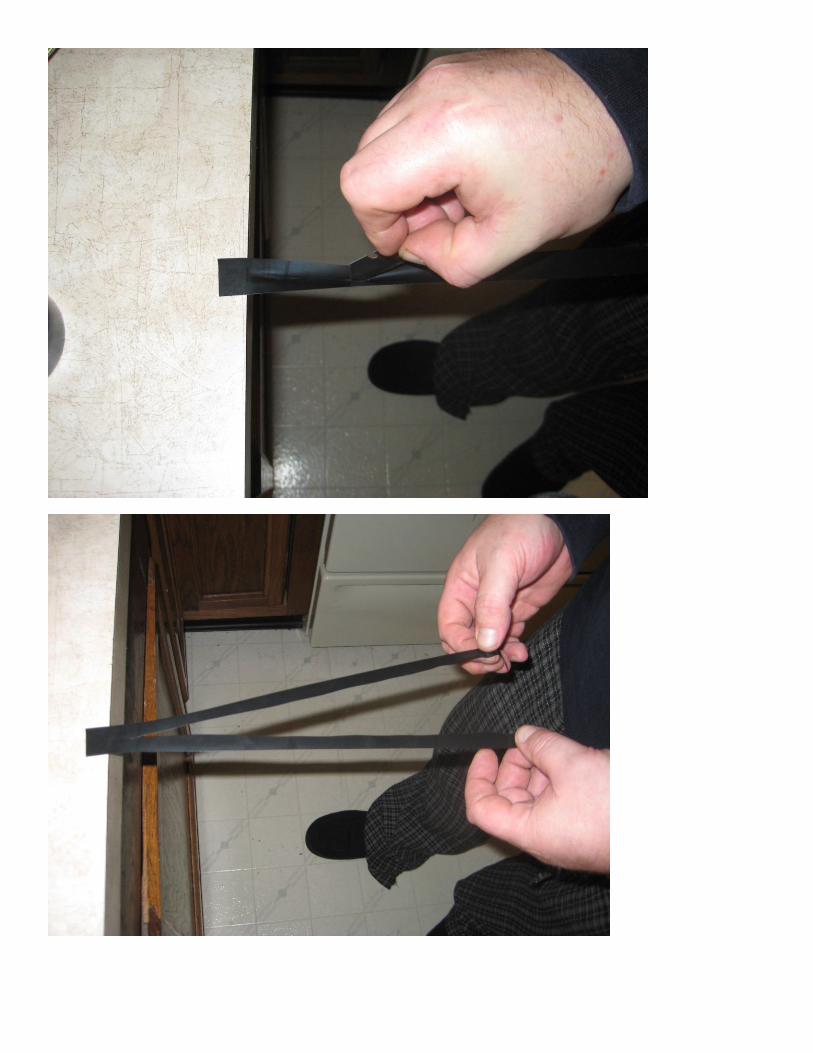
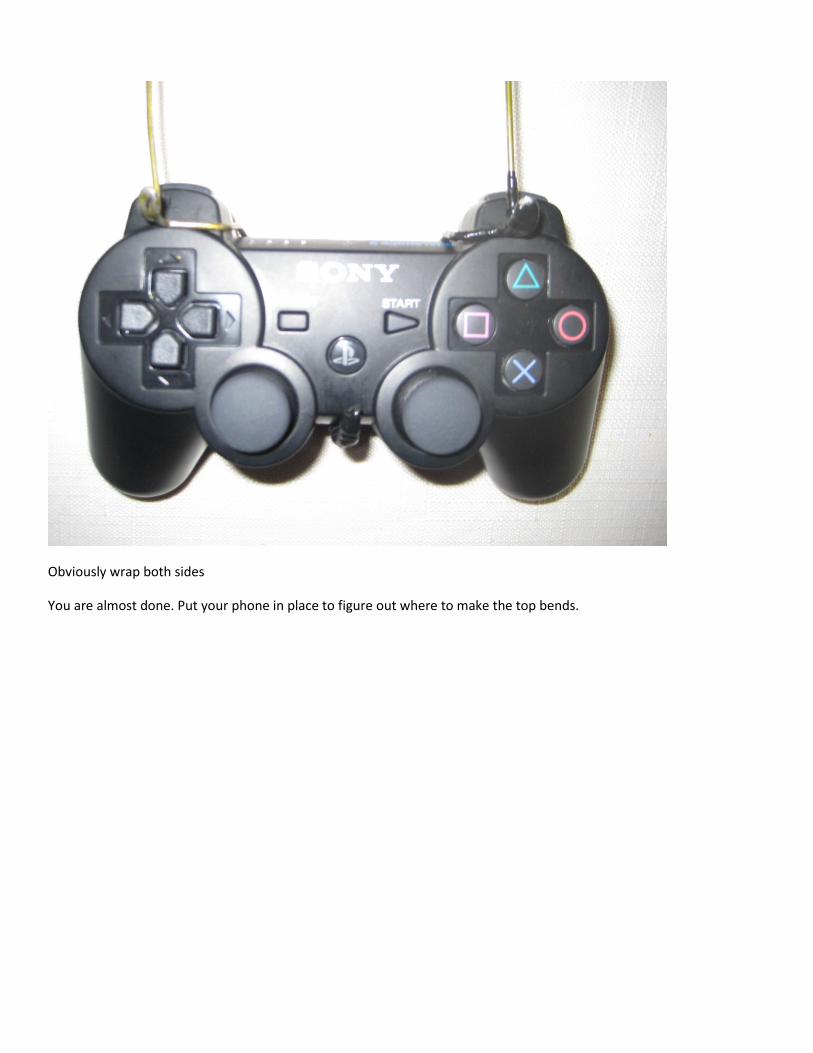
Obviously wrap both sides
You are almost done. Put your phone in place to figure out where to make the top bends.
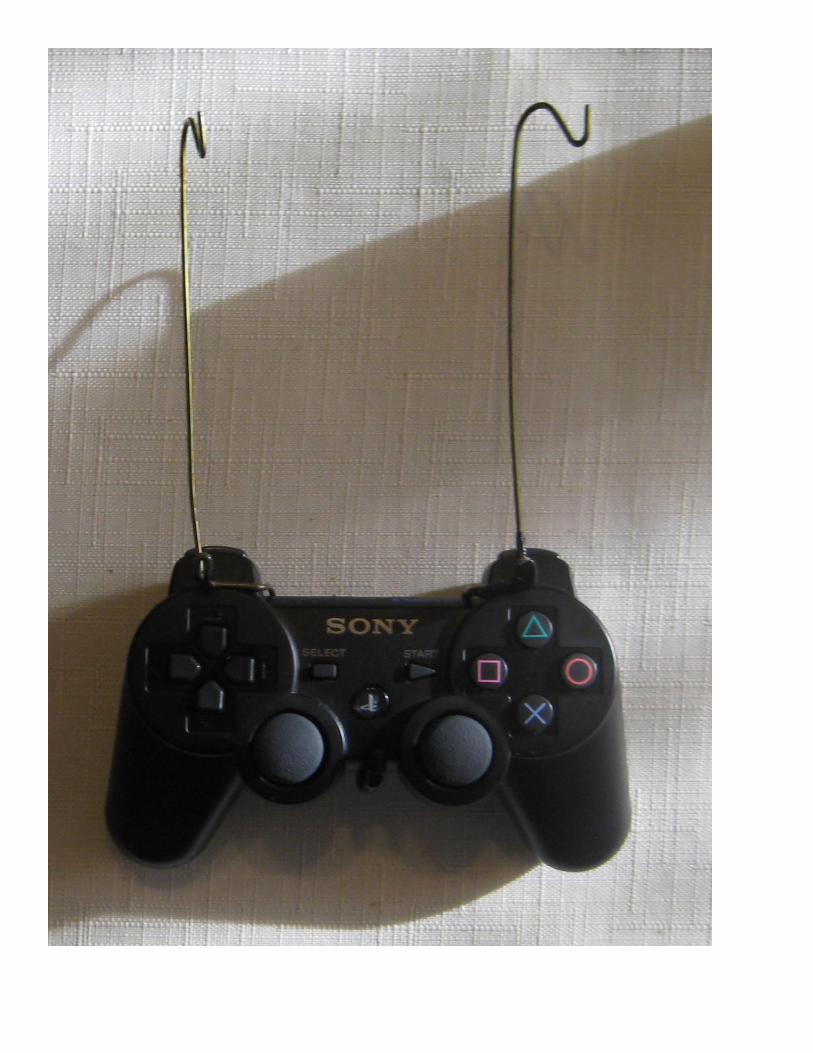
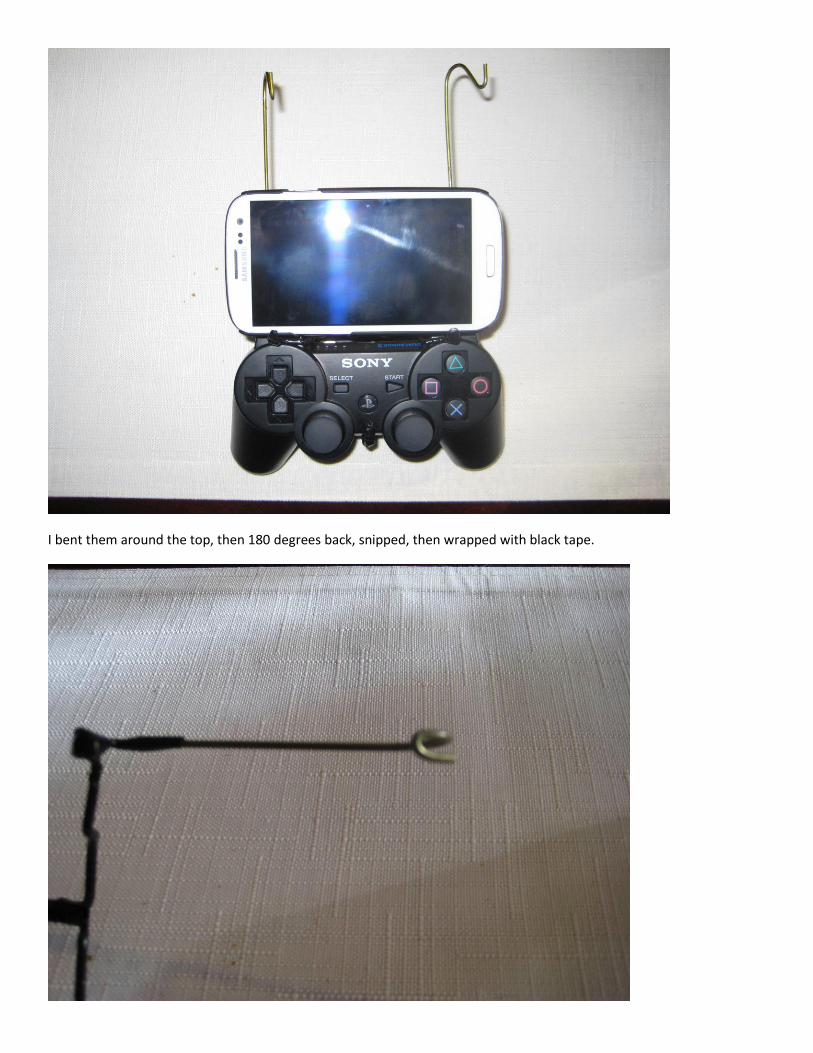
I bent them around the top, then 180 degrees back, snipped, then wrapped with black tape.
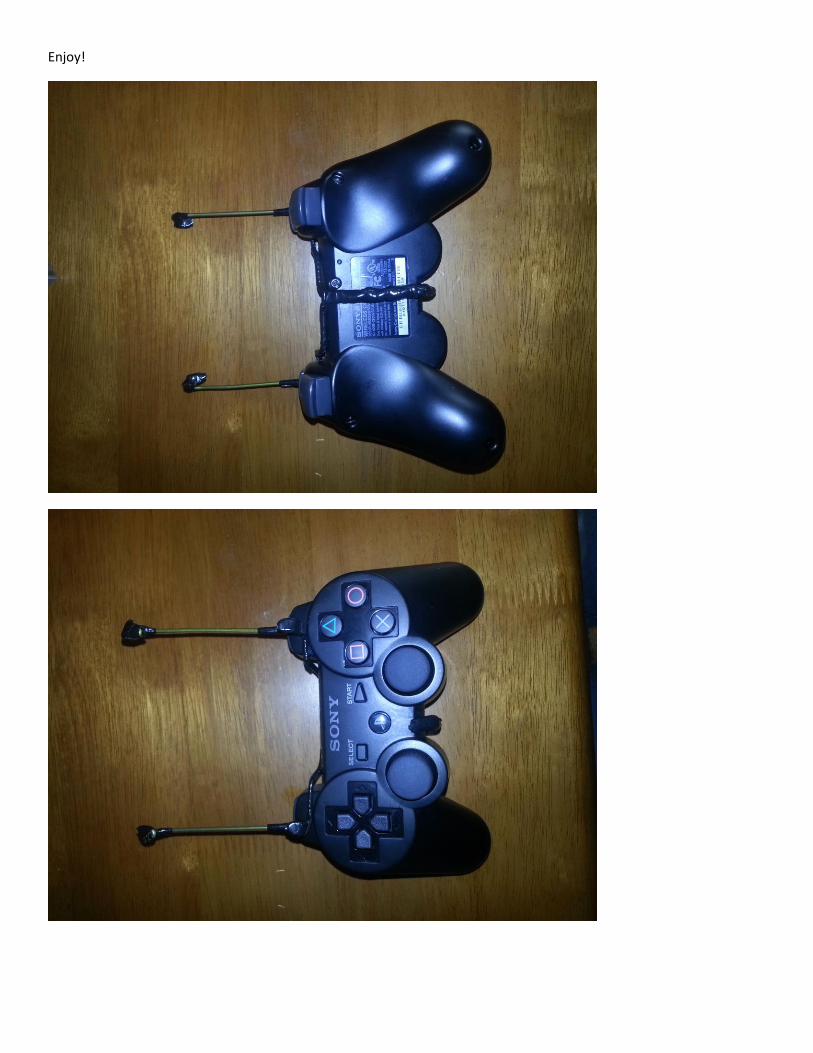
Enjoy!