Embed Size (px)
Citation preview
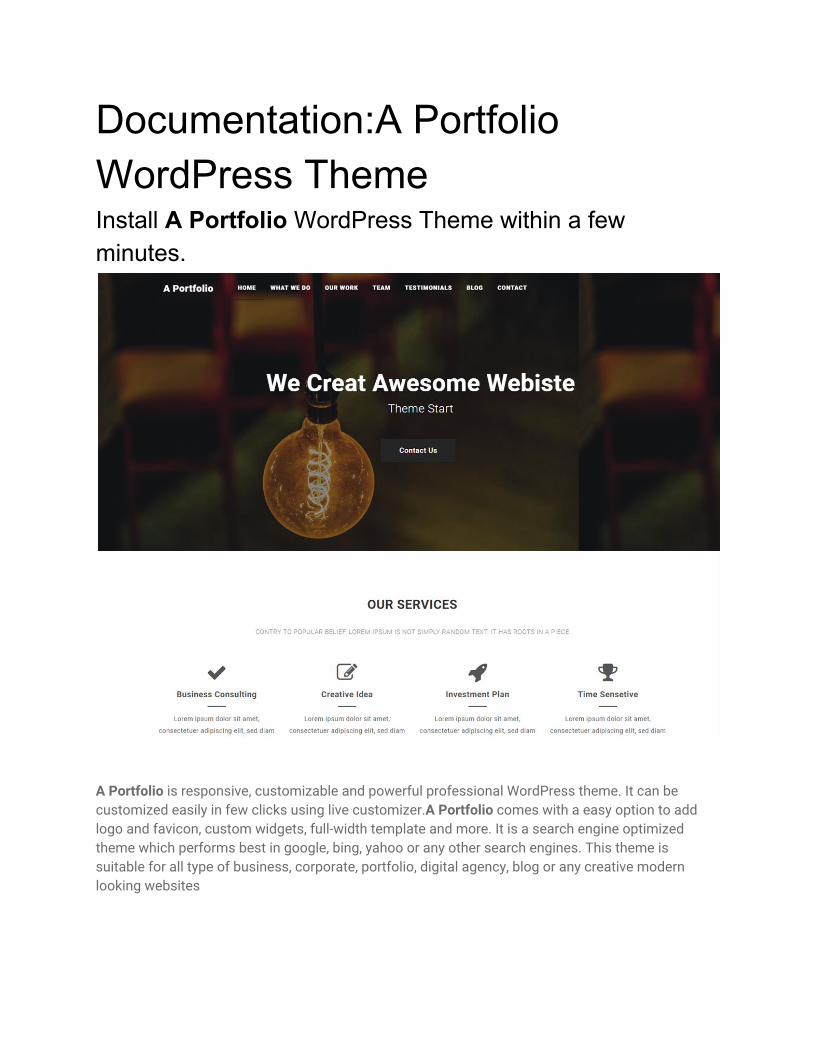
Documentation:A Portfolio WordPress Theme Install A Portfolio WordPress Theme within a few minutes.
A Portfolio is responsive, customizable and powerful professional WordPress theme. It can be customized easily in few clicks using live customizer.A Portfolio comes with a easy option to add logo and favicon, custom widgets, full-width template and more. It is a search engine optimized theme which performs best in google, bing, yahoo or any other search engines. This theme is suitable for all type of business, corporate, portfolio, digital agency, blog or any creative modern looking websites

A Portfolio documentation: How to start? This documentation will show you step by step how to complete the basic configuration of A Portfolio.It is important that you follow these steps carefully because some steps build up on each other and that will help you a great deal to set up your website properly:
1. How to set up a static front page in WordPress? 2. How to upload, install and activate A Portfolio? 3. What is page and how to create it? 4. What is category and how to create it? 5. How to create menus? 6. How & where to place widgets on your website? 7. How to create posts? 8. How to add logo, header image and site title/tagline? 9. How to adjust options & layout? 10. How to add google map in contact section?
1 – How to set up a static front page in WordPress? In order to create a A Portfolio like front page like shown in the theme demos for A Portfolio,
● First to create new page named Home(or else) . ● Select Homepage template for your just newly created page under Page Attributes on
the right side. ● Finally, publish this page.
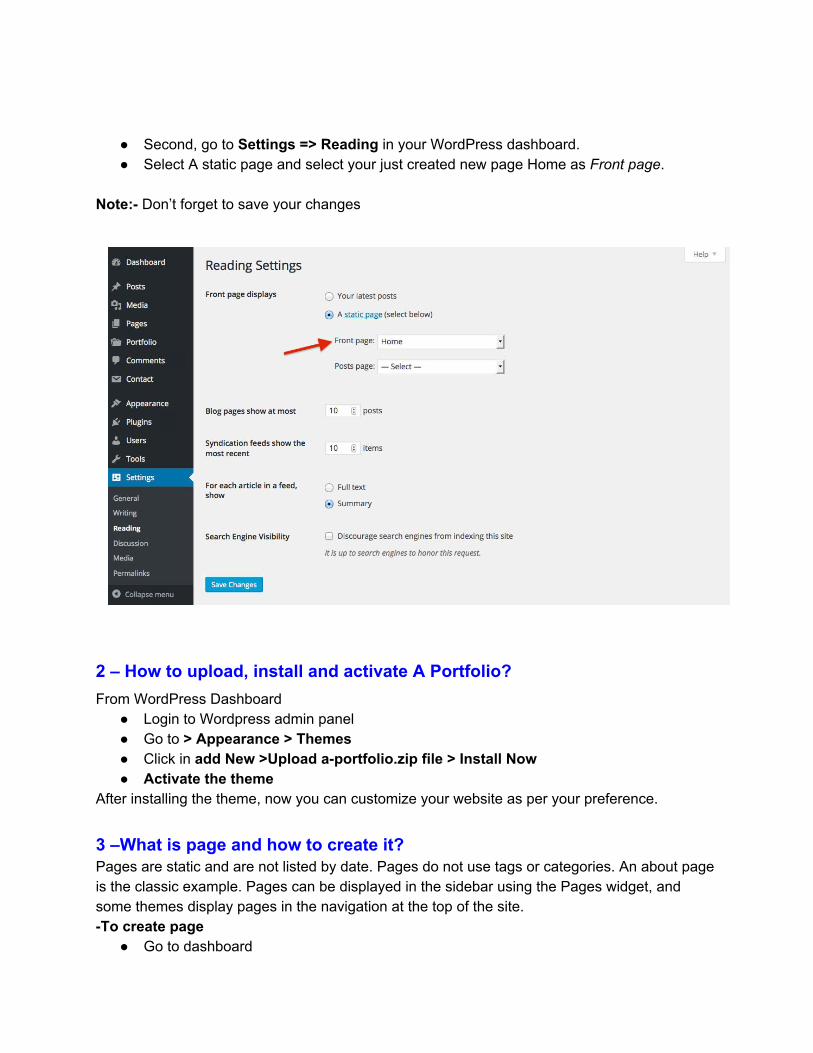
● Second, go to Settings => Reading in your WordPress dashboard. ● Select A static page and select your just created new page Home as Front page.
Note:- Don’t forget to save your changes
2 – How to upload, install and activate A Portfolio? From WordPress Dashboard
● Login to Wordpress admin panel ● Go to > Appearance > Themes ● Click in add New >Upload a-portfolio.zip file > Install Now ● Activate the theme
After installing the theme, now you can customize your website as per your preference. 3 –What is page and how to create it? Pages are static and are not listed by date. Pages do not use tags or categories. An about page is the classic example. Pages can be displayed in the sidebar using the Pages widget, and some themes display pages in the navigation at the top of the site. -To create page
● Go to dashboard
● Click in Pages > Add New > Follow instructions as below
● After adding all content, you can publish your page and create necessary pages by
same method.
4 – What is category and how to create it? Categories provide a helpful way to group related posts together, and to quickly tell readers what a post is about. Categories also make it easier for people to find your content. Categories are similar to, put broader than,tags. How to create categories
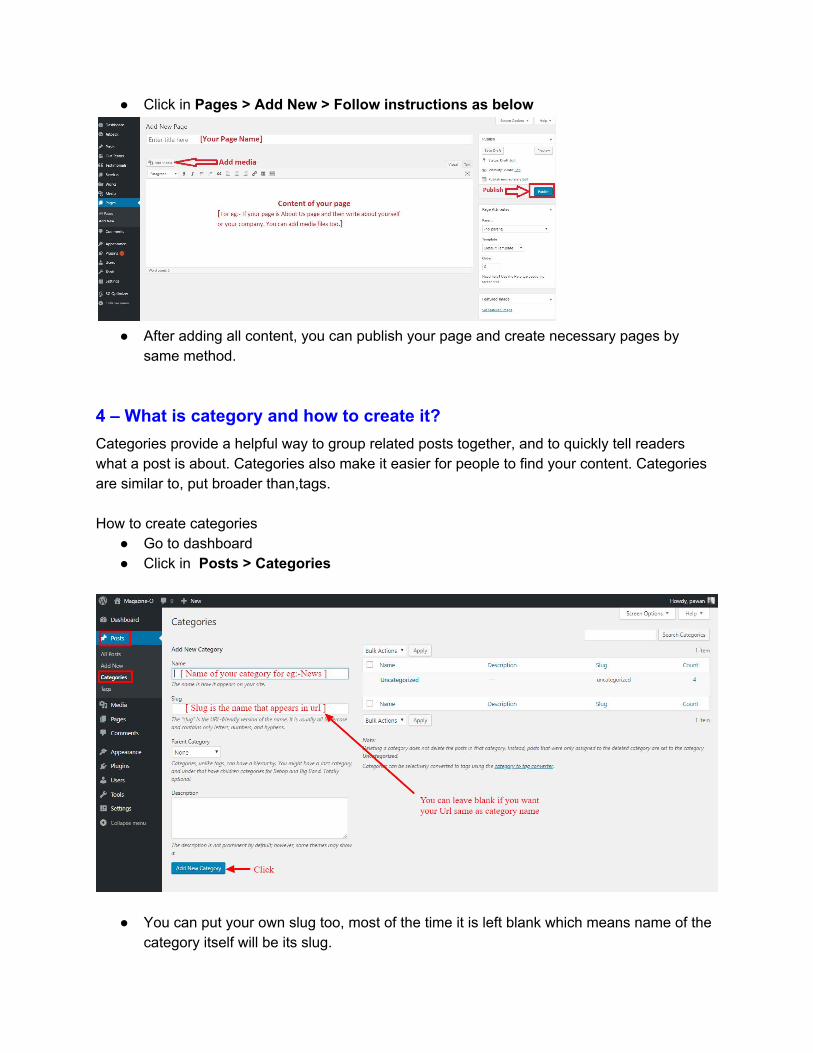
● Go to dashboard ● Click in Posts > Categories
● You can put your own slug too, most of the time it is left blank which means name of the
category itself will be its slug.

● [ For eg. yoursite.com/category/category_name] ● You can put description if you want. ● Now after adding category, your category will appear in right side of the post page. ● You can add more categories in same manner.
5 – How to create menus? This theme comes with only one menu locations. Primary menu.
You can create menus in two ways.
● Appearance=>Customize=>Menus=>Create New Menu ● Appearance => Menus(We RECOMMENDED this Option for creating menus.)
● Create New Menu [You need to create only one menu] ● Give name of the menu[For eg. Primary Menu] > Create Menu
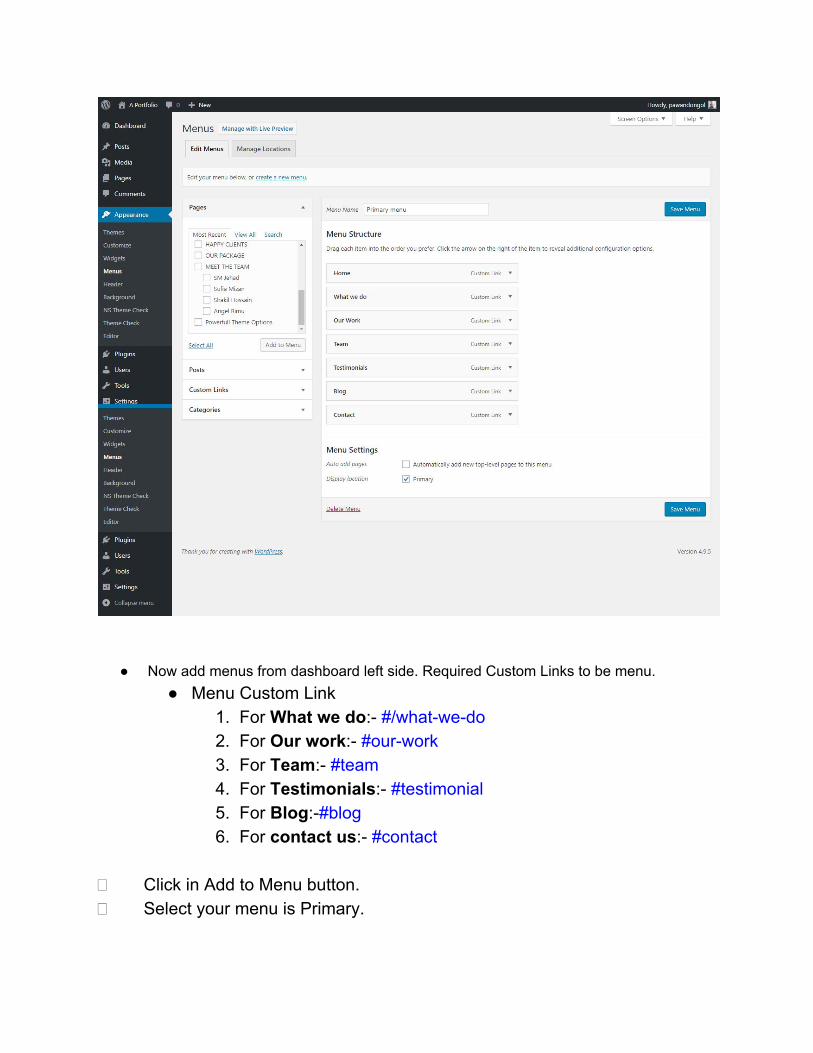
● Now add menus from dashboard left side. Required Custom Links to be menu. ● Menu Custom Link
1. For What we do:- #/what-we-do 2. For Our work:- #our-work 3. For Team:- #team 4. For Testimonials:- #testimonial 5. For Blog:-#blog 6. For contact us:- #contact
Click in Add to Menu button. Select your menu is Primary.
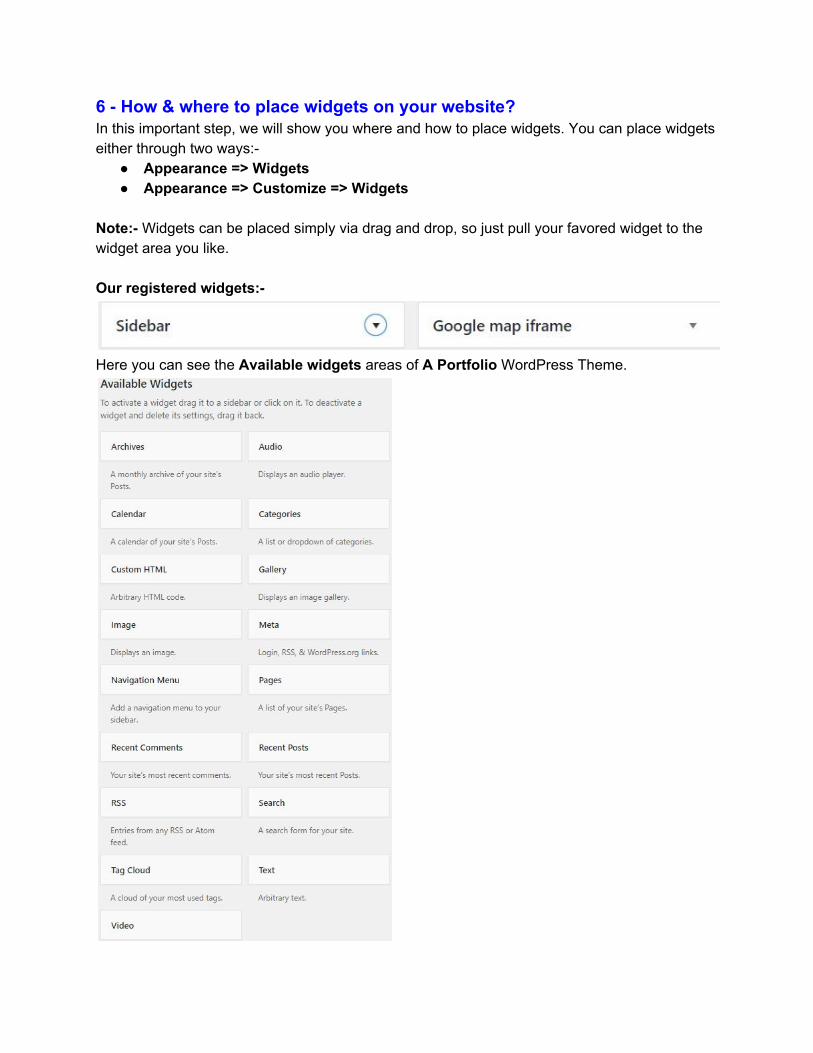
6 - How & where to place widgets on your website? In this important step, we will show you where and how to place widgets. You can place widgets either through two ways:-
● Appearance => Widgets ● Appearance => Customize => Widgets
Note:- Widgets can be placed simply via drag and drop, so just pull your favored widget to the widget area you like. Our registered widgets:-
Here you can see the Available widgets areas of A Portfolio WordPress Theme.
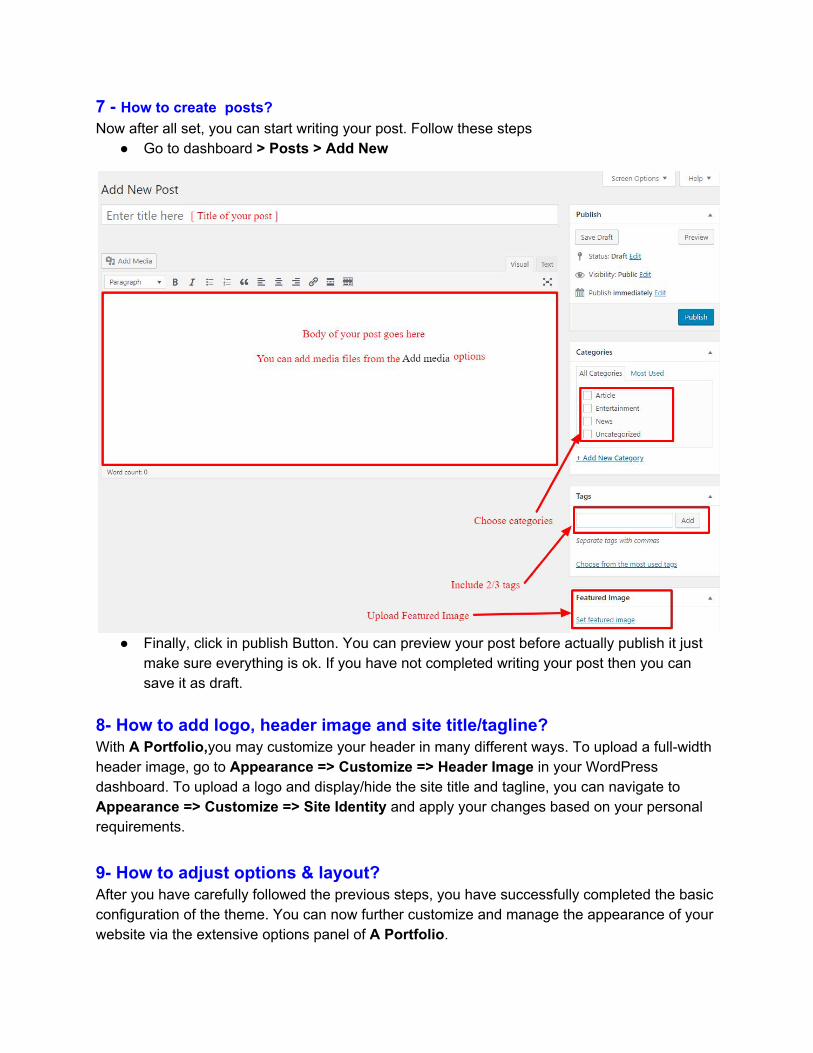
7 - How to create posts? Now after all set, you can start writing your post. Follow these steps
● Go to dashboard > Posts > Add New
● Finally, click in publish Button. You can preview your post before actually publish it just make sure everything is ok. If you have not completed writing your post then you can save it as draft.
8- How to add logo, header image and site title/tagline? With A Portfolio,you may customize your header in many different ways. To upload a full-width header image, go to Appearance => Customize => Header Image in your WordPress dashboard. To upload a logo and display/hide the site title and tagline, you can navigate to Appearance => Customize => Site Identity and apply your changes based on your personal requirements. 9- How to adjust options & layout? After you have carefully followed the previous steps, you have successfully completed the basic configuration of the theme. You can now further customize and manage the appearance of your website via the extensive options panel of A Portfolio.
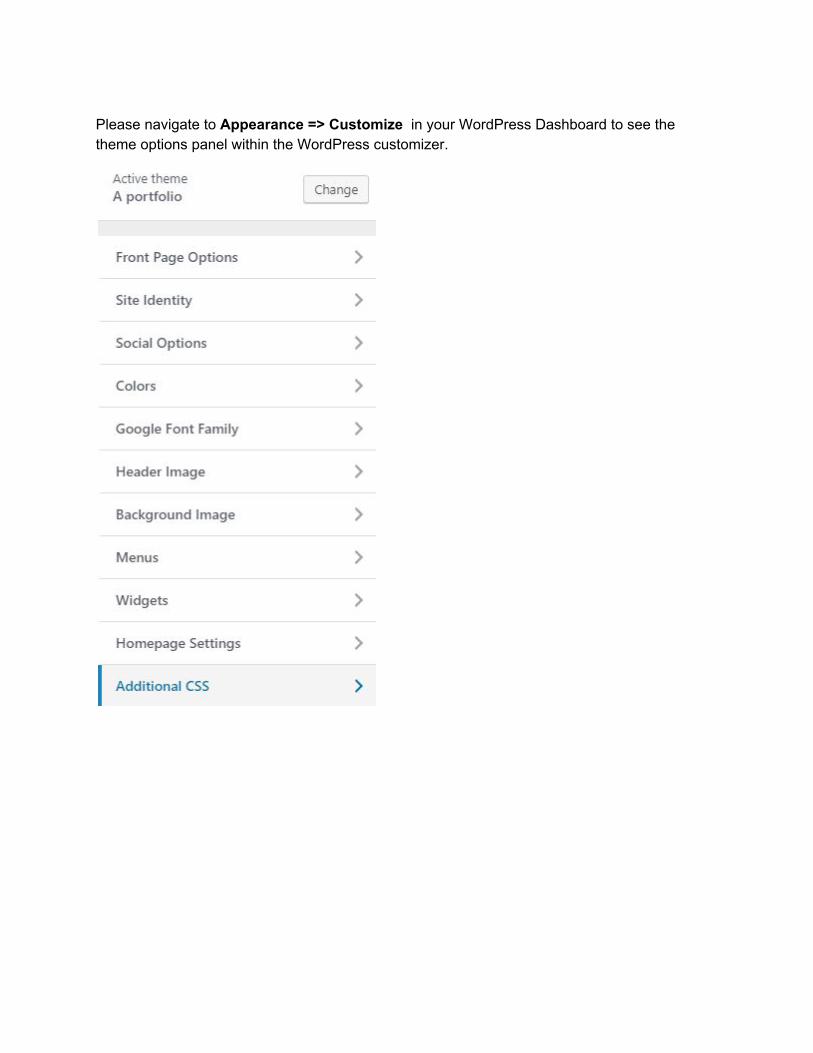
Please navigate to Appearance => Customize in your WordPress Dashboard to see the theme options panel within the WordPress customizer.
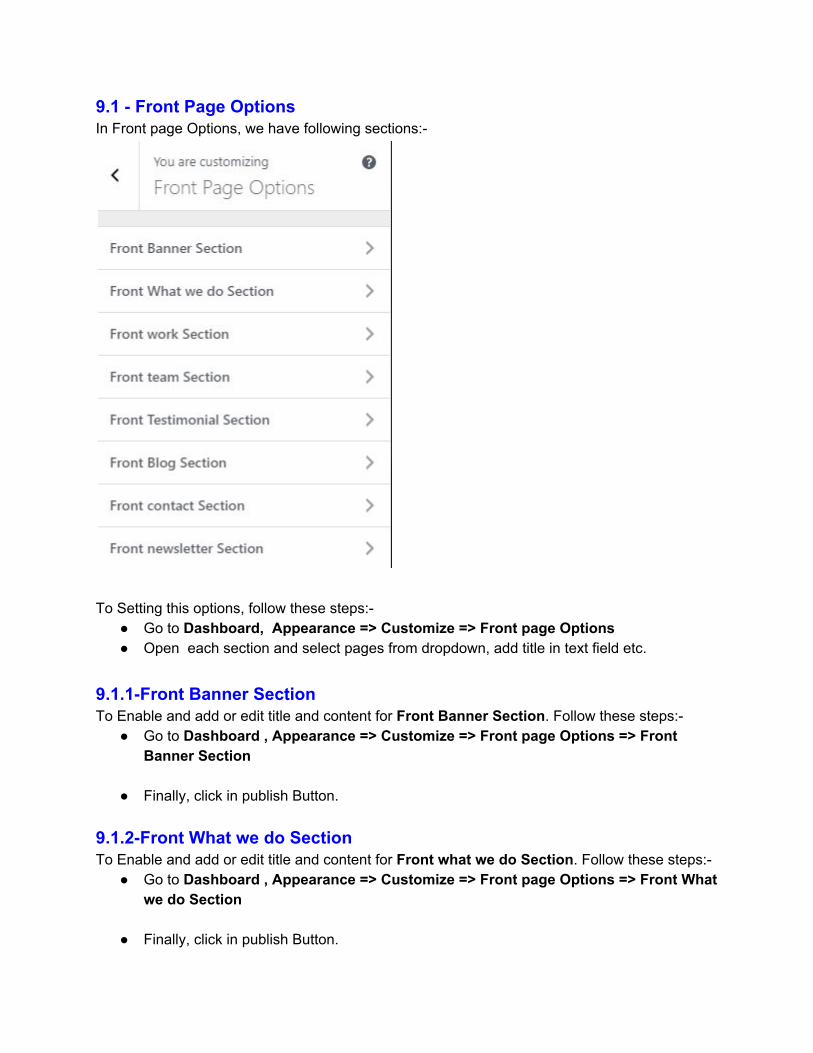
9.1 - Front Page Options In Front page Options, we have following sections:-
To Setting this options, follow these steps:-
● Go to Dashboard, Appearance => Customize => Front page Options ● Open each section and select pages from dropdown, add title in text field etc.
9.1.1-Front Banner Section To Enable and add or edit title and content for Front Banner Section. Follow these steps:-
● Go to Dashboard , Appearance => Customize => Front page Options => Front Banner Section
● Finally, click in publish Button. 9.1.2-Front What we do Section To Enable and add or edit title and content for Front what we do Section. Follow these steps:-
● Go to Dashboard , Appearance => Customize => Front page Options => Front What we do Section
● Finally, click in publish Button.
9.1.3-Front work Section To Enable and add or edit title and content for Front work Section. Follow these steps:-
● Go to Dashboard , Appearance => Customize => Front page Options => Front work Section
● Finally, click in publish Button. 9.1.4-Front team Section To Enable and add or edit title and content for Front team Section. Follow these steps:-
● Go to Dashboard , Appearance => Customize => Front page Options => Front team Section
● Finally, click in publish Button. 9.1.5-Front Testimonial Section To Enable and add or edit title and content for Front Testimonial Section. Follow these steps:-
● Go to Dashboard , Appearance => Customize => Front page Options => Front Testimonial Section
● Finally, click in publish Button. 9.1.6-Front Blog Section To Enable and add or edit title and content for Front Blog Section. Follow these steps:-
● Go to Dashboard , Appearance => Customize => Front page Options => Front Blog Section
● Finally, click in publish Button. 9.1.7-Front Contact Section To Enable and add or edit title and content for Front Contact Section. Follow these steps:-
● Go to Dashboard , Appearance => Customize => Front page Options => Front Contact Section
● Finally, click in publish Button. 9.1.8-Front Newsletter Section To Enable and add or edit title and content for Front newsletter Section. Follow these steps:-
● Go to Dashboard , Appearance => Customize => Front page Options => Front newsletter Section
● Finally, click in publish Button.
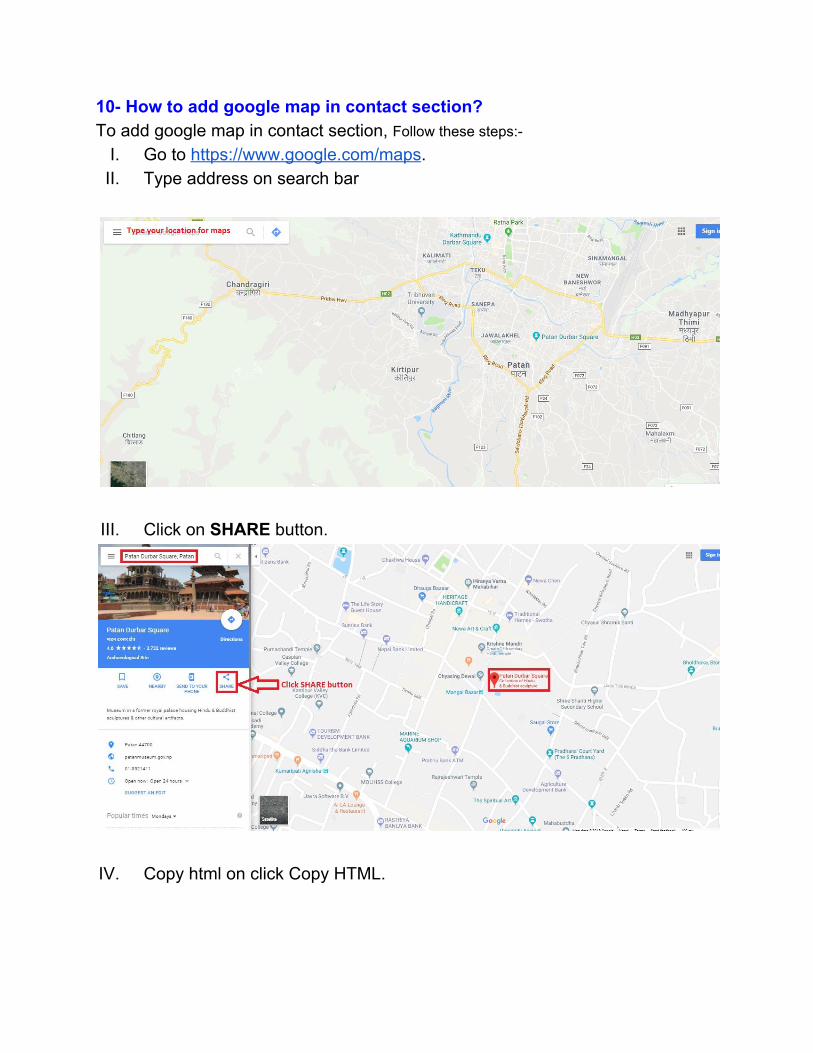
10- How to add google map in contact section? To add google map in contact section, Follow these steps:-
I. Go to https://www.google.com/maps. II. Type address on search bar
III. Click on SHARE button.
IV. Copy html on click Copy HTML.
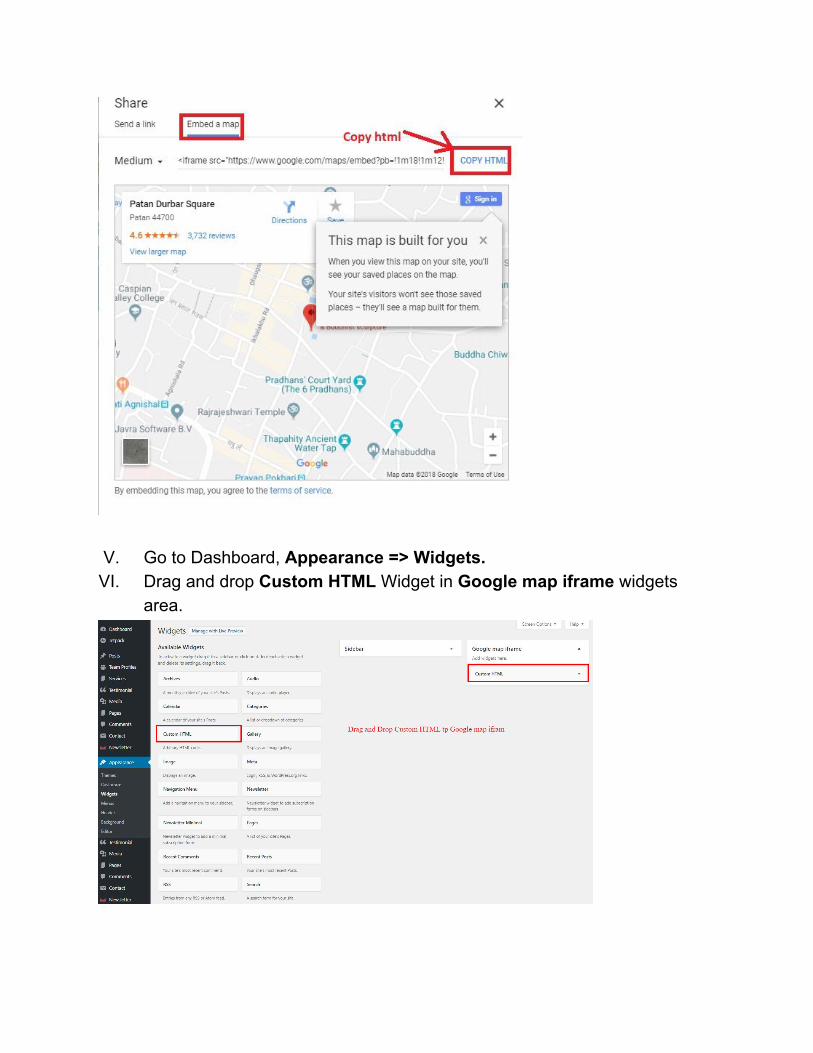
V. Go to Dashboard, Appearance => Widgets. VI. Drag and drop Custom HTML Widget in Google map iframe widgets
area.
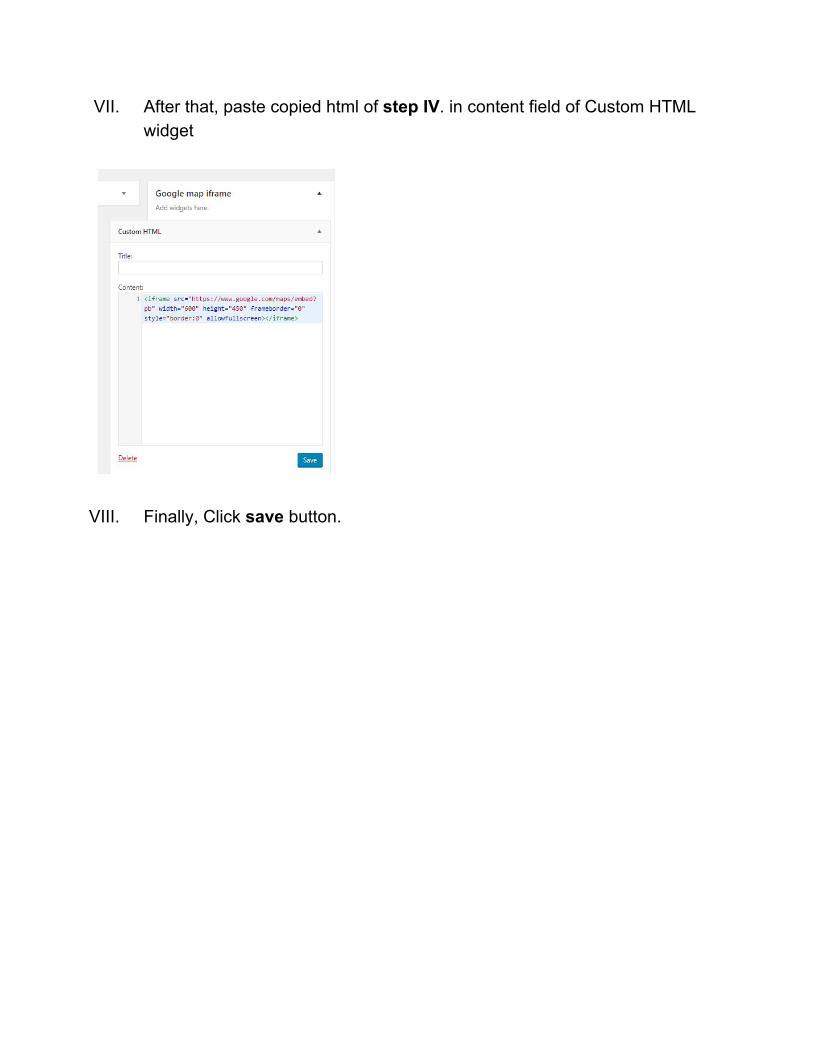
VII. After that, paste copied html of step IV. in content field of Custom HTML widget
VIII. Finally, Click save button.