Embed Size (px)
Citation preview
Editing Video with iMovie
1
Before You Start 3
Getting Started 3
Create a New Movie Project 4
Adding Media to Your Movie Timeline 6
Editing Clips in Your Movie Timeline – Cutting 8
Adjusting & Deleting Clips 10
Editing Photo Clips – Pan & Zoom 11
Editing Transition Effects 12
Adding Audio 13
Adding Voice Recording 15
Adding Text 16
Naming Your Movie 17
Exporting & Sharing Your Movie 18
2
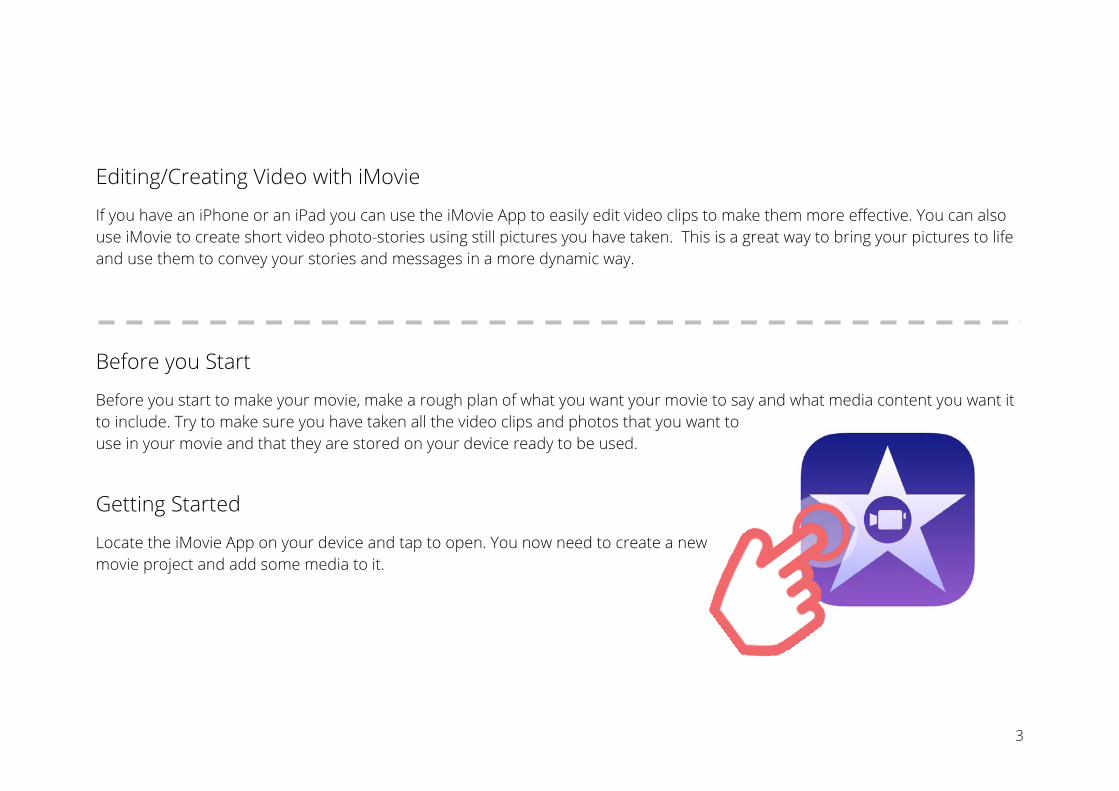
Editing/Creating Video with iMovie
If you have an iPhone or an iPad you can use the iMovie App to easily edit video clips to make them more effective. You can also use iMovie to create short video photo-stories using still pictures you have taken. This is a great way to bring your pictures to life and use them to convey your stories and messages in a more dynamic way.
Before you Start
Before you start to make your movie, make a rough plan of what you want your movie to say and what media content you want it to include. Try to make sure you have taken all the video clips and photos that you want to use in your movie and that they are stored on your device ready to be used.
Getting Started
Locate the iMovie App on your device and tap to open. You now need to create a new movie project and add some media to it.
3
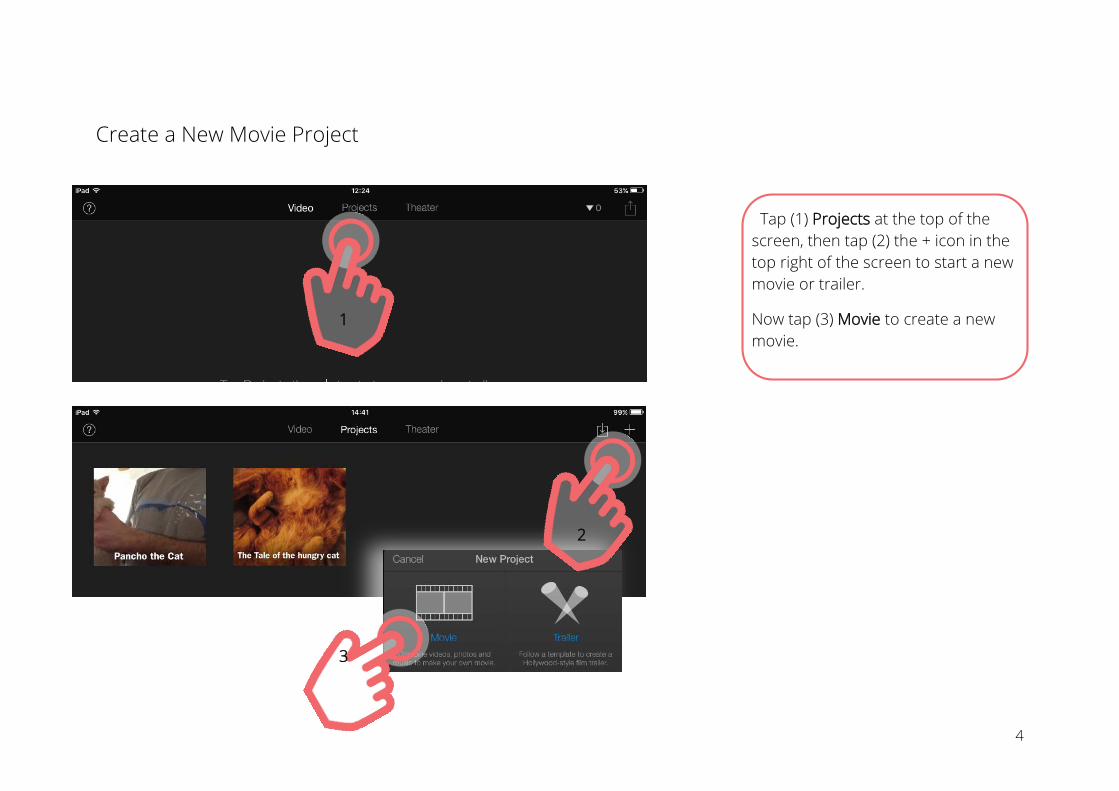
Create a New Movie Project
Tap (1) Projects at the top of the screen, then tap (2) the + icon in the top right of the screen to start a new movie or trailer.
Now tap (3) Movie to create a new movie.
1
2
3
4
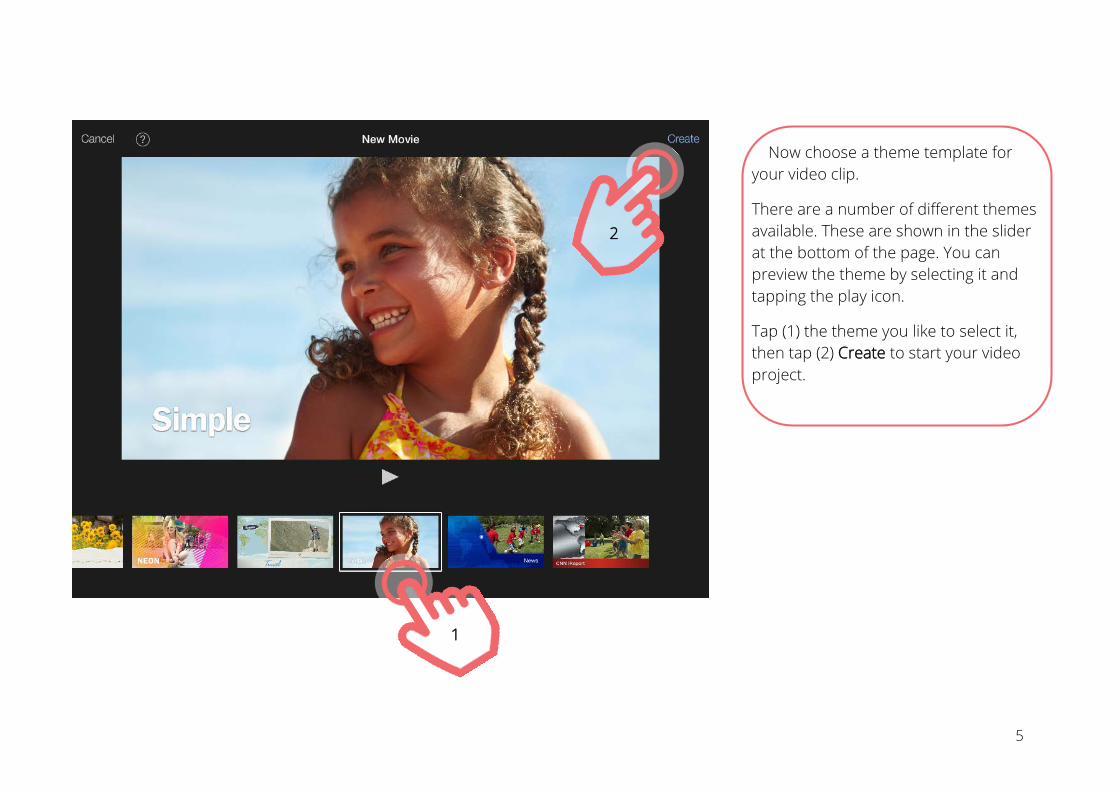
Now choose a theme template for your video clip.
There are a number of different themes available. These are shown in the slider at the bottom of the page. You can preview the theme by selecting it and tapping the play icon.
Tap (1) the theme you like to select it, then tap (2) Create to start your video project.
1
2
5
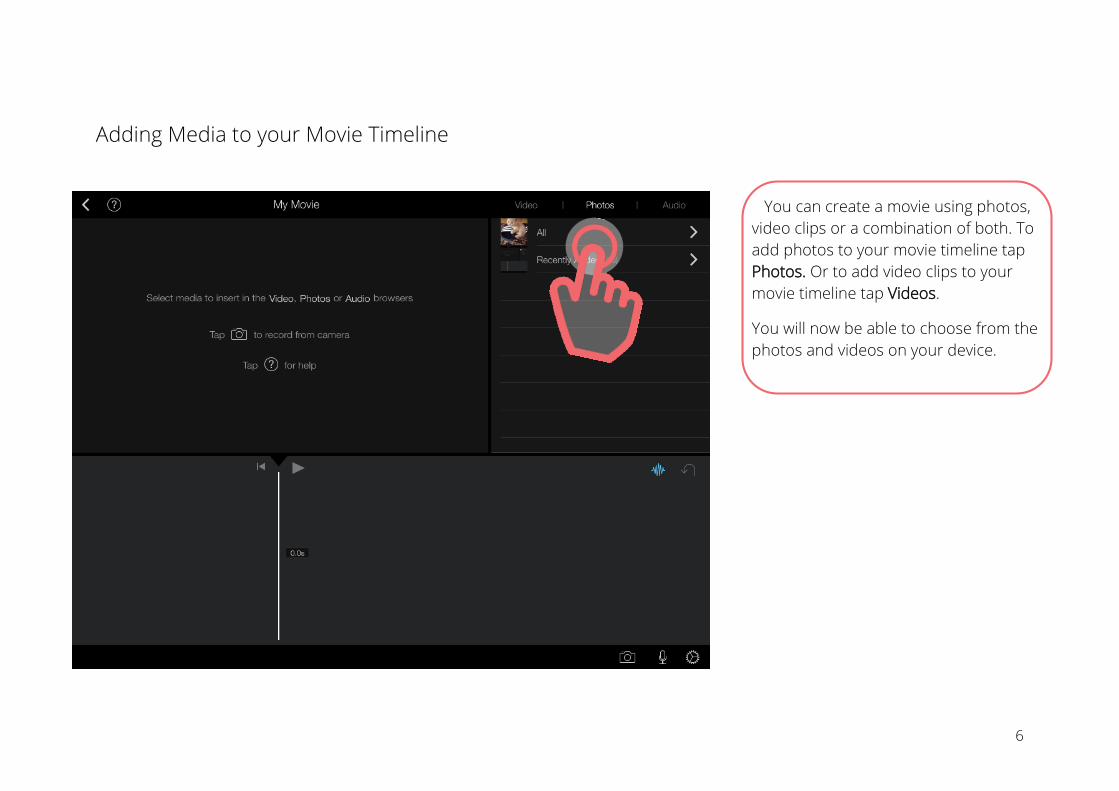
Adding Media to your Movie Timeline
You can create a movie using photos, video clips or a combination of both. To add photos to your movie timeline tap Photos. Or to add video clips to your movie timeline tap Videos.
You will now be able to choose from the photos and videos on your device.
6
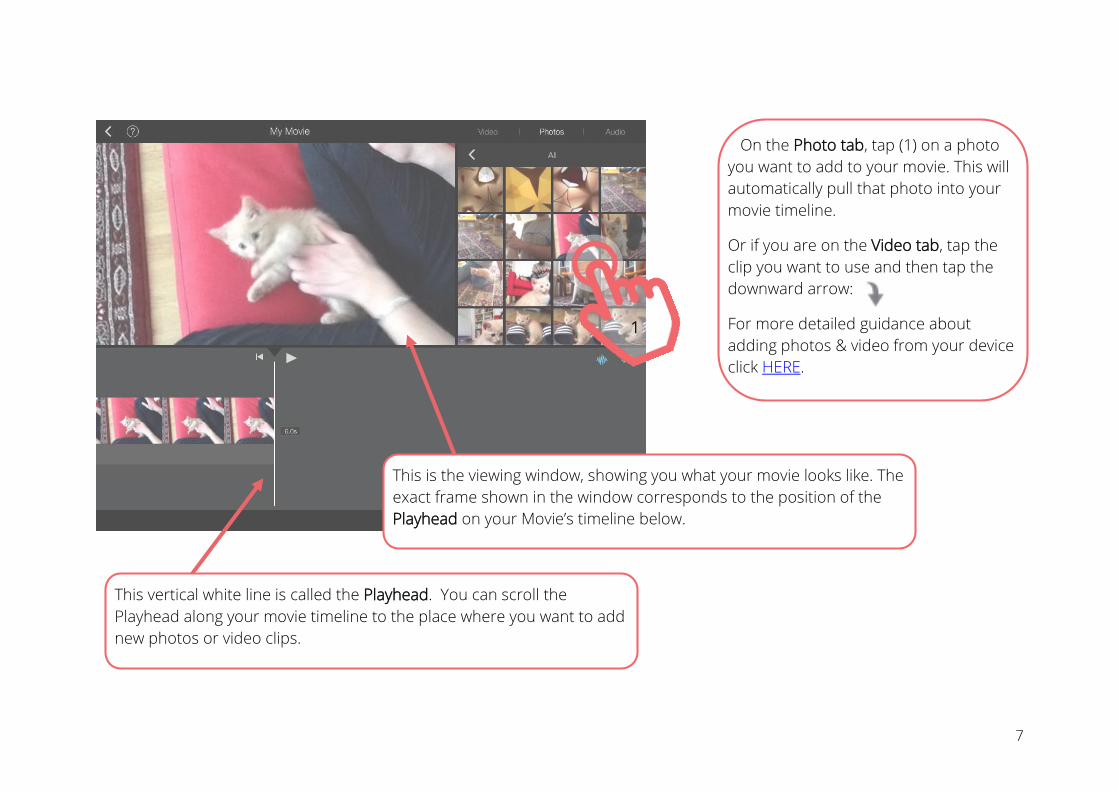
On the Photo tab, tap (1) on a photo you want to add to your movie. This will automatically pull that photo into your movie timeline.
Or if you are on the Video tab, tap the clip you want to use and then tap the downward arrow:
For more detailed guidance about adding photos & video from your device click HERE.
This is the viewing window, showing you what your movie looks like. The exact frame shown in the window corresponds to the position of the Playhead on your Movie’s timeline below.
This vertical white line is called the Playhead. You can scroll the Playhead along your movie timeline to the place where you want to add new photos or video clips.
1
7
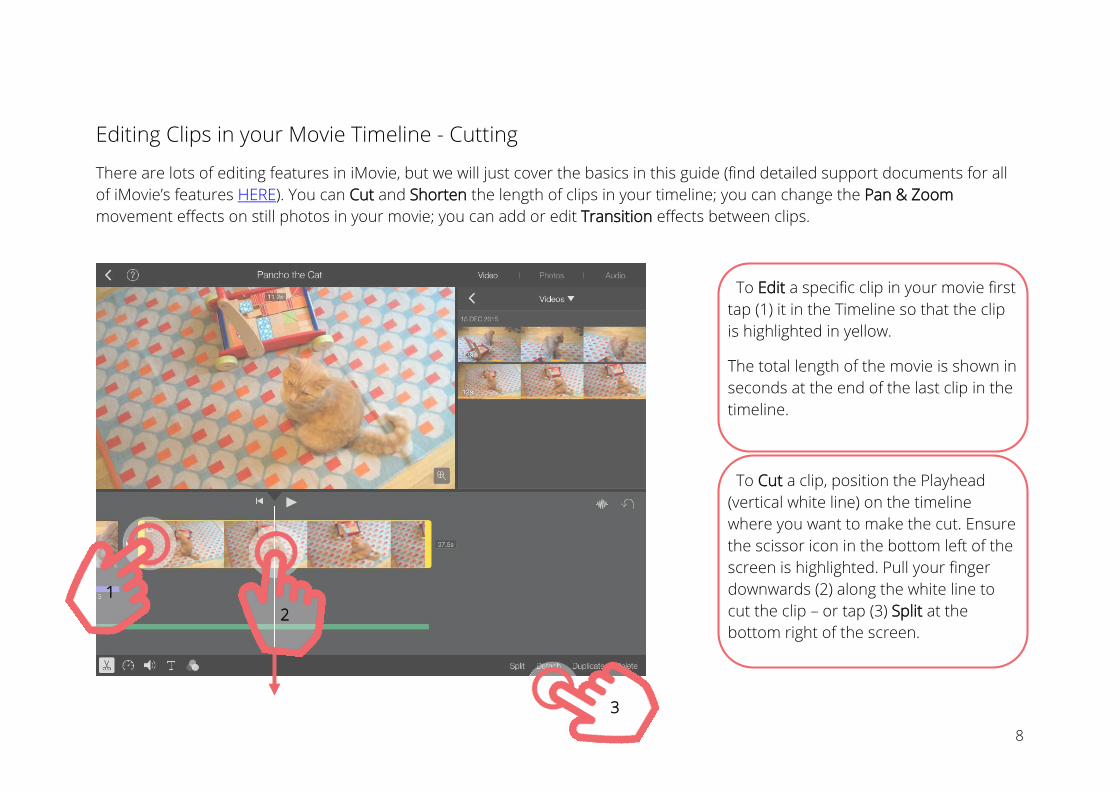
Editing Clips in your Movie Timeline - Cutting
There are lots of editing features in iMovie, but we will just cover the basics in this guide (find detailed support documents for all of iMovie’s features HERE). You can Cut and Shorten the length of clips in your timeline; you can change the Pan & Zoom movement effects on still photos in your movie; you can add or edit Transition effects between clips.
To Edit a specific clip in your movie first tap (1) it in the Timeline so that the clip is highlighted in yellow.
The total length of the movie is shown in seconds at the end of the last clip in the timeline.
To Cut a clip, position the Playhead (vertical white line) on the timeline where you want to make the cut. Ensure the scissor icon in the bottom left of the screen is highlighted. Pull your finger downwards (2) along the white line to cut the clip – or tap (3) Split at the bottom right of the screen.
1
3
2
8
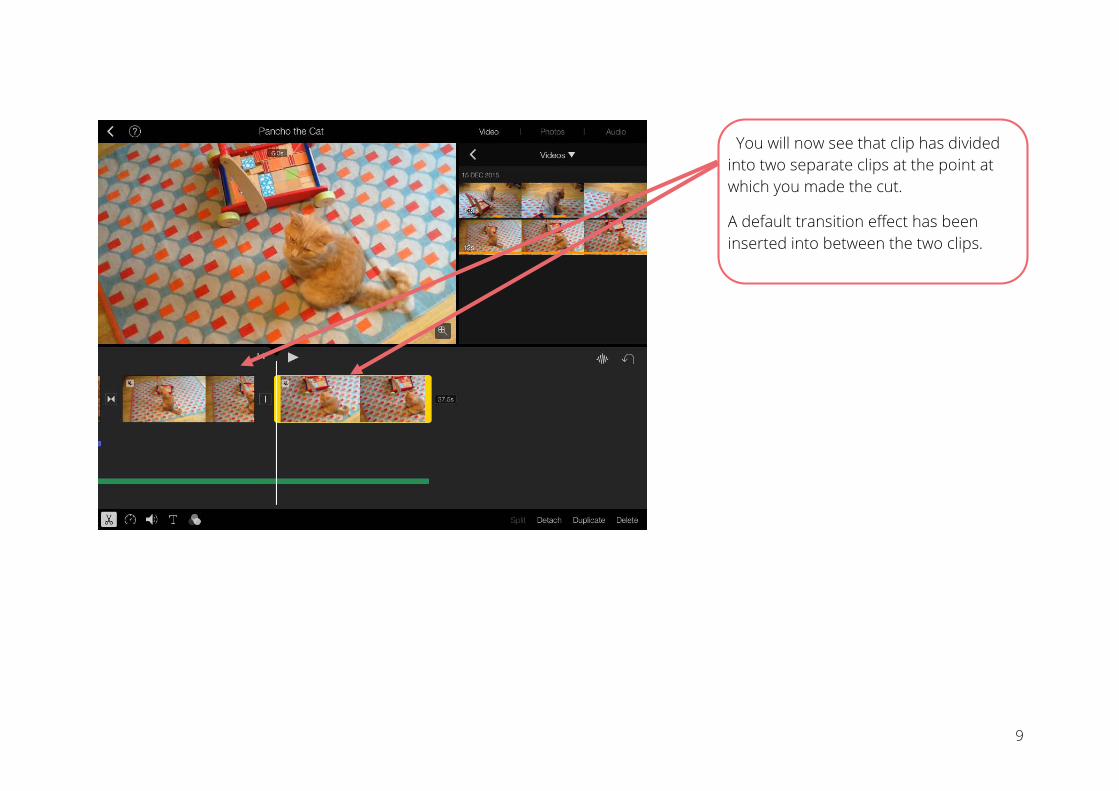
You will now see that clip has divided into two separate clips at the point at which you made the cut.
A default transition effect has been inserted into between the two clips.
9
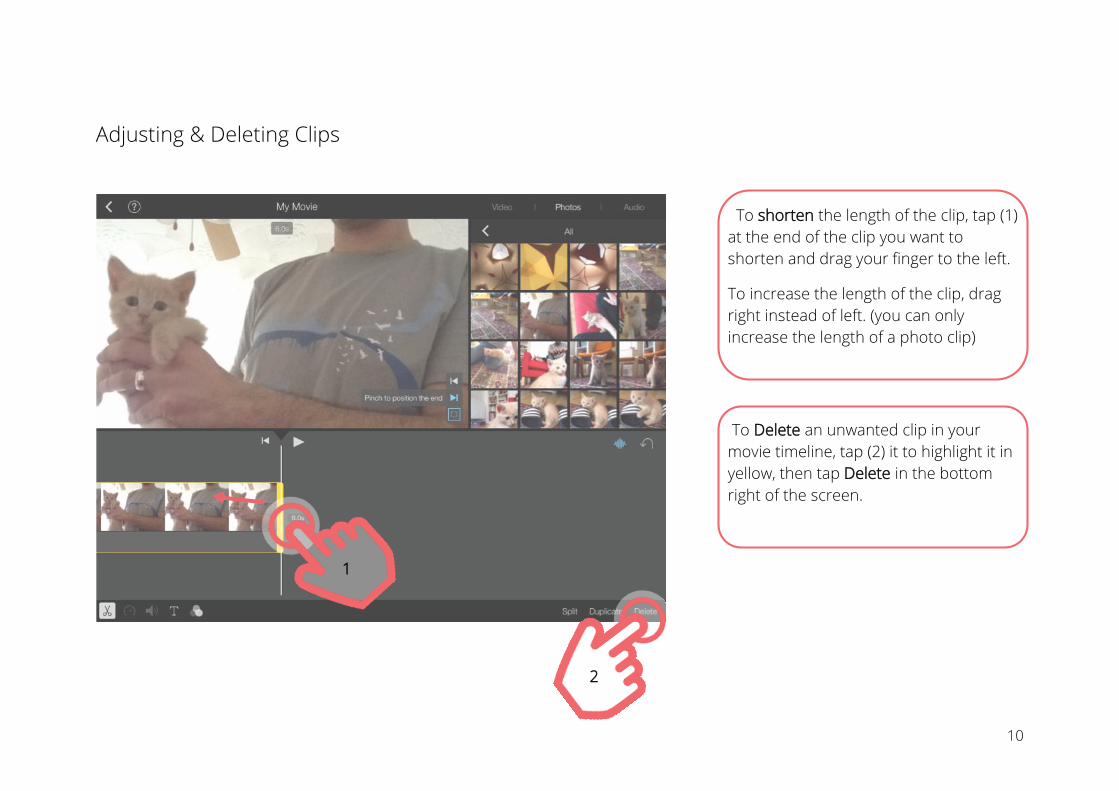
Adjusting & Deleting Clips
To shorten the length of the clip, tap (1) at the end of the clip you want to shorten and drag your finger to the left.
To increase the length of the clip, drag right instead of left. (you can only increase the length of a photo clip)
To Delete an unwanted clip in your movie timeline, tap (2) it to highlight it in yellow, then tap Delete in the bottom right of the screen.
1
2
10
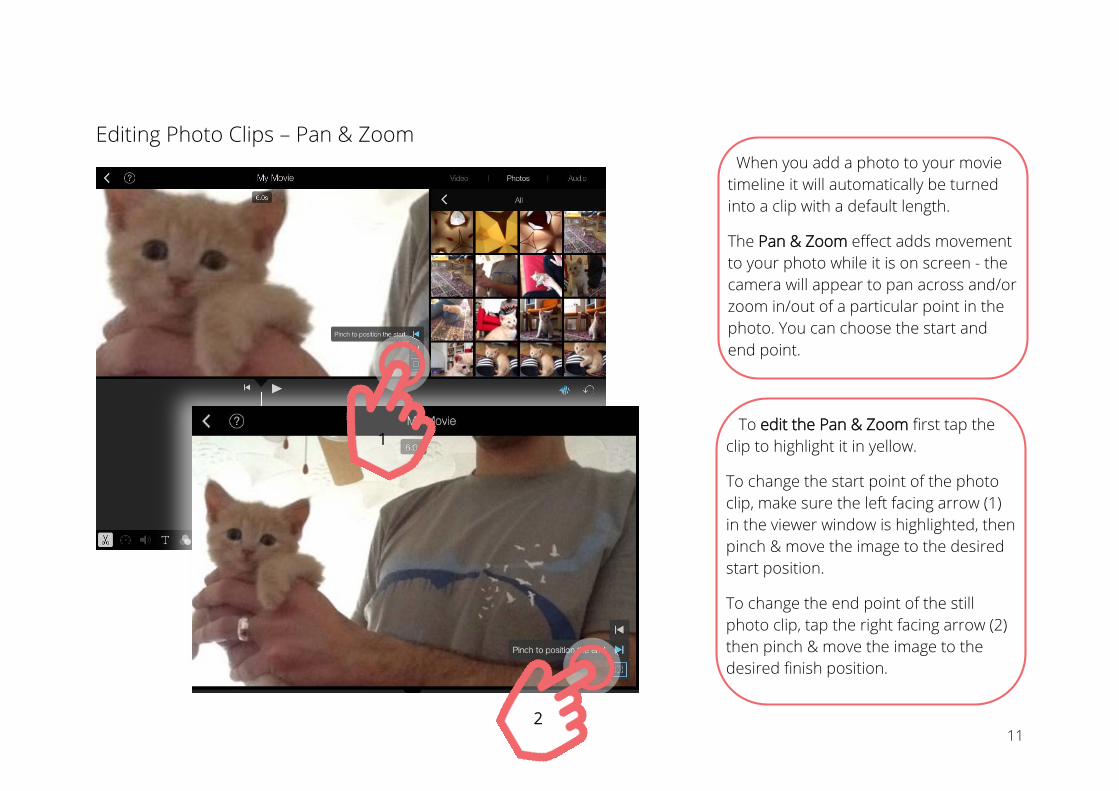
Editing Photo Clips – Pan & Zoom
When you add a photo to your movie timeline it will automatically be turned into a clip with a default length.
The Pan & Zoom effect adds movement to your photo while it is on screen - the camera will appear to pan across and/or zoom in/out of a particular point in the photo. You can choose the start and end point.
To edit the Pan & Zoom first tap the clip to highlight it in yellow.
To change the start point of the photo clip, make sure the left facing arrow (1) in the viewer window is highlighted, then pinch & move the image to the desired start position.
To change the end point of the still photo clip, tap the right facing arrow (2) then pinch & move the image to the desired finish position.
1
2 11
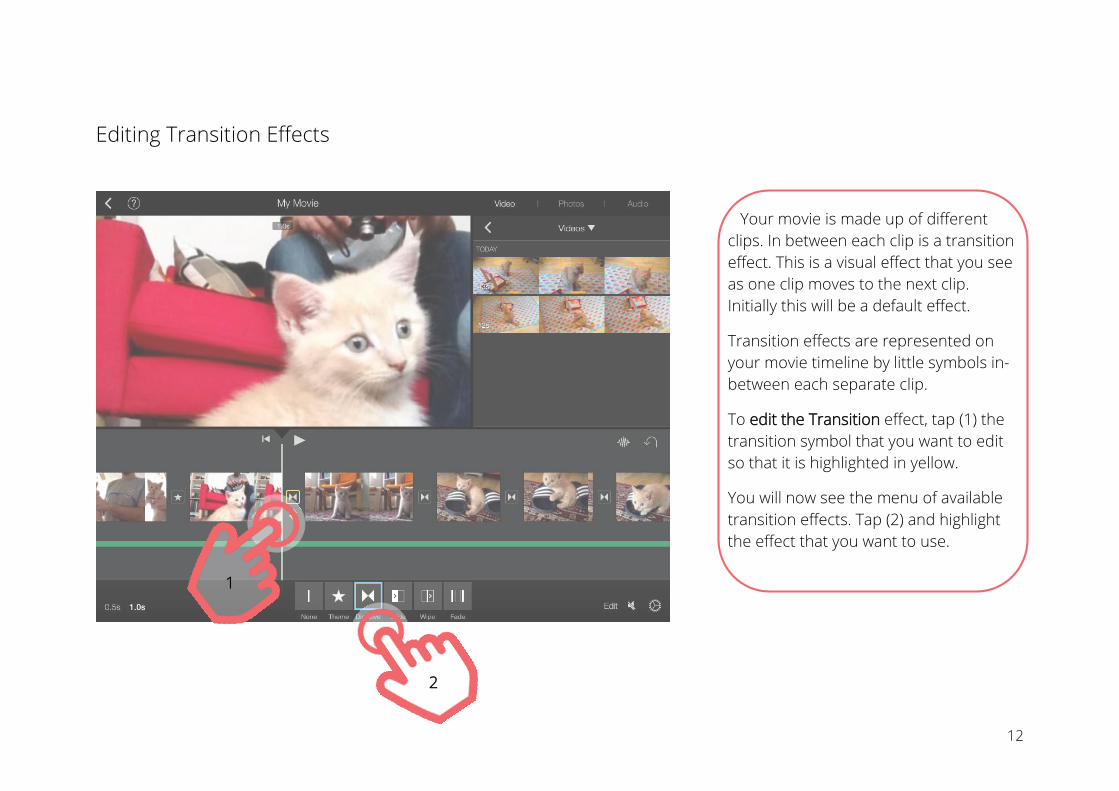
Editing Transition Effects
Your movie is made up of different clips. In between each clip is a transition effect. This is a visual effect that you see as one clip moves to the next clip. Initially this will be a default effect.
Transition effects are represented on your movie timeline by little symbols in-between each separate clip.
To edit the Transition effect, tap (1) the transition symbol that you want to edit so that it is highlighted in yellow.
You will now see the menu of available transition effects. Tap (2) and highlight the effect that you want to use.
1
2
12
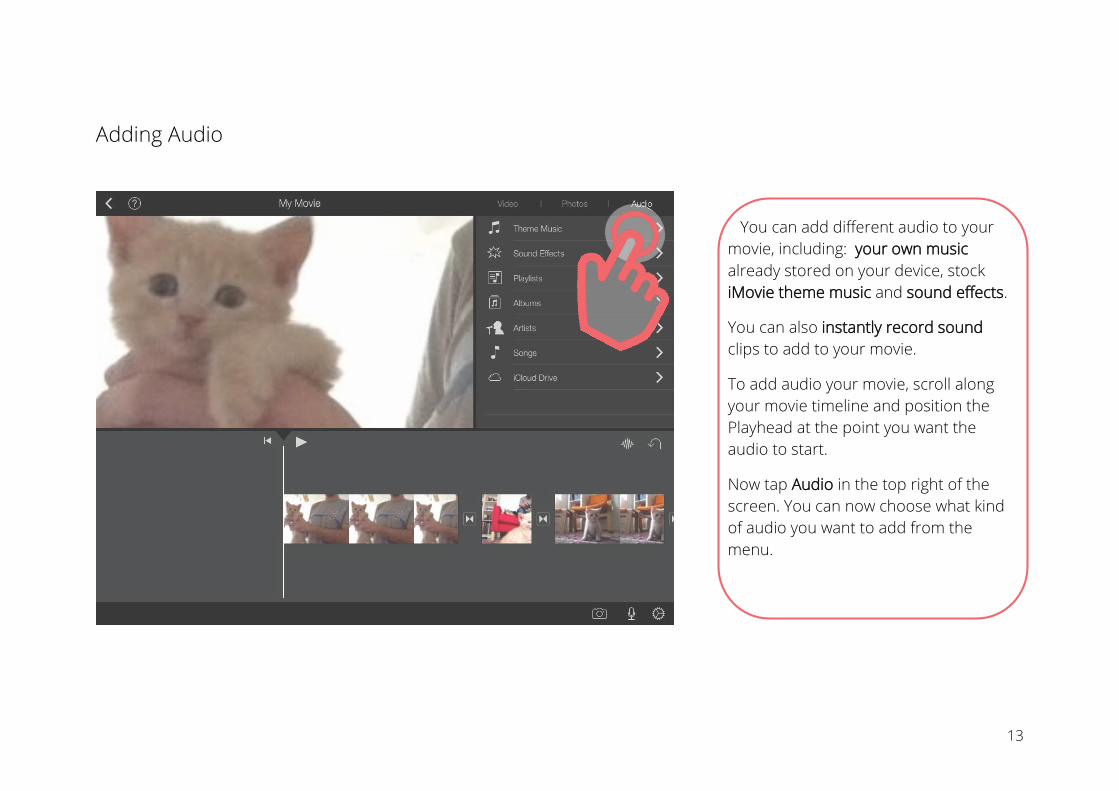
Adding Audio
You can add different audio to your movie, including: your own music already stored on your device, stock iMovie theme music and sound effects.
You can also instantly record sound clips to add to your movie.
To add audio your movie, scroll along your movie timeline and position the Playhead at the point you want the audio to start.
Now tap Audio in the top right of the screen. You can now choose what kind of audio you want to add from the menu.
13
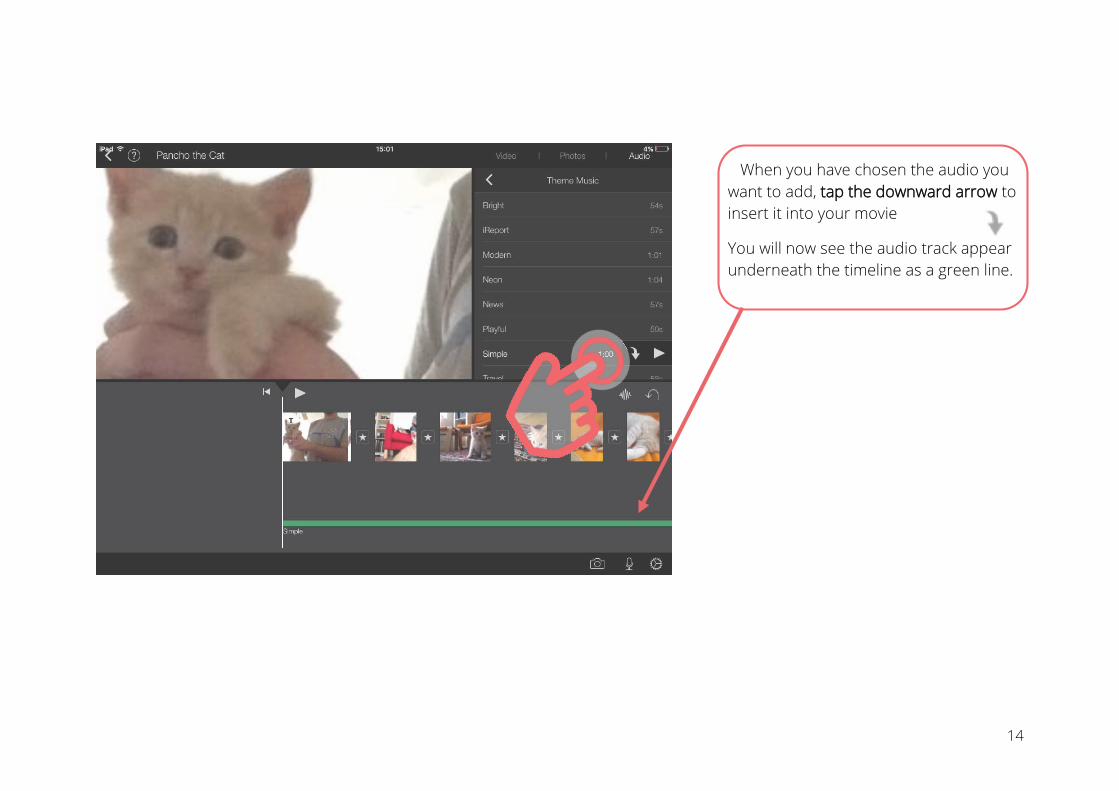
When you have chosen the audio you want to add, tap the downward arrow to insert it into your movie
You will now see the audio track appear underneath the timeline as a green line.
14
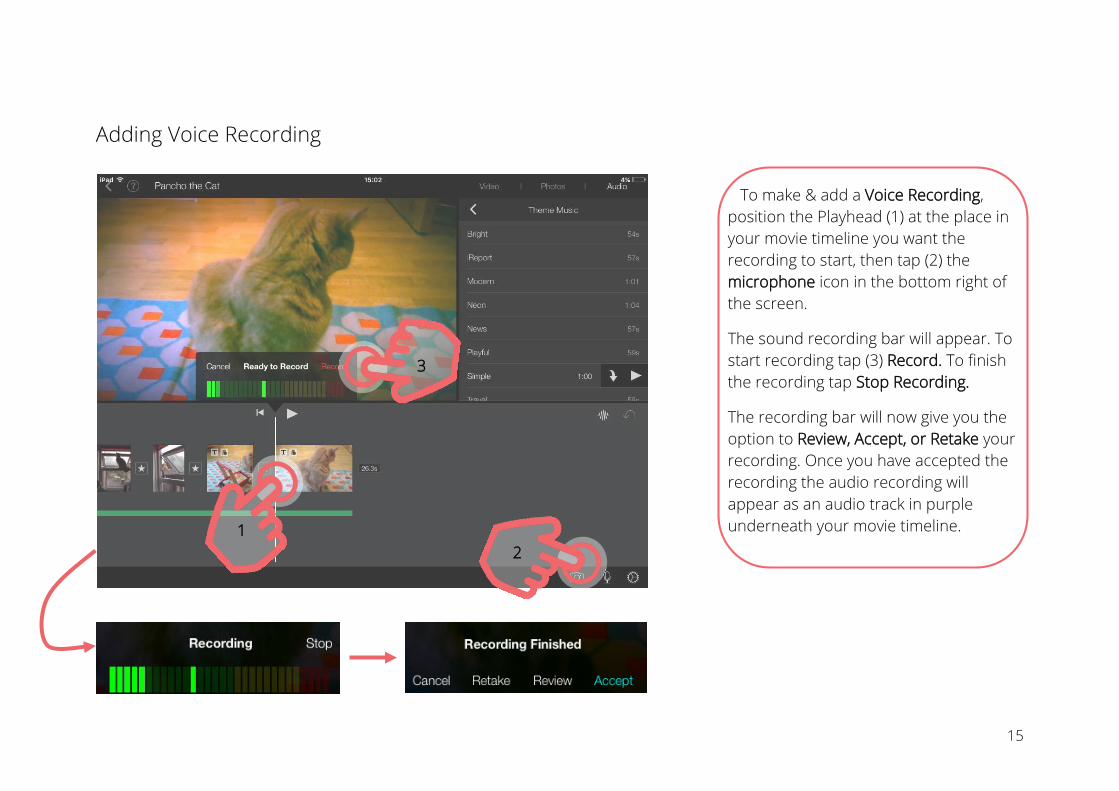
Adding Voice Recording
To make & add a Voice Recording, position the Playhead (1) at the place in your movie timeline you want the recording to start, then tap (2) the microphone icon in the bottom right of the screen.
The sound recording bar will appear. To start recording tap (3) Record. To finish the recording tap Stop Recording.
The recording bar will now give you the option to Review, Accept, or Retake your recording. Once you have accepted the recording the audio recording will appear as an audio track in purple underneath your movie timeline.
1 2
3
15
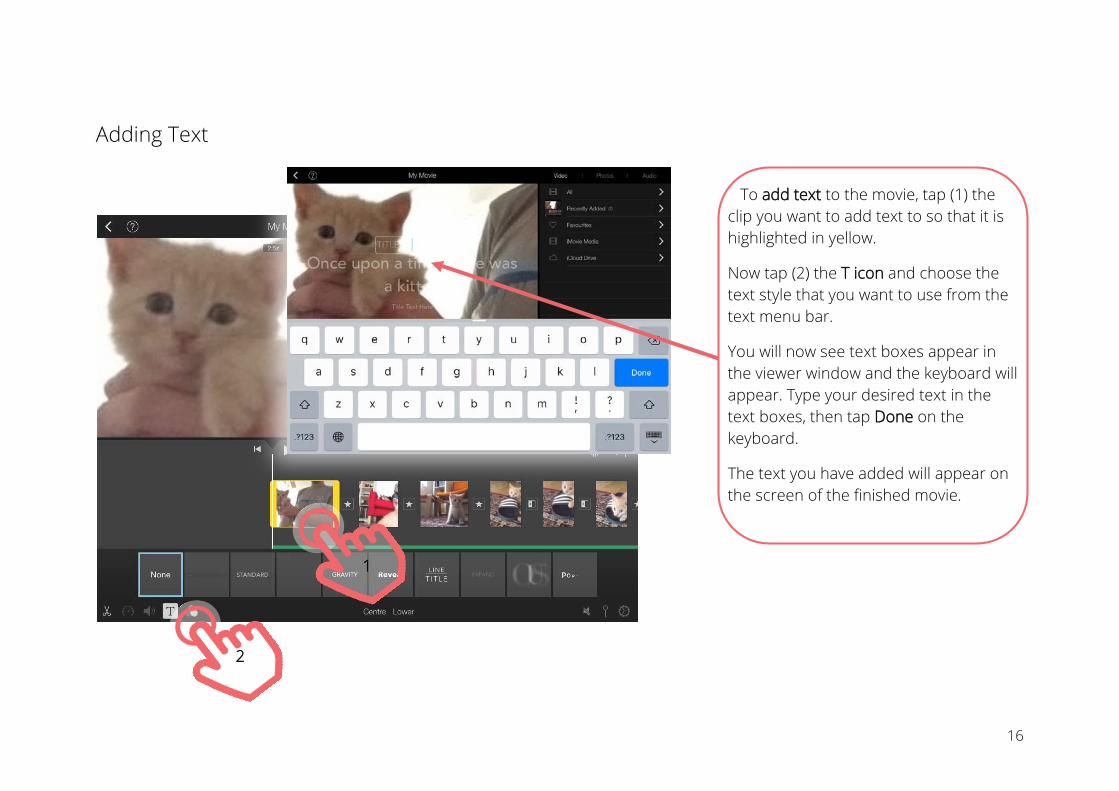
Adding Text
To add text to the movie, tap (1) the clip you want to add text to so that it is highlighted in yellow.
Now tap (2) the T icon and choose the text style that you want to use from the text menu bar.
You will now see text boxes appear in the viewer window and the keyboard will appear. Type your desired text in the text boxes, then tap Done on the keyboard.
The text you have added will appear on the screen of the finished movie.
1
2
16
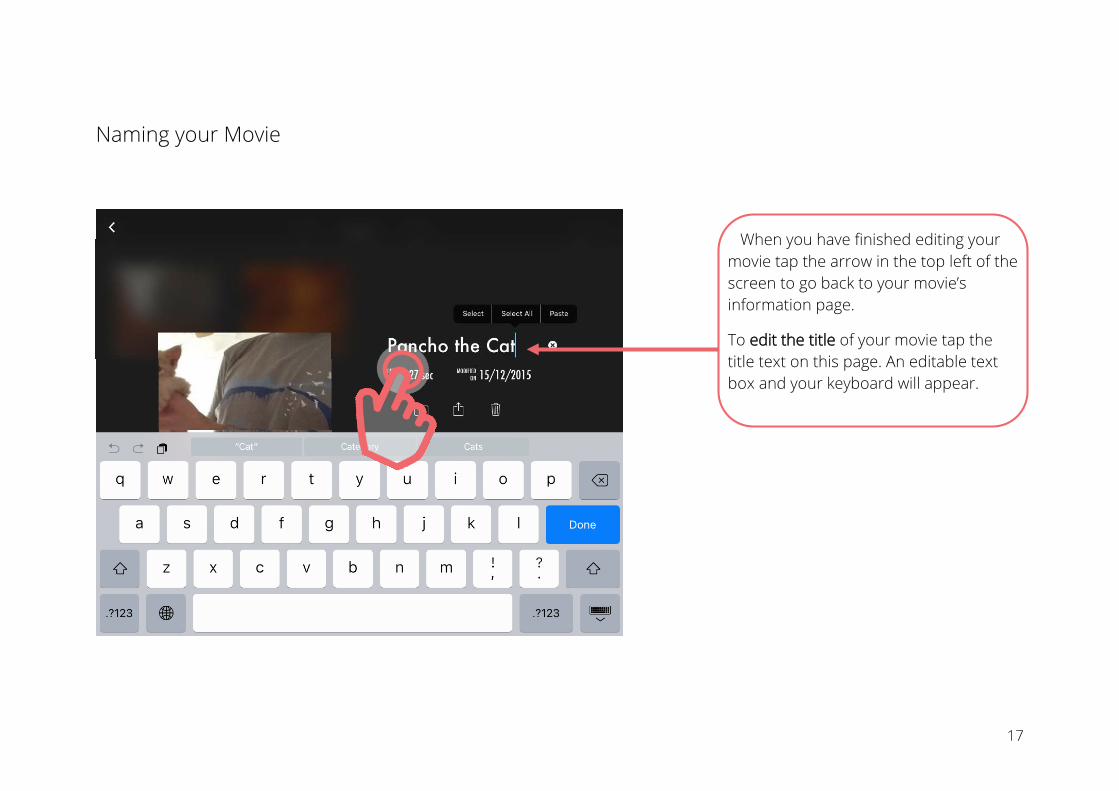
Naming your Movie
When you have finished editing your movie tap the arrow in the top left of the screen to go back to your movie’s information page.
To edit the title of your movie tap the title text on this page. An editable text box and your keyboard will appear.
17
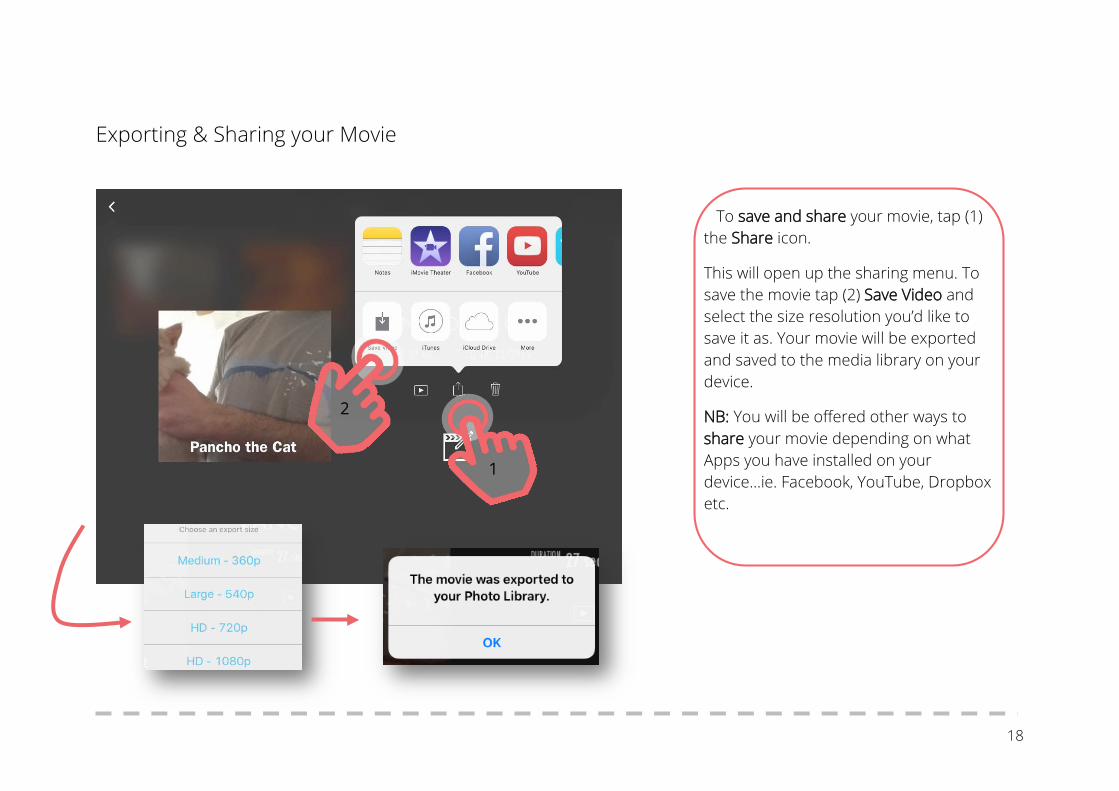
Exporting & Sharing your Movie
To save and share your movie, tap (1) the Share icon.
This will open up the sharing menu. To save the movie tap (2) Save Video and select the size resolution you’d like to save it as. Your movie will be exported and saved to the media library on your device.
NB: You will be offered other ways to share your movie depending on what Apps you have installed on your device…ie. Facebook, YouTube, Dropbox etc.
1
2
18