Embed Size (px)
Citation preview

Exploring the XMPP Protocol: A Debugging Console
What’s in this Chapter?
Hooking into Strophe’s logging facilities➤➤
Parsing XML➤➤
Manipulating your presence➤➤
Querying for software versions➤➤
Dealing with XMPP errors➤➤
Developers have always enjoyed crafting and refining their tools. In your journey through XMPP applications, you will need a tool to aid exploration and to inspect protocol traffic. Few web developers could live without the view source command or the ability to easily craft URLs to test functionality of remote sites. In the world of XMPP stanzas, such a tool would allow you to inspect protocol traffic and easily create stanzas to send. You’ll build a protocol debugging console named Peek over the course of this chapter, and, afterwards, you will use it to investigate a few XMPP services and typical protocol situations.
Peek will be useful throughout this book. Whenever you encounter an example stanza, you can load Peek, type in the stanza, and watch what happens in response. In this way, you can play with various XMPP features even before you start building applications.
Many of the parts required to build Peek have already been introduced: establishing connec-tions, sending stanzas, and setting up basic handlers for incoming traffic. However, Peek will need some new features of Strophe, and once Peek is built, you’ll use it to explore a few new XMPP concepts.
4
64 ❘ Chapter 4 Exploring thE xMpp protocol: A DEbugging consolE
appliCation previeW
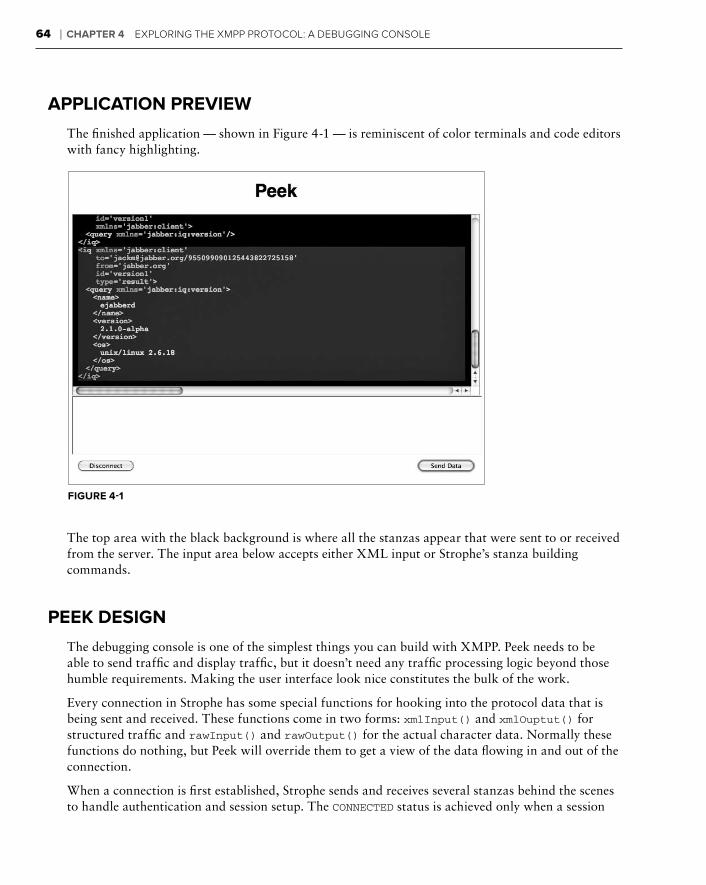
The finished application — shown in Figure 4-1 — is reminiscent of color terminals and code editors with fancy highlighting.
Figure 4-1
The top area with the black background is where all the stanzas appear that were sent to or received from the server. The input area below accepts either XML input or Strophe’s stanza building commands.
peek Design
The debugging console is one of the simplest things you can build with XMPP. Peek needs to be able to send traffic and display traffic, but it doesn’t need any traffic processing logic beyond those humble requirements. Making the user interface look nice constitutes the bulk of the work.
Every connection in Strophe has some special functions for hooking into the protocol data that is being sent and received. These functions come in two forms: xmlInput() and xmlOuptut() for structured traffic and rawInput() and rawOutput() for the actual character data. Normally these functions do nothing, but Peek will override them to get a view of the data flowing in and out of the connection.
When a connection is first established, Strophe sends and receives several stanzas behind the scenes to handle authentication and session setup. The CONNECTED status is achieved only when a session

Building the Console ❘ 65
has been successfully started. You’ll first handle traffic display so that you can see these setup stan-zas as they happen.
The XMPP streams carry data in XML, but that XML is not formatted for display. In fact, most XMPP servers, clients, and libraries will send XML that is stripped of unnecessary whitespace. Stanzas viewed on the wire will look mostly like one giant string of text. Following is an example stanza with pleasant formatting, followed by the same stanza as it would typically appear:
<message to=’[email protected]/meryton’ from=’[email protected]/meryton’ type=’chat’> <body>Come, Darcy, I must have you dance. I hate to see you standing about by yourself in this stupid manner. You had much better dance.</body></message>
<message to=’[email protected]/meryton’ from=’[email protected]/meryton’type=’chat’><body>Come, Darcy, I must have you dance. I hate to see you standingabout by yourself in this stupid manner. You had much better dance.</body></message>
For short stanzas this difference is not great, but for longer stanzas and within large groups of stan-zas, the latter is almost unreadable.
You will be using xmlInput() and xmlOutput() to get structured traffic, and then wrapping this in HTML and CSS to display the traffic using syntax highlighting and extra whitespace. We won’t be covering this display translation code in much detail because it is orthogonal to your objective, but the code is easy to understand and modify if you’re curious.
With your console set up and receiving protocol traffic, your attentions will turn to handling user input. You start by allowing the user to input XML stanzas by hand. Because Strophe only accepts actual XML data for sending across the connection, you must parse this input text into XML and then send it over the connection. You’ll use the web browser’s native XML parsing abili-ties to accomplish this.
Typing out XML is fairly tedious, so you’ll add the ability for users to use Strophe’s own stanza building commands like $msg(), $pres(), and $iq(). Peek will use JavaScript’s eval() to execute this code.
If it sounds simple, it is. However, Peek will be extremely useful in experimenting with and debug-ging your applications and the servers with which you interact.
BuilDing the Console
Peek will use the same application structure as the Hello application from Chapter 3. You will first need to create the user interface by building peek.html and peek.css, and then you’ll create the application logic in JavaScript. The final source code is included at the end of the section in case you get stuck.
66 ❘ Chapter 4 Exploring thE xMpp protocol: A DEbugging consolE
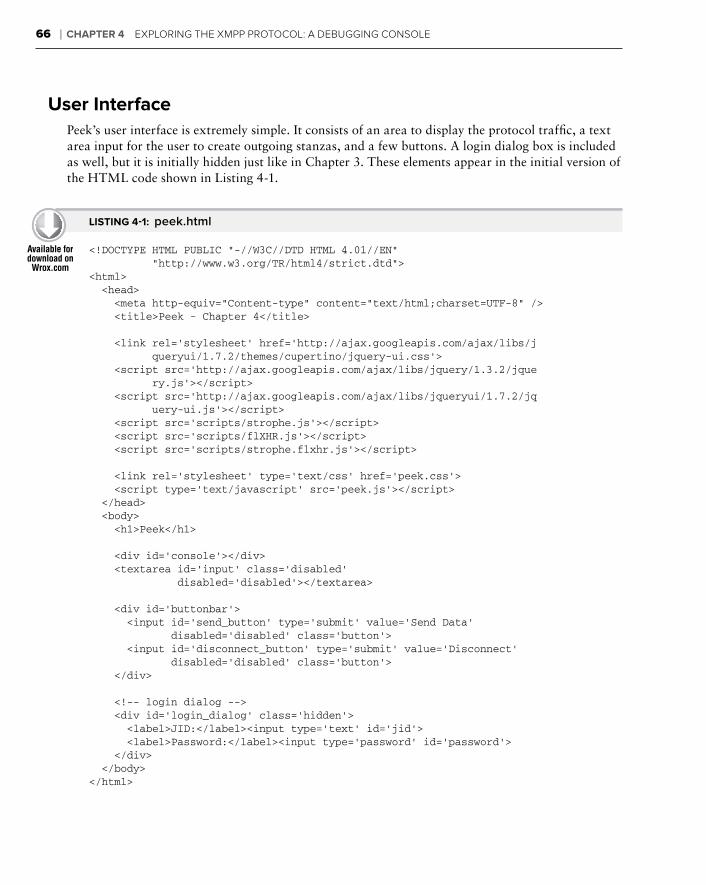
user interfacePeek’s user interface is extremely simple. It consists of an area to display the protocol traffic, a text area input for the user to create outgoing stanzas, and a few buttons. A login dialog box is included as well, but it is initially hidden just like in Chapter 3. These elements appear in the initial version of the HTML code shown in Listing 4-1.
listing 4-1: peek.html
<!DOCTYPE HTML PUBLIC “-//W3C//DTD HTML 4.01//EN” “http://www.w3.org/TR/html4/strict.dtd”><html> <head> <meta http-equiv=”Content-type” content=”text/html;charset=UTF-8” /> <title>Peek - Chapter 4</title>
<link rel=’stylesheet’ href=’http://ajax.googleapis.com/ajax/libs/j queryui/1.7.2/themes/cupertino/jquery-ui.css’> <script src=’http://ajax.googleapis.com/ajax/libs/jquery/1.3.2/jque ry.js’></script> <script src=’http://ajax.googleapis.com/ajax/libs/jqueryui/1.7.2/jq uery-ui.js’></script> <script src=’scripts/strophe.js’></script> <script src=’scripts/flXHR.js’></script> <script src=’scripts/strophe.flxhr.js’></script>
<link rel=’stylesheet’ type=’text/css’ href=’peek.css’> <script type=’text/javascript’ src=’peek.js’></script> </head> <body> <h1>Peek</h1>
<div id=’console’></div> <textarea id=’input’ class=’disabled’ disabled=’disabled’></textarea>
<div id=’buttonbar’> <input id=’send_button’ type=’submit’ value=’Send Data’ disabled=’disabled’ class=’button’> <input id=’disconnect_button’ type=’submit’ value=’Disconnect’ disabled=’disabled’ class=’button’> </div>
<!-- login dialog --> <div id=’login_dialog’ class=’hidden’> <label>JID:</label><input type=’text’ id=’jid’> <label>Password:</label><input type=’password’ id=’password’> </div> </body></html>
Building the Console ❘ 67
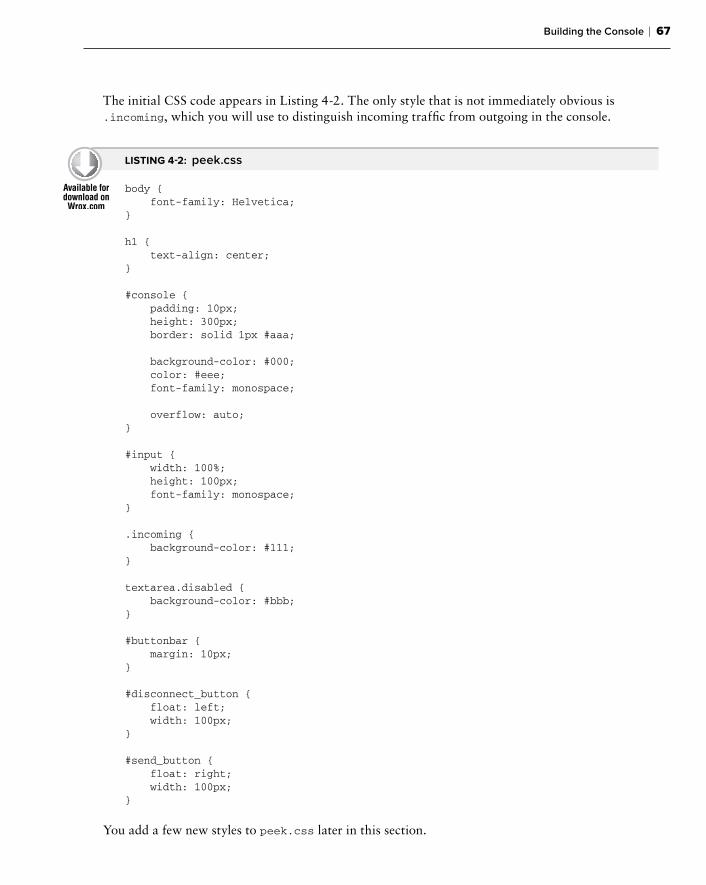
The initial CSS code appears in Listing 4-2. The only style that is not immediately obvious is .incoming, which you will use to distinguish incoming traffic from outgoing in the console.
listing 4-2: peek.css
body { font-family: Helvetica;}
h1 { text-align: center;}
#console { padding: 10px; height: 300px; border: solid 1px #aaa;
background-color: #000; color: #eee; font-family: monospace;
overflow: auto;}
#input { width: 100%; height: 100px; font-family: monospace;}
.incoming { background-color: #111;}
textarea.disabled { background-color: #bbb;}
#buttonbar { margin: 10px;}
#disconnect_button { float: left; width: 100px;}
#send_button { float: right; width: 100px;}
You add a few new styles to peek.css later in this section.
68 ❘ Chapter 4 Exploring thE xMpp protocol: A DEbugging consolE
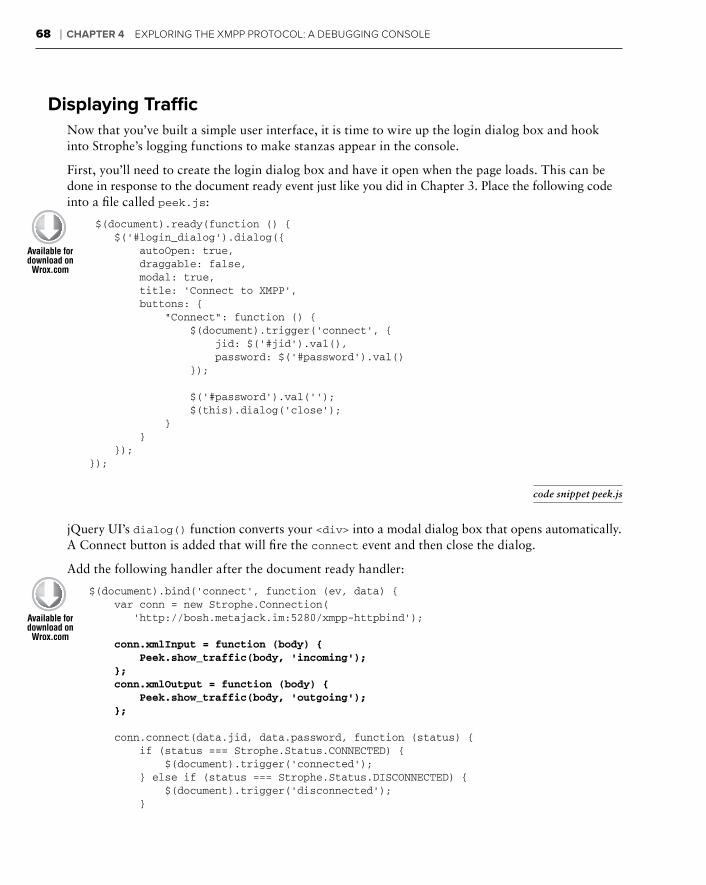
Displaying trafficNow that you’ve built a simple user interface, it is time to wire up the login dialog box and hook into Strophe’s logging functions to make stanzas appear in the console.
First, you’ll need to create the login dialog box and have it open when the page loads. This can be done in response to the document ready event just like you did in Chapter 3. Place the following code into a file called peek.js:
$(document).ready(function () { $(‘#login_dialog’).dialog({ autoOpen: true, draggable: false, modal: true, title: ‘Connect to XMPP’, buttons: { “Connect”: function () { $(document).trigger(‘connect’, { jid: $(‘#jid’).val(), password: $(‘#password’).val() });
$(‘#password’).val(‘’); $(this).dialog(‘close’); } } });});
code snippet peek.js
jQuery UI’s dialog() function converts your <div> into a modal dialog box that opens automatically. A Connect button is added that will fire the connect event and then close the dialog.
Add the following handler after the document ready handler:
$(document).bind(‘connect’, function (ev, data) { var conn = new Strophe.Connection( ‘http://bosh.metajack.im:5280/xmpp-httpbind’);
conn.xmlInput = function (body) { Peek.show_traffic(body, ‘incoming’); }; conn.xmlOutput = function (body) { Peek.show_traffic(body, ‘outgoing’); };
conn.connect(data.jid, data.password, function (status) { if (status === Strophe.Status.CONNECTED) { $(document).trigger(‘connected’); } else if (status === Strophe.Status.DISCONNECTED) { $(document).trigger(‘disconnected’); }
Building the Console ❘ 69
}); Peek.connection = conn;});
code snippet peek.js
Much of this code you’ve seen before in Chapter 3. The highlighted lines are new, and they over-write the blank, do-nothing default logging functions of the connection object with your own ver-sions. Instead of pointing to two functions that would be almost identical, inline functions are used that will call show_traffic() with the correct parameters.
Add the following implementation of the Peek object, including the show_traffic() and xml2html() function, after the document ready handler:
var Peek = { connection: null,
show_traffic: function (body, type) { if (body.childNodes.length > 0) { var console = $(‘#console’).get(0); var at_bottom = console.scrollTop >= console.scrollHeight - console.clientHeight;;
$.each(body.childNodes, function () { $(‘#console’).append(“<div class=’” + type + “‘>” + Peek.xml2html(Strophe.serialize(this)) + “</div>”); });
if (at_bottom) { console.scrollTop = console.scrollHeight; }
} },
xml2html: function (s) { return s.replace(/&/g, “&”) .replace(/</g, “<”) .replace(/>/g, “>”); }};
code snippet peek.js
The Peek object serves as a namespace container for all application code and state. This is good pro-gramming practice, and isolates your code from other applications. Currently, the only application state the application has is the connection variable.
Web browsers do not speak XMPP natively (at least not yet) so XMPP connections must be tunneled through HTTP requests. A side effect of this tunneling is that stanzas are delivered in a <body>
70 ❘ Chapter 4 Exploring thE xMpp protocol: A DEbugging consolE
wrapper, which contains some metadata about the request. The details of this tunneling, called BOSH, are the subject of XEP-0124 and XEP-0206 and were touched on in Chapter 2. The show_traffic() function ignores this <body> wrapper and deals with its children, which are the stanzas themselves.
Each stanza is converted from XML to text (this is referred to as serialization) using a new Strophe function, Strophe.serialize(). The XML string produced by Strophe’s serialize() function must first be escaped before insertion into the HTML document, or the XML elements will be interpreted as HTML ones. The escaping is done by the xml2html() function, which replaces the special characters with their escaped versions. Then the text is appended to the console’s content as a <div>. Incoming stanzas are given a CSS class of incoming, and outgoing stanzas receive the class outgoing. These are typical uses of jQuery.
The console should scroll to the bottom when new data comes in, so the scrollTop attribute of the element is set equal to its scrollHeight. However, it would be frustrating if it moved to the bottom while you were scrolled up to read something at the top. The code checks to see if the console is cur-rently all the way at the bottom before changing the scroll position. If the user is looking at some-thing old, the window will not jump to the bottom when something new comes in. When the user returns to the bottom, the auto-scrolling behavior will kick in again.
Finally, you should add some logic to make the Disconnect button functional. Once Peek is con-nected, you’ll want to enable the Disconnect button, and when Peek disconnects, you’ll want to dis-able the button. You can do this by binding the connected and disconnected events, which your connection callback fires when those states are reported by Strophe. Add the following handlers at the end of peek.js:
$(document).bind(‘connected’, function () { $(‘#disconnect_button’).removeAttr(‘disabled’);});
$(document).bind(‘disconnected’, function () { $(‘#disconnect_button’).attr(‘disabled’, ‘disabled’);});
code snippet peek.js
To make the button do something, you must handle its click event. Add the following code to the document ready event handler:
$(‘#disconnect_button’).click(function () { Peek.connection.disconnect();});
code snippet peek.js
If you load the application in a web browser and log in to your favorite XMPP server, you’ll see the stanzas that are sent during authentication appear in the console. The only problem is that they are shown as long strings without any formatting. It’s time for you to make them prettier and easier to read.
Building the Console ❘ 71
Making XMl prettyLooking at long strings of text gets old pretty fast, so you’ll want to reformat the XML to produce a more pleasing and readable display. A typical way to do this is via indentation. Each child element should appear indented under its parent, with its children similarly indented. Attributes can also be indented so that they line up with all the other attributes, each on its own line. Finally, you can assign different colors to all the different pieces: punctuation, tag names, attributes, attribute values, and content.
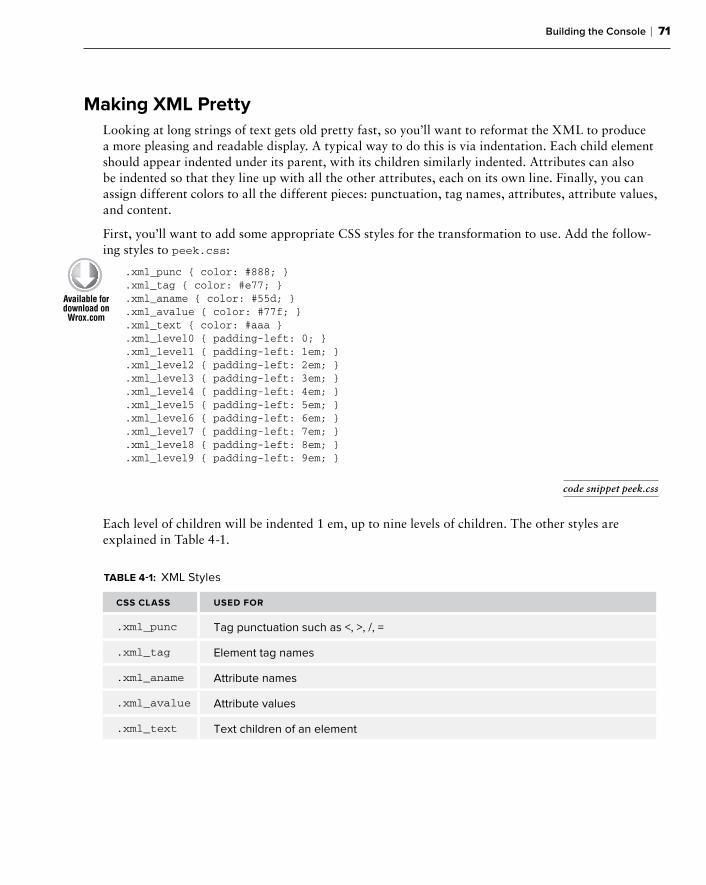
First, you’ll want to add some appropriate CSS styles for the transformation to use. Add the follow-ing styles to peek.css:
.xml_punc { color: #888; }
.xml_tag { color: #e77; }
.xml_aname { color: #55d; }
.xml_avalue { color: #77f; }
.xml_text { color: #aaa }
.xml_level0 { padding-left: 0; }
.xml_level1 { padding-left: 1em; }
.xml_level2 { padding-left: 2em; }
.xml_level3 { padding-left: 3em; }
.xml_level4 { padding-left: 4em; }
.xml_level5 { padding-left: 5em; }
.xml_level6 { padding-left: 6em; }
.xml_level7 { padding-left: 7em; }
.xml_level8 { padding-left: 8em; }
.xml_level9 { padding-left: 9em; }
code snippet peek.css
Each level of children will be indented 1 em, up to nine levels of children. The other styles are explained in Table 4-1.
taBle 4-1: XML Styles
Css Class useD For
.xml_punc Tag punctuation such as <, >, /, =
.xml_tag Element tag names
.xml_aname Attribute names
.xml_avalue Attribute values
.xml_text Text children of an element
72 ❘ Chapter 4 Exploring thE xMpp protocol: A DEbugging consolE
Next, you’ll need to modify show_traffic() to use something besides Strophe.serialize() to generate the representation. In the following code, Peek.pretty_xml() has replaced the old serial-ization code on the highlighted line:
show_traffic: function (body, type) { if (body.childNodes.length > 0) { var console = $(‘#console’).get(0); var at_bottom = console.scrollTop >= console.scrollHeight - console.clientHeight;;
$.each(body.childNodes, function () { $(‘#console’).append(“<div class=’” + type + “‘>” + Peek.pretty_xml(this) + “</div>”); }); }}
code snippet peek.js
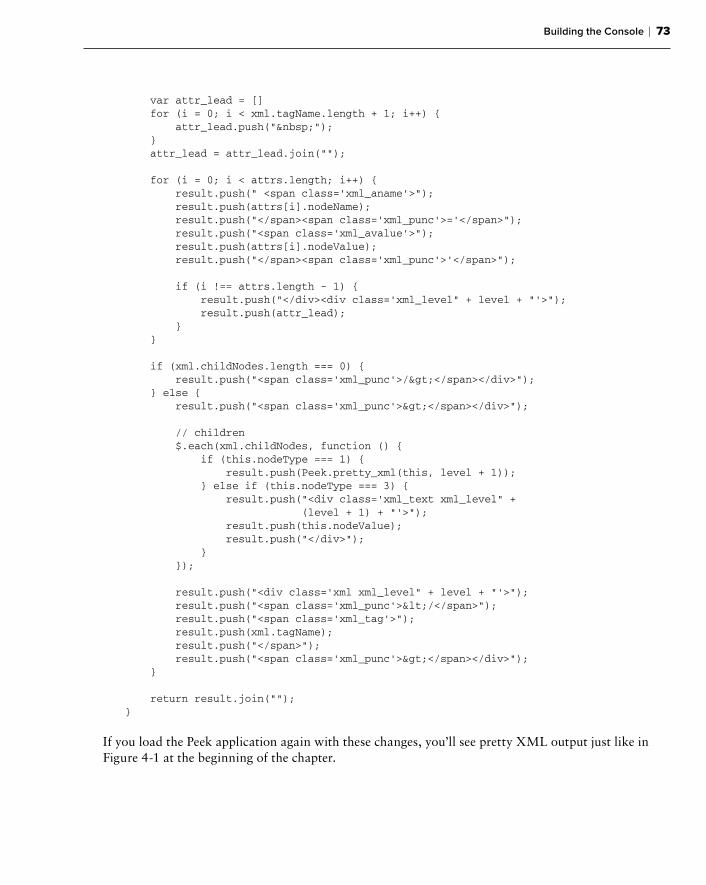
Finally, you’ll need to implement pretty_xml(). The implementation in Listing 4-3 is recursive. First it styles the opening tag and its attributes; then the function calls itself for each child tag; and finally, it styles the closing tag. There are a few extra cases to handle the text children and empty tags as well. Each line of the output is in its own <div> element, and the text children are in their own, potentially multiline <div>.
You might wonder why the code puts all the strings, part by part, into an array instead of concat-enating them all together with +. Using an array to hold parts of a larger string and then joining it all together at once is a common optimization pattern in JavaScript. Because JavaScript strings are immutable, a new string must be created when two strings are joined. Waiting until all the small strings are created to do the final concatenation saves a lot of intermediate string creation work by the interpreter. Similar string concatenation optimization patterns exist for other programming lan-guages with immutable strings like Python and Java.
listing 4-3: The pretty_xml() function in peek.js
pretty_xml: function (xml, level) { var i, j; var result = []; if (!level) { level = 0; }
result.push(“<div class=’xml_level” + level + “‘>”); result.push(“<span class=’xml_punc’><</span>”); result.push(“<span class=’xml_tag’>”); result.push(xml.tagName); result.push(“</span>”);
// attributes var attrs = xml.attributes;
Building the Console ❘ 73
var attr_lead = [] for (i = 0; i < xml.tagName.length + 1; i++) { attr_lead.push(“ ”); } attr_lead = attr_lead.join(“”);
for (i = 0; i < attrs.length; i++) { result.push(“ <span class=’xml_aname’>”); result.push(attrs[i].nodeName); result.push(“</span><span class=’xml_punc’>=’</span>”); result.push(“<span class=’xml_avalue’>”); result.push(attrs[i].nodeValue); result.push(“</span><span class=’xml_punc’>’</span>”);
if (i !== attrs.length - 1) { result.push(“</div><div class=’xml_level” + level + “‘>”); result.push(attr_lead); } }
if (xml.childNodes.length === 0) { result.push(“<span class=’xml_punc’>/></span></div>”); } else { result.push(“<span class=’xml_punc’>></span></div>”);
// children $.each(xml.childNodes, function () { if (this.nodeType === 1) { result.push(Peek.pretty_xml(this, level + 1)); } else if (this.nodeType === 3) { result.push(“<div class=’xml_text xml_level” + (level + 1) + “‘>”); result.push(this.nodeValue); result.push(“</div>”); } });
result.push(“<div class=’xml xml_level” + level + “‘>”); result.push(“<span class=’xml_punc’></</span>”); result.push(“<span class=’xml_tag’>”); result.push(xml.tagName); result.push(“</span>”); result.push(“<span class=’xml_punc’>></span></div>”); }
return result.join(“”);}
If you load the Peek application again with these changes, you’ll see pretty XML output just like in Figure 4-1 at the beginning of the chapter.
74 ❘ Chapter 4 Exploring thE xMpp protocol: A DEbugging consolE
Dealing with XMl inputThe console now shows beautiful, colorized XML stanzas, but unfortunately, once the initial authentication and session setup is complete, there are no more stanzas to render. It’s time to add user input to Peek so that you can interact with the console.
First, you’ll need to enable the input field and the Send button once the connection is ready to accept stanzas. You already did this for the Disconnect button in the connected and disconnected event handlers. Because both buttons have the button class, you can handle both buttons at the same time. For the text area, you’ll also need to remove the disabled class, which was used to alter the background color. The new handlers are shown here with the changed lines highlighted:
$(document).bind(‘connected’, function () { $(‘.button’).removeAttr(‘disabled’); $(‘#input’).removeClass(‘disabled’).removeAttr(‘disabled’);});
$(document).bind(‘disconnected’, function () { $(‘.button’).attr(‘disabled’, ‘disabled’); $(‘#input’).addClass(‘disabled’).attr(‘disabled’, ‘disabled’);});
code snippet peek.js
The user can now type in XML in the text area whenever an established connection exists. You just need to do something when the user clicks Send.
Strophe’s send() function only accepts valid XML DOM objects or Strophe.Builder objects. This makes it difficult to send invalid XML over the XMPP connection. Sending invalid XML would cause the server to terminate the connection immediately. Users can only input text, however, so you must first create a function that parses text into XML. Fortunately, web browsers all come with built-in XML parsers. Add the following text_to_xml() function to the Peek object:
text_to_xml: function (text) { var doc = null; if (window[‘DOMParser’]) { var parser = new DOMParser(); doc = parser.parseFromString(text, ‘text/xml’); } else if (window[‘ActiveXObject’]) { var doc = new ActiveXObject(“MSXML2.DOMDocument”); doc.async = false; doc.loadXML(text); } else { throw { type: ‘PeekError’, message: ‘No DOMParser object found.’ }; }
var elem = doc.documentElement; if ($(elem).filter(‘parsererror’).length > 0) {

Building the Console ❘ 75
return null; } return elem;}
code snippet peek.js
The text_to_xml() function creates an XML parser and parses the string. Internet Explorer 6 does not have the DOMParser class, so you must use an ActiveX object instead. Firefox, Safari, and Opera, however, all implement DOMParser. The ActiveX object differs slightly from the DOMParser API, but for Peek’s needs, the changes required are very minor.
Some DOMParser objects will produce XML documents for invalid input, and these error documents will have a top-level <parsererror> element. You must check for this so that you don’t accidentally send these error documents as XMPP stanzas.
All that is left is to wire up the Send button to the text_to_xml() function and send the result. You can add the following code to the document ready event handler to achieve this:
$(‘#send_button’).click(function () { var xml = Peek.text_to_xml($(‘#input’).val()); if (xml) { Peek.connection.send(xml); $(‘#input’).val(‘’); }});
code snippet peek.js
Notice that you don’t need to add the XML to the console. Strophe automatically passes the stanza to the xmlInput() and rawInput() logging functions, and these already take care of adding pretty XML data to the console.
There is one last thing to do — handle input errors. Currently if the user types something invalid, like <<presence/>, clicking Send does nothing. It would be nice to give the user some feedback. jQuery makes it extremely easy to do this. The modified Send button click event handler animates the background fading to red when an input error is detected:
$(‘#send_button’).click(function () { var xml = Peek.text_to_xml($(‘#input’).val()); if (xml) { Peek.connection.send(xml); $(‘#input’).val(‘’); } else { $(‘#input’).animate({backgroundColor: “#faa”}, 200); }});
code snippet peek.js
76 ❘ Chapter 4 Exploring thE xMpp protocol: A DEbugging consolE
Now you must also reset the background color once the user starts to correct his mistake. You can use a keypress event handler to do this. The following code should be added to the document ready handler:
$(‘#input’).keypress(function () { $(this).css({backgroundColor: ‘#fff’});});
code snippet peek.js
Peek is now a working XMPP debugger!
Making input easierTyping out all the XML by hand can be a little tiresome. Strophe compensates for this by having the easy-to-use Builder object and its helper functions, $msg(), $pres(), and $iq(). It’s easy to extend Peek to allow users to input code as well as XML, making their life much easier if they know a little JavaScript.
First, you must detect if the input is code or XML. The easiest way to do this is to look at the first character. If it is <, then it looks a lot like XML; if it is $ it looks a lot like one of the three Builder object helper functions. If the user’s input looks like code, you can use JavaScript’s eval() function to execute it. You can replace the Send button click event handler with this new logic:
$(‘#send_button’).click(function () { var input = $(‘#input’).val(); var error = false; if (input.length > 0) { if (input[0] === ‘<’) { var xml = Peek.text_to_xml(input); if (xml) { Peek.connection.send(xml); $(‘#input’).val(‘’); } else { error = true; } } else if (input[0] === ‘$’) { try { var builder = eval(input); Peek.connection.send(builder); $(‘#input’).val(‘’); } catch (e) { error = true; } } else { error = true; } }
if (error) { $(‘#input’).animate({backgroundColor: “#faa”}); }});
code snippet peek.js
Building the Console ❘ 77
For the case where the first character is <, the logic is exactly the same. When the first character is $, however, Peek evaluates the input as code, and if there are no errors, attempts to send this as a stanza. If the code throws an exception (for example, if the code contains a syntax error or does not produce a Builder object), an error is flagged.
Peek is now ready to help you explore the depths of XMPP. The completed peek.js file appears in Listing 4-4.
listing 4-4: peek.js (final)
var Peek = { connection: null,
show_traffic: function (body, type) { if (body.childNodes.length > 0) { var console = $(‘#console’).get(0); var at_bottom = console.scrollTop >= console.scrollHeight - console.clientHeight;;
$.each(body.childNodes, function () { $(‘#console’).append(“<div class=’” + type + “‘>” + Peek.pretty_xml(this) + “</div>”); });
if (at_bottom) { console.scrollTop = console.scrollHeight; } } },
pretty_xml: function (xml, level) { var i, j; var result = []; if (!level) { level = 0; }
result.push(“<div class=’xml_level” + level + “‘>”); result.push(“<span class=’xml_punc’><</span>”); result.push(“<span class=’xml_tag’>”); result.push(xml.tagName); result.push(“</span>”);
// attributes var attrs = xml.attributes; var attr_lead = [] for (i = 0; i < xml.tagName.length + 1; i++) { attr_lead.push(“ ”); } attr_lead = attr_lead.join(“”);
for (i = 0; i < attrs.length; i++) {continues
78 ❘ Chapter 4 Exploring thE xMpp protocol: A DEbugging consolE
result.push(“ <span class=’xml_aname’>”); result.push(attrs[i].nodeName); result.push(“</span><span class=’xml_punc’>=’</span>”); result.push(“<span class=’xml_avalue’>”); result.push(attrs[i].nodeValue); result.push(“</span><span class=’xml_punc’>’</span>”);
if (i !== attrs.length - 1) { result.push(“</div><div class=’xml_level” + level + “‘>”); result.push(attr_lead); } }
if (xml.childNodes.length === 0) { result.push(“<span class=’xml_punc’>/></span></div>”); } else { result.push(“<span class=’xml_punc’>></span></div>”);
// children $.each(xml.childNodes, function () { if (this.nodeType === 1) { result.push(Peek.pretty_xml(this, level + 1)); } else if (this.nodeType === 3) { result.push(“<div class=’xml_text xml_level” + (level + 1) + “‘>”); result.push(this.nodeValue); result.push(“</div>”); } });
result.push(“<div class=’xml xml_level” + level + “‘>”); result.push(“<span class=’xml_punc’></</span>”); result.push(“<span class=’xml_tag’>”); result.push(xml.tagName); result.push(“</span>”); result.push(“<span class=’xml_punc’>></span></div>”); }
return result.join(“”); },
text_to_xml: function (text) { var doc = null; if (window[‘DOMParser’]) { var parser = new DOMParser(); doc = parser.parseFromString(text, ‘text/xml’); } else if (window[‘ActiveXObject’]) { var doc = new ActiveXObject(“MSXML2.DOMDocument”); doc.async = false; doc.loadXML(text); } else { throw {
listing 4-4 (continued)

Building the Console ❘ 79
type: ‘PeekError’, message: ‘No DOMParser object found.’ }; }
var elem = doc.documentElement; if ($(elem).filter(‘parsererror’).length > 0) { return null; } return elem; }};
$(document).ready(function () { $(‘#login_dialog’).dialog({ autoOpen: true, draggable: false, modal: true, title: ‘Connect to XMPP’, buttons: { “Connect”: function () { $(document).trigger(‘connect’, { jid: $(‘#jid’).val(), password: $(‘#password’).val() });
$(‘#password’).val(‘’); $(this).dialog(‘close’); } } });
$(‘#disconnect_button’).click(function () { Peek.connection.disconnect(); });
$(‘#send_button’).click(function () { var input = $(‘#input’).val(); var error = false; if (input.length > 0) { if (input[0] === ‘<’) { var xml = Peek.text_to_xml(input); if (xml) { Peek.connection.send(xml); $(‘#input’).val(‘’); } else { error = true; } } else if (input[0] === ‘$’) { try { var builder = eval(input); Peek.connection.send(builder); $(‘#input’).val(‘’); } catch (e) {
continues
80 ❘ Chapter 4 Exploring thE xMpp protocol: A DEbugging consolE
console.log(e); error = true; } } else { error = true; } }
if (error) { $(‘#input’).animate({backgroundColor: “#faa”}); } });
$(‘#input’).keypress(function () { $(this).css({backgroundColor: ‘#fff’}); });});
$(document).bind(‘connect’, function (ev, data) { var conn = new Strophe.Connection( “http://bosh.metajack.im:5280/xmpp-httpbind”);
conn.xmlInput = function (body) { Peek.show_traffic(body, ‘incoming’); }; conn.xmlOutput = function (body) { Peek.show_traffic(body, ‘outgoing’); };
conn.connect(data.jid, data.password, function (status) { if (status === Strophe.Status.CONNECTED) { $(document).trigger(‘connected’); } else if (status === Strophe.Status.DISCONNECTED) { $(document).trigger(‘disconnected’); } }); Peek.connection = conn;});
$(document).bind(‘connected’, function () { $(‘.button’).removeAttr(‘disabled’); $(‘#input’).removeClass(‘disabled’).removeAttr(‘disabled’);});
$(document).bind(‘disconnected’, function () { $(‘.button’).attr(‘disabled’, ‘disabled’); $(‘#input’).addClass(‘disabled’).attr(‘disabled’, ‘disabled’);});
listing 4-4 (continued)
Exploring XMPP ❘ 81
eXploring XMpp
Peek is quite useful at helping you investigate how something works or why something is not doing what you expect. You can cut and paste the stanza building code from your application and see exactly what the server’s response is. If you are unfamiliar with a particular protocol extension, you can type in the examples to see how the server responds to various inputs.
This book is filled with examples that you can try out in Peek. Be sure to adjust the server names and JIDs appropriately; the examples in this book use imaginary server domains and JIDs of fic-tional characters. You see what happens if you try to use these made-up examples in the section “Dealing with Errors.”
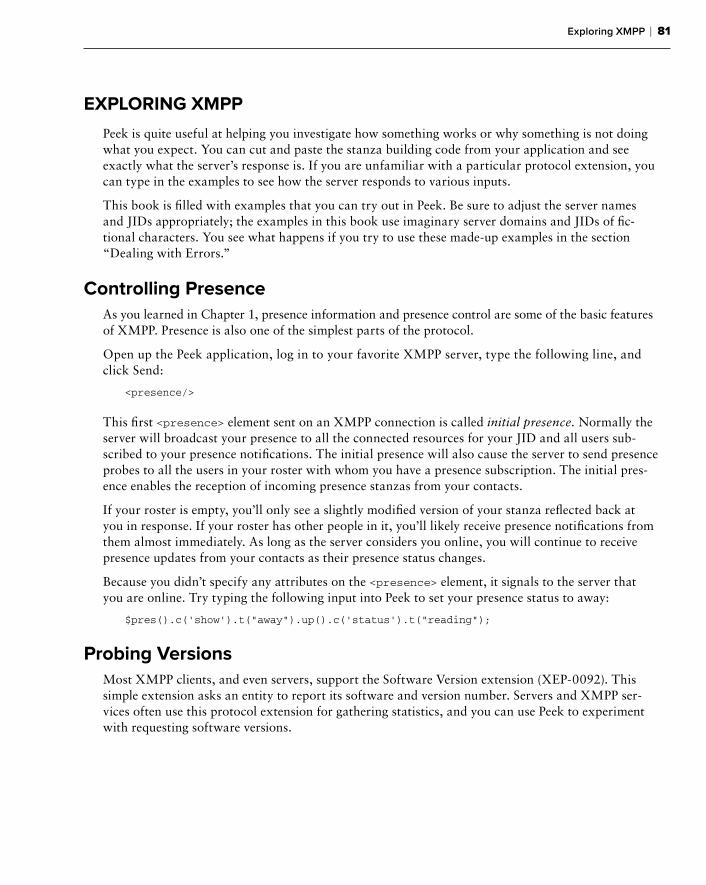
Controlling presenceAs you learned in Chapter 1, presence information and presence control are some of the basic features of XMPP. Presence is also one of the simplest parts of the protocol.
Open up the Peek application, log in to your favorite XMPP server, type the following line, and click Send:
<presence/>
This first <presence> element sent on an XMPP connection is called initial presence. Normally the server will broadcast your presence to all the connected resources for your JID and all users sub-scribed to your presence notifications. The initial presence will also cause the server to send presence probes to all the users in your roster with whom you have a presence subscription. The initial pres-ence enables the reception of incoming presence stanzas from your contacts.
If your roster is empty, you’ll only see a slightly modified version of your stanza reflected back at you in response. If your roster has other people in it, you’ll likely receive presence notifications from them almost immediately. As long as the server considers you online, you will continue to receive presence updates from your contacts as their presence status changes.
Because you didn’t specify any attributes on the <presence> element, it signals to the server that you are online. Try typing the following input into Peek to set your presence status to away:
$pres().c(‘show’).t(“away”).up().c(‘status’).t(“reading”);
probing versionsMost XMPP clients, and even servers, support the Software Version extension (XEP-0092). This simple extension asks an entity to report its software and version number. Servers and XMPP ser-vices often use this protocol extension for gathering statistics, and you can use Peek to experiment with requesting software versions.
82 ❘ Chapter 4 Exploring thE xMpp protocol: A DEbugging consolE
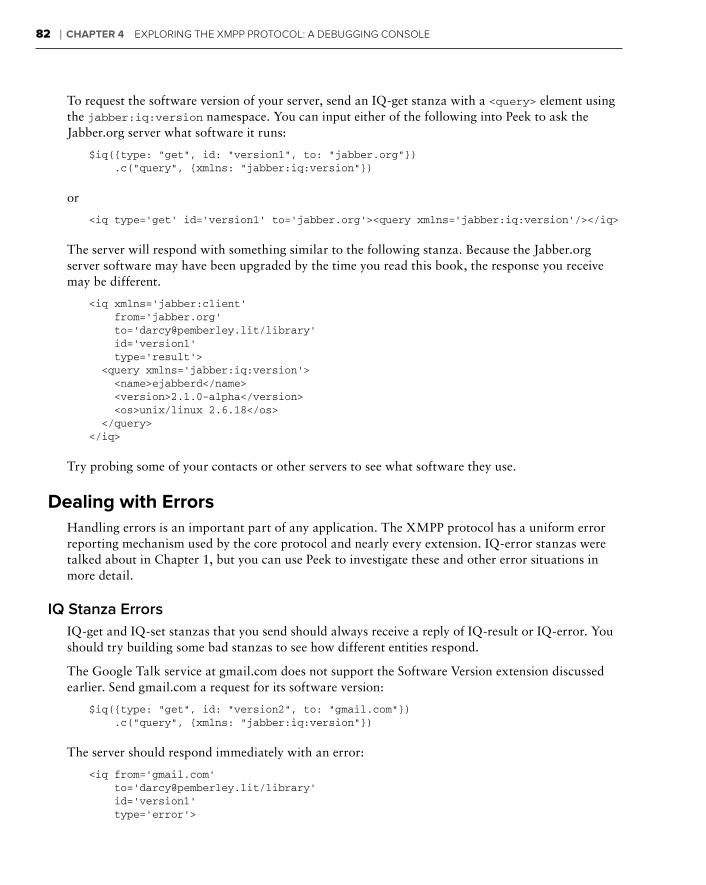
To request the software version of your server, send an IQ-get stanza with a <query> element using the jabber:iq:version namespace. You can input either of the following into Peek to ask the Jabber.org server what software it runs:
$iq({type: “get”, id: “version1”, to: “jabber.org”}) .c(“query”, {xmlns: “jabber:iq:version”})
or
<iq type=’get’ id=’version1’ to=’jabber.org’><query xmlns=’jabber:iq:version’/></iq>
The server will respond with something similar to the following stanza. Because the Jabber.org server software may have been upgraded by the time you read this book, the response you receive may be different.
<iq xmlns=’jabber:client’ from=’jabber.org’ to=’[email protected]/library’ id=’version1’ type=’result’> <query xmlns=’jabber:iq:version’> <name>ejabberd</name> <version>2.1.0-alpha</version> <os>unix/linux 2.6.18</os> </query></iq>
Try probing some of your contacts or other servers to see what software they use.
Dealing with errorsHandling errors is an important part of any application. The XMPP protocol has a uniform error reporting mechanism used by the core protocol and nearly every extension. IQ-error stanzas were talked about in Chapter 1, but you can use Peek to investigate these and other error situations in more detail.
IQ Stanza Errors
IQ-get and IQ-set stanzas that you send should always receive a reply of IQ-result or IQ-error. You should try building some bad stanzas to see how different entities respond.
The Google Talk service at gmail.com does not support the Software Version extension discussed earlier. Send gmail.com a request for its software version:
$iq({type: “get”, id: “version2”, to: “gmail.com”}) .c(“query”, {xmlns: “jabber:iq:version”})
The server should respond immediately with an error:
<iq from=’gmail.com’ to=’[email protected]/library’ id=’version1’ type=’error’>
Exploring XMPP ❘ 83
<query xmlns=’jabber:iq:version’/> <error code=’503’ type=’cancel’> <service-unavailable xmlns=’urn:ietf:params:xml:ns:xmpp-stanzas’/> </error></iq>
This IQ-error stanza contains the contents of your original request as the first child. Many error stanzas you’ll receive will include the original request’s contents, although in some cases, this may be omitted if the stanza is quite large or contains sensitive information. The <error> element is required, and it should contain a <text> element and exactly one other child with the urn:ietf:params:xml:ns:xmpp-stanzas namespace. The preceding error stanza did not contain a <text> child–it’s optional–but you see an example of this in the next section. The latter type of child’s name tells you the kind of error that happened. In this case it was service-unavailable. This is exactly the error that was expected, because gmail.com does not support this extension.
Notice, also, that the <error> element’s type attribute is cancel. This means that you should not try to continue this operation. Some errors will have type attributes of modify, which means that your application should try again with the input corrected. Other error types are also possible and include continue, auth, and wait. You can send the following stanza to a non-existent room on a multi-user chat service to induce an error:
<iq type=’get’ to=’[email protected]’ id=’info1’> <query xmlns=’http://jabber.org/protocol/disco#info’/></iq>
You should receive a response similar to the following one. Note that the server has supplied a human-readable <text> element as well as the normal error condition element.
<iq to=’[email protected]/library’ from=’[email protected]’ id=’info1’ type=’error’> <query xmlns=’http://jabber.org/protocol/disco#info’/> <error code=’404’ type=’cancel’> <item-not-found xmlns=’urn:ietf:params:xml:ns:xmpp-stanzas’/> <text xmlns=’urn:ietf:params:xml:ns:xmpp-stanzas’> Conference room does not exist </text> </error></iq>
The <error> element may also contain an application-specific error condition, which will have a namespace specific to the service. You can find more information on the <error> element and IQ-error stanzas in RFC 3920 section 9.3.
Message Stanza Errors
<message> stanzas can also result in errors, and these are structured very similarly to IQ-error stan-zas. Just like IQ-error stanzas, <message> stanza errors will have a type attribute of error, usually contain the original message, and also contain the same <error> elements.
84 ❘ Chapter 4 Exploring thE xMpp protocol: A DEbugging consolE
One of the most common message errors is failed delivery to a user. For example, try sending a mes-sage to a made-up user on a made-up server:
$msg({to: [email protected]’, type: ‘chat’}).c(‘body’) .t(‘What think you of books?’)
Because the domain longbourn.lit does not exist, the server will respond with a message error like the following:
<message to=’[email protected]’ from=’[email protected]’ type=’error’> <body>What think you of books?</body> <error code=’404’ type=’cancel’> <remote-server-not-found xmlns=’urn:ietf:params:xml:ns:xmpp-stanzas’/> </error></message>
These kinds of delivery errors are quite common; users often mistype addresses or have contacts that have changed servers.
Presence Stanza Errors
Like message errors, <presence> stanza errors generally occur when remote servers are unreachable either because they don’t exist or some network link is offline. They occasionally crop up in other places as well. Just like IQ-error and message errors, presence errors have a type attribute of error and contain the <error> element.
Often you will see these as a result of server presence probes. Your XMPP server sends a probe to all your contacts when you send initial presence, and if any of those contacts’ servers cannot be reached, this generates a presence error that gets delivered to you. An example of this type of error is included here:
<presence [email protected]/library’ from=’[email protected]’ type=’error’> <error code=’404’ type=’cancel’> <remote-server-not-found xmlns=’urn:ietf:params:xml:ns:xmpp-stanzas’/> </error></presence>
For some reason, the longbourn.lit server was not reachable by the pemberley.lit server where Darcy’s XMPP account is, and a presence error is returned as a result of the presence probe.
Each type of stanza has a matching error stanza, and they all work the same way. The errors that your application must pay attention to are dependent on the application and the significance of the failure. For instance, clients usually ignore these presence errors because the state of the contact
Summary ❘ 85
is the same from the user’s perspective whether the contact is on an unreachable server or offline. However, presence errors received when trying to join a multi-user chat room (see Chapter 8) indicate real problems that the user should be notified about.
Better DeBugging
Peek is already extremely useful, but it could be even better. Try adding some extra features:
Make stanzas in the console foldable — clicking on an element hides and shows children.➤➤
Often users will want to run the same commands again; add support for command history.➤➤
suMMary
In this chapter, you built an application to inspect protocol traffic and aid in exploration and debug-ging of XMPP applications and services. Along the way you:
Hooked into Strophe’s structured logging facilities➤➤
Parsed XML input from the user➤➤
Rendered XML as nicely formatted HTML➤➤
Evaluated user input as JavaScript code➤➤
Once Peek was built, it was used to explore some common pieces of the XMPP protocol:
Manipulating your own presence information➤➤
Retrieving software version information from other entities➤➤
Dealing with various common stanza errors➤➤
Throughout the rest of the book, you should find Peek useful in diagnosing problems and exploring the XMPP protocol.
In the next chapter, you build a simple messaging client for use with the Identi.ca microblogging service.