Embed Size (px)
Citation preview

1
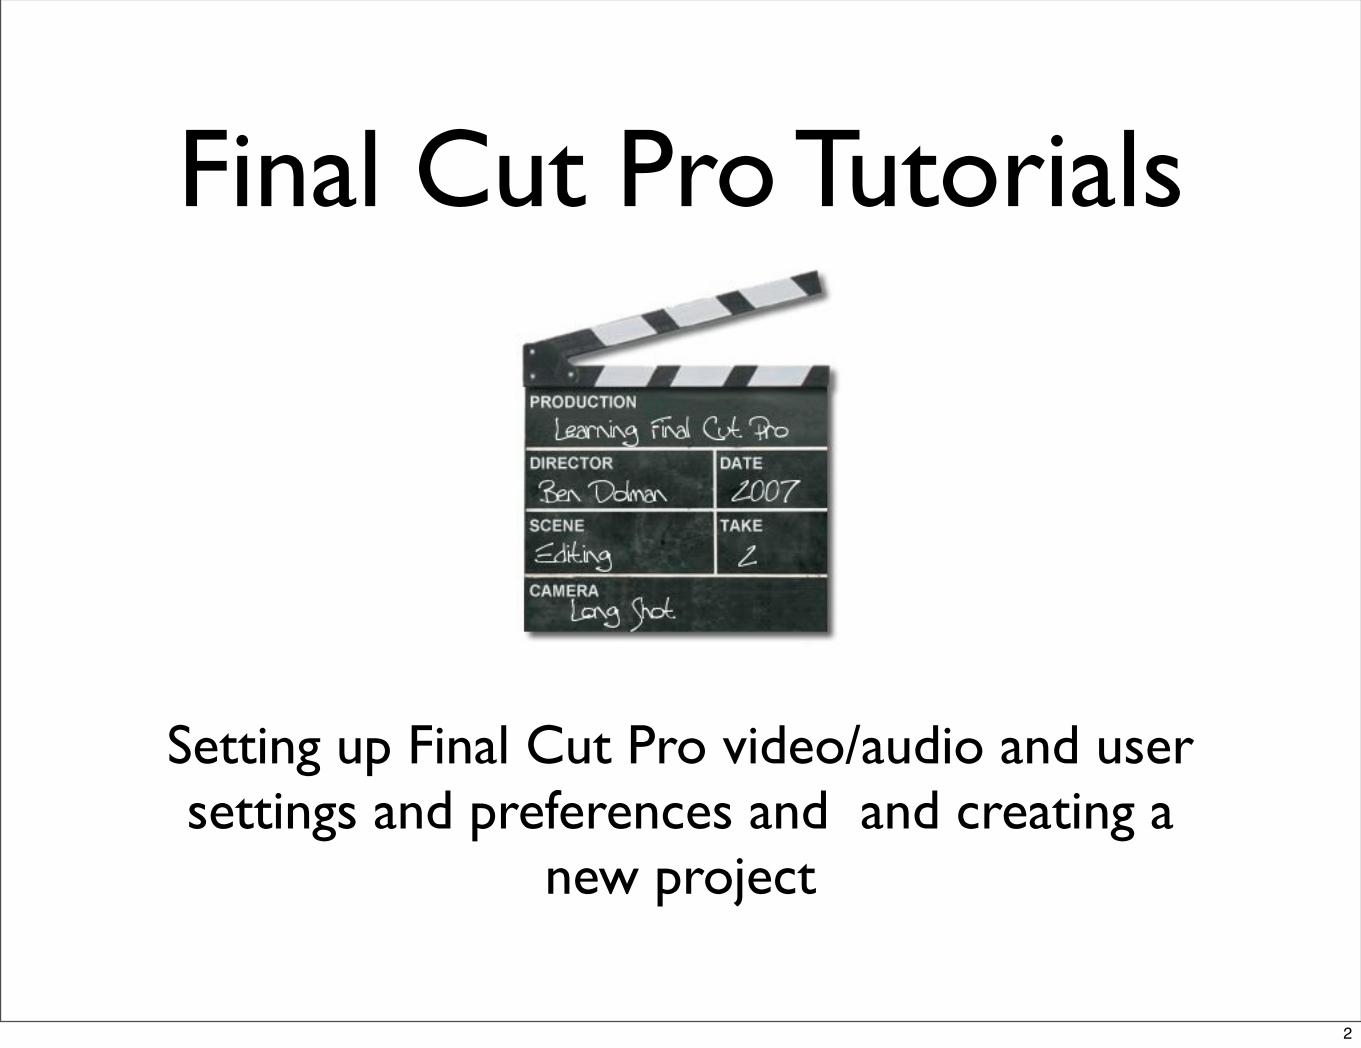
Final Cut Pro Tutorials
Setting up Final Cut Pro video/audio and user settings and preferences and and creating a
new project
2
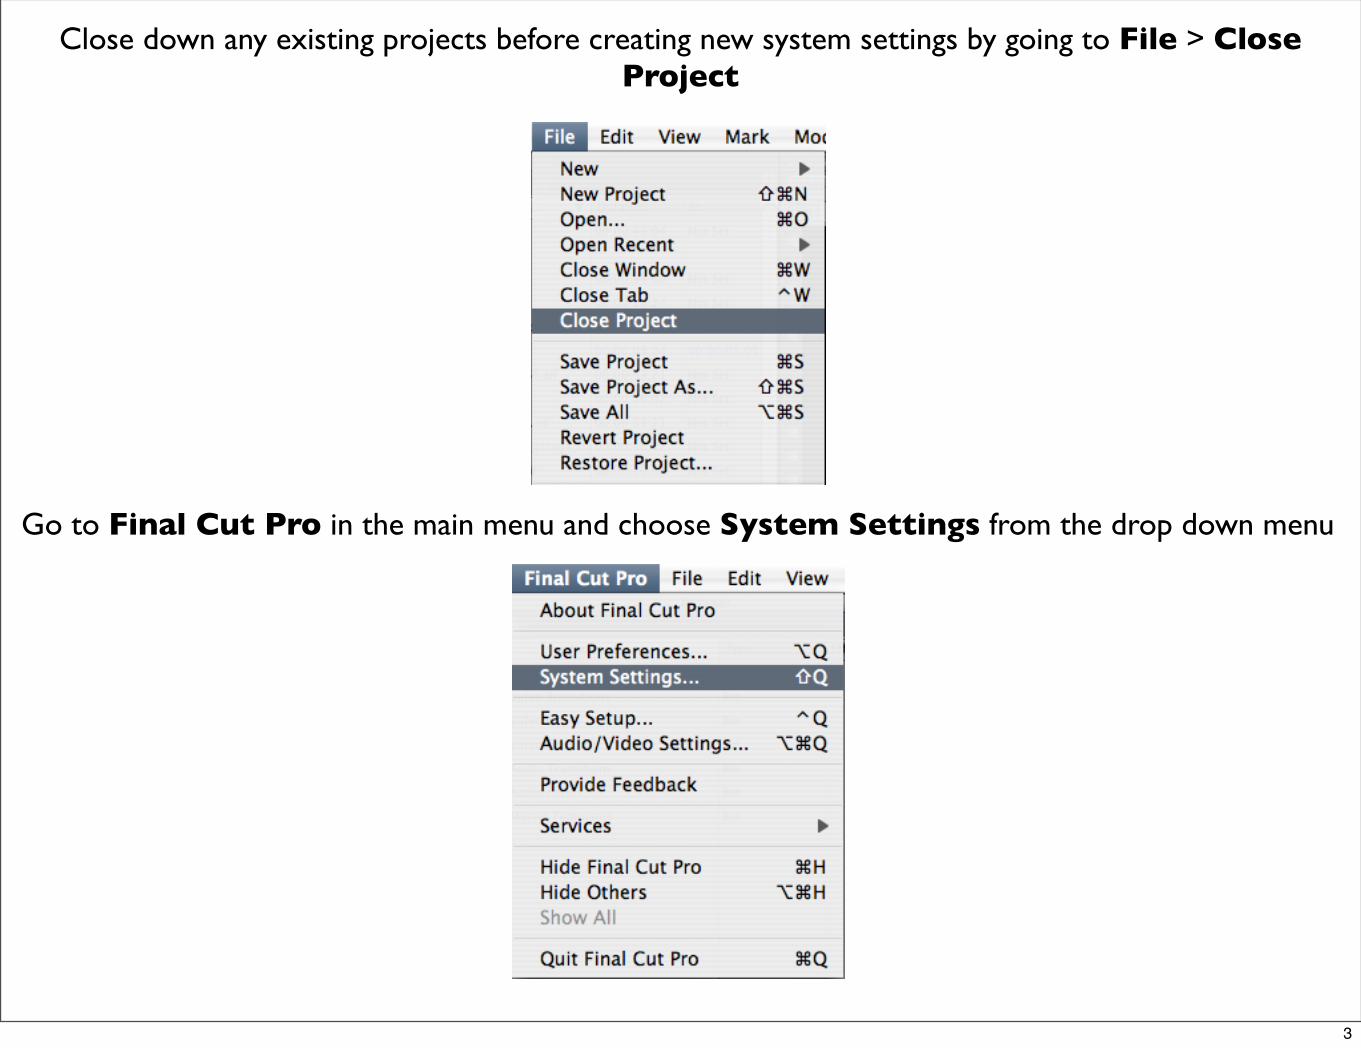
Close down any existing projects before creating new system settings by going to File > Close Project
Go to Final Cut Pro in the main menu and choose System Settings from the drop down menu
3
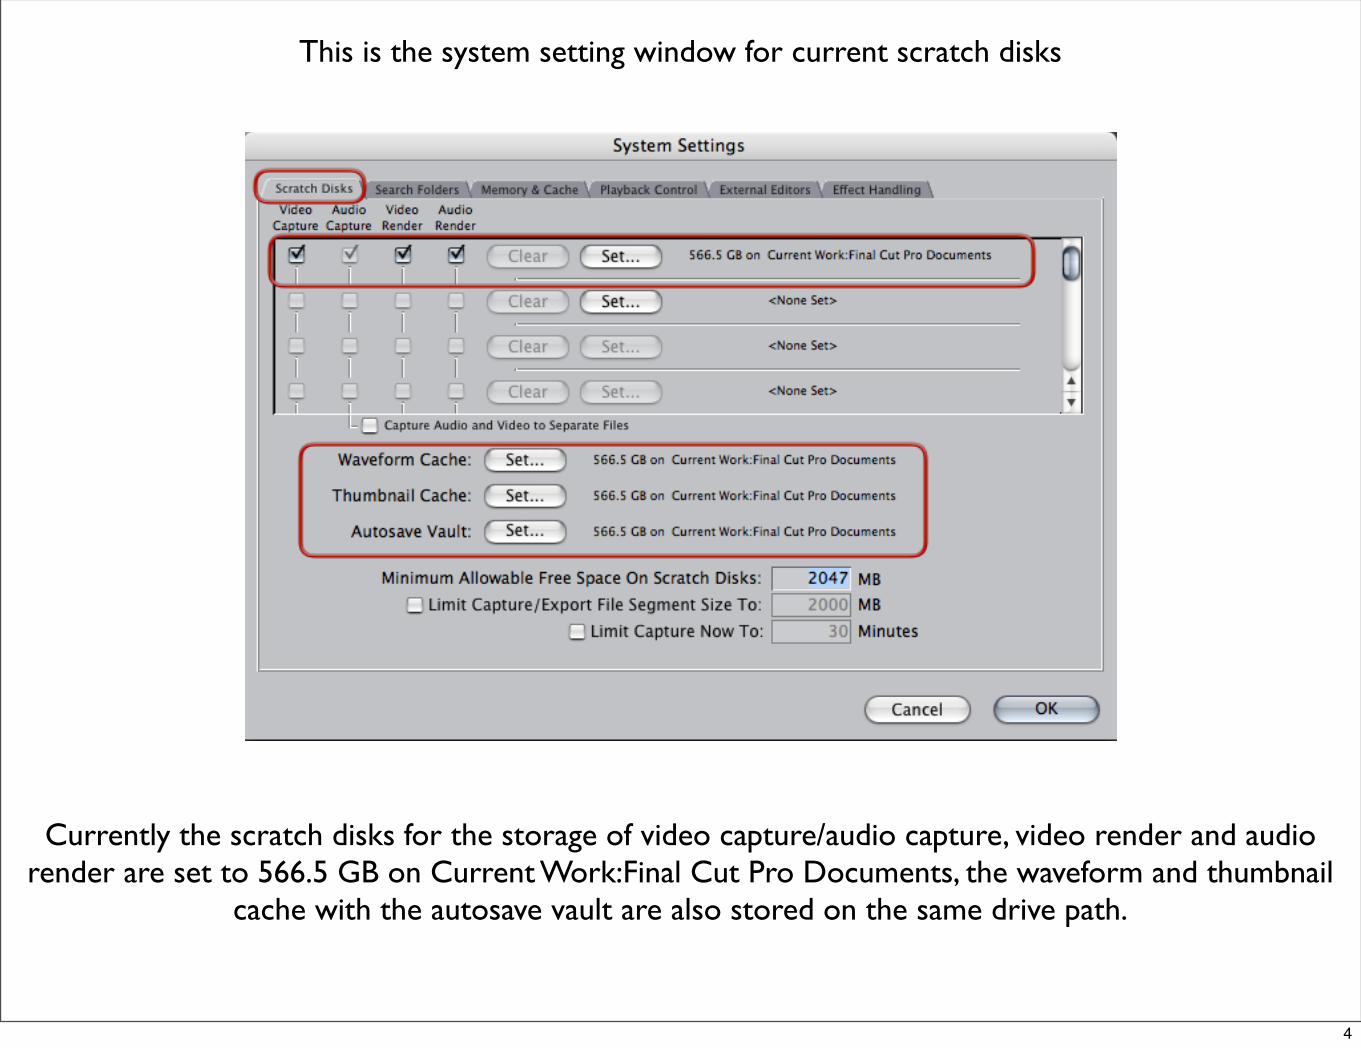
This is the system setting window for current scratch disks
Currently the scratch disks for the storage of video capture/audio capture, video render and audio render are set to 566.5 GB on Current Work:Final Cut Pro Documents, the waveform and thumbnail
cache with the autosave vault are also stored on the same drive path.
4

This is the current path to the scratch disks as seen through the finder window, note the 6 folders in the Final Cut Pro Documents correspond to the scratch disks in the systems setting window on the
previous page.
5
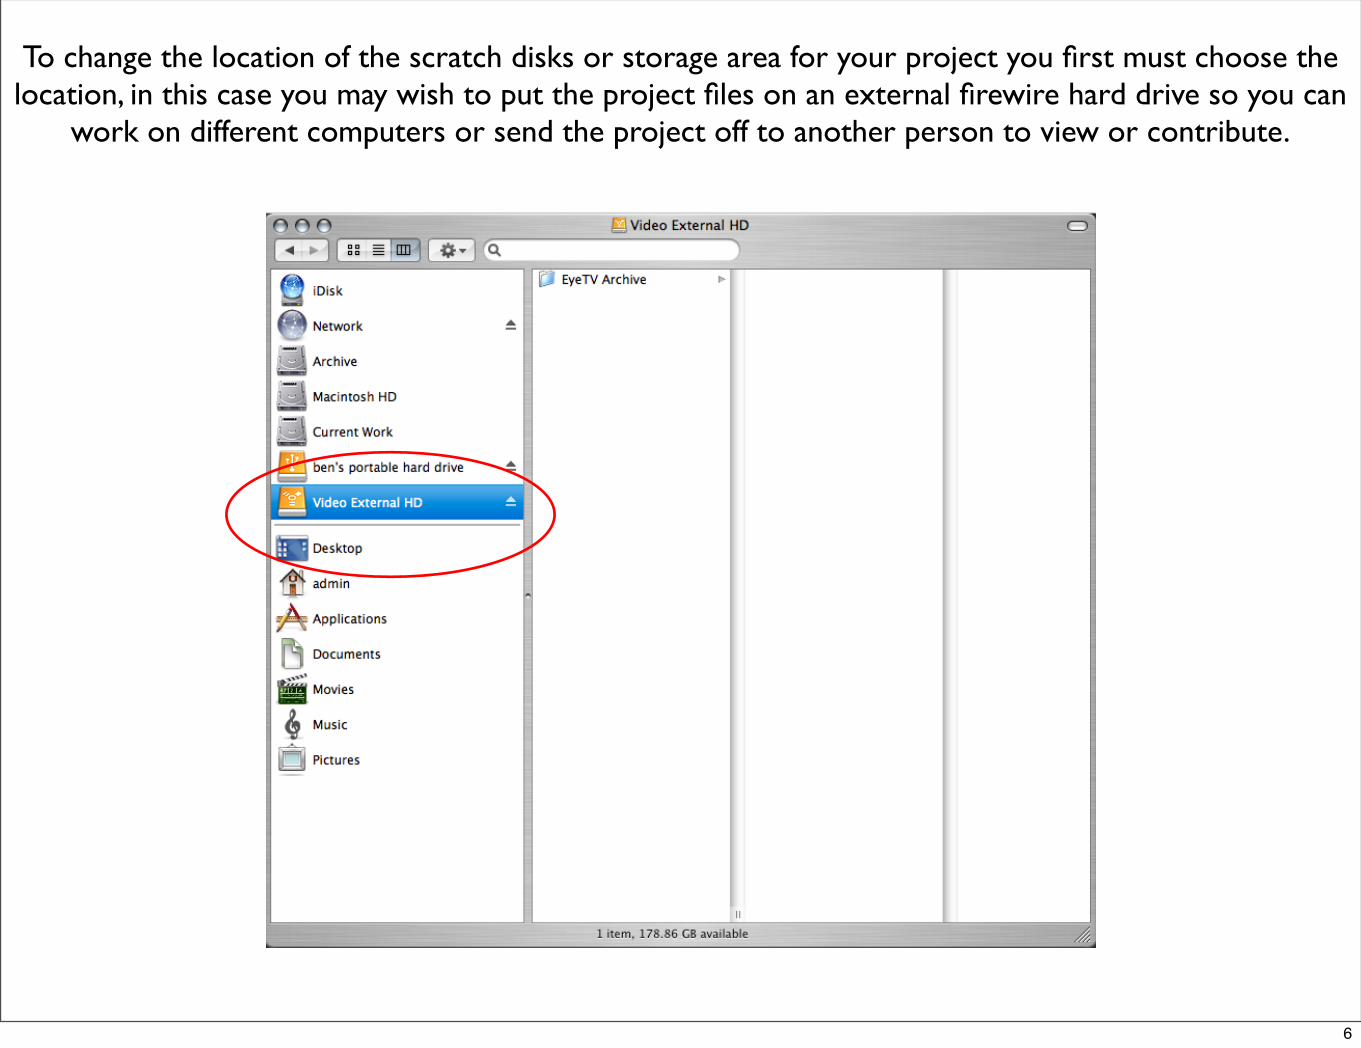
To change the location of the scratch disks or storage area for your project you first must choose the location, in this case you may wish to put the project files on an external firewire hard drive so you can
work on different computers or send the project off to another person to view or contribute.
6
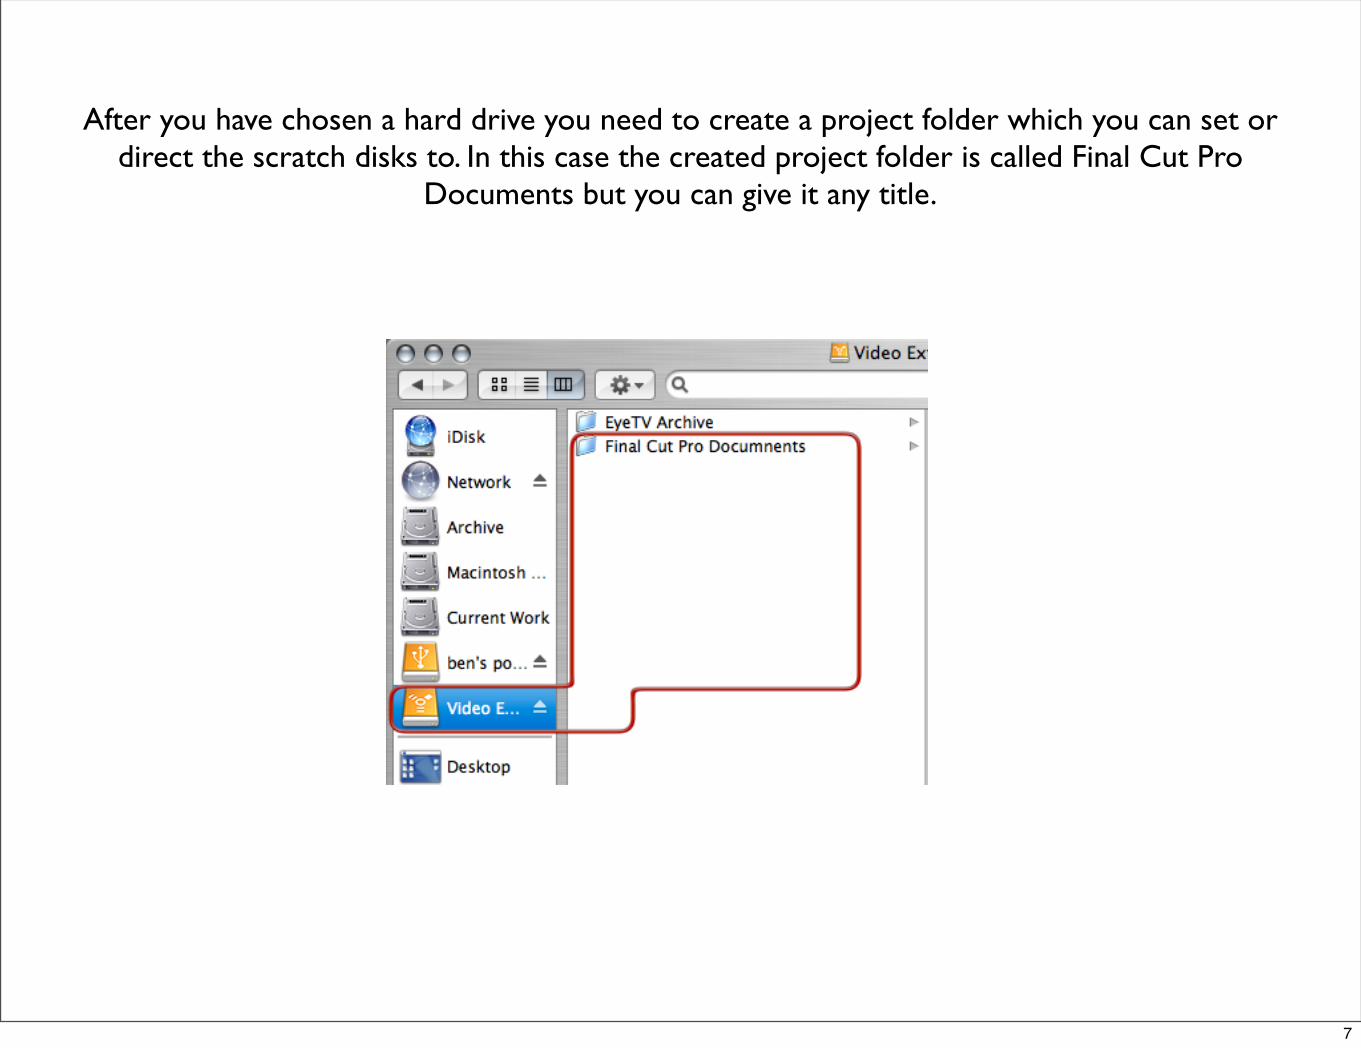
After you have chosen a hard drive you need to create a project folder which you can set or direct the scratch disks to. In this case the created project folder is called Final Cut Pro
Documents but you can give it any title.
7
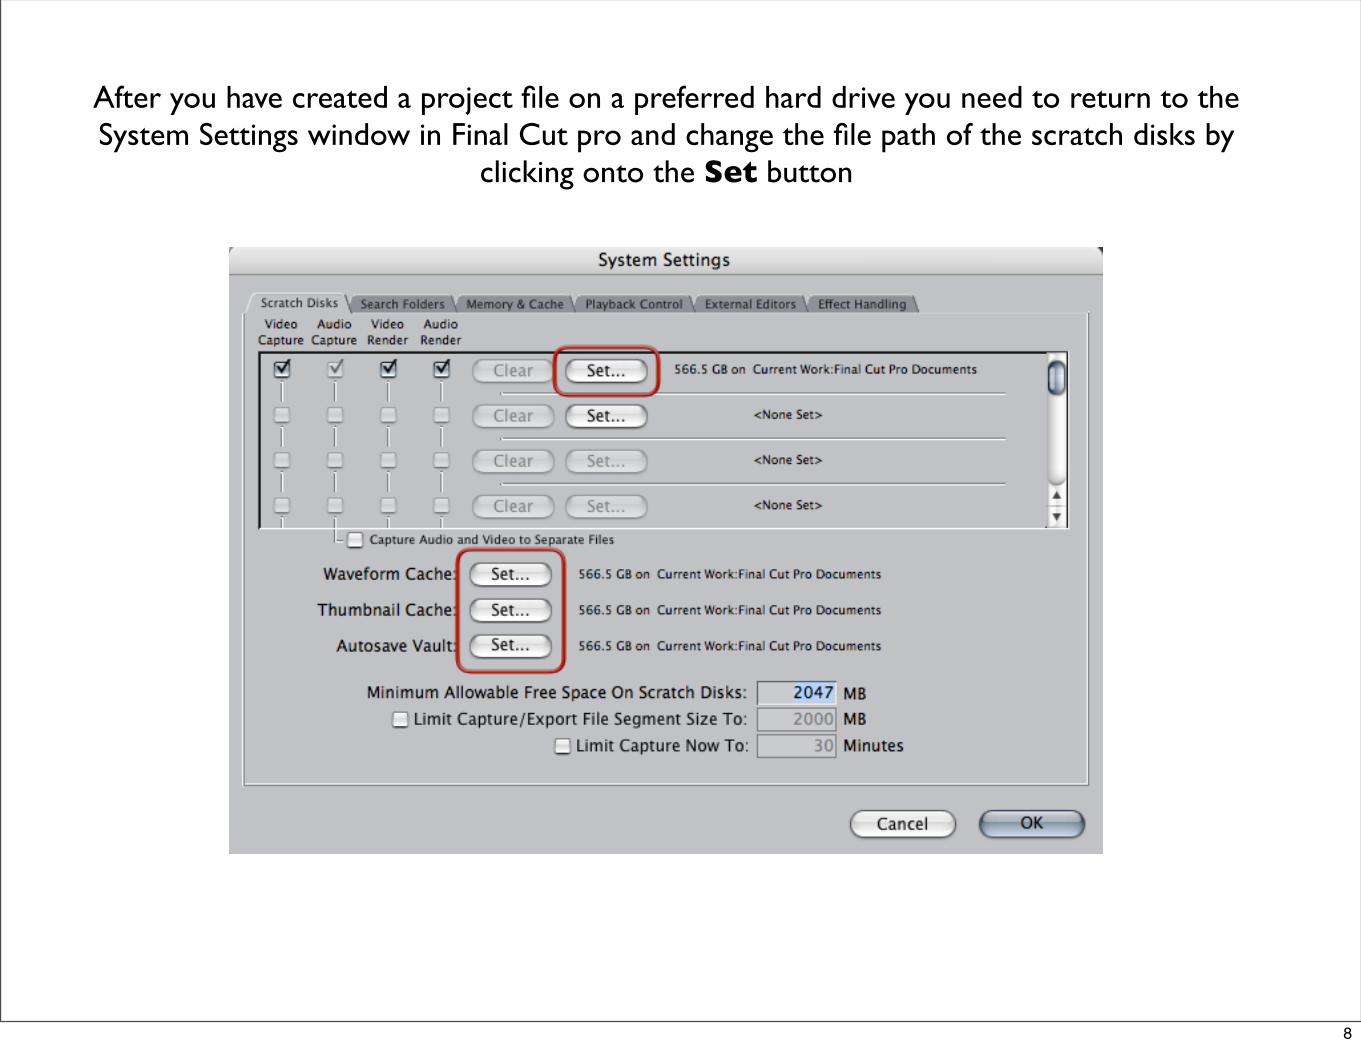
After you have created a project file on a preferred hard drive you need to return to the System Settings window in Final Cut pro and change the file path of the scratch disks by
clicking onto the Set button
8
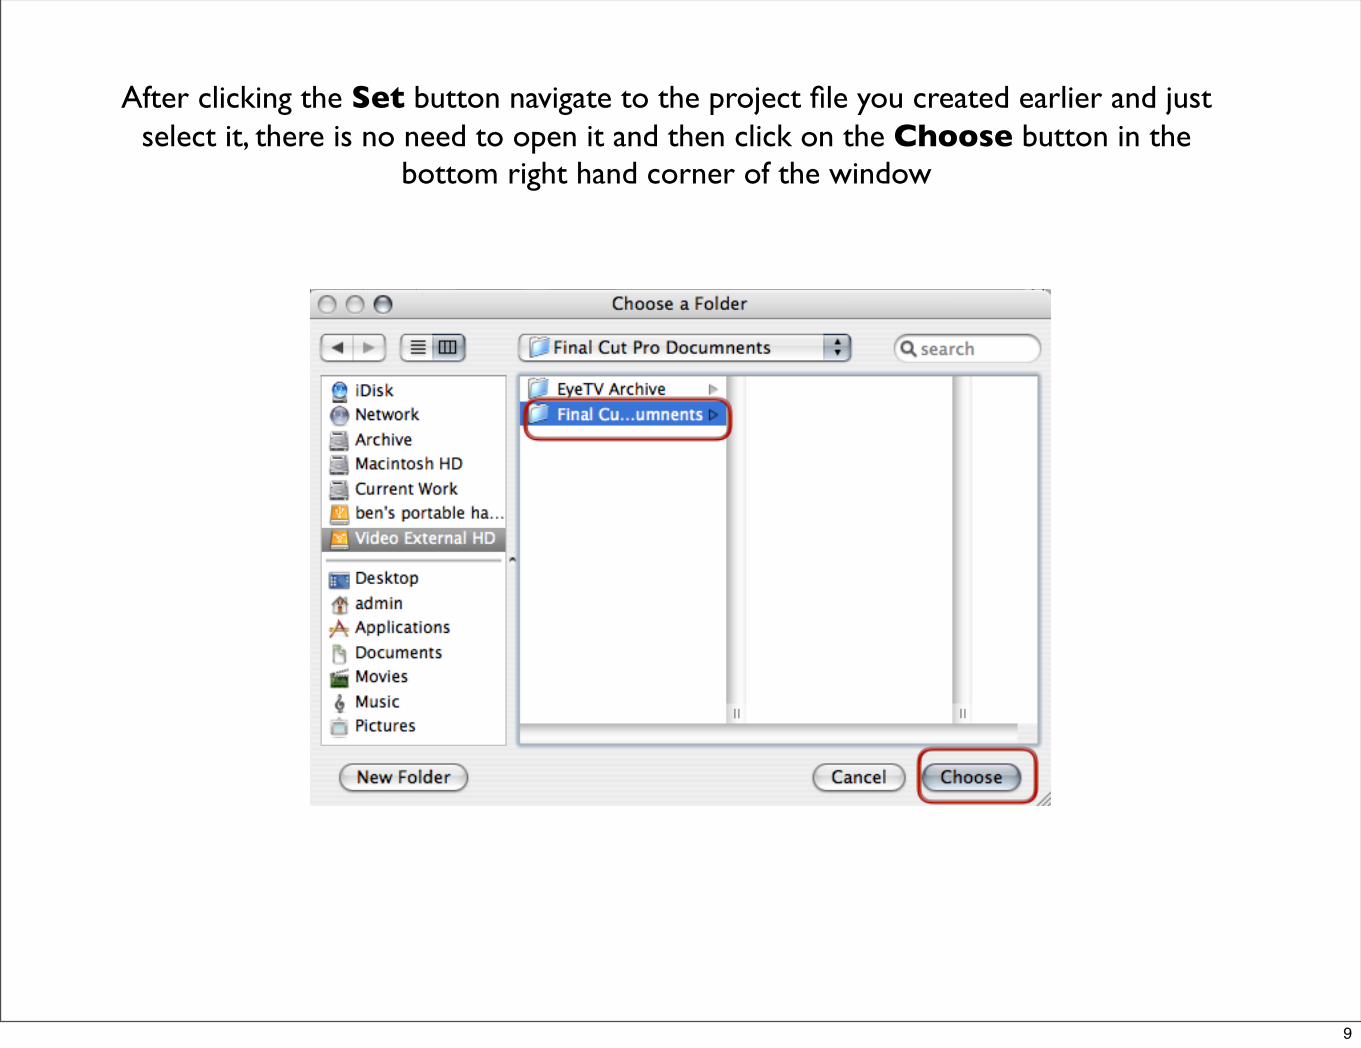
After clicking the Set button navigate to the project file you created earlier and just select it, there is no need to open it and then click on the Choose button in the
bottom right hand corner of the window
9
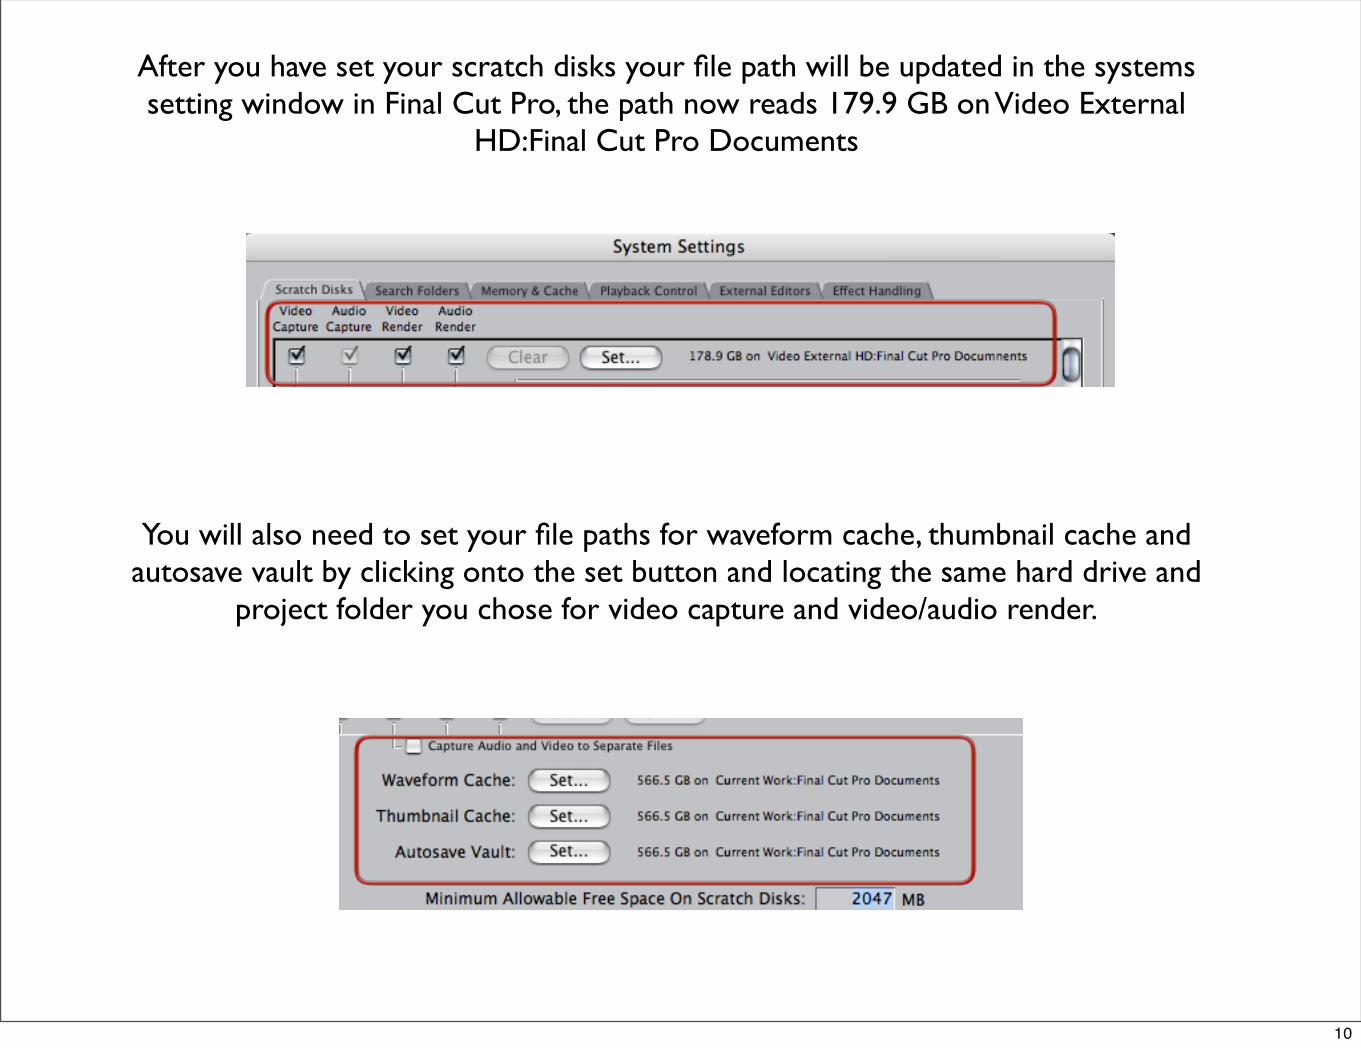
After you have set your scratch disks your file path will be updated in the systems setting window in Final Cut Pro, the path now reads 179.9 GB on Video External
HD:Final Cut Pro Documents
You will also need to set your file paths for waveform cache, thumbnail cache and autosave vault by clicking onto the set button and locating the same hard drive and
project folder you chose for video capture and video/audio render.
10
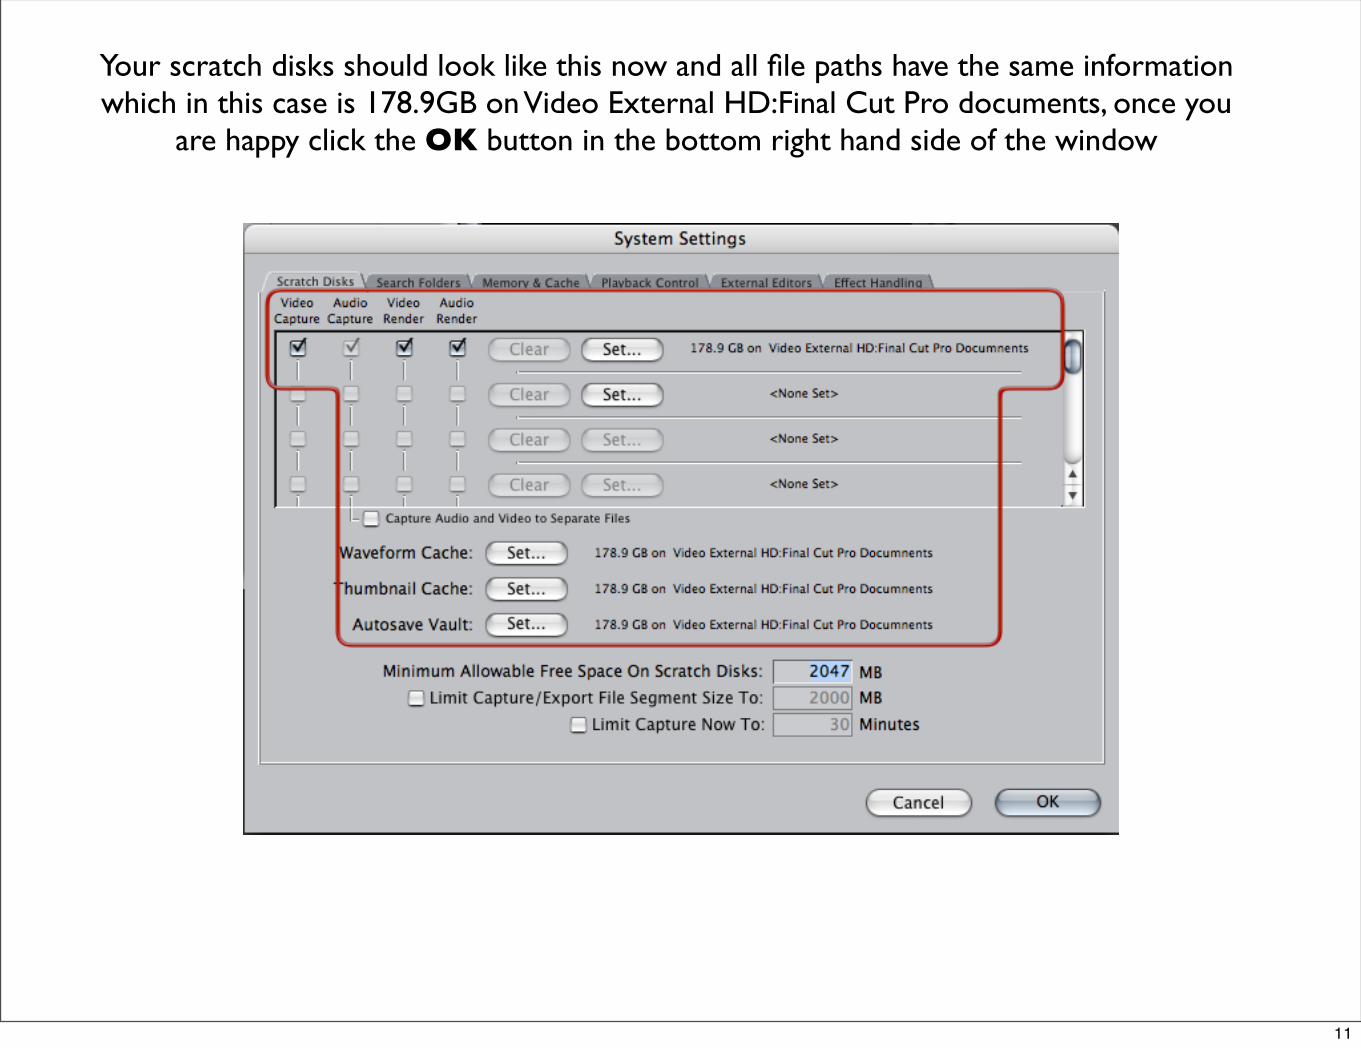
Your scratch disks should look like this now and all file paths have the same information which in this case is 178.9GB on Video External HD:Final Cut Pro documents, once you
are happy click the OK button in the bottom right hand side of the window
11
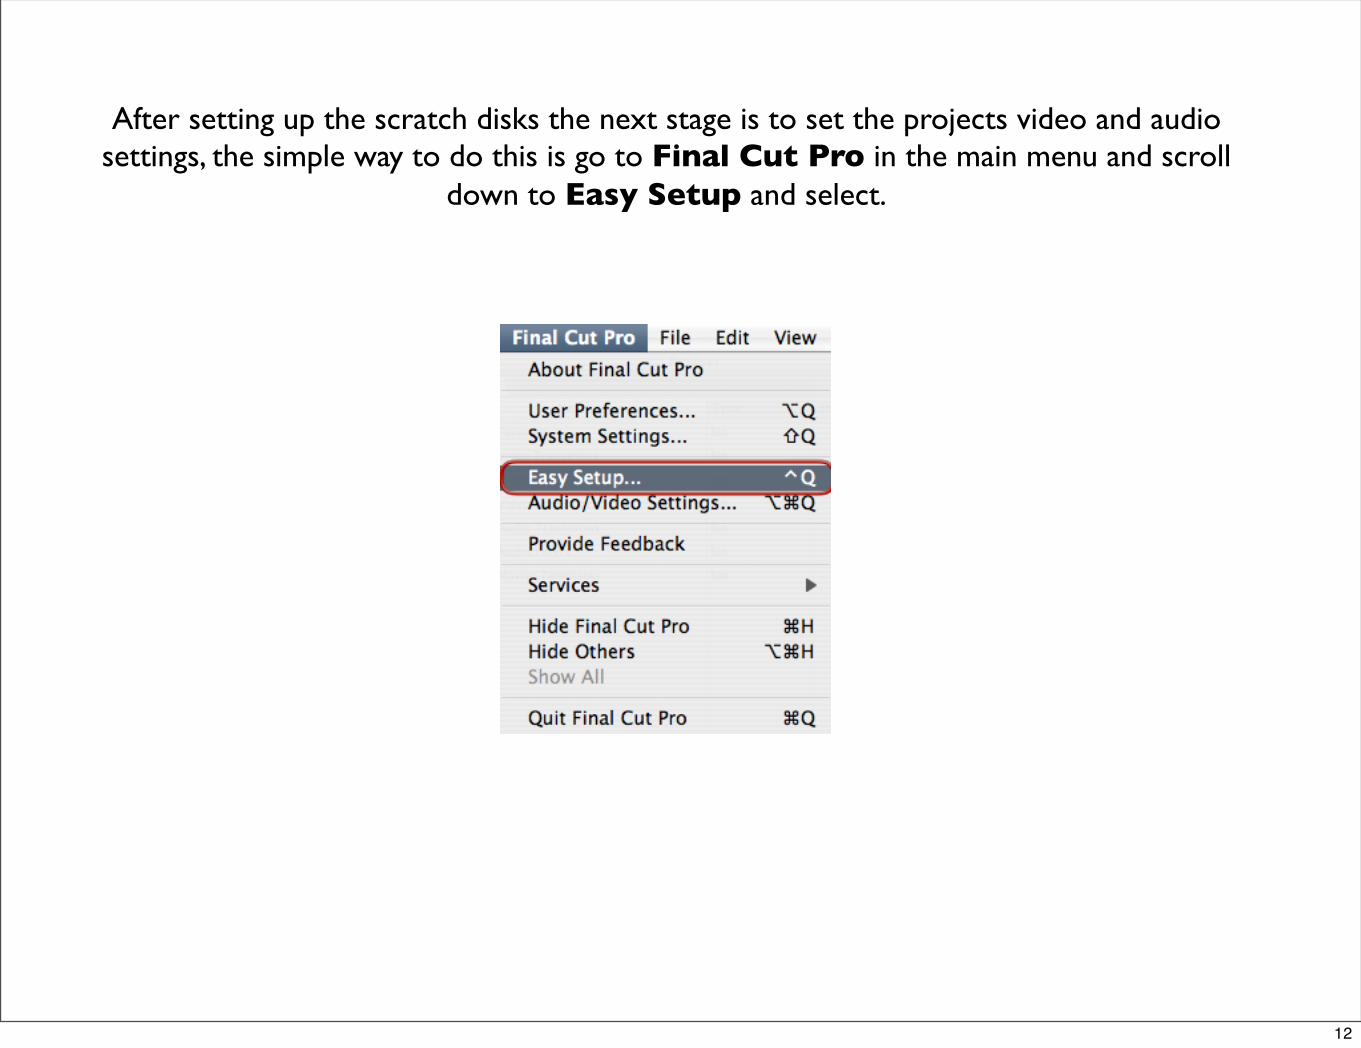
After setting up the scratch disks the next stage is to set the projects video and audio settings, the simple way to do this is go to Final Cut Pro in the main menu and scroll
down to Easy Setup and select.
12
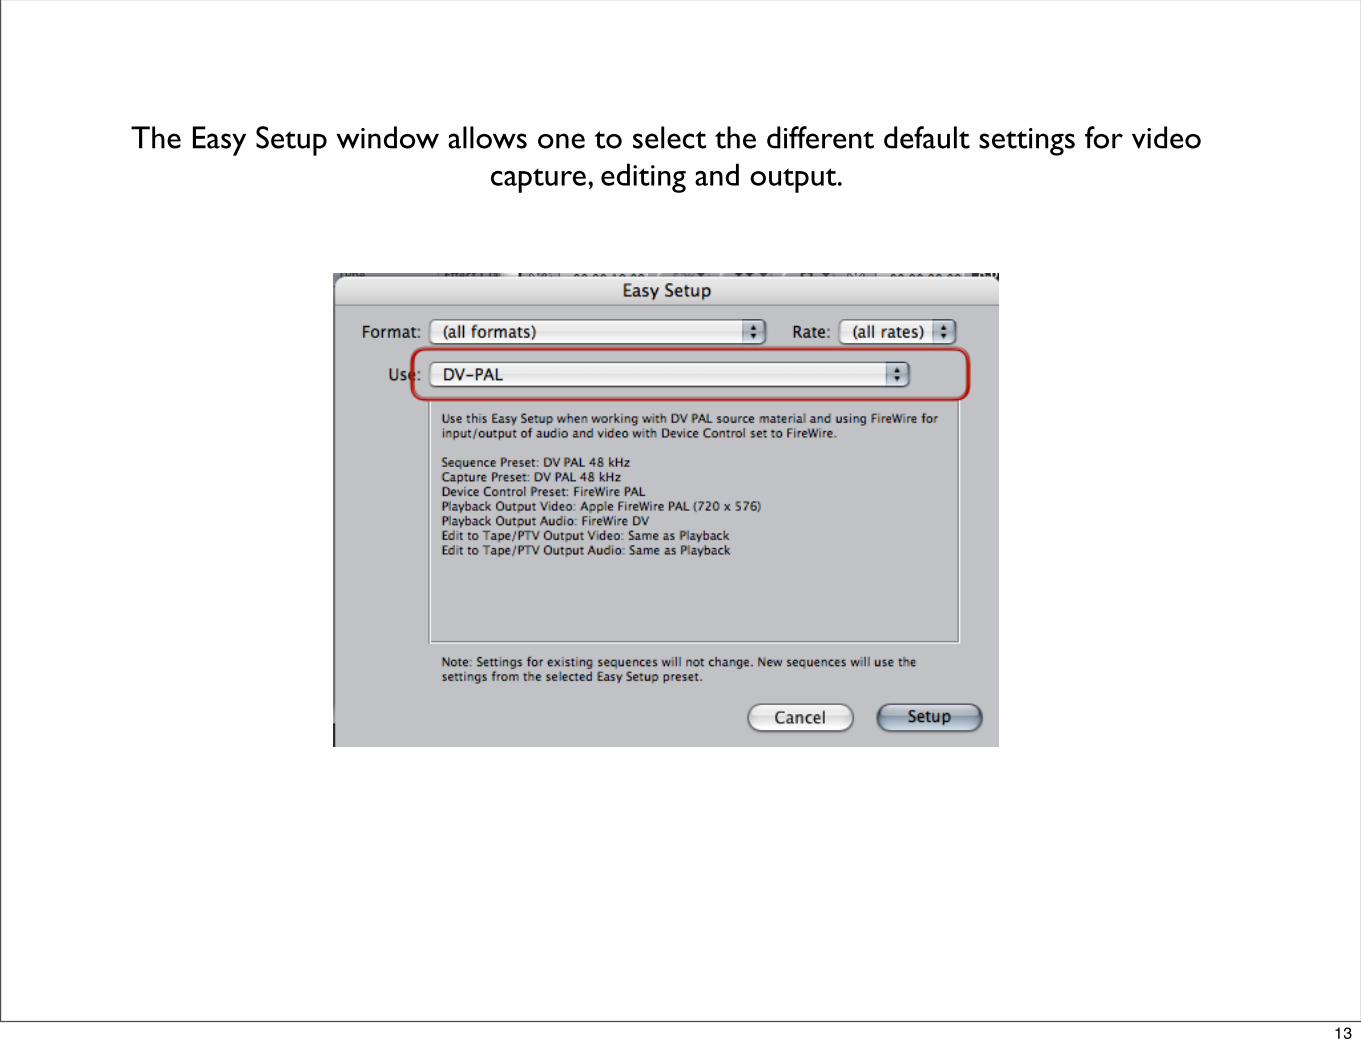
The Easy Setup window allows one to select the different default settings for video capture, editing and output.
13
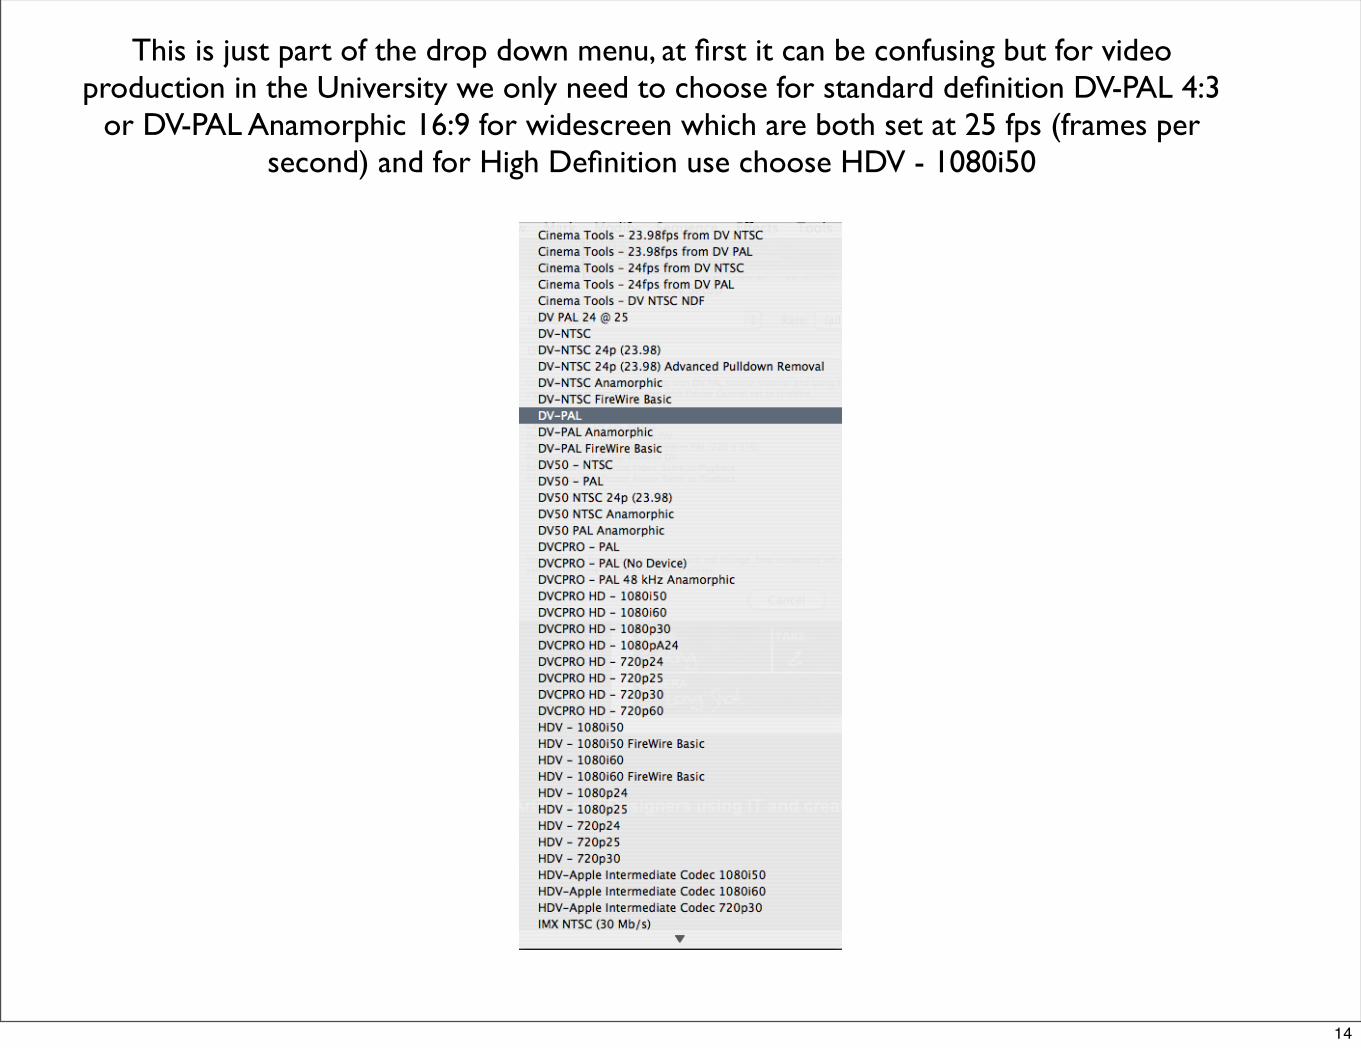
This is just part of the drop down menu, at first it can be confusing but for video production in the University we only need to choose for standard definition DV-PAL 4:3
or DV-PAL Anamorphic 16:9 for widescreen which are both set at 25 fps (frames per second) and for High Definition use choose HDV - 1080i50
14
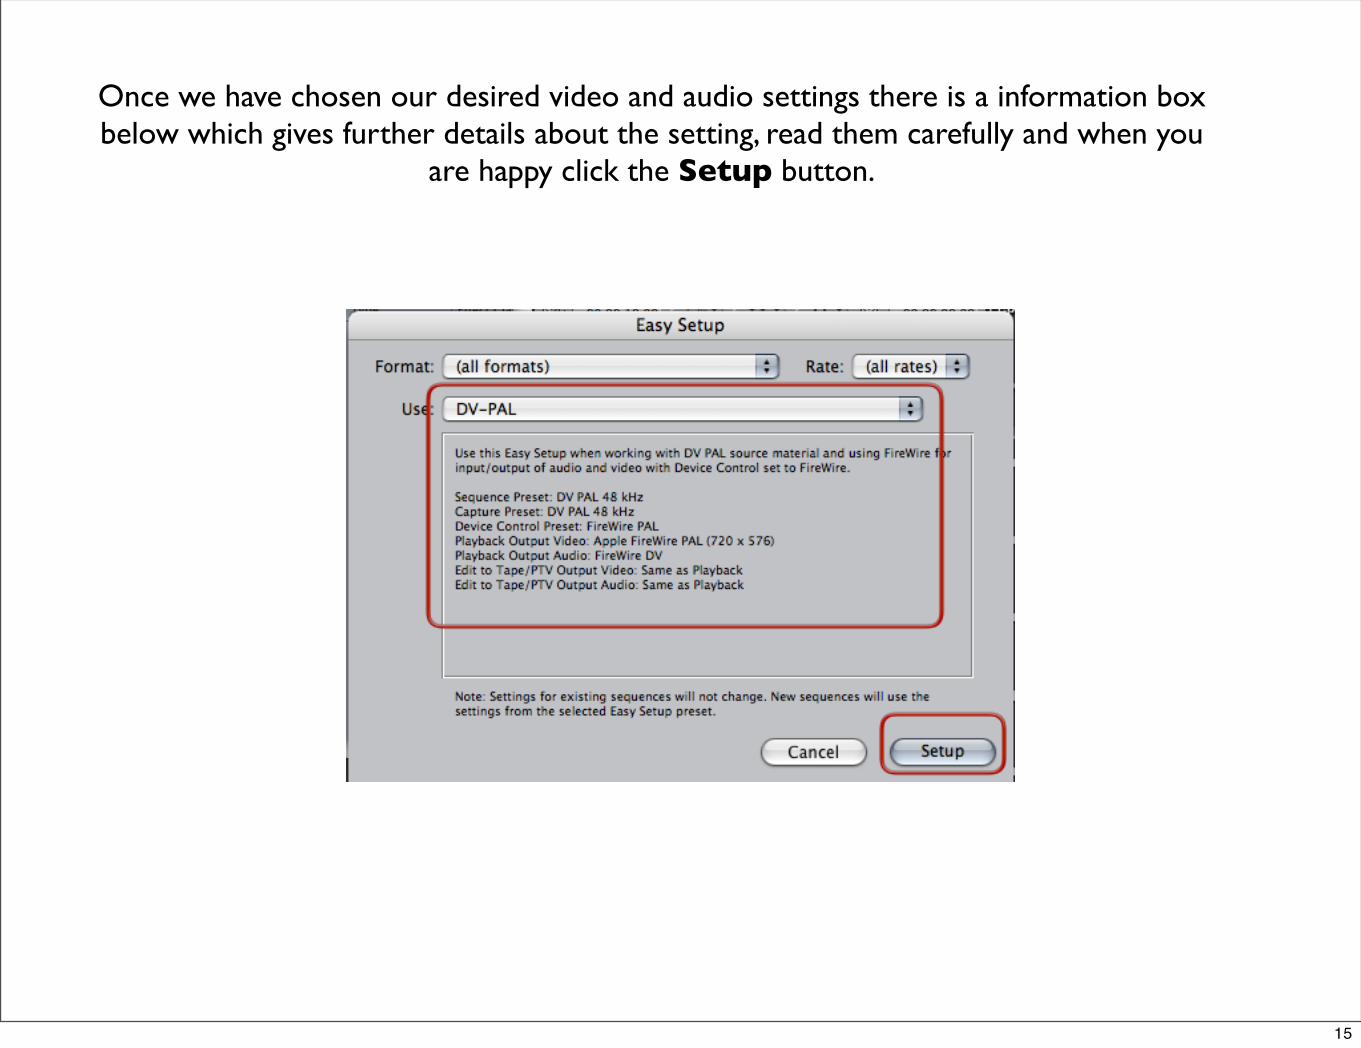
Once we have chosen our desired video and audio settings there is a information box below which gives further details about the setting, read them carefully and when you
are happy click the Setup button.
15
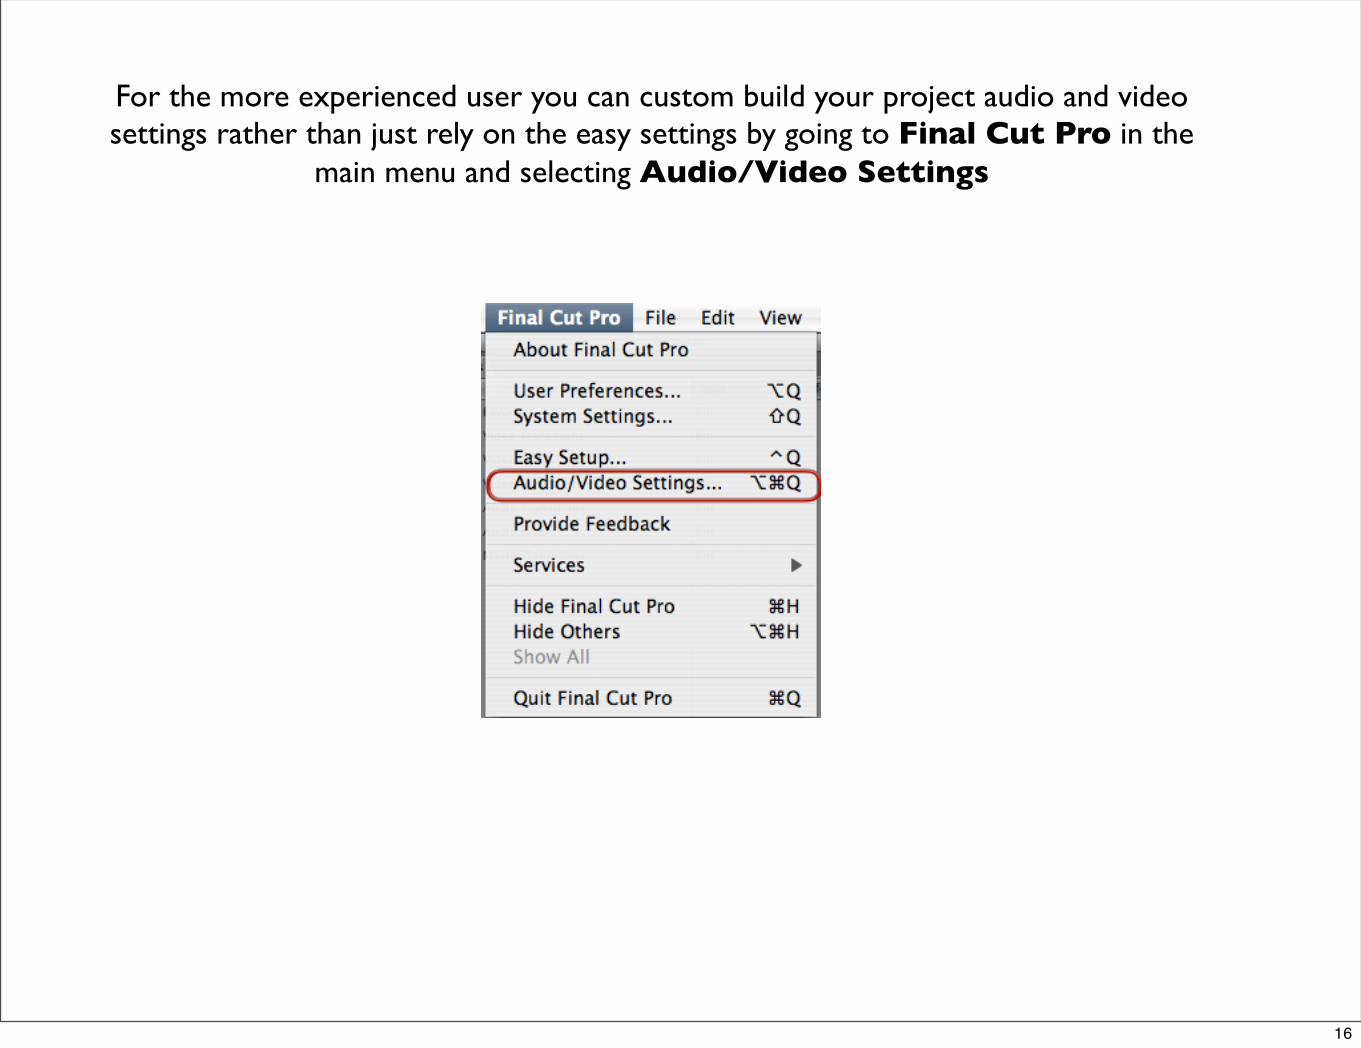
For the more experienced user you can custom build your project audio and video settings rather than just rely on the easy settings by going to Final Cut Pro in the
main menu and selecting Audio/Video Settings
16
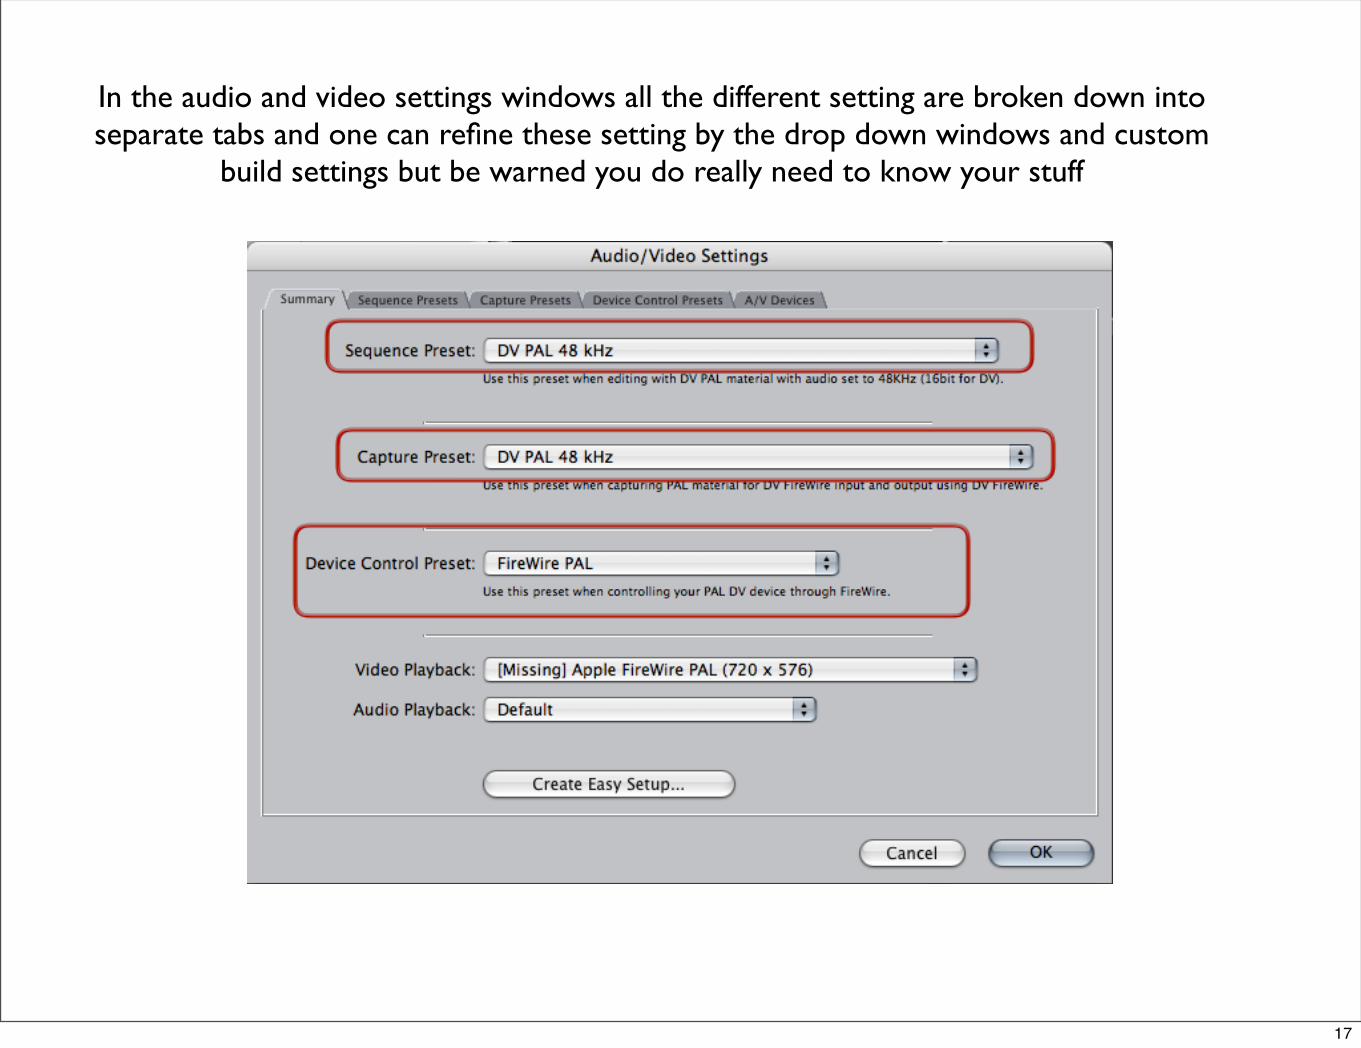
In the audio and video settings windows all the different setting are broken down into separate tabs and one can refine these setting by the drop down windows and custom
build settings but be warned you do really need to know your stuff
17
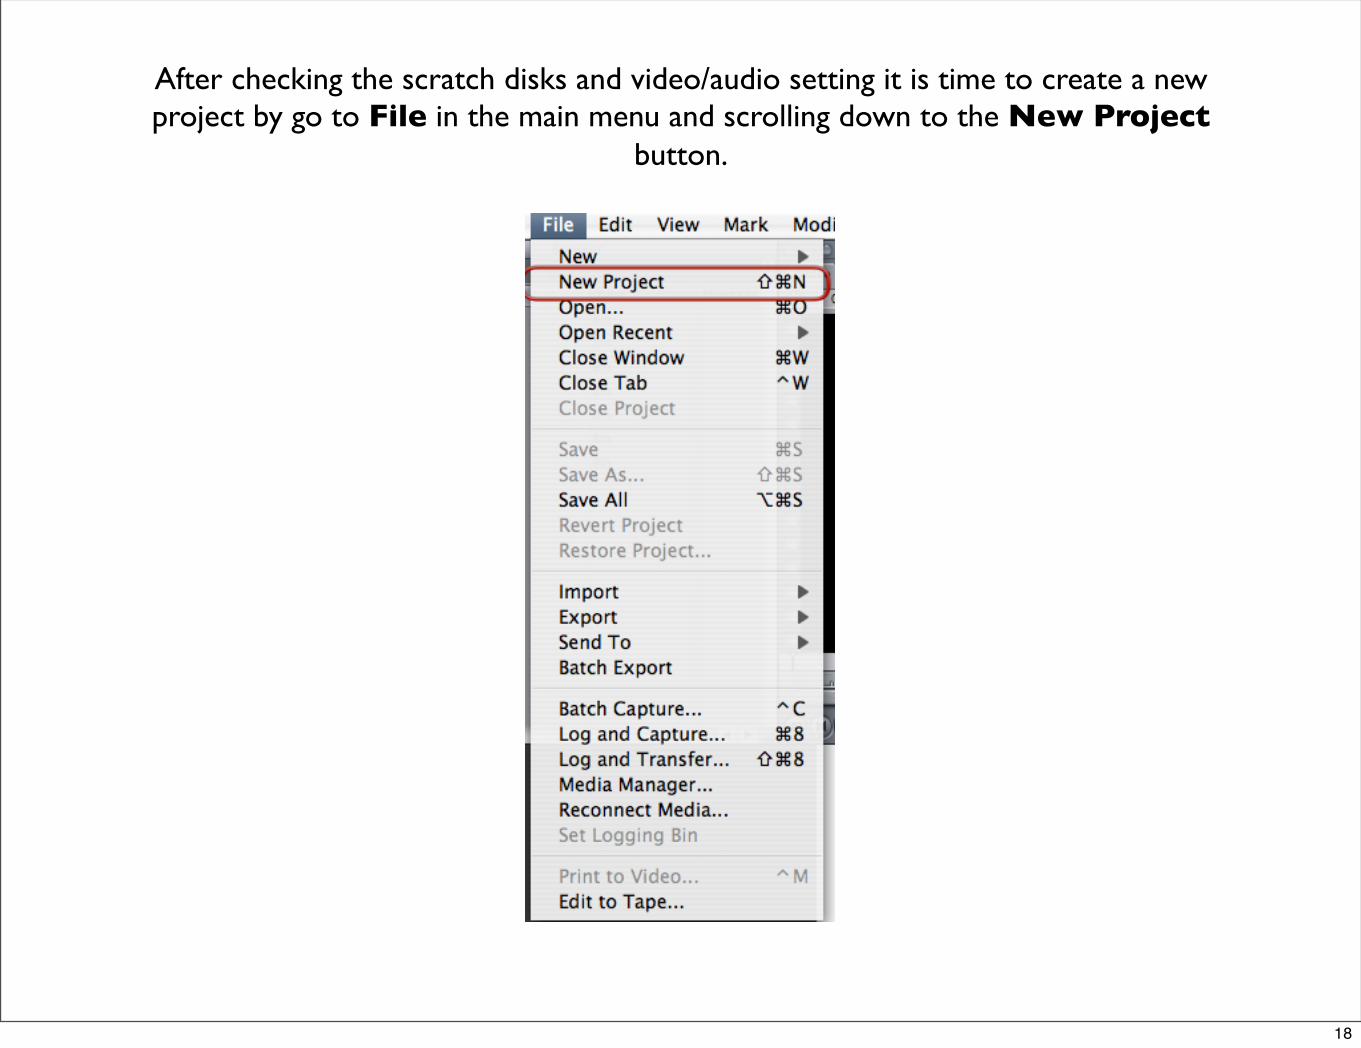
After checking the scratch disks and video/audio setting it is time to create a new project by go to File in the main menu and scrolling down to the New Project
button.
18
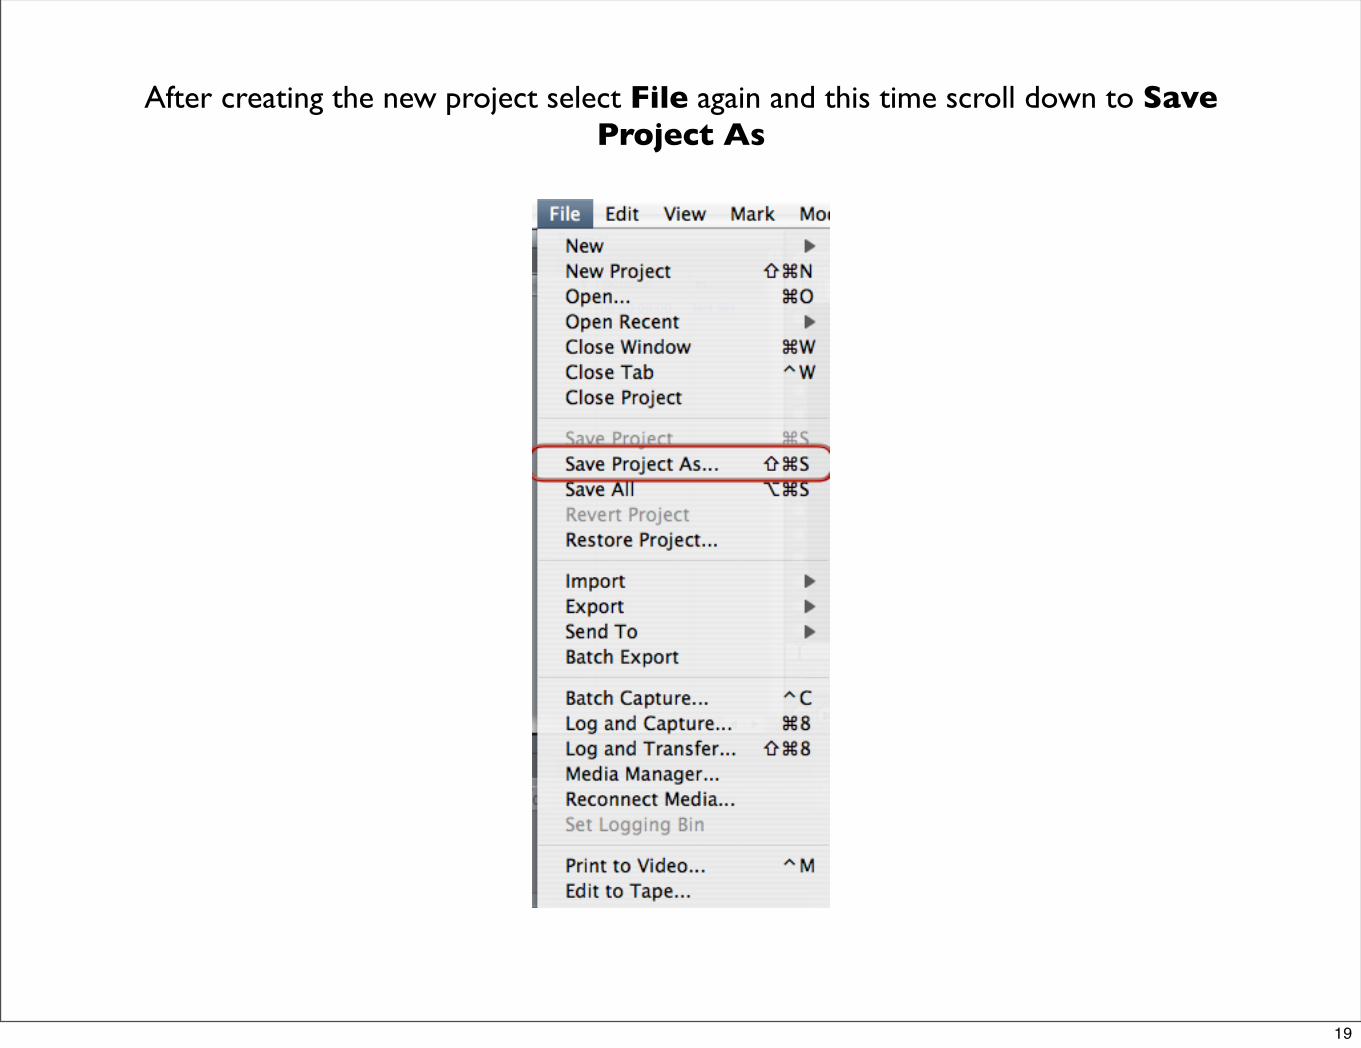
After creating the new project select File again and this time scroll down to Save Project As
19
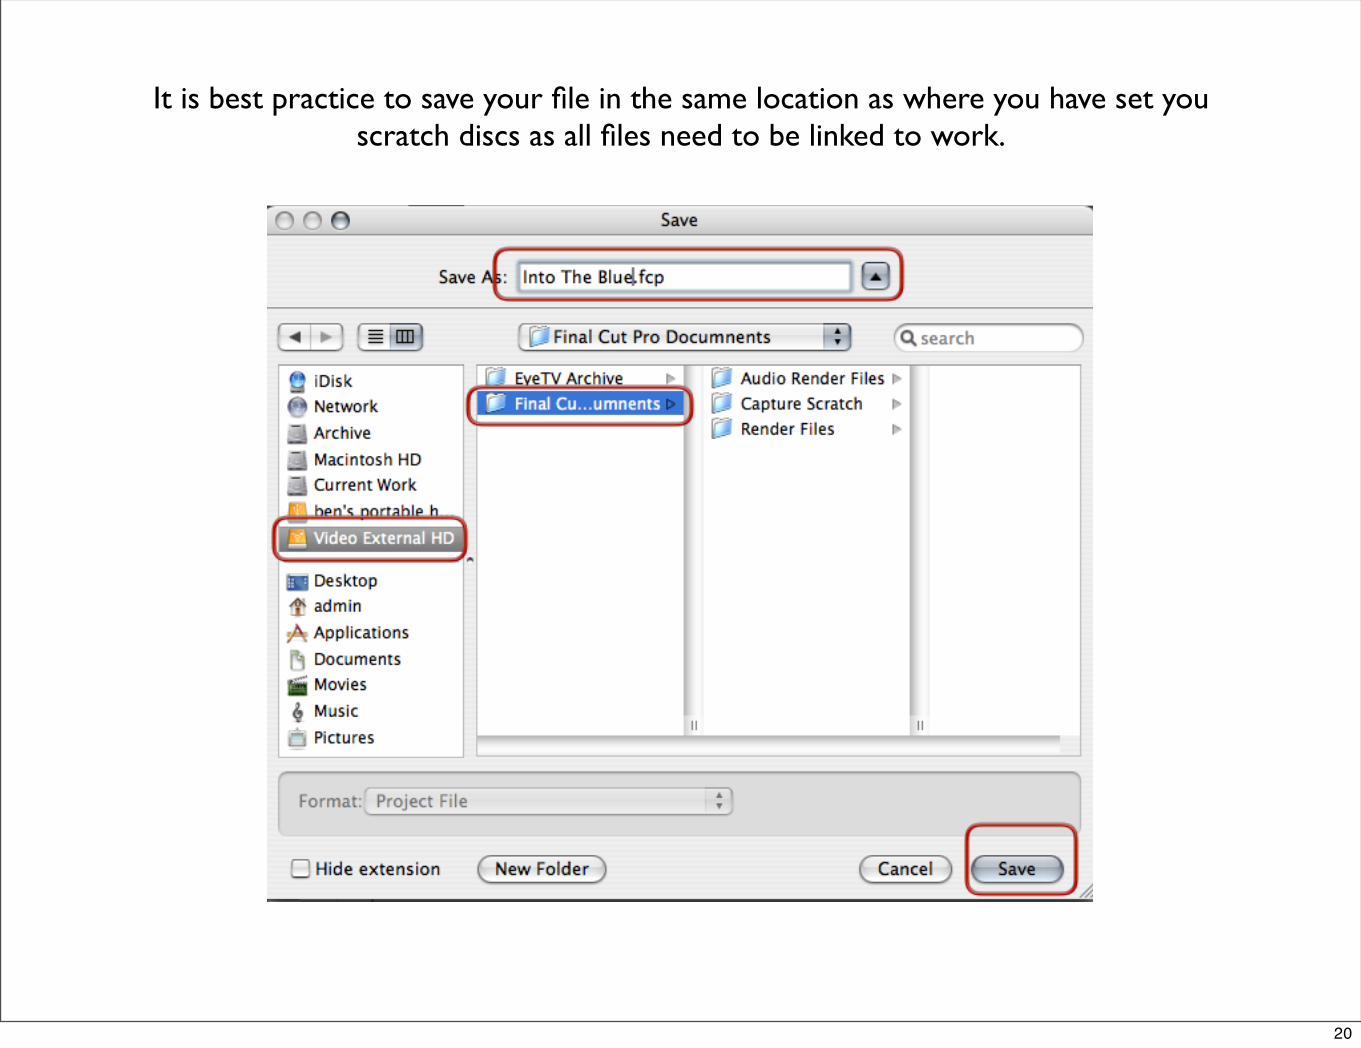
It is best practice to save your file in the same location as where you have set you scratch discs as all files need to be linked to work.
20
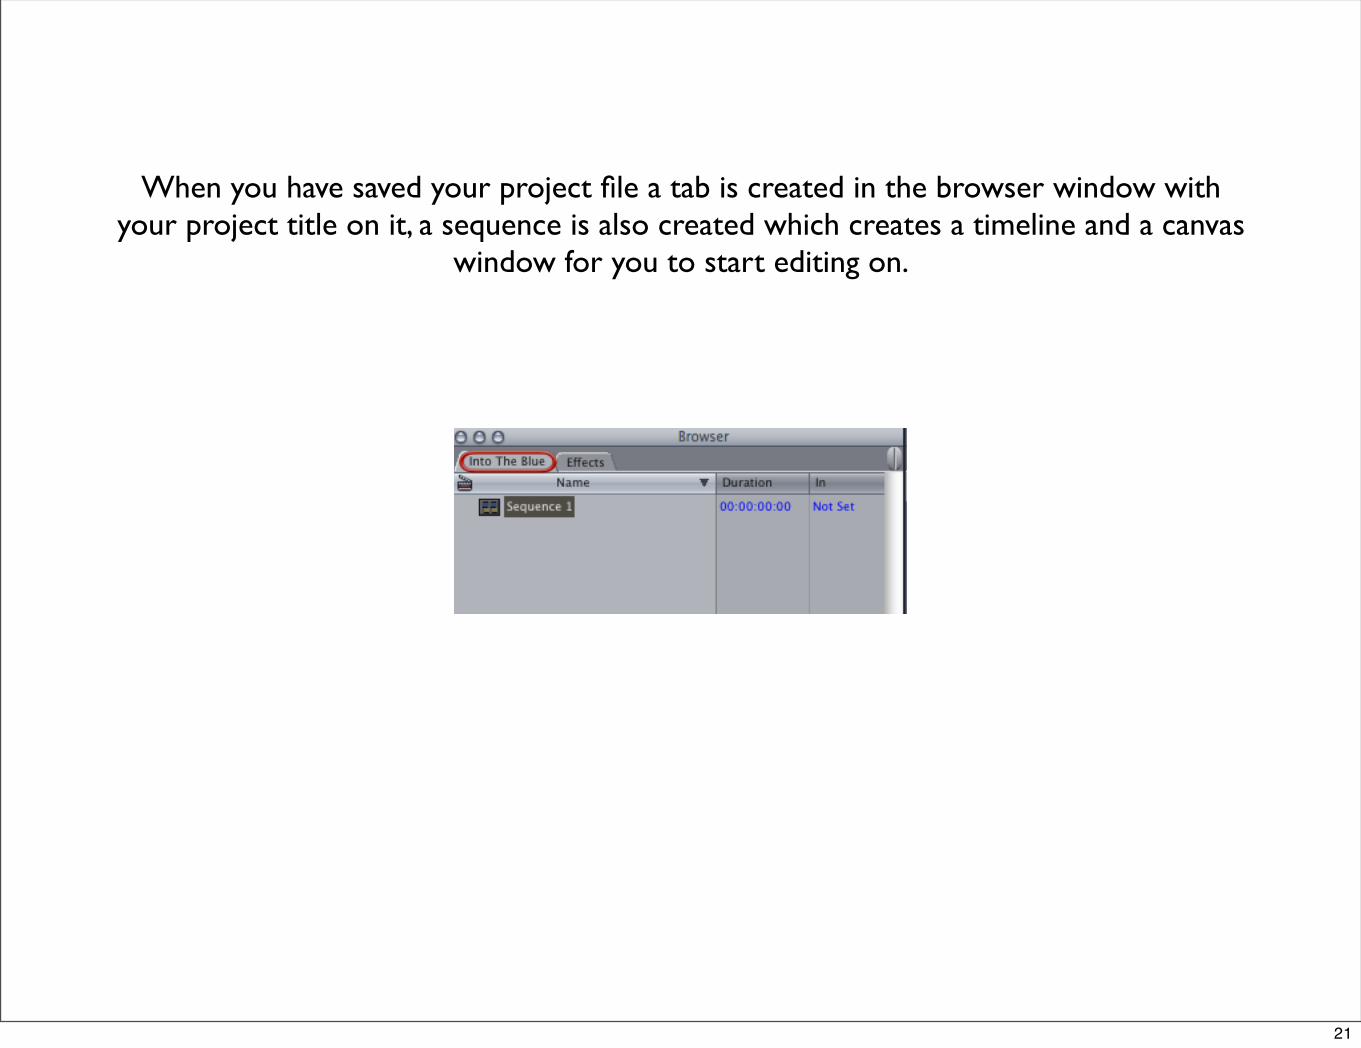
When you have saved your project file a tab is created in the browser window with your project title on it, a sequence is also created which creates a timeline and a canvas
window for you to start editing on.
21
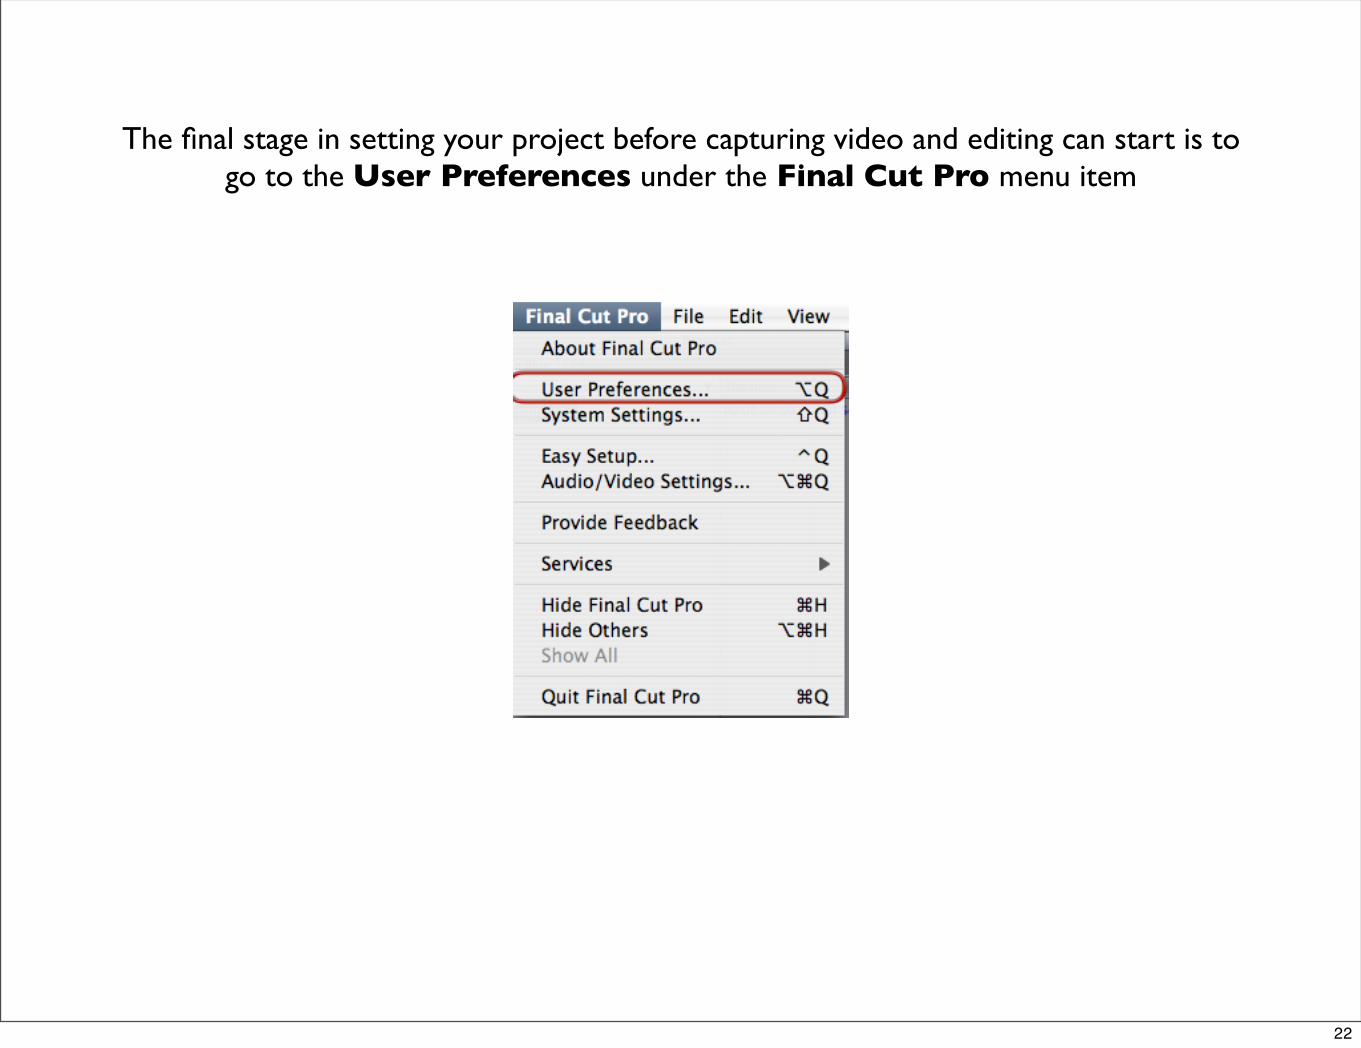
The final stage in setting your project before capturing video and editing can start is to go to the User Preferences under the Final Cut Pro menu item
22
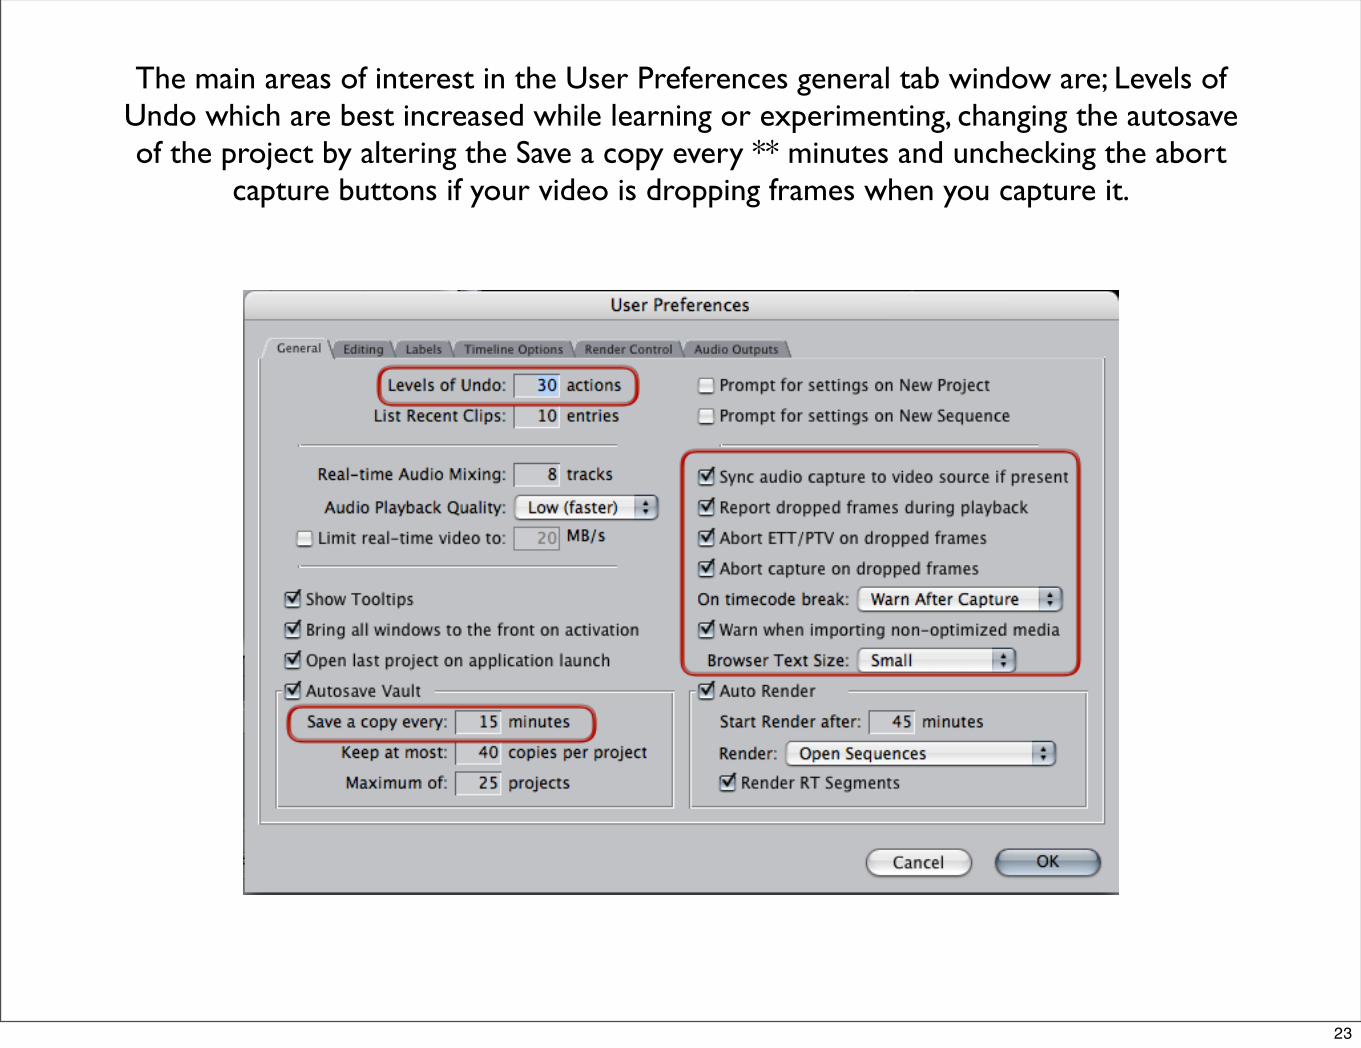
The main areas of interest in the User Preferences general tab window are; Levels of Undo which are best increased while learning or experimenting, changing the autosave of the project by altering the Save a copy every ** minutes and unchecking the abort
capture buttons if your video is dropping frames when you capture it.
23
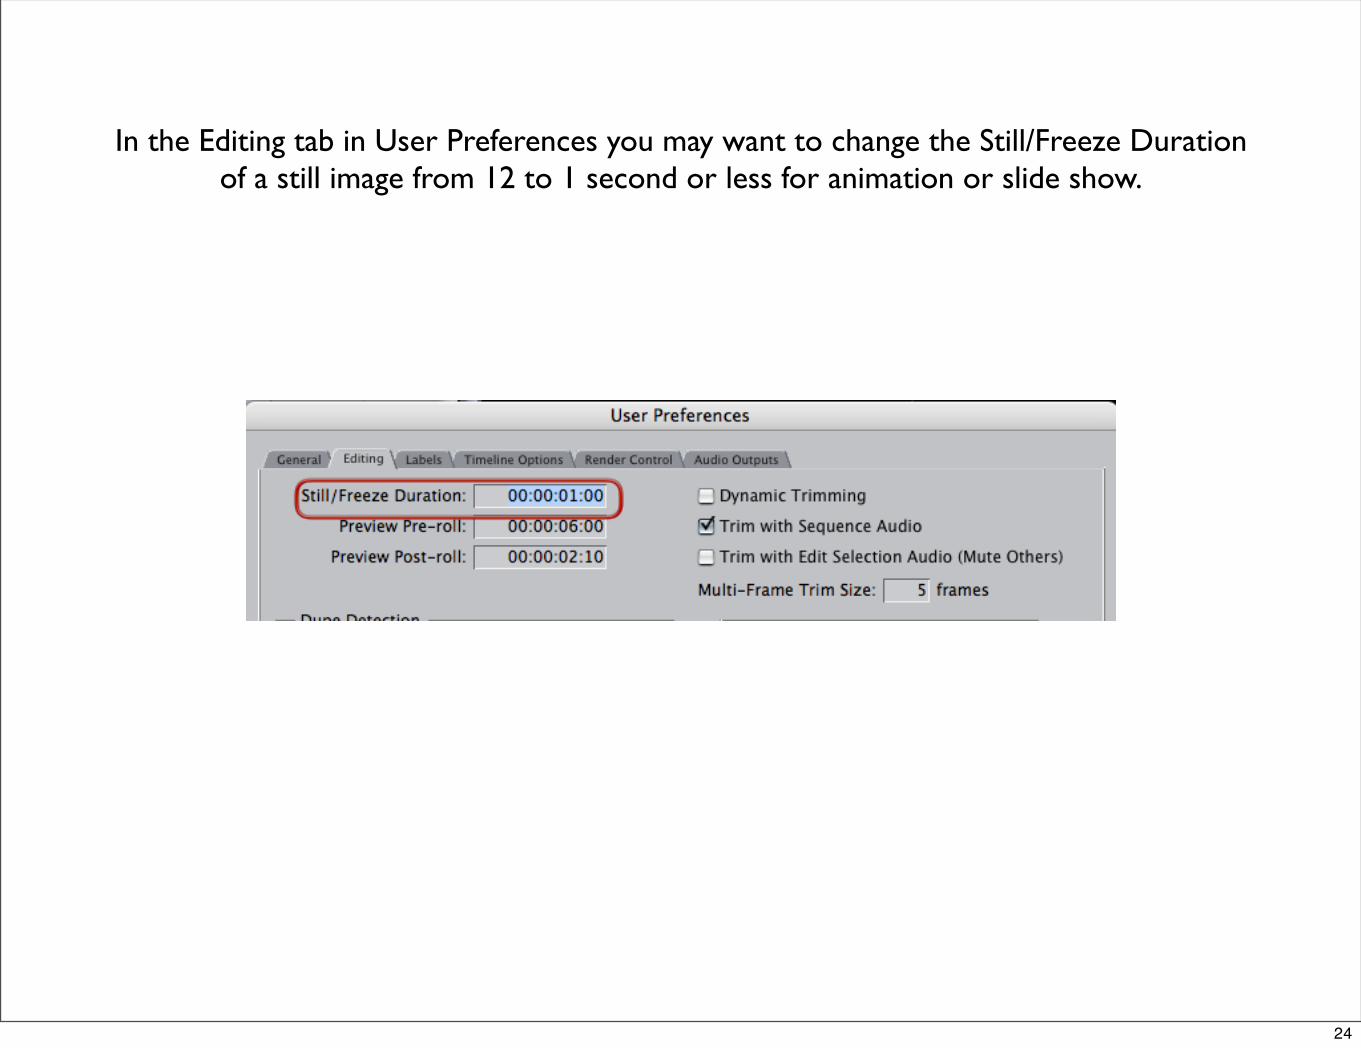
In the Editing tab in User Preferences you may want to change the Still/Freeze Duration of a still image from 12 to 1 second or less for animation or slide show.
24
Now we are ready to capture video, import files and edit
25