Embed Size (px)
Citation preview
Visit our store: www.twiddletails.com
1. Print or trace your block design onto the dull side of a sheet of freezer paper. Cut out on the seam line.
Freezer Paper Foundation Piecing Tutorial
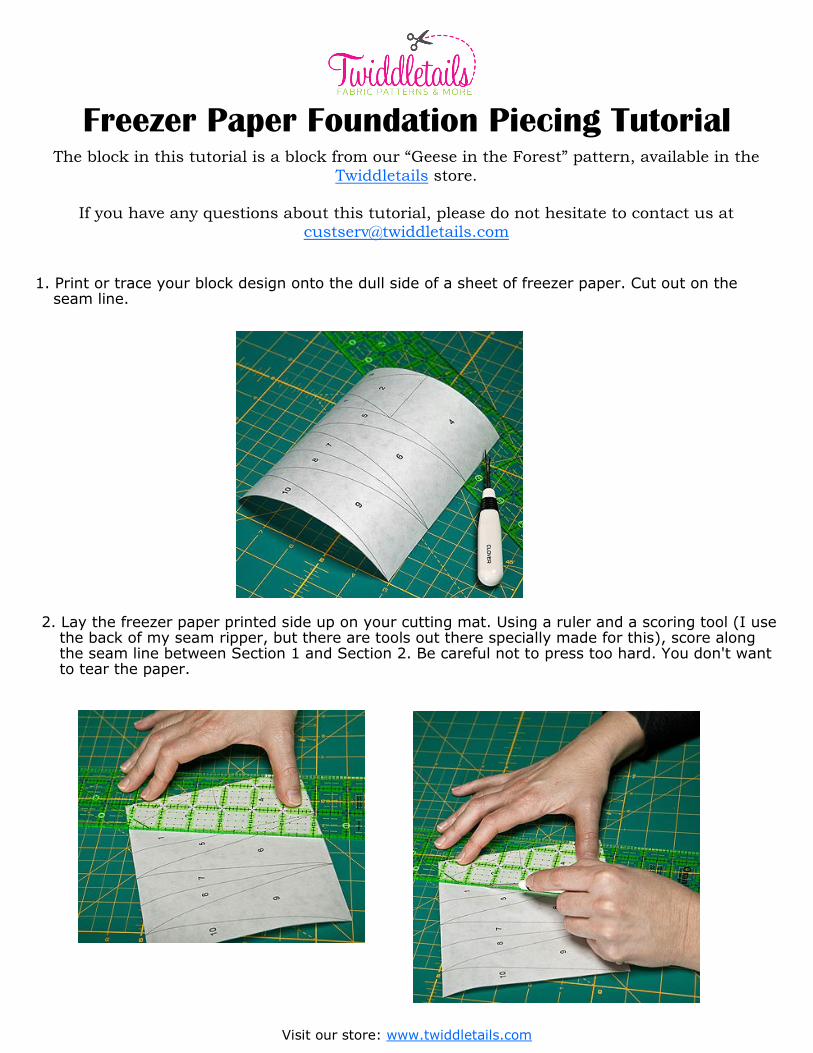
2. Lay the freezer paper printed side up on your cutting mat. Using a ruler and a scoring tool (I use the back of my seam ripper, but there are tools out there specially made for this), score along the seam line between Section 1 and Section 2. Be careful not to press too hard. You don't want to tear the paper.
The block in this tutorial is a block from our “Geese in the Forest” pattern, available in the
Twiddletails store.
If you have any questions about this tutorial, please do not hesitate to contact us at [email protected]

Visit our store: www.twiddletails.com
2. continued. Extend your scoring across the entire diagram, edge to edge.
3. Repeat this for each seam line in the block, scoring across the entire pattern sheet for each seam line. Fold and open up the paper right sides together along each seam line to crease it.
4. Lay a piece of the fabric you're planning to use for Section 1, RIGHT SIDE DOWN on the cutting mat. Lay the pattern on top of it with the printed side up, overlapping the fabric so that Section A co-vers the fabric and allows for seam allowances all the way around. You should be able to see the fabric through the freezer paper, making it easy to position. Remember to leave an outside seam allowance too, since you did not leave a seam allowance when cutting out the pattern.

Visit our store: www.twiddletails.com
5. Cut the fabric roughly to size. You can use scissors for this. (I could have used even less fabric here by lifting the freezer paper and cutting the fabric on the diagonal about 1/2" from the seam line between Section 1 and Section 2.)
6. Take the pattern and fabric to the ironing board and lay down as you did in the previous step (fabric right side down).
7. Using a warm DRY iron, iron the freezer paper to the fabric ONLY covering Section 1 and about 1" all the way around it with the iron. I find that by ironing an inch of the freezer paper around the section to the fabric dulls the freezer paper's back and stops it from sticking when sewing. We'll get to that in a next step.
Visit our store: www.twiddletails.com
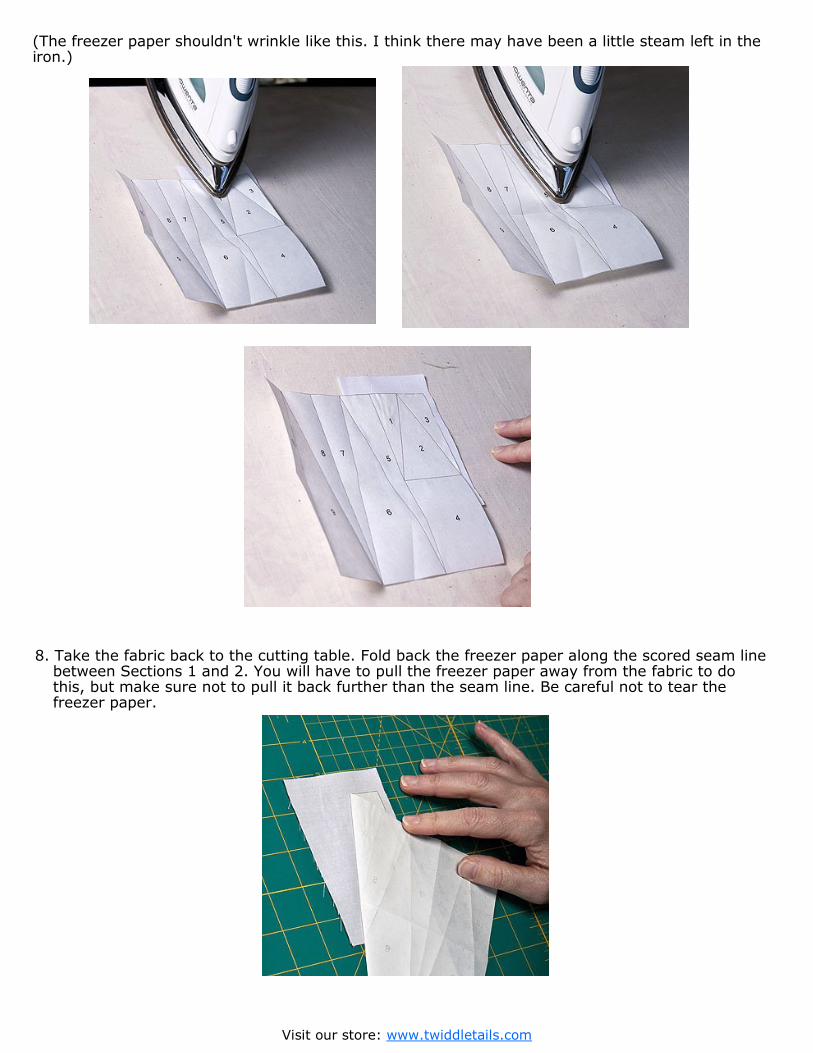
(The freezer paper shouldn't wrinkle like this. I think there may have been a little steam left in the iron.)
8. Take the fabric back to the cutting table. Fold back the freezer paper along the scored seam line between Sections 1 and 2. You will have to pull the freezer paper away from the fabric to do this, but make sure not to pull it back further than the seam line. Be careful not to tear the freezer paper.
Visit our store: www.twiddletails.com
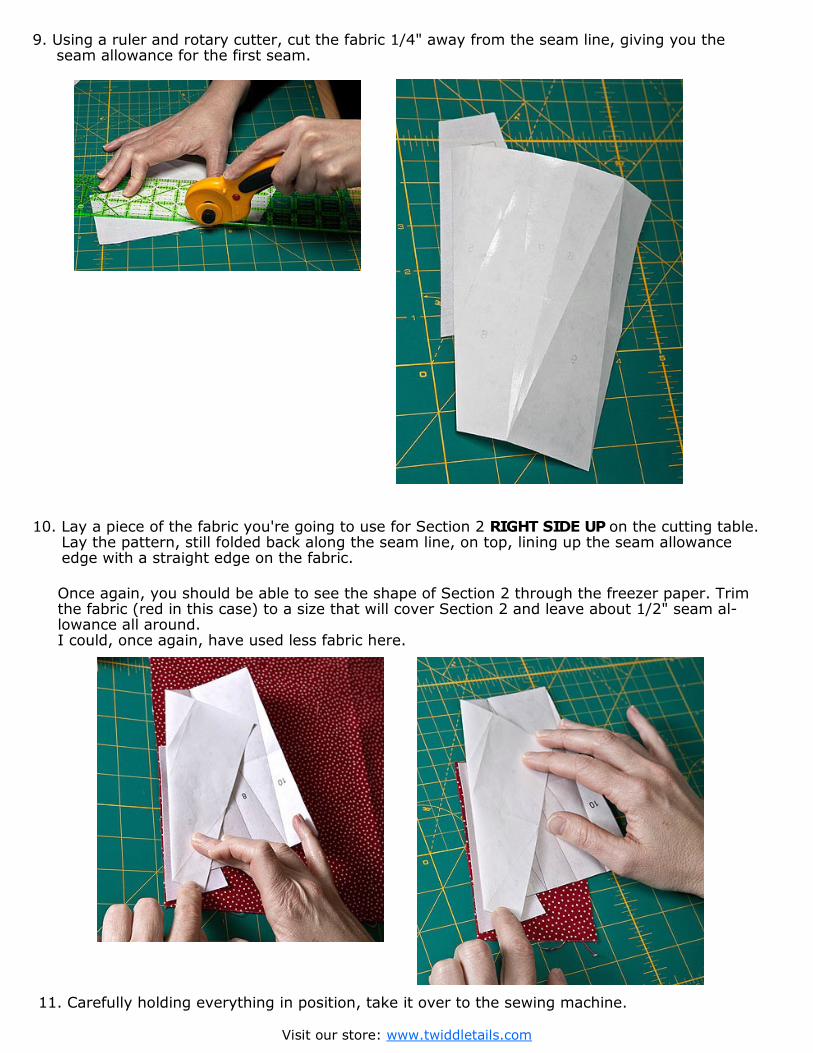
9. Using a ruler and rotary cutter, cut the fabric 1/4" away from the seam line, giving you the seam allowance for the first seam.
10. Lay a piece of the fabric you're going to use for Section 2 RIGHT SIDE UP on the cutting table. Lay the pattern, still folded back along the seam line, on top, lining up the seam allowance edge with a straight edge on the fabric.
Once again, you should be able to see the shape of Section 2 through the freezer paper. Trim the fabric (red in this case) to a size that will cover Section 2 and leave about 1/2" seam al-lowance all around. I could, once again, have used less fabric here.
11. Carefully holding everything in position, take it over to the sewing machine.
Visit our store: www.twiddletails.com
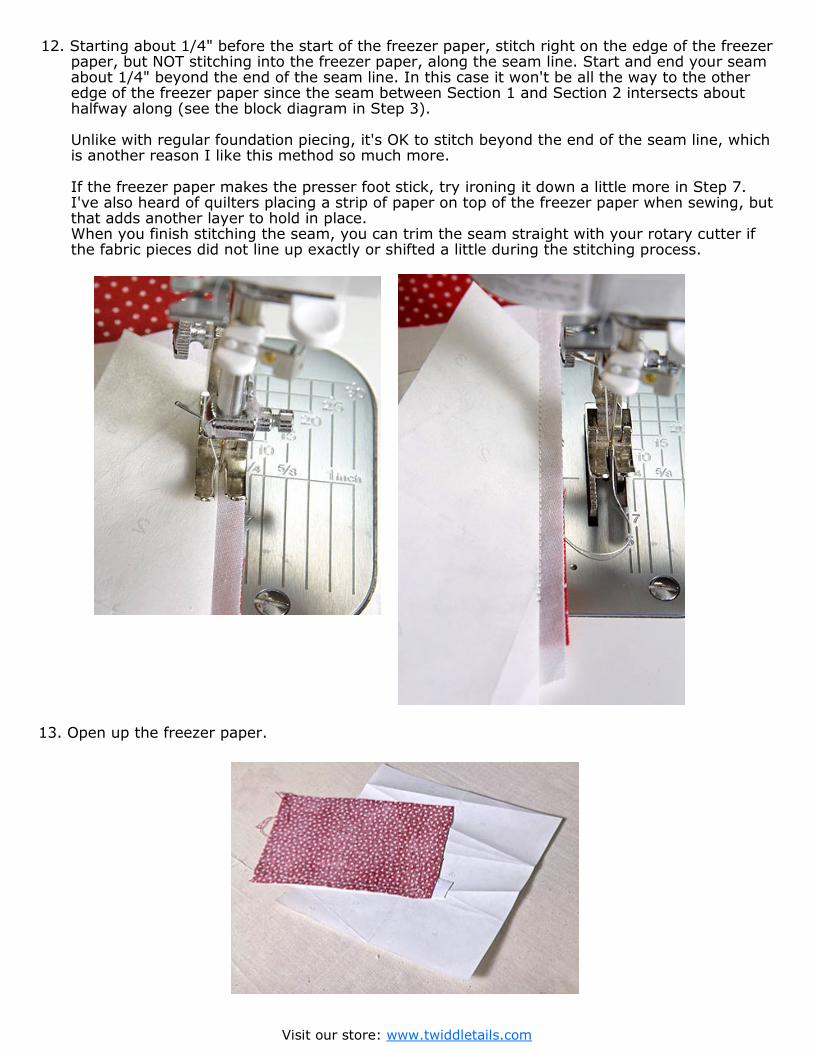
12. Starting about 1/4" before the start of the freezer paper, stitch right on the edge of the freezer paper, but NOT stitching into the freezer paper, along the seam line. Start and end your seam about 1/4" beyond the end of the seam line. In this case it won't be all the way to the other edge of the freezer paper since the seam between Section 1 and Section 2 intersects about halfway along (see the block diagram in Step 3). Unlike with regular foundation piecing, it's OK to stitch beyond the end of the seam line, which is another reason I like this method so much more. If the freezer paper makes the presser foot stick, try ironing it down a little more in Step 7. I've also heard of quilters placing a strip of paper on top of the freezer paper when sewing, but that adds another layer to hold in place. When you finish stitching the seam, you can trim the seam straight with your rotary cutter if the fabric pieces did not line up exactly or shifted a little during the stitching process.
13. Open up the freezer paper.
Visit our store: www.twiddletails.com
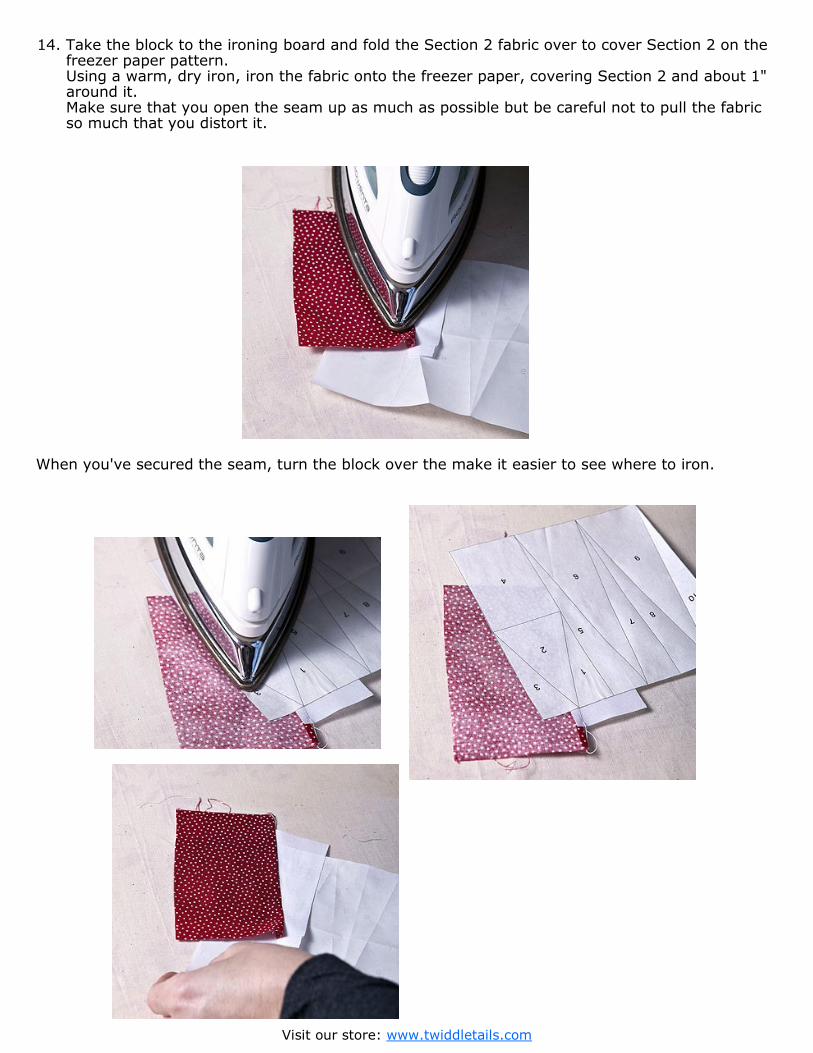
14. Take the block to the ironing board and fold the Section 2 fabric over to cover Section 2 on the freezer paper pattern. Using a warm, dry iron, iron the fabric onto the freezer paper, covering Section 2 and about 1" around it. Make sure that you open the seam up as much as possible but be careful not to pull the fabric so much that you distort it.
When you've secured the seam, turn the block over the make it easier to see where to iron.
Visit our store: www.twiddletails.com
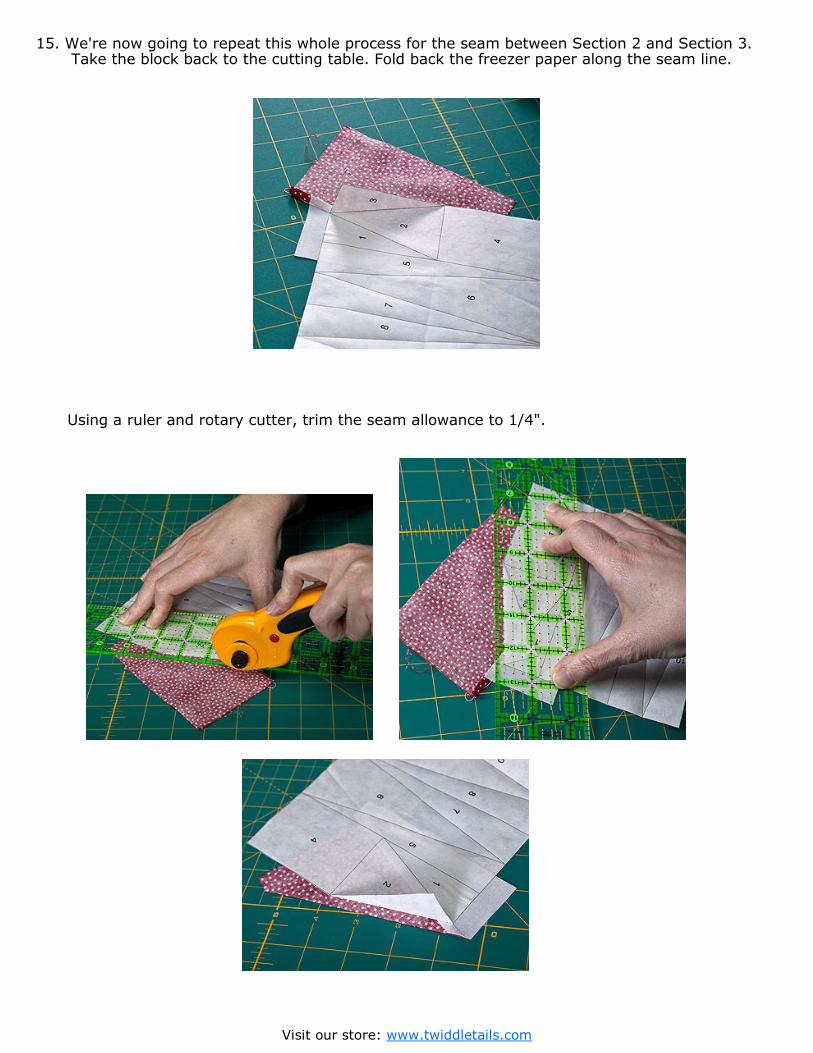
15. We're now going to repeat this whole process for the seam between Section 2 and Section 3. Take the block back to the cutting table. Fold back the freezer paper along the seam line.
Using a ruler and rotary cutter, trim the seam allowance to 1/4".
Visit our store: www.twiddletails.com
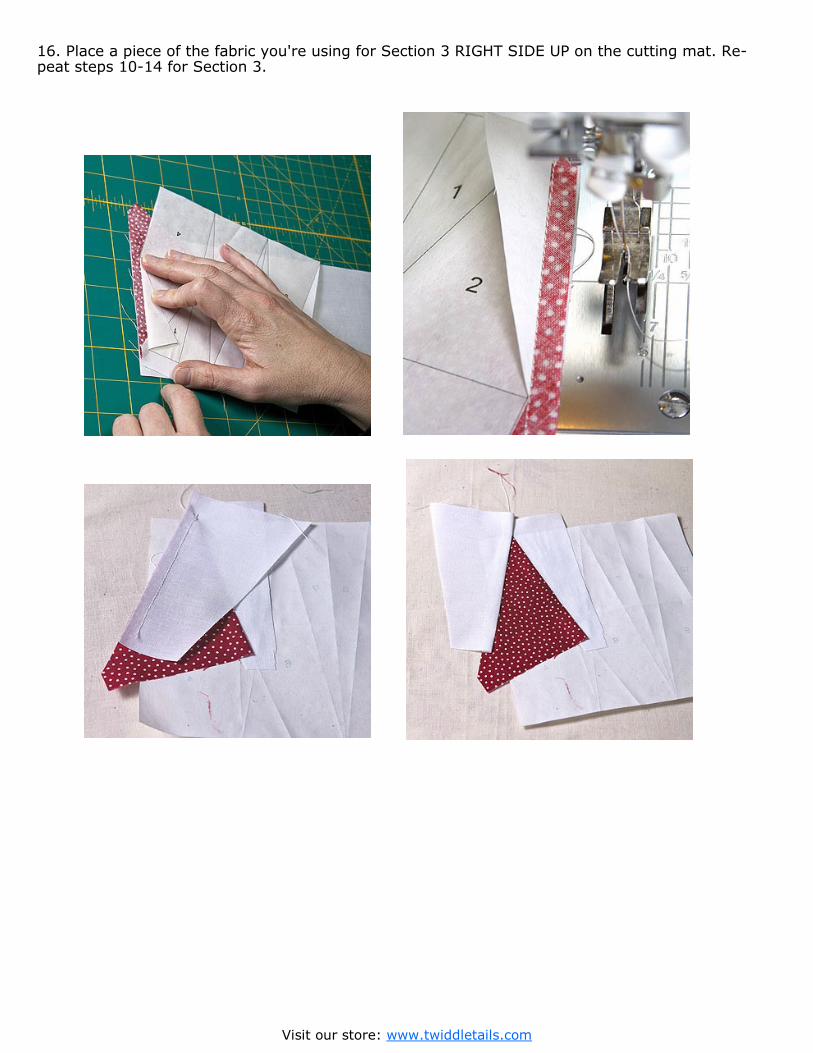
16. Place a piece of the fabric you're using for Section 3 RIGHT SIDE UP on the cutting mat. Re-peat steps 10-14 for Section 3.
Visit our store: www.twiddletails.com
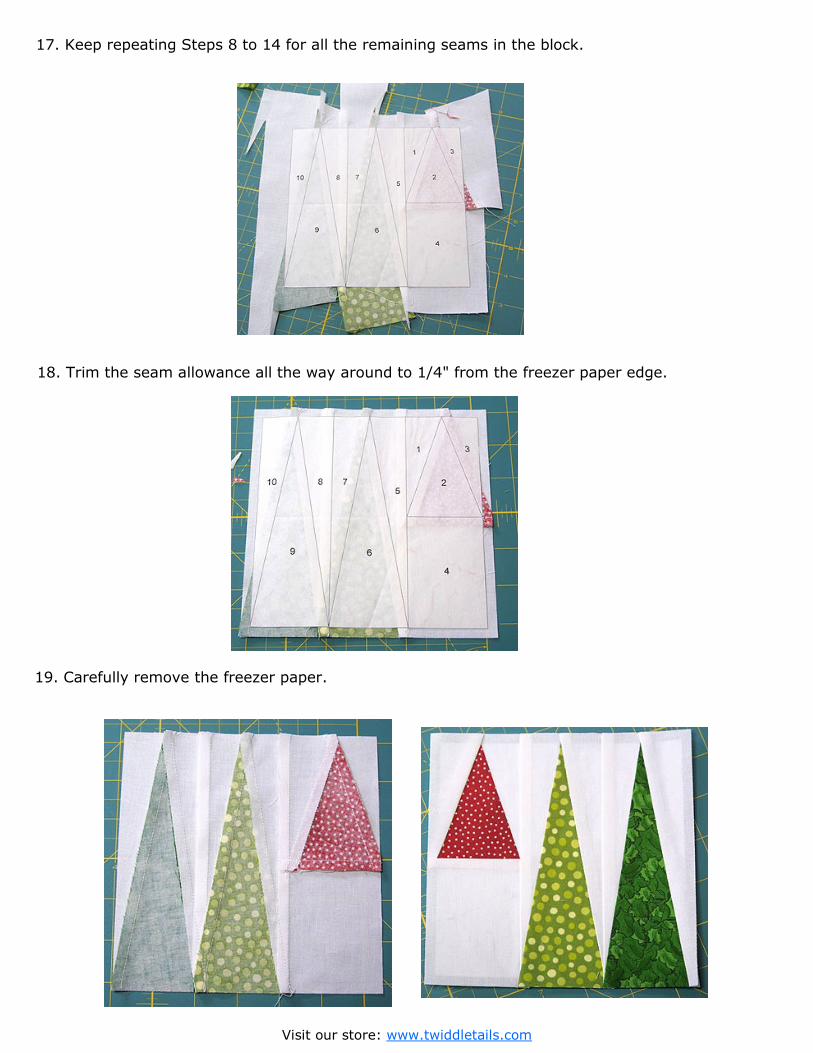
17. Keep repeating Steps 8 to 14 for all the remaining seams in the block.
18. Trim the seam allowance all the way around to 1/4" from the freezer paper edge.
19. Carefully remove the freezer paper.


![[General Freezer Catalog] - Mayekawa · IQF Line Freezer Total Service Spiral Freezer / Batch Freezer 4. SlimLight Freezer Dramatically improved performance and ease of use with the](https://img.pdfslide.net/doc/110x75/5ead01b8d725ef2de964d998/general-freezer-catalog-iqf-line-freezer-total-service-spiral-freezer-batch.jpg)


![Piecing it all together[1]](https://img.pdfslide.net/doc/110x75/5593f88d1a28aba1088b46d5/piecing-it-all-together1.jpg)