Embed Size (px)
Citation preview
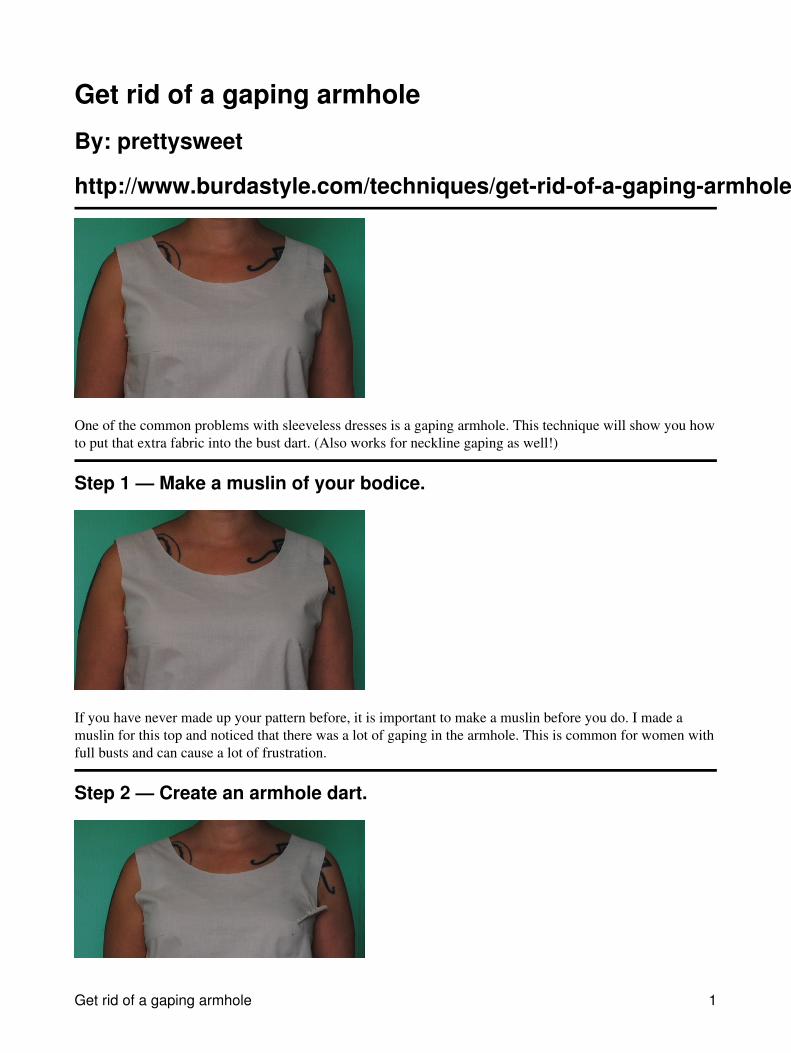
Get rid of a gaping armhole
By: prettysweet
http://www.burdastyle.com/techniques/get-rid-of-a-gaping-armhole
One of the common problems with sleeveless dresses is a gaping armhole. This technique will show you howto put that extra fabric into the bust dart. (Also works for neckline gaping as well!)
Step 1 — Make a muslin of your bodice.
If you have never made up your pattern before, it is important to make a muslin before you do. I made amuslin for this top and noticed that there was a lot of gaping in the armhole. This is common for women withfull busts and can cause a lot of frustration.
Step 2 — Create an armhole dart.
Get rid of a gaping armhole 1
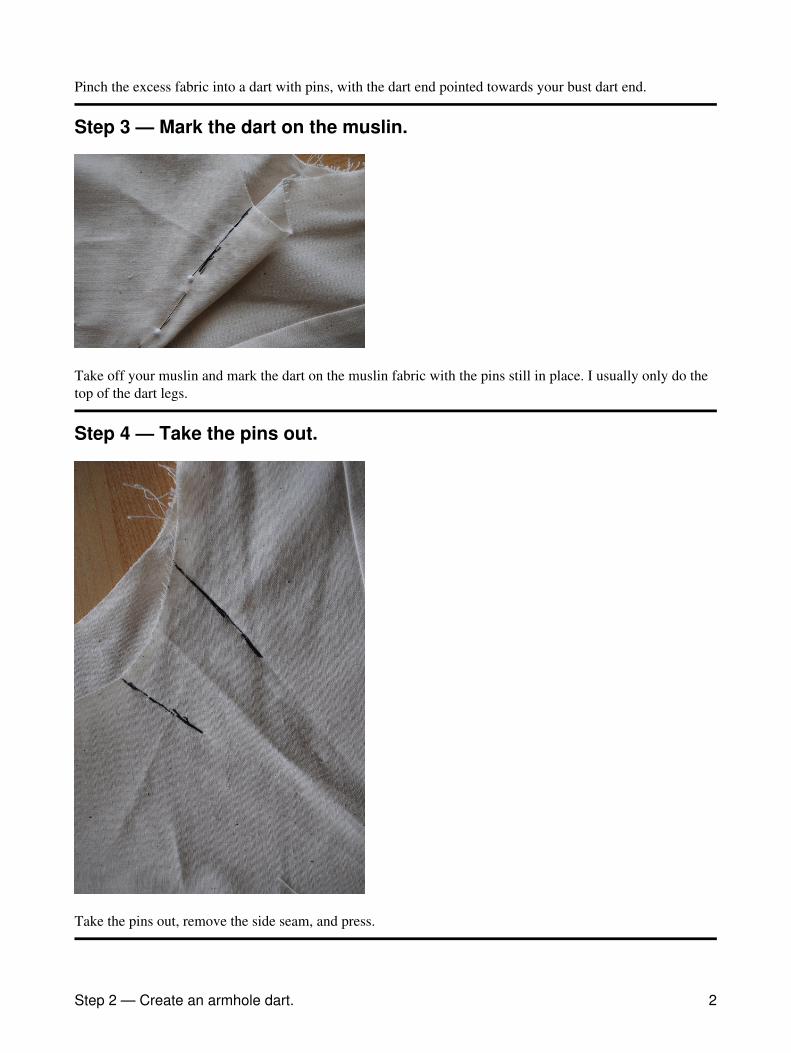
Pinch the excess fabric into a dart with pins, with the dart end pointed towards your bust dart end.
Step 3 — Mark the dart on the muslin.
Take off your muslin and mark the dart on the muslin fabric with the pins still in place. I usually only do thetop of the dart legs.
Step 4 — Take the pins out.
Take the pins out, remove the side seam, and press.
Step 2 — Create an armhole dart. 2
Step 5 — Copy marks onto pattern.
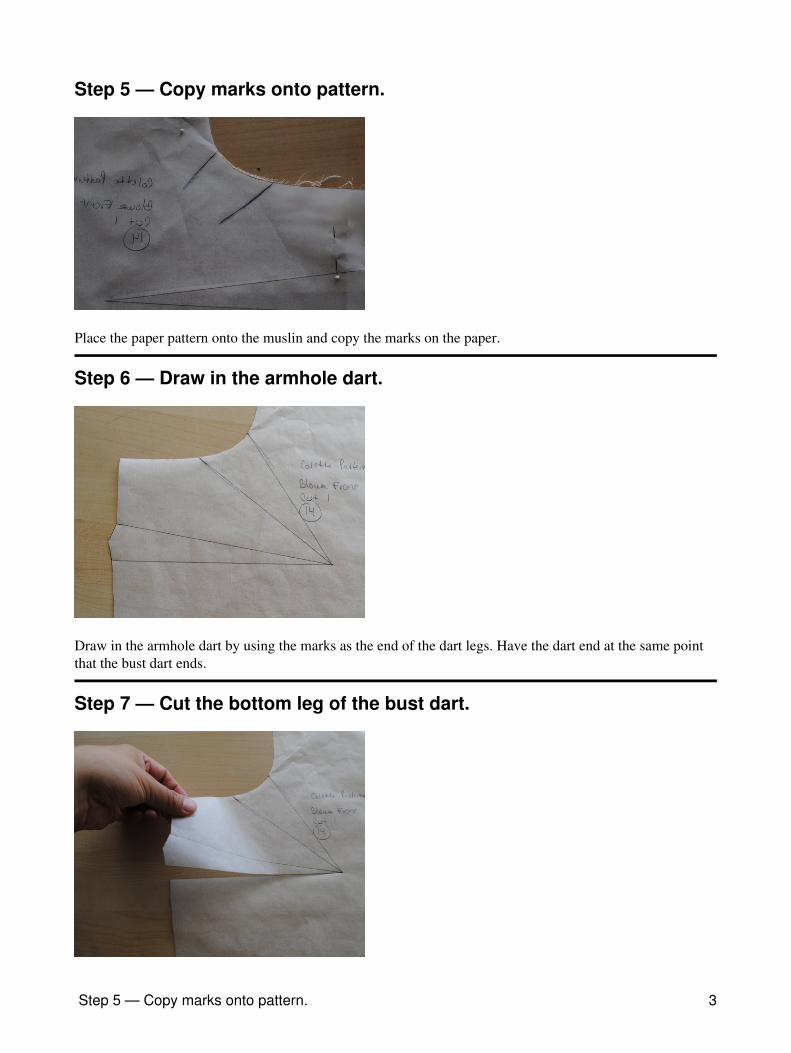
Place the paper pattern onto the muslin and copy the marks on the paper.
Step 6 — Draw in the armhole dart.
Draw in the armhole dart by using the marks as the end of the dart legs. Have the dart end at the same pointthat the bust dart ends.
Step 7 — Cut the bottom leg of the bust dart.
Step 5 — Copy marks onto pattern. 3
Cut the bottom leg of the bust dart to the end point.
Step 8 — Cut the bottom leg of the armhole dart.
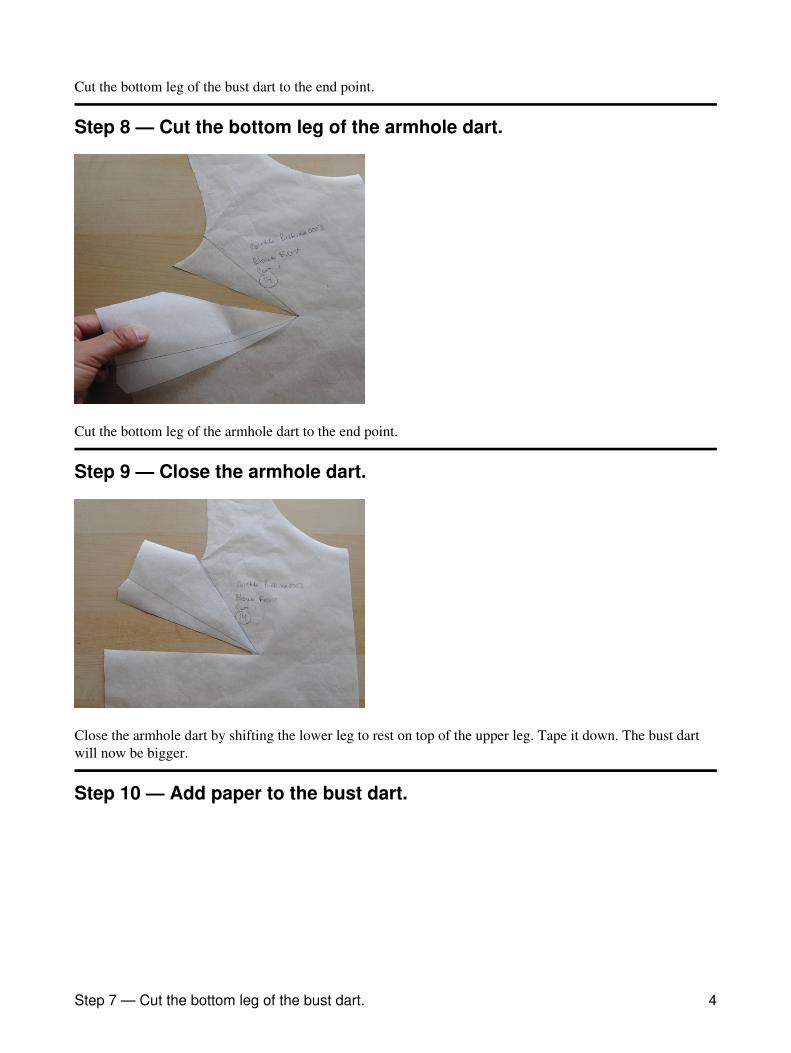
Cut the bottom leg of the armhole dart to the end point.
Step 9 — Close the armhole dart.
Close the armhole dart by shifting the lower leg to rest on top of the upper leg. Tape it down. The bust dartwill now be bigger.
Step 10 — Add paper to the bust dart.
Step 7 — Cut the bottom leg of the bust dart. 4
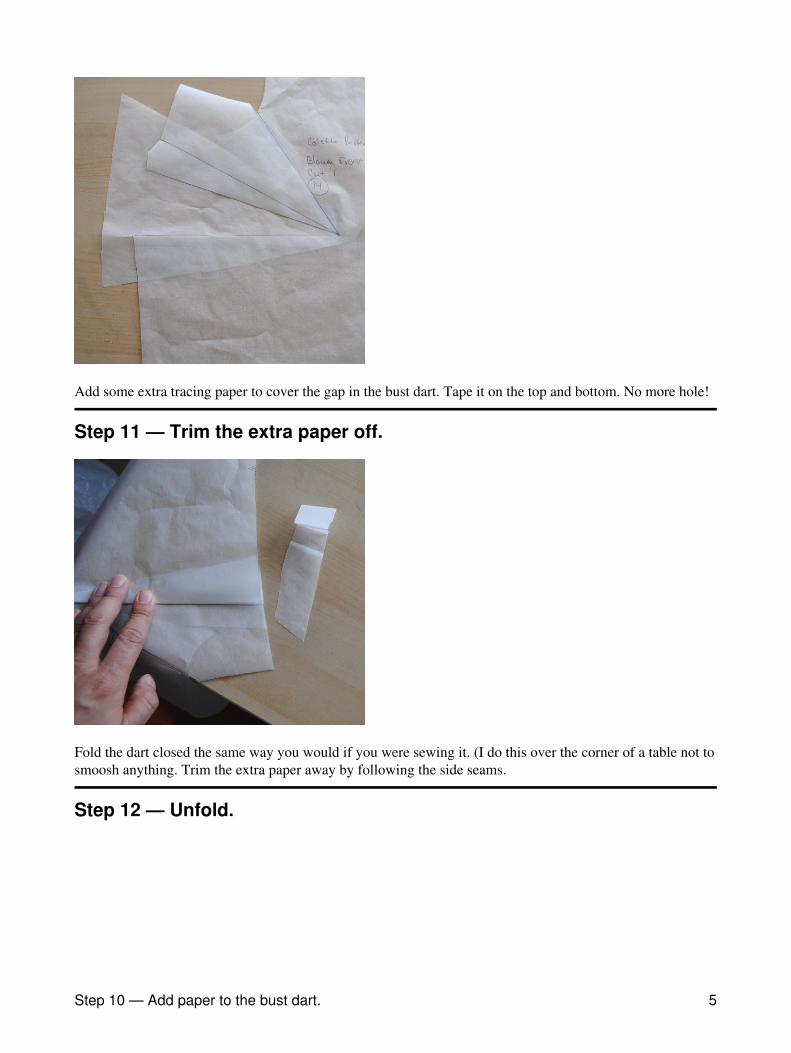
Add some extra tracing paper to cover the gap in the bust dart. Tape it on the top and bottom. No more hole!
Step 11 — Trim the extra paper off.
Fold the dart closed the same way you would if you were sewing it. (I do this over the corner of a table not tosmoosh anything. Trim the extra paper away by following the side seams.
Step 12 — Unfold.
Step 10 — Add paper to the bust dart. 5
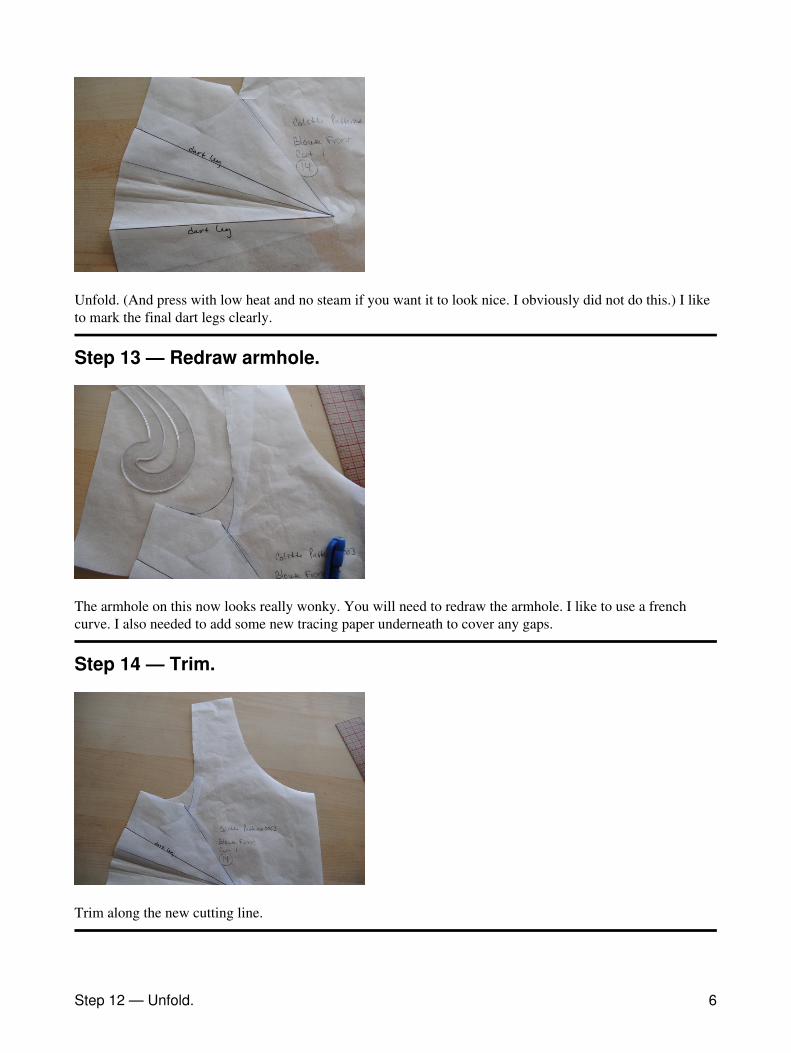
Unfold. (And press with low heat and no steam if you want it to look nice. I obviously did not do this.) I liketo mark the final dart legs clearly.
Step 13 — Redraw armhole.
The armhole on this now looks really wonky. You will need to redraw the armhole. I like to use a frenchcurve. I also needed to add some new tracing paper underneath to cover any gaps.
Step 14 — Trim.
Trim along the new cutting line.
Step 12 — Unfold. 6
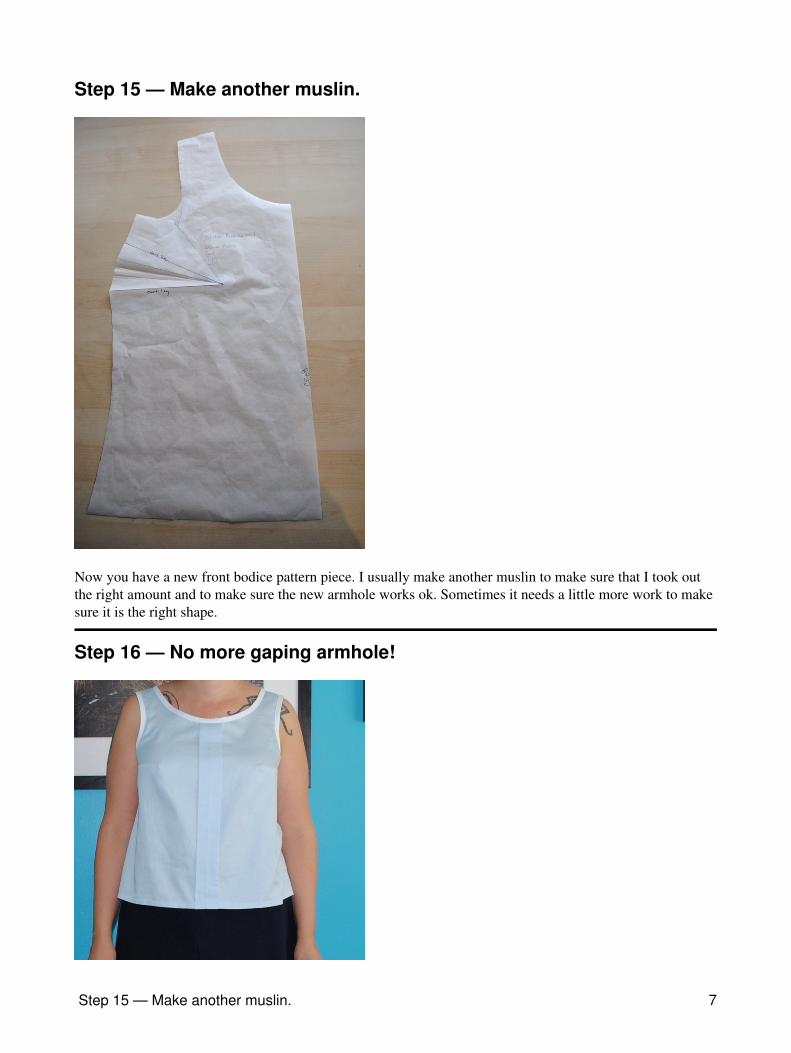
Step 15 — Make another muslin.
Now you have a new front bodice pattern piece. I usually make another muslin to make sure that I took outthe right amount and to make sure the new armhole works ok. Sometimes it needs a little more work to makesure it is the right shape.
Step 16 — No more gaping armhole!
Step 15 — Make another muslin. 7

No more gaping armhole. The first muslin of this shirt was a bit distressing, but I used this technique to fixthe armhole problems.
Get rid of a gaping armhole
Step 16 — No more gaping armhole! 8