Embed Size (px)
Citation preview
Goldeneye Setup Editor V2.0 Solo Level in Multi
Tutorial
By SubDrag
This tutorial will show you how to take a solo mission and play it in multiplayer. What
you will end up doing is make a multiplayer map, then have another level load this
level’s details instead. Here is a step-by-step tutorial on how to do that. First thing you
should do is make a multiplayer map for your given level in the Visual Editor.
In this instance, we’ll do Runway. So you should in this case do File -> Open, and
choose UsetuprunZ but don’t hit ok yet.
We’re going to do something tricky here! After choosing the Visual Level as
UsetuprunZ.bin, in the Quick Convert level, choose Ump_setuparchZ.bin. This means
when you do a quicksave, it will overwrite the multiplayer archives file (but you’ll still be
editing Runway visually). We’re doing this because later we will change Archives to be
Runway, so we’re modifying Runway to overwrite Archives’ spot.
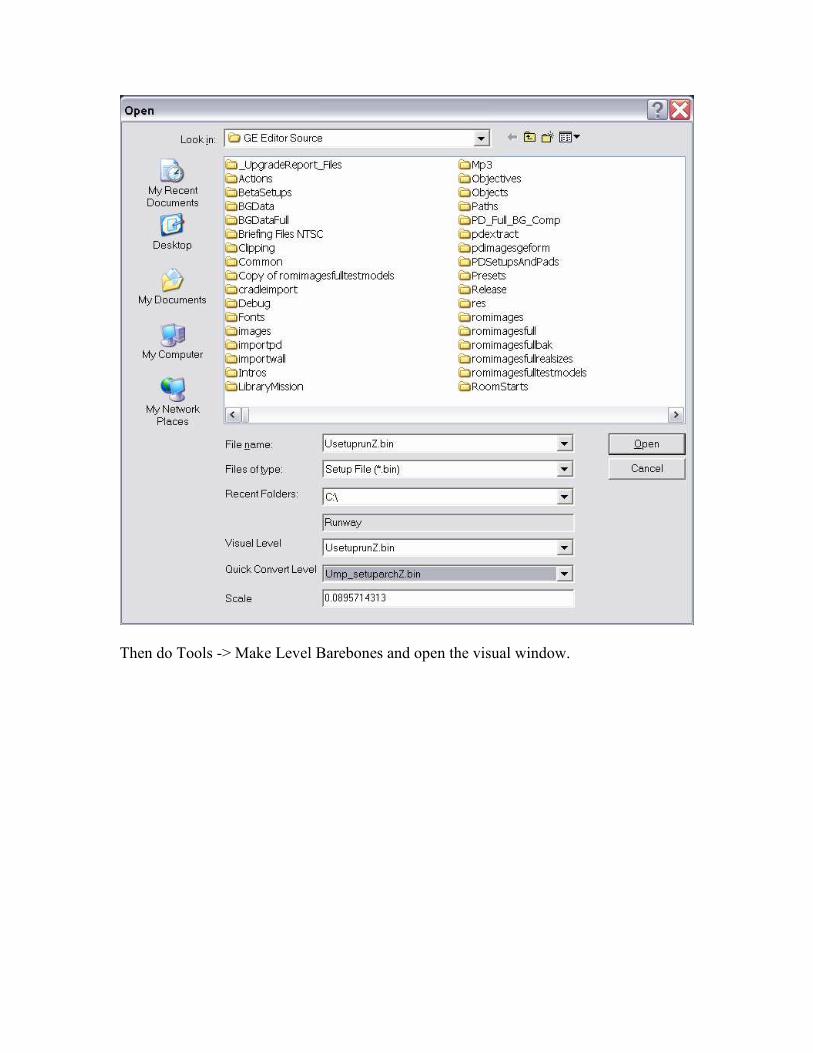
Then do Tools -> Make Level Barebones and open the visual window.
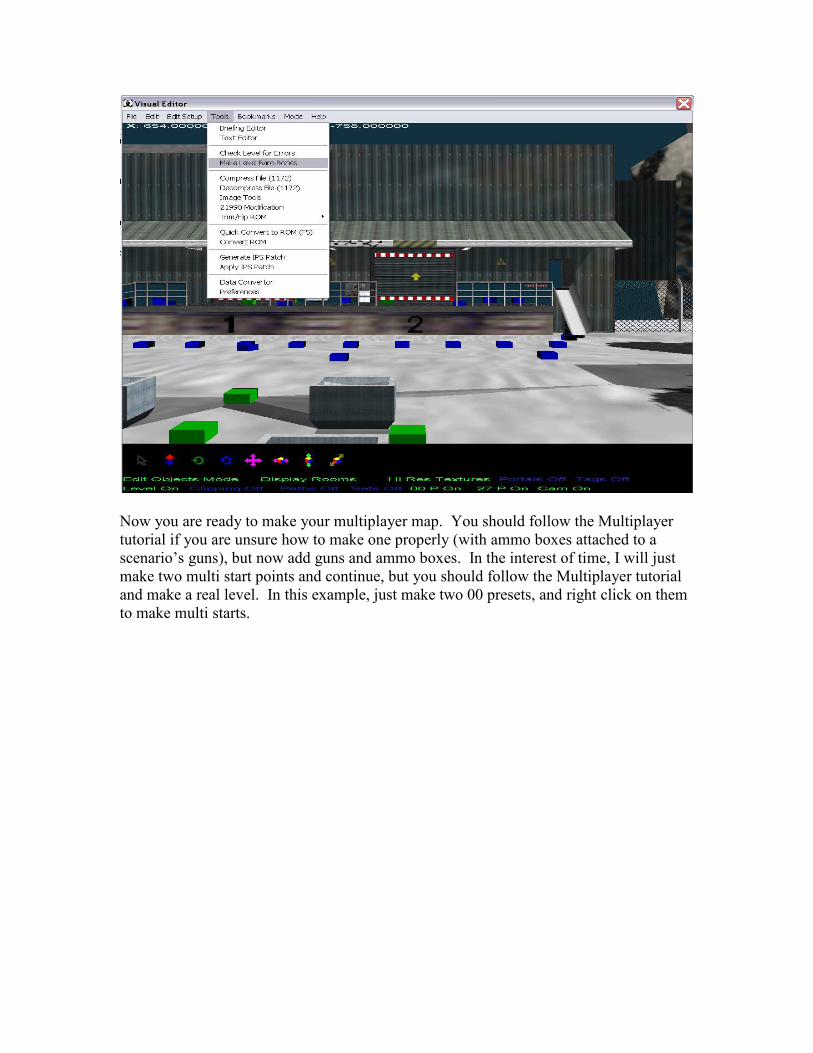
Now you are ready to make your multiplayer map. You should follow the Multiplayer
tutorial if you are unsure how to make one properly (with ammo boxes attached to a
scenario’s guns), but now add guns and ammo boxes. In the interest of time, I will just
make two multi start points and continue, but you should follow the Multiplayer tutorial
and make a real level. In this example, just make two 00 presets, and right click on them
to make multi starts.
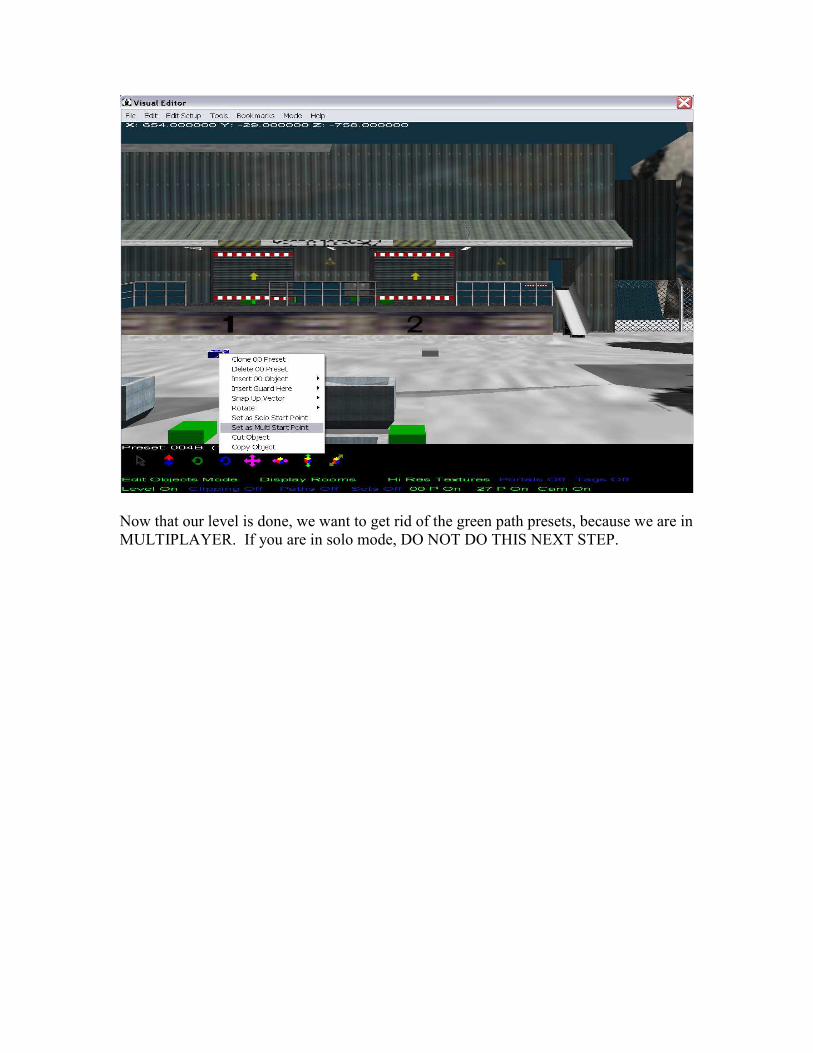
Now that our level is done, we want to get rid of the green path presets, because we are in
MULTIPLAYER. If you are in solo mode, DO NOT DO THIS NEXT STEP.
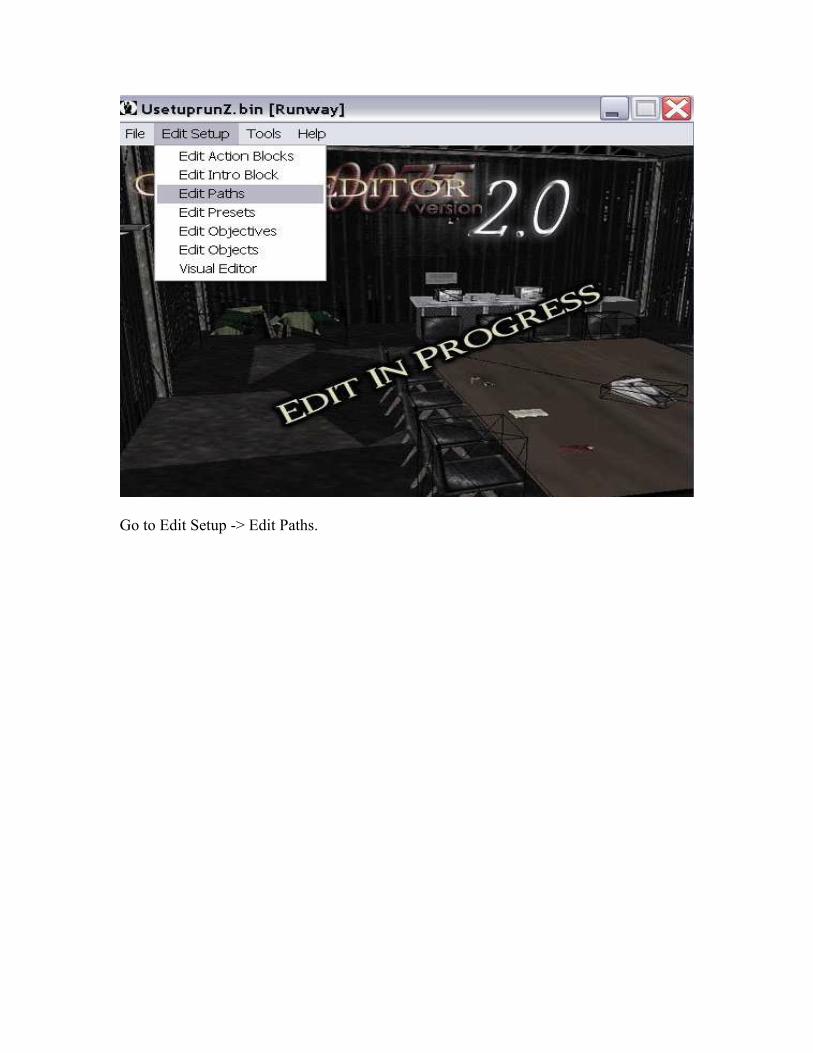
Go to Edit Setup -> Edit Paths.
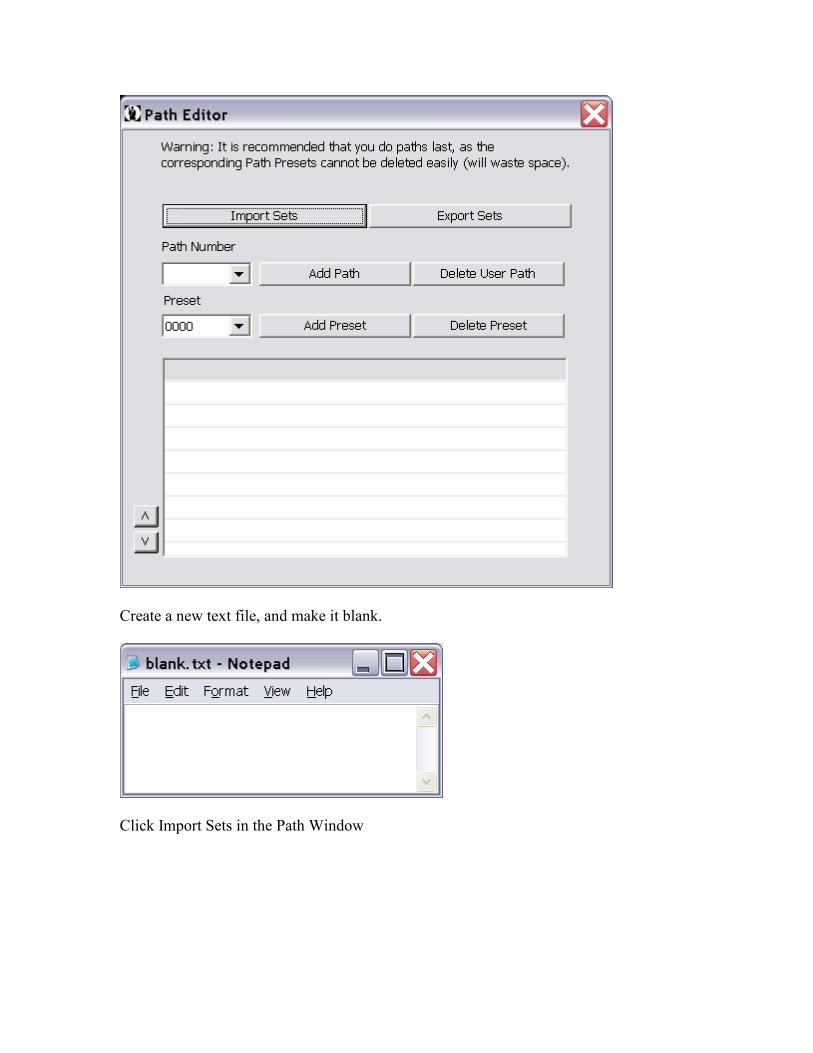
Create a new text file, and make it blank.
Click Import Sets in the Path Window
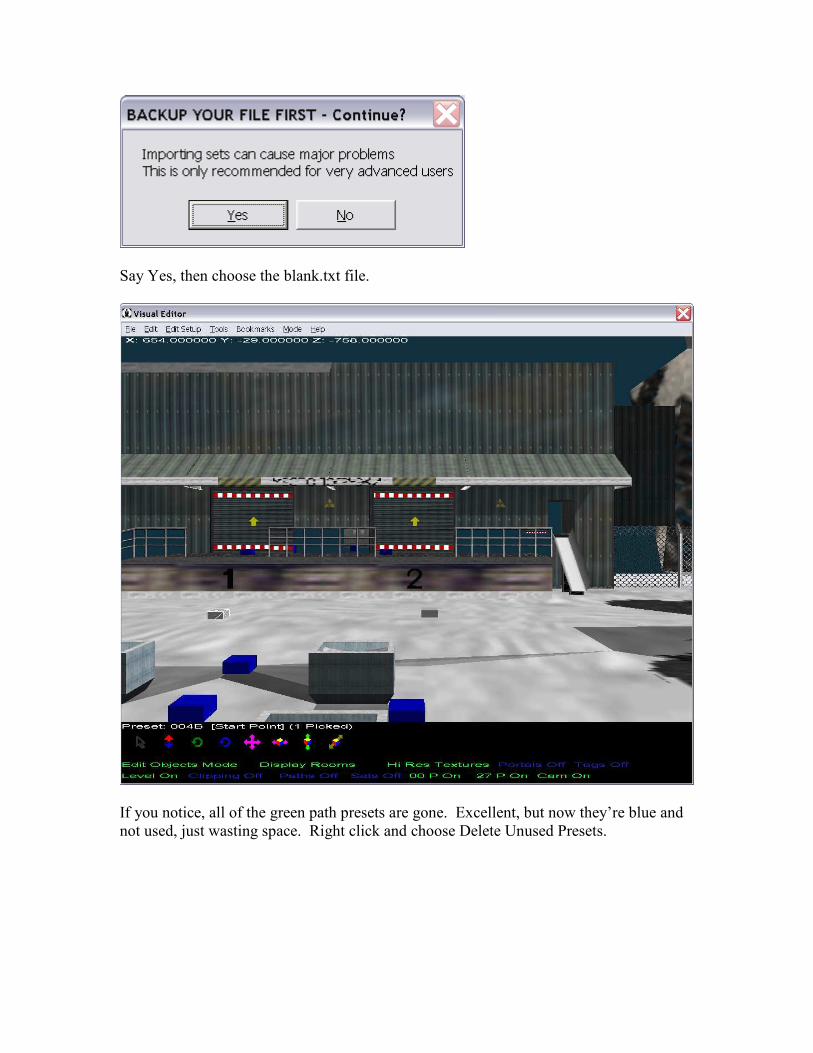
Say Yes, then choose the blank.txt file.
If you notice, all of the green path presets are gone. Excellent, but now they’re blue and
not used, just wasting space. Right click and choose Delete Unused Presets.
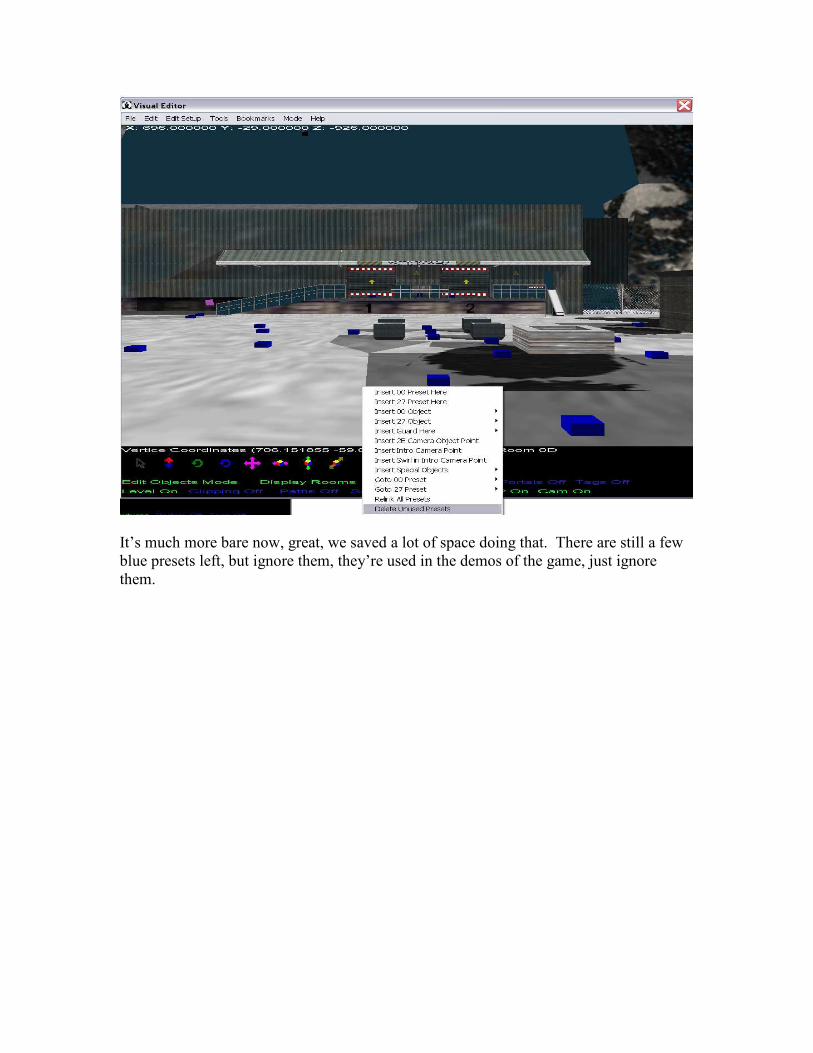
It’s much more bare now, great, we saved a lot of space doing that. There are still a few
blue presets left, but ignore them, they’re used in the demos of the game, just ignore
them.

Finally, we need to delete the single player stuff leftover. Note that Tools -> Make Level
Bare-bones deletes automatically the objectives and action blocks. Go to Edit Setup ->
Edit Intro Block.
Click Delete All Entries and choose yes at the following types (none of the following
pictures should have any entries):
Delete All Entries of 01 Start Weapon
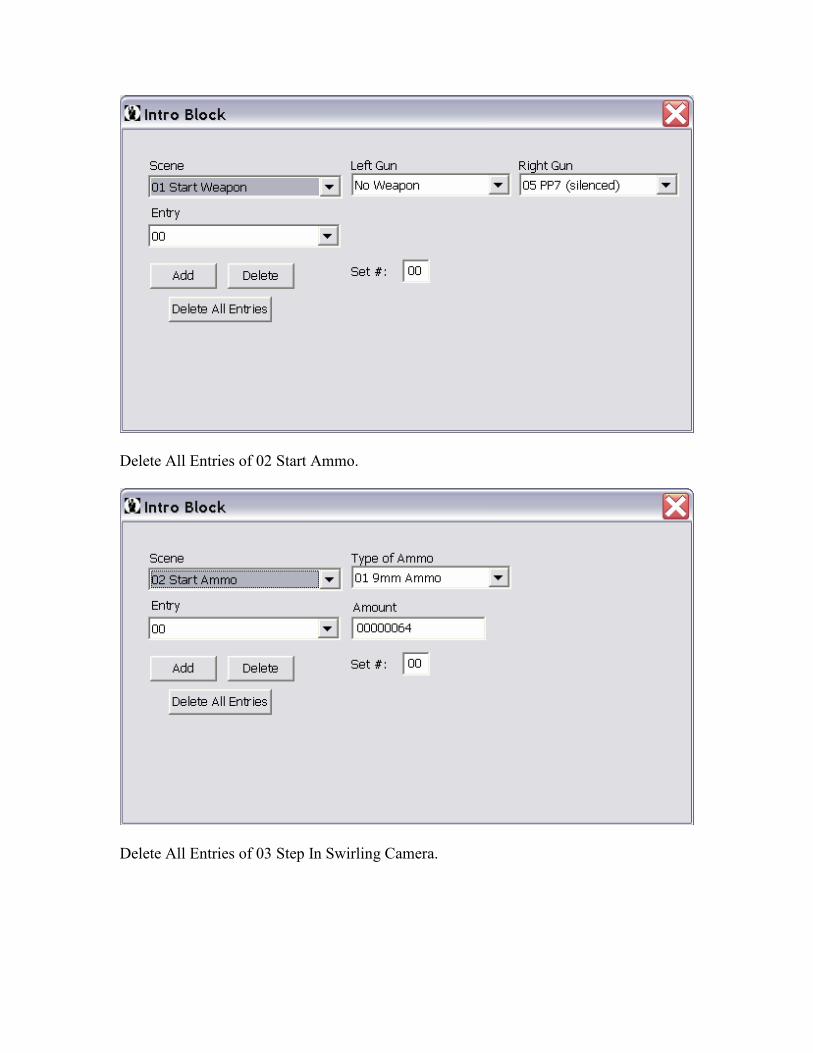
Delete All Entries of 02 Start Ammo.
Delete All Entries of 03 Step In Swirling Camera.
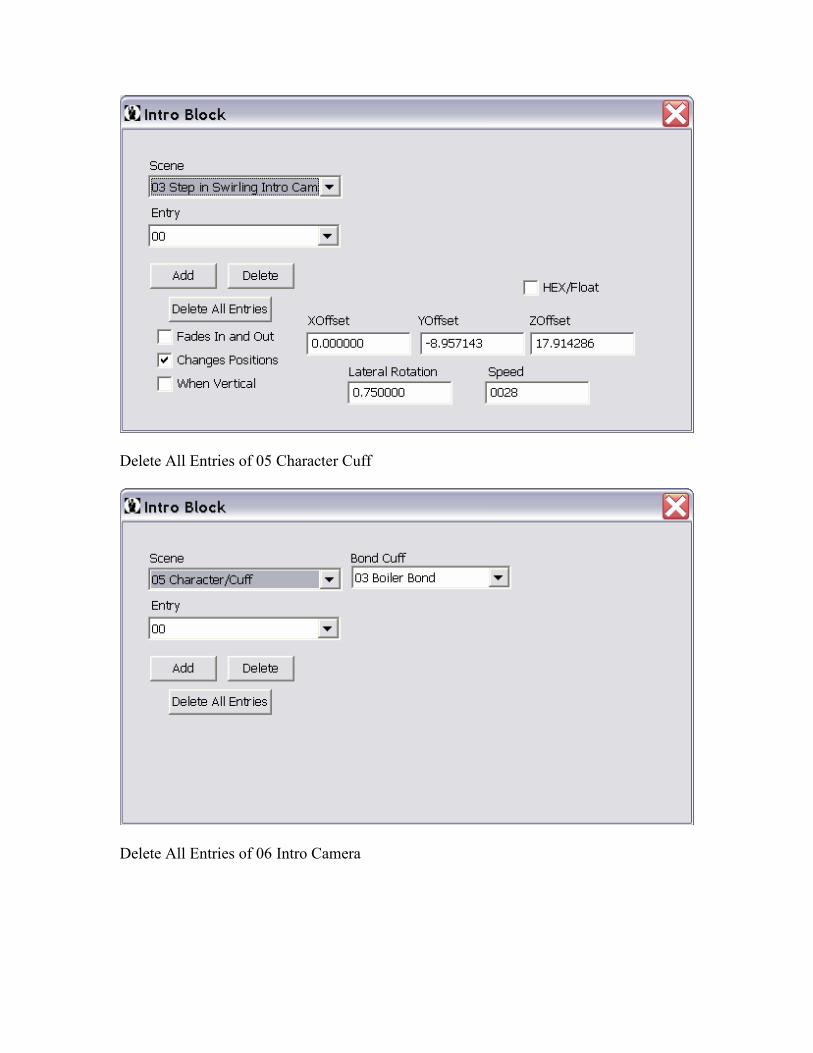
Delete All Entries of 05 Character Cuff
Delete All Entries of 06 Intro Camera
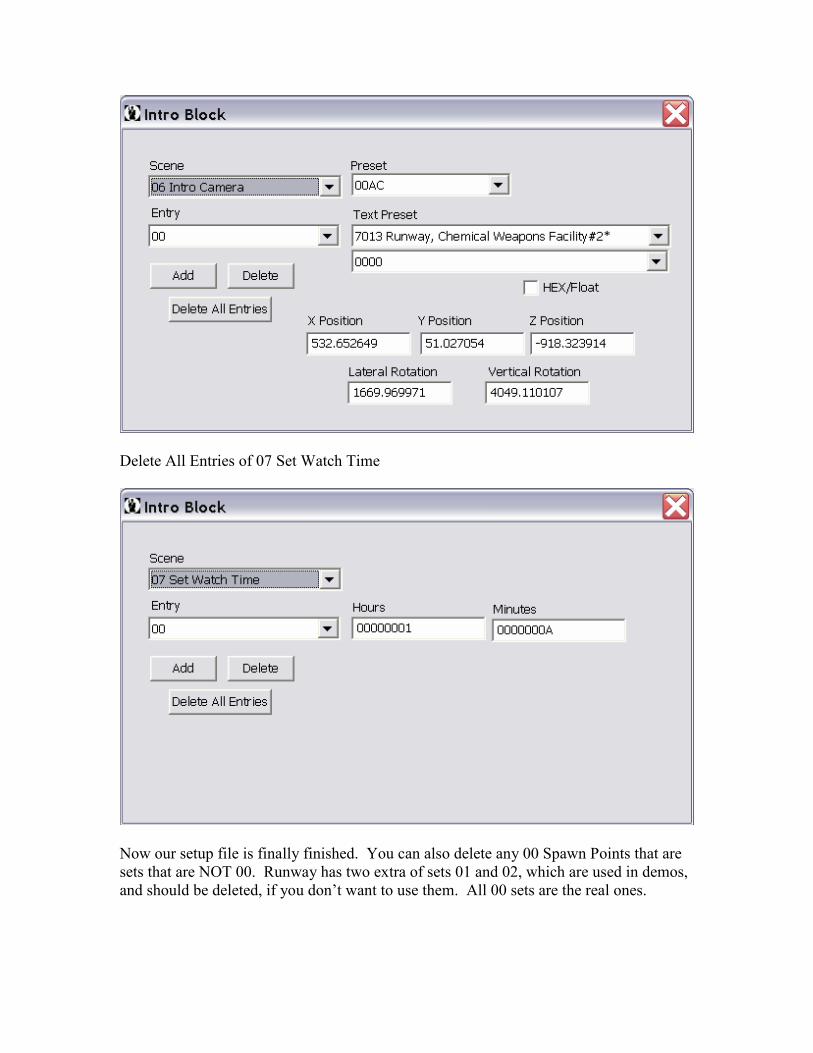
Delete All Entries of 07 Set Watch Time
Now our setup file is finally finished. You can also delete any 00 Spawn Points that are
sets that are NOT 00. Runway has two extra of sets 01 and 02, which are used in demos,
and should be deleted, if you don’t want to use them. All 00 sets are the real ones.
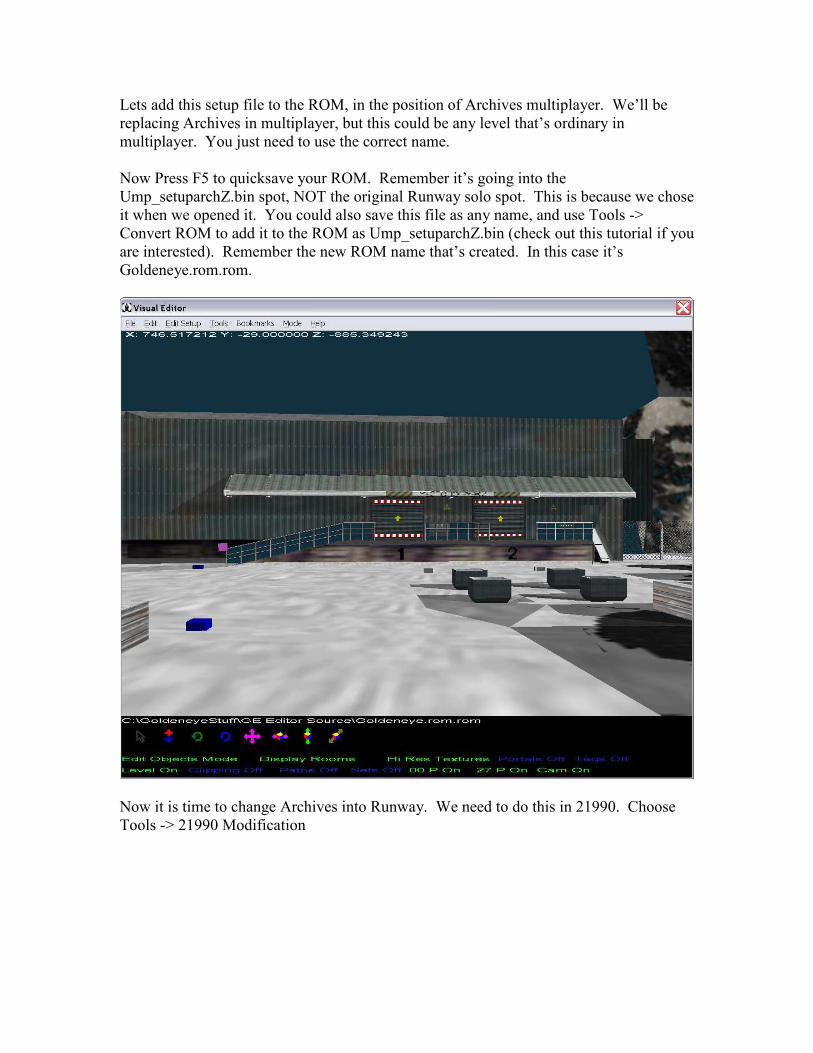
Lets add this setup file to the ROM, in the position of Archives multiplayer. We’ll be
replacing Archives in multiplayer, but this could be any level that’s ordinary in
multiplayer. You just need to use the correct name.
Now Press F5 to quicksave your ROM. Remember it’s going into the
Ump_setuparchZ.bin spot, NOT the original Runway solo spot. This is because we chose
it when we opened it. You could also save this file as any name, and use Tools ->
Convert ROM to add it to the ROM as Ump_setuparchZ.bin (check out this tutorial if you
are interested). Remember the new ROM name that’s created. In this case it’s
Goldeneye.rom.rom.
Now it is time to change Archives into Runway. We need to do this in 21990. Choose
Tools -> 21990 Modification
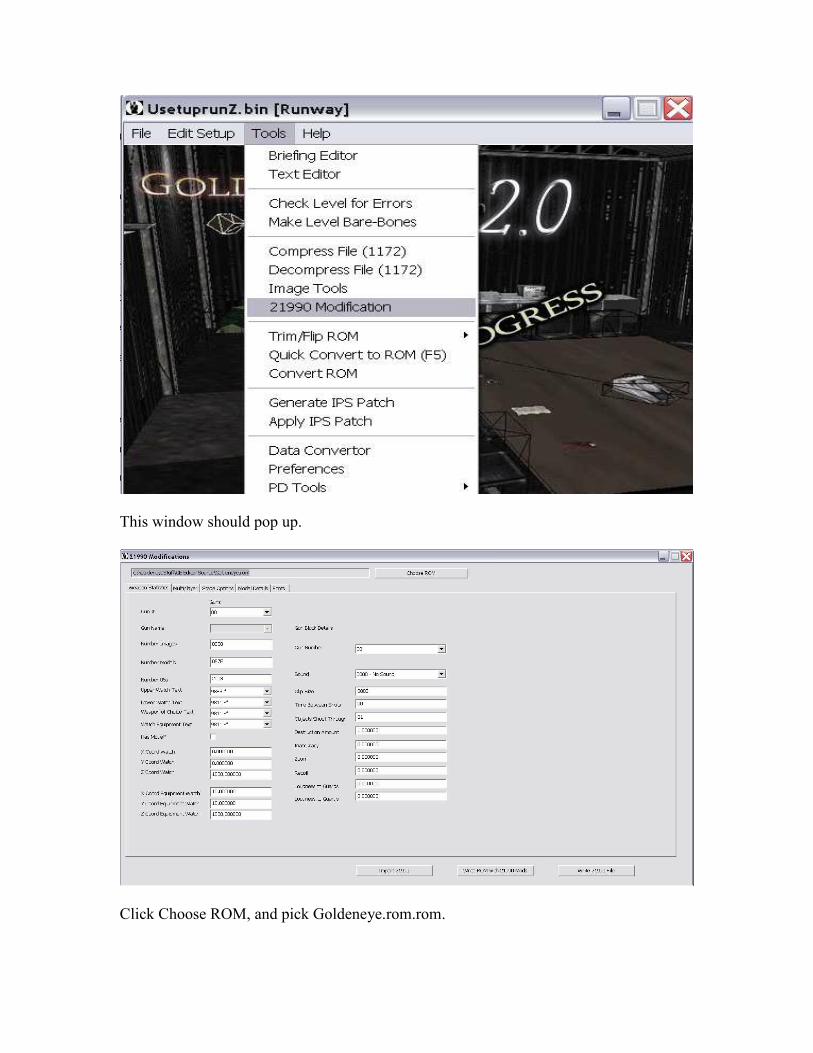
This window should pop up.
Click Choose ROM, and pick Goldeneye.rom.rom.
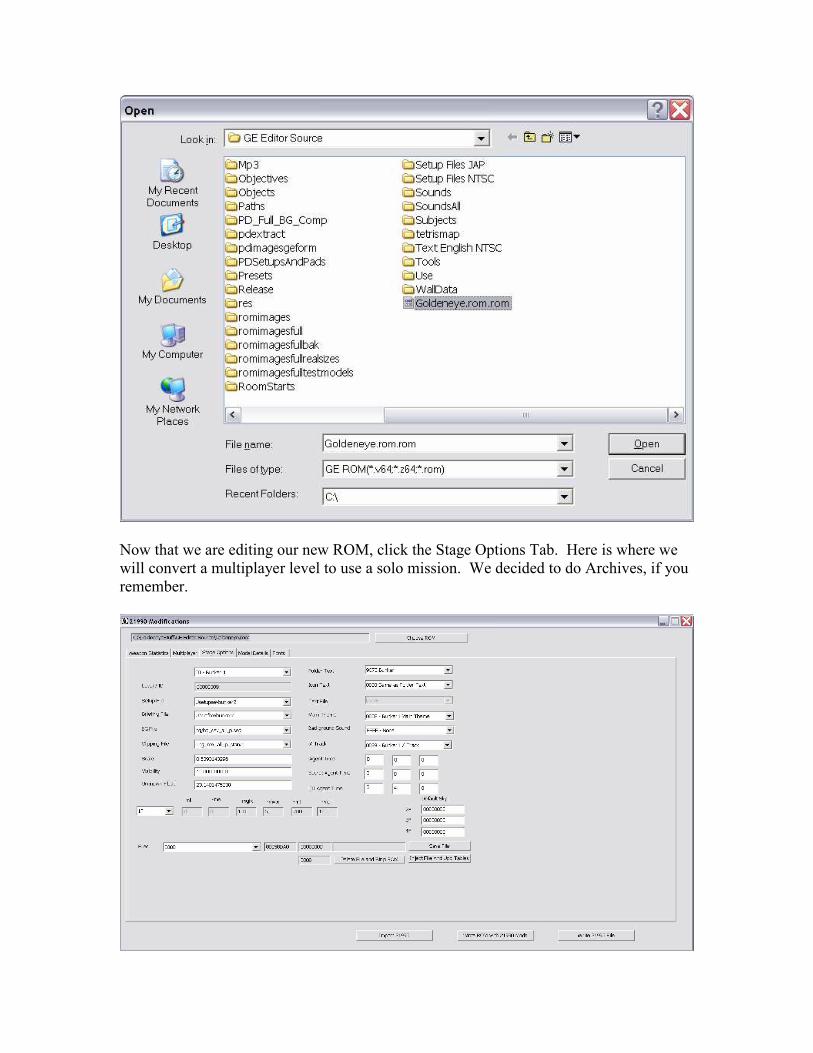
Now that we are editing our new ROM, click the Stage Options Tab. Here is where we
will convert a multiplayer level to use a solo mission. We decided to do Archives, if you
remember.
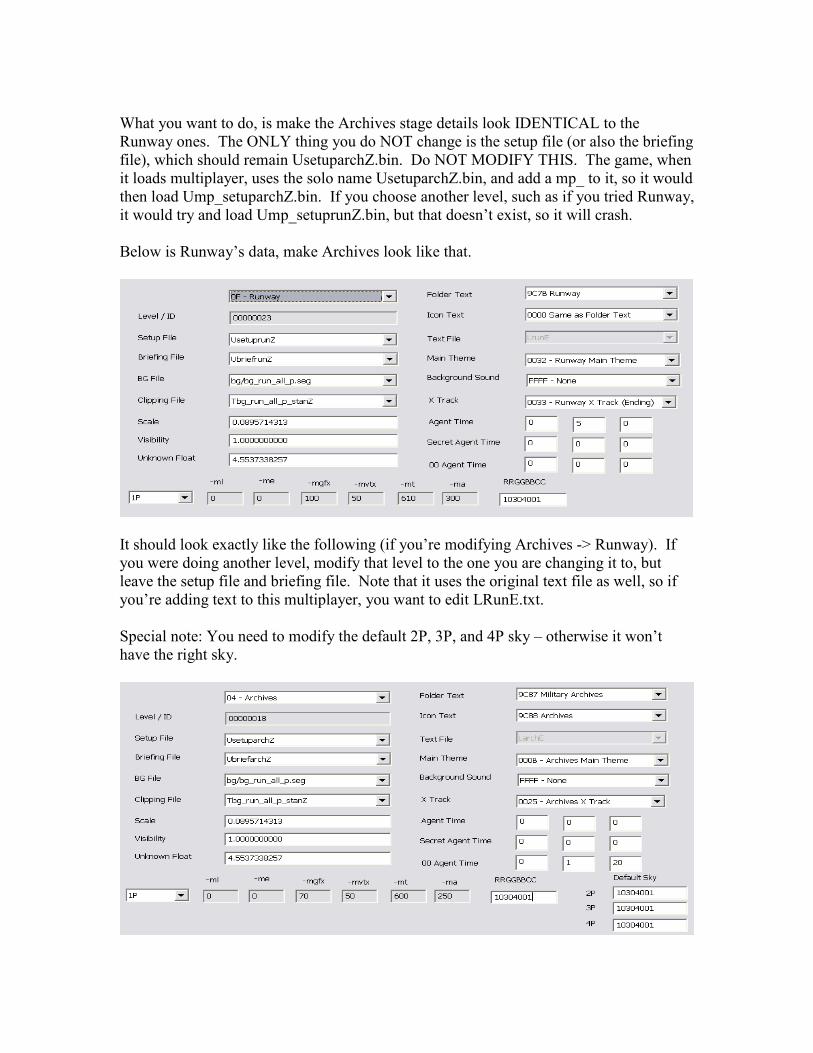
What you want to do, is make the Archives stage details look IDENTICAL to the
Runway ones. The ONLY thing you do NOT change is the setup file (or also the briefing
file), which should remain UsetuparchZ.bin. Do NOT MODIFY THIS. The game, when
it loads multiplayer, uses the solo name UsetuparchZ.bin, and add a mp_ to it, so it would
then load Ump_setuparchZ.bin. If you choose another level, such as if you tried Runway,
it would try and load Ump_setuprunZ.bin, but that doesn’t exist, so it will crash.
Below is Runway’s data, make Archives look like that.
It should look exactly like the following (if you’re modifying Archives -> Runway). If
you were doing another level, modify that level to the one you are changing it to, but
leave the setup file and briefing file. Note that it uses the original text file as well, so if
you’re adding text to this multiplayer, you want to edit LRunE.txt.
Special note: You need to modify the default 2P, 3P, and 4P sky – otherwise it won’t
have the right sky.
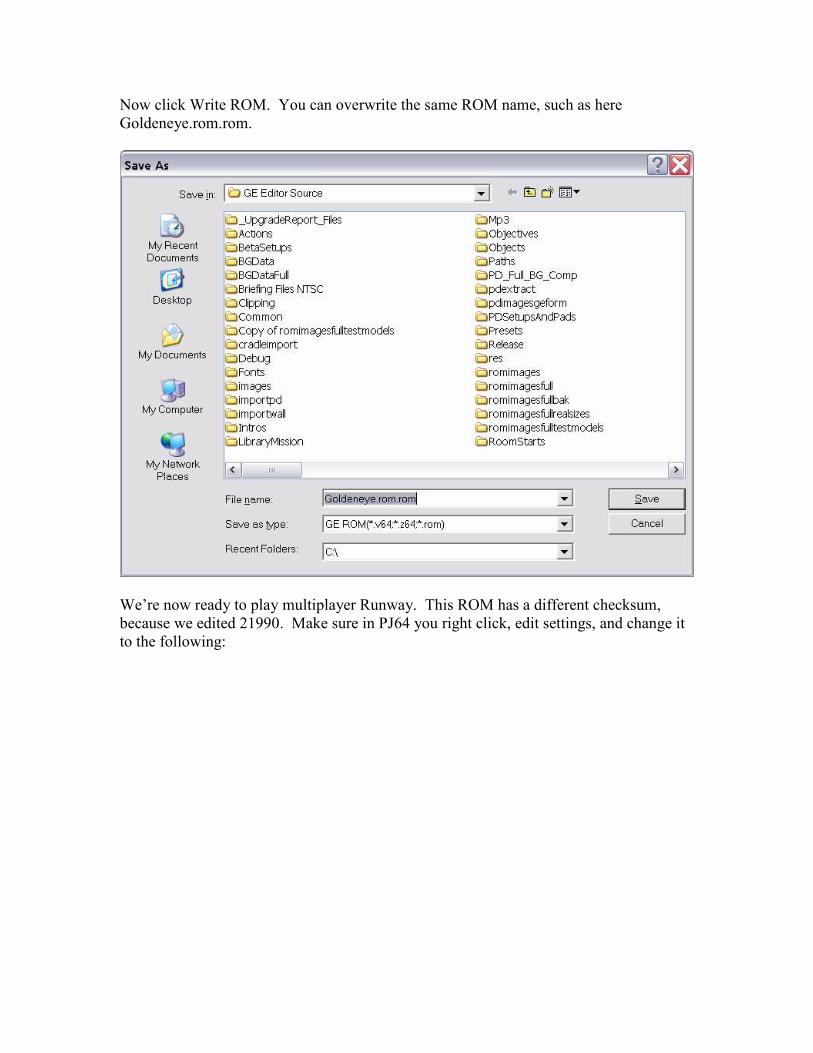
Now click Write ROM. You can overwrite the same ROM name, such as here
Goldeneye.rom.rom.
We’re now ready to play multiplayer Runway. This ROM has a different checksum,
because we edited 21990. Make sure in PJ64 you right click, edit settings, and change it
to the following:
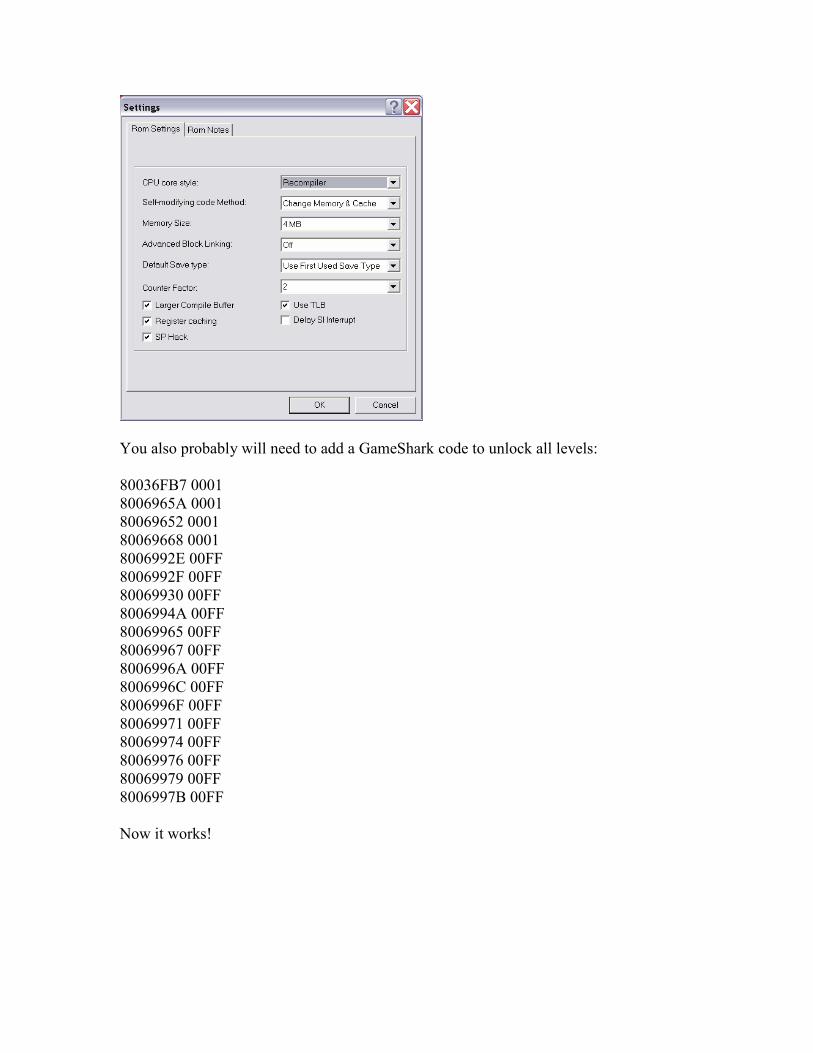
You also probably will need to add a GameShark code to unlock all levels:
80036FB7 0001
8006965A 0001
80069652 0001
80069668 0001
8006992E 00FF
8006992F 00FF
80069930 00FF
8006994A 00FF
80069965 00FF
80069967 00FF
8006996A 00FF
8006996C 00FF
8006996F 00FF
80069971 00FF
80069974 00FF
80069976 00FF
80069979 00FF
8006997B 00FF
Now it works!
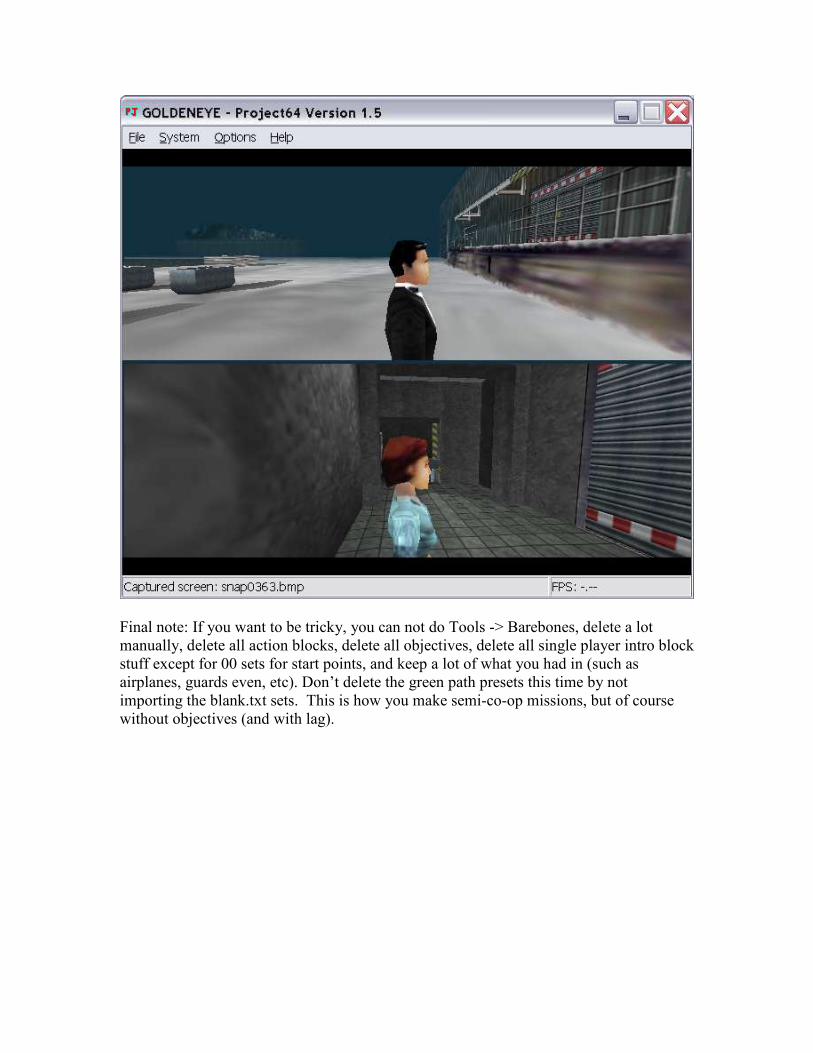
Final note: If you want to be tricky, you can not do Tools -> Barebones, delete a lot
manually, delete all action blocks, delete all objectives, delete all single player intro block
stuff except for 00 sets for start points, and keep a lot of what you had in (such as
airplanes, guards even, etc). Don’t delete the green path presets this time by not
importing the blank.txt sets. This is how you make semi-co-op missions, but of course
without objectives (and with lag).