Embed Size (px)
Citation preview
GoToMyPC™ User’s Guide
Expertcity, Inc © 2002 Expertcity, Inc. All Rights Reserved.
5385 Hollister Avenue • Santa Barbara, CA 93111 • Voice: 805.690.6400 • Fax: 805.690.6471
GoToMyPC
User’s Guide Version 3.0
GoToMyPC™ User’s Guide
© 2002 Expertcity, Inc. All Rights Reserved
Contents Getting Started............................................................................................. 1
System Requirements ................................................................................... 1 Terms ......................................................................................................... 1
Setting Up GoToMyPC ................................................................................... 2 Set Up a Host computer ................................................................................ 2 Leave the Host Computer Accessible ............................................................... 2
Accessing Your GoToMyPC Host Computer ................................................... 3 Access your Host computer ............................................................................ 3 Remotely Unlock Your Host Computer ............................................................. 3
The GoToMyPC Viewer.................................................................................. 4 Resize Your Viewer Window ........................................................................... 4 Resize Your Host Computer's Image................................................................ 4 Universal Viewer........................................................................................... 5
Using GoToMyPC Tools ................................................................................. 6 File Transfer................................................................................................. 6 Chat............................................................................................................ 7 Draw........................................................................................................... 7 Guest Invitation............................................................................................ 8 Remote Printing............................................................................................ 9 Cut/Copy and Paste .....................................................................................12 Desktop Shortcut.........................................................................................12 Remember Me.............................................................................................13
End Your GoToMyPC Session ...................................................................... 14 Remotely Lock Your Host Computer ...............................................................14 End Your GoToMyPC Connection ....................................................................14
Setting Preferences .................................................................................... 15 Managing My Computers ............................................................................ 17
Add or Remove Host Computers ....................................................................17 Move Host Computers between Accounts ........................................................17 Change your Host computer's Nickname.........................................................18 Create a new Host Access Code .....................................................................18 What to Do When Your Host Computer Is Offline .............................................18 Reinstall GoToMyPC .....................................................................................18 Upgrade GoToMyPC .....................................................................................19 Contact Customer Support ............................................................................19
Safety Tips ................................................................................................. 20

GoToMyPC™ User’s Guide
© 2002 Expertcity, Inc. All Rights Reserved. 1
Getting Started Congratulations are joining GoToMyPC! This guide shows you how to set up your computer and access it from another computer. It also explains the main features of GoToMyPC to get you working quickly.
System Requirements
Host computer (the computer that you will access remotely): ! Required: Windows 95, 98, 2000, Me, NT or XP ! Required: Internet Explorer or Netscape Navigator 4.0 or later ! Required: "Always on" Internet connection (cable, ISDN, DSL or better) ! Recommended: Minimum of Pentium 300 with 64 MB of RAM
Client computer (the computer that you will use to access the Host computer): ! Required: Windows 95, 98, 2000, Me, NT 4.0, XP or any operating system
that has a Java-enabled browser ! Required: Java-enabled Internet Explorer or Netscape Navigator 4.0 or later ! Recommended: Broadband Internet connection (cable, ISDN, DSL or better) ! Recommended: Resolution same or higher than the Host computer
Note: Because of various operating system restrictions, some features of GoToMyPC require the service to be installed on the Host computer with administrator rights. Please see your network administrator for assistance.
Terms
Host computer - The Host computer is the computer you will want to access from a remote location. You will install the GoToMyPC software on the Host computer. The Host computer is a unique and specific computer.
Client computer - The Client computer is the computer you will use to access your Host computer. It can be any computer connected to the Internet anywhere in the world (airport kiosk, Internet cafe, hotel, library, etc.).
Account Password - Your account password is what you use to log in to the GoToMyPC Web site. It must be at least eight characters and contain both letters and numbers. You will use your account password to enter the GoToMyPC Web site and set up a Host computer.
Computer Nickname - The computer nickname is the name you assign to a Host computer when you download the GoToMyPC. Using nicknames helps you identify your computers. It can be any name you choose: Office, Home, Laptop, Rover — you decide.
Computer Access Code - Your computer access code is the unique password that you set up for each Host computer. It must be at least eight characters and contain both letters and numbers. You will use the access code every time you log in to a Host computer.
Viewer window - The Viewer is the window displayed on your Client computer in which your Host computer's desktop will appear. The Viewer window has its own title and menu bars.
Host computer image - The Host computer image is the picture of the Host computer’s desktop that appears in the Viewer window.
System Tray Icon – Right-click the GoToMyPC system tray icon to access GoToMyPC system preference and setting options.
GoToMyPC™ User’s Guide
© 2002 Expertcity, Inc. All Rights Reserved. 2
Setting Up GoToMyPC Before you can access your computer remotely, you’ll first need to install the GoToMyPC software. To do this, you will need to be at the Host computer and have the email address and password you used to register.
Set Up a Host computer
To set up a Host computer for remote access
Step One - Download the software
1. Be sure that you are at the computer you will want to access remotely; this will be the Host computer.
2. Open a browser window and go to www.gotomypc.com.
3. In the Returning Users section, enter your Email address and account Password and click the Log In button.
4. First-time users, or users who do not have any computers set up, click the Click Here link in step two. Returning users who already have a computer set up, click the Add Computer button.
5. Click the Click Here link
6. Click Yes or Grant to begin downloading the GoToMyPC software.
Step Two - Set up the software
1. The Install Shield Wizard will begin automatically. Select the default destination for the GoToMyPC software installation and click Next.
2. Select the check box to launch GoToMyPC after installation and click Finish.
3. When prompted, enter your Email address and account Password (these are the same that you use to log in to the GoToMyPC Web site)and click OK.
4. When prompted, enter a computer Nickname for the Host computer; if needed, select the Group to which this computer should belong. Give the computer an Access Code, confirm the Access Code and click OK.
5. On the Setup Complete notification box, click OK. The icon will appear in the System Tray to let you know that the service is running.
Congratulations, you have set up your Host computer with GoToMyPC!
Note: If you are a GoToMyPC user in an environment that requires authentication to access the Internet, you will be prompted to enter your corporate account log in information during the GoToMyPC setup process.
Leave the Host Computer Accessible
To be able to access your Host computer from a remote Client computer, you need to ensure that your Host computer meets the three following conditions:
1. The Host computer is turned on.
2. The Host computer is connected to the Internet with a live connection.
3. The GoToMyPC service is running.
Note: To help ensure the security of your computer, you may want to lock your computer with a screensaver password (Windows 95 /98/Me/XP Home) or by using the Ctrl-Alt-Delete function (Windows NT/2000/XP Professional) before leaving the computer. Users not using XP Home version multiple log in functionality may want to consider Ctrl-Alt-Delete lock workstation function.
GoToMyPC™ User’s Guide
© 2002 Expertcity, Inc. All Rights Reserved. 3
Accessing Your GoToMyPC Host Computer Once GoToMyPC is set up and running on your Host PC, you can access it immediately from almost any other Windows or Java-enabled browser computer (Client PC) connected to the Internet (airport kiosk, Internet cafe, hotel, etc.).
To perform these steps you’ll need to be at a Client computer (any computer other than the Host PC you just set up), your email address, password and access code.
Access your Host computer
To remotely access your Host computer
1. Point your Web browser to www.gotomypc.com.
2. Enter your Email address and account Password and click Log In.
3. If prompted, choose the account you want to access and click Go (only applies if you have multiple accounts associated with one email ID).
This will load your My Computers page.
4. To the right of the computer Nickname, click the Connect button.
5. When prompted, Click Yes or Grant to download of the GoToMyPC Viewer.
6. When prompted, enter the Host computer's Access Code and click OK.
7. The Host computer desktop image will appear in the Viewer window.
You are now connected to your Host computer and ready to start accessing all your files, applications, and email as if you were sitting at that computer!
Note: If a computer's status is Offline, then you will not be able to access that Host computer. To access a Host computer, you need to leave the computer on, connected to the Internet, with GoToMyPC running.
Remotely Unlock Your Host Computer
If you locked your Host computer after previous use, you will need to remotely unlock it when you connect. Your operating system determines the unlock method.
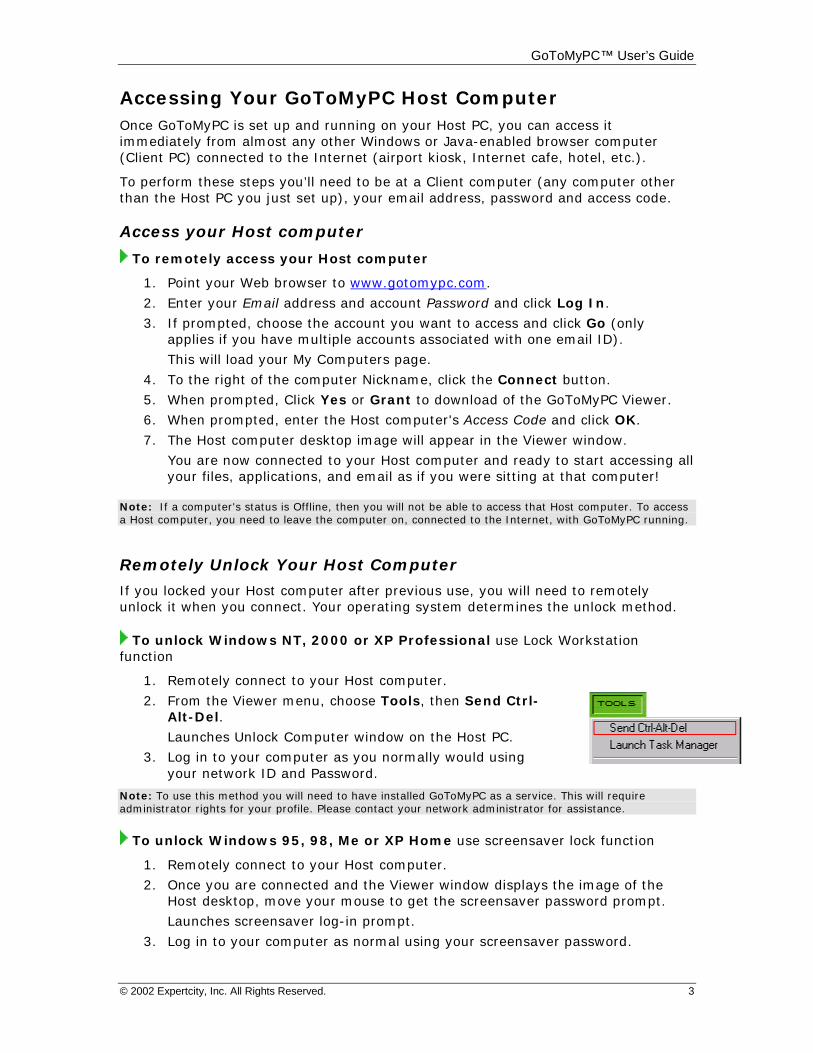
To unlock Windows NT, 2000 or XP Professional use Lock Workstation function
1. Remotely connect to your Host computer.
2. From the Viewer menu, choose Tools, then Send Ctrl-Alt-Del.
Launches Unlock Computer window on the Host PC.
3. Log in to your computer as you normally would using your network ID and Password.
Note: To use this method you will need to have installed GoToMyPC as a service. This will require administrator rights for your profile. Please contact your network administrator for assistance.
To unlock Windows 95, 98, Me or XP Home use screensaver lock function
1. Remotely connect to your Host computer.
2. Once you are connected and the Viewer window displays the image of the Host desktop, move your mouse to get the screensaver password prompt.
Launches screensaver log-in prompt.
3. Log in to your computer as normal using your screensaver password.
GoToMyPC™ User’s Guide
© 2002 Expertcity, Inc. All Rights Reserved. 4
The GoToMyPC Viewer Resize Your Viewer Window
You can choose to have the Viewer appear as a window on your desktop or as a full-screen image.
! In Window mode: The Viewer will appear as a window on your desktop just like any other application. You will always be able to see the Viewer menu bar and the Windows controls in the upper-right corner of your screen as well as be able to resize the Viewer window just like any other application window
! In Full Screen mode: The Viewer will expand to full screen and the menu will auto-hide at the top of the screen. A tab the same color as your Viewer window will be displayed at the top of the screen; this tab will enable you to access the Viewer menu bar when needed
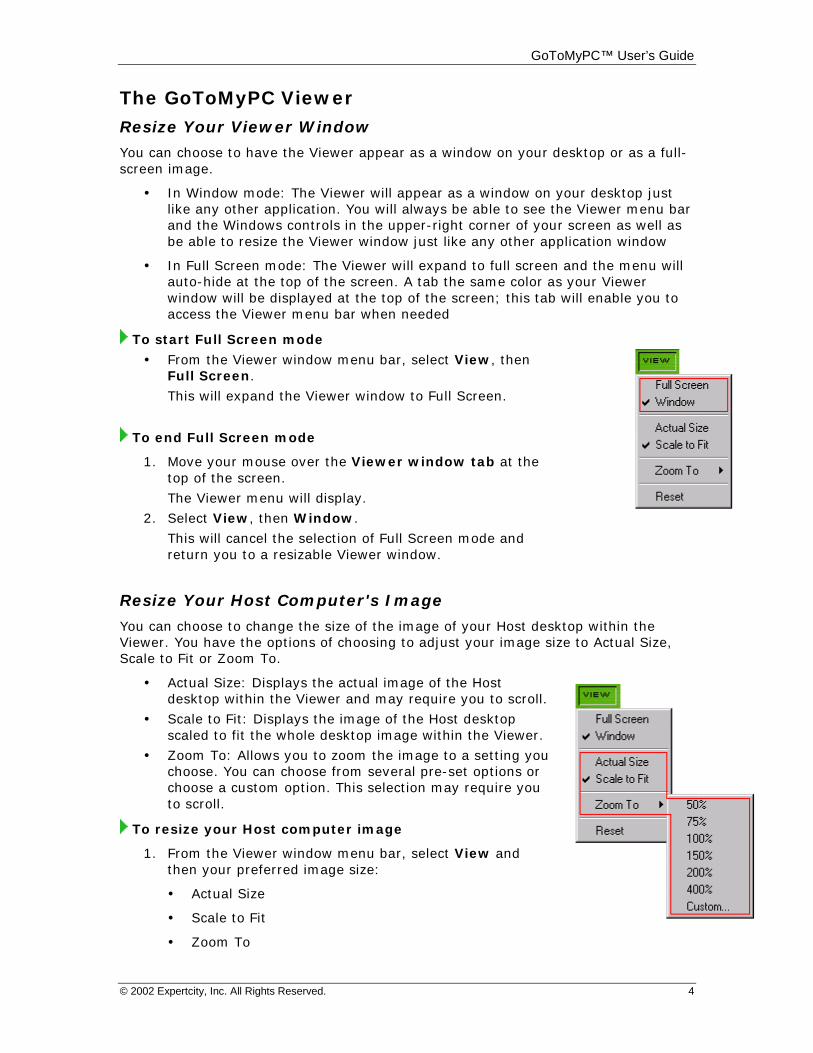
To start Full Screen mode
! From the Viewer window menu bar, select View, then Full Screen.
This will expand the Viewer window to Full Screen.
To end Full Screen mode
1. Move your mouse over the Viewer window tab at the top of the screen.
The Viewer menu will display.
2. Select View, then Window.
This will cancel the selection of Full Screen mode and return you to a resizable Viewer window.
Resize Your Host Computer's Image
You can choose to change the size of the image of your Host desktop within the Viewer. You have the options of choosing to adjust your image size to Actual Size, Scale to Fit or Zoom To.
! Actual Size: Displays the actual image of the Host desktop within the Viewer and may require you to scroll.
! Scale to Fit: Displays the image of the Host desktop scaled to fit the whole desktop image within the Viewer.
! Zoom To: Allows you to zoom the image to a setting you choose. You can choose from several pre-set options or choose a custom option. This selection may require you to scroll.
To resize your Host computer image
1. From the Viewer window menu bar, select View and then your preferred image size:
! Actual Size
! Scale to Fit
! Zoom To
GoToMyPC™ User’s Guide
© 2002 Expertcity, Inc. All Rights Reserved. 5
Universal Viewer
The Universal Viewer enables you to view your Host PCs from any computing device and operating system that supports Java, including Mac, Linux or Solaris computers or from Windows computers that do not accept downloadable files.
This feature is particularly useful if you are using an Internet kiosk. To help ensure the greatest possible usability, the Universal Viewer has a limited set of features, and does not include Chat, Clipboard, File Transfer and Viewer/image Scaling/Dimming.
There is nothing you need to do to enable the Universal Viewer. It will automatically appear during the connection process if you are using an operating system other than Windows to connect to your Host PC, or if you are using a Windows PC that does not accept downloadable files.
To help ensure your security when using the Universal Viewer, you will be logged out of your GoToMyPC My Computers page anytime you navigate to a new Web page, end your session or exceed your Viewer inactivity time-out period without any keyboard or mouse activity.
Note: To use the Universal Viewer, the Client computer will need to have Java Virtual Machine (Microsoft VM) installed and one of the following operating system/browser combinations: Mac – Internet Explorer 5.0; Linux - Netscape 4.7; Solaris - Netscape 4.7; Win - Netscape 4.7 or Internet Explorer 5. The Host computer requires a Windows operating system, an Internet connection and GoToMyPC software installed and running.
GoToMyPC™ User’s Guide
© 2002 Expertcity, Inc. All Rights Reserved. 6
Using GoToMyPC Tools GoToMyPC is easy to use and comes with a complete set of tools to help you get the most out of your remote-access session. Outlined below are several of the main features you’ll want to try. Most of the features are part of the Viewer; other features are accessible from the GoToMyPC icon in the taskbar status area.
Note: If you are a GoToMyPC Corporate account user, your ability to access features may be disabled by your GoToMyPC account administrator. If you are unable to access a feature, please contact your account administrator for further details.
File Transfer
File transfer enables you to quickly and easily transfer files between your Host and Client computers.
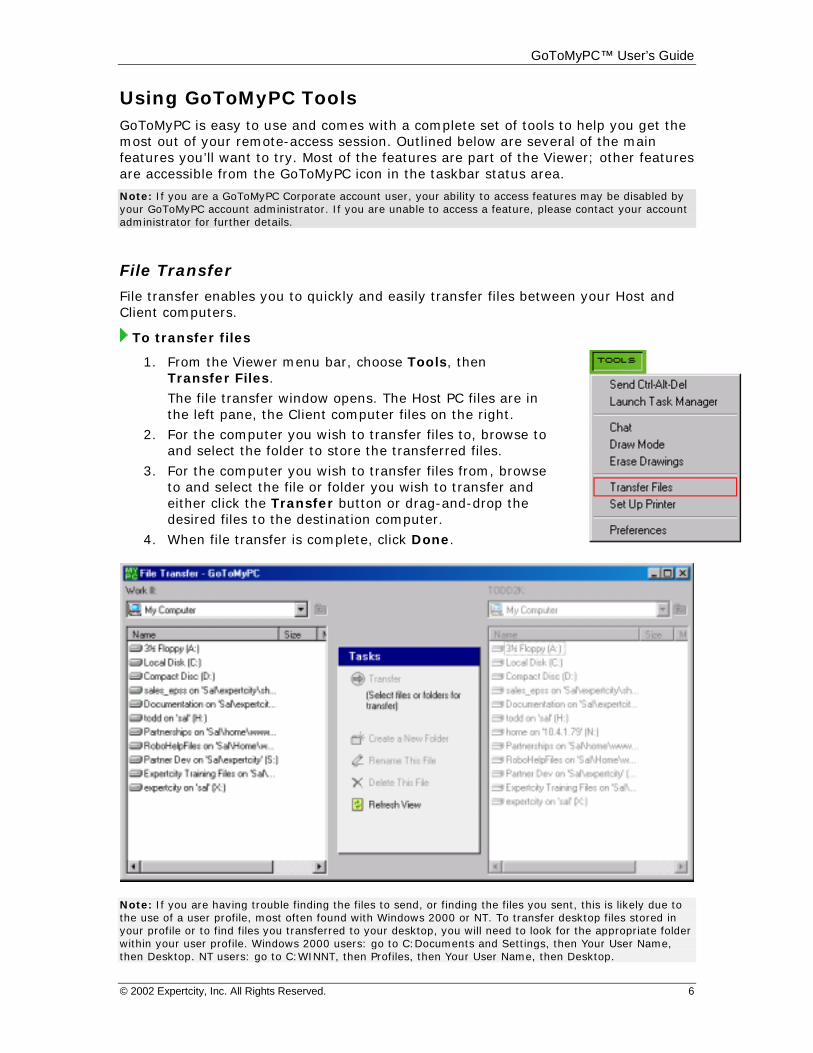
To transfer files
1. From the Viewer menu bar, choose Tools, then Transfer Files.
The file transfer window opens. The Host PC files are in the left pane, the Client computer files on the right.
2. For the computer you wish to transfer files to, browse to and select the folder to store the transferred files.
3. For the computer you wish to transfer files from, browse to and select the file or folder you wish to transfer and either click the Transfer button or drag-and-drop the desired files to the destination computer.
4. When file transfer is complete, click Done.
Note: If you are having trouble finding the files to send, or finding the files you sent, this is likely due to the use of a user profile, most often found with Windows 2000 or NT. To transfer desktop files stored in your profile or to find files you transferred to your desktop, you will need to look for the appropriate folder within your user profile. Windows 2000 users: go to C:Documents and Settings, then Your User Name, then Desktop. NT users: go to C:WINNT, then Profiles, then Your User Name, then Desktop.
GoToMyPC™ User’s Guide
© 2002 Expertcity, Inc. All Rights Reserved. 7
Chat
Chat is a function that enables you to start a chat dialog with someone located at your Host computer while you are on your Client computer. It also enables you to communicate via chat with a guest you have invited to your computer.
To communicate with Chat, simply enter your text into the text entry field and click Send or press the Enter key on your keyboard.
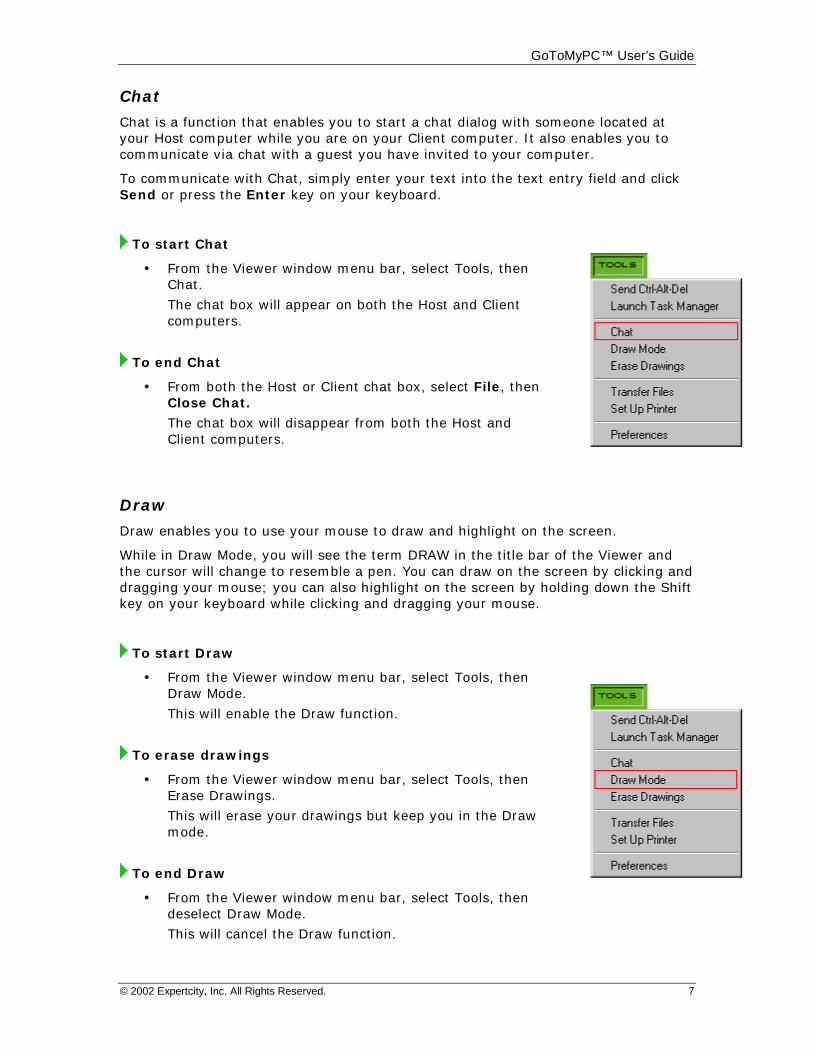
To start Chat
! From the Viewer window menu bar, select Tools, then Chat.
The chat box will appear on both the Host and Client computers.
To end Chat
! From both the Host or Client chat box, select File, then Close Chat.
The chat box will disappear from both the Host and Client computers.
Draw
Draw enables you to use your mouse to draw and highlight on the screen.
While in Draw Mode, you will see the term DRAW in the title bar of the Viewer and the cursor will change to resemble a pen. You can draw on the screen by clicking and dragging your mouse; you can also highlight on the screen by holding down the Shift key on your keyboard while clicking and dragging your mouse.
To start Draw
! From the Viewer window menu bar, select Tools, then Draw Mode.
This will enable the Draw function.
To erase drawings
! From the Viewer window menu bar, select Tools, then Erase Drawings.
This will erase your drawings but keep you in the Draw mode.
To end Draw
! From the Viewer window menu bar, select Tools, then deselect Draw Mode.
This will cancel the Draw function.
GoToMyPC™ User’s Guide
© 2002 Expertcity, Inc. All Rights Reserved. 8
Guest Invitation
The guest invitation feature of GoToMyPC enables you to invite a guest to view the desktop of your Host computer while you are at the Host computer.
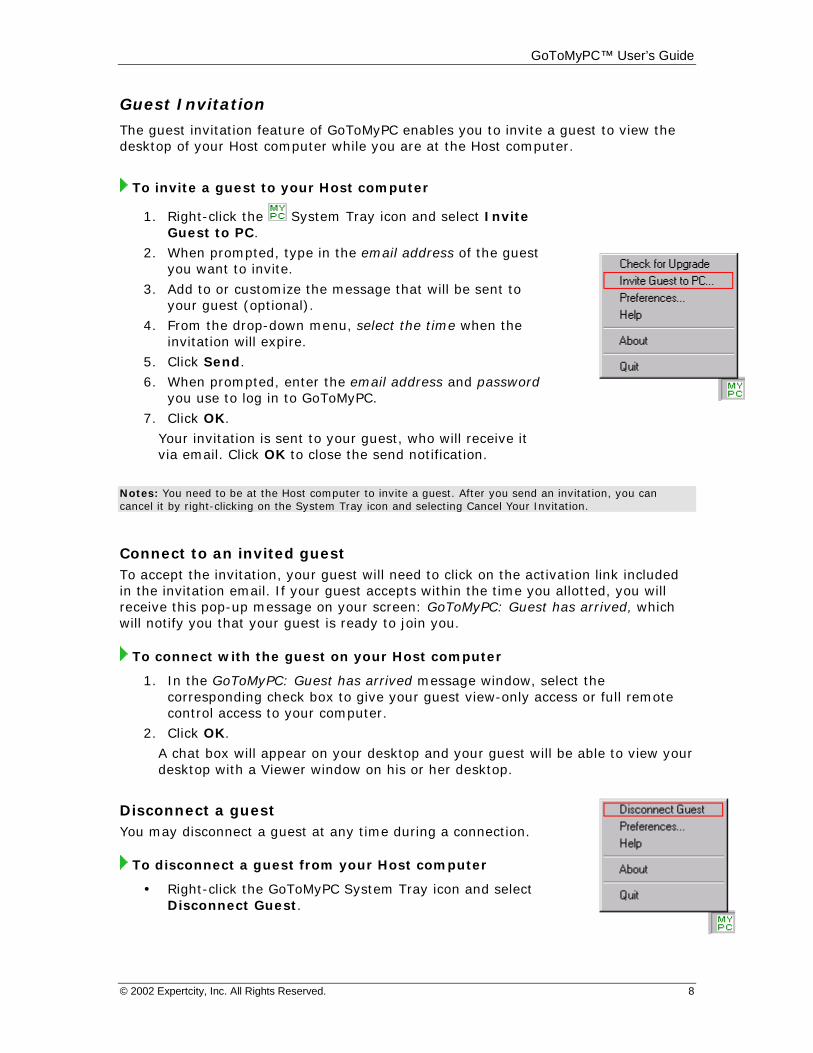
To invite a guest to your Host computer
1. Right-click the System Tray icon and select Invite Guest to PC.
2. When prompted, type in the email address of the guest you want to invite.
3. Add to or customize the message that will be sent to your guest (optional).
4. From the drop-down menu, select the time when the invitation will expire.
5. Click Send.
6. When prompted, enter the email address and password you use to log in to GoToMyPC.
7. Click OK.
Your invitation is sent to your guest, who will receive it via email. Click OK to close the send notification.
Notes: You need to be at the Host computer to invite a guest. After you send an invitation, you can cancel it by right-clicking on the System Tray icon and selecting Cancel Your Invitation.
Connect to an invited guest To accept the invitation, your guest will need to click on the activation link included in the invitation email. If your guest accepts within the time you allotted, you will receive this pop-up message on your screen: GoToMyPC: Guest has arrived, which will notify you that your guest is ready to join you.
To connect with the guest on your Host computer
1. In the GoToMyPC: Guest has arrived message window, select the corresponding check box to give your guest view-only access or full remote control access to your computer.
2. Click OK.
A chat box will appear on your desktop and your guest will be able to view your desktop with a Viewer window on his or her desktop.
Disconnect a guest You may disconnect a guest at any time during a connection.
To disconnect a guest from your Host computer
! Right-click the GoToMyPC System Tray icon and select Disconnect Guest.
GoToMyPC™ User’s Guide
© 2002 Expertcity, Inc. All Rights Reserved. 9
Remote Printing
Remote Printing enables you to print documents that are on your Host computer to your local Client computer printer. From your Client computer, you have the ability to print documents from a Host application that may not be installed on the Client computer. Once you have enabled Remote Printing, you can print a document from the Host computer to the Client computer printer by printing as you normally would.
The process for enabling Remote Printing requires that you first set up the Client computer’s printer type on the Host computer.
You may enable Remote Printing from the Viewer menu bar while in a session or from the Preferences menu in the GoToMyPC system tray icon (usually located in the lower-right corner of your screen near the clock).
Note: The add printer wizard may not work correctly if you attempt to install the printer from the system tray icon while you are in session.
Note: The process of installing Remote Printing will vary depending upon operating system and access to printer drivers. If you do not have the necessary printer driver on your Host computer, you may need to download the driver from the manufacturer’s Web site before you can complete the installation of a remote printer.
To enable Remote Printing from Viewer menu while in session
* For Windows 2000, and XP
1. From the Viewer window menu bar, select Tools, then Set Up Printer.
The “GoToMyPC – Select a printer to set up” window opens.
2. On the “GoToMyPC – Select a printer to set up” window, The drop-down will automatically select the default printer (from your Printers folder) installed on your local computer. If you wish to select another printer, click the drop-down window and choose the printer you want to set up.
3. Click OK.
The “GoToMyPC – Set up printer” window opens.
4. On the “GoToMyPC – Set up printer” window, check the box to “Install the printer automatically.” Click Next.
GoToMyPC will attempt to find the drivers for your printer and install them on the Host computer.
• If successful: You will receive notification that the printer setup was completed successfully. Click OK. The printer will be added to your GoToMyPC printers list available on the GoToMyPC Preferences menu.
• If unsuccessful: Repeat steps 1 to 3 and when you reach at step 4, uncheck the box “Install the printer automatically.” Click Next.
5. The “Add printer wizard” window opens. Notice the GoToMyPC “Add printer wizard” Tips window attached to the left of the printer wizard window. Please pay special attention to this window during the setup process; it will provide special assistance in setting up a GoToMyPC printer.
6. On the “Add printer wizard” window. Click Next.
7. On the Select Local or Network Printer page, select Local printer. Make that Plug and Play auto-detection is NOT selected. Click Next.
GoToMyPC™ User’s Guide
© 2002 Expertcity, Inc. All Rights Reserved. 10
8. On the Select the Printer Port page, scroll down and select the GoToPort. Click Next.
9. On the Add Printer page, select the manufacturer and model of your printer. Click Next.
Note: Start by selecting the manufacturer and then select the printer model that is closest to the model you have. If you cannot find a close match, you may need to download the driver from the manufacturer’s Web site. Once you have downloaded the driver (be sure it is the right driver for your Host computer operating system), click the Have Disk button, browse to where you downloaded the driver, select the driver and click OK.
10. On the name your printer page, enter the name for this printer. We recommend that you keep the “GoToMyPC” preface to the printer name to help you identify the printer in the future. Select No if asked to set this printer as the default printer. Click Next.
11. On the Printer Sharing page, select Do not share this printer. Click Next.
12. On the Print Test page, select Yes if GoToMyPC if you are in a GoToMyPC session, select No if not. Click Next.
13. Click Finish.
To enable Remote Printing from Viewer menu while in session
* For Windows 95, 98, ME and NT
1. From the Viewer window menu bar, select Tools, then Set Up Printer.
The “Add printer wizard” window opens. Notice the GoToMyPC “Add printer wizard” Tips window attached to the left of the printer wizard window. Please pay special attention to this window during the setup process; it will provide special assistance in setting up a GoToMyPC printer.
2. On the “Add printer wizard” window. Click Next.
3. On the select local or network printer page, select Local printer. Make sure that Plug and Play auto-detection is NOT selected. Click Next.
4. On the Select the Printer Port page, scroll down and select the GoToPort. Click Next.
5. On the Add Printer Page, select the manufacturer and model of your printer. Click Next.
Note: Start by selecting the manufacturer and then select the printer model that is closest to the model you have. If you cannot find a close match, you may need to download the driver from the manufacturer’s Web site. Once you have downloaded the driver (be sure it is the right driver for your Host computer’s operating system), click the Have Disk button, browse to where you downloaded the driver, select the driver and click OK.
6. On the Name Your Printer page, enter the name for this printer. We recommend that you keep the “GoToMyPC” preface to the printer name to help you identify the printer in the future. Select No if asked to set this printer as the default printer. Click Next.
7. On the Printer Sharing page, select Do not share this printer. Click Next.
8. On the Print Test page, select Yes if GoToMyPC if you are in a GoToMyPC session, select No if not. Click Next.
9. Click Finish.
GoToMyPC™ User’s Guide
© 2002 Expertcity, Inc. All Rights Reserved. 11
To enable Remote Printing from GoToMyPC system tray icon
* For all Windows operating systems
1. Right-click the GoToMyPC system tray icon and select Preferences.
2. On the Preferences window select the Printing tab.
3. On the Printing tab click the Add Printer button.
The “Add printer wizard” window opens. Notice the GoToMyPC “Add printer wizard” Tips window attached to the left of the printer wizard window. Please pay special attention to this window during the setup process; it will provide special assistance in setting up a GoToMyPC printer.
4. On the “Add printer wizard” window. Click Next.
5. On the select local or network printer page, select Local printer. Make sure that Plug and Play auto-detection is NOT selected. Click Next.
6. On the Select the Printer Port page, scroll down and select the GoToPort. Click Next.
7. On the Add Printer page, select the manufacturer and model of your printer. Click Next.
Note: Start by selecting the manufacturer and then select the printer model that is closest to the model you have. If you cannot find a close match, you may need to download the driver from the manufacturer’s Web site. Once you have downloaded the driver (be sure it is the right driver for your Host computer’s operating system), click the Have Disk button, browse to where you downloaded the driver, select the driver and click OK.
8. On the Name Your Printer page, enter the name for this printer. We recommend that you keep the “GoToMyPC” preface to the printer name to help you identify the printer in the future. Select No if asked to set this printer as the default printer. Click Next.
9. On the Printer Sharing page, select Do not share this printer. Click Next.
10. On the Print Test page, select Yes if GoToMyPC if you are in a GoToMyPC session, select No if not. Click Next.
11. Click Finish.
Note: To use the Remote Printing feature, you will need to ensure that you have administrator rights when you upgrade/install GoToMyPC if your Host computer operating system is Windows NT, 2000 or XP Professional. If you are on Windows 95 or 98 and upgrading to GoToMyPC 2.0 from a previous version, you will need to reboot your computer after upgrading to enable Remote Printing.
GoToMyPC™ User’s Guide
© 2002 Expertcity, Inc. All Rights Reserved. 12
Cut/Copy and Paste
Cut/copy and paste enables you to cut/copy and paste text between the Host and Client computers.
To cut/copy and paste text
1. Select the text you want to cut or copy by left-clicking you mouse and dragging the cursor over the text.
2. Right-click your mouse on the selected text and choose Cut or Copy.
3. Place your mouse in the location where you want to paste the text and left-click your mouse.
4. Right-click your mouse and select Paste.
Desktop Shortcut
The Desktop Shortcut works by putting a shortcut on a Client computer that links directly to a specific Host PC to enable fast and easy access to the PC. The Desktop Shortcut is great for users who frequently use the same Client computer to access the same Host PC (say from a home computer to a PC at work).
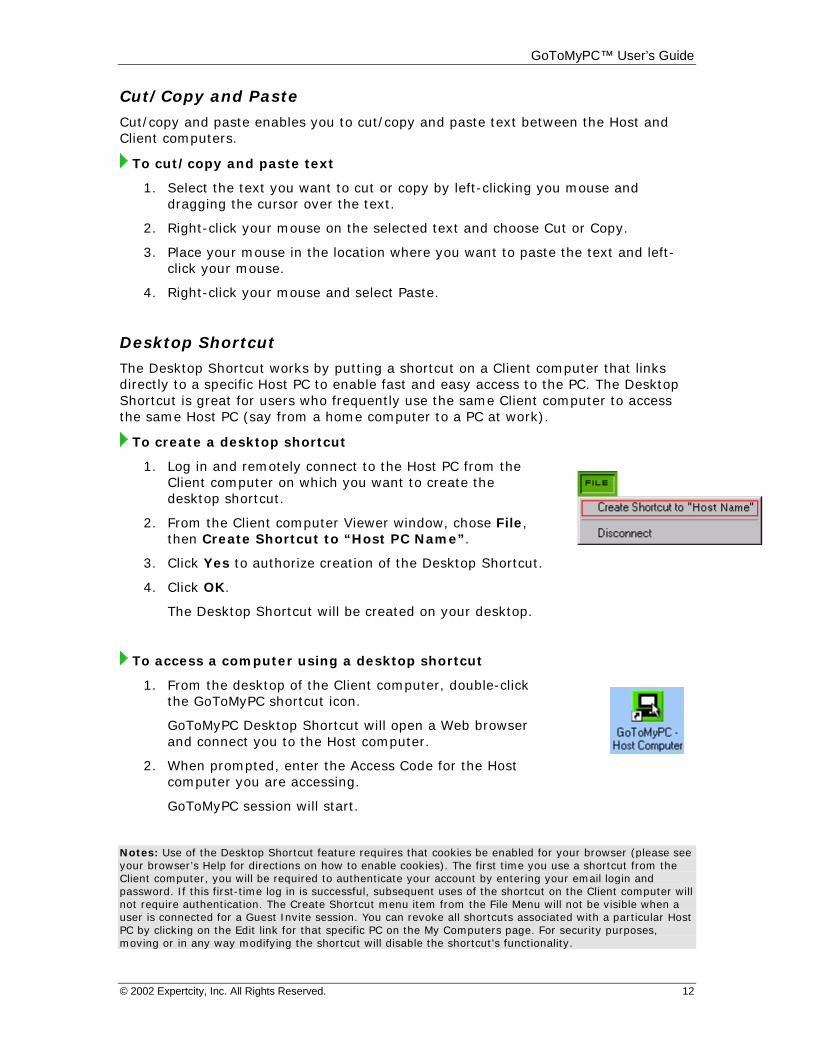
To create a desktop shortcut
1. Log in and remotely connect to the Host PC from the Client computer on which you want to create the desktop shortcut.
2. From the Client computer Viewer window, chose File, then Create Shortcut to “Host PC Name”.
3. Click Yes to authorize creation of the Desktop Shortcut.
4. Click OK.
The Desktop Shortcut will be created on your desktop.
To access a computer using a desktop shortcut
1. From the desktop of the Client computer, double-click the GoToMyPC shortcut icon.
GoToMyPC Desktop Shortcut will open a Web browser and connect you to the Host computer.
2. When prompted, enter the Access Code for the Host computer you are accessing.
GoToMyPC session will start.
Notes: Use of the Desktop Shortcut feature requires that cookies be enabled for your browser (please see your browser’s Help for directions on how to enable cookies). The first time you use a shortcut from the Client computer, you will be required to authenticate your account by entering your email login and password. If this first-time log in is successful, subsequent uses of the shortcut on the Client computer will not require authentication. The Create Shortcut menu item from the File Menu will not be visible when a user is connected for a Guest Invite session. You can revoke all shortcuts associated with a particular Host PC by clicking on the Edit link for that specific PC on the My Computers page. For security purposes, moving or in any way modifying the shortcut will disable the shortcut’s functionality.
GoToMyPC™ User’s Guide
© 2002 Expertcity, Inc. All Rights Reserved. 13
Remember Me
Remember Me enables you to set a cookie in your browser that will automatically log you in to a specific GoToMyPC account - without the need for you to enter your email log in and password – simply by returning to the GoToMyPC Web site.
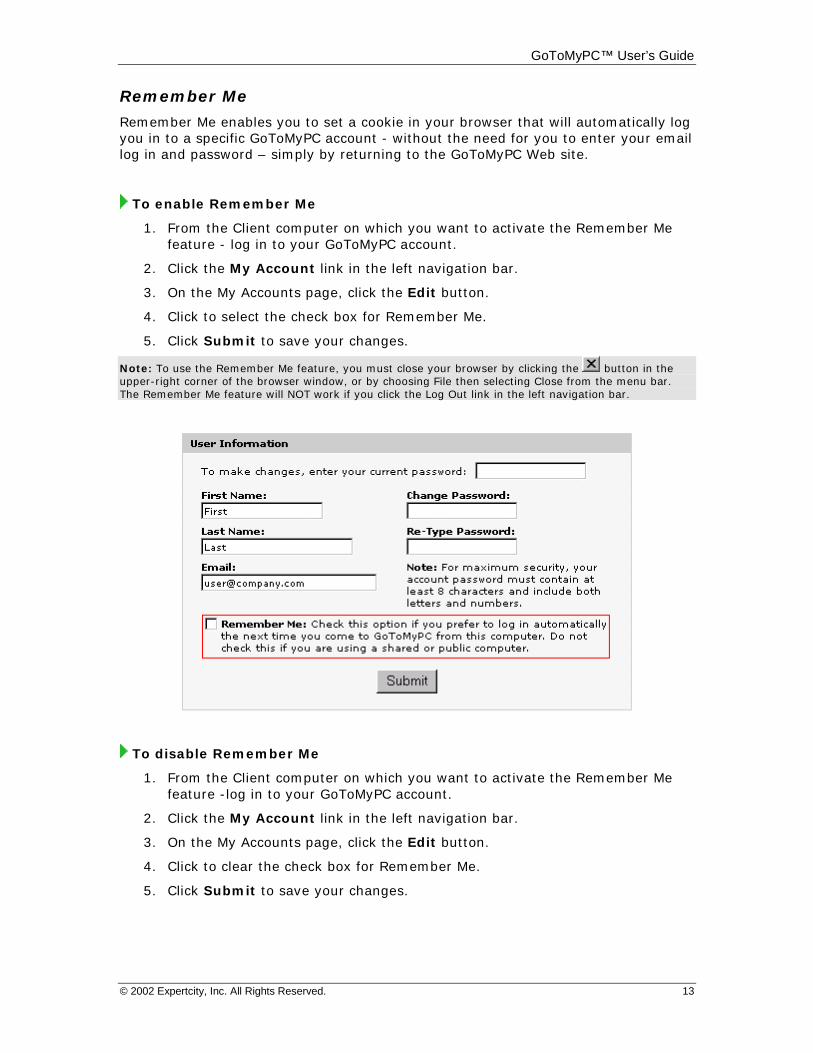
To enable Remember Me
1. From the Client computer on which you want to activate the Remember Me feature - log in to your GoToMyPC account.
2. Click the My Account link in the left navigation bar.
3. On the My Accounts page, click the Edit button.
4. Click to select the check box for Remember Me.
5. Click Submit to save your changes.
Note: To use the Remember Me feature, you must close your browser by clicking the button in the upper-right corner of the browser window, or by choosing File then selecting Close from the menu bar. The Remember Me feature will NOT work if you click the Log Out link in the left navigation bar.
To disable Remember Me
1. From the Client computer on which you want to activate the Remember Me feature -log in to your GoToMyPC account.
2. Click the My Account link in the left navigation bar.
3. On the My Accounts page, click the Edit button.
4. Click to clear the check box for Remember Me.
5. Click Submit to save your changes.
GoToMyPC™ User’s Guide
© 2002 Expertcity, Inc. All Rights Reserved. 14
End Your GoToMyPC Session Prior to disconnecting from your GoToMyPC session, you may want to first lock your computer to help ensure security.
Remotely Lock Your Host Computer
When you are through using your Host computer, we recommend that you lock your computer to help protect your data. Your operating system will determine how to lock your computer.
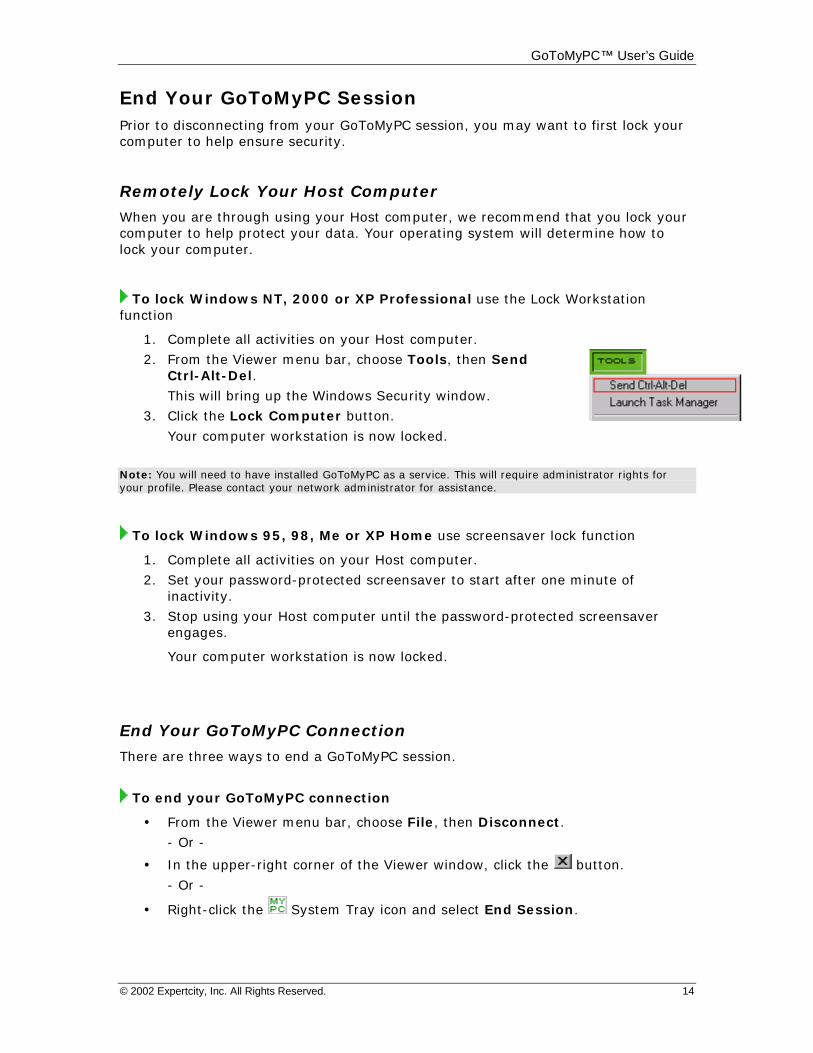
To lock Windows NT, 2000 or XP Professional use the Lock Workstation function
1. Complete all activities on your Host computer.
2. From the Viewer menu bar, choose Tools, then Send Ctrl-Alt-Del.
This will bring up the Windows Security window.
3. Click the Lock Computer button.
Your computer workstation is now locked.
Note: You will need to have installed GoToMyPC as a service. This will require administrator rights for your profile. Please contact your network administrator for assistance.
To lock Windows 95, 98, Me or XP Home use screensaver lock function
1. Complete all activities on your Host computer.
2. Set your password-protected screensaver to start after one minute of inactivity.
3. Stop using your Host computer until the password-protected screensaver engages.
Your computer workstation is now locked.
End Your GoToMyPC Connection
There are three ways to end a GoToMyPC session.
To end your GoToMyPC connection
! From the Viewer menu bar, choose File, then Disconnect.
- Or -
! In the upper-right corner of the Viewer window, click the button.
- Or -
! Right-click the System Tray icon and select End Session.
GoToMyPC™ User’s Guide
© 2002 Expertcity, Inc. All Rights Reserved. 15
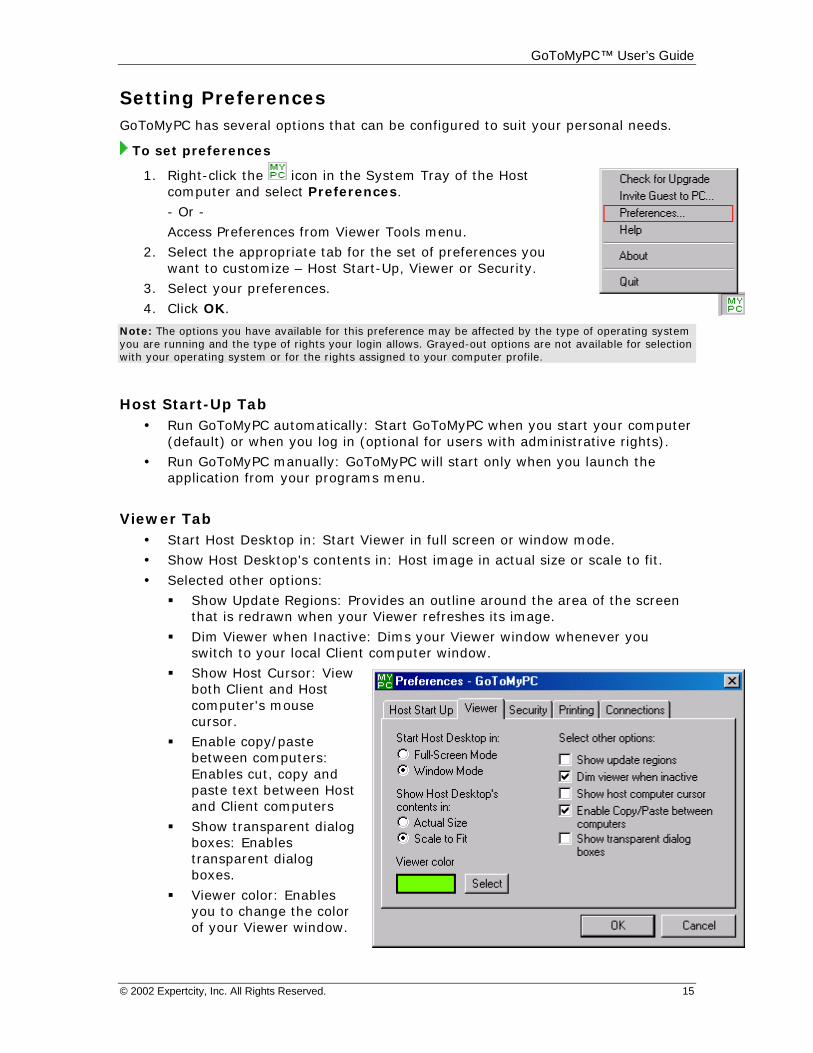
Setting Preferences GoToMyPC has several options that can be configured to suit your personal needs.
To set preferences
1. Right-click the icon in the System Tray of the Host computer and select Preferences.
- Or -
Access Preferences from Viewer Tools menu.
2. Select the appropriate tab for the set of preferences you want to customize – Host Start-Up, Viewer or Security.
3. Select your preferences.
4. Click OK.
Note: The options you have available for this preference may be affected by the type of operating system you are running and the type of rights your login allows. Grayed-out options are not available for selection with your operating system or for the rights assigned to your computer profile.
Host Start-Up Tab ! Run GoToMyPC automatically: Start GoToMyPC when you start your computer
(default) or when you log in (optional for users with administrative rights).
! Run GoToMyPC manually: GoToMyPC will start only when you launch the application from your programs menu.
Viewer Tab ! Start Host Desktop in: Start Viewer in full screen or window mode.
! Show Host Desktop's contents in: Host image in actual size or scale to fit.
! Selected other options:
# Show Update Regions: Provides an outline around the area of the screen that is redrawn when your Viewer refreshes its image.
# Dim Viewer when Inactive: Dims your Viewer window whenever you switch to your local Client computer window.
# Show Host Cursor: View both Client and Host computer's mouse cursor.
# Enable copy/paste between computers: Enables cut, copy and paste text between Host and Client computers
# Show transparent dialog boxes: Enables transparent dialog boxes.
# Viewer color: Enables you to change the color of your Viewer window.
GoToMyPC™ User’s Guide
© 2002 Expertcity, Inc. All Rights Reserved. 16
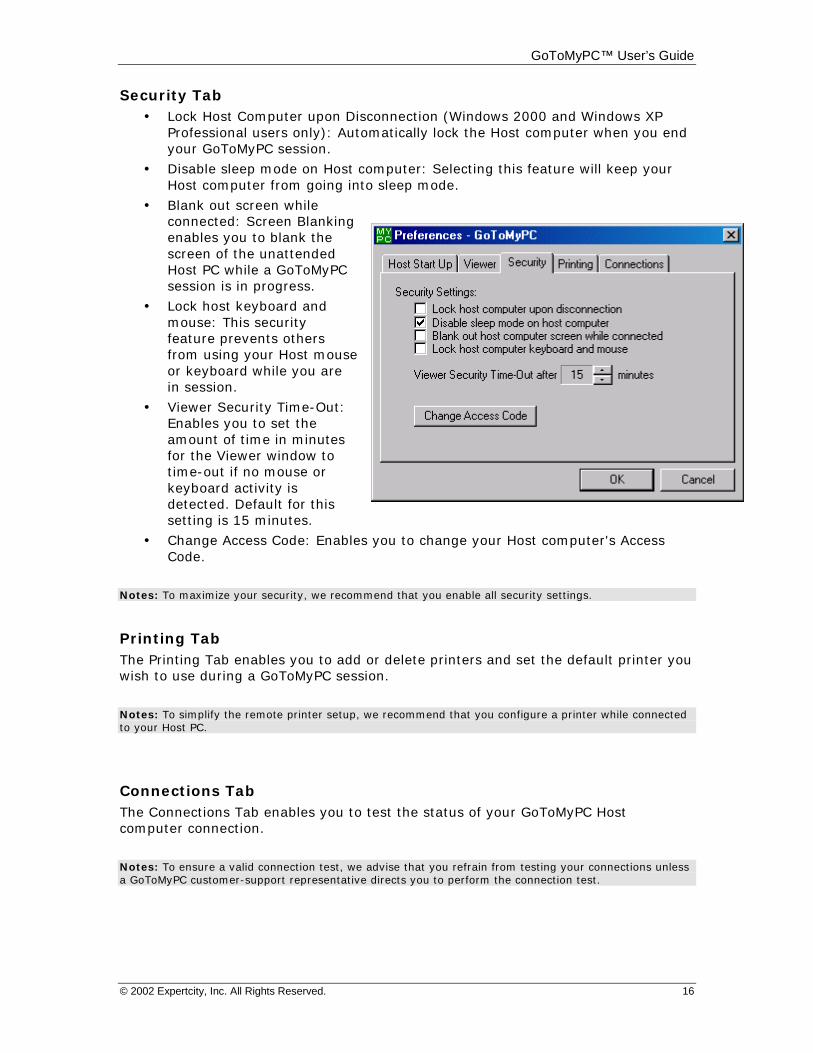
Security Tab ! Lock Host Computer upon Disconnection (Windows 2000 and Windows XP
Professional users only): Automatically lock the Host computer when you end your GoToMyPC session.
! Disable sleep mode on Host computer: Selecting this feature will keep your Host computer from going into sleep mode.
! Blank out screen while connected: Screen Blanking enables you to blank the screen of the unattended Host PC while a GoToMyPC session is in progress.
! Lock host keyboard and mouse: This security feature prevents others from using your Host mouse or keyboard while you are in session.
! Viewer Security Time-Out: Enables you to set the amount of time in minutes for the Viewer window to time-out if no mouse or keyboard activity is detected. Default for this setting is 15 minutes.
! Change Access Code: Enables you to change your Host computer's Access Code.
Notes: To maximize your security, we recommend that you enable all security settings.
Printing Tab The Printing Tab enables you to add or delete printers and set the default printer you wish to use during a GoToMyPC session.
Notes: To simplify the remote printer setup, we recommend that you configure a printer while connected to your Host PC.
Connections Tab The Connections Tab enables you to test the status of your GoToMyPC Host computer connection.
Notes: To ensure a valid connection test, we advise that you refrain from testing your connections unless a GoToMyPC customer-support representative directs you to perform the connection test.
GoToMyPC™ User’s Guide
© 2002 Expertcity, Inc. All Rights Reserved. 17
Managing My Computers
Add or Remove Host Computers
You have the option of removing and adding new computers at any time, allowing you the flexibility to rotate Host computers on your account.
To add a Host computer to your account
1. Go to the computer you want to add to your account.
2. Log in to your GoToMyPC My Computers page.
3. On your My Computers page, click the Add Computer button.
4. Follow the normal process to download GoToMyPC and register a Host PC.
Note: Your ability to add computers will depend upon the plan you have purchased, or if you are a corporate account user, the number of computers your administrator has authorized.
To remove a Host computer from your account
1. Log in to your GoToMyPC My Computers page.
2. On your My Computers page, click the Edit link next to the computer you wish to remove.
3. On the next page click the Delete button; this will remove the computer from your My Computers page. To remove the GoToMyPC service from the Host computer, please use Add/Remove Programs feature on your Host computer.
Note: You may add and remove Host computers as often as you wish. You may also want to consider upgrading your account to allow for a greater number of PCs to be permanently available to you.
Move Host Computers between Accounts
To move a computer from one account (e.g., individual) to another account (e.g., business end-user account) you will need to uninstall and reinstall the GoToMyPC software for each computer you wish to move.
To move a registered computer to another account
Step One - Remove GoToMyPC from Host and your My Computers page.
1. First, delete the computer from your My Computers page for the account.
! Log in to your GoToMyPC My Computers page, on your My Computers page click the Edit link next to the computer you wish to remove, on the next page select the Delete button.
2. Then, remove the GoToMyPC service from your Host computer.
Go to the Host computer from which you want to remove the GoToMyPC service, and uninstall GoToMyPC from the computer.
! From the Task bar choose Start, then Settings, then Control Panel, then Add/Remove Programs and then GoToMyPC.
Step Two - Add GoToMyPC to the new Host and your My Computers page.
1. First, go to the new Host computer and download the GoToMyPC service.
! Log in to your GoToMyPC My Computers page for the specific account and download and set up GoToMyPC on that computer.
2. When prompted, add the computer to your other account by registering the computer, using that account's unique Email address and account Password.
GoToMyPC™ User’s Guide
© 2002 Expertcity, Inc. All Rights Reserved. 18
Change your Host computer's Nickname
You can change your Host computer’s nickname at anytime.
1. Log in to your GoToMyPC My Computers page. 2. To the right of the name of the computer you want to change, click the Edit
link. 3. In the Nickname field, type in the new nickname and click the Rename
button. The computer Nickname is changed.
Create a new Host Access Code
You may change the Host computer Access Code at any time.
1. Go to the Host computer whose Access Code you want to change.
2. Make sure that the GoToMyPC service is running (look for icon in the System Tray).
3. Right-click on the GoToMyPC System Tray icon and select Preferences.
4. Click the Security tab.
5. Click the Change access code button.
6. Click the Forgot it? link.
7. Enter your Email address and account Password.
8. Check your email and click on or copy the activation link into your browser.
The browser will take you to the Change Access Code page.
9. Enter your new Access Code, confirm the new Access Code and click OK.
Note: You will need to be at the Host computer to perform this function because you will not be able to log in to your Host computer without knowing the Access Code for that computer.
What to Do When Your Host Computer Is Offline
If you log in to your GoToMyPC My Computers page and notice that one of your computers is Offline, then one of three conditions, or a combination of conditions, may exist. The three conditions are:
! The Host computer is turned off
! The Host computer is not connected to the Internet
! The GoToMyPC service is not running
To start the GoToMyPC service
From the taskbar choose Start, then Programs and then GoToMyPC.
Reinstall GoToMyPC
If for any reason the GoToMyPC software on your Host computer gets deleted or corrupted, you can easily reinstall GoToMyPC at any time. To reinstall GoToMyPC on the same Host computer, open a Web browser and go to www.gotomypc.com/upgrade.tmpl and follow the directions.
GoToMyPC™ User’s Guide
© 2002 Expertcity, Inc. All Rights Reserved. 19
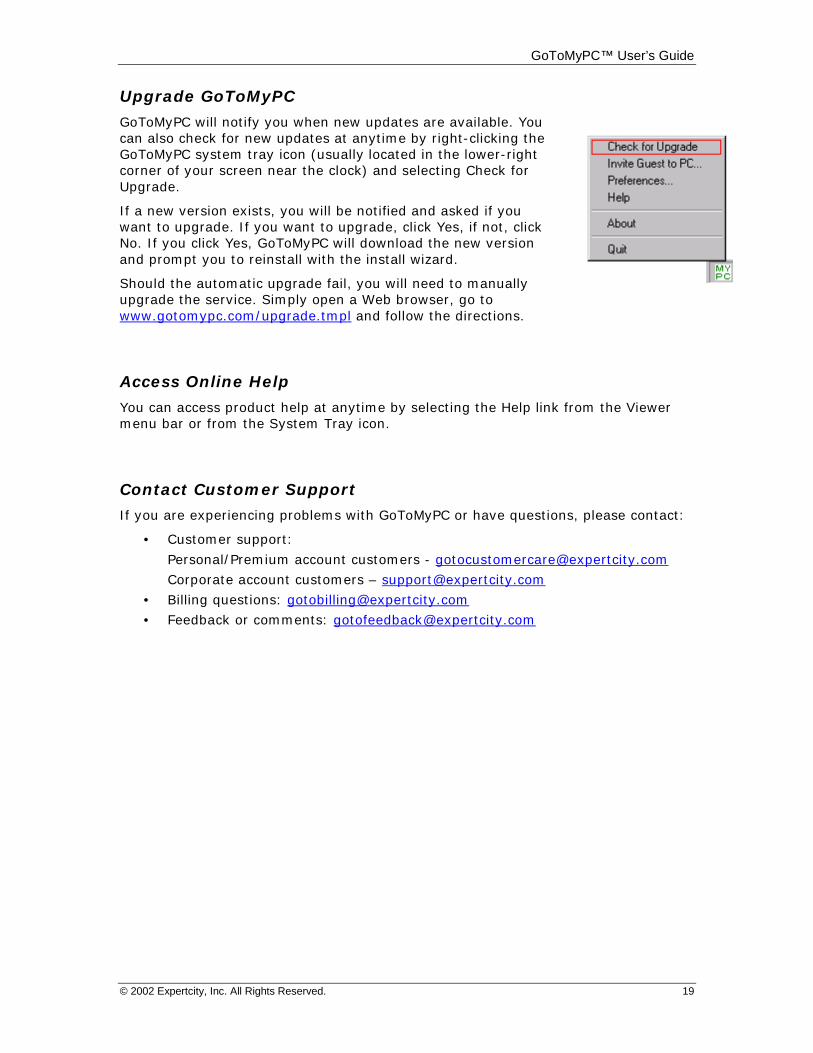
Upgrade GoToMyPC
GoToMyPC will notify you when new updates are available. You can also check for new updates at anytime by right-clicking the GoToMyPC system tray icon (usually located in the lower-right corner of your screen near the clock) and selecting Check for Upgrade.
If a new version exists, you will be notified and asked if you want to upgrade. If you want to upgrade, click Yes, if not, click No. If you click Yes, GoToMyPC will download the new version and prompt you to reinstall with the install wizard.
Should the automatic upgrade fail, you will need to manually upgrade the service. Simply open a Web browser, go to www.gotomypc.com/upgrade.tmpl and follow the directions.
Access Online Help
You can access product help at anytime by selecting the Help link from the Viewer menu bar or from the System Tray icon.
Contact Customer Support
If you are experiencing problems with GoToMyPC or have questions, please contact:
• Customer support:
Personal/Premium account customers - [email protected]
Corporate account customers – [email protected]
• Billing questions: [email protected]
• Feedback or comments: [email protected]
GoToMyPC™ User’s Guide
© 2002 Expertcity, Inc. All Rights Reserved. 20
Safety Tips
GoToMyPC provides the highest built in security so you can confidently access your computer from anywhere. For added security, here are a few things you can do.
1. Keep Your Password and Access Code Secure.
• Maintaining tight password security is the best way to protect your GoToMyPC account and host computer.
• GoToMyPC requires that your passwords have at least eight characters that include letters and numbers. When choosing your passwords, try not to use common or easily guessed words. For the highest level of security, your account password and host access code should be different.
• Don’t share your password with anyone and change your password regularly. You can change your access code from your host computer by right clicking the GoToMyPC system tray icon and selecting Change Access Code.
• When using shared or public computers exercise special care by not using GoToMyPC’s “Remember Me” feature to log in automatically. In addition, you should not use your Web browser’s “auto complete” feature.
2. Protect Your Host Computer During Your Session.
• Use the Blank Host Computer Screen feature to prevent someone at your host computer from viewing your activity (most configurations).
• Use the Lock Keyboard and Mouse feature to prevent others from using your host’s mouse and keyboard when you are in a session (most configurations).
3. Use Safety Features When Inviting Guests.
• You choose the expiration period for each invitation so you know when to be available when your guest arrives. The invitation expires if the guest does not connect to your computer within your designated period. Because the invitation automatically expires, your guest cannot attempt to connect when you are away from your computer.
• You choose the level of access to grant your invited guests. To limit a guest’s access to your computer, grant them view-only control. Alternatively, you can allow full control of your keyboard and mouse.
4. End Your Sessions Completely.
• Make sure to end your GoToMyPC sessions completely when you are finished by closing the Viewer and logging out of the GoToMyPC Web site.
• Be certain to not leave your session unattended.
• When you log out, remember that the last programs you were working on remain showing on your host computer. Make sure to close any sensitive documents or programs before you end your session.
• If your host computer is running Windows 2000 or Windows NT, you can optionally lock the computer when your GoToMyPC session ends. This prevents someone at your host computer from using your computer after your session ends. Enable this feature from the Security tab of GoToMyPC Preferences.