Embed Size (px)
Citation preview

GSE Performance POWER STEERING FOR ARCTIC CAT & YAMAHA
Yamaha Viper / Cat 7000 series instructions
---------------------------------------------------------------------------------------
You will need several tools for this installation - it is recommended that a trained professional install this kit.
When we refer to LH or RH it is understood that you will always be standing in front of the machine looking back at it.
First thing to do is take both side panels and the hood off.
next remove the screws from the upper radiator mount using a T25 torx driver. see picture below
next you will have to pull up on the top of the radiator so you can get to the front airbox screws.
it is easiest to use a long extention with a 1/4 drive ratchet and a T20 torx bit.
see picture on the next page
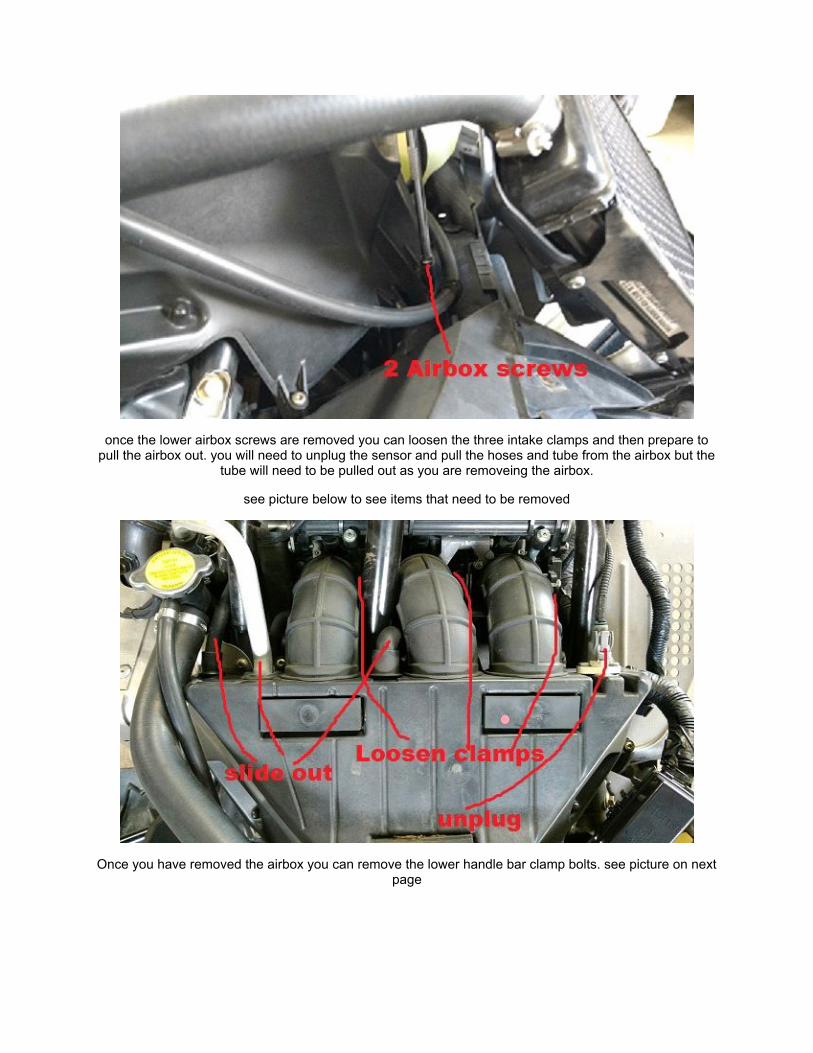
once the lower airbox screws are removed you can loosen the three intake clamps and then prepare to pull the airbox out. you will need to unplug the sensor and pull the hoses and tube from the airbox but the
tube will need to be pulled out as you are removeing the airbox.
see picture below to see items that need to be removed
Once you have removed the airbox you can remove the lower handle bar clamp bolts. see picture on next page
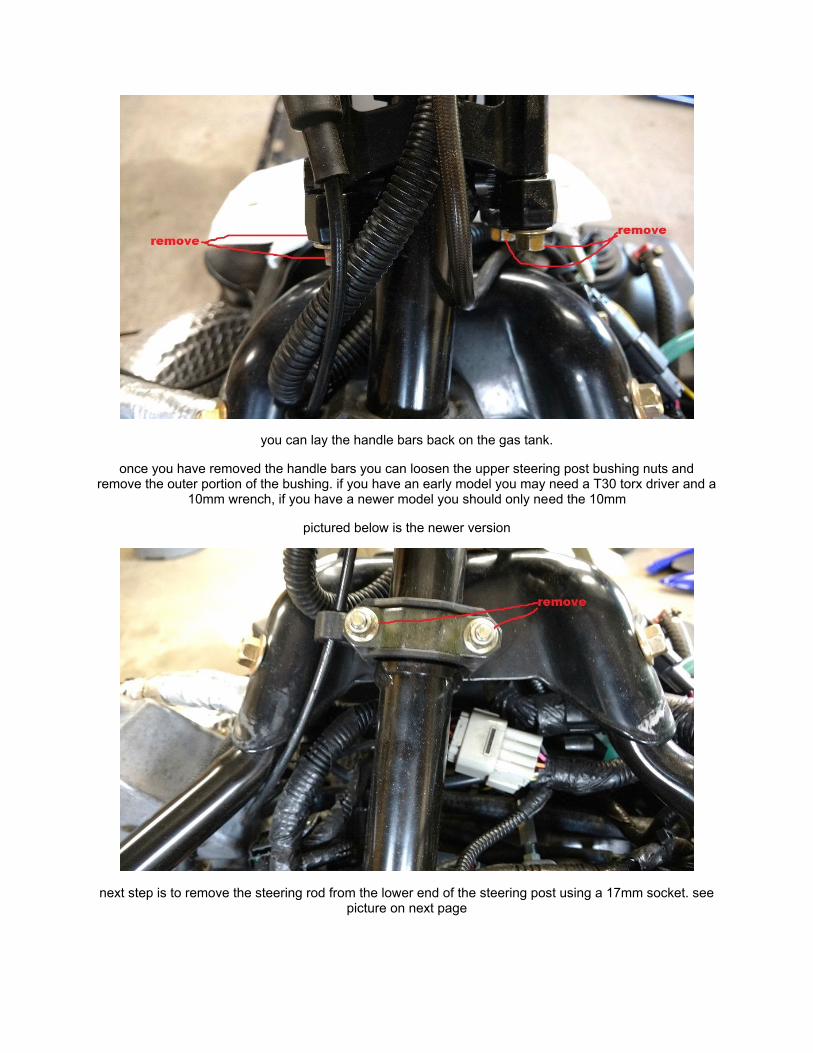
you can lay the handle bars back on the gas tank.
once you have removed the handle bars you can loosen the upper steering post bushing nuts and remove the outer portion of the bushing. if you have an early model you may need a T30 torx driver and a
10mm wrench, if you have a newer model you should only need the 10mm
pictured below is the newer version
next step is to remove the steering rod from the lower end of the steering post using a 17mm socket. see picture on next page
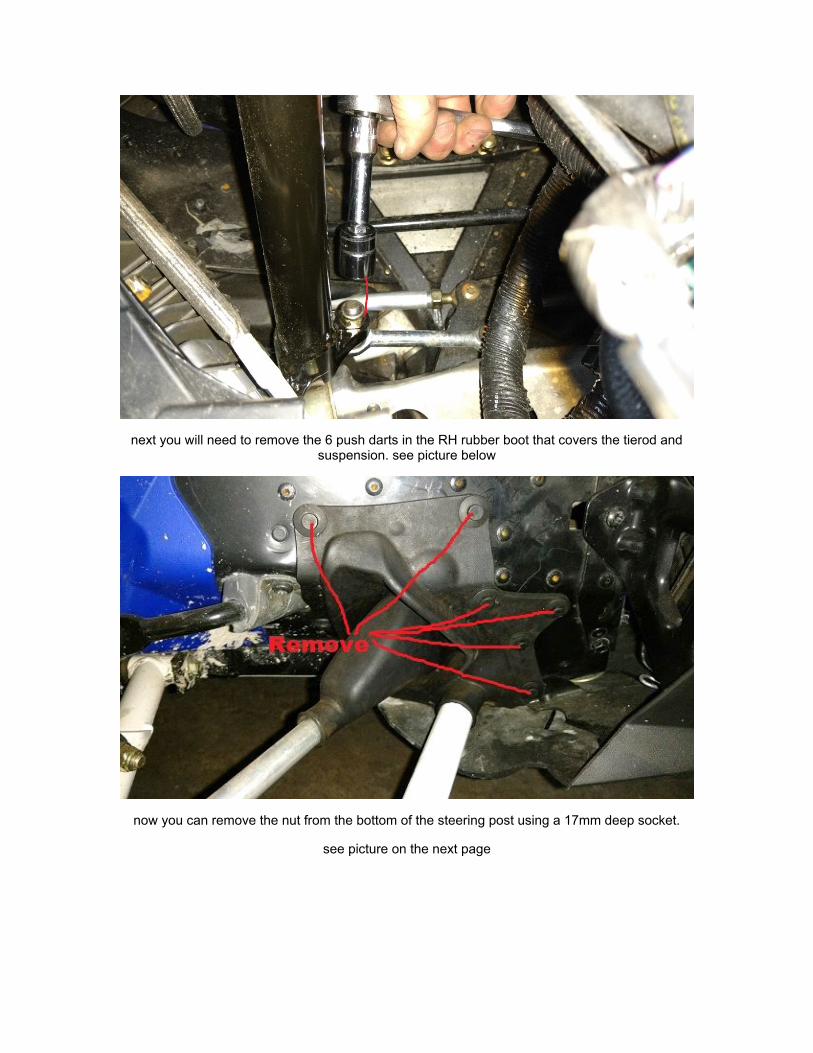
next you will need to remove the 6 push darts in the RH rubber boot that covers the tierod and suspension. see picture below
now you can remove the nut from the bottom of the steering post using a 17mm deep socket.
see picture on the next page

Once you have removed the nut you can pull the steering post out.
next you can loosen both front motor mount bolts using a 15mm wrench and a 18mm socket. do not pull the bolts out yet.
next you can install the lower portion of the steering post from your kit. see picture below for correct
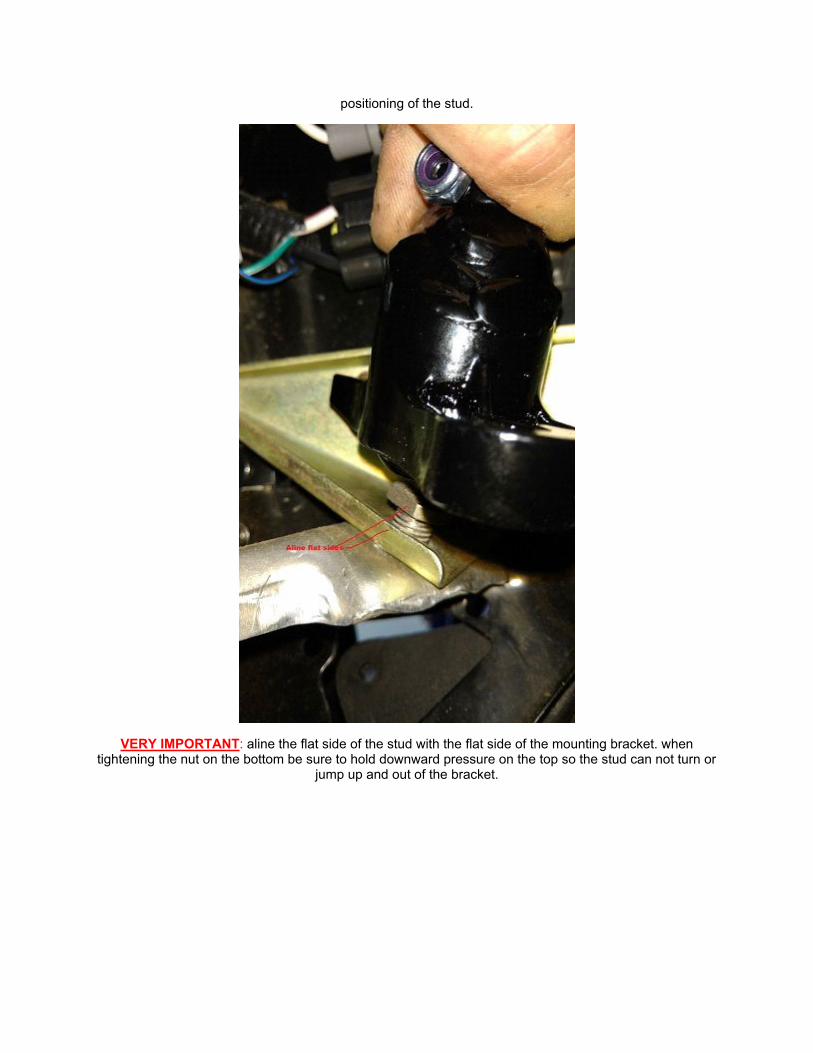
positioning of the stud.
VERY IMPORTANT: aline the flat side of the stud with the flat side of the mounting bracket. when tightening the nut on the bottom be sure to hold downward pressure on the top so the stud can not turn or
jump up and out of the bracket.
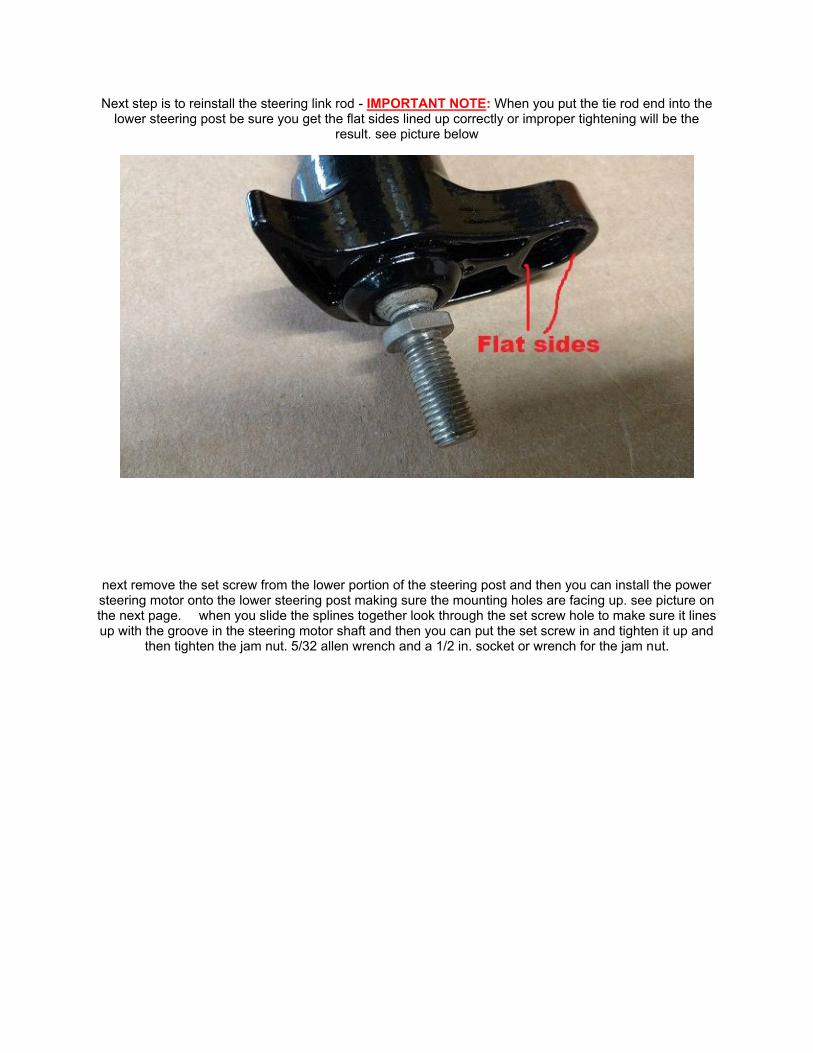
Next step is to reinstall the steering link rod - IMPORTANT NOTE: When you put the tie rod end into the lower steering post be sure you get the flat sides lined up correctly or improper tightening will be the
result. see picture below
next remove the set screw from the lower portion of the steering post and then you can install the power steering motor onto the lower steering post making sure the mounting holes are facing up. see picture on the next page. when you slide the splines together look through the set screw hole to make sure it lines up with the groove in the steering motor shaft and then you can put the set screw in and tighten it up and
then tighten the jam nut. 5/32 allen wrench and a 1/2 in. socket or wrench for the jam nut.
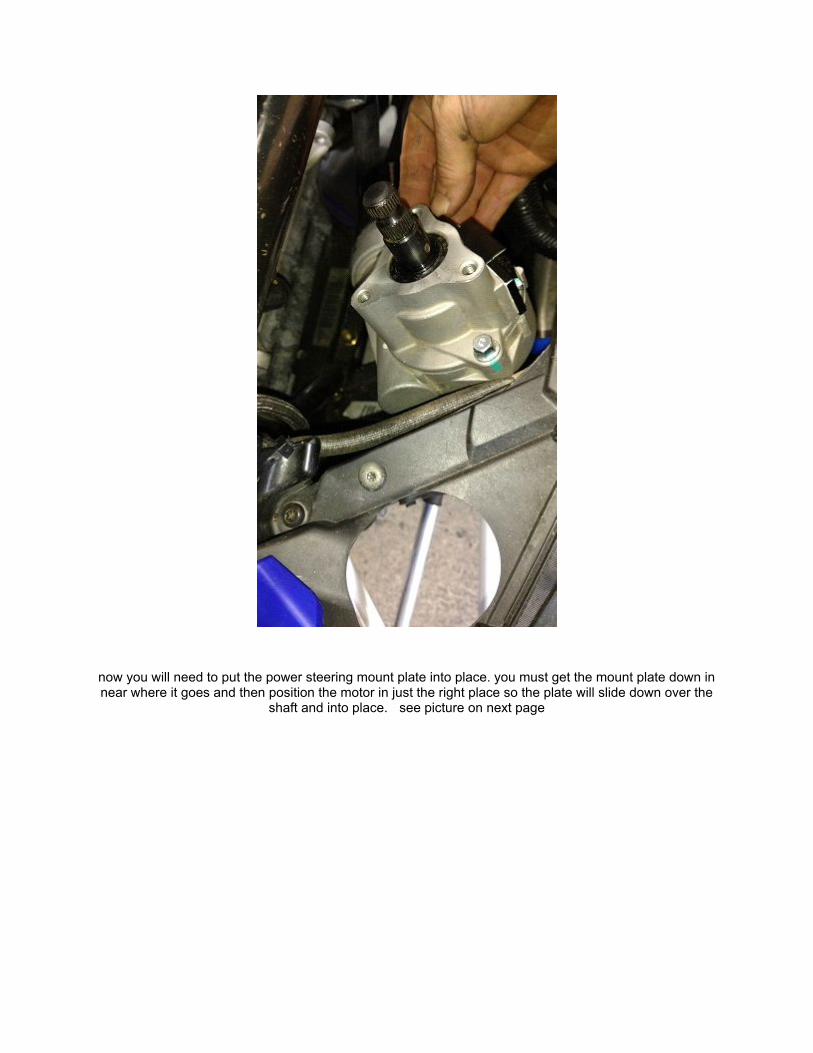
now you will need to put the power steering mount plate into place. you must get the mount plate down in near where it goes and then position the motor in just the right place so the plate will slide down over the
shaft and into place. see picture on next page
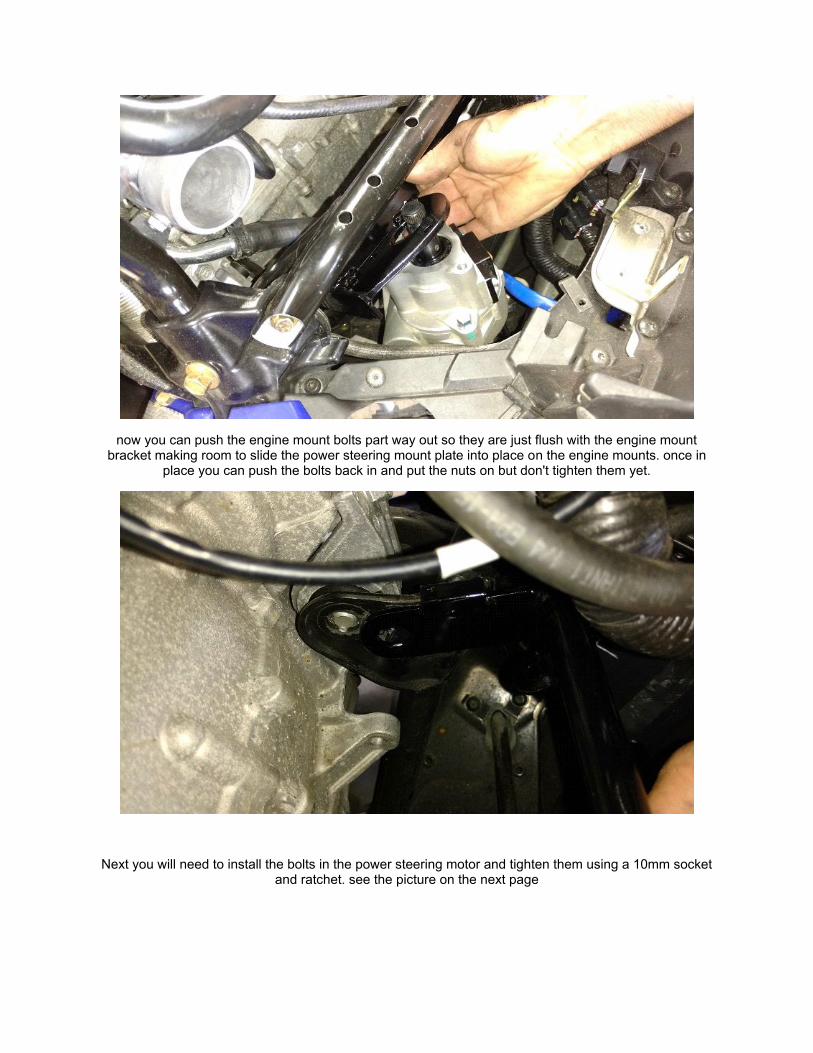
now you can push the engine mount bolts part way out so they are just flush with the engine mount bracket making room to slide the power steering mount plate into place on the engine mounts. once in
place you can push the bolts back in and put the nuts on but don't tighten them yet.
Next you will need to install the bolts in the power steering motor and tighten them using a 10mm socket and ratchet. see the picture on the next page
after you tighten the power steering motor mounting bolts you can go back and tighten the engine mount bolts.
Now you will be able to install the steering post. first remove the set screw, now make sure your skis are pointing straight forward and the T at the top of the steering post is straight across and in the proper
location. once you are sure everything is lined up where it needs to be you can slide the splined yoke onto the steering motor splines. once again make sure the groove is in line with the set screw hole and
then you can install the set screw and tighten it, also tighten the jam nut.
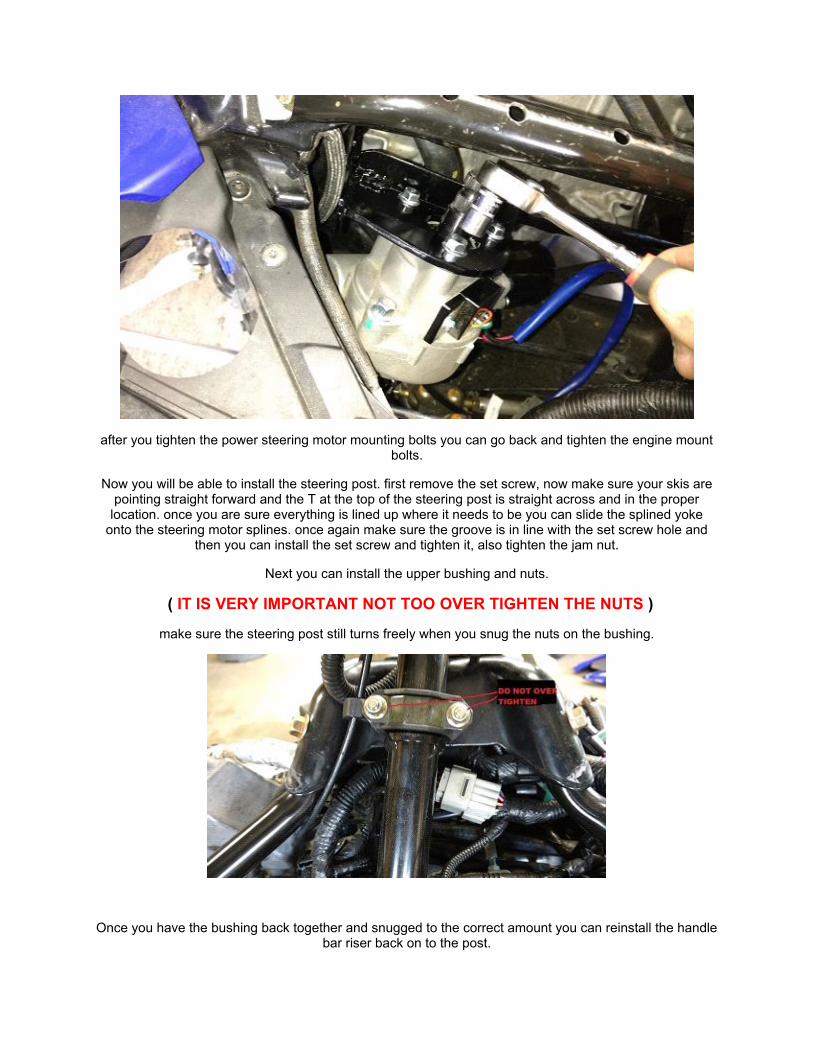
Next you can install the upper bushing and nuts.
( IT IS VERY IMPORTANT NOT TOO OVER TIGHTEN THE NUTS )
make sure the steering post still turns freely when you snug the nuts on the bushing.
Once you have the bushing back together and snugged to the correct amount you can reinstall the handle bar riser back on to the post.
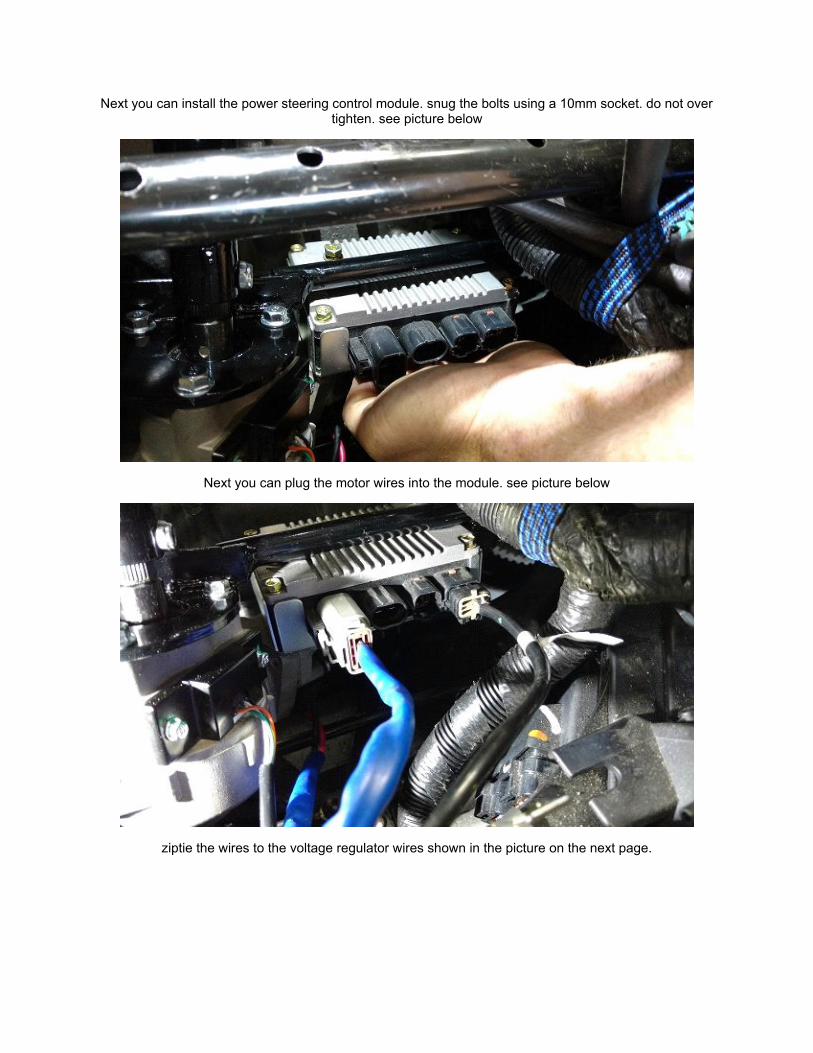
Next you can install the power steering control module. snug the bolts using a 10mm socket. do not over tighten. see picture below
Next you can plug the motor wires into the module. see picture below
ziptie the wires to the voltage regulator wires shown in the picture on the next page.
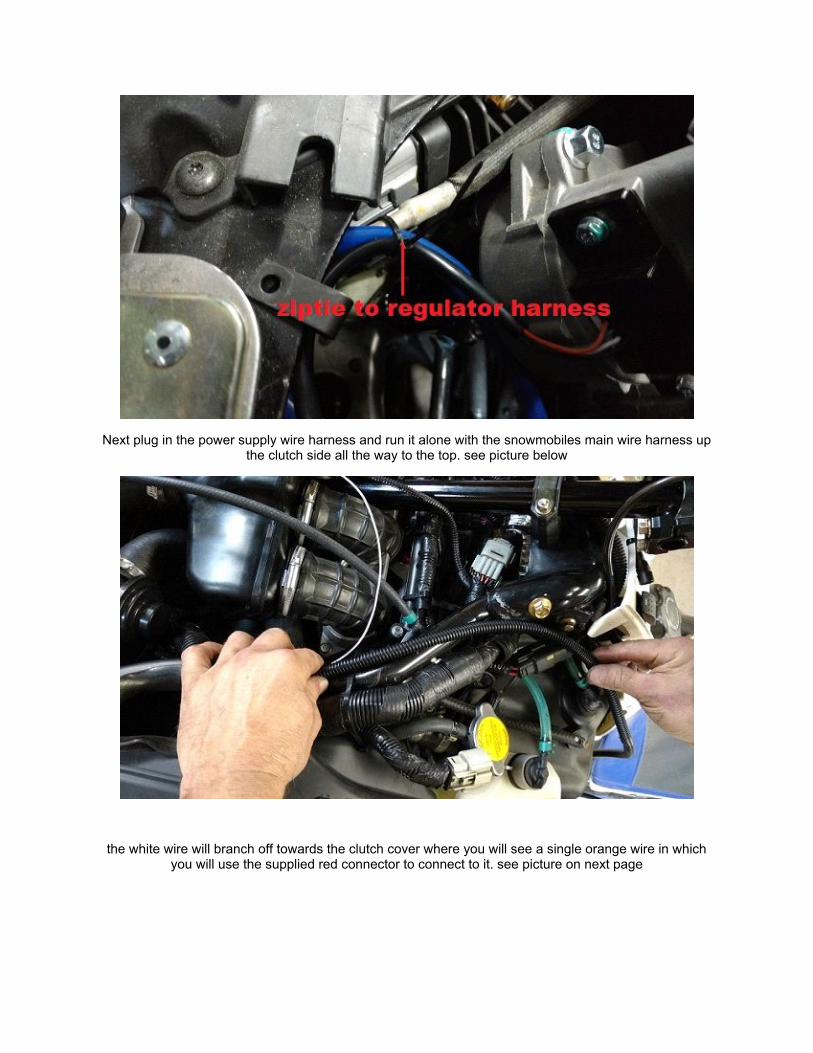
Next plug in the power supply wire harness and run it alone with the snowmobiles main wire harness up the clutch side all the way to the top. see picture below
the white wire will branch off towards the clutch cover where you will see a single orange wire in which you will use the supplied red connector to connect to it. see picture on next page
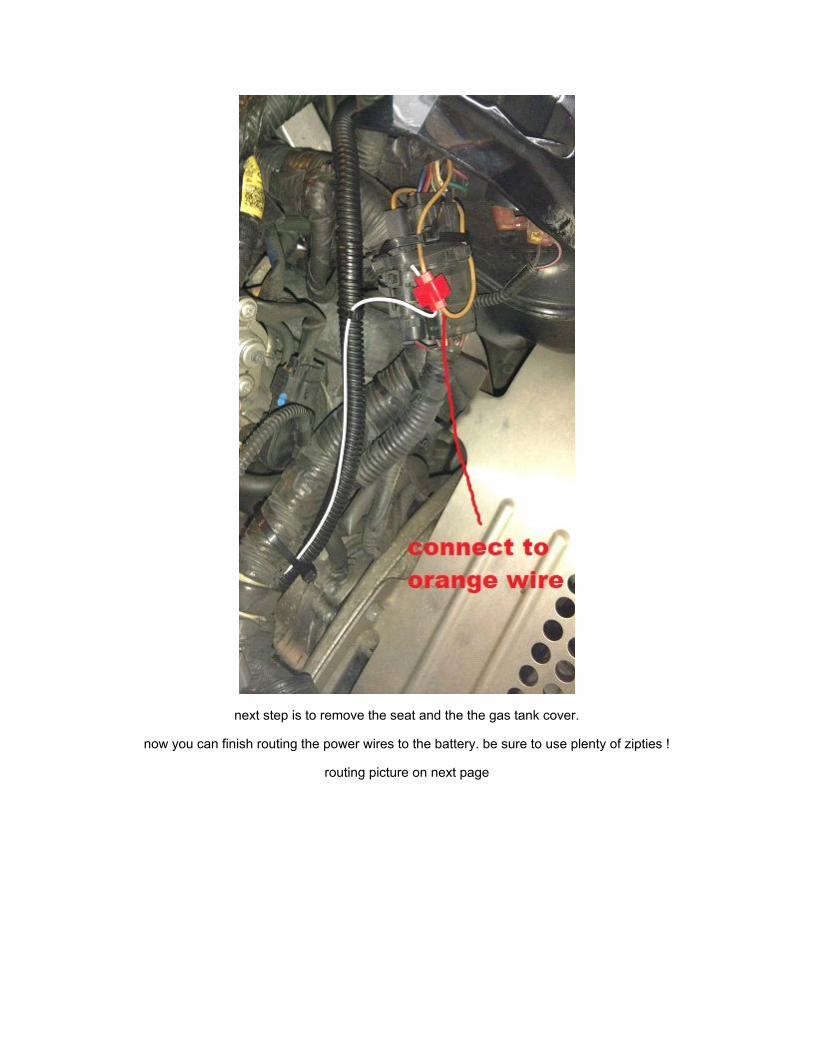
next step is to remove the seat and the the gas tank cover.
now you can finish routing the power wires to the battery. be sure to use plenty of zipties !
routing picture on next page
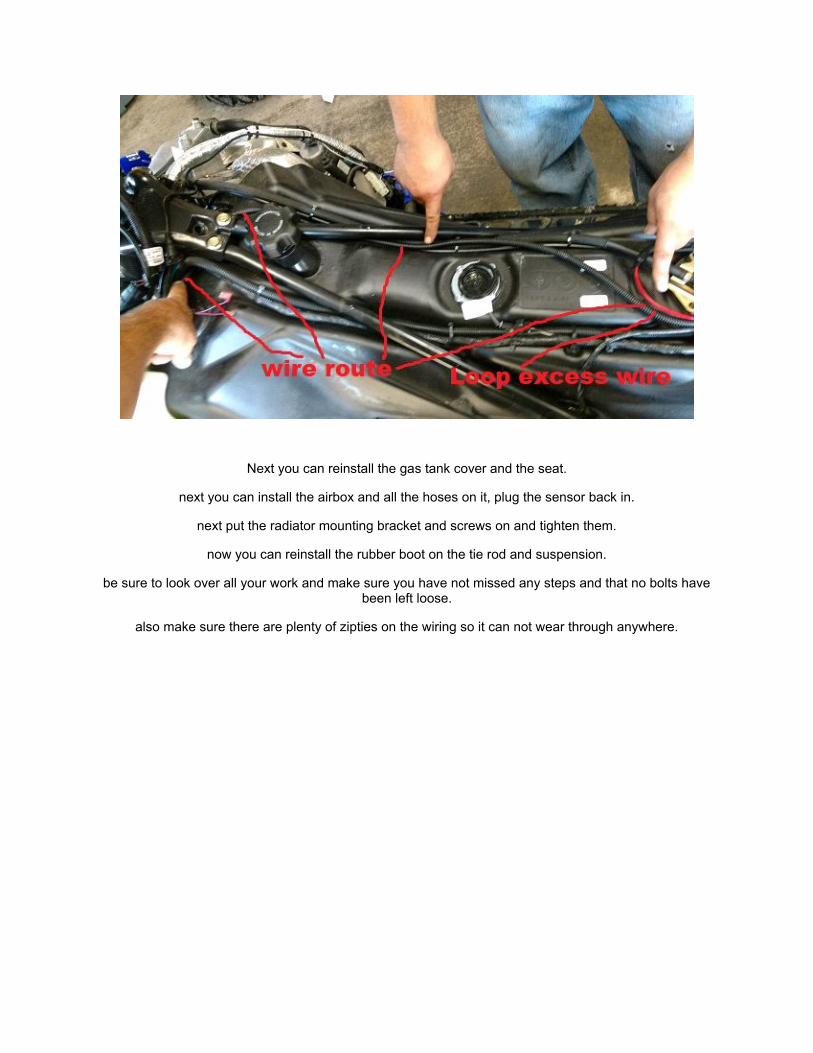
Next you can reinstall the gas tank cover and the seat.
next you can install the airbox and all the hoses on it, plug the sensor back in.
next put the radiator mounting bracket and screws on and tighten them.
now you can reinstall the rubber boot on the tie rod and suspension.
be sure to look over all your work and make sure you have not missed any steps and that no bolts have been left loose.
also make sure there are plenty of zipties on the wiring so it can not wear through anywhere.

This kit is manufactured by RRF and sold exclusively by GSE Performance
Be sure to check out our performance mufflers and high flow air filters
If you have any questions about any of the steps you can call us at
315-783-3705
www.gseperformance.com
www.facebook.com/GSEPerformance/