Embed Size (px)
Citation preview
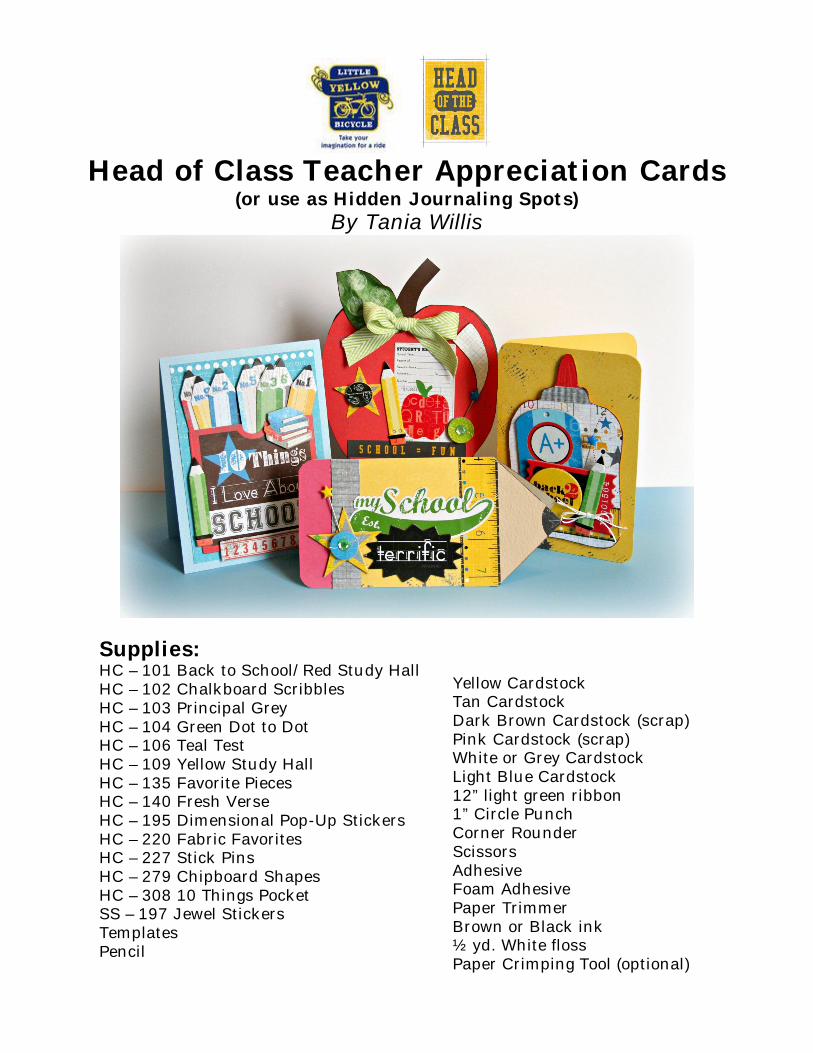
Head of Class Teacher Appreciation Cards
(or use as Hidden Journaling Spots) By Tania Willis
Supplies: HC – 101 Back to School/Red Study Hall HC – 102 Chalkboard Scribbles HC – 103 Principal Grey HC – 104 Green Dot to Dot HC – 106 Teal Test HC – 109 Yellow Study Hall HC – 135 Favorite Pieces HC – 140 Fresh Verse HC – 195 Dimensional Pop-Up Stickers HC – 220 Fabric Favorites HC – 227 Stick Pins HC – 279 Chipboard Shapes HC – 308 10 Things Pocket SS – 197 Jewel Stickers Templates Pencil
Yellow Cardstock Tan Cardstock Dark Brown Cardstock (scrap) Pink Cardstock (scrap) White or Grey Cardstock Light Blue Cardstock 12” light green ribbon 1” Circle Punch Corner Rounder Scissors Adhesive Foam Adhesive Paper Trimmer Brown or Black ink ½ yd. White floss Paper Crimping Tool (optional)
Instructions:
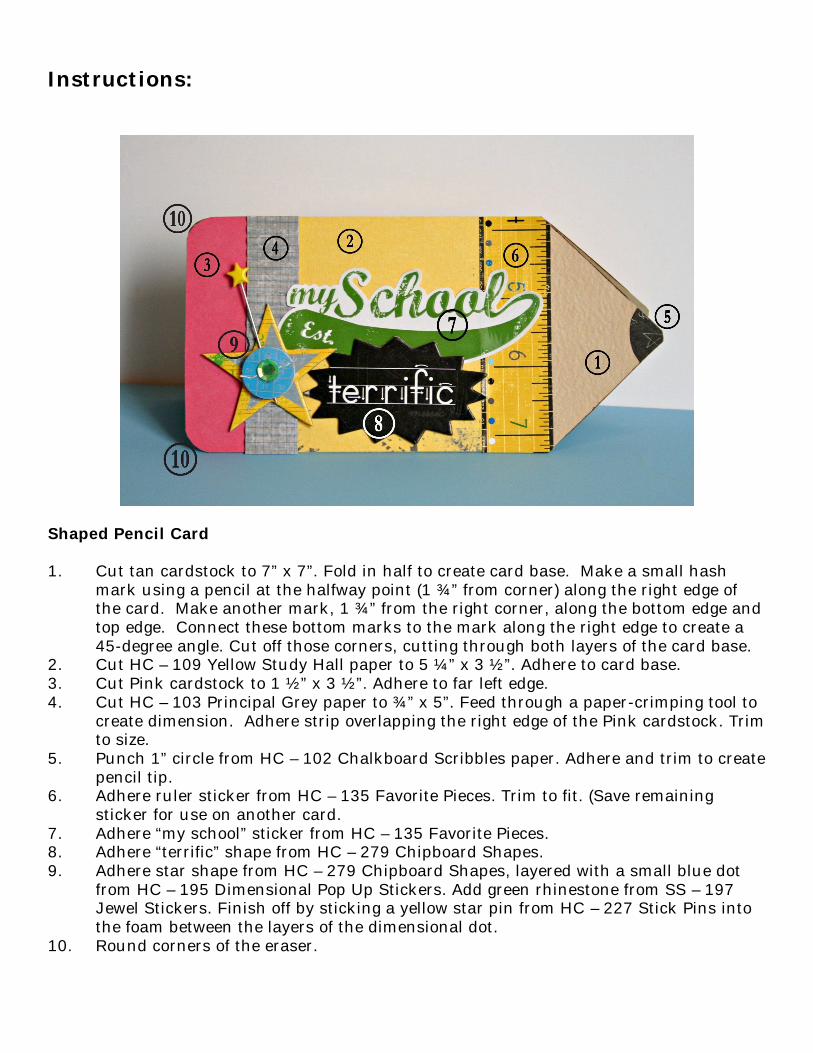
Shaped Pencil Card 1. Cut tan cardstock to 7” x 7”. Fold in half to create card base. Make a small hash
mark using a pencil at the halfway point (1 ¾” from corner) along the right edge of the card. Make another mark, 1 ¾” from the right corner, along the bottom edge and top edge. Connect these bottom marks to the mark along the right edge to create a 45-degree angle. Cut off those corners, cutting through both layers of the card base.
2. Cut HC – 109 Yellow Study Hall paper to 5 ¼” x 3 ½”. Adhere to card base. 3. Cut Pink cardstock to 1 ½” x 3 ½”. Adhere to far left edge. 4. Cut HC – 103 Principal Grey paper to ¾” x 5”. Feed through a paper-crimping tool to
create dimension. Adhere strip overlapping the right edge of the Pink cardstock. Trim to size.
5. Punch 1” circle from HC – 102 Chalkboard Scribbles paper. Adhere and trim to create pencil tip.
6. Adhere ruler sticker from HC – 135 Favorite Pieces. Trim to fit. (Save remaining sticker for use on another card.
7. Adhere “my school” sticker from HC – 135 Favorite Pieces. 8. Adhere “terrific” shape from HC – 279 Chipboard Shapes. 9. Adhere star shape from HC – 279 Chipboard Shapes, layered with a small blue dot
from HC – 195 Dimensional Pop Up Stickers. Add green rhinestone from SS – 197 Jewel Stickers. Finish off by sticking a yellow star pin from HC – 227 Stick Pins into the foam between the layers of the dimensional dot.
10. Round corners of the eraser.

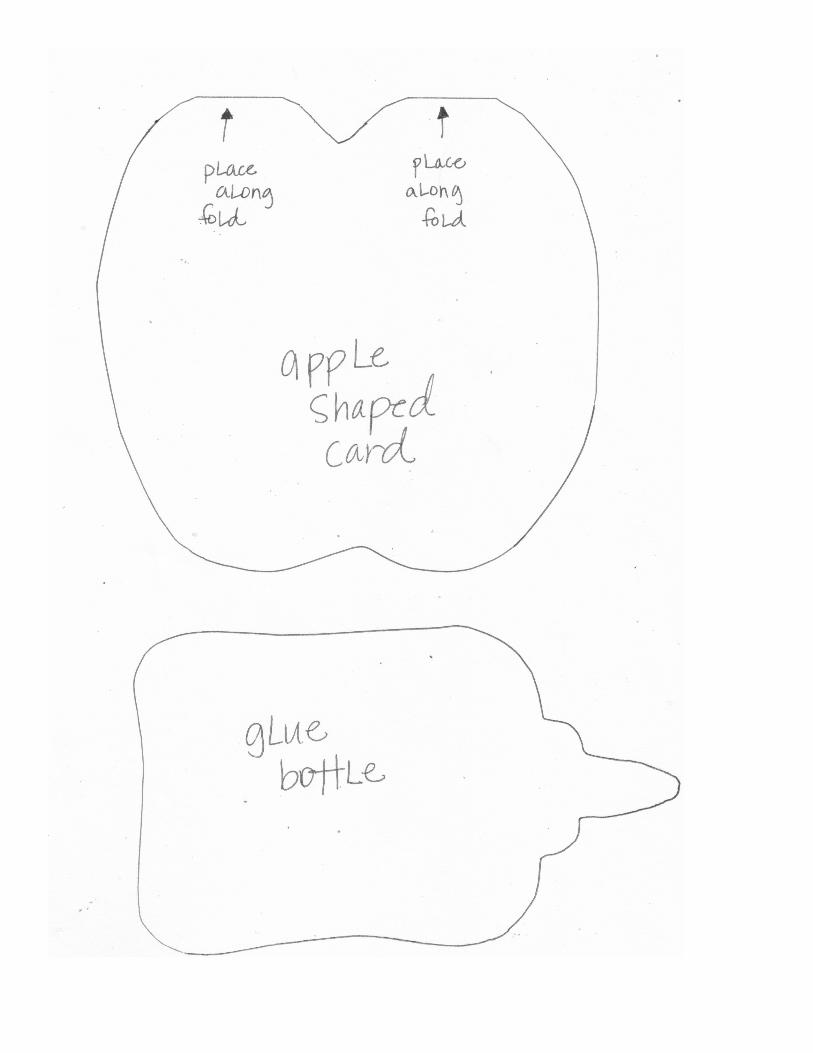
School = Fun Shaped Apple Card 1. Cut Grey (or white) Cardstock to 5 ½” x 10”. Fold in half for a 5 ½” x 5” card base.
Cut apple shape from card base (template provided). Adhere 5 ½” x 5” of HC – 101 Red Study Hall paper to the card front. Trim to shape. Ink edges.
2. Cut a stem shape from Dark Brown cardstock. Adhere to the inside of the card on the back of the front panel. Ink edges.
3. Cut an apostrophe shape from HC – 101 Back to School paper. Ink edges and adhere. 4. Cut a leaf shape from HC – 104 Green Dot-to-Dot paper. Crumple paper several times
to add dimension. Ink edges and adhere. 5. Adhere “Student’s Report” sticker and apple sticker from HC – 135 Favorite Pieces to
card front. 6. Layer small black pop up dot from HC – 195 Dimensional Pop Up Stickers on top of
the yellow star sticker from HC – 135 Favorite Pieces. 7. Adhere “school=fun” sticker. 8. Adhere yellow pencil from HC – 279 Chipboard Shapes. 9. Adhere small green pop up dot from HC – 195 Dimensional Pop Up Stickers. 10. Push a blue star pin from HC – 227 Stick Pins through the foam in between the
layers of the green pop up sticker.

Back 2 School Card 1. Cut Yellow cardstock to 8” x 6”. Fold in half. Cut HC – 109 Yellow Study Hall paper to
4” x 6” adhere to front. Round corners. 2. Cut glue bottle (template provided) from HC – 101 Back to School paper. 3. Cut 1 ¼” x ¾” piece from HC – 101 Red Study Hall paper. Adhere to top of glue bottle
and trim to size. 4. Cut ½” x 2” piece from HC – 103 Principal Grey paper. Run through paper crimping
tool. Adhere across bottle top and trim to size. Ink edges of bottle. 5. Adhere the remaining scrap of the ruler strip sticker from HC – 135 Favorite Pieces
along the bottom edge of the bottle. Trim edges. 6. Adhere blue A+ piece from HC – 279 Chipboard Shapes. 7. Layer red/black piece with the yellow back2school piece, both from HC – 279
Chipboard Shapes. 8. Tie a double strand of floss into a bow around green pencil shape from HC – 279
Chipboard Shapes. Adhere. 9. Round all four corners.
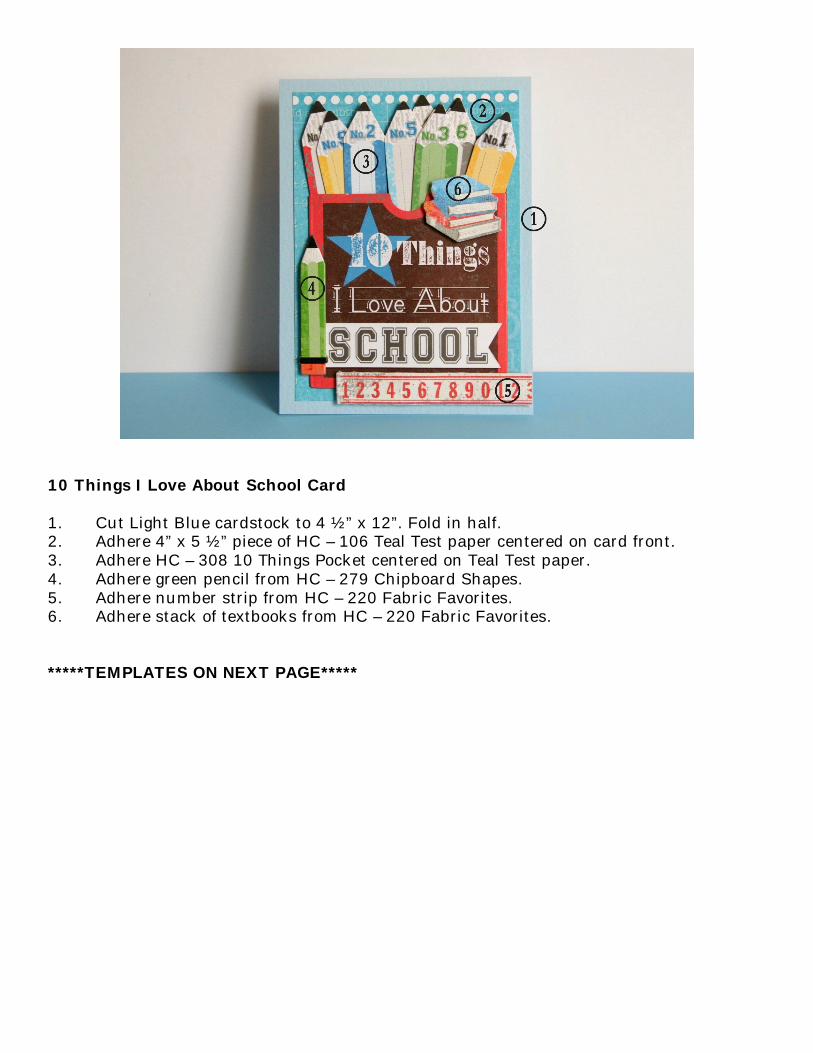
10 Things I Love About School Card 1. Cut Light Blue cardstock to 4 ½” x 12”. Fold in half. 2. Adhere 4” x 5 ½” piece of HC – 106 Teal Test paper centered on card front. 3. Adhere HC – 308 10 Things Pocket centered on Teal Test paper. 4. Adhere green pencil from HC – 279 Chipboard Shapes. 5. Adhere number strip from HC – 220 Fabric Favorites. 6. Adhere stack of textbooks from HC – 220 Fabric Favorites. *****TEMPLATES ON NEXT PAGE*****