Embed Size (px)
Citation preview

Table of Contents
How a Lock Works ......................................................3
Tools of the Trade ........................................................5
Single Pin Lock Picking ...............................................8
Raking a Lock..............................................................11
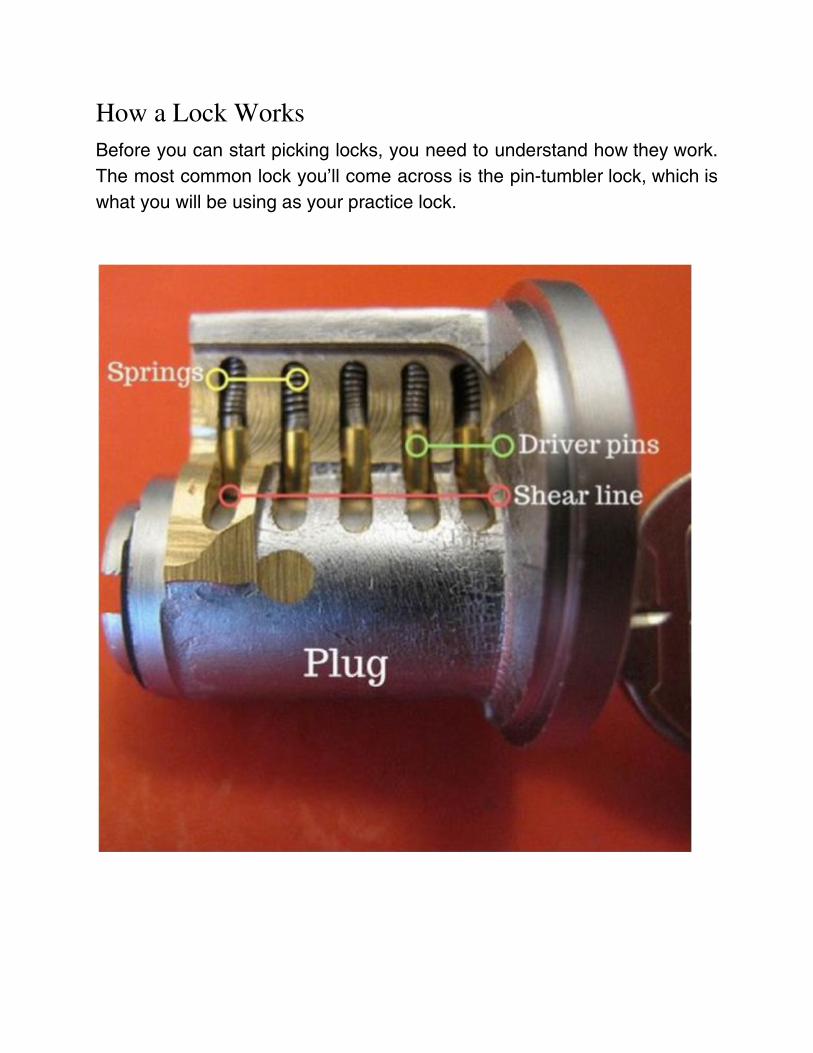
How a Lock Works Before you can start picking locks, you need to understand how they work. The most common lock you’ll come across is the pin-tumbler lock, which is what you will be using as your practice lock.
Inside a pin-tumbler lock are several pins of different lengths. The lock will not open unless the right key pushes these pins into the correct position.
Each pin consists of two parts, the driver pins and the key pins. Without any key, the springs above the pins will push the driver pins down, preventing the plug from turning.
Insert the key and the key pins and driver pins will be lifted to the right height so that the split between the two pieces reaches the shear line and the plug can rotate. If you use the wrong key, even if it fits in the lock, it will not align the gaps with the shear line, so the plug still can’t turn.
When you pick a lock, you need to adjust the pins so that they are at the correct heights for the plug to turn.
Sounds simple, right? Let’s get started!

Tools of the Trade
Your lock picking kit has all the tools you need to pick your first lock. It’s a good idea to identify them before you start, though.
Practice Lock
While you can technically practice with any lock you have on hand, a clear lock will allow you to see what you’re doing. The plastic sides give a clear view of the pins so you can learn exactly how to move your picks. It’s a very useful item to have as you work on popping your first lock.
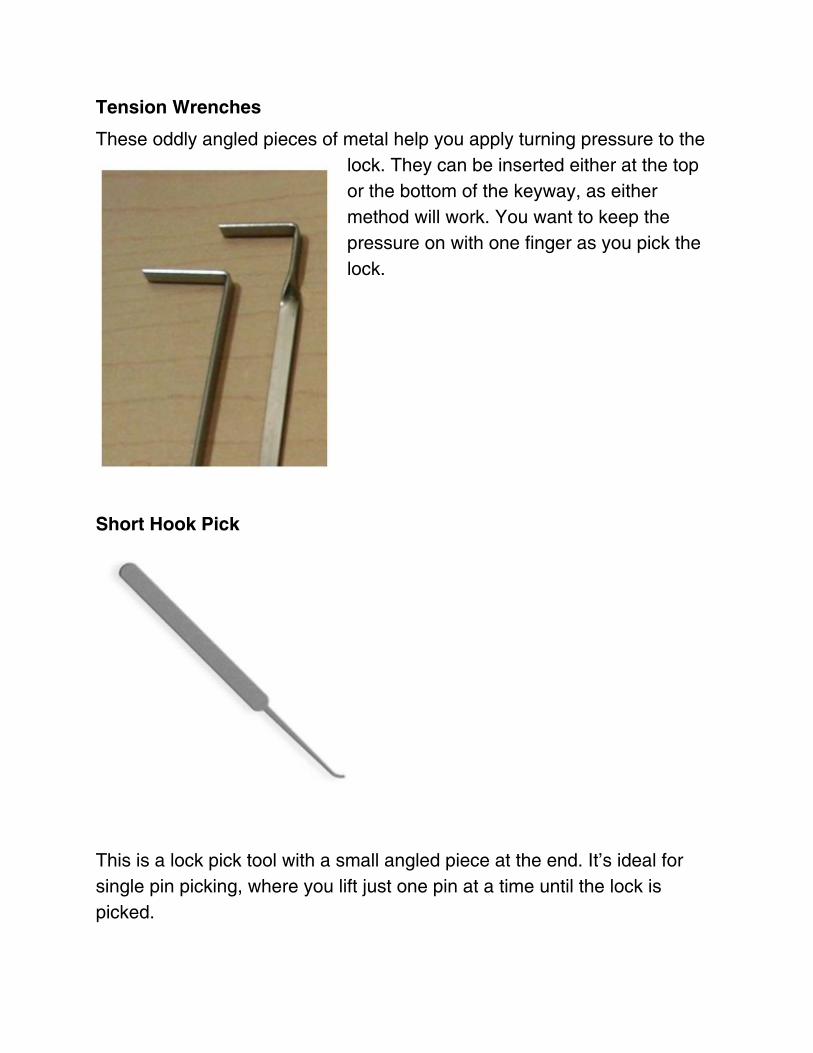
Tension Wrenches
These oddly angled pieces of metal help you apply turning pressure to the lock. They can be inserted either at the top or the bottom of the keyway, as either method will work. You want to keep the pressure on with one finger as you pick the lock.
Short Hook Pick
This is a lock pick tool with a small angled piece at the end. It’s ideal for single pin picking, where you lift just one pin at a time until the lock is picked.
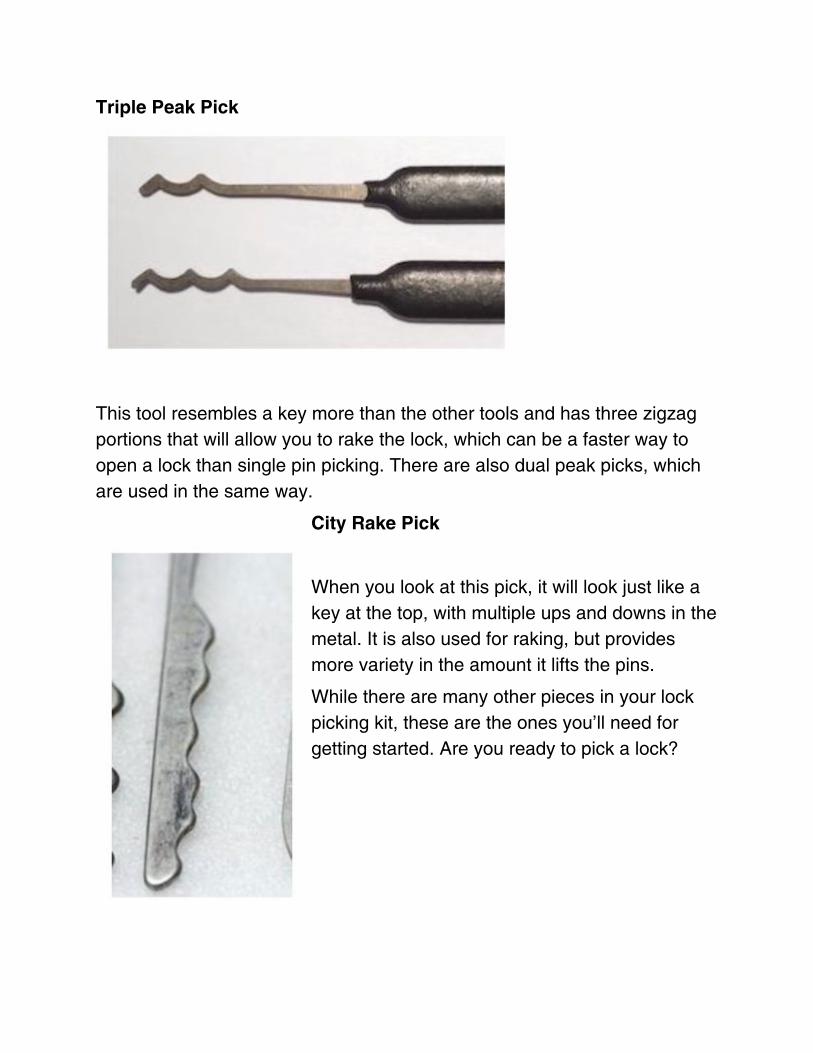
Triple Peak Pick
This tool resembles a key more than the other tools and has three zigzag portions that will allow you to rake the lock, which can be a faster way to open a lock than single pin picking. There are also dual peak picks, which are used in the same way.
City Rake Pick
When you look at this pick, it will look just like a key at the top, with multiple ups and downs in the metal. It is also used for raking, but provides more variety in the amount it lifts the pins.
While there are many other pieces in your lock picking kit, these are the ones you’ll need for getting started. Are you ready to pick a lock?

Single Pin Lock Picking The first method of lock picking that we’ll be looking at is the single pin method. It’s a simple way to get started and will work with any pin-tumbler lock.
Step One: Insert your tension wrench and apply a little pressure so that it begins to turn the plug.
Step Two: Find a seized pin. When you apply pressure to the tension wrench, some of the pins will seize or be held nearly immobile. Turn the plug slightly by pushing on the tension wrench.
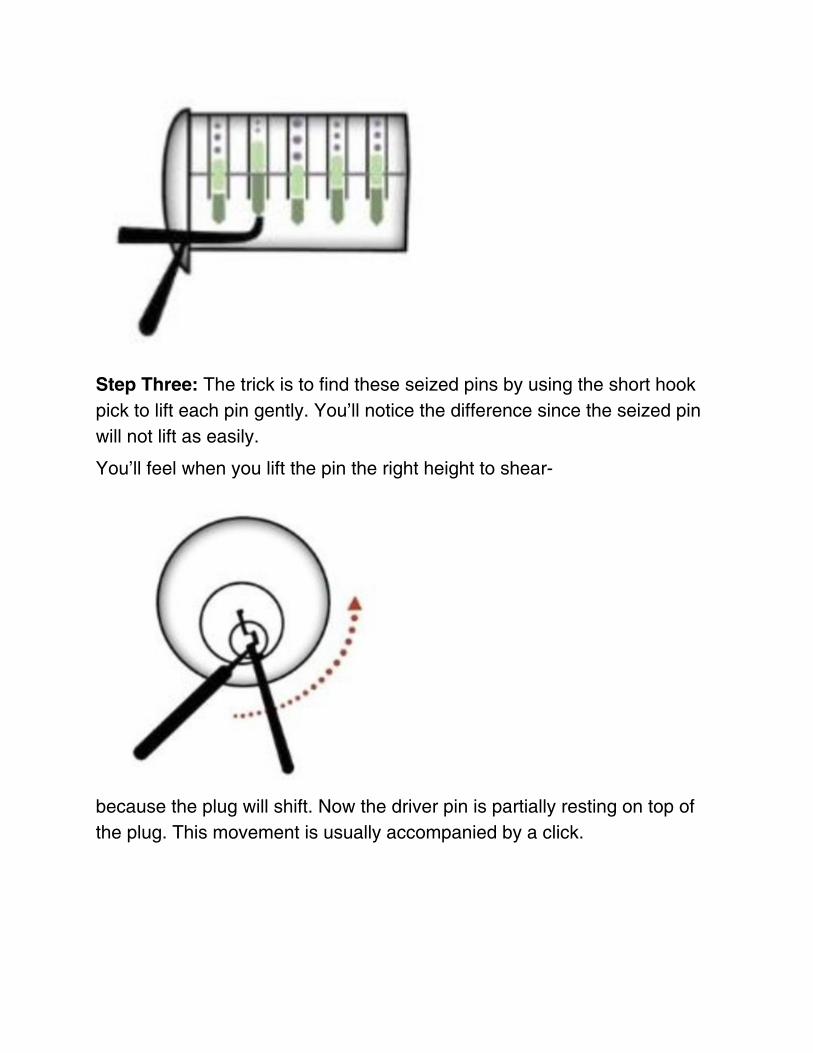
Step Three: The trick is to find these seized pins by using the short hook pick to lift each pin gently. You’ll notice the difference since the seized pin will not lift as easily.
You’ll feel when you lift the pin the right height to shear-
because the plug will shift. Now the driver pin is partially resting on top of the plug. This movement is usually accompanied by a click.
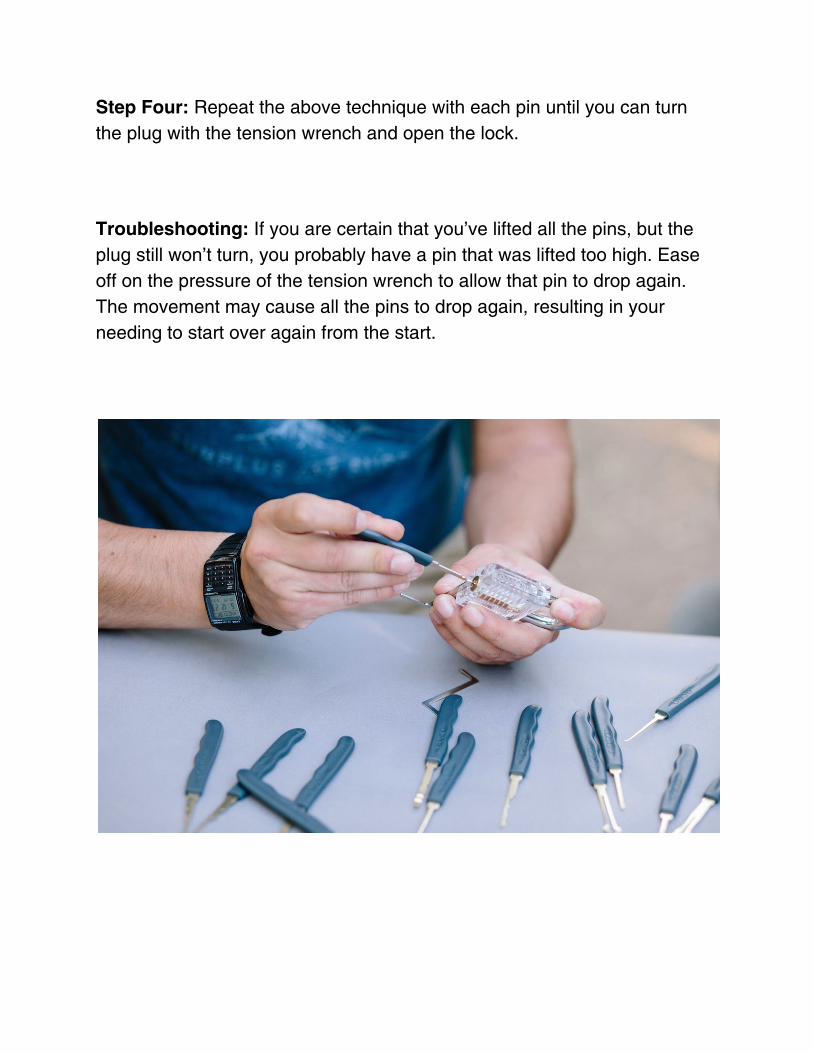
Step Four: Repeat the above technique with each pin until you can turn the plug with the tension wrench and open the lock.
Troubleshooting: If you are certain that you’ve lifted all the pins, but the plug still won’t turn, you probably have a pin that was lifted too high. Ease off on the pressure of the tension wrench to allow that pin to drop again. The movement may cause all the pins to drop again, resulting in your needing to start over again from the start.
Raking a Lock
This technique can go fairly quickly, depending on the complexity of the lock. You can use either type of raking tool . . . experiment to see which you prefer.
Step One: Insert the tension wrench and do not apply any pressure.
Step Two: Insert the rake pick of your choice. You will quickly develop a preference for one rake pick and can use that more often, but it’s a good idea to test them early on.
Step Three: Apply slight pressure to the tension wrench and draw the rake pick back out. This can be done slowly or quickly. The amount of pressure will vary depending on the lock, so it can take some practice to consistently open the lock on the first try.
Step Four: Repeat as needed, releasing pressure between tries. It shouldn’t take too long before the lock pops open.
Troubleshooting: If the lock just won’t open and you’ve heard clicks, try “resetting” it by pulling the rake pick out and then turning the plug back to normal position. The pins should fall back into their normal place at this point and you can then begin again.
It takes time and practice to do this consistently, so you’ll want to keep practicing these basic methods until you have them down pat.