Embed Size (px)
Citation preview
pg. 1 © Advanced Solutions, Inc. 2015
How to Install and Configure
pg. 2 © Advanced Solutions, Inc. 2015
How to Set-up Autodesk Collaboration for Revit 2015/2016
Make sure that Revit software (Building Design Suite Premium, Building Design Suite Ultimate, Revit, Revit
Architecture, & Revit Structure) is installed on each station that will be running Autodesk Collaboration for
Revit. This has to be done for each station that will be using Autodesk Collaboration for Revit.
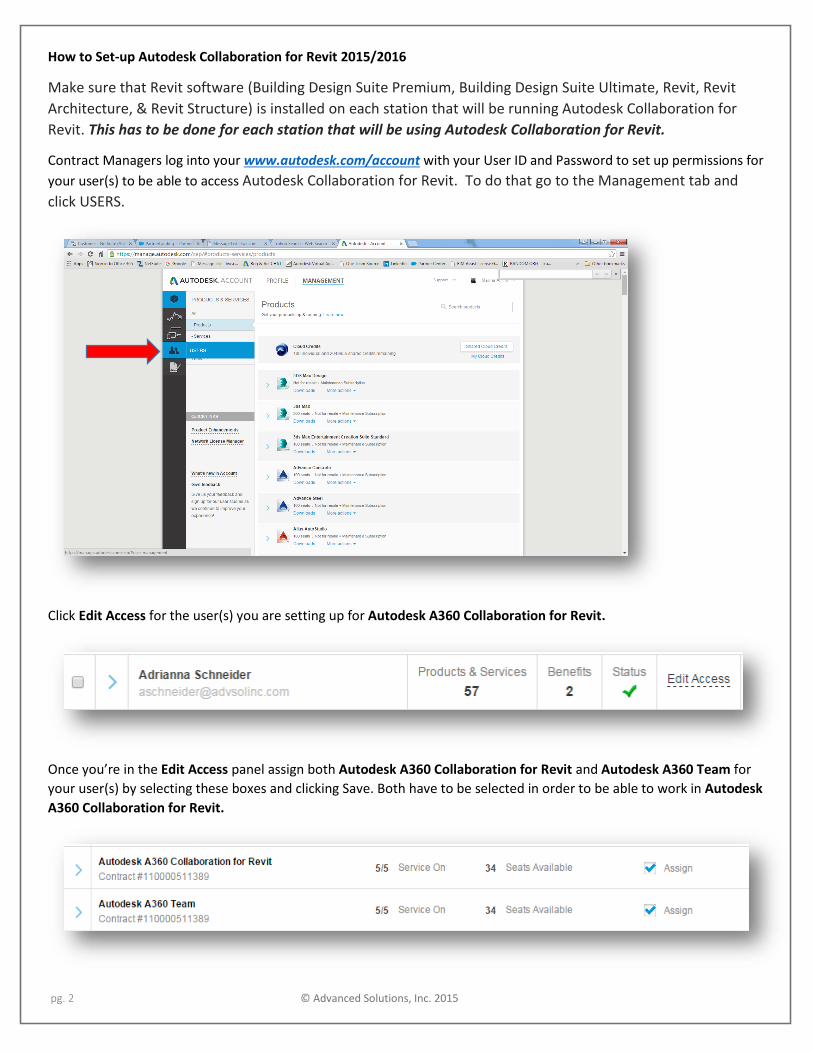
Contract Managers log into your www.autodesk.com/account with your User ID and Password to set up permissions for
your user(s) to be able to access Autodesk Collaboration for Revit. To do that go to the Management tab and
click USERS.
Click Edit Access for the user(s) you are setting up for Autodesk A360 Collaboration for Revit.
Once you’re in the Edit Access panel assign both Autodesk A360 Collaboration for Revit and Autodesk A360 Team for
your user(s) by selecting these boxes and clicking Save. Both have to be selected in order to be able to work in Autodesk
A360 Collaboration for Revit.
pg. 3 © Advanced Solutions, Inc. 2015
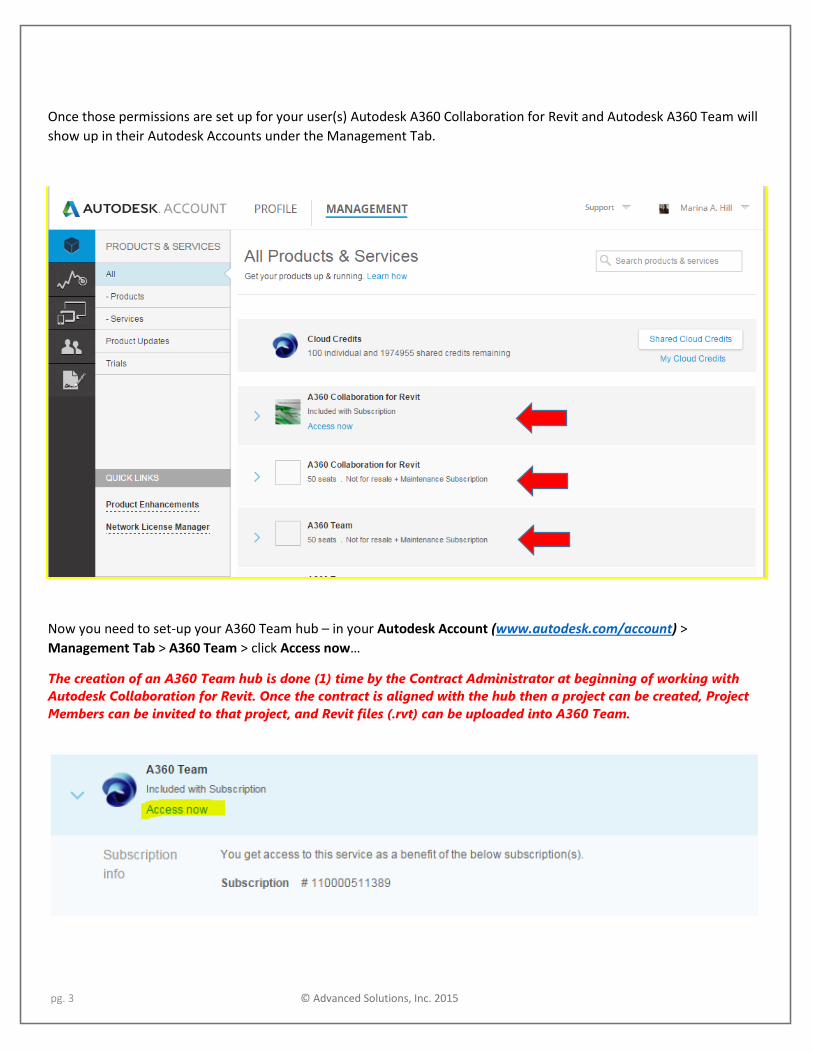
Once those permissions are set up for your user(s) Autodesk A360 Collaboration for Revit and Autodesk A360 Team will
show up in their Autodesk Accounts under the Management Tab.
Now you need to set-up your A360 Team hub – in your Autodesk Account (www.autodesk.com/account) >
Management Tab > A360 Team > click Access now…
The creation of an A360 Team hub is done (1) time by the Contract Administrator at beginning of working with
Autodesk Collaboration for Revit. Once the contract is aligned with the hub then a project can be created, Project
Members can be invited to that project, and Revit files (.rvt) can be uploaded into A360 Team.
pg. 4 © Advanced Solutions, Inc. 2015
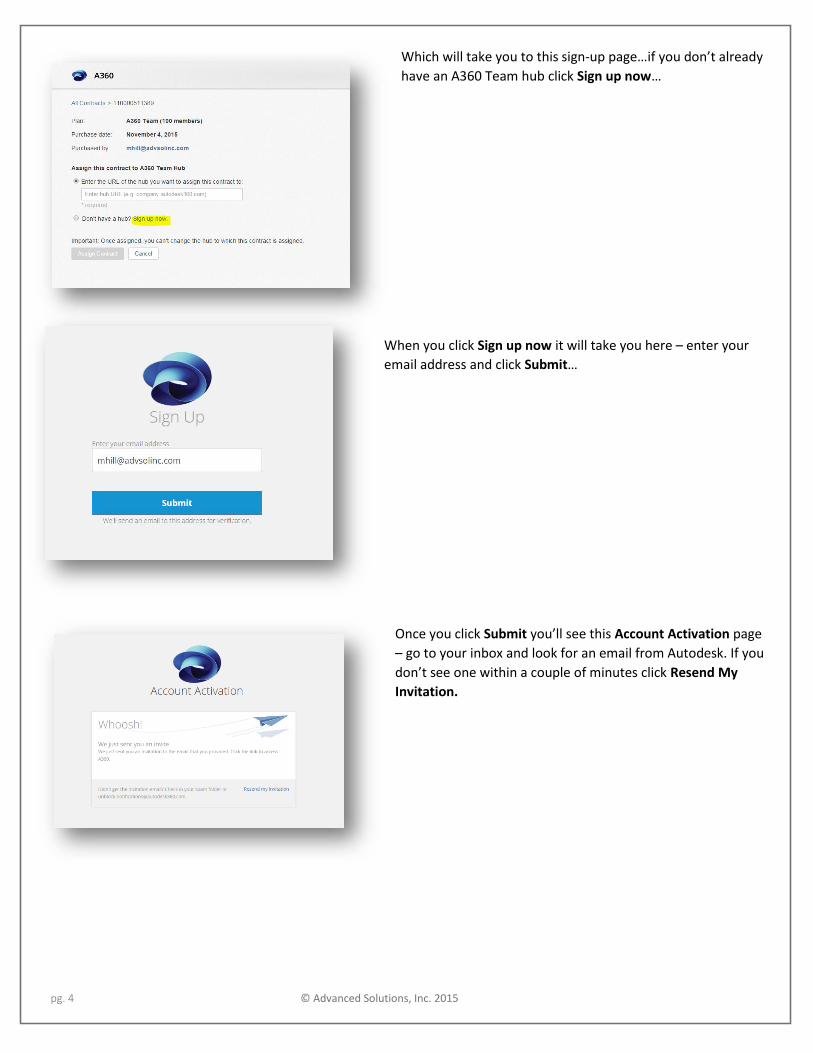
Which will take you to this sign-up page…if you don’t already
have an A360 Team hub click Sign up now…
When you click Sign up now it will take you here – enter your
email address and click Submit…
Once you click Submit you’ll see this Account Activation page
– go to your inbox and look for an email from Autodesk. If you
don’t see one within a couple of minutes click Resend My
Invitation.

pg. 5 © Advanced Solutions, Inc. 2015
You’ll get this email from Autodesk asking you to verify
your email address.
When you click on Verify your email and it will take you
to the A360 Team sign-on page.
Sign in using your Autodesk Account Password and click
Sign In.
You may see a pop-up message about browser
compatibility, click Continue to Autodesk to access
A360 Team.
You should now be in your A360 Team hub – your hub IP address will be sent to you by Autodesk by email.
pg. 6 © Advanced Solutions, Inc. 2015
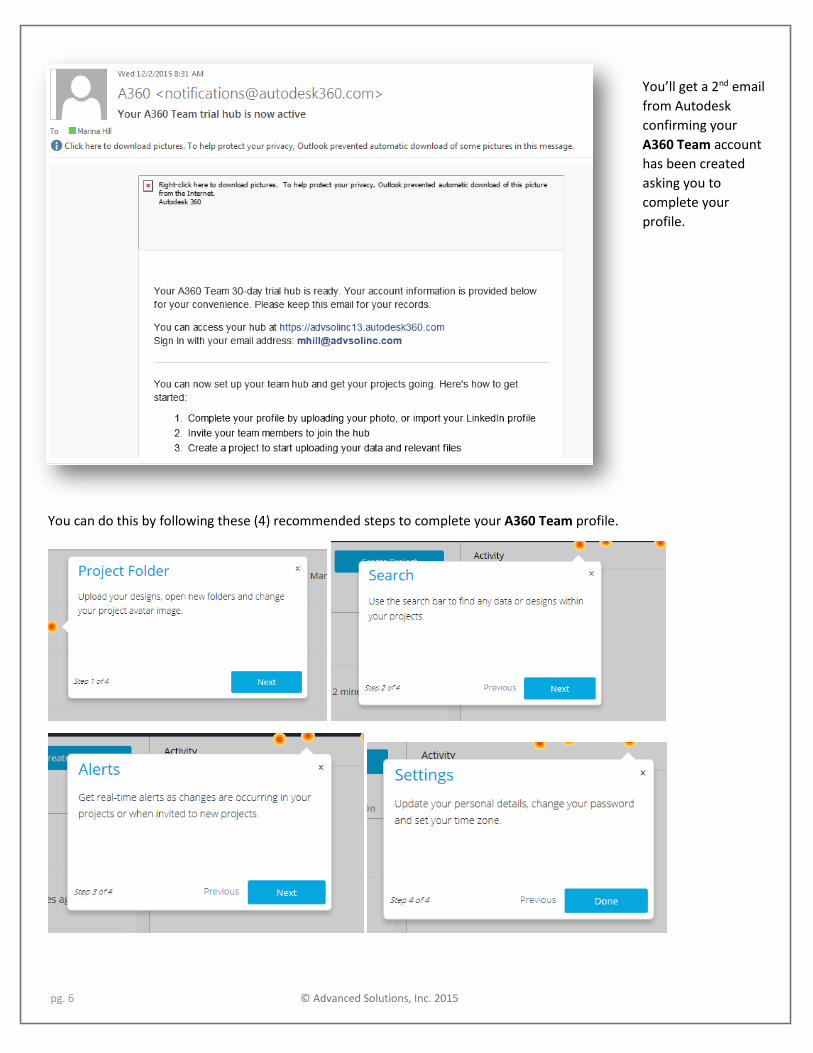
You’ll get a 2nd email
from Autodesk
confirming your
A360 Team account
has been created
asking you to
complete your
profile.
You can do this by following these (4) recommended steps to complete your A360 Team profile.
pg. 7 © Advanced Solutions, Inc. 2015
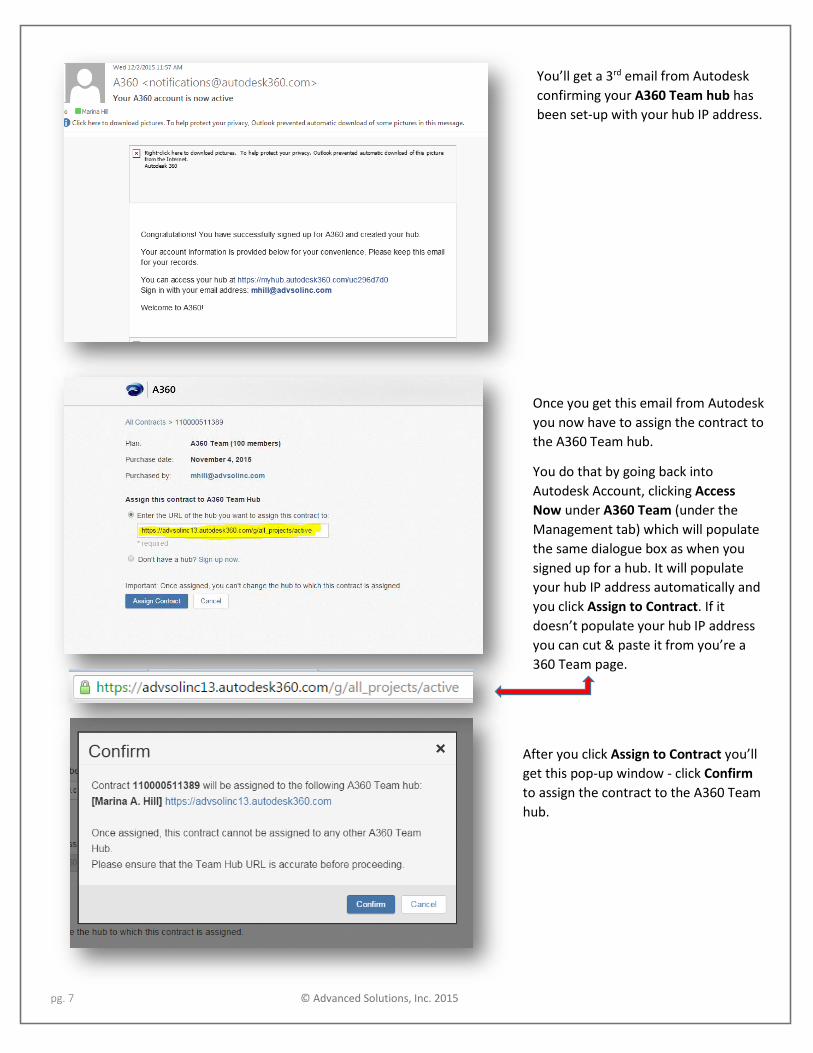
You’ll get a 3rd email from Autodesk
confirming your A360 Team hub has
been set-up with your hub IP address.
Once you get this email from Autodesk
you now have to assign the contract to
the A360 Team hub.
You do that by going back into
Autodesk Account, clicking Access
Now under A360 Team (under the
Management tab) which will populate
the same dialogue box as when you
signed up for a hub. It will populate
your hub IP address automatically and
you click Assign to Contract. If it
doesn’t populate your hub IP address
you can cut & paste it from you’re a
360 Team page.
After you click Assign to Contract you’ll
get this pop-up window - click Confirm
to assign the contract to the A360 Team
hub.

pg. 8 © Advanced Solutions, Inc. 2015
You now need to create a
project in A360 Team.
You do that by clicking Create Project, creating a
project name, including the project purpose, choosing
an Avatar, and clicking Save.
Now you can start inviting users to your project.
Everything till this point has been the administrative set-up that’s needed for Autodesk Collaboration for
Revit
Everything from this point is workstation set-up that has to be done on every station that runs Autodesk
Collaboration for Revit
pg. 9 © Advanced Solutions, Inc. 2015
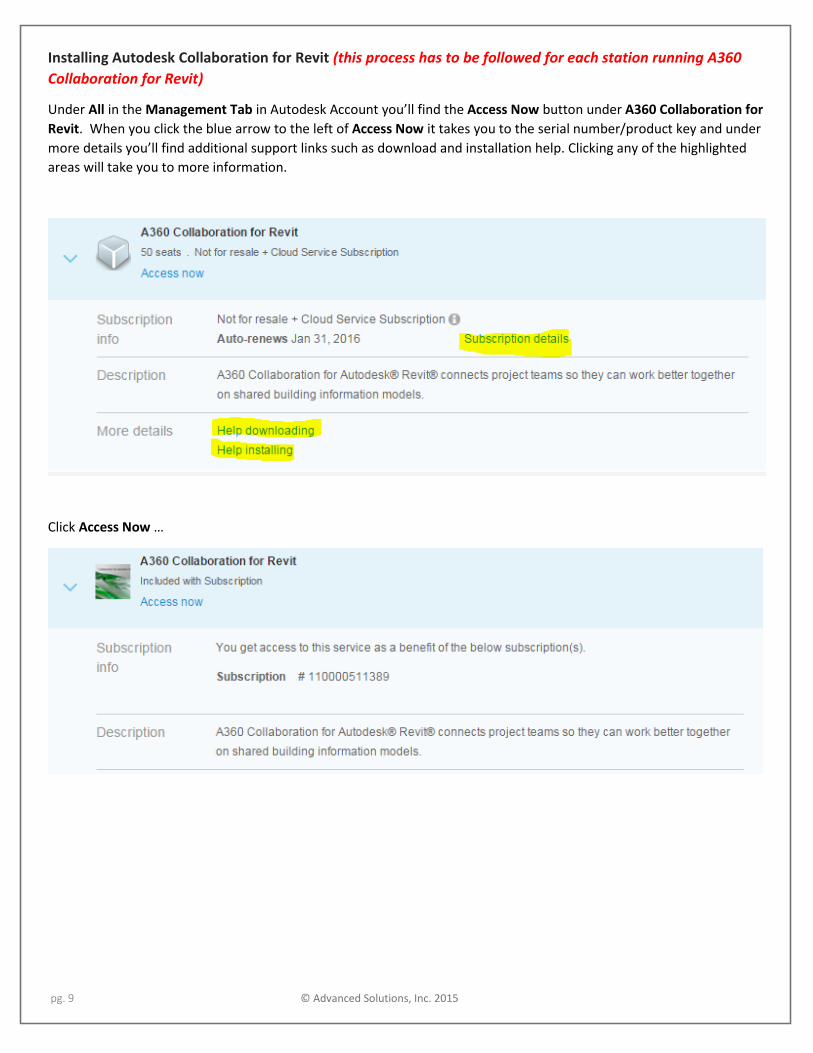
Installing Autodesk Collaboration for Revit (this process has to be followed for each station running A360
Collaboration for Revit)
Under All in the Management Tab in Autodesk Account you’ll find the Access Now button under A360 Collaboration for
Revit. When you click the blue arrow to the left of Access Now it takes you to the serial number/product key and under
more details you’ll find additional support links such as download and installation help. Clicking any of the highlighted
areas will take you to more information.
Click Access Now …
pg. 10 © Advanced Solutions, Inc. 2015
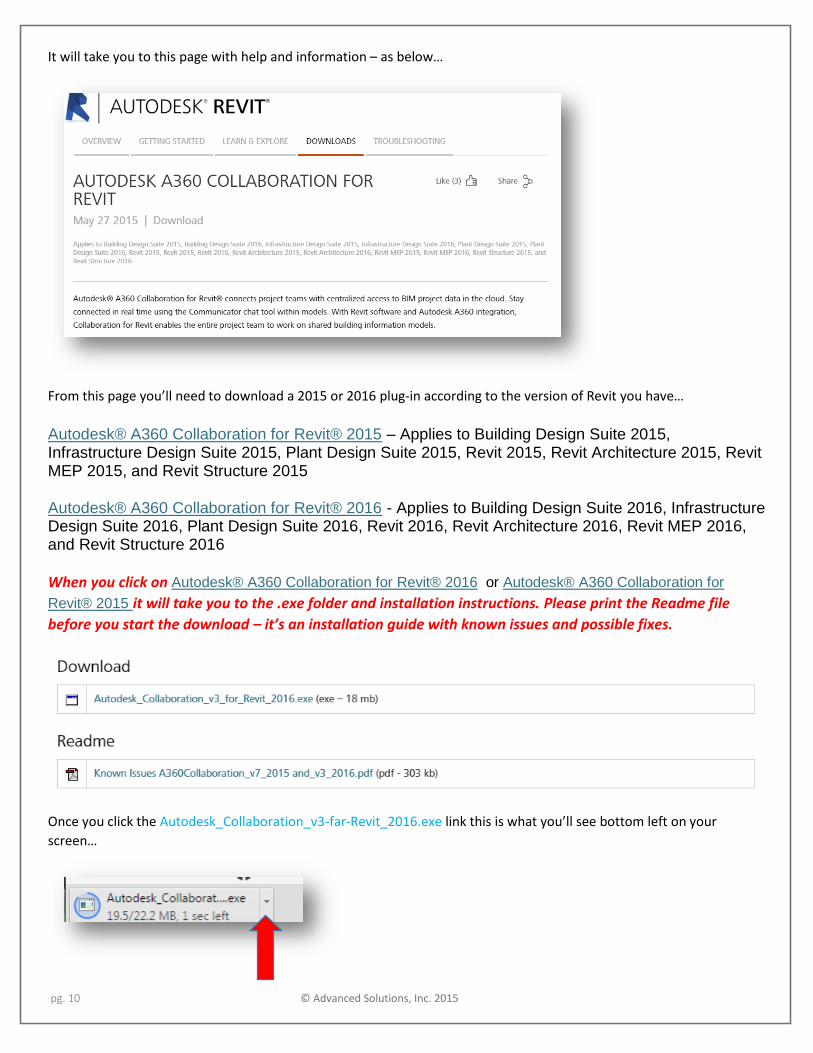
It will take you to this page with help and information – as below…
From this page you’ll need to download a 2015 or 2016 plug-in according to the version of Revit you have…
Autodesk® A360 Collaboration for Revit® 2015 – Applies to Building Design Suite 2015, Infrastructure Design Suite 2015, Plant Design Suite 2015, Revit 2015, Revit Architecture 2015, Revit MEP 2015, and Revit Structure 2015
Autodesk® A360 Collaboration for Revit® 2016 - Applies to Building Design Suite 2016, Infrastructure Design Suite 2016, Plant Design Suite 2016, Revit 2016, Revit Architecture 2016, Revit MEP 2016, and Revit Structure 2016
When you click on Autodesk® A360 Collaboration for Revit® 2016 or Autodesk® A360 Collaboration for
Revit® 2015 it will take you to the .exe folder and installation instructions. Please print the Readme file
before you start the download – it’s an installation guide with known issues and possible fixes.
Once you click the Autodesk_Collaboration_v3-far-Revit_2016.exe link this is what you’ll see bottom left on your
screen…

pg. 11 © Advanced Solutions, Inc. 2015
From here you click the small arrow to the right of the .exe box to launch the plug-in installer – this opens this dialogue
box and you click Run…
After you click Run you’ll get the dialogue box below - choose Install (not download all) to install the plug-ins that are
necessary to run Collaboration for Revit in your 2015/2016 software – this installation will take about 30-40 minutes…
pg. 12 © Advanced Solutions, Inc. 2015
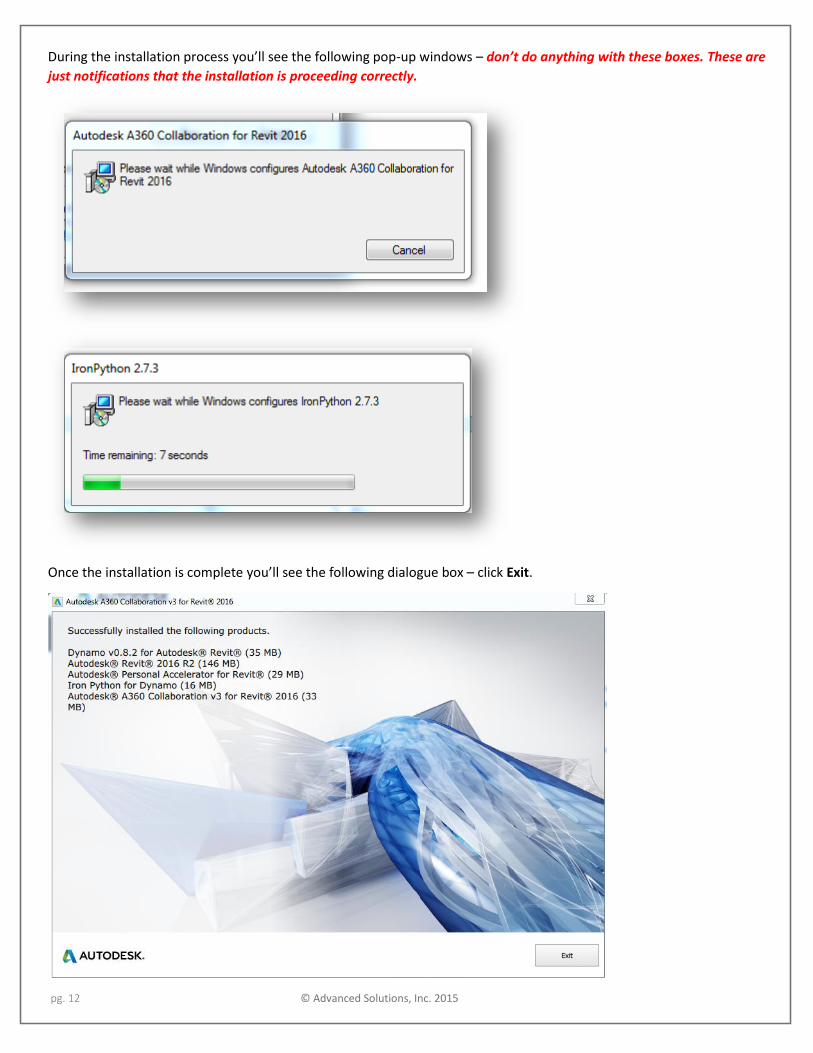
During the installation process you’ll see the following pop-up windows – don’t do anything with these boxes. These are
just notifications that the installation is proceeding correctly.
Once the installation is complete you’ll see the following dialogue box – click Exit.
pg. 13 © Advanced Solutions, Inc. 2015
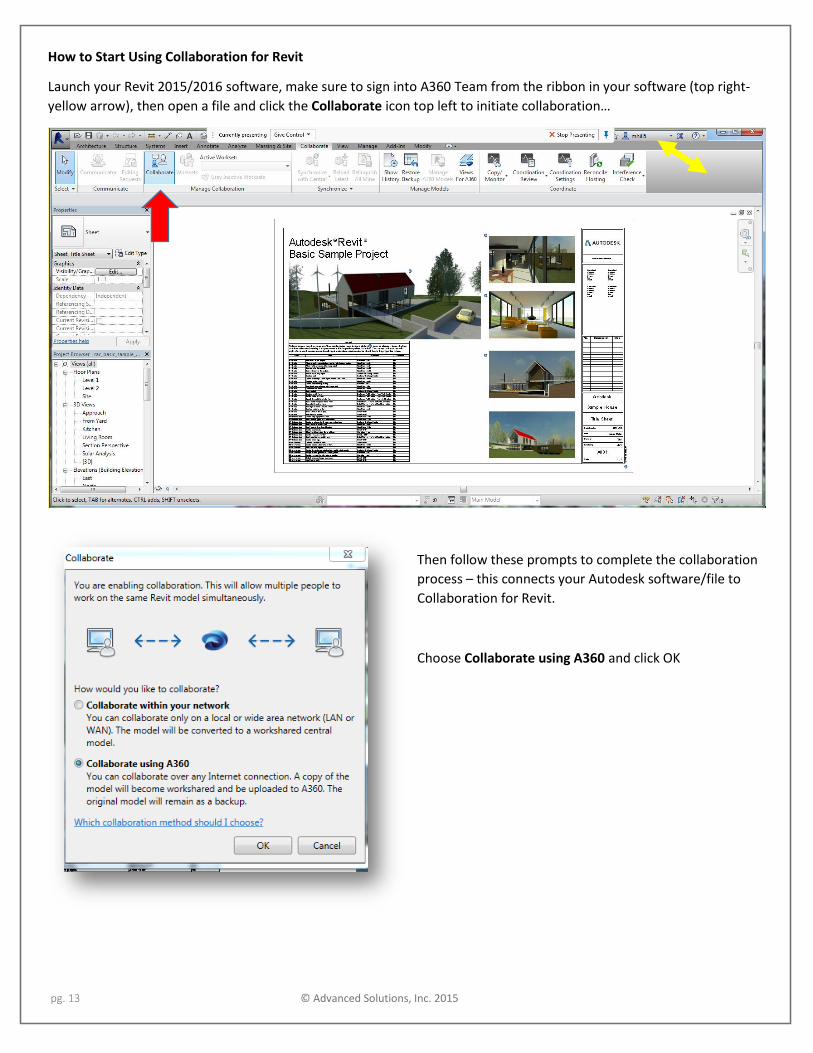
How to Start Using Collaboration for Revit
Launch your Revit 2015/2016 software, make sure to sign into A360 Team from the ribbon in your software (top right-
yellow arrow), then open a file and click the Collaborate icon top left to initiate collaboration…
Then follow these prompts to complete the collaboration
process – this connects your Autodesk software/file to
Collaboration for Revit.
Choose Collaborate using A360 and click OK
pg. 14 © Advanced Solutions, Inc. 2015
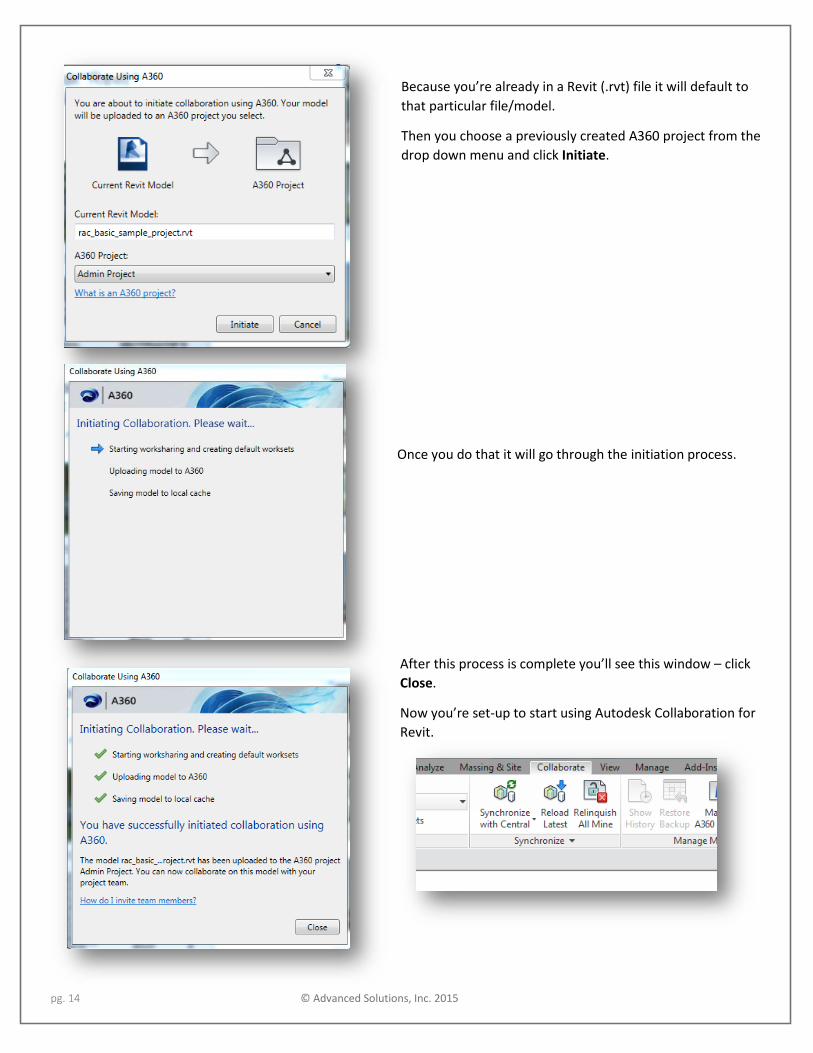
Because you’re already in a Revit (.rvt) file it will default to
that particular file/model.
Then you choose a previously created A360 project from the
drop down menu and click Initiate.
Once you do that it will go through the initiation process.
After this process is complete you’ll see this window – click
Close.
Now you’re set-up to start using Autodesk Collaboration for
Revit.