Embed Size (px)
Citation preview
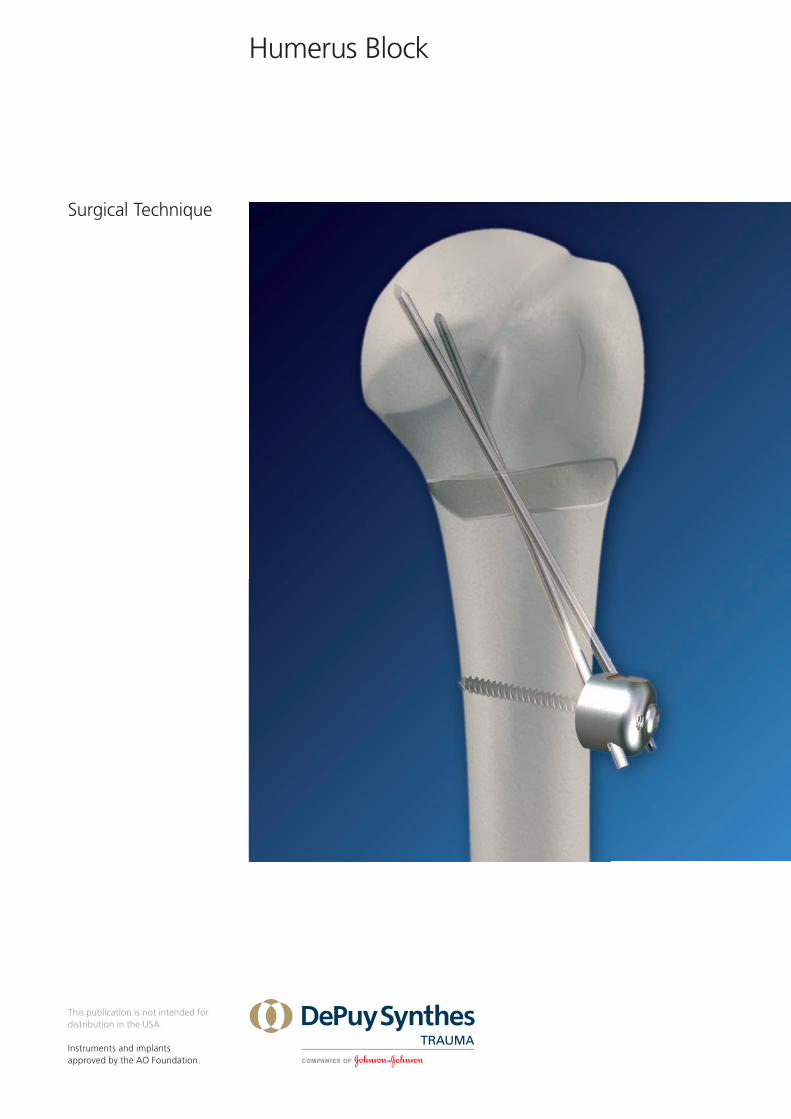
Surgical Technique
Humerus Block
This publication is not intended for distribution in the USA.
Instruments and implantsapproved by the AO Foundation.


Humerus Block Surgical Technique DePuy Synthes 3
Contents
Indications / contraindications 4
Case study 5
Implants and instruments 6
Features and benefits 9
Preparation 11
Surgical steps 12
Postoperative treatment 20
Ordering information 21
Bibliography 22
Warning
This description is not sufficient for an immediate application of the instru-
mentation. An instruction by an experienced surgeon in handling this instru-
mentation is highly recommended.
4 DePuy Synthes Humerus Block Surgical Technique
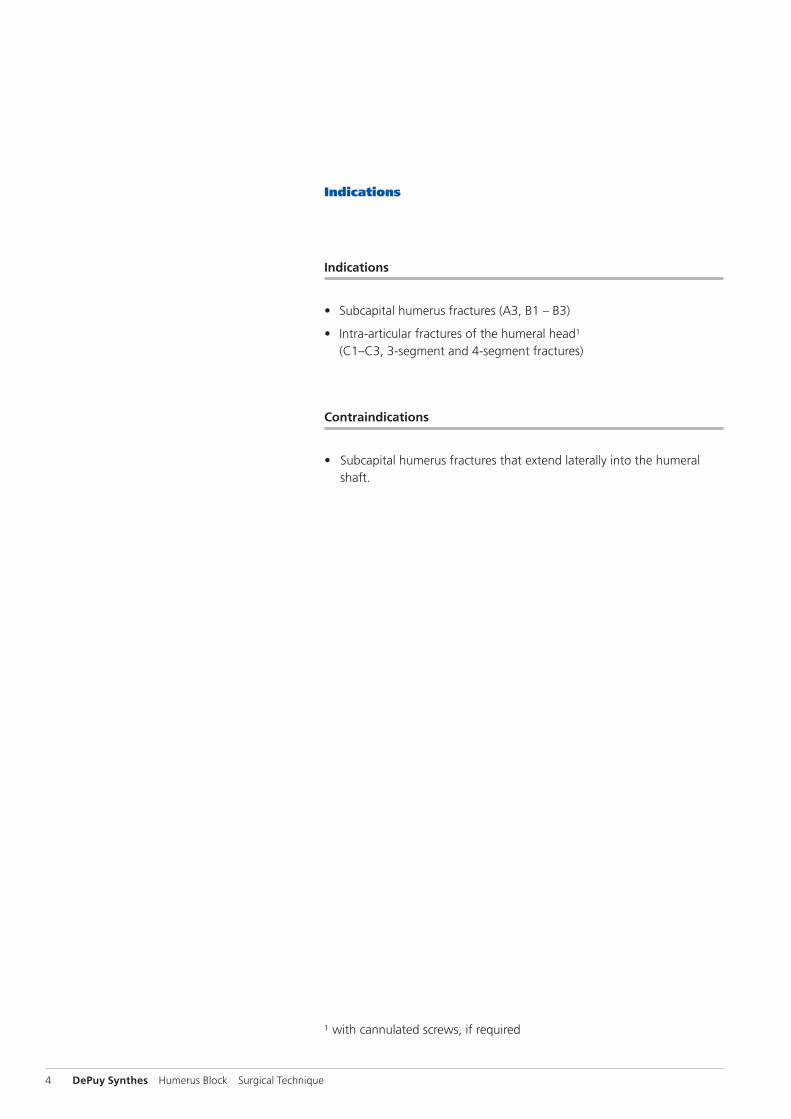
Indications
Indications
• Subcapital humerus fractures (A3, B1 – B3)
• Intra-articular fractures of the humeral head1 (C1–C3, 3-segment and 4-segment fractures)
Contraindications
• Subcapital humerus fractures that extend laterally into the humeral shaft.
1 with cannulated screws, if required
Humerus Block Surgical Technique DePuy Synthes 5
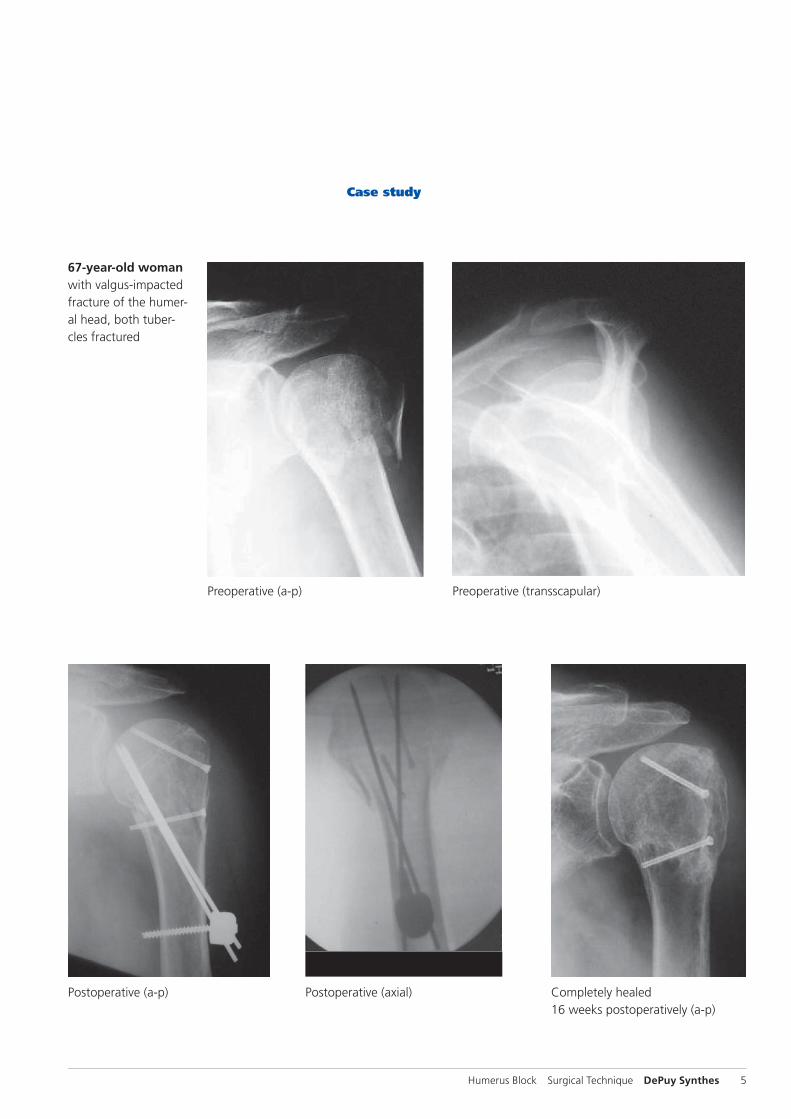
Case study
67-year-old womanwith valgus-impacted fracture of the humer-al head, both tuber-cles fractured
Preoperative (a-p) Preoperative (transscapular)
Postoperative (a-p) Postoperative (axial) Completely healed16 weeks postoperatively (a-p)
2
1
35°
3
4
3
A B
24°
6 DePuy Synthes Humerus Block Surgical Technique
Implant and instruments
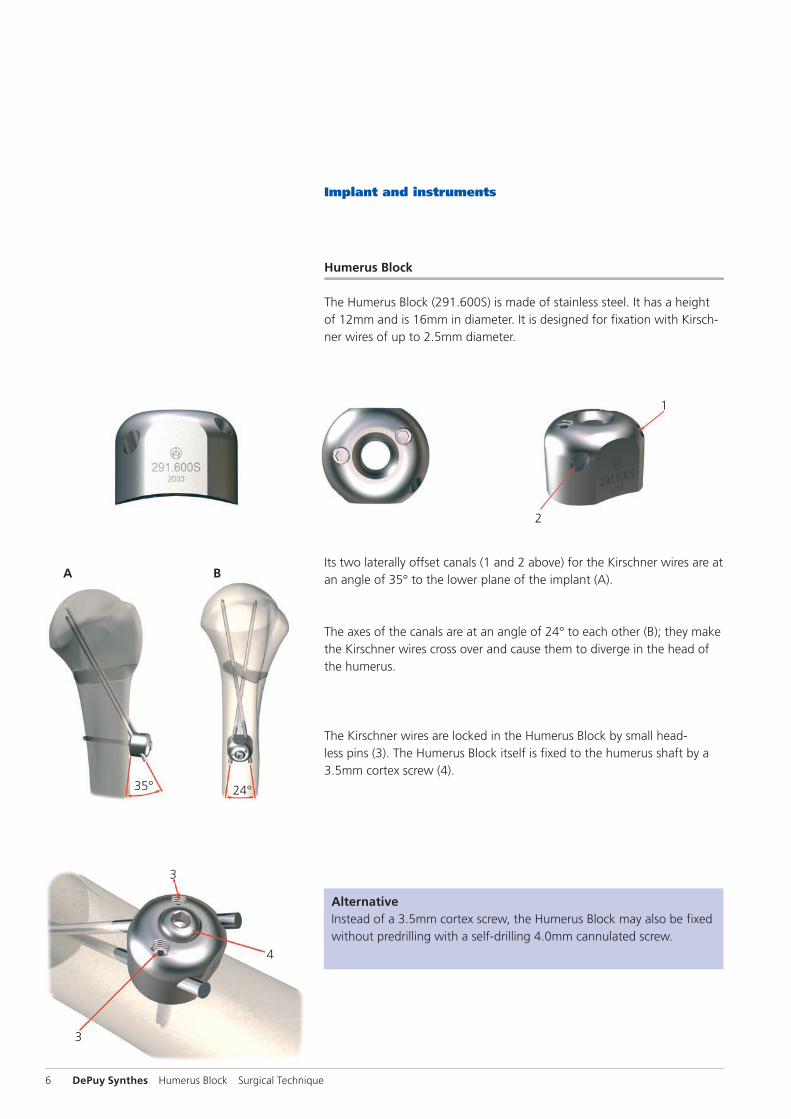
Humerus Block
The Humerus Block (291.600S) is made of stainless steel. It has a height of 12mm and is 16mm in diameter. It is designed for fixation with Kirsch-ner wires of up to 2.5mm diameter.
Its two laterally offset canals (1 and 2 above) for the Kirschner wires are at an angle of 35° to the lower plane of the implant (A).
The axes of the canals are at an angle of 24° to each other (B); they make the Kirschner wires cross over and cause them to diverge in the head of the humerus.
The Kirschner wires are locked in the Humerus Block by small head-less pins (3). The Humerus Block itself is fixed to the humerus shaft by a 3.5mm cortex screw (4).
AlternativeInstead of a 3.5mm cortex screw, the Humerus Block may also be fixed without predrilling with a self-drilling 4.0mm cannulated screw.
Humerus Block Surgical Technique DePuy Synthes 7
Humerus Block instruments
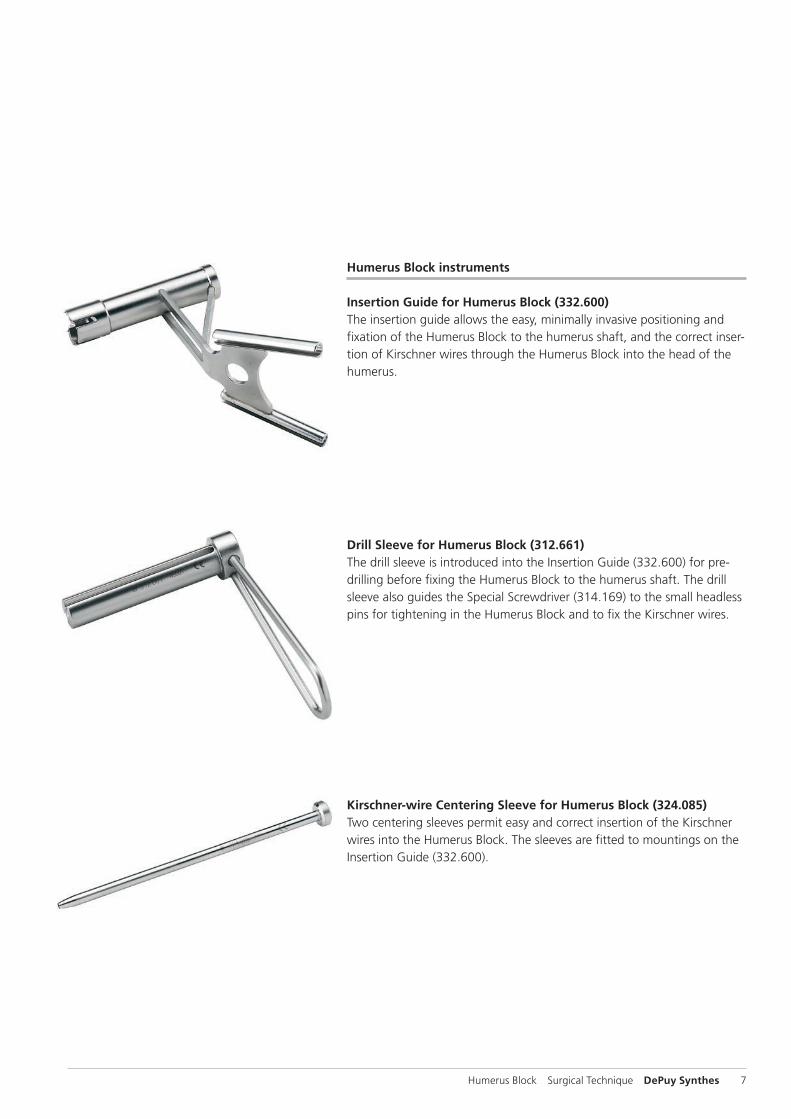
Insertion Guide for Humerus Block (332.600)The insertion guide allows the easy, minimally invasive positioning and fixation of the Humerus Block to the humerus shaft, and the correct inser-tion of Kirschner wires through the Humerus Block into the head of the humerus.
Drill Sleeve for Humerus Block (312.661)The drill sleeve is introduced into the Insertion Guide (332.600) for pre-drilling before fixing the Humerus Block to the humerus shaft. The drill sleeve also guides the Special Screwdriver (314.169) to the small headless pins for tightening in the Humerus Block and to fix the Kirschner wires.
Kirschner-wire Centering Sleeve for Humerus Block (324.085)Two centering sleeves permit easy and correct insertion of the Kirschner wires into the Humerus Block. The sleeves are fitted to mountings on the Insertion Guide (332.600).
8 DePuy Synthes Humerus Block Surgical Technique
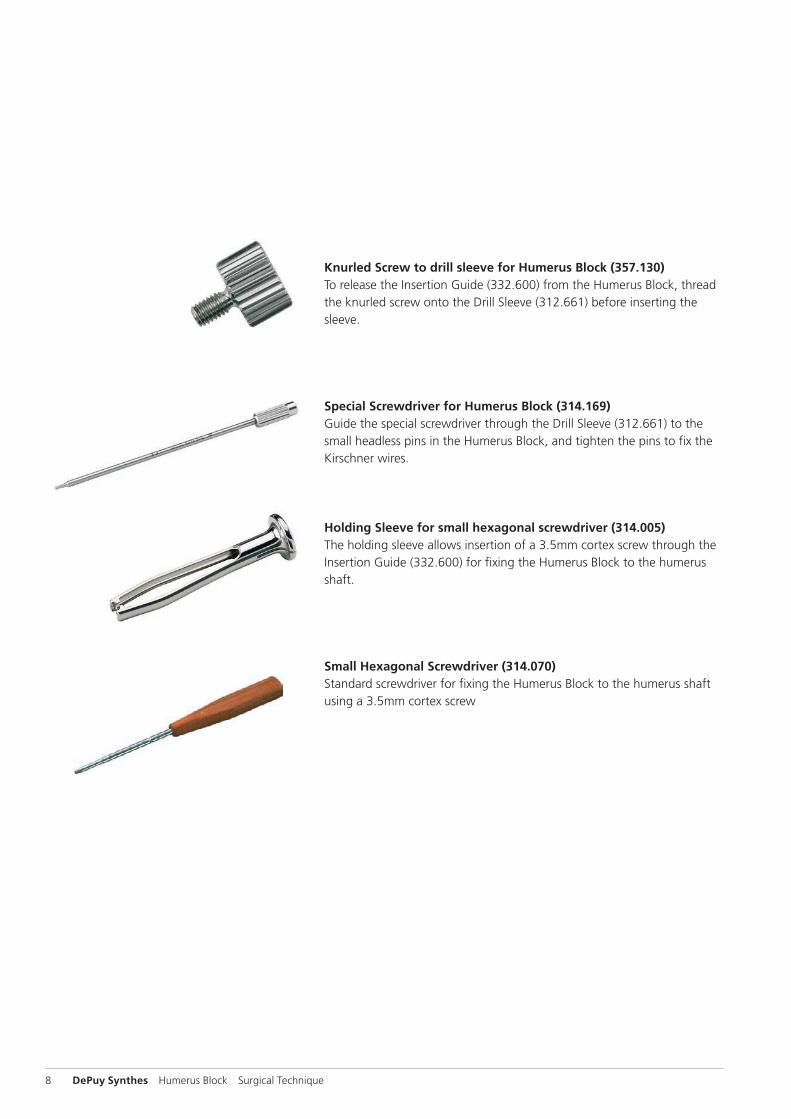
Knurled Screw to drill sleeve for Humerus Block (357.130)To release the Insertion Guide (332.600) from the Humerus Block, thread the knurled screw onto the Drill Sleeve (312.661) before inserting the sleeve.
Special Screwdriver for Humerus Block (314.169)Guide the special screwdriver through the Drill Sleeve (312.661) to the small headless pins in the Humerus Block, and tighten the pins to fix the Kirschner wires.
Holding Sleeve for small hexagonal screwdriver (314.005) The holding sleeve allows insertion of a 3.5mm cortex screw through the Insertion Guide (332.600) for fixing the Humerus Block to the humerus shaft.
Small Hexagonal Screwdriver (314.070) Standard screwdriver for fixing the Humerus Block to the humerus shaft using a 3.5mm cortex screw
Humerus Block Surgical Technique DePuy Synthes 9
Features and benefits
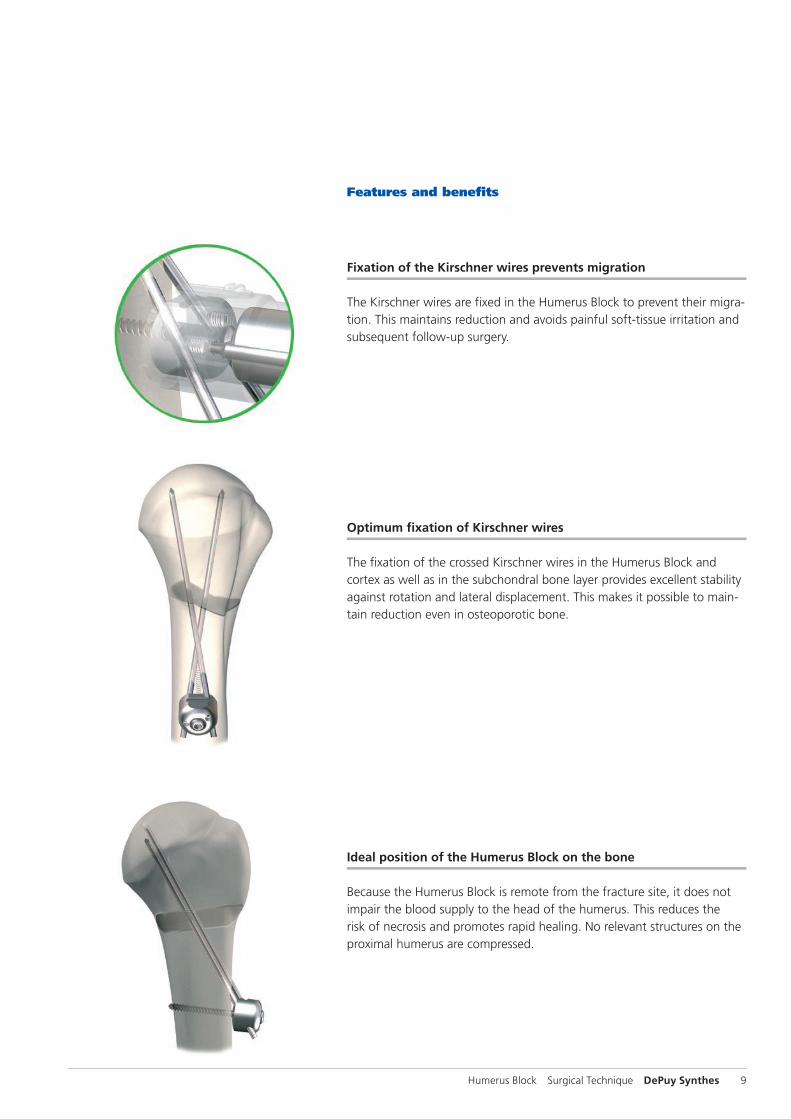
Fixation of the Kirschner wires prevents migration
The Kirschner wires are fixed in the Humerus Block to prevent their migra-tion. This maintains reduction and avoids painful soft-tissue irritation and subsequent follow-up surgery.
Optimum fixation of Kirschner wires
The fixation of the crossed Kirschner wires in the Humerus Block and cortex as well as in the subchondral bone layer provides excellent stability against rotation and lateral displacement. This makes it possible to main-tain reduction even in osteoporotic bone.
Ideal position of the Humerus Block on the bone
Because the Humerus Block is remote from the fracture site, it does not impair the blood supply to the head of the humerus. This reduces the risk of necrosis and promotes rapid healing. No relevant structures on the proximal humerus are compressed.
12 DePuy Synthes Humerus Block Surgical Technique
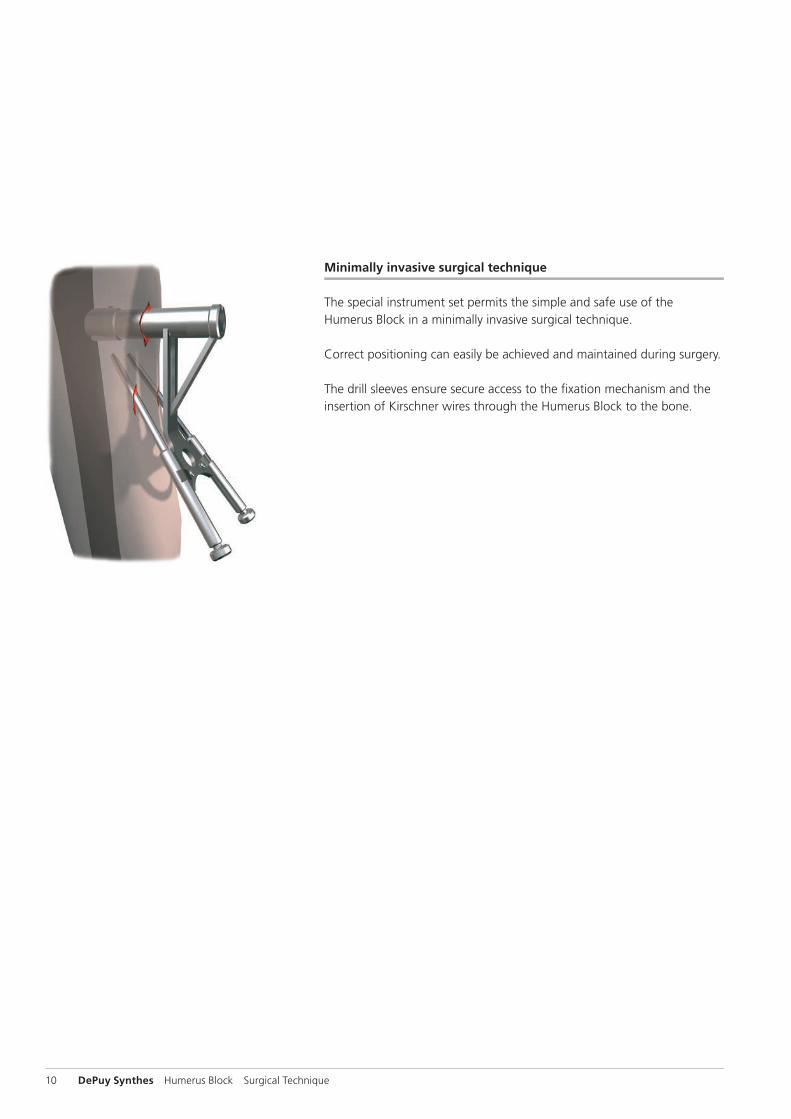
Minimally invasive surgical technique
The special instrument set permits the simple and safe use of the Humerus Block in a minimally invasive surgical technique.
Correct positioning can easily be achieved and maintained during surgery.
The drill sleeves ensure secure access to the fixation mechanism and the insertion of Kirschner wires through the Humerus Block to the bone.
Humerus Block Surgical Technique DePuy Synthes 11
Preparation
Preoperative planning
An accurate study of a-p, axial, and transscapular x-rays provides a pic-ture of the position of the various fragments and their relationship to one another. A computer tomogram is also useful, especially if available in 3D, and provides even better information about the appearance of the frac-ture.
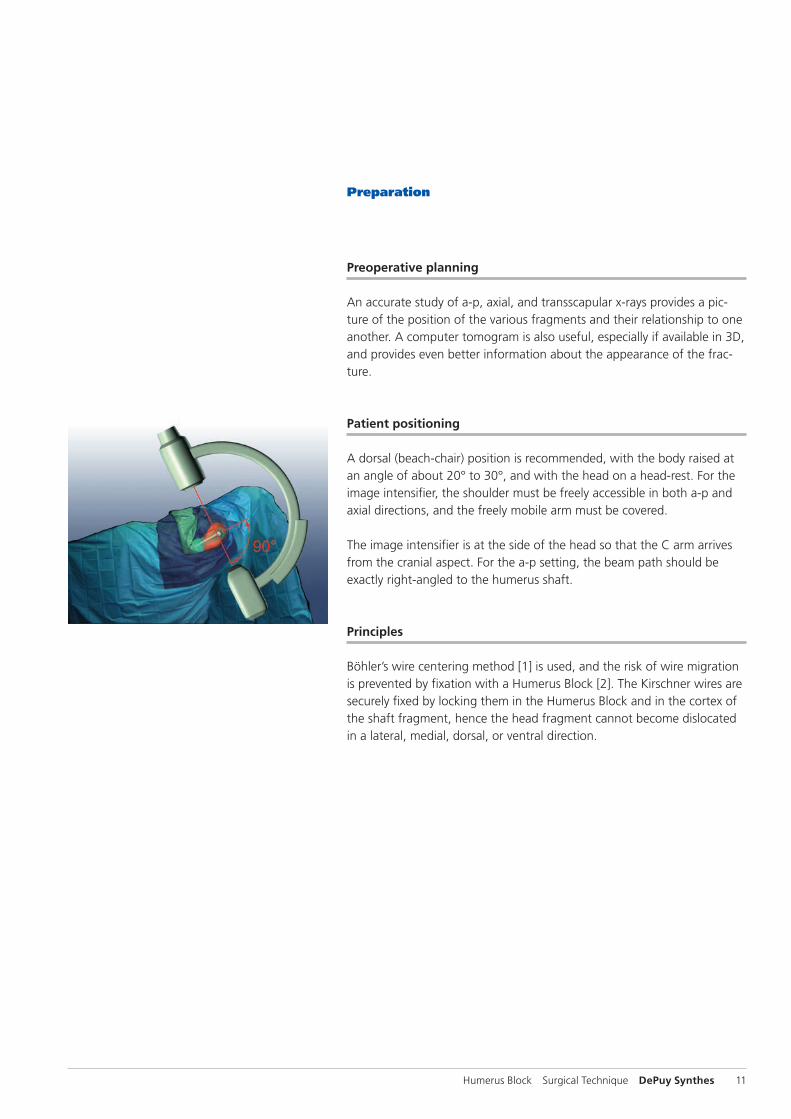
Patient positioning
A dorsal (beach-chair) position is recommended, with the body raised at an angle of about 20° to 30°, and with the head on a head-rest. For the image intensifier, the shoulder must be freely accessible in both a-p and axial directions, and the freely mobile arm must be covered.
The image intensifier is at the side of the head so that the C arm arrives from the cranial aspect. For the a-p setting, the beam path should be exactly right-angled to the humerus shaft.
Principles
Böhler’s wire centering method [1] is used, and the risk of wire migration is prevented by fixation with a Humerus Block [2]. The Kirschner wires are securely fixed by locking them in the Humerus Block and in the cortex of the shaft fragment, hence the head fragment cannot become dislocated in a lateral, medial, dorsal, or ventral direction.
2.1.
11 DePuy Synthes Humerus Block Surgical Technique
Surgical steps
1 Reduction
Cover the fracture as described by Böhler [1] or reduce it provisionally with the aid of percutaneously inserted instruments in the a-p view.
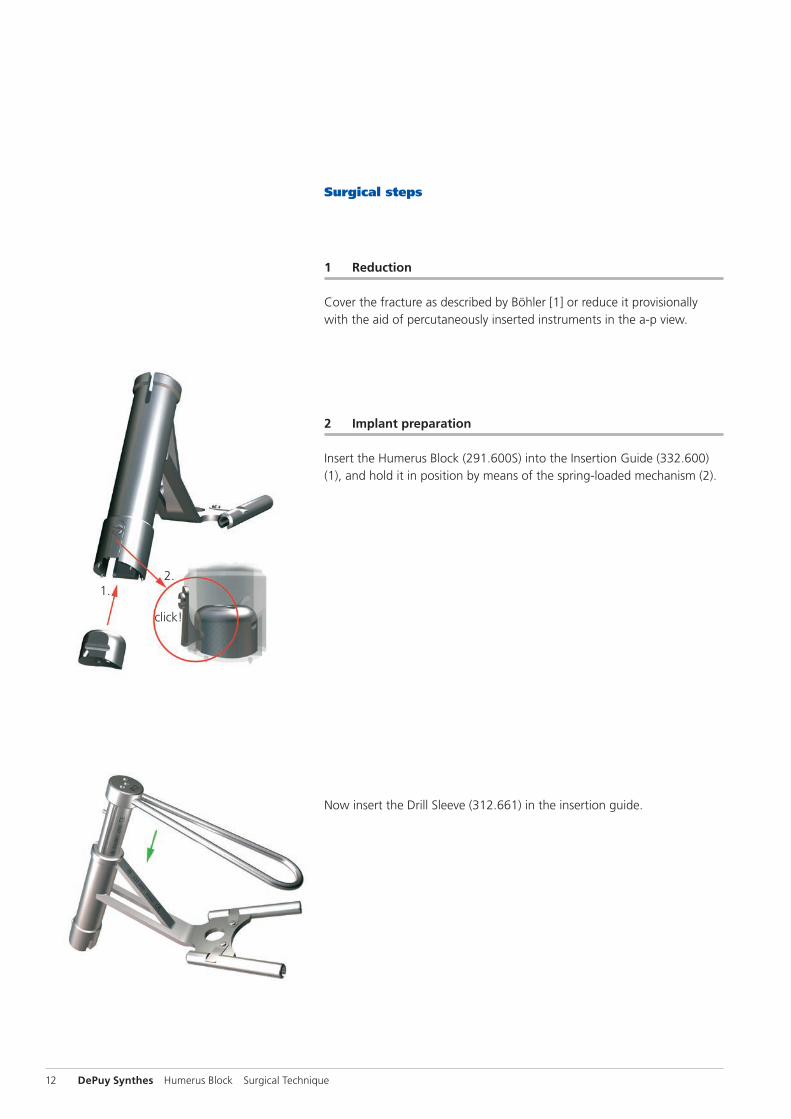
2 Implant preparation
Insert the Humerus Block (291.600S) into the Insertion Guide (332.600) (1), and hold it in position by means of the spring-loaded mechanism (2).
Now insert the Drill Sleeve (312.661) in the insertion guide.
click!
Humerus Block Surgical Technique DePuy Synthes 13
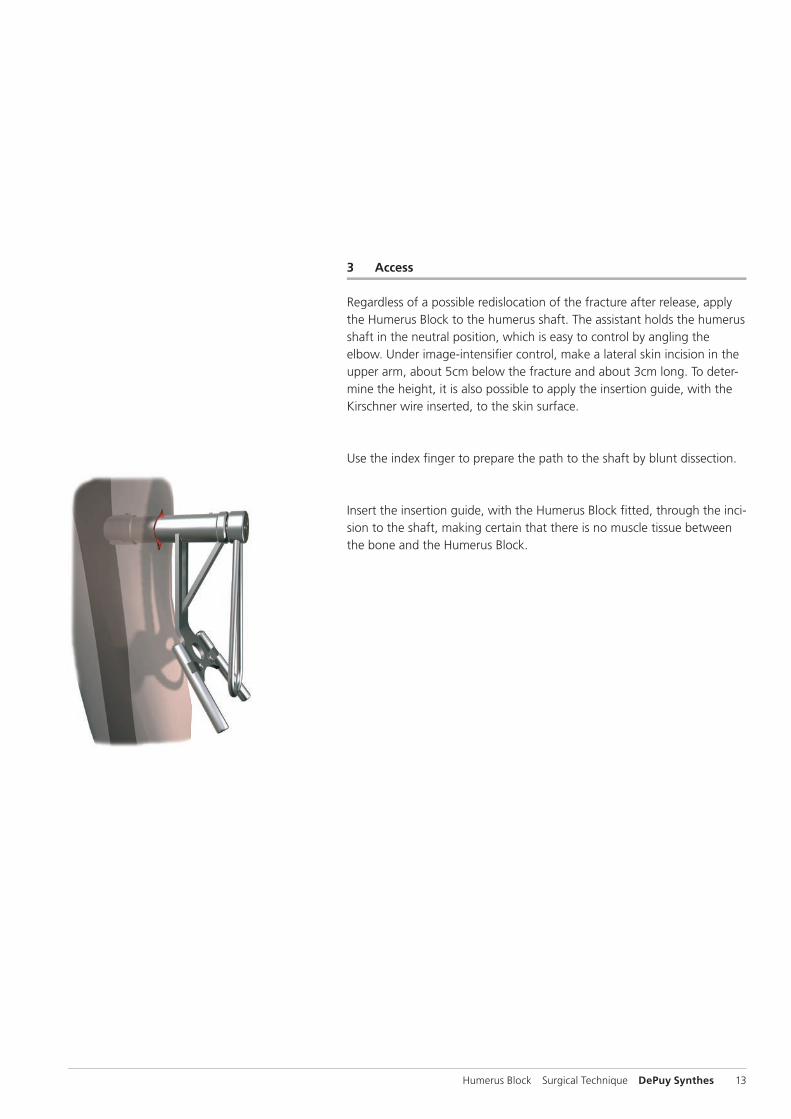
3 Access
Regardless of a possible redislocation of the fracture after release, apply the Humerus Block to the humerus shaft. The assistant holds the humerus shaft in the neutral position, which is easy to control by angling the elbow. Under image-intensifier control, make a lateral skin incision in the upper arm, about 5cm below the fracture and about 3cm long. To deter-mine the height, it is also possible to apply the insertion guide, with the Kirschner wire inserted, to the skin surface.
Use the index finger to prepare the path to the shaft by blunt dissection.
Insert the insertion guide, with the Humerus Block fitted, through the inci-sion to the shaft, making certain that there is no muscle tissue between the bone and the Humerus Block.
A B
14 DePuy Synthes Humerus Block Surgical Technique
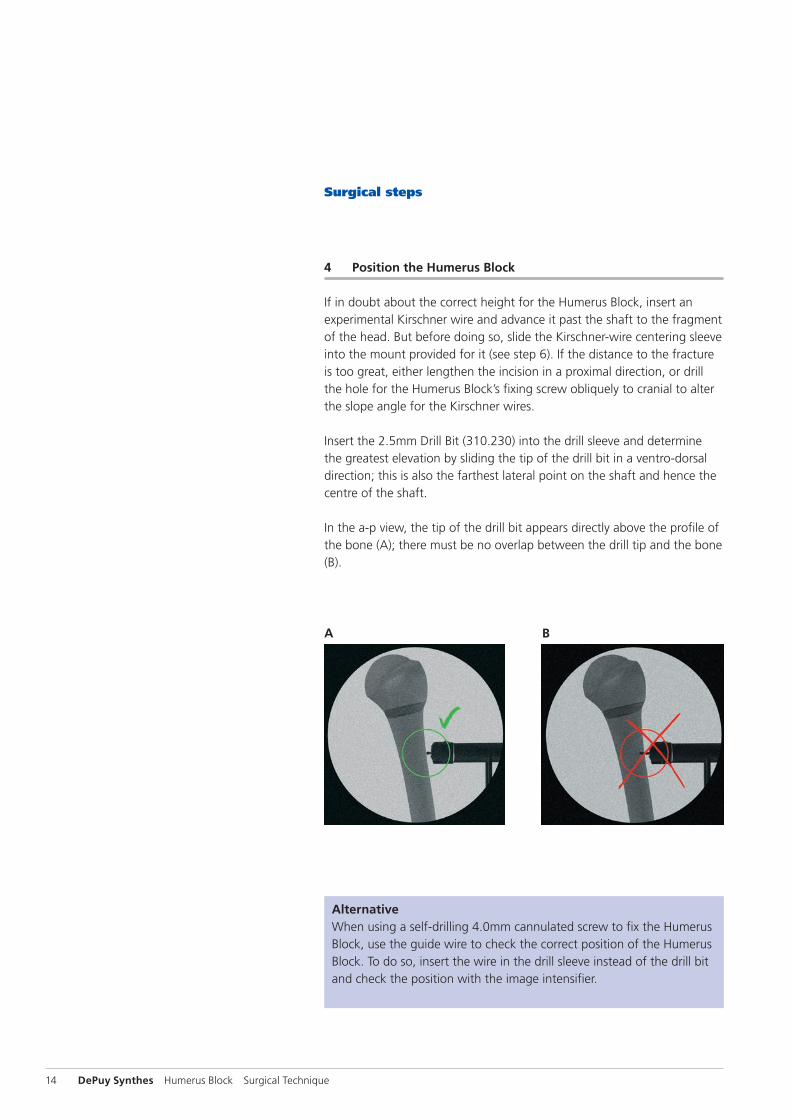
4 Position the Humerus Block
If in doubt about the correct height for the Humerus Block, insert an experimental Kirschner wire and advance it past the shaft to the fragment of the head. But before doing so, slide the Kirschner-wire centering sleeve into the mount provided for it (see step 6). If the distance to the fracture is too great, either lengthen the incision in a proximal direction, or drill the hole for the Humerus Block’s fixing screw obliquely to cranial to alter the slope angle for the Kirschner wires.
Insert the 2.5mm Drill Bit (310.230) into the drill sleeve and determine the greatest elevation by sliding the tip of the drill bit in a ventro-dorsal direction; this is also the farthest lateral point on the shaft and hence the centre of the shaft.
In the a-p view, the tip of the drill bit appears directly above the profile of the bone (A); there must be no overlap between the drill tip and the bone (B).
AlternativeWhen using a self-drilling 4.0mm cannulated screw to fix the Humerus Block, use the guide wire to check the correct position of the Humerus Block. To do so, insert the wire in the drill sleeve instead of the drill bit and check the position with the image intensifier.
Surgical steps
(1)
Humerus Block Surgical Technique DePuy Synthes 15
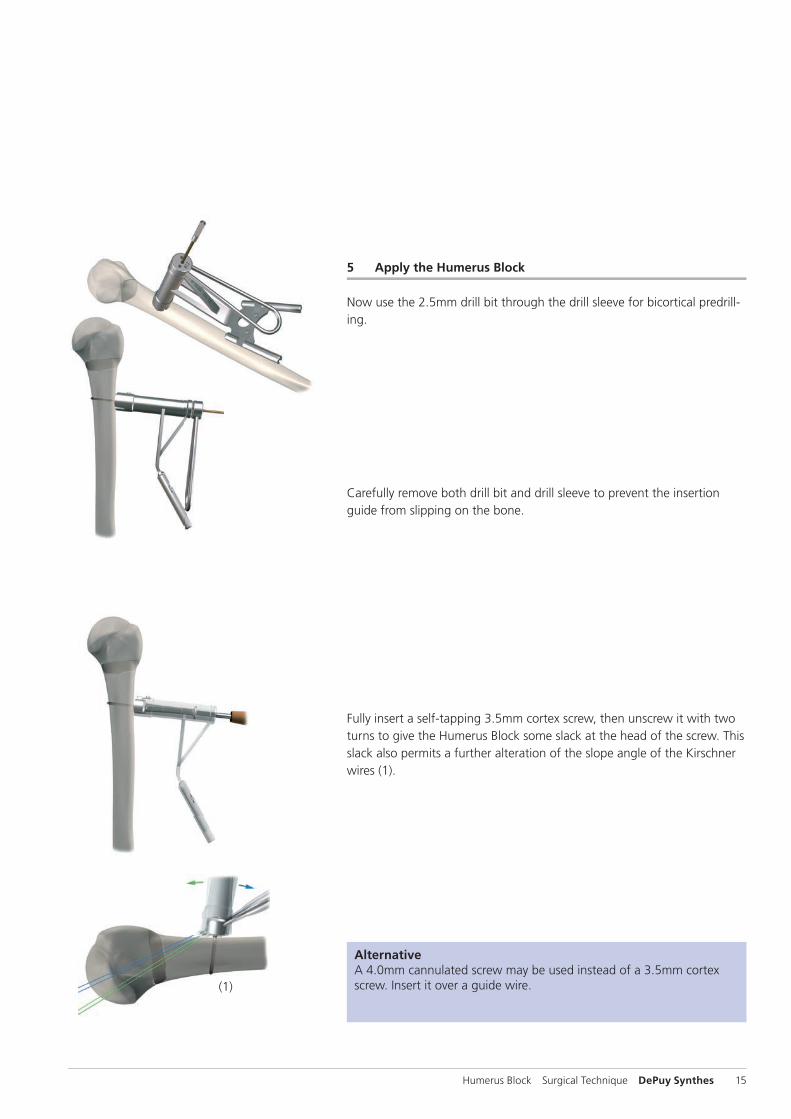
5 Apply the Humerus Block
Now use the 2.5mm drill bit through the drill sleeve for bicortical predrill-ing.
Carefully remove both drill bit and drill sleeve to prevent the insertion guide from slipping on the bone.
Fully insert a self-tapping 3.5mm cortex screw, then unscrew it with two turns to give the Humerus Block some slack at the head of the screw. This slack also permits a further alteration of the slope angle of the Kirschner wires (1).
AlternativeA 4.0mm cannulated screw may be used instead of a 3.5mm cortex screw. Insert it over a guide wire.
16 DePuy Synthes Humerus Block Surgical Technique
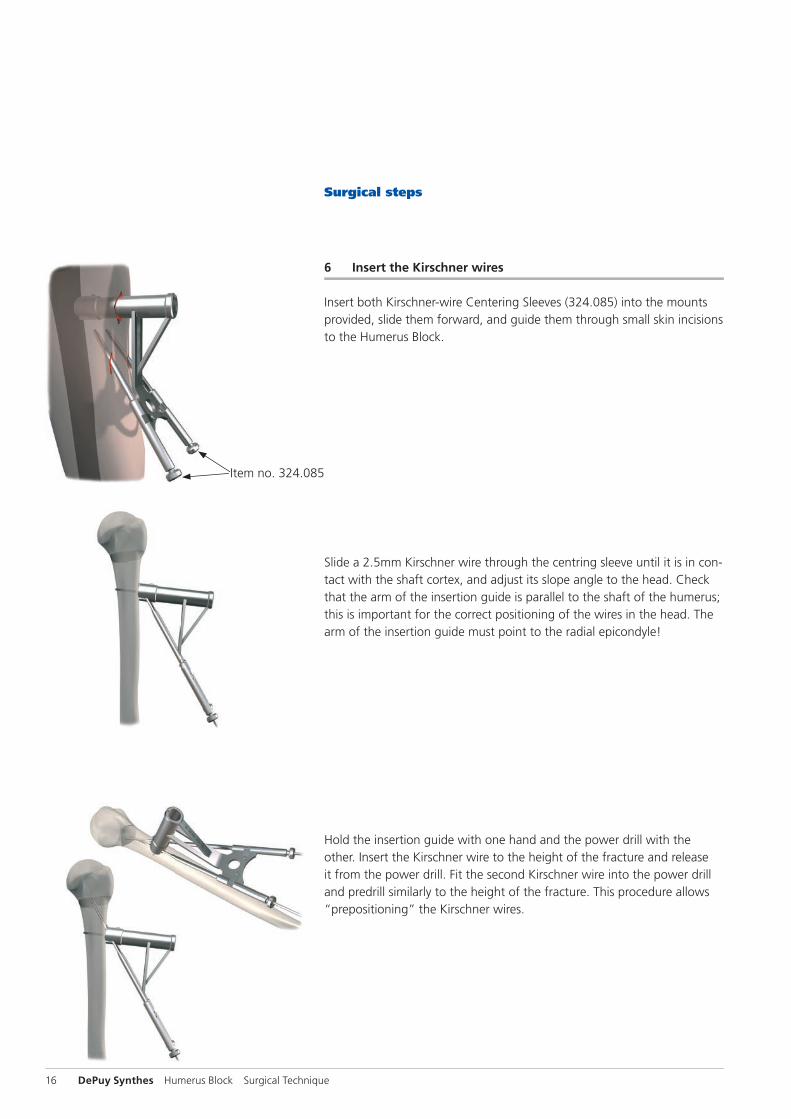
6 Insert the Kirschner wires
Insert both Kirschner-wire Centering Sleeves (324.085) into the mounts provided, slide them forward, and guide them through small skin incisions to the Humerus Block.
Slide a 2.5mm Kirschner wire through the centring sleeve until it is in con-tact with the shaft cortex, and adjust its slope angle to the head. Check that the arm of the insertion guide is parallel to the shaft of the humerus; this is important for the correct positioning of the wires in the head. The arm of the insertion guide must point to the radial epicondyle!
Hold the insertion guide with one hand and the power drill with the other. Insert the Kirschner wire to the height of the fracture and release it from the power drill. Fit the second Kirschner wire into the power drill and predrill similarly to the height of the fracture. This procedure allows “prepositioning” the Kirschner wires.
Surgical steps
Item no. 324.085
Humerus Block Surgical Technique DePuy Synthes 17
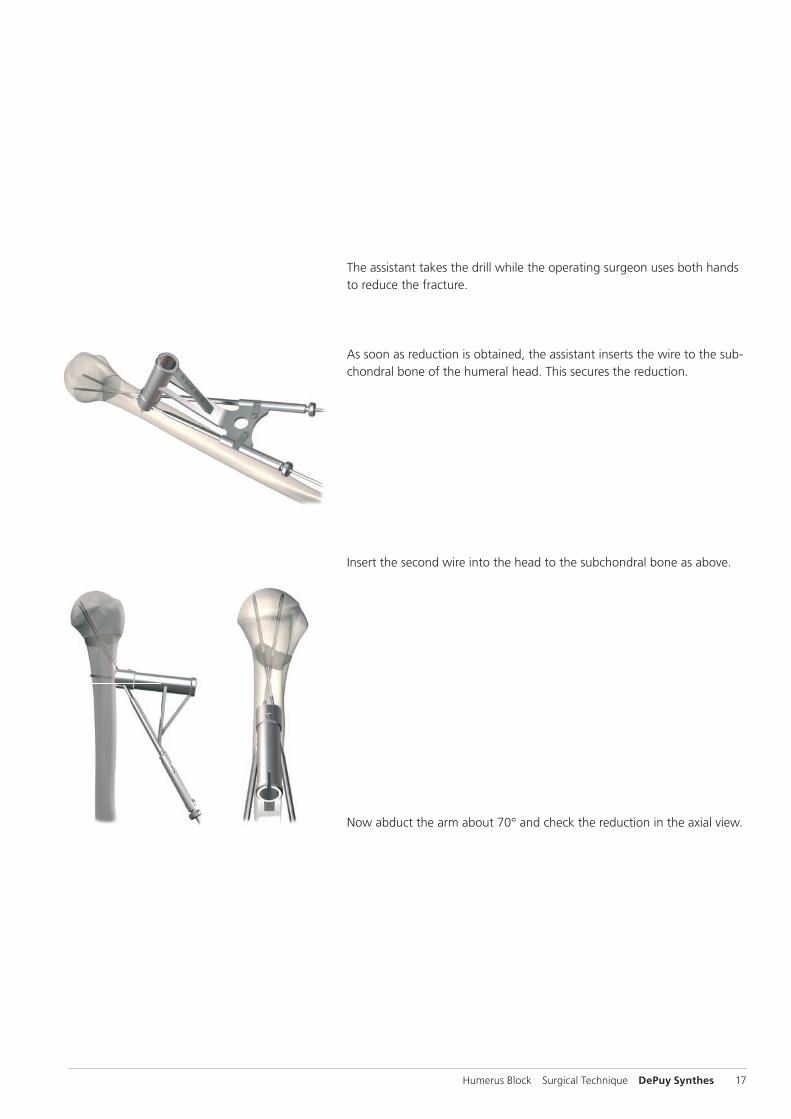
The assistant takes the drill while the operating surgeon uses both hands to reduce the fracture.
As soon as reduction is obtained, the assistant inserts the wire to the sub-chondral bone of the humeral head. This secures the reduction.
Insert the second wire into the head to the subchondral bone as above.
Now abduct the arm about 70° and check the reduction in the axial view.
18 DePuy Synthes Humerus Block Surgical Technique
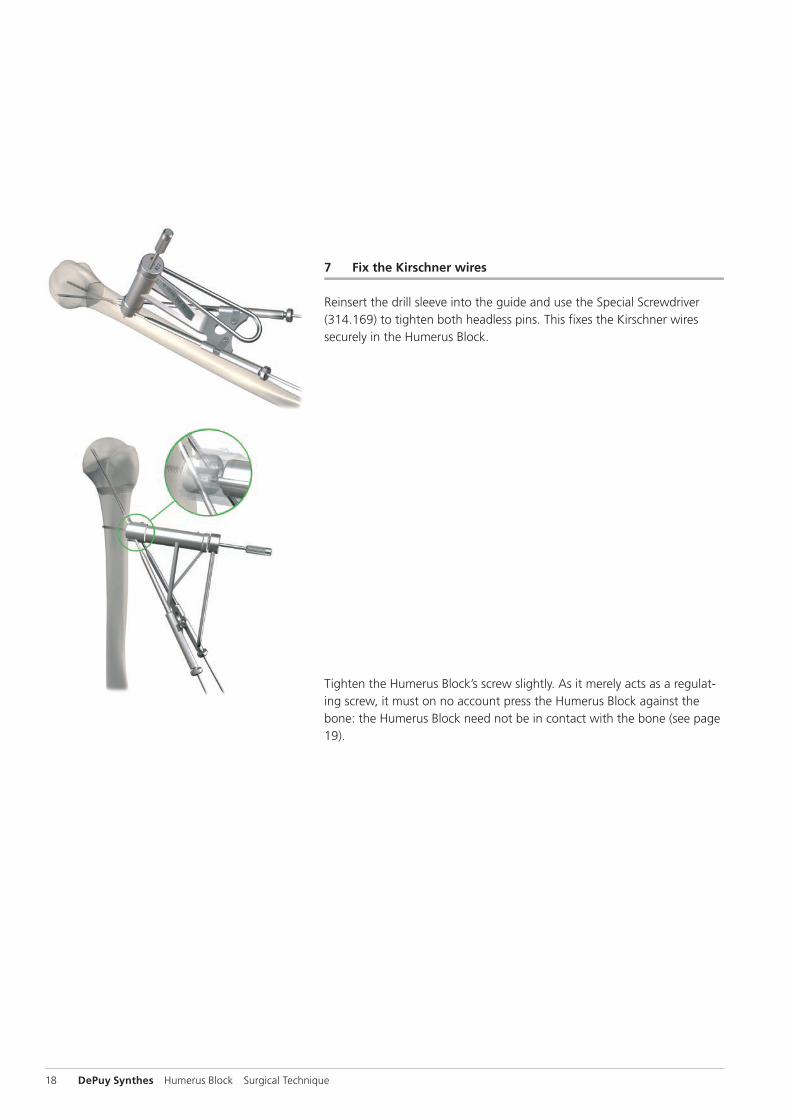
7 Fix the Kirschner wires
Reinsert the drill sleeve into the guide and use the Special Screwdriver (314.169) to tighten both headless pins. This fixes the Kirschner wires securely in the Humerus Block.
Tighten the Humerus Block’s screw slightly. As it merely acts as a regulat-ing screw, it must on no account press the Humerus Block against the bone: the Humerus Block need not be in contact with the bone (see page 19).
2
1
3
Humerus Block Surgical Technique DePuy Synthes 19
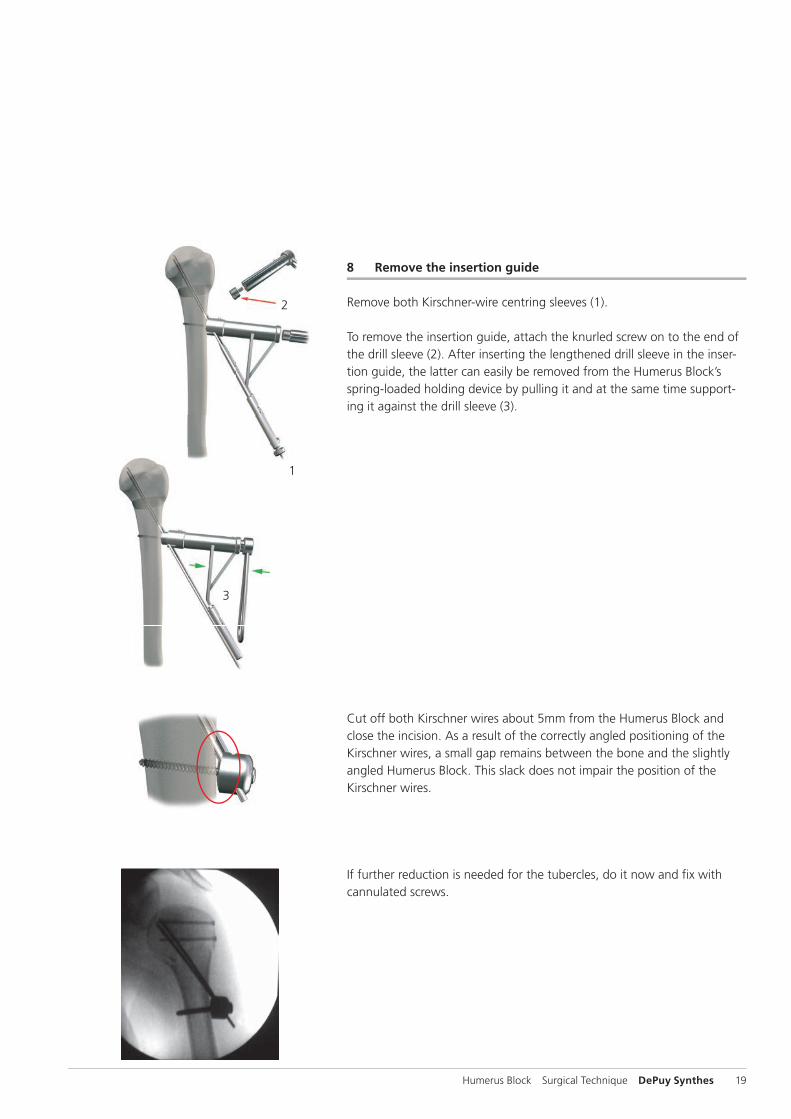
8 Remove the insertion guide
Remove both Kirschner-wire centring sleeves (1).
To remove the insertion guide, attach the knurled screw on to the end of the drill sleeve (2). After inserting the lengthened drill sleeve in the inser-tion guide, the latter can easily be removed from the Humerus Block’s spring-loaded holding device by pulling it and at the same time support-ing it against the drill sleeve (3).
Cut off both Kirschner wires about 5mm from the Humerus Block and close the incision. As a result of the correctly angled positioning of the Kirschner wires, a small gap remains between the bone and the slightly angled Humerus Block. This slack does not impair the position of the Kirschner wires.
If further reduction is needed for the tubercles, do it now and fix with cannulated screws.
12 DePuy Synthes Humerus Block Surgical Technique
Postoperative treatment
Postoperative treatment depends on the type of fracture and the degree of porosis. Because this is a percutaneous technique, the postoperative treatment is similar to conservative therapy. In the presence of severe porotic conditions, the upper arm can easily be immobilized for two to three weeks in a Gilchrist bandage, before beginning passive and active motion therapy. In favourable conditions, motion therapy can begin ear-lier.
If the Kirschner wires perforate the head fragment and touch the glenoid, withdraw them to the subchondral bone three weeks before starting motion therapy, or remove them.
Implant removal
After four to six weeks, use the same skin incision under short general anaesthesia or a local anaesthetic to slide the insertion guide over the Humerus Block. After insertion of the drill sleeve, use the special screw-driver to loosen both headless pins, then use pointed forceps to remove the Kirschner wires. Unscrew the cortex screw and remove the Humerus Block. Removal is also possible without use of the insertion guide.
Humerus Block Surgical Technique DePuy Synthes 11
Ordering information
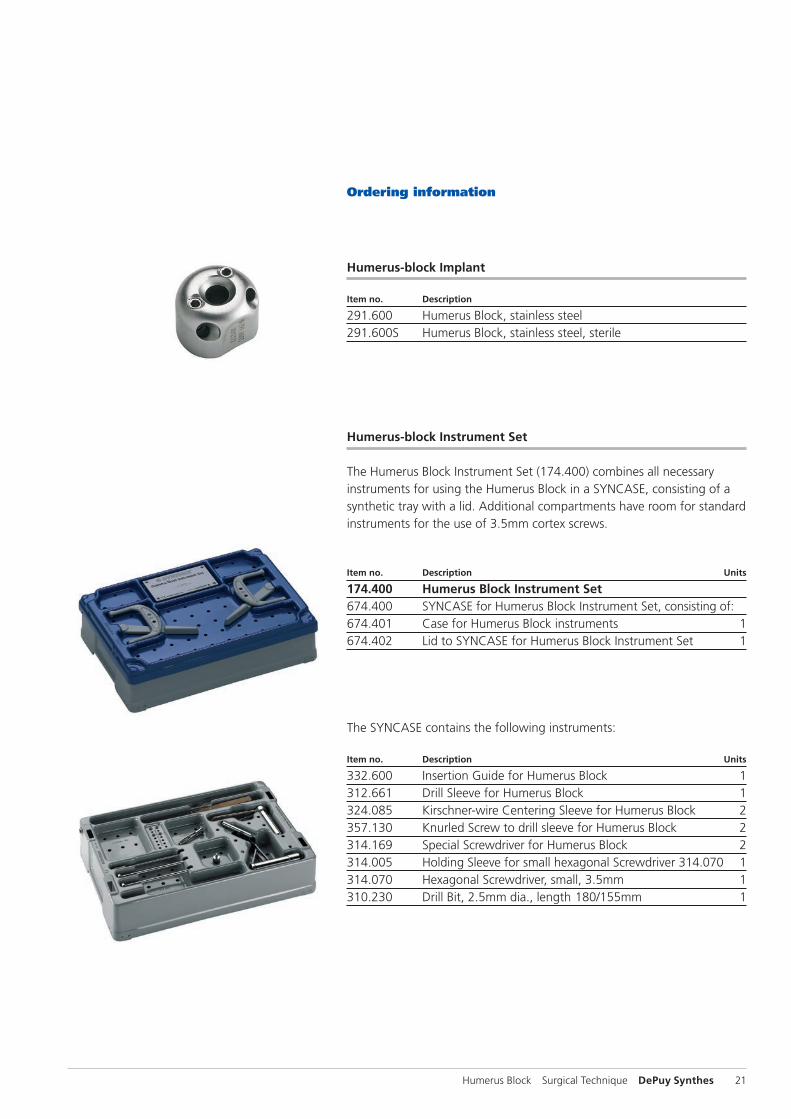
Humerus-block Implant
Item no. Description
291.600 Humerus Block, stainless steel291.600S Humerus Block, stainless steel, sterile
Humerus-block Instrument Set
The Humerus Block Instrument Set (174.400) combines all necessary instruments for using the Humerus Block in a SYNCASE, consisting of a synthetic tray with a lid. Additional compartments have room for standard instruments for the use of 3.5mm cortex screws.
Item no. Description Units
174.400 Humerus Block Instrument Set 674.400 SYNCASE for Humerus Block Instrument Set, consisting of:674.401 Case for Humerus Block instruments 1674.402 Lid to SYNCASE for Humerus Block Instrument Set 1
The SYNCASE contains the following instruments:
Item no. Description Units
332.600 Insertion Guide for Humerus Block 1312.661 Drill Sleeve for Humerus Block 1324.085 Kirschner-wire Centering Sleeve for Humerus Block 2357.130 Knurled Screw to drill sleeve for Humerus Block 2314.169 Special Screwdriver for Humerus Block 2314.005 Holding Sleeve for small hexagonal Screwdriver 314.070 1314.070 Hexagonal Screwdriver, small, 3.5mm 1310.230 Drill Bit, 2.5mm dia., length 180/155mm 1
11 DePuy Synthes Humerus Block Surgical Technique
1 Böhler, J.; Perkutane Osteosynthese mit dem Röntgenbildverstärker (Percutaneous osteosynthesis with the image intensifier.) Vienna, Klin. Wochenschrift, (clinical weekly) 1962;26:485-487
2 H. Resch, M.D., C. Hübner, M.D., R. Schwaiger, M.D. Landeskrankenhaus (General Hospital) Salzburg; Minimally invasive reduction and osteosythesis of articular fractures of the humeral head. Injury, Int. J. Care Injured 32 (2001) S-A25-32
Bibliography


Synthes GmbHEimattstrasse 34436 OberdorfSwitzerlandTel: +41 61 965 61 11Fax: +41 61 965 66 22www.depuysynthes.com 0123 ©
DeP
uy S
ynth
es T
raum
a, a
div
isio
n of
Syn
thes
Gm
bH. 2
015.
A
ll rig
hts
rese
rved
. 03
6.0
00.
108
DSE
M/T
RM
/011
5/02
96
01/1
5
This publication is not intended for distribution in the USA.
All surgical techniques are available as PDF files at www.synthes.com/lit