Embed Size (px)
Citation preview
Installation Instructions :BMW M2, M125i, M235i : Page 1
1. We will start by removing the stock airbox system. 2. Loosen the hose clamp which secures the intake tube to the flexible inlet tube.
3. Pull the mount on the tube upwards and out of the rubber grommet. 4. Remove the breather from the intake tube. It can be removed by squeezing the plastic tabs
at the end and lifting away from the tube.
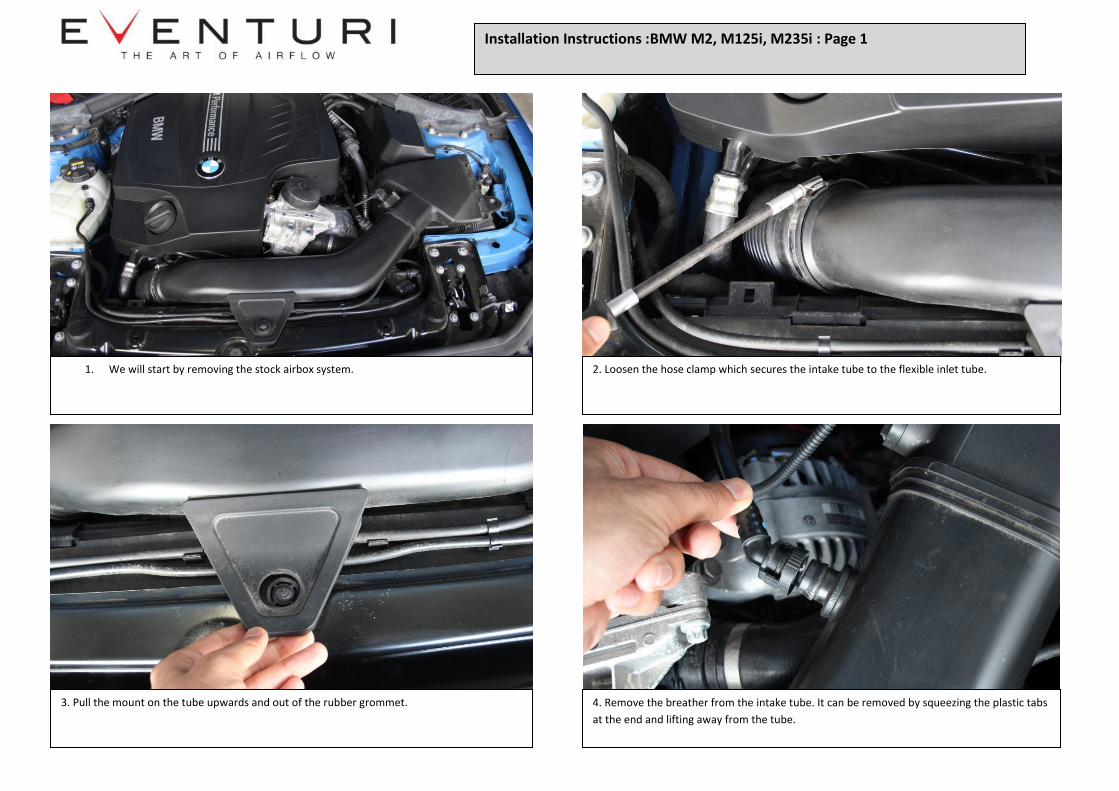
Installation Instructions : BMW M2, M125i, M235i: Page 2
5. Disconnect the MAF sensor plug from the sensor itself. 6. If your car is an M2 it will be helpful to remove the strut brace on the airbox side. Simply
remove the 4 bolts holding it in place and lift away.
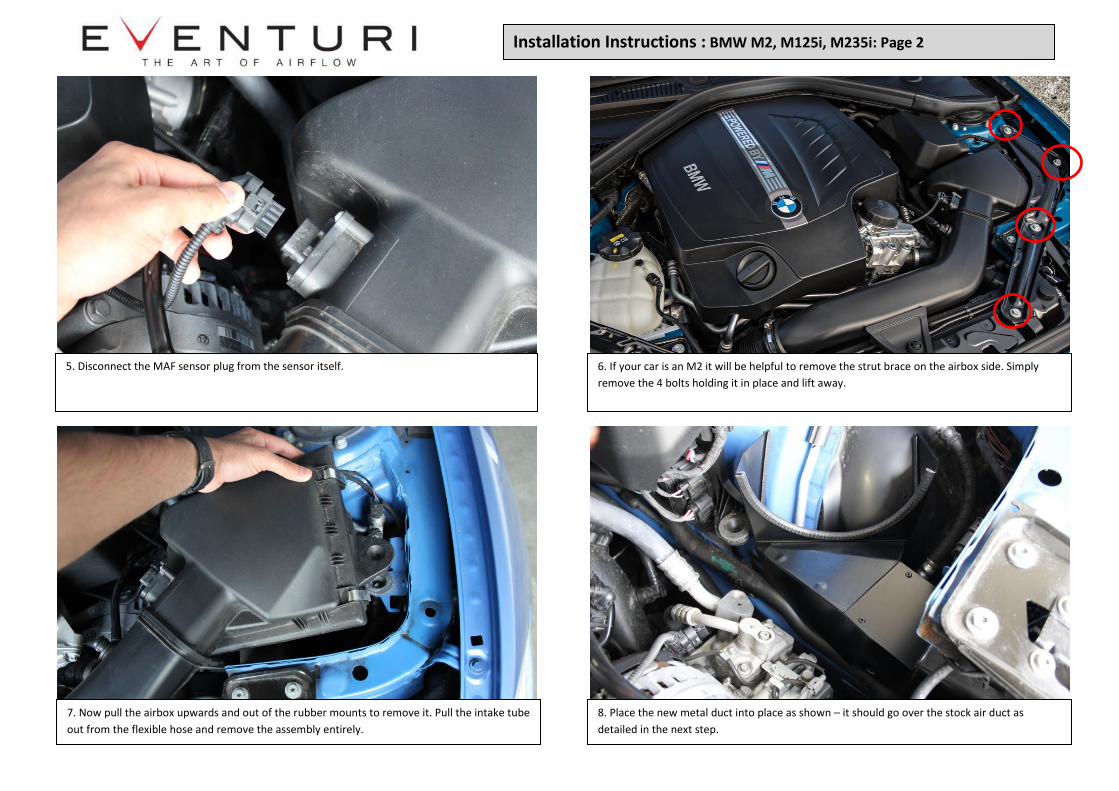
7. Now pull the airbox upwards and out of the rubber mounts to remove it. Pull the intake tube
out from the flexible hose and remove the assembly entirely.
8. Place the new metal duct into place as shown – it should go over the stock air duct as
detailed in the next step.
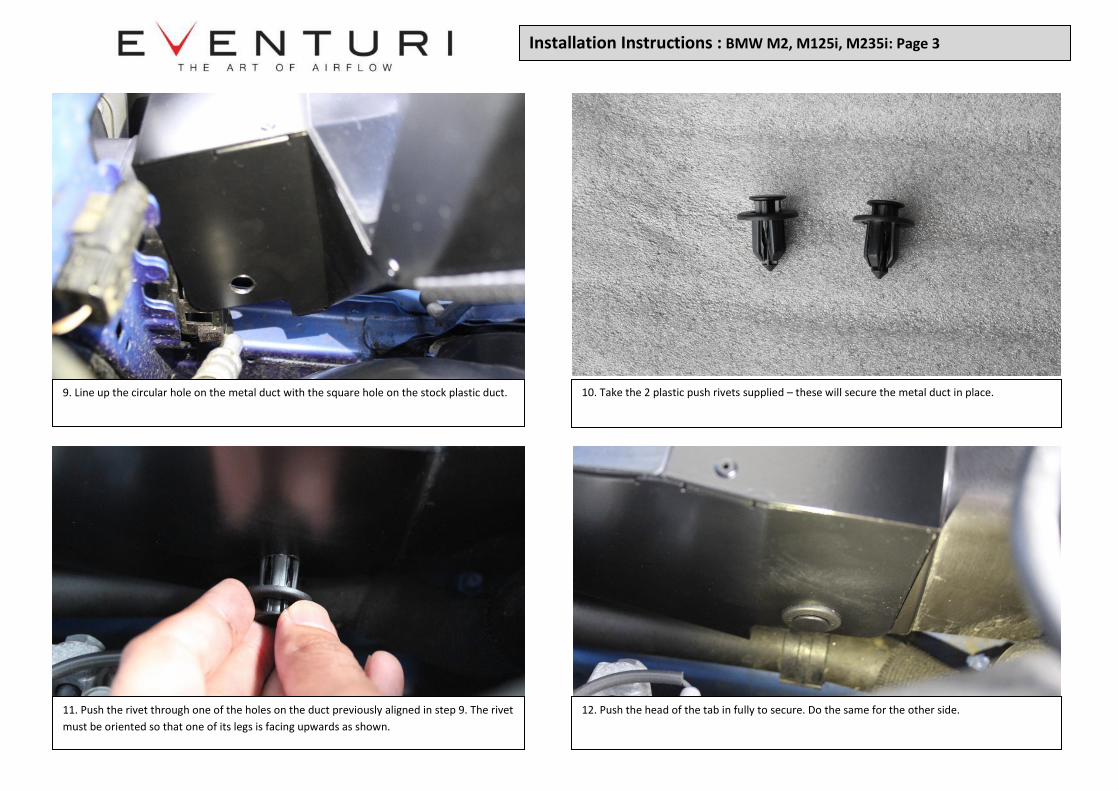
9. Line up the circular hole on the metal duct with the square hole on the stock plastic duct.
11. Push the rivet through one of the holes on the duct previously aligned in step 9. The rivet
must be oriented so that one of its legs is facing upwards as shown.
12. Push the head of the tab in fully to secure. Do the same for the other side.
10. Take the 2 plastic push rivets supplied – these will secure the metal duct in place.
Installation Instructions : BMW M2, M125i, M235i: Page 3
Installation Instructions : BMW M2, M125i, M235i: Page 4
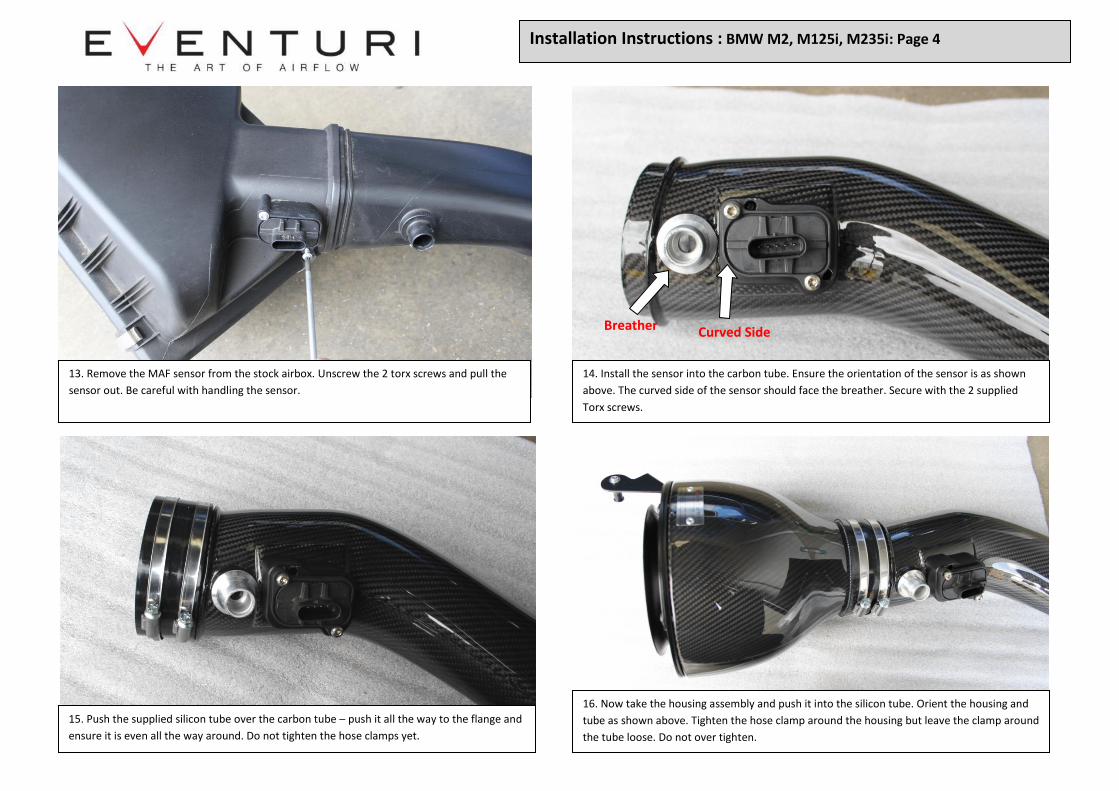
13. Remove the MAF sensor from the stock airbox. Unscrew the 2 torx screws and pull the
sensor out. Be careful with handling the sensor.
.
14. Install the sensor into the carbon tube. Ensure the orientation of the sensor is as shown
above. The curved side of the sensor should face the breather. Secure with the 2 supplied
Torx screws.
15. Push the supplied silicon tube over the carbon tube – push it all the way to the flange and
ensure it is even all the way around. Do not tighten the hose clamps yet.
.
16. Now take the housing assembly and push it into the silicon tube. Orient the housing and
tube as shown above. Tighten the hose clamp around the housing but leave the clamp around
the tube loose. Do not over tighten.
.
Curved Side Breather
Installation Instructions : BMW M2, M125i, M235i: Page 5
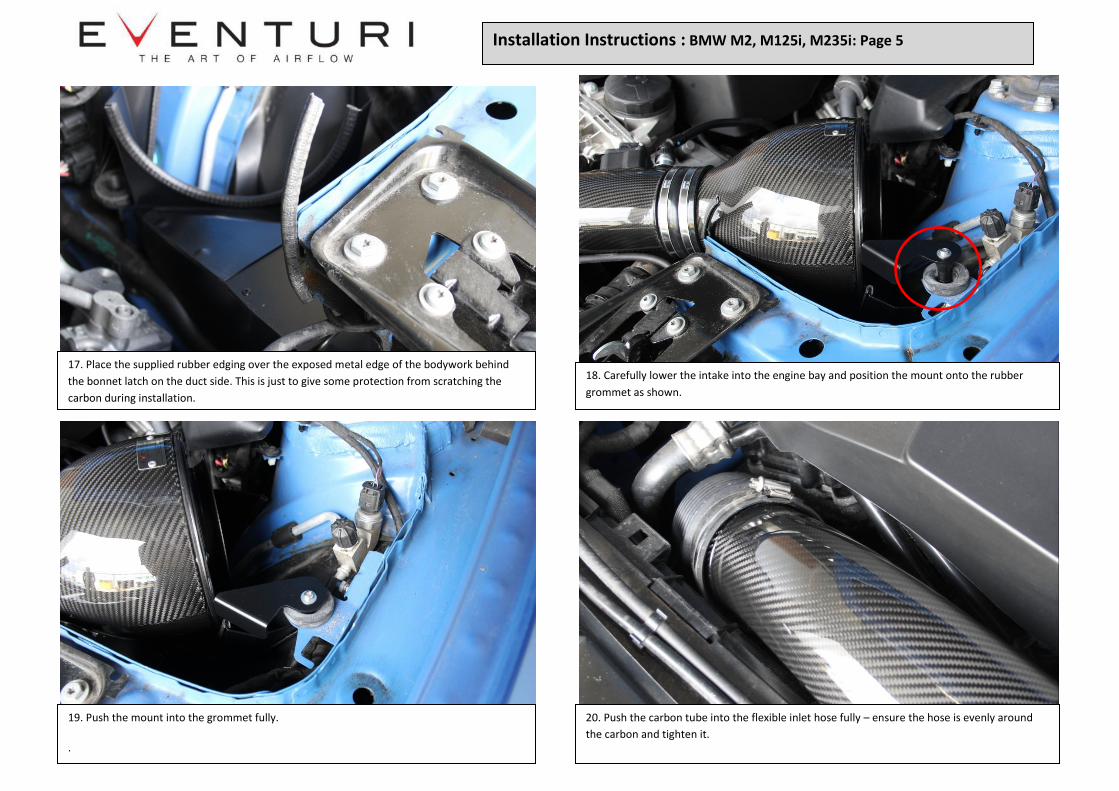
17. Place the supplied rubber edging over the exposed metal edge of the bodywork behind
the bonnet latch on the duct side. This is just to give some protection from scratching the
carbon during installation.
.
18. Carefully lower the intake into the engine bay and position the mount onto the rubber
grommet as shown.
19. Push the mount into the grommet fully.
.
20. Push the carbon tube into the flexible inlet hose fully – ensure the hose is evenly around
the carbon and tighten it.
Installation Instructions : BMW M2, M125i, M235i: Page 6
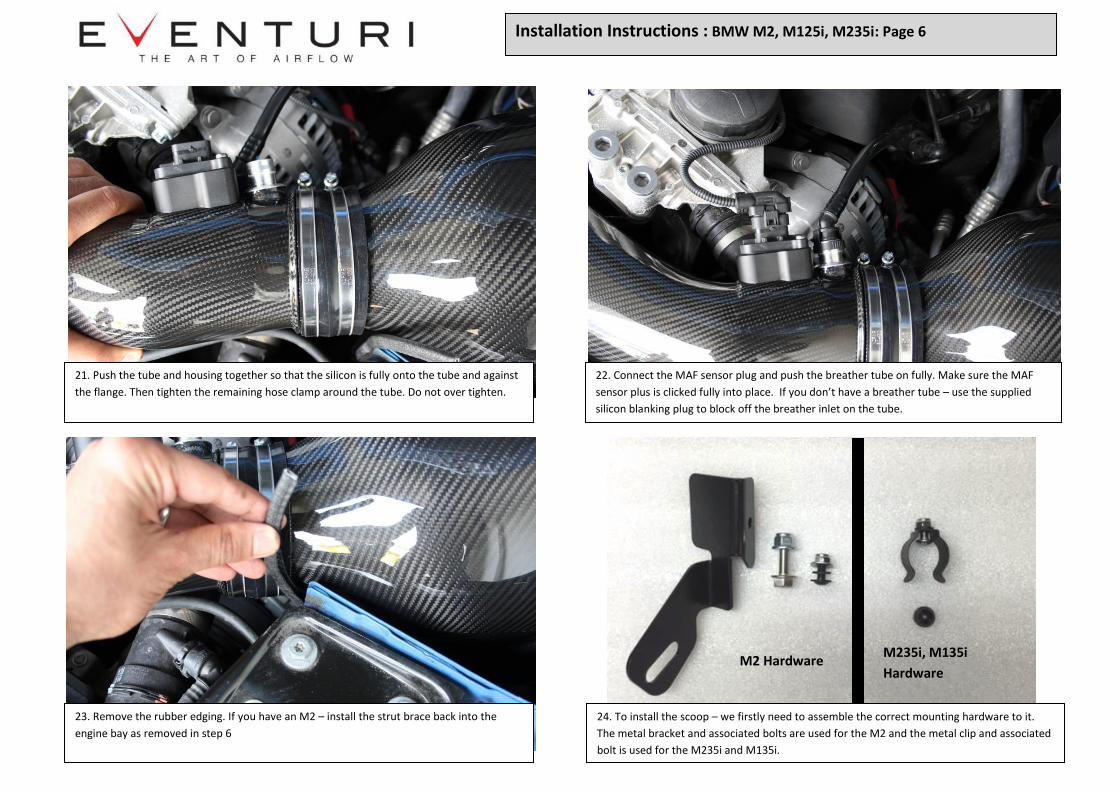
21. Push the tube and housing together so that the silicon is fully onto the tube and against
the flange. Then tighten the remaining hose clamp around the tube. Do not over tighten.
22. Connect the MAF sensor plug and push the breather tube on fully. Make sure the MAF
sensor plus is clicked fully into place. If you don’t have a breather tube – use the supplied
silicon blanking plug to block off the breather inlet on the tube.
23. Remove the rubber edging. If you have an M2 – install the strut brace back into the
engine bay as removed in step 6
24. To install the scoop – we firstly need to assemble the correct mounting hardware to it.
The metal bracket and associated bolts are used for the M2 and the metal clip and associated
bolt is used for the M235i and M135i.
.
M2 Hardware M235i, M135i
Hardware

Installation Instructions : BMW M2, M125i, M235i: Page 7
25. For the M235i and M135i, take the metal clip and secure it to the back of the carbon
scoop using the silver M5 screw as shown. Screw the bolt into the hole on the scoop.
.
26. Align the clip as shown.
27. Put the black washer and lock nut on the other side of the screw and tighten. 28. Push the black plastic cap over the lock nut to conceal it.
STEPS 25 – 28 are for the M235i and M135i
STEPS 29 – 31 are for the M2
.
Installation Instructions : BMW M2, M125i, M235i: Page 8
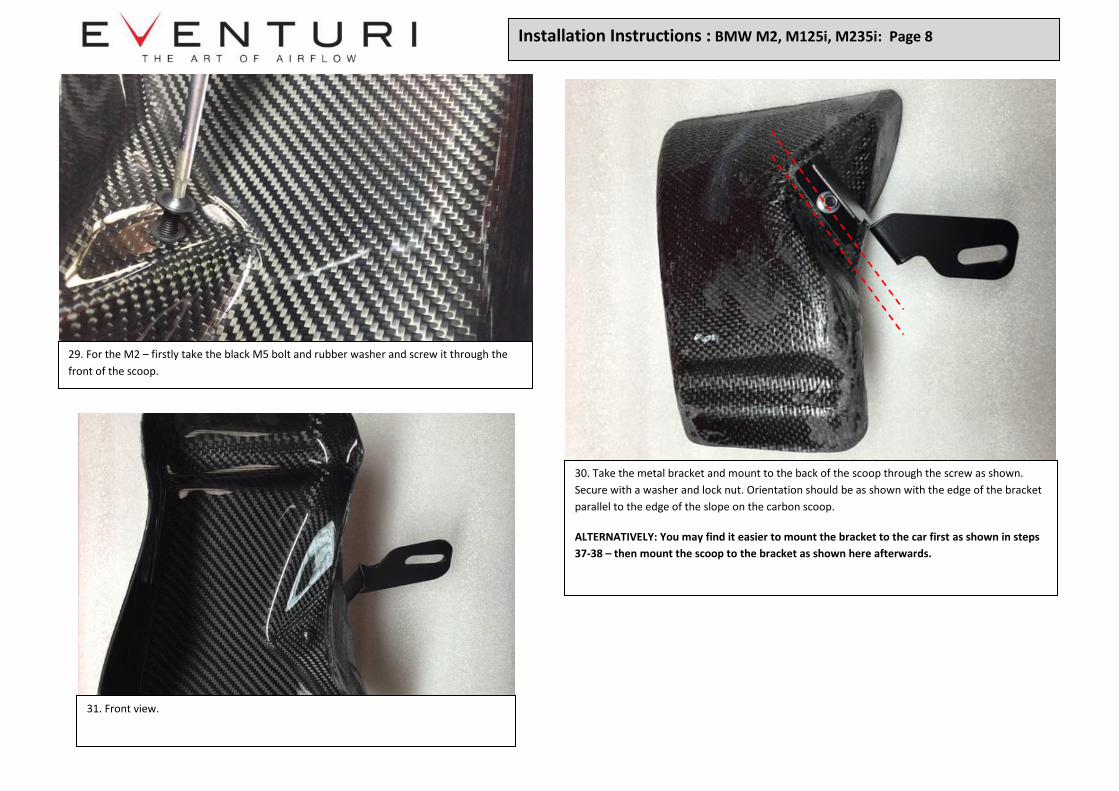
29. For the M2 – firstly take the black M5 bolt and rubber washer and screw it through the
front of the scoop.
.
30. Take the metal bracket and mount to the back of the scoop through the screw as shown.
Secure with a washer and lock nut. Orientation should be as shown with the edge of the bracket
parallel to the edge of the slope on the carbon scoop.
ALTERNATIVELY: You may find it easier to mount the bracket to the car first as shown in steps
37-38 – then mount the scoop to the bracket as shown here afterwards.
31. Front view.
Installation Instructions : BMW M2, M125i, M235i: Page 9
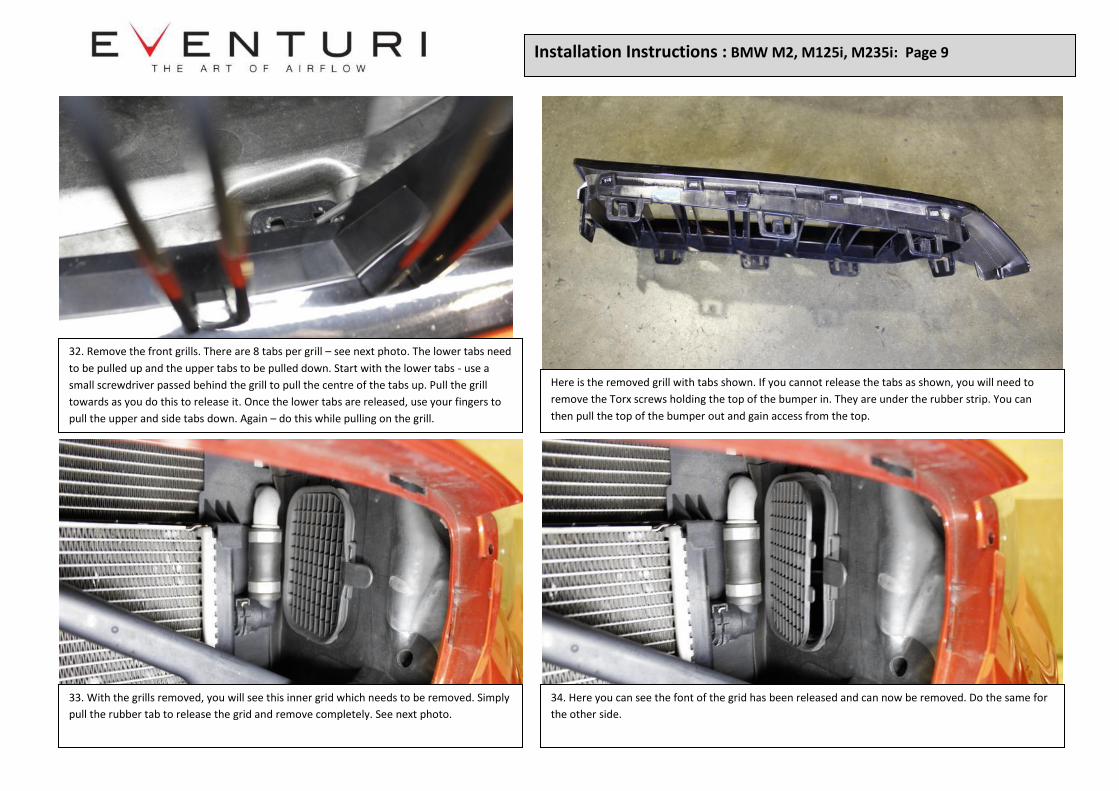
32. Remove the front grills. There are 8 tabs per grill – see next photo. The lower tabs need
to be pulled up and the upper tabs to be pulled down. Start with the lower tabs - use a
small screwdriver passed behind the grill to pull the centre of the tabs up. Pull the grill
towards as you do this to release it. Once the lower tabs are released, use your fingers to
pull the upper and side tabs down. Again – do this while pulling on the grill.
.
Here is the removed grill with tabs shown. If you cannot release the tabs as shown, you will need to
remove the Torx screws holding the top of the bumper in. They are under the rubber strip. You can
then pull the top of the bumper out and gain access from the top.
Ess .
33. With the grills removed, you will see this inner grid which needs to be removed. Simply
pull the rubber tab to release the grid and remove completely. See next photo.
34. Here you can see the font of the grid has been released and can now be removed. Do the same for
the other side.
Installation Instructions : BMW M2, M125i, M235i: Page 10
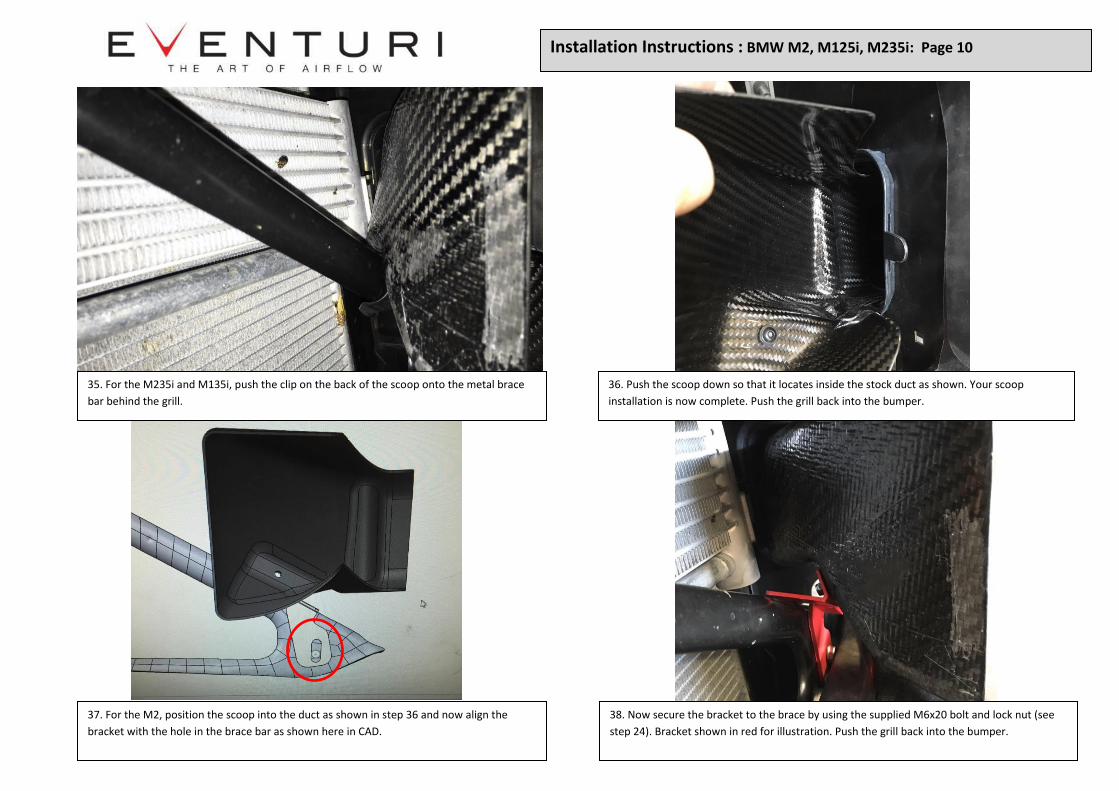
35. For the M235i and M135i, push the clip on the back of the scoop onto the metal brace
bar behind the grill.
36. Push the scoop down so that it locates inside the stock duct as shown. Your scoop
installation is now complete. Push the grill back into the bumper.
37. For the M2, position the scoop into the duct as shown in step 36 and now align the
bracket with the hole in the brace bar as shown here in CAD.
38. Now secure the bracket to the brace by using the supplied M6x20 bolt and lock nut (see
step 24). Bracket shown in red for illustration. Push the grill back into the bumper.
.
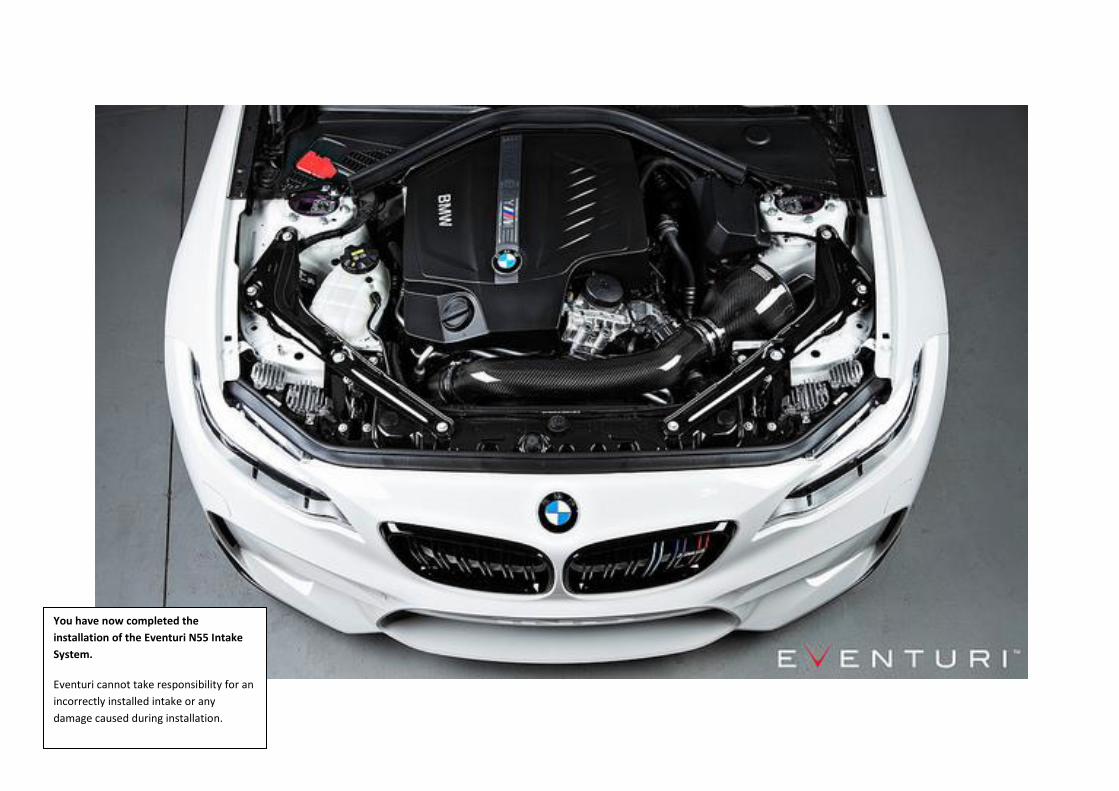
You have now completed the
installation of the Eventuri N55 Intake
System.
Eventuri cannot take responsibility for an
incorrectly installed intake or any
damage caused during installation.