Embed Size (px)
Citation preview
1
Installing IBM Domino Server on Linux (Centos 7.2)
-the Operating System is not supported!-
Requirements: ......................................................................................................................................... 2
1. Installing IBM Domino Server 9.0.1 ................................................................................................. 2
1.1. Creating new Linux user .......................................................................................................... 2
1.2. Connecting via WinSCP for easy data transfer ........................................................................ 3
1.3. Server installation .................................................................................................................... 4
2. Install the latest Fix pack (Fix pack 6) ............................................................................................ 11
2.1. Fix pack installation – first shot ............................................................................................. 11
2.2. Fix pack installation – try again ............................................................................................. 13
3. Configuring the Domino Server ..................................................................................................... 15
3.1 Start Configuration ................................................................................................................ 15
3.2 Server Setup .......................................................................................................................... 15
4. Common issues ............................................................................................................................. 22
5. Configure your Admin Client ......................................................................................................... 23
6. Our experience with a mixed infrastructure (Linux and Windows servers) ................................. 25
Sources: ................................................................................................................................................. 26
2
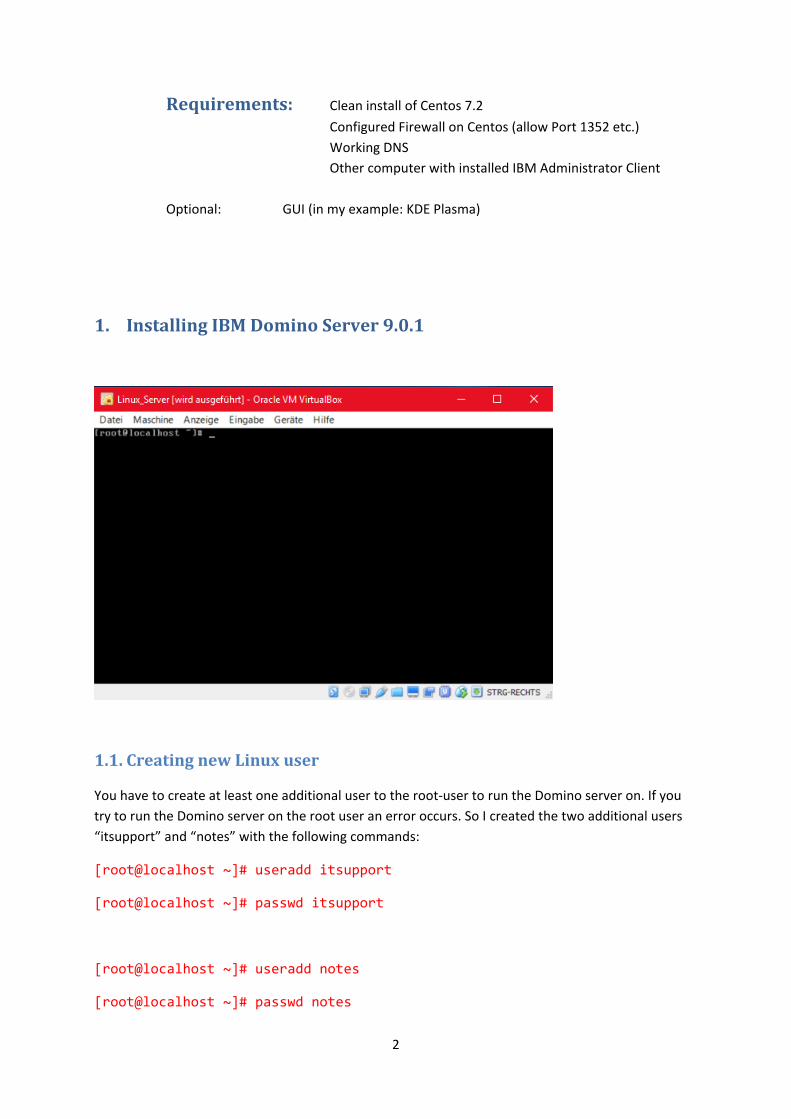
Requirements: Clean install of Centos 7.2 Configured Firewall on Centos (allow Port 1352 etc.) Working DNS Other computer with installed IBM Administrator Client Optional: GUI (in my example: KDE Plasma)
1. Installing IBM Domino Server 9.0.1
1.1. Creating new Linux user
You have to create at least one additional user to the root-user to run the Domino server on. If you try to run the Domino server on the root user an error occurs. So I created the two additional users “itsupport” and “notes” with the following commands:
[root@localhost ~]# useradd itsupport
[root@localhost ~]# passwd itsupport
[root@localhost ~]# useradd notes
[root@localhost ~]# passwd notes
3
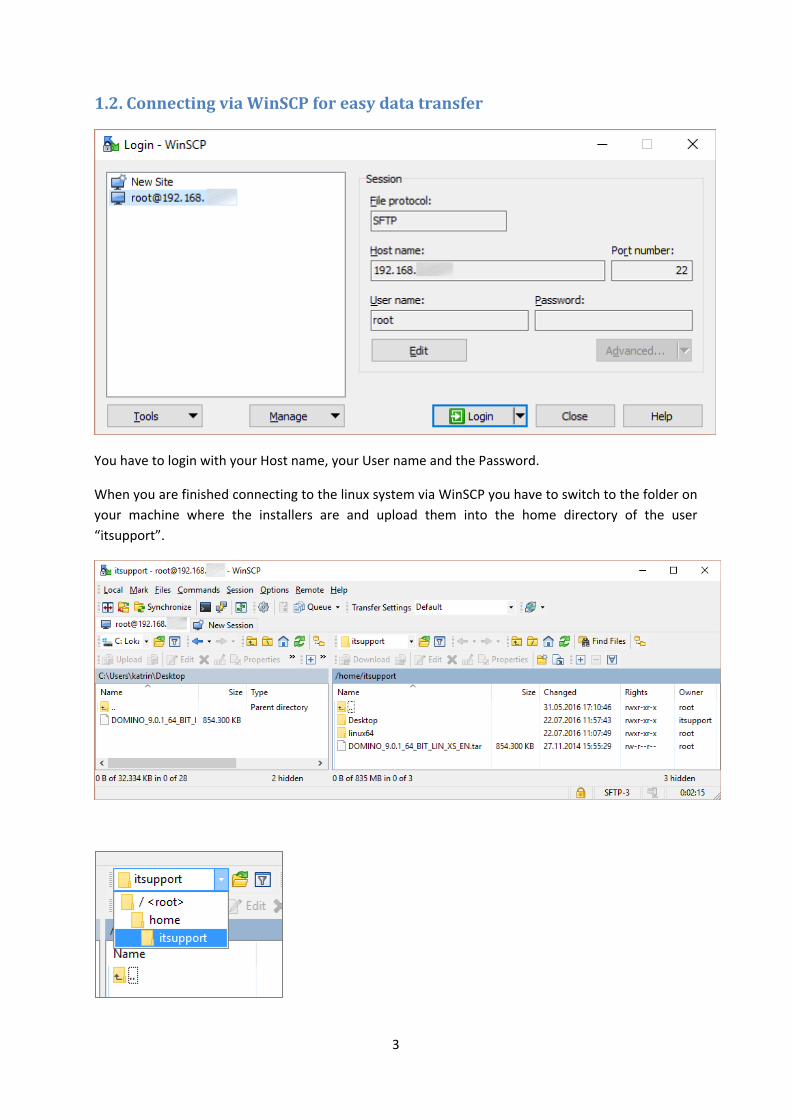
1.2. Connecting via WinSCP for easy data transfer
You have to login with your Host name, your User name and the Password.
When you are finished connecting to the linux system via WinSCP you have to switch to the folder on your machine where the installers are and upload them into the home directory of the user “itsupport”.
4
Back on the Linux system you have to also switch to the directory where your installers are:
[root@localhost ~]# cd /home/itsupport/
and unpack them (in our case it is the file “Domino_9.0.1_64_BIT_LIN_XS_EN.tar”):
[root@localhost itsupport]# tar xvf DOMINO_9.0.1_64_BIT_LIN_XS_EN.tar
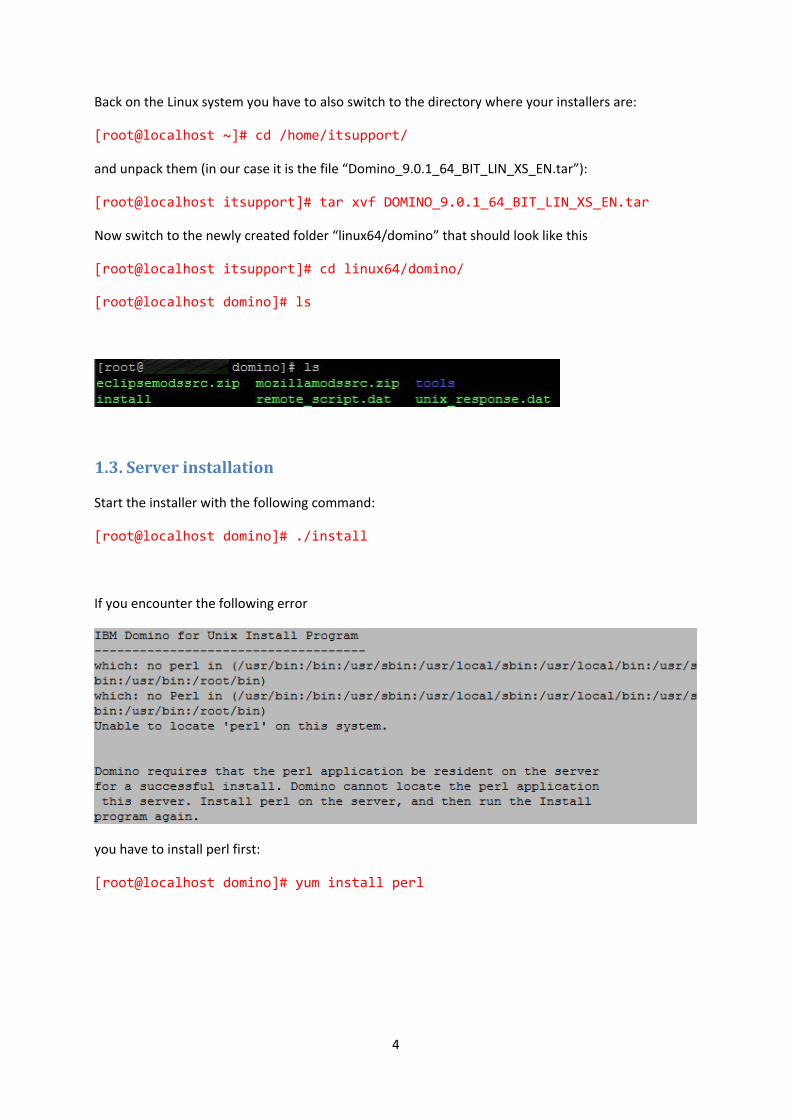
Now switch to the newly created folder “linux64/domino” that should look like this
[root@localhost itsupport]# cd linux64/domino/
[root@localhost domino]# ls
1.3. Server installation
Start the installer with the following command:
[root@localhost domino]# ./install
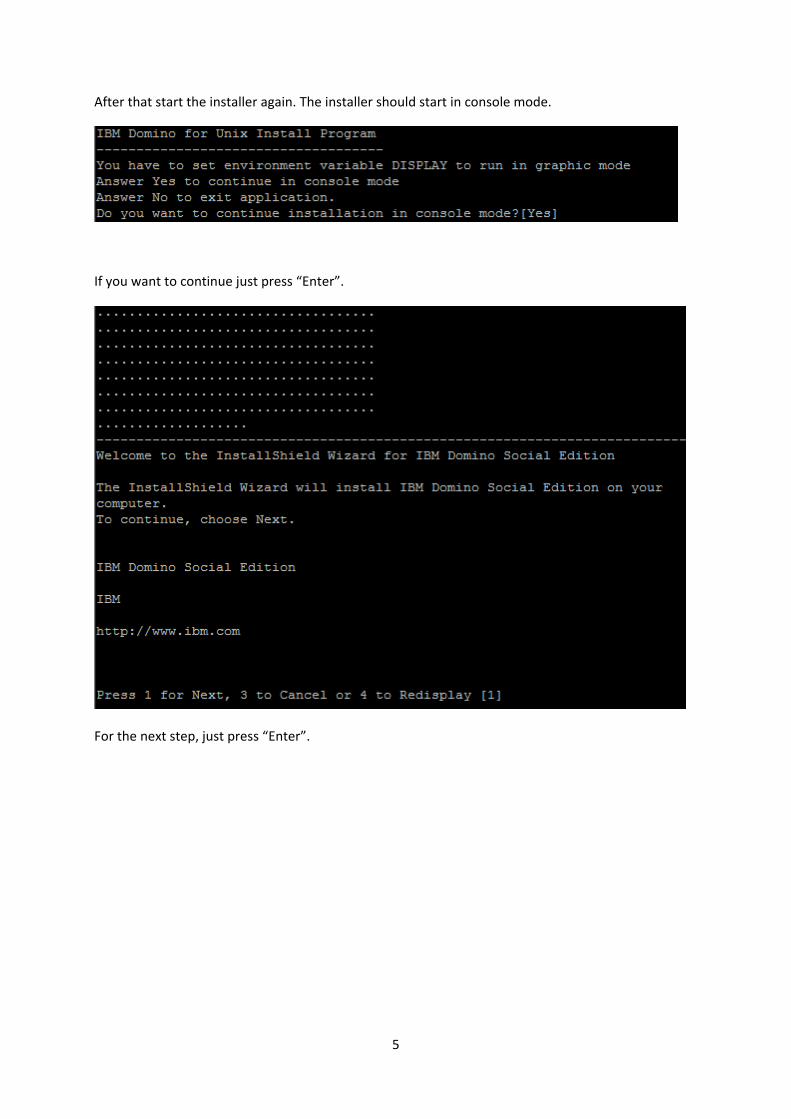
If you encounter the following error
you have to install perl first:
[root@localhost domino]# yum install perl
5
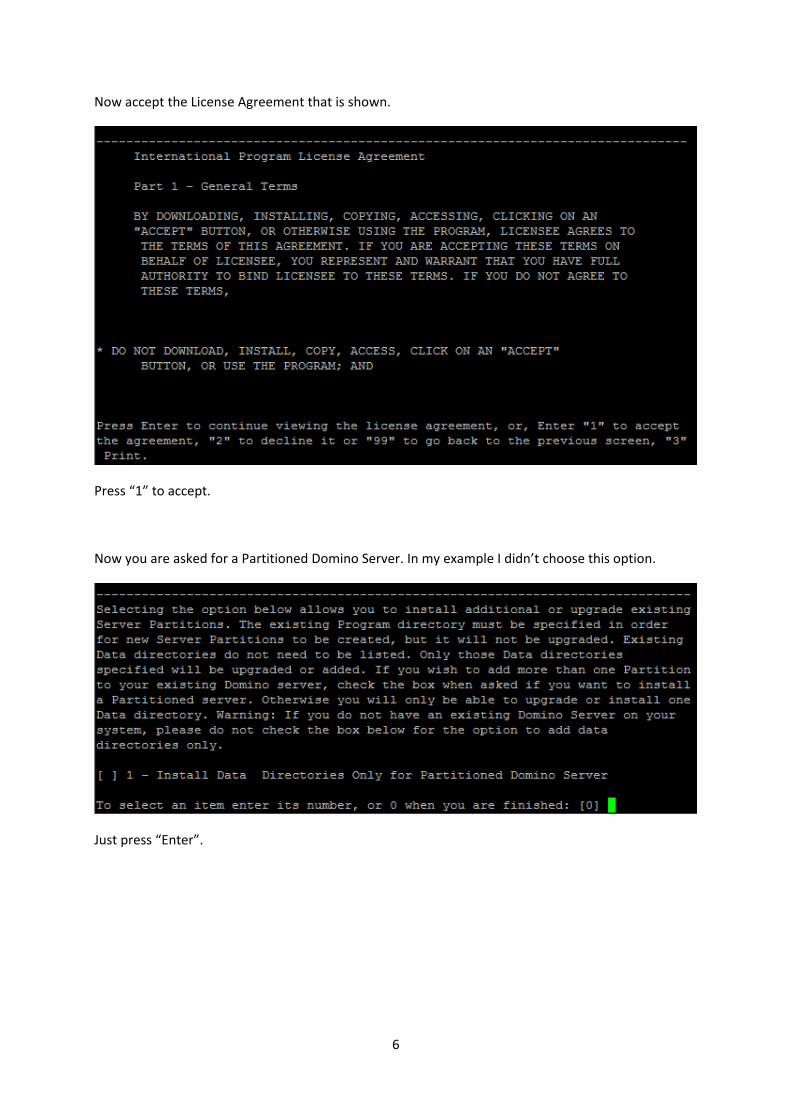
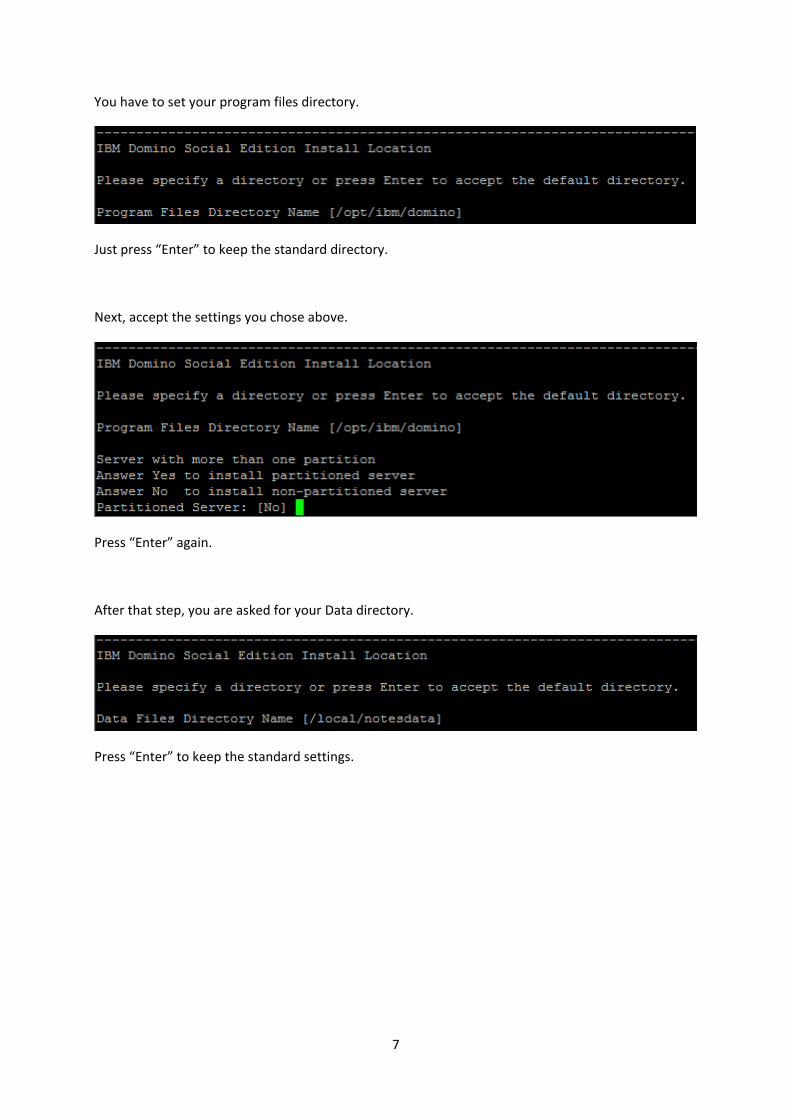
After that start the installer again. The installer should start in console mode.
If you want to continue just press “Enter”.
For the next step, just press “Enter”.
6
Now accept the License Agreement that is shown.
Press “1” to accept.
Now you are asked for a Partitioned Domino Server. In my example I didn’t choose this option.
Just press “Enter”.
7
You have to set your program files directory.
Just press “Enter” to keep the standard directory.
Next, accept the settings you chose above.
Press “Enter” again.
After that step, you are asked for your Data directory.
Press “Enter” to keep the standard settings.
8
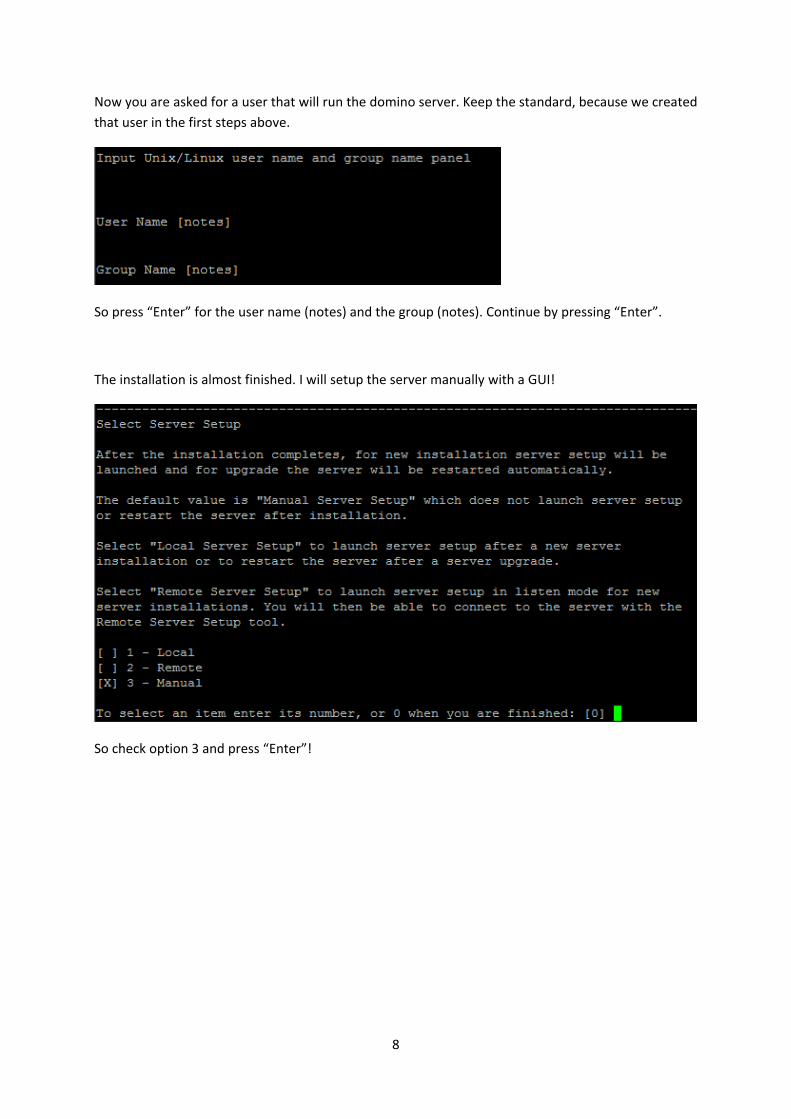
Now you are asked for a user that will run the domino server. Keep the standard, because we created that user in the first steps above.
So press “Enter” for the user name (notes) and the group (notes). Continue by pressing “Enter”.
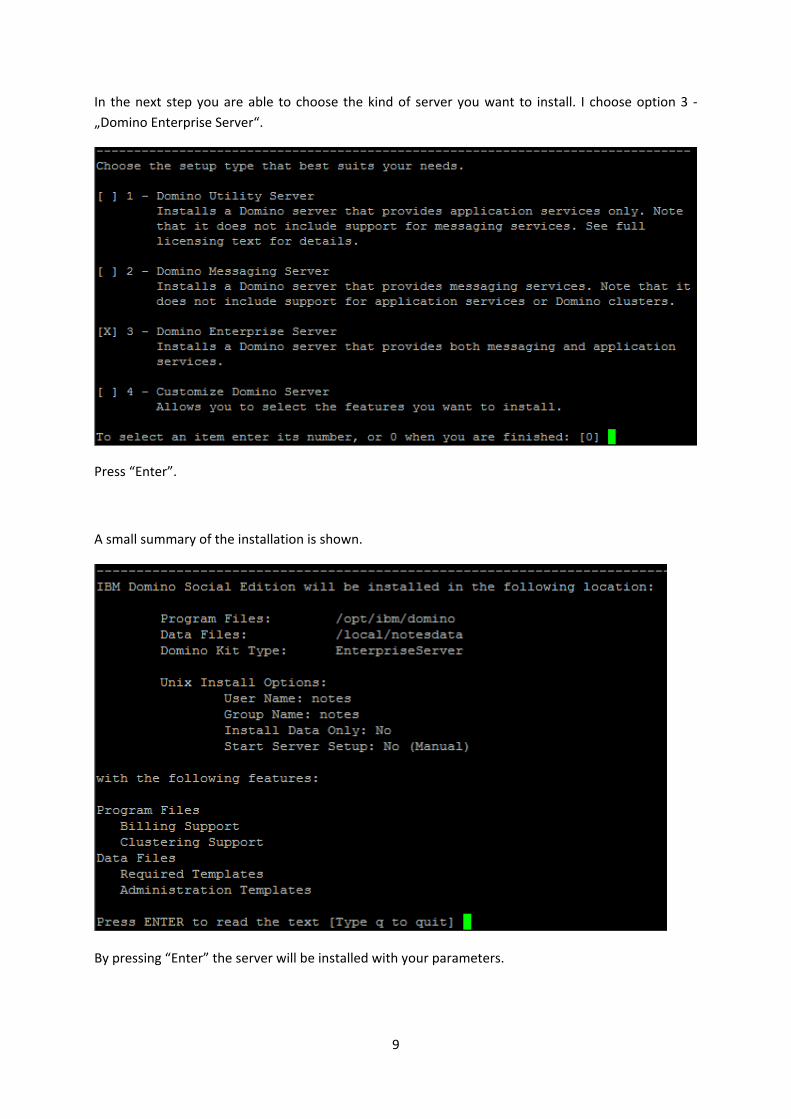
The installation is almost finished. I will setup the server manually with a GUI!
So check option 3 and press “Enter”!
9
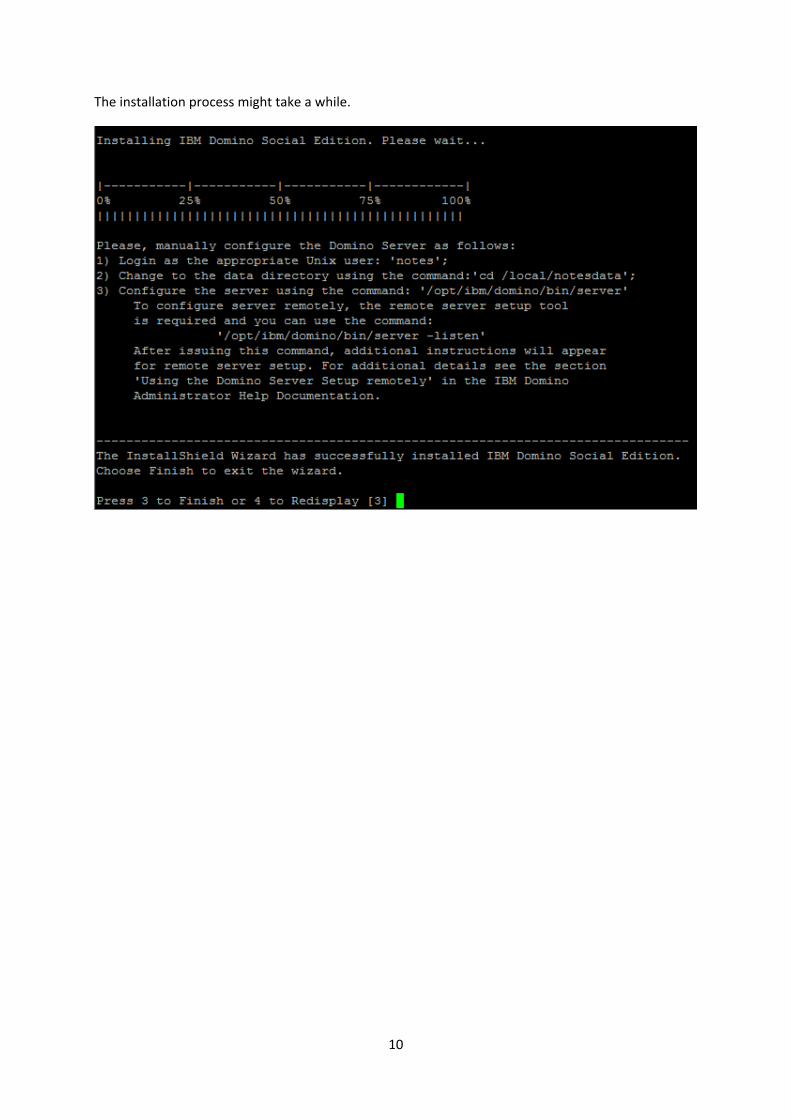
In the next step you are able to choose the kind of server you want to install. I choose option 3 - „Domino Enterprise Server“.
Press “Enter”.
A small summary of the installation is shown.
By pressing “Enter” the server will be installed with your parameters.
10
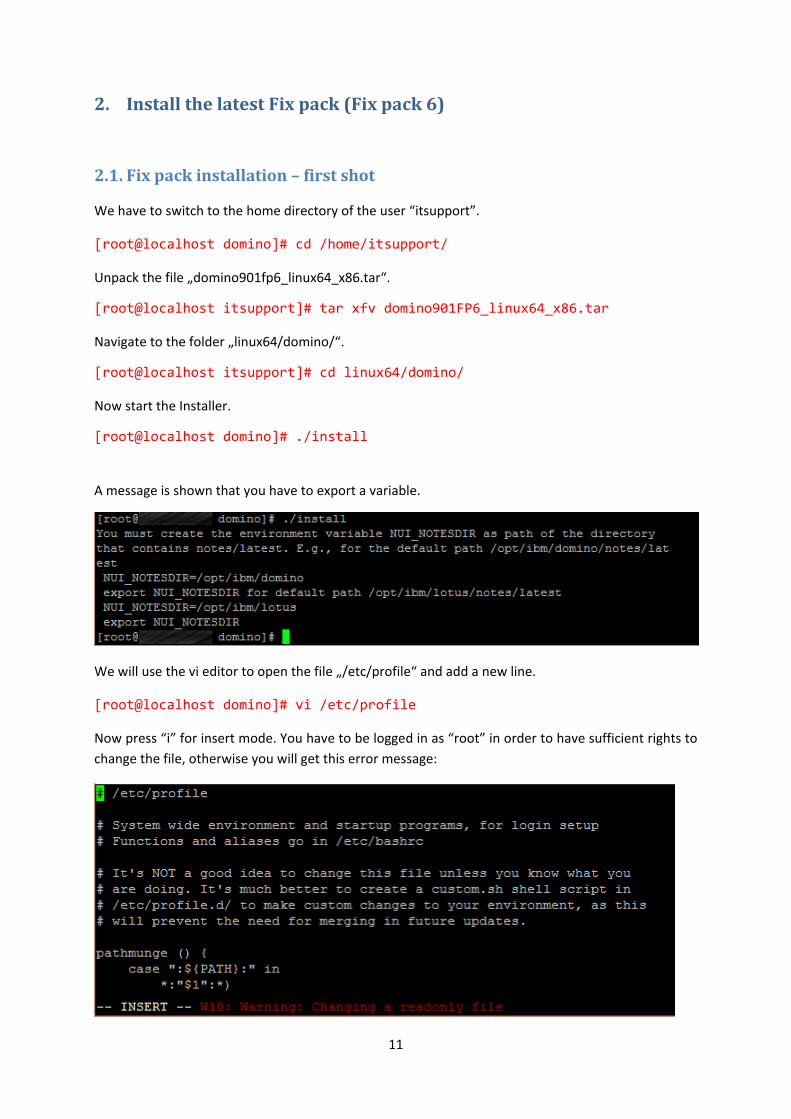
The installation process might take a while.
11
2. Install the latest Fix pack (Fix pack 6)
2.1. Fix pack installation – first shot
We have to switch to the home directory of the user “itsupport”.
[root@localhost domino]# cd /home/itsupport/
Unpack the file „domino901fp6_linux64_x86.tar“.
[root@localhost itsupport]# tar xfv domino901FP6_linux64_x86.tar
Navigate to the folder „linux64/domino/“.
[root@localhost itsupport]# cd linux64/domino/
Now start the Installer.
[root@localhost domino]# ./install
A message is shown that you have to export a variable.
We will use the vi editor to open the file „/etc/profile“ and add a new line.
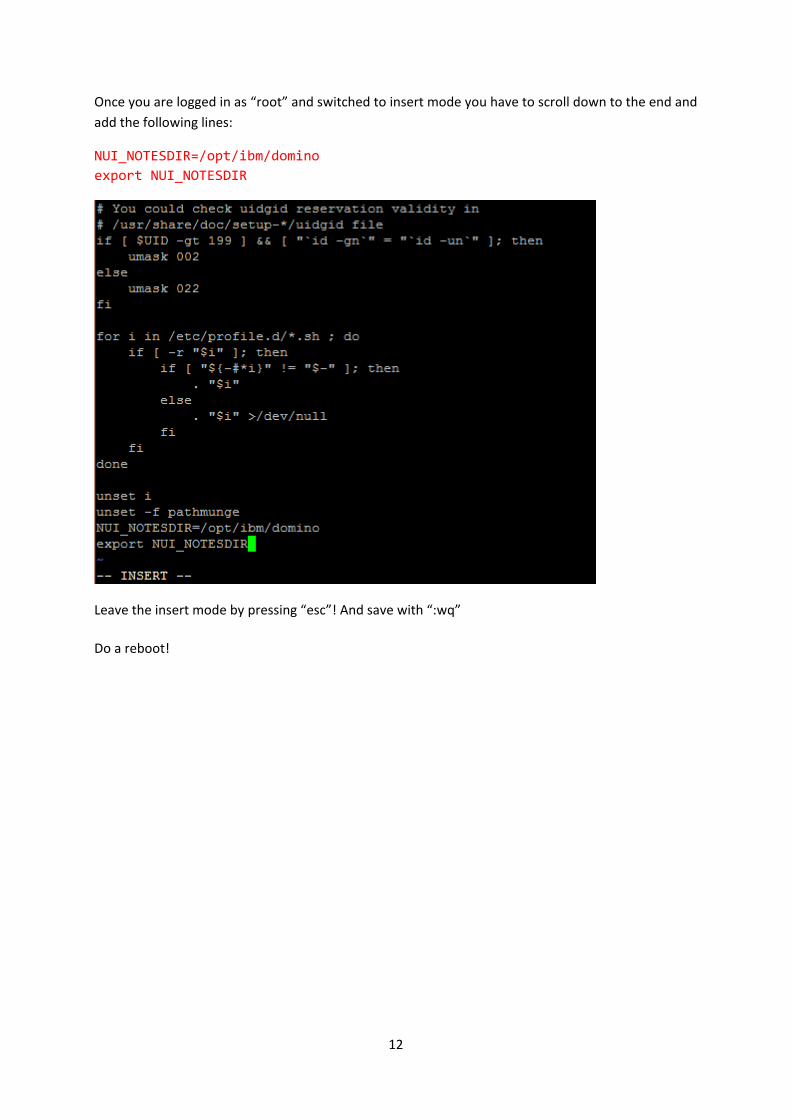
[root@localhost domino]# vi /etc/profile
Now press “i” for insert mode. You have to be logged in as “root” in order to have sufficient rights to change the file, otherwise you will get this error message:
12
Once you are logged in as “root” and switched to insert mode you have to scroll down to the end and add the following lines:
NUI_NOTESDIR=/opt/ibm/domino export NUI_NOTESDIR
Leave the insert mode by pressing “esc”! And save with “:wq” Do a reboot!
13
2.2. Fix pack installation – try again
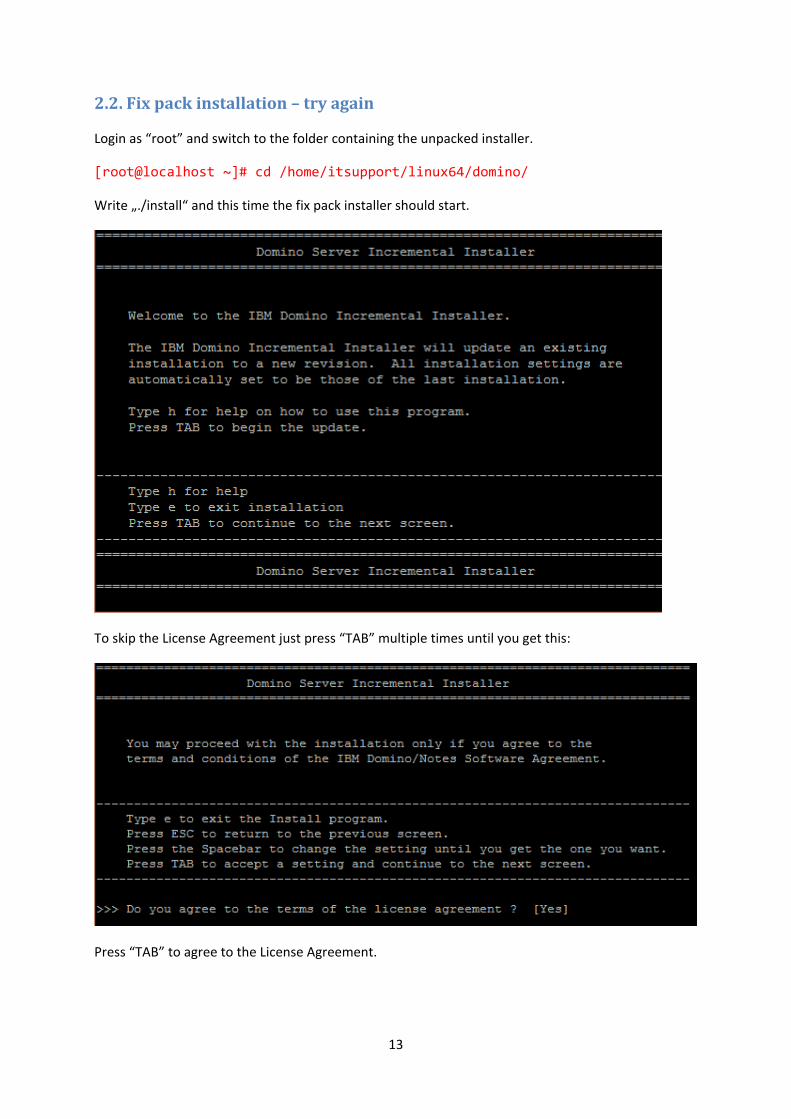
Login as “root” and switch to the folder containing the unpacked installer.
[root@localhost ~]# cd /home/itsupport/linux64/domino/
Write „./install“ and this time the fix pack installer should start.
To skip the License Agreement just press “TAB” multiple times until you get this:
Press “TAB” to agree to the License Agreement.
14
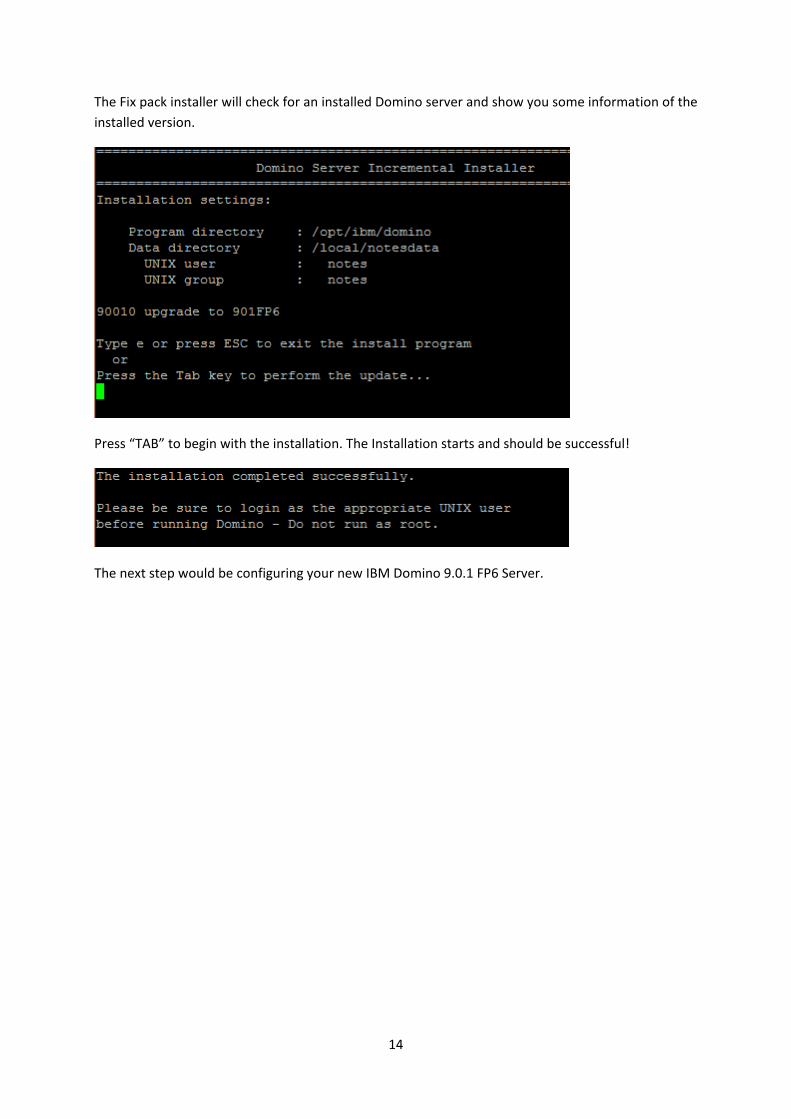
The Fix pack installer will check for an installed Domino server and show you some information of the installed version.
Press “TAB” to begin with the installation. The Installation starts and should be successful!
The next step would be configuring your new IBM Domino 9.0.1 FP6 Server.
15
3. Configuring the Domino Server
We will use a GUI for configuring the Domino server, in our case KDE Plasma. Please be sure to install it before configuration. You could also do it remotely (e.g. from a Windows Client).
But before we start configuring the server we have to set some rights for the notes user. With the following command the notes user becomes the owner of the folder “/local/notesdata/”:
[root@localhost ~]# chown notes /local/notesdata/
Of course you have to be logged in as “root” to perform this changing of rights.
3.1 Start Configuration
But in order to configure the Domino server you have to switch to the notes user again. From here you can start the GUI with the following command:
[notes@localhost ~]$ startx
Now you start a bash shell/console within the GUI and switch to your data folder:
[notes@localhost ~]$ cd /local/notesdata/
From here you can start the server with the following command:
[notes@localhost notesdata]$ /opt/ibm/domino/bin/server
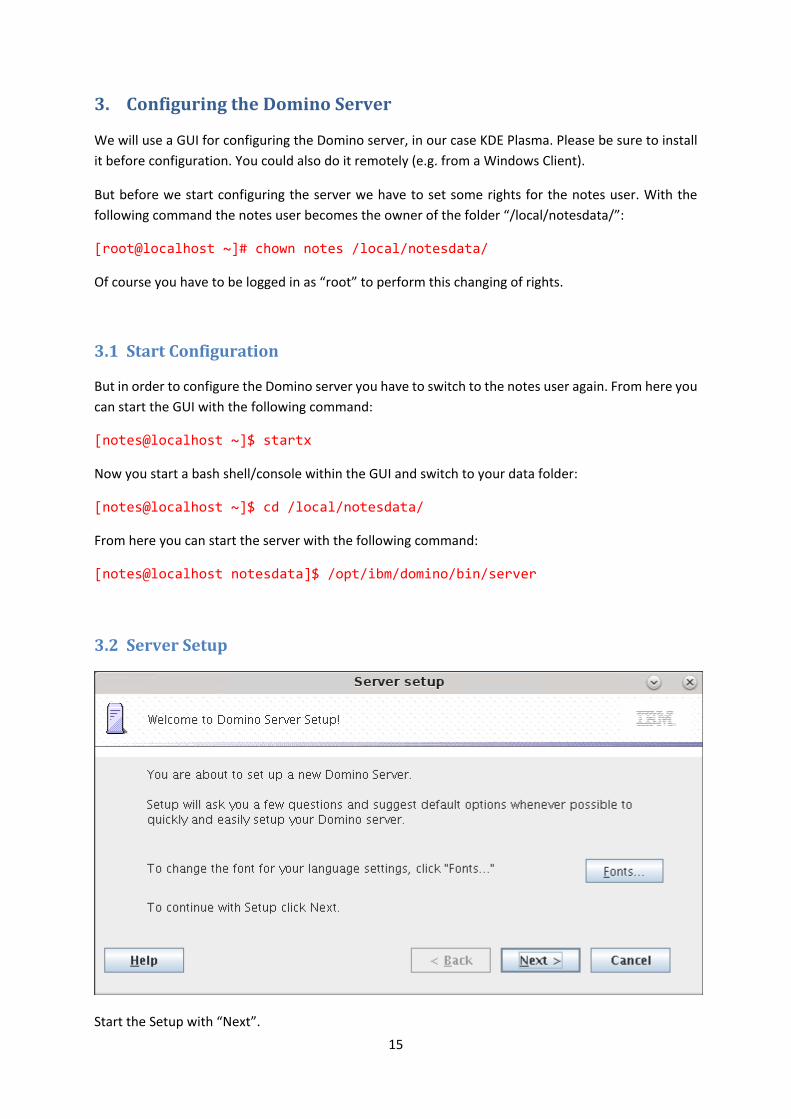
3.2 Server Setup
Start the Setup with “Next”.
16
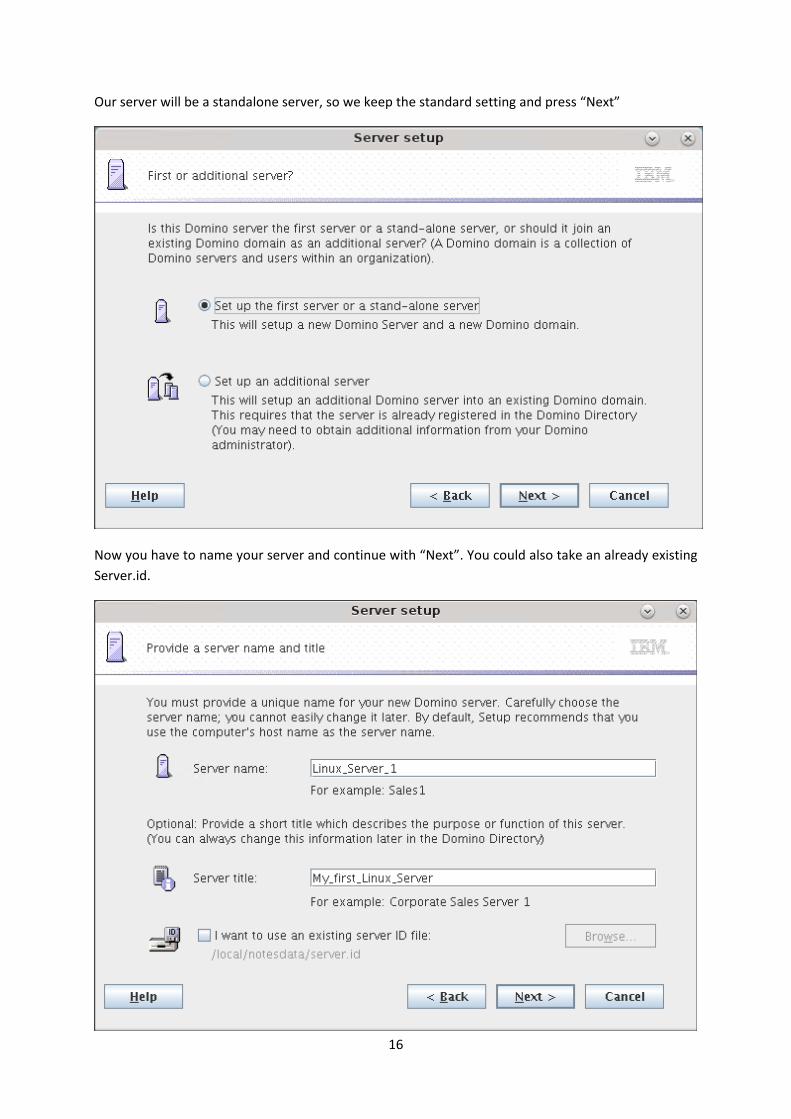
Our server will be a standalone server, so we keep the standard setting and press “Next”
Now you have to name your server and continue with “Next”. You could also take an already existing Server.id.
17
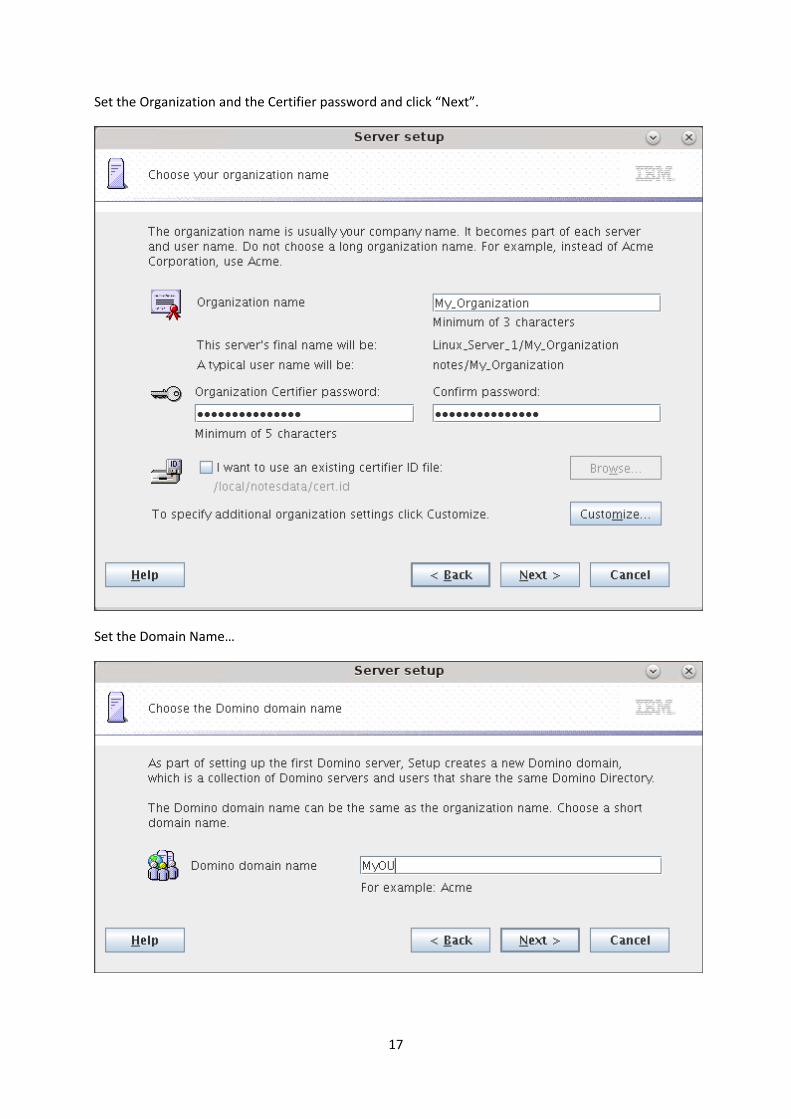
Set the Organization and the Certifier password and click “Next”.
Set the Domain Name…
18
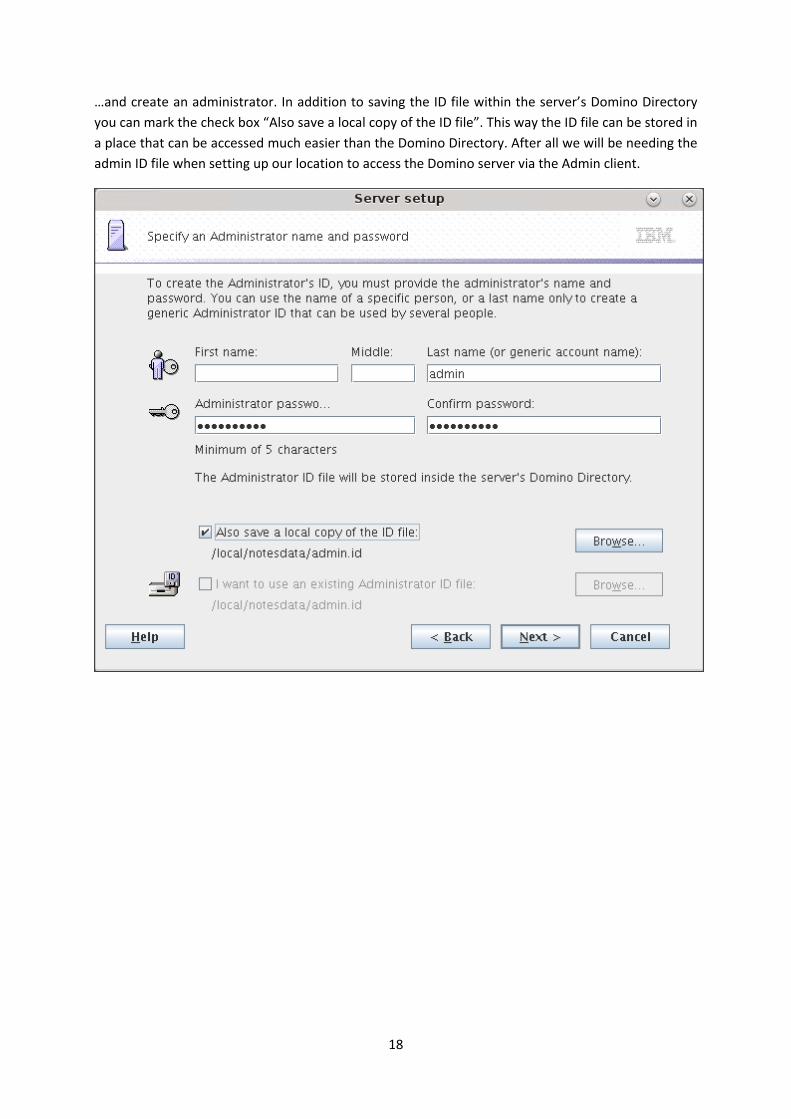
…and create an administrator. In addition to saving the ID file within the server’s Domino Directory you can mark the check box “Also save a local copy of the ID file”. This way the ID file can be stored in a place that can be accessed much easier than the Domino Directory. After all we will be needing the admin ID file when setting up our location to access the Domino server via the Admin client.
19
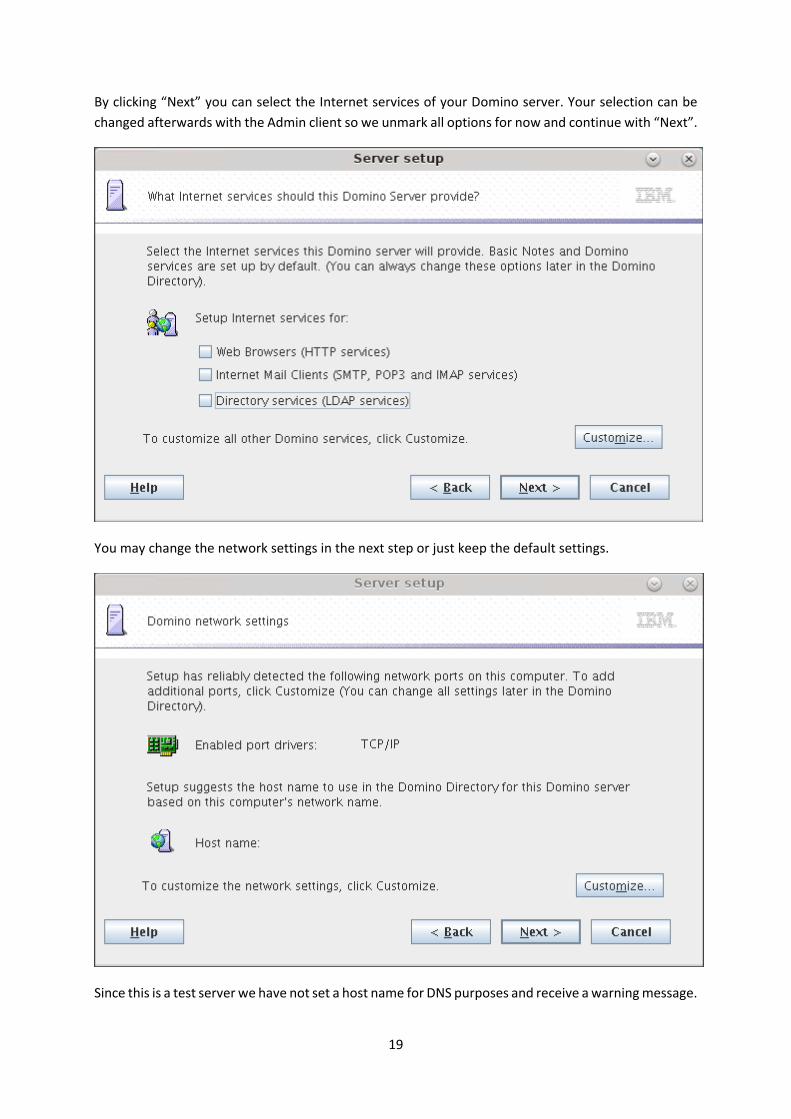
By clicking “Next” you can select the Internet services of your Domino server. Your selection can be changed afterwards with the Admin client so we unmark all options for now and continue with “Next”.
You may change the network settings in the next step or just keep the default settings.
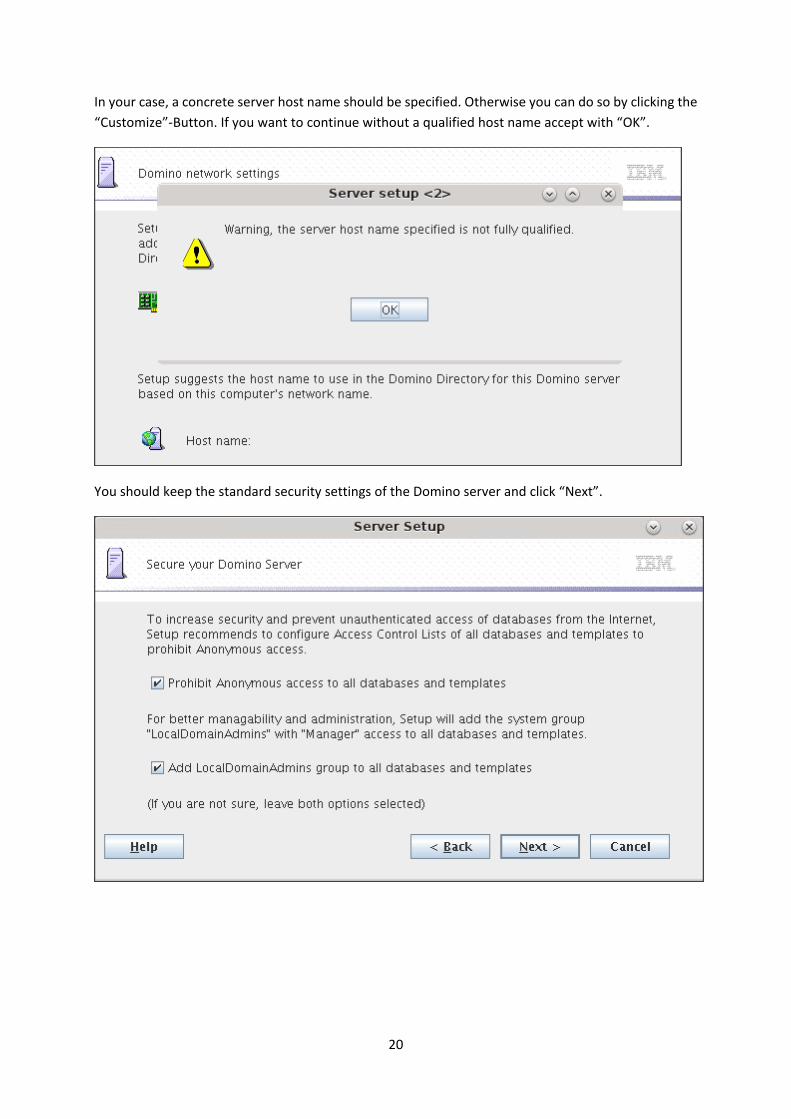
Since this is a test server we have not set a host name for DNS purposes and receive a warning message.
20
In your case, a concrete server host name should be specified. Otherwise you can do so by clicking the “Customize”-Button. If you want to continue without a qualified host name accept with “OK”.
You should keep the standard security settings of the Domino server and click “Next”.
21
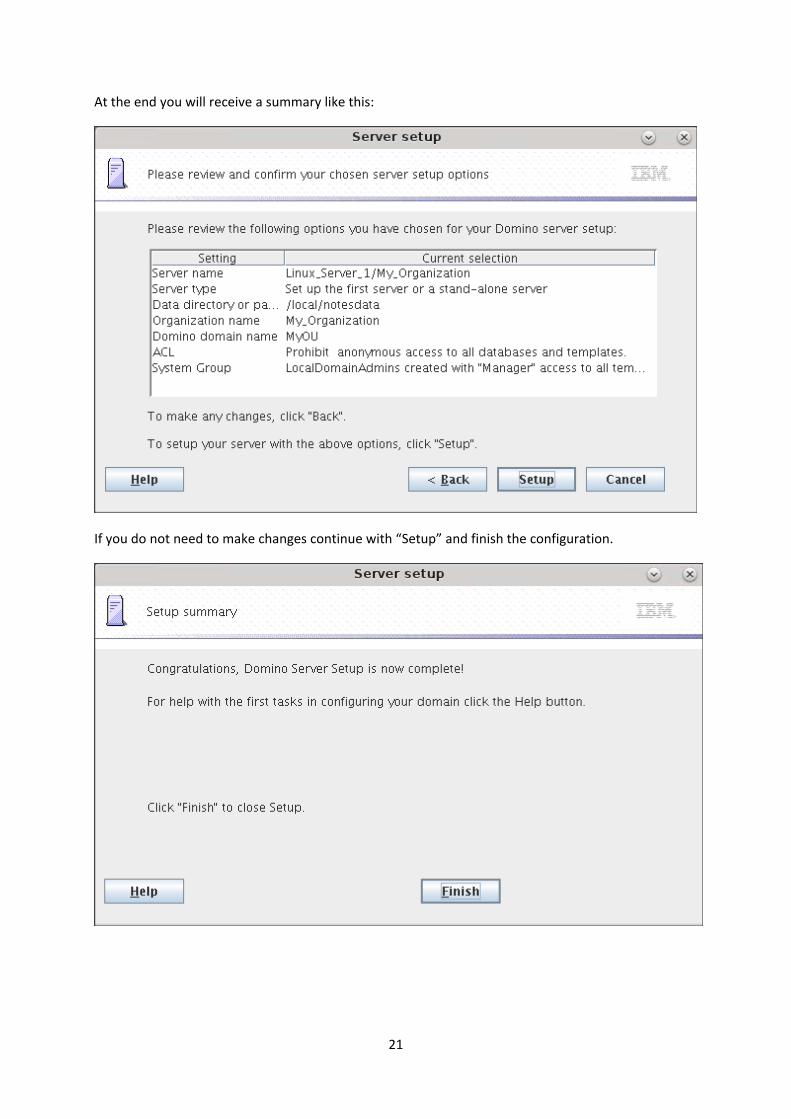
At the end you will receive a summary like this:
If you do not need to make changes continue with “Setup” and finish the configuration.
22
4. Common issues
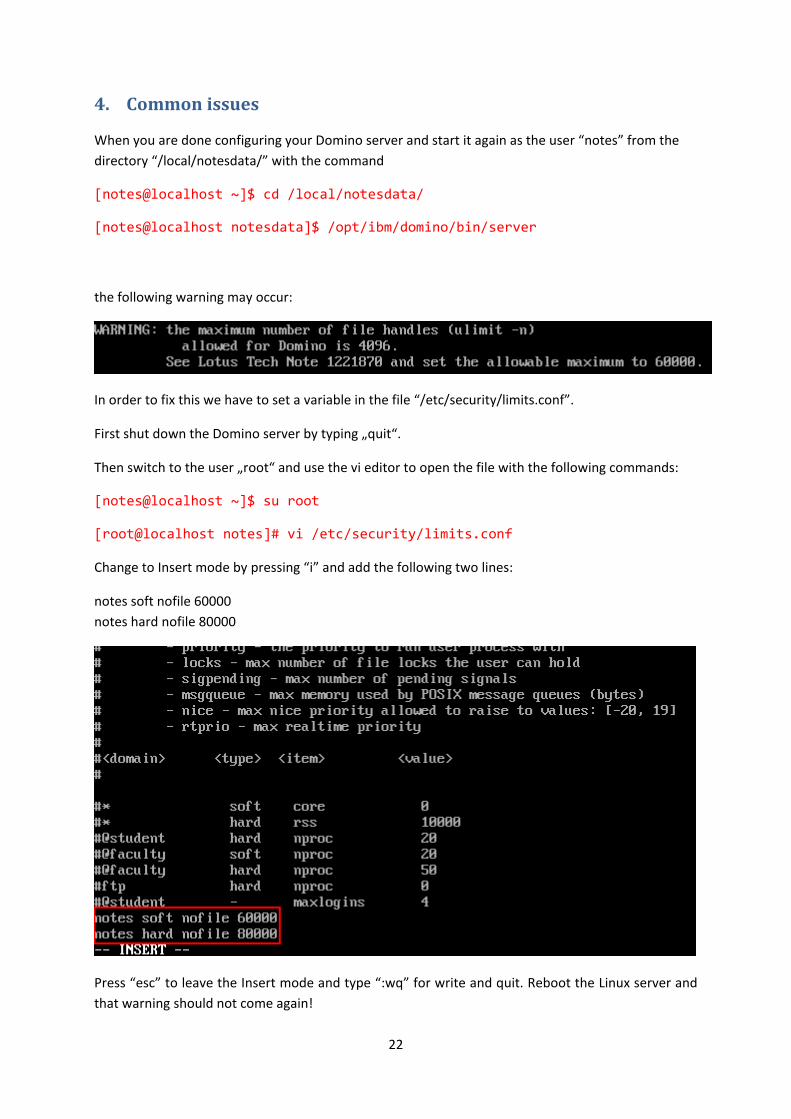
When you are done configuring your Domino server and start it again as the user “notes” from the directory “/local/notesdata/” with the command
[notes@localhost ~]$ cd /local/notesdata/
[notes@localhost notesdata]$ /opt/ibm/domino/bin/server
the following warning may occur:
In order to fix this we have to set a variable in the file “/etc/security/limits.conf”.
First shut down the Domino server by typing „quit“.
Then switch to the user „root“ and use the vi editor to open the file with the following commands:
[notes@localhost ~]$ su root
[root@localhost notes]# vi /etc/security/limits.conf
Change to Insert mode by pressing “i” and add the following two lines:
notes soft nofile 60000 notes hard nofile 80000
Press “esc” to leave the Insert mode and type “:wq” for write and quit. Reboot the Linux server and that warning should not come again!
23
5. Configure your Admin Client
Start the Domino server (if not already started) with the notes user:
[notes@localhost ~]$ cd /local/notesdata/
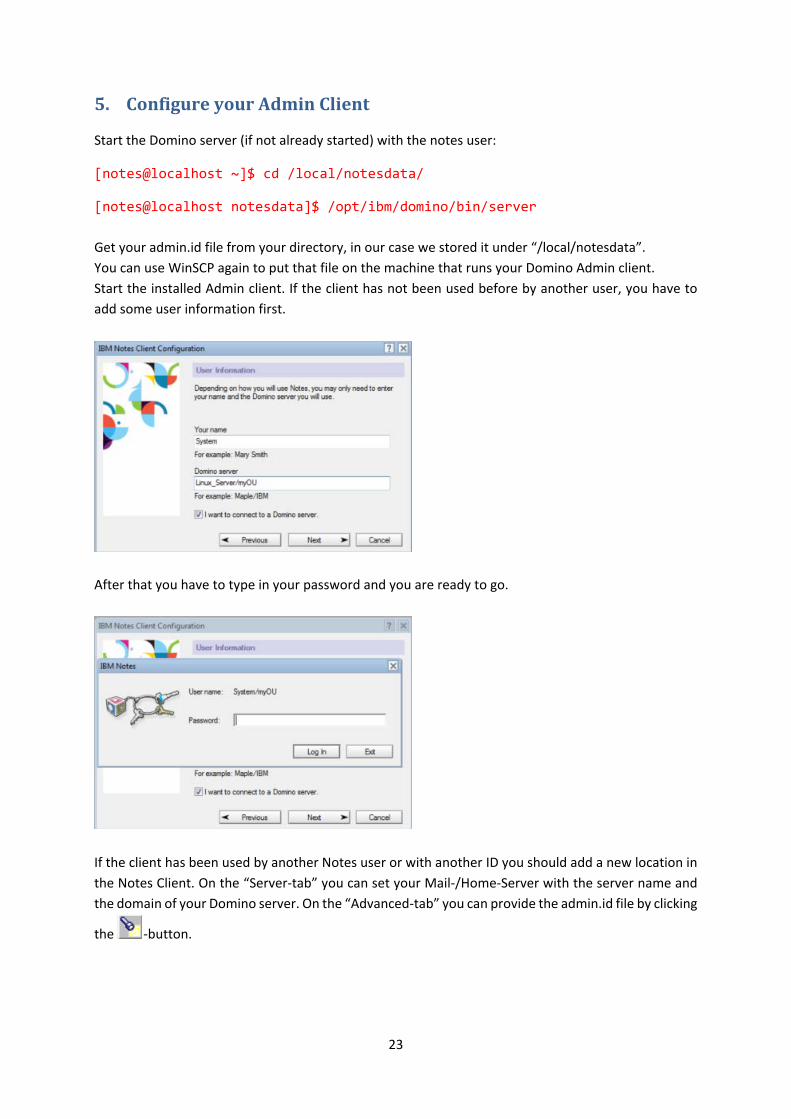
[notes@localhost notesdata]$ /opt/ibm/domino/bin/server Get your admin.id file from your directory, in our case we stored it under “/local/notesdata”. You can use WinSCP again to put that file on the machine that runs your Domino Admin client. Start the installed Admin client. If the client has not been used before by another user, you have to add some user information first.
After that you have to type in your password and you are ready to go.
If the client has been used by another Notes user or with another ID you should add a new location in the Notes Client. On the “Server-tab” you can set your Mail-/Home-Server with the server name and the domain of your Domino server. On the “Advanced-tab” you can provide the admin.id file by clicking
the -button.
24
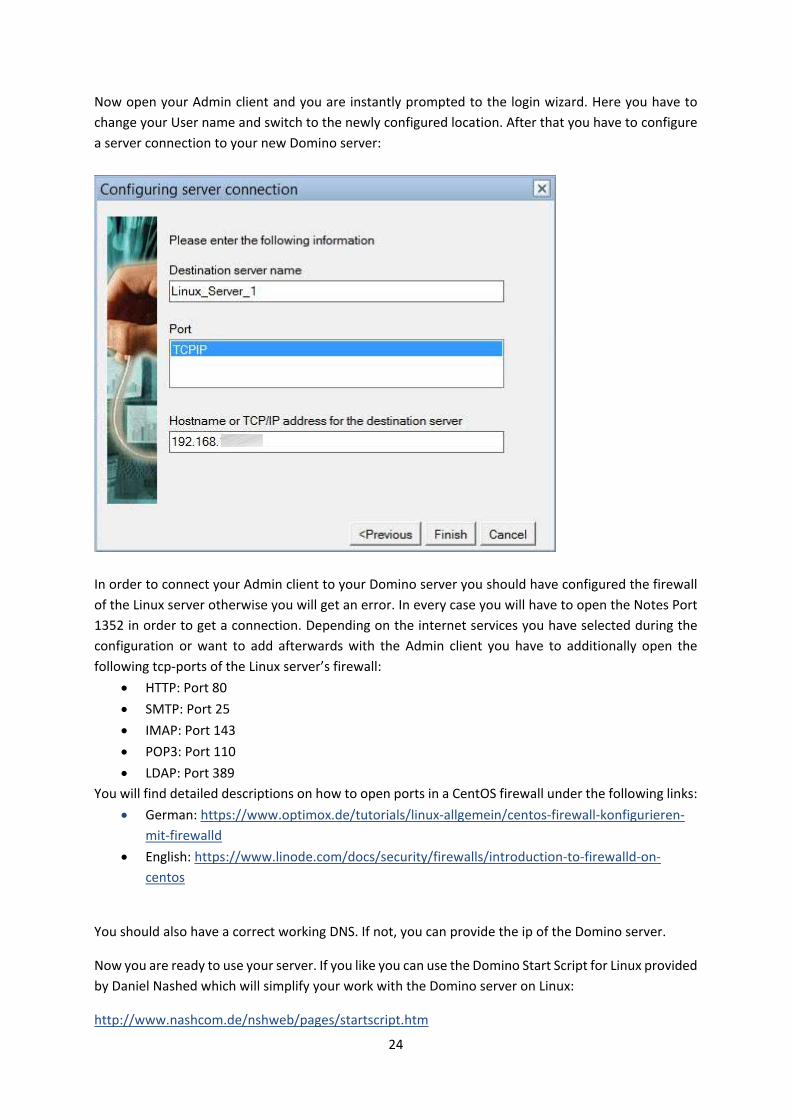
Now open your Admin client and you are instantly prompted to the login wizard. Here you have to change your User name and switch to the newly configured location. After that you have to configure a server connection to your new Domino server:
In order to connect your Admin client to your Domino server you should have configured the firewall of the Linux server otherwise you will get an error. In every case you will have to open the Notes Port 1352 in order to get a connection. Depending on the internet services you have selected during the configuration or want to add afterwards with the Admin client you have to additionally open the following tcp-ports of the Linux server’s firewall:
• HTTP: Port 80 • SMTP: Port 25 • IMAP: Port 143 • POP3: Port 110 • LDAP: Port 389
You will find detailed descriptions on how to open ports in a CentOS firewall under the following links: • German: https://www.optimox.de/tutorials/linux-allgemein/centos-firewall-konfigurieren-
mit-firewalld • English: https://www.linode.com/docs/security/firewalls/introduction-to-firewalld-on-
centos
You should also have a correct working DNS. If not, you can provide the ip of the Domino server.
Now you are ready to use your server. If you like you can use the Domino Start Script for Linux provided by Daniel Nashed which will simplify your work with the Domino server on Linux:
http://www.nashcom.de/nshweb/pages/startscript.htm
25
6. Our experience with a mixed infrastructure (Linux and Windows servers)
Currently, we have several development servers in use - two of them are Linux systems and the others are running on Windows. With this mixed infrastructure we encountered the following problem: We wanted to drag and drop some databases from a Windows server to a Linux server (via the IBM Admin client). All databases were transferred, but after the transfer the containing folders had different names on the Linux server than they had on the Windows server. There are two reasons for this problems:
1. When it comes to folder names, Windows does not pay attention to case sensitivity, but Linux does.
2. When you copy a database from a Windows hosted Domino server to a Linux hosted Domino server the resulting folder path is calculated based on the information contained in the Notes Database property file and not the actual path on the Windows host.
Here is an example: On a Windows host a user creates a database and save it to the folder path “itwu/dev”. This saving information goes right into the database property file. But, since there is an already existing folder with the name “itwu/DEV”, Windows saves the database under this folder path, ignoring the case. When you try the same procedure on a Linux system it creates a new folder under the path “itwu/dev”. Of course this also happens when you try to copy the database from the Windows host to the Linux host.
This behavior may result in a problem when links to that database holding the old non-case-sensitive folder name “itwu/DEV” do not work on a Linux system anymore because the folder name is “itwu/dev” now. So, if you encounter the problem that a link to a database does not work on the Linux system anymore, just check the path and compare it to the folder name – you may want to rename the folder or change the link.

26
Sources:
http://atnotes.de/index.php?action=printpage;topic=57114.0 http://www.somethingsomewhere.net/domino-server-installation-on-linux-centos-or-redhat/ https://www.youtube.com/watch?v=uUQVRwdhCqE https://www-10.lotus.com/ldd/ndseforum.nsf/xpTopicThread.xsp?documentId=CC37CB1A996D1D0385257C0000033CBD http://www.lotus-expert.com/de/categories/notes-domino/184-setting-the-nuinotesdir-variable.html