Embed Size (px)
Citation preview
8/14/2019 Instructions for Paper Piecing
http://slidepdf.com/reader/full/instructions-for-paper-piecing 1/6
At the end of this set of instructions are the paper piecing patterns. You will need one copy for eachblock you are going to make. I paper piece any time I have tiny pieces because it makes it easier forme to have an accurate block.
I’ve named each block after the center letter so it is easier to follow. The letter also refers to the fabricI chose to use in each of those blocks. Block C is the corner block, block B is the center block on the
edges. Block A is the center block that is cut 2 ½” and doesn’t need to be paper pieced.
Cutting
I cut each of my pieces of fabric between ⅛” and ¼” larger than called for in the pattern. Check yourfabric to make sure that you have enough fabric in your kit to do this. My kit said the fabric was 45”wide but mine was only 42” wide. Measure after you cut the selvedge off. Cutting the pieces a bitbigger will enable you to have a little ‘wiggle’ room as you paper piece.
When you use paper piecing you will be sewing on the line with the paper facing you and the fabricnear the feed dogs as in the photo below.
Block C (easier of the two blocks) Set your stitch length to 1.5! You must have a small stitch lengthso that you can tear the paper off easily when you are done sewing and trimming your block.
C 1.Center the main fabric on the back of the paper. I hold my fabric and paper up to a light sourceto see if it is centered. I pin this square to the paper. My fabric is directional. I drew an arrow oneach paper pattern to indicate the direction the fabric should be placed.
C 2.Place A1 directly behind the spot labeled A1 on the paper. You can see in the photo below that
there is a little bit (about ⅛”) of fabric C showing around the edges. This is to ensure that your A1fabric will cover the corner completely.
Paper Piecing Pattern for Prairie Flower Block 1
8/14/2019 Instructions for Paper Piecing
http://slidepdf.com/reader/full/instructions-for-paper-piecing 2/6
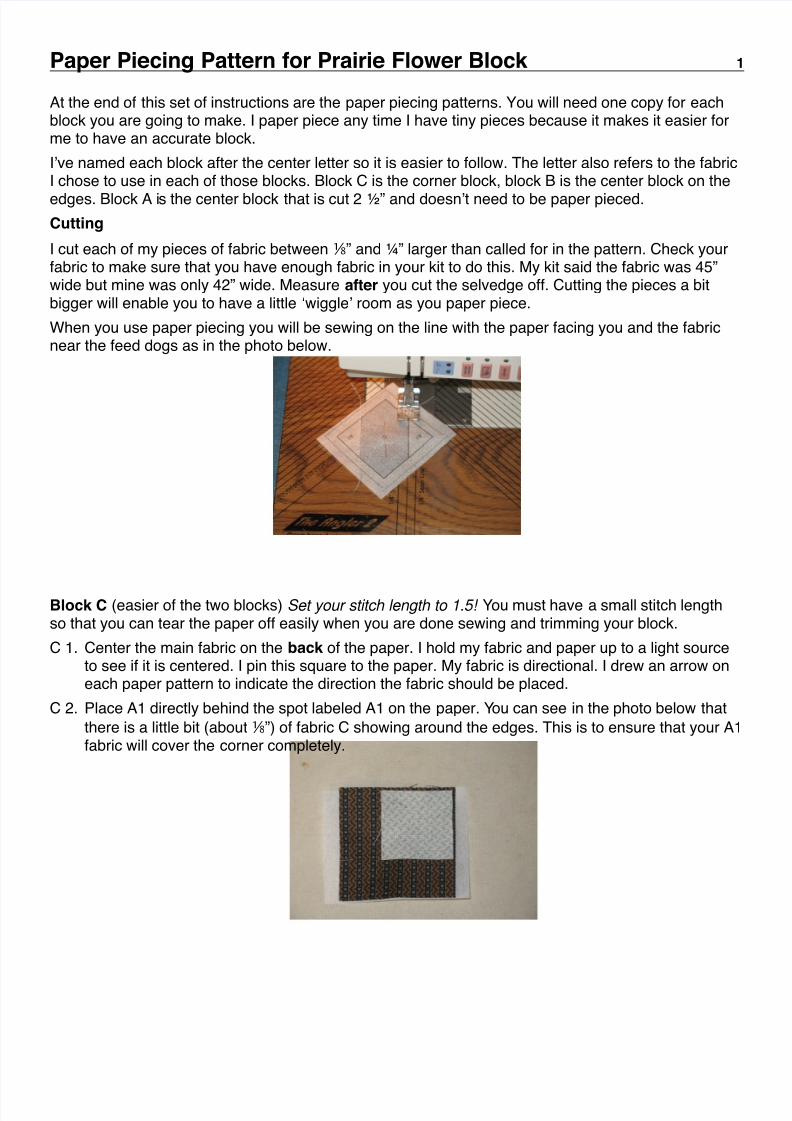
C 3.Flip the paper and fabric so the paper is on top. Sew along the solid line.
C 4.Repeat steps 1 and 2 for the other corner.
C 5.Fold the paper back and trim the seam allowance to approximately ¼” on both corners. Becauseyou sewed on the line your seam is accurate so your trimming doesn’t have to be exact.
Paper Piecing Pattern for Prairie Flower Block 2
8/14/2019 Instructions for Paper Piecing
http://slidepdf.com/reader/full/instructions-for-paper-piecing 3/6
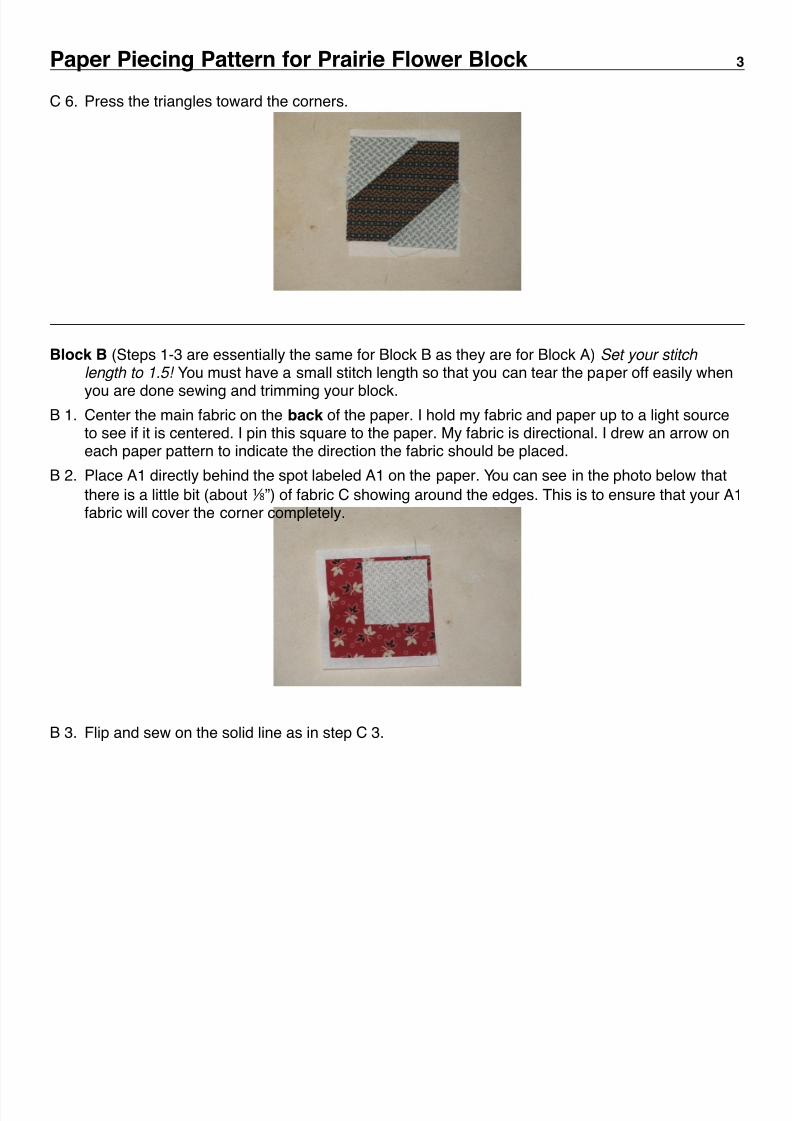
C 6.Press the triangles toward the corners.
Block B (Steps 1-3 are essentially the same for Block B as they are for Block A) Set your stitch length to 1.5! You must have a small stitch length so that you can tear the paper off easily when
you are done sewing and trimming your block.B 1. Center the main fabric on the back of the paper. I hold my fabric and paper up to a light source
to see if it is centered. I pin this square to the paper. My fabric is directional. I drew an arrow oneach paper pattern to indicate the direction the fabric should be placed.
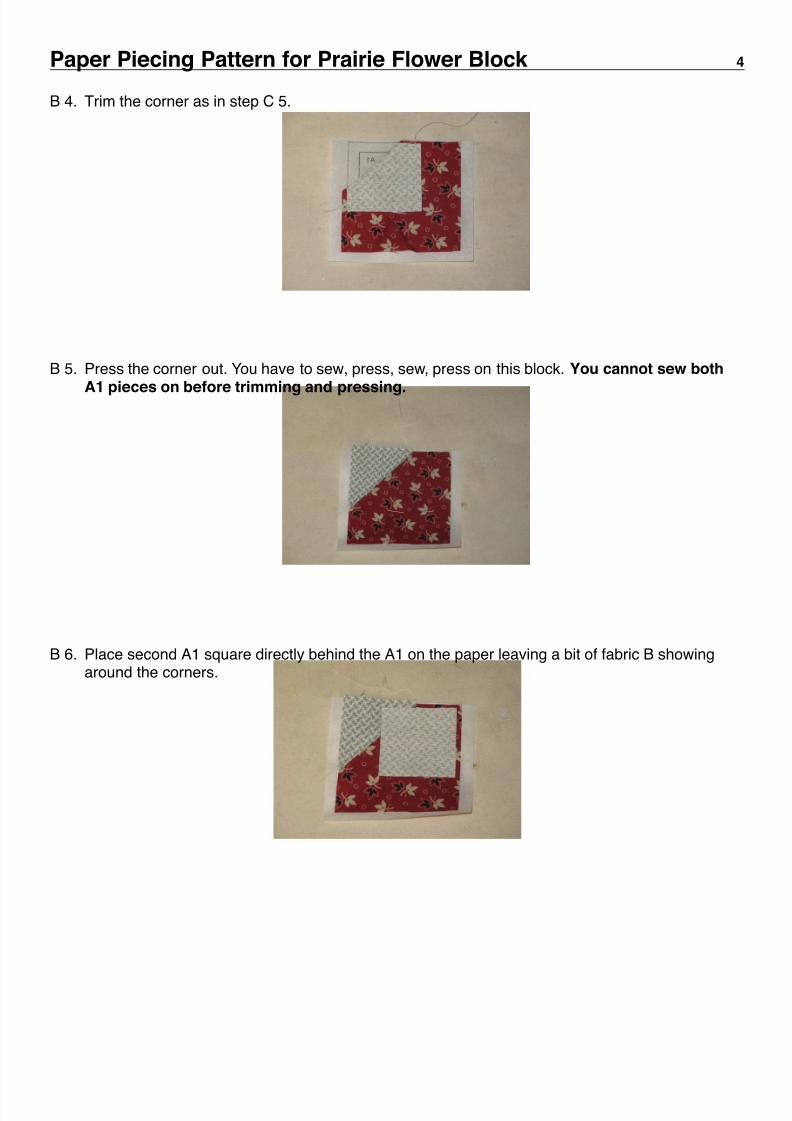
B 2. Place A1 directly behind the spot labeled A1 on the paper. You can see in the photo below that
there is a little bit (about ⅛”) of fabric C showing around the edges. This is to ensure that your A1fabric will cover the corner completely.
B 3. Flip and sew on the solid line as in step C 3.
Paper Piecing Pattern for Prairie Flower Block 3
8/14/2019 Instructions for Paper Piecing
http://slidepdf.com/reader/full/instructions-for-paper-piecing 4/6
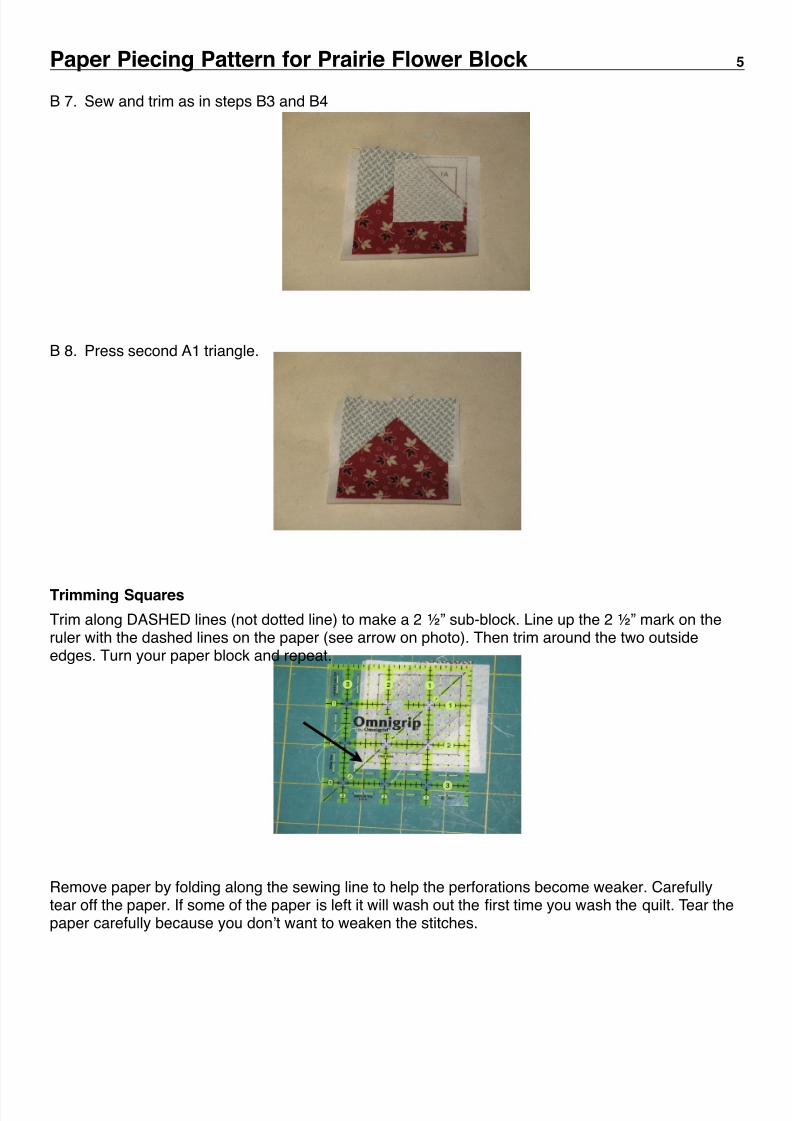
B 4. Trim the corner as in step C 5.
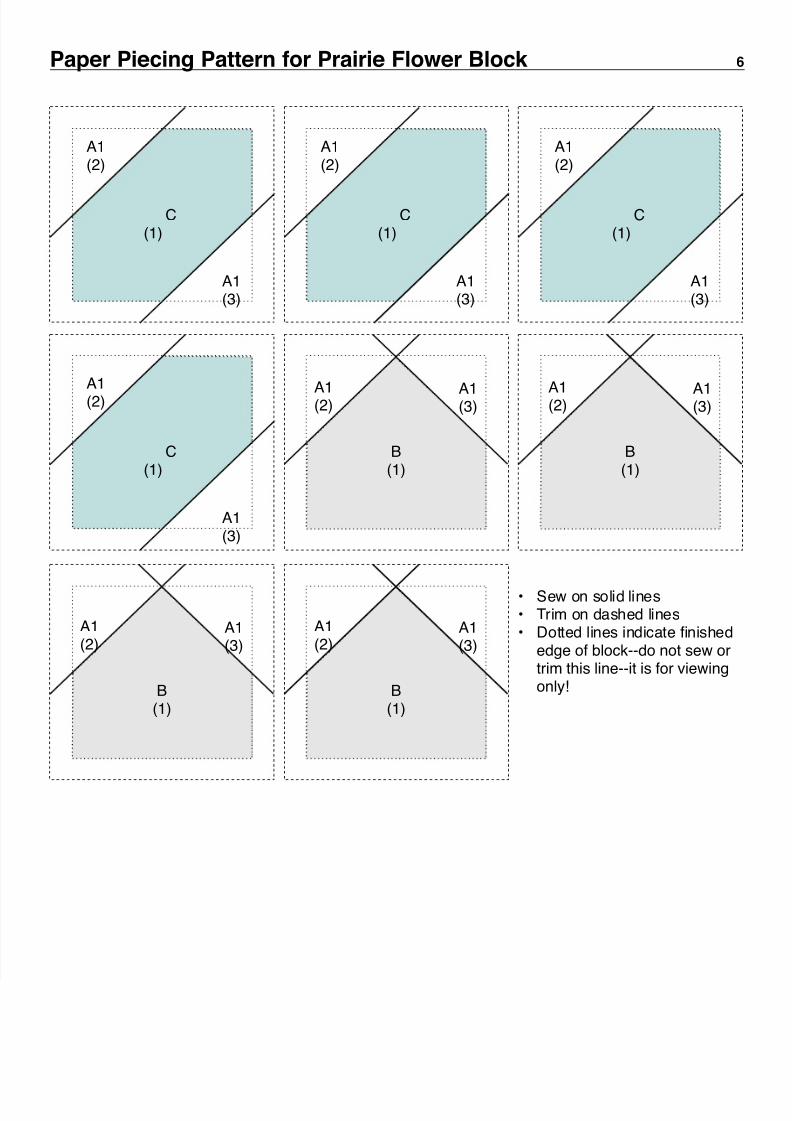
B 5. Press the corner out. You have to sew, press, sew, press on this block. You cannot sew both
A1 pieces on before trimming and pressing.
B 6. Place second A1 square directly behind the A1 on the paper leaving a bit of fabric B showingaround the corners.
Paper Piecing Pattern for Prairie Flower Block 4
8/14/2019 Instructions for Paper Piecing
http://slidepdf.com/reader/full/instructions-for-paper-piecing 5/6
B 7. Sew and trim as in steps B3 and B4
B 8. Press second A1 triangle.
Trimming Squares
Trim along DASHED lines (not dotted line) to make a 2 ½” sub-block. Line up the 2 ½” mark on theruler with the dashed lines on the paper (see arrow on photo). Then trim around the two outsideedges. Turn your paper block and repeat.
Remove paper by folding along the sewing line to help the perforations become weaker. Carefullytear off the paper. If some of the paper is left it will wash out the first time you wash the quilt. Tear thepaper carefully because you don’t want to weaken the stitches.
Paper Piecing Pattern for Prairie Flower Block 5
8/14/2019 Instructions for Paper Piecing
http://slidepdf.com/reader/full/instructions-for-paper-piecing 6/6
Paper Piecing Pattern for Prairie Flower Block 6
A1(3)
C(1)
A1(2)
A1(2) A1(3)
B(1)
• Sew on solid lines• Trim on dashed lines• Dotted lines indicate finished
edge of block--do not sew ortrim this line--it is for viewingonly!
A1(2) A1(3)
B(1)
A1(2)
A1(3)
B(1)
A1(2)
A1(3)
B(1)
A1(3)
C(1)
A1(2)
A1(3)
C(1)
A1(2)
A1(3)
C(1)
A1(2)


![Piecing it all together[1]](https://img.pdfslide.net/doc/110x75/5593f88d1a28aba1088b46d5/piecing-it-all-together1.jpg)