Embed Size (px)
DESCRIPTION
Instructions that I made myself of 2 photo editing programsOne is sumopaint(which is actually a drawing program but you can still edit with it) and one is photoscapeHopefully it's helpful ^^
Citation preview
Jin-Ho Lee
How can I edit my photos on a computer?There are two programs that can be used to edit photos:
PhotoscapeSumo Paint
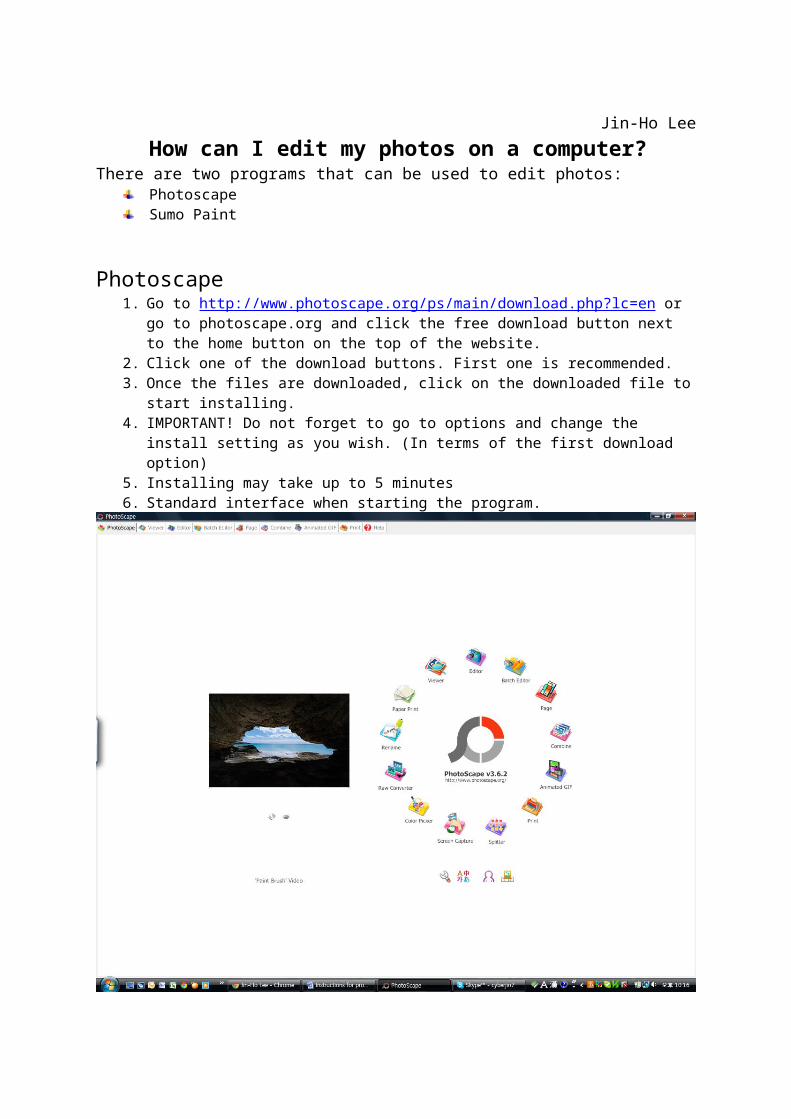
Photoscape1. Go to http://www.photoscape.org/ps/main/download.php?lc=en or go to photoscape.org
and click the free download button next to the home button on the top of the website.2. Click one of the download buttons. First one is recommended. 3. Once the files are downloaded, click on the downloaded file to start installing.4. IMPORTANT! Do not forget to go to options and change the install setting as you wish. (In
terms of the first download option)5. Installing may take up to 5 minutes6. Standard interface when starting the program.
7. To start editing a photo, click on Editor which is on the top of the circle with various other
pictures and tools.
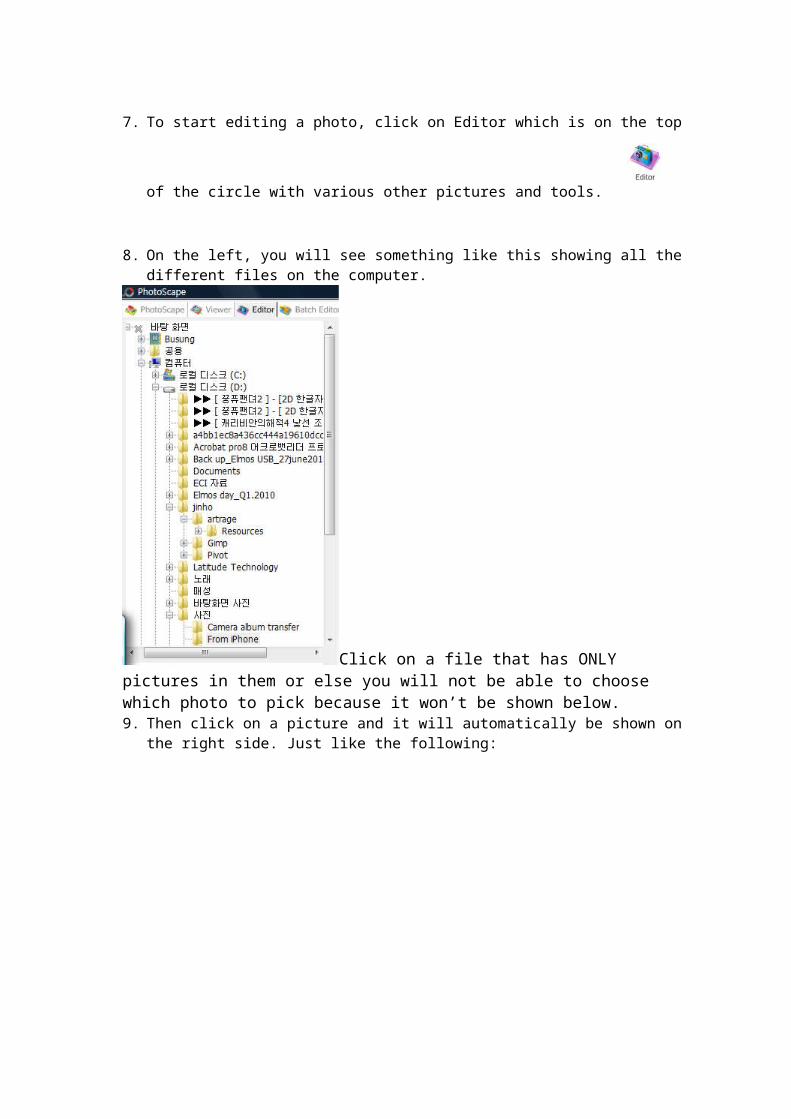
8. On the left, you will see something like this showing all the different files on the computer.
Click on a file that has ONLY pictures in them or else you will not be able to choose which photo to pick because it won’t be shown below.9. Then click on a picture and it will automatically be shown on the right side. Just like the
following:
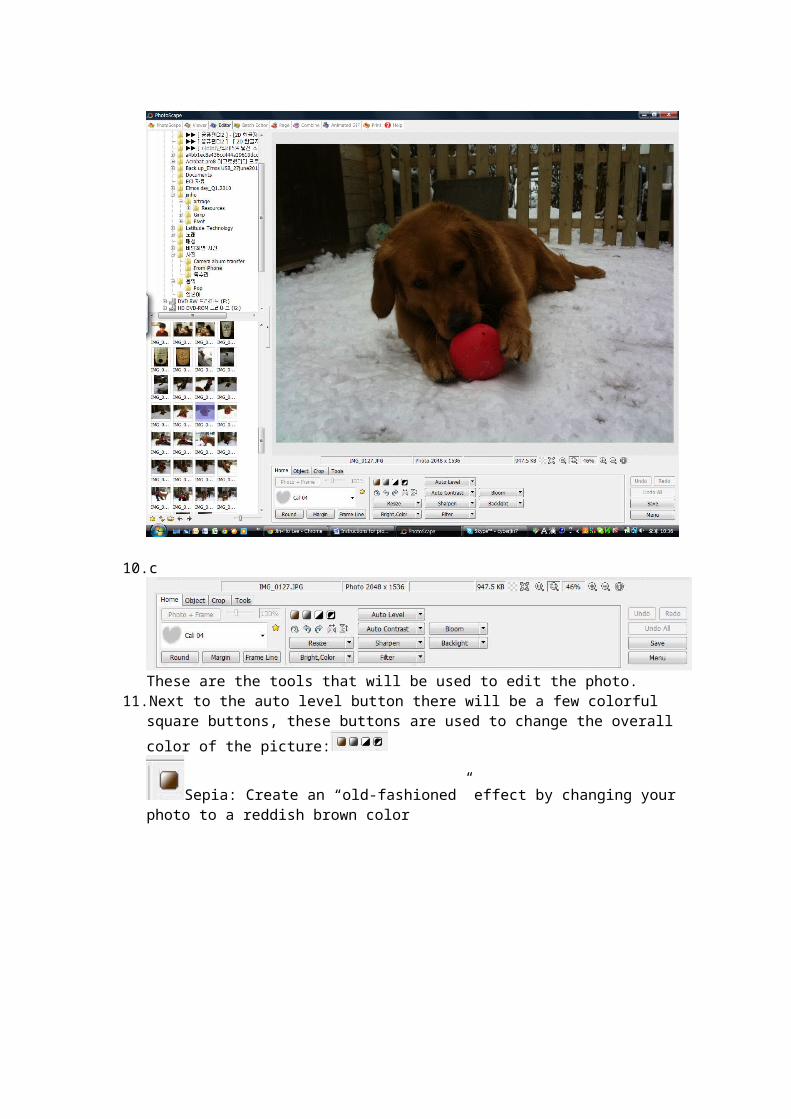
10. c
These are the tools that will be used to edit the photo.11. Next to the auto level button there will be a few colorful square buttons, these buttons are
used to change the overall color of the picture:
Sepia: Create an “old-fashioned” effect by changing your photo to a reddish brown color
Grayscale: Convert your images to black and white tones. Eliminates hue in the photo.*Hue is a technical term standing for actually the colors like red, yellow blue etc*
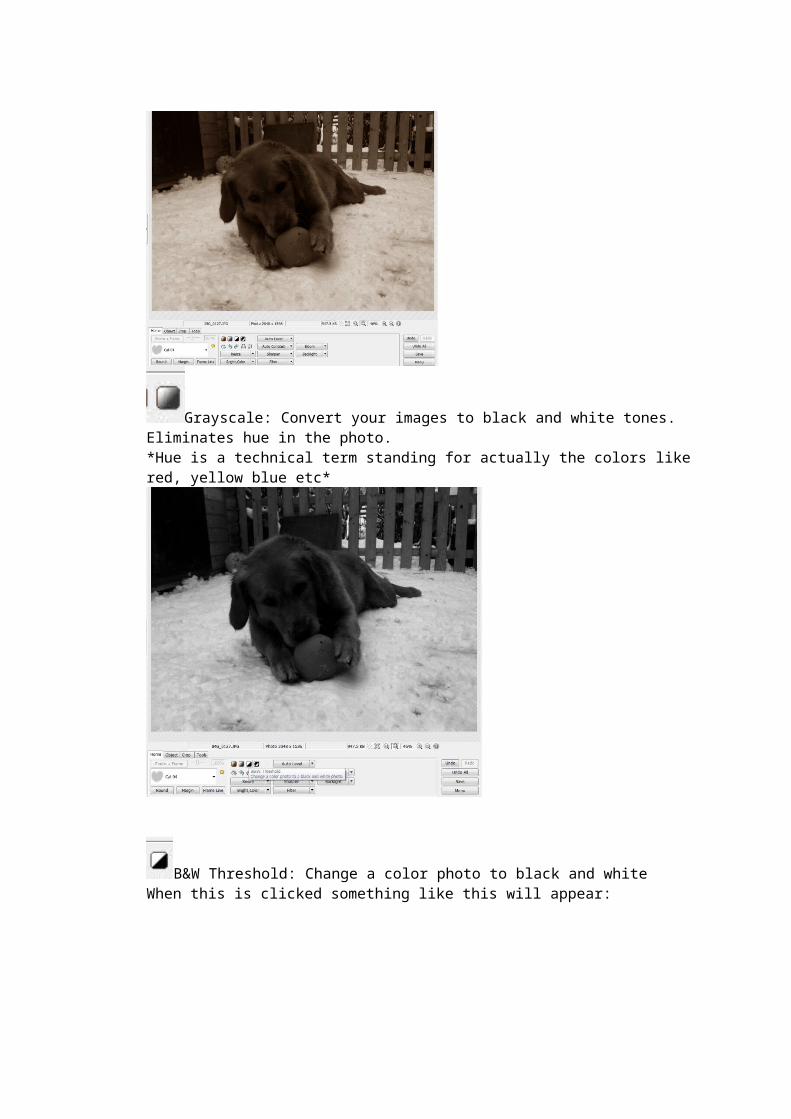
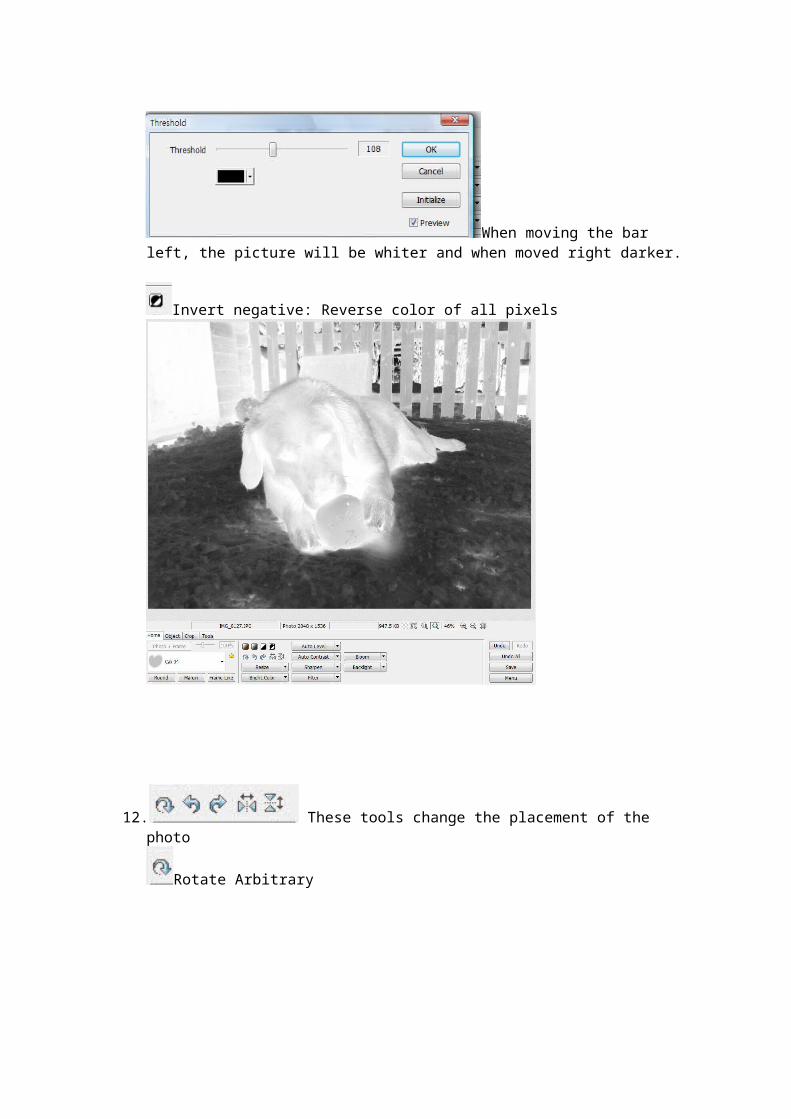
B&W Threshold: Change a color photo to black and whiteWhen this is clicked something like this will appear:
When moving the bar left, the picture will be whiter and when moved right darker.
Invert negative: Reverse color of all pixels
12. These tools change the placement of the photo
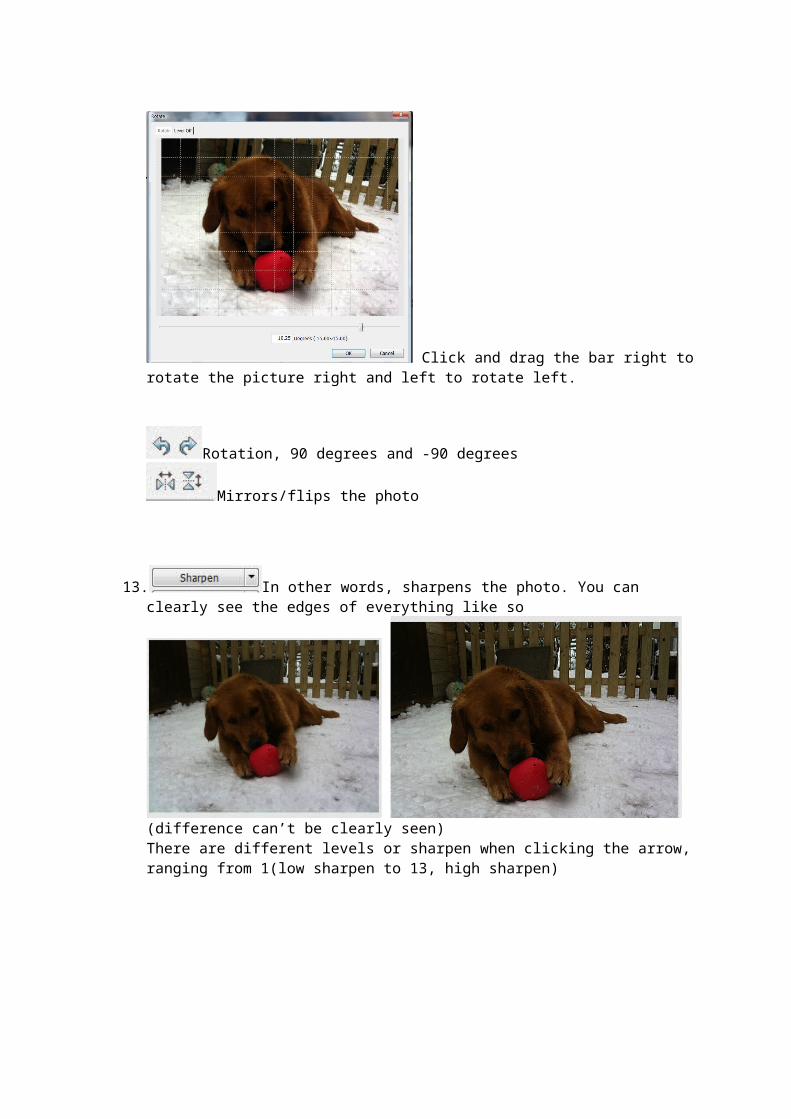
Rotate Arbitrary
Click and drag the bar right to rotate the picture right and left to rotate left.
Rotation, 90 degrees and -90 degrees
Mirrors/flips the photo
13. In other words, sharpens the photo. You can clearly see the edges of everything like so
(difference can’t be clearly seen)There are different levels or sharpen when clicking the arrow, ranging from 1(low sharpen to 13, high sharpen)
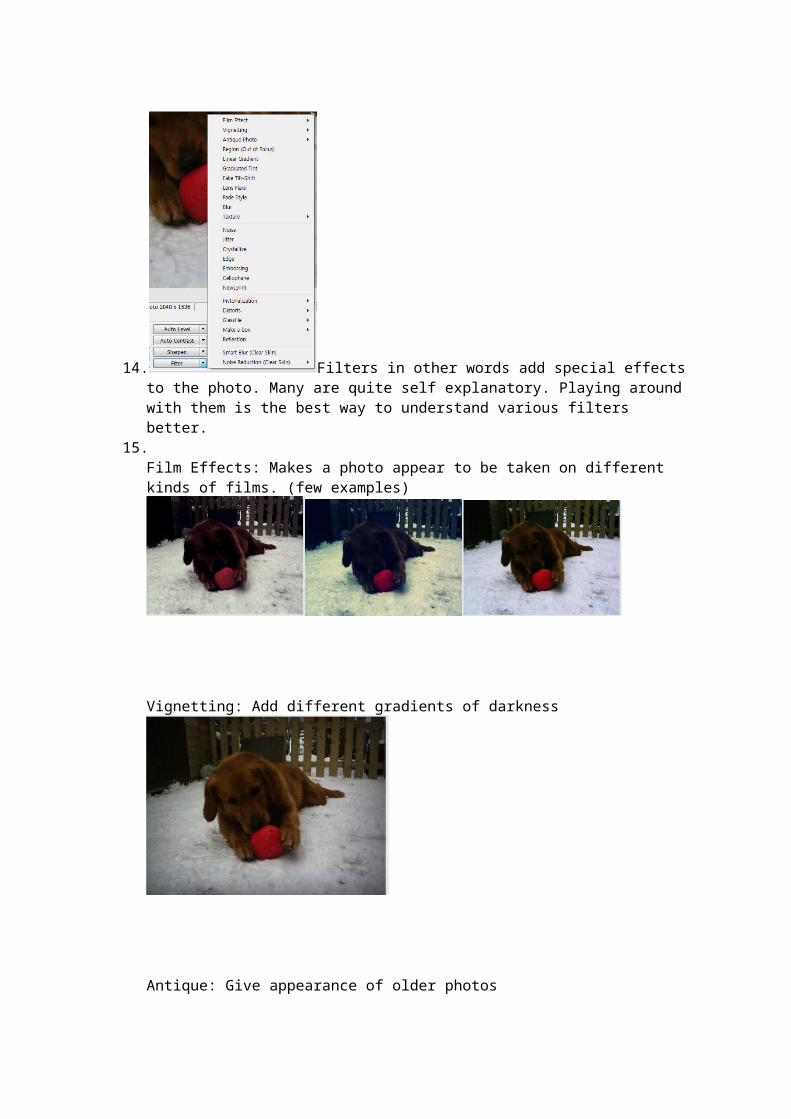
14. Filters in other words add special effects to the photo. Many are quite self explanatory. Playing around with them is the best way to understand various filters better.
15.Film Effects: Makes a photo appear to be taken on different kinds of films. (few examples)
Vignetting: Add different gradients of darkness
Antique: Give appearance of older photos
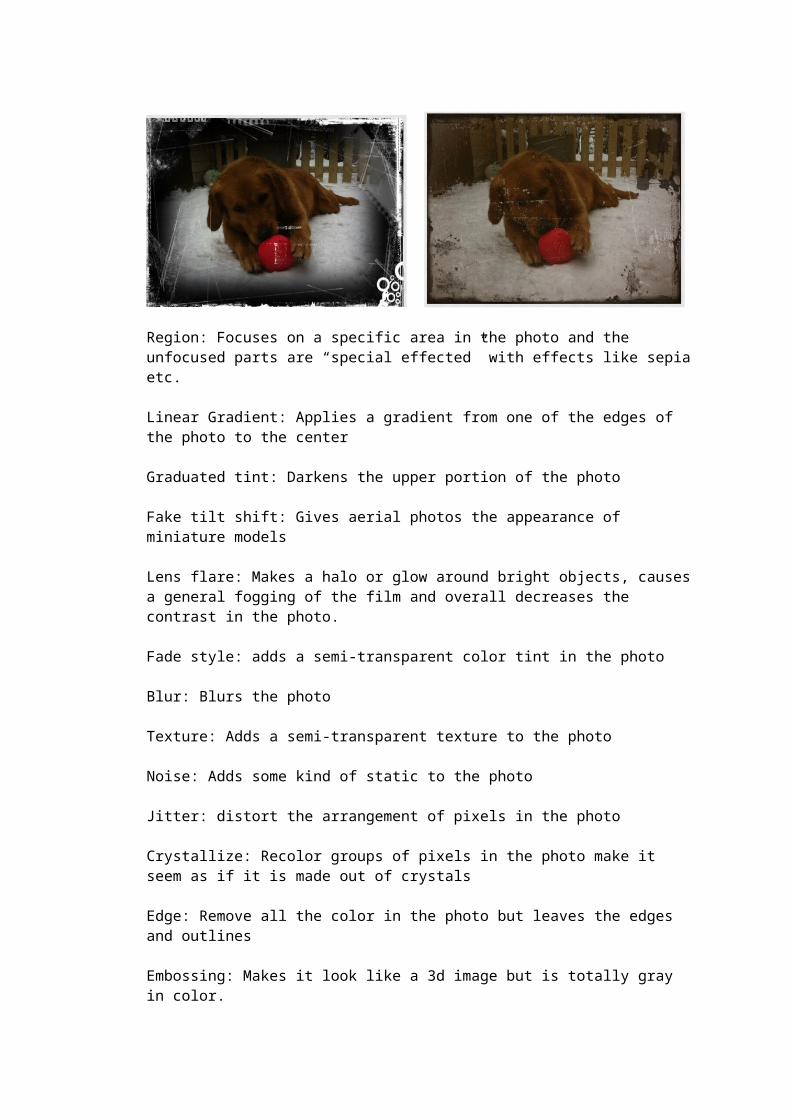
Region: Focuses on a specific area in the photo and the unfocused parts are “special effected” with effects like sepia etc.
Linear Gradient: Applies a gradient from one of the edges of the photo to the center
Graduated tint: Darkens the upper portion of the photo
Fake tilt shift: Gives aerial photos the appearance of miniature models
Lens flare: Makes a halo or glow around bright objects, causes a general fogging of the film and overall decreases the contrast in the photo.
Fade style: adds a semi-transparent color tint in the photo
Blur: Blurs the photo
Texture: Adds a semi-transparent texture to the photo
Noise: Adds some kind of static to the photo
Jitter: distort the arrangement of pixels in the photo
Crystallize: Recolor groups of pixels in the photo make it seem as if it is made out of crystals
Edge: Remove all the color in the photo but leaves the edges and outlines
Embossing: Makes it look like a 3d image but is totally gray in color.
Cellophane: Puts a semitransparent layer ontop of the photo which is red, green and blue. It is also slightly offset.
Newspaper: Gives a newspaper like appearance to the photo
Pictorialization: Gives you several options making it look as if your photo has been hand made as in drawn/ painted
Distort: Provides several different options letting you choose how to “warp” your photo
Glass tile: Gives an impression as if the photo is under a glass tile.
Make a box: Literally make a 3d cube which has the photo on all sides
Reflection: Reflects the image and put it right below the original image.
Smart blur: Blurs colors to make a pixelled photo smoother.
Noise Reduction: Exact opposite of Noise filter(see above)
All these filters will have a message box pop up showing the different options on how to change the filters, all of it is self explanatory and good results will come out when playing around with them and practicing.
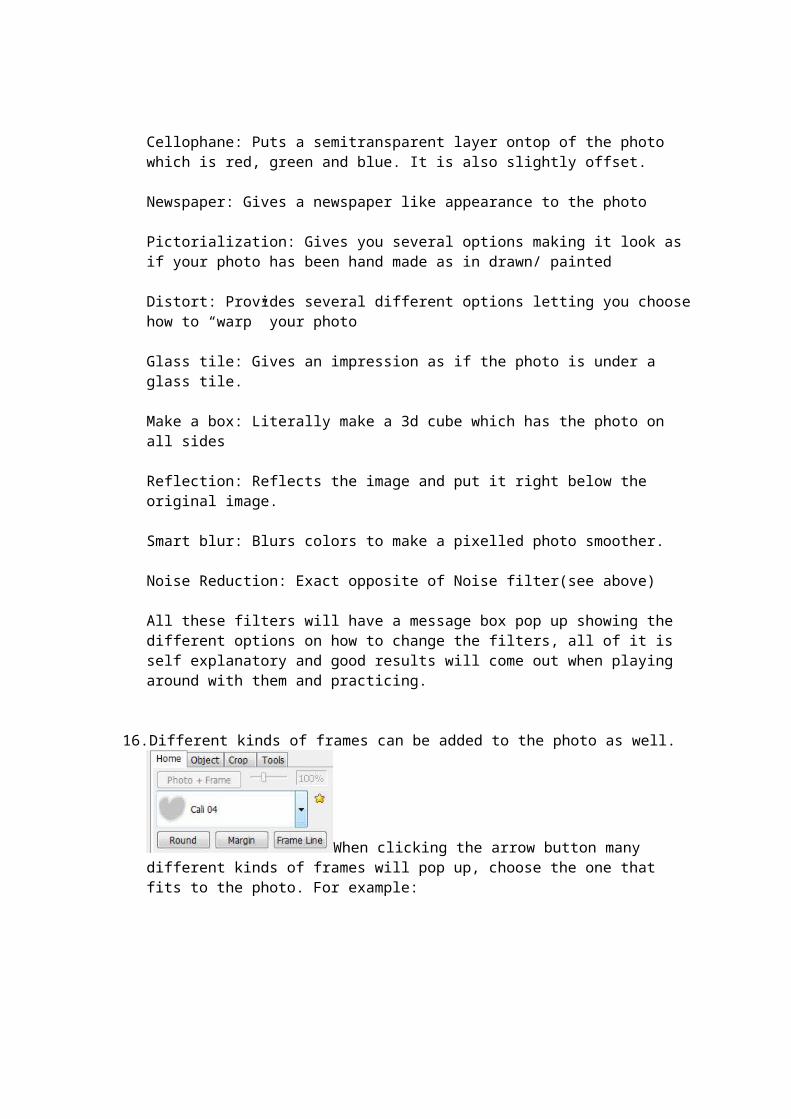
16. Different kinds of frames can be added to the photo as well.
When clicking the arrow button many different kinds of frames will pop up, choose the one that fits to the photo. For example:
Frame: Gradient 8
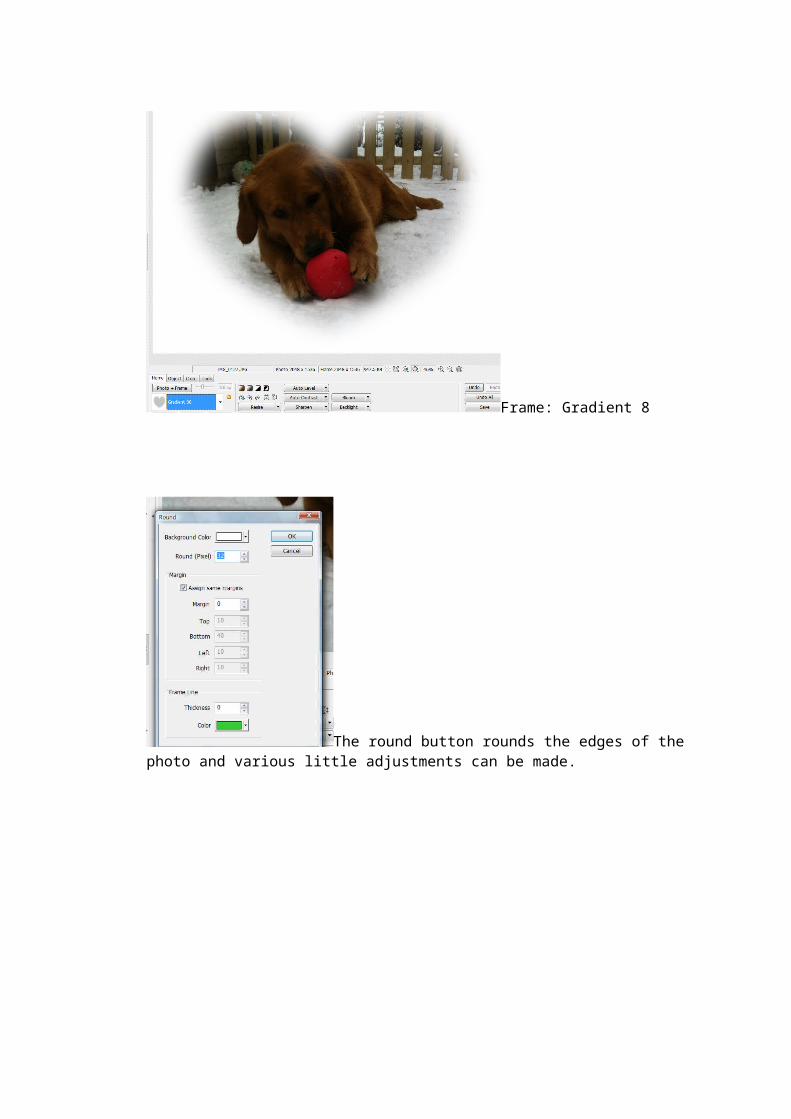
The round button rounds the edges of the photo and various little adjustments can be made.
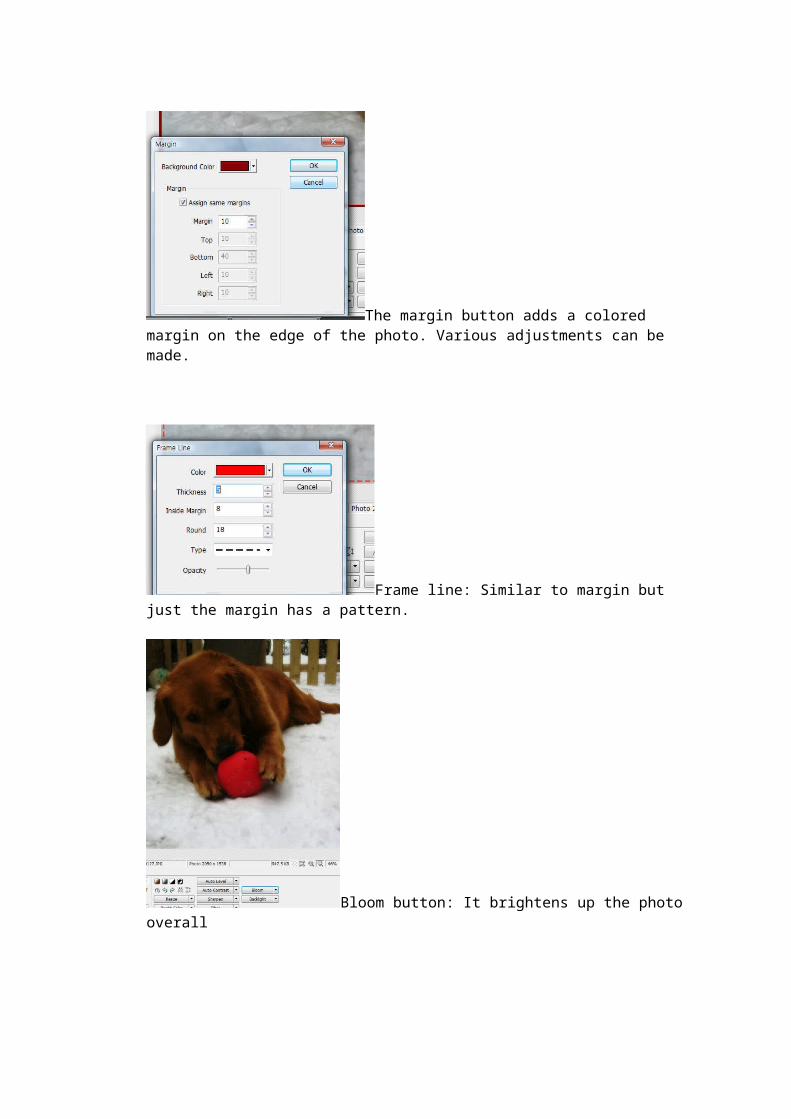
The margin button adds a colored margin on the edge of the photo. Various adjustments can be made.
Frame line: Similar to margin but just the margin has a pattern.
Bloom button: It brightens up the photo overall
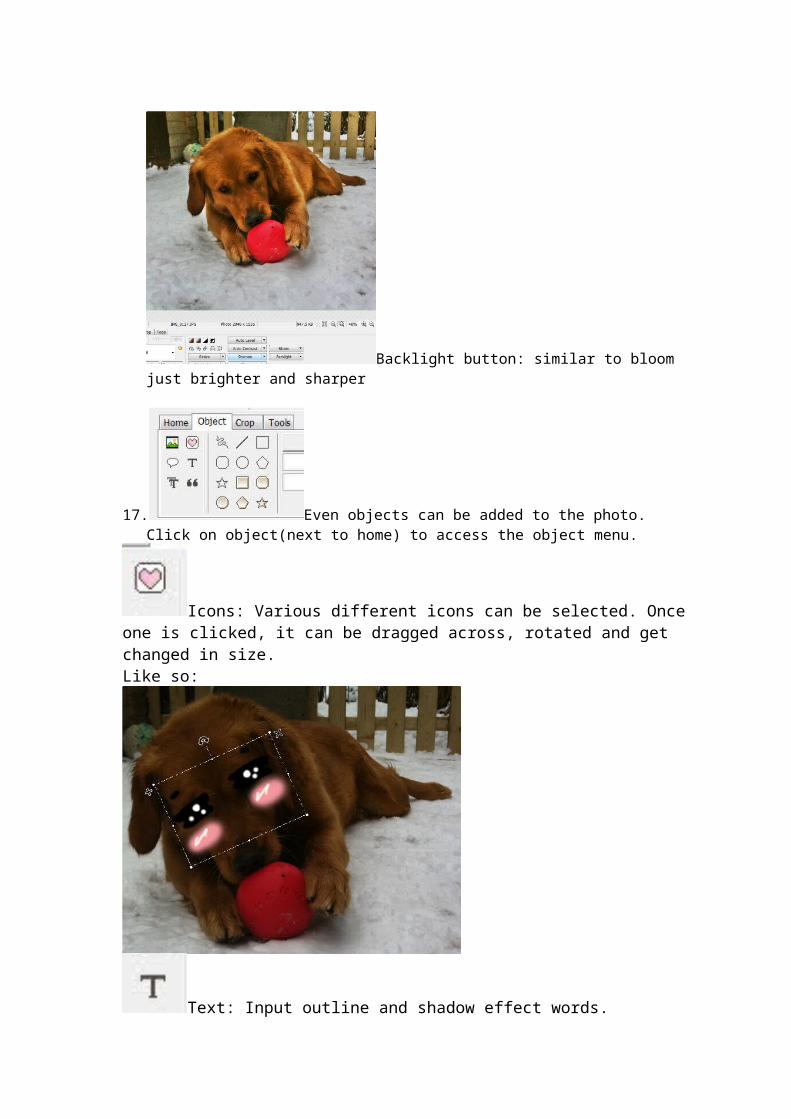
Backlight button: similar to bloom just brighter and sharper
17. Even objects can be added to the photo. Click on object(next to home) to access the object menu.
Icons: Various different icons can be selected. Once one is clicked, it can be dragged across, rotated and get changed in size. Like so:
Text: Input outline and shadow effect words.
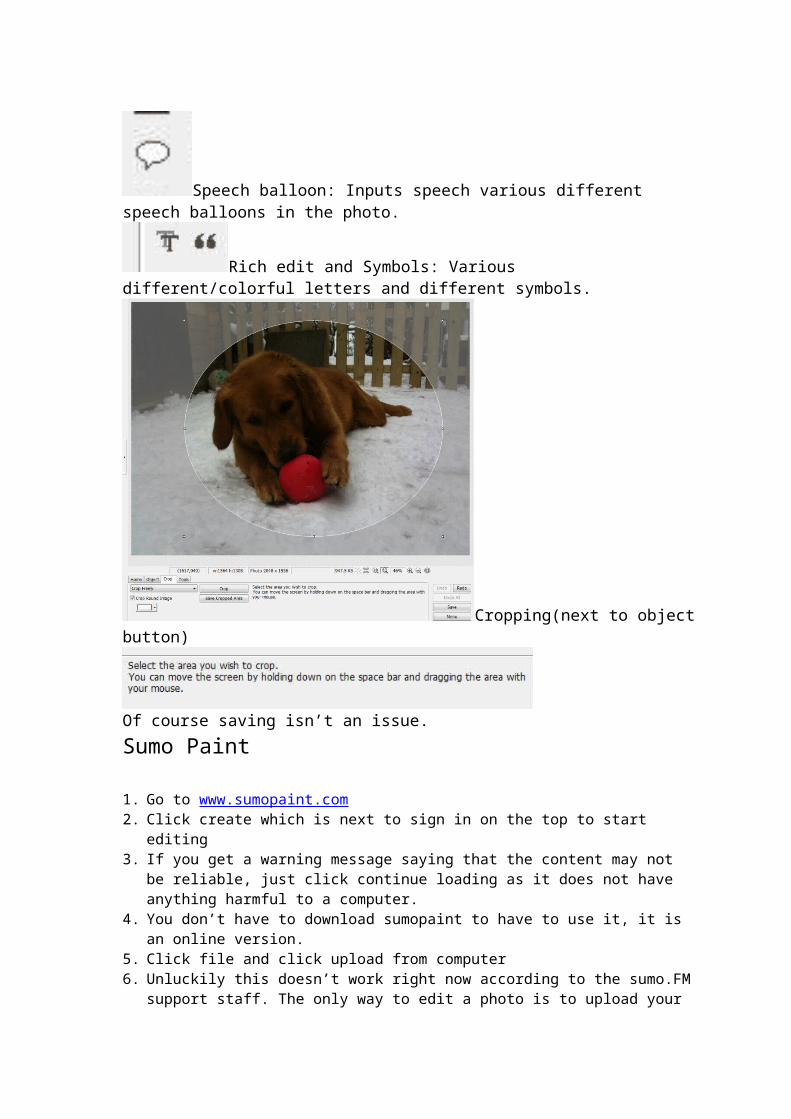
Speech balloon: Inputs speech various different speech balloons in the photo.
Rich edit and Symbols: Various different/colorful letters and different symbols.
Cropping(next to object button)
Of course saving isn’t an issue.
Sumo Paint
1. Go to www.sumopaint.com2. Click create which is next to sign in on the top to start editing3. If you get a warning message saying that the content may not be reliable, just click continue
loading as it does not have anything harmful to a computer. 4. You don’t have to download sumopaint to have to use it, it is an online version.5. Click file and click upload from computer6. Unluckily this doesn’t work right now according to the sumo.FM support staff. The only way
to edit a photo is to upload your photo you wish to edit on the internet like in photobucket, copy the url and click open from url under file and paste the url in.
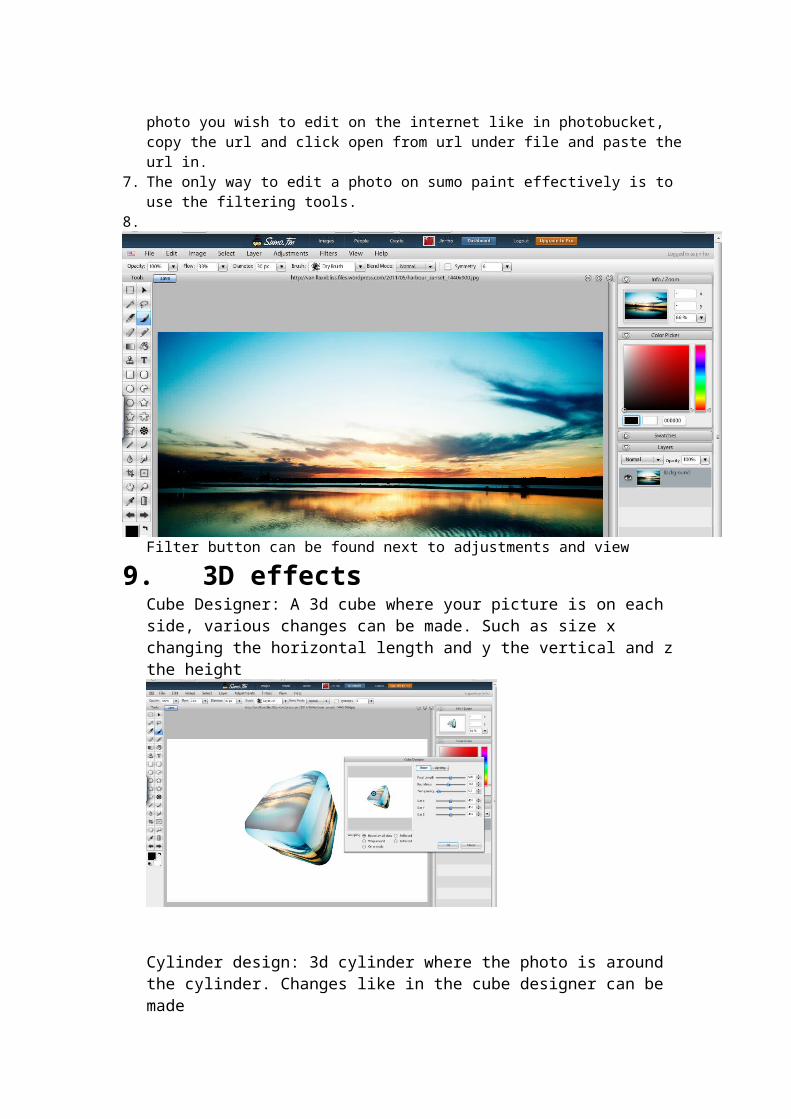
7. The only way to edit a photo on sumo paint effectively is to use the filtering tools.8.
Filter button can be found next to adjustments and view
9. 3D effectsCube Designer: A 3d cube where your picture is on each side, various changes can be made. Such as size x changing the horizontal length and y the vertical and z the height
Cylinder design: 3d cylinder where the photo is around the cylinder. Changes like in the cube designer can be made
Sphere design: 3d sphere with the photo around it. Changes like in the cylinder can be made
Perspective tiling
Reflection: Reflects image as if the reflection is in water
10. BlurGaussian Blur: Normal blurring effect.
Linear blur: Blur according to a gradient (gradient location can be changed by the blue circles like objects that turn red when clicked)Radial blur: A roundish blur
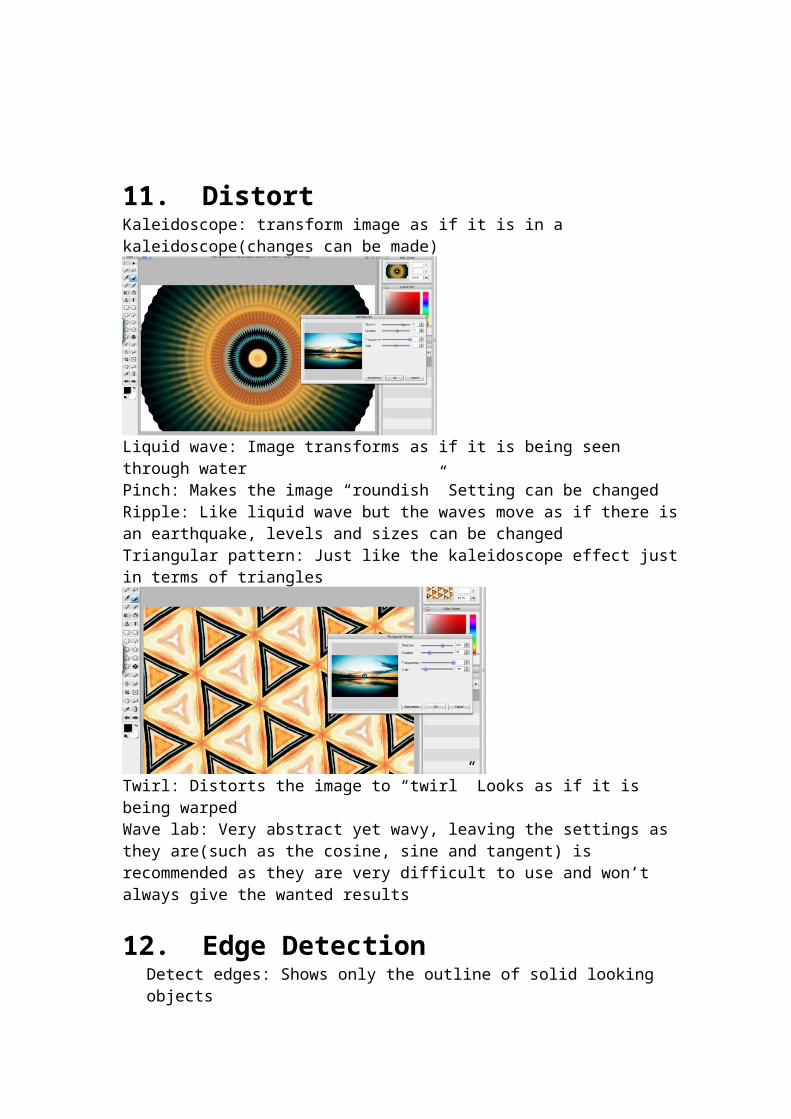
11. DistortKaleidoscope: transform image as if it is in a kaleidoscope(changes can be made)
Liquid wave: Image transforms as if it is being seen through waterPinch: Makes the image “roundish” Setting can be changedRipple: Like liquid wave but the waves move as if there is an earthquake, levels and sizes can be changedTriangular pattern: Just like the kaleidoscope effect just in terms of triangles
Twirl: Distorts the image to “twirl” Looks as if it is being warpedWave lab: Very abstract yet wavy, leaving the settings as they are(such as the cosine, sine and tangent) is recommended as they are very difficult to use and won’t always give the wanted results
12. Edge DetectionDetect edges: Shows only the outline of solid looking objectsGlowing edges: Gives the edges a glow

Plastic edges: Puts an additional offset edge into the image which is white to make it look like plastic literally.
13. Lighting Effects
Radius can be changed to change the width of the lighting. Can be rotated and moved.
14. Noise Clouds: Covers the image with clouds, not a recommended filter as changes can’t be madeNoise: Makes it look like an image of a tv with bad cable connection
Perlin Noise: Very abstract rainbow colors. Also not recommended as it doesn’t show the image again.
15. Pixelate
Make it look like a mosaic painting(camouflage, crystallize, mosaic, pixelate) Halftone pattern: Redrawn in black and white with only shapes like circles and rectangles
16. SharpenSharpen: Make the edges of solid looking objects much clearerUnsharpen: Exact opposite
17. StylizeDithered poster: Like the halftone pattern with unsaturated colors making it look oldEmboss: Make it look a bit 3d but can’t be noticed that much
18. TextureBumpmap: Puts a kind of spark of light on the wanted place.
19. Other FiltersOffset: Make several images offset to each other.
Which one is better?Considering efficiency factors, technical issues and user friendliness, photoscape is clearly the better one of the two. Starting with the technical issues, the only advantage of using sumo paint is that it does not have to be downloaded like photoscape which has a rather long downloading process. But during the editing, photoscape has no problems at all compared to sumo paint. Sumo paint has an option of uploading a photo from the user’s computer but strangely it does not work at all. I have contacted the sumo paint staff and they have said they would repair it but they still did not repair it at all. And photoscape has much more variety of special effects that both creative and very easy to use. Whereas in sumo paint, there are various filters but they are very complex to use and most likely a person with a lot of practice would be only be able to use it well enough to get good results. In photoscape, there are setting changes but they aren’t as complex considering the fact that it was made for children to use as well. And the interface is much easier to navigate as it is labeled with pictures or with big letters.