Embed Size (px)
Citation preview
Logistics Solutions for the Warfighter
Name of Presenter: Code: Date Presented:
Marine Corps Logistics Command Albany, Georgia
INTERMEC SCANNER SETUP and USE
Logistics Solutions for the Warfighter 2
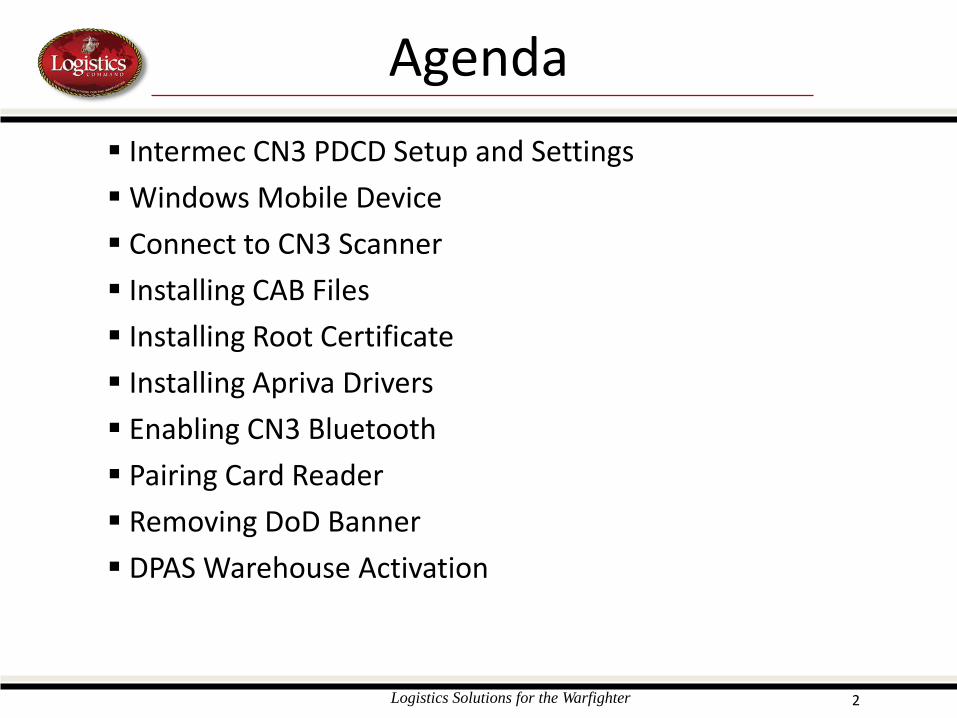
Intermec CN3 PDCD Setup and Settings
Windows Mobile Device
Connect to CN3 Scanner
Installing CAB Files
Installing Root Certificate
Installing Apriva Drivers
Enabling CN3 Bluetooth
Pairing Card Reader
Removing DoD Banner
DPAS Warehouse Activation
Agenda
Logistics Solutions for the Warfighter 3
PDCD Setup
Setting Up the
Intermec CN3G/CN3eG PDCD
Logistics Solutions for the Warfighter 4
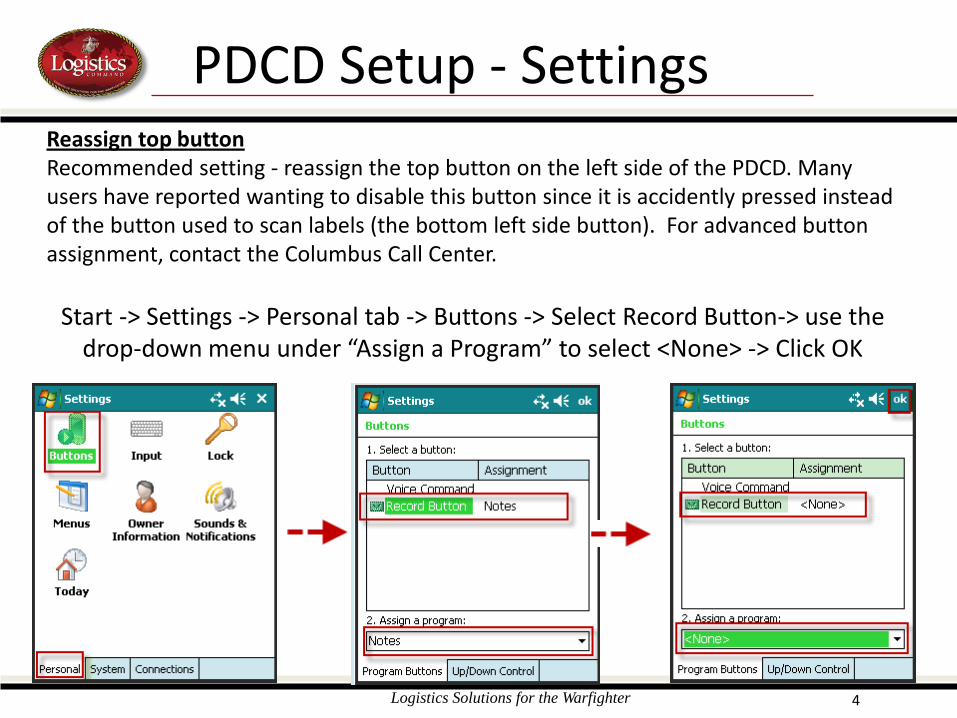
PDCD Setup - Settings Reassign top button Recommended setting - reassign the top button on the left side of the PDCD. Many users have reported wanting to disable this button since it is accidently pressed instead of the button used to scan labels (the bottom left side button). For advanced button assignment, contact the Columbus Call Center.
Start -> Settings -> Personal tab -> Buttons -> Select Record Button-> use the drop-down menu under “Assign a Program” to select <None> -> Click OK
Logistics Solutions for the Warfighter 5
PDCD Setup - Settings
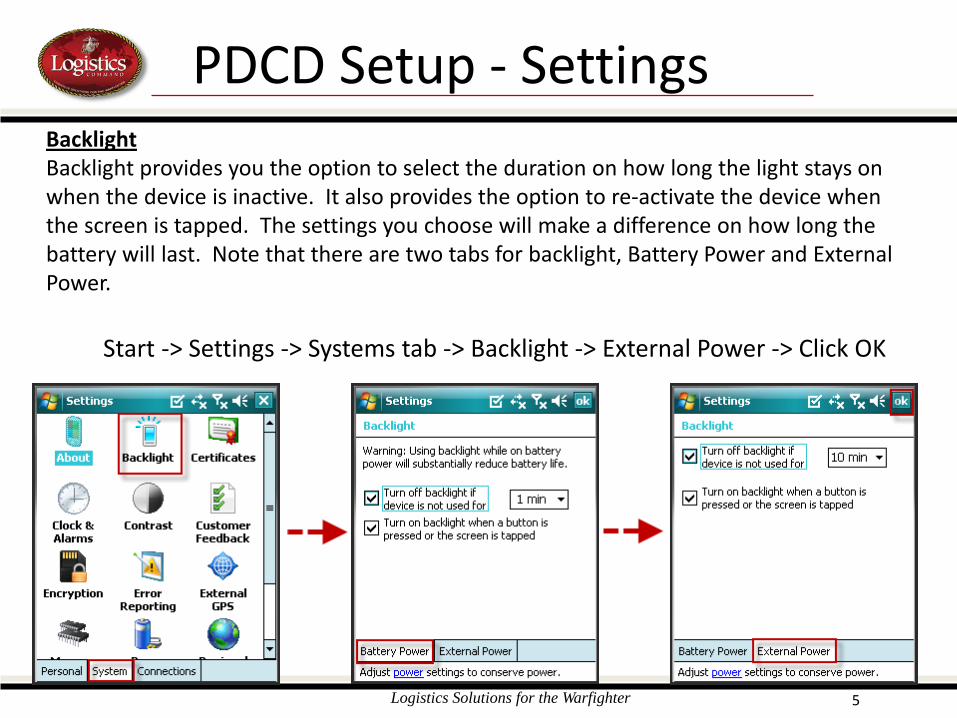
Start -> Settings -> Systems tab -> Backlight -> External Power -> Click OK
Backlight Backlight provides you the option to select the duration on how long the light stays on when the device is inactive. It also provides the option to re-activate the device when the screen is tapped. The settings you choose will make a difference on how long the battery will last. Note that there are two tabs for backlight, Battery Power and External Power.
Logistics Solutions for the Warfighter 6
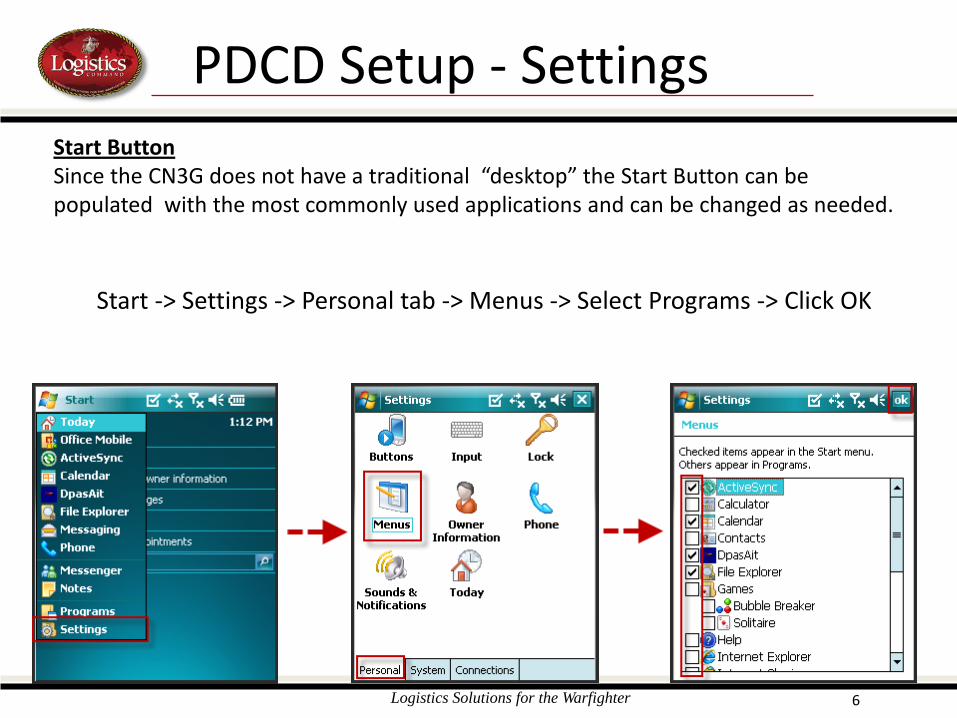
PDCD Setup - Settings Start Button Since the CN3G does not have a traditional “desktop” the Start Button can be populated with the most commonly used applications and can be changed as needed.
Start -> Settings -> Personal tab -> Menus -> Select Programs -> Click OK

Logistics Solutions for the Warfighter 7
PDCD Setup - Settings
Start -> Settings -> Systems tab -> Clock & Alarms -> Click OK
Clock and Alarms DPAS uses this time to change the status of an asset’s Last Inventoried Date once the inventory is reconciled. Inaccurate dates and times will create bad data in DPAS.
Logistics Solutions for the Warfighter 8
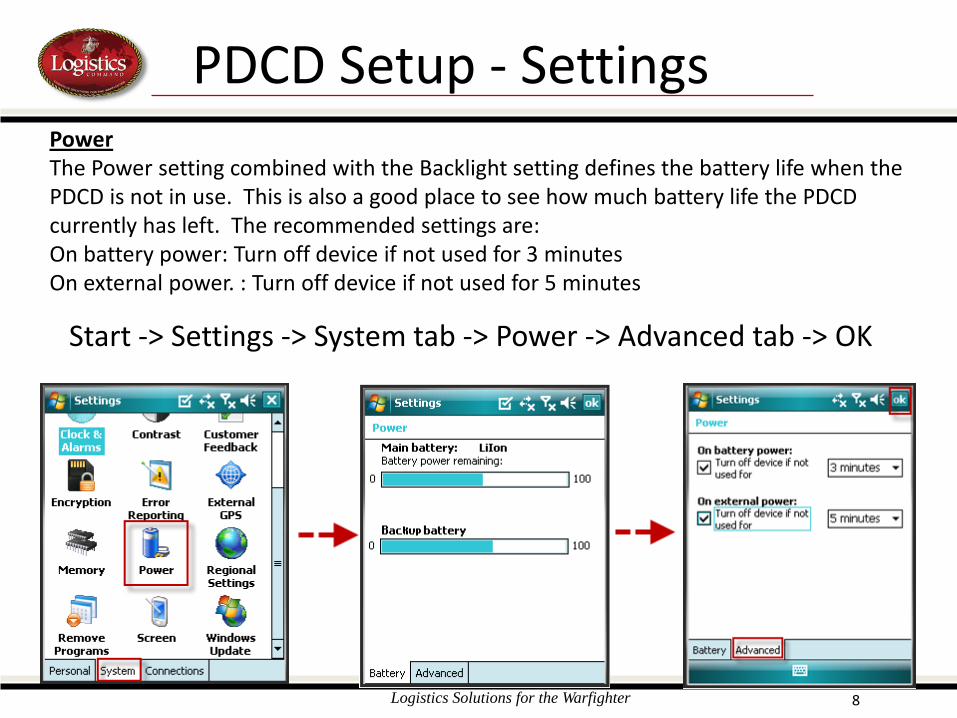
PDCD Setup - Settings Power The Power setting combined with the Backlight setting defines the battery life when the PDCD is not in use. This is also a good place to see how much battery life the PDCD currently has left. The recommended settings are: On battery power: Turn off device if not used for 3 minutes On external power. : Turn off device if not used for 5 minutes
Start -> Settings -> System tab -> Power -> Advanced tab -> OK
Logistics Solutions for the Warfighter 9
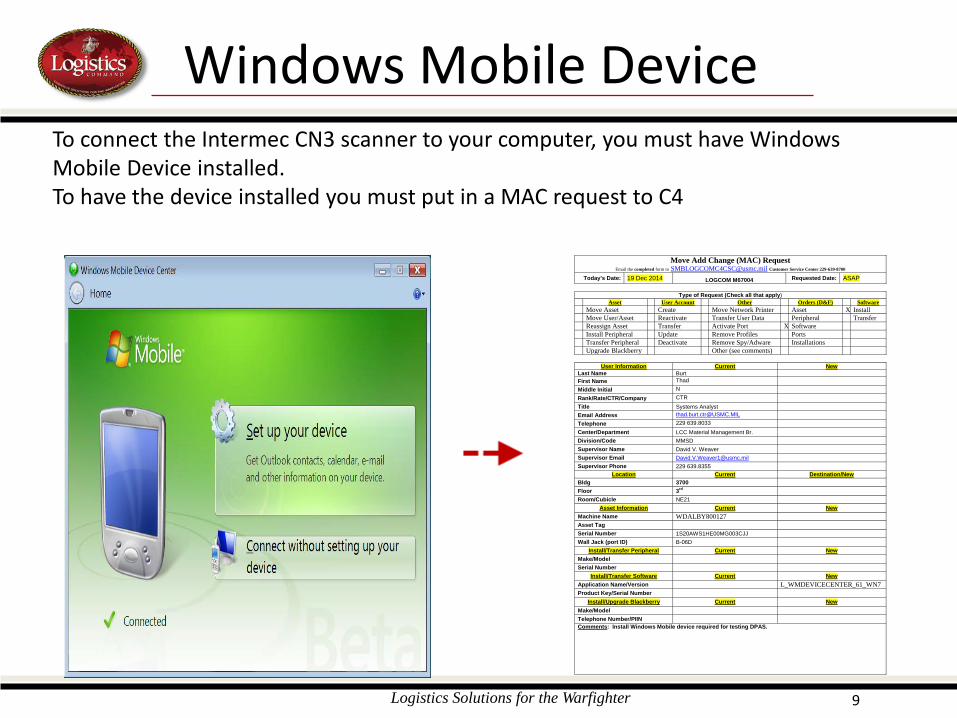
Windows Mobile Device To connect the Intermec CN3 scanner to your computer, you must have Windows Mobile Device installed. To have the device installed you must put in a MAC request to C4
Move Add Change (MAC) Request Email the completed form to [email protected] Customer Service Center 229-639-8700
Today’s Date: 19 Dec 2014 LOGCOM M67004 Requested Date: ASAP
Type of Request (Check all that apply) Asset User Account Other Orders (D&F) Software Move Asset Create Move Network Printer Asset X Install Move User/Asset Reactivate Transfer User Data Peripheral Transfer Reassign Asset Transfer Activate Port X Software Install Peripheral Update Remove Profiles Ports Transfer Peripheral Deactivate Remove Spy/Adware Installations Upgrade Blackberry Other (see comments)
User Information Current New Last Name Burt First Name Thad Middle Initial N Rank/Rate/CTR/Company CTR Title Systems Analyst Email Address [email protected] Telephone 229 639.8033 Center/Department LCC Material Management Br. Division/Code MMSD Supervisor Name David V. Weaver Supervisor Email [email protected] Supervisor Phone 229 639.8355
Location Current Destination/New Bldg 3700 Floor 3rd Room/Cubicle NE21
Asset Information Current New Machine Name WDALBY800127 Asset Tag Serial Number 1S20AWS1HE00MG003CJJ Wall Jack (port ID) B-06D
Install/Transfer Peripheral Current New Make/Model Serial Number
Install/Transfer Software Current New Application Name/Version L_WMDEVICECENTER_61_WN7 Product Key/Serial Number
Install/Upgrade Blackberry Current New Make/Model Telephone Number/PIIN Comments: Install Windows Mobile device required for testing DPAS.
Logistics Solutions for the Warfighter 10
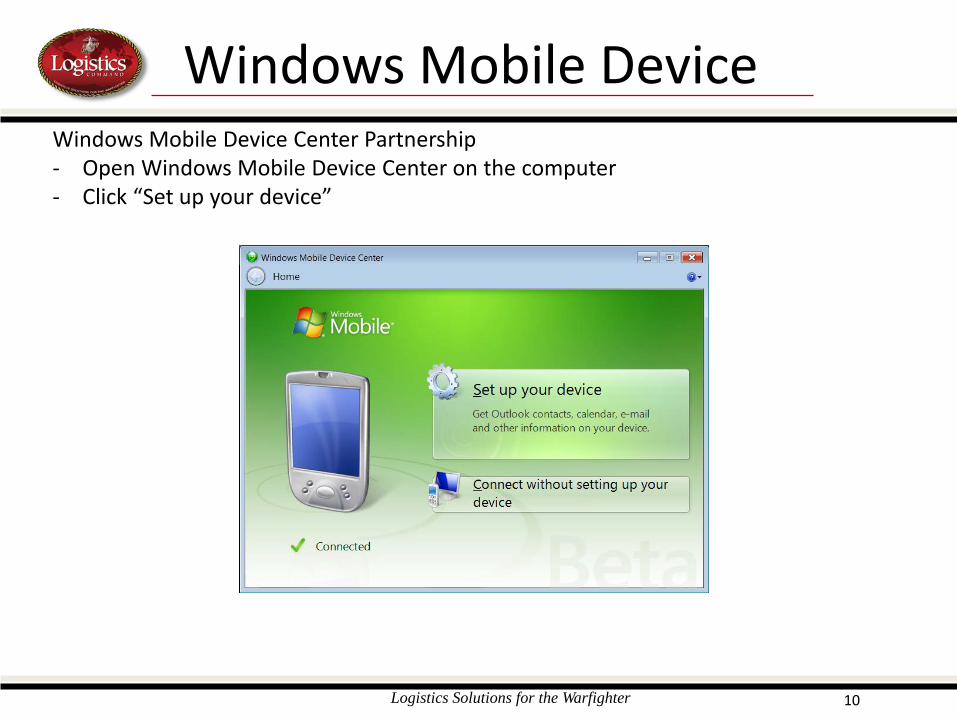
Windows Mobile Device Windows Mobile Device Center Partnership - Open Windows Mobile Device Center on the computer - Click “Set up your device”
Logistics Solutions for the Warfighter 11
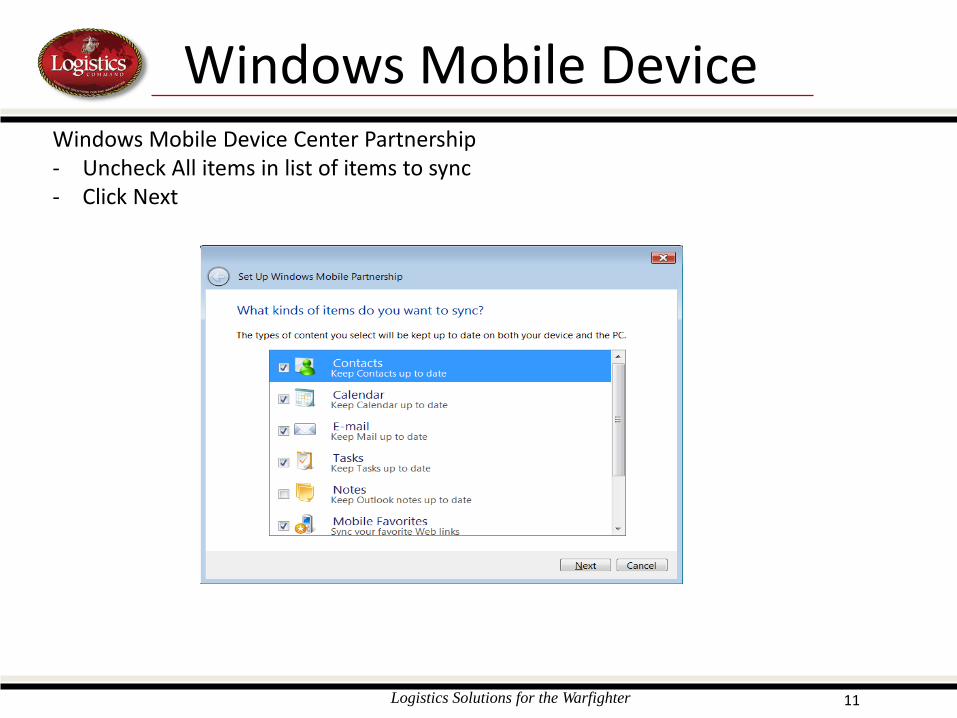
Windows Mobile Device Windows Mobile Device Center Partnership - Uncheck All items in list of items to sync - Click Next
Logistics Solutions for the Warfighter 12
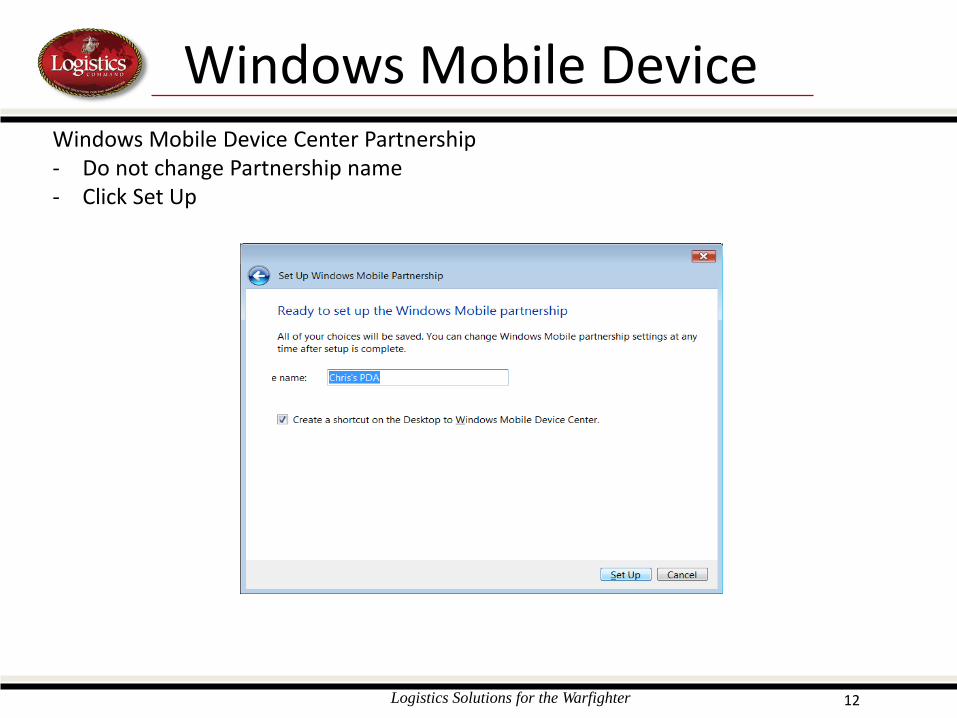
Windows Mobile Device Windows Mobile Device Center Partnership - Do not change Partnership name - Click Set Up
Logistics Solutions for the Warfighter 13
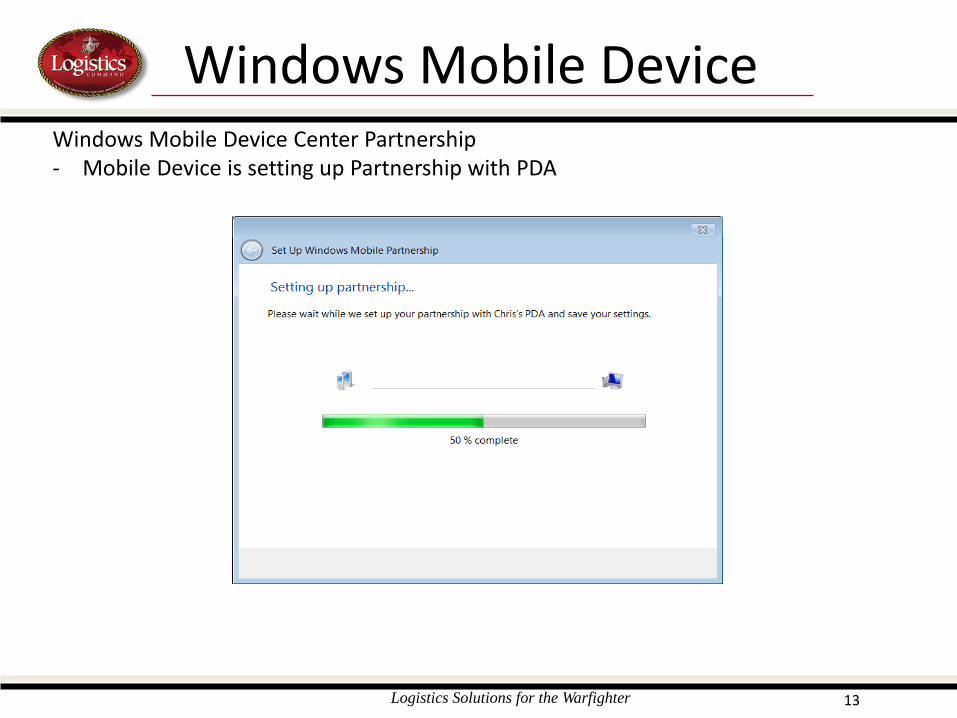
Windows Mobile Device Windows Mobile Device Center Partnership - Mobile Device is setting up Partnership with PDA
Logistics Solutions for the Warfighter 14
Connect to CN3 Scanner On the CN3 Scanner - Select Start -> Settings -> Connections Tab -> Network Cards Tab - Tap each adapter listed and make sure the “Use server-assigned IP Address” option is
selected
Logistics Solutions for the Warfighter 15
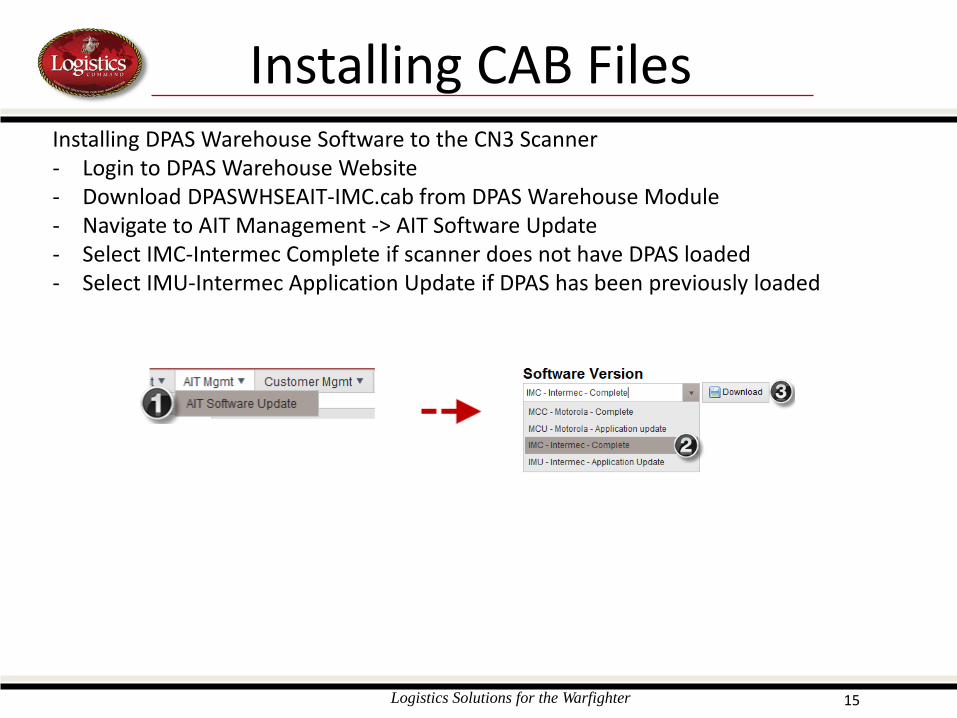
Installing CAB Files Installing DPAS Warehouse Software to the CN3 Scanner - Login to DPAS Warehouse Website - Download DPASWHSEAIT-IMC.cab from DPAS Warehouse Module - Navigate to AIT Management -> AIT Software Update - Select IMC-Intermec Complete if scanner does not have DPAS loaded - Select IMU-Intermec Application Update if DPAS has been previously loaded
Logistics Solutions for the Warfighter 16
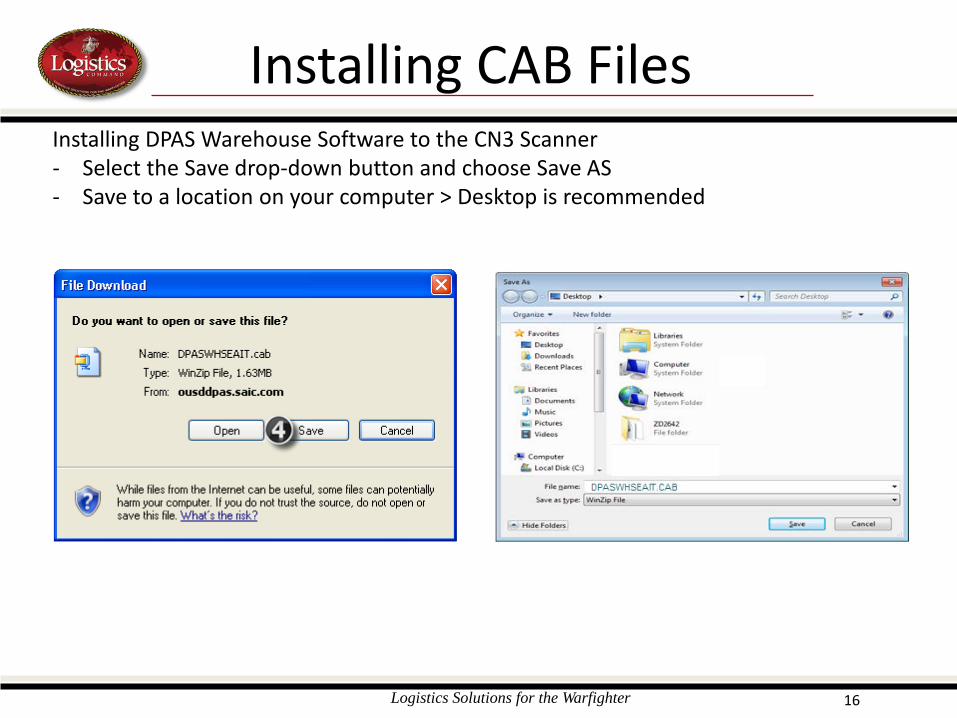
Installing CAB Files Installing DPAS Warehouse Software to the CN3 Scanner - Select the Save drop-down button and choose Save AS - Save to a location on your computer > Desktop is recommended
Logistics Solutions for the Warfighter 17
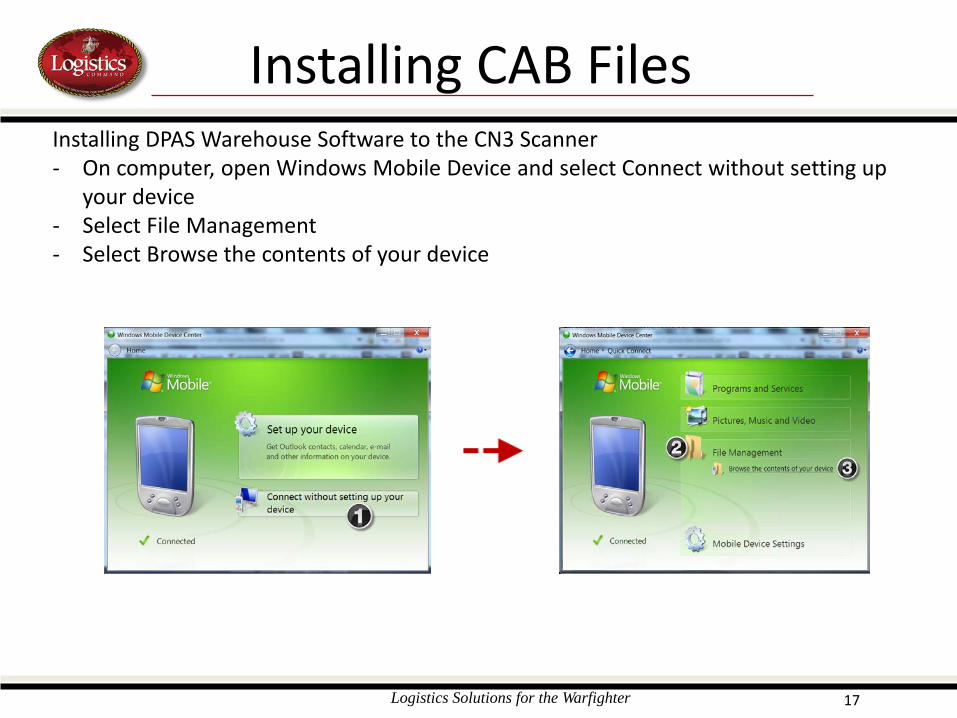
Installing CAB Files Installing DPAS Warehouse Software to the CN3 Scanner - On computer, open Windows Mobile Device and select Connect without setting up
your device - Select File Management - Select Browse the contents of your device
Logistics Solutions for the Warfighter 18
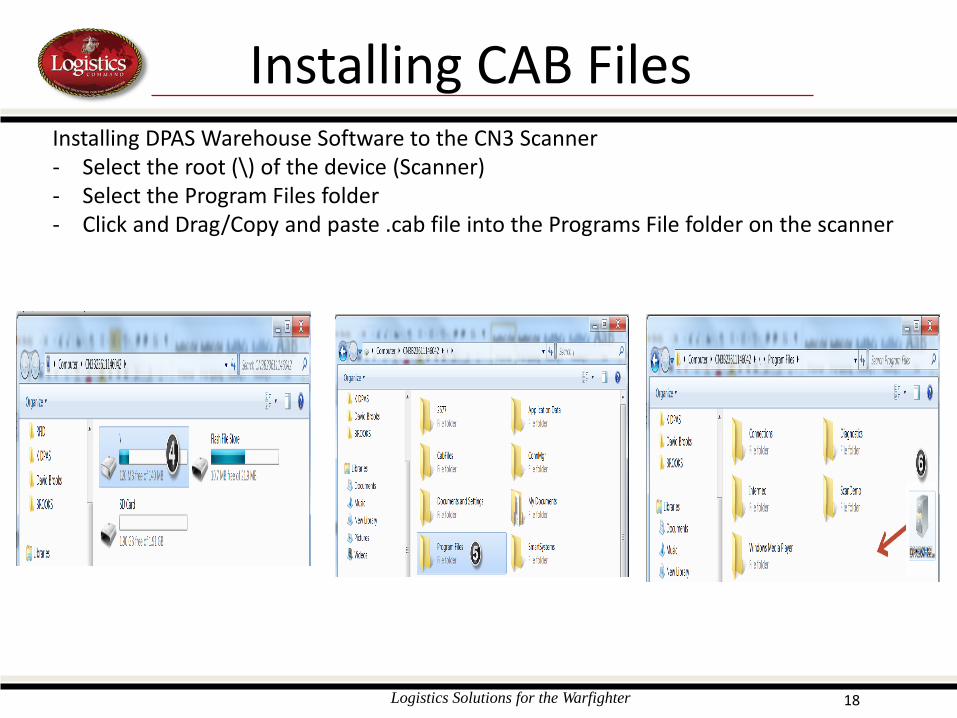
Installing CAB Files Installing DPAS Warehouse Software to the CN3 Scanner - Select the root (\) of the device (Scanner) - Select the Program Files folder - Click and Drag/Copy and paste .cab file into the Programs File folder on the scanner
Logistics Solutions for the Warfighter 19
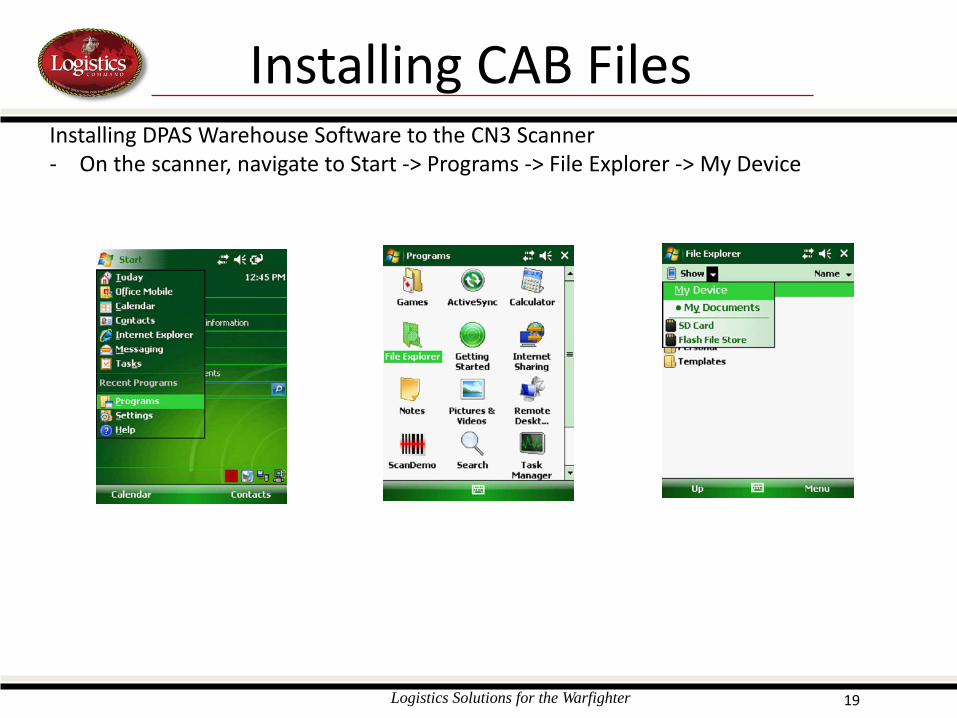
Installing CAB Files Installing DPAS Warehouse Software to the CN3 Scanner - On the scanner, navigate to Start -> Programs -> File Explorer -> My Device

Logistics Solutions for the Warfighter 20
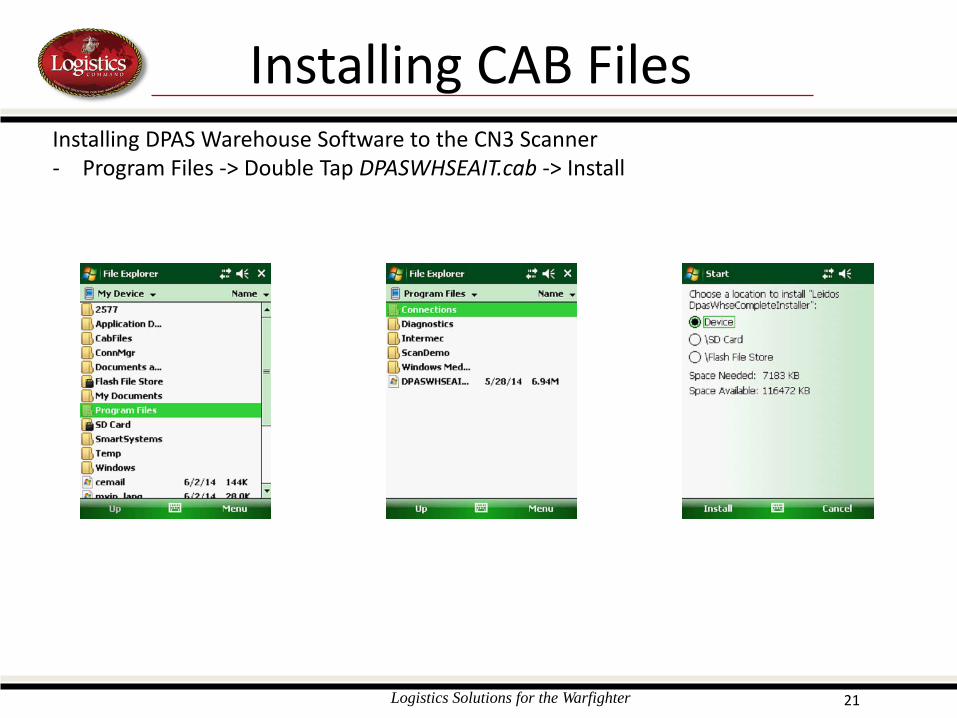
Installing CAB Files Installing DPAS Warehouse Software to the CN3 Scanner - Program Files -> Double Tap DPASWHSEAIT.cab -> Install
Logistics Solutions for the Warfighter 21
Installing CAB Files Installing DPAS Warehouse Software to the CN3 Scanner - Program Files -> Double Tap DPASWHSEAIT.cab -> Install
Logistics Solutions for the Warfighter 22
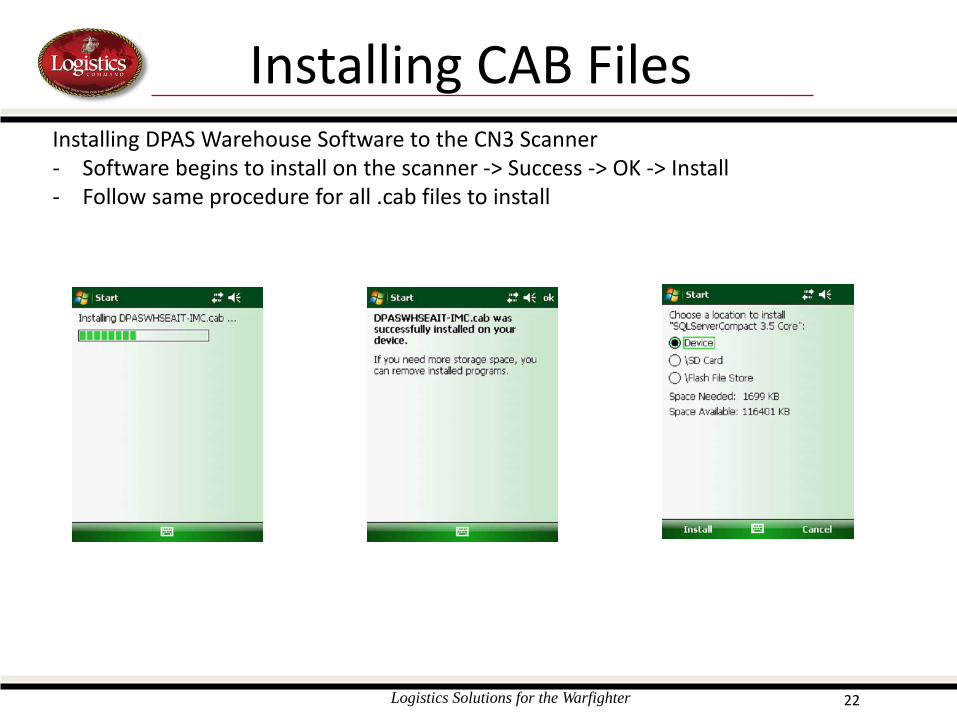
Installing CAB Files Installing DPAS Warehouse Software to the CN3 Scanner - Software begins to install on the scanner -> Success -> OK -> Install - Follow same procedure for all .cab files to install
Logistics Solutions for the Warfighter 23
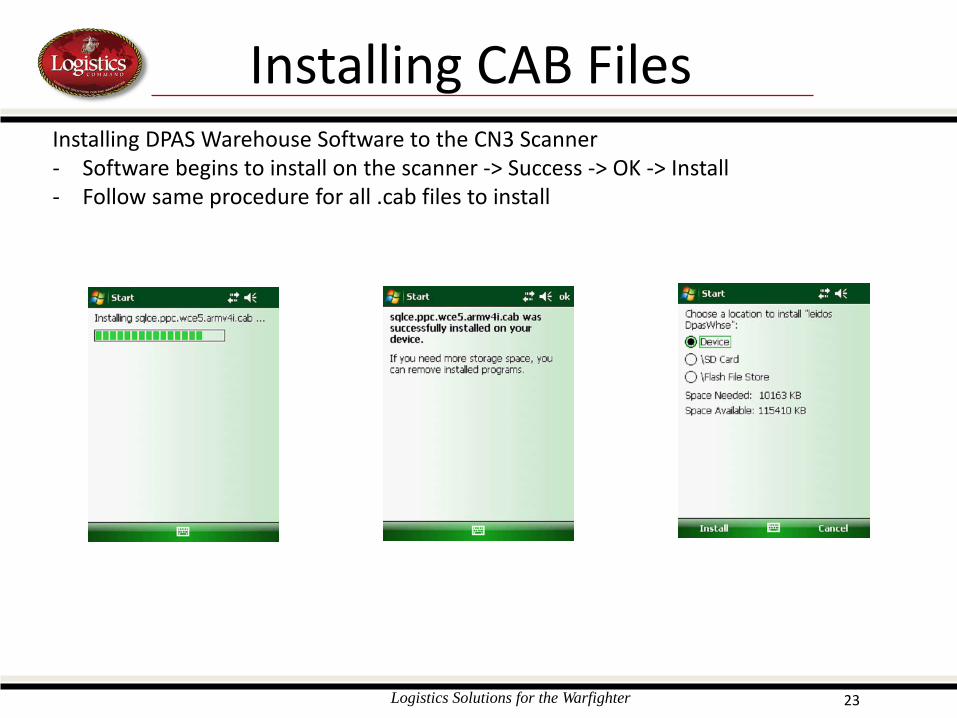
Installing CAB Files Installing DPAS Warehouse Software to the CN3 Scanner - Software begins to install on the scanner -> Success -> OK -> Install - Follow same procedure for all .cab files to install
Logistics Solutions for the Warfighter 24
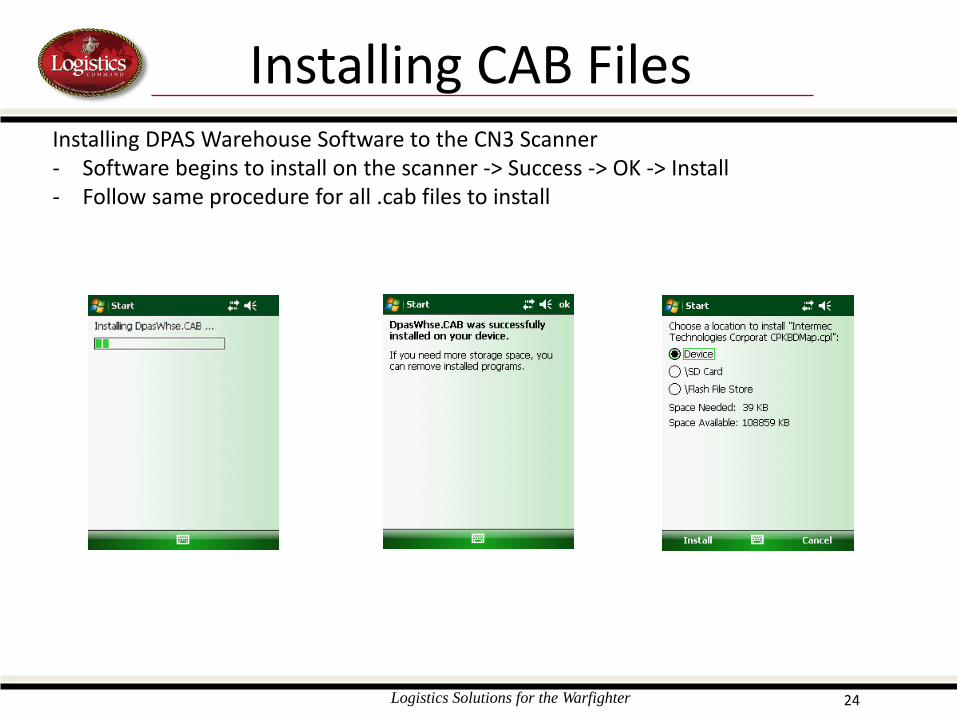
Installing CAB Files Installing DPAS Warehouse Software to the CN3 Scanner - Software begins to install on the scanner -> Success -> OK -> Install - Follow same procedure for all .cab files to install
Logistics Solutions for the Warfighter 25
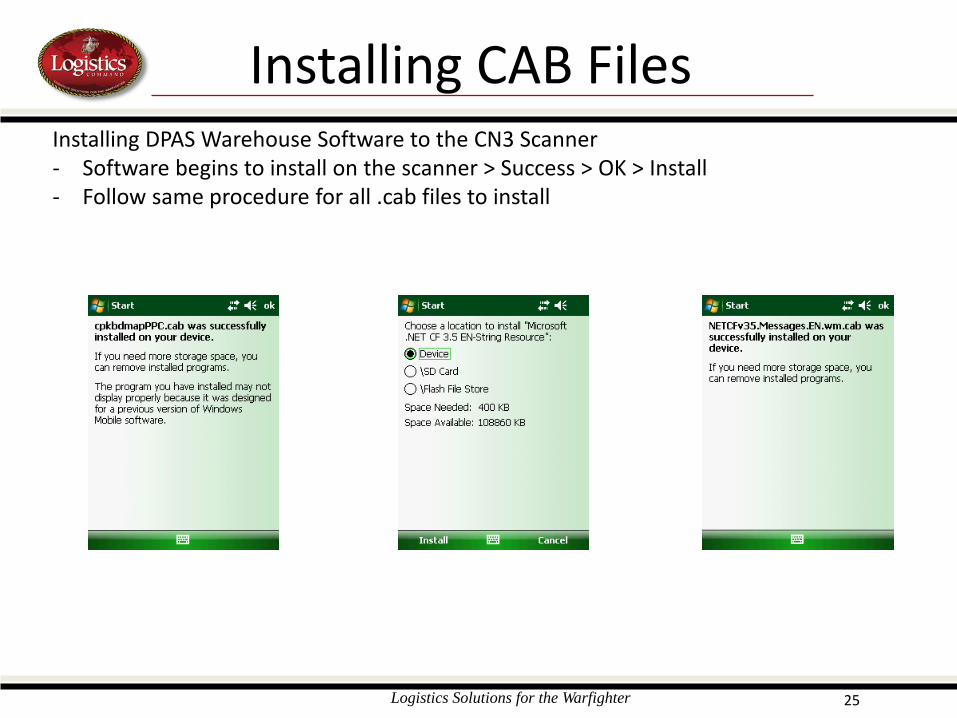
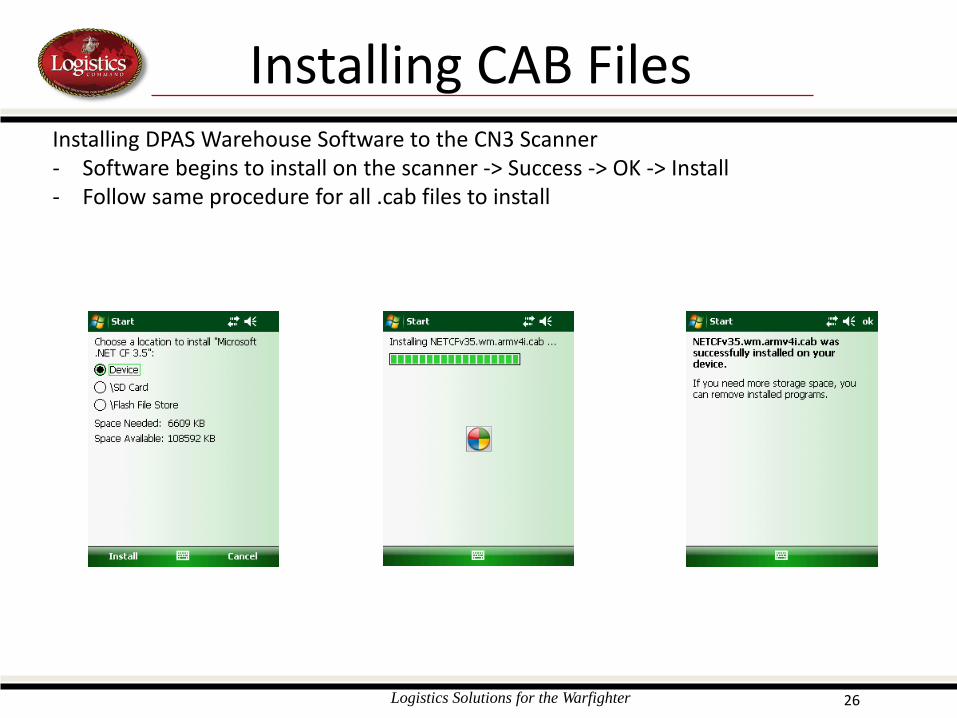
Installing CAB Files Installing DPAS Warehouse Software to the CN3 Scanner - Software begins to install on the scanner > Success > OK > Install - Follow same procedure for all .cab files to install
Logistics Solutions for the Warfighter 26
Installing CAB Files Installing DPAS Warehouse Software to the CN3 Scanner - Software begins to install on the scanner -> Success -> OK -> Install - Follow same procedure for all .cab files to install
Logistics Solutions for the Warfighter 27
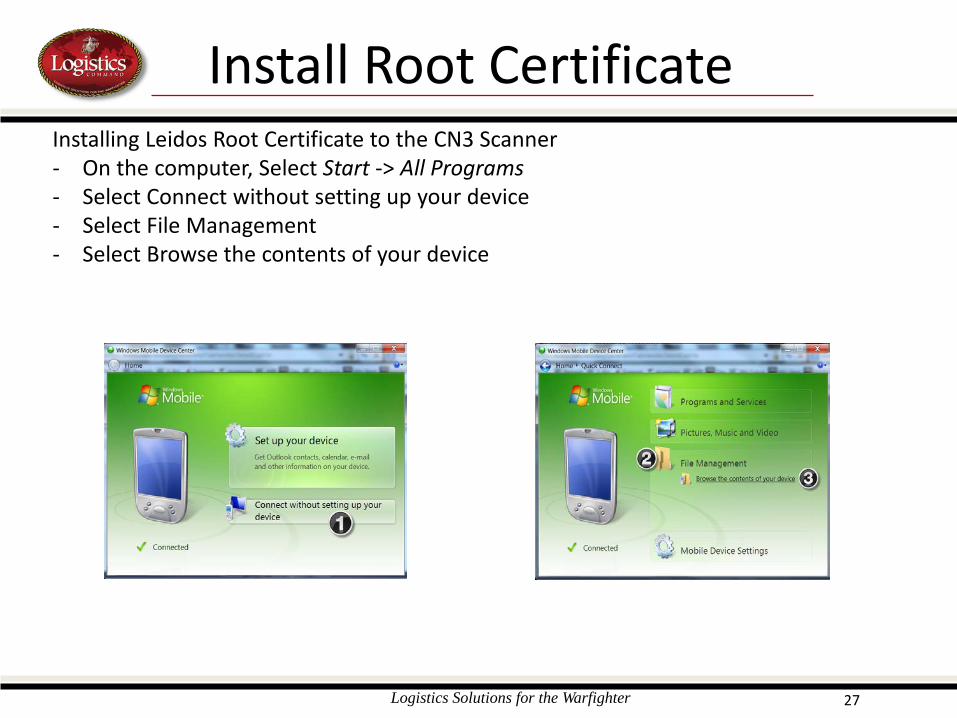
Install Root Certificate Installing Leidos Root Certificate to the CN3 Scanner - On the computer, Select Start -> All Programs - Select Connect without setting up your device - Select File Management - Select Browse the contents of your device
Logistics Solutions for the Warfighter 28
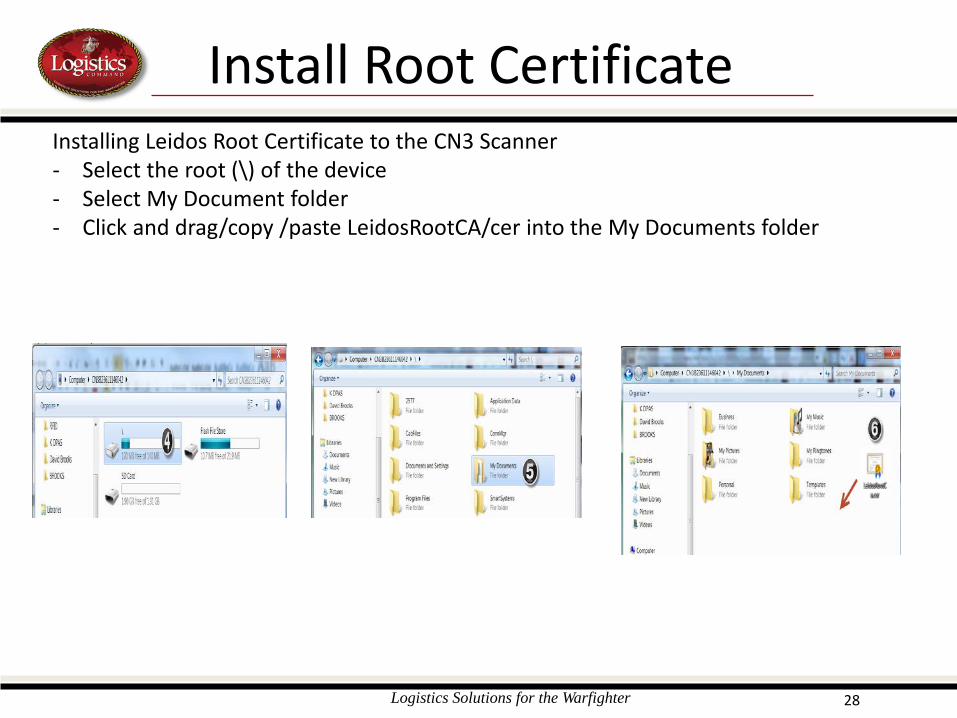
Install Root Certificate Installing Leidos Root Certificate to the CN3 Scanner - Select the root (\) of the device - Select My Document folder - Click and drag/copy /paste LeidosRootCA/cer into the My Documents folder
Logistics Solutions for the Warfighter 29
Installing Apriva Drivers Installing Apriva Drivers on the computer - Install the Apriva software (Apriva Authentication Release 1.7.11) - Extract the Apriva file to a new folder on your PC Desktop - Using Windows Mobile Device Center, copy the new folder to the handheld device
(My Documents), again remember this location as you will need to go to it. You will likely get a pop-up during the copy asking if you want to copy the SetupAprivaBeta.exe, click

Logistics Solutions for the Warfighter 30
Installing Apriva Drivers Installing Apriva Drivers on the scanner - If you have Apriva Drivers already installed, uninstall them. You can check this by
going to Windows -> Settings -> System -> Remove Program - **Note: Not all items are in alphabetical order on this screen, and sometimes
removing an item will change the order of these items. - If you see "Apriva Crytographic Services" in the list remove it - If you see "Apriva Smart Card Reader Driver" in the list remove it - Install the Apriva files in the following order, these Apriva files are in the location you
copied the folder contents to in the computer. On the scanner go to File Explorer -> My Device -> My Documents.
- AprivaDevCerts - AprivaSmartCardDriver.02.01.06 - A reboot will occur after installing this cab - AprivaCSPware.01.06.15 - A reboot will occur after installing this cab - Run the SetupAprivaBeta.exe program, this program is in the location you copied in the (My Documents) folder. This will cause a reboot. - The new version of Apriva has been installed and the scanner can now be paired with the card reader
Logistics Solutions for the Warfighter 31
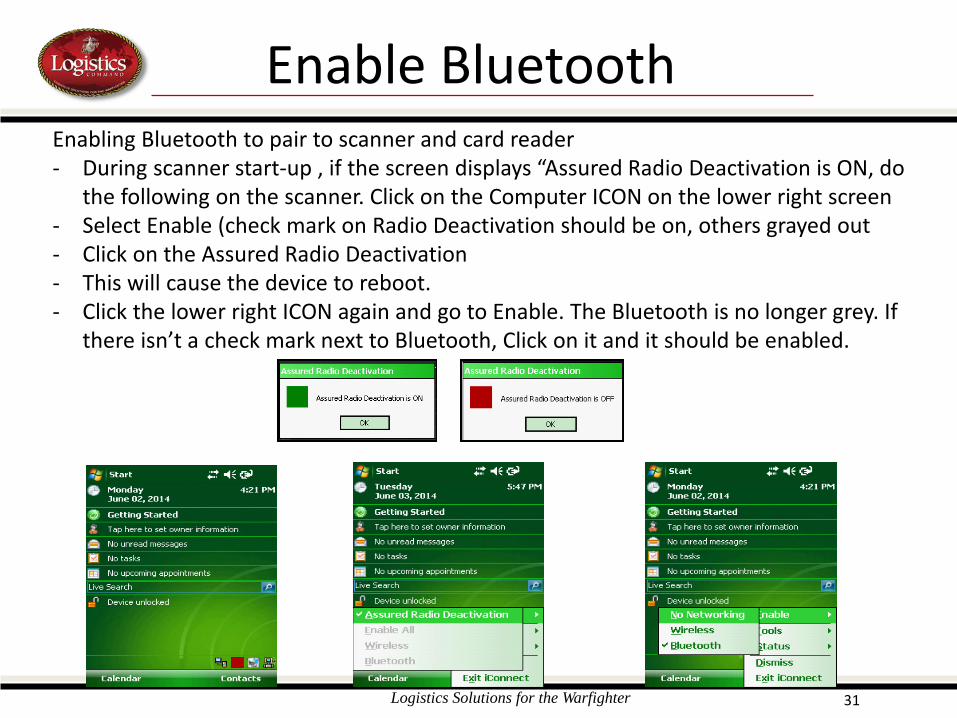
Enable Bluetooth Enabling Bluetooth to pair to scanner and card reader - During scanner start-up , if the screen displays “Assured Radio Deactivation is ON, do
the following on the scanner. Click on the Computer ICON on the lower right screen - Select Enable (check mark on Radio Deactivation should be on, others grayed out - Click on the Assured Radio Deactivation - This will cause the device to reboot. - Click the lower right ICON again and go to Enable. The Bluetooth is no longer grey. If
there isn’t a check mark next to Bluetooth, Click on it and it should be enabled.
Logistics Solutions for the Warfighter 32
Pairing Card Reader Pairing scanner to card reader - Disconnect the USB cable connecting the handheld to the PC (at the PC side) - Use the USB adapter that converts the USB Type A (big flat version) to the Mini-B
(much smaller connector). (This adapter should be included in the Apriva reader box) - Plug the USB adapter into the Apriva reader, plugging it into the PDA port (port
names are on the front bottom location of the reader, above the ports) - If the Card reader is on, turn it off - Turn the Card reader on - On Scanner go to Start -> Settings -> System -> Apriva Reader - If USB is not selected, select it - Click the Test connection button
Logistics Solutions for the Warfighter 33
Pairing Card Reader Pairing scanner to card reader - If you have the card reader on, connected to the correct port, and "restarted" the
card reader (if it was on before) you should get a pop-up. "Test connection. Connection to smart card reader is working.“
- If you do not get this message, make sure the cable is plugged into the correct port and restart the card reader
- Click the Pair button. This will take a few moments for it to complete - Once this is done you should get a message saying "Pairing complete. You may now
use the Bluetooth to connect to your reader." It might say something else if you didn't have the device paired before
- Click on the Bluetooth button - Disconnect the card reader then click the Test Connection button. It should say "Test
connection. Connection to smart card reader is working.“ The reader is now paired with your device
Logistics Solutions for the Warfighter 34
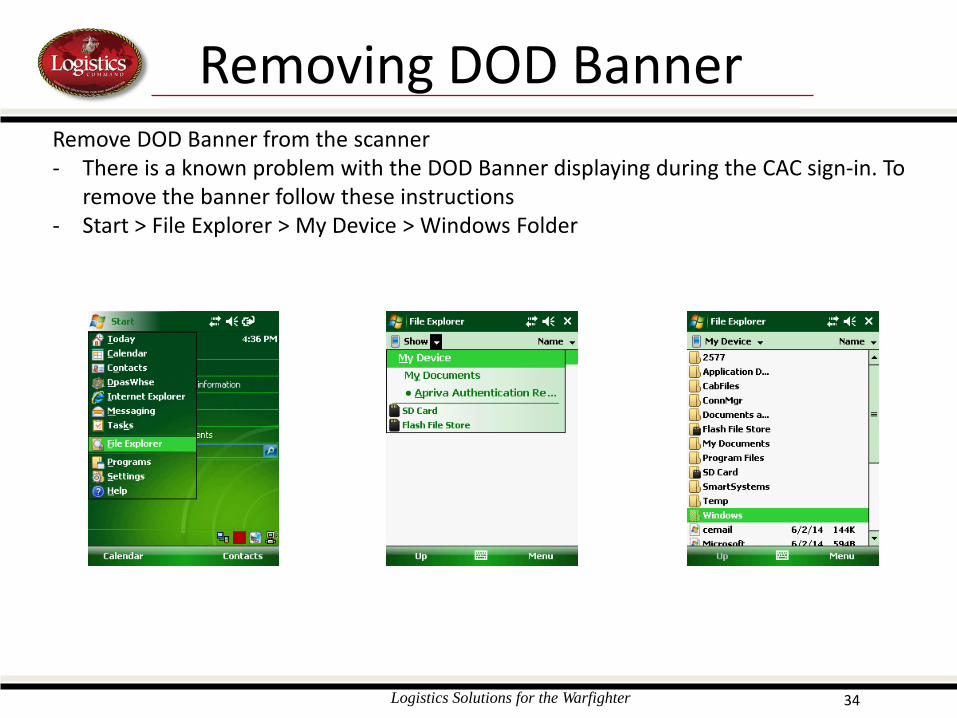
Removing DOD Banner Remove DOD Banner from the scanner - There is a known problem with the DOD Banner displaying during the CAC sign-in. To
remove the banner follow these instructions - Start > File Explorer > My Device > Windows Folder
Logistics Solutions for the Warfighter 35
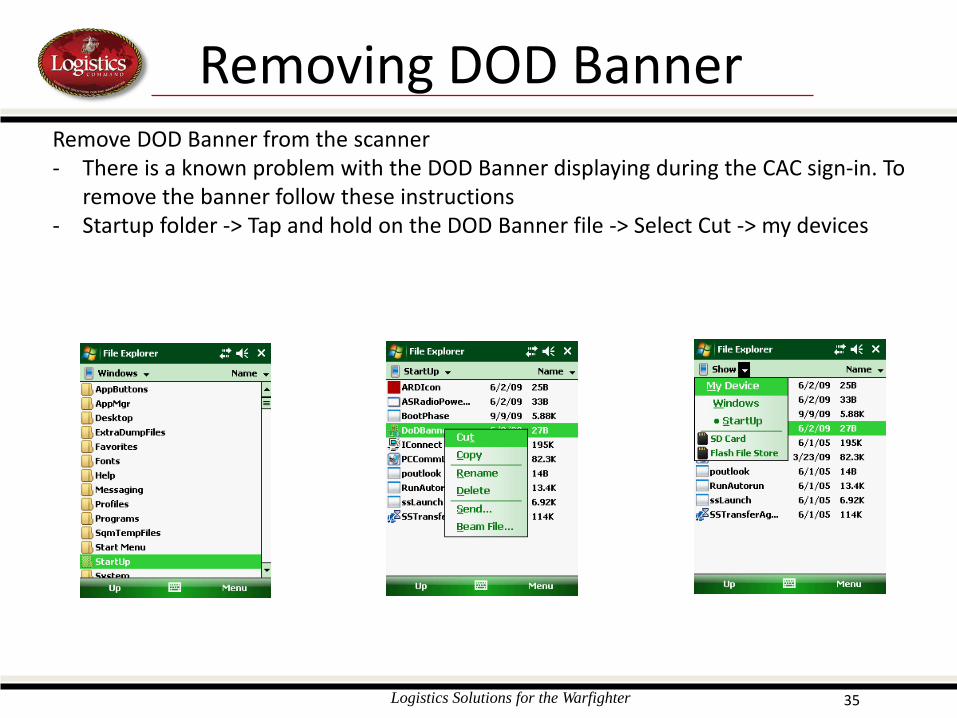
Removing DOD Banner Remove DOD Banner from the scanner - There is a known problem with the DOD Banner displaying during the CAC sign-in. To
remove the banner follow these instructions - Startup folder -> Tap and hold on the DOD Banner file -> Select Cut -> my devices
Logistics Solutions for the Warfighter 36
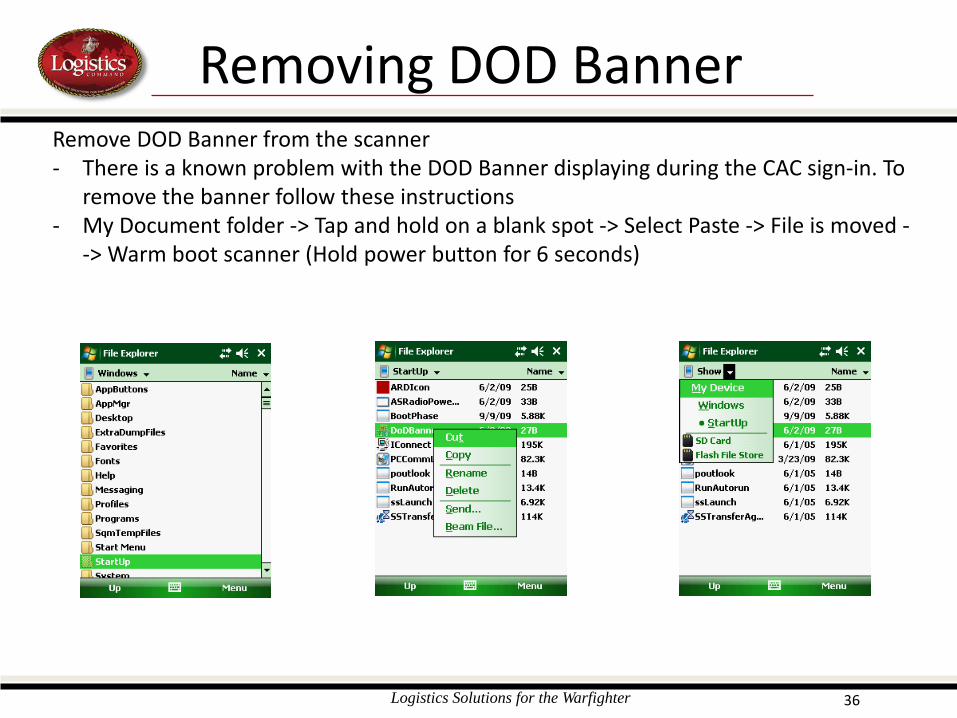
Removing DOD Banner Remove DOD Banner from the scanner - There is a known problem with the DOD Banner displaying during the CAC sign-in. To
remove the banner follow these instructions - My Document folder -> Tap and hold on a blank spot -> Select Paste -> File is moved -
-> Warm boot scanner (Hold power button for 6 seconds)
Logistics Solutions for the Warfighter 37
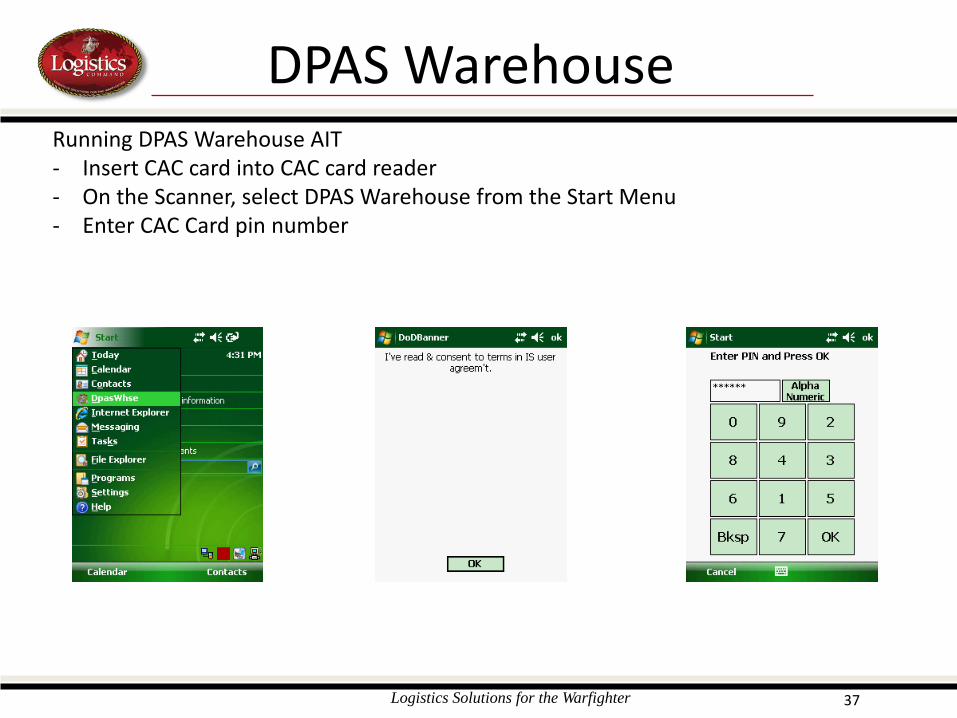
DPAS Warehouse Running DPAS Warehouse AIT - Insert CAC card into CAC card reader - On the Scanner, select DPAS Warehouse from the Start Menu - Enter CAC Card pin number

Logistics Solutions for the Warfighter 38
DPAS Warehouse Running DPAS Warehouse AIT - Acquiring certificate from CAC card - Select Data Update to download DPAS Warehouse into scanner