Embed Size (px)
Citation preview
Issue #6 september 2014
Print Friendly Patterns
Harvest Wine Tote by Jennifer Pionk Pumpkin Coasters by Theresa Grant
Little Zoo Finger Puppets by Alessandra Hayden Candy Corn Hat by Carrie Carpenter
Little Franky by Allison Hoffman Fuzzy Monster Beanie by Danyel Pink
Jack-o-Lantern Trick-or-Treat Bag by Jessica Schloss Boot & Ankle Cuffs by Salena Baca Winter Fury Hat by Kathy Lashley
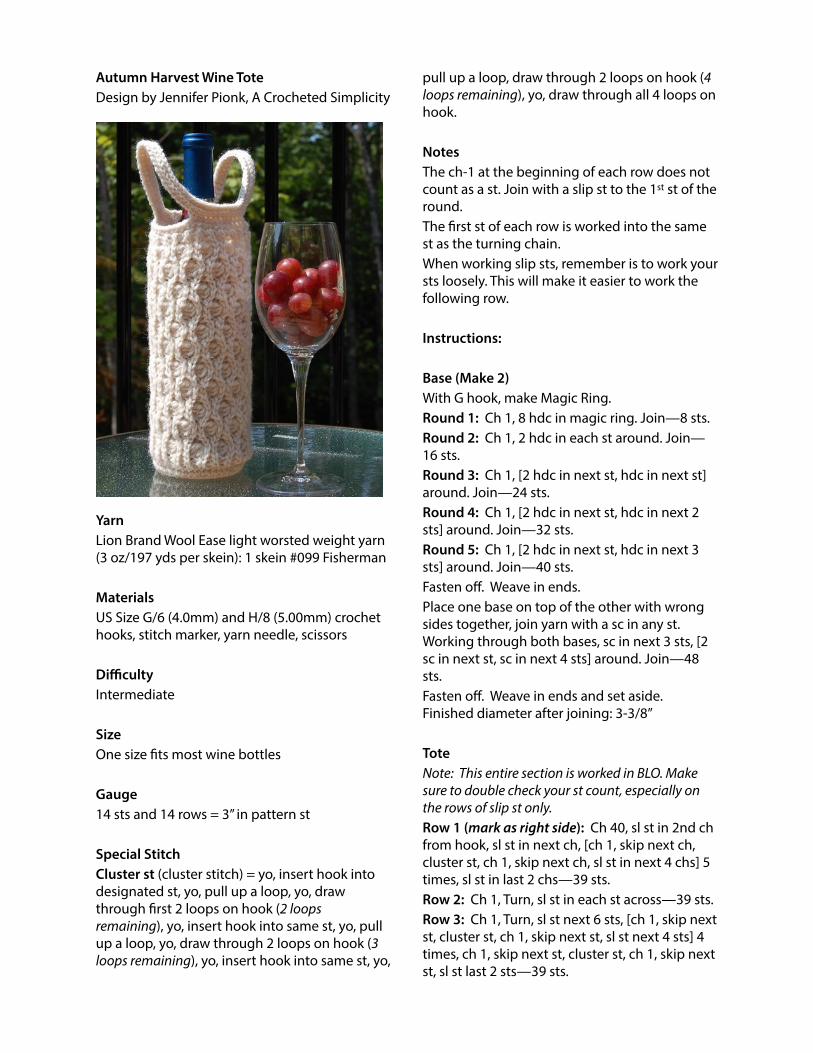
Autumn Harvest Wine Tote Design by Jennifer Pionk, A Crocheted Simplicity
Yarn Lion Brand Wool Ease light worsted weight yarn (3 oz/197 yds per skein): 1 skein #099 Fisherman
Materials US Size G/6 (4.0mm) and H/8 (5.00mm) crochet hooks, stitch marker, yarn needle, scissors
Difficulty Intermediate
Size One size fits most wine bottles
Gauge 14 sts and 14 rows = 3” in pattern st
Special Stitch Cluster st (cluster stitch) = yo, insert hook into designated st, yo, pull up a loop, yo, draw through first 2 loops on hook (2 loops remaining), yo, insert hook into same st, yo, pull up a loop, yo, draw through 2 loops on hook (3 loops remaining), yo, insert hook into same st, yo,
pull up a loop, draw through 2 loops on hook (4 loops remaining), yo, draw through all 4 loops on hook. Notes The ch-1 at the beginning of each row does not count as a st. Join with a slip st to the 1st st of the round. The first st of each row is worked into the same st as the turning chain. When working slip sts, remember is to work your sts loosely. This will make it easier to work the following row.
Instructions:
Base (Make 2) With G hook, make Magic Ring. Round 1: Ch 1, 8 hdc in magic ring. Join—8 sts. Round 2: Ch 1, 2 hdc in each st around. Join—16 sts. Round 3: Ch 1, [2 hdc in next st, hdc in next st] around. Join—24 sts. Round 4: Ch 1, [2 hdc in next st, hdc in next 2 sts] around. Join—32 sts. Round 5: Ch 1, [2 hdc in next st, hdc in next 3 sts] around. Join—40 sts. Fasten off. Weave in ends. Place one base on top of the other with wrong sides together, join yarn with a sc in any st. Working through both bases, sc in next 3 sts, [2 sc in next st, sc in next 4 sts] around. Join—48 sts. Fasten off. Weave in ends and set aside. Finished diameter after joining: 3-3/8”
Tote Note: This entire section is worked in BLO. Make sure to double check your st count, especially on the rows of slip st only. Row 1 (mark as right side): Ch 40, sl st in 2nd ch from hook, sl st in next ch, [ch 1, skip next ch, cluster st, ch 1, skip next ch, sl st in next 4 chs] 5 times, sl st in last 2 chs—39 sts. Row 2: Ch 1, Turn, sl st in each st across—39 sts. Row 3: Ch 1, Turn, sl st next 6 sts, [ch 1, skip next st, cluster st, ch 1, skip next st, sl st next 4 sts] 4 times, ch 1, skip next st, cluster st, ch 1, skip next st, sl st last 2 sts—39 sts.
Row 4: Ch 1, Turn, sl st in each st across—39 sts. Row 5: Ch 1, Turn, sl st in next 2 sts, [ch 1, skip next st, cluster st, ch 1, skip next st, sl st next 4 sts] 5 times, sl st in last 2 sts—39 sts. Rows 6-48: Repeat Rows 2-5. Do Not Fasten Off.
“Barely There” Seam Insert hook under the Front Loop of 1st st from Row 47. Fold your piece in half bringing Row 1 up to meet Row 48 (right side out). Make sure the working yarn is always on the inside of your folded piece before working into row 1. Insert hook from top to bottom through the Front Loop of Row 1. Yarn over and pull through all loops on hook to create the sl st. Repeat for each remaining st—39 sl st. Do NOT Fasten Off.
Handles Round 1 (mark as right side): With H hook, continuing on from the side seam, ch 1, sc in side of each row around. Join—48 sts. Round 2: Change to G hook, ch 1, sc in each st around. Join—48 sts. Round 3: Ch 1, sc in next 6 sts, ch 32, skip next 12 sts, sc in next 12 sts, ch 32, skip next 12 sts, sc in last 6 sts. Join—24 sts + 64 chs. Round 4: Ch 1, sc in each st and ch around. Join—88 sts. Round 5: Ch 1, sl st in each st around. Special Join Technique noted below—88 sts. Special Join Technique – Before joining, increase the last loop on your hook by pulling slightly. Remove your hook and insert it into the 1st st of the round, back to front. Place loop back on hook and pull slightly on working yarn to tighten. Pull loop through 1st st of round to complete the join. Round 6: Ch 1, sc in the sts from Round 4 (working over the sl sts from Round 5). Join—88 sts. Round 7: Ch 1, sl st in each st around. Special Join Technique noted above—88 sts. Fasten off. Weave in ends.
Joining the Tote to the Base Turn the tote inside out, line up the base with the bottom opening of the tote.
With G hook, join yarn with a sc making sure to work through both the tote and base, sc in each st around. Join—48 sts. Fasten off. Weave in ends. Turn wine tote right side out.
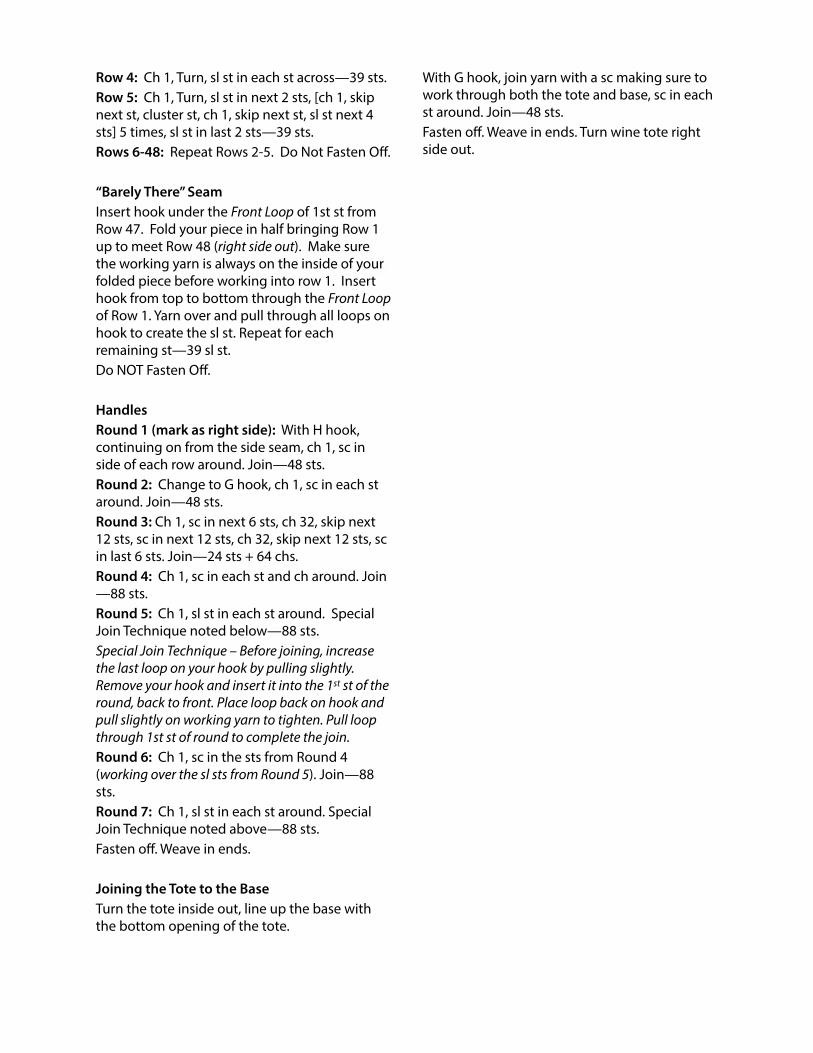
Pumpkin Coasters Design by: Theresa Grant, Unravel Me Designs
Yarn Worsted weight cotton yarn: 40 yards (A) and small amount of (B)
Materials US Size H/8 (5.0mm) crochet hook, measuring tape, yarn needle, scissors
Difficulty Beginner
Size One size - approx. 4 inches tall x 4.5 inches wide, not including stem
Gauge Not critical to this project
Note Pattern is worked in rounds. Do not turn.
Instructions:
With A, make magic ring. Round 1: Ch 3 (counts as 1st dc now and throughout), 14 dc in ring, join to top of ch-3—15 dc. Round 2: Ch 3, dc in same st as join, 2 dc in each dc around, join to top of ch-3—30 dc.
Round 3: Ch 3, [2 dc in next dc, dc in next dc] 6 times, 2 hdc in next dc, sc in next 2 dc, 2 hdc in next dc, dc in next dc, [2 dc in next dc, dc in next dc] 6 times, join to top of ch-3—44 sts. Round 4: Ch 1 (not a st), sc in next 21 sts, sl st in next 2 sts, sc in next 21 sts, join to top of first sc—44 sts. Fasten off. Finishing Join B for stem in first sl st at top center of coaster. Row 1: Ch 3, dc in same st as join, dc in next sl st—3 dc. Fasten off and weave in ends.

Little Zoo Finger Puppets Design by Alessandra Hayden, Just Be Happy Patterns
Yarn Sport Weight Yarn: 10 yds white (A) and pink (B), and small amount of black (C).
Materials US Size F/5 (3.75mm) crochet hook, scissors, yarn needle, stitch marker, polyester fiber fill
Difficulty Easy
Size Made to fit children's fingers
Gauge 4 sc and 5 rows = 1” square
Special Stitch French Knot = Thread needle. Stitch up straight through to right side. With right side facing you, wrap thread around needle twice. Stitch down into the fabric, sliding the knot off of your needle and onto your thread. Pull the thread through and fasten off.
Notes Pattern is worked in a continuous round, do NOT join unless specified. Use a stitch marker to keep track of your rounds.
Instructions:
Legs (Make 2 per puppet) With A or B, make magic ring. Round 1: Ch 1, 5 sc into ring—5 sc. Round 2: 2 sc in each sc around—10 sc. Rounds 3-11: Sc around. Fasten off after Round 11—10 sc. Round 12: Hold the two legs side by side. Now sc together one st of 1st leg and one st of 2nd leg at the same time to connect the two legs. Rounds 13-15: Sc around—20 sc. Fasten off and weave in ends.
Polar Bear Head With A, make magic ring. Round 1: Ch 1, 4 sc into ring—4 sc. Round 2: Sc around—4 sc. Round 3: 2 sc in each sc around—8 sc. Round 4: (Sc in next, 2 sc in next) 4 times—12 sc. Round 5: (Sc in next 2, 2 sc in next) 4 times—16 sc. Round 6: (Sc in next 3, 2 sc in next) 4 times—20 sc. Round 7: (Sc in next 4, 2 sc in next) 4 times—24 sc. Rounds 8-10: Sc around—24 sc. Using C and yarn needle, embroider a little nose and make two french knots for the eyes. Round 11: (Sc in next 4, sc2tog) 4 times—20 sc. Round 12: (Sc in next 3, sc2tog) 4 times—16 sc. Round 13: (Sc in next 2, sc2tog) 4 times—12 sc. Round 14: (Sc in next, sc2tog) 4 times—8 sc. Fasten off, leaving a long tail for sewing. Stuff the head with polyester fiber fill, cinch the opening closed, and sew head to the top of the legs.
Polar Bear Ears (Make 2) Round 1: With A, ch 2, 3 sc in 2nd ch from hook—3 sc. Round 2: 2 sc in each sc around—6 sc. Fasten off, leaving a long tail for sewing. Sew ears to head.
Elephant Head With B, make magic ring. Round 1: Ch 1, 4 sc into ring—4 sc. Rounds 2-6: Sc around—4 sc. Round 7: 2 sc in each sc around—8 sc.
Round 8: (Sc in next, 2 sc in next) 4 times—12 sc. Round 9: (Sc in next 2, 2 sc in next) 4 times—16 sc. Round 10: (Sc in next 3, 2 sc in next) 4 times—20 sc. Round 11: (Sc in next 4, 2 sc in next) 4 times—24 sc. Rounds 12-14: Sc around—24 sc. Using C and yarn needle, make two french knots for the eyes. Round 15: (Sc in next 4, sc2tog) 4 times—20 sc. Round 16: (Sc in next 3, sc2tog) 4 times—16 sc. Round 17: (Sc in next 2, sc2tog) 4 times—12 sc. Round 18: (Sc in next, sc2tog) 4 times—8 sc. Fasten off, leaving a long tail for sewing. Stuff the head with polyester fiber fill, cinch the opening closed, and sew head to the top of the legs.
Elephant Ears (Make 2) Round 1: With B, ch 6, 3 hdc in 3rd ch from hook, slip st into the same st, skip 2 sts, 3 hdc in last ch, slip st into same st. Fasten off, leaving a long tail for sewing. Sew ears to head.
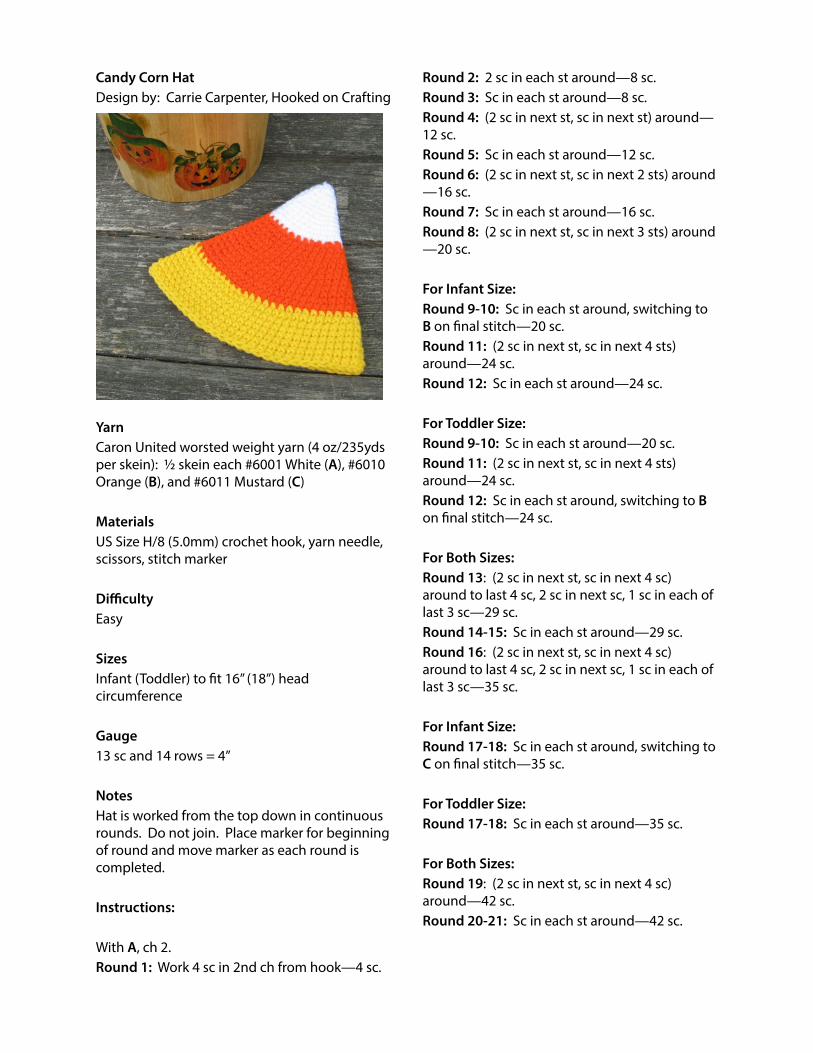
Candy Corn Hat Design by: Carrie Carpenter, Hooked on Crafting
Yarn Caron United worsted weight yarn (4 oz/235yds per skein): ½ skein each #6001 White (A), #6010 Orange (B), and #6011 Mustard (C)
Materials US Size H/8 (5.0mm) crochet hook, yarn needle, scissors, stitch marker
Difficulty Easy
Sizes Infant (Toddler) to fit 16” (18”) head circumference
Gauge 13 sc and 14 rows = 4”
Notes Hat is worked from the top down in continuous rounds. Do not join. Place marker for beginning of round and move marker as each round is completed.
Instructions:
With A, ch 2. Round 1: Work 4 sc in 2nd ch from hook—4 sc.
Round 2: 2 sc in each st around—8 sc. Round 3: Sc in each st around—8 sc. Round 4: (2 sc in next st, sc in next st) around—12 sc. Round 5: Sc in each st around—12 sc. Round 6: (2 sc in next st, sc in next 2 sts) around—16 sc. Round 7: Sc in each st around—16 sc. Round 8: (2 sc in next st, sc in next 3 sts) around—20 sc.
For Infant Size: Round 9-10: Sc in each st around, switching to B on final stitch—20 sc. Round 11: (2 sc in next st, sc in next 4 sts) around—24 sc. Round 12: Sc in each st around—24 sc.
For Toddler Size: Round 9-10: Sc in each st around—20 sc. Round 11: (2 sc in next st, sc in next 4 sts) around—24 sc. Round 12: Sc in each st around, switching to B on final stitch—24 sc.
For Both Sizes: Round 13: (2 sc in next st, sc in next 4 sc) around to last 4 sc, 2 sc in next sc, 1 sc in each of last 3 sc—29 sc. Round 14-15: Sc in each st around—29 sc. Round 16: (2 sc in next st, sc in next 4 sc) around to last 4 sc, 2 sc in next sc, 1 sc in each of last 3 sc—35 sc.
For Infant Size: Round 17-18: Sc in each st around, switching to C on final stitch—35 sc.
For Toddler Size: Round 17-18: Sc in each st around—35 sc.
For Both Sizes: Round 19: (2 sc in next st, sc in next 4 sc) around—42 sc. Round 20-21: Sc in each st around—42 sc.
Round 22: (2 sc in next st, sc in next 4 sc) around to last 2 sc, 2 sc in next sc, 1 sc in last sc—51 sc.
For Infant Size: Round 23: Sc in each st around—51 sc. Round 24: Sc in each st around—51 sc. Round 25: (2 sc in next st, sc in next 6 sc) around to last 2 sc, 2 sc in next sc, 1 sc in last sc. Fasten off—59 sc.
For Toddler Size: Round 23: Sc in each st around switching to C on final stitch—51 sc. Round 24: Sc in each st around—51 sc. Round 25: (2 sc in next st, sc in next 6 sc around to last 2 sc, 2 sc in next sc, 1 sc in last sc—59 sc. Round 26-36: Sc in each st around. Fasten off and weave in ends—59 sc.
For longer hats, additional rounds of sc may be worked.
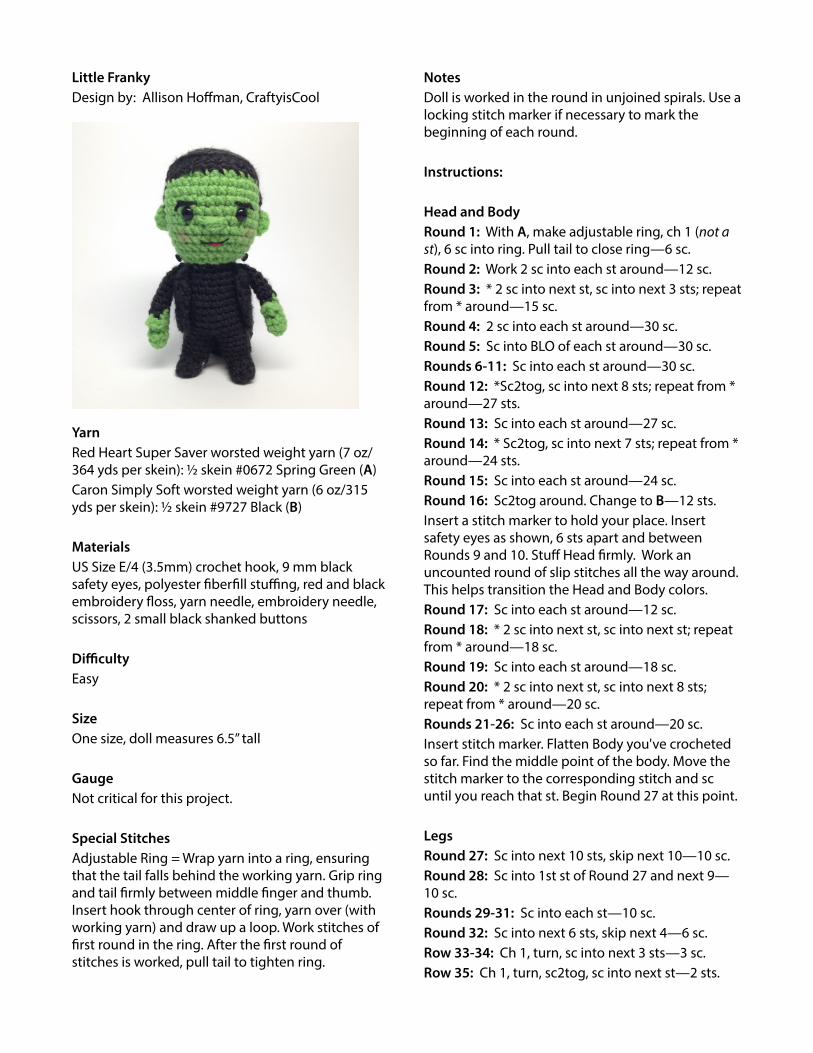
Little Franky Design by: Allison Hoffman, CraftyisCool
Yarn Red Heart Super Saver worsted weight yarn (7 oz/364 yds per skein): ½ skein #0672 Spring Green (A) Caron Simply Soft worsted weight yarn (6 oz/315 yds per skein): ½ skein #9727 Black (B)
Materials US Size E/4 (3.5mm) crochet hook, 9 mm black safety eyes, polyester fiberfill stuffing, red and black embroidery floss, yarn needle, embroidery needle, scissors, 2 small black shanked buttons
Difficulty Easy
Size One size, doll measures 6.5” tall
Gauge Not critical for this project.
Special Stitches Adjustable Ring = Wrap yarn into a ring, ensuring that the tail falls behind the working yarn. Grip ring and tail firmly between middle finger and thumb. Insert hook through center of ring, yarn over (with working yarn) and draw up a loop. Work stitches of first round in the ring. After the first round of stitches is worked, pull tail to tighten ring.
Notes Doll is worked in the round in unjoined spirals. Use a locking stitch marker if necessary to mark the beginning of each round.
Instructions:
Head and Body Round 1: With A, make adjustable ring, ch 1 (not a st), 6 sc into ring. Pull tail to close ring—6 sc. Round 2: Work 2 sc into each st around—12 sc. Round 3: * 2 sc into next st, sc into next 3 sts; repeat from * around—15 sc. Round 4: 2 sc into each st around—30 sc. Round 5: Sc into BLO of each st around—30 sc. Rounds 6-11: Sc into each st around—30 sc. Round 12: *Sc2tog, sc into next 8 sts; repeat from * around—27 sts. Round 13: Sc into each st around—27 sc. Round 14: * Sc2tog, sc into next 7 sts; repeat from * around—24 sts. Round 15: Sc into each st around—24 sc. Round 16: Sc2tog around. Change to B—12 sts. Insert a stitch marker to hold your place. Insert safety eyes as shown, 6 sts apart and between Rounds 9 and 10. Stuff Head firmly. Work an uncounted round of slip stitches all the way around. This helps transition the Head and Body colors. Round 17: Sc into each st around—12 sc. Round 18: * 2 sc into next st, sc into next st; repeat from * around—18 sc. Round 19: Sc into each st around—18 sc. Round 20: * 2 sc into next st, sc into next 8 sts; repeat from * around—20 sc. Rounds 21-26: Sc into each st around—20 sc. Insert stitch marker. Flatten Body you've crocheted so far. Find the middle point of the body. Move the stitch marker to the corresponding stitch and sc until you reach that st. Begin Round 27 at this point.
Legs Round 27: Sc into next 10 sts, skip next 10—10 sc. Round 28: Sc into 1st st of Round 27 and next 9—10 sc. Rounds 29-31: Sc into each st—10 sc. Round 32: Sc into next 6 sts, skip next 4—6 sc. Row 33-34: Ch 1, turn, sc into next 3 sts—3 sc. Row 35: Ch 1, turn, sc2tog, sc into next st—2 sts.
Row 36: Ch 1, turn, sc into next st, 2 sc into next st —3 sc. Rows 37-40: Ch 1, turn, sc into each st—3 sc. Fasten off and leave a long tail for sewing. Re-join B at back of doll, at 11th st of Round 26. Repeat Rounds 27-31. Round 32: Sc into each st around—10 sts. Row 33-34: Ch 1, turn, sc into next 3 sts—3 sc. Row 35: Ch 1, turn, sc2tog, sc into next st—2 sts. Row 36: Ch 1, turn, sc into next st, 2 sc into next st —3 sc. Rows 37-40: Ch 1, turn, sc into each st—3 sc. Fasten off and leave a long tail for sewing. Stuff Body and Legs firmly. Fold flaps back at the bottom of legs, lining up Row 40 with the back of the leg at Round 32 to form feet. Sew along edges of feet all the way around.
Jacket With B, ch 18. Row 1: 2 hdc into 3rd ch from hook, hdc into next 14 chs, 2 hdc into last ch—18 hdc. Row 2: Ch 2, turn, 2 hdc into 1st st, hdc into next 16 sts, 2 hdc into last st—20 hdc. Rows 3-6: Ch 2, turn, hdc in each st across—20 hdc. Fasten off and leave a long tail for sewing. Wrap Jacket around Body and stitch into place with the yarn tail and yarn needle.
Arms (Make 2) Round 1: With A, make adjustable ring, ch 1, 5 sc into ring. Pull tail to close ring—5 sc. Rounds 2-3: Sc into each st around—5 sc. Round 4: Sc into FLO of next st, ch 2, sl st into FLO of same st, sc into next 4 sts—5 sc. Round 5: Sc into BLO of next st, sc into next 4 sts. Change to B—5 sc. Rounds 6-13: Sc into each st around—5 sc. Fasten off and leave a long tail for sewing. It is not necessary to stuff the arms. Sew each Arm to the Body at the neckline.
Hair Round 1: Starting at the top of the Hair, with B, make adjustable ring, ch 1, 6 sc into ring. Pull tail to close ring—6 sc. Round 2: 2 sc into each st around—12 sc.
Round 3: * 2 sc into next st, sc into next 3 sts; repeat from *around—15 sc. Round 4: 2 sc into each st around—30 sc. Round 5: Sc into BLO of each st around—30 sc. Rounds 6-7: Sc into each st around—30 sc. Row 8: Ch 1, turn, sc into 18 sts—18 sc. Rows 9-10: Ch 1, turn, sc into each st across—18 sts. Row 11: Ch 1, turn, sc2tog, sc into 14 sts, sc2tog—16 sts. Row 12: Ch 1, turn, sc2tog, sc into 12 sts, sc2tog—14 sts. Row 13: Ch 1, turn, sc into each st across—14 sc. Fasten off and leave a long tail for sewing. With yarn needle, sew the Hair to the Head with Rows 8-13 at the back of the Head. As you sew the front of the Hair, make longer stitches down the front to mimic short bangs down over Franky’s forehead.
Ears (Make two) Round 1: With A, make adjustable ring, ch 1, 4 sc into ring. Pull tail to close ring—4 sc. Fasten off and leave a long tail for sewing. Use a yarn needle to sew Ears to the sides of the Head.
Finishing For the nose, thread a yarn needle with a long strand of A. Come up between Rounds 10 and 11 of the Head and make several horizontal loose stitches about 2 sc stitches wide. Refer to photo. Keeping these stitches loose will give the nose dimension. Knot the yarn and weave back inside the Head. Use an embroidery needle and black embroidery floss to make a mouth. Come up at one side, make a loose straight stitch across, back down on the other side, then come up at the middle of the smile, tacking down the loose straight stitch in a smile shape. Add a small stitch of red embroidery floss just underneath the black. Refer to photo. Use a yarn needle and a short length of black yarn to make eyebrows. One vertical stitch and one longer horizontal stitch should be connected for each eyebrow. With an embroidery needle and black embroidery floss, sew each black shanked button to the each side of the neck as shown. Weave in all ends. Apply a small amount of pink blush to each cheek with your fingertip.
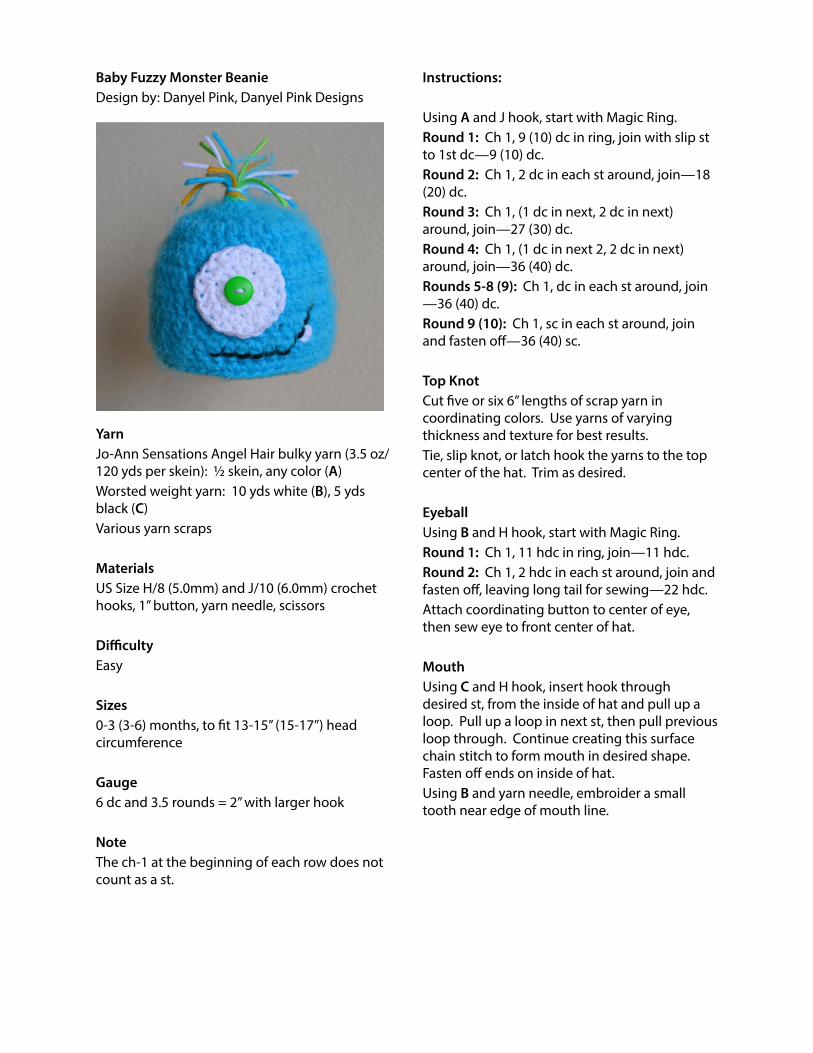
Baby Fuzzy Monster Beanie Design by: Danyel Pink, Danyel Pink Designs
Yarn Jo-Ann Sensations Angel Hair bulky yarn (3.5 oz/120 yds per skein): ½ skein, any color (A) Worsted weight yarn: 10 yds white (B), 5 yds black (C) Various yarn scraps
Materials US Size H/8 (5.0mm) and J/10 (6.0mm) crochet hooks, 1” button, yarn needle, scissors
Difficulty Easy
Sizes 0-3 (3-6) months, to fit 13-15” (15-17”) head circumference
Gauge 6 dc and 3.5 rounds = 2” with larger hook
Note The ch-1 at the beginning of each row does not count as a st.
Instructions:
Using A and J hook, start with Magic Ring. Round 1: Ch 1, 9 (10) dc in ring, join with slip st to 1st dc—9 (10) dc. Round 2: Ch 1, 2 dc in each st around, join—18 (20) dc. Round 3: Ch 1, (1 dc in next, 2 dc in next) around, join—27 (30) dc. Round 4: Ch 1, (1 dc in next 2, 2 dc in next) around, join—36 (40) dc. Rounds 5-8 (9): Ch 1, dc in each st around, join—36 (40) dc. Round 9 (10): Ch 1, sc in each st around, join and fasten off—36 (40) sc.
Top Knot Cut five or six 6” lengths of scrap yarn in coordinating colors. Use yarns of varying thickness and texture for best results. Tie, slip knot, or latch hook the yarns to the top center of the hat. Trim as desired.
Eyeball Using B and H hook, start with Magic Ring. Round 1: Ch 1, 11 hdc in ring, join—11 hdc. Round 2: Ch 1, 2 hdc in each st around, join and fasten off, leaving long tail for sewing—22 hdc. Attach coordinating button to center of eye, then sew eye to front center of hat.
Mouth Using C and H hook, insert hook through desired st, from the inside of hat and pull up a loop. Pull up a loop in next st, then pull previous loop through. Continue creating this surface chain stitch to form mouth in desired shape. Fasten off ends on inside of hat. Using B and yarn needle, embroider a small tooth near edge of mouth line.
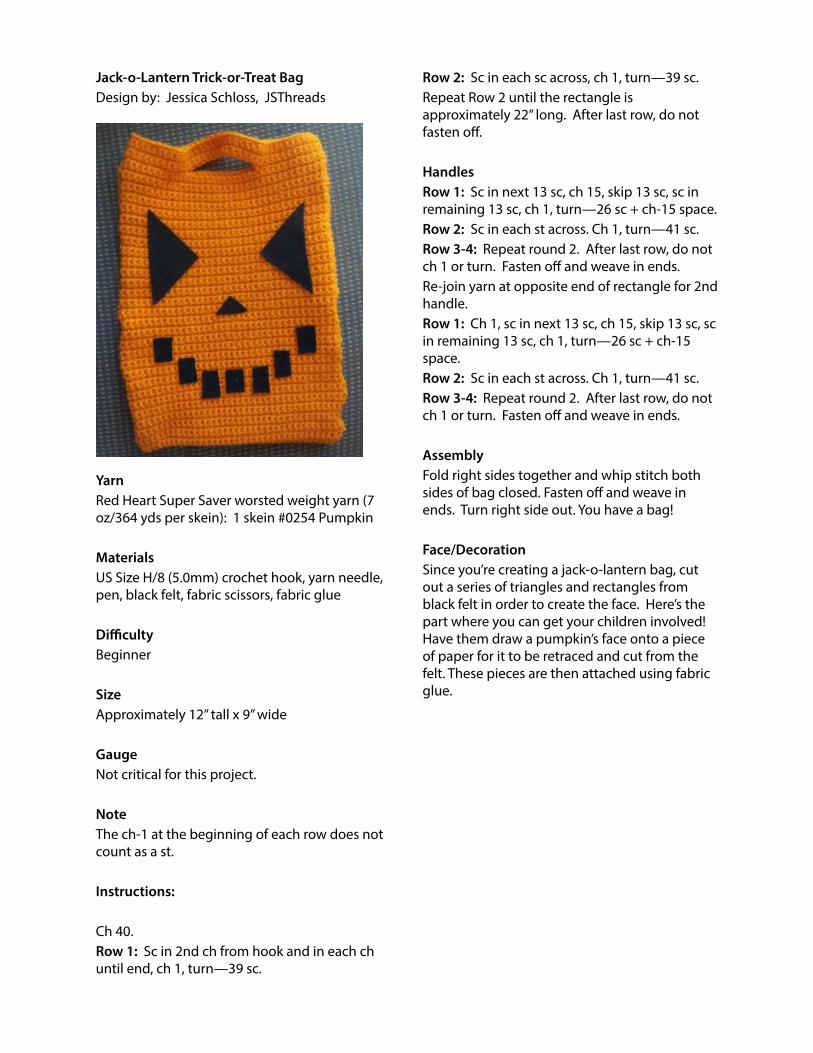
Jack-o-Lantern Trick-or-Treat Bag Design by: Jessica Schloss, JSThreads
Yarn Red Heart Super Saver worsted weight yarn (7 oz/364 yds per skein): 1 skein #0254 Pumpkin
Materials US Size H/8 (5.0mm) crochet hook, yarn needle, pen, black felt, fabric scissors, fabric glue
Difficulty Beginner
Size Approximately 12” tall x 9” wide
Gauge Not critical for this project.
Note The ch-1 at the beginning of each row does not count as a st.
Instructions:
Ch 40. Row 1: Sc in 2nd ch from hook and in each ch until end, ch 1, turn—39 sc.
Row 2: Sc in each sc across, ch 1, turn—39 sc. Repeat Row 2 until the rectangle is approximately 22” long. After last row, do not fasten off.
Handles Row 1: Sc in next 13 sc, ch 15, skip 13 sc, sc in remaining 13 sc, ch 1, turn—26 sc + ch-15 space. Row 2: Sc in each st across. Ch 1, turn—41 sc. Row 3-4: Repeat round 2. After last row, do not ch 1 or turn. Fasten off and weave in ends. Re-join yarn at opposite end of rectangle for 2nd handle. Row 1: Ch 1, sc in next 13 sc, ch 15, skip 13 sc, sc in remaining 13 sc, ch 1, turn—26 sc + ch-15 space. Row 2: Sc in each st across. Ch 1, turn—41 sc. Row 3-4: Repeat round 2. After last row, do not ch 1 or turn. Fasten off and weave in ends.
Assembly Fold right sides together and whip stitch both sides of bag closed. Fasten off and weave in ends. Turn right side out. You have a bag!
Face/Decoration Since you’re creating a jack-o-lantern bag, cut out a series of triangles and rectangles from black felt in order to create the face. Here’s the part where you can get your children involved! Have them draw a pumpkin’s face onto a piece of paper for it to be retraced and cut from the felt. These pieces are then attached using fabric glue.
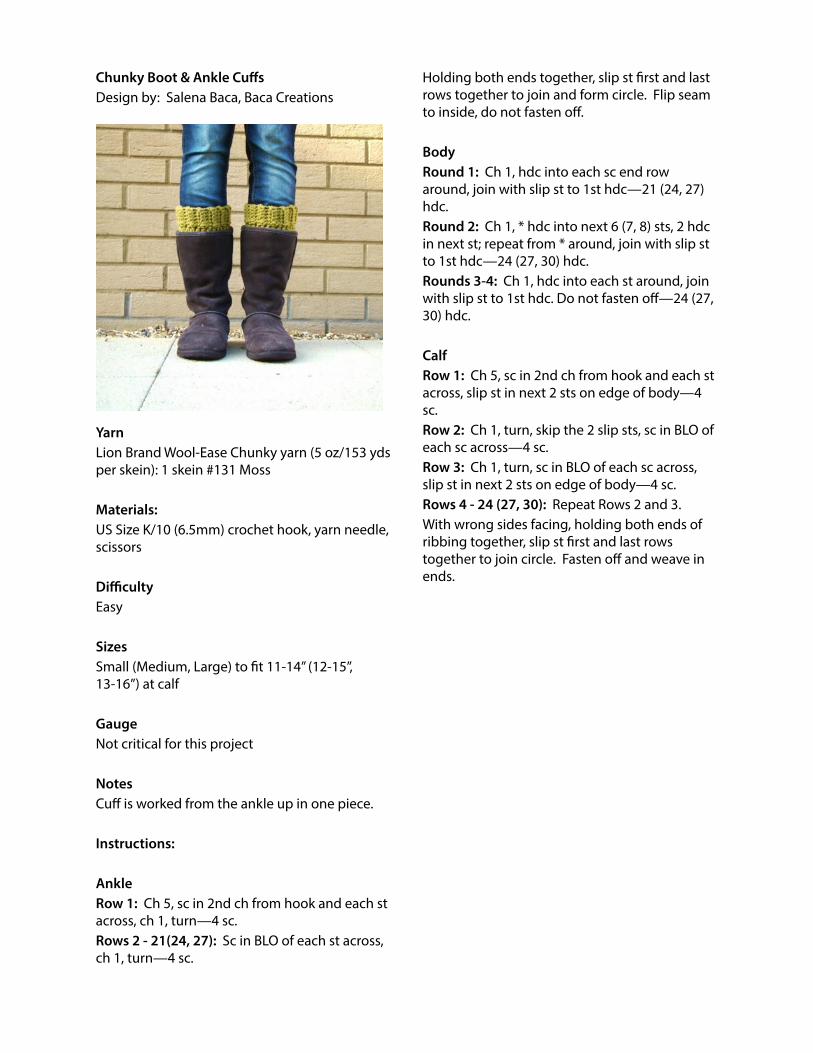
Chunky Boot & Ankle Cuffs Design by: Salena Baca, Baca Creations
Yarn Lion Brand Wool-Ease Chunky yarn (5 oz/153 yds per skein): 1 skein #131 Moss
Materials: US Size K/10 (6.5mm) crochet hook, yarn needle, scissors
Difficulty Easy
Sizes Small (Medium, Large) to fit 11-14” (12-15”, 13-16”) at calf
Gauge Not critical for this project
Notes Cuff is worked from the ankle up in one piece.
Instructions:
Ankle Row 1: Ch 5, sc in 2nd ch from hook and each st across, ch 1, turn—4 sc. Rows 2 - 21(24, 27): Sc in BLO of each st across, ch 1, turn—4 sc.
Holding both ends together, slip st first and last rows together to join and form circle. Flip seam to inside, do not fasten off.
Body Round 1: Ch 1, hdc into each sc end row around, join with slip st to 1st hdc—21 (24, 27) hdc. Round 2: Ch 1, * hdc into next 6 (7, 8) sts, 2 hdc in next st; repeat from * around, join with slip st to 1st hdc—24 (27, 30) hdc. Rounds 3-4: Ch 1, hdc into each st around, join with slip st to 1st hdc. Do not fasten off—24 (27, 30) hdc.
Calf Row 1: Ch 5, sc in 2nd ch from hook and each st across, slip st in next 2 sts on edge of body—4 sc. Row 2: Ch 1, turn, skip the 2 slip sts, sc in BLO of each sc across—4 sc. Row 3: Ch 1, turn, sc in BLO of each sc across, slip st in next 2 sts on edge of body—4 sc. Rows 4 - 24 (27, 30): Repeat Rows 2 and 3. With wrong sides facing, holding both ends of ribbing together, slip st first and last rows together to join circle. Fasten off and weave in ends.
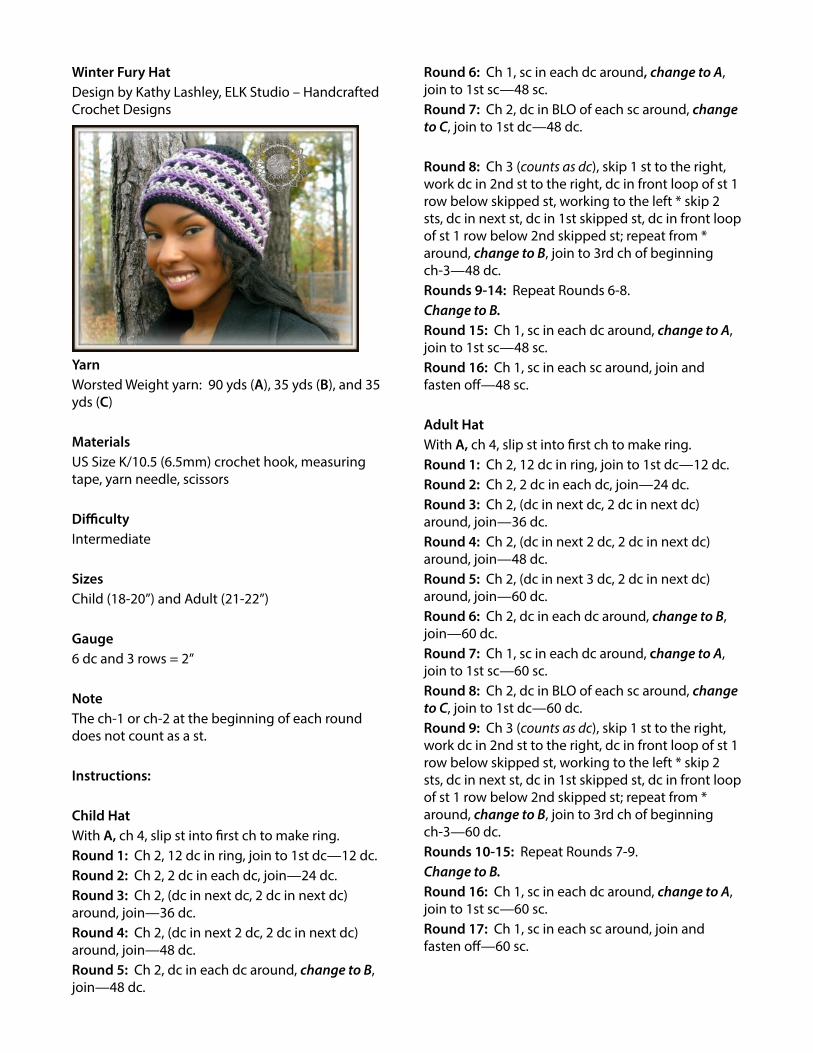
Winter Fury Hat Design by Kathy Lashley, ELK Studio – Handcrafted Crochet Designs
Yarn Worsted Weight yarn: 90 yds (A), 35 yds (B), and 35 yds (C)
Materials US Size K/10.5 (6.5mm) crochet hook, measuring tape, yarn needle, scissors
Difficulty Intermediate
Sizes Child (18-20”) and Adult (21-22”)
Gauge 6 dc and 3 rows = 2”
Note The ch-1 or ch-2 at the beginning of each round does not count as a st.
Instructions:
Child Hat With A, ch 4, slip st into first ch to make ring. Round 1: Ch 2, 12 dc in ring, join to 1st dc—12 dc. Round 2: Ch 2, 2 dc in each dc, join—24 dc. Round 3: Ch 2, (dc in next dc, 2 dc in next dc) around, join—36 dc. Round 4: Ch 2, (dc in next 2 dc, 2 dc in next dc) around, join—48 dc. Round 5: Ch 2, dc in each dc around, change to B, join—48 dc.
Round 6: Ch 1, sc in each dc around, change to A, join to 1st sc—48 sc. Round 7: Ch 2, dc in BLO of each sc around, change to C, join to 1st dc—48 dc.
Round 8: Ch 3 (counts as dc), skip 1 st to the right, work dc in 2nd st to the right, dc in front loop of st 1 row below skipped st, working to the left * skip 2 sts, dc in next st, dc in 1st skipped st, dc in front loop of st 1 row below 2nd skipped st; repeat from * around, change to B, join to 3rd ch of beginning ch-3—48 dc. Rounds 9-14: Repeat Rounds 6-8. Change to B. Round 15: Ch 1, sc in each dc around, change to A, join to 1st sc—48 sc. Round 16: Ch 1, sc in each sc around, join and fasten off—48 sc.
Adult Hat With A, ch 4, slip st into first ch to make ring. Round 1: Ch 2, 12 dc in ring, join to 1st dc—12 dc. Round 2: Ch 2, 2 dc in each dc, join—24 dc. Round 3: Ch 2, (dc in next dc, 2 dc in next dc) around, join—36 dc. Round 4: Ch 2, (dc in next 2 dc, 2 dc in next dc) around, join—48 dc. Round 5: Ch 2, (dc in next 3 dc, 2 dc in next dc) around, join—60 dc. Round 6: Ch 2, dc in each dc around, change to B, join—60 dc. Round 7: Ch 1, sc in each dc around, change to A, join to 1st sc—60 sc. Round 8: Ch 2, dc in BLO of each sc around, change to C, join to 1st dc—60 dc. Round 9: Ch 3 (counts as dc), skip 1 st to the right, work dc in 2nd st to the right, dc in front loop of st 1 row below skipped st, working to the left * skip 2 sts, dc in next st, dc in 1st skipped st, dc in front loop of st 1 row below 2nd skipped st; repeat from * around, change to B, join to 3rd ch of beginning ch-3—60 dc. Rounds 10-15: Repeat Rounds 7-9. Change to B. Round 16: Ch 1, sc in each dc around, change to A, join to 1st sc—60 sc. Round 17: Ch 1, sc in each sc around, join and fasten off—60 sc.


![Women’s medium/Men’s me- Needles: Size 2 (2.75mm) double Yarn: MC Argosy Luxury ... · 2010. 10. 27. · Yarn: MC - Argosy Luxury Fibers Hanna Sport, Blue Mills (1 [1] skein)](https://img.pdfslide.net/doc/110x75/5fdc5c35c16c64165a4a10e1/womenas-mediummenas-me-needles-size-2-275mm-double-yarn-mc-argosy-luxury.jpg)