Embed Size (px)
Citation preview
KAYAKING
A Scout Is Trustworty. Please do not copy or distribute this electronic version.

How to Use This PamphletThe secret to successfully earning a merit badge is for you to use both the pamphlet and the suggestions of your counselor.
Your counselor can be as important to you as a coach is to an athlete. Use all of the resources your counselor can make available to you. This may be the best chance you will have to learn about this particular subject. Make it count.
If you or your counselor feels that any information in this pamphlet is incorrect, please let us know. Please state your source of information.
Merit badge pamphlets are reprinted annually and requirements updated regularly. Your suggestions for improvement are welcome.
Who Pays for This Pamphlet?This merit badge pamphlet is one in a series of more than 100 covering all kinds of hobby and career subjects. It is made available for you to buy as a service of the national and local councils, Boy Scouts of America. The costs of the development, writing, and editing of the merit badge pamphlets are paid for by the Boy Scouts of America in order to bring you the best book at a reasonable price.g y p
Send comments along with a brief statement about yourself to National Advancement Committee, S209 • Boy Scouts of America • 1325 West Walnut Hill Lane • P.O. Box 152079 • Irving, TX 75015-2079 • [email protected].
A Scout Is Trustworty. Please do not copy or distribute this electronic version.
kayaking
BOy SCOUTS OF aMERiCaMERiT BaDgE SERiES
A Scout Is Trustworty. Please do not copy or distribute this electronic version.
Note to the CounselorWhile Kayaking merit badge counselors may have formal training in kayaking and paddle craft instruction, it is not required. The objective is to have standard qualifications for merit badge counselors. The Boy Scouts of America’s risk manage-ment plans call for certain qualifications for particular activities, such as those on the water. However, merit badge counselors have the option of achieving these qualifications for themselves, or, when those activities are taking place, they may use the services of others so qualified.
It is permissible for councils to “raise the bar” and approve only those counselors who meet certain qualifications—but this is strictly a council-based decision. It is also permissible, of course, for the National Council or a local council to establish standards for camps or events offering merit badges that include activities requiring special qualifications.
Kayaking instruction should follow the information and techniques presented in this pamphlet. Supplemental information and additional strokes should not be introduced until the basic requirements are met. The learning objectives emphasize safety and basic skills proficiency for solo kayaking. Participants in kayaking instruc-tion should understand and appreciate the limits of their ability and experience. It is the merit badge counselor’s responsibility to follow all BSA safety policies, especially the nine points of Safety Afloat. Although earning the Kayaking merit badge can help prepare a Scout for paddling on moving water, it does not constitute the special training required to participate in a whitewater activity. This merit badge can be earned concurrently with the Kayaking BSA Award, but earning one does not automatically qualify the Scout as earning the other.
Teaching Conditions and EquipmentThis merit badge should be taught on quiet water without significant wind, waves, or current. The boats should be hard-shell kayaks with large, open cockpits from which the Scout can easily perform a wet exit, or they should be sit-on-tops or inflatable crafts. The boats should preferably be solo boats, and all testing should be done with the Scout as a solo paddler. A kayak with a spray skirt should be permitted only when the Scout has had prior kayak training and is able to perform a wet exit with a skirt to the counselor’s satisfaction.
35702ISBN 978-0-8395-0010-0©2012 Boy Scouts of America2012 Printing
A Scout Is Trustworty. Please do not copy or distribute this electronic version.
kayaking 3
Requirements 1. Do the following:
a. Explain to your counselor the hazards you are most likely to encounter while participating in kayaking activities, including weather and water-related hazards, and what you should do to anticipate, help prevent, mitigate, and respond to these hazards.
b. Review prevention, symptoms, and first-aid treatment for the following injuries or illnesses that can occur while kayaking: blisters, cold-water shock and hypothermia, heat-related illnesses, dehydration, sunburn, sprains, and strains.
c. Review the BSA Safety Afloat policy. Explain to your counselor how this applies to kayaking.
2. Before doing requirements 3 through 9, successfully complete the BSA swimmer test: Jump feetfirst into water over the head in depth. Level off and swim 75 yards in a strong manner using one or more of the following strokes: sidestroke, breaststroke, trudgen, or crawl; then swim 25 yards using an easy, resting backstroke. The 100 yards must be completed in one swim without stops and must include at least one sharp turn. After completing the swim, rest by floating.
3. Do the following:
a. Review the characteristics of life jackets most appropriate for kayaking and understand why one must always be worn while paddling. Then demonstrate how to select and fit a life jacket for kayaking.
b. Review the importance of safety equipment such as a signal device, extra paddle, sponge, bilge pump, and throw bag.
4. Do the following:
a. Name and point out the major parts of a kayak.
b. Review the differences in the design between recreational, whitewater, and sea or touring kayaks. Include how length, width, stability, and rocker are involved in the design of each type.
c. Review the advantages and disadvantages of the materials most commonly used to make kayaks. Explain the care, maintenance, and storage of a kayak.
d. Using the trucker’s hitch and bowline, demonstrate how to secure a kayak to a rack on a vehicle or a trailer, or to a rack on land.
A Scout Is Trustworty. Please do not copy or distribute this electronic version.
4 kayaking
5. Discuss the following:
a. How to choose a kayak paddle.
b. The different materials from which paddles are made, parts of a paddle, and the care and maintenance of a paddle.
6. Using a properly equipped kayak with an open cockpit, a sit-on-top, or an inflatable kayak, do the following:
a. Safely capsize and perform a wet exit.
b. Reenter the kayak with assistance from a buddy boat.
c. Demonstrate a kayak-over-kayak rescue.
d. Demonstrate the HELP position.
e. Capsize the kayak, swim it and the paddle to shore, and empty water from the kayak with assistance, if needed.
7. As a solo paddler, use a properly equipped kayak to demonstrate the following:
a. Forward stroke
b. Backstroke
c. Forward sweep
d. Reverse sweep
e. Draw stroke
f. Stern draw
8. As a solo paddler, use a properly equipped kayak to demonstrate the following:
a. Paddle a straight line for 25 yards, make a sharp turn, and return 25 yards in a straight line.
b. Spin or pivot 360 degrees to the right and 360 degrees to the left.
c. Move abeam to the right 10 feet and to the left 10 feet.
d. Stop the boat in one boat length.
e. Paddle a buoyed course of a length determined by your counselor that includes two right turns and two left turns performed while under way.
A Scout Is Trustworty. Please do not copy or distribute this electronic version.
kayaking 5
Contents
Introduction . . . . . . . . . . . . . . . . . . . . . . . . . . . . . . . . . . . . . 7
Safety and First Aid . . . . . . . . . . . . . . . . . . . . . . . . . . . . . . . . 9
Kayaks and Equipment . . . . . . . . . . . . . . . . . . . . . . . . . . . . 25
Transportation and Rescues . . . . . . . . . . . . . . . . . . . . . . . . . 45
Skills and Maneuvers . . . . . . . . . . . . . . . . . . . . . . . . . . . . . . 61
Glossary . . . . . . . . . . . . . . . . . . . . . . . . . . . . . . . . . . . . . . . 80
Kayaking Resources . . . . . . . . . . . . . . . . . . . . . . . . . . . . . . . 83
A Scout Is Trustworty. Please do not copy or distribute this electronic version.
A Scout Is Trustworty. Please do not copy or distribute this electronic version.
kayaking 7
.introduction
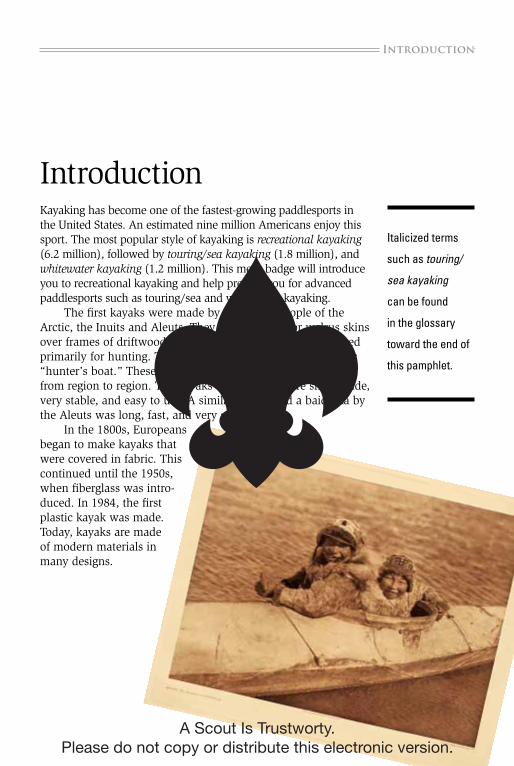
IntroductionKayaking has become one of the fastest-growing paddlesports in the United States. An estimated nine million Americans enjoy this sport. The most popular style of kayaking is recreational kayaking (6.2 million), followed by touring/sea kayaking (1.8 million), and whitewater kayaking (1.2 million). This merit badge will introduce you to recreational kayaking and help prepare you for advanced paddlesports such as touring/sea and whitewater kayaking.
The first kayaks were made by the native people of the Arctic, the Inuits and Aleuts. They stretched seal or walrus skins over frames of driftwood or whale bones. The boats were used primarily for hunting. The word kayak in Inuit actually means “hunter’s boat.” These early kayaks varied greatly in design from region to region. The kayaks of the Inuits were short, wide, very stable, and easy to use. A similar boat called a baidarka by the Aleuts was long, fast, and very seaworthy.
In the 1800s, Europeans began to make kayaks that were covered in fabric. This continued until the 1950s, when fiberglass was intro-duced. In 1984, the first plastic kayak was made. Today, kayaks are made of modern materials in many designs.
Italicized terms
such as touring/
sea kayaking
can be found
in the glossary
toward the end of
this pamphlet.
A Scout Is Trustworty. Please do not copy or distribute this electronic version.
A Scout Is Trustworty. Please do not copy or distribute this electronic version.
kayaking 9
.Safety and First aid
Safety and First AidWhen you are earning any of the aquatic merit badges, it is important to follow safety rules and use self-discipline and good judgment.
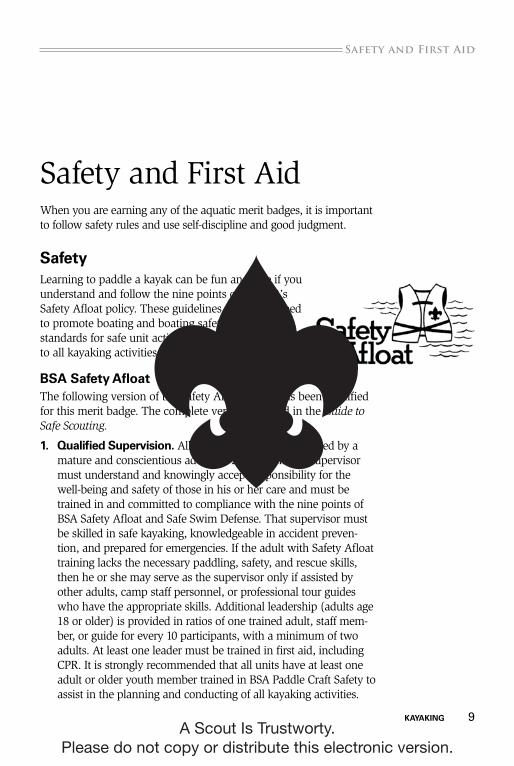
SafetyLearning to paddle a kayak can be fun and safe if you understand and follow the nine points of the BSA’s Safety Afloat policy. These guidelines were developed to promote boating and boating safety and to set standards for safe unit activity afloat. They apply to all kayaking activities.
BSa Safety afloatThe following version of the Safety Afloat policy has been modified for this merit badge. The complete version is found in the Guide to Safe Scouting.
1. Qualified Supervision. All kayaking must be supervised by a mature and conscientious adult age 21 or older. The supervisor must understand and knowingly accept responsibility for the well-being and safety of those in his or her care and must be trained in and committed to compliance with the nine points of BSA Safety Afloat and Safe Swim Defense. That supervisor must be skilled in safe kayaking, knowledgeable in accident preven-tion, and prepared for emergencies. If the adult with Safety Afloat training lacks the necessary paddling, safety, and rescue skills, then he or she may serve as the supervisor only if assisted by other adults, camp staff personnel, or professional tour guides who have the appropriate skills. Additional leadership (adults age 18 or older) is provided in ratios of one trained adult, staff mem-ber, or guide for every 10 participants, with a minimum of two adults. At least one leader must be trained in first aid, including CPR. It is strongly recommended that all units have at least one adult or older youth member trained in BSA Paddle Craft Safety to assist in the planning and conducting of all kayaking activities.
A Scout Is Trustworty. Please do not copy or distribute this electronic version.
10 kayaking
Safety and First aid.
2. Personal Health Review. All participants must provide a complete health history, signed by a physician, parent, or legal guardian, as evidence of fitness for kayaking activities. Participants should let their leaders know if they have had any recent illnesses or injuries so supervision and protection can be adjusted to anticipate potential risks. For significant health conditions, the adult supervisor should require an examination by a physician and consult with parent, guardian, or caregiver for appropriate precautions.
3. Swimming ability. Operation of a kayak is limited to youth and adults who have completed the annual BSA swimmer classification test: Jump feetfirst into water over the head in depth. Swim 75 yards in a strong manner using one or more of the following strokes: sidestroke, breaststroke, trudgen, or crawl; then swim 25 yards using an easy, resting backstroke. The 100 yards must be completed in one swim without stops and must include at least one sharp turn. After completing the swim, rest by floating.
Anyone not classified as a swimmer may ride in a kayak as a buddy with an adult swimmer who is skilled in that craft.
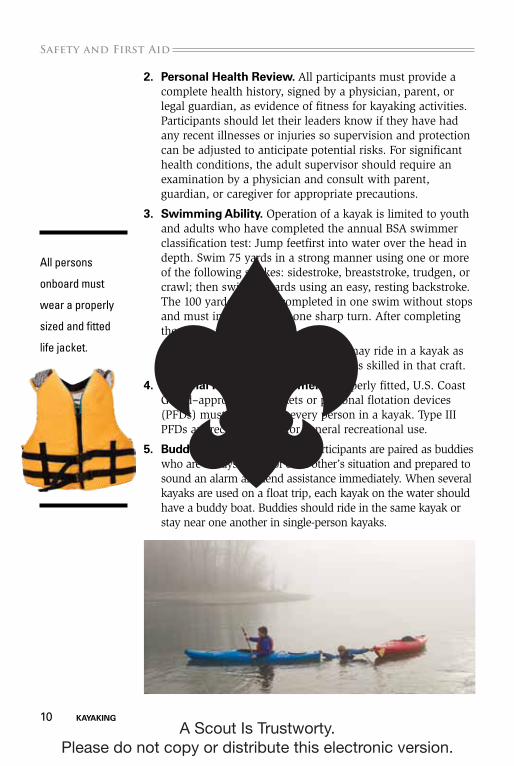
4. Personal Flotation Equipment. Properly fitted, U.S. Coast Guard–approved life jackets or personal flotation devices (PFDs) must be worn by every person in a kayak. Type III PFDs are recommended for general recreational use.
5. Buddy System. All kayaking participants are paired as buddies who are always aware of each other’s situation and prepared to sound an alarm and lend assistance immediately. When several kayaks are used on a float trip, each kayak on the water should have a buddy boat. Buddies should ride in the same kayak or stay near one another in single-person kayaks.
All persons
onboard must
wear a properly
sized and fitted
life jacket.
A Scout Is Trustworty. Please do not copy or distribute this electronic version.
kayaking 11
.Safety and First aid
6. Skill Proficiency. Everyone in a kayaking activity must have enough knowledge and skill to participate safely. Passengers should know how their movement affects the kayak’s stability and should have a basic understanding of self-rescue. Paddlers must meet government requirements, be able to control the kayak, know how changes in the environment influence that control, and participate only in activities within their or the group’s capabilities.
• Participants should be instructed in basic safety procedures before launch and allowed to proceed once they have demonstrated the ability to control the kayak adequately to return to shore.
• Before embarking on a long float trip or outing lasting more than four hours, paddlers should have three hours of kayak training and supervised practice or should be able to success-fully complete a 100-yard course and recover from a capsize.
• Unit trips on whitewater above Class II must be done with a professional guide in each craft or after all participants have received American Canoe Association or equivalent training for the class of water and type of craft involved.
7. Planning. Proper planning is necessary to ensure a safe and enjoyable kayaking experience. All plans should include a scheduled itinerary, notification of appropriate parties, communication arrangements, contingencies in case of inclement weather or equipment failure, and options for emergency response.
• Preparation—Any kayaking activity requires access to the proper equipment and transportation of gear and partici-pants. Determine what state and local regulations apply. Get permission to use or cross private property. Determine whether personal resources will be used or outfitters will supply equipment, food, and shuttle services. Lists of group and personal equipment and supplies must be compiled and checked.
Training in kayaking should be appropriate for the age, size, and experience of the participants. It should cover basic skills on calm water before proceeding to advanced skills involving current, waves, high winds, or extended distance.
A Scout Is Trustworty. Please do not copy or distribute this electronic version.
12 kayaking
Safety and First aid.
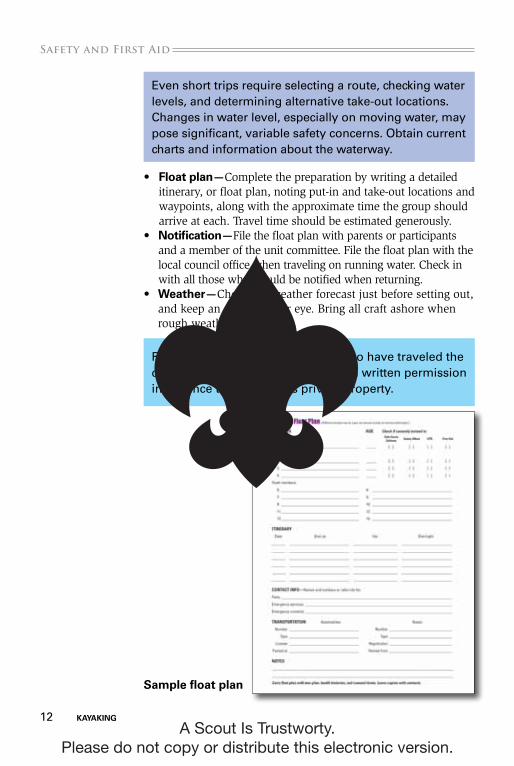
• Float plan—Complete the preparation by writing a detailed itinerary, or float plan, noting put-in and take-out locations and waypoints, along with the approximate time the group should arrive at each. Travel time should be estimated generously.
• notification—File the float plan with parents or participants and a member of the unit committee. File the float plan with the local council office when traveling on running water. Check in with all those who should be notified when returning.
• Weather—Check the weather forecast just before setting out, and keep an alert weather eye. Bring all craft ashore when rough weather threatens.
Even short trips require selecting a route, checking water levels, and determining alternative take-out locations. Changes in water level, especially on moving water, may pose significant, variable safety concerns. Obtain current charts and information about the waterway.
Review the float plan with others who have traveled the course recently. Remember to obtain written permission in advance to use or cross private property.
Sample float plan
A Scout Is Trustworty. Please do not copy or distribute this electronic version.
kayaking 13
.Safety and First aid
• Contingencies—Planning must identify possible emergencies and other circumstances that could force a change of plans. Appropriate alternative plans must be developed for each.
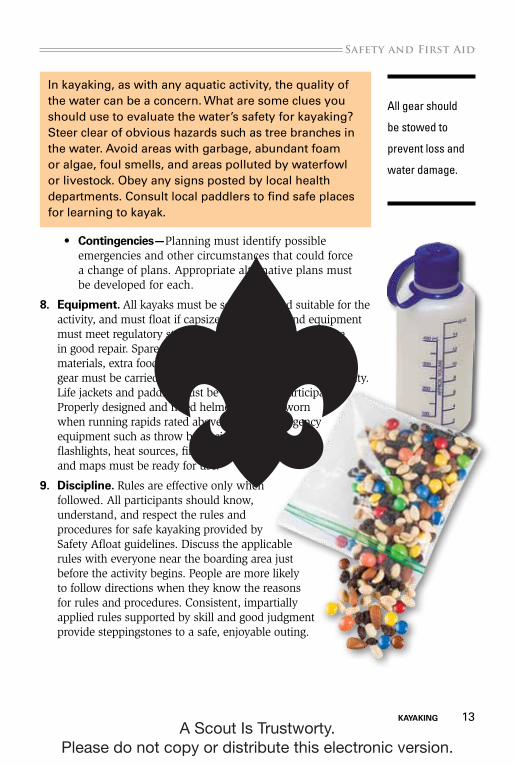
8. Equipment. All kayaks must be seaworthy and suitable for the activity, and must float if capsized. All kayaks and equipment must meet regulatory standards, be properly sized, and be in good repair. Spare equipment (such as paddles), repair materials, extra food and water, dry clothes, and emergency gear must be carried and should be appropriate for the activity. Life jackets and paddles must be sized to the participants. Properly designed and fitted helmets must be worn when running rapids rated above Class II. Emergency equipment such as throw bags, signal devices, flashlights, heat sources, first-aid kits, radios, and maps must be ready for use.
9. Discipline. Rules are effective only when followed. All participants should know, understand, and respect the rules and procedures for safe kayaking provided by Safety Afloat guidelines. Discuss the applicable rules with everyone near the boarding area just before the activity begins. People are more likely to follow directions when they know the reasons for rules and procedures. Consistent, impartially applied rules supported by skill and good judgment provide steppingstones to a safe, enjoyable outing.
All gear should
be stowed to
prevent loss and
water damage.
In kayaking, as with any aquatic activity, the quality of the water can be a concern. What are some clues you should use to evaluate the water’s safety for kayaking? Steer clear of obvious hazards such as tree branches in the water. Avoid areas with garbage, abundant foam or algae, foul smells, and areas polluted by waterfowl or livestock. Obey any signs posted by local health departments. Consult local paddlers to find safe places for learning to kayak.
A Scout Is Trustworty. Please do not copy or distribute this electronic version.

14 kayaking
Safety and First aid.
Common Paddling HazardsSafe kayaking includes being aware of potential weather and water-related hazards such as storms, wind, and waves. Always be prepared for unexpected weather and water conditions.
Storms and LightningDepending on the area and the time of year, storms can be predicted with some accuracy. However, storms can develop at any time and with surprising speed. Once you notice an approaching storm, get off the water as quickly as possible. If caught in a storm, paddle as quickly as possible to shore. Be prepared to bail water out of the kayak if the rain is heavy. Once the shore is reached, carry the kayaks up onto shore and use ropes to secure them against blowing winds and high waters.
Hearing thunder or seeing lightning should prompt the same actions. During a thunderstorm, there is no safe place in the outdoors from lightning. The vast majority of lightning injuries and deaths on boats occur on small boats such as canoes, kayaks, or motorboats with no cabin. All float plans should include a contingency plan for thunderstorms.
Get off and stay off the water before the storm arrives. If caught in a sudden storm, stay away from open or exposed shorelines. On shore, the safest place is a building when you can be indoors. If no building is available, any fully enclosed, metal-topped vehicle such as a hard-topped car, minivan, bus, truck, etc., can provide shelter.
In the outdoors, stay away from the high ground; avoid open fields, tops of ridges, or hills. Stay away from metal fences, telephone or power lines, or towers. Stay away from isolated or tall trees; seek large groups of trees about the same height. Seek dry ditches, trenches, or the low ground. Stay out of caves.
Do not huddle as a group. Spread out so you are at least 20 feet—or even 100 feet—from the next closest person. As a last resort when there is no safe shelter and you are caught out in the open, you may be able to reduce your risk of being struck by lightning by assuming a low, crouching position with feet together, a bent-over position, kneeling or sitting cross-legged or sitting with your arms around your legs. You can place hands on ears to help minimize acoustic shock from thunder. These positions will help reduce the chances of lightning injuring you, but they are no substitute for getting to safer terrain or a structure if it is immediately available.
Check weather
advisories before
starting, and
know what to do
when hazardous
conditions occur.
A Scout Is Trustworty. Please do not copy or distribute this electronic version.
kayaking 15
.Safety and First aid
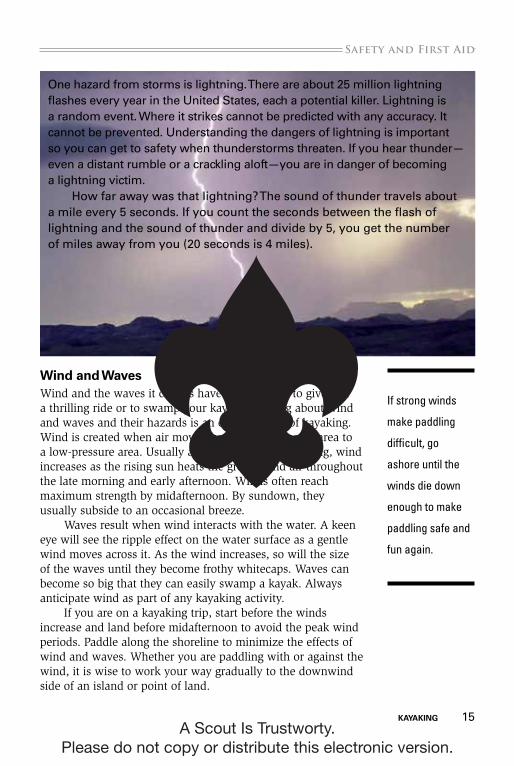
Wind and WavesWind and the waves it creates have the potential to give you a thrilling ride or to swamp your kayak. Learning about wind and waves and their hazards is an essential part of kayaking. Wind is created when air moves from a high-pressure area to a low-pressure area. Usually absent in the early morning, wind increases as the rising sun heats the ground and air throughout the late morning and early afternoon. Winds often reach maximum strength by midafternoon. By sundown, they usually subside to an occasional breeze.
Waves result when wind interacts with the water. A keen eye will see the ripple effect on the water surface as a gentle wind moves across it. As the wind increases, so will the size of the waves until they become frothy whitecaps. Waves can become so big that they can easily swamp a kayak. Always anticipate wind as part of any kayaking activity.
If you are on a kayaking trip, start before the winds increase and land before midafternoon to avoid the peak wind periods. Paddle along the shoreline to minimize the effects of wind and waves. Whether you are paddling with or against the wind, it is wise to work your way gradually to the downwind side of an island or point of land.
If strong winds
make paddling
difficult, go
ashore until the
winds die down
enough to make
paddling safe and
fun again.
One hazard from storms is lightning. There are about 25 million lightning flashes every year in the United States, each a potential killer. Lightning is a random event. Where it strikes cannot be predicted with any accuracy. It cannot be prevented. Understanding the dangers of lightning is important so you can get to safety when thunderstorms threaten. If you hear thunder—even a distant rumble or a crackling aloft—you are in danger of becoming a lightning victim.
How far away was that lightning? The sound of thunder travels about a mile every 5 seconds. If you count the seconds between the flash of lightning and the sound of thunder and divide by 5, you get the number of miles away from you (20 seconds is 4 miles).
A Scout Is Trustworty. Please do not copy or distribute this electronic version.
16 kayaking
Safety and First aid.
First aidBecause kayaking is a physical activity that takes place in the out-doors, participants are susceptible to a range of injuries that occur from repetitive action or exposure to the elements. Knowing how to deal with these conditions, should they occur, is a key to ensuring that your kayak outings remain safe and fun.
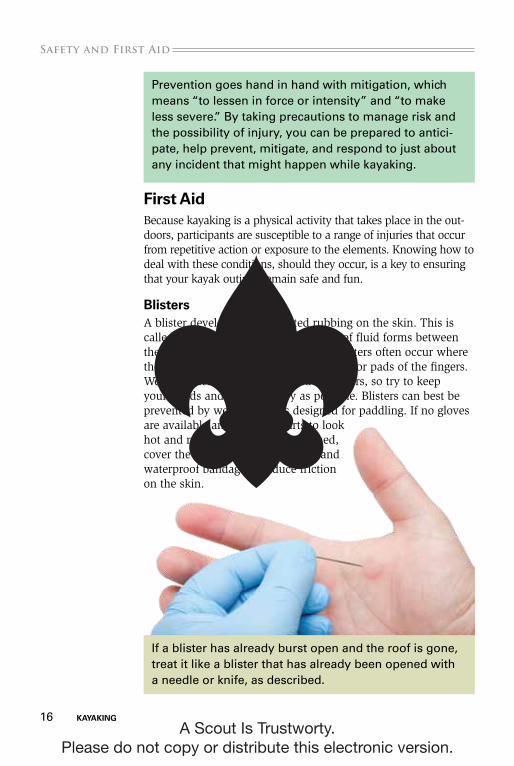
BlistersA blister develops from repeated rubbing on the skin. This is called a friction blister. A small pocket of fluid forms between the skin’s upper layers. For kayakers, blisters often occur where the paddle shaft rubs against the thumbs or pads of the fingers. Wet skin increases the likelihood of blisters, so try to keep your hands and fingers as dry as possible. Blisters can best be prevented by wearing gloves designed for paddling. If no gloves are available and the skin starts to look hot and red but no blister has formed, cover the area with a dry dressing and waterproof bandage to reduce friction on the skin.
Prevention goes hand in hand with mitigation, which means “to lessen in force or intensity” and “to make less severe.” By taking precautions to manage risk and the possibility of injury, you can be prepared to antici-pate, help prevent, mitigate, and respond to just about any incident that might happen while kayaking.
If a blister has already burst open and the roof is gone, treat it like a blister that has already been opened with a needle or knife, as described.
A Scout Is Trustworty. Please do not copy or distribute this electronic version.
kayaking 17
.Safety and First aid
Once a blister forms, it is best to immediately drain it. First, clean the area thoroughly and then use a sterilized needle or point of a knife to open the blister from the side in several places, leaving the roof of skin in place as a protective cover for the layers of skin below. Draining the blister usually provides immediate pain relief. Wash the area with soap and water and then apply a thin layer of an antibiotic ointment to prevent infection. Cover with a dry dressing and hold it in place with waterproof tape or a compressive elastic bandage. This should protect the blister and prevent further friction to the affected area. Try to avoid getting the area wet.
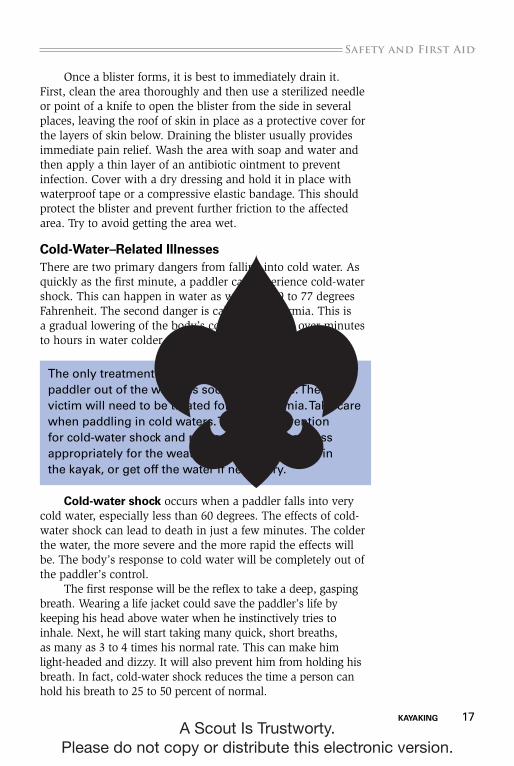
Cold-Water–Related illnesses There are two primary dangers from falling into cold water. As quickly as the first minute, a paddler can experience cold-water shock. This can happen in water as warm as 69 to 77 degrees Fahrenheit. The second danger is called hypothermia. This is a gradual lowering of the body’s core temperature over minutes to hours in water colder than 80 degrees.
Cold-water shock occurs when a paddler falls into very cold water, especially less than 60 degrees. The effects of cold-water shock can lead to death in just a few minutes. The colder the water, the more severe and the more rapid the effects will be. The body’s response to cold water will be completely out of the paddler’s control.
The first response will be the reflex to take a deep, gasping breath. Wearing a life jacket could save the paddler’s life by keeping his head above water when he instinctively tries to inhale. Next, he will start taking many quick, short breaths, as many as 3 to 4 times his normal rate. This can make him light-headed and dizzy. It will also prevent him from holding his breath. In fact, cold-water shock reduces the time a person can hold his breath to 25 to 50 percent of normal.
The only treatment for cold-water shock is to get the paddler out of the water as soon as possible. Then the victim will need to be treated for hypothermia. Take care when paddling in cold waters. The best prevention for cold-water shock and related injuries is to dress appropriately for the weather and stay dry—stay in the kayak, or get off the water if necessary.
A Scout Is Trustworty. Please do not copy or distribute this electronic version.
18 kayaking
Safety and First aid.
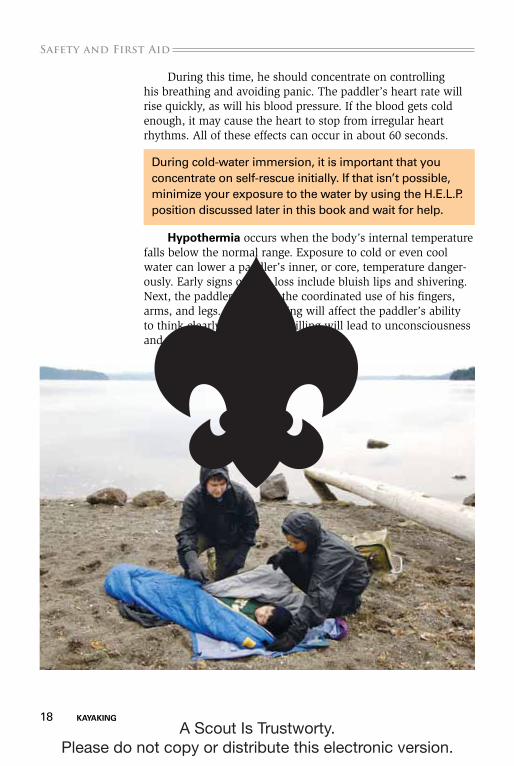
During this time, he should concentrate on controlling his breathing and avoiding panic. The paddler’s heart rate will rise quickly, as will his blood pressure. If the blood gets cold enough, it may cause the heart to stop from irregular heart rhythms. All of these effects can occur in about 60 seconds.
Hypothermia occurs when the body’s internal temperature falls below the normal range. Exposure to cold or even cool water can lower a paddler’s inner, or core, temperature danger-ously. Early signs of heat loss include bluish lips and shivering. Next, the paddler will lose the coordinated use of his fingers, arms, and legs. Further cooling will affect the paddler’s ability to think clearly. Continued chilling will lead to unconsciousness and, eventually, death.
During cold-water immersion, it is important that you concentrate on self-rescue initially. If that isn’t possible, minimize your exposure to the water by using the H.E.L.P. position discussed later in this book and wait for help.
A Scout Is Trustworty. Please do not copy or distribute this electronic version.
kayaking 19
.Safety and First aid
Treatment for hypothermia involves carefully removing the person from the water, removing his wet clothing, and drying him. Warm the person by wrapping him in blankets and putting dry clothing on him. Pay special attention to covering the head, as most heat loss occurs from the head. Warm the person’s trunk first, not his hands and feet. Warming arms and legs first can cause shock. If using hot-water bottles or chemical hot packs, wrap them in cloth; don’t apply them directly to the skin. Place the heating sources on the chest, neck, and groin.
Avoid rough handling or jerking of the patient, especially if the person is lethargic or unconscious. This may cause the heart to develop life-threatening irregular rhythms. If he is conscious, give the person a warm drink. Avoid caffeine or alcohol. Once the body temperature begins to rise, keep the person dry and wrapped in a warm blanket. Cover the person’s head and neck as well. Avoid rapid rewarming as it, too, can induce fatal heart rhythms.
Heat-Related illnessesHeat-related illnesses range from having flu-like symptoms to life-threatening hyperthermia. Heat-related illnesses result when the body cannot keep itself cool enough. One way the body can cool itself is by losing heat to either the air or water around it. As the air or water temperature outside the body approaches the body’s normal temperature of 98 degrees Fahrenheit, the harder it is for the body to lose heat. When the surrounding tempera-tures are above normal body temperature, the body will begin to absorb heat.
An important way that body loses heat is through sweating. As the water in sweat evaporates from the skin, the process uses energy and lowers body temperature. However, if a person is dehydrated and cannot sweat or the air is already saturated with water so there is no room in the air for more water, the risks of heat-related illnesses go up dramatically. For this reason, exercising when the temperature and humidity are high is especially dangerous.
Before setting out during hot weather, paddlers should check with the National Weather Service to see what the predicted heat index is. If the air temperature is 90 degrees and the relative humidity is 100 percent, the heat index—how hot it feels—is 132 degrees. Strong winds, particularly with very hot, dry air, can be extremely hazardous, as rapidly moving air can further alter a body’s temperature from the normal range.
A body tempera-
ture at or greater
than 106 degrees
Fahrenheit is
a life-threatening
medical condi-
tion that requires
immediate medical
treatment by health-
care professionals.
A Scout Is Trustworty. Please do not copy or distribute this electronic version.
20 kayaking
Safety and First aid.
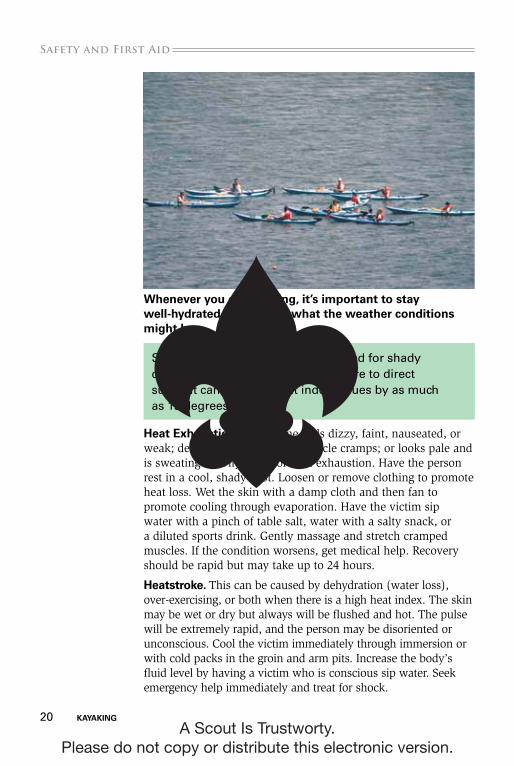
Heat Exhaustion. If someone feels dizzy, faint, nauseated, or weak; develops a headache or muscle cramps; or looks pale and is sweating heavily, treat for heat exhaustion. Have the person rest in a cool, shady spot. Loosen or remove clothing to promote heat loss. Wet the skin with a damp cloth and then fan to promote cooling through evaporation. Have the victim sip water with a pinch of table salt, water with a salty snack, or a diluted sports drink. Gently massage and stretch cramped muscles. If the condition worsens, get medical help. Recovery should be rapid but may take up to 24 hours.
Heatstroke. This can be caused by dehydration (water loss), over-exercising, or both when there is a high heat index. The skin may be wet or dry but always will be flushed and hot. The pulse will be extremely rapid, and the person may be disoriented or unconscious. Cool the victim immediately through immersion or with cold packs in the groin and arm pits. Increase the body’s fluid level by having a victim who is conscious sip water. Seek emergency help immediately and treat for shock.
Since heat index values are calculated for shady conditions with a light wind, exposure to direct sunlight can increase heat index values by as much as 15 degrees.
Whenever you go kayaking, it’s important to stay well-hydrated—no matter what the weather conditions might be.
A Scout Is Trustworty. Please do not copy or distribute this electronic version.
.Safety and First aid
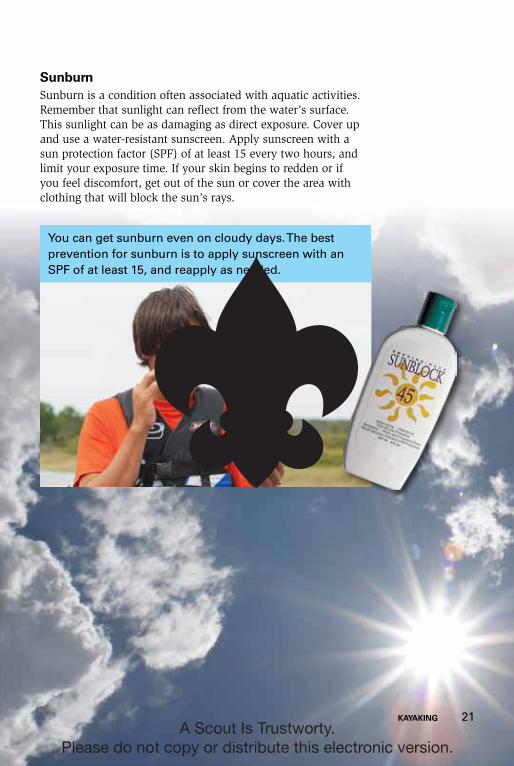
SunburnSunburn is a condition often associated with aquatic activities. Remember that sunlight can reflect from the water’s surface. This sunlight can be as damaging as direct exposure. Cover up and use a water-resistant sunscreen. Apply sunscreen with a sun protection factor (SPF) of at least 15 every two hours, and limit your exposure time. If your skin begins to redden or if you feel discomfort, get out of the sun or cover the area with clothing that will block the sun’s rays.
You can get sunburn even on cloudy days. The best prevention for sunburn is to apply sunscreen with an SPF of at least 15, and reapply as needed.
kayaking 21A Scout Is Trustworty.
Please do not copy or distribute this electronic version.

22 kayaking
Safety and First aid.
DehydrationWhen we lose more water than we take in, we become dehy-drated. Symptoms of mild dehydration include increased thirst, dry lips, and dark yellow urine. Symptoms of moderate to severe dehydration include severe thirst, dry mouth with little saliva, dry skin, weakness, dizziness, confusion, nausea, cramping, loss of appetite, decreased sweating (even with exertion), decreased urine production, and dark brown urine.
For mild dehydration, drink a quart or two of water or sports drink over two to four hours. Rest for 24 hours and continue drinking fluids. See a physician for moderate to severe dehydration, which requires emergency care. Prevent dehydration by drinking plenty of fluids whenever you are kayaking, in hot or cold weather. Drink enough so that your urine stays clear.
Sprains and StrainsA sprain involves a joint’s ligaments—a short band of tough, flexible tissue that connects bones or holds a joint together. A sprain usually means that some or all of the fibers of the ligament were overstretched or possibly torn, such as when the joint is put in an unnatural position and force is suddenly applied to the joint. For kayakers, sprains are more likely to affect the arm and shoulder joints.
A strain affects muscles or the ropelike ends of the muscles, called tendons, which attach the muscle to the bone it moves. Strains can happen when muscles are made to work extra hard or are overused. Because a kayaker uses the same muscles repeatedly, the muscles and tendons can become strained.
Sprains and strains have three common symptoms: pain, swelling, and spasms. The pain from a joint sprain is immedi-ate. Muscle strains may not be painful until the day after using a muscle over and over again. The muscle/tendon or ligament will then begin to swell. Once pain and swelling occur, the mus-cles surrounding the injured area often will begin to contract and tighten (spasm).
Sprains and strains
are sometimes
unavoidable, but
you can take
some preventive
precautions.
When you are
transporting a
kayak or on the
trail, watch where
you step, every
step of the way,
and don’t get
distracted.
Avoid dehydration by drinking plenty of fluids and eating enough throughout the day to keep your body well-balanced. If you become weary or develop a headache or body aches, or if you become confused, rest in the shade and sip water until the symptoms subside.
A Scout Is Trustworty. Please do not copy or distribute this electronic version.
kayaking 23
.Safety and First aid
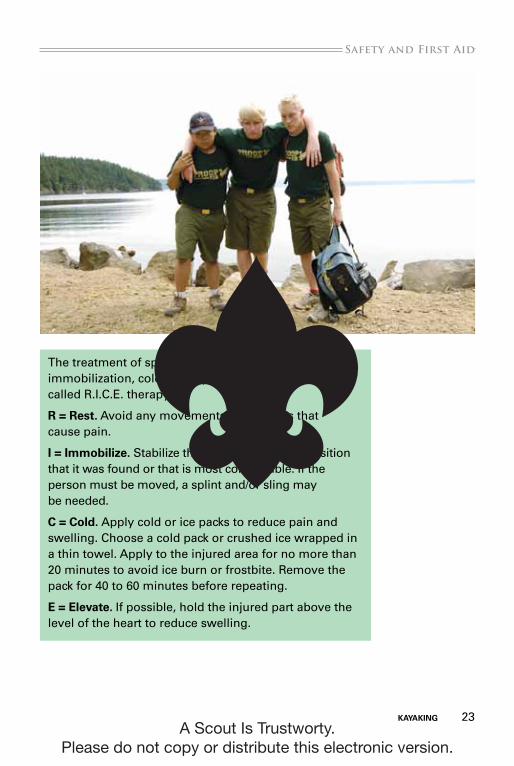
The treatment of sprains and strains involves rest, immobilization, cold therapy, and elevation. This is called R.I.C.E. therapy.
R = Rest. Avoid any movements or activities that cause pain.
i = immobilize. Stabilize the injured area in the position that it was found or that is most comfortable. If the person must be moved, a splint and/or sling may be needed.
C = Cold. Apply cold or ice packs to reduce pain and swelling. Choose a cold pack or crushed ice wrapped in a thin towel. Apply to the injured area for no more than 20 minutes to avoid ice burn or frostbite. Remove the pack for 40 to 60 minutes before repeating.
E = Elevate. If possible, hold the injured part above the level of the heart to reduce swelling.
A Scout Is Trustworty. Please do not copy or distribute this electronic version.
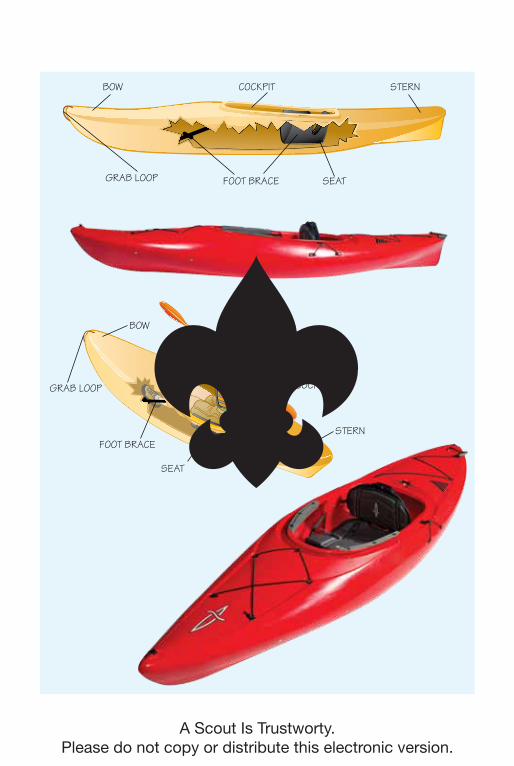
seat
grab loop foot brace seat
bow cockpit stern
stern
grab loop
foot brace
cockpit
bow
A Scout Is Trustworty. Please do not copy or distribute this electronic version.
kayaking 25
.kayaks and Equipment
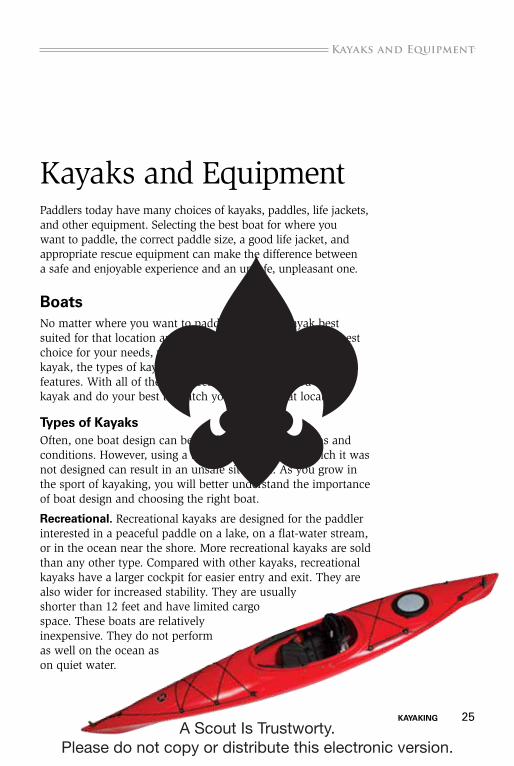
Kayaks and EquipmentPaddlers today have many choices of kayaks, paddles, life jackets, and other equipment. Selecting the best boat for where you want to paddle, the correct paddle size, a good life jacket, and appropriate rescue equipment can make the difference between a safe and enjoyable experience and an unsafe, unpleasant one.
BoatsNo matter where you want to paddle, there is a kayak best suited for that location and water conditions. To make the best choice for your needs, you will need to learn the parts of a kayak, the types of kayaks, and the effects of various design features. With all of these choices, look at where you want to kayak and do your best to match your boat to that location.
Types of kayaksOften, one boat design can be used in different locations and conditions. However, using a boat in conditions for which it was not designed can result in an unsafe situation. As you grow in the sport of kayaking, you will better understand the importance of boat design and choosing the right boat.
Recreational. Recreational kayaks are designed for the paddler interested in a peaceful paddle on a lake, on a flat-water stream, or in the ocean near the shore. More recreational kayaks are sold than any other type. Compared with other kayaks, recreational kayaks have a larger cockpit for easier entry and exit. They are also wider for increased stability. They are usually shorter than 12 feet and have limited cargo space. These boats are relatively inexpensive. They do not perform as well on the ocean as on quiet water.
A Scout Is Trustworty. Please do not copy or distribute this electronic version.
26 kayaking
kayaks and Equipment.
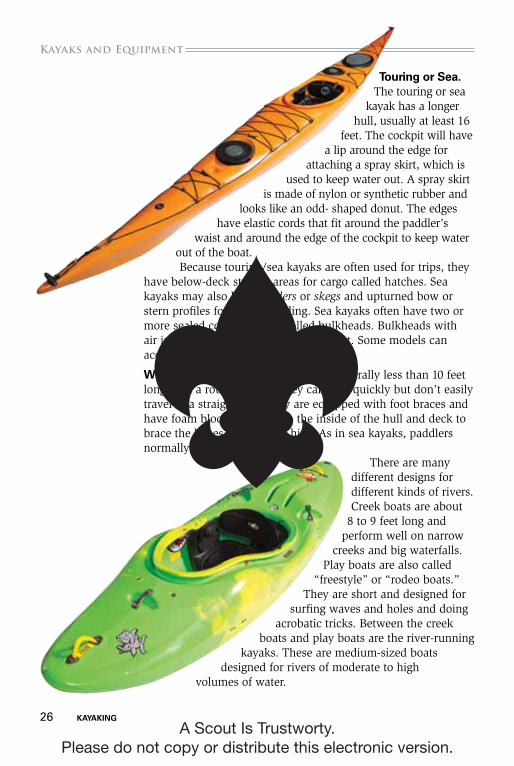
Touring or Sea. The touring or sea
kayak has a longer hull, usually at least 16
feet. The cockpit will have a lip around the edge for
attaching a spray skirt, which is used to keep water out. A spray skirt
is made of nylon or synthetic rubber and looks like an odd- shaped donut. The edges
have elastic cords that fit around the paddler’s waist and around the edge of the cockpit to keep water
out of the boat.Because touring/sea kayaks are often used for trips, they
have below-deck storage areas for cargo called hatches. Sea kayaks may also have rudders or skegs and upturned bow or stern profiles for wave shedding. Sea kayaks often have two or more sealed compartments called bulkheads. Bulkheads with air in them provide flotation for the boat. Some models can accommodate two or three paddlers.
Whitewater. Whitewater kayaks are generally less than 10 feet long with a rounded hull. They can turn quickly but don’t easily travel in a straight line. They are equipped with foot braces and have foam blocks attached to the inside of the hull and deck to brace the knees, thighs, and hips. As in sea kayaks, paddlers normally use spray skirts.
There are many different designs for different kinds of rivers. Creek boats are about
8 to 9 feet long and perform well on narrow
creeks and big waterfalls. Play boats are also called
“freestyle” or “rodeo boats.” They are short and designed for
surfing waves and holes and doing acrobatic tricks. Between the creek
boats and play boats are the river-running kayaks. These are medium-sized boats
designed for rivers of moderate to high volumes of water.
A Scout Is Trustworty. Please do not copy or distribute this electronic version.
kayaking 27
.kayaks and Equipment
kayak DesignsKayaks have many designs. The three types that will generally be used for this merit badge are described below.
Decked. A decked kayak is the traditional kayak where the top part of the boat is covered. It also has one or more cockpits where the paddler sits in a bucket seat. A decked kayak is designed to keep water from waves or spray from getting into the boat. Depending on the materials used to make the kayak, it may be made as a single piece or as two halves, the deck and the hull, that are joined together.
Sit-On-Top. Sit-on-top kayaks have sealed hulls with permanent air chambers that make them float. Sit-on-tops were developed from paddle boards equipped with a backrest and footrests. Instead of sitting in a cockpit inside the boat, the paddler sits in a seat in the cockpit on top of the boat. Water that enters the cockpit drains out through scupper holes, or tubes that run from the cockpit through the boat to the bottom of the hull.
Sit-on-top kayaks are popular for fishing and SCUBA diving. Paddlers can easily enter and exit the water, change seating positions, and even stand. The center of gravity for the paddler in a sit-on-top is higher than in a decked kayak because its seat is slightly above water level. To compensate for the higher center of gravity, sit-on-tops are often wider and slower than traditional kayaks of the same length.
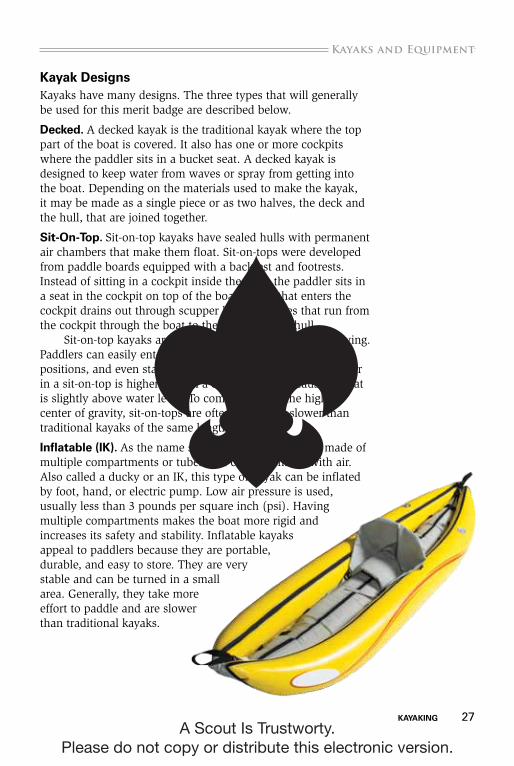
inflatable (ik). As the name suggests, these kayaks are made of multiple compartments or tubes that can be inflated with air. Also called a ducky or an IK, this type of kayak can be inflated by foot, hand, or electric pump. Low air pressure is used, usually less than 3 pounds per square inch (psi). Having multiple compartments makes the boat more rigid and increases its safety and stability. Inflatable kayaks appeal to paddlers because they are portable, durable, and easy to store. They are very stable and can be turned in a small area. Generally, they take more effort to paddle and are slower than traditional kayaks.
A Scout Is Trustworty. Please do not copy or distribute this electronic version.
28 kayaking
kayaks and Equipment.
kayak Design CharacteristicsSome key design characteristics help identify how a kayak will perform. If you understand these design principles and the design of your kayak, you will be able to predict how your kayak will perform when it comes to speed, stability, and turning.
Length is an important measurement; it plays a big part in determining maximum speed and helps indicate capacity. Longer boats are typically faster than shorter ones. A longer kayak will also go straighter or “track” better than a shorter boat. A boat’s capacity is determined by its length and depth. A longer kayak will be able to hold a bigger paddler or carry more cargo than a shorter one.
Width and fullness indicate forward efficiency, seaworthi-ness, and the ability to travel straight, or “track.” Narrow boats that slice through the water are efficient trackers. They will require less effort to achieve the same speed as wider boats. Narrow boats may track well but give up some stability. They will feel more tippy and unstable than a wider kayak. Flat-bottom recreational boats are very stable but tend to be slower.
Cross-sectional shaping affects stability, tracking, and speed. Flat-bottom hulls have good initial stability; that is, they make the paddler feel very secure and unlikely to tip over. These boats have a somewhat square angle where the boat’s bottom and sides join. This is called a hard “chine.” This type of boat will feel stable until it passes its tipping point, and then it will tip over quickly. A kayak with good initial stability will often be more unstable in rolling waves.
Boats that are more rounded and less square where the side and bottom meet are said to have a “soft” chine. These rounded or U-shaped hulls will have less initial stability but better secondary stability. A kayak with good secondary stability will feel more unstable when entered. It can be more easily rolled on its side and then rolled back up without tipping over. These boats are more stable in rolling waves.
The streamlined shape of a rounded hull will plow through the water efficiently and is faster than a flat-bottom hull. A V-hull is a compromise between a flat hull and a rounded hull. The V-shaped hull provides an effect like a keel down the center line of the boat. V-shaped hulls provide good tracking and also maximize secondary stability in waves.
A Scout Is Trustworty. Please do not copy or distribute this electronic version.
kayaking 29
.kayaks and Equipment
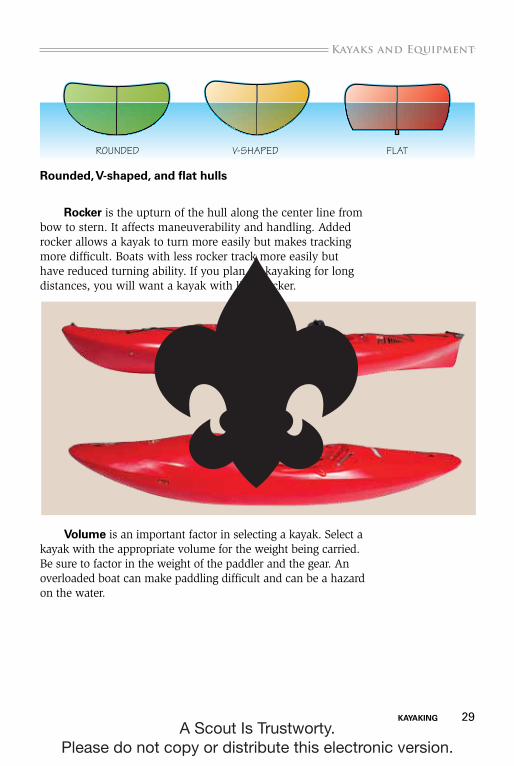
Rocker is the upturn of the hull along the center line from bow to stern. It affects maneuverability and handling. Added rocker allows a kayak to turn more easily but makes tracking more difficult. Boats with less rocker track more easily but have reduced turning ability. If you plan on kayaking for long distances, you will want a kayak with little rocker.
Volume is an important factor in selecting a kayak. Select a kayak with the appropriate volume for the weight being carried. Be sure to factor in the weight of the paddler and the gear. An overloaded boat can make paddling difficult and can be a hazard on the water.
rounded V-shaped flat
Rounded, V-shaped, and flat hulls
A Scout Is Trustworty. Please do not copy or distribute this electronic version.
30 kayaking
kayaks and Equipment.
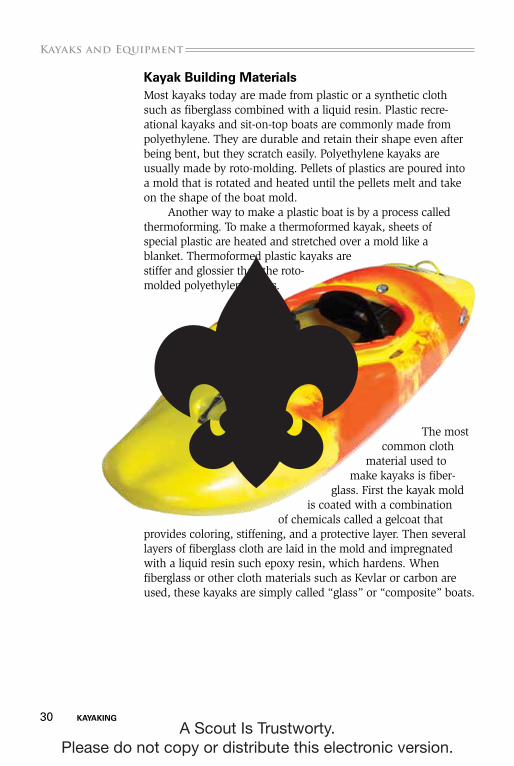
kayak Building MaterialsMost kayaks today are made from plastic or a synthetic cloth such as fiberglass combined with a liquid resin. Plastic recre-ational kayaks and sit-on-top boats are commonly made from polyethylene. They are durable and retain their shape even after being bent, but they scratch easily. Polyethylene kayaks are usually made by roto-molding. Pellets of plastics are poured into a mold that is rotated and heated until the pellets melt and take on the shape of the boat mold.
Another way to make a plastic boat is by a process called thermoforming. To make a thermoformed kayak, sheets of special plastic are heated and stretched over a mold like a blanket. Thermoformed plastic kayaks are stiffer and glossier than the roto-molded polyethylene boats.
The most common cloth
material used to make kayaks is fiber-
glass. First the kayak mold is coated with a combination
of chemicals called a gelcoat that provides coloring, stiffening, and a protective layer. Then several layers of fiberglass cloth are laid in the mold and impregnated with a liquid resin such epoxy resin, which hardens. When fiberglass or other cloth materials such as Kevlar or carbon are used, these kayaks are simply called “glass” or “composite” boats.
A Scout Is Trustworty. Please do not copy or distribute this electronic version.
kayaking 31
.kayaks and Equipment
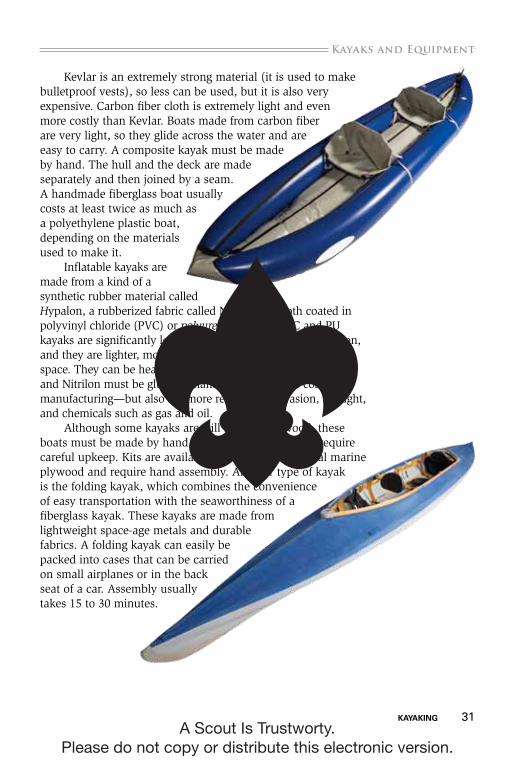
Kevlar is an extremely strong material (it is used to make bulletproof vests), so less can be used, but it is also very expensive. Carbon fiber cloth is extremely light and even more costly than Kevlar. Boats made from carbon fiber are very light, so they glide across the water and are easy to carry. A composite kayak must be made by hand. The hull and the deck are made separately and then joined by a seam. A handmade fiberglass boat usually costs at least twice as much as a polyethylene plastic boat, depending on the materials used to make it.
Inflatable kayaks are made from a kind of a synthetic rubber material called Hypalon, a rubberized fabric called Nitrilon, or cloth coated in polyvinyl chloride (PVC) or polyurethane (PU). PVC and PU kayaks are significantly less expensive than Hypalon or Nitrilon, and they are lighter, more portable, and require less storage space. They can be heat-welded in a machine, while Hypalon and Nitrilon must be glued by hand—increasing the cost of manufacturing—but also are more resistant to abrasion, sunlight, and chemicals such as gas and oil.
Although some kayaks are still made from wood, these boats must be made by hand, are very expensive, and require careful upkeep. Kits are available that use precut special marine plywood and require hand assembly. Another type of kayak is the folding kayak, which combines the convenience of easy transportation with the seaworthiness of a fiberglass kayak. These kayaks are made from lightweight space-age metals and durable fabrics. A folding kayak can easily be packed into cases that can be carried on small airplanes or in the back seat of a car. Assembly usually takes 15 to 30 minutes.
A Scout Is Trustworty. Please do not copy or distribute this electronic version.
32 kayaking
kayaks and Equipment.
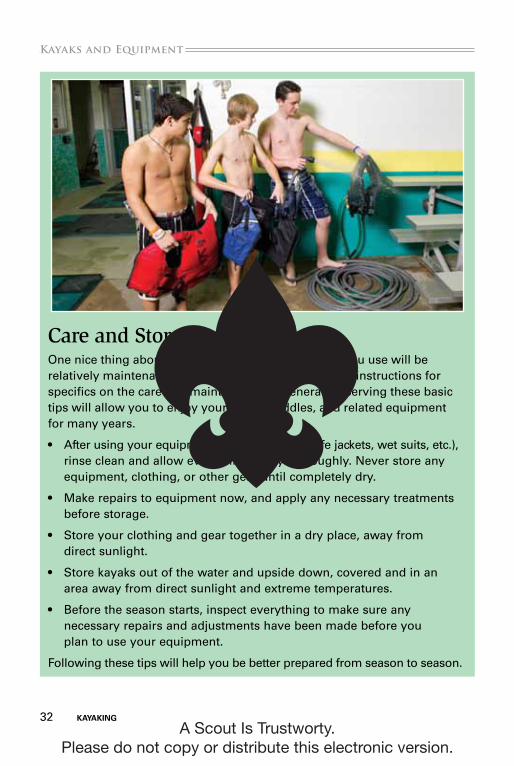
Care and StorageOne nice thing about kayaking is that the equipment you use will be relatively maintenance free. Follow the manufacturer’s instructions for specifics on the care and maintenance. In general, observing these basic tips will allow you to enjoy your kayak, paddles, and related equipment for many years.
• After using your equipment (kayaks, paddles, life jackets, wet suits, etc.), rinse clean and allow everything to dry thoroughly. Never store any equipment, clothing, or other gear until completely dry.
• Make repairs to equipment now, and apply any necessary treatments before storage.
• Store your clothing and gear together in a dry place, away from direct sunlight.
• Store kayaks out of the water and upside down, covered and in an area away from direct sunlight and extreme temperatures.
• Before the season starts, inspect everything to make sure any necessary repairs and adjustments have been made before you plan to use your equipment.
Following these tips will help you be better prepared from season to season.
A Scout Is Trustworty. Please do not copy or distribute this electronic version.
kayaking 33
.kayaks and Equipment
PaddlesYour paddle transfers effort into movement. Proper paddle size and style increase the boat’s responsiveness and make paddling more fun. Just as boats come in a variety of sizes, shapes, and materials, so do paddles.
Selecting your PaddleKayak paddles vary in style to conform with the type of water you will be paddling. In general, a shorter paddle performs maneuvering strokes more quickly than a longer paddle. A longer paddle is better for touring, particularly in longer boats. Longer paddles are also more efficient in wider boats. A longer paddle can reach farther across the kayak to catch the water on each stroke. Regardless of the length of the paddle, a paddler will appreciate a lighter paddle at the end of a full day on the water.
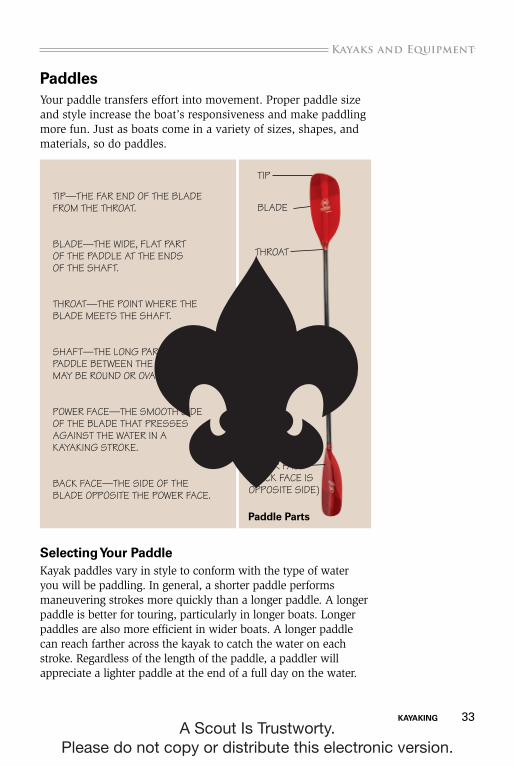
tip—the far end of the blade from the throat.
blade—the wide, flat part of the paddle at the ends of the shaft.
throat—the point where the blade meets the shaft.
shaft—the long part of the paddle between the blades. may be round or oVal.
power face—the smooth side of the blade that presses against the water in a kayaking stroke.
back face—the side of the blade opposite the power face.
shaft
throat
tip
Paddle Parts
blade
shaft
power face(back face is opposite side)
A Scout Is Trustworty. Please do not copy or distribute this electronic version.
34 kayaking
kayaks and Equipment.
In selecting a kayak paddle, the most important thing to consider is the comfort of the paddle in your hands. Quality paddles have an oval shaft, which provides better control and comfort and helps you set the correct angle. Most paddles have straight shafts, but a few designs are bent at the grip positions to ease strain on the wrists.
The actual length of the paddle will be determined by a number of factors, including the type of water being paddled, the width of your kayak, your size, the length of the blades, your style of paddling, and your personal preferences. Paddles for recreational kayaks are normally sized in centimeters, with typical lengths between 200 and 220 centimeters.
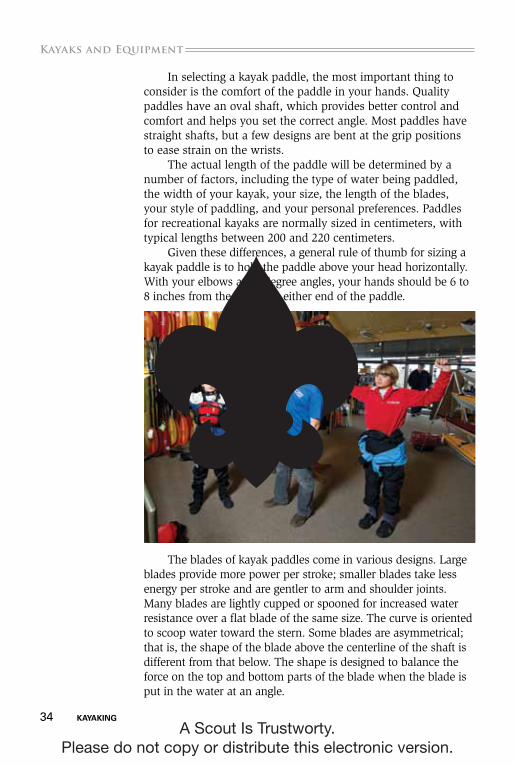
Given these differences, a general rule of thumb for sizing a kayak paddle is to hold the paddle above your head horizontally. With your elbows at 90-degree angles, your hands should be 6 to 8 inches from the throat on either end of the paddle.
The blades of kayak paddles come in various designs. Large blades provide more power per stroke; smaller blades take less energy per stroke and are gentler to arm and shoulder joints. Many blades are lightly cupped or spooned for increased water resistance over a flat blade of the same size. The curve is oriented to scoop water toward the stern. Some blades are asymmetrical; that is, the shape of the blade above the centerline of the shaft is different from that below. The shape is designed to balance the force on the top and bottom parts of the blade when the blade is put in the water at an angle.
A Scout Is Trustworty. Please do not copy or distribute this electronic version.
kayaking 35
.kayaks and Equipment
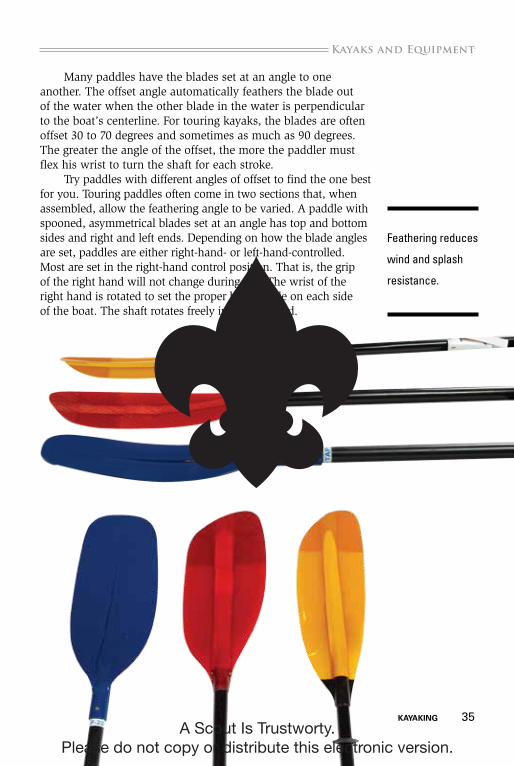
Many paddles have the blades set at an angle to one another. The offset angle automatically feathers the blade out of the water when the other blade in the water is perpendicular to the boat’s centerline. For touring kayaks, the blades are often offset 30 to 70 degrees and sometimes as much as 90 degrees. The greater the angle of the offset, the more the paddler must flex his wrist to turn the shaft for each stroke.
Try paddles with different angles of offset to find the one best for you. Touring paddles often come in two sections that, when assembled, allow the feathering angle to be varied. A paddle with spooned, asymmetrical blades set at an angle has top and bottom sides and right and left ends. Depending on how the blade angles are set, paddles are either right-hand- or left-hand-controlled. Most are set in the right-hand control position. That is, the grip of the right hand will not change during use. The wrist of the right hand is rotated to set the proper blade angle on each side of the boat. The shaft rotates freely in the left hand.
Feathering reduces
wind and splash
resistance.
A Scout Is Trustworty. Please do not copy or distribute this electronic version.
kayaks and Equipment.
Essential EquipmentWhile kayaking equipment comes in several designs geared toward the style of paddling desired, some gear on the water is standard no matter the style of the boat. These items—life jackets, clothing that protects the kayaker in various weather conditions, proper footwear, and safety equipment—help ensure a fun-filled, safe day of paddling.
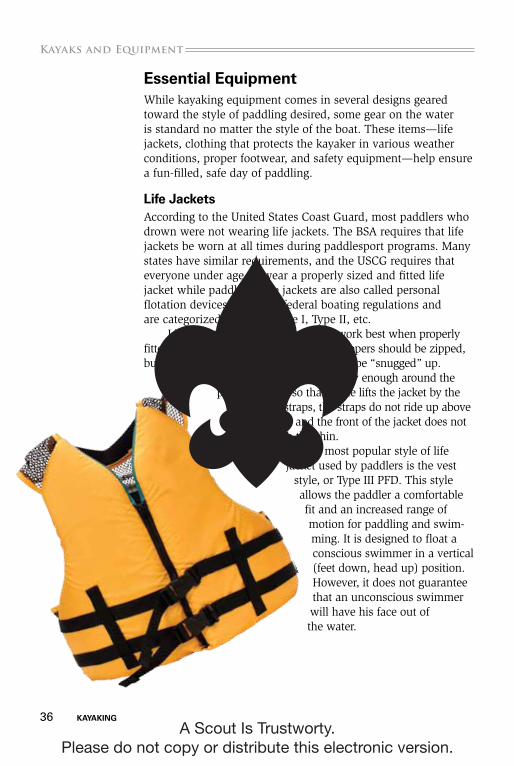
Life JacketsAccording to the United States Coast Guard, most paddlers who drown were not wearing life jackets. The BSA requires that life jackets be worn at all times during paddlesport programs. Many states have similar requirements, and the USCG requires that everyone under age 13 wear a properly sized and fitted life jacket while paddling. Life jackets are also called personal flotation devices (PFDs) in federal boating regulations and are categorized by types: Type I, Type II, etc.
Life jackets provide buoyancy and work best when properly fitted—snug and secure. This means all zippers should be zipped, buckles be buckled, and adjustment straps be “snugged” up.
Properly fitted life jackets fit tightly enough around the paddler’s torso so that if one lifts the jacket by the
shoulder straps, the straps do not ride up above the ears and the front of the jacket does not
reach the chin.The most popular style of life
jacket used by paddlers is the vest style, or Type III PFD. This style allows the paddler a comfortable fit and an increased range of motion for paddling and swim-ming. It is designed to float a conscious swimmer in a vertical (feet down, head up) position. However, it does not guarantee that an unconscious swimmer will have his face out of the water.
36 kayaking
A Scout Is Trustworty. Please do not copy or distribute this electronic version.

kayaking 37
.kayaks and Equipment
ClothingThe clothing you wear while paddling can make a big difference in the success of a trip on the water. When you think of what to wear and what to bring with you, remember to plan for the worst and dress for immersion. You should always dress appropriately for the water temperature, not the air temperature.
To avoid potentially life-threatening situations, wear the proper clothing for the conditions. A layering system of clothing is important. This system allows the paddler to add or remove layers as needed, enhancing comfort when on the water. When you are planning your layering system, a simple “three W’s” approach is easy to remember.
Sizing Your Life JacketOn land, have a buddy stand behind you and firmly pull up both shoulder straps. If the shoulder straps pull up to ear level, the life jacket doesn’t fit snugly enough. Readjust the jacket or try a smaller size or different style.
In calm, shallow water, test the fit of a life jacket by relaxing your body and tilting your head back. It should keep your chin well above water. If it doesn’t, readjust for a snugger fit or try a life jacket with a higher buoy-ancy rating. Check the label to find the rating.
A Scout Is Trustworty. Please do not copy or distribute this electronic version.
38 kayaking
kayaks and Equipment.
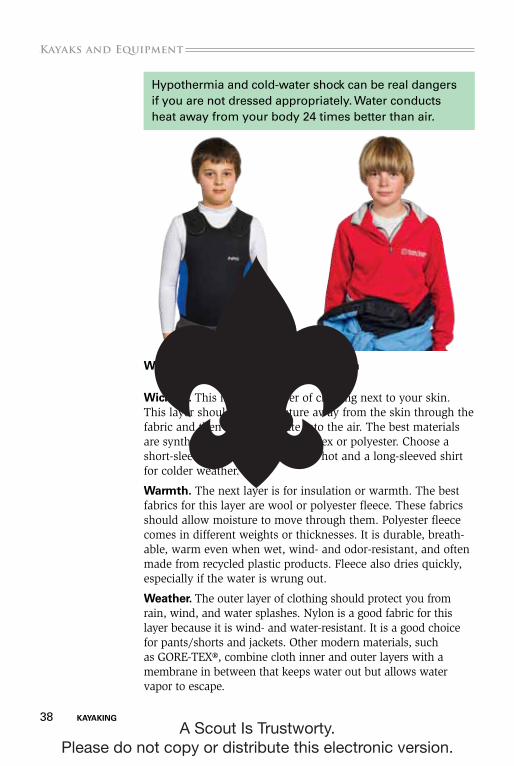
Wicking. This is the first layer of clothing next to your skin. This layer should draw moisture away from the skin through the fabric and then let it evaporate into the air. The best materials are synthetic fabrics such as spandex or polyester. Choose a short-sleeved T-shirt for when it is hot and a long-sleeved shirt for colder weather.
Warmth. The next layer is for insulation or warmth. The best fabrics for this layer are wool or polyester fleece. These fabrics should allow moisture to move through them. Polyester fleece comes in different weights or thicknesses. It is durable, breath-able, warm even when wet, wind- and odor-resistant, and often made from recycled plastic products. Fleece also dries quickly, especially if the water is wrung out.
Weather. The outer layer of clothing should protect you from rain, wind, and water splashes. Nylon is a good fabric for this layer because it is wind- and water-resistant. It is a good choice for pants/shorts and jackets. Other modern materials, such as GORE-TEX®, combine cloth inner and outer layers with a membrane in between that keeps water out but allows water vapor to escape.
Hypothermia and cold-water shock can be real dangers if you are not dressed appropriately. Water conducts heat away from your body 24 times better than air.
Wicking Warmth
A Scout Is Trustworty. Please do not copy or distribute this electronic version.
kayaking 39
.kayaks and Equipment
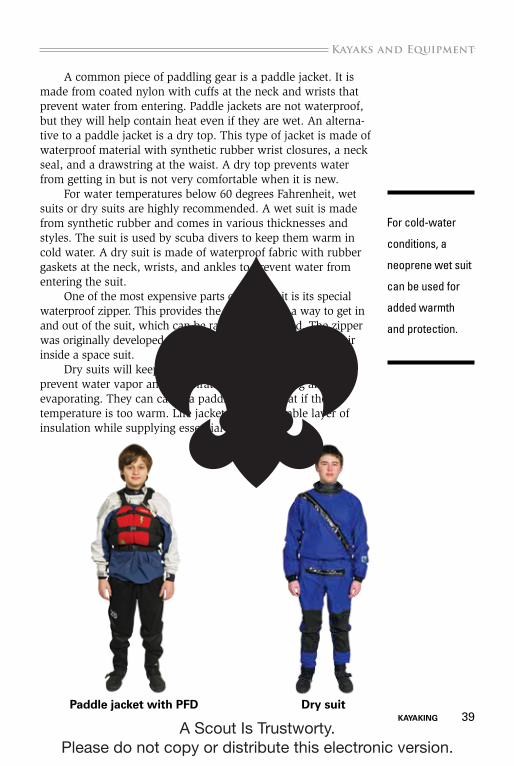
A common piece of paddling gear is a paddle jacket. It is made from coated nylon with cuffs at the neck and wrists that prevent water from entering. Paddle jackets are not waterproof, but they will help contain heat even if they are wet. An alterna-tive to a paddle jacket is a dry top. This type of jacket is made of waterproof material with synthetic rubber wrist closures, a neck seal, and a drawstring at the waist. A dry top prevents water from getting in but is not very comfortable when it is new.
For water temperatures below 60 degrees Fahrenheit, wet suits or dry suits are highly recommended. A wet suit is made from synthetic rubber and comes in various thicknesses and styles. The suit is used by scuba divers to keep them warm in cold water. A dry suit is made of waterproof fabric with rubber gaskets at the neck, wrists, and ankles to prevent water from entering the suit.
One of the most expensive parts of a dry suit is its special waterproof zipper. This provides the paddler with a way to get in and out of the suit, which can be rather complicated. The zipper was originally developed for the U.S. space program to hold air inside a space suit.
Dry suits will keep water from getting in but will also prevent water vapor and perspiration from escaping and evaporating. They can cause a paddler to overheat if the air temperature is too warm. Life jackets add a valuable layer of insulation while supplying essential flotation.
Paddle jacket with PFD Dry suit
For cold-water
conditions, a
neoprene wet suit
can be used for
added warmth
and protection.
A Scout Is Trustworty. Please do not copy or distribute this electronic version.
40 kayaking
kayaks and Equipment.
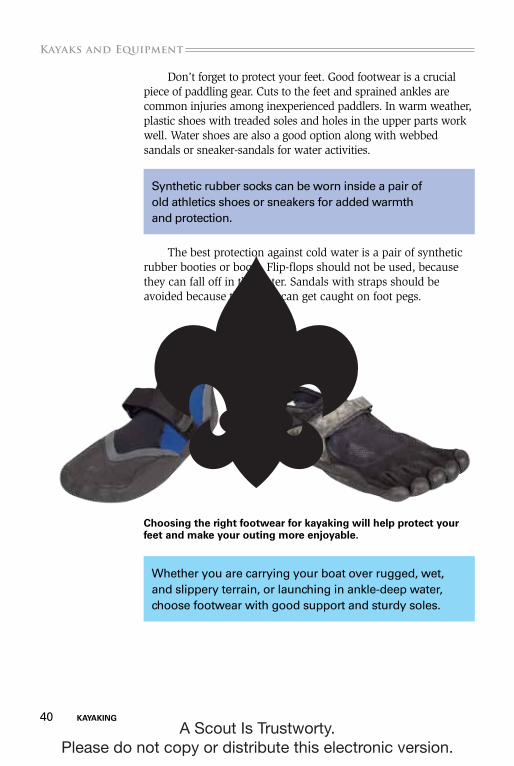
Don’t forget to protect your feet. Good footwear is a crucial piece of paddling gear. Cuts to the feet and sprained ankles are common injuries among inexperienced paddlers. In warm weather, plastic shoes with treaded soles and holes in the upper parts work well. Water shoes are also a good option along with webbed sandals or sneaker-sandals for water activities.
The best protection against cold water is a pair of synthetic rubber booties or boots. Flip-flops should not be used, because they can fall off in the water. Sandals with straps should be avoided because the straps can get caught on foot pegs.
Choosing the right footwear for kayaking will help protect your feet and make your outing more enjoyable.
Whether you are carrying your boat over rugged, wet, and slippery terrain, or launching in ankle-deep water, choose footwear with good support and sturdy soles.
Synthetic rubber socks can be worn inside a pair of old athletics shoes or sneakers for added warmth and protection.
A Scout Is Trustworty. Please do not copy or distribute this electronic version.
kayaking 41
.kayaks and Equipment
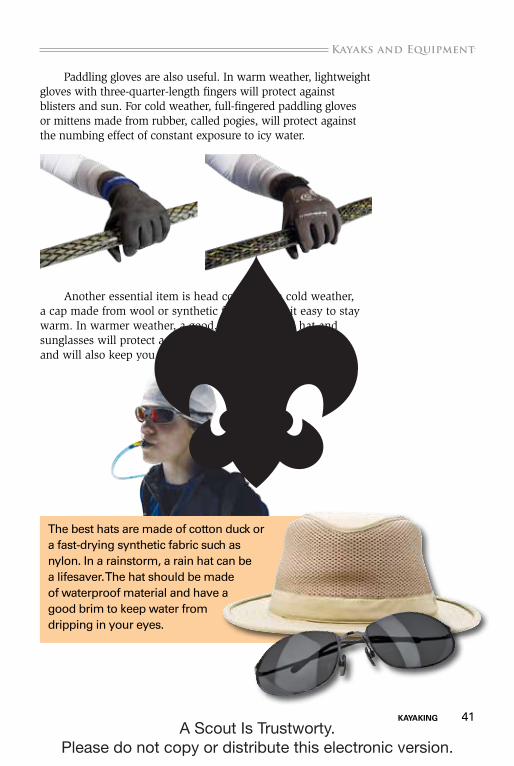
Paddling gloves are also useful. In warm weather, lightweight gloves with three-quarter-length fingers will protect against blisters and sun. For cold weather, full-fingered paddling gloves or mittens made from rubber, called pogies, will protect against the numbing effect of constant exposure to icy water.
Another essential item is head covering. In cold weather, a cap made from wool or synthetic fleece makes it easy to stay warm. In warmer weather, a good, wide-brimmed hat and sunglasses will protect against direct sunlight and sunburn and will also keep you cooler.
The best hats are made of cotton duck or a fast-drying synthetic fabric such as nylon. In a rainstorm, a rain hat can be a lifesaver. The hat should be made of waterproof material and have a good brim to keep water from dripping in your eyes.
A Scout Is Trustworty. Please do not copy or distribute this electronic version.
42 kayaking
kayaks and Equipment.
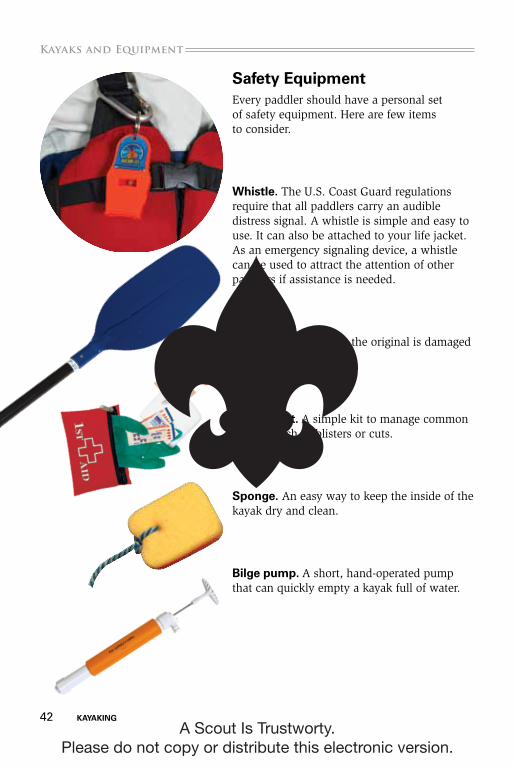
Safety EquipmentEvery paddler should have a personal set of safety equipment. Here are few items to consider.
Whistle. The U.S. Coast Guard regulations require that all paddlers carry an audible distress signal. A whistle is simple and easy to use. It can also be attached to your life jacket. As an emergency signaling device, a whistle can be used to attract the attention of other paddlers if assistance is needed.
Spare paddle. In case the original is damaged or lost.
First-aid kit. A simple kit to manage common injuries such as blisters or cuts.
Sponge. An easy way to keep the inside of the kayak dry and clean.
Bilge pump. A short, hand-operated pump that can quickly empty a kayak full of water.
A Scout Is Trustworty. Please do not copy or distribute this electronic version.
kayaking 43
.kayaks and Equipment
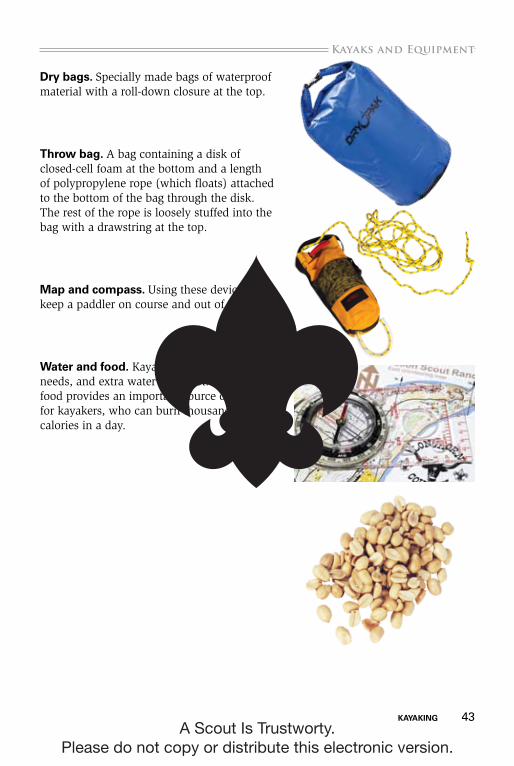
Dry bags. Specially made bags of waterproof material with a roll-down closure at the top.
Throw bag. A bag containing a disk of closed-cell foam at the bottom and a length of polypropylene rope (which floats) attached to the bottom of the bag through the disk. The rest of the rope is loosely stuffed into the bag with a drawstring at the top.
Map and compass. Using these devices will keep a paddler on course and out of trouble.
Water and food. Kayakers have high water needs, and extra water is a must. High-calorie food provides an important source of energy for kayakers, who can burn thousands of calories in a day.
A Scout Is Trustworty. Please do not copy or distribute this electronic version.
A Scout Is Trustworty. Please do not copy or distribute this electronic version.
kayaking 45
.Transportation and Rescues
Transportation and RescuesWherever you want to paddle your kayak, you will need to get it there. Since kayaks are usually too big to fit inside a car, they are secured onto roof racks or onto a trailer. Specially designed trailers can transport many kayaks at once. Making sure your kayak stays secure to the car or trailer is very important; if a boat falls off in transit it could cause a serious accident.
There are many ways to make securing a boat easier. These include straps with cam buckles, hooks, ratchets, or carabiners. The simplest way to secure a kayak to a rack and secure the ends of the boat is by using a sturdy rope with a few simple knots.
knotsWhen you are tying down a kayak, it is important to use the right kind of rope and knots that will not slip. Secure one end of polypropylene rope with a bowline and tie off the other end using an adjustable knot to set tension. The taut line is a common adjustable knot, but it requires that the rope be tight to keep it from slipping. Unfortunately, when the car is in motion, wind vibrations will cause this knot to slide and become ineffective. Using the trucker’s hitch will help to solve this problem. This knot provides a mechanical advantage and, when tied properly, does not slip.
Ideally, you will want to practice how to secure a kayak to a vehicle on a real car or trailer. If neither is available, you can demonstrate this skill on a specially made rack on land. Make sure you have a hook or stake mounted to the ground or a heavy object so you can practice bow and stern lines.
A Scout Is Trustworty. Please do not copy or distribute this electronic version.
46 kayaking
Transportation and Rescues.
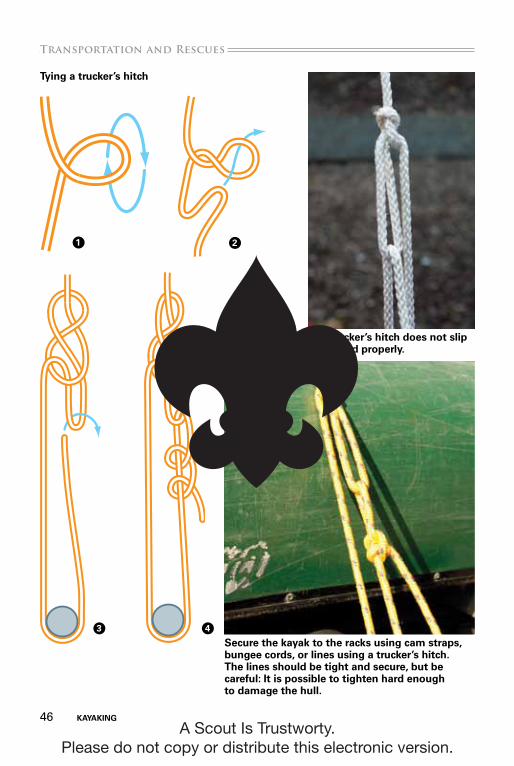
The trucker’s hitch does not slip when tied properly.
Secure the kayak to the racks using cam straps, bungee cords, or lines using a trucker’s hitch. The lines should be tight and secure, but be careful: it is possible to tighten hard enough to damage the hull.
Tying a trucker’s hitch
1 2
3 4
A Scout Is Trustworty. Please do not copy or distribute this electronic version.
kayaking 47
.Transportation and Rescues
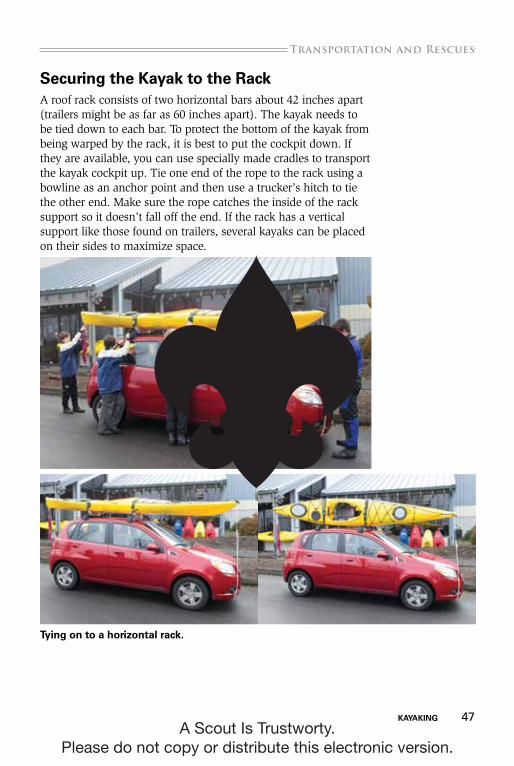
Securing the kayak to the RackA roof rack consists of two horizontal bars about 42 inches apart (trailers might be as far as 60 inches apart). The kayak needs to be tied down to each bar. To protect the bottom of the kayak from being warped by the rack, it is best to put the cockpit down. If they are available, you can use specially made cradles to transport the kayak cockpit up. Tie one end of the rope to the rack using a bowline as an anchor point and then use a trucker’s hitch to tie the other end. Make sure the rope catches the inside of the rack support so it doesn’t fall off the end. If the rack has a vertical support like those found on trailers, several kayaks can be placed on their sides to maximize space.
Tying on to a horizontal rack.
A Scout Is Trustworty. Please do not copy or distribute this electronic version.
48 kayaking
Transportation and Rescues.
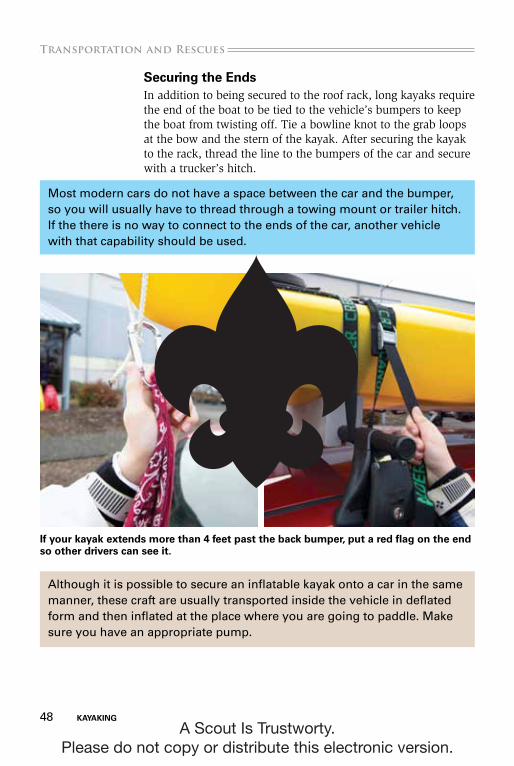
Securing the EndsIn addition to being secured to the roof rack, long kayaks require the end of the boat to be tied to the vehicle’s bumpers to keep the boat from twisting off. Tie a bowline knot to the grab loops at the bow and the stern of the kayak. After securing the kayak to the rack, thread the line to the bumpers of the car and secure with a trucker’s hitch.
if your kayak extends more than 4 feet past the back bumper, put a red flag on the end so other drivers can see it.
Most modern cars do not have a space between the car and the bumper, so you will usually have to thread through a towing mount or trailer hitch. If the there is no way to connect to the ends of the car, another vehicle with that capability should be used.
Although it is possible to secure an inflatable kayak onto a car in the same manner, these craft are usually transported inside the vehicle in deflated form and then inflated at the place where you are going to paddle. Make sure you have an appropriate pump.
A Scout Is Trustworty. Please do not copy or distribute this electronic version.
kayaking 49
.Transportation and Rescues
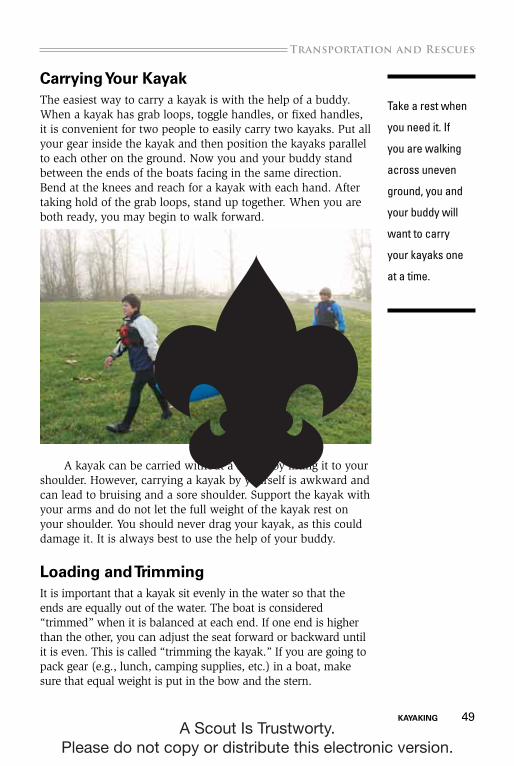
Carrying your kayakThe easiest way to carry a kayak is with the help of a buddy. When a kayak has grab loops, toggle handles, or fixed handles, it is convenient for two people to easily carry two kayaks. Put all your gear inside the kayak and then position the kayaks parallel to each other on the ground. Now you and your buddy stand between the ends of the boats facing in the same direction. Bend at the knees and reach for a kayak with each hand. After taking hold of the grab loops, stand up together. When you are both ready, you may begin to walk forward.
A kayak can be carried without a buddy by lifting it to your shoulder. However, carrying a kayak by yourself is awkward and can lead to bruising and a sore shoulder. Support the kayak with your arms and do not let the full weight of the kayak rest on your shoulder. You should never drag your kayak, as this could damage it. It is always best to use the help of your buddy.
Loading and TrimmingIt is important that a kayak sit evenly in the water so that the ends are equally out of the water. The boat is considered “trimmed” when it is balanced at each end. If one end is higher than the other, you can adjust the seat forward or backward until it is even. This is called “trimming the kayak.” If you are going to pack gear (e.g., lunch, camping supplies, etc.) in a boat, make sure that equal weight is put in the bow and the stern.
Take a rest when
you need it. If
you are walking
across uneven
ground, you and
your buddy will
want to carry
your kayaks one
at a time.
A Scout Is Trustworty. Please do not copy or distribute this electronic version.
50 kayaking
Transportation and Rescues.
Fitting your kayakBecause kayaks come in multiple sizes, it is important to find one that fits you properly. Generally speaking if you are a big person, you need a big kayak. Likewise, a small person needs a smaller kayak. Paddling a boat that is the wrong size will affect the kayak’s stability and your ability to maneuver it.
Before you put your kayak in the water, get into it while it is on land. Make sure that you can get in and out comfortably. You do not want to capsize and then realize that the boat is too tight to easily exit. Adjust the foot pegs so that your legs are slightly bent when you are sitting on the seat. When you are using a sit-on-top kayak, simply choose the foothold that feels the most comfortable.
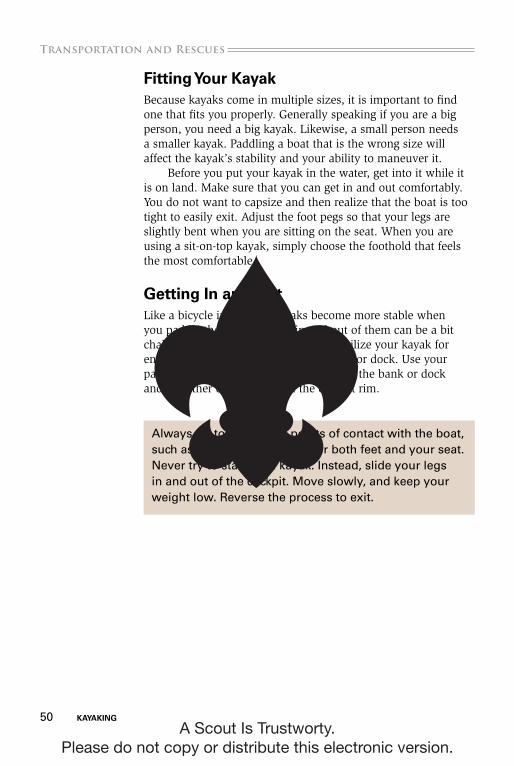
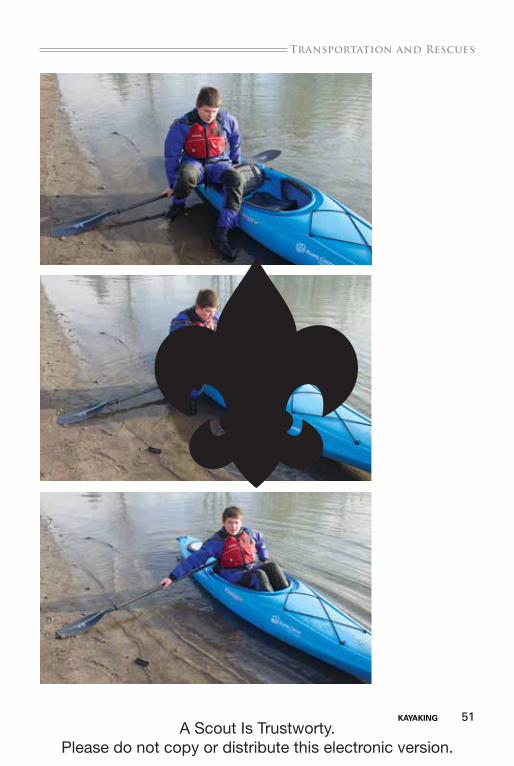
getting in and OutLike a bicycle in motion, kayaks become more stable when you paddle them, but getting in and out of them can be a bit challenging as they can be tippy. To stabilize your kayak for entry, bring the boat parallel to the shore or dock. Use your paddle for balance by placing one end on the bank or dock and the other end just behind the cockpit rim.
Always try to keep three points of contact with the boat, such as both hands and foot, or both feet and your seat. Never try to stand in a kayak. Instead, slide your legs in and out of the cockpit. Move slowly, and keep your weight low. Reverse the process to exit.
A Scout Is Trustworty. Please do not copy or distribute this electronic version.
kayaking 51
.Transportation and Rescues
A Scout Is Trustworty. Please do not copy or distribute this electronic version.
52 kayaking
Transportation and Rescues.
RescuesAlthough not likely, kayaks can capsize; paddlers should be pre-pared if this occurs. It is important that you ALWAYS wear your life jacket. Make sure it has been properly fitted, fully buckled up and, most important, is on your body. Even if you are learning your rescue skills in a swimming pool, learning how to move in the water while wearing a life jacket is an important skill.
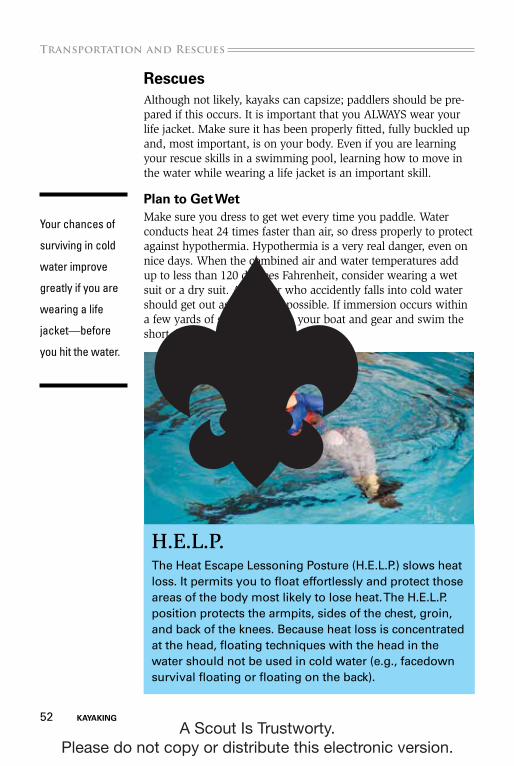
Plan to get WetMake sure you dress to get wet every time you paddle. Water conducts heat 24 times faster than air, so dress properly to protect against hypothermia. Hypothermia is a very real danger, even on nice days. When the combined air and water temperatures add up to less than 120 degrees Fahrenheit, consider wearing a wet suit or a dry suit. A paddler who accidently falls into cold water should get out as quickly as possible. If immersion occurs within a few yards of shore, abandon your boat and gear and swim the short distance to get out of the water.
H.E.L.P.The Heat Escape Lessoning Posture (H.E.L.P.) slows heat loss. It permits you to float effortlessly and protect those areas of the body most likely to lose heat. The H.E.L.P. position protects the armpits, sides of the chest, groin, and back of the knees. Because heat loss is concentrated at the head, floating techniques with the head in the water should not be used in cold water (e.g., facedown survival floating or floating on the back).
Your chances of
surviving in cold
water improve
greatly if you are
wearing a life
jacket—before
you hit the water.
A Scout Is Trustworty. Please do not copy or distribute this electronic version.
kayaking 53
.Transportation and Rescues
Although swimming will generate heat through exercise, the increased water flow caused by swimming will rapidly conduct that heat away. Consequently, even a good swimmer will not be able to swim very far in cold water. If the distance is more than a few yards, the paddler should wait for assistance from his buddy boat. To minimize his loss of heat, the paddler should assume the H.E.L.P. position until rescue arrives.
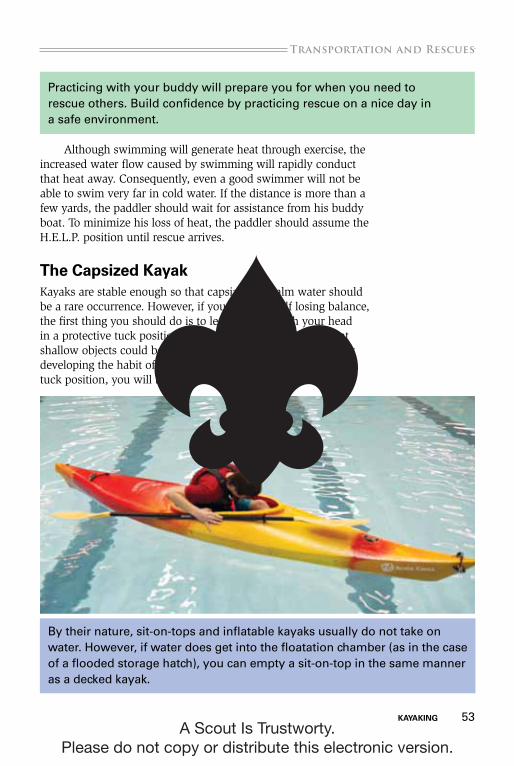
The Capsized kayakKayaks are stable enough so that capsizing in calm water should be a rare occurrence. However, if you find yourself losing balance, the first thing you should do is to lean forward with your head in a protective tuck position. There is always a possibility that shallow objects could be in the water directly below you, so by developing the habit of automatically getting into the protective tuck position, you will be better able to avoid injury.
Practicing with your buddy will prepare you for when you need to rescue others. Build confidence by practicing rescue on a nice day in a safe environment.
By their nature, sit-on-tops and inflatable kayaks usually do not take on water. However, if water does get into the floatation chamber (as in the case of a flooded storage hatch), you can empty a sit-on-top in the same manner as a decked kayak.
A Scout Is Trustworty. Please do not copy or distribute this electronic version.
54 kayaking
Transportation and Rescues.
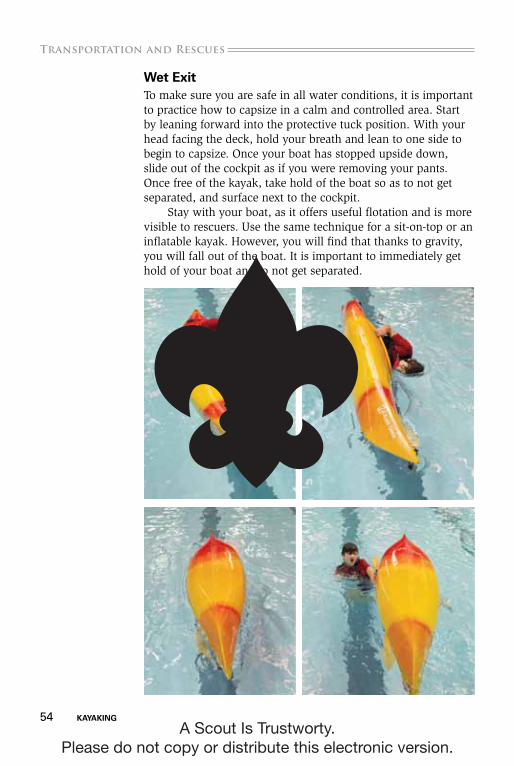
Wet ExitTo make sure you are safe in all water conditions, it is important to practice how to capsize in a calm and controlled area. Start by leaning forward into the protective tuck position. With your head facing the deck, hold your breath and lean to one side to begin to capsize. Once your boat has stopped upside down, slide out of the cockpit as if you were removing your pants. Once free of the kayak, take hold of the boat so as to not get separated, and surface next to the cockpit.
Stay with your boat, as it offers useful flotation and is more visible to rescuers. Use the same technique for a sit-on-top or an inflatable kayak. However, you will find that thanks to gravity, you will fall out of the boat. It is important to immediately get hold of your boat and to not get separated.
A Scout Is Trustworty. Please do not copy or distribute this electronic version.
kayaking 55
.Transportation and Rescues
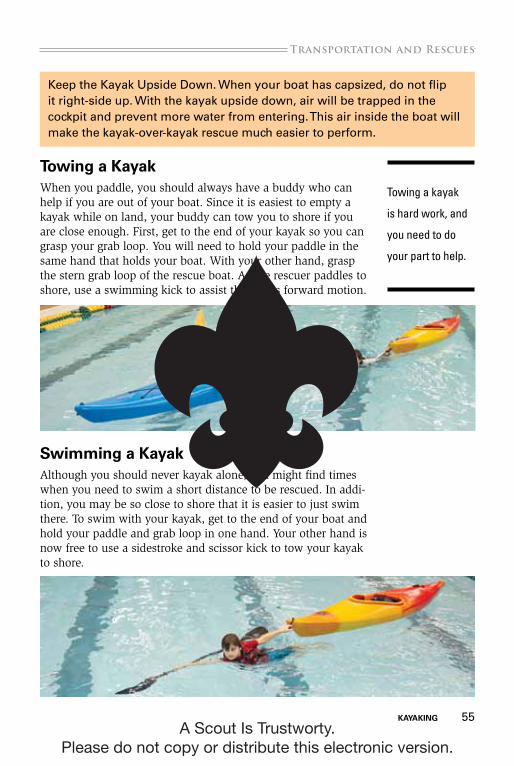
Towing a kayakWhen you paddle, you should always have a buddy who can help if you are out of your boat. Since it is easiest to empty a kayak while on land, your buddy can tow you to shore if you are close enough. First, get to the end of your kayak so you can grasp your grab loop. You will need to hold your paddle in the same hand that holds your boat. With your other hand, grasp the stern grab loop of the rescue boat. As the rescuer paddles to shore, use a swimming kick to assist the boat’s forward motion.
Swimming a kayakAlthough you should never kayak alone, you might find times when you need to swim a short distance to be rescued. In addi-tion, you may be so close to shore that it is easier to just swim there. To swim with your kayak, get to the end of your boat and hold your paddle and grab loop in one hand. Your other hand is now free to use a sidestroke and scissor kick to tow your kayak to shore.
Towing a kayak
is hard work, and
you need to do
your part to help.
Keep the Kayak Upside Down. When your boat has capsized, do not flip it right-side up. With the kayak upside down, air will be trapped in the cockpit and prevent more water from entering. This air inside the boat will make the kayak-over-kayak rescue much easier to perform.
A Scout Is Trustworty. Please do not copy or distribute this electronic version.
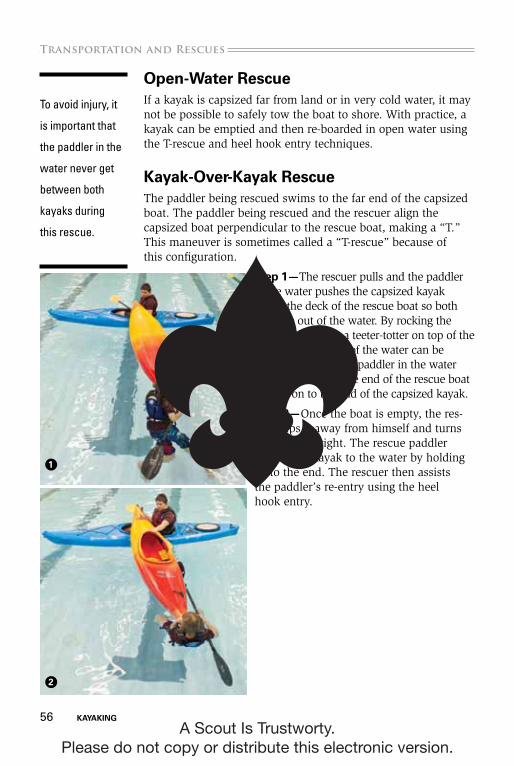
56 kayaking
Transportation and Rescues.
Open-Water RescueIf a kayak is capsized far from land or in very cold water, it may not be possible to safely tow the boat to shore. With practice, a kayak can be emptied and then re-boarded in open water using the T-rescue and heel hook entry techniques.
kayak-Over-kayak RescueThe paddler being rescued swims to the far end of the capsized boat. The paddler being rescued and the rescuer align the capsized boat perpendicular to the rescue boat, making a “T.” This maneuver is sometimes called a “T-rescue” because of this configuration.
Step 1—The rescuer pulls and the paddler in the water pushes the capsized kayak across the deck of the rescue boat so both ends are out of the water. By rocking the capsized boat like a teeter-totter on top of the rescue kayak, most of the water can be quickly drained. The paddler in the water should hold on to the end of the rescue boat or hold on to the end of the capsized kayak.
Step 2—Once the boat is empty, the res-cuer flips it away from himself and turns the kayak upright. The rescue paddler returns the kayak to the water by holding on to the end. The rescuer then assists the paddler’s re-entry using the heel hook entry.
To avoid injury, it
is important that
the paddler in the
water never get
between both
kayaks during
this rescue.
1
2
A Scout Is Trustworty. Please do not copy or distribute this electronic version.
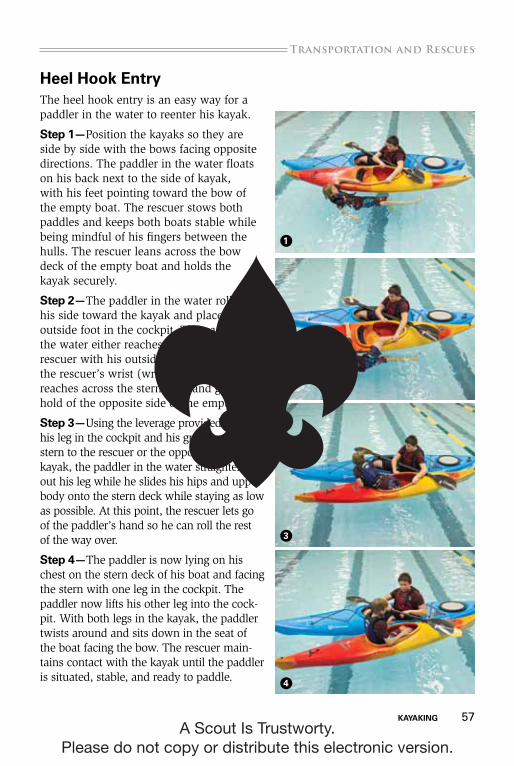
kayaking 57
.Transportation and Rescues
Heel Hook EntryThe heel hook entry is an easy way for a paddler in the water to reenter his kayak.
Step 1—Position the kayaks so they are side by side with the bows facing opposite directions. The paddler in the water floats on his back next to the side of kayak, with his feet pointing toward the bow of the empty boat. The rescuer stows both paddles and keeps both boats stable while being mindful of his fingers between the hulls. The rescuer leans across the bow deck of the empty boat and holds the kayak securely.
Step 2—The paddler in the water rolls on his side toward the kayak and places his outside foot in the cockpit. The paddler in the water either reaches up toward the rescuer with his outside hand and grasps the rescuer’s wrist (wrist to wrist) or reaches across the stern deck and grabs hold of the opposite side of the empty boat.
Step 3—Using the leverage provided by his leg in the cockpit and his grip across the stern to the rescuer or the opposite side of the kayak, the paddler in the water straightens out his leg while he slides his hips and upper body onto the stern deck while staying as low as possible. At this point, the rescuer lets go of the paddler’s hand so he can roll the rest of the way over.
Step 4—The paddler is now lying on his chest on the stern deck of his boat and facing the stern with one leg in the cockpit. The paddler now lifts his other leg into the cock-pit. With both legs in the kayak, the paddler twists around and sits down in the seat of the boat facing the bow. The rescuer main-tains contact with the kayak until the paddler is situated, stable, and ready to paddle.
1
2
3
4
A Scout Is Trustworty. Please do not copy or distribute this electronic version.
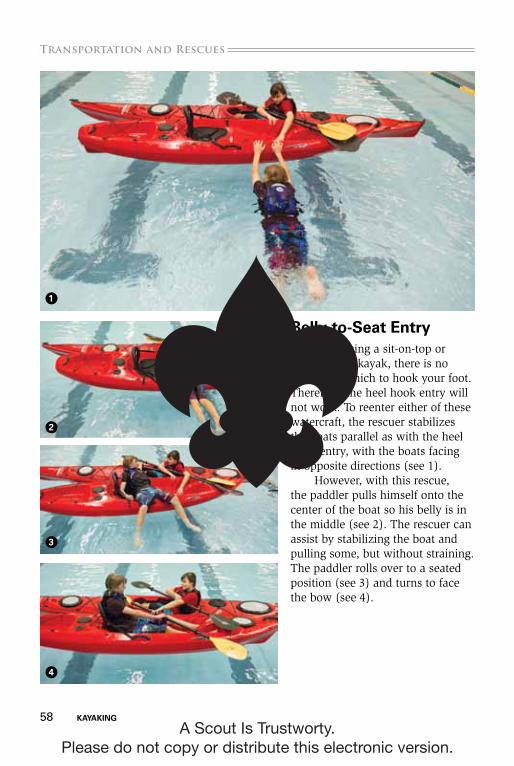
58 kayaking
Transportation and Rescues.
Belly-to-Seat EntryIf you are using a sit-on-top or an inflatable kayak, there is no cockpit in which to hook your foot. Therefore, the heel hook entry will not work. To reenter either of these watercraft, the rescuer stabilizes the boats parallel as with the heel hook entry, with the boats facing in opposite directions (see 1).
However, with this rescue, the paddler pulls himself onto the center of the boat so his belly is in the middle (see 2). The rescuer can assist by stabilizing the boat and pulling some, but without straining. The paddler rolls over to a seated position (see 3) and turns to face the bow (see 4).
1
2
3
4
A Scout Is Trustworty. Please do not copy or distribute this electronic version.
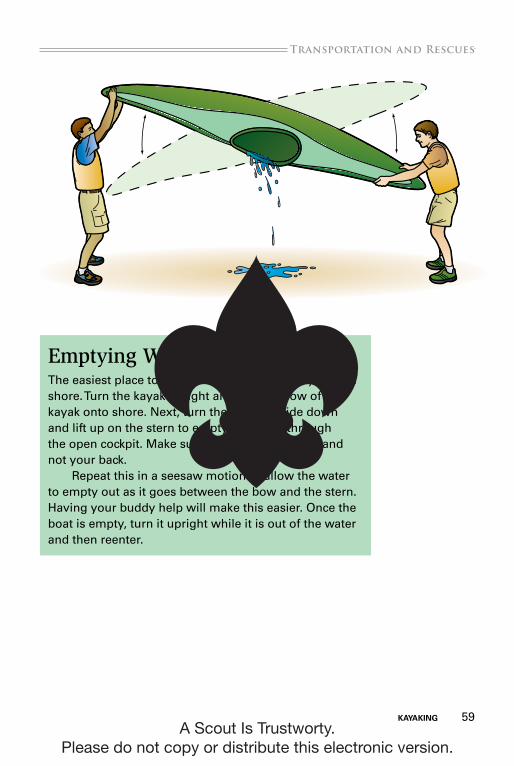
kayaking 59
.Transportation and Rescues
Emptying Water on ShoreThe easiest place to empty water from your kayak is on shore. Turn the kayak upright and pull the bow of the kayak onto shore. Next, turn the kayak upside down and lift up on the stern to empty the water through the open cockpit. Make sure to lift with your legs and not your back.
Repeat this in a seesaw motion to allow the water to empty out as it goes between the bow and the stern. Having your buddy help will make this easier. Once the boat is empty, turn it upright while it is out of the water and then reenter.
A Scout Is Trustworty. Please do not copy or distribute this electronic version.
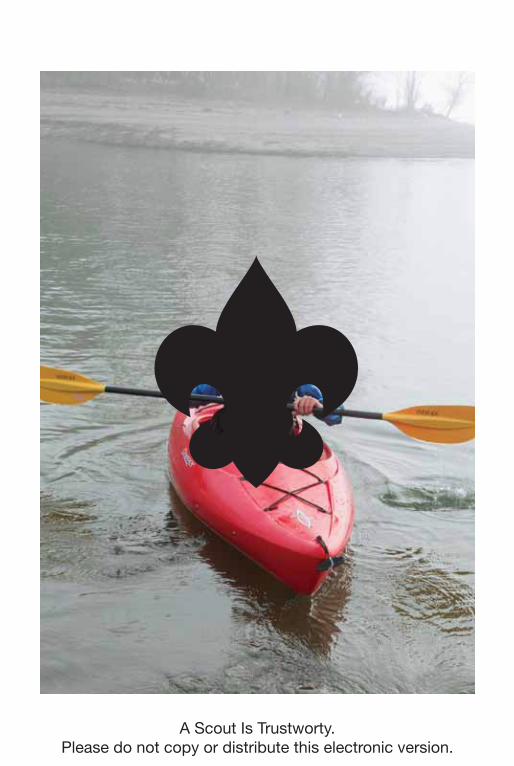
A Scout Is Trustworty. Please do not copy or distribute this electronic version.
kayaking 61
.Skills and Maneuvers
Skills and ManeuversYou have the right kayak for your body type and the outings you plan to make. You have learned how to get into it and out of it on land and on water. Now you have to make it go. The paddling skills that will allow you to maneuver your craft through the water begin with proper form and body balance.
kayaking FoundationsNo matter what kind of kayak they paddle, good kayakers use the same set of skills to keep their boat under control. Whether they’re in a 6-foot-long whitewater boat, an 18-foot-long sea kayak, or something in between, kayakers need to keep their boat upright and make it go where they want. This merit badge will teach you how to do that by using your body and paddle.
Paddler ComfortThe first step to controlling a kayak is one that is often overlooked: paddler comfort. It’s hard to learn paddling if the paddler is not comfortable sitting in the boat. When a kayak fits well, it is easier for the paddler to control the boat and respond to changing water conditions.
Comfort starts with gear that fits well and is appropriate for the area paddled. A well-fitted life jacket is obvious, but warm clothes, closed-toe shoes, and head protec-tion are just as important. A boat and paddle that fit help kayakers be more comfortable and have more fun on the water. Beyond these basics, food and water, rescue gear, and a group of fellow paddlers can make each trip on the water more fun and more safe.
A Scout Is Trustworty. Please do not copy or distribute this electronic version.
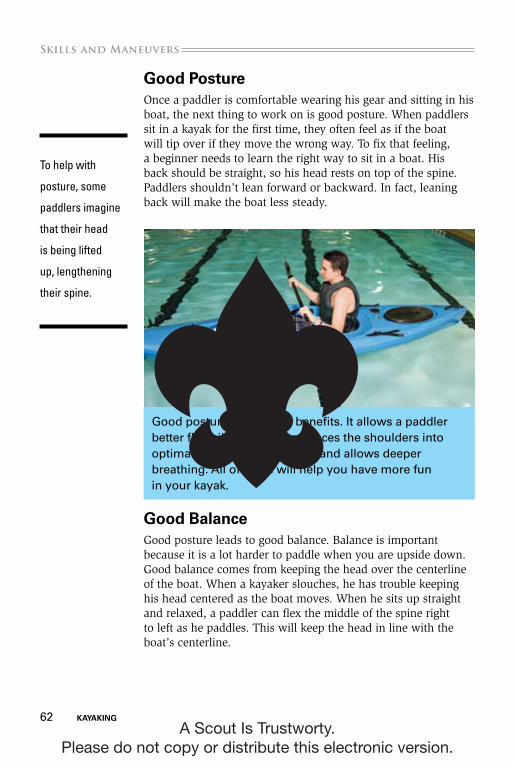
62 kayaking
Skills and Maneuvers.
good PostureOnce a paddler is comfortable wearing his gear and sitting in his boat, the next thing to work on is good posture. When paddlers sit in a kayak for the first time, they often feel as if the boat will tip over if they move the wrong way. To fix that feeling, a beginner needs to learn the right way to sit in a boat. His back should be straight, so his head rests on top of the spine. Paddlers shouldn’t lean forward or backward. In fact, leaning back will make the boat less steady.
good BalanceGood posture leads to good balance. Balance is important because it is a lot harder to paddle when you are upside down. Good balance comes from keeping the head over the centerline of the boat. When a kayaker slouches, he has trouble keeping his head centered as the boat moves. When he sits up straight and relaxed, a paddler can flex the middle of the spine right to left as he paddles. This will keep the head in line with the boat’s centerline.
To help with
posture, some
paddlers imagine
that their head
is being lifted
up, lengthening
their spine.
Good posture gives huge benefits. It allows a paddler better flexibility and vision, places the shoulders into optimal position for paddling, and allows deeper breathing. All of these will help you have more fun in your kayak.
A Scout Is Trustworty. Please do not copy or distribute this electronic version.
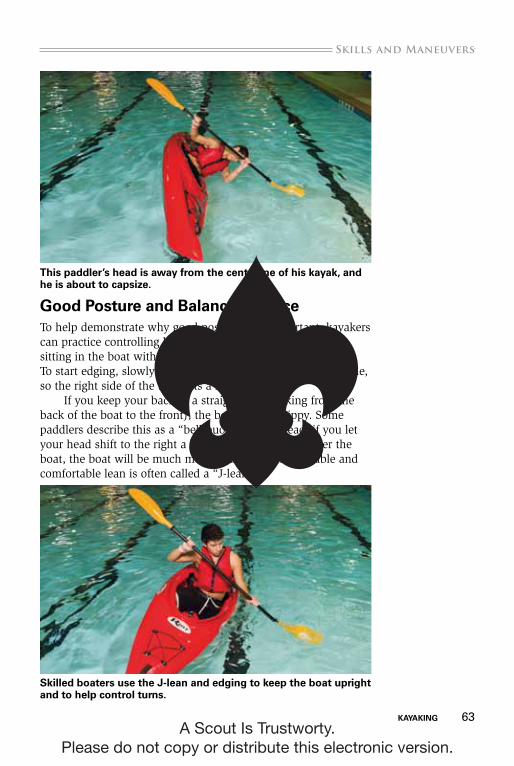
kayaking 63
.Skills and Maneuvers
good Posture and Balance PracticeTo help demonstrate why good posture is so important, kayakers can practice controlling how much their boat edges. Start by sitting in the boat with good posture, so that the boat sits flat. To start edging, slowly shift some of your weight to the left side, so the right side of the boat lifts a little.
If you keep your back in a straight line (looking from the back of the boat to the front), the boat will feel tippy. Some paddlers describe this as a “bell-buoy lean.” Instead, if you let your head shift to the right a bit, so it stays centered over the boat, the boat will be much more stable. This more stable and comfortable lean is often called a “J-lean.”
Skilled boaters use the J-lean and edging to keep the boat upright and to help control turns.
This paddler’s head is away from the centerline of his kayak, and he is about to capsize.
A Scout Is Trustworty. Please do not copy or distribute this electronic version.

64 kayaking
Skills and Maneuvers.
If your boat is equipped with thigh straps or thigh braces, you also can put a little pressure on those with your right leg, to make the boat feel even more stable. You can flatten the boat by bringing your weight back to the boat’s center. Practice moving from a flat boat to a boat on edge to practice keeping good posture and balance.
good Shoulder PositionGood posture and balance lead to a strong position for a paddler’s shoulders. Keeping a strong shoulder position sometimes is referred to as “staying in the box” or “staying in the cube.” Shoulders are both the most mobile joint in the body and the most mobile point between the paddle and the boat. To make shoulders work well, paddlers generally should keep their elbows low (at or below chin height), bent, and in front of the body.
Elbows can be sharply bent or almost fully extended. Maintaining some degree of bend allows elbows
to act as shock absorbers, protecting both the elbow and the shoulder. This is the same position you would hold your arms if you were doing pushups.
To feel why the strong shoulder position is important, stand up and lift your arms out from your sides until your elbows are as high as they can go and it looks like you are ready to do a pushup against the air. After a few minutes, your shoulders will get tired and uncomfortable. Next, keep your hands in place and relax your elbows. When you drop your elbows down below the shoulders and close to your body, you will feel a lot better.
New kayakers tend to have tight hips and lean away from the kayak when it rides up on edge. Unfortunately, this can lead to an unplanned capsize.
A Scout Is Trustworty. Please do not copy or distribute this electronic version.
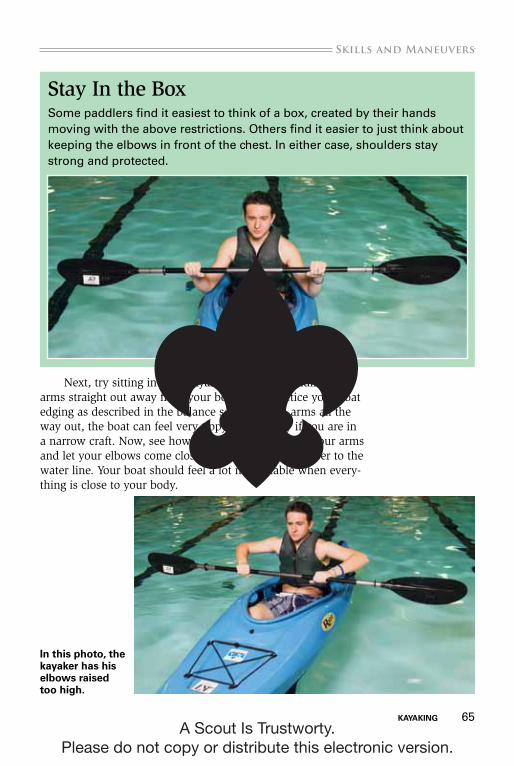
kayaking 65
.Skills and Maneuvers
Stay In the BoxSome paddlers find it easiest to think of a box, created by their hands moving with the above restrictions. Others find it easier to just think about keeping the elbows in front of the chest. In either case, shoulders stay strong and protected.
Next, try sitting in your kayak in the water, holding your arms straight out away from your body, and practice your boat edging as described in the balance section. With arms all the way out, the boat can feel very tippy, particularly if you are in a narrow craft. Now, see how it feels when you drop your arms and let your elbows come closer to your chest and closer to the water line. Your boat should feel a lot more stable when every-thing is close to your body.
in this photo, the kayaker has his elbows raised too high.
A Scout Is Trustworty. Please do not copy or distribute this electronic version.
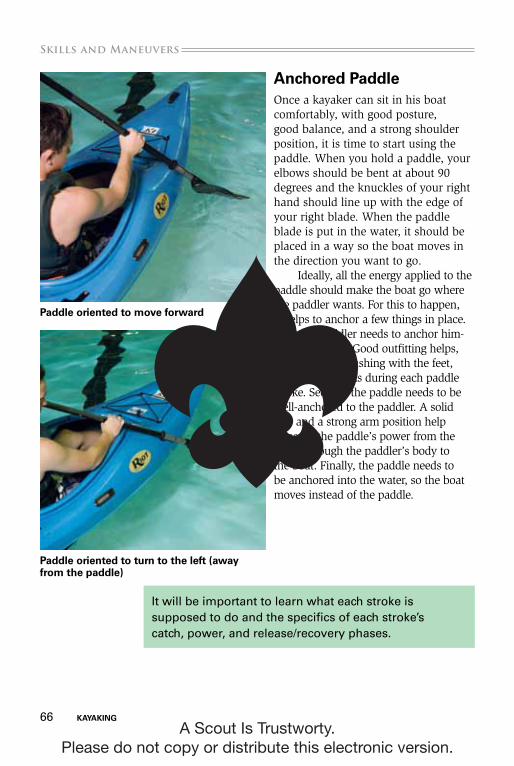
66 kayaking
Skills and Maneuvers.
anchored PaddleOnce a kayaker can sit in his boat comfortably, with good posture, good balance, and a strong shoulder position, it is time to start using the paddle. When you hold a paddle, your elbows should be bent at about 90 degrees and the knuckles of your right hand should line up with the edge of your right blade. When the paddle blade is put in the water, it should be placed in a way so the boat moves in the direction you want to go.
Ideally, all the energy applied to the paddle should make the boat go where the paddler wants. For this to happen, it helps to anchor a few things in place. First, the paddler needs to anchor him-self in the boat. Good outfitting helps, as does gently pushing with the feet, legs, and buttocks during each paddle stroke. Second, the paddle needs to be well-anchored to the paddler. A solid grip and a strong arm position help transmit the paddle’s power from the water through the paddler’s body to the boat. Finally, the paddle needs to be anchored into the water, so the boat moves instead of the paddle.
It will be important to learn what each stroke is supposed to do and the specifics of each stroke’s catch, power, and release/recovery phases.
Paddle oriented to turn to the left (away from the paddle)
Paddle oriented to move forward
A Scout Is Trustworty. Please do not copy or distribute this electronic version.

kayaking 67
.Skills and Maneuvers
There are several ways you can anchor the blade. The easiest and most common way is to insert it into the water, in a position to move the boat in the direction you want to go. Then, apply power to the blade by taking a slow, deliberate stroke to move your boat. You will know you are doing this correctly if, as the boat moves, the paddle blade stays close to where you put it in the water. To move faster, simply apply a little more power to the blade.
However, if a lot of bubbles and splash form around the paddle blade, the blade is not working as effectively as possible. This could happen because you are pulling too hard on the paddle. The result is just like spinning a car’s wheels in mud. You will put out a lot of effort and generate a lot of splash without going anywhere. To fix this problem, slow the paddle blade down until the bubbles and splashing stop.
Bubbles can also form if your paddle blade is not completely submerged. To fix that, make sure your paddle blade is completely under water when you apply power. Remember: It’s your blade, so use all of it!
Gentle pushing
helps keep the
paddler from
sliding in the
seat when he
applies power
to the paddle.
Paddle oriented to move sideways (toward the paddle)
A Scout Is Trustworty. Please do not copy or distribute this electronic version.
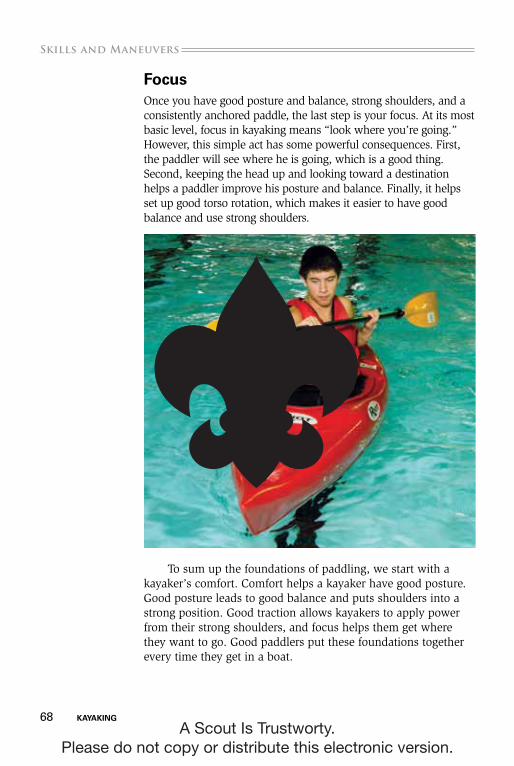
68 kayaking
Skills and Maneuvers.
FocusOnce you have good posture and balance, strong shoulders, and a consistently anchored paddle, the last step is your focus. At its most basic level, focus in kayaking means “look where you’re going.” However, this simple act has some powerful consequences. First, the paddler will see where he is going, which is a good thing. Second, keeping the head up and looking toward a destination helps a paddler improve his posture and balance. Finally, it helps set up good torso rotation, which makes it easier to have good balance and use strong shoulders.
To sum up the foundations of paddling, we start with a kayaker’s comfort. Comfort helps a kayaker have good posture. Good posture leads to good balance and puts shoulders into a strong position. Good traction allows kayakers to apply power from their strong shoulders, and focus helps them get where they want to go. Good paddlers put these foundations together every time they get in a boat.
A Scout Is Trustworty. Please do not copy or distribute this electronic version.
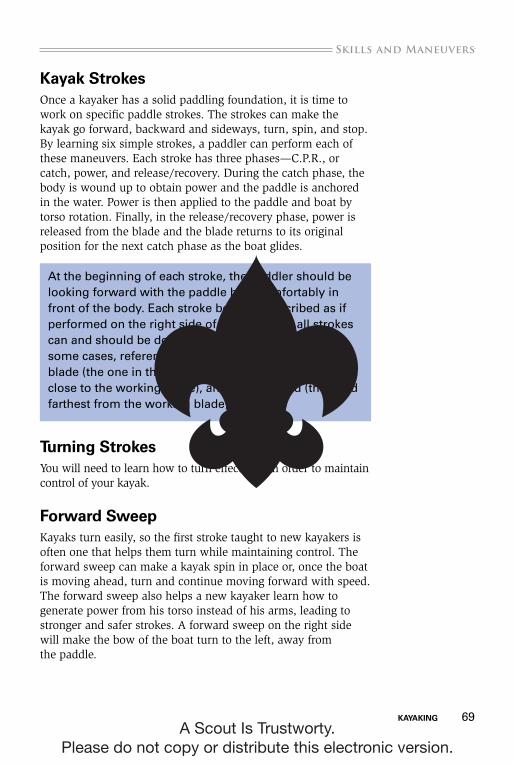
kayaking 69
.Skills and Maneuvers
kayak StrokesOnce a kayaker has a solid paddling foundation, it is time to work on specific paddle strokes. The strokes can make the kayak go forward, backward and sideways, turn, spin, and stop. By learning six simple strokes, a paddler can perform each of these maneuvers. Each stroke has three phases—C.P.R., or catch, power, and release/recovery. During the catch phase, the body is wound up to obtain power and the paddle is anchored in the water. Power is then applied to the paddle and boat by torso rotation. Finally, in the release/recovery phase, power is released from the blade and the blade returns to its original position for the next catch phase as the boat glides.
Turning StrokesYou will need to learn how to turn effectively in order to maintain control of your kayak.
Forward SweepKayaks turn easily, so the first stroke taught to new kayakers is often one that helps them turn while maintaining control. The forward sweep can make a kayak spin in place or, once the boat is moving ahead, turn and continue moving forward with speed. The forward sweep also helps a new kayaker learn how to generate power from his torso instead of his arms, leading to stronger and safer strokes. A forward sweep on the right side will make the bow of the boat turn to the left, away from the paddle.
At the beginning of each stroke, the paddler should be looking forward with the paddle held comfortably in front of the body. Each stroke below is described as if performed on the right side of the body, but all strokes can and should be done on both sides of the body. In some cases, reference will be made to the working blade (the one in the water), the working hand (the one close to the working blade), and the top hand (the hand farthest from the working blade).
A Scout Is Trustworty. Please do not copy or distribute this electronic version.
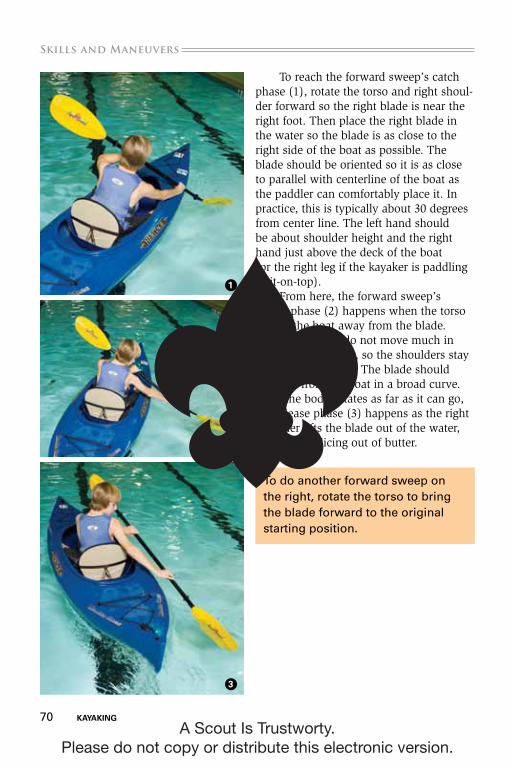
70 kayaking
Skills and Maneuvers.
To reach the forward sweep’s catch phase (1), rotate the torso and right shoul-der forward so the right blade is near the right foot. Then place the right blade in the water so the blade is as close to the right side of the boat as possible. The blade should be oriented so it is as close to parallel with centerline of the boat as the paddler can comfortably place it. In practice, this is typically about 30 degrees from center line. The left hand should be about shoulder height and the right hand just above the deck of the boat (or the right leg if the kayaker is paddling a sit-on-top).
From here, the forward sweep’s power phase (2) happens when the torso rotates the boat away from the blade. Ideally, the arms do not move much in relation to the body, so the shoulders stay in a strong position. The blade should separate from the boat in a broad curve. Once the body rotates as far as it can go, the release phase (3) happens as the right shoulder lifts the blade out of the water, like a knife slicing out of butter.
To do another forward sweep on the right, rotate the torso to bring the blade forward to the original starting position.
1
2
3
A Scout Is Trustworty. Please do not copy or distribute this electronic version.
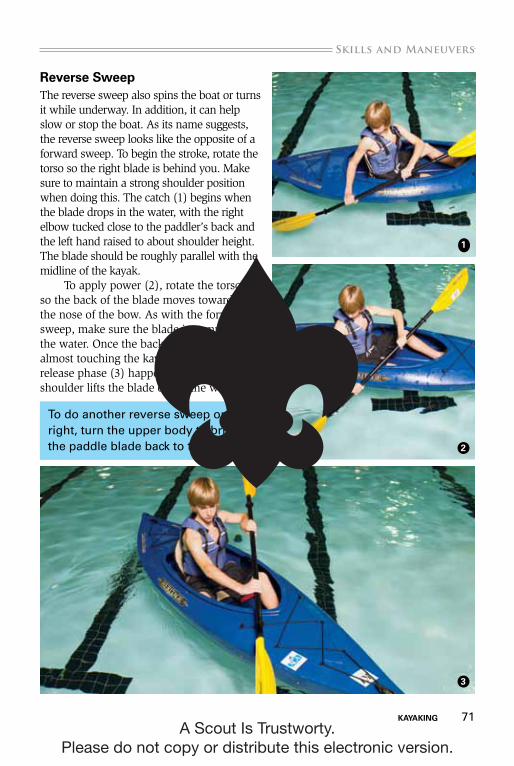
kayaking 71
.Skills and Maneuvers
Reverse SweepThe reverse sweep also spins the boat or turns it while underway. In addition, it can help slow or stop the boat. As its name suggests, the reverse sweep looks like the opposite of a forward sweep. To begin the stroke, rotate the torso so the right blade is behind you. Make sure to maintain a strong shoulder position when doing this. The catch (1) begins when the blade drops in the water, with the right elbow tucked close to the paddler’s back and the left hand raised to about shoulder height. The blade should be roughly parallel with the midline of the kayak.
To apply power (2), rotate the torso so the back of the blade moves toward the nose of the bow. As with the forward sweep, make sure the blade is completely in the water. Once the back face of the blade is almost touching the kayak near the feet, the release phase (3) happens when the right shoulder lifts the blade out of the water.
To do another reverse sweep on the right, turn the upper body to bring the paddle blade back to the stern.
1
2
3
A Scout Is Trustworty. Please do not copy or distribute this electronic version.
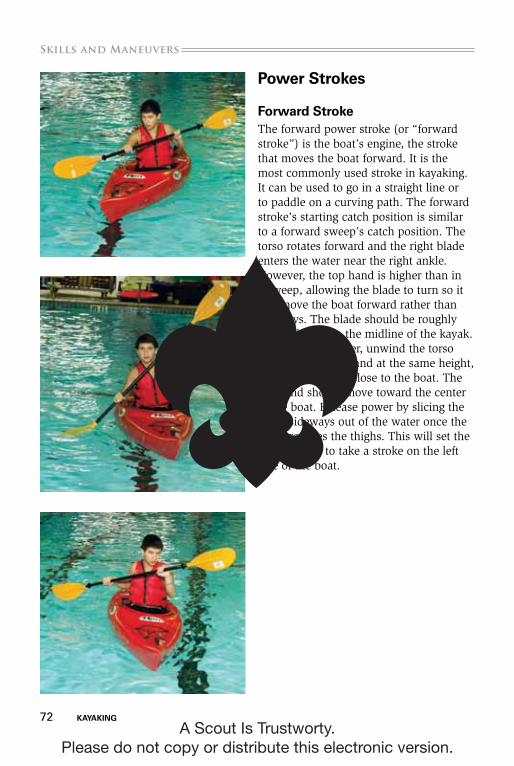
72 kayaking
Skills and Maneuvers.
Power Strokes
Forward StrokeThe forward power stroke (or “forward stroke”) is the boat’s engine, the stroke that moves the boat forward. It is the most commonly used stroke in kayaking. It can be used to go in a straight line or to paddle on a curving path. The forward stroke’s starting catch position is similar to a forward sweep’s catch position. The torso rotates forward and the right blade enters the water near the right ankle. However, the top hand is higher than in a sweep, allowing the blade to turn so it will move the boat forward rather than sideways. The blade should be roughly perpendicular to the midline of the kayak.
To apply power, unwind the torso and keep the top hand at the same height, so the blade stays close to the boat. The top hand should move toward the center of the boat. Release power by slicing the blade sideways out of the water once the blade reaches the thighs. This will set the left blade up to take a stroke on the left side of the boat.
A Scout Is Trustworty. Please do not copy or distribute this electronic version.
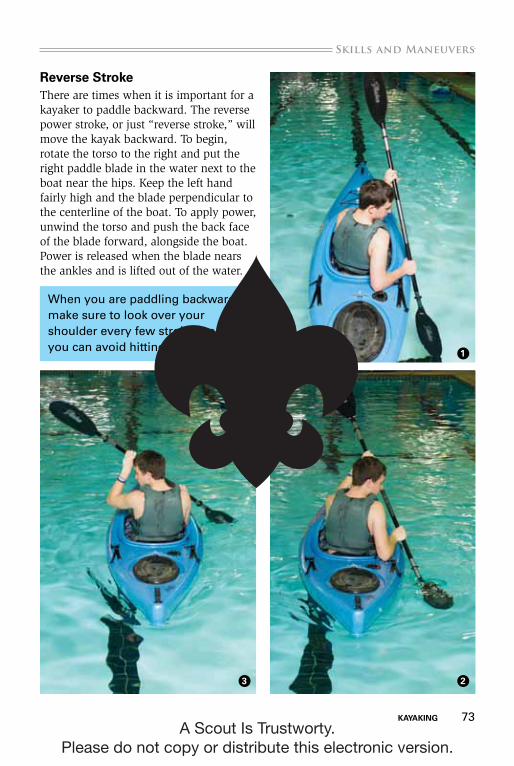
kayaking 73
.Skills and Maneuvers
Reverse StrokeThere are times when it is important for a kayaker to paddle backward. The reverse power stroke, or just “reverse stroke,” will move the kayak backward. To begin, rotate the torso to the right and put the right paddle blade in the water next to the boat near the hips. Keep the left hand fairly high and the blade perpendicular to the centerline of the boat. To apply power, unwind the torso and push the back face of the blade forward, alongside the boat. Power is released when the blade nears the ankles and is lifted out of the water.
When you are paddling backward, make sure to look over your shoulder every few strokes so you can avoid hitting things.
1
23
A Scout Is Trustworty. Please do not copy or distribute this electronic version.
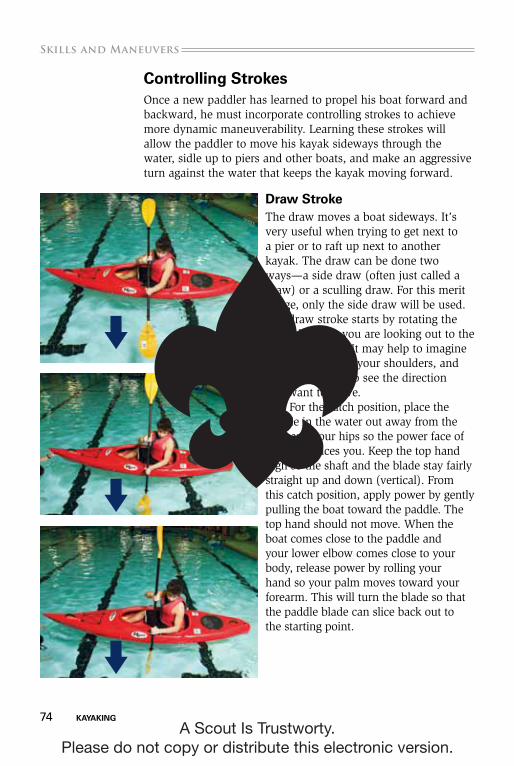
74 kayaking
Skills and Maneuvers.
Controlling StrokesOnce a new paddler has learned to propel his boat forward and backward, he must incorporate controlling strokes to achieve more dynamic maneuverability. Learning these strokes will allow the paddler to move his kayak sideways through the water, sidle up to piers and other boats, and make an aggressive turn against the water that keeps the kayak moving forward.
Draw StrokeThe draw moves a boat sideways. It’s very useful when trying to get next to a pier or to raft up next to another kayak. The draw can be done two ways—a side draw (often just called a draw) or a sculling draw. For this merit badge, only the side draw will be used. The draw stroke starts by rotating the upper body so you are looking out to the side of the boat. It may help to imagine you have eyes on your shoulders, and those eyes need to see the direction you want to move.
For the catch position, place the paddle in the water out away from the boat and your hips so the power face of the blade faces you. Keep the top hand high so the shaft and the blade stay fairly straight up and down (vertical). From this catch position, apply power by gently pulling the boat toward the paddle. The top hand should not move. When the boat comes close to the paddle and your lower elbow comes close to your body, release power by rolling your hand so your palm moves toward your forearm. This will turn the blade so that the paddle blade can slice back out to the starting point.
A Scout Is Trustworty. Please do not copy or distribute this electronic version.
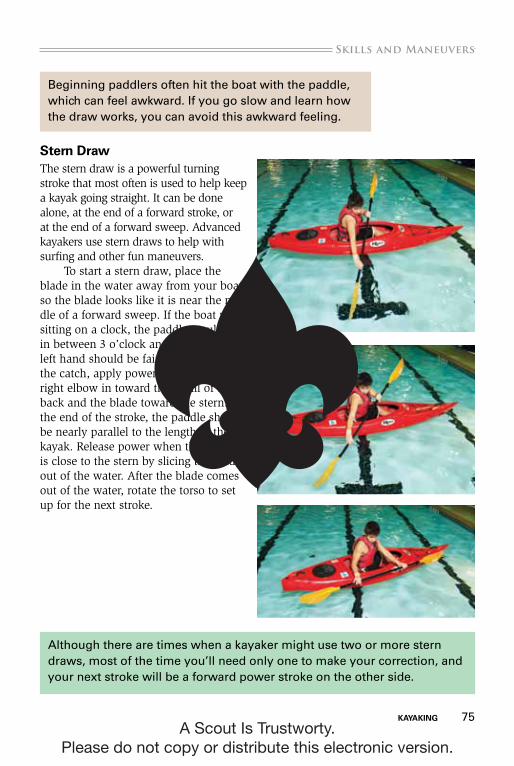
kayaking 75
.Skills and Maneuvers
Stern DrawThe stern draw is a powerful turning stroke that most often is used to help keep a kayak going straight. It can be done alone, at the end of a forward stroke, or at the end of a forward sweep. Advanced kayakers use stern draws to help with surfing and other fun maneuvers.
To start a stern draw, place the blade in the water away from your boat, so the blade looks like it is near the mid-dle of a forward sweep. If the boat were sitting on a clock, the paddle would go in between 3 o’clock and 4 o’clock. The left hand should be fairly low. From the catch, apply power by bringing the right elbow in toward the small of the back and the blade toward the stern. At the end of the stroke, the paddle should be nearly parallel to the length of the kayak. Release power when the blade is close to the stern by slicing the blade out of the water. After the blade comes out of the water, rotate the torso to set up for the next stroke.
Although there are times when a kayaker might use two or more stern draws, most of the time you’ll need only one to make your correction, and your next stroke will be a forward power stroke on the other side.
Beginning paddlers often hit the boat with the paddle, which can feel awkward. If you go slow and learn how the draw works, you can avoid this awkward feeling.
A Scout Is Trustworty. Please do not copy or distribute this electronic version.
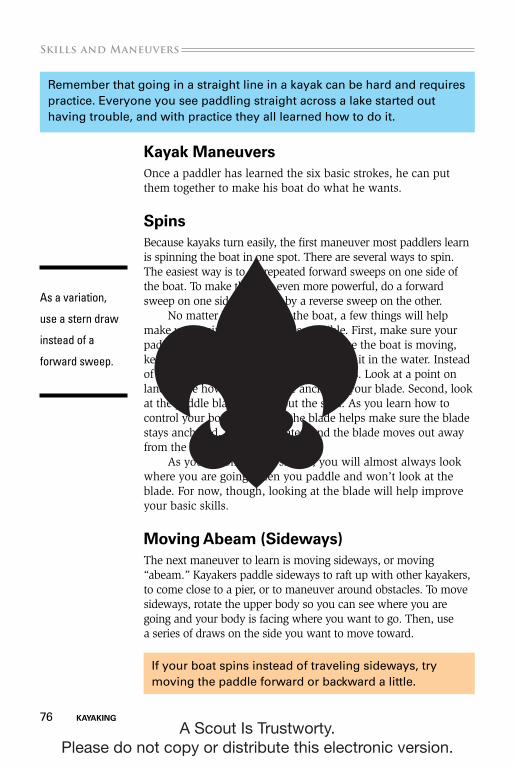
76 kayaking
Skills and Maneuvers.
kayak ManeuversOnce a paddler has learned the six basic strokes, he can put them together to make his boat do what he wants.
SpinsBecause kayaks turn easily, the first maneuver most paddlers learn is spinning the boat in one spot. There are several ways to spin. The easiest way is to do repeated forward sweeps on one side of the boat. To make the spin even more powerful, do a forward sweep on one side, followed by a reverse sweep on the other.
No matter how you spin the boat, a few things will help make your spins as powerful as possible. First, make sure your paddle is well-anchored in the water. Once the boat is moving, keep the paddle in one spot when you put it in the water. Instead of the paddle moving, only the boat moves. Look at a point on land to see how well you have anchored your blade. Second, look at the paddle blade throughout the spin. As you learn how to control your boat, looking at the blade helps make sure the blade stays anchored, the torso rotates, and the blade moves out away from the boat.
As you become more skilled, you will almost always look where you are going when you paddle and won’t look at the blade. For now, though, looking at the blade will help improve your basic skills.
Moving abeam (Sideways) The next maneuver to learn is moving sideways, or moving “abeam.” Kayakers paddle sideways to raft up with other kayakers, to come close to a pier, or to maneuver around obstacles. To move sideways, rotate the upper body so you can see where you are going and your body is facing where you want to go. Then, use a series of draws on the side you want to move toward.
As a variation,
use a stern draw
instead of a
forward sweep.
Remember that going in a straight line in a kayak can be hard and requires practice. Everyone you see paddling straight across a lake started out having trouble, and with practice they all learned how to do it.
If your boat spins instead of traveling sideways, try moving the paddle forward or backward a little.
A Scout Is Trustworty. Please do not copy or distribute this electronic version.
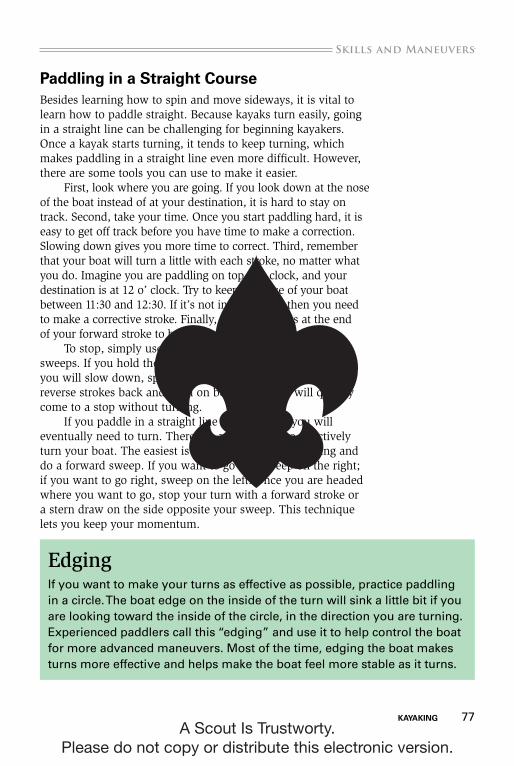
kayaking 77
.Skills and Maneuvers
Paddling in a Straight CourseBesides learning how to spin and move sideways, it is vital to learn how to paddle straight. Because kayaks turn easily, going in a straight line can be challenging for beginning kayakers. Once a kayak starts turning, it tends to keep turning, which makes paddling in a straight line even more difficult. However, there are some tools you can use to make it easier.
First, look where you are going. If you look down at the nose of the boat instead of at your destination, it is hard to stay on track. Second, take your time. Once you start paddling hard, it is easy to get off track before you have time to make a correction. Slowing down gives you more time to correct. Third, remember that your boat will turn a little with each stroke, no matter what you do. Imagine you are paddling on top of a clock, and your destination is at 12 o’ clock. Try to keep the nose of your boat between 11:30 and 12:30. If it’s not in that range, then you need to make a corrective stroke. Finally, use stern draws at the end of your forward stroke to bring you back on track.
To stop, simply use reverse power strokes or reverse sweeps. If you hold the blade in the water for a reverse stroke, you will slow down, spin, and eventually stop. If you take reverse strokes back and forth on both sides, you will quickly come to a stop without turning.
If you paddle in a straight line long enough, you will eventually need to turn. There are a lot of ways to effectively turn your boat. The easiest is to look where you are going and do a forward sweep. If you want to go left, sweep on the right; if you want to go right, sweep on the left. Once you are headed where you want to go, stop your turn with a forward stroke or a stern draw on the side opposite your sweep. This technique lets you keep your momentum.
EdgingIf you want to make your turns as effective as possible, practice paddling in a circle. The boat edge on the inside of the turn will sink a little bit if you are looking toward the inside of the circle, in the direction you are turning. Experienced paddlers call this “edging” and use it to help control the boat for more advanced maneuvers. Most of the time, edging the boat makes turns more effective and helps make the boat feel more stable as it turns.
A Scout Is Trustworty. Please do not copy or distribute this electronic version.
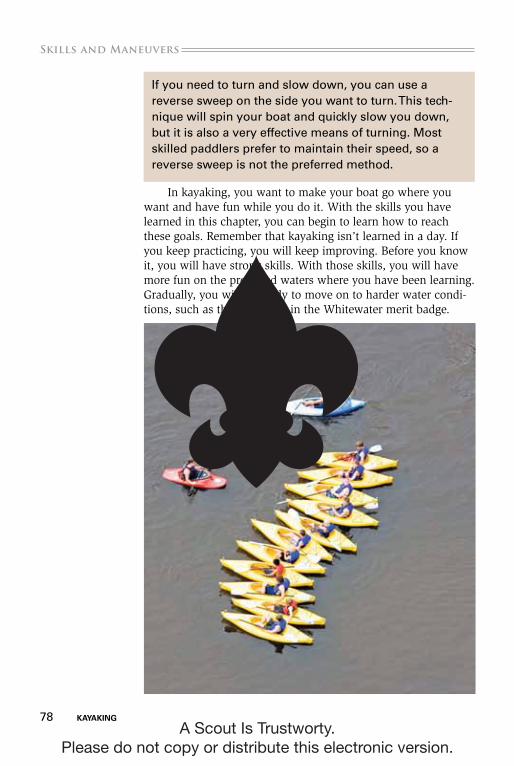
78 kayaking
Skills and Maneuvers.
In kayaking, you want to make your boat go where you want and have fun while you do it. With the skills you have learned in this chapter, you can begin to learn how to reach these goals. Remember that kayaking isn’t learned in a day. If you keep practicing, you will keep improving. Before you know it, you will have strong skills. With those skills, you will have more fun on the protected waters where you have been learning. Gradually, you will be ready to move on to harder water condi-tions, such as those covered in the Whitewater merit badge.
If you need to turn and slow down, you can use a reverse sweep on the side you want to turn. This tech-nique will spin your boat and quickly slow you down, but it is also a very effective means of turning. Most skilled paddlers prefer to maintain their speed, so a reverse sweep is not the preferred method.
A Scout Is Trustworty. Please do not copy or distribute this electronic version.
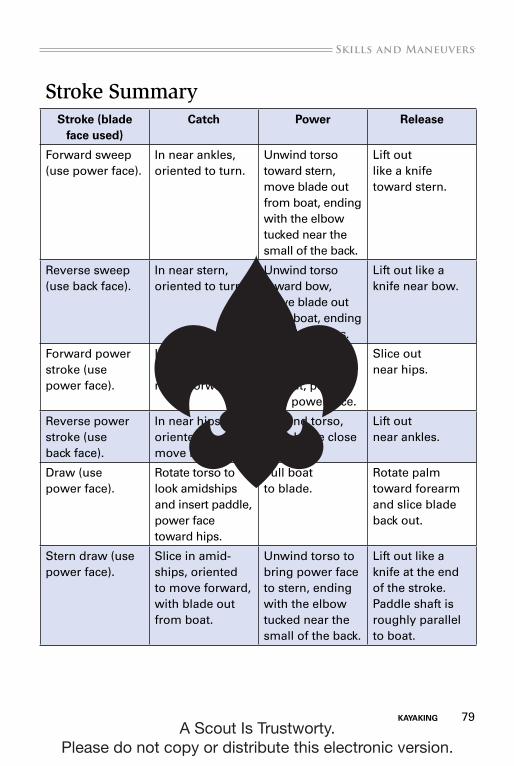
kayaking 79
.Skills and Maneuvers
Stroke SummaryStroke (blade
face used)Catch Power Release
Forward sweep (use power face).
In near ankles, oriented to turn.
Unwind torso toward stern, move blade out from boat, ending with the elbow tucked near the small of the back.
Lift out like a knife toward stern.
Reverse sweep (use back face).
In near stern, oriented to turn.
Unwind torso toward bow, move blade out from boat, ending near the ankles.
Lift out like a knife near bow.
Forward power stroke (use power face).
In near ankles, oriented to move forward.
Unwind torso, keep blade close to boat, power with power face.
Slice out near hips.
Reverse power stroke (use back face).
In near hips, oriented to move backward.
Unwind torso, keep blade close to boat.
Lift out near ankles.
Draw (use power face).
Rotate torso to look amidships and insert paddle, power face toward hips.
Pull boat to blade.
Rotate palm toward forearm and slice blade back out.
Stern draw (use power face).
Slice in amid-ships, oriented to move forward, with blade out from boat.
Unwind torso to bring power face to stern, ending with the elbow tucked near the small of the back.
Lift out like a knife at the end of the stroke. Paddle shaft is roughly parallel to boat.
A Scout Is Trustworty. Please do not copy or distribute this electronic version.
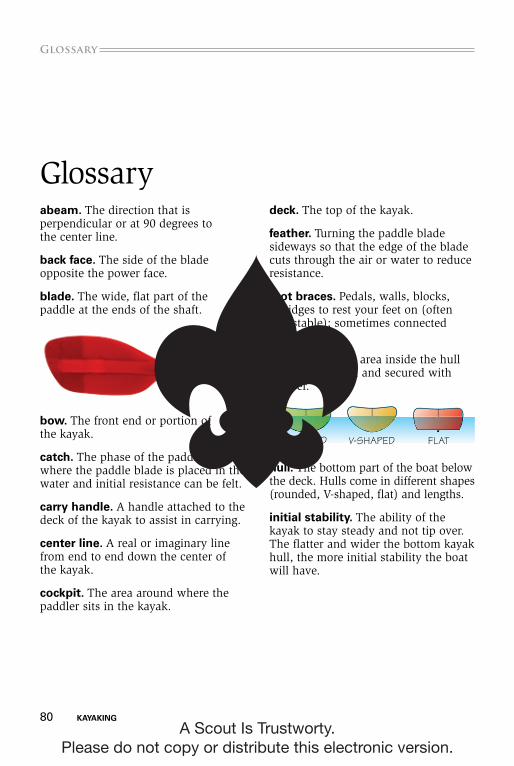
80 kayaking
glossary.
Glossaryabeam. The direction that is perpendicular or at 90 degrees to the center line.
back face. The side of the blade opposite the power face.
blade. The wide, flat part of the paddle at the ends of the shaft.
bow. The front end or portion of the kayak.
catch. The phase of the paddle stroke where the paddle blade is placed in the water and initial resistance can be felt.
carry handle. A handle attached to the deck of the kayak to assist in carrying.
center line. A real or imaginary line from end to end down the center of the kayak.
cockpit. The area around where the paddler sits in the kayak.
deck. The top of the kayak.
feather. Turning the paddle blade sideways so that the edge of the blade cuts through the air or water to reduce resistance.
foot braces. Pedals, walls, blocks, or ridges to rest your feet on (often adjustable); sometimes connected to a rudder.
hatch. A storage area inside the hull that is watertight and secured with a cover.
hull. The bottom part of the boat below the deck. Hulls come in different shapes (rounded, V-shaped, flat) and lengths.
initial stability. The ability of the kayak to stay steady and not tip over. The flatter and wider the bottom kayak hull, the more initial stability the boat will have.
rounded V-shaped flat
A Scout Is Trustworty. Please do not copy or distribute this electronic version.
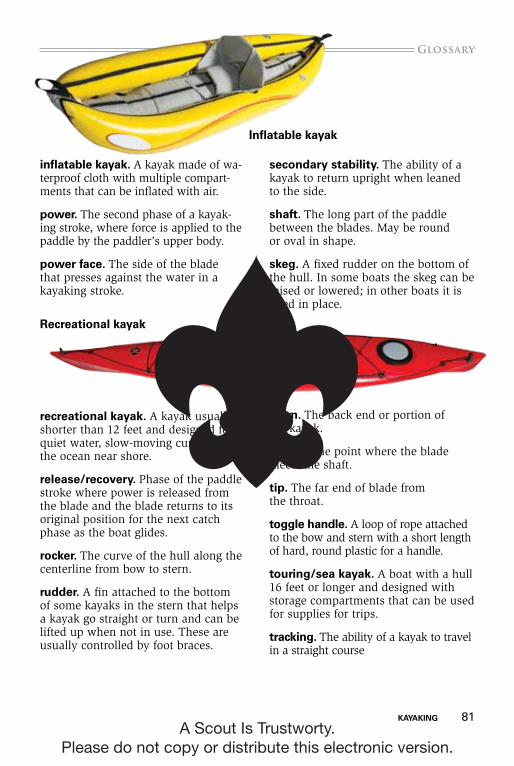
kayaking 81
.glossary
inflatable kayak. A kayak made of wa-terproof cloth with multiple compart-ments that can be inflated with air.
power. The second phase of a kayak-ing stroke, where force is applied to the paddle by the paddler’s upper body.
power face. The side of the blade that presses against the water in a kayaking stroke.
recreational kayak. A kayak usually shorter than 12 feet and designed for quiet water, slow-moving current or the ocean near shore.
release/recovery. Phase of the paddle stroke where power is released from the blade and the blade returns to its original position for the next catch phase as the boat glides.
rocker. The curve of the hull along the centerline from bow to stern.
rudder. A fin attached to the bottom of some kayaks in the stern that helps a kayak go straight or turn and can be lifted up when not in use. These are usually controlled by foot braces.
secondary stability. The ability of a kayak to return upright when leaned to the side.
shaft. The long part of the paddle between the blades. May be round or oval in shape.
skeg. A fixed rudder on the bottom of the hull. In some boats the skeg can be raised or lowered; in other boats it is fixed in place.
stern. The back end or portion of the kayak.
throat. The point where the blade meets the shaft.
tip. The far end of blade from the throat.
toggle handle. A loop of rope attached to the bow and stern with a short length of hard, round plastic for a handle.
touring/sea kayak. A boat with a hull 16 feet or longer and designed with storage compartments that can be used for supplies for trips.
tracking. The ability of a kayak to travel in a straight course
Recreational kayak
inflatable kayak
A Scout Is Trustworty. Please do not copy or distribute this electronic version.
A Scout Is Trustworty. Please do not copy or distribute this electronic version.
kayaking 83
.kayaking Resources
Kayaking ResourcesScouting LiteratureBoy Scout Handbook; Fieldbook; Aquatics Supervision; Kayaking BSA; Camping, Canoeing, First Aid, Lifesaving, Rowing, Scuba Diving, Small-Boat Sailing, Swimming, Water Sports, and Whitewater merit badge pamphlets.
Books
American Canoe Association. Essentials of Kayak Touring. Menasha Ridge Press, 2005.
American Canoe Association, Dillon, Pam, and Jeremy Oyen, eds. Kayaking. Human Kinetics, 2009.
Burnham, Bill, and Mary Burnham. Kayaking for Everyone. Globe Pequot Press, 2010.
Whiting, Ken. Recreational Kayaking: The Ultimate Guide. The Heliconia Press, 2008.
Visit the Boy Scouts of America’s official retail website (with your parent’s permission) at http://www.scoutstuff.org for a complete listing of all merit badge pamphlets and other helpful Scouting materials and supplies.
kayaking 83A Scout Is Trustworty.
Please do not copy or distribute this electronic version.

84 kayaking
kayaking Resources.
Organizations and Websitesamerican Canoe association108 Hanover St.Fredericksburg, VA 22401Telephone: 540-907-4460Website: www.americancanoe.org
Paddling.netWebsite: www.paddling.net
acknowledgmentsThis merit badge was produced through the combined skills and efforts of a team of Boy Scout and American Canoe Association paddlers and BSA aquatic leaders. Special thanks to Pat Noack, Aquatics Instructor BSA and chair, BSA National Aquatics Task Force, for his leadership and guidance of the project. The following individuals also were members of the workgroup that devel-oped and refined the requirements for this merit badge as well as served as reviewers of the text: David Bell, Mike Chicanowski, Keith Cooke, Jay Fox, Jeremy Oyen, Robin Pope, Charles Rose, Richard Thomas, and Jim Virgin. The writing team consisted of the following adult volunteer Scouters and American Canoe Association leaders and trainers:
• Richard Thomas, BSA Aquatics Instructor; member, BSA National Aquatics Task Force; ACA Canoeing Instructor Trainer; and Kayaking merit badge project leader
• Jeremy Oyen, REI Curriculum and Training coordinator; former ACA director of Safety Education, Instruction, and Outreach; and ACA Coastal Kayaking Instructor Trainer Educator and Canoeing/Adaptive Paddling Instructor Trainer
• Robin Pope, president, ACA board of directors; chair, ACA Safety Education and Instruction Council; and ACA Advanced Whitewater Kayaking Instructor Trainer Educator
• Jim Virgin, member, BSA National Aquatics Task Force; vice president, ACA board of directors; and ACA Costal Kayaking and Whitewater Kayaking Instructor
The Kayaking merit badge and pamphlet were prepared with the support of the American Canoe Association and its leadership.
A Scout Is Trustworty. Please do not copy or distribute this electronic version.
kayaking 85
.kayaking Resources
Special thanks to Dave Slover and his staff at Alder Creek Kayak and Canoe in Portland, Oregon, for making possible the photography of many types of boats, equipment, and paddling gear.
Photo and illustration Credits
American Canoe Association—page 84
Edward S. Curtis—page 7
Jupiter.com—page 41 (brimmed hat and sunglasses)
Photos.com—pages 21 (background) and 55 (bottom)
Publicdomainpictures.net—page 19
Thinkstock—page 16
Zedcor Wholly Owned/Thinkstock—pages 10 and 36
All other photos and illustrations not mentioned above are the property of or are protected by the Boy Scouts of America.
John McDearmon—illustrations on pages 24, 29, 46, 59, 64, and 80
A Scout Is Trustworty. Please do not copy or distribute this electronic version.

86 kayaking
notes
A Scout Is Trustworty. Please do not copy or distribute this electronic version.

kayaking 87
notes
A Scout Is Trustworty. Please do not copy or distribute this electronic version.
88 kayaking
notes
A Scout Is Trustworty. Please do not copy or distribute this electronic version.

Merit badge libraryThough intended as an aid to Boy Scouts, Varsity Scouts, and qualified Venturers and Sea Scouts in meeting merit badge requirements, these pamphlets are of general interest and are made available by many schools and public libraries. The latest revision date of each pamphlet might not correspond with the copyright date shown below, because this list is corrected only once a year, in January. Any number of merit badge pamphlets may be revised throughout the year; others are simply reprinted until a revision becomes necessary.
If a Scout has already started working on a merit badge when a new edition for that pamphlet is introduced, he may continue to use the same merit badge pamphlet to earn the badge and fulfill the requirements therein. In other words, the Scout need not start over again with the new pamphlet and possibly revised requirements.
Merit badge Pamphlet yearAmerican Business 2002American Cultures 2005American Heritage 2005American Labor 2006Animal Science 2006Archaeology 2006Archery 2004Architecture and
Landscape Architecture 2010Art 2006Astronomy 2010Athletics 2006Automotive Maintenance 2008Aviation 2006Backpacking 2007Basketry 2003Bird Study 2005Bugling (see Music)Camping 2005Canoeing 2004Chemistry 2004Chess 2011Cinematography 2008Citizenship in the
Community 2005Citizenship in the Nation 2005Citizenship in the World 2005Climbing 2011Coin Collecting 2008Collections 2008Communication 2009Composite Materials 2006Computers 2009Cooking 2007Crime Prevention 2005Cycling 2003Dentistry 2006Disabilities Awareness 2005Dog Care 2003Drafting 2008Electricity 2004Electronics 2004Emergency Preparedness 2008Energy 2005Engineering 2008
Merit badge Pamphlet yearEntrepreneurship 2006Environmental Science 2006Family Life 2005Farm Mechanics 2008Fingerprinting 2003Fire Safety 2004First Aid 2007Fish and Wildlife
Management 2004Fishing 2009Fly-Fishing 2009Forestry 2005Gardening 2002Genealogy 2005Geocaching 2010Geology 2005Golf 2002Graphic Arts 2006Hiking 2007Home Repairs 2009Horsemanship 2010Indian Lore 2008Insect Study 2008Inventing 2010Journalism 2006Landscape Architecture
(see Architecture)Law 2003Leatherwork 2002Lifesaving 2008Mammal Study 2003Medicine 2009Metalwork 2007Model Design and Building 2010Motorboating 2008Music and Bugling 2003Nature 2003Nuclear Science 2010Oceanography 2009Orienteering 2003Painting 2008Personal Fitness 2006Personal Management 2003Pets 2003Photography 2005
Merit badge Pamphlet yearPioneering 2006Plant Science 2005Plumbing 2004Pottery 2008Public Health 2005Public Speaking 2002Pulp and Paper 2006Radio 2008Railroading 2003Reading 2003Reptile and
Amphibian Study 2005Rifle Shooting 2001Robotics 2011Rowing 2006Safety 2006Salesmanship 2003Scholarship 2004Scouting Heritage 2010Scuba Diving 2009Sculpture 2007Shotgun Shooting 2005Skating 2005Small-Boat Sailing 2004Snow Sports 2007Soil and Water
Conservation 2004Space Exploration 2004Sports 2006Stamp Collecting 2007Surveying 2004Swimming 2008Textile 2003Theater 2005Traffic Safety 2006Truck Transportation 2005Veterinary Medicine 2005Water Sports 2007Weather 2006Welding 2012Whitewater 2005Wilderness Survival 2007Wood Carving 2006Woodwork 2011
BOY SCOUTS OF AMERICA • SUPPLY GROUP
NatiONal diStribUtiON CeNter direCt Mail CeNter 2109 Westinghouse Boulevard P.O. Box 909 P.O. Box 7143 Pineville, NC 28134-0909 Charlotte, NC 28241-7143 For fast credit card orders— VISA, MasterCard, American Express— www.scoutstuff.org call BSA operators toll-free 1-800-323-0732A Scout Is Trustworty. Please do not copy or distribute this electronic version.
KAYAKING
The Supply Group is
ready to be a partner
on your trail to
Eagle through high
adventure. The
adventure is yours,
and we are ready
with the gear you
will need. You can
depend on the latest
in lightweight,
durable, quality
gear that will
meet and surpass
your toughest
requirements.
www.scoutstuff.org
florida sea base
eagle scout
philmont scout ranch
northern tier SKU 614941
35702 2012 Printing
On
th
e r
oad
to
hig
h a
dv
entu
re
A Scout Is Trustworty. Please do not copy or distribute this electronic version.