Embed Size (px)
Citation preview
FYS3240
PC-based instrumentation and microcontrollers
LabVIEW programming I LabVIEW basics
Spring 2013 – Lecture #2
Bekkeng 8.1.2013
Virtual Instruments
• LabVIEW programs are called virtual instruments, or VIs,
because their appearance and operation imitate physical
instruments, such as oscilloscopes and multimeters.
– A LabVIEW program has the file ending *.vi, e.g. test.vi
• LabVIEW contains a comprehensive set of tools for acquiring,
analyzing, displaying, and storing data, as well as tools to help
you troubleshoot code you write.
• In LabVIEW a VI is:
– A LabVIEW program when it is the top-file
– A SubVI when a VI is used in another VI
• A SubVI is similar to a function in other programming
languages

LabVIEW – Start up
• Click Blank VI
• or select File – New VI
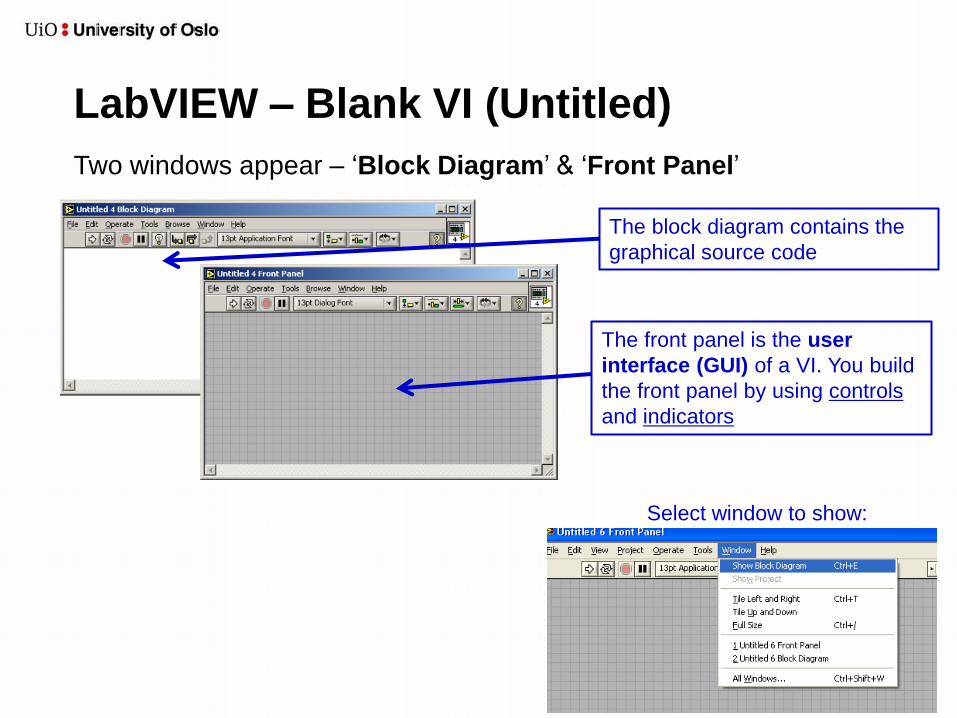
LabVIEW – Blank VI (Untitled)
Two windows appear – ‘Block Diagram’ & ‘Front Panel’
Select window to show:
The block diagram contains the
graphical source code
The front panel is the user
interface (GUI) of a VI. You build
the front panel by using controls
and indicators
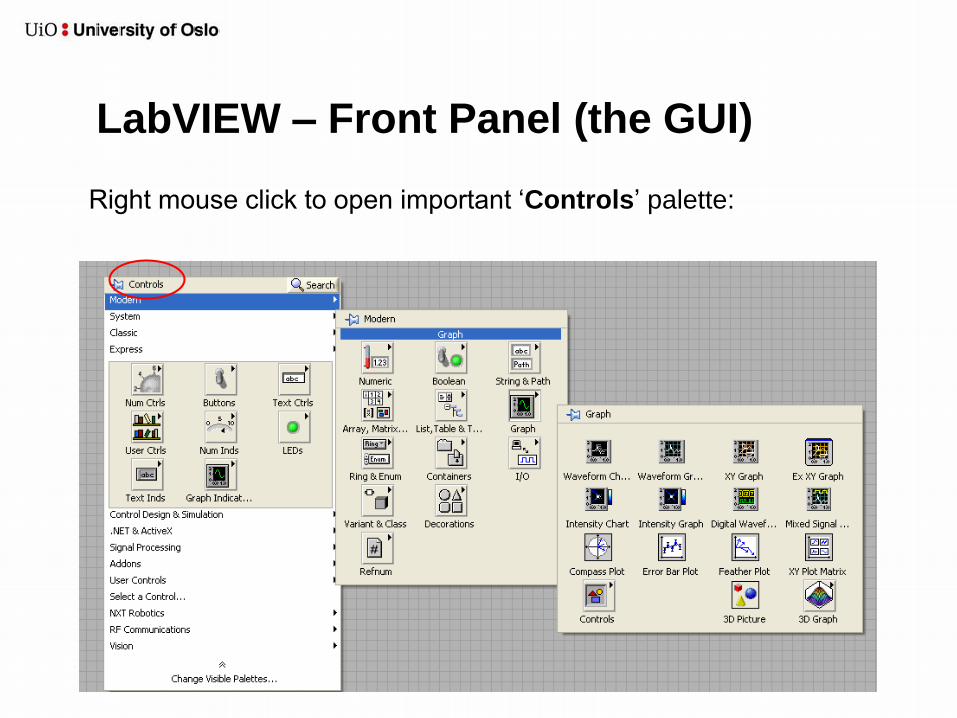
LabVIEW – Front Panel (the GUI)
Right mouse click to open important ‘Controls’ palette:
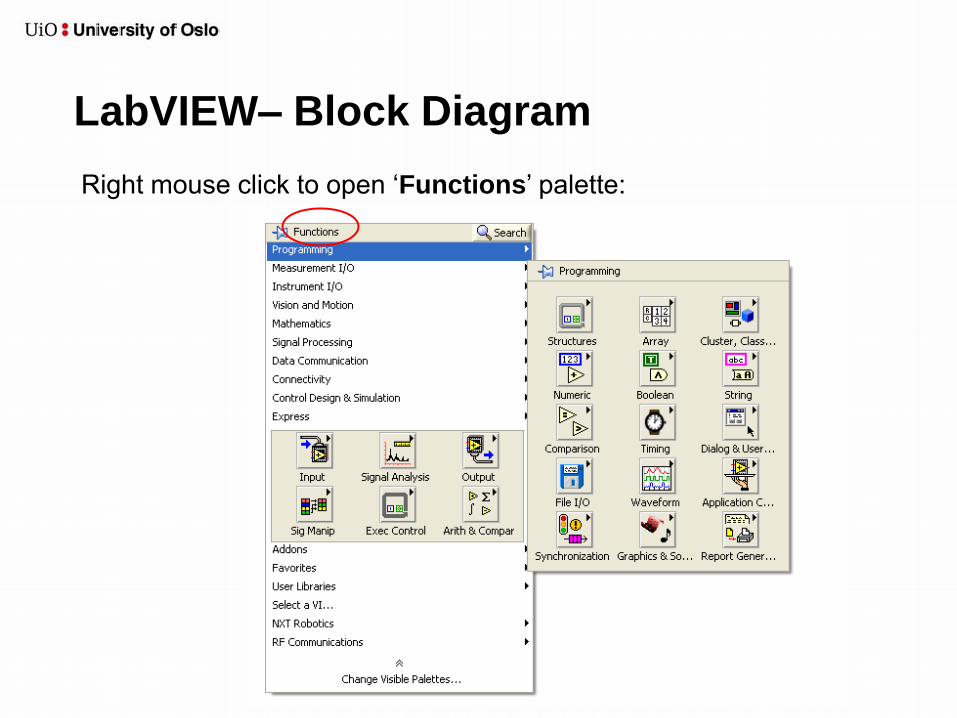
LabVIEW– Block Diagram
Right mouse click to open ‘Functions’ palette:
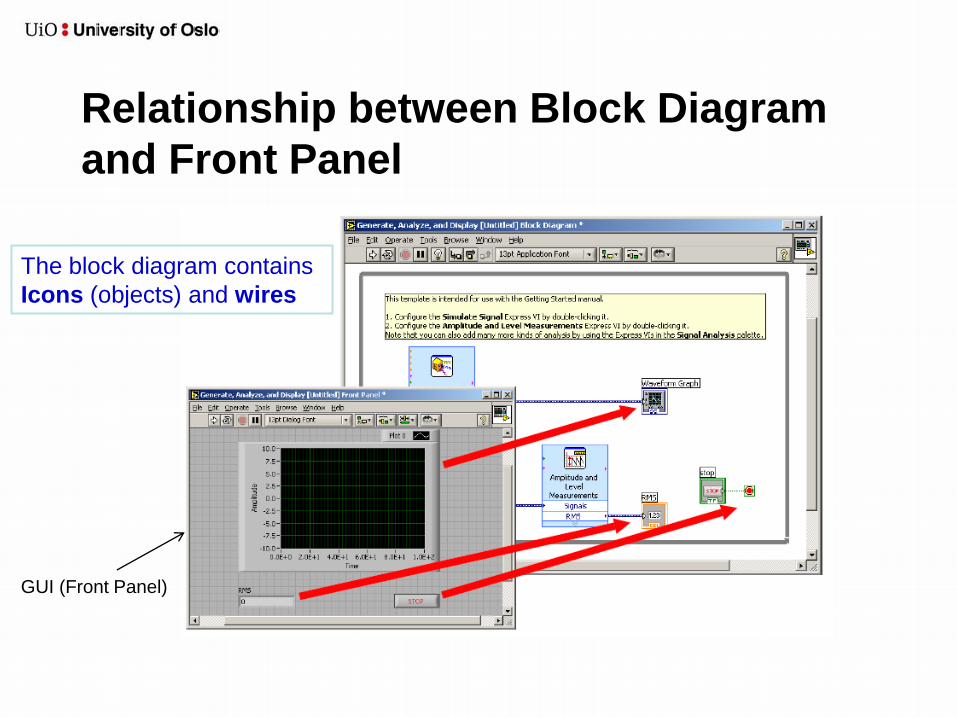
Relationship between Block Diagram
and Front Panel
The block diagram contains
Icons (objects) and wires
GUI (Front Panel)
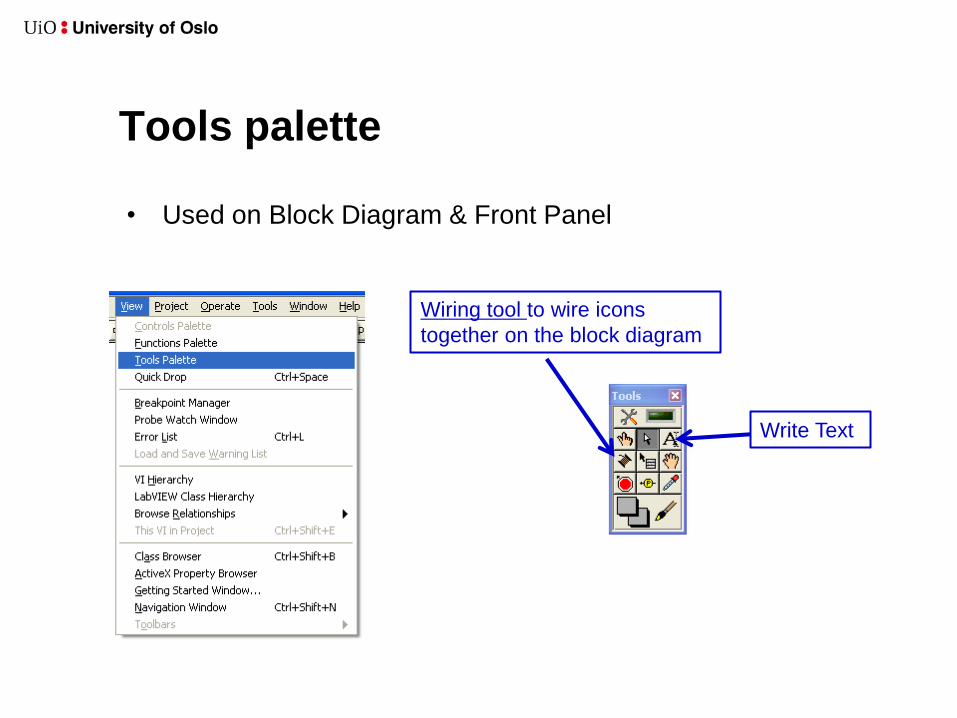
Tools palette
• Used on Block Diagram & Front Panel
Write Text
Wiring tool to wire icons
together on the block diagram
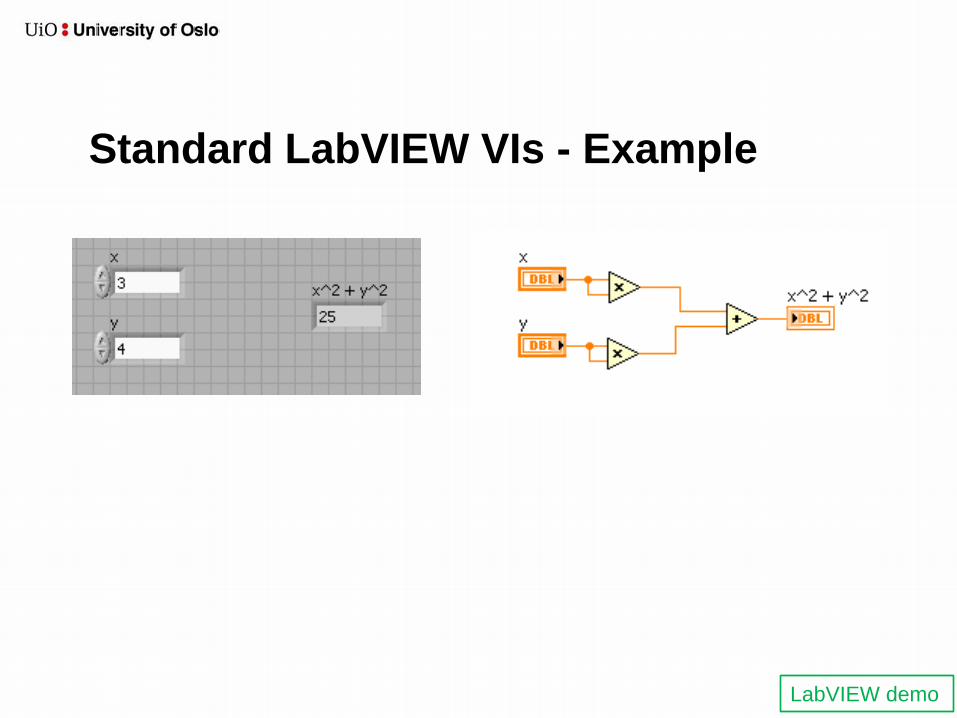
Standard LabVIEW VIs - Example
LabVIEW demo
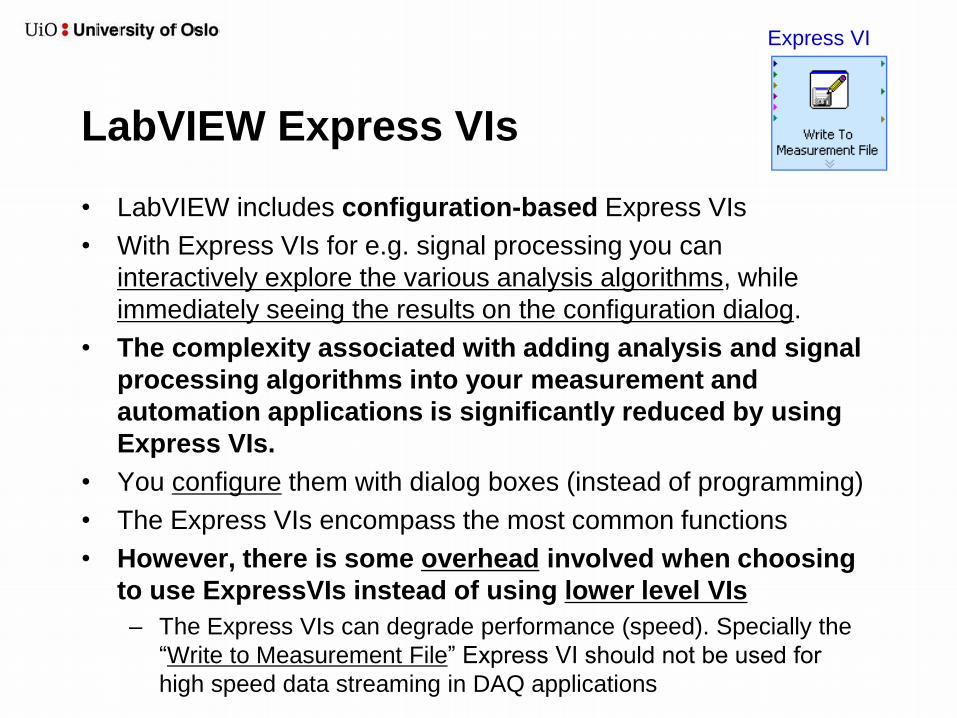
LabVIEW Express VIs
• LabVIEW includes configuration-based Express VIs
• With Express VIs for e.g. signal processing you can
interactively explore the various analysis algorithms, while
immediately seeing the results on the configuration dialog.
• The complexity associated with adding analysis and signal
processing algorithms into your measurement and
automation applications is significantly reduced by using
Express VIs.
• You configure them with dialog boxes (instead of programming)
• The Express VIs encompass the most common functions
• However, there is some overhead involved when choosing
to use ExpressVIs instead of using lower level VIs
– The Express VIs can degrade performance (speed). Specially the
“Write to Measurement File” Express VI should not be used for
high speed data streaming in DAQ applications
Express VI
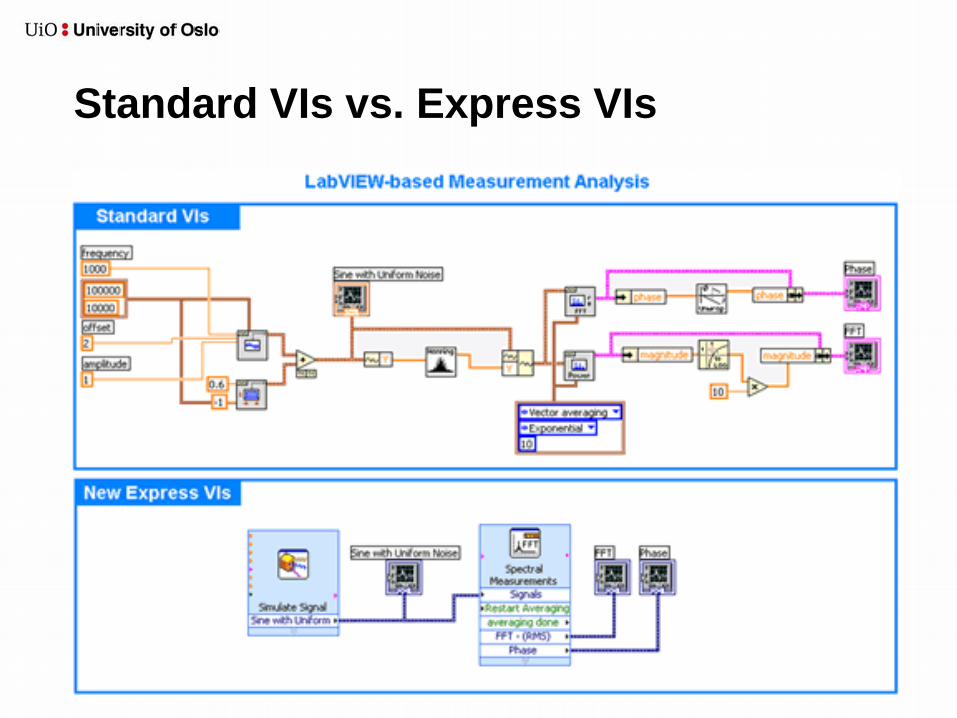
Standard VIs vs. Express VIs
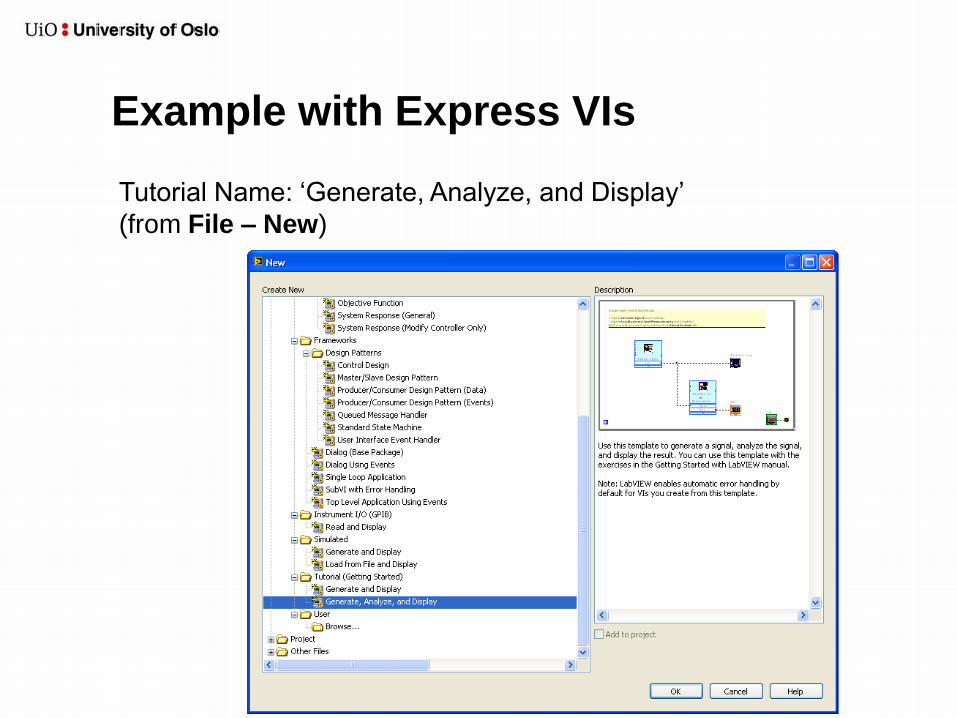
Example with Express VIs
Tutorial Name: ‘Generate, Analyze, and Display’
(from File – New)
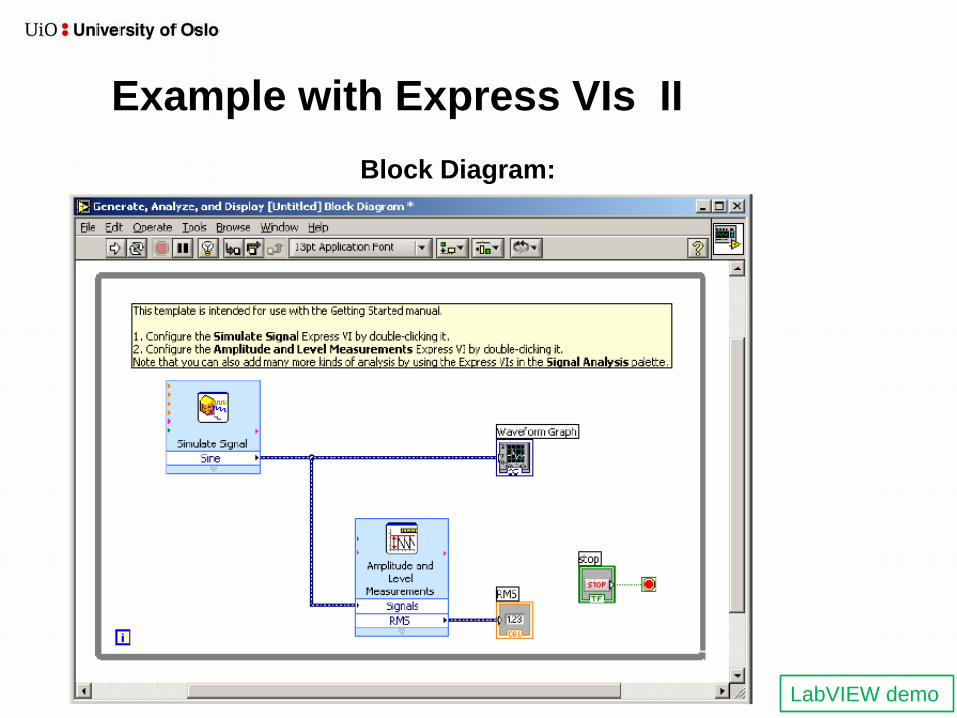
Example with Express VIs II
Block Diagram:
LabVIEW demo
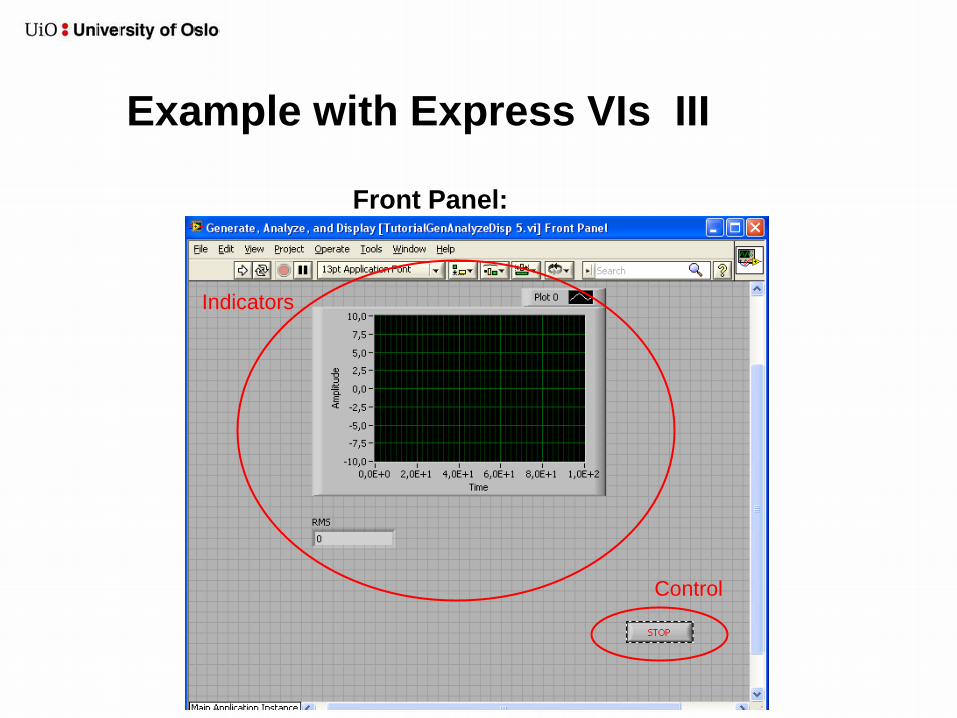
Example with Express VIs III
Front Panel:
Indicators
Control
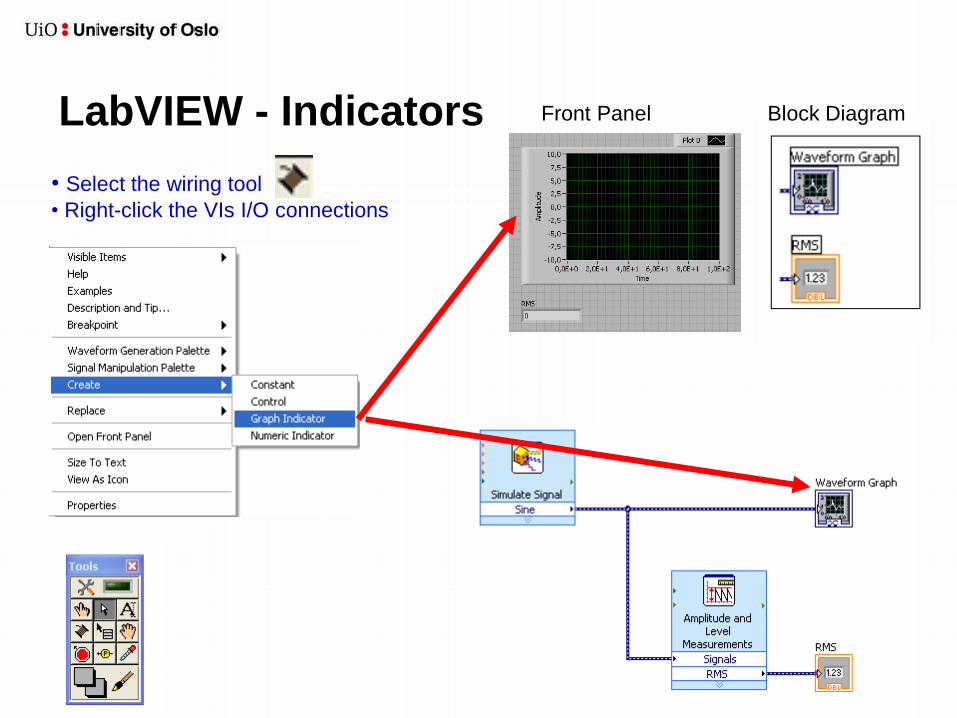
LabVIEW - Indicators
• Select the wiring tool
• Right-click the VIs I/O connections
Front Panel Block Diagram
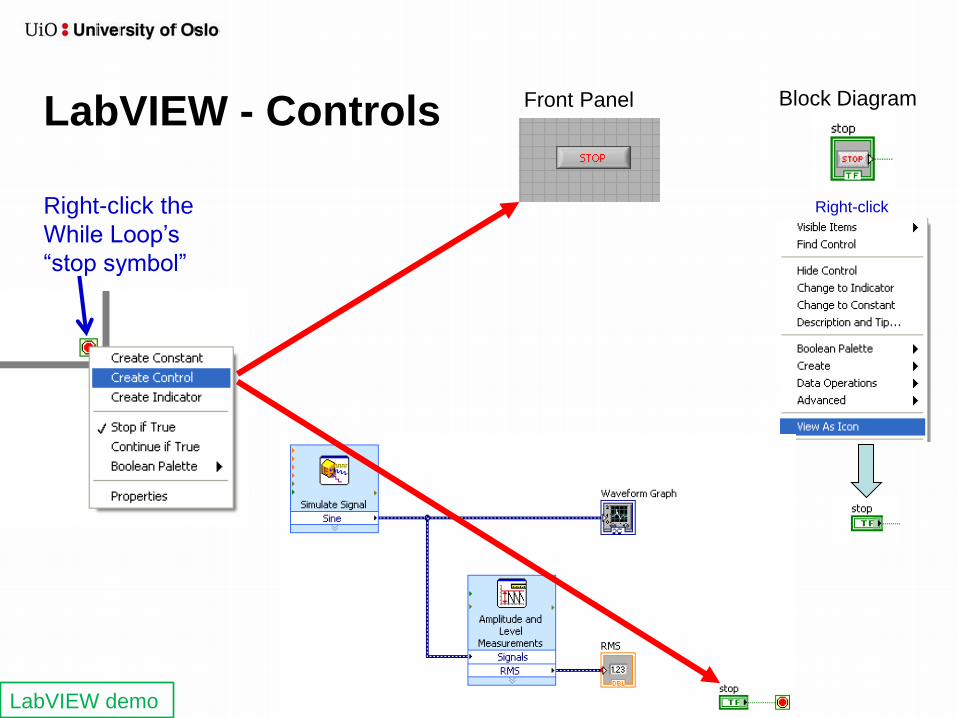
LabVIEW - Controls
Right-click the
While Loop’s
“stop symbol”
Front Panel Block Diagram
LabVIEW demo
Right-click
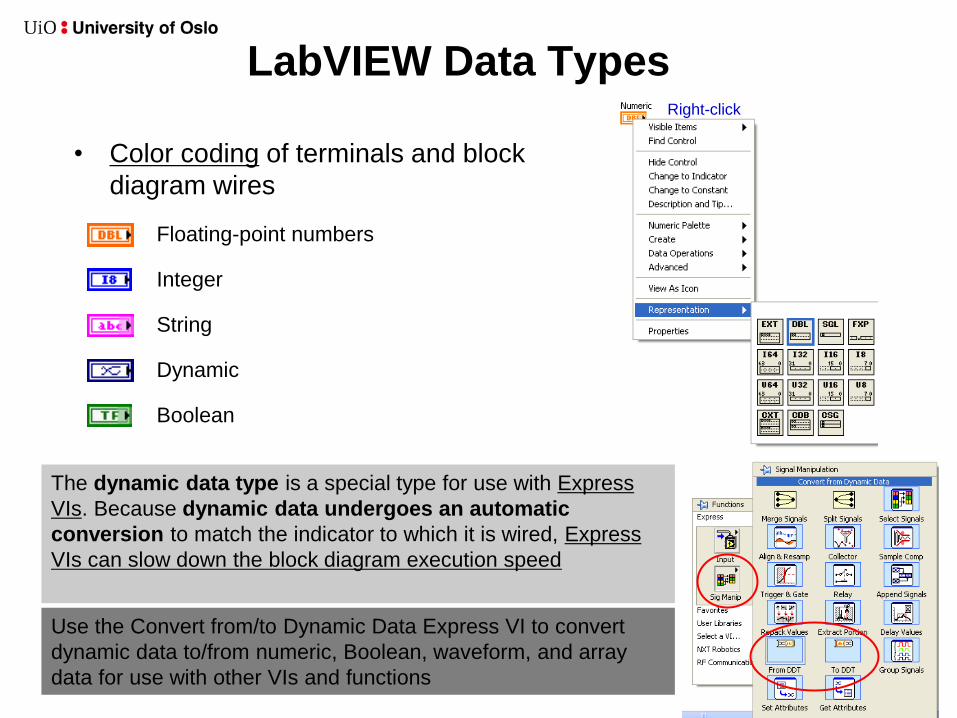
LabVIEW Data Types
• Color coding of terminals and block
diagram wires
Integer
String
Boolean
Dynamic
Floating-point numbers
The dynamic data type is a special type for use with Express
VIs. Because dynamic data undergoes an automatic
conversion to match the indicator to which it is wired, Express
VIs can slow down the block diagram execution speed
Use the Convert from/to Dynamic Data Express VI to convert
dynamic data to/from numeric, Boolean, waveform, and array
data for use with other VIs and functions
Right-click
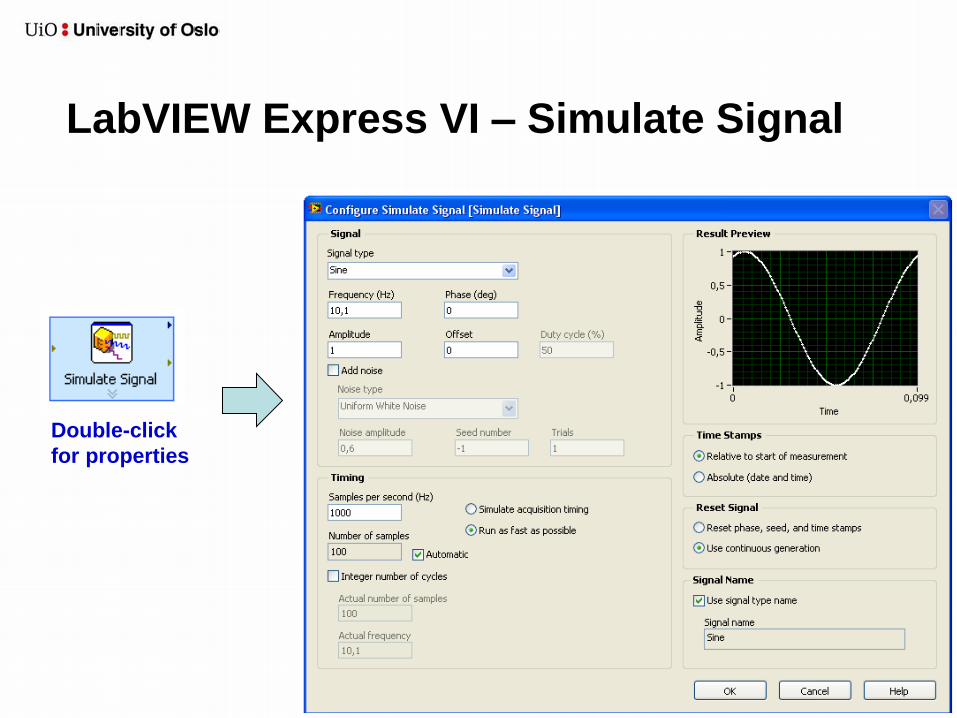
LabVIEW Express VI – Simulate Signal
Double-click
for properties
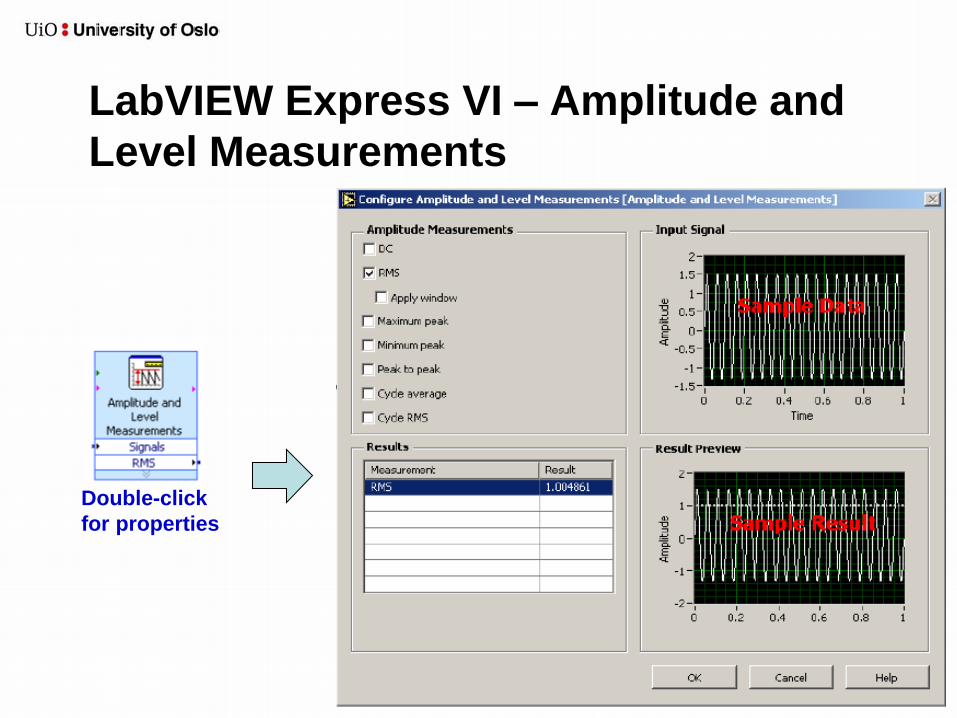
LabVIEW Express VI – Amplitude and
Level Measurements
Double-click
for properties
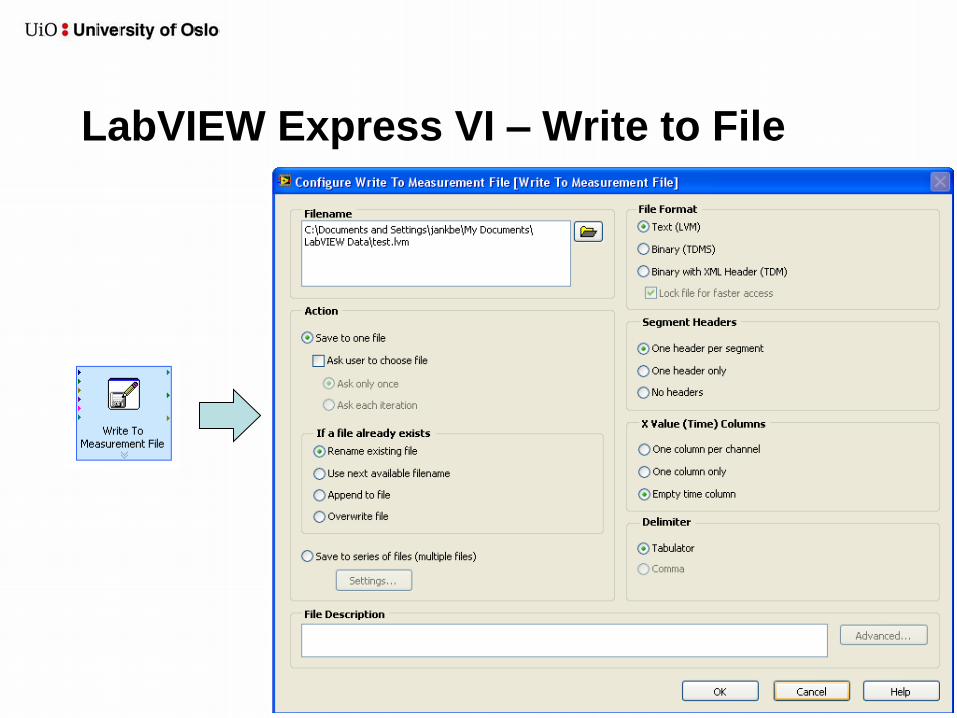
LabVIEW Express VI – Write to File
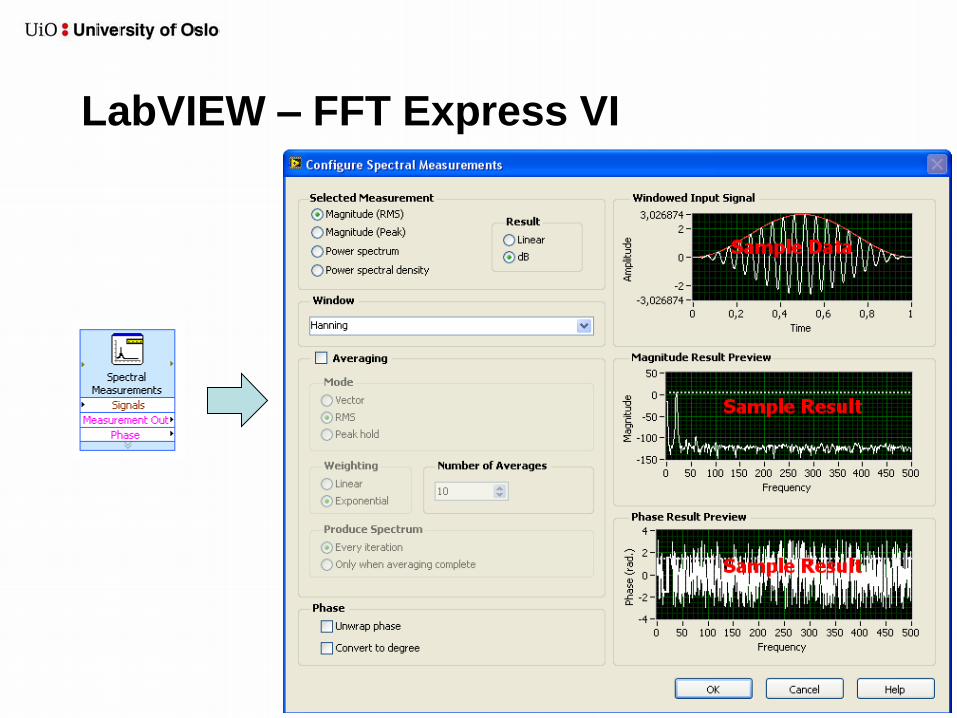
LabVIEW – FFT Express VI
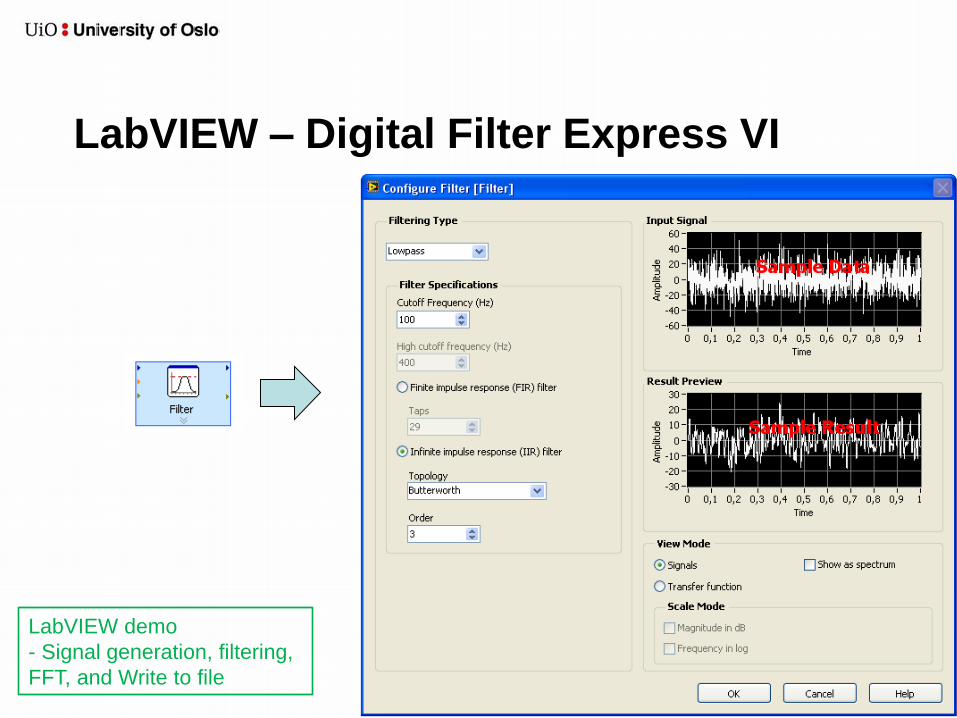
LabVIEW – Digital Filter Express VI
LabVIEW demo
- Signal generation, filtering,
FFT, and Write to file
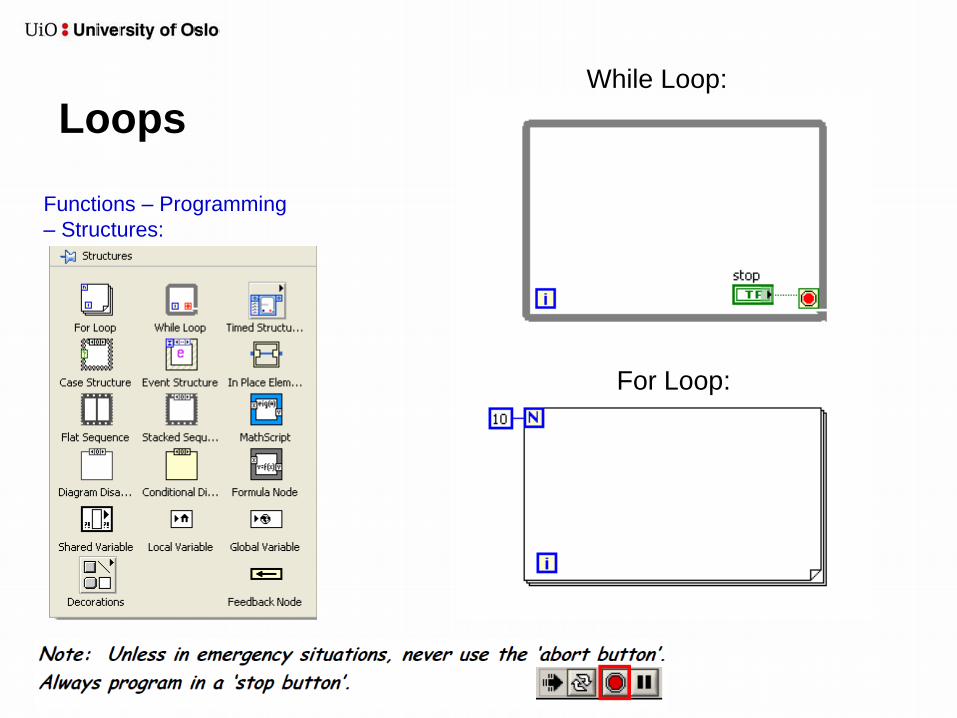
Loops
Functions – Programming
– Structures:
While Loop:
For Loop:
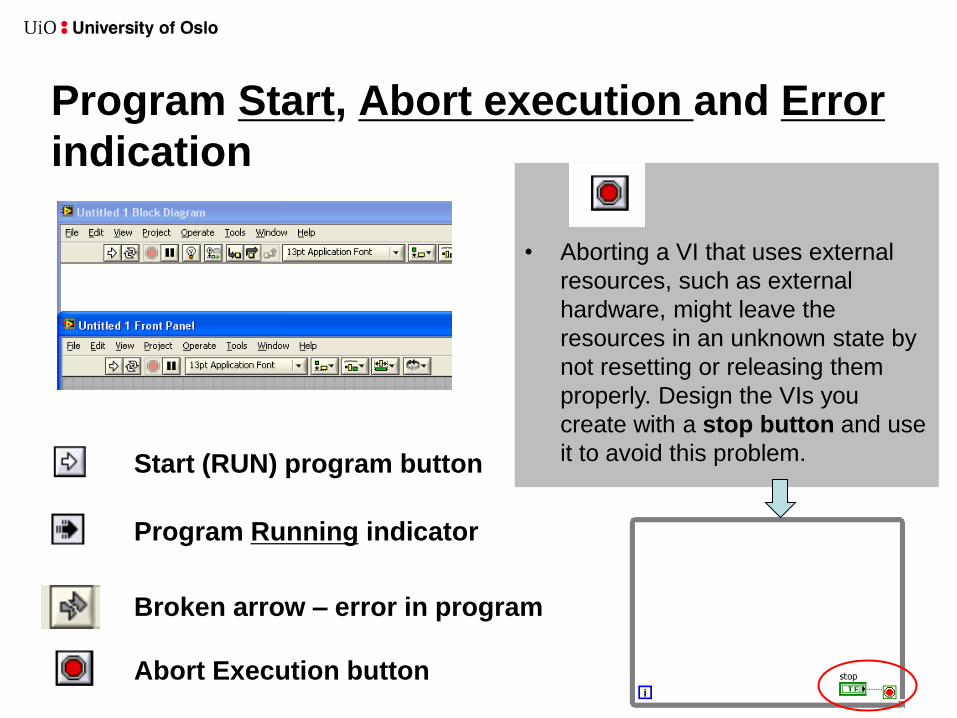
Program Start, Abort execution and Error
indication
• Aborting a VI that uses external
resources, such as external
hardware, might leave the
resources in an unknown state by
not resetting or releasing them
properly. Design the VIs you
create with a stop button and use
it to avoid this problem.
Start (RUN) program button
Program Running indicator
Broken arrow – error in program
Abort Execution button
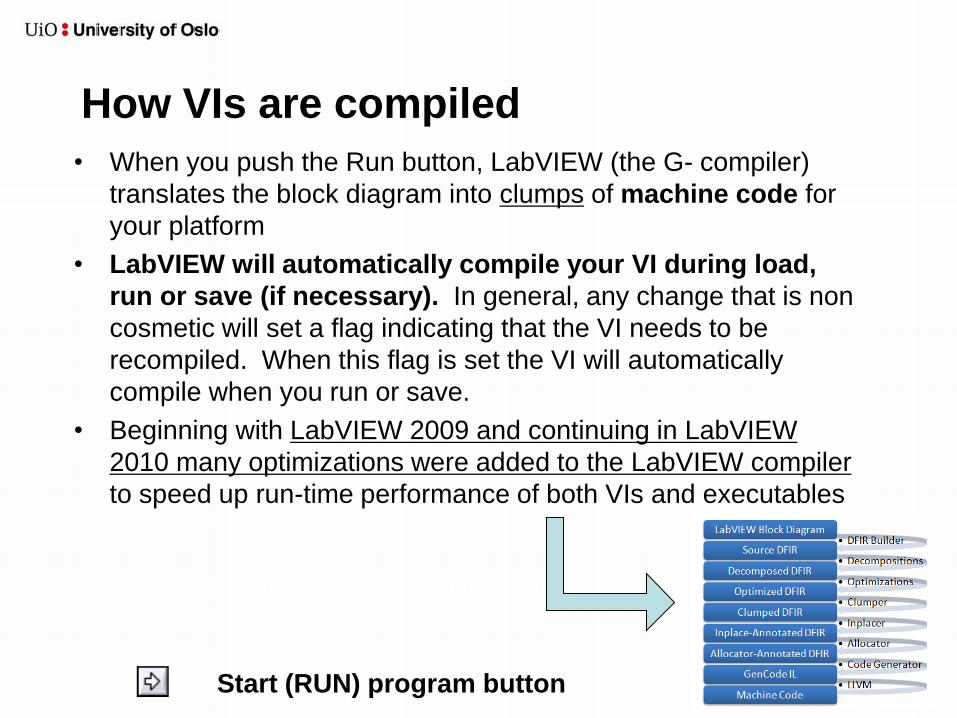
How VIs are compiled
• When you push the Run button, LabVIEW (the G- compiler)
translates the block diagram into clumps of machine code for
your platform
• LabVIEW will automatically compile your VI during load,
run or save (if necessary). In general, any change that is non
cosmetic will set a flag indicating that the VI needs to be
recompiled. When this flag is set the VI will automatically
compile when you run or save.
• Beginning with LabVIEW 2009 and continuing in LabVIEW
2010 many optimizations were added to the LabVIEW compiler
to speed up run-time performance of both VIs and executables
Start (RUN) program button
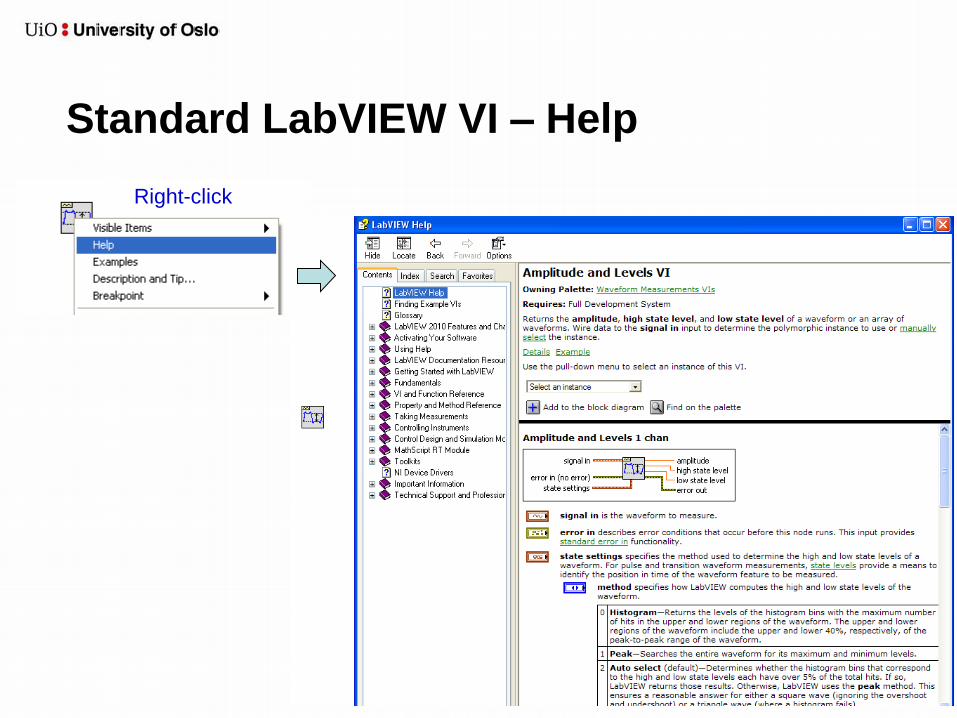
Standard LabVIEW VI – Help
Right-click
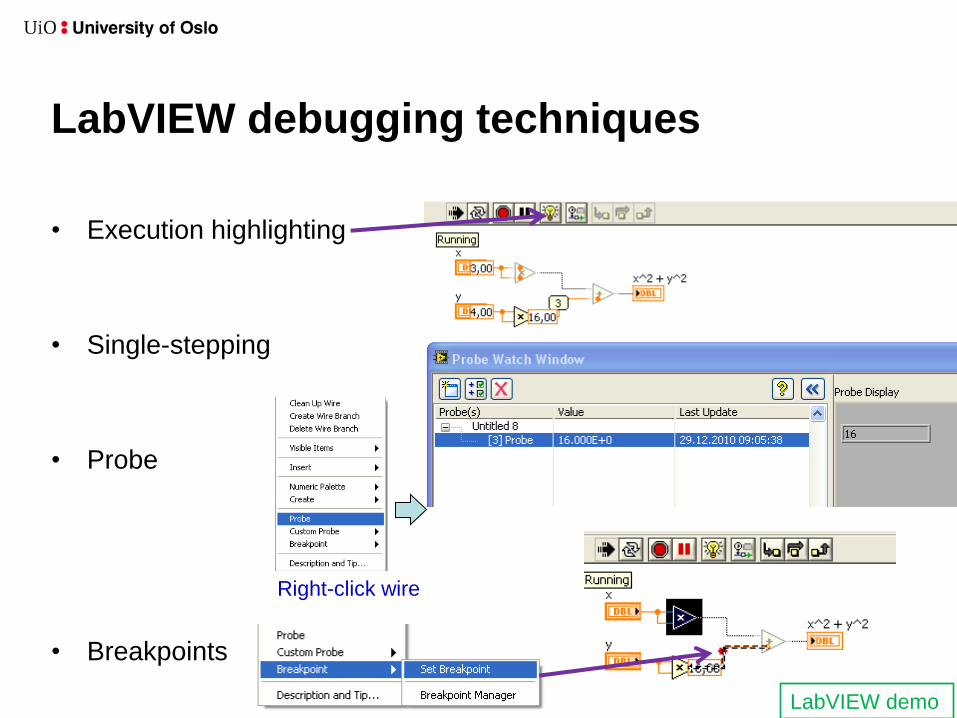
LabVIEW debugging techniques
• Execution highlighting
• Single-stepping
• Probe
• Breakpoints
Right-click wire
LabVIEW demo
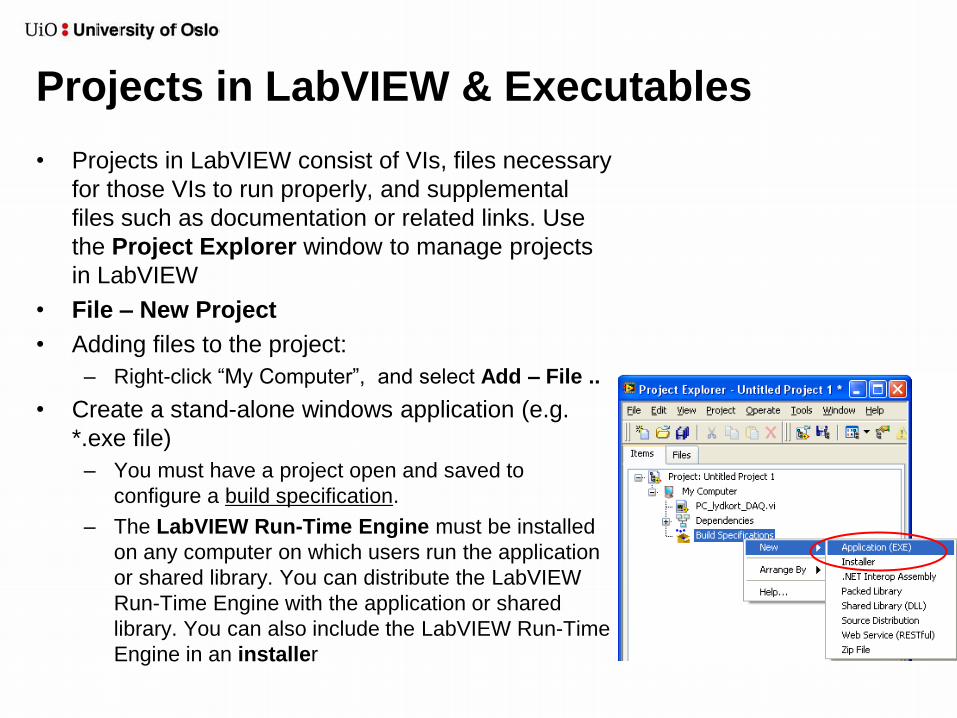
Projects in LabVIEW & Executables
• Projects in LabVIEW consist of VIs, files necessary
for those VIs to run properly, and supplemental
files such as documentation or related links. Use
the Project Explorer window to manage projects
in LabVIEW
• File – New Project
• Adding files to the project:
– Right-click “My Computer”, and select Add – File ..
• Create a stand-alone windows application (e.g.
*.exe file)
– You must have a project open and saved to
configure a build specification.
– The LabVIEW Run-Time Engine must be installed
on any computer on which users run the application
or shared library. You can distribute the LabVIEW
Run-Time Engine with the application or shared
library. You can also include the LabVIEW Run-Time
Engine in an installer

LabVIEW – Help I
• Select Help»Show Context Help from the front panel or the block
diagram
• Move the cursor over to the graphical symbol to see the help
information
• Very useful when looking at functions in the ‘Functions’ palette:
LabVIEW demo
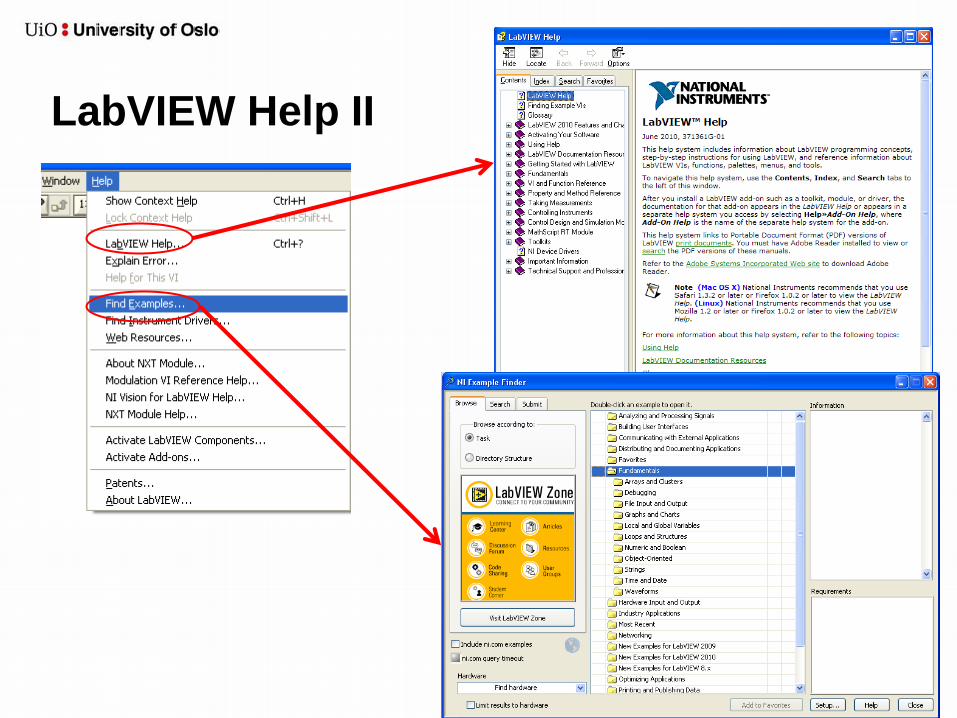
LabVIEW Help II
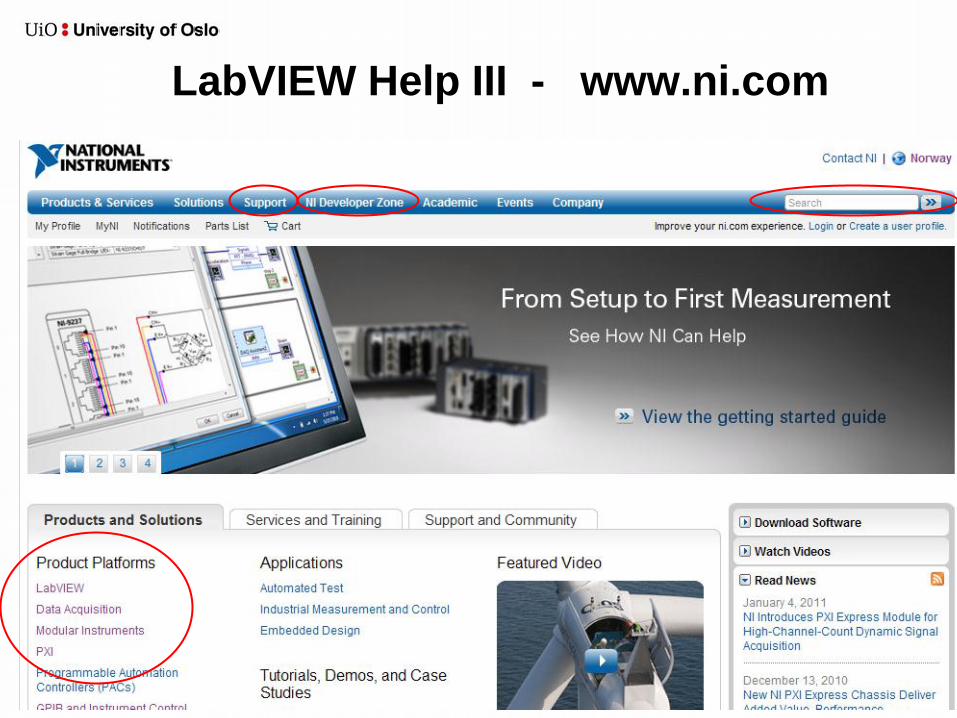
LabVIEW Help III - www.ni.com
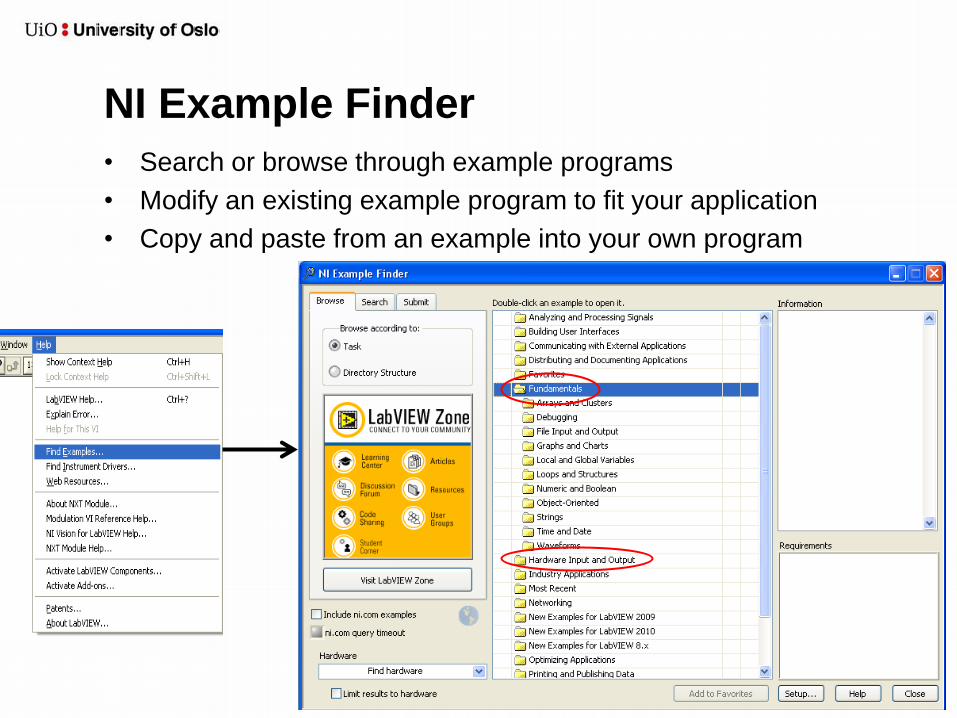
NI Example Finder
• Search or browse through example programs
• Modify an existing example program to fit your application
• Copy and paste from an example into your own program

Further introduction to LabVIEW
• ”Getting Started with LabVIEW” pdf file
• ”LabVIEW Fundamentals” pdf file