Embed Size (px)
Citation preview
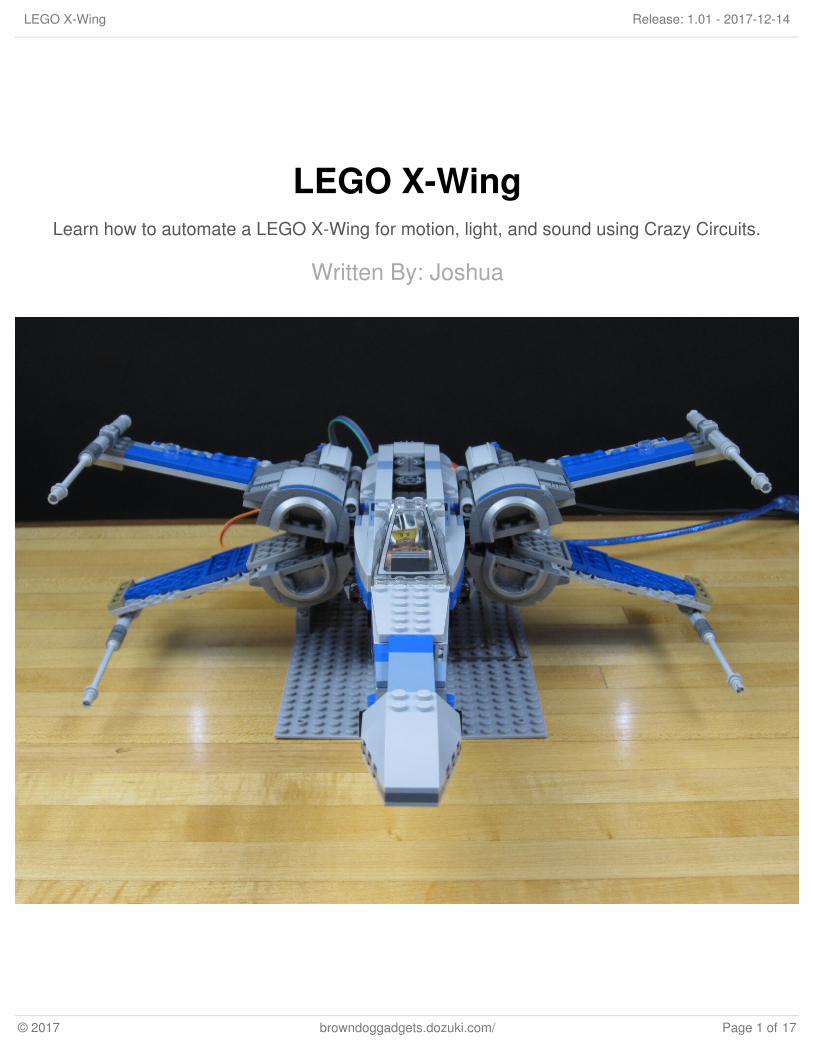
LEGO X-WingLearn how to automate a LEGO X-Wing for motion, light, and sound using Crazy Circuits.
Written By: Joshua
LEGO X-Wing Release: 1.01 - 2017-12-14
© 2017 browndoggadgets.dozuki.com/ Page 1 of 17
INTRODUCTION
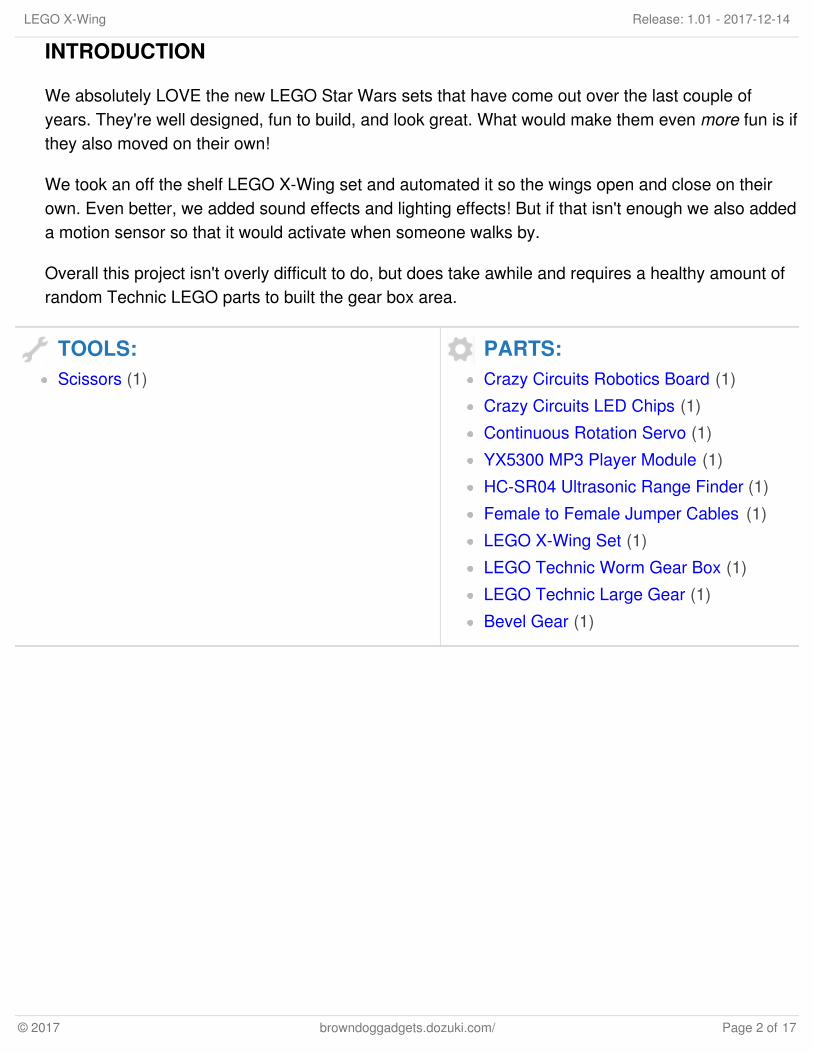
We absolutely LOVE the new LEGO Star Wars sets that have come out over the last couple ofyears. They're well designed, fun to build, and look great. What would make them even more fun is ifthey also moved on their own!
We took an off the shelf LEGO X-Wing set and automated it so the wings open and close on theirown. Even better, we added sound effects and lighting effects! But if that isn't enough we also addeda motion sensor so that it would activate when someone walks by.
Overall this project isn't overly difficult to do, but does take awhile and requires a healthy amount ofrandom Technic LEGO parts to built the gear box area.
TOOLS:Scissors (1)
PARTS:Crazy Circuits Robotics Board (1)
Crazy Circuits LED Chips (1)
Continuous Rotation Servo (1)
YX5300 MP3 Player Module (1)
HC-SR04 Ultrasonic Range Finder (1)
Female to Female Jumper Cables (1)
LEGO X-Wing Set (1)
LEGO Technic Worm Gear Box (1)
LEGO Technic Large Gear (1)
Bevel Gear (1)
LEGO X-Wing Release: 1.01 - 2017-12-14
© 2017 browndoggadgets.dozuki.com/ Page 2 of 17
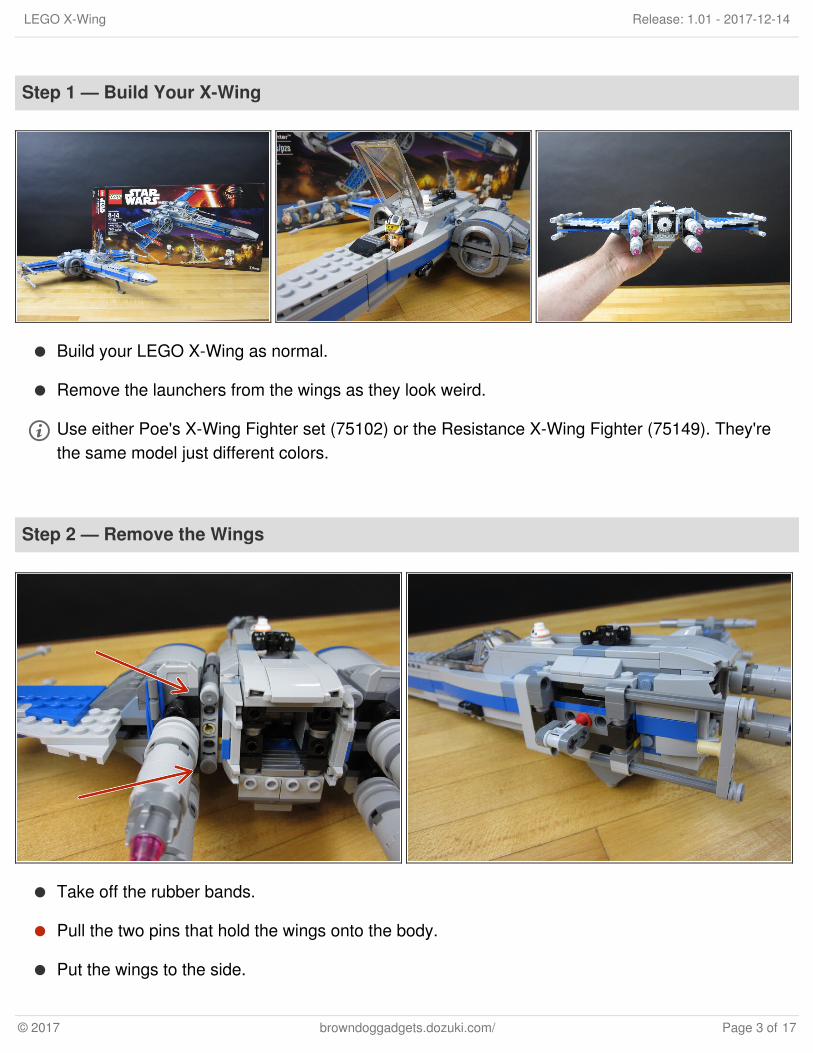
Step 1 — Build Your X-Wing
Build your LEGO X-Wing as normal.
Remove the launchers from the wings as they look weird.
Use either Poe's X-Wing Fighter set (75102) or the Resistance X-Wing Fighter (75149). They'rethe same model just different colors.
Step 2 — Remove the Wings
Take off the rubber bands.
Pull the two pins that hold the wings onto the body.
Put the wings to the side.
LEGO X-Wing Release: 1.01 - 2017-12-14
© 2017 browndoggadgets.dozuki.com/ Page 3 of 17
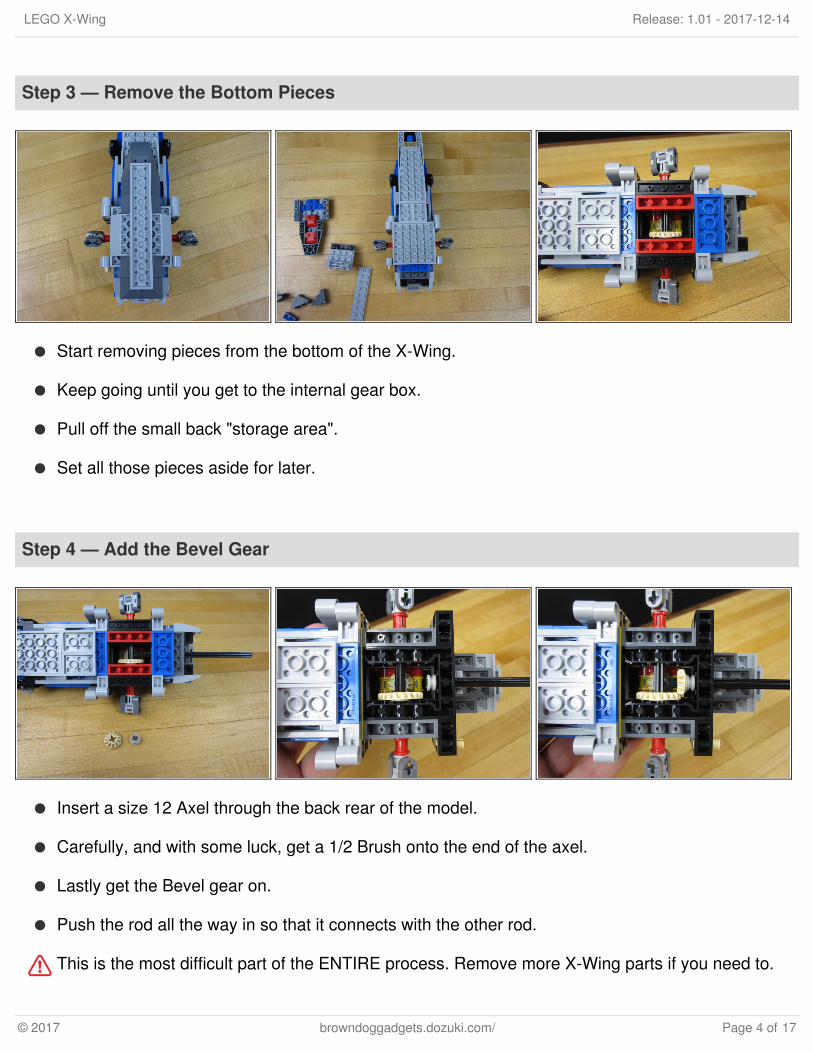
Step 3 — Remove the Bottom Pieces
Start removing pieces from the bottom of the X-Wing.
Keep going until you get to the internal gear box.
Pull off the small back "storage area".
Set all those pieces aside for later.
Step 4 — Add the Bevel Gear
Insert a size 12 Axel through the back rear of the model.
Carefully, and with some luck, get a 1/2 Brush onto the end of the axel.
Lastly get the Bevel gear on.
Push the rod all the way in so that it connects with the other rod.
This is the most difficult part of the ENTIRE process. Remove more X-Wing parts if you need to.
LEGO X-Wing Release: 1.01 - 2017-12-14
© 2017 browndoggadgets.dozuki.com/ Page 4 of 17

Step 5 — Rebuild the Bottom
Rebuild the entire bottom of your X-Wing. Refer to the box and original directions.
LEGO X-Wing Release: 1.01 - 2017-12-14
© 2017 browndoggadgets.dozuki.com/ Page 5 of 17
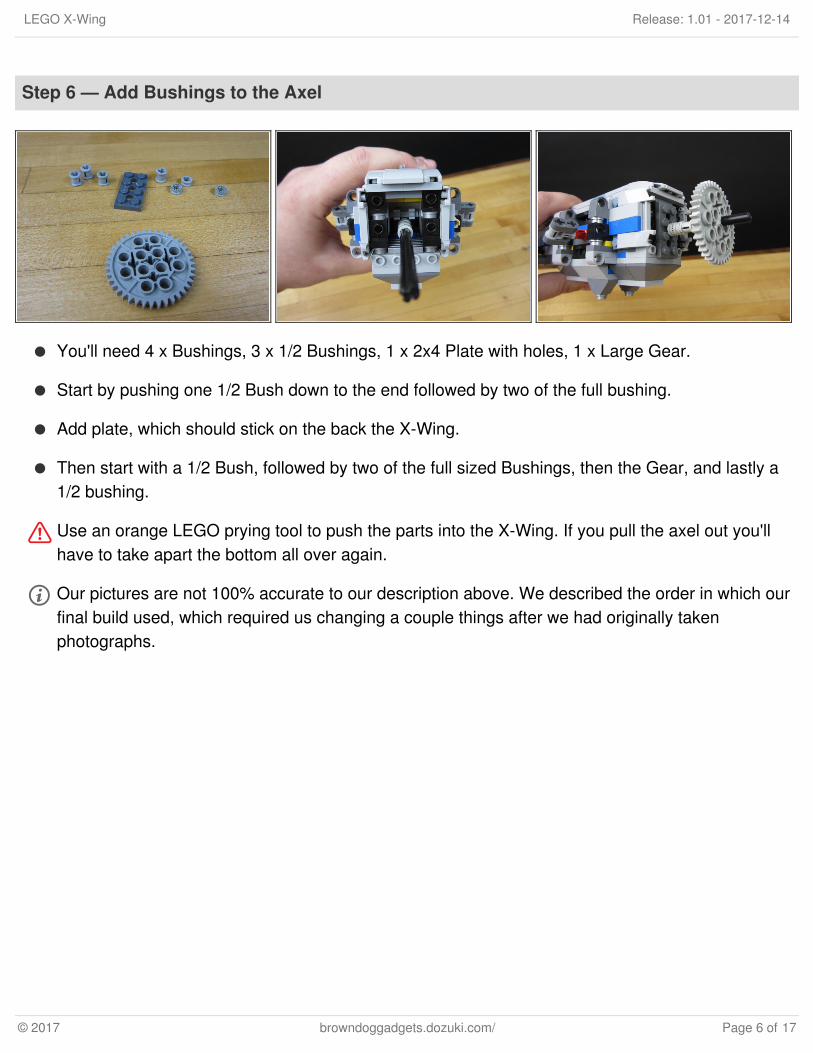
Step 6 — Add Bushings to the Axel
You'll need 4 x Bushings, 3 x 1/2 Bushings, 1 x 2x4 Plate with holes, 1 x Large Gear.
Start by pushing one 1/2 Bush down to the end followed by two of the full bushing.
Add plate, which should stick on the back the X-Wing.
Then start with a 1/2 Bush, followed by two of the full sized Bushings, then the Gear, and lastly a1/2 bushing.
Use an orange LEGO prying tool to push the parts into the X-Wing. If you pull the axel out you'llhave to take apart the bottom all over again.
Our pictures are not 100% accurate to our description above. We described the order in which ourfinal build used, which required us changing a couple things after we had originally takenphotographs.
LEGO X-Wing Release: 1.01 - 2017-12-14
© 2017 browndoggadgets.dozuki.com/ Page 6 of 17
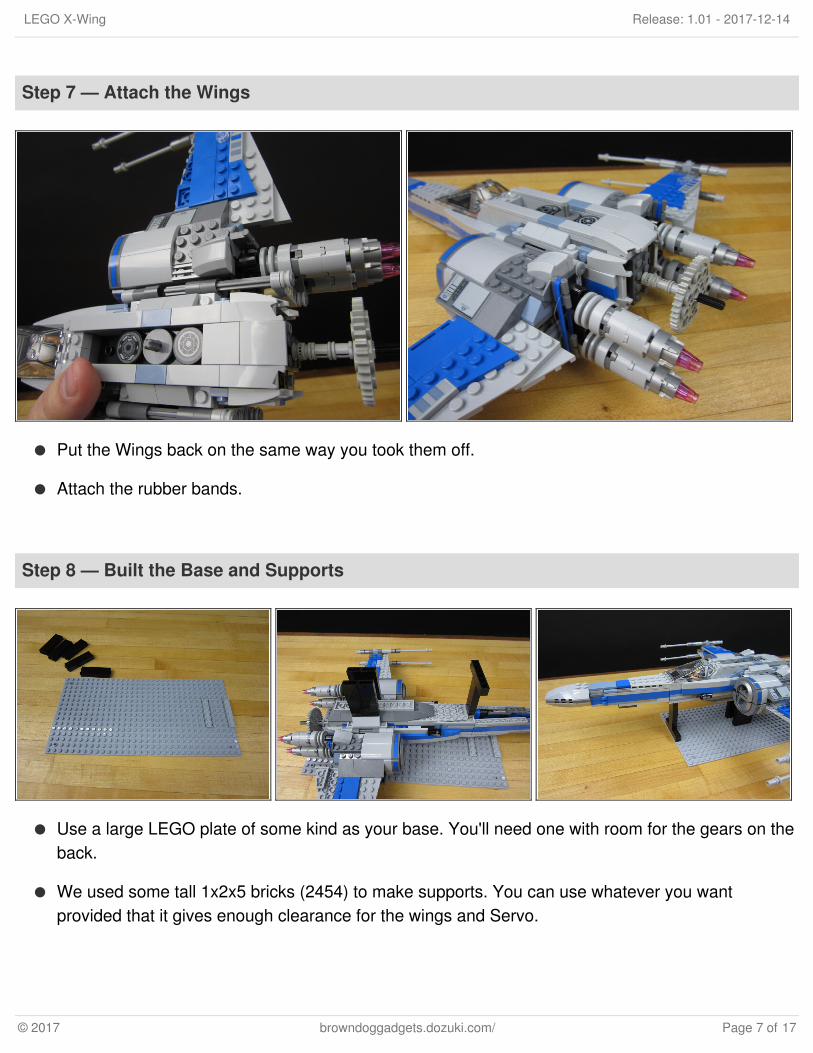
Step 7 — Attach the Wings
Put the Wings back on the same way you took them off.
Attach the rubber bands.
Step 8 — Built the Base and Supports
Use a large LEGO plate of some kind as your base. You'll need one with room for the gears on theback.
We used some tall 1x2x5 bricks (2454) to make supports. You can use whatever you wantprovided that it gives enough clearance for the wings and Servo.
LEGO X-Wing Release: 1.01 - 2017-12-14
© 2017 browndoggadgets.dozuki.com/ Page 7 of 17
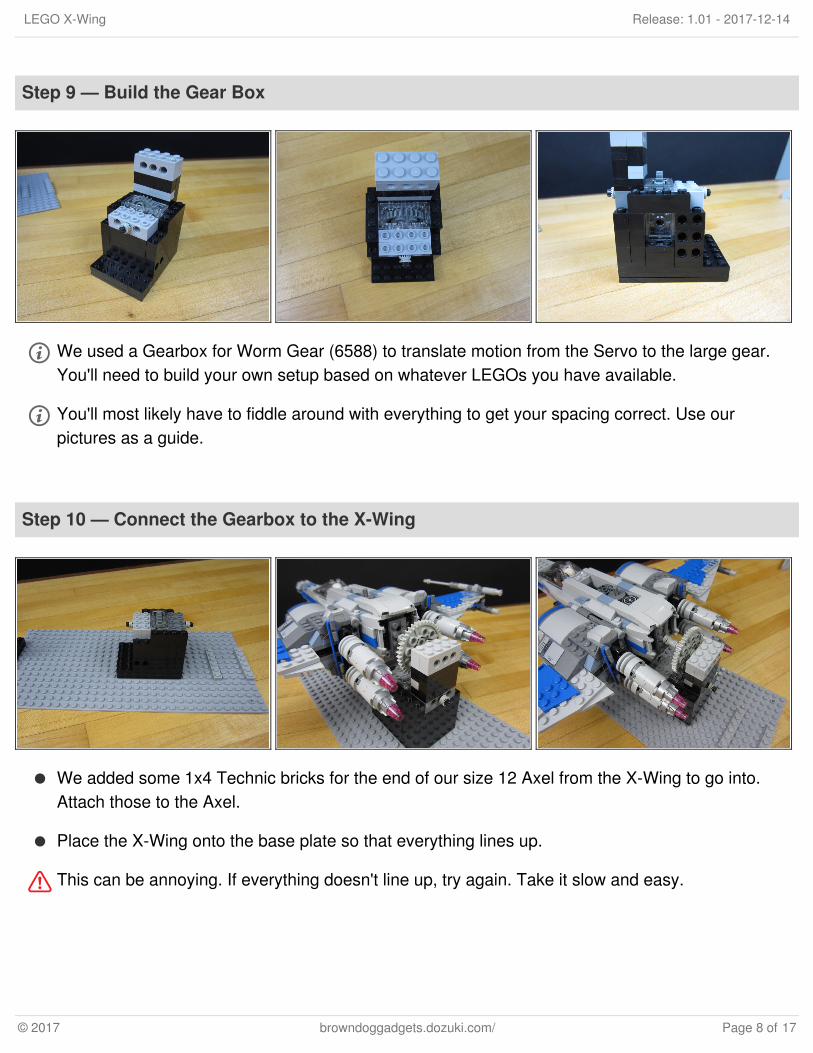
Step 9 — Build the Gear Box
We used a Gearbox for Worm Gear (6588) to translate motion from the Servo to the large gear.You'll need to build your own setup based on whatever LEGOs you have available.
You'll most likely have to fiddle around with everything to get your spacing correct. Use ourpictures as a guide.
Step 10 — Connect the Gearbox to the X-Wing
We added some 1x4 Technic bricks for the end of our size 12 Axel from the X-Wing to go into.Attach those to the Axel.
Place the X-Wing onto the base plate so that everything lines up.
This can be annoying. If everything doesn't line up, try again. Take it slow and easy.
LEGO X-Wing Release: 1.01 - 2017-12-14
© 2017 browndoggadgets.dozuki.com/ Page 8 of 17
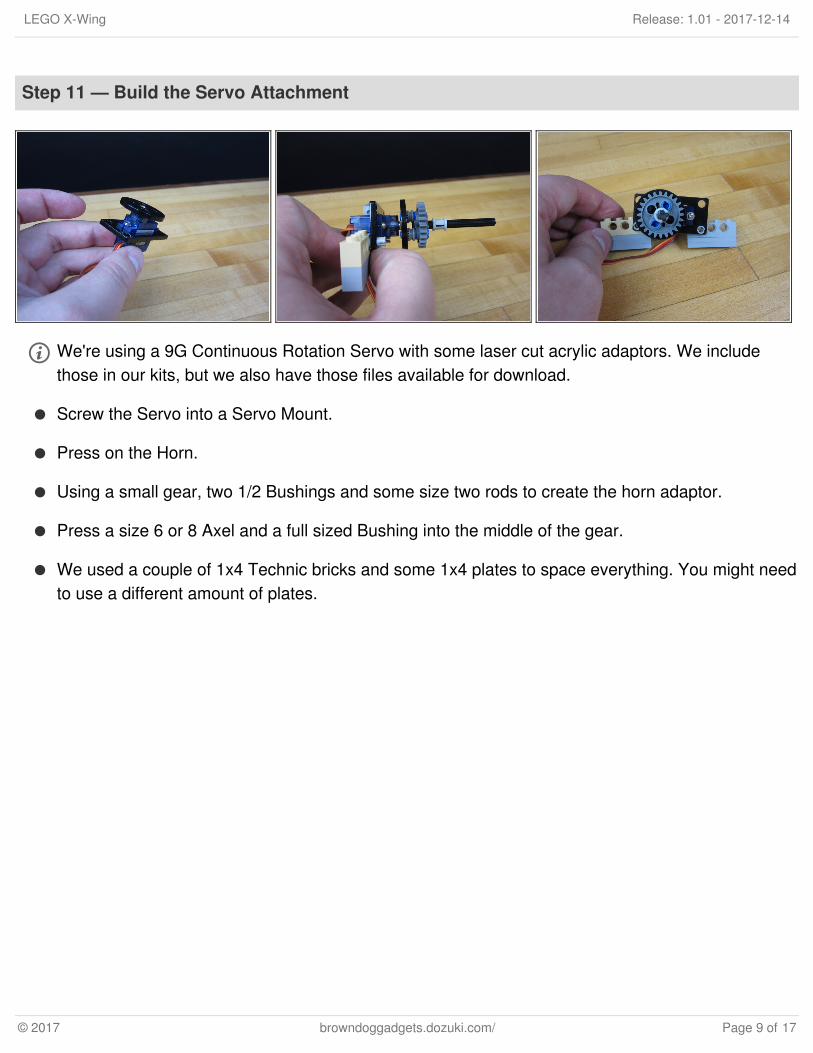
Step 11 — Build the Servo Attachment
We're using a 9G Continuous Rotation Servo with some laser cut acrylic adaptors. We includethose in our kits, but we also have those files available for download.
Screw the Servo into a Servo Mount.
Press on the Horn.
Using a small gear, two 1/2 Bushings and some size two rods to create the horn adaptor.
Press a size 6 or 8 Axel and a full sized Bushing into the middle of the gear.
We used a couple of 1x4 Technic bricks and some 1x4 plates to space everything. You might needto use a different amount of plates.
LEGO X-Wing Release: 1.01 - 2017-12-14
© 2017 browndoggadgets.dozuki.com/ Page 9 of 17
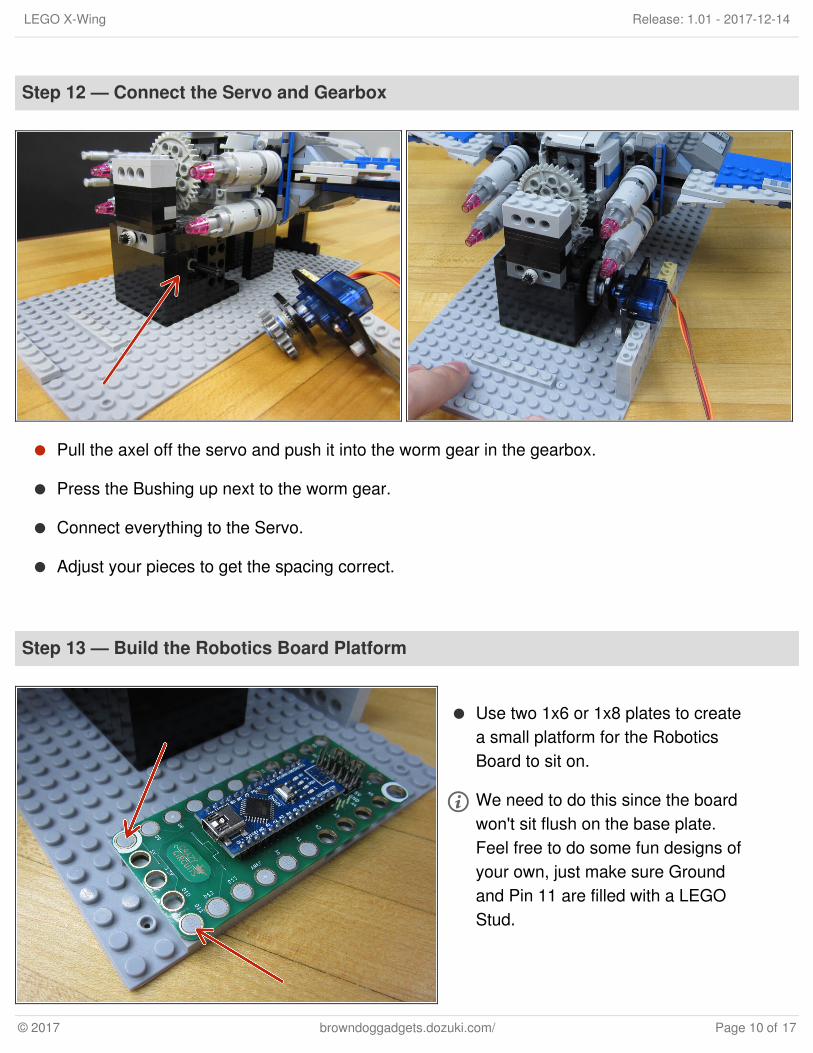
Step 12 — Connect the Servo and Gearbox
Pull the axel off the servo and push it into the worm gear in the gearbox.
Press the Bushing up next to the worm gear.
Connect everything to the Servo.
Adjust your pieces to get the spacing correct.
Step 13 — Build the Robotics Board Platform
Use two 1x6 or 1x8 plates to createa small platform for the RoboticsBoard to sit on.
We need to do this since the boardwon't sit flush on the base plate.Feel free to do some fun designs ofyour own, just make sure Groundand Pin 11 are filled with a LEGOStud.
LEGO X-Wing Release: 1.01 - 2017-12-14
© 2017 browndoggadgets.dozuki.com/ Page 10 of 17
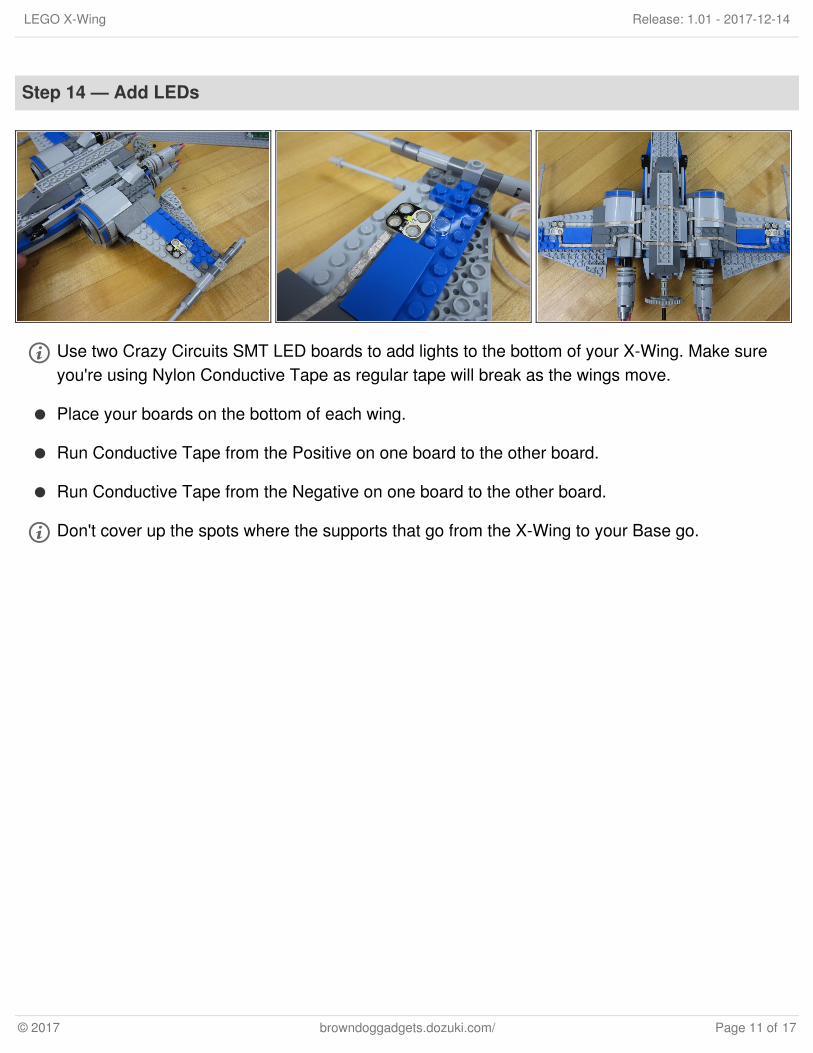
Step 14 — Add LEDs
Use two Crazy Circuits SMT LED boards to add lights to the bottom of your X-Wing. Make sureyou're using Nylon Conductive Tape as regular tape will break as the wings move.
Place your boards on the bottom of each wing.
Run Conductive Tape from the Positive on one board to the other board.
Run Conductive Tape from the Negative on one board to the other board.
Don't cover up the spots where the supports that go from the X-Wing to your Base go.
LEGO X-Wing Release: 1.01 - 2017-12-14
© 2017 browndoggadgets.dozuki.com/ Page 11 of 17
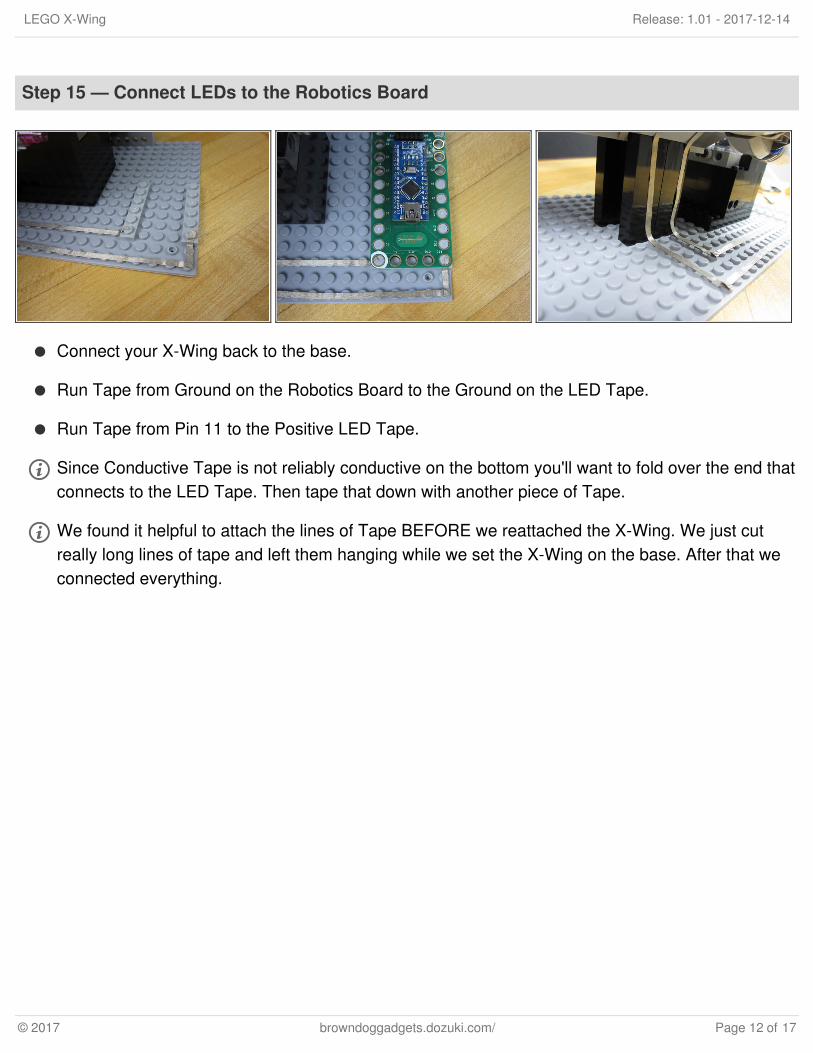
Step 15 — Connect LEDs to the Robotics Board
Connect your X-Wing back to the base.
Run Tape from Ground on the Robotics Board to the Ground on the LED Tape.
Run Tape from Pin 11 to the Positive LED Tape.
Since Conductive Tape is not reliably conductive on the bottom you'll want to fold over the end thatconnects to the LED Tape. Then tape that down with another piece of Tape.
We found it helpful to attach the lines of Tape BEFORE we reattached the X-Wing. We just cutreally long lines of tape and left them hanging while we set the X-Wing on the base. After that weconnected everything.
LEGO X-Wing Release: 1.01 - 2017-12-14
© 2017 browndoggadgets.dozuki.com/ Page 12 of 17
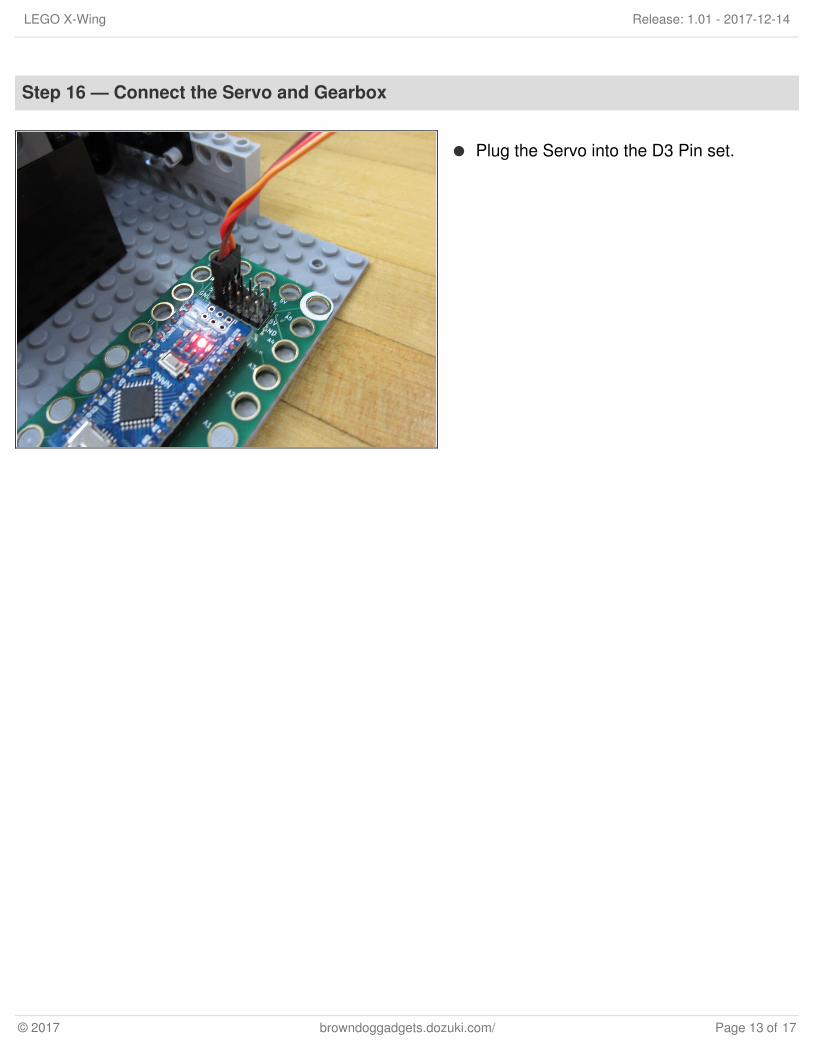
Step 16 — Connect the Servo and Gearbox
Plug the Servo into the D3 Pin set.
LEGO X-Wing Release: 1.01 - 2017-12-14
© 2017 browndoggadgets.dozuki.com/ Page 13 of 17

Step 17 — Connect the Range Finder
The Diagram at the start of the guide is a good reference to show you how to wire up the RangeFinder.
Connect VCC to a 5V Pin.
Connect Trig to A4.
Connect Echo to A5.
Connect GND to a GND Pin.
LEGO X-Wing Release: 1.01 - 2017-12-14
© 2017 browndoggadgets.dozuki.com/ Page 14 of 17
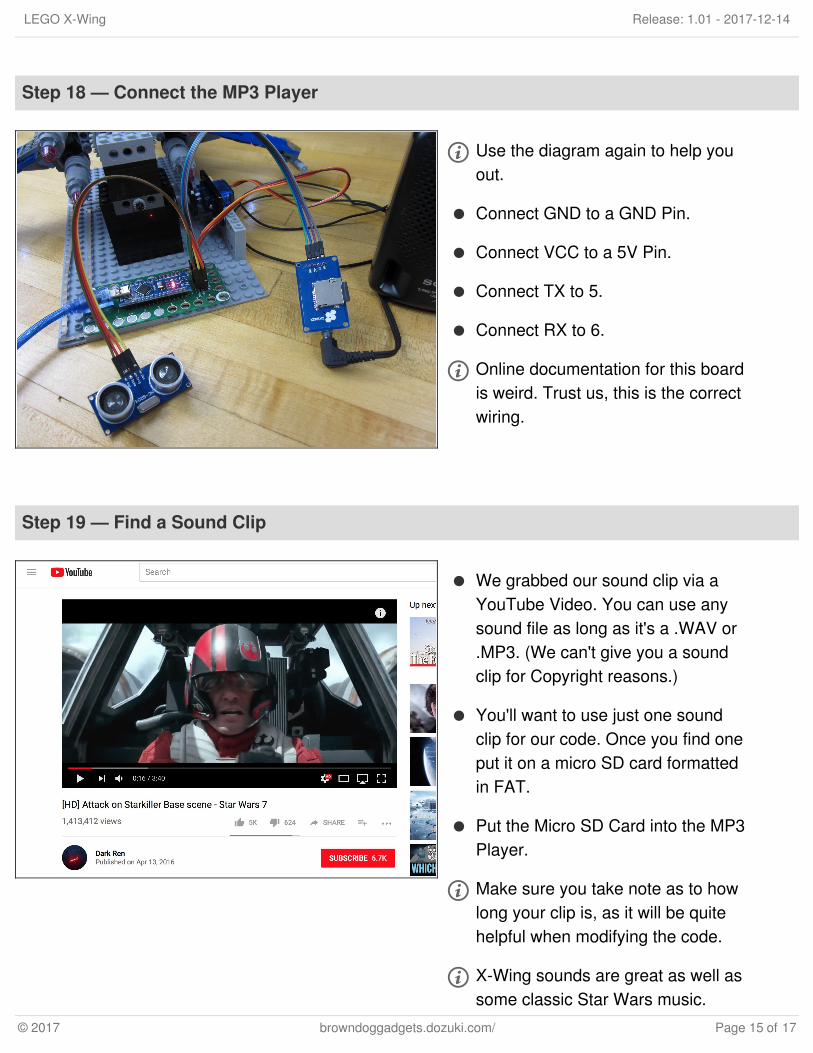
Step 18 — Connect the MP3 Player
Use the diagram again to help youout.
Connect GND to a GND Pin.
Connect VCC to a 5V Pin.
Connect TX to 5.
Connect RX to 6.
Online documentation for this boardis weird. Trust us, this is the correctwiring.
Step 19 — Find a Sound Clip
We grabbed our sound clip via aYouTube Video. You can use anysound file as long as it's a .WAV or.MP3. (We can't give you a soundclip for Copyright reasons.)
You'll want to use just one soundclip for our code. Once you find oneput it on a micro SD card formattedin FAT.
Put the Micro SD Card into the MP3Player.
Make sure you take note as to howlong your clip is, as it will be quitehelpful when modifying the code.
X-Wing sounds are great as well assome classic Star Wars music.
LEGO X-Wing Release: 1.01 - 2017-12-14
© 2017 browndoggadgets.dozuki.com/ Page 15 of 17
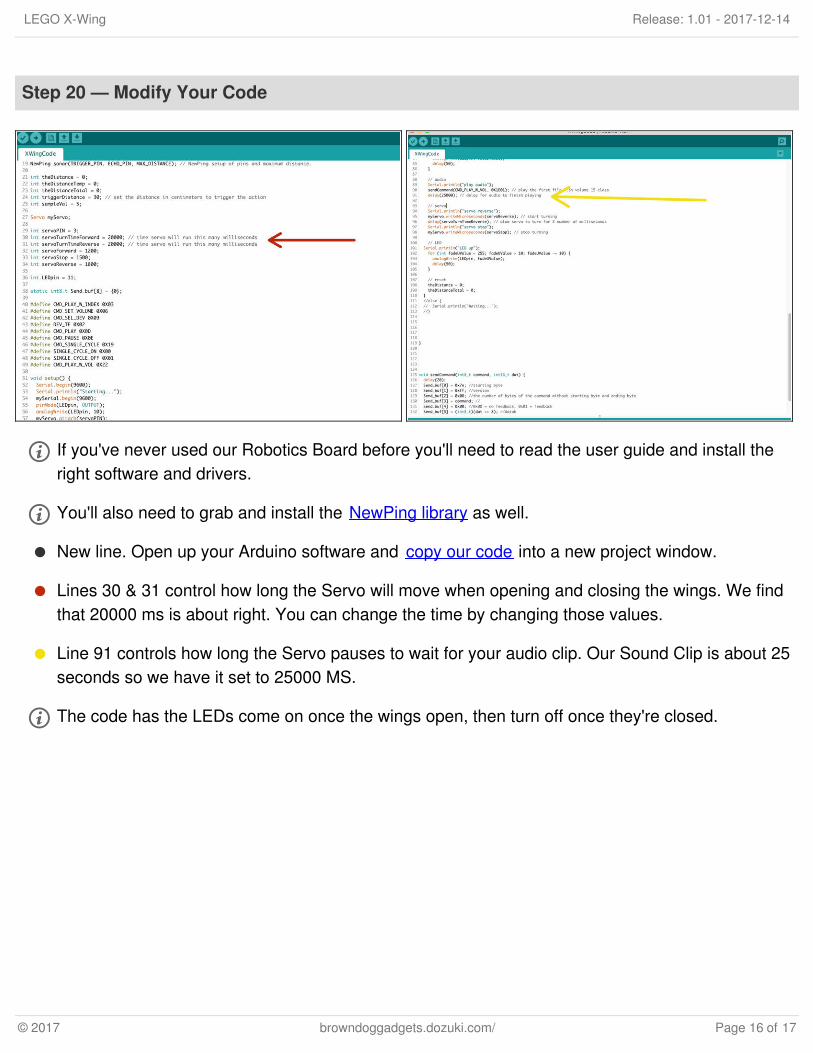
Step 20 — Modify Your Code
If you've never used our Robotics Board before you'll need to read the user guide and install theright software and drivers.
You'll also need to grab and install the NewPing library as well.
New line. Open up your Arduino software and copy our code into a new project window.
Lines 30 & 31 control how long the Servo will move when opening and closing the wings. We findthat 20000 ms is about right. You can change the time by changing those values.
Line 91 controls how long the Servo pauses to wait for your audio clip. Our Sound Clip is about 25seconds so we have it set to 25000 MS.
The code has the LEDs come on once the wings open, then turn off once they're closed.
LEGO X-Wing Release: 1.01 - 2017-12-14
© 2017 browndoggadgets.dozuki.com/ Page 16 of 17
This document was last generated on 2017-12-21 04:26:28 AM.
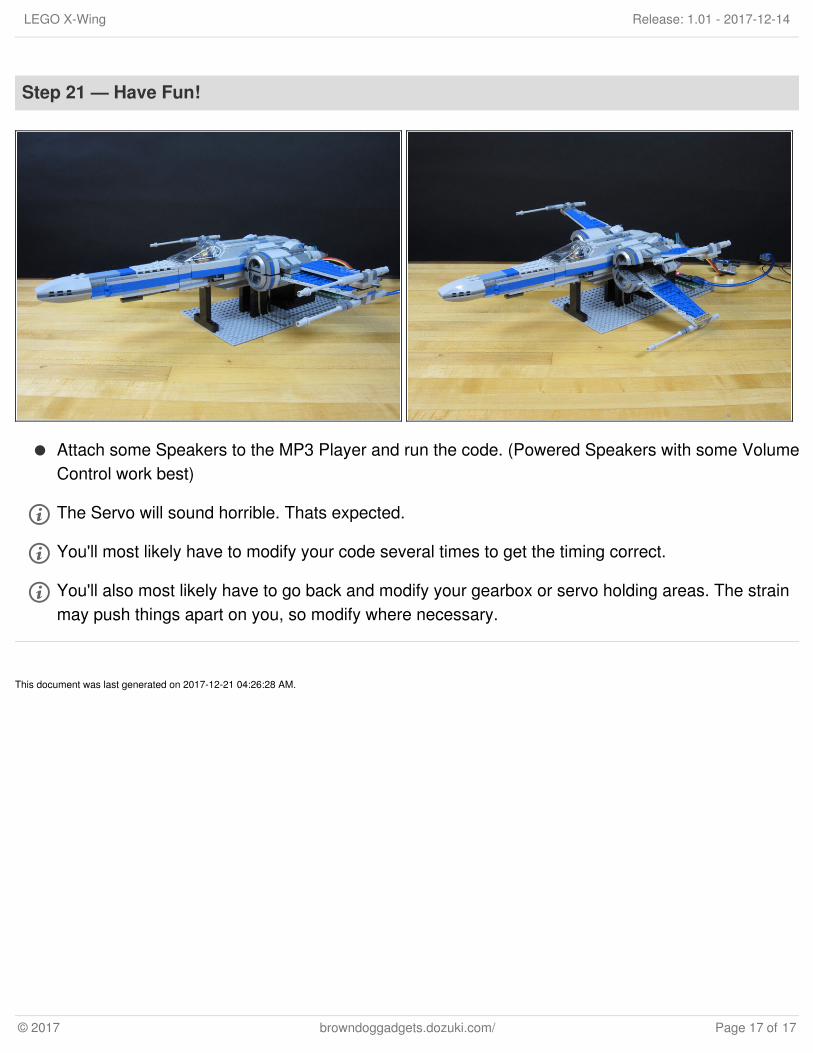
Step 21 — Have Fun!
Attach some Speakers to the MP3 Player and run the code. (Powered Speakers with some VolumeControl work best)
The Servo will sound horrible. Thats expected.
You'll most likely have to modify your code several times to get the timing correct.
You'll also most likely have to go back and modify your gearbox or servo holding areas. The strainmay push things apart on you, so modify where necessary.
LEGO X-Wing Release: 1.01 - 2017-12-14
© 2017 browndoggadgets.dozuki.com/ Page 17 of 17