Embed Size (px)
Citation preview
Linux/Unix 1: The Unix File System
Lesson 1: Gett ing StartedHow to Learn using O'Reilly School of Technology CoursesGett ing Started
Using the CodeRunnerLesson 2: List ing Files
List ing FilesGett ing more informat ionWild CardsHanding in a Quiz or Object ive
Lesson 3: File PermissionsFile Permissions
So What About Those Other Characters?Another Way to Change Permissions
Lesson 4: Basic File Manipulat ionBasic File Manipulat ion
Copying f ilesMoving FilesDelet ing FilesCreat ing and Removing DirectoriesCopying into Directories
Handing in Object ivesLesson 5: Connecting to the Useract ive Access Server
The Hottub Access ServerConnect ing to hottub
Lesson 6: Text EditorsThe Need for a Text EditorWhat is Emacs?
Command Keys and the Emacs WindowOther Text Editors
PicoVi
Lesson 7: ShellsWhat is a Shell?
Bash Command HistoryDot FilesAliasesLogin FilesPATH and Other Environment Variables
Lesson 8: System InfoWUname
Lesson 9: Unix Pipes and GrepGrepOutput Redirect ion
Lesson 10: Unix Regular ExpressionsRegular Expressions
.*^ and $
Lesson 11: Odds and Ends
More or LessHead and TailManLocateFind
Lesson 12: LinksHard LinksMore About Hard LinksSymbolic Links
Lesson 13: ProcessesProcessesParent and Child ProcessesBackgrounding a Process
Lesson 14: Tar and GzipTar and Gzip
TarGzip
Lesson 15: The Super UserThe Super UserAccessing your Bubble machinesu
Lesson 16: SSHWhat is SSH?Using SSHInstalling SSH on your bubbleSSHDrc.localSCP
Lesson 17: SyslogSystem LogsSample Log Files and EntriesLog File ExampleSyslog.confKeeping track of user loginsOther log f iles
Lesson 18: CronCronCrontabMore on Redirect ing OutputEdit ing your Crontab
Lesson 19: Managing UsersUser AccountsThe Password FileThe Shadow FileThe Group FileAdding AccountsRemoving Accounts
Copyright © 1998-2014 O'Reilly Media, Inc.
This work is licensed under a Creat ive Commons Attribut ion-ShareAlike 3.0 Unported License.See ht tp://creat ivecommons.org/licenses/by-sa/3.0/legalcode for more informat ion.

Getting Started
How to Learn using O'Reilly School of Technology CoursesWelcome to O'Reilly School o f Technology (OST) System Administration Course. The best way to learn a new skill o rtechno logy is to experiment. The more you experiment, the more you learn. Our learning system is designed toencourage experimentation and help you learn how to learn system administration. Here are some tips for using iteffectively:
Learn in yo ur o wn vo ice
Work through your own ideas and listen to yourself in order to learn your new skill. We want you to facilitate your ownlearning, so we avo id lengthy video or audio streaming, and keep spurious animated demonstrations to a minimum.
T ake yo ur t ime
Learning takes time and rushing can have negative effects on your progress. By taking your time, you will try newthings and learn more. Even if you have some experience you will be surprised what new concepts or new ways tolook at the Linux world you may discover.
Creat e yo ur o wn examples and demo nst rat io ns
In order to understand a complex concept, you need to understand its various parts. We will help you by o fferingguidance as you create a demonstration piece by piece.
Experiment wit h yo ur ideas and quest io ns
You are encouraged to wander from the path o ften to explore possibilities! We can not possibly anticipate all o f yourquestions and ideas, so it is up to you to experiment and create on your own.
Accept guidance, but do no t depend o n it
Try to overcome difficulties on your own. Going from misunderstanding to understanding on your own is the best wayto learn any new skill. Our goal is fo r you to use the techno logy independent o f us. Of course, you can always contactyour instructor if you are out o f ideas.
Creat e REAL pro ject s
Real pro jects are more meaningful and rewarding to complete than simulated pro jects. They will help you tounderstand what is invo lved in real world situations. After each lesson you will be given objectives and/or quizzes soyou can test your new knowledge.
Getting StartedFor this class we will be using the Coderunner in your web browser. This application allows you to connect to aremote server running the Linux operating system. A server is a computer that serves files and services to o thercomputers via a network. To access the OST server, use the username and password sent to you after signing up forthe course.
Your machine will send text characters to our server. Our server will send the resulting output back to your computer.
Our server has Linux installed as its operating system. Linux is an alternative operating system primarily used forserver applications. Linux is Unix that can be run using Intel processors. You will be using Unix commands tocommunicate with the Linux server.
You may still be wondering about the differences between Unix and Linux. Unix was the operating system developedby AT&T Bell labs back in the 70 's. Unix was developed primarily fo r use by guru programmers, making it somewhatunfriendly fo r the casual user. At that time, Unix only ran on expensive mainframe computers. In the early 90 's, acomputer science student named Linus Torvalds developed a free version o f Unix at the University o f Helsinki. Thisnew version could be used on personal computers, much like the PC you probably have on your desk right now. Thisnew version o f Unix was called Linux. For the purposes o f this course, we will use the terms interchangeably.
Using the CodeRunner
The bottom half o f this browser window is called CodeRunner. CodeRunner is used to experiment with manytypes o f programming languages. Whenever you are working on this course, you will be using the Unixterminal. Try selecting this button now.
You will be logged in automatically or you will be prompted to enter your login and password. If yourusername appears but no o ther action takes place, click on the CodeRunner with your mouse and enter yourpassword. The characters o f your password will no t appear on the screen and the cursor will no t move. Onceyou hit Enter you then be logged in the OST server.
It should look something like this:
Last login: Thu Dec 18 11:01:45 2008 from somewhere.over.the.rainbow.comcold:~$
You will see information telling you the last time you logged into your shell and from where. The server isnamed co ld. All OST students have shells on this server. A shell is a place where you can execute Unixcommands on the server. The commands you execute within your own shell will no t effect any o ther shell.
co ld:~$ is called a command prompt. If you see this, you're ready to execute Unix commands. If you do not,please email your instructor so she can help you.
When you are finished with your session, simply type exit at the prompt.
It should look something like this
cold:~$ exit
Keep in mind that if your session is dormant fo r longer that 60 minutes, you will be disconnectedautomatically from the server. Simply hit the Co nnect in the middle o f the CodeRunner screen to login again.
Note If you are already familiar with a different telnet or ssh client, feel free to use it. Be sure to use thehostname co ld.useract ive.co m to connect.
Copyright © 1998-2014 O'Reilly Media, Inc.
This work is licensed under a Creative Commons Attribution-ShareAlike 3.0 Unported License.See http://creativecommons.org/licenses/by-sa/3.0/legalcode for more information.
Listing FilesLesson Objectives
To be able to navigate a directory structure using the ls and cd commands.
Listing FilesIn the last lesson, you learned how to login to your shell on the OST server. Go ahead and login to your shell now.
Your shell contains all o f the files that you have saved to your OST account. To see a list o f these files, you will use thels command. Most Unix commands have very short names. At first the command names may not make much senseto you, but they do have meaning. In this case ls stands for list stuff. Some people say it is a shortened version o f list.
Try using the ls command.
At the command prompt, type the fo llowing commands:
cold:~$ lsObjective1.txt cgi index.htmlcold:~$
Even if you have never saved anything to your account, you will have an index.ht ml file and a cgi directory. These areautomatically created when you register with OST. If you have taken o ther OST courses you may have quite a few files.
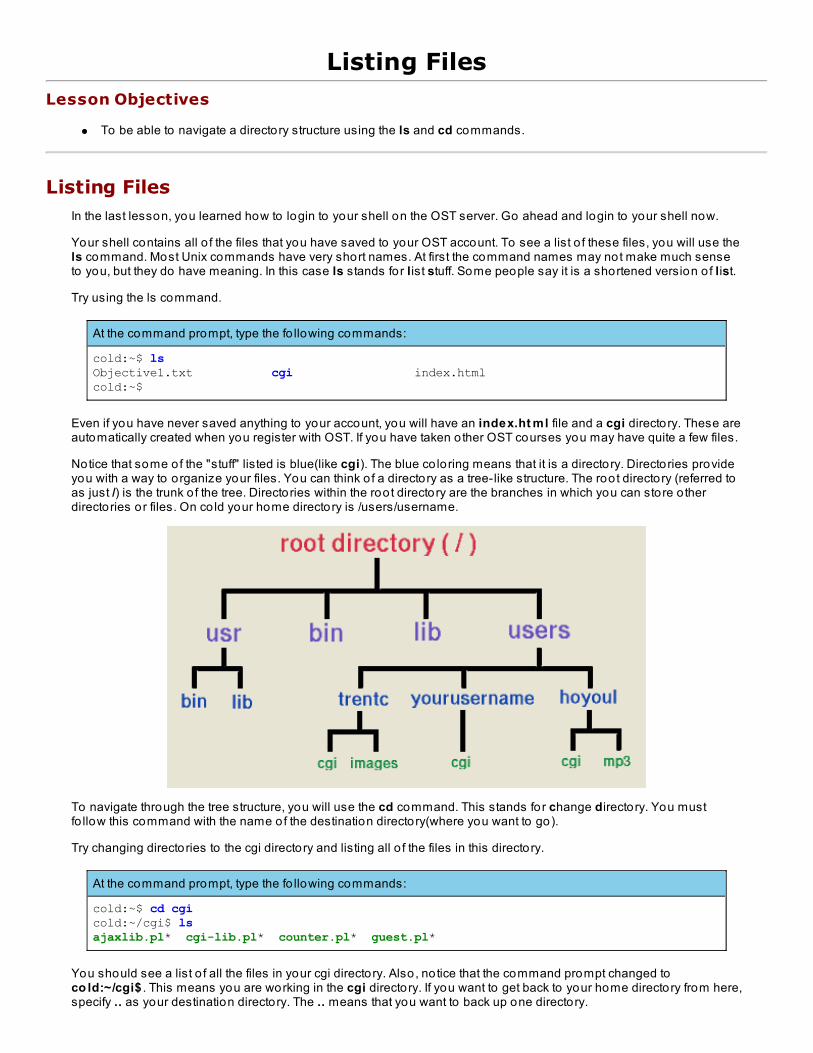
Notice that some of the "stuff" listed is blue(like cgi). The blue co loring means that it is a directory. Directories provideyou with a way to organize your files. You can think o f a directory as a tree-like structure. The root directory (referred toas just /) is the trunk o f the tree. Directories within the root directory are the branches in which you can store o therdirectories or files. On co ld your home directory is /users/username.
To navigate through the tree structure, you will use the cd command. This stands for change directory. You mustfo llow this command with the name of the destination directory(where you want to go).
Try changing directories to the cgi directory and listing all o f the files in this directory.
At the command prompt, type the fo llowing commands:
cold:~$ cd cgicold:~/cgi$ lsajaxlib.pl* cgi-lib.pl* counter.pl* guest.pl*
You should see a list o f all the files in your cgi directory. Also, notice that the command prompt changed toco ld:~/cgi$ . This means you are working in the cgi directory. If you want to get back to your home directory from here,specify .. as your destination directory. The .. means that you want to back up one directory.
Do some exploring and see what is in the root (/) directory.
At the command prompt, type the fo llowing commands:
cold:~$ cd /cold:/$ ls bin etc initrd media mnt2 root software tmp var boot home lib misc opt sbin srv users dev httpd@ lost+found mnt proc selinux sys usr
Like the commands o f Linux, the names o f these directories and their contents have specific meaning. Part o f being asystem administrator is research. Try searching the web for the meaning o f some of these directories. Just lookaround a bit to get used to using cd and ls. If you ever get lost, you can be transported back to your directory instantlyby typing cd with no destination directory. Go ahead and do this now.
Getting more information
After you have finished exploring, go back to your cgi directory and list the files again. You will be using the -lflag to get more information about these files. A f lag is an additional parameter given to a command thatgives it more specific instructions on how to perform its job.
After the command prompt, type the fo llowing commands:
cold:~/cgi$ ls -ltotal 20-rwxr-xr-x 1 username webusers 486 Jun 9 16:25 ajaxlib.pl*-rwxr-xr-x 1 username webusers 4433 Jun 9 16:25 cgi-lib.pl*-rwxr-xr-x 1 username webusers 2765 Jun 9 16:25 counter.pl*-rwxr-xr-x 1 username webusers 3182 Jun 9 16:25 guest.pl*cold:~/cgi$
In the first co lumn (the one that looks like a bunch o f strange letters and dashes) are the file permissions foreach file. You will learn more about permissions in the next lesson.
The second co lumn gives your username, or the owner o f the file or directory, fo llowed by the wordwebusers, the group to which the file belongs. All OST students are part o f the webusers group.
The third co lumn shows the size o f the file (in bytes), the date the file was last modified, and the file's name.
There are some other flags that can be used with the ls command. One o f these flags allows you to seehidden files. By default, ls does not list files that start with a period (also called a dot). These are known asdotfiles. We can force these files and directories to be listed by specifying the -a flag.
See if you can find the dotfile in your home directory.
After the command prompt, type the fo llowing commands:
cold:~$ ls -altotal 392drwxr-xr-x 4 username webusers 4096 Jun 9 10:46 .drwxr-xr-x 1921 root root 151552 Jun 9 10:40 ..-rw------- 1 username webusers 58 Jun 9 10:46 .bash_history-rwxr-xr-x 1 username webusers 42 Jun 9 10:46 .bash_login*drwxr-xr-x 2 username webusers 4096 Jun 9 10:36 cgi-rwxr-xr-x 1 username webusers 334 Jun 9 10:46 .emacs*-rw-r--r-- 1 username webusers 557 Jun 9 10:46 index.html-rw-r--r-- 1 username webusers 0 Jun 9 10:46 Objective1.txtdrwxr-xr-x 4 username webusers 4096 Mar 3 10:46 .php_files-rw-rw-r-- 1 username webusers 32768 Jul 23 14:29 .psdevtabdrwx------ 2 username webusers 4096 Jul 15 15:25 .sshcold:~$
If there are any dotfiles in your home directory, they will be at the top o f the list. At the very least you should
have the dotfile .bash_hist o ry. The single dot (.) and double dot (..) directories represent the currentdirectory and the parent directory respectively. This is why you can type cd .. to back up one directory.
It is also important to note that you can use a tilde (~) to represent your home directory. cd back into your cgidirectory to see this in action.
After the command prompt, type the fo llowing commands:
cold:~/cgi$ cd ~cold:~$
Wild Cards
If you have hundreds o f files in your directory, the ls command can return a lo t more information than youcare to see. Wild cards can be used to limit the amount o f information displayed.
cd into your /usr/bin directory. There are two ways to do this:
Type cd /, then type cd usr, and then type cd bin. Using this process, you wouldd have to typethree separate commands.Type cd /usr/bin. You can reach the same destination using only one command.
After the command prompt, type the fo llowing commands:
cold:/usr/bin$ ls
There are a lo t o f files in /usr/bin! What if you were looking for a file that started with the letter n (lowercase N),but you could not remember exactly what it was called? This is where a wild card can be helpful. The asterisk(*) is used to take the place o f any number o f characters.
Note Keep in mind that Unix is case sensitive. This means that Unix can distinguish between upperand lower case letters.
After the command prompt, type the fo llowing commands:
cold:/usr/bin$ ls n*
You should see a list o f all the files that begin with the letter n. Now try this:
After the command prompt, type the fo llowing commands:
cold:/usr/bin$ ls n? nc* nl* nm*
Do you see how ? works? It stands for any single character. If you wanted to list the files called runt andruns, but not running, you could use ls run?
Handing in a Quiz or Objective
After you have read the lesson you have your first quiz to complete that allows you to demonstrate theconcepts you have learned. Under Lesson 2 there is a Quiz 1 item. Click on this to reveal the quiz questions.Be sure to scro ll down the page to make sure you have answered all questions. When you have finished,scro ll down the top half o f the Coderunner screen and select the button that reads Hand in at the bottom rightside o f the window. You will use the same procedure to hand in objectives. Simply click on the Hand In buttonto hand in any files created(Please do not use the Drop In box for this course.). This button will alert yourinstructor that your work is ready to be evaluated.
Copyright © 1998-2014 O'Reilly Media, Inc.
This work is licensed under a Creative Commons Attribution-ShareAlike 3.0 Unported License.See http://creativecommons.org/licenses/by-sa/3.0/legalcode for more information.
File PermissionsLesson Objectives
By the end o f this lesson you will:
Understand the differences between read, writ e , and execut e file permissions.Understand the concept o f owner/group/everyone access levels.Be able to modify permissions using the chmo d command.
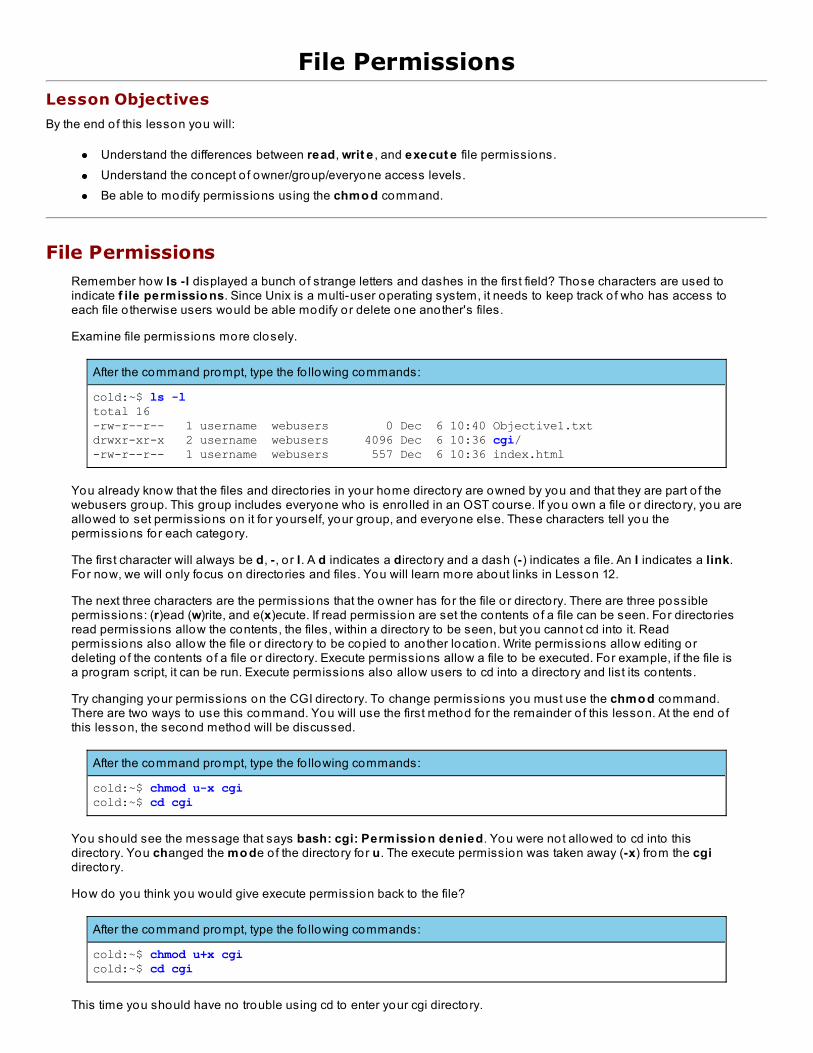
File PermissionsRemember how ls -l displayed a bunch o f strange letters and dashes in the first field? Those characters are used toindicate f ile permissio ns. Since Unix is a multi-user operating system, it needs to keep track o f who has access toeach file o therwise users would be able modify or delete one another's files.
Examine file permissions more closely.
After the command prompt, type the fo llowing commands:
cold:~$ ls -ltotal 16-rw-r--r-- 1 username webusers 0 Dec 6 10:40 Objective1.txtdrwxr-xr-x 2 username webusers 4096 Dec 6 10:36 cgi/-rw-r--r-- 1 username webusers 557 Dec 6 10:36 index.html
You already know that the files and directories in your home directory are owned by you and that they are part o f thewebusers group. This group includes everyone who is enro lled in an OST course. If you own a file or directory, you areallowed to set permissions on it fo r yourself, your group, and everyone else. These characters tell you thepermissions for each category.
The first character will always be d, - , o r l. A d indicates a directory and a dash (-) indicates a file. An l indicates a link.For now, we will only focus on directories and files. You will learn more about links in Lesson 12.
The next three characters are the permissions that the owner has for the file or directory. There are three possiblepermissions: (r)ead (w)rite, and e(x)ecute. If read permission are set the contents o f a file can be seen. For directoriesread permissions allow the contents, the files, within a directory to be seen, but you cannot cd into it. Readpermissions also allow the file or directory to be copied to another location. Write permissions allow editing ordeleting o f the contents o f a file or directory. Execute permissions allow a file to be executed. For example, if the file isa program script, it can be run. Execute permissions also allow users to cd into a directory and list its contents.
Try changing your permissions on the CGI directory. To change permissions you must use the chmo d command.There are two ways to use this command. You will use the first method for the remainder o f this lesson. At the end o fthis lesson, the second method will be discussed.
After the command prompt, type the fo llowing commands:
cold:~$ chmod u-x cgicold:~$ cd cgi
You should see the message that says bash: cgi: Permissio n denied. You were not allowed to cd into thisdirectory. You changed the mo de o f the directory for u. The execute permission was taken away (-x) from the cgidirectory.
How do you think you would give execute permission back to the file?
After the command prompt, type the fo llowing commands:
cold:~$ chmod u+x cgicold:~$ cd cgi
This time you should have no trouble using cd to enter your cgi directory.

What if you wanted to remove all three permissions? (Make sure you are in your home directory.)
After the command prompt, type the fo llowing commands:
cold:~$ chmod u-rwx cgicold:~$ ls -ltotal 16-rw-r--r-- 1 username webusers 0 Dec 6 10:40 Objective1.txtd---r-xr-x 2 username webusers 4096 Dec 6 10:36 cgi/-rw-r--r-- 1 username webusers 557 Dec 6 10:36 index.html
When you are finished, add read, write, and execute permissions back to your cgi directory. Make sure yourpermissions are exactly as they were originally.
So What About Those Other Characters?
The next three characters are the permissions the group has for the file or directory. Remember, your group iswebusers. The final three characters are the permissions for all o ther people.
Here is an example o f permissions on a file:
Try removing read permissions for the group and giving write and execute permissions to yourself and o therpeople for your index.html file.
After the command prompt, type the fo llowing commands:
cold:~$ chmod guo-r,uo+wx index.htmlcold:~$ ls -ltotal 16-rw-r--r-- 1 username webusers 0 Dec 6 10:40 Objective1.txtdrwxr-xr-x 2 username webusers 4096 Dec 6 10:36 cgi/--wx--x-wx 1 username webusers 557 Dec 6 10:36 index.html*
Now, try visiting the URL ht t p://yo urdo main/index.ht ml on the internet. Be sure to replace yo urdo mainwith username.o reillyst udent .co m .
What happened? You should see the message that you are Fo rbidden to view the page. This is because theweb server that serves your web pages is not readable by any group.
Change the permissions o f index.html back to their o riginal state. Then visit the URL again. You should seeyour page displayed now.
So, now that you know what permissions are, how do you set them for a file or directory? For most files (likeHTML files), you will want to be sure that everyone (the owner, the group, and all o ther people) can read thefile, but only you, the owner, have permission to write to it. That permission would look like this: -rw-r--r--
Another common permission is -rw------- . This permission means you are the only person who can readand write to the file. Using rw is a good idea if you have a file that contains your password.
If you have a cgi script, you will probably want to make sure that the group (especially the server) and all o therpeople on the internet can execute it. To do that, set the permissions to -rwxr-xr-x.
Another Way to Change Permissionschmo d can use a numerical argument to symbolize the permissions as well. The first digit is used to changethe permissions o f the owner, the second digit is used to change the permissions o f the group, and the thirddigit is used to change the permissions o f all o ther people.

To determine the number you need to use, you will have to use a little addition. The sum of the numbersrepresent the permission that will be set fo r the file:
4 = Read2 = Writ e1 = eXecut e
To give the owner read and write permissions, you would add 2 + 4 , so the first digit would be 6 . To give thegroup and all o ther people read access only, the second digit and third digit would be 4 . The command youwould use would be:
chmo d 644 f ilename.ht mlAs a system administrator, you will need to make sure that file permissions are set correctly in order to maintainsecurity. Be sure you understand how to change permissions before moving on to the next lesson.
Copyright © 1998-2014 O'Reilly Media, Inc.
This work is licensed under a Creative Commons Attribution-ShareAlike 3.0 Unported License.See http://creativecommons.org/licenses/by-sa/3.0/legalcode for more information.
Basic File ManipulationLesson Objectives
To understand basic file and directory manipulation using cp, mv, rm , mkdir, rm -r.
Basic File ManipulationNow that you know how to change permissions on your files and directories, it is time to learn some basic commandsfor manipulating files.
Copying files
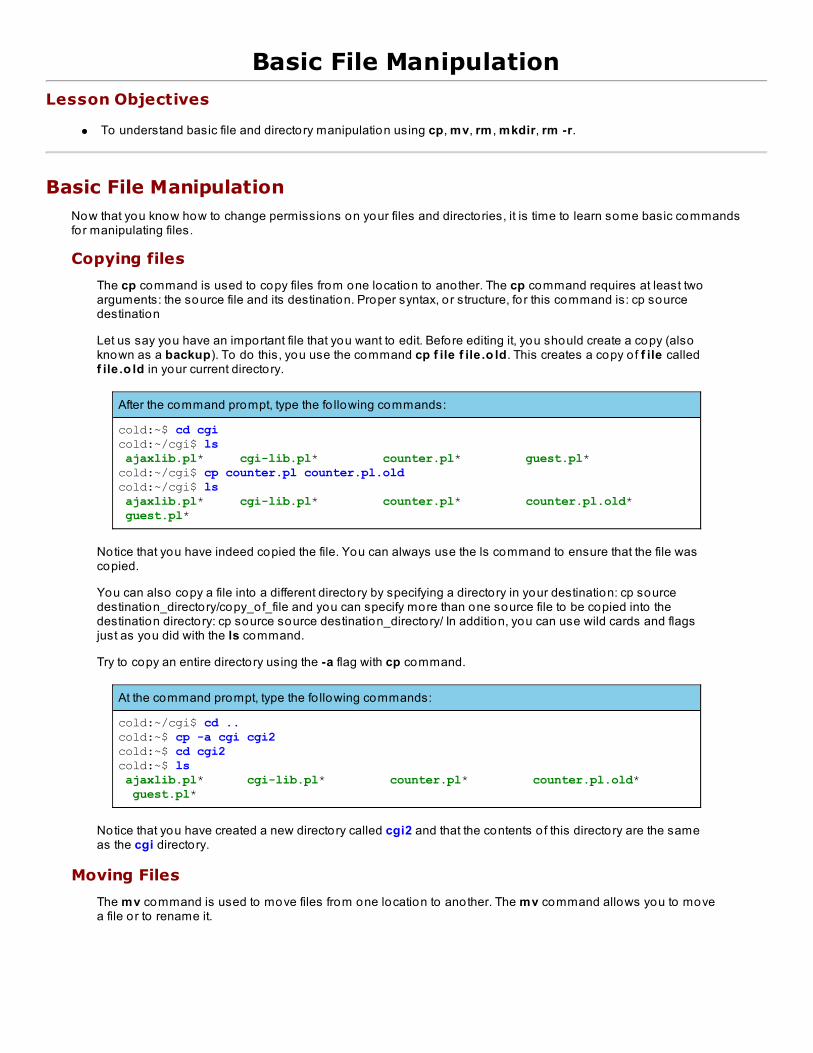
The cp command is used to copy files from one location to another. The cp command requires at least twoarguments: the source file and its destination. Proper syntax, or structure, fo r this command is: cp sourcedestination
Let us say you have an important file that you want to edit. Before editing it, you should create a copy (alsoknown as a backup). To do this, you use the command cp f ile f ile .o ld. This creates a copy o f f ile calledf ile .o ld in your current directory.
After the command prompt, type the fo llowing commands:
cold:~$ cd cgicold:~/cgi$ ls ajaxlib.pl* cgi-lib.pl* counter.pl* guest.pl*cold:~/cgi$ cp counter.pl counter.pl.oldcold:~/cgi$ ls ajaxlib.pl* cgi-lib.pl* counter.pl* counter.pl.old* guest.pl*
Notice that you have indeed copied the file. You can always use the ls command to ensure that the file wascopied.
You can also copy a file into a different directory by specifying a directory in your destination: cp sourcedestination_directory/copy_of_file and you can specify more than one source file to be copied into thedestination directory: cp source source destination_directory/ In addition, you can use wild cards and flagsjust as you did with the ls command.
Try to copy an entire directory using the -a flag with cp command.
At the command prompt, type the fo llowing commands:
cold:~/cgi$ cd ..cold:~$ cp -a cgi cgi2cold:~$ cd cgi2cold:~$ ls ajaxlib.pl* cgi-lib.pl* counter.pl* counter.pl.old* guest.pl*
Notice that you have created a new directory called cgi2 and that the contents o f this directory are the sameas the cgi directory.
Moving Files
The mv command is used to move files from one location to another. The mv command allows you to movea file or to rename it.
After the command prompt, type the fo llowing commands:
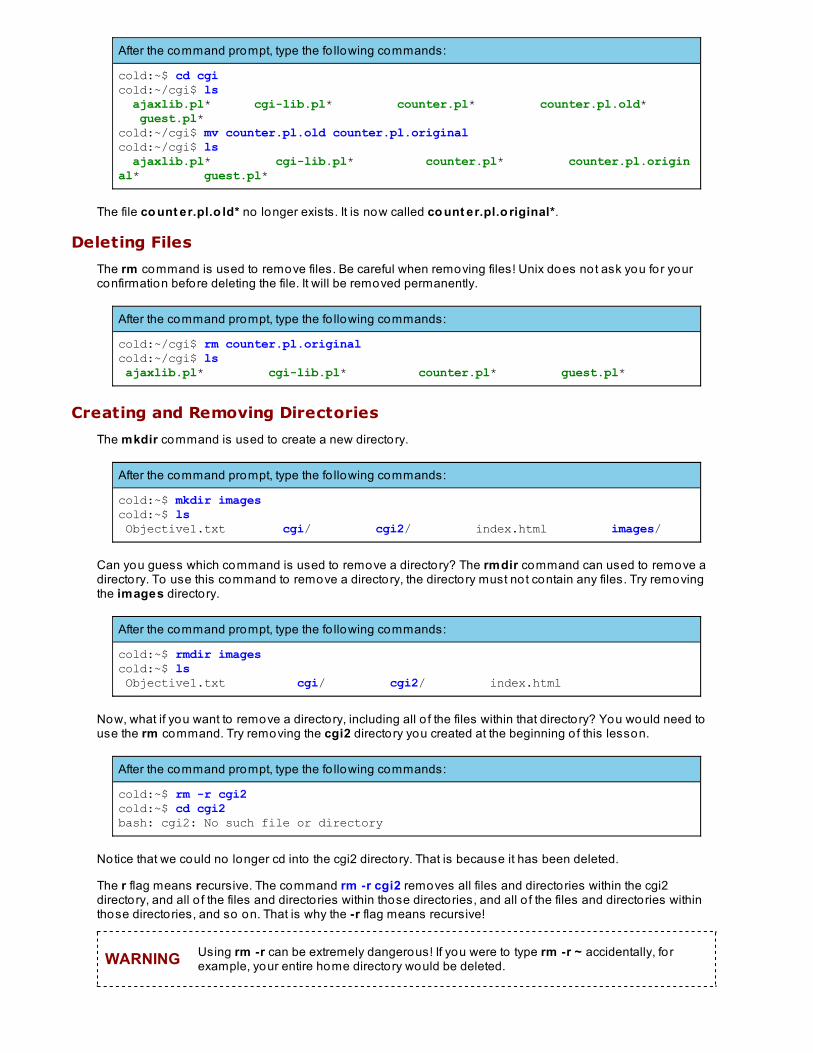
cold:~$ cd cgicold:~/cgi$ ls ajaxlib.pl* cgi-lib.pl* counter.pl* counter.pl.old* guest.pl*cold:~/cgi$ mv counter.pl.old counter.pl.originalcold:~/cgi$ ls ajaxlib.pl* cgi-lib.pl* counter.pl* counter.pl.original* guest.pl*
The file co unt er.pl.o ld* no longer exists. It is now called co unt er.pl.o riginal*.
Deleting Files
The rm command is used to remove files. Be careful when removing files! Unix does not ask you for yourconfirmation before deleting the file. It will be removed permanently.
After the command prompt, type the fo llowing commands:
cold:~/cgi$ rm counter.pl.originalcold:~/cgi$ ls ajaxlib.pl* cgi-lib.pl* counter.pl* guest.pl*
Creating and Removing Directories
The mkdir command is used to create a new directory.
After the command prompt, type the fo llowing commands:
cold:~$ mkdir imagescold:~$ ls Objective1.txt cgi/ cgi2/ index.html images/
Can you guess which command is used to remove a directory? The rmdir command can used to remove adirectory. To use this command to remove a directory, the directory must not contain any files. Try removingthe images directory.
After the command prompt, type the fo llowing commands:
cold:~$ rmdir imagescold:~$ ls Objective1.txt cgi/ cgi2/ index.html
Now, what if you want to remove a directory, including all o f the files within that directory? You would need touse the rm command. Try removing the cgi2 directory you created at the beginning o f this lesson.
After the command prompt, type the fo llowing commands:
cold:~$ rm -r cgi2cold:~$ cd cgi2bash: cgi2: No such file or directory
Notice that we could no longer cd into the cgi2 directory. That is because it has been deleted.
The r flag means recursive. The command rm -r cgi2 removes all files and directories within the cgi2directory, and all o f the files and directories within those directories, and all o f the files and directories withinthose directories, and so on. That is why the -r flag means recursive!
WARNING Using rm -r can be extremely dangerous! If you were to type rm -r ~ accidentally, fo rexample, your entire home directory would be deleted.
Copying into Directories
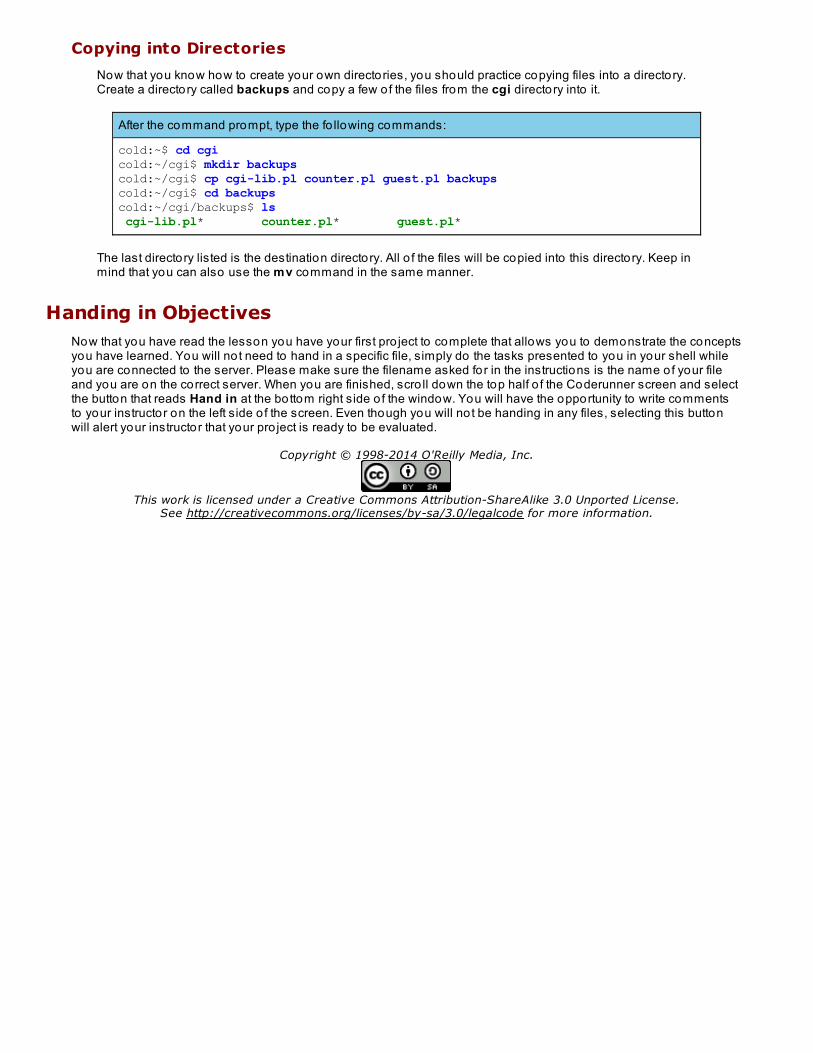
Now that you know how to create your own directories, you should practice copying files into a directory.Create a directory called backups and copy a few of the files from the cgi directory into it.
After the command prompt, type the fo llowing commands:
cold:~$ cd cgicold:~/cgi$ mkdir backupscold:~/cgi$ cp cgi-lib.pl counter.pl guest.pl backupscold:~/cgi$ cd backupscold:~/cgi/backups$ ls cgi-lib.pl* counter.pl* guest.pl*
The last directory listed is the destination directory. All o f the files will be copied into this directory. Keep inmind that you can also use the mv command in the same manner.
Handing in ObjectivesNow that you have read the lesson you have your first pro ject to complete that allows you to demonstrate the conceptsyou have learned. You will no t need to hand in a specific file, simply do the tasks presented to you in your shell whileyou are connected to the server. Please make sure the filename asked for in the instructions is the name of your fileand you are on the correct server. When you are finished, scro ll down the top half o f the Coderunner screen and selectthe button that reads Hand in at the bottom right side o f the window. You will have the opportunity to write commentsto your instructor on the left side o f the screen. Even though you will no t be handing in any files, selecting this buttonwill alert your instructor that your pro ject is ready to be evaluated.
Copyright © 1998-2014 O'Reilly Media, Inc.
This work is licensed under a Creative Commons Attribution-ShareAlike 3.0 Unported License.See http://creativecommons.org/licenses/by-sa/3.0/legalcode for more information.
Connecting to the Useractive Access ServerLesson Objectives
To be able to access hottub from the co ld server, The hottub server is another OST server that you will be using inthis course.
The Hottub Access ServerUp until now, you have been logging into the OST's co ld server. From now on, you will be logging into another groupof machines called ho t t ub. These machines are part o f a system that was developed specifically fo r the purpose o fteaching Unix. In later lessons, you will be given root access on your own machine inside o f hottub's private network.Root access is a special type o f access usually reserved for system administrators responsible for maintaining thesecurity and usability o f the server.
Connecting to hottub
Login to your Unix shell on the co ld server, just like before. You will be using the ssh program to connect tohottub. ssh is similar to t e lnet , which is a program to connect to o ther computers. Every time you login toyour shell on co ld, you are using a telnet program to do it. ssh is a more secure form of telnet. It stands forsecure shell. You will learn more about ssh in Lesson 16. For now, all you need to know is how to login tohottub.
Normally, the syntax you would use to connect to a server looks something like this:
cold:~$ ssh server.useractive.com
Because you are sharing computers with o ther students taking this class, you will be using an alias that OSThas created in order to connect to hottub.
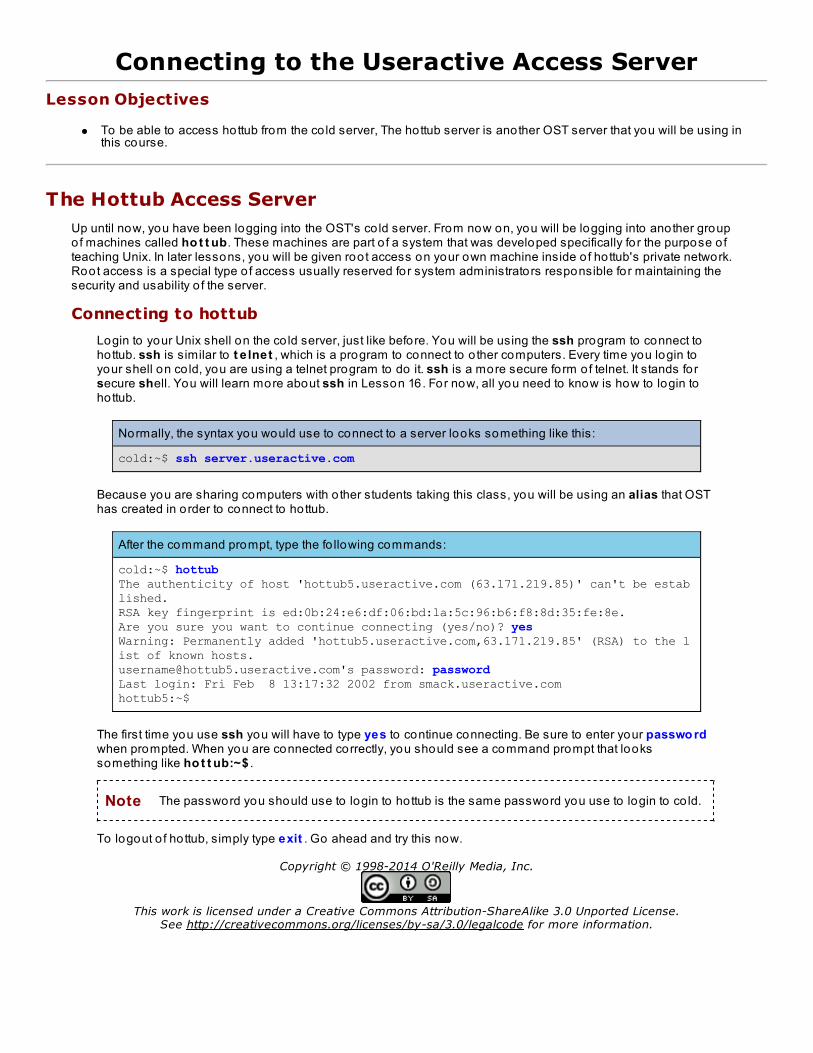
After the command prompt, type the fo llowing commands:
cold:~$ hottubThe authenticity of host 'hottub5.useractive.com (63.171.219.85)' can't be established.RSA key fingerprint is ed:0b:24:e6:df:06:bd:la:5c:96:b6:f8:8d:35:fe:8e.Are you sure you want to continue connecting (yes/no)? yesWarning: Permanently added 'hottub5.useractive.com,63.171.219.85' (RSA) to the list of known [email protected]'s password: password Last login: Fri Feb 8 13:17:32 2002 from smack.useractive.comhottub5:~$
The first time you use ssh you will have to type yes to continue connecting. Be sure to enter your passwo rdwhen prompted. When you are connected correctly, you should see a command prompt that lookssomething like ho t t ub:~$ .
Note The password you should use to login to hottub is the same password you use to login to co ld.
To logout o f hottub, simply type exit . Go ahead and try this now.
Copyright © 1998-2014 O'Reilly Media, Inc.
This work is licensed under a Creative Commons Attribution-ShareAlike 3.0 Unported License.See http://creativecommons.org/licenses/by-sa/3.0/legalcode for more information.
Text EditorsLesson Objectives
To be able to use Unix text edito rs.
The Need for a Text EditorMost o f the files used to configure a Unix server are merely text files. This means that you will o ften find yourself editingfiles by hand using a text edito r. There are lo ts o f edito rs you can use to do this, but the three most common ones areemacs, pico /nano , and vi. The majority o f this lesson will be dedicated to understanding emacs. Pico/nano and viwill be discussed briefly at the end o f this lesson.
What is Emacs?Emacs is very versitile Unix based text edito r. If you can think o f a feature that a text based editor should have, emacsprobably has it. The name is an abbreviation for editor macros.
Command Keys and the Emacs Window
You will use different command key sequences to manipulate your file in emacs. They are used to save a file,search for a specific section o f a file, and exit out o f a file. To execute a command key sequence, you need tofo llow a few basic rules.
C-g
The C stands for the CONTROL key (Ctrl). The g stands for the G key and the dash (-) signifiesthat you should hit bo th keys (the CONTROL key and the G key) at the same time.
M-x
The M stands for the META key. Unfortunately, most computers no longer have a META key.When you see this you should hit the ESCAPE key (Esc) instead. Then hit the X key. If the METAkey still existed, you would hit the META key and the X key at the same time. However, whenyou are using the ESCAPE key you must hit the keys separately. In o ther words, you would hitthe ESCAPE key first, then the X key. In some instances, hitting the ESC twice before the X keyis needed for META function. This may sound confusing, but you will get the hang o f it.
Emacs is usually accessed from the Unix command line by typing emacs, fo llowed by the name of a file.
After the command prompt, type the fo llowing commands:
hottub:~$ emacs myfile.txt
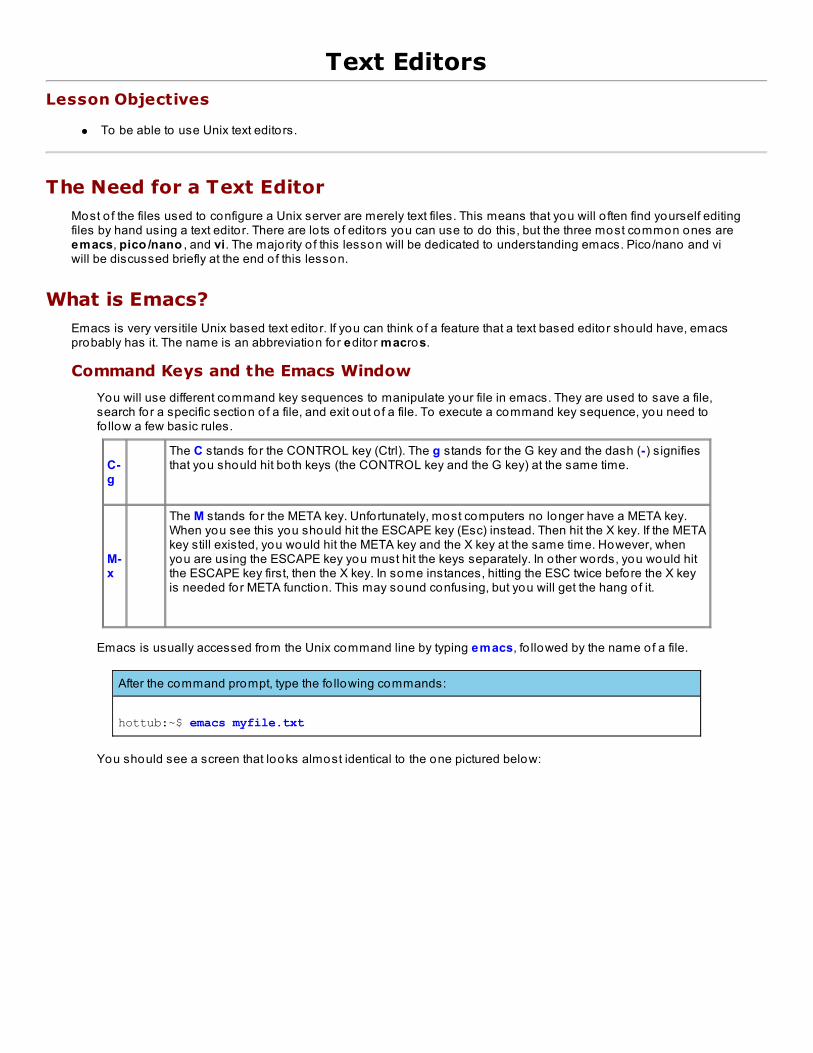
You should see a screen that looks almost identical to the one pictured below:
You can ignore the top heading highlighted in black. The blank area in the middle is where you will be typing.At the bottom you will see a line highlighted in black and then a white line below it.
The black line tells you almost everything you would ever want to know about the current editing environment.You should see the name of the file currently being edited (myf ile .t xt ). Inside parenthesis you should seethe word T ext . This tells you the type o f file you are editing. In this case you are editing a basic text file. TheL1 indicates that your cursor is currently on line 1 o f the document. The last part tells you which section o f thefile you are viewing. Right now, it says All because you have the entire content o f the file on your screen.Often, it will be a percentage o f the document or Bo t if you happen to be at the end.
The last line in white is the command line. Whenever you use command keys, they will be displayed there.When you complete a command (such as saving), it will show up there as well.
Type something in to the document so you can practice saving and exiting the file. Emacs will no t let you savea file that has nothing in it.
Note
Because you are connecting to the server via an applet within the browser, it does not replicatethe emacs program perfectly. After typing text into your document, try using the right and leftarrow keys to move back and forth along the text. Depending on the browser and operatingsystem you're using, you may find that some of the characters disappear. If this happens, typeC-l and your text will reappear. Please email your instructor if you have any questions aboutthis.
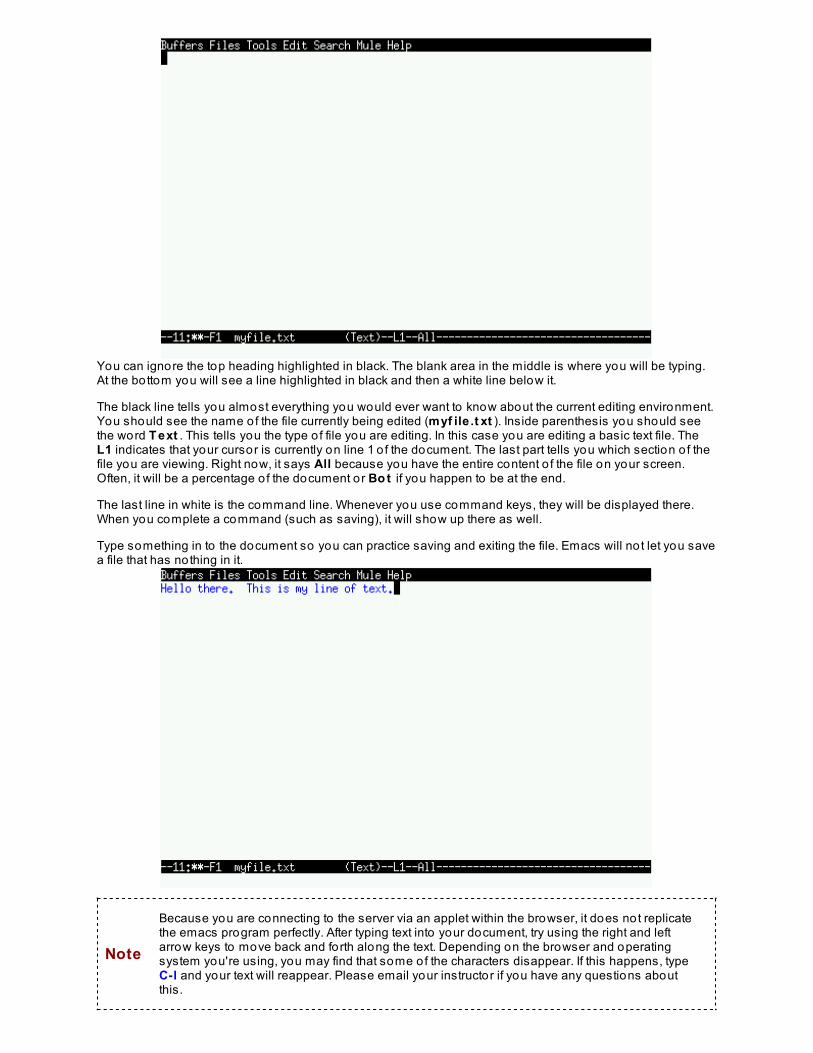
Now try saving myf ile .t xt . Type C-x and then C-s to save the file. If you make a mistake you can type C-g tostart over. When you are successful, you will see a message that the file was written in the emacs commandline.
Exit emacs by typing C-x C-c. You should see a Unix command prompt. Use ls to see if the file is in youraccount now.
After the command prompt, type the fo llowing commands:
hottub:~$ ls -l myfile.txt-rw-rw-r-- 1 username users 38 Jul 24 09:26 myfile.txt
Once you are certain the file exists, open it again so you can get more comfortable using emacs.
After the command prompt, type the fo llowing commands:
hottub:~$ emacs myfile.txt
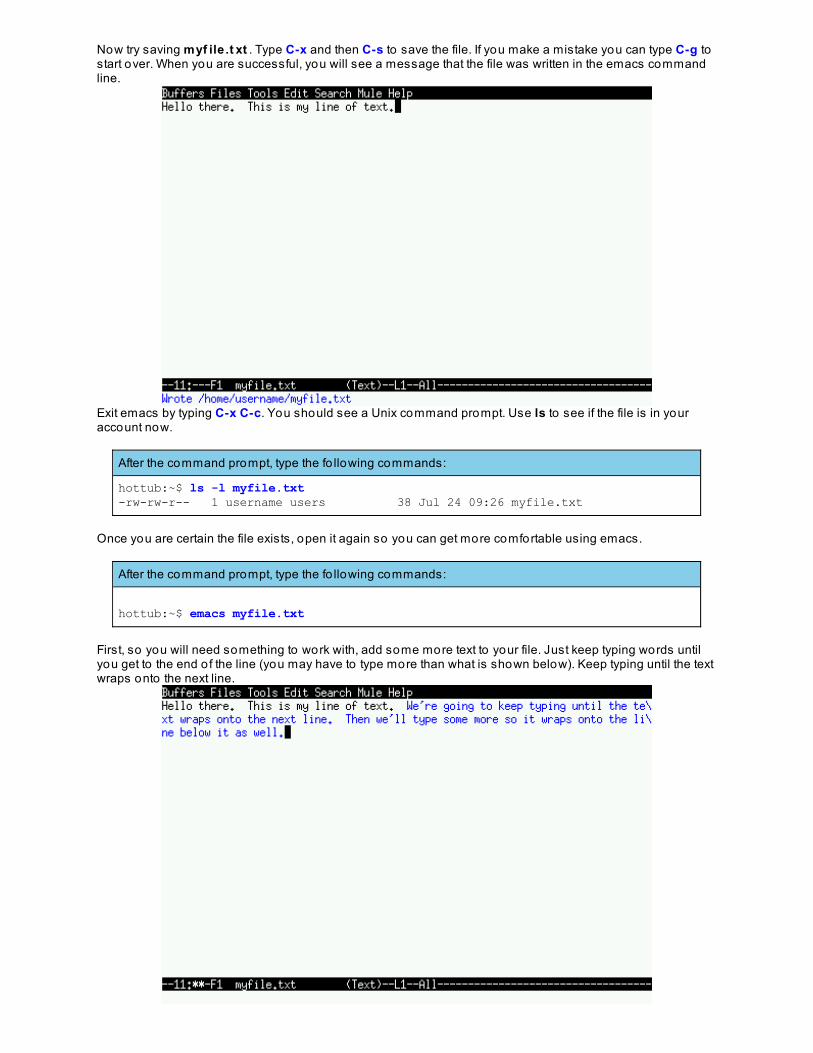
First, so you will need something to work with, add some more text to your file. Just keep typing words untilyou get to the end o f the line (you may have to type more than what is shown below). Keep typing until the textwraps onto the next line.
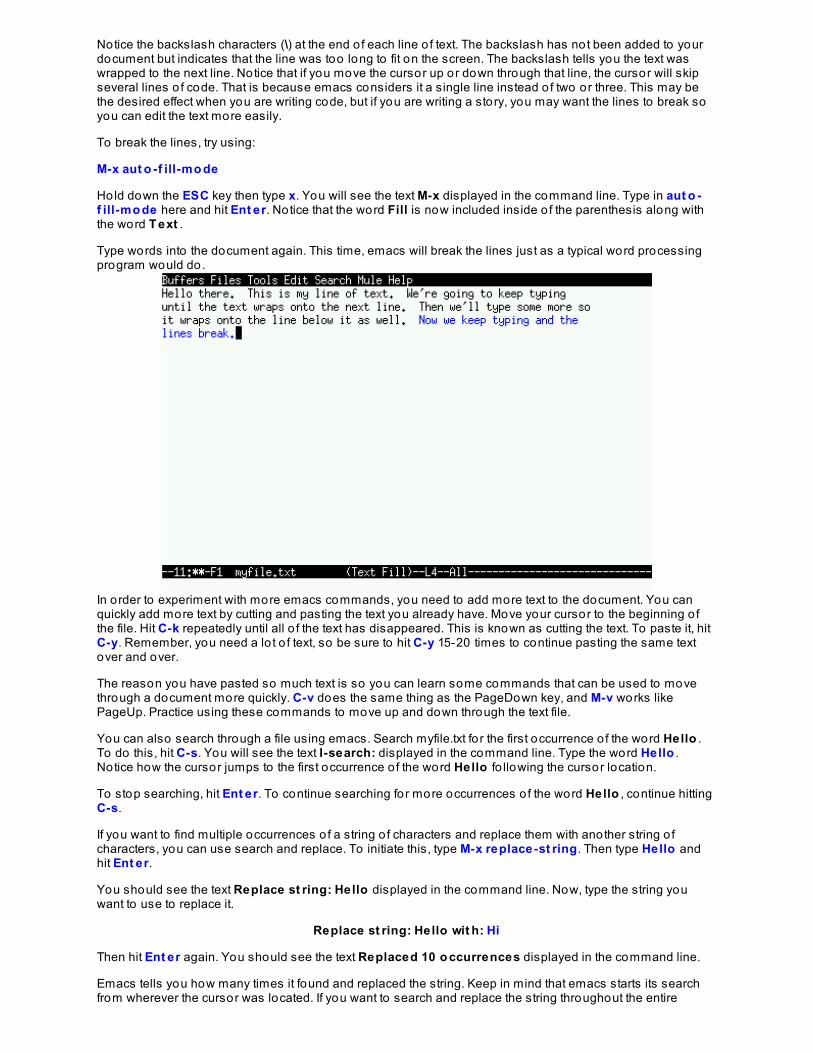
Notice the backslash characters (\) at the end o f each line o f text. The backslash has not been added to yourdocument but indicates that the line was too long to fit on the screen. The backslash tells you the text waswrapped to the next line. Notice that if you move the cursor up or down through that line, the cursor will skipseveral lines o f code. That is because emacs considers it a single line instead o f two or three. This may bethe desired effect when you are writing code, but if you are writing a story, you may want the lines to break soyou can edit the text more easily.
To break the lines, try using:
M-x aut o -f ill-mo de
Hold down the ESC key then type x. You will see the text M-x displayed in the command line. Type in aut o -f ill-mo de here and hit Ent er. Notice that the word Fill is now included inside o f the parenthesis along withthe word T ext .
Type words into the document again. This time, emacs will break the lines just as a typical word processingprogram would do.
In order to experiment with more emacs commands, you need to add more text to the document. You canquickly add more text by cutting and pasting the text you already have. Move your cursor to the beginning o fthe file. Hit C-k repeatedly until all o f the text has disappeared. This is known as cutting the text. To paste it, hitC-y. Remember, you need a lo t o f text, so be sure to hit C-y 15-20 times to continue pasting the same textover and over.
The reason you have pasted so much text is so you can learn some commands that can be used to movethrough a document more quickly. C-v does the same thing as the PageDown key, and M-v works likePageUp. Practice using these commands to move up and down through the text file.
You can also search through a file using emacs. Search myfile.txt fo r the first occurrence o f the word Hello .To do this, hit C-s. You will see the text I-search: displayed in the command line. Type the word Hello .Notice how the cursor jumps to the first occurrence o f the word Hello fo llowing the cursor location.
To stop searching, hit Ent er. To continue searching for more occurrences o f the word Hello , continue hittingC-s.
If you want to find multiple occurrences o f a string o f characters and replace them with another string o fcharacters, you can use search and replace. To initiate this, type M-x replace-st ring. Then type Hello andhit Ent er.
You should see the text Replace st ring: Hello displayed in the command line. Now, type the string youwant to use to replace it.
Replace st ring: Hello wit h: Hi
Then hit Ent er again. You should see the text Replaced 10 o ccurrences displayed in the command line.
Emacs tells you how many times it found and replaced the string. Keep in mind that emacs starts its searchfrom wherever the cursor was located. If you want to search and replace the string throughout the entire
document, make sure your cursor is at the beginning o f it. Also , emacs replaces exactly what you type in thesearch string. If you want to replace the word t he with a, the word t hen will become an. Be careful!
Note Remember, you can always cancel an emacs command using C-g if you make a mistake.
When you edit an existing file with emacs, it creates a backup o f the o ld version by appending a tilde (~) to theend o f the filename. For example, if you were to exit emacs and list the files in your directory, you would findthe files myf ile .t xt and myf ile .t xt ~ . This is helpful if you edit and save a file, then realize you have made amistake. You can always use the tilde file as a backup file. The backup files that emacs creates are commonlyreferred to as emacs droppings.
If you have not done so already, save the file myfile.txt using C-x C-s. Then exit the document using C-x C-c.
After the command prompt, type the fo llowing commands:
hottub:~$ ls myfile*myfile.txt myfile.txt~
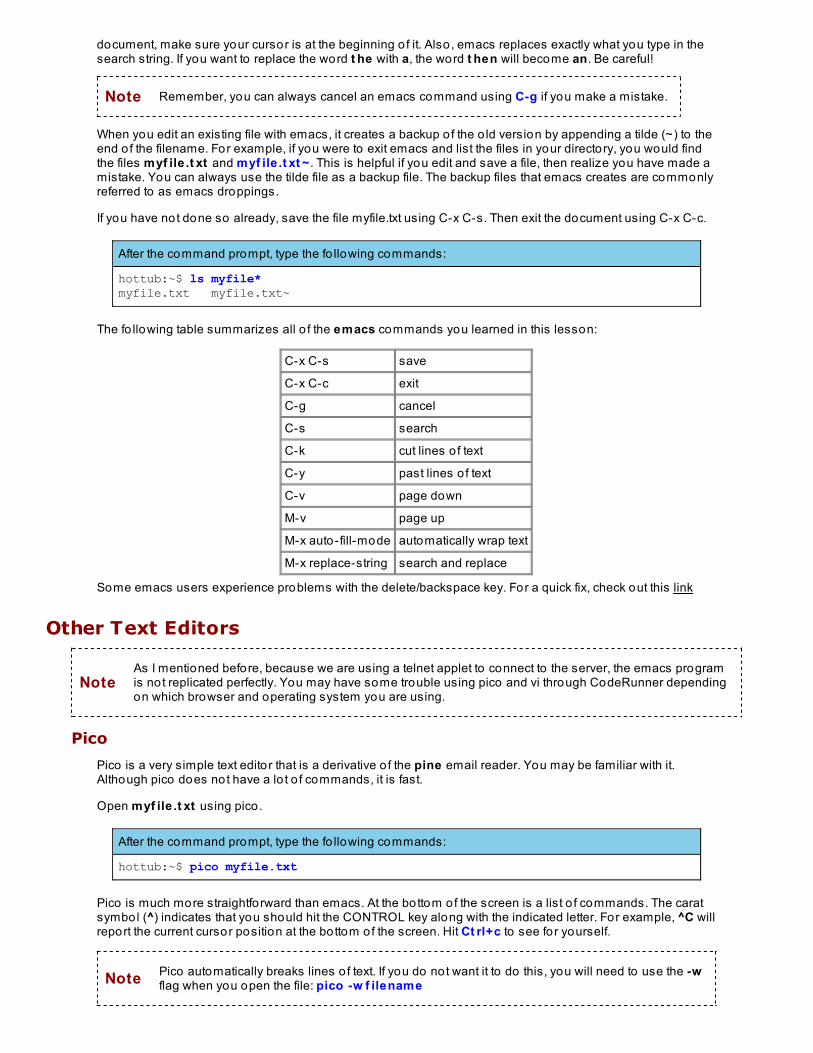
The fo llowing table summarizes all o f the emacs commands you learned in this lesson:
C-x C-s save
C-x C-c exit
C-g cancel
C-s search
C-k cut lines o f text
C-y past lines o f text
C-v page down
M-v page up
M-x auto-fill-mode automatically wrap text
M-x replace-string search and replace
Some emacs users experience problems with the delete/backspace key. For a quick fix, check out this link
Other Text Editors
NoteAs I mentioned before, because we are using a telnet applet to connect to the server, the emacs programis not replicated perfectly. You may have some trouble using pico and vi through CodeRunner dependingon which browser and operating system you are using.
Pico
Pico is a very simple text edito r that is a derivative o f the pine email reader. You may be familiar with it.Although pico does not have a lo t o f commands, it is fast.
Open myf ile .t xt using pico .
After the command prompt, type the fo llowing commands:
hottub:~$ pico myfile.txt
Pico is much more straightforward than emacs. At the bottom of the screen is a list o f commands. The caratsymbol (^) indicates that you should hit the CONTROL key along with the indicated letter. For example, ^C willreport the current cursor position at the bottom of the screen. Hit Ct rl+c to see for yourself.
Note Pico automatically breaks lines o f text. If you do not want it to do this, you will need to use the -wflag when you open the file: pico -w f ilename

To exit pico , hit Ct rl+x. If you have not made any changes to the document, the program will exitimmediately. If you have made changes, you will be asked if you want to save the modified buffer. Type y tosave it. You will then be asked for the filename. Normally you would not want to change the filename, so youwould just hit Ent er.
Note More current version o f Linux/Unix have replaced Pico with Nano but most commands are thesame.
Vi
Many Linux/Unix operating systems will have either vi and/or emacs installed. vi can be more challenging tolearn but allows a system administrator to work quickly by combining commands.
After the command prompt, type the fo llowing commands:
hottub:~$ vi myfile.txt
A good indication that you are using vi is the presence o f tildes (~).
To exit the program enter ESC then :q. If fo r some reason you cannot quit, you can force the program to quitby adding an exclamation po int: ESC :q!
If you want to learn more about vi there is a nice tutorial provided by the University o f Califo rnia at San Diego.
For the remainder o f this course we will be using emacs in our examples but feel free to use any editor you feelcomfortable with or wish to learn more about.
Copyright © 1998-2014 O'Reilly Media, Inc.
This work is licensed under a Creative Commons Attribution-ShareAlike 3.0 Unported License.See http://creativecommons.org/licenses/by-sa/3.0/legalcode for more information.
ShellsLesson Objectives
To understand Unix shells. Key concepts include hist o ry, aliases, enviro nment variables, pat h, and editing dotfiles.
What is a Shell?A shell is a program that allows you to communicate with the operating system on another computer. Go ahead andlogin to your hottub shell. Most o f the time you're logged into your shell, there's a prompt, just waiting for you to type ina command. See look...it's just waiting:
Observe the fo llowing:
hottub:~$
...and waiting...
Observe the fo llowing:
hottub:~$
...until you give it a command.
After the command prompt, type the fo llowing commands:
hottub:~$ uptime 4:15pm up 26 days, 23:44, 6 users, load average: 0.00, 0.01, 0.00
Then it waits again. Very patient, don't you think?
There are a lo t o f different shells. They all do basically the same thing, but have different features to separate them fromone another. The original shell was the Bourne Shell, sh. OST uses bash, the Bourne again shell, which has morebuilt- in features.
Bash Command History
One of the most convenient features o f bash is that it keeps a history o f the commands you type. To illustratethis, try typing a few different commands. Don't worry about what these commands do--you're just using themto illustrate the bash history feature. You'll probably get slightly different results than those shown below.
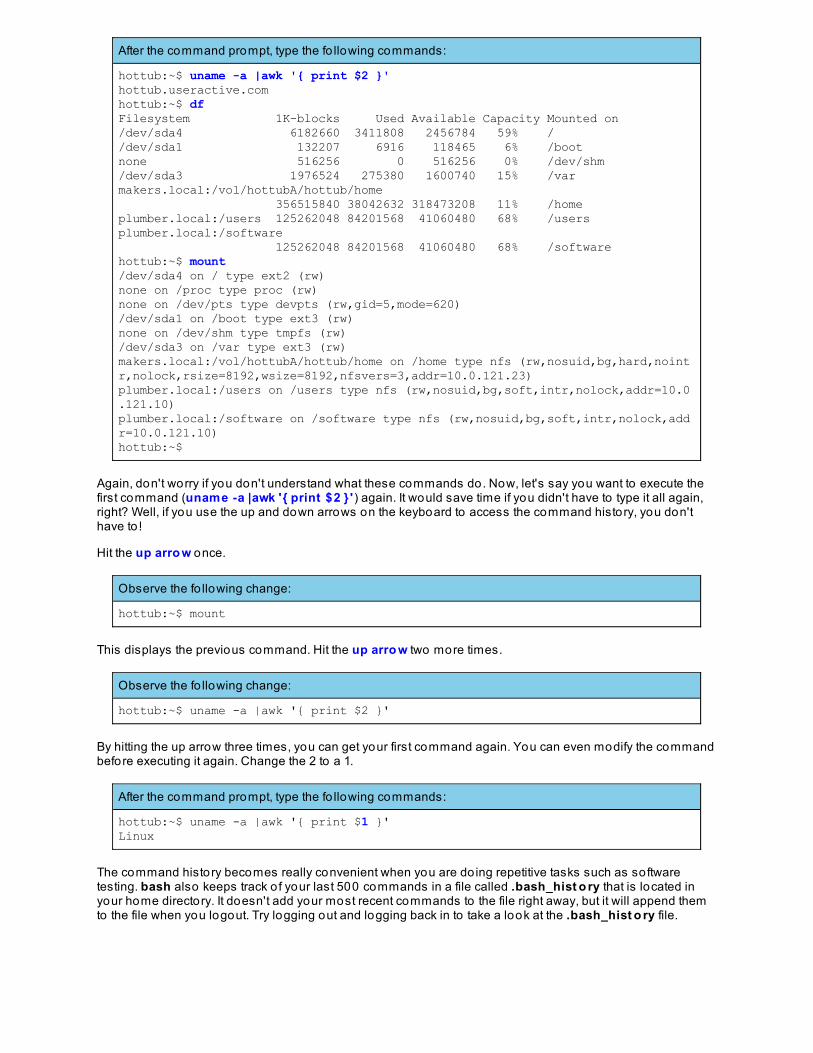
After the command prompt, type the fo llowing commands:
hottub:~$ uname -a |awk '{ print $2 }'hottub.useractive.comhottub:~$ dfFilesystem 1K-blocks Used Available Capacity Mounted on/dev/sda4 6182660 3411808 2456784 59% //dev/sda1 132207 6916 118465 6% /bootnone 516256 0 516256 0% /dev/shm/dev/sda3 1976524 275380 1600740 15% /varmakers.local:/vol/hottubA/hottub/home 356515840 38042632 318473208 11% /homeplumber.local:/users 125262048 84201568 41060480 68% /usersplumber.local:/software 125262048 84201568 41060480 68% /softwarehottub:~$ mount/dev/sda4 on / type ext2 (rw)none on /proc type proc (rw)none on /dev/pts type devpts (rw,gid=5,mode=620)/dev/sda1 on /boot type ext3 (rw)none on /dev/shm type tmpfs (rw)/dev/sda3 on /var type ext3 (rw)makers.local:/vol/hottubA/hottub/home on /home type nfs (rw,nosuid,bg,hard,nointr,nolock,rsize=8192,wsize=8192,nfsvers=3,addr=10.0.121.23)plumber.local:/users on /users type nfs (rw,nosuid,bg,soft,intr,nolock,addr=10.0.121.10)plumber.local:/software on /software type nfs (rw,nosuid,bg,soft,intr,nolock,addr=10.0.121.10)hottub:~$
Again, don't worry if you don't understand what these commands do. Now, let's say you want to execute thefirst command (uname -a |awk '{ print $2 } ') again. It would save time if you didn't have to type it all again,right? Well, if you use the up and down arrows on the keyboard to access the command history, you don'thave to !
Hit the up arro w once.
Observe the fo llowing change:
hottub:~$ mount
This displays the previous command. Hit the up arro w two more times.
Observe the fo llowing change:
hottub:~$ uname -a |awk '{ print $2 }'
By hitting the up arrow three times, you can get your first command again. You can even modify the commandbefore executing it again. Change the 2 to a 1.
After the command prompt, type the fo llowing commands:
hottub:~$ uname -a |awk '{ print $1 }'Linux
The command history becomes really convenient when you are do ing repetitive tasks such as softwaretesting. bash also keeps track o f your last 500 commands in a file called .bash_hist o ry that is located inyour home directory. It doesn't add your most recent commands to the file right away, but it will append themto the file when you logout. Try logging out and logging back in to take a look at the .bash_hist o ry file.
After the command prompt, type the fo llowing commands:
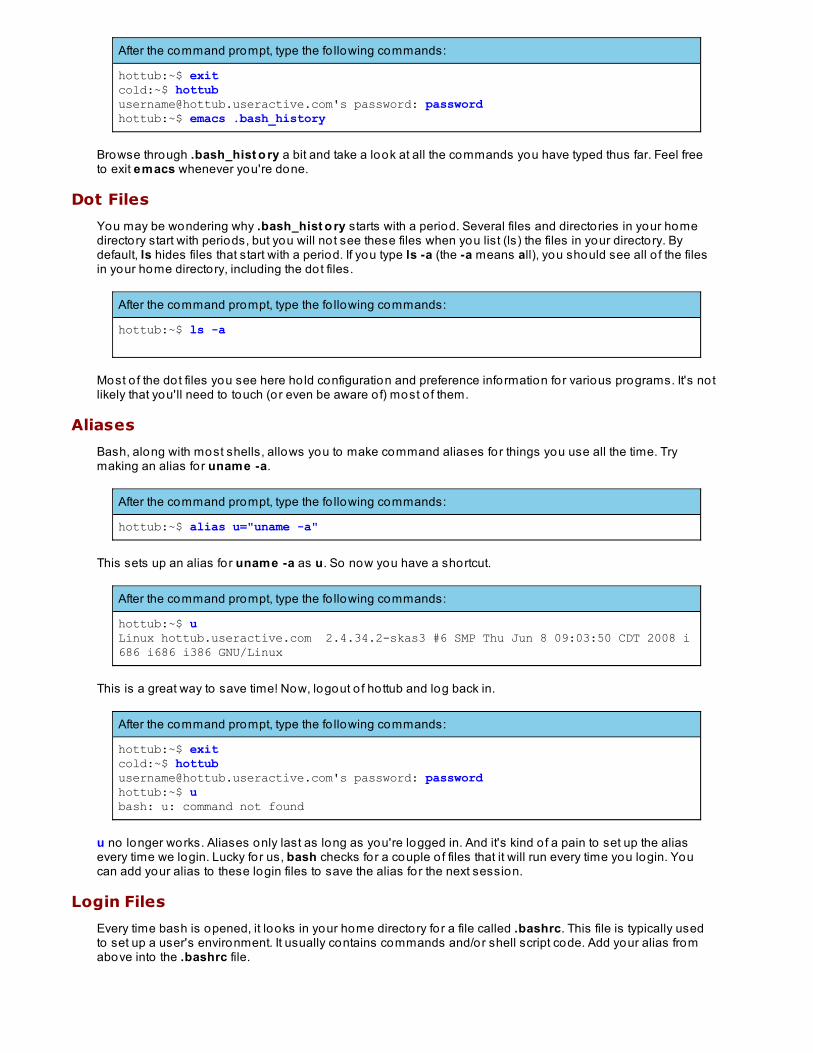
hottub:~$ exitcold:~$ [email protected]'s password: passwordhottub:~$ emacs .bash_history
Browse through .bash_hist o ry a bit and take a look at all the commands you have typed thus far. Feel freeto exit emacs whenever you're done.
Dot Files
You may be wondering why .bash_hist o ry starts with a period. Several files and directories in your homedirectory start with periods, but you will no t see these files when you list (ls) the files in your directory. Bydefault, ls hides files that start with a period. If you type ls -a (the -a means all), you should see all o f the filesin your home directory, including the dot files.
After the command prompt, type the fo llowing commands:
hottub:~$ ls -a
Most o f the dot files you see here ho ld configuration and preference information for various programs. It's notlikely that you'll need to touch (or even be aware o f) most o f them.
Aliases
Bash, along with most shells, allows you to make command aliases for things you use all the time. Trymaking an alias for uname -a.
After the command prompt, type the fo llowing commands:
hottub:~$ alias u="uname -a"
This sets up an alias for uname -a as u. So now you have a shortcut.
After the command prompt, type the fo llowing commands:
hottub:~$ uLinux hottub.useractive.com 2.4.34.2-skas3 #6 SMP Thu Jun 8 09:03:50 CDT 2008 i686 i686 i386 GNU/Linux
This is a great way to save time! Now, logout o f hottub and log back in.
After the command prompt, type the fo llowing commands:
hottub:~$ exitcold:~$ [email protected]'s password: passwordhottub:~$ ubash: u: command not found
u no longer works. Aliases only last as long as you're logged in. And it's kind o f a pain to set up the aliasevery time we login. Lucky for us, bash checks for a couple o f files that it will run every time you login. Youcan add your alias to these login files to save the alias for the next session.
Login Files
Every time bash is opened, it looks in your home directory for a file called .bashrc. This file is typically usedto set up a user's environment. It usually contains commands and/or shell script code. Add your alias fromabove into the .bashrc file.
After the command prompt, type the fo llowing commands:
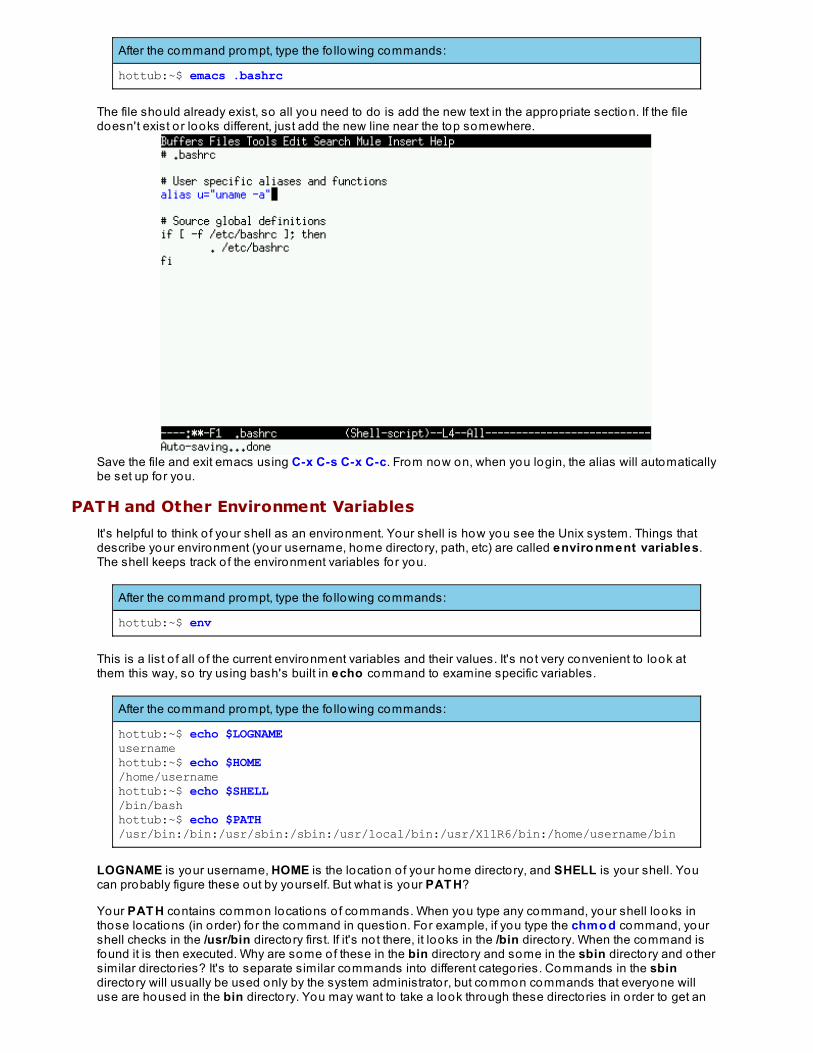
hottub:~$ emacs .bashrc
The file should already exist, so all you need to do is add the new text in the appropriate section. If the filedoesn't exist o r looks different, just add the new line near the top somewhere.
Save the file and exit emacs using C-x C-s C-x C-c. From now on, when you login, the alias will automaticallybe set up for you.
PATH and Other Environment Variables
It's helpful to think o f your shell as an environment. Your shell is how you see the Unix system. Things thatdescribe your environment (your username, home directory, path, etc) are called enviro nment variables.The shell keeps track o f the environment variables for you.
After the command prompt, type the fo llowing commands:
hottub:~$ env
This is a list o f all o f the current environment variables and their values. It's not very convenient to look atthem this way, so try using bash's built in echo command to examine specific variables.
After the command prompt, type the fo llowing commands:
hottub:~$ echo $LOGNAMEusernamehottub:~$ echo $HOME/home/usernamehottub:~$ echo $SHELL/bin/bashhottub:~$ echo $PATH/usr/bin:/bin:/usr/sbin:/sbin:/usr/local/bin:/usr/X11R6/bin:/home/username/bin
LOGNAME is your username, HOME is the location o f your home directory, and SHELL is your shell. Youcan probably figure these out by yourself. But what is your PAT H?
Your PAT H contains common locations o f commands. When you type any command, your shell looks inthose locations (in order) fo r the command in question. For example, if you type the chmo d command, yourshell checks in the /usr/bin directory first. If it's not there, it looks in the /bin directory. When the command isfound it is then executed. Why are some of these in the bin directory and some in the sbin directory and o thersimilar directories? It's to separate similar commands into different categories. Commands in the sbindirectory will usually be used only by the system administrator, but common commands that everyone willuse are housed in the bin directory. You may want to take a look through these directories in order to get an
idea o f the commands you'll likely be using later.
The which command checks your path as well. It is used to find the actual location o f commands in yourpath.
After the command prompt, type the fo llowing commands:
hottub:~$ which chmod/bin/chmod
If a command is not found in your path (and you didn't specify the path on the command line), it will no t beexecuted. Many times the default system path does not include all o f the locations where commands reside.A lo t o f systems do not have any sbin directories in your path. OST contains sbin directories, but it is missing/usr/lo cal/sbin. The local bin directories are for installed programs that are not part o f the base distribution.They are programs installed by the system administrator, which will be you eventually! Let's add this directoryto the path using the expo rt command.
After the command prompt, type the fo llowing commands:
hottub:~$ export PATH=$PATH:/usr/local/sbinhottub:~$ echo $PATH/usr/bin:/bin:/usr/sbin:/sbin:/usr/local/bin:/usr/X11R6/bin:/home/username/bin:/usr/local/sbin
The expo rt command can be added to .bashrc so that it's executed every time you login to hottub.
After the command prompt, type the fo llowing commands:
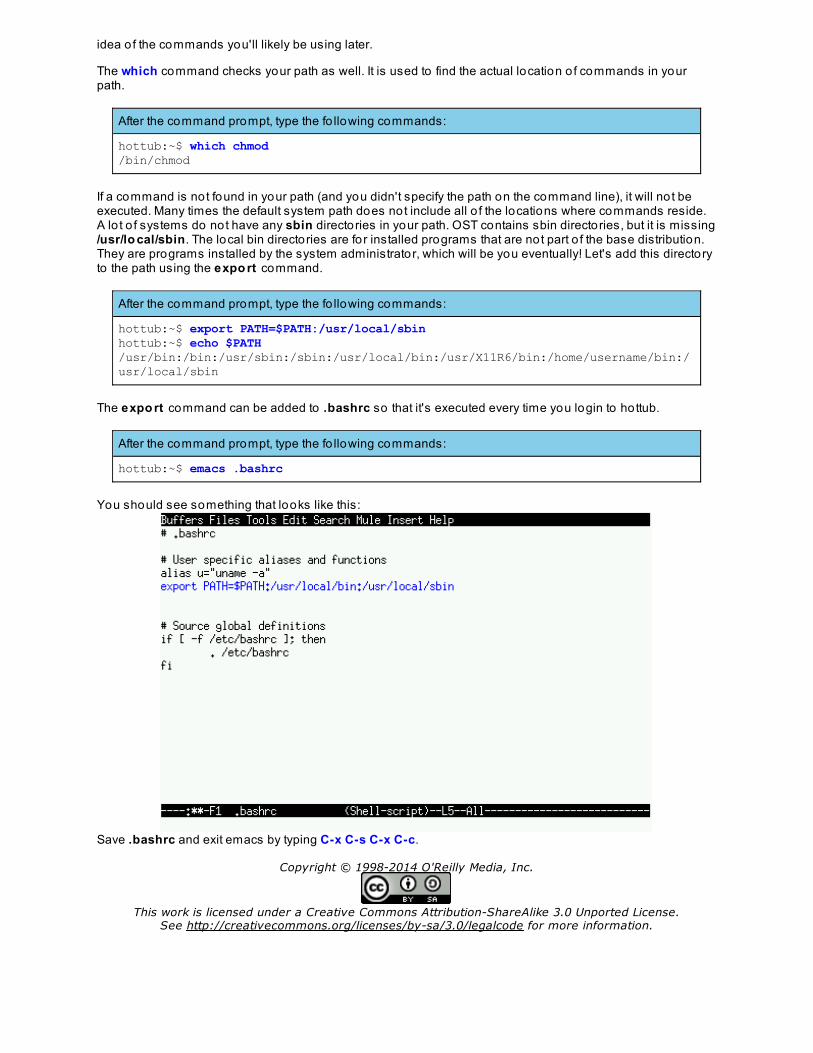
hottub:~$ emacs .bashrc
You should see something that looks like this:
Save .bashrc and exit emacs by typing C-x C-s C-x C-c.
Copyright © 1998-2014 O'Reilly Media, Inc.
This work is licensed under a Creative Commons Attribution-ShareAlike 3.0 Unported License.See http://creativecommons.org/licenses/by-sa/3.0/legalcode for more information.
System InfoLesson Objectives
To be able to use useful commands like w, upt ime , f inger, and uname .
WSuppose you have multiple users logging into your system. How do you know who 's logged in? Well, that's where wcomes in. You can think o f w as asking "who?"
After the command prompt, type the fo llowing commands:
cold:~$ w 2:36pm up 2 days, 22:35, 3 users, load average: 1.09, 0.79, 0.71USER TTY FROM LOGIN@ IDLE JCPU PCPU WHATsammy pts/1 - Mon11am 0.00s 0.13s 0.02s w sammy pts/2 - 2:32pm 10.00s 0.04s 0.04s ssh hot.userkerry pts/4 hot.useractive.c 2:36pm 10.00s 0.02s 0.02s -bash
Notice that w provides you with more information than just who is logged in to hottub. Let's go over this informationslowly. First, look at the first line o f text that is printed:
2:36pm Time of day.
up 2days,22:35
System uptime - 2 days 22 hours 35 minutes.
3 users Number o f users currently logged in.
lo adaverage
Load average is a measure o f the utilization o f your CPU. Anything below 1 is great. If your load averageis consistently higher than 2, you might want to consider upgrading to a faster machine.
1.09 Load average for the last minute.
0.79 Load average for the last 5 minutes.
0.71 Load average for the last 15 minutes.
Alright, so that's the top line, what's the information about each user logged in? Let's look at the last entry.
kerry The username.
pt s/4 The terminal connection name.
ho t .useract ive.c This is the location from which the user is connecting to the server. It is usually a truncatedhostname. A dash means that the user is connecting to the machine locally.
2:36pm Time at which the user logged in.
10.00s This is how long the user has been idle on the system. In this case, kerry has not executedany command for 10.00 seconds.
0.02s JCPU - This is the amount o f to tal CPU time used by the current login session on that tty(session).
0.02s PCPU - This is the amount o f CPU time used by the current process.
-bash The current process the user is running. -bash is just the shell, so kerry isn't do ing anythingspecial right now.
The first line o f text can also be obtained with the upt ime command.
After the command prompt, type the fo llowing commands:
hottub:~$ uptime 3:22pm up 2 days, 23:14, 3 users, load average: 1.09, 0.79, 0.71
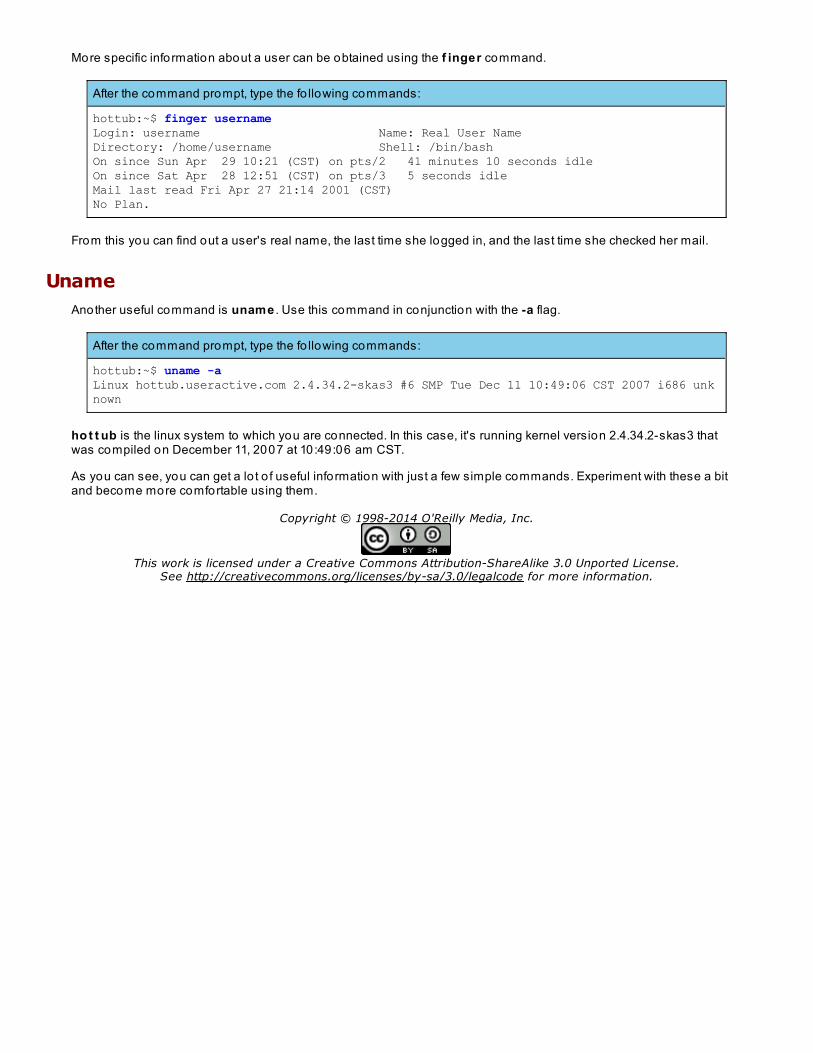
More specific information about a user can be obtained using the f inger command.
After the command prompt, type the fo llowing commands:
hottub:~$ finger usernameLogin: username Name: Real User NameDirectory: /home/username Shell: /bin/bashOn since Sun Apr 29 10:21 (CST) on pts/2 41 minutes 10 seconds idleOn since Sat Apr 28 12:51 (CST) on pts/3 5 seconds idleMail last read Fri Apr 27 21:14 2001 (CST)No Plan.
From this you can find out a user's real name, the last time she logged in, and the last time she checked her mail.
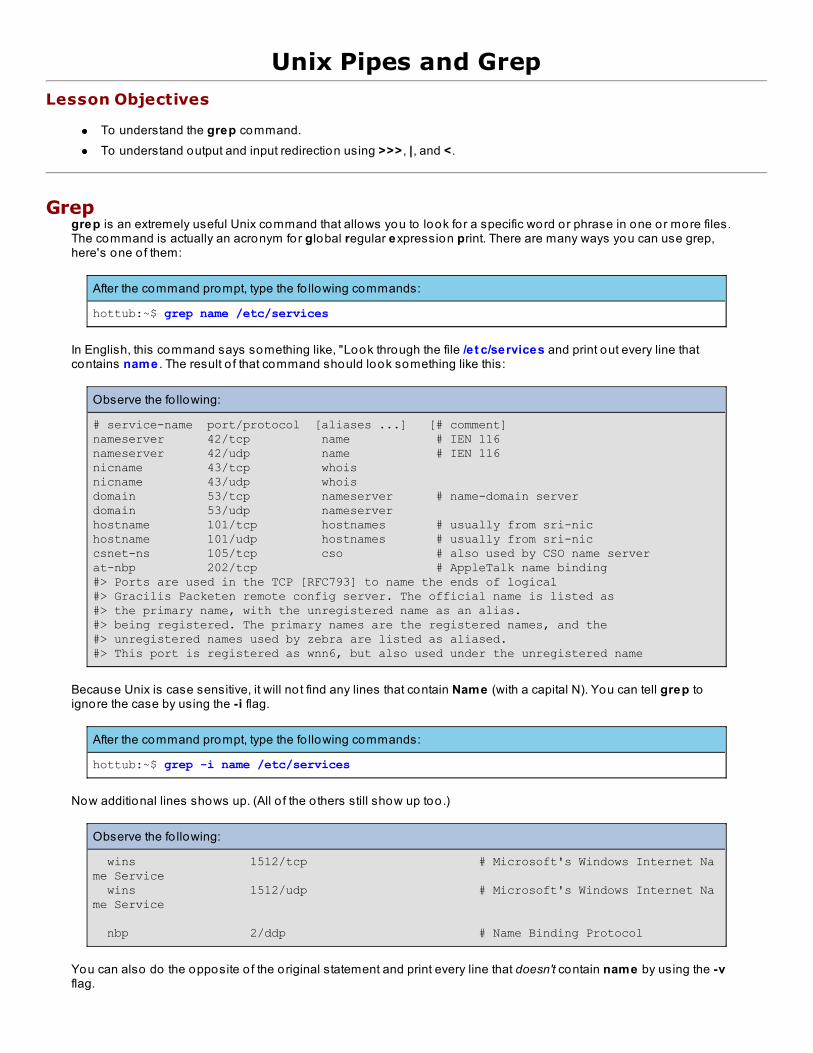
UnameAnother useful command is uname . Use this command in conjunction with the -a flag.
After the command prompt, type the fo llowing commands:
hottub:~$ uname -aLinux hottub.useractive.com 2.4.34.2-skas3 #6 SMP Tue Dec 11 10:49:06 CST 2007 i686 unknown
ho t t ub is the linux system to which you are connected. In this case, it's running kernel version 2.4.34.2-skas3 thatwas compiled on December 11, 2007 at 10:49:06 am CST.
As you can see, you can get a lo t o f useful information with just a few simple commands. Experiment with these a bitand become more comfortable using them.
Copyright © 1998-2014 O'Reilly Media, Inc.
This work is licensed under a Creative Commons Attribution-ShareAlike 3.0 Unported License.See http://creativecommons.org/licenses/by-sa/3.0/legalcode for more information.
Unix Pipes and GrepLesson Objectives
To understand the grep command.To understand output and input redirection using >>> , |, and < .
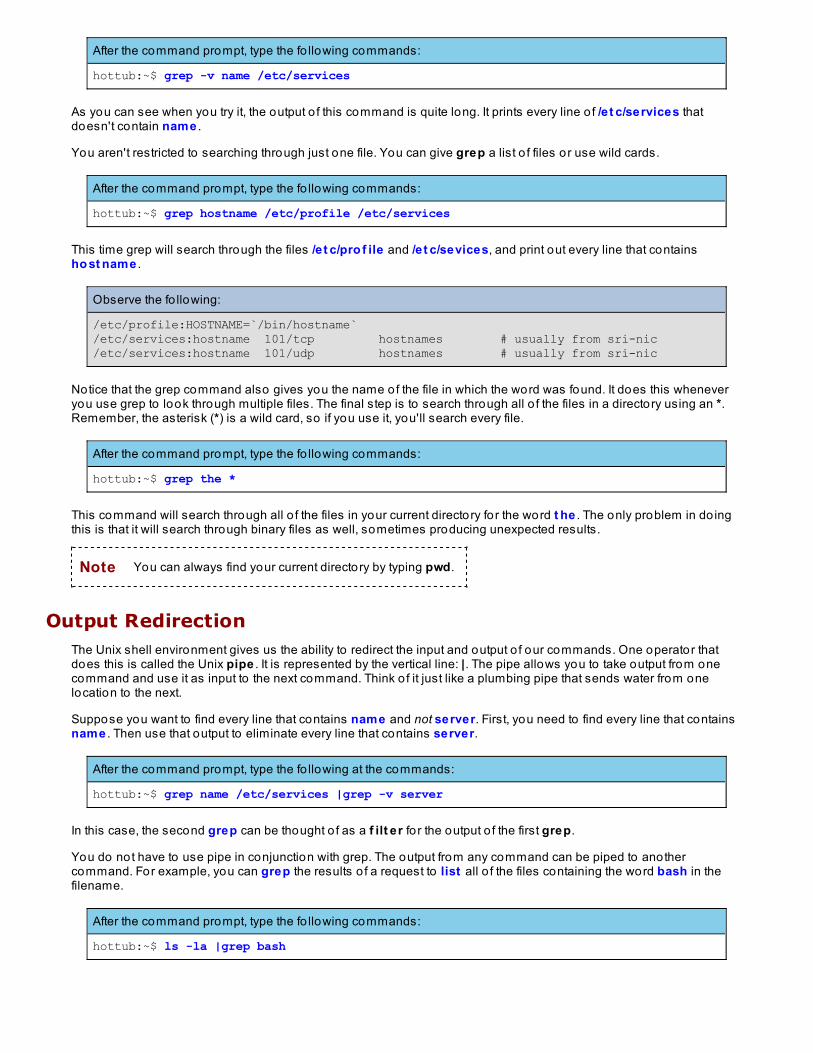
Grepgrep is an extremely useful Unix command that allows you to look for a specific word or phrase in one or more files.The command is actually an acronym for global regular expression print. There are many ways you can use grep,here's one o f them:
After the command prompt, type the fo llowing commands:
hottub:~$ grep name /etc/services
In English, this command says something like, "Look through the file /e t c/services and print out every line thatcontains name . The result o f that command should look something like this:
Observe the fo llowing:
# service-name port/protocol [aliases ...] [# comment]nameserver 42/tcp name # IEN 116nameserver 42/udp name # IEN 116nicname 43/tcp whois nicname 43/udp whois domain 53/tcp nameserver # name-domain serverdomain 53/udp nameserverhostname 101/tcp hostnames # usually from sri-nichostname 101/udp hostnames # usually from sri-niccsnet-ns 105/tcp cso # also used by CSO name serverat-nbp 202/tcp # AppleTalk name binding#> Ports are used in the TCP [RFC793] to name the ends of logical#> Gracilis Packeten remote config server. The official name is listed as#> the primary name, with the unregistered name as an alias.#> being registered. The primary names are the registered names, and the#> unregistered names used by zebra are listed as aliased.#> This port is registered as wnn6, but also used under the unregistered name
Because Unix is case sensitive, it will no t find any lines that contain Name (with a capital N). You can tell grep toignore the case by using the -i flag.
After the command prompt, type the fo llowing commands:
hottub:~$ grep -i name /etc/services
Now additional lines shows up. (All o f the o thers still show up too.)
Observe the fo llowing:
wins 1512/tcp # Microsoft's Windows Internet Name Service wins 1512/udp # Microsoft's Windows Internet Name Service nbp 2/ddp # Name Binding Protocol
You can also do the opposite o f the original statement and print every line that doesn't contain name by using the -vflag.
After the command prompt, type the fo llowing commands:
hottub:~$ grep -v name /etc/services
As you can see when you try it, the output o f this command is quite long. It prints every line o f /e t c/services thatdoesn't contain name .
You aren't restricted to searching through just one file. You can give grep a list o f files or use wild cards.
After the command prompt, type the fo llowing commands:
hottub:~$ grep hostname /etc/profile /etc/services
This time grep will search through the files /e t c/pro f ile and /e t c/sevices, and print out every line that containsho st name .
Observe the fo llowing:
/etc/profile:HOSTNAME=`/bin/hostname`/etc/services:hostname 101/tcp hostnames # usually from sri-nic/etc/services:hostname 101/udp hostnames # usually from sri-nic
Notice that the grep command also gives you the name of the file in which the word was found. It does this wheneveryou use grep to look through multiple files. The final step is to search through all o f the files in a directory using an *.Remember, the asterisk (*) is a wild card, so if you use it, you'll search every file.
After the command prompt, type the fo llowing commands:
hottub:~$ grep the *
This command will search through all o f the files in your current directory for the word t he . The only problem in do ingthis is that it will search through binary files as well, sometimes producing unexpected results.
Note You can always find your current directory by typing pwd.
Output RedirectionThe Unix shell environment gives us the ability to redirect the input and output o f our commands. One operator thatdoes this is called the Unix pipe . It is represented by the vertical line: |. The pipe allows you to take output from onecommand and use it as input to the next command. Think o f it just like a plumbing pipe that sends water from onelocation to the next.
Suppose you want to find every line that contains name and not server. First, you need to find every line that containsname . Then use that output to eliminate every line that contains server.
After the command prompt, type the fo llowing at the commands:
hottub:~$ grep name /etc/services |grep -v server
In this case, the second grep can be thought o f as a f ilt er fo r the output o f the first grep.
You do not have to use pipe in conjunction with grep. The output from any command can be piped to anothercommand. For example, you can grep the results o f a request to list all o f the files containing the word bash in thefilename.
After the command prompt, type the fo llowing commands:
hottub:~$ ls -la |grep bash
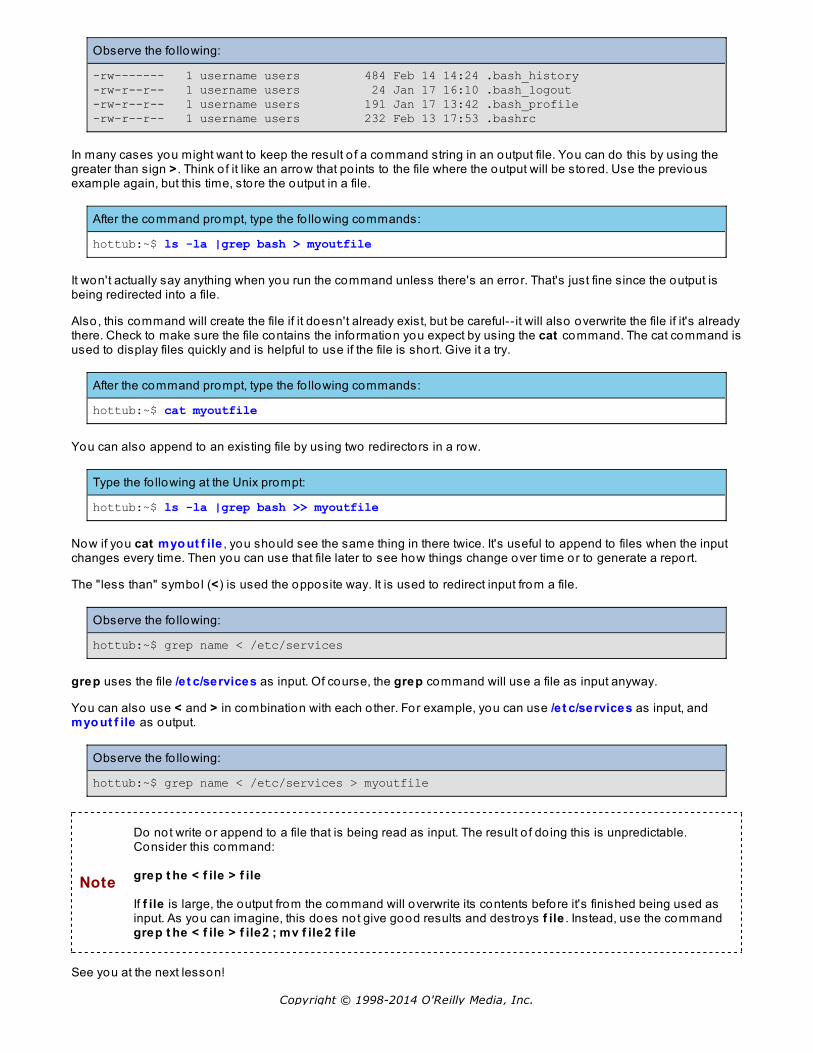
Observe the fo llowing:
-rw------- 1 username users 484 Feb 14 14:24 .bash_history-rw-r--r-- 1 username users 24 Jan 17 16:10 .bash_logout-rw-r--r-- 1 username users 191 Jan 17 13:42 .bash_profile-rw-r--r-- 1 username users 232 Feb 13 17:53 .bashrc
In many cases you might want to keep the result o f a command string in an output file. You can do this by using thegreater than sign > . Think o f it like an arrow that po ints to the file where the output will be stored. Use the previousexample again, but this time, store the output in a file.
After the command prompt, type the fo llowing commands:
hottub:~$ ls -la |grep bash > myoutfile
It won't actually say anything when you run the command unless there's an error. That's just fine since the output isbeing redirected into a file.
Also, this command will create the file if it doesn't already exist, but be careful-- it will also overwrite the file if it's alreadythere. Check to make sure the file contains the information you expect by using the cat command. The cat command isused to display files quickly and is helpful to use if the file is short. Give it a try.
After the command prompt, type the fo llowing commands:
hottub:~$ cat myoutfile
You can also append to an existing file by using two redirectors in a row.
Type the fo llowing at the Unix prompt:
hottub:~$ ls -la |grep bash >> myoutfile
Now if you cat myo ut f ile , you should see the same thing in there twice. It's useful to append to files when the inputchanges every time. Then you can use that file later to see how things change over time or to generate a report.
The "less than" symbol (<) is used the opposite way. It is used to redirect input from a file.
Observe the fo llowing:
hottub:~$ grep name < /etc/services
grep uses the file /e t c/services as input. Of course, the grep command will use a file as input anyway.
You can also use < and > in combination with each o ther. For example, you can use /e t c/services as input, andmyo ut f ile as output.
Observe the fo llowing:
hottub:~$ grep name < /etc/services > myoutfile
Note
Do not write or append to a file that is being read as input. The result o f do ing this is unpredictable.Consider this command:
grep t he < f ile > f ile
If f ile is large, the output from the command will overwrite its contents before it's finished being used asinput. As you can imagine, this does not give good results and destroys f ile . Instead, use the commandgrep t he < f ile > f ile2 ; mv f ile2 f ile
See you at the next lesson!
Copyright © 1998-2014 O'Reilly Media, Inc.

Copyright © 1998-2014 O'Reilly Media, Inc.
This work is licensed under a Creative Commons Attribution-ShareAlike 3.0 Unported License.See http://creativecommons.org/licenses/by-sa/3.0/legalcode for more information.
Unix Regular ExpressionsLesson Objectives
To understand Unix regular expressions.
Regular ExpressionsIf you remember from the previous lesson, the re in grep stands for regular expression. A regular expressio n is away o f defining a pattern. In the previous lesson our pattern was simply a word, such as name .
Note If you know Perl, you'll no tice that Unix regular expressions are not exactly the same as Perl regularexpressions.
You used the -i flag with the grep command to search for words without being case sensitive. That way you foundoccurrences o f both name and Name . Another way to do this is to use brackets.
Observe the fo llowing:
hottub:~$ grep [nN]ame /etc/services
This will find either n o r N fo llowed by ame . The brackets are used to give a list o f possibilities. You can either typeeach character to be matched or you can give a list. For example [a-z]a[a-z]e matches any lowercase letter (a throughz), fo llowed by an a, then any lowercase letter, and finally an e .
Here are some examples o f o ther lists you can use:
[aeio uAEIOU] matches any lower or upper case vowel
[^aeio uAEIOU] matches a non-vowel character. (The ^ means NOT when inside a bracket.)
[0-9] matches any single digit
[^0-9] matches any character that is not a digit.
[a-z] matches any lowercase letter
[a-zA-Z ] matches any lower OR upper case letter
[a-zA-Z 0-9] matches any digit o r letter
.
You can match any character by using a period.
n..e
This will match the letters n and e with any two characters between them. It will therefore match name , nine ,nZ We , n3be , and n/(e .
*
You can use an asterisk (*) to find zero or more occurrences o f a character.
[nN]e*d
This will match Ned, need, nd, and neeeeed. If you want to match one or more blank spaces, you must usequotes around the regular expression.
"a space""a *lo t "
The second example will match zero or more blank spaces which will account fo r the common misspelling o f"a lo t" as "alo t". Keep in mind however, that it's testing each line for a match separately. So if the letter "a" is atthe end o f one line and the word "lo t" is at the beginning o f the next line, no match will be found.
^ and $
You can specify to match a pattern when it is at the beginning or end o f a line. If ^ is used, it will match theword when it's located at the beginning o f a line.
^t he
This will match any line that starts with t he . If $ is used, it will match the word when it's located at the end o f aline.
t he$
This will match any line that ends with t he .
You can use any combination o f these characters to match just about anything you want.
"^ *[A-Z ]"
This will match any line that starts with zero or more spaces which is then fo llowed by an uppercase letter. It could beuseful fo r finding the first line o f a paragraph.
The most difficult thing about regular expressions is deciding which one is best to use. They are an extremely usefultoo l fo r programmers, so be sure to experiment with them a bit before you move on to the next lesson. See you there!
Copyright © 1998-2014 O'Reilly Media, Inc.
This work is licensed under a Creative Commons Attribution-ShareAlike 3.0 Unported License.See http://creativecommons.org/licenses/by-sa/3.0/legalcode for more information.
Odds and EndsLesson Objectives
To understand pagers. These include mo re , less, head, t ail, man, lo cat e , and f ind.
More or LessYou already know how to edit files, but if you want to browse through a file, there are couple o f faster ways. You canuse the commands mo re and less.
mo re will print out a file one full screen at a time. To see the next screen, you must hit the space bar. When you reachthe end o f the file, the command will exit. You can exit before this by typing q.
The biggest problem with mo re is that we cannot see the previous screen. So I usually opt to use a command calledless. less has more features than mo re . I guess you could say less is mo re , more or less.
It works exactly the same way, except you have the ability to use Page Up (o r PgUp on some keyboards), PageDo wn (o r PgDo wn), and the arrow keys.
Let's try using some of these commands. We'll need some text to practice on, so I grabbed an HTML version o f theintroductory chapter on MySQL from www.mysql.com. If it's not in your home directory, copy it there from/e t c/skel/manual_Int ro duct io n.ht ml.
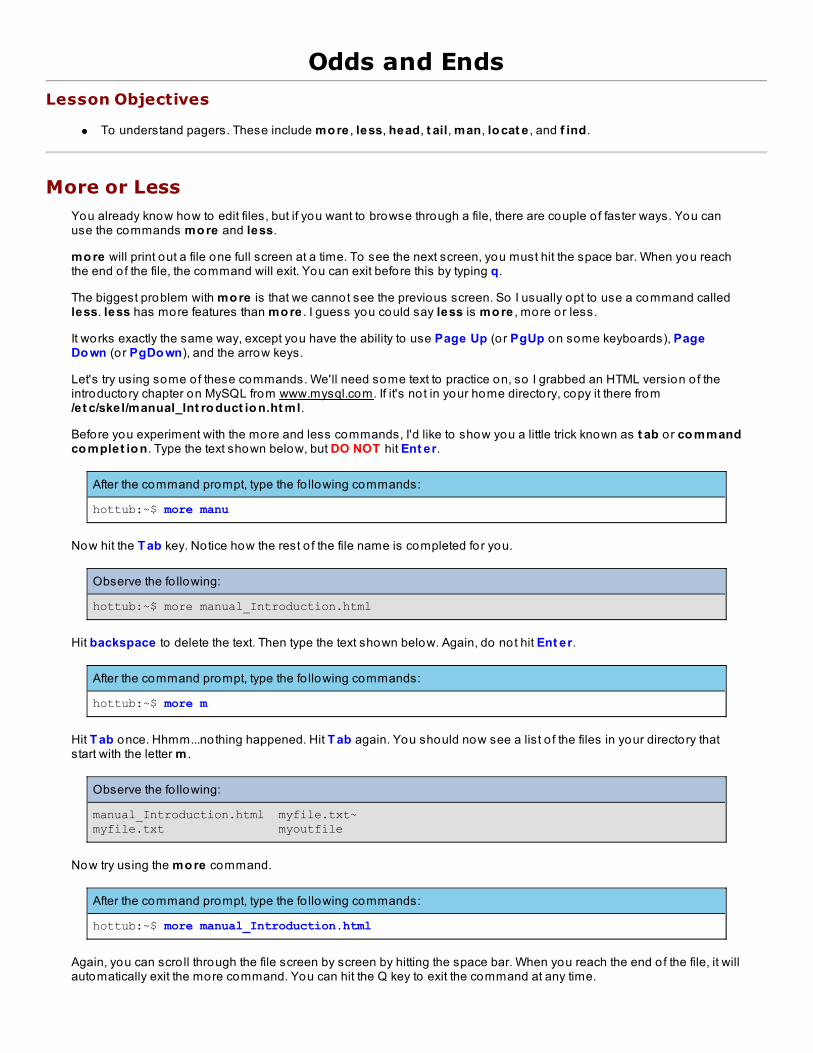
Before you experiment with the more and less commands, I'd like to show you a little trick known as t ab o r co mmandco mplet io n. Type the text shown below, but DO NOT hit Ent er.
After the command prompt, type the fo llowing commands:
hottub:~$ more manu
Now hit the T ab key. Notice how the rest o f the file name is completed for you.
Observe the fo llowing:
hottub:~$ more manual_Introduction.html
Hit backspace to delete the text. Then type the text shown below. Again, do not hit Ent er.
After the command prompt, type the fo llowing commands:
hottub:~$ more m
Hit T ab once. Hhmm...nothing happened. Hit T ab again. You should now see a list o f the files in your directory thatstart with the letter m .
Observe the fo llowing:
manual_Introduction.html myfile.txt~myfile.txt myoutfile
Now try using the mo re command.
After the command prompt, type the fo llowing commands:
hottub:~$ more manual_Introduction.html
Again, you can scro ll through the file screen by screen by hitting the space bar. When you reach the end o f the file, it willautomatically exit the more command. You can hit the Q key to exit the command at any time.
After the command prompt, type the fo llowing commands:
hottub:~$ less manual_Introduction.html
To exit the less command you must use the Q key. It will no t automatically exit when you have reached the end o f thefile.
Because both commands let you examine a file page by page, they are called pagers. While in mo re o r less, you cansearch for a string by typing / and the string for which you want to search. After typing the string, hit Ent er.
Head and TailSometimes you only need to see the top or bottom of a file or input stream. When that's the case, use the head o r t ailcommands. By default they show you the first o r last 10 lines respectively. However, with the -n flag, you can specifyhow many lines you would like to display.
After the command prompt, type the fo llowing commands:
hottub:~$ head manual_Introduction.html
This will display the first 10 lines o f the document.
After the command prompt, type the fo llowing commands:
hottub:~$ tail manual_Introduction.html
This will display the last 10 lines.
After the command prompt, type the fo llowing commands:
hottub:~$ tail -n 15 manual_Introduction.html
This will display the last 15 lines.
ManThere are so many commands with so many different options that it's almost impossible to cover all o f them for everysituation. Luckily, Unix systems come with an extensive set o f manuals that are called the man pages. To accessthem, use the man command. For example, have a look at the man page for ls.
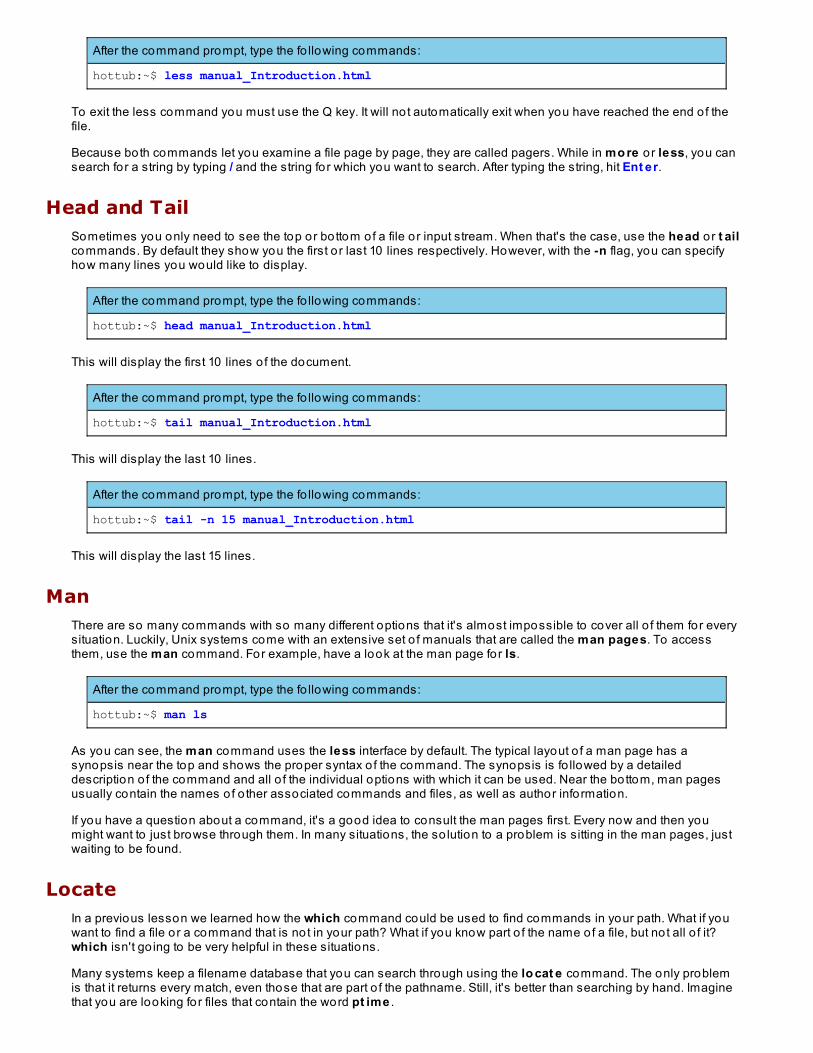
After the command prompt, type the fo llowing commands:
hottub:~$ man ls
As you can see, the man command uses the less interface by default. The typical layout o f a man page has asynopsis near the top and shows the proper syntax o f the command. The synopsis is fo llowed by a detaileddescription o f the command and all o f the individual options with which it can be used. Near the bottom, man pagesusually contain the names o f o ther associated commands and files, as well as author information.
If you have a question about a command, it's a good idea to consult the man pages first. Every now and then youmight want to just browse through them. In many situations, the so lution to a problem is sitting in the man pages, justwaiting to be found.
LocateIn a previous lesson we learned how the which command could be used to find commands in your path. What if youwant to find a file or a command that is not in your path? What if you know part o f the name of a file, but not all o f it?which isn't go ing to be very helpful in these situations.
Many systems keep a filename database that you can search through using the lo cat e command. The only problemis that it returns every match, even those that are part o f the pathname. Still, it's better than searching by hand. Imaginethat you are looking for files that contain the word pt ime .

After the command prompt, type the fo llowing commands:
hottub:~$ locate ptime /var/cache/yum/dag/headers/perl-DateTime-Format-Strptime-0-1.0700-1.1.e13.rf.noarch.hdr /var/cache/yum/dag/headers/perl-DateTime-Format-Strptime-0-1.0702-1.e13.rf.noarch.hdr /usr/bin/ruptime /usr/bin/uptime /usr/sbin/ntptimeset /usr/sbin/ntptime /usr/share/doc/ntp-4.1.2/ntptime.htm /usr/share/man/man1/ntptime.1.gz /usr/share/man/man1/ruptime.1.gz /usr/share/man/man1/uptime.1.gz /usr/share/man/man3/strptime.3.gz
One of the files that was found was the upt ime command (commands are really just a type o f file). When you type thiscommand, you receive information about how long the system has been running. This information is obtained fromthe database. How does it get into the database? It's updated automatically using the command updat edb. Manysystems run this command automatically every night.
FindIf lo cat e isn't giving you what you want, o r if you want a little more power, try using the f ind command. Since f indactually looks through the filesystem (instead o f checking the database) it uses up a lo t more system resources.Therefore, the first argument o f f ind is the directory to start looking in. This directory will act as a base for the search.
After the command prompt, type the fo llowing commands:
hottub:~$ find /usr/bin -name "*ptime*"/usr/bin/uptime/usr/bin/ruptime
f ind has many different options. I suggest you read through a little bit o f the man page for f ind to get a sense o f thepossibilities.
Copyright © 1998-2014 O'Reilly Media, Inc.
This work is licensed under a Creative Commons Attribution-ShareAlike 3.0 Unported License.See http://creativecommons.org/licenses/by-sa/3.0/legalcode for more information.
LinksLesson Objectives
To understand file links including hard links and symbolic links.
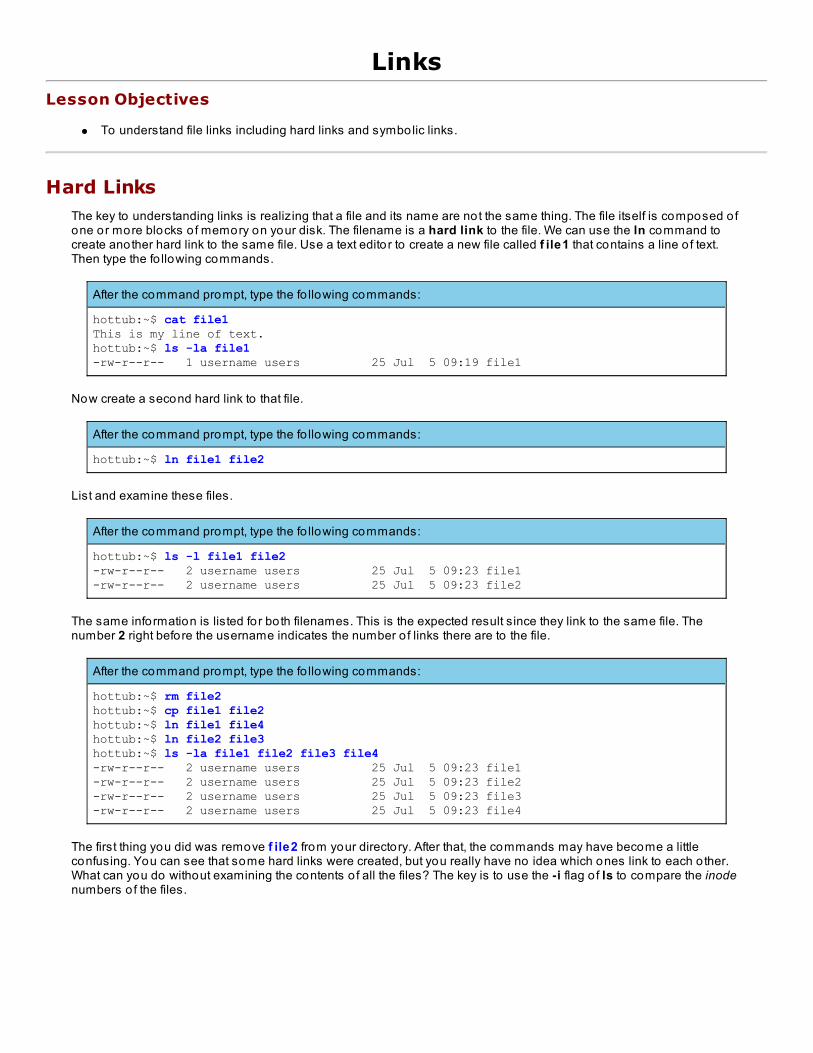
Hard LinksThe key to understanding links is realizing that a file and its name are not the same thing. The file itself is composed o fone or more blocks o f memory on your disk. The filename is a hard link to the file. We can use the ln command tocreate another hard link to the same file. Use a text edito r to create a new file called f ile1 that contains a line o f text.Then type the fo llowing commands.
After the command prompt, type the fo llowing commands:
hottub:~$ cat file1This is my line of text.hottub:~$ ls -la file1-rw-r--r-- 1 username users 25 Jul 5 09:19 file1
Now create a second hard link to that file.
After the command prompt, type the fo llowing commands:
hottub:~$ ln file1 file2
List and examine these files.
After the command prompt, type the fo llowing commands:
hottub:~$ ls -l file1 file2-rw-r--r-- 2 username users 25 Jul 5 09:23 file1-rw-r--r-- 2 username users 25 Jul 5 09:23 file2
The same information is listed for both filenames. This is the expected result since they link to the same file. Thenumber 2 right before the username indicates the number o f links there are to the file.
After the command prompt, type the fo llowing commands:
hottub:~$ rm file2hottub:~$ cp file1 file2hottub:~$ ln file1 file4 hottub:~$ ln file2 file3hottub:~$ ls -la file1 file2 file3 file4-rw-r--r-- 2 username users 25 Jul 5 09:23 file1-rw-r--r-- 2 username users 25 Jul 5 09:23 file2-rw-r--r-- 2 username users 25 Jul 5 09:23 file3-rw-r--r-- 2 username users 25 Jul 5 09:23 file4
The first thing you did was remove f ile2 from your directory. After that, the commands may have become a littleconfusing. You can see that some hard links were created, but you really have no idea which ones link to each o ther.What can you do without examining the contents o f all the files? The key is to use the -i flag o f ls to compare the inodenumbers o f the files.
After the command prompt, type the fo llowing commands:
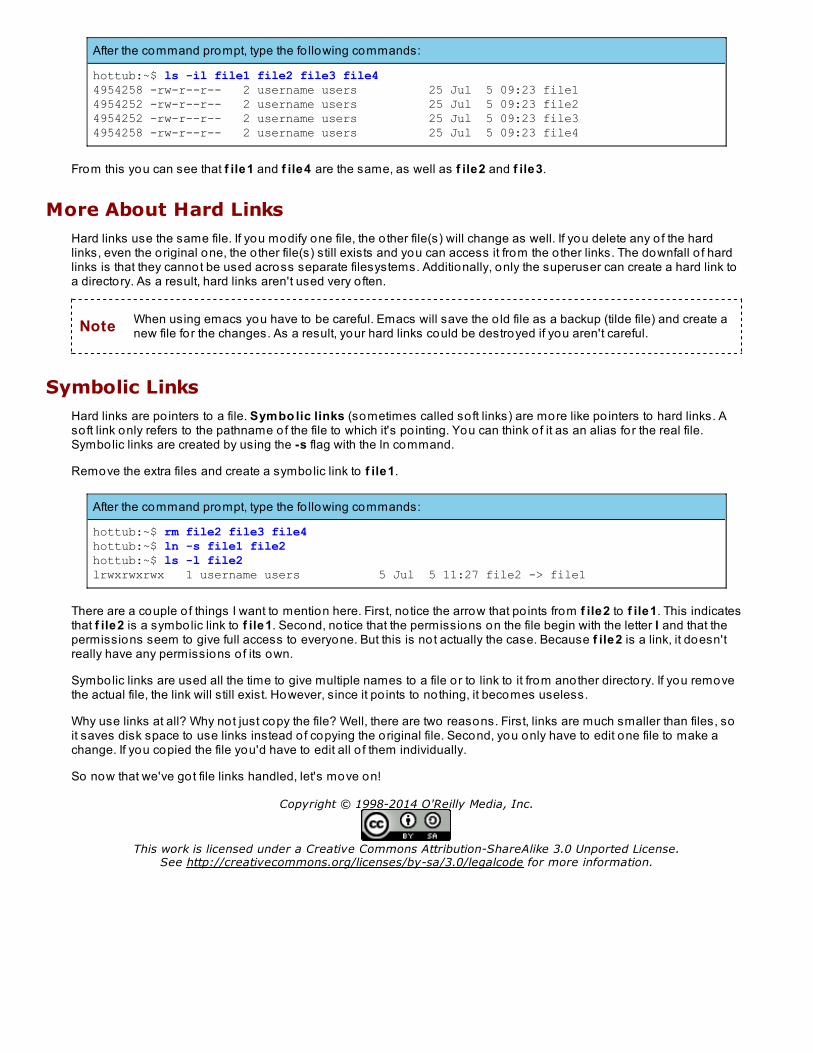
hottub:~$ ls -il file1 file2 file3 file44954258 -rw-r--r-- 2 username users 25 Jul 5 09:23 file14954252 -rw-r--r-- 2 username users 25 Jul 5 09:23 file24954252 -rw-r--r-- 2 username users 25 Jul 5 09:23 file34954258 -rw-r--r-- 2 username users 25 Jul 5 09:23 file4
From this you can see that f ile1 and f ile4 are the same, as well as f ile2 and f ile3.
More About Hard LinksHard links use the same file. If you modify one file, the o ther file(s) will change as well. If you delete any o f the hardlinks, even the original one, the o ther file(s) still exists and you can access it from the o ther links. The downfall o f hardlinks is that they cannot be used across separate filesystems. Additionally, only the superuser can create a hard link toa directory. As a result, hard links aren't used very o ften.
Note When using emacs you have to be careful. Emacs will save the o ld file as a backup (tilde file) and create anew file fo r the changes. As a result, your hard links could be destroyed if you aren't careful.
Symbolic LinksHard links are po inters to a file. Symbo lic links (sometimes called soft links) are more like po inters to hard links. Asoft link only refers to the pathname of the file to which it's po inting. You can think o f it as an alias for the real file.Symbolic links are created by using the -s flag with the ln command.
Remove the extra files and create a symbolic link to f ile1.
After the command prompt, type the fo llowing commands:
hottub:~$ rm file2 file3 file4hottub:~$ ln -s file1 file2hottub:~$ ls -l file2lrwxrwxrwx 1 username users 5 Jul 5 11:27 file2 -> file1
There are a couple o f things I want to mention here. First, no tice the arrow that po ints from f ile2 to f ile1. This indicatesthat f ile2 is a symbolic link to f ile1. Second, notice that the permissions on the file begin with the letter l and that thepermissions seem to give full access to everyone. But this is not actually the case. Because f ile2 is a link, it doesn'treally have any permissions o f its own.
Symbolic links are used all the time to give multiple names to a file or to link to it from another directory. If you removethe actual file, the link will still exist. However, since it po ints to nothing, it becomes useless.
Why use links at all? Why not just copy the file? Well, there are two reasons. First, links are much smaller than files, soit saves disk space to use links instead o f copying the original file. Second, you only have to edit one file to make achange. If you copied the file you'd have to edit all o f them individually.
So now that we've got file links handled, let's move on!
Copyright © 1998-2014 O'Reilly Media, Inc.
This work is licensed under a Creative Commons Attribution-ShareAlike 3.0 Unported License.See http://creativecommons.org/licenses/by-sa/3.0/legalcode for more information.
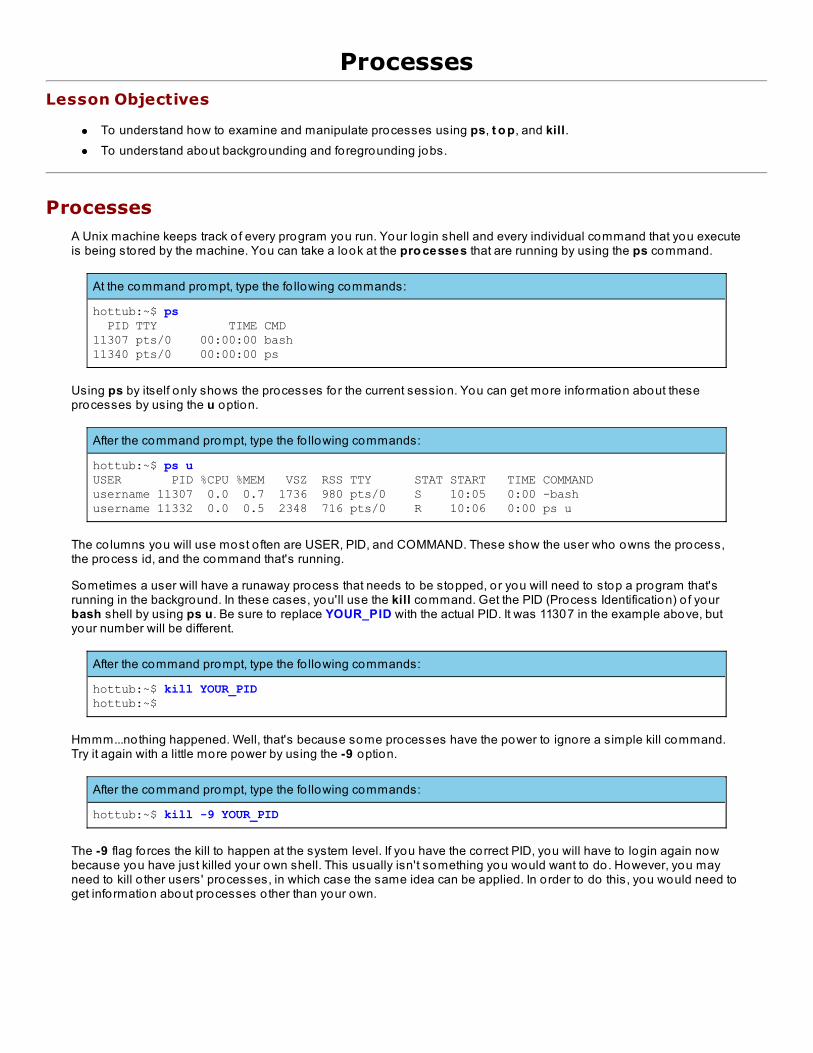
ProcessesLesson Objectives
To understand how to examine and manipulate processes using ps, t o p, and kill.To understand about backgrounding and foregrounding jobs.
ProcessesA Unix machine keeps track o f every program you run. Your login shell and every individual command that you executeis being stored by the machine. You can take a look at the pro cesses that are running by using the ps command.
At the command prompt, type the fo llowing commands:
hottub:~$ ps PID TTY TIME CMD11307 pts/0 00:00:00 bash11340 pts/0 00:00:00 ps
Using ps by itself only shows the processes for the current session. You can get more information about theseprocesses by using the u option.
After the command prompt, type the fo llowing commands:
hottub:~$ ps uUSER PID %CPU %MEM VSZ RSS TTY STAT START TIME COMMANDusername 11307 0.0 0.7 1736 980 pts/0 S 10:05 0:00 -bashusername 11332 0.0 0.5 2348 716 pts/0 R 10:06 0:00 ps u
The co lumns you will use most o ften are USER, PID, and COMMAND. These show the user who owns the process,the process id, and the command that's running.
Sometimes a user will have a runaway process that needs to be stopped, or you will need to stop a program that'srunning in the background. In these cases, you'll use the kill command. Get the PID (Process Identification) o f yourbash shell by using ps u. Be sure to replace YOUR_PID with the actual PID. It was 11307 in the example above, butyour number will be different.
After the command prompt, type the fo llowing commands:
hottub:~$ kill YOUR_PIDhottub:~$
Hmmm...nothing happened. Well, that's because some processes have the power to ignore a simple kill command.Try it again with a little more power by using the -9 option.
After the command prompt, type the fo llowing commands:
hottub:~$ kill -9 YOUR_PID
The -9 flag forces the kill to happen at the system level. If you have the correct PID, you will have to login again nowbecause you have just killed your own shell. This usually isn't something you would want to do. However, you mayneed to kill o ther users' processes, in which case the same idea can be applied. In order to do this, you would need toget information about processes o ther than your own.
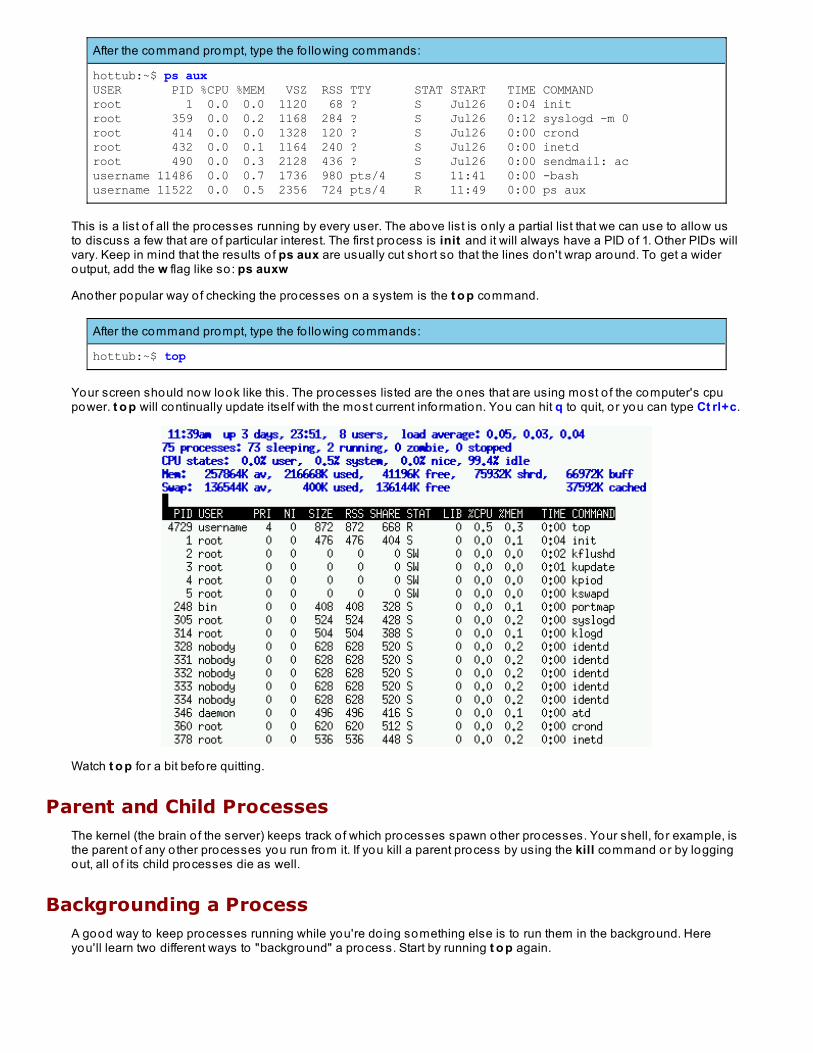
After the command prompt, type the fo llowing commands:
hottub:~$ ps auxUSER PID %CPU %MEM VSZ RSS TTY STAT START TIME COMMANDroot 1 0.0 0.0 1120 68 ? S Jul26 0:04 initroot 359 0.0 0.2 1168 284 ? S Jul26 0:12 syslogd -m 0root 414 0.0 0.0 1328 120 ? S Jul26 0:00 crondroot 432 0.0 0.1 1164 240 ? S Jul26 0:00 inetdroot 490 0.0 0.3 2128 436 ? S Jul26 0:00 sendmail: acusername 11486 0.0 0.7 1736 980 pts/4 S 11:41 0:00 -bashusername 11522 0.0 0.5 2356 724 pts/4 R 11:49 0:00 ps aux
This is a list o f all the processes running by every user. The above list is only a partial list that we can use to allow usto discuss a few that are o f particular interest. The first process is init and it will always have a PID o f 1. Other PIDs willvary. Keep in mind that the results o f ps aux are usually cut short so that the lines don't wrap around. To get a wideroutput, add the w flag like so: ps auxw
Another popular way o f checking the processes on a system is the t o p command.
After the command prompt, type the fo llowing commands:
hottub:~$ top
Your screen should now look like this. The processes listed are the ones that are using most o f the computer's cpupower. t o p will continually update itself with the most current information. You can hit q to quit, o r you can type Ct rl+c.
Watch t o p fo r a bit before quitting.
Parent and Child ProcessesThe kernel (the brain o f the server) keeps track o f which processes spawn other processes. Your shell, fo r example, isthe parent o f any o ther processes you run from it. If you kill a parent process by using the kill command or by loggingout, all o f its child processes die as well.
Backgrounding a ProcessA good way to keep processes running while you're do ing something else is to run them in the background. Hereyou'll learn two different ways to "background" a process. Start by running t o p again.

After the command prompt, type the fo llowing commands:
hottub:~$ top
Once t o p is open and running, hit Ct rl + z .
Observe the fo llowing:
[1]+ Stopped (signal)hottub:~$
This tells you that the t o p process has stopped. It hasn't been killed, just paused. You can let it keep running by usingbg.
After the command prompt, type the fo llowing commands:
hottub:~$ bg[1]+ top &
The ampersand (&) indicates that the program is running in the background. The benefit to temporarily backgroundinga process is that you can pause to run a different command, then resume what you were do ing later.
Suppose you're finished using t o p and you don't want it to run in the background because it's using up valuablesystem resources. You can get a list o f current tasks with the jo bs command.
After the command prompt, type the fo llowing commands:
hottub:~$ jobs[1]+ Stopped (tty output) top
The number in the brackets on the left side is the job number. You can use it to reference the job when you want to getrid o f it.
After the command prompt, type the fo llowing commands:
hottub:~$ kill %1
You can also start a command so that it runs in the background immediately. It's pretty po intless with t o p, since youneed to see the command in order to use it. But let's use t o p anyway, just to illustrate the po int.
After the command prompt, type the fo llowing commands:
hottub:~$ top &hottub:~$
If you use the jo bs command, you can see that t o p is indeed running in the background.
After the command prompt, type the fo llowing commands:
hottub:~$ jobs[1]+ Stopped (tty output) top
You can foreground the process to check out what's happening.
After the command prompt, type the fo llowing commands:
hottub:~$ fg
Practice backgrounding and foregrounding some processes to get more comfortable do ing it. When you're finished,make sure to exit all o f the processes.
Copyright © 1998-2014 O'Reilly Media, Inc.

Copyright © 1998-2014 O'Reilly Media, Inc.
This work is licensed under a Creative Commons Attribution-ShareAlike 3.0 Unported License.See http://creativecommons.org/licenses/by-sa/3.0/legalcode for more information.
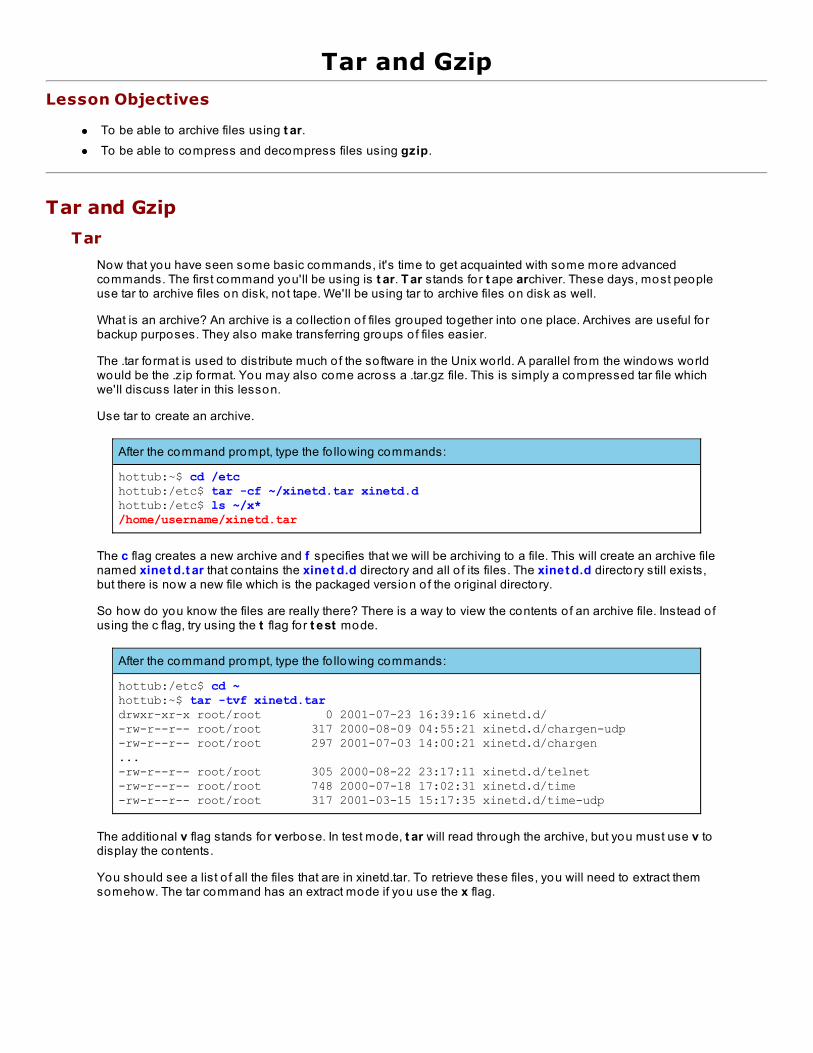
Tar and GzipLesson Objectives
To be able to archive files using t ar.To be able to compress and decompress files using gzip.
Tar and Gzip
Tar
Now that you have seen some basic commands, it's time to get acquainted with some more advancedcommands. The first command you'll be using is t ar. T ar stands for t ape archiver. These days, most peopleuse tar to archive files on disk, not tape. We'll be using tar to archive files on disk as well.
What is an archive? An archive is a co llection o f files grouped together into one place. Archives are useful fo rbackup purposes. They also make transferring groups o f files easier.
The .tar fo rmat is used to distribute much o f the software in the Unix world. A parallel from the windows worldwould be the .zip fo rmat. You may also come across a .tar.gz file. This is simply a compressed tar file whichwe'll discuss later in this lesson.
Use tar to create an archive.
After the command prompt, type the fo llowing commands:
hottub:~$ cd /etchottub:/etc$ tar -cf ~/xinetd.tar xinetd.dhottub:/etc$ ls ~/x*/home/username/xinetd.tar
The c flag creates a new archive and f specifies that we will be archiving to a file. This will create an archive filenamed xinet d.t ar that contains the xinet d.d directory and all o f its files. The xinet d.d directory still exists,but there is now a new file which is the packaged version o f the original directory.
So how do you know the files are really there? There is a way to view the contents o f an archive file. Instead o fusing the c flag, try using the t flag for t est mode.
After the command prompt, type the fo llowing commands:
hottub:/etc$ cd ~hottub:~$ tar -tvf xinetd.tar drwxr-xr-x root/root 0 2001-07-23 16:39:16 xinetd.d/-rw-r--r-- root/root 317 2000-08-09 04:55:21 xinetd.d/chargen-udp-rw-r--r-- root/root 297 2001-07-03 14:00:21 xinetd.d/chargen...-rw-r--r-- root/root 305 2000-08-22 23:17:11 xinetd.d/telnet-rw-r--r-- root/root 748 2000-07-18 17:02:31 xinetd.d/time-rw-r--r-- root/root 317 2001-03-15 15:17:35 xinetd.d/time-udp
The additional v flag stands for verbose. In test mode, t ar will read through the archive, but you must use v todisplay the contents.
You should see a list o f all the files that are in xinetd.tar. To retrieve these files, you will need to extract themsomehow. The tar command has an extract mode if you use the x flag.

After the command prompt, type the fo llowing commands:
hottub:~$ tar -xf xinetd.tarhottub:~$ cd xinetd.dhottub:~/xinetd.d$ ls chargen daytime echo finger rlogin rsync telnet time-udp chargen-udp daytime-udp echo-udp rexec rsh services time
Notice that when tar extracted the archive, it created the xinet d.d directory. There are now two copies o f thisdirectory--one in your home directory and one in the etc directory. Tar files preserve the original directorystructure, so they are extremely useful when creating backups. Keep in mind that xinet d.t ar still exists eventhough you have extracted the files. You may want to delete this file at some po int later on, but we'll be using itin the example below.
Gzip
While t ar combines multiple files and directories into a single archive, the gzip command can compress afile into a smaller size. Compressed files are useful fo r saving disk space and for decreasing the amount o ftime it takes to download a file.
The gzip command is very easy to use.
After the command prompt, type the fo llowing commands:
hottub:~/xinetd.d$ cd ..hottub:~$ gzip xinetd.tarhottub:~$ ls xinetd.tar*xinetd.tar.gzhottub:~$
gzip has compressed the xinet d.t ar file and added the .gz extension to it. You can decompress this fileusing gunzip.
After the command prompt, type the fo llowing commands:
hottub:~$ gunzip xinetd.tar.gz
T ar and gzip are o ften used in conjunction with each o ther. You can tar multiple files to create a single file,then gzip the file to compress it. For this reason, t ar has a built- in flag so that you can compress anddecompress archive files in one step (the z flag). Adding this flag to a tar command will compress the file if itis used in conjunction with the c flag.
Observe the fo llowing:
hottub:~$ tar -cvzf test.tar.gz mytestdirectory
Sometimes these files are created using a .t gz extension. However, .t ar.gz is the most common.
If you add the z flag, in conjunction with the x flag, it will decompress the file. Experiment and see if you canwork this out fo r yourself!
Copyright © 1998-2014 O'Reilly Media, Inc.
This work is licensed under a Creative Commons Attribution-ShareAlike 3.0 Unported License.See http://creativecommons.org/licenses/by-sa/3.0/legalcode for more information.
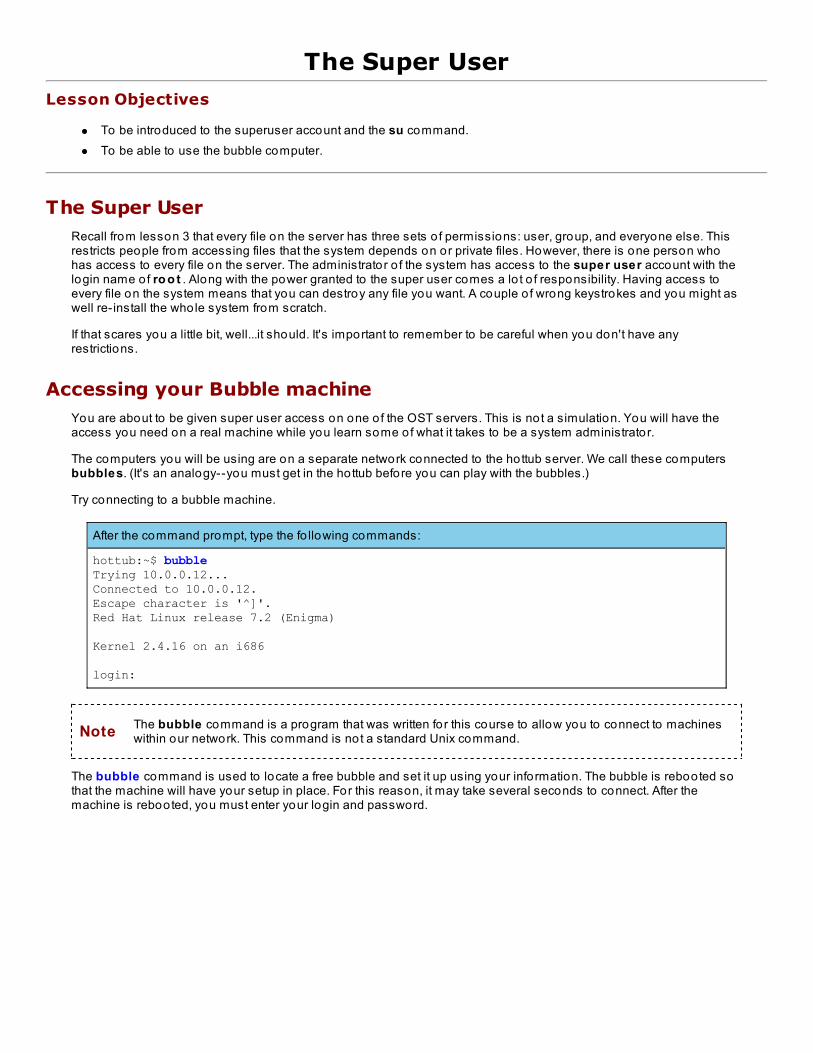
The Super UserLesson Objectives
To be introduced to the superuser account and the su command.To be able to use the bubble computer.
The Super UserRecall from lesson 3 that every file on the server has three sets o f permissions: user, group, and everyone else. Thisrestricts people from accessing files that the system depends on or private files. However, there is one person whohas access to every file on the server. The administrator o f the system has access to the super user account with thelogin name of ro o t . Along with the power granted to the super user comes a lo t o f responsibility. Having access toevery file on the system means that you can destroy any file you want. A couple o f wrong keystrokes and you might aswell re-install the whole system from scratch.
If that scares you a little bit, well...it should. It's important to remember to be careful when you don't have anyrestrictions.
Accessing your Bubble machineYou are about to be given super user access on one o f the OST servers. This is not a simulation. You will have theaccess you need on a real machine while you learn some of what it takes to be a system administrator.
The computers you will be using are on a separate network connected to the hottub server. We call these computersbubbles. (It's an analogy--you must get in the hottub before you can play with the bubbles.)
Try connecting to a bubble machine.
After the command prompt, type the fo llowing commands:
hottub:~$ bubbleTrying 10.0.0.12...Connected to 10.0.0.12.Escape character is '^]'.Red Hat Linux release 7.2 (Enigma)
Kernel 2.4.16 on an i686
login:
Note The bubble command is a program that was written for this course to allow you to connect to machineswithin our network. This command is not a standard Unix command.
The bubble command is used to locate a free bubble and set it up using your information. The bubble is rebooted sothat the machine will have your setup in place. For this reason, it may take several seconds to connect. After themachine is rebooted, you must enter your login and password.
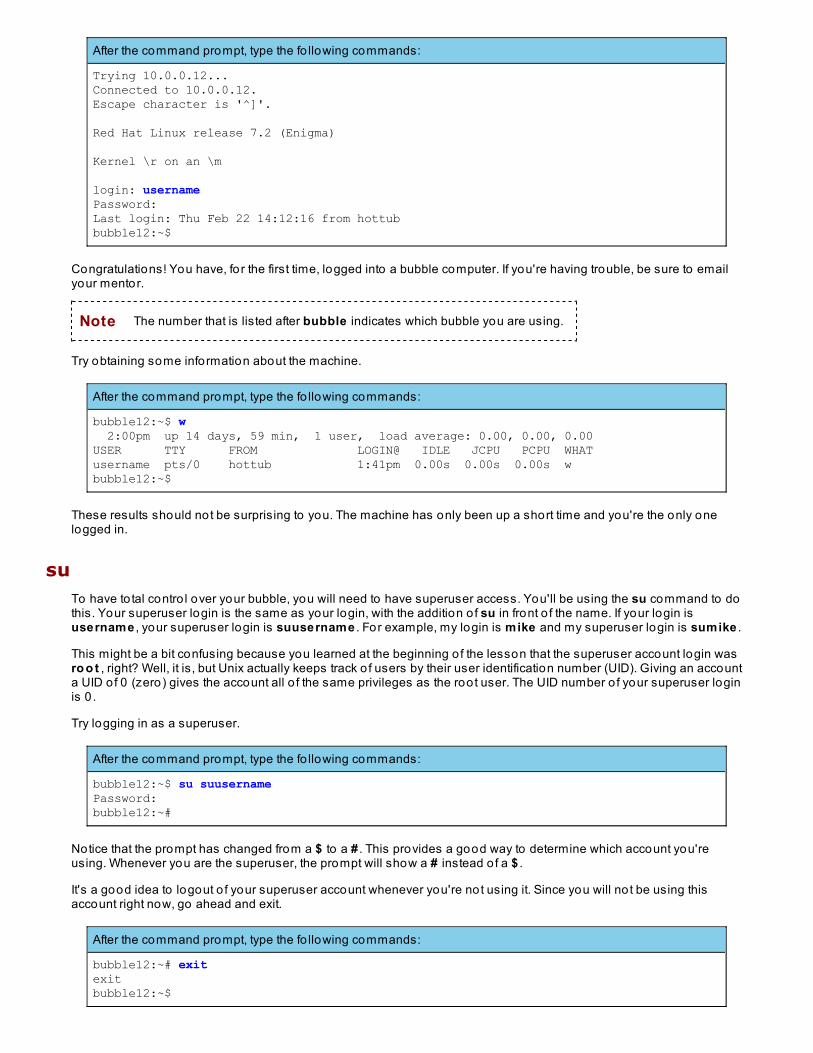
After the command prompt, type the fo llowing commands:
Trying 10.0.0.12...Connected to 10.0.0.12.Escape character is '^]'.
Red Hat Linux release 7.2 (Enigma)
Kernel \r on an \m
login: usernamePassword: Last login: Thu Feb 22 14:12:16 from hottubbubble12:~$
Congratulations! You have, fo r the first time, logged into a bubble computer. If you're having trouble, be sure to emailyour mentor.
Note The number that is listed after bubble indicates which bubble you are using.
Try obtaining some information about the machine.
After the command prompt, type the fo llowing commands:
bubble12:~$ w 2:00pm up 14 days, 59 min, 1 user, load average: 0.00, 0.00, 0.00USER TTY FROM LOGIN@ IDLE JCPU PCPU WHATusername pts/0 hottub 1:41pm 0.00s 0.00s 0.00s w bubble12:~$
These results should not be surprising to you. The machine has only been up a short time and you're the only onelogged in.
suTo have to tal contro l over your bubble, you will need to have superuser access. You'll be using the su command to dothis. Your superuser login is the same as your login, with the addition o f su in front o f the name. If your login isusername , your superuser login is suusername . For example, my login is mike and my superuser login is sumike .
This might be a bit confusing because you learned at the beginning o f the lesson that the superuser account login wasro o t , right? Well, it is, but Unix actually keeps track o f users by their user identification number (UID). Giving an accounta UID o f 0 (zero) gives the account all o f the same privileges as the root user. The UID number o f your superuser loginis 0 .
Try logging in as a superuser.
After the command prompt, type the fo llowing commands:
bubble12:~$ su suusernamePassword: bubble12:~#
Notice that the prompt has changed from a $ to a # . This provides a good way to determine which account you'reusing. Whenever you are the superuser, the prompt will show a # instead o f a $ .
It's a good idea to logout o f your superuser account whenever you're not using it. Since you will no t be using thisaccount right now, go ahead and exit.
After the command prompt, type the fo llowing commands:
bubble12:~# exitexitbubble12:~$
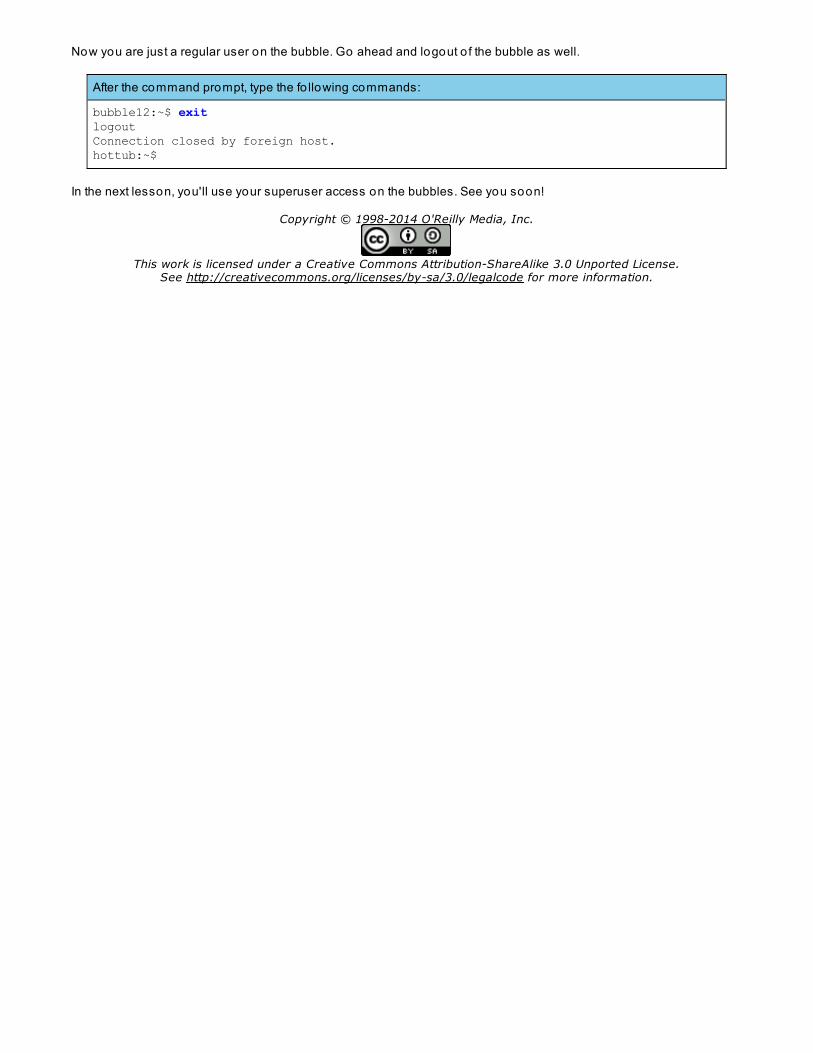
Now you are just a regular user on the bubble. Go ahead and logout o f the bubble as well.
After the command prompt, type the fo llowing commands:
bubble12:~$ exitlogoutConnection closed by foreign host.hottub:~$
In the next lesson, you'll use your superuser access on the bubbles. See you soon!
Copyright © 1998-2014 O'Reilly Media, Inc.
This work is licensed under a Creative Commons Attribution-ShareAlike 3.0 Unported License.See http://creativecommons.org/licenses/by-sa/3.0/legalcode for more information.
SSHLesson Objectives
To understand ssh by downloading, installing, and modifying it.
What is SSH?ssh stands for secure shell. It's a way to connect to a server, very similar to telnet, but with one important difference.The connections and everything you type is encrypted. This is why it's secure.
Why is this so important? With telnet (and most o ther network applications), everything you type is sent over thenetwork as plain text, including your password. If there are computers on your network that can't be "trusted," theycould eavesdrop on your telnet session and learn your password. With an ssh connection, you can be sure thateverything passed between your computer and the remote machine is encrypted. Even if someone intercepts what youtyped, there is no way to decipher it.
Using SSHUsing ssh is almost exactly like using t e lnet . When you t e lnet to a machine it gives you the familiar login prompt:
Observe the fo llowing:
faucet:~$ telnet hostname.useractive.comTrying 204.212.246.153...Connected to hostname.useractive.com.Escape character is '^]'.
Red Hat Linux release 7.0 (Guinness)Kernel 2.2.16-22 on an i686login:
ssh assumes that you will login with the same username you are currently using. This means you don't have to enteryour login name when you connect to hottub. What if you have to connect to a machine using a different login than theone you're currently using? That's no problem.
Observe the fo llowing:
cold:~$ ssh [email protected]
You would then be logged in as billy on hostname.useractive.com.
Installing SSH on your bubbleThe bubble doesn't have ssh installed on it right now, so you'll need to install it. You will use the ncf t p program todownload the software from the hottub. ncftp is a file transfer program. In fact f t p stands for f ile t ransfer pro toco l.
Login to a bubble. Then connect to the hottub anonymous file server using the ncftp program located at the addressbelow.
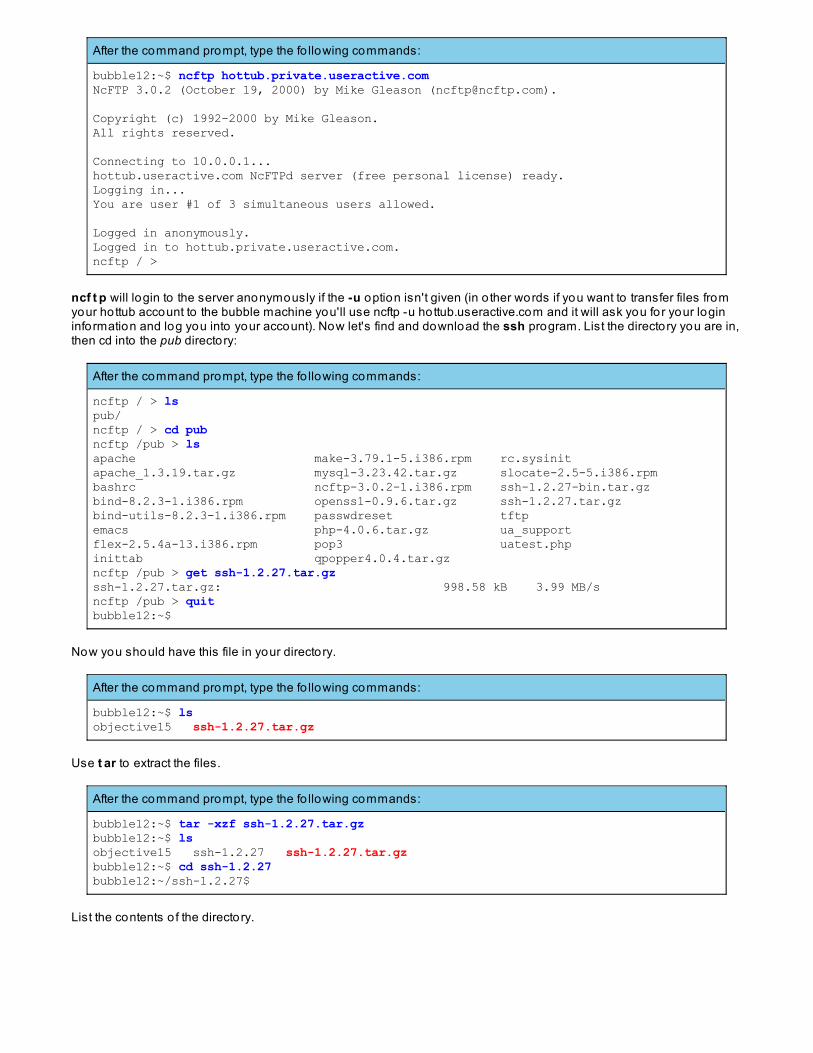
After the command prompt, type the fo llowing commands:
bubble12:~$ ncftp hottub.private.useractive.comNcFTP 3.0.2 (October 19, 2000) by Mike Gleason ([email protected]).
Copyright (c) 1992-2000 by Mike Gleason.All rights reserved.
Connecting to 10.0.0.1...hottub.useractive.com NcFTPd server (free personal license) ready.Logging in... You are user #1 of 3 simultaneous users allowed.
Logged in anonymously.Logged in to hottub.private.useractive.com.ncftp / >
ncf t p will login to the server anonymously if the -u option isn't given (in o ther words if you want to transfer files fromyour hottub account to the bubble machine you'll use ncftp -u hottub.useractive.com and it will ask you for your logininformation and log you into your account). Now let's find and download the ssh program. List the directory you are in,then cd into the pub directory:
After the command prompt, type the fo llowing commands:
ncftp / > ls pub/ncftp / > cd pubncftp /pub > lsapache make-3.79.1-5.i386.rpm rc.sysinitapache_1.3.19.tar.gz mysql-3.23.42.tar.gz slocate-2.5-5.i386.rpmbashrc ncftp-3.0.2-1.i386.rpm ssh-1.2.27-bin.tar.gzbind-8.2.3-1.i386.rpm openss1-0.9.6.tar.gz ssh-1.2.27.tar.gzbind-utils-8.2.3-1.i386.rpm passwdreset tftpemacs php-4.0.6.tar.gz ua_supportflex-2.5.4a-13.i386.rpm pop3 uatest.phpinittab qpopper4.0.4.tar.gzncftp /pub > get ssh-1.2.27.tar.gzssh-1.2.27.tar.gz: 998.58 kB 3.99 MB/s ncftp /pub > quitbubble12:~$
Now you should have this file in your directory.
After the command prompt, type the fo llowing commands:
bubble12:~$ lsobjective15 ssh-1.2.27.tar.gz
Use t ar to extract the files.
After the command prompt, type the fo llowing commands:
bubble12:~$ tar -xzf ssh-1.2.27.tar.gzbubble12:~$ lsobjective15 ssh-1.2.27 ssh-1.2.27.tar.gzbubble12:~$ cd ssh-1.2.27bubble12:~/ssh-1.2.27$
List the contents o f the directory.
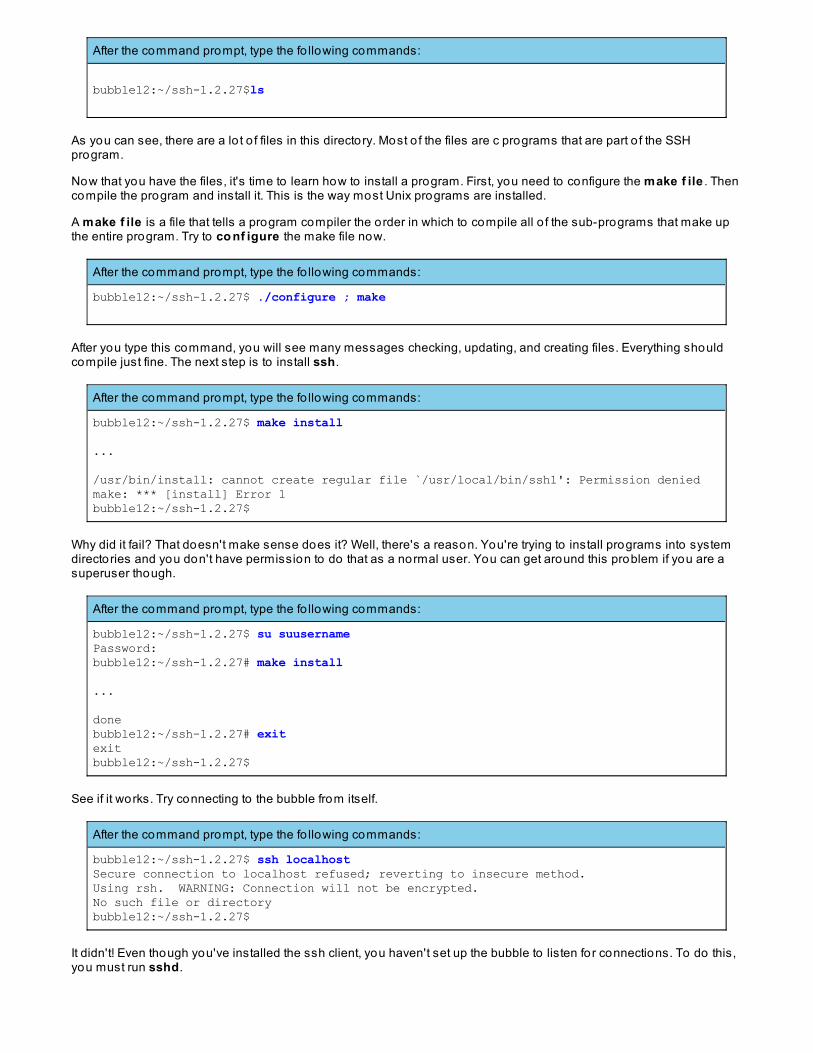
After the command prompt, type the fo llowing commands:
bubble12:~/ssh-1.2.27$ls
As you can see, there are a lo t o f files in this directory. Most o f the files are c programs that are part o f the SSHprogram.
Now that you have the files, it's time to learn how to install a program. First, you need to configure the make f ile . Thencompile the program and install it. This is the way most Unix programs are installed.
A make f ile is a file that tells a program compiler the order in which to compile all o f the sub-programs that make upthe entire program. Try to co nf igure the make file now.
After the command prompt, type the fo llowing commands:
bubble12:~/ssh-1.2.27$ ./configure ; make
After you type this command, you will see many messages checking, updating, and creating files. Everything shouldcompile just fine. The next step is to install ssh.
After the command prompt, type the fo llowing commands:
bubble12:~/ssh-1.2.27$ make install
...
/usr/bin/install: cannot create regular file `/usr/local/bin/ssh1': Permission deniedmake: *** [install] Error 1bubble12:~/ssh-1.2.27$
Why did it fail? That doesn't make sense does it? Well, there's a reason. You're trying to install programs into systemdirectories and you don't have permission to do that as a normal user. You can get around this problem if you are asuperuser though.
After the command prompt, type the fo llowing commands:
bubble12:~/ssh-1.2.27$ su suusernamePassword: bubble12:~/ssh-1.2.27# make install
...
donebubble12:~/ssh-1.2.27# exitexitbubble12:~/ssh-1.2.27$
See if it works. Try connecting to the bubble from itself.
After the command prompt, type the fo llowing commands:
bubble12:~/ssh-1.2.27$ ssh localhostSecure connection to localhost refused; reverting to insecure method.Using rsh. WARNING: Connection will not be encrypted.No such file or directorybubble12:~/ssh-1.2.27$
It didn't! Even though you've installed the ssh client, you haven't set up the bubble to listen for connections. To do this,you must run sshd.
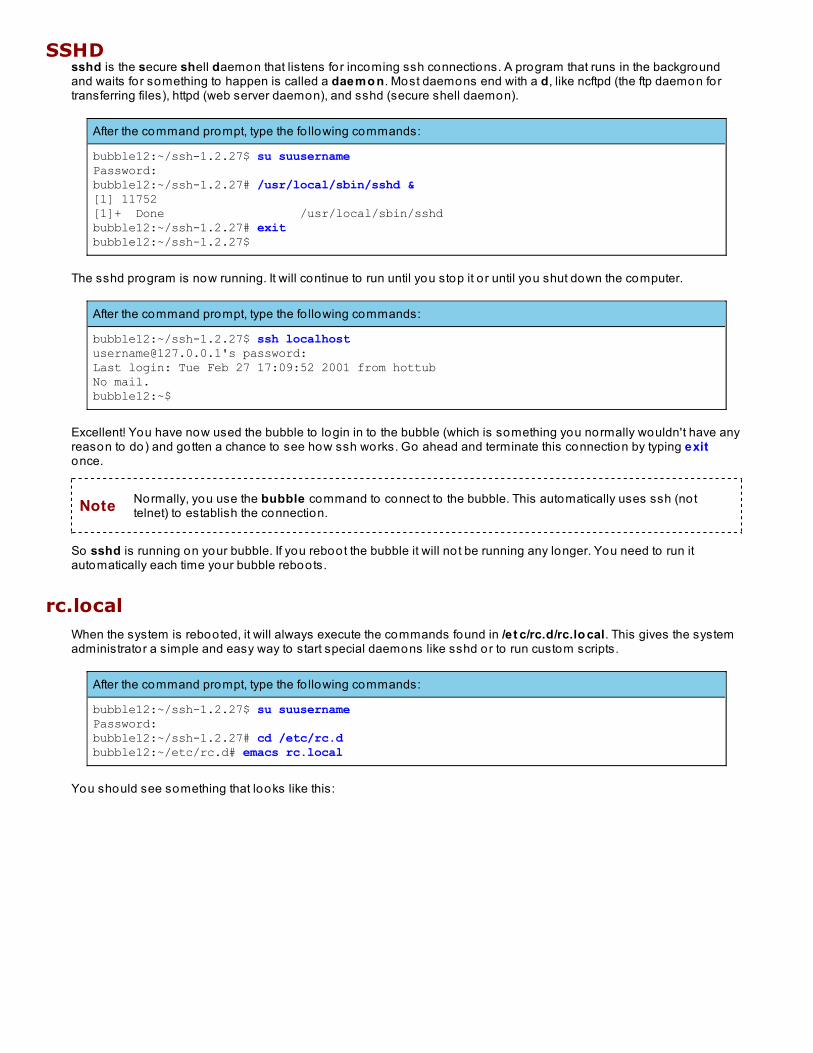
SSHDsshd is the secure shell daemon that listens for incoming ssh connections. A program that runs in the backgroundand waits fo r something to happen is called a daemo n. Most daemons end with a d, like ncftpd (the ftp daemon fortransferring files), httpd (web server daemon), and sshd (secure shell daemon).
After the command prompt, type the fo llowing commands:
bubble12:~/ssh-1.2.27$ su suusernamePassword: bubble12:~/ssh-1.2.27# /usr/local/sbin/sshd &[1] 11752[1]+ Done /usr/local/sbin/sshdbubble12:~/ssh-1.2.27# exitbubble12:~/ssh-1.2.27$
The sshd program is now running. It will continue to run until you stop it o r until you shut down the computer.
After the command prompt, type the fo llowing commands:
bubble12:~/ssh-1.2.27$ ssh [email protected]'s password: Last login: Tue Feb 27 17:09:52 2001 from hottubNo mail.bubble12:~$
Excellent! You have now used the bubble to login in to the bubble (which is something you normally wouldn't have anyreason to do) and gotten a chance to see how ssh works. Go ahead and terminate this connection by typing exitonce.
Note Normally, you use the bubble command to connect to the bubble. This automatically uses ssh (nottelnet) to establish the connection.
So sshd is running on your bubble. If you reboot the bubble it will no t be running any longer. You need to run itautomatically each time your bubble reboots.
rc.localWhen the system is rebooted, it will always execute the commands found in /e t c/rc.d/rc.lo cal. This gives the systemadministrator a simple and easy way to start special daemons like sshd or to run custom scripts.
After the command prompt, type the fo llowing commands:
bubble12:~/ssh-1.2.27$ su suusernamePassword: bubble12:~/ssh-1.2.27# cd /etc/rc.dbubble12:~/etc/rc.d# emacs rc.local
You should see something that looks like this:
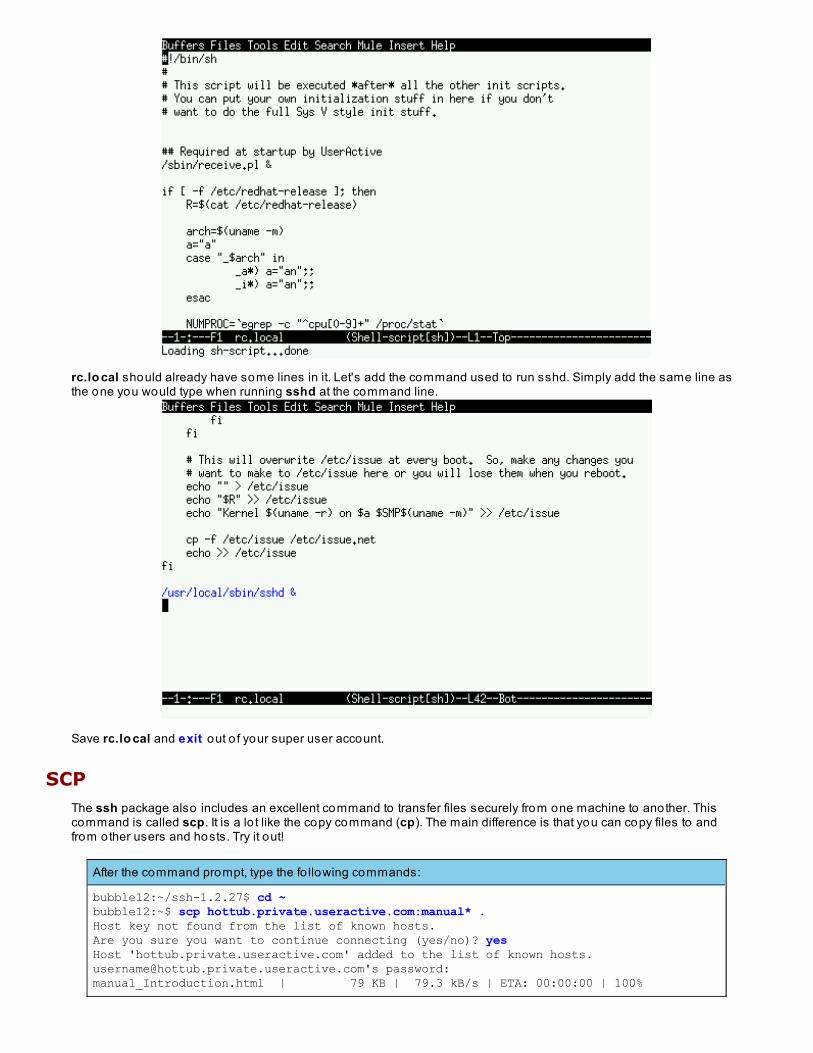
rc.lo cal should already have some lines in it. Let's add the command used to run sshd. Simply add the same line asthe one you would type when running sshd at the command line.
Save rc.lo cal and exit out o f your super user account.
SCPThe ssh package also includes an excellent command to transfer files securely from one machine to another. Thiscommand is called scp. It is a lo t like the copy command (cp). The main difference is that you can copy files to andfrom other users and hosts. Try it out!
After the command prompt, type the fo llowing commands:
bubble12:~/ssh-1.2.27$ cd ~bubble12:~$ scp hottub.private.useractive.com:manual* .Host key not found from the list of known hosts.Are you sure you want to continue connecting (yes/no)? yesHost 'hottub.private.useractive.com' added to the list of known [email protected]'s password: manual_Introduction.html | 79 KB | 79.3 kB/s | ETA: 00:00:00 | 100%

All files that have names beginning with manual will be copied from the ho t t ub to your current directory on the bubble(.), which in this case is your home directory.
scp also allows you to specify a username in front o f the hostname, just like ssh does. Congratulations on installingyour first program! As a system administrator, you will install many programs. Onward!
Copyright © 1998-2014 O'Reilly Media, Inc.
This work is licensed under a Creative Commons Attribution-ShareAlike 3.0 Unported License.See http://creativecommons.org/licenses/by-sa/3.0/legalcode for more information.
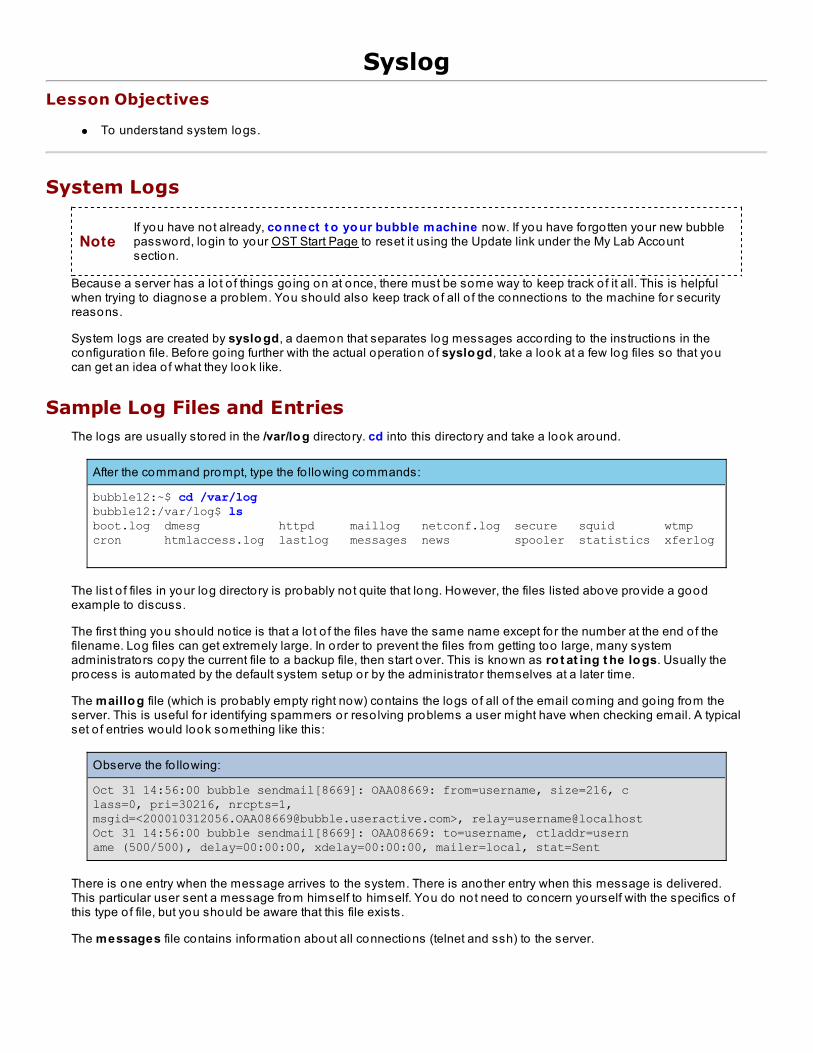
SyslogLesson Objectives
To understand system logs.
System Logs
NoteIf you have not already, co nnect t o yo ur bubble machine now. If you have forgotten your new bubblepassword, login to your OST Start Page to reset it using the Update link under the My Lab Accountsection.
Because a server has a lo t o f things go ing on at once, there must be some way to keep track o f it all. This is helpfulwhen trying to diagnose a problem. You should also keep track o f all o f the connections to the machine for securityreasons.
System logs are created by syslo gd, a daemon that separates log messages according to the instructions in theconfiguration file. Before go ing further with the actual operation o f syslo gd, take a look at a few log files so that youcan get an idea o f what they look like.
Sample Log Files and EntriesThe logs are usually stored in the /var/lo g directory. cd into this directory and take a look around.
After the command prompt, type the fo llowing commands:
bubble12:~$ cd /var/logbubble12:/var/log$ lsboot.log dmesg httpd maillog netconf.log secure squid wtmpcron htmlaccess.log lastlog messages news spooler statistics xferlog
The list o f files in your log directory is probably not quite that long. However, the files listed above provide a goodexample to discuss.
The first thing you should notice is that a lo t o f the files have the same name except fo r the number at the end o f thefilename. Log files can get extremely large. In order to prevent the files from getting too large, many systemadministrators copy the current file to a backup file, then start over. This is known as ro t at ing t he lo gs. Usually theprocess is automated by the default system setup or by the administrator themselves at a later time.
The maillo g file (which is probably empty right now) contains the logs o f all o f the email coming and go ing from theserver. This is useful fo r identifying spammers or reso lving problems a user might have when checking email. A typicalset o f entries would look something like this:
Observe the fo llowing:
Oct 31 14:56:00 bubble sendmail[8669]: OAA08669: from=username, size=216, class=0, pri=30216, nrcpts=1,msgid=<[email protected]>, relay=username@localhostOct 31 14:56:00 bubble sendmail[8669]: OAA08669: to=username, ctladdr=username (500/500), delay=00:00:00, xdelay=00:00:00, mailer=local, stat=Sent
There is one entry when the message arrives to the system. There is another entry when this message is delivered.This particular user sent a message from himself to himself. You do not need to concern yourself with the specifics o fthis type o f file, but you should be aware that this file exists.
The messages file contains information about all connections (telnet and ssh) to the server.
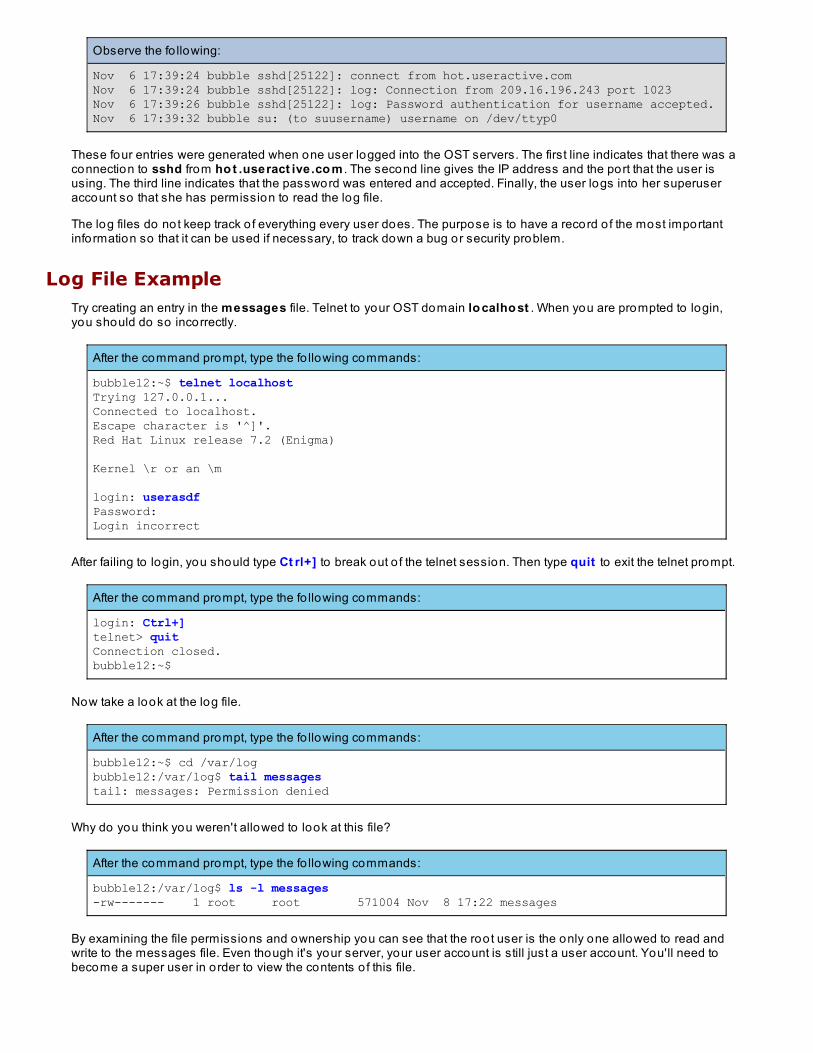
Observe the fo llowing:
Nov 6 17:39:24 bubble sshd[25122]: connect from hot.useractive.comNov 6 17:39:24 bubble sshd[25122]: log: Connection from 209.16.196.243 port 1023Nov 6 17:39:26 bubble sshd[25122]: log: Password authentication for username accepted.Nov 6 17:39:32 bubble su: (to suusername) username on /dev/ttyp0
These four entries were generated when one user logged into the OST servers. The first line indicates that there was aconnection to sshd from ho t .useract ive.co m . The second line gives the IP address and the port that the user isusing. The third line indicates that the password was entered and accepted. Finally, the user logs into her superuseraccount so that she has permission to read the log file.
The log files do not keep track o f everything every user does. The purpose is to have a record o f the most importantinformation so that it can be used if necessary, to track down a bug or security problem.
Log File ExampleTry creating an entry in the messages file. Telnet to your OST domain lo calho st . When you are prompted to login,you should do so incorrectly.
After the command prompt, type the fo llowing commands:
bubble12:~$ telnet localhostTrying 127.0.0.1...Connected to localhost.Escape character is '^]'.Red Hat Linux release 7.2 (Enigma)
Kernel \r or an \m
login: userasdfPassword: Login incorrect
After failing to login, you should type Ct rl+] to break out o f the telnet session. Then type quit to exit the telnet prompt.
After the command prompt, type the fo llowing commands:
login: Ctrl+]telnet> quitConnection closed.bubble12:~$
Now take a look at the log file.
After the command prompt, type the fo llowing commands:
bubble12:~$ cd /var/logbubble12:/var/log$ tail messagestail: messages: Permission denied
Why do you think you weren't allowed to look at this file?
After the command prompt, type the fo llowing commands:
bubble12:/var/log$ ls -l messages-rw------- 1 root root 571004 Nov 8 17:22 messages
By examining the file permissions and ownership you can see that the root user is the only one allowed to read andwrite to the messages file. Even though it's your server, your user account is still just a user account. You'll need tobecome a super user in order to view the contents o f this file.
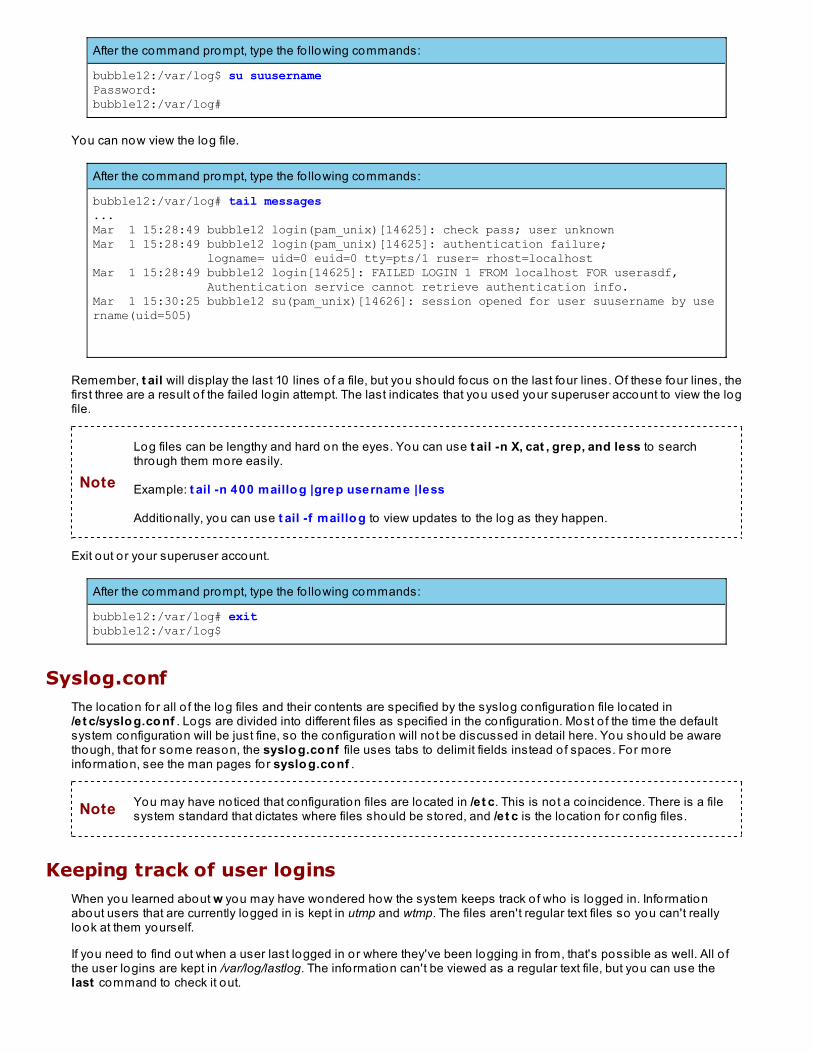
After the command prompt, type the fo llowing commands:
bubble12:/var/log$ su suusernamePassword:bubble12:/var/log#
You can now view the log file.
After the command prompt, type the fo llowing commands:
bubble12:/var/log# tail messages...Mar 1 15:28:49 bubble12 login(pam_unix)[14625]: check pass; user unknownMar 1 15:28:49 bubble12 login(pam_unix)[14625]: authentication failure; logname= uid=0 euid=0 tty=pts/1 ruser= rhost=localhostMar 1 15:28:49 bubble12 login[14625]: FAILED LOGIN 1 FROM localhost FOR userasdf, Authentication service cannot retrieve authentication info.Mar 1 15:30:25 bubble12 su(pam_unix)[14626]: session opened for user suusername by username(uid=505)
Remember, t ail will display the last 10 lines o f a file, but you should focus on the last four lines. Of these four lines, thefirst three are a result o f the failed login attempt. The last indicates that you used your superuser account to view the logfile.
Note
Log files can be lengthy and hard on the eyes. You can use t ail -n X, cat , grep, and less to searchthrough them more easily.
Example: t ail -n 400 maillo g |grep username |less
Additionally, you can use t ail -f maillo g to view updates to the log as they happen.
Exit out or your superuser account.
After the command prompt, type the fo llowing commands:
bubble12:/var/log# exitbubble12:/var/log$
Syslog.confThe location for all o f the log files and their contents are specified by the syslog configuration file located in/e t c/syslo g.co nf . Logs are divided into different files as specified in the configuration. Most o f the time the defaultsystem configuration will be just fine, so the configuration will no t be discussed in detail here. You should be awarethough, that fo r some reason, the syslo g.co nf file uses tabs to delimit fields instead o f spaces. For moreinformation, see the man pages for syslo g.co nf .
Note You may have noticed that configuration files are located in /e t c. This is not a co incidence. There is a filesystem standard that dictates where files should be stored, and /e t c is the location for config files.
Keeping track of user loginsWhen you learned about w you may have wondered how the system keeps track o f who is logged in. Informationabout users that are currently logged in is kept in utmp and wtmp. The files aren't regular text files so you can't reallylook at them yourself.
If you need to find out when a user last logged in or where they've been logging in from, that's possible as well. All o fthe user logins are kept in /var/log/lastlog. The information can't be viewed as a regular text file, but you can use thelast command to check it out.

Type the fo llowing at the Unix prompt:
bubble12:~$ last username |head -n 5username pts/0 bubble.useractiv Tue Nov 21 11:50 still logged inusername pts/0 hottub Mon Nov 20 23:57 - 23:59 (00:01)username pts/0 hottub Mon Nov 20 20:04 - 21:47 (01:42)username pts/0 hottub Mon Nov 20 18:56 - 19:00 (00:04)username pts/0 hottub Mon Nov 20 18:19 - 18:47 (00:27)
This shows the last 5 times that "username" has logged in. I suggest you don't type last without any arguments orwithout piping it through a filter. Otherwise it will print all o f the login information for all o f the users. If it hasn't beencleared in awhile the lastlog can get pretty big. We can also grep to see the last 5 logins from the bubble to the hottub.
Type the fo llowing at the Unix prompt:
hottub:~$ last |grep bubble |head -n 5username pts/62 bubble.useractiv Tue Nov 21 11:50 still logged inusername pts/13 bubble.useractiv Mon Nov 20 12:10 - 12:11 (00:01)username pts/13 bubble.useractiv Sun Nov 19 14:36 - 15:09 (00:33)username pts/13 bubble.useractiv Wed Nov 15 23:17 - 23:24 (00:06)somedude pts/13 bubble.useractiv Wed Nov 15 12:33 - 17:14 (04:41)
Keep in mind that your lastlog is go ing to be different than mine. So you'll probably want to try to look for a differenthost. Notice that with this method I was also able to see that "somedude" logged in from bubble as well as"username."
Other log filesThere are a few other logs files that you should know about that aren't functions o f syslogd.
First, the cron daemon--that we'll learn about in the next lesson--keeps track o f its own logs in /var/log/cron. Entries inthe cron log look like this:
Observe the fo llowing:
root (11/21-15:01:00-10617) CMD (run-parts /etc/cron.hourly)username (11/21-15:08:00-10641) CMD (echo "hello" 1> /tmp/test 2> /tmp/test)
They're very simple really. You see the user the command was run for, the time it was executed, and the commanditself.
Cron isn't the only program that creates its own log files. Chances are your webserver does as well. The only problemis that the location o f the webserver logs tends to vary system by system. Places to look would be /var/log/httpd o r/httpd/logs.
Copyright © 1998-2014 O'Reilly Media, Inc.
This work is licensed under a Creative Commons Attribution-ShareAlike 3.0 Unported License.See http://creativecommons.org/licenses/by-sa/3.0/legalcode for more information.
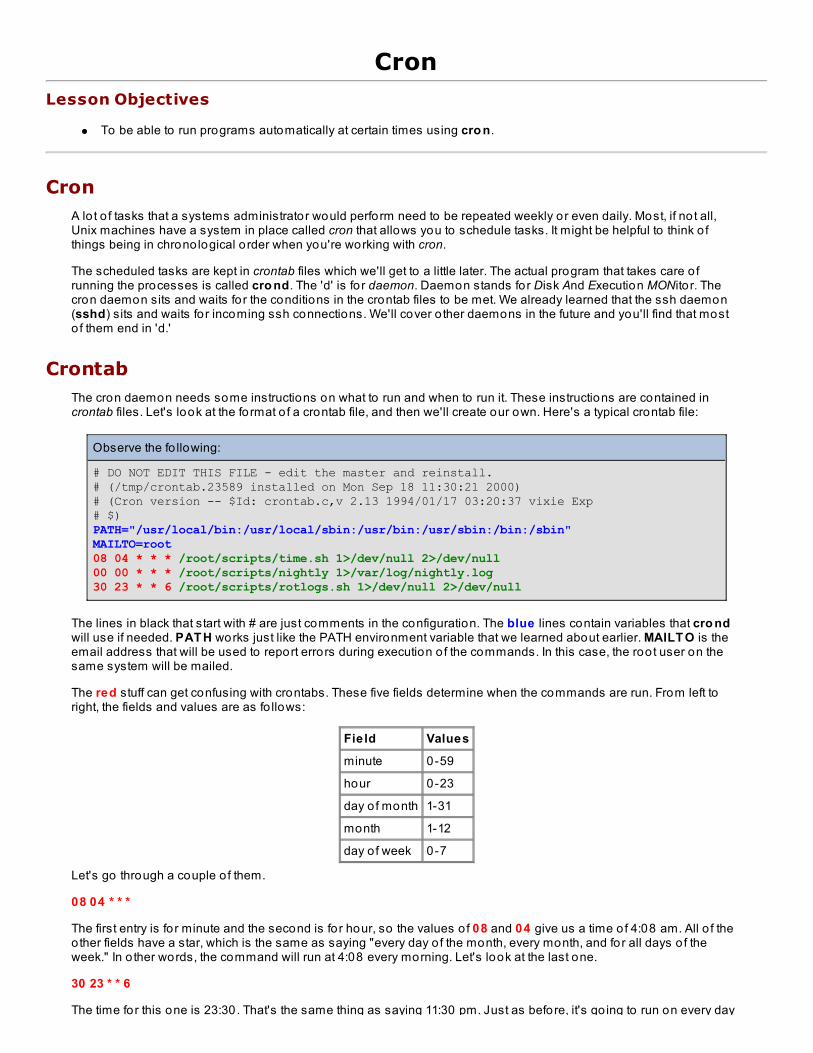
CronLesson Objectives
To be able to run programs automatically at certain times using cro n.
CronA lo t o f tasks that a systems administrator would perform need to be repeated weekly or even daily. Most, if no t all,Unix machines have a system in place called cron that allows you to schedule tasks. It might be helpful to think o fthings being in chrono logical o rder when you're working with cron.
The scheduled tasks are kept in crontab files which we'll get to a little later. The actual program that takes care o frunning the processes is called cro nd. The 'd' is fo r daemon. Daemon stands for Disk And Execution MONito r. Thecron daemon sits and waits fo r the conditions in the crontab files to be met. We already learned that the ssh daemon(sshd) sits and waits fo r incoming ssh connections. We'll cover o ther daemons in the future and you'll find that mosto f them end in 'd.'
CrontabThe cron daemon needs some instructions on what to run and when to run it. These instructions are contained incrontab files. Let's look at the format o f a crontab file, and then we'll create our own. Here's a typical crontab file:
Observe the fo llowing:
# DO NOT EDIT THIS FILE - edit the master and reinstall.# (/tmp/crontab.23589 installed on Mon Sep 18 11:30:21 2000)# (Cron version -- $Id: crontab.c,v 2.13 1994/01/17 03:20:37 vixie Exp# $)PATH="/usr/local/bin:/usr/local/sbin:/usr/bin:/usr/sbin:/bin:/sbin"MAILTO=root08 04 * * * /root/scripts/time.sh 1>/dev/null 2>/dev/null00 00 * * * /root/scripts/nightly 1>/var/log/nightly.log30 23 * * 6 /root/scripts/rotlogs.sh 1>/dev/null 2>/dev/null
The lines in black that start with # are just comments in the configuration. The blue lines contain variables that cro ndwill use if needed. PAT H works just like the PATH environment variable that we learned about earlier. MAILT O is theemail address that will be used to report errors during execution o f the commands. In this case, the root user on thesame system will be mailed.
The red stuff can get confusing with crontabs. These five fields determine when the commands are run. From left toright, the fields and values are as fo llows:
Field Values
minute 0-59
hour 0-23
day o f month 1-31
month 1-12
day o f week 0-7
Let's go through a couple o f them.
08 04 * * *
The first entry is fo r minute and the second is fo r hour, so the values o f 08 and 04 give us a time o f 4:08 am. All o f theother fields have a star, which is the same as saying "every day o f the month, every month, and for all days o f theweek." In o ther words, the command will run at 4:08 every morning. Let's look at the last one.
30 23 * * 6
The time for this one is 23:30. That's the same thing as saying 11:30 pm. Just as before, it's go ing to run on every day
The time for this one is 23:30. That's the same thing as saying 11:30 pm. Just as before, it's go ing to run on every dayof every month, but this time, it's only go ing to run if it's Saturday.
Note Sunday can be represented by both 0 and 7.
We can also select multiple times by using commas. For example, if we wanted the previous example to run onWednesdays as well, we'd do the fo llowing:
30 23 * * 3,6
The green parts from above are the command lines that cron will run.
/ro o t /script s/ro t lo gs.sh 1>/dev/null 2>/dev/null
The ro t lo gs.sh script is located in /root/scripts. (It's purpose is to ro tate the logs on the server from which this crontabexample was taken.) It's always a good idea to include the full path to the command. What's the o ther stuff though?
More on Redirecting OutputIn previous lessons you learned how to redirect the output o f a command to a file. You can do the same thing with acommand run by cron. If you don't, any output will be written to the conso le. So essentially, unless you're physicallysitting at the machine you'll have no idea what happened. Here's the command from the example again:
/ro o t /script s/ro t lo gs.sh 1>/dev/null 2>/dev/null
The 1 and the 2 stand for STDOUT (standard output) and STDERR (standard error), respectively. They are separateforms o f output, so we need to distinguish between them when we redirect the output.
In the case above, instead o f writing the output to a file, we just redirect it to /dev/null. We do this when we don't carewhat the output is and we'd rather it didn't clutter up the conso le. /dev/null is kind o f like a black ho le, anything you putinto it will disappear fo rever. It's the big Nothing o f the Unix world.
Editing your CrontabThe location o f the crontab files can vary from system to system, but typical places to look would be:
/var/spoo l/cron/var/cron
Additionally, RedHat Linux contains the crontab information for the root user in several directories under /etc.
Although the crontab files are just text, you should use the cro nt ab command to edit them.
After the command prompt, type the fo llowing commands:
bubble12:~$ crontab -e
Ahh! What's that? Remember when I to ld you about vi? Well, there it is. The -e flag tells crontab that we want to use thedefault edito r and the default edito r in this case happens to be vi. Do you remember how to exit? If no t, type ESC then:q.
Before we run cro nt ab again. Let's set our default edito r to something more familiar, like pico . We do this by settingthe EDITOR environment variable. Do you remember how to do this?
After the command prompt, type the fo llowing commands:
bubble12:~$ export EDITOR=pico
Let's try to edit our crontab again. You may want to add that line to your .bashrc as well.
After the command prompt, type the fo llowing commands:
bubble12:~$ crontab -e
Yeah, that's better.
By default, cro nt ab will try to edit the crontab o f the user that runs it. So if you're currently the superuser, you will beediting root's crontab. Otherwise it will be your individual user crontab that gets edited. Keep in mind though, cro nd willrun the command as the user who 's crontab made the command. So if the command needs to be run as root, it betterbe in root's crontab.
Note Root can edit anyone's crontab by using the -u flag.
Your crontab file is probably empty at this po int. Let's add a simple entry.
Type the fo llowing into your editor:
45 * * * * /bin/echo "hello" 1> /tmp/test 2> /tmp/test
The time or number o f minutes you choose for your crontab refers to the part o f the hour your command will execute. Ifyou choose 45 fo r the minutes in your crontab, your command will execute at 45 minutes past the hour, every hour. Tosave time when you're testing, pick a time that's 5-10 minutes into the future. Also, make sure you hit ent er at the endof that crontab line. If there isn't a newline at the end, it won't run.
Now save and exit. (C-x y <ent er> fo r pico) Just to prove that cron will create the output file, let's check to make sureit's not there now.
After the command prompt, type the fo llowing commands:
bubble12:~$ ls -la /tmp/testls: /tmp/test: No such file or directory
Alright, good. Now let's just wait a few minutes to let cron run the command. When the time you selected is past, runthe ls command again. (You can check the system time with dat e .)
After the command prompt, type the fo llowing commands:
bubble12:~$ ls -la /tmp/test-rw-r--r-- 1 username username 6 Oct 31 15:45 /tmp/testbubble12:~$ cat /tmp/testhello
Excellent. Notice that the file modification time is 45 minutes, just like it should be. Keep in mind that the crontab entrywe created will run that command every hour. Let's try another one.
After the command prompt, type the fo llowing commands:
45 13 * * * /bin/echo "hello" 1> /tmp/test 2> /tmp/test
Can you explain what's happening here? What time do you think this would execute? Good job! See you soon for thefinal lesson!
Copyright © 1998-2014 O'Reilly Media, Inc.
This work is licensed under a Creative Commons Attribution-ShareAlike 3.0 Unported License.See http://creativecommons.org/licenses/by-sa/3.0/legalcode for more information.
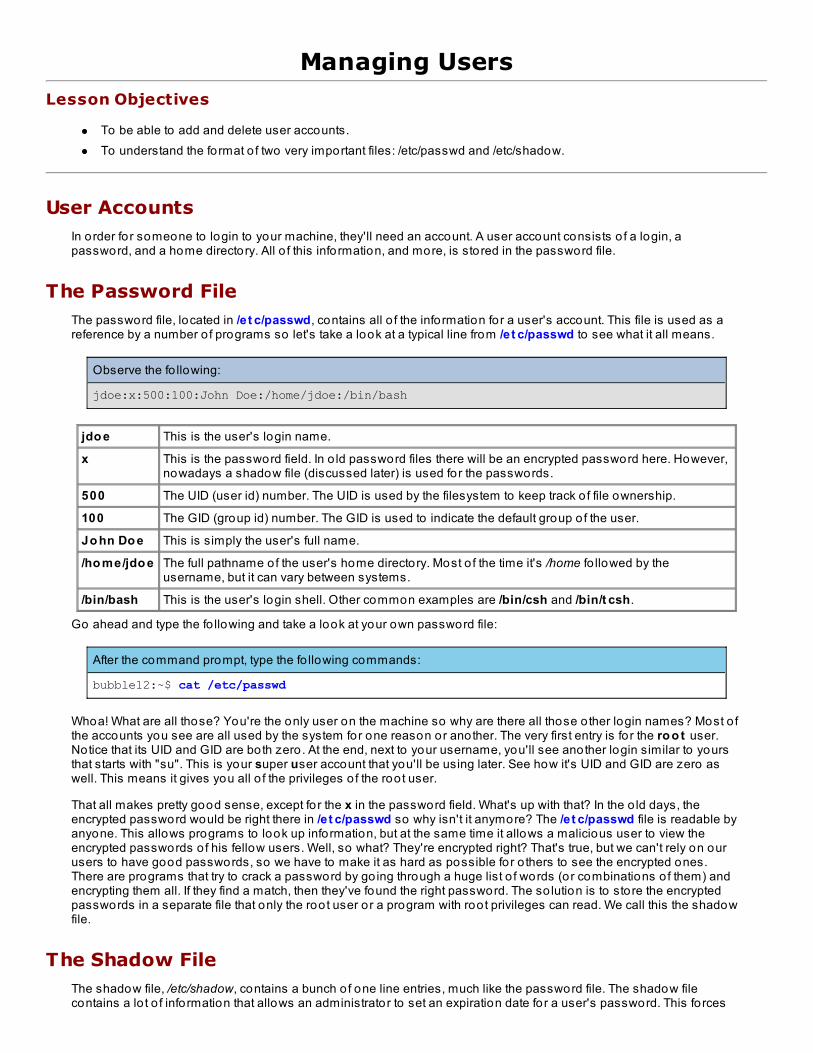
Managing UsersLesson Objectives
To be able to add and delete user accounts.To understand the format o f two very important files: /etc/passwd and /etc/shadow.
User AccountsIn order fo r someone to login to your machine, they'll need an account. A user account consists o f a login, apassword, and a home directory. All o f this information, and more, is stored in the password file.
The Password FileThe password file, located in /e t c/passwd, contains all o f the information for a user's account. This file is used as areference by a number o f programs so let's take a look at a typical line from /e t c/passwd to see what it all means.
Observe the fo llowing:
jdoe:x:500:100:John Doe:/home/jdoe:/bin/bash
jdo e This is the user's login name.
x This is the password field. In o ld password files there will be an encrypted password here. However,nowadays a shadow file (discussed later) is used for the passwords.
500 The UID (user id) number. The UID is used by the filesystem to keep track o f file ownership.
100 The GID (group id) number. The GID is used to indicate the default group o f the user.
Jo hn Do e This is simply the user's full name.
/ho me/jdo e The full pathname of the user's home directory. Most o f the time it's /home fo llowed by theusername, but it can vary between systems.
/bin/bash This is the user's login shell. Other common examples are /bin/csh and /bin/t csh.
Go ahead and type the fo llowing and take a look at your own password file:
After the command prompt, type the fo llowing commands:
bubble12:~$ cat /etc/passwd
Whoa! What are all those? You're the only user on the machine so why are there all those o ther login names? Most o fthe accounts you see are all used by the system for one reason or another. The very first entry is fo r the ro o t user.Notice that its UID and GID are both zero . At the end, next to your username, you'll see another login similar to yoursthat starts with "su". This is your super user account that you'll be using later. See how it's UID and GID are zero aswell. This means it gives you all o f the privileges o f the root user.
That all makes pretty good sense, except fo r the x in the password field. What's up with that? In the o ld days, theencrypted password would be right there in /e t c/passwd so why isn't it anymore? The /e t c/passwd file is readable byanyone. This allows programs to look up information, but at the same time it allows a malicious user to view theencrypted passwords o f his fellow users. Well, so what? They're encrypted right? That's true, but we can't rely on ourusers to have good passwords, so we have to make it as hard as possible for o thers to see the encrypted ones.There are programs that try to crack a password by go ing through a huge list o f words (or combinations o f them) andencrypting them all. If they find a match, then they've found the right password. The so lution is to store the encryptedpasswords in a separate file that only the root user or a program with root privileges can read. We call this the shadowfile.
The Shadow FileThe shadow file, /etc/shadow, contains a bunch o f one line entries, much like the password file. The shadow filecontains a lo t o f information that allows an administrator to set an expiration date for a user's password. This fo rces
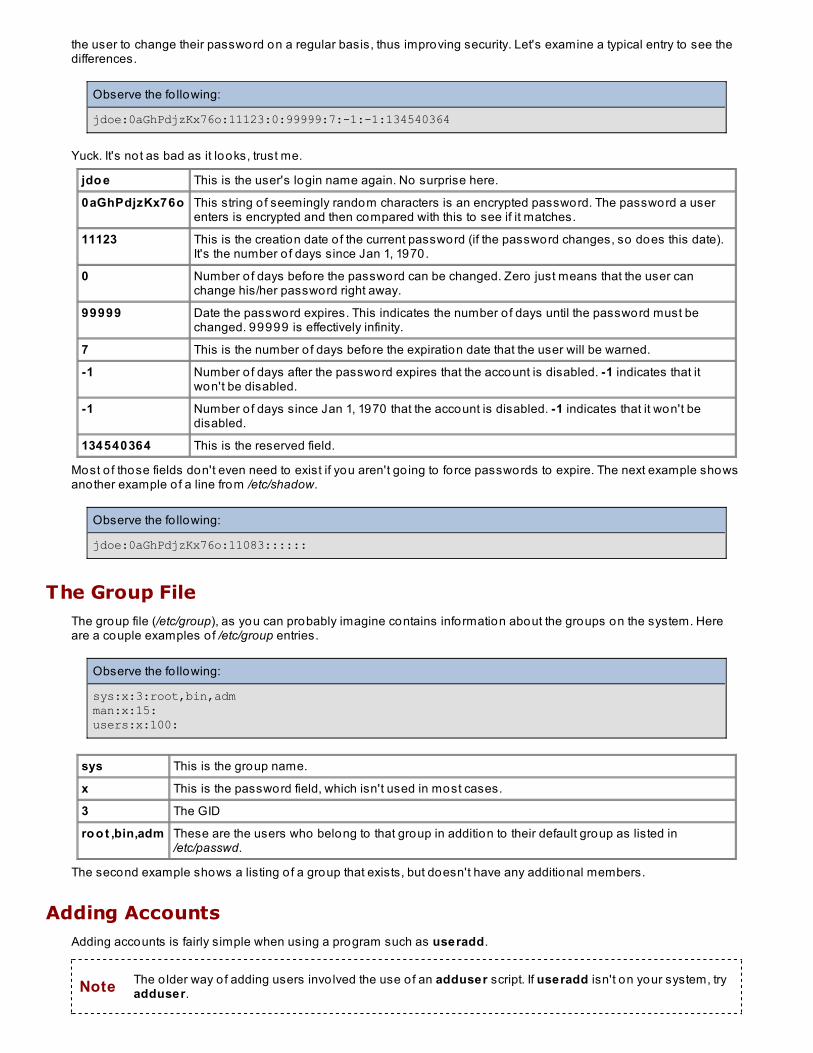
the user to change their password on a regular basis, thus improving security. Let's examine a typical entry to see thedifferences.
Observe the fo llowing:
jdoe:0aGhPdjzKx76o:11123:0:99999:7:-1:-1:134540364
Yuck. It's not as bad as it looks, trust me.
jdo e This is the user's login name again. No surprise here.
0aGhPdjzKx76o This string o f seemingly random characters is an encrypted password. The password a userenters is encrypted and then compared with this to see if it matches.
11123 This is the creation date o f the current password (if the password changes, so does this date).It's the number o f days since Jan 1, 1970.
0 Number o f days before the password can be changed. Zero just means that the user canchange his/her password right away.
99999 Date the password expires. This indicates the number o f days until the password must bechanged. 99999 is effectively infinity.
7 This is the number o f days before the expiration date that the user will be warned.
-1 Number o f days after the password expires that the account is disabled. -1 indicates that itwon't be disabled.
-1 Number o f days since Jan 1, 1970 that the account is disabled. -1 indicates that it won't bedisabled.
134540364 This is the reserved field.
Most o f those fields don't even need to exist if you aren't go ing to force passwords to expire. The next example showsanother example o f a line from /etc/shadow.
Observe the fo llowing:
jdoe:0aGhPdjzKx76o:11083::::::
The Group FileThe group file (/etc/group), as you can probably imagine contains information about the groups on the system. Hereare a couple examples o f /etc/group entries.
Observe the fo llowing:
sys:x:3:root,bin,admman:x:15:users:x:100:
sys This is the group name.
x This is the password field, which isn't used in most cases.
3 The GID
ro o t ,bin,adm These are the users who belong to that group in addition to their default group as listed in/etc/passwd.
The second example shows a listing o f a group that exists, but doesn't have any additional members.
Adding AccountsAdding accounts is fairly simple when using a program such as useradd.
Note The o lder way o f adding users invo lved the use o f an adduser script. If useradd isn't on your system, tryadduser.
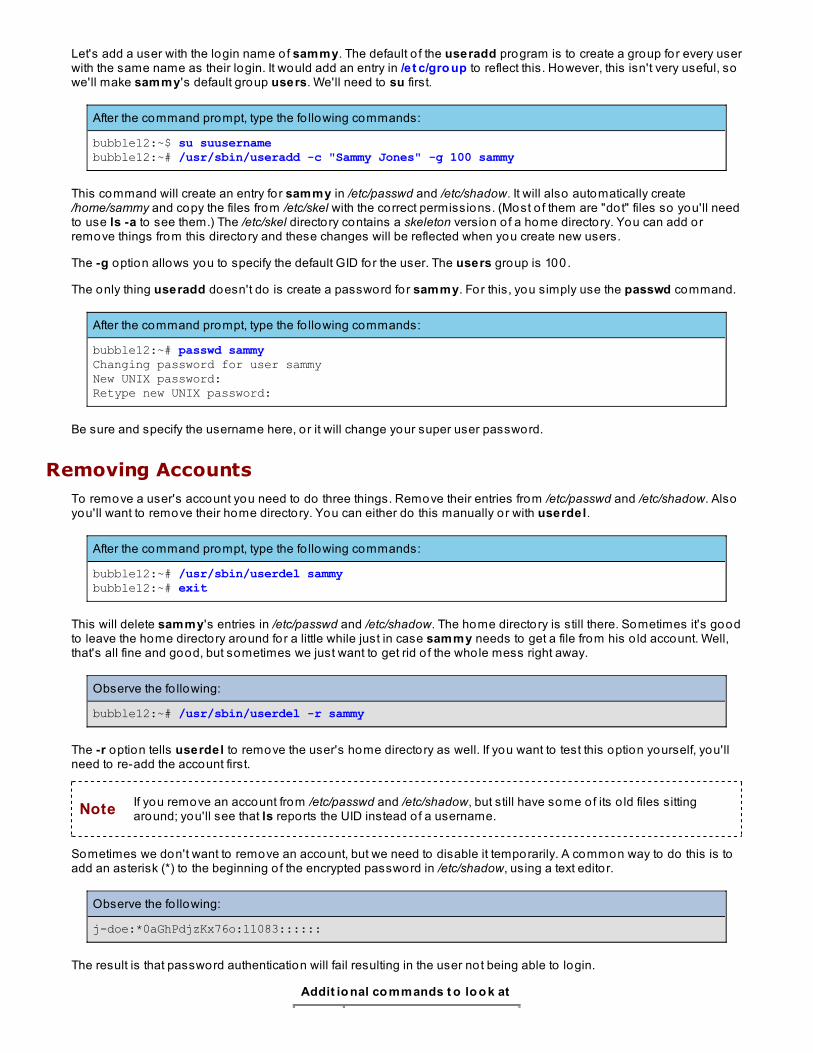
Let's add a user with the login name of sammy. The default o f the useradd program is to create a group for every userwith the same name as their login. It would add an entry in /e t c/gro up to reflect this. However, this isn't very useful, sowe'll make sammy's default group users. We'll need to su first.
After the command prompt, type the fo llowing commands:
bubble12:~$ su suusername bubble12:~# /usr/sbin/useradd -c "Sammy Jones" -g 100 sammy
This command will create an entry fo r sammy in /etc/passwd and /etc/shadow. It will also automatically create/home/sammy and copy the files from /etc/skel with the correct permissions. (Most o f them are "dot" files so you'll needto use ls -a to see them.) The /etc/skel directory contains a skeleton version o f a home directory. You can add orremove things from this directory and these changes will be reflected when you create new users.
The -g option allows you to specify the default GID for the user. The users group is 100.
The only thing useradd doesn't do is create a password for sammy. For this, you simply use the passwd command.
After the command prompt, type the fo llowing commands:
bubble12:~# passwd sammyChanging password for user sammyNew UNIX password: Retype new UNIX password:
Be sure and specify the username here, or it will change your super user password.
Removing AccountsTo remove a user's account you need to do three things. Remove their entries from /etc/passwd and /etc/shadow. Alsoyou'll want to remove their home directory. You can either do this manually or with userdel.
After the command prompt, type the fo llowing commands:
bubble12:~# /usr/sbin/userdel sammybubble12:~# exit
This will delete sammy's entries in /etc/passwd and /etc/shadow. The home directory is still there. Sometimes it's goodto leave the home directory around for a little while just in case sammy needs to get a file from his o ld account. Well,that's all fine and good, but sometimes we just want to get rid o f the whole mess right away.
Observe the fo llowing:
bubble12:~# /usr/sbin/userdel -r sammy
The -r option tells userdel to remove the user's home directory as well. If you want to test this option yourself, you'llneed to re-add the account first.
Note If you remove an account from /etc/passwd and /etc/shadow, but still have some of its o ld files sittingaround; you'll see that ls reports the UID instead o f a username.
Sometimes we don't want to remove an account, but we need to disable it temporarily. A common way to do this is toadd an asterisk (*) to the beginning o f the encrypted password in /etc/shadow, using a text edito r.
Observe the fo llowing:
j-doe:*0aGhPdjzKx76o:11083::::::
The result is that password authentication will fail resulting in the user not being able to login.
Addit io nal co mmands t o lo o k at

cho wn Change ownership o f a file(s)
chgrp Change the group o f a file(s)
Copyright © 1998-2014 O'Reilly Media, Inc.
This work is licensed under a Creative Commons Attribution-ShareAlike 3.0 Unported License.See http://creativecommons.org/licenses/by-sa/3.0/legalcode for more information.