Embed Size (px)
Citation preview
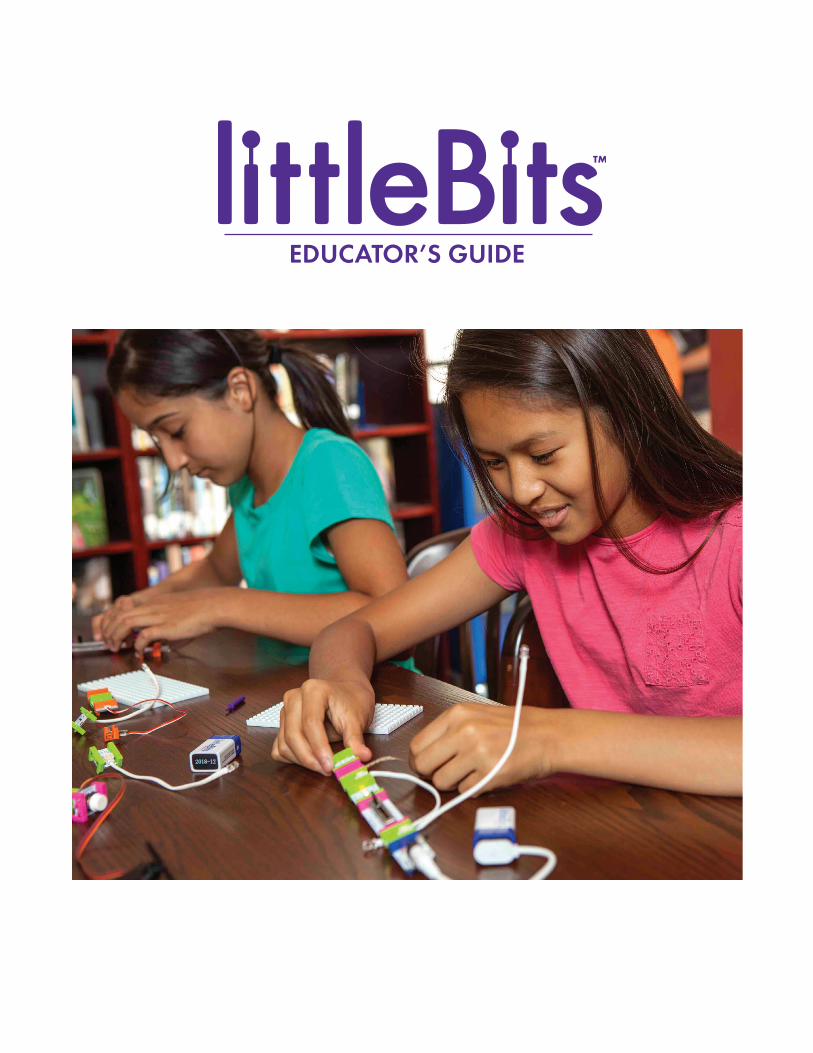
EDUCATOR’S GUIDE
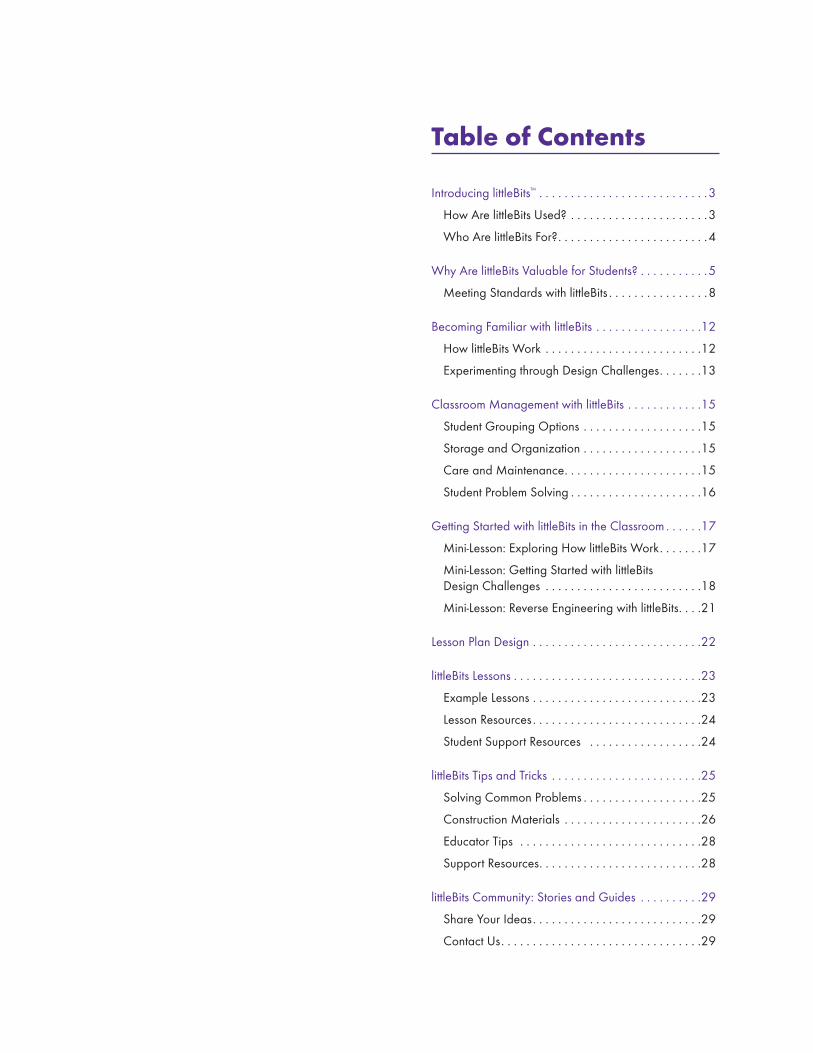
Table of Contents
Introducing littleBits™ . . . . . . . . . . . . . . . . . . . . . . . . . . .3
How Are littleBits Used? . . . . . . . . . . . . . . . . . . . . . .3
Who Are littleBits For? . . . . . . . . . . . . . . . . . . . . . . . .4
Why Are littleBits Valuable for Students? . . . . . . . . . . .5
Meeting Standards with littleBits . . . . . . . . . . . . . . . .8
Becoming Familiar with littleBits . . . . . . . . . . . . . . . . .12
How littleBits Work . . . . . . . . . . . . . . . . . . . . . . . . .12
Experimenting through Design Challenges . . . . . . .13
Classroom Management with littleBits . . . . . . . . . . . .15
Student Grouping Options . . . . . . . . . . . . . . . . . . .15
Storage and Organization . . . . . . . . . . . . . . . . . . .15
Care and Maintenance . . . . . . . . . . . . . . . . . . . . . .15
Student Problem Solving . . . . . . . . . . . . . . . . . . . . .16
Getting Started with littleBits in the Classroom . . . . . .17
Mini-Lesson: Exploring How littleBits Work . . . . . . .17
Mini-Lesson: Getting Started with littleBits Design Challenges . . . . . . . . . . . . . . . . . . . . . . . . .18
Mini-Lesson: Reverse Engineering with littleBits . . . .21
Lesson Plan Design . . . . . . . . . . . . . . . . . . . . . . . . . . .22
littleBits Lessons . . . . . . . . . . . . . . . . . . . . . . . . . . . . . .23
Example Lessons . . . . . . . . . . . . . . . . . . . . . . . . . . .23
Lesson Resources . . . . . . . . . . . . . . . . . . . . . . . . . . .24
Student Support Resources . . . . . . . . . . . . . . . . . .24
littleBits Tips and Tricks . . . . . . . . . . . . . . . . . . . . . . . .25
Solving Common Problems . . . . . . . . . . . . . . . . . . .25
Construction Materials . . . . . . . . . . . . . . . . . . . . . .26
Educator Tips . . . . . . . . . . . . . . . . . . . . . . . . . . . . .28
Support Resources . . . . . . . . . . . . . . . . . . . . . . . . . .28
littleBits Community: Stories and Guides . . . . . . . . . .29
Share Your Ideas . . . . . . . . . . . . . . . . . . . . . . . . . . .29
Contact Us . . . . . . . . . . . . . . . . . . . . . . . . . . . . . . . .29
3Educator’s Guide
Introducing littleBits™
At littleBits™, our mission is to empower everyone to create inventions, large and small .
littleBits makes it easy for both teachers and students to engage in STEAM by using a universal, 21st-century language: electronic building blocks . We are surrounded by technology every day and yet have little idea how it works or how to create with it . littleBits changes that .
The intuitive, color-coded Bits™ each have a specific function (ie. motion, lights, sound, sensors, internet connectivity), and all the Bits snap together with magnets to make larger circuits . Building circuits is simple and intuitive, allowing students to create powerful, sophisticated electronics in a matter of seconds . With an ever-expanding library of Bits, educators and students can grow their collection and engage in increasingly complex projects as their understanding of the system and Bits grows .
A global community of educators is using littleBits to ignite their students’ curiosity and engage them in active inquiry and problem solving. The flexibility and adaptability of the Bits mean students of all ages and abilities can use them to create very simple or very complex inventions . Both novice and experienced educators use littleBits as a cross-curricular, multisensory tool to reach students through multiple learning modalities .
HOW ARE LITTLEBITS USED?In addition to being used across all grade levels, littleBits can also be used across a variety of formal and informal learning environments .
In the classroom, educators use littleBits to supplement and enhance their existing curriculum, or often as part of a larger project-based unit. The open-ended design and real-world application of littleBits make it a natural fit for any project-based learning curriculum .
littleBits can be used as a material to enhance cross-curricular projects . By incorporating Bits into larger projects and assessments (for example, a diorama, poster, etc.), students are able to add another level of creativity and interactivity to their projects .
Some educators, particularly those with younger students, collaborate with older “buddy classes” to support inquiry and engage students in higher-level learning . littleBits can also be used as part of an independent learning center or choice time activity, serving as a hands-on learning resource for students who complete in-class assignments early . They are also valuable as an in-class contingency plan for the absent educator .
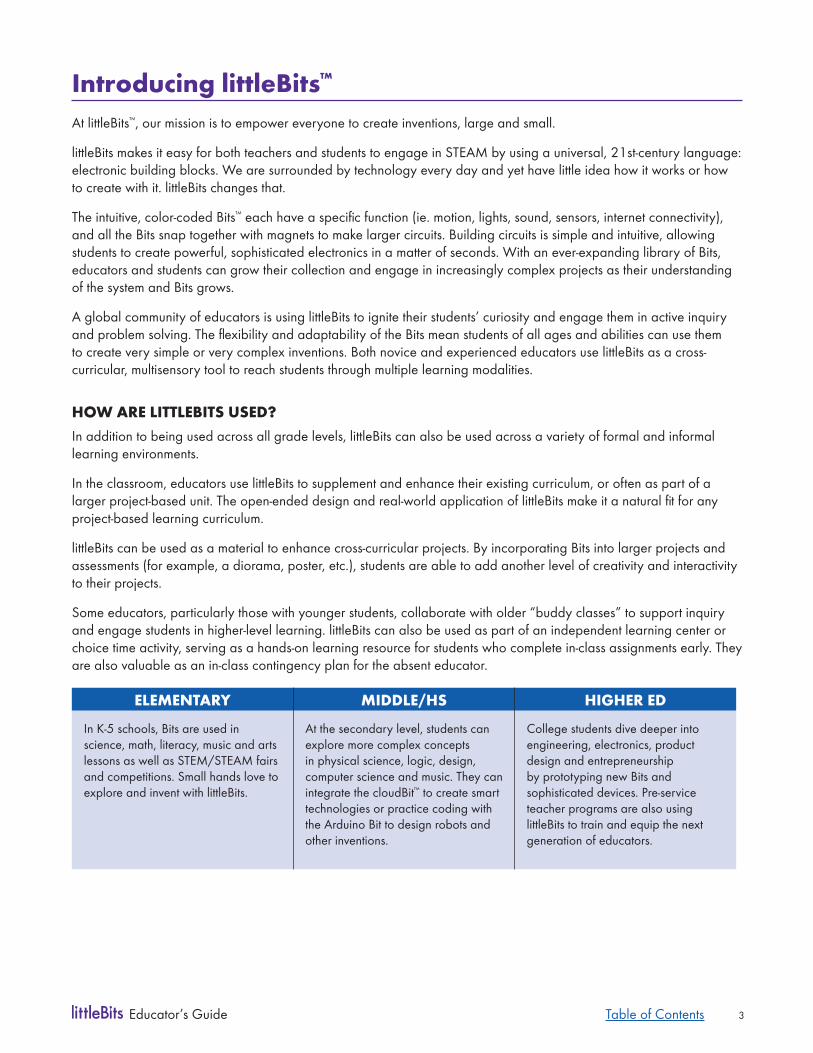
ELEMENTARY MIDDLE/HS HIGHER ED
In K-5 schools, Bits are used in science, math, literacy, music and arts lessons as well as STEM/STEAM fairs and competitions . Small hands love to explore and invent with littleBits .
At the secondary level, students can explore more complex concepts in physical science, logic, design, computer science and music . They can integrate the cloudBit™ to create smart technologies or practice coding with the Arduino Bit to design robots and other inventions .
College students dive deeper into engineering, electronics, product design and entrepreneurship by prototyping new Bits and sophisticated devices . Pre-service teacher programs are also using littleBits to train and equip the next generation of educators .
Table of Contents
4Educator’s Guide
Beyond the classroomEducators are finding creative ways to use littleBits with students in less formal settings . Before-school and after-school programs and clubs can be an effective way to attract students to science, math, and engineering concepts, and can target underrepresented populations such as girls . Other implementation models include summer school and remedial intervention programs .
In addition, makerspaces are being implemented in school library programs to encourage innovation and creative design . Educator-led design workshops give students an opportunity to experiment with littleBits in open-ended design challenges .
WHO ARE LITTLEBITS FOR?littleBits is a full range tool for students across all grade and ability levels . While the products are recommended for ages 8 and up, successful programs have been run with younger students under adult supervision .
Students can work with littleBits at their own level and pace thanks to the opened-ended design . From elementary school to college and from special education to gifted and talented programs, littleBits is a useful hands-on learning tool for all students . littleBits also encourages communication and collaboration, making it a useful tool for English language learners . Even students in university courses, pre-service teachers, and teachers involved in professional development use littleBits for hands-on learning about STEAM .
littleBits is a solution that brings all students together . Students are all included, regardless of gender, interests, culture, language, socio-economic class, or skill level . littleBits is not a prescriptive or linear tool . All students can innovate, invent, and achieve their creative vision with littleBits .
The home-school connectionlittleBits is a tool that can transition between learning spaces and environments . While technology literacy may begin within the school, littleBits can build strong home-school connections as students transfer their skills into an interest in electronics and design thinking at home . littleBits can foster both parent and child growth through shared invention and collaboration .
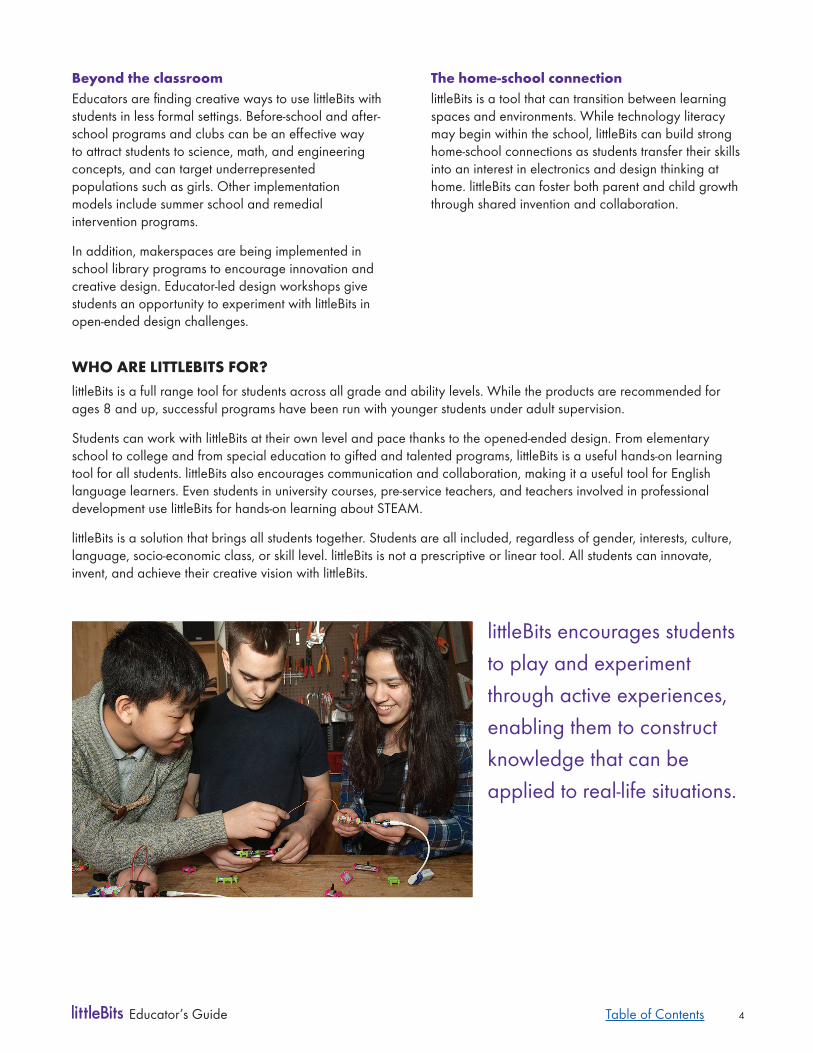
littleBits encourages students to play and experiment through active experiences, enabling them to construct knowledge that can be applied to real-life situations .
Table of Contents
5Educator’s Guide
Why Are littleBits Valuable for Students?littleBits’ products are at the intersection of important trends in education today: STEAM programs, the Maker Movement, project-based learning, personalized learning, 21st-century skills and design thinking . The electronic building blocks that make up the littleBits system represent a powerful and universal language to help students become not only intelligent consumers of technology, but also inventors of the world around them .
FROM THE CLASSROOM
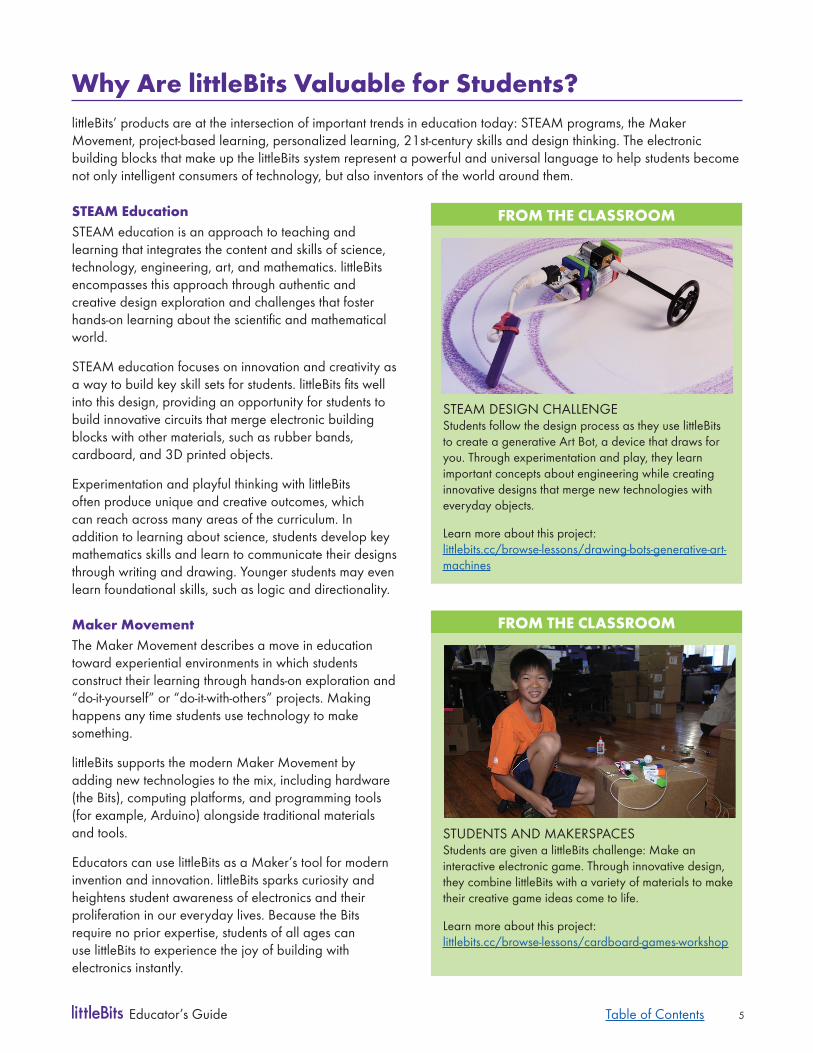
STEAM DESIGN CHALLENGEStudents follow the design process as they use littleBits to create a generative Art Bot, a device that draws for you . Through experimentation and play, they learn important concepts about engineering while creating innovative designs that merge new technologies with everyday objects .
Learn more about this project: littlebits .cc/browse-lessons/drawing-bots-generative-art-machines
STEAM EducationSTEAM education is an approach to teaching and learning that integrates the content and skills of science, technology, engineering, art, and mathematics . littleBits encompasses this approach through authentic and creative design exploration and challenges that foster hands-on learning about the scientific and mathematical world .
STEAM education focuses on innovation and creativity as a way to build key skill sets for students. littleBits fits well into this design, providing an opportunity for students to build innovative circuits that merge electronic building blocks with other materials, such as rubber bands, cardboard, and 3D printed objects .
Experimentation and playful thinking with littleBits often produce unique and creative outcomes, which can reach across many areas of the curriculum . In addition to learning about science, students develop key mathematics skills and learn to communicate their designs through writing and drawing . Younger students may even learn foundational skills, such as logic and directionality .
Maker MovementThe Maker Movement describes a move in education toward experiential environments in which students construct their learning through hands-on exploration and “do-it-yourself” or “do-it-with-others” projects . Making happens any time students use technology to make something .
littleBits supports the modern Maker Movement by adding new technologies to the mix, including hardware (the Bits), computing platforms, and programming tools (for example, Arduino) alongside traditional materials and tools .
Educators can use littleBits as a Maker’s tool for modern invention and innovation . littleBits sparks curiosity and heightens student awareness of electronics and their proliferation in our everyday lives . Because the Bits require no prior expertise, students of all ages can use littleBits to experience the joy of building with electronics instantly .
FROM THE CLASSROOM
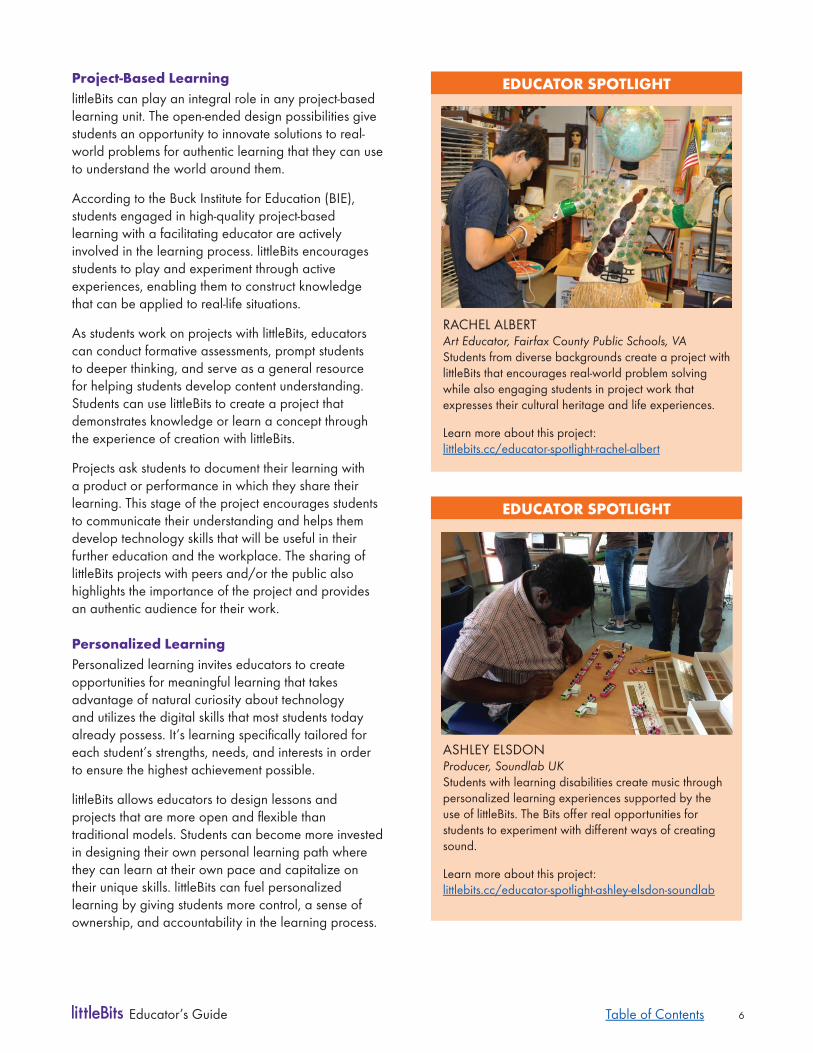
STUDENTS AND MAKERSPACESStudents are given a littleBits challenge: Make an interactive electronic game . Through innovative design, they combine littleBits with a variety of materials to make their creative game ideas come to life .
Learn more about this project: littlebits .cc/browse-lessons/cardboard-games-workshop
Table of Contents
6Educator’s Guide
Project-Based LearninglittleBits can play an integral role in any project-based learning unit . The open-ended design possibilities give students an opportunity to innovate solutions to real-world problems for authentic learning that they can use to understand the world around them .
According to the Buck Institute for Education (BIE), students engaged in high-quality project-based learning with a facilitating educator are actively involved in the learning process . littleBits encourages students to play and experiment through active experiences, enabling them to construct knowledge that can be applied to real-life situations .
As students work on projects with littleBits, educators can conduct formative assessments, prompt students to deeper thinking, and serve as a general resource for helping students develop content understanding . Students can use littleBits to create a project that demonstrates knowledge or learn a concept through the experience of creation with littleBits .
Projects ask students to document their learning with a product or performance in which they share their learning . This stage of the project encourages students to communicate their understanding and helps them develop technology skills that will be useful in their further education and the workplace . The sharing of littleBits projects with peers and/or the public also highlights the importance of the project and provides an authentic audience for their work .
Personalized LearningPersonalized learning invites educators to create opportunities for meaningful learning that takes advantage of natural curiosity about technology and utilizes the digital skills that most students today already possess. It’s learning specifi cally tailored for each student’s strengths, needs, and interests in order to ensure the highest achievement possible .
littleBits allows educators to design lessons and projects that are more open and fl exible than traditional models . Students can become more invested in designing their own personal learning path where they can learn at their own pace and capitalize on their unique skills . littleBits can fuel personalized learning by giving students more control, a sense of ownership, and accountability in the learning process .
EDUCATOR SPOTLIGHT
RACHEL ALBERTArt Educator, Fairfax County Public Schools, VAStudents from diverse backgrounds create a project with littleBits that encourages real-world problem solving while also engaging students in project work that expresses their cultural heritage and life experiences .
Learn more about this project: littlebits .cc/educator-spotlight-rachel-albert
EDUCATOR SPOTLIGHT
ASHLEY ELSDONProducer, Soundlab UKStudents with learning disabilities create music through personalized learning experiences supported by the use of littleBits. The Bits off er real opportunities for students to experiment with diff erent ways of creating sound .
Learn more about this project: littlebits .cc/educator-spotlight-ashley-elsdon-soundlab
Table of Contents
7Educator’s Guide
21st-Century SkillsWith a focus on real-world problem solving with technology and critical thinking, littleBits helps students develop key 21st-century skills for learning and career readiness . They provide a natural environment for students to practice collaboration, critical thinking, communication, and creative design . These skills, outlined by the Partnership for 21st Century Learning, are vital for today’s students to survive in tomorrow’s job market. Twentieth century skills ― rote memorization, repetitive tasks and general knowledge ― just won’t cut it.
Although students can work on littleBits projects individually, most projects involve small groups . Collaboration is perhaps the most important 21st-century skill, one that is consistently mentioned as desirable for the workplace . Collaboration is one of the ways in which littleBits connects students to the real world as they also work with students in other grades, schools, or even countries, and with community mentors and experts .
Design ThinkingStudents use littleBits to prototype solutions to authentic problems and implement design solutions . The Bits are easy to use, allowing students to come up with more sophisticated solutions as part of the design thinking process developed by Stanford University, in which students empathize, defi ne, ideate, prototype, and test design solutions . littleBits creates a low-risk environment for students to experiment with ideas that may not have been possible before .
Once students design and test prototypes, they may revisit the iterative design process to improve upon their designs and develop working prototypes that could potentially be taken to market or “marketed” in the classroom . As students take action on their products, they develop entrepreneurship skills in business strategy, marketing, branding, and fi nance.
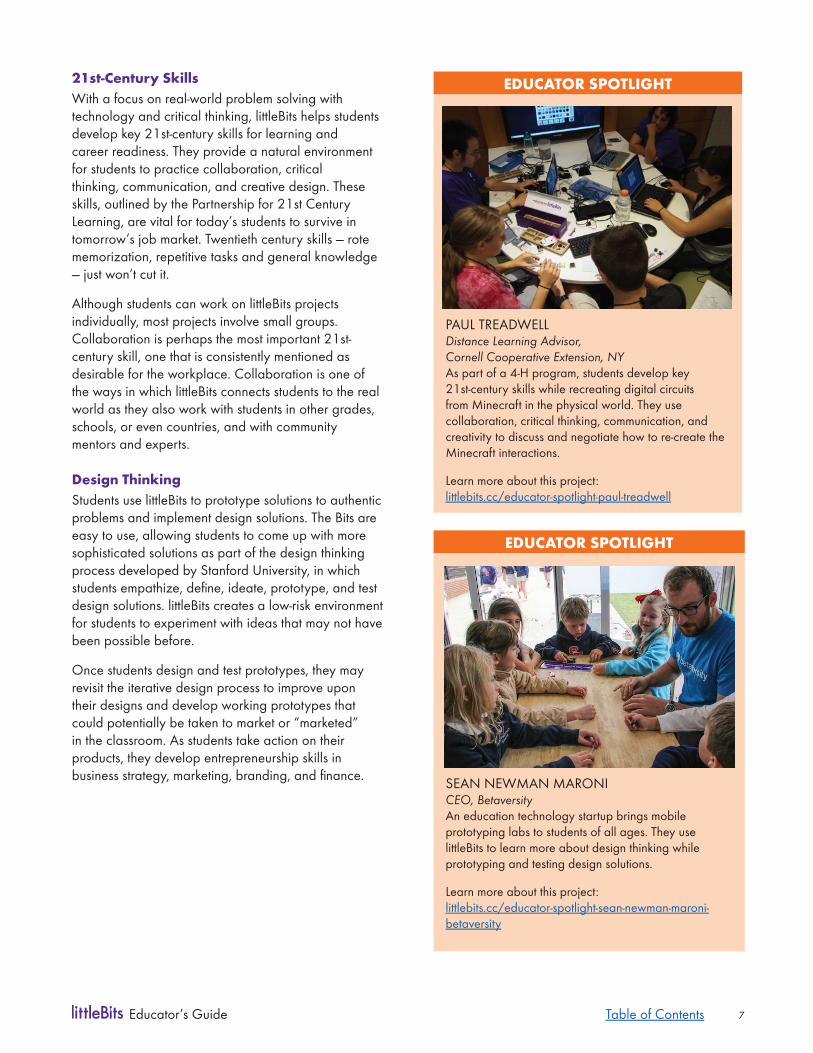
EDUCATOR SPOTLIGHT
PAUL TREADWELLDistance Learning Advisor, Cornell Cooperative Extension, NYAs part of a 4-H program, students develop key 21st-century skills while recreating digital circuits from Minecraft in the physical world . They use collaboration, critical thinking, communication, and creativity to discuss and negotiate how to re-create the Minecraft interactions .
Learn more about this project: littlebits .cc/educator-spotlight-paul-treadwell
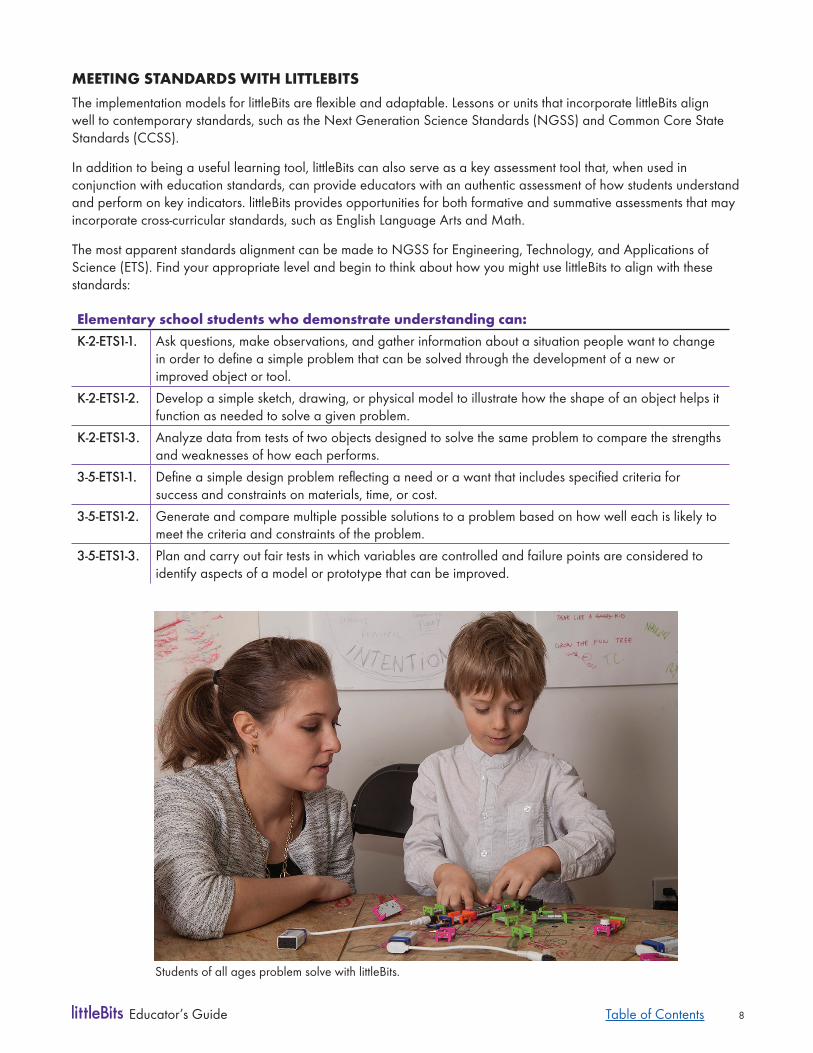
EDUCATOR SPOTLIGHT
SEAN NEWMAN MARONICEO, BetaversityAn education technology startup brings mobile prototyping labs to students of all ages . They use littleBits to learn more about design thinking while prototyping and testing design solutions .
Learn more about this project: littlebits .cc/educator-spotlight-sean-newman-maroni-betaversity
Table of Contents
8Educator’s Guide
MEETING STANDARDS WITH LITTLEBITSThe implementation models for littleBits are flexible and adaptable. Lessons or units that incorporate littleBits align well to contemporary standards, such as the Next Generation Science Standards (NGSS) and Common Core State Standards (CCSS).
In addition to being a useful learning tool, littleBits can also serve as a key assessment tool that, when used in conjunction with education standards, can provide educators with an authentic assessment of how students understand and perform on key indicators . littleBits provides opportunities for both formative and summative assessments that may incorporate cross-curricular standards, such as English Language Arts and Math .
The most apparent standards alignment can be made to NGSS for Engineering, Technology, and Applications of Science (ETS). Find your appropriate level and begin to think about how you might use littleBits to align with these standards:
Elementary school students who demonstrate understanding can:K-2-ETS1-1. Ask questions, make observations, and gather information about a situation people want to change
in order to define a simple problem that can be solved through the development of a new or improved object or tool .
K-2-ETS1-2. Develop a simple sketch, drawing, or physical model to illustrate how the shape of an object helps it function as needed to solve a given problem .
K-2-ETS1-3. Analyze data from tests of two objects designed to solve the same problem to compare the strengths and weaknesses of how each performs .
3-5-ETS1-1. Define a simple design problem reflecting a need or a want that includes specified criteria for success and constraints on materials, time, or cost .
3-5-ETS1-2. Generate and compare multiple possible solutions to a problem based on how well each is likely to meet the criteria and constraints of the problem .
3-5-ETS1-3. Plan and carry out fair tests in which variables are controlled and failure points are considered to identify aspects of a model or prototype that can be improved .
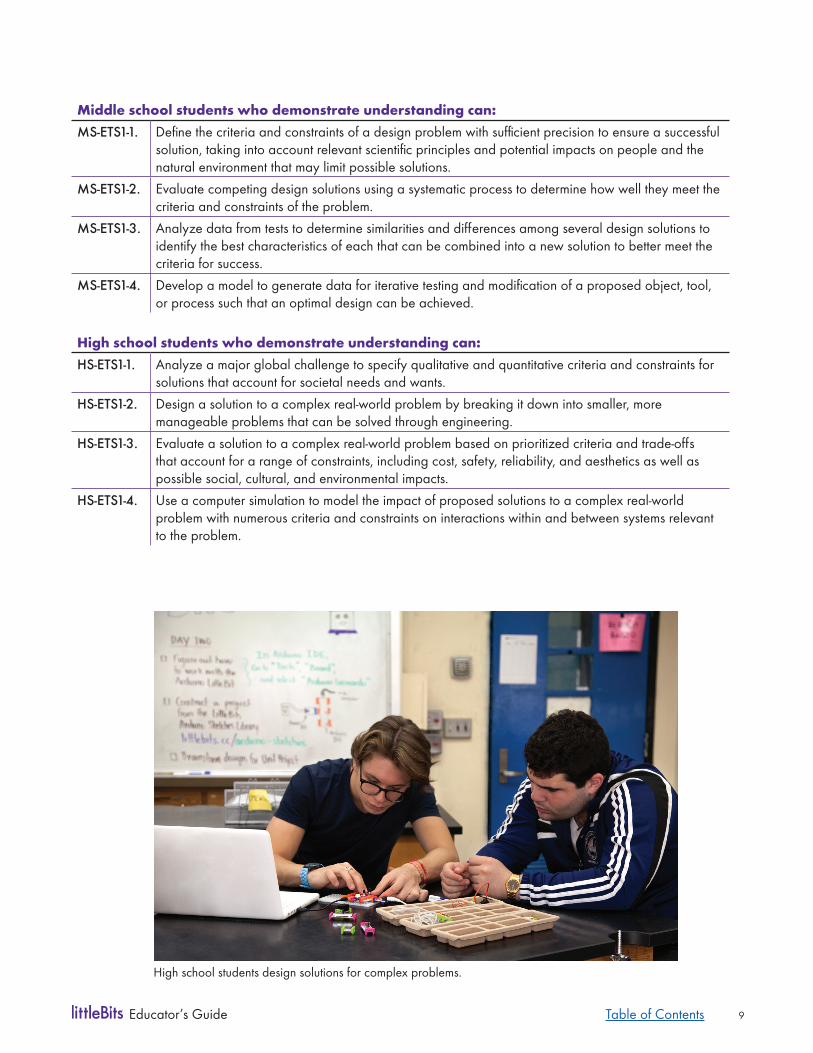
Students of all ages problem solve with littleBits .
Table of Contents
9Educator’s Guide
Middle school students who demonstrate understanding can:MS-ETS1-1. Define the criteria and constraints of a design problem with sufficient precision to ensure a successful
solution, taking into account relevant scientific principles and potential impacts on people and the natural environment that may limit possible solutions .
MS-ETS1-2. Evaluate competing design solutions using a systematic process to determine how well they meet the criteria and constraints of the problem .
MS-ETS1-3. Analyze data from tests to determine similarities and differences among several design solutions to identify the best characteristics of each that can be combined into a new solution to better meet the criteria for success .
MS-ETS1-4. Develop a model to generate data for iterative testing and modification of a proposed object, tool, or process such that an optimal design can be achieved .
High school students who demonstrate understanding can:HS-ETS1-1. Analyze a major global challenge to specify qualitative and quantitative criteria and constraints for
solutions that account for societal needs and wants .HS-ETS1-2. Design a solution to a complex real-world problem by breaking it down into smaller, more
manageable problems that can be solved through engineering .HS-ETS1-3. Evaluate a solution to a complex real-world problem based on prioritized criteria and trade-offs
that account for a range of constraints, including cost, safety, reliability, and aesthetics as well as possible social, cultural, and environmental impacts .
HS-ETS1-4. Use a computer simulation to model the impact of proposed solutions to a complex real-world problem with numerous criteria and constraints on interactions within and between systems relevant to the problem .
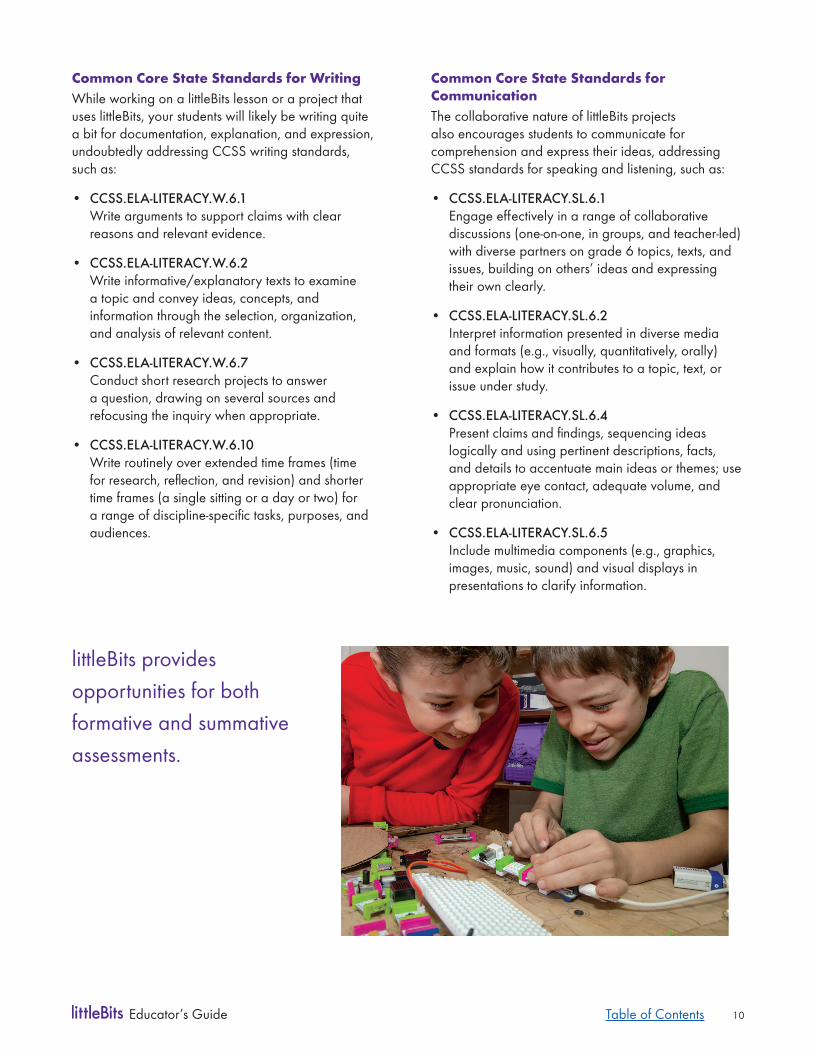
High school students design solutions for complex problems .
Table of Contents
10Educator’s Guide
Common Core State Standards for WritingWhile working on a littleBits lesson or a project that uses littleBits, your students will likely be writing quite a bit for documentation, explanation, and expression, undoubtedly addressing CCSS writing standards, such as:
• CCSS.ELA-LITERACY.W.6.1 Write arguments to support claims with clear reasons and relevant evidence .
• CCSS.ELA-LITERACY.W.6.2 Write informative/explanatory texts to examine a topic and convey ideas, concepts, and information through the selection, organization, and analysis of relevant content .
• CCSS.ELA-LITERACY.W.6.7 Conduct short research projects to answer a question, drawing on several sources and refocusing the inquiry when appropriate .
• CCSS.ELA-LITERACY.W.6.10 Write routinely over extended time frames (time for research, reflection, and revision) and shorter time frames (a single sitting or a day or two) for a range of discipline-specific tasks, purposes, and audiences .
Common Core State Standards for CommunicationThe collaborative nature of littleBits projects also encourages students to communicate for comprehension and express their ideas, addressing CCSS standards for speaking and listening, such as:
• CCSS.ELA-LITERACY.SL.6.1 Engage effectively in a range of collaborative discussions (one-on-one, in groups, and teacher-led) with diverse partners on grade 6 topics, texts, and issues, building on others’ ideas and expressing their own clearly .
• CCSS.ELA-LITERACY.SL.6.2 Interpret information presented in diverse media and formats (e.g., visually, quantitatively, orally) and explain how it contributes to a topic, text, or issue under study .
• CCSS.ELA-LITERACY.SL.6.4 Present claims and findings, sequencing ideas logically and using pertinent descriptions, facts, and details to accentuate main ideas or themes; use appropriate eye contact, adequate volume, and clear pronunciation .
• CCSS.ELA-LITERACY.SL.6.5 Include multimedia components (e.g., graphics, images, music, sound) and visual displays in presentations to clarify information .
littleBits provides opportunities for both formative and summative assessments .
Table of Contents
11Educator’s Guide
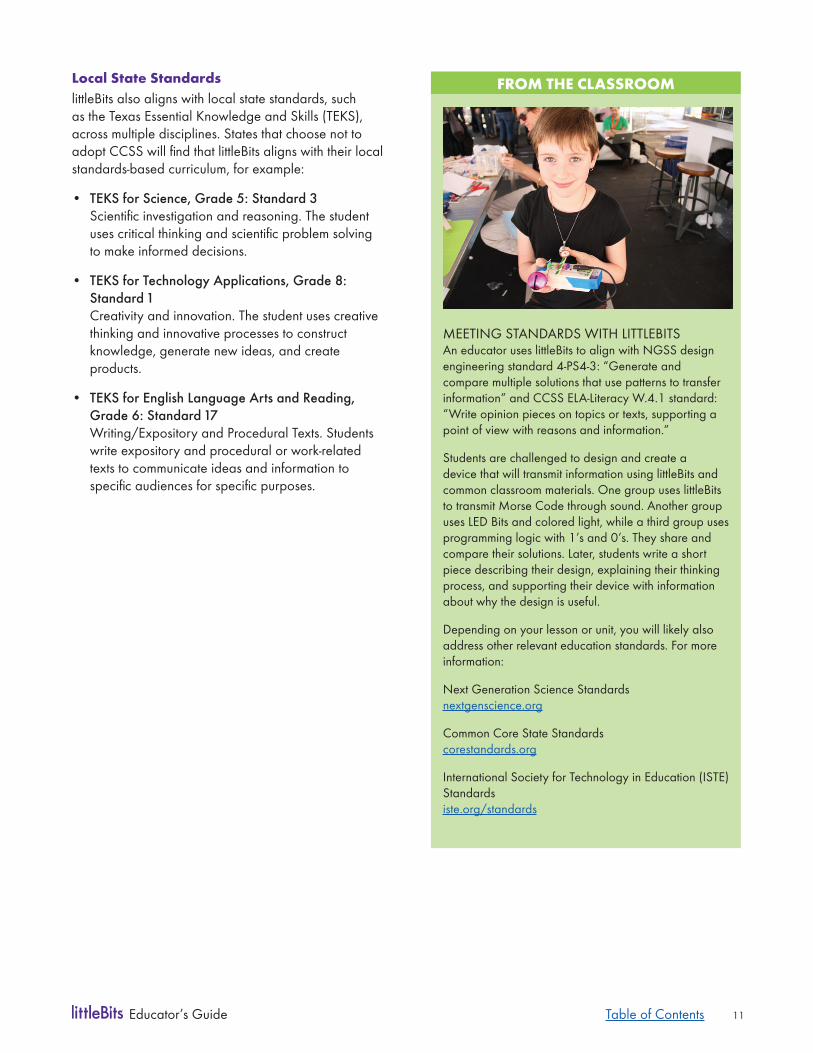
FROM THE CLASSROOM
MEETING STANDARDS WITH LITTLEBITSAn educator uses littleBits to align with NGSS design engineering standard 4-PS4-3: “Generate and compare multiple solutions that use patterns to transfer information” and CCSS ELA-Literacy W .4 .1 standard: “Write opinion pieces on topics or texts, supporting a point of view with reasons and information .”
Students are challenged to design and create a device that will transmit information using littleBits and common classroom materials . One group uses littleBits to transmit Morse Code through sound . Another group uses LED Bits and colored light, while a third group uses programming logic with 1’s and 0’s . They share and compare their solutions . Later, students write a short piece describing their design, explaining their thinking process, and supporting their device with information about why the design is useful .
Depending on your lesson or unit, you will likely also address other relevant education standards . For more information:
Next Generation Science Standards nextgenscience .org
Common Core State Standards corestandards .org
International Society for Technology in Education (ISTE) Standards iste .org/standards
Local State StandardslittleBits also aligns with local state standards, such as the Texas Essential Knowledge and Skills (TEKS), across multiple disciplines . States that choose not to adopt CCSS will find that littleBits aligns with their local standards-based curriculum, for example:
• TEKS for Science, Grade 5: Standard 3 Scientific investigation and reasoning. The student uses critical thinking and scientific problem solving to make informed decisions .
• TEKS for Technology Applications, Grade 8: Standard 1 Creativity and innovation . The student uses creative thinking and innovative processes to construct knowledge, generate new ideas, and create products .
• TEKS for English Language Arts and Reading, Grade 6: Standard 17 Writing/Expository and Procedural Texts . Students write expository and procedural or work-related texts to communicate ideas and information to specific audiences for specific purposes.
Table of Contents
12Educator’s Guide
Becoming Familiar with littleBits
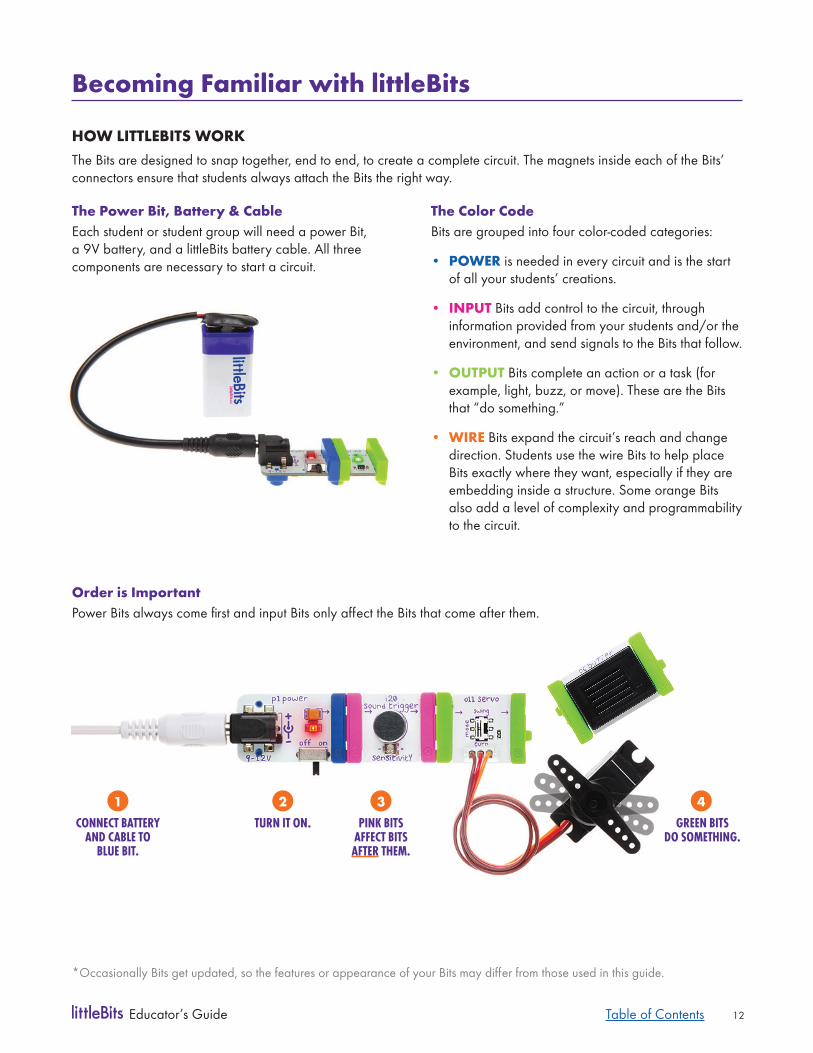
HOW LITTLEBITS WORK The Bits are designed to snap together, end to end, to create a complete circuit . The magnets inside each of the Bits’ connectors ensure that students always attach the Bits the right way .
The Power Bit, Battery & CableEach student or student group will need a power Bit, a 9V battery, and a littleBits battery cable . All three components are necessary to start a circuit .
The Color CodeBits are grouped into four color-coded categories:
• POWER is needed in every circuit and is the start of all your students’ creations .
• INPUT Bits add control to the circuit, through information provided from your students and/or the environment, and send signals to the Bits that follow .
• OUTPUT Bits complete an action or a task (for example, light, buzz, or move). These are the Bits that “do something .”
• WIRE Bits expand the circuit’s reach and change direction . Students use the wire Bits to help place Bits exactly where they want, especially if they are embedding inside a structure . Some orange Bits also add a level of complexity and programmability to the circuit .
1CONNECT BATTERY
AND CABLE TO BLUE BIT.
2TURN IT ON.
3PINK BITS
AFFECT BITS AFTER THEM.
4GREEN BITS
DO SOMETHING.
Order is ImportantPower Bits always come first and input Bits only affect the Bits that come after them.
*Occasionally Bits get updated, so the features or appearance of your Bits may differ from those used in this guide.
Table of Contents
13Educator’s Guide
Making AdjustmentsSome Bits are designed to be adjustable, allowing students to have greater control over the input and output options . The switches and screws are meant to be interactive .
Some Bits have switches to change modes (for example, the DC motor spinning forward or in reverse, and the number Bit displaying “value” or “volts” mode). Other Bits have small screws to make adjustments, for example, changing the timing of the pulse or specifying a color for the RGB LED . A small screwdriver is included in your kit .
You can learn more about making Bit-specific adjustments by viewing the Bit’s respective information card (see Student Support Resources, p. 24). Each card includes a description of the Bit’s function, instructions for adjusting the Bit, and an illustration of how the Bit might be used within a circuit .
EXPERIMENTING THROUGH DESIGN CHALLENGESThe best way to learn about littleBits is through experimentation and play . Complete the following challenges, which are designed to get you building simple circuits. While you’re learning more about how littleBits work, reflect on the prominent role of electronics and circuits in your daily life .
Developing a degree of familiarity with littleBits will help you envision how to use them with students . As you work through each step of the challenges, think about how the activity could be used in your own classroom and the modifications you might need to make. (Note: The challenges below are based on Bits in the Workshop Set, August 2015 release. You can find answers to the challenges in Mini Lesson: Getting Started with littleBits Design Challenges, p. 18)
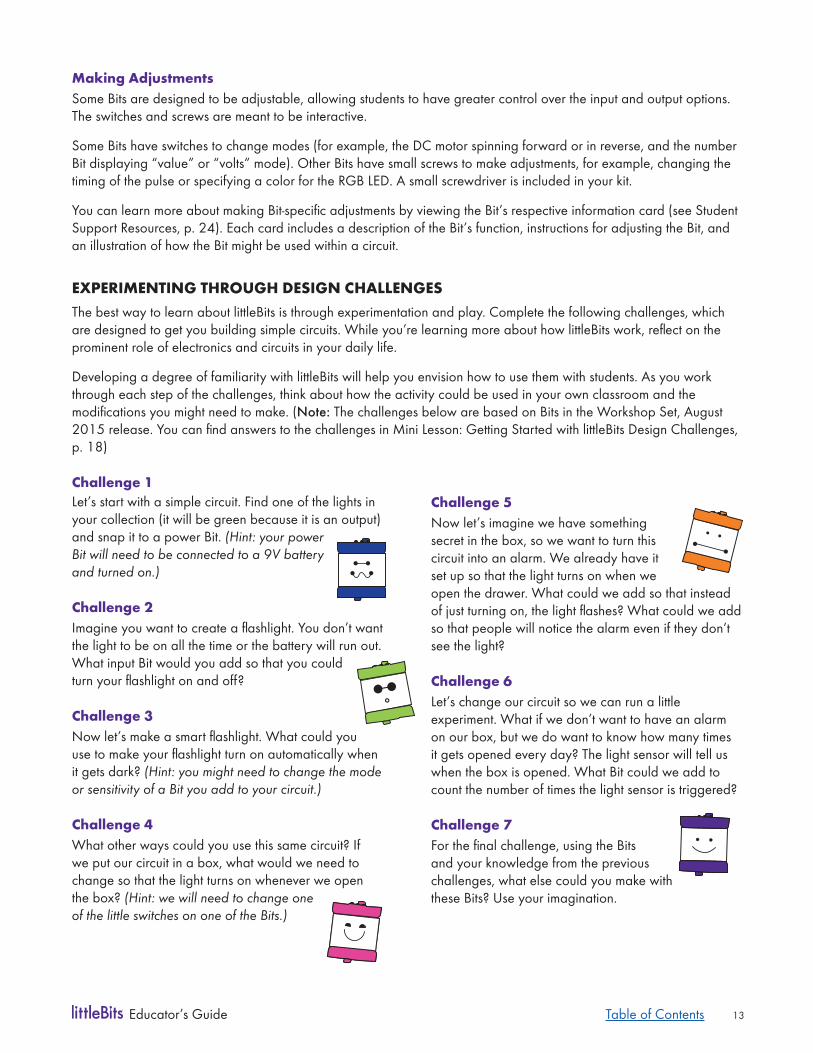
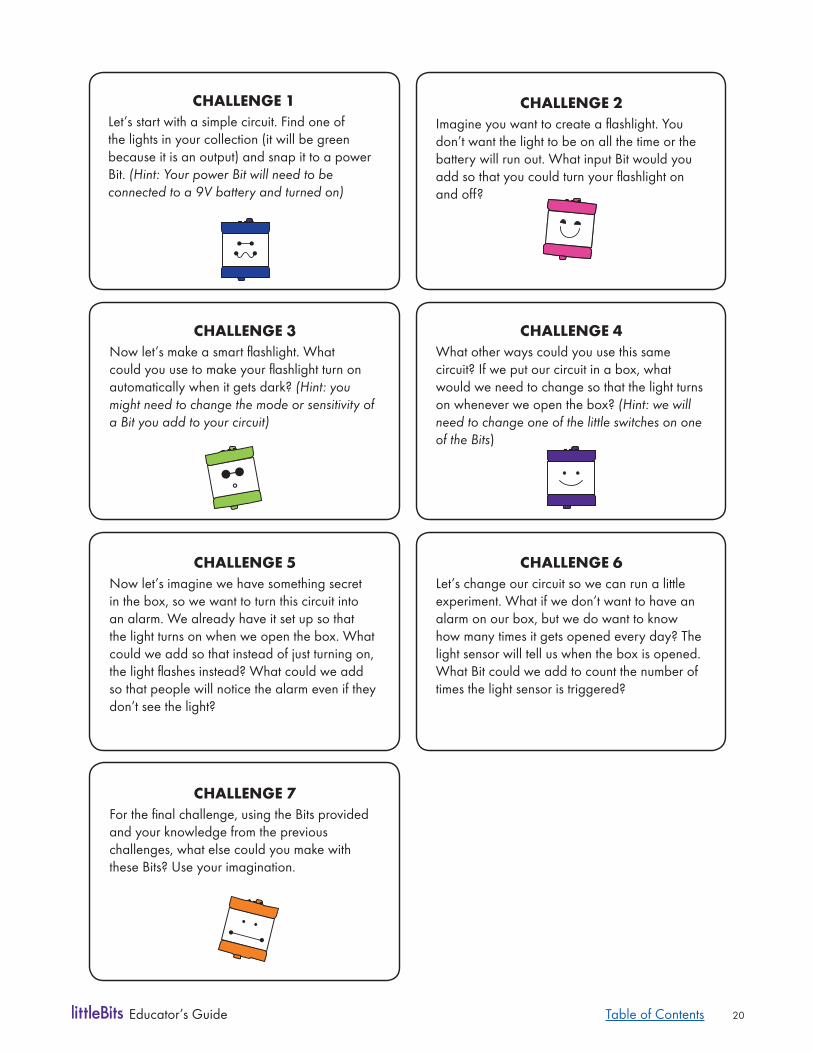
Challenge 1Let’s start with a simple circuit . Find one of the lights in your collection (it will be green because it is an output) and snap it to a power Bit . (Hint: your power Bit will need to be connected to a 9V battery and turned on.)
Challenge 2Imagine you want to create a flashlight. You don’t want the light to be on all the time or the battery will run out . What input Bit would you add so that you could turn your flashlight on and off?
Challenge 3Now let’s make a smart flashlight. What could you use to make your flashlight turn on automatically when it gets dark? (Hint: you might need to change the mode or sensitivity of a Bit you add to your circuit.)
Challenge 4What other ways could you use this same circuit? If we put our circuit in a box, what would we need to change so that the light turns on whenever we open the box? (Hint: we will need to change one of the little switches on one of the Bits.)
Challenge 5Now let’s imagine we have something secret in the box, so we want to turn this circuit into an alarm . We already have it set up so that the light turns on when we open the drawer . What could we add so that instead of just turning on, the light flashes? What could we add so that people will notice the alarm even if they don’t see the light?
Challenge 6Let’s change our circuit so we can run a little experiment . What if we don’t want to have an alarm on our box, but we do want to know how many times it gets opened every day? The light sensor will tell us when the box is opened . What Bit could we add to count the number of times the light sensor is triggered?
Challenge 7For the final challenge, using the Bits and your knowledge from the previous challenges, what else could you make with these Bits? Use your imagination .
Table of Contents
14Educator’s Guide
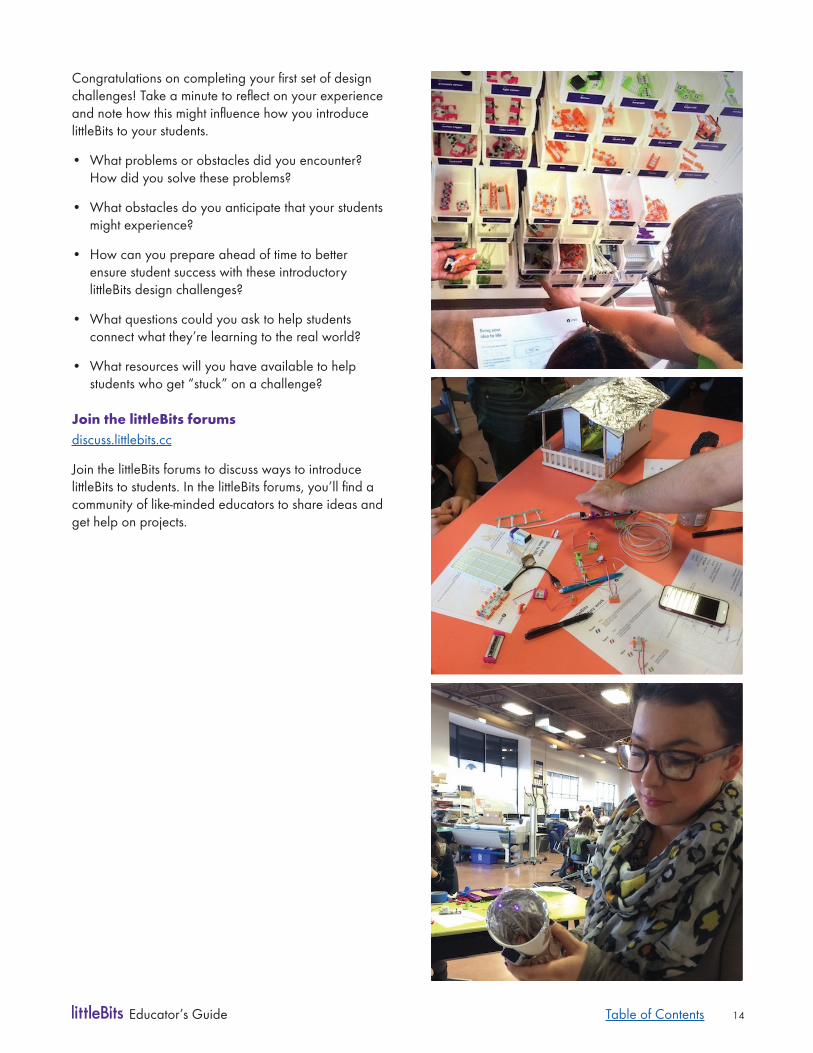
Congratulations on completing your first set of design challenges! Take a minute to reflect on your experience and note how this might influence how you introduce littleBits to your students .
• What problems or obstacles did you encounter? How did you solve these problems?
• What obstacles do you anticipate that your students might experience?
• How can you prepare ahead of time to better ensure student success with these introductory littleBits design challenges?
• What questions could you ask to help students connect what they’re learning to the real world?
• What resources will you have available to help students who get “stuck” on a challenge?
Join the littleBits forumsdiscuss .littlebits .cc
Join the littleBits forums to discuss ways to introduce littleBits to students. In the littleBits forums, you’ll find a community of like-minded educators to share ideas and get help on projects .
Table of Contents
15Educator’s Guide
Classroom Management with littleBitsPrior to using littleBits with students, consider how you will best manage the Bits in a way that ensures organization and quick setup to optimize learning opportunities .
STUDENT GROUPING OPTIONSStudents can work with littleBits in pairs or small groups (3-4 students). Keep in mind that larger groups can be problematic and students may become frustrated if there aren’t enough Bits to go around, particularly power Bits, batteries, and cables as these are limiting factors within a circuit . While some students may prefer to work alone, grouping students encourages collaboration and may lead to increased learning gains through peer communication .
Groups can be determined by interest or project, for example, grouping students who are interested in designing a home improvement device . In this option, it is recommended that you divide the kits to best match the Bits to the project . Other options include mixed grouping by ability level, gender, or special needs .
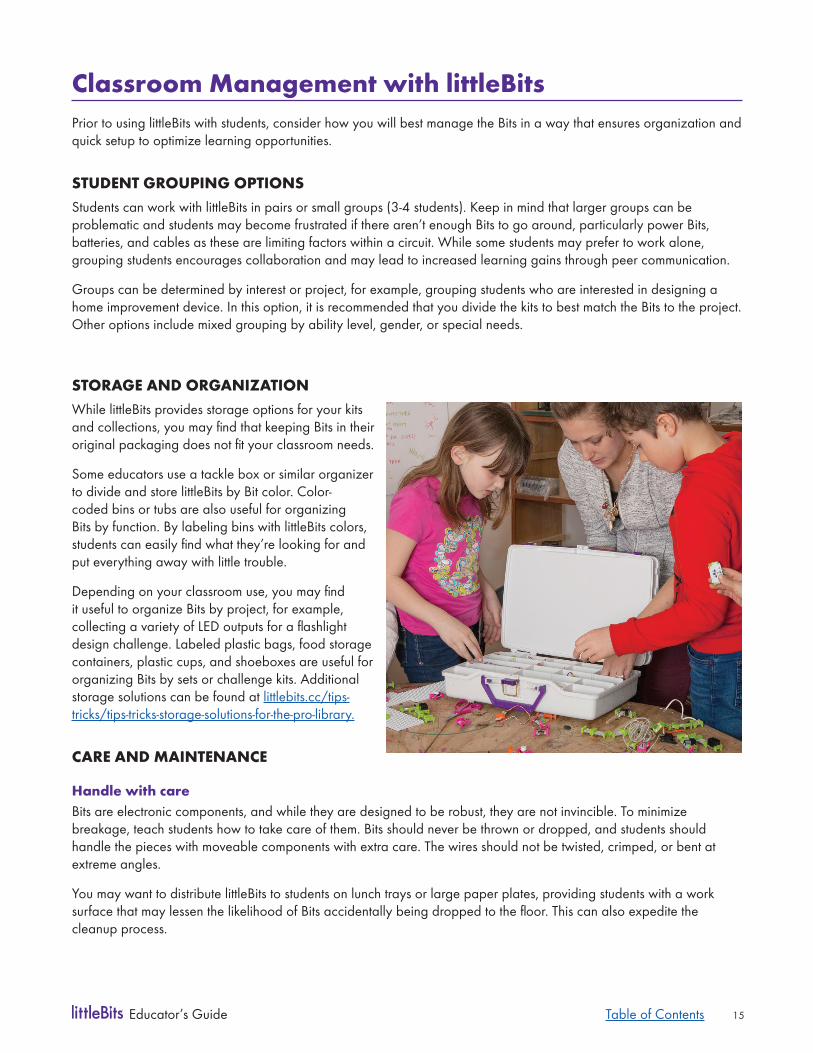
STORAGE AND ORGANIZATIONWhile littleBits provides storage options for your kits and collections, you may find that keeping Bits in their original packaging does not fit your classroom needs.
Some educators use a tackle box or similar organizer to divide and store littleBits by Bit color . Color-coded bins or tubs are also useful for organizing Bits by function . By labeling bins with littleBits colors, students can easily find what they’re looking for and put everything away with little trouble .
Depending on your classroom use, you may find it useful to organize Bits by project, for example, collecting a variety of LED outputs for a flashlight design challenge . Labeled plastic bags, food storage containers, plastic cups, and shoeboxes are useful for organizing Bits by sets or challenge kits . Additional storage solutions can be found at littlebits .cc/tips-tricks/tips-tricks-storage-solutions-for-the-pro-library .
CARE AND MAINTENANCE
Handle with careBits are electronic components, and while they are designed to be robust, they are not invincible . To minimize breakage, teach students how to take care of them . Bits should never be thrown or dropped, and students should handle the pieces with moveable components with extra care . The wires should not be twisted, crimped, or bent at extreme angles .
You may want to distribute littleBits to students on lunch trays or large paper plates, providing students with a work surface that may lessen the likelihood of Bits accidentally being dropped to the floor. This can also expedite the cleanup process .
Table of Contents
16Educator’s Guide
Attaching Bits to surfacesIf your students plan to embed their littleBits within a structure, many educators find that poster tack and glue dots (available at craft stores) work better than tape to attach the Bits to a variety of surfaces . Another option is to use the littleBits shoes to secure the Bits into student projects . Shoes are available in adhesive, magnet, or hook and loop depending on the surface you are using. You can find these helpful additions in the accessory section on the littleBits shop page .
Cleaning BitsOccasionally, you may need to clean the Bits . If you find that you’re getting a poor connection between Bits, cleaning is a good first step to troubleshoot the problem .
The best way to clean Bits is to wipe them with a dry cloth (a clean t-shirt works perfectly). If any of the electrical connectors are oxidized (you may see dark deposits on them), put a small amount of isopropyl alcohol on a soft, clean cloth and gently wipe the deposits . Do not use any other cleaning products on your Bits . Note: Some electrical connector cleaners have chemicals that can damage the plastic part of the Bit, and therefore are not recommended .
STUDENT PROBLEM SOLVINGOne important aspect of classroom management with littleBits is establishing well-defined procedures for what students should do when something goes wrong . Students can easily solve many common problems, allowing for increased independence and less reliance on educator intervention .
Student protocolThe first step is to define a protocol you wish students to follow if they encounter an issue. Some educators evoke an “ask three before me” rule, in which students are required to ask three peers for help before asking the teacher . Show students how to reference the Bit cards, or use other available resources, for independent problem solving .
Troubleshooting resourcesYou may find it helpful to post “tips and tricks” posters around the classroom to help students independently solve common problems and share creative solution ideas . Students can post any solutions, tips, or tricks they have discovered to create a collective peer-generated resource for using littleBits .
Another option is to co-create a troubleshooting checklist with students . This checklist might include helpful tips, for example, check all connections, check switches and screws, check the battery, and so forth .
Assigning student rolesYour protocol may also include assigned student roles, in which students take responsibility for helping one another when an issue arises . Student roles may include engineers (students with a strong understanding of how littleBits are assembled), mechanics (students with an aptitude for troubleshooting common problems), cleaners (students who have been specially trained in how to clean Bits), organizers (students who are responsible for the care and handling of Bits during cleanup), and creatives (students who can think of creative solutions for assembly).
Depending on your classroom project, you can also assign student ambassadors to project-specific roles, for example, the “green team” that understands energy alternatives or students who specialize in troubleshooting LEDs .
Table of Contents
17Educator’s Guide
Getting Started with littleBits in the ClassroomThe following mini-lessons are designed to help you introduce littleBits to your students . The Connect step is intended to pique students’ curiosity by drawing connections to their own lives or interests . The lessons continue with guided exploration of specific Bits in the Teach section, inquiry-based learning through experimentation in Engage, practice with the Bits through brief challenges in Practice, and wrap up with reflection and shared learning in the Close step . Each step of the lessons is equally important in order to develop students’ confidence and self-direction skills when using the Bits . Select and adapt lessons to make them applicable to your schedule, implementation model, and students . Each lesson takes about one hour .
MINI-LESSON: EXPLORING HOW LITTLEBITS WORK
ConnectBegin by asking students to brainstorm ways in which we use and rely on electronics in our everyday lives . In small groups, ask students to rank the top five electronic devices they couldn’t live without, providing rationale for the ways in which our lives would be significantly different without electronics. Ask questions to help students begin thinking like designers and engineers, for example:
• How do electronics work?
• What do electronics need in order to work?
After this introduction, explain to students that they are going to begin experimenting and investigating electronics with littleBits .
TeachDistribute a single input Bit and an output Bit to each student and encourage them to explore how the Bits connect . After a few minutes, ask students to share what they have observed and learned about the Bits (for example, they have magnets and snap together). Within this discussion, introduce and define the following terms:
• Bit• Circuit• Power
• Input • Output• Wire
• Switch• Screw
If possible, relate these terms to prior learning that you have done in your classroom .
EngageDistribute a power Bit, battery, cable, and wire Bit to each student (pair students as needed). Again, provide time for students to explore their Bits independently . Through experimentation and trial and error, students will naturally learn how to assemble littleBits . It is important to provide students with this opportunity .
After a few minutes of exploration, ask students to share what they have observed and learned about assembling the Bits . Use guiding questions to promote deeper understanding and engage students in active inquiry, for example:
• How can you tell the top of the Bit from the bottom?
• How does the bottom of the Bit look different than the top?
• How do you know that you are connecting littleBits the right way?
• Does the order of assembly matter?
• How do the Bit colors inform or affect your design?
Table of Contents

18Educator’s Guide
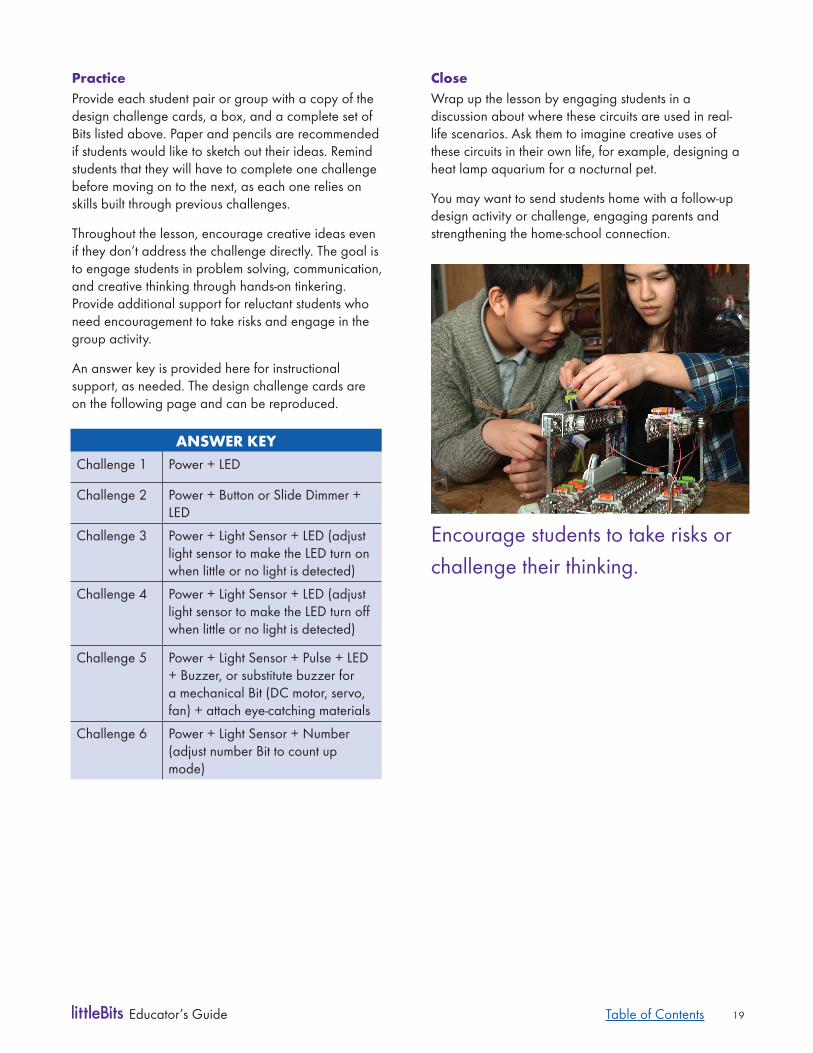
PracticeThe remainder of the mini-lesson engages students in active learning through discovery . Place students in small groups of three to four students and ask them to share, swap, and combine Bits to create at least one circuit with power, input and output . Walk around and encourage students to take risks or challenge their thinking, for example:
• Can you create a circuit with more than one input?
• Can you create a circuit with more than one output?
• Can you think of a real-life application of this circuit? Where have you seen something similar?
CloseWrap up the lesson by reviewing what students have learned about how littleBits work . Ask one student from each group to explain a circuit they created, using the terms introduced in the lesson .
Establish your cleanup and storage expectations . Show students how you would like them to handle Bits, and how Bits should be organized for storing between lessons .
Optional: Show Ayah Bdeir’s TED talk: Building blocks that blink, beep and teach (ted .com/talks/ayah_bdeir_building_blocks_that_blink_beep_and_teach) as a way to introduce littleBits and get students excited about the possibilities .
MINI-LESSON: GETTING STARTED WITH LITTLEBITS DESIGN CHALLENGES
ConnectBegin by asking students to explain, “How does a flashlight work?” Engage students’ prior knowledge and ask them to use critical thinking skills to reverse engineer this common object that we often take for granted .
With the stage set, explain to students that they will use littleBits to create circuits that are found in many common objects, such as a flashlight.
TeachDivide students into pairs (ideally, if you have enough Bits) or groups of three to four as needed. Each student group should have a set of the following Bits:
• power + 9V battery + cable
• button• light sensor• pulse
• slide dimmer• temp sensor• buzzer• DC motor• fan
• long LED• number• RGB LED• servo• wire
Although students will not need all of these Bits to complete the challenges, it’s important not to limit their creativity by providing only the required Bits . Each student group will also need a small box with a lid such as a recycled shoebox, granola bar box, or cereal box .
Optional, as needed: Review any fundamental terms or concepts your students will need to know in order to be successful with these design challenges, for example, the color-coding system or the order of assembly . You may want to have the Bit cards (see Student Support Resources, p. 24) available for students who require additional scaffolding and support .
EngageExplain to students that they will be working through a series of design challenges (see printable cards on p. 20), using littleBits to build circuits that are likely familiar to them .
Remind students of the protocol they should follow if they have questions or encounter troubleshooting issues .
Table of Contents
19Educator’s Guide
PracticeProvide each student pair or group with a copy of the design challenge cards, a box, and a complete set of Bits listed above . Paper and pencils are recommended if students would like to sketch out their ideas . Remind students that they will have to complete one challenge before moving on to the next, as each one relies on skills built through previous challenges .
Throughout the lesson, encourage creative ideas even if they don’t address the challenge directly . The goal is to engage students in problem solving, communication, and creative thinking through hands-on tinkering . Provide additional support for reluctant students who need encouragement to take risks and engage in the group activity .
An answer key is provided here for instructional support, as needed . The design challenge cards are on the following page and can be reproduced .
CloseWrap up the lesson by engaging students in a discussion about where these circuits are used in real-life scenarios . Ask them to imagine creative uses of these circuits in their own life, for example, designing a heat lamp aquarium for a nocturnal pet .
You may want to send students home with a follow-up design activity or challenge, engaging parents and strengthening the home-school connection .
Encourage students to take risks or challenge their thinking .
ANSWER KEYChallenge 1 Power + LED
Challenge 2 Power + Button or Slide Dimmer + LED
Challenge 3 Power + Light Sensor + LED (adjust light sensor to make the LED turn on when little or no light is detected)
Challenge 4 Power + Light Sensor + LED (adjust light sensor to make the LED turn off when little or no light is detected)
Challenge 5 Power + Light Sensor + Pulse + LED + Buzzer, or substitute buzzer for a mechanical Bit (DC motor, servo, fan) + attach eye-catching materials
Challenge 6 Power + Light Sensor + Number (adjust number Bit to count up mode)
Table of Contents
20Educator’s Guide
CHALLENGE 1Let’s start with a simple circuit . Find one of the lights in your collection (it will be green because it is an output) and snap it to a power Bit . (Hint: Your power Bit will need to be connected to a 9V battery and turned on)
CHALLENGE 2Imagine you want to create a flashlight. You don’t want the light to be on all the time or the battery will run out . What input Bit would you add so that you could turn your flashlight on and off?
CHALLENGE 3Now let’s make a smart flashlight. What could you use to make your flashlight turn on automatically when it gets dark? (Hint: you might need to change the mode or sensitivity of a Bit you add to your circuit)
CHALLENGE 4What other ways could you use this same circuit? If we put our circuit in a box, what would we need to change so that the light turns on whenever we open the box? (Hint: we will need to change one of the little switches on one of the Bits)
CHALLENGE 5Now let’s imagine we have something secret in the box, so we want to turn this circuit into an alarm . We already have it set up so that the light turns on when we open the box . What could we add so that instead of just turning on, the light flashes instead? What could we add so that people will notice the alarm even if they don’t see the light?
CHALLENGE 6Let’s change our circuit so we can run a little experiment . What if we don’t want to have an alarm on our box, but we do want to know how many times it gets opened every day? The light sensor will tell us when the box is opened . What Bit could we add to count the number of times the light sensor is triggered?
CHALLENGE 7For the final challenge, using the Bits provided and your knowledge from the previous challenges, what else could you make with these Bits? Use your imagination .
Table of Contents
21Educator’s Guide
MINI-LESSON: REVERSE ENGINEERING WITH LITTLEBITS
ConnectBegin by showing students a common object that performs an action and can be easily taken apart, such as a wind-up toy . Ask students, “How could you find out how this works?”
As time allows, take apart the object and briefly explore how the mechanisms work inside . Explain to students that the process of deconstructing an object and analyzing the individual parts is called reverse engineering . Many engineers use this method to learn about and improve designs .
With the stage set, explain to students that they will think like engineers and use reverse engineering to analyze the individual components of a larger circuit, ultimately determining how each Bit functions as part of the whole .
TeachPrior to the lesson, prepare bags that contain some known Bits with which students are familiar (for example, a power Bit, battery, cable, button, and LED) and three unknown Bits that students have not seen . On each unknown Bit, if time allows, the name can be covered with a small piece of masking tape, so as not to provide too much information about the Bit’s function . Examples of unknown Bits may include the pulse Bit, inverter, light sensor, or the sound sensor .
(Optional, as needed) Depending on your students’ experience level with littleBits, demonstrate how the known Bits can be assembled to create a complete circuit . Review any fundamental terms or concepts your students will need to know in order to be successful with this activity, for example, the color-coding system or the order of assembly .
EngageDivide students into groups of two and provide each student pair with a Bit bag . Challenge students to “experiment and explore to figure out what the unknown Bits do .” While some students may hesitate and ask for more direction, keep this activity intentionally open-ended to allow for creative problem solving .
As students are working, walk around and ask questions to encourage self-discovery and scientific thinking, for example:
• What method are you using to figure out what the Bits do?
• How did you come up with this method? Could it be improved?
• What Bits stay the same (constant variables)? Which Bits do you change?
• How are you recording what you’ve learned?
PracticeAfter determining the functions of the unknown Bits, provide time for students to sketch and design a product that utilizes the Bits in the bag, for example, an alarm for a lunchbox or a door . As time allows, students can begin building their product .
CloseWrap up the lesson by engaging students in a discussion about what they have learned . Ask students to apply this learning to explain how reverse engineering might be used to solve a real-life problem .
Table of Contents
22Educator’s Guide
Lesson Plan DesignAs you begin to design littleBits lessons for your own classroom, you may find it helpful to think through and use the following framework for planning inquiry-based lessons, especially when students are getting started with littleBits .
ConnectSet the stage for learning by engaging student interest in the purpose of the lesson . This may include brainstorming, discussion, and defining the lesson objective . Consider:
• What prior knowledge might help students with this lesson, and how can you activate this knowledge?
• How can you help students begin to generate questions to engage them in the lesson?
• How will you make connections between this lesson and past learning experiences?
TeachProvide time for students to actively explore littleBits and begin to generate questions for further exploration . Consider:
• What specific concepts would be useful for students to understand in order to be successful with this lesson?
• What concepts can students discover through experimentation with littleBits, and what concepts are best taught through explicit instruction?
• What steps would help students refine and improve their design? For example, sketching or peer brainstorming .
EngageStudents are given an opportunity to conceptualize and verbalize their thinking, and demonstrate what they are learning through prototypes . Formal terms are introduced and concepts are explained to students as needed . Consider:
• Which Bits will students need to accomplish the goals of the lesson?
• What questions can you ask to further refine students’ thinking and focus them on the goals of the lesson?
• How can you encourage student ideation?
PracticeStudents further refine and extend their conceptual understanding through additional experiences . This may include testing and refining the original prototype. Consider:
• What questions could you ask students to refine their thinking?
• How can you challenge students to think beyond the current task and deepen their understanding?
CloseStudents share and document their understanding of the key concepts presented in the lesson . Consider:
• What authentic assessment measure will help you determine if students have met the lesson objectives?
• What opportunities exist to incorporate other curricular areas, such as English Language Arts, into the assessment?
• How will students share and document their understanding?
GOING BEYOND THE LESSON
Once students develop an understanding of the different Bit functions, littleBits can become an organic tool for exploration and discovery . Rather than always planning the use of littleBits in structured lessons, you will likely find that your students naturally seek out littleBits as another available tool to reach a solution, much in the same way that students would use a calculator or graph paper . Encourage innovative, intrinsic uses of littleBits across curricular areas to activate learning that is both personalized and student-driven .
Table of Contents
23Educator’s Guide
littleBits LessonsThe Education page on the littleBits website contains many useful resources to get you started with littleBits in the classroom . The following activities show how lessons can be designed to incorporate littleBits in a way that encourages open-ended inquiry and discovery while also meeting important learning standards . You may want to adapt one or more of these lessons for use with your students .
EXAMPLE LESSONS
Beginner• Hack My House
littlebits .cc/browse-lessons/hack-my-house-workshop Students use littleBits and craft materials to create buildings that integrate electronics in common objects .
• Exploring Bioluminescence with littleBits littlebits .cc/browse-lessons/exploring-bioluminescence-with-littlebits Students explore bioluminescence and design their own illuminated sea creatures using littleBits LED Bits .
Intermediate• Make Something that Does Something
littlebits .cc/browse-lessons/make-something-that-does-something-b221fddb-709e-4e89-9d00-9b3b15ec4a1a Using littleBits and common classroom materials, students use a design process to build a circuit that accomplishes a task .
• Let’s Make a Techno Jungle Together littlebits .cc/browse-lessons/let-s-make-a-techno-jungle-together Students use littleBits to create interactive toys while learning about design thinking and engineering with electronics .
Advanced• Music Meets Physics with Beats
littlebits .cc/browse-lessons/music-meets-physics-with-beats Students conduct an experiment to view the waveforms of a pair of slightly different frequencies, as well as the waveform of the resulting beats .
• Modeling the Human Vocal Tract littlebits .cc/browse-lessons/vocal-synthesizer-workshop-modeling-the-human-vocal-tract Students use littleBits logic Bits to create a modular synthesizer that models the human vocal tract .
Table of Contents
24Educator’s Guide
LESSON RESOURCES
Lesson Planslittlebits .cc/browse-lessons
Find new, innovative ideas for implementing littleBits across all grade levels and subjects . Each lesson plan can be adapted to fi t your own curricular standards. You can also upload lesson plan ideas to share with other community educators .
STEAM Resourceslittlebits .cc/steam-resources
The littleBits Education site has STEAM resources to help educators integrate the content and skills of science, technology, engineering, art, and mathematics . These resources include a littleBits Workshop Guide, project booklets, and case studies .
Education Bloglittlebits .cc/category/education-2
Become inspired by innovative educators who are using littleBits to teach a new generation of inventors and creative problem-solvers . This forum is also useful for troubleshooting littleBits and reading Bit-specifi c tips and tricks .
Tips and Trickslittlebits .cc/tips-tricks
A collection of troubleshooting tips, how-to videos, and project ideas using many of the most popular Bits . Use these project ideas to inspire your own classroom lessons .
STUDENT SUPPORT RESOURCES Listed below are additional materials that you can use to support student learning and design thinking during littleBits lessons .
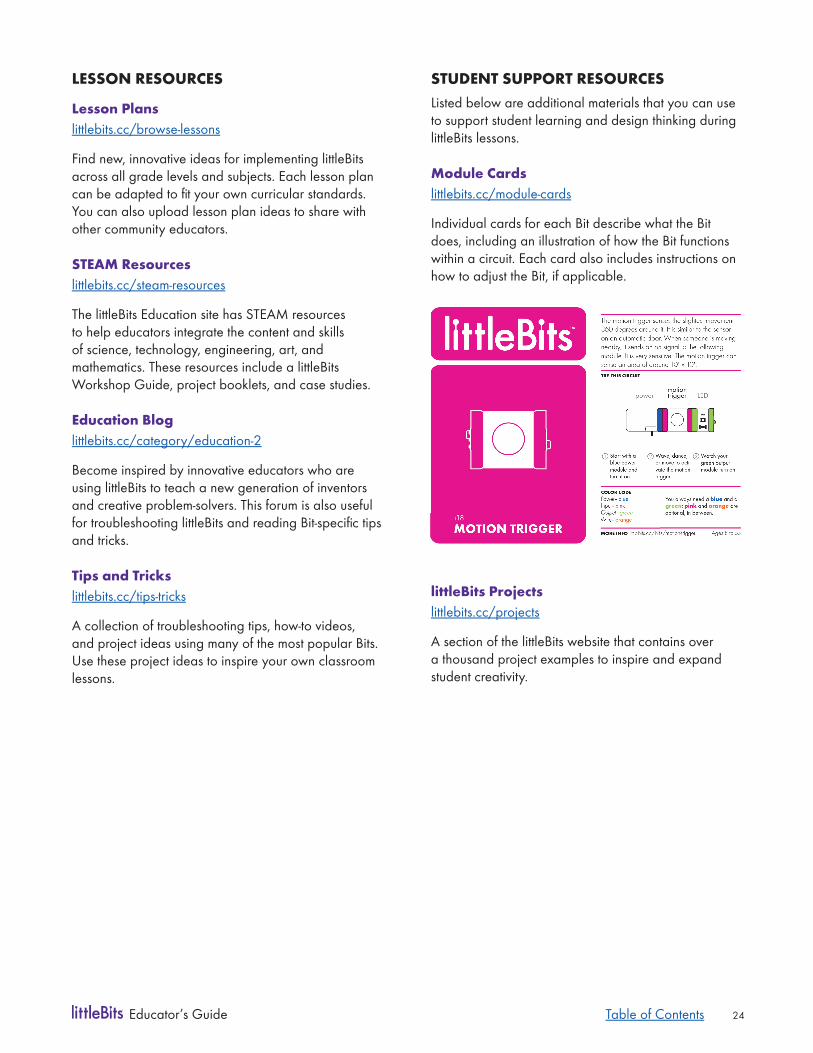
Module Cardslittlebits .cc/module-cards
Individual cards for each Bit describe what the Bit does, including an illustration of how the Bit functions within a circuit . Each card also includes instructions on how to adjust the Bit, if applicable .
littleBits Projectslittlebits .cc/projects
A section of the littleBits website that contains over a thousand project examples to inspire and expand student creativity .
Table of Contents
25Educator’s Guide
littleBits Tips and Tricks
SOLVING COMMON PROBLEMSThe following tips and tricks can help you solve common problems you may encounter when using littleBits in your classroom .
My circuit isn’t working.Potential Solutions to Try:• Is your power Bit switched on? The switches are
small, and sometimes students miss them . When turned on, there should be an LED light on the power Bit that shines red .
• If you’re using a battery, does it need to be charged or replaced? You may want to keep a battery tester in your classroom .
• Do you need to wipe your connectors? If there is dust on the connectors or the magnets, wipe them off with a clean, dry cloth.
• Do you need to clean your connectors? If any of the three electrical connectors are oxidized (they’ll have dark deposits on them) you can use some isopropyl alcohol on your soft, clean cloth .
The motors are running slowly, or one motor lags behind.Potential Solutions to Try:• Does your battery need to be recharged or
replaced?
• Do you have more than two motors in your circuit? If so, the power demands of the motors may require multiple power sources from splitting into two circuits .
• Can you reduce the number of motors in your design through mechanical means, such as linking components with wires or gears?
My Bit connectors have adhesive residue on them.Potential Solutions to Try:• Dirt, dust, and other residue can cause the Bits to
have an inconsistent connection and cleaning them off will usually help to solve these problems.
• Use a clean, dry, soft cloth to wipe the connectors . A soft t-shirt works well .
• If required, use a small amount of isopropyl alcohol on the cloth .
My LED won’t light up.Potential Solutions to Try:• Does your circuit have power? Does the battery
need to be charged or replaced?
• Are you using an input Bit? Do you need to adjust the input?
• Do the Bit connectors need to be cleaned?
My students are having trouble getting their Bits to stick to structure surfaces.Potential Solutions to Try:• Are you using masking tape? Poster tack, glue
dots, or a strong double-sided tape may be more effective when attaching Bits to a variety of surfaces .
• Do you have littleBits accessories? Select the shoe type (adhesive, magnet, or hook and loop) or Brick Adapter (for LEGO® compatibility) that is best suited for the surface you are using . If needed, you can purchase additional shoes or adapters on the littleBits website: littlebits .cc/accessories .
A Bit fell off the table and it was stepped on.Potential Solutions to Try:• Are the connectors working? Can the broken
components be fixed with a small amount of glue? Try Sugru™, a self-setting clay-like substance that dries with a silicone-like texture . It is quite strong and recommended as a safe product for use with littleBits .
• Is the Bit beyond repair? You can replace missing or broken Bits on the littleBits web site: littlebits .cc/shop?filter=Bits or contact our support team at support@littleBits .cc
Table of Contents

26Educator’s Guide
CONSTRUCTION MATERIALSWhat can you use when your students want to create more advanced circuits that require fixed structure, or they want to move their circuits around the classroom? How can students incorporate other building materials, such as LEGO® pieces, wheels, and turntables?
The following section provides information on littleBits accessories that will help students incorporate construction materials .
Mounting Boards
The mounting board allows students to keep their circuit intact and move it around with ease . Students snap together their littleBits circuit and press the feet of the Bits into the holes of the mounting board . Mounting boards also provide an effective way for students to store their circuits safely between work sessions .
Tips: There are four holes in the corners so you can permanently mount your circuit to any surface, project, or permanent installation .
For larger circuits, you can extend from one mounting board to another using a wire in between .
A circuit can be positioned to hold two or more mounting boards together .
The battery tends to be a bit heavy and does not have little feet that fit into the holes of the mounting board. Try using glue dots or a strong double-sided tape to stick the battery down to the mounting board .
For more tips and project ideas: littlebits .cc/tips-tricks/tips-tricks-mounting-board-2
Brick Adapter
The brick adapter allows students to easily snap littleBits Bits to LEGO bricks . Simply snap the brick strip underneath your LEGO bricks and press the feet of your littleBits Bits into place .
Tips: To build vertically, build a pillar out of LEGO bricks that will hold the brick adapter perpendicularly .
Students can use the holes in LEGO parts to position the long LED and hold it in place . This is especially helpful when you are trying to focus the light on the sensor .
Semi-translucent LEGO bricks diffuse light quite nicely. They also happen to fit around the top of the long LED.
For more tips and project ideas: littlebits .cc/tips-tricks/tips-tricks-littlebits-lego
Table of Contents
27Educator’s Guide
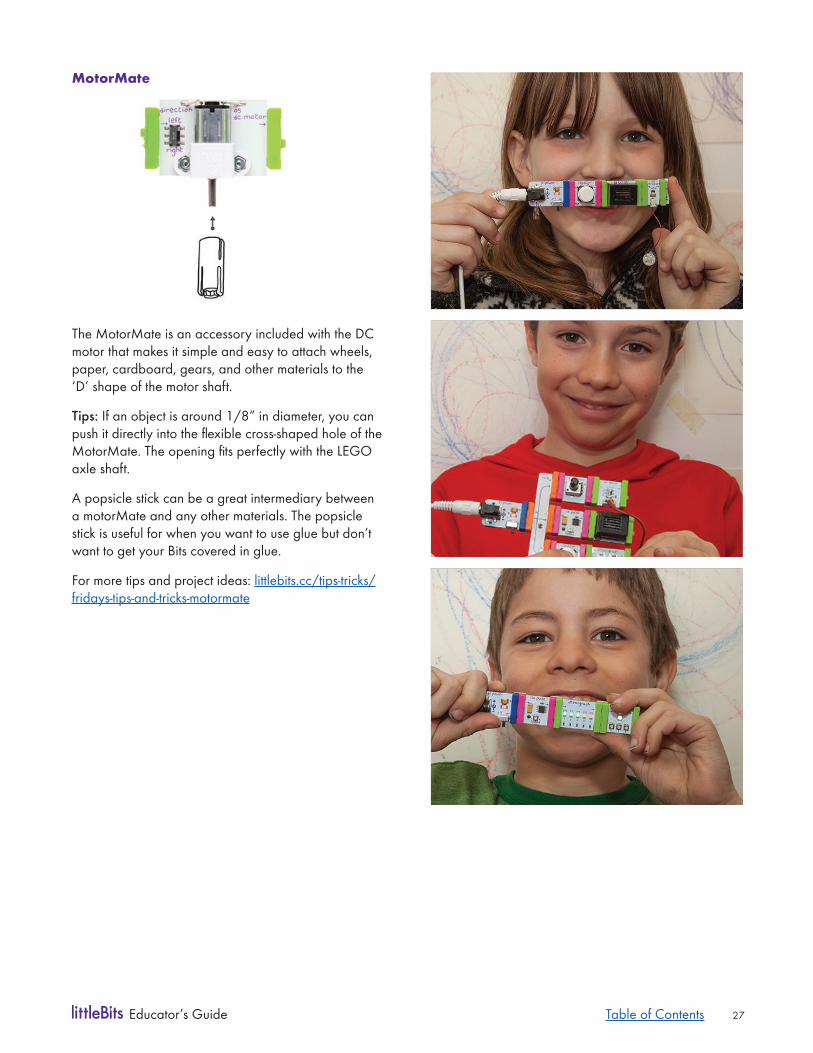
MotorMate
The MotorMate is an accessory included with the DC motor that makes it simple and easy to attach wheels, paper, cardboard, gears, and other materials to the ‘D’ shape of the motor shaft .
Tips: If an object is around 1/8” in diameter, you can push it directly into the flexible cross-shaped hole of the MotorMate. The opening fits perfectly with the LEGO axle shaft .
A popsicle stick can be a great intermediary between a motorMate and any other materials . The popsicle stick is useful for when you want to use glue but don’t want to get your Bits covered in glue .
For more tips and project ideas: littlebits .cc/tips-tricks/fridays-tips-and-tricks-motormate
Table of Contents
28Educator’s Guide
EDUCATOR TIPS Learn from experienced educators who use littleBits with their students . These responses come from interviews with active educators posted on the littleBits Education blog .
What works well when using littleBits in the classroom?• “Allow students to bring in their own materials, such
as LEGO or K’Nex, for their projects .”
• “Ask the school custodians to save empty paper towel tubes and cardboard boxes for students to reuse in their projects .”
• “The module cards help my students answer many of their own questions about how Bits work or how they can be adjusted . The students were less frustrated because they weren’t waiting on me .”
• “It’s helpful to have several small metal screwdrivers on hand in addition to the plastic screwdriver that’s included in the kits .”
• “Student groups of two work well when students are sharing a kit .”
• “Have the students sketch their circuits and explain them to each other . It really helps them to understand what’s happening .”
• “Let students take a kit home, and pair it with a design challenge that parents and students can work on together . This works well to build home-school connections to classroom learning .”
• “An old t-shirt, fresh out of the laundry, works well for wiping the connectors and the magnets .”
• “Have the project booklets on-hand for more reluctant students to get started .”
What is challenging when using littleBits in the classroom?• “Bits can fall off of desks and tables, and often end
up getting stepped on . Using cafeteria trays when students are working with Bits can help with this problem .”
• “It can be challenging for students to put the Bits back in the original boxes. I find that the littleBits tackle box saves a lot of time and it’s easier for students to find what they’re looking for.”
• “Free play with littleBits has its definite advantages, but students will sometimes disengage after a time . Having a goal or design challenge to help structure the play engages students for a longer period of time and helps me meet specific learning standards .”
• “The battery tends to be a bit heavy and does not have little feet that fit into the holes of the shoes. I find that Velcro, rubber bands, and zip ties work well to secure the battery to different surfaces.”
• “Storage space for large unfinished projects can be a challenge. I find that inexpensive bookshelves can hold a lot and use a small amount of space .”
• “Getting Bits to adhere to other materials can sometimes frustrate students . The littleBits shoes that come with the kit work well, and students can reuse them for different projects too.”
SUPPORT RESOURCES
littleBits ForumView a large collection of troubleshooting topics . You can even post your own question to the littleBits expert community . discuss .littlebits .cc/c/troubleshooting
Tips and Tricks BlogRead Bit-specific information and tips from the experts on a variety of Bits. This collection includes video tutorials and clever project ideas . littlebits .cc/tips-tricks
Frequently Asked QuestionsView answers to a list of the most frequently asked questions . support .littlebits .cc/hc/en-us
Table of Contents
29Educator’s Guide
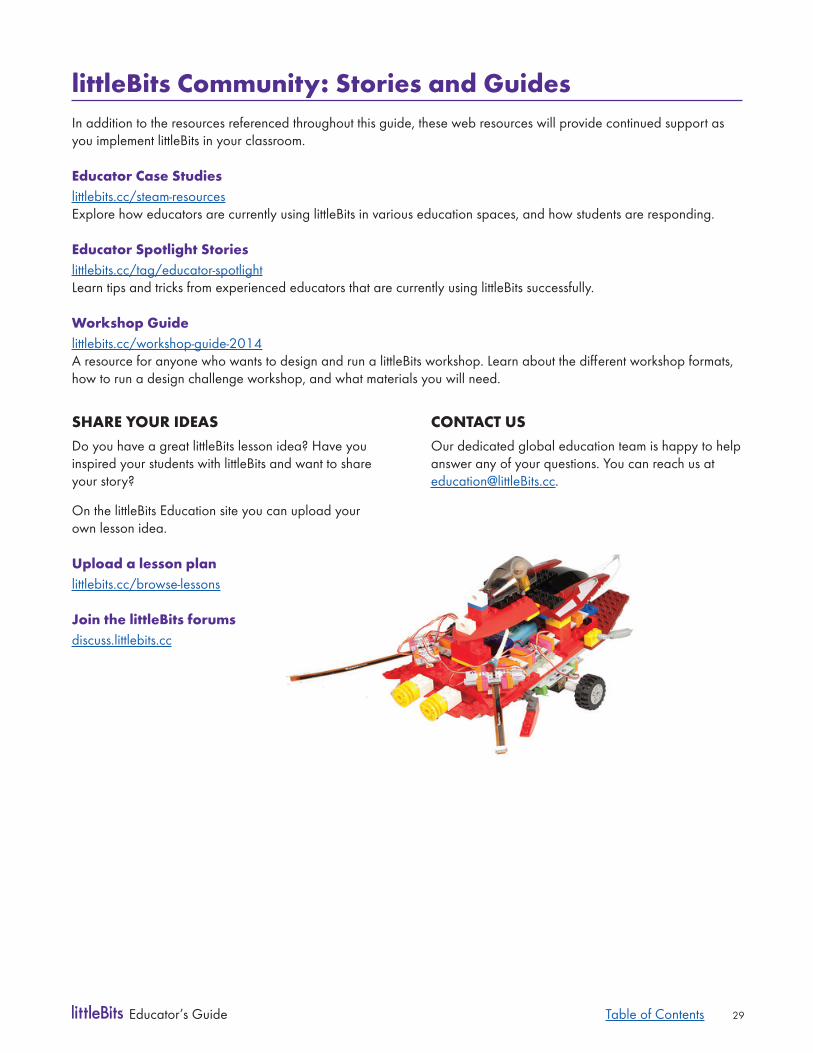
littleBits Community: Stories and GuidesIn addition to the resources referenced throughout this guide, these web resources will provide continued support as you implement littleBits in your classroom .
Educator Case Studieslittlebits .cc/steam-resources Explore how educators are currently using littleBits in various education spaces, and how students are responding .
Educator Spotlight Storieslittlebits .cc/tag/educator-spotlight Learn tips and tricks from experienced educators that are currently using littleBits successfully .
Workshop Guidelittlebits .cc/workshop-guide-2014 A resource for anyone who wants to design and run a littleBits workshop. Learn about the different workshop formats, how to run a design challenge workshop, and what materials you will need .
SHARE YOUR IDEASDo you have a great littleBits lesson idea? Have you inspired your students with littleBits and want to share your story?
On the littleBits Education site you can upload your own lesson idea .
Upload a lesson planlittlebits .cc/browse-lessons
Join the littleBits forumsdiscuss .littlebits .cc
CONTACT USOur dedicated global education team is happy to help answer any of your questions . You can reach us at education@littleBits .cc .
Table of Contents

700-0107 V10