Embed Size (px)
Citation preview
MICROFICHE REFERENCE
A project of Volunteers in Asia
and tie Lmermakt-r T he Cusaw
Published by: Haddon Tools 4719 West Route 120 McHenry, IL 60050 USA
Paper copies dre $ 1.00.
Available from: Haddon Tools 4719 West Rout& 120 McHenry, IL 60050 USA
Reproduced by permission of Haddon Tools.
Reproduction of this microfiche document in any form is subject to the same restrictions as those of the original document.
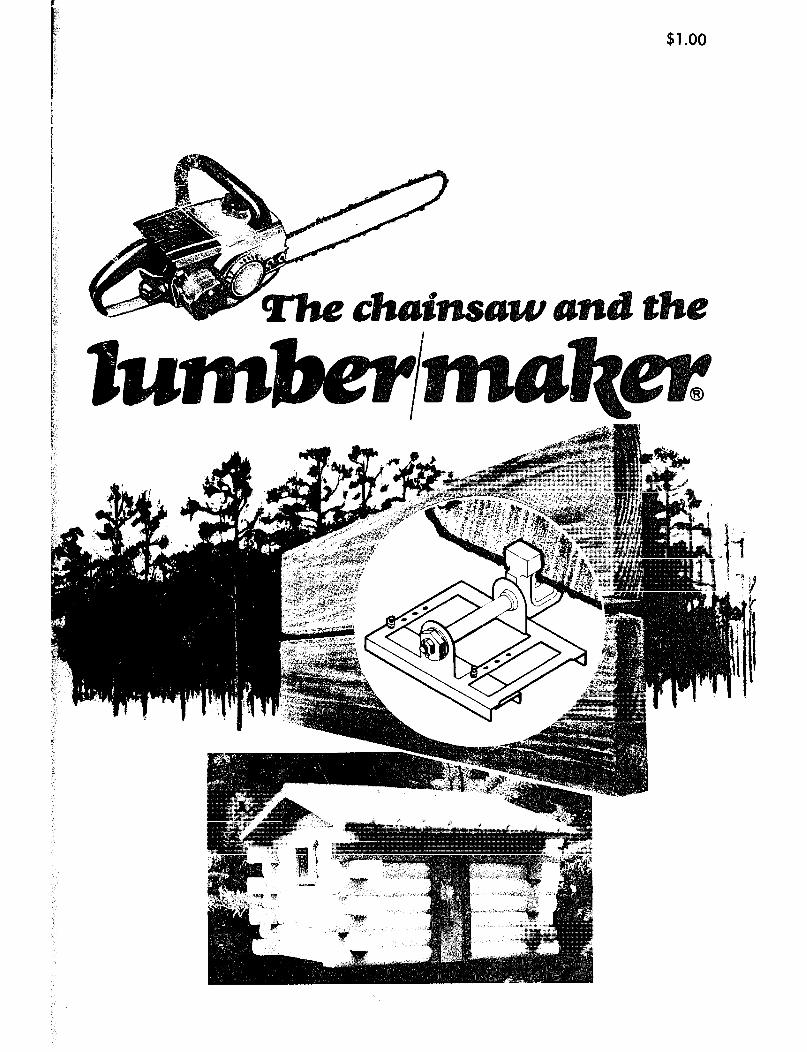
$1.00
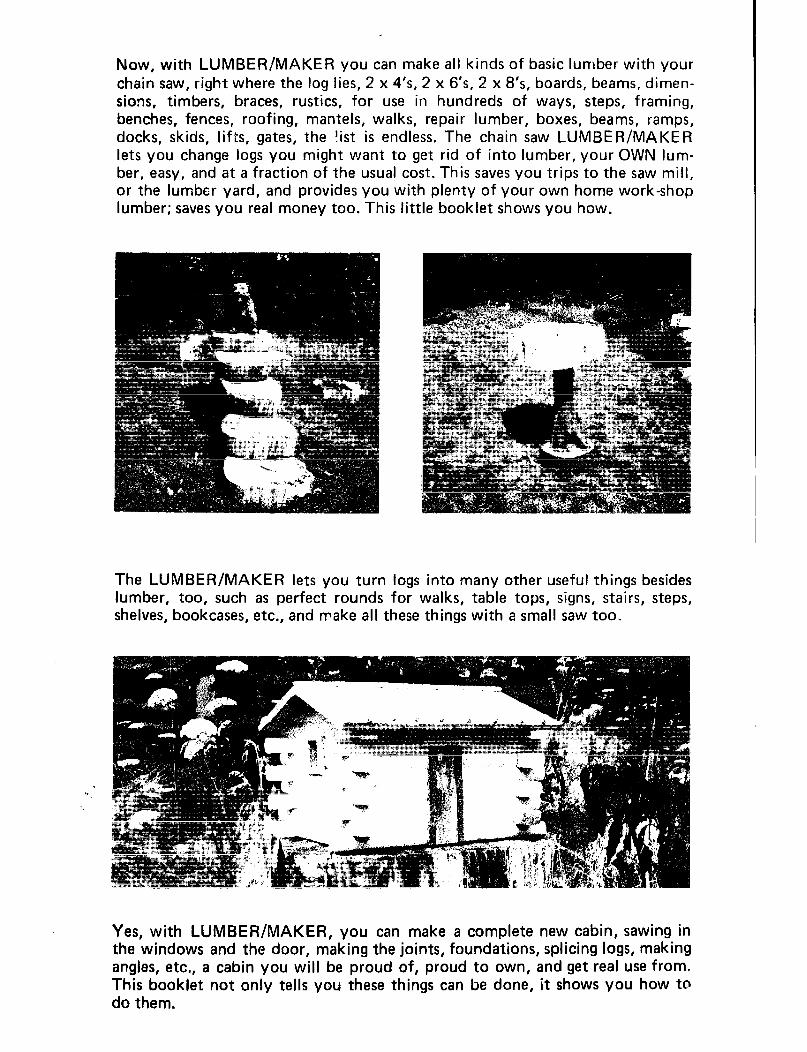
Now, with LUMBER/MAKER you can make all kinds of basic lumber with your chain saw, right where the log lies, 2 x 4’s, 2 x 8’s, 2 x 8’s, boards, beams, dimen- sions, timbers, braces, rustics, for use in hundreds of ways, steps, framing, benches, fences, roofing, mantels, walks, repair lumber, boxes, beams, ramps, docks, skids, lifts, gates, the !ist is endless. The chain saw LUMBER/MAKER lets you change logs you might want to get rid of into lumber, your OWN lum- ber, easy, and at a fraction of the usual cost. This saves you trips to the saw mill, or the lumbsr yard, and provides you with plenty of your own home work-shop lumber; saves you real money too. This little booklet shows you how.
The LUMBER/MAKER lets you turn logs into many other useful things besides lumber, too, such as perfect rounds for walks, table tops, signs, stairs, steps, shelves, bookcases, etc., and make all these things with a small saw too.
Yes, with LUMBER/MAKER, you can make a complete new cabin, sawing in the windows and the door, making the joints, foundations, splicing logs, making angles, etc., a cabin you will be proud of, proud to own, and get real use from. This booklet not only tells you these things can be done, it shows you how to do them.
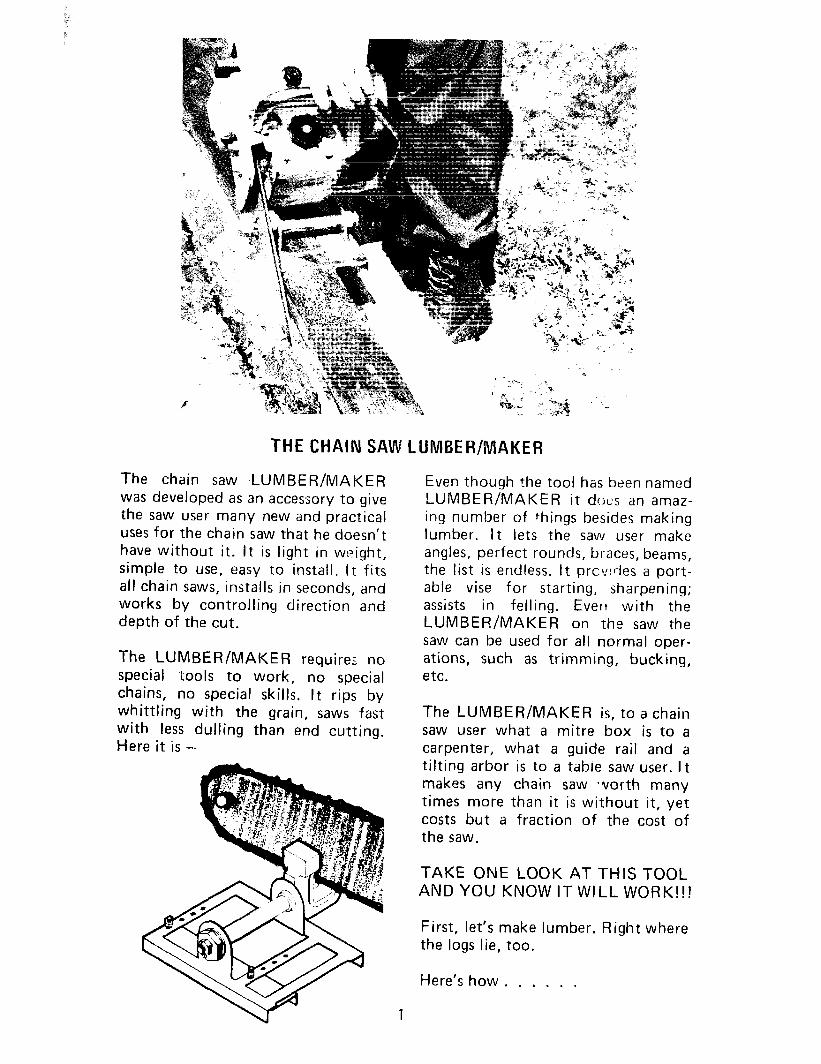
THE CHAIN SAW LUMBER/MAKER
The chain saw .LUMBER/MAKER was developed as an accessory to give the saw user many new and practical uses for the chain saw that he doesn’t have without it. It is light in wi;light, simple to use, easy to install. It fits all chain saws, installs in seconds, and works by controlling direction and depth of the cut.
The LUMBER/MAKER requires no special tools to work, no special chains, no special skills. It rips by whittling with the grain, saws fast with less dulling than end cutting. Here it is -
Even though the tool has been named LUMBER/MAKER it dots an amaz- ing number of things besides making lumber. It lets the saw user make angles, perfect rounds, braces, beams, the list is endless. It prct:!des a port- able vise for starting, sharpening; assists in felling. Even with the LUMBER/MAKER on the saw the saw can be used for all normal oper- ations, such as trimming, bucking, etc.
The LUMBER/MAKER is, to a chain saw user what a mitre box is to a carpenter, what a guide rail and a tilting arbor is to a table saw user. It makes any chain saw *(vorth many times more than it is without it, yet costs but a fraction of the cost of the saw.
TAKE ONE LOOK AT THIS TOOL AND YOU KNOW IT WILL WORK!!!
First, let’s make lumber. Right where the logs lie, too.
Here’s how. . . . . .
1
HERE’S THE WAY TO MAKE 5ASlC LUMBER
The LUMBER/MAKER works by guiding a chain saw down a board fastened nn top of a log, or a “cant” of lumber. Suggested boards to be used as guide boards are 2 x 4’s or 2 x 6’s, available in any lumber yard.
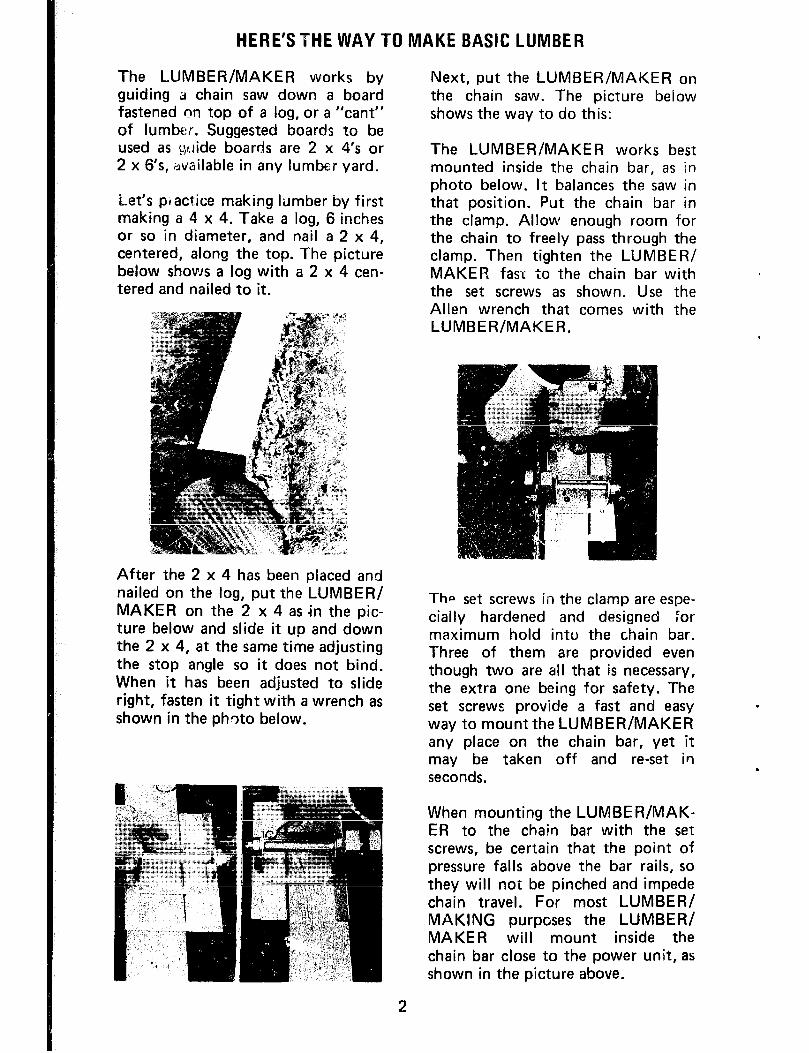
Let’s practice making lumber by first making a 4 x 4. Take a log, 6 inches or so in diameter, and nail a 2 x 4, centered, along the top. The picture below shows a log with a 2 x 4 cen- tered and nailed to it.
After the 2 x 4 has been placed and nailed on the log, put the LUMBER/ MAKER on the 2 x 4 as in the pic- ture below and slide it up and down the 2 x 4, at the same time adjusting the stop angle so it does not bind, When it has been adjusted to slide right, fasten it tight with a wrench as shown in the photo below.
Next, put the LUMBER/MAKER on the chain saw. The picture below shows the way to do this:
The LUMBER/MAKER works best mounted inside the chain bar, as in photo below. It balances the saw in that position. Put the chain bar in the clamp. Allow enough room for the chain to freely pass through the clamp. Then tighten the LUMBER/ MAKER fast to the chain bar with the set screws as shown. Use the Allen wrench that comes with the LUMBER/MAKER.
Tha set screws in the clamp are espe- cially hardened and designed for maximum hold intu the chain bar. Three of them are provided even though two are all that is necessary, the extra one being for safety. The set screws provide a fast and easy way to mount the LUMBER/MAKER any place on the chain bar, yet it may be taken off and reset in seconds.
When mounting the LUMBE R/MAK- ER to the chain bar with the set screws, be certain that the point of pressure falls above the bar rails, so they will not be pinched and impede chain travel. For most LUMBER/ MAKING purposes the LUMBER/ MAKER will mount inside the chain bar close to the power unit, as shown in the picture above.
2
When mounting the LUMBER/MAK- ER to the chain bar with the set screws, tighten the screws evenly, and by hand only, with the “two-in- a-row” being tightened first. Tighten the single one last. These set screws will bite into the chain bar. After you have tightened them by hand, bring the third screw up snug, in case one of the other screws happens to loosen. This screw will act as a safety.
When using the set screws to mount the LUMBER/MAKER on the chain bar, remember that the clamp spreads slightly to keep the screws under con- tinuous tension. Tighten them alter- nately and evenly, by hand, with the key that comes with the tool, until they are set. When you want to take the LUMBER/MAKER nff your saw, LOOSEN THE SCREW, FIRST ONE THEN THE OTHER, .k, LITTLE AT A TIME. If you don’t,. tension on the last one might be so great you will have trouble removing it. If you have trouble removing any screw because it is set too tight, turn the others back in to take the tension off the one that is stuck, then remove it.
Do try this set-screw setting a time or two to get the feel of it before you -actually use it. After you have tighten- jd the set-screws, test for actual set by attempting to move the clamp on the bar. An alternate way to mount the LUMBER/MAKER to the chain saw with nuts and bolts, is likewise available, and has its advantages, especially when lumber making is continuous or the saw is large. This mounting is described later on ir, this booklet. With the LUMBER/ MAKER on the saw and the guide board on the log, we’re ready to make the 4” x 4”.
Start up the saw, and with the LUM- BER/MAKER riding the guide board, saw off first one side of the log, then the other. The illustrations below show one side off, and the next being sawed off. Both sides are removed without moving the guide board.
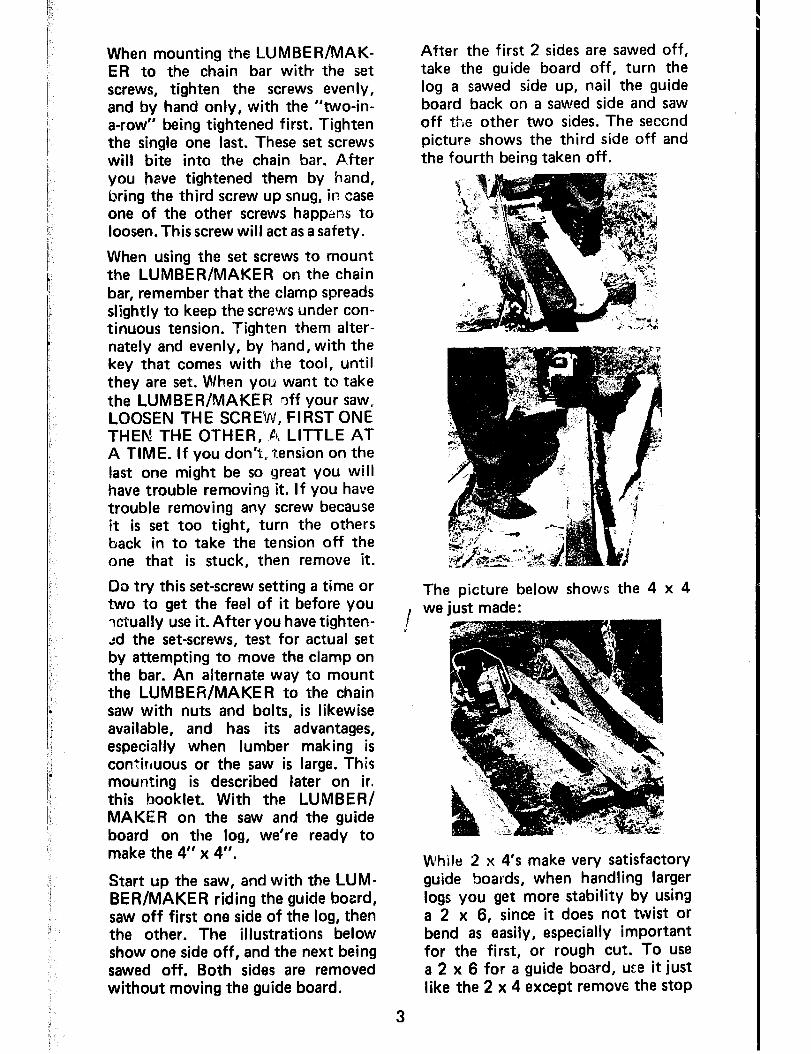
After the first 2 sides are sawed off, take the guide board off, turn the log a sawed side up, nail the guide board back on a sawed side and saw off the other two sides. The second picture shows the third side off and the fourth being taken off.
The picture below shows the 4 x 4 we just made:
While 2 x 4’s make very satisfactory guide boards, when handling larger logs you get more stability by using a 2 x 6, since it does not twist or bend as easily, especially important for the first, or rough cut. To use a 2 x 6 for a guide board, use it just like the 2 x 4 except remove the stop
3
angle from the LUMBER/MAKER, as shown in the following picture:
When using a 2 x 6 as a guide board, the saw rides on a larger surface, and does more precise work.
MAKING A 6 x 6 TIMBER
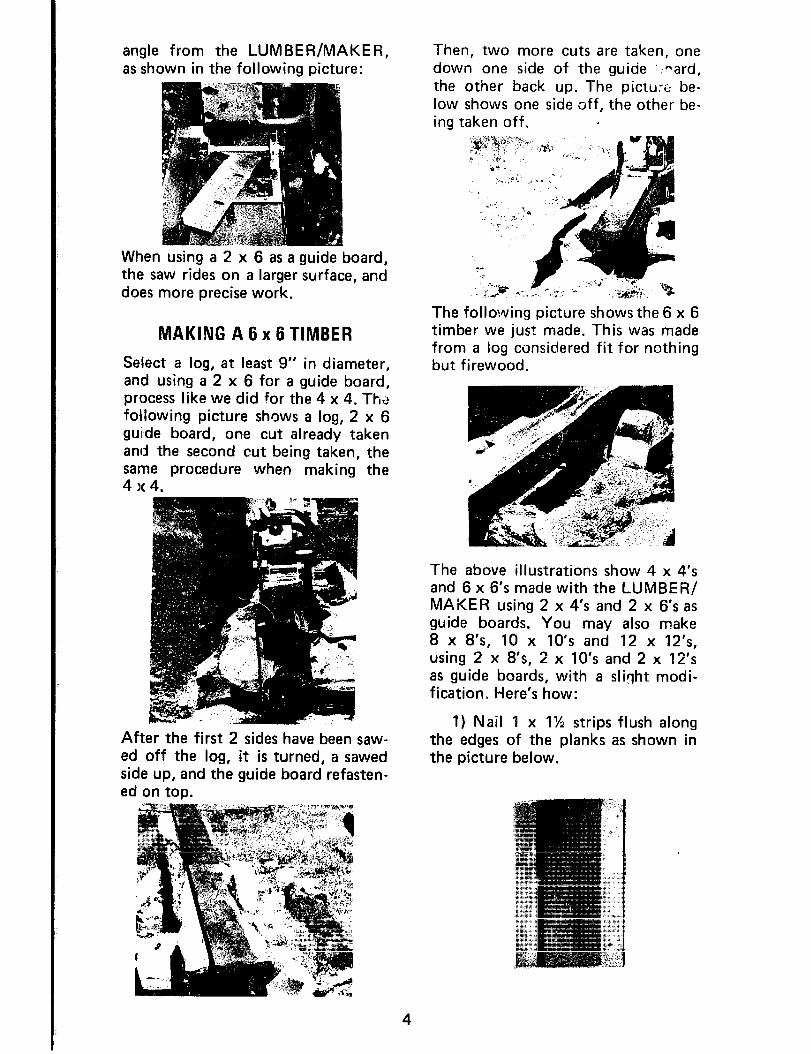
Select a log, at least 9” in diameter, and using a 2 x 6 for a guide board, process like we did for the 4 x 4. Thd following picture shows a log, 2 x 6 guide board, one cut already taken and the second cut being taken, the sarne procedure when making the 4 I< 4.
After the first 2 sides have been saw- ed off the log, it is turned, a sawed side up, and the guide board refasten- ed on top.
Then, two more cuts are taken, one down one side of the guide ‘;nard, the other back up. The pictux be- low shows one side off, the other be- ing taken off.
The following picture shows the 6 x 6 timber we just made. This was made from a log considered fit for nothing but firewood.
The above illustrations show 4 x 4’s and 6 x 6’s made with the LUMBER/ MAKER using 2 x 4’s and 2 x 6’s as guide boards. You may also make 8 x 8’s, IO x 10’s and 12 x 12’s, using 2 x 8’s, 2 x 10’s and 2 x 12’s as guide boards, with a slight modi- fication. Here’s how:
1) Nail 1 x 1% strips flush along the edges of the planks as shown in the picture below.
4
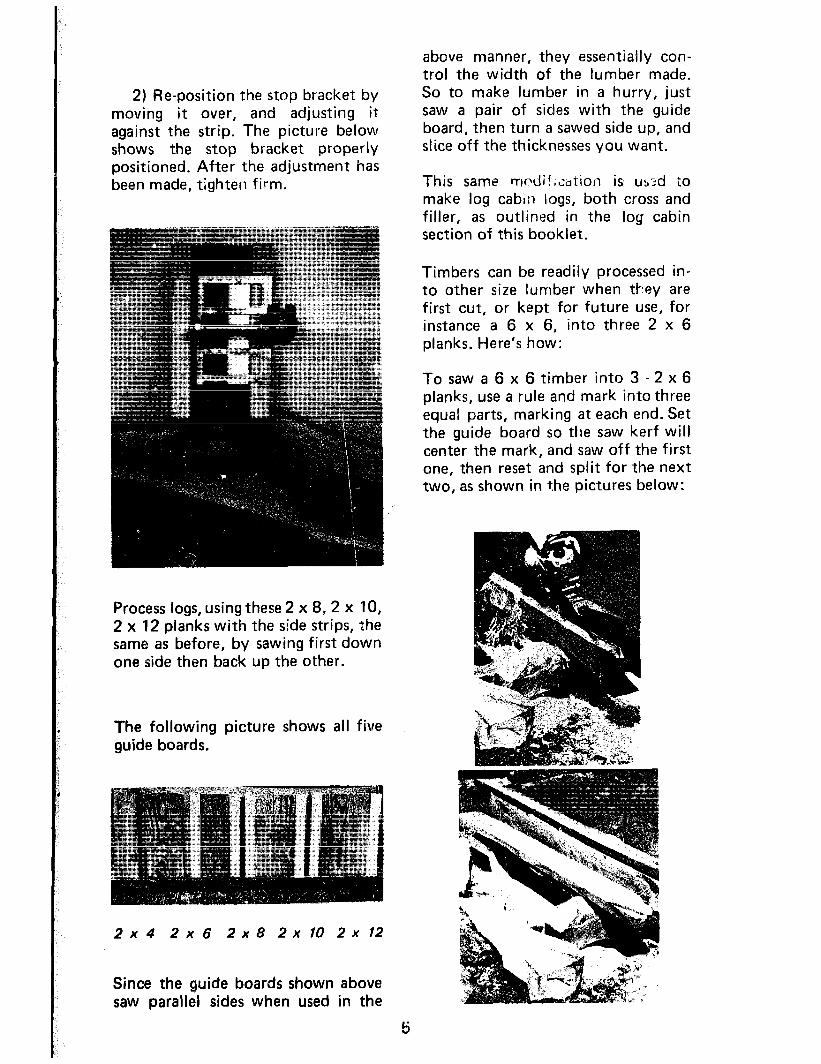
2) Re-position the stop bracket by moving it over, and adjusting it against the strip. The picture below shows the stop bracket properly positioned. After the adjustment has been made, tighten firm.
Process logs, using these 2 x 8, 2 x 10, 2 x 12 planks with the side strips, the same as before, by sawing first down one side then back up the other.
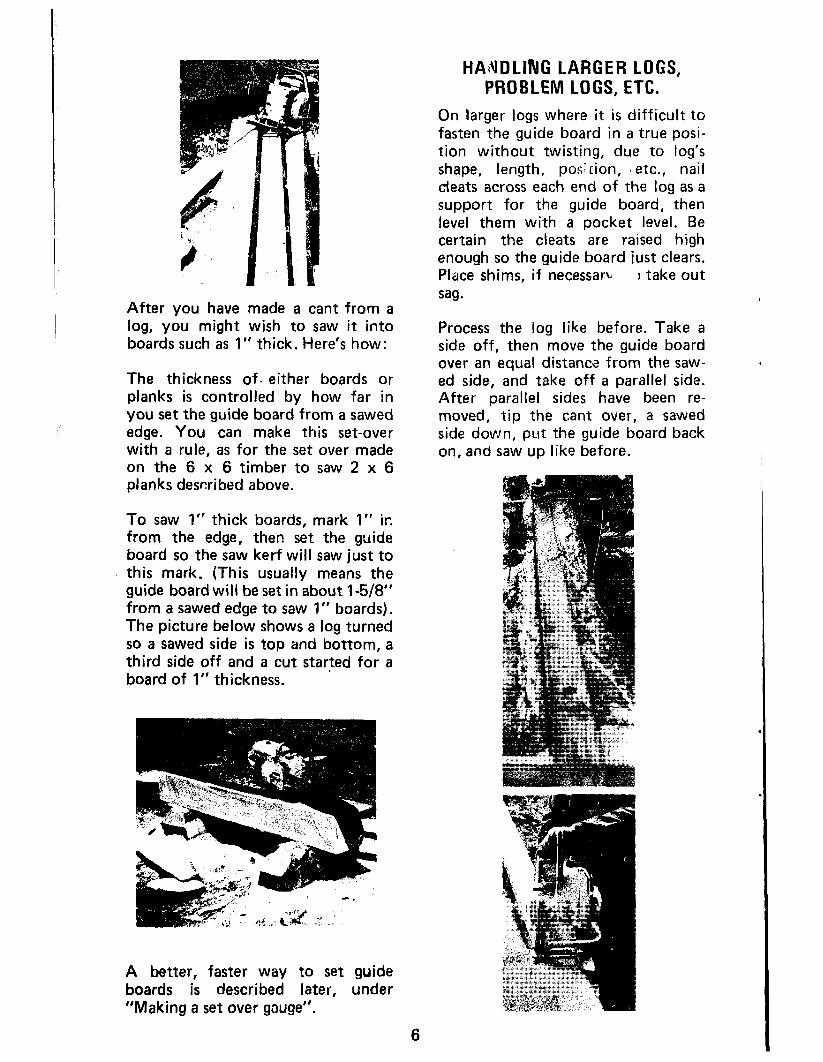
The following picture shows all five guide boards.
2x4 2x6 2x8 2x10 2x12
Since the guide boards shown above saw parallel sides when used in the
above manner, they essentially con- trol the width of the lumber made. So to make lumber in a hurry, just saw a pair of sides with the guide board, then turn a sawed side up, and slice off the thicknesses you want.
This same wdii,c~tion is ub3d to make log cabi;> logs, both cross and filler, as outlined in the log cabin section of this booklet.
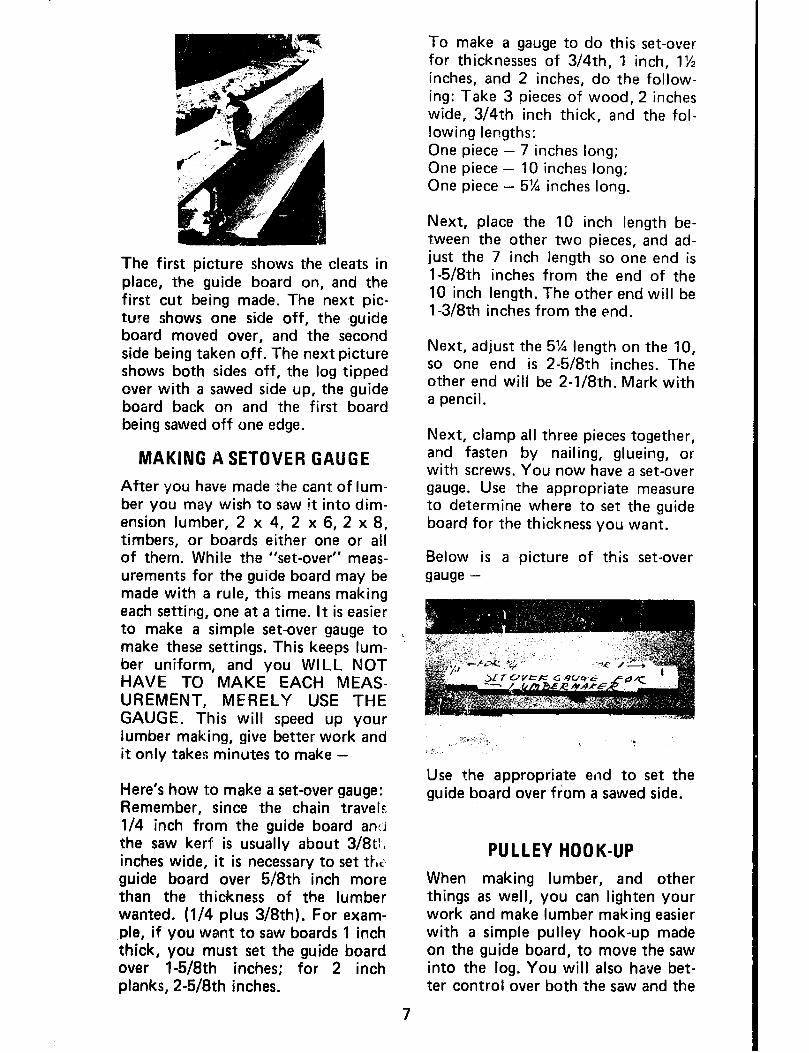
Timbers can be readily processed in- to other size lumber when My are first cut, or kept for future use, for instance a 6 x 6, into three 2 x 6 planks. Here’s how:
To saw a 6 x 6 timber into 3 - 2 x 6 planks, use a rule and mark into three equal parts, marking at each end. Set the guide board so the saw kerf will center the mark, and saw off the first one, then reset and split for the next two, as shown in ?he pictures below:
After you have made a cant from a log, you might wish to saw it into boards such as 1” thick. Here’s how:
The thickness of. either boards or planks is controlled by how far in you set the guide board from a sawed edge. You can make this set-over with a rule, as for the set over made on the 6 x 6 timber to saw 2 x 6 planks described above.
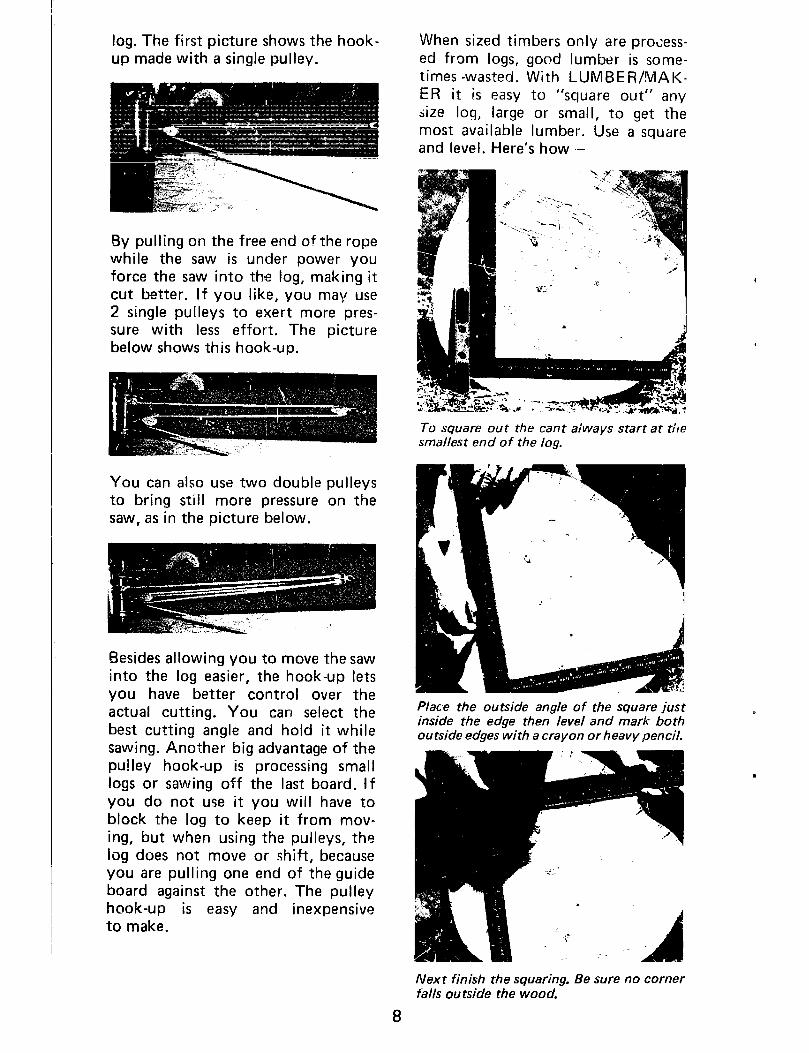
To saw I” thick boards, mark 1” ir. from the edge, then set the guide board so the saw kerf will saw just to this mark. (This usually means the guide board will be set in about l-5/8” from a sawed edge to saw 1” boards). The picture below shows a log turned so a sawed side is top and bottom, a third side off and a cut started for a board of 1” thickness.
A better, faster way to set guide boards is described later, under “Making a set over gauge”.
HAdDLING LARGER LOGS, PROBLEM LOGS, ETC.
On larger logs where it is difficult to fasten the guide board in a true posi- tion without twisting, due to log’s shape, length, position, . etc., nail cleats across each end of the log as a support for the guide board, then level them with a pocket level. Be certain the cleats are raised high enough so the guide board iust clears. Place shims, if necessarb I take out sag.
Process the log like before. Take a side off, then move the guide board over an equal distance from the saw- ed side, and take off a parallel side. After parallel sides have been re- moved, tip the cant over, a sawed side down, put the guide board back on, and saw up like before.
6
The first picture shows the cleats in place, the guide board on, and the first cut being made. The next pic- ture shows one side off, the .guide board moved over, and the second side being taken off. The next picture shows both sides off, the log tipped over with a sawed side up, the guide board back on and the first board being sawed off one edge.
MAKING A SETOVER GAUGE
After you have made the cant of lum- ber you may wish to saw it into dim- ension lumber, 2 x 4, 2 x 6, 2 x 8, timbers, or boards either one or all of them. While the “set-over” meas- urements for the guide board may be made with a rule, this means making each setting, one at a time. It is easier to make a simple set-over gauge to make these settings. This keeps lum- ber uniform, and you WILL NOT HAVE TO MAKE EACH MEAS- UREMENT, MERELY USE THE GAUGE. This will speed up your lumber making, give better work and it only takes minutes to make -
Here’s how to make a set-over gauge: Remember, since the chain travels l/4 inch from the guide board ant1 the saw kerf is usually about 3/8t:, inches wide, it is necessary to set the> guide board over 5/8th inch more than the thickness of the lumber wanted. (l/4 plus 3/8th). For exam- ple, if you want to saw boards 1 inch thick, you must set the guide board over I-5/8th inches; for 2 inch planks, 2-5/8th inches.
To make a gauge to do this set-over for thicknesses of 3/4th, 1 inch, 1% inches, and 2 inches, do the follow- ing: Take 3 pieces of wood, 2 inches wide, 3/4th inch thick, and the fol- lowing lengths: One piece - 7 inches long; One piece - 10 inches long; One piece - 5% inches long.
Next, place the 10 inch length be- tween the other two pieces, and ad- just the 7 inch length so one end is l-5/8th inches from the end of the 10 inch length. The other end will be I-3/8th inches from the end.
Next, adjust the 5% length on the 10, so one end is 2-5/8th inches. The other end will be 2-1/8th. Mark with a pencil.
Next, clamp all three pieces together, and fasten by nailing, glueing, or with screws. You now have a set-over gauge. Use the appropriate measure to determine where to set the guide board for the thickness you want.
Below is a picture of this set-over gauge -
Use the appropriate end to set the guide board over from a sawed side.
PULLEY HOOK-UP
When making lumber, and other things as well, you can lighten your work and make lumber making easier with a simple pulley hook-up made on the guide board, to move the saw into the log. You will also have bet- ter control over both the saw and the
7
log. The first picture shows the hook- up made with a single pulley.
When sized timbers only are process- ed from logs, good lumber is some- times -wasted. With LUMBER/MAK- ER it is easy to “square out” any size log, large or small, to get the most available lumber. Use a square and level. Here’s how -
By pulling on the free end of the rope while the saw is under power you force the saw into the log, making it cut better. If you like, you may use 2 single pulleys to exert more pres- sure with less effort. The picture below shows this hook-up.
To square out the cant always start at the smallest end of the log.
You can also use two double pulleys to bring still more pressure on the saw, as in the picture below.
Besides allowing you to move the saw into the log easier, the hook-up lets you have better control over the actual cutting. You can select the best cutting angle and hold it while sawing. Another big advantage of the pulley hook-up is processing small logs or sawing off the last board. If you do not use it you will have to block the log to keep it from mov- ing, but when using the pulleys, the log does not move or shift, because you are pulling one end of the guide board against the other. The pulley hook-up is easy and inexpensive to make.
Plac,e the outside angle of the square just inside the edge then level and mark both outside edges with a crayon or heavy pencil.
Next finish the squaring. Be sure no corner falls outside the wood.
8
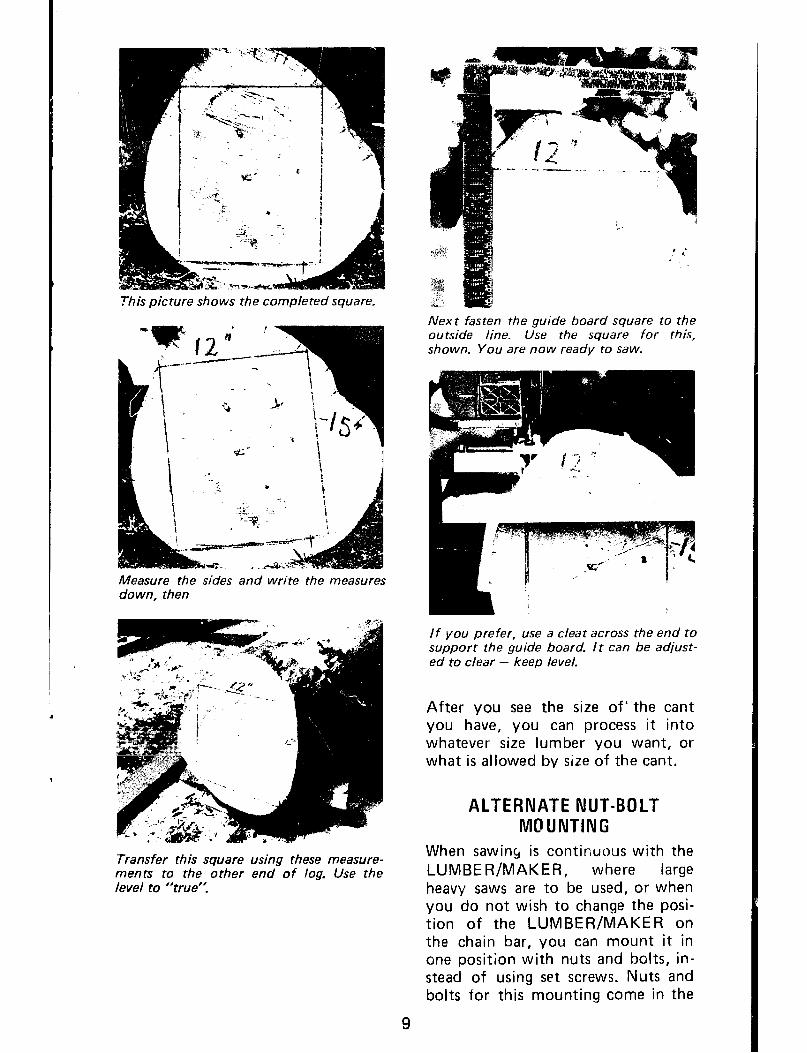
This picture shows the completed square.
Measure the sides and write the measures down, then
Transfer this square using these measure- ments to the other end of log. Use the level to “true”.
9
Next fasten the guide board square to the outside line. Use the square for this, shown. You are now ready to saw.
If you prefer, use a cleat across the end to support the guide board. It can be adjust- ed to clear - keep level.
After you see the size of’ the cant you have, you can process it into whatever size lumber you want, or what is allowed by size of the cant.
ALTERNATE NUT-BOLT MCWNTING
When sawing is continuous with the LUMBER/MAKER, where large heavy saws are to be used, or when you do not wish to change the posi- tion of the LUMBER/MAKER on the chain bar, you can mount it in one position with nuts and bolts, in- stead of using set screws. Nuts and bolts for this mounting come in the
parts bag. Two pilot holes are pro- vided in one side of the clamp, to locate the place to drill and guide the bit. This allows this mou ::ing to be made easily and accurately.
Do use a good l/4” steel cutting bit to make this mounting.
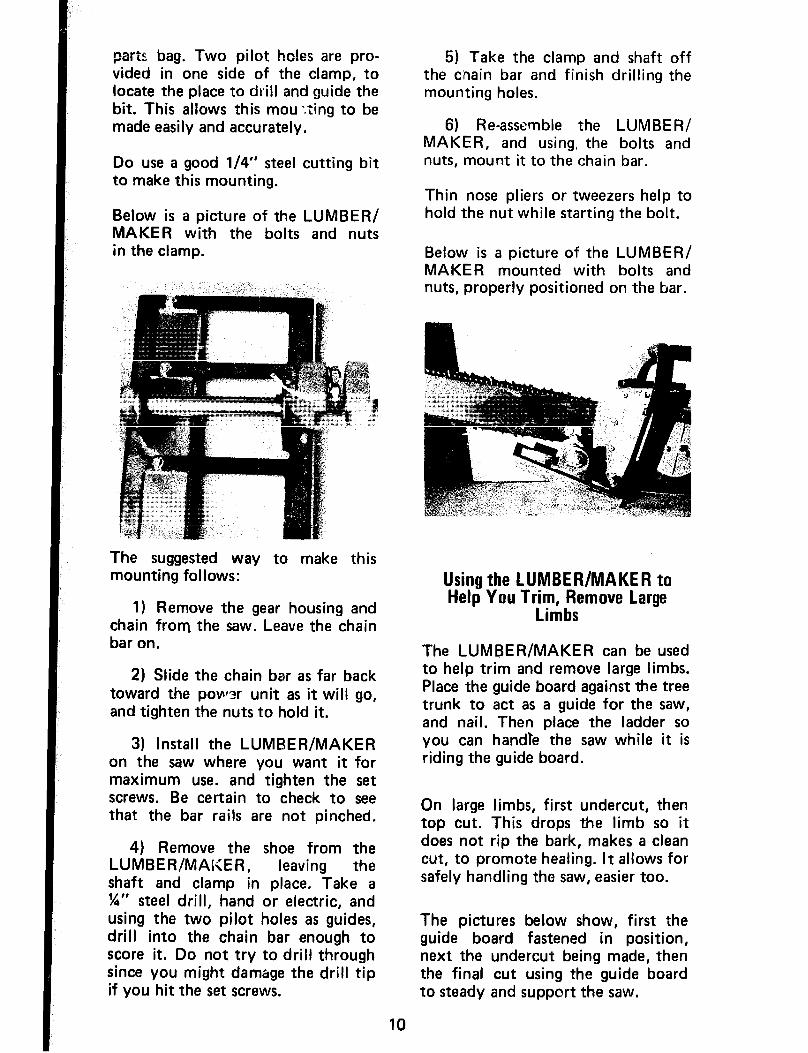
Below is a picture of the LUMBER/ MAKER with the bolts and nuts in the clamp.
The suggested way to make this mounting follows:
1) Remove the gear housing and chain from the saw. Leave the chain bar on,
2) Slide the chain bar as far back toward the power unit as it will go, and tighten the nuts to hold it.
3) Install the LUMBER/MAKER on the saw where you want it for maximum use. and tighten the set screws. Be certain to check to see that the bar rails are not pinched.
4) Remove the shoe from the LUMBER/MAKER, leaving the shaft and clamp in place. Take a I&” steel drill, hand or electric, and using the two pilot holes as guides, drill into the chain bar enough to score it. Do not try to drill through since you might damage the drill tip if you hit the set screws.
5) Take the clamp and shaft off the c‘nain bar and finish drilling the mounting holes.
6) Re-assemble the LUMBER/ MAKER, and using, the bolts and nuts, mount it to the chain bar.
Thin nose pliers or tweezers help to hold the nut while starting the bolt.
Below is a picture of the LUMBER/ MAKER mounted with bolts and nuts, properly positioned on the bar.
Using the LUMBER/MAKER to Help You Trininemove Large
The LUMBER/MAKER can be used to help trim and remove large limbs. Place the guide board against the tree trunk to act as a guide for the saw, and nail. Then place the ladder so you can handle the saw while it is riding the guide board.
On large limbs, first undercut, then top cut. This drops the limb so it does not rip the bark, makes a clean cut, to promote healing. It allows for safely handling the saw, easier too.
The pictures below show, first the guide board fastened in position, next the undercut being made, then the final cut using the guide board to steady and support the saw.
10

By us~rlq the LUMBE ~/MA KE R iot felling, ~lfid followlr,y ttiti dbovr pro- cedure, the saw will not !)lnd. It WIII allow thr operatot- to V;/or k irl iull view of “what’s happening”, and till1 allow a very COP’ .,rtable position for the operator. LUMBER/MAKER leaves practically no stump, addinq what used to he cons~derecl waste to the log. LUMBER/MAKER ic easier, faster and safer. One man can d3 it. Large trees can be easily handled, less accllferlts w111 happen, a11d the operator never WOI ks “blind”.
Use Your LUMBER/MAKER To Help You Fell Trees
1
To fell trees easily, safely, get more lumber, and not leave an unsightly SIUF,;P, do it this way:
Make your fellings wedge cut as low as you can, then place a guide board on the opposite Fide, horirontally, so the saw will cut a couple of inches atJove the knife polrlt of the weclqe. Adjust the LUMBER/MAKER on the saw 50 thr saw will cut only deep enough to cause the tlee to fall. In trl s manner you WIII have perfect ccritrol.
If wedges WIII t,e necessary to kerp the cut from closing, saw rhc ~;~c-lt:s of the cut first, Ieavtng the center Intact, and drive in the wedges. Sa~v the cen- ter of thf, cut last.
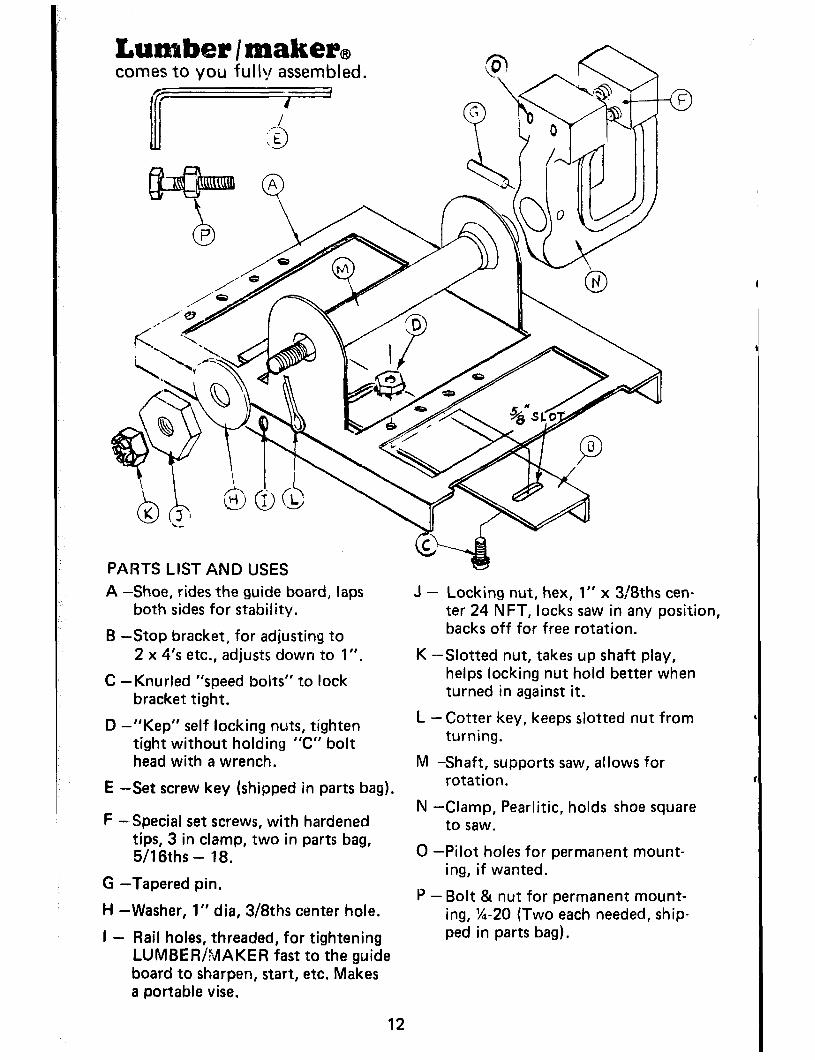
comes to you fully assembled.
PARTS LIST AND USES A -Shoe, rides the guide board, laps J - Locking nut, hex, 1” x 3/8ths cen-
both sides for stability. ter 24 NFT, locks saw in any position,
B -Stop bracket, for adjusting to backs off for free rotation.
2 x 4’s etc., adjusts down to 1”. K -Slotted nut, takes up shaft play,
C -Knurled “speed bolts” to lock helps locking nut hold better when
bracket tight. turned in against it.
D -I’ Kep” self locking nuts, tighten L -Cotter key, keeps slotted nut from
tight without holding “C” bolt turning.
head with a wrench. M -Shaft, supports saw, allows for
E -Set screw key (shipped in parts bag). rotation.
F -Special set screws, with hardened N -Clamp, Pearlitic, holds shoe square
to saw. tips, 3 in clamp, two in parts bag, 5/l 6ths - 18. 0 -Pilot holes for permanent mount-
G -Tapered pin, ing, if wanted.
H -Washer, 1” dia, 3/8ths center hole. P -Bolt & nut for permanent mount-
ing, X-20 (Two each needed, ship-
I - Rail holes, threaded, for tightening LUMBER/MAKER fast to the guide board to sharpen, start, etc. Makes a portable vise.
ped in parts bag).
12
LUMBER/MAKING HELPFUL HINTS - COMMON SENSE TIPS
L
I
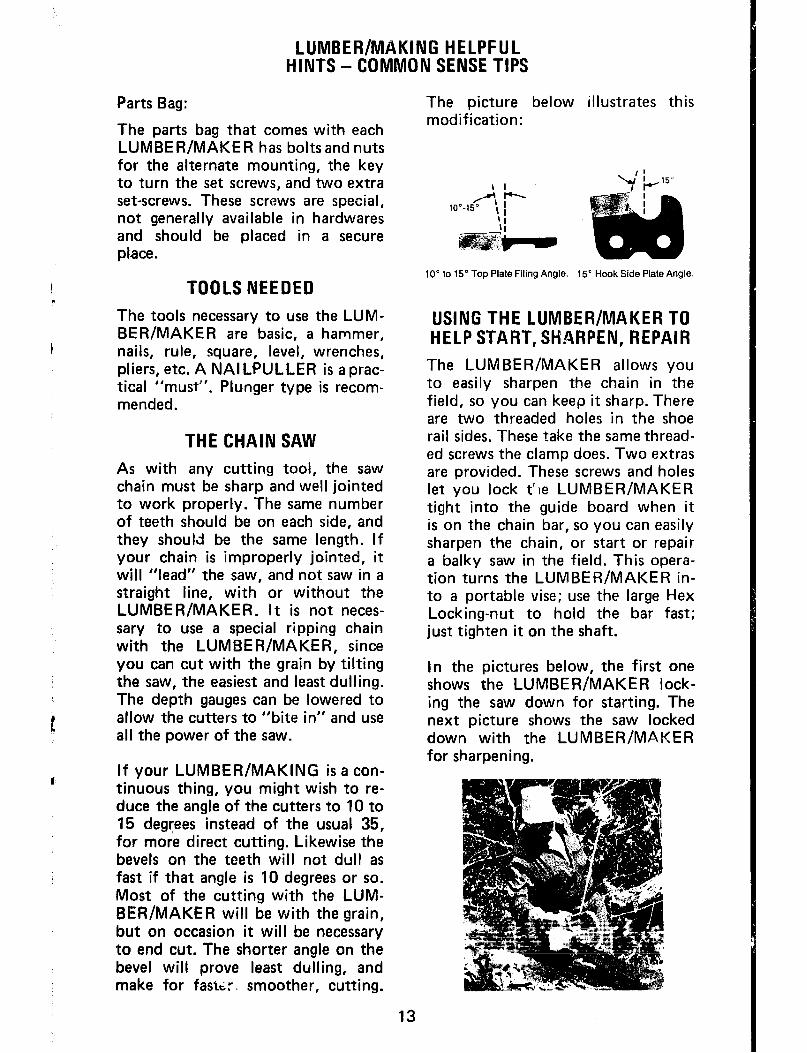
Parts Bag: The picture below illustrates this
The parts bag that comes with each LUMBER/MAKER has bolts and nuts for the alternate mounting, the key to turn the set screws, and two extra set-screws. These screws are special, not generally available in hardwares and should be placed in a secure place.
TOOLS NEEDED 10” to 15” Top Plate Filing Angle. 15” Hook Side Plate Angle.
The tools necessary to use the LUM- BER/MAKER are basic, a hammer, nails, rule, square, level, wrenches, pliers, etc. A NAILPULLER is a prac- tical “must”. Plunger type is recom- mended.
USING THE LUMBER/MAKER TO HELP START, SHARPEN, REPAIR
The LUMBER/MAKER allows you to easily sharpen the chain in the field, so you can keep it sharp. There . . . . . . .
THE CHAIN SAW
As with any cutting tool, the saw chain must be sharp and well jointed to work properly. The same number of teeth should be on each side, and they should be the same length. If your chain is improperly jointed, it will “lead” the saw, and not saw in a straight line, with or without the LUMBER/MAKER. It is not neces- sary to use a special ripping chain with the LUMBER/MAKER, since you can cut with the grain by tilting the saw, the easiest and least dulling. The depth gauges can be lowered to allow the cutters to “bite in” and use all the power of the saw.
If your LUMBER/MAKING is a con- tinuous thing, you might wish to re- duce the angle of the cutters to 10 to 15 degrees instead of the usual 35, for more direct cutting. Likewise the bevels on the teeth will not dull as fast if that angle is 10 degrees or so. Most of the cutting with the LUM- BER/MAKER will be with the grain, but on occasion it will be necessary to end cut. The shorter angle on the bevel will prove least dulling, and make for fastt;r. smoother, cutting.
13
are two threaded holes In the shoe rail sides. These take the same thread- ed screws the clamp does. Two extras are provided. These screws and holes let you lock tile LUMBER/MAKER tight into the guide board when it is on the chain bar, so you can easily sharpen the chain, or start or repair a balky saw in the field. This opera- tion turns the LUMBER/MAKER in- to a portable vise; use the large Hex Locking-nut to hold the bar fast; just tighten it on the shaft.
In the pictures below, the first one shows the LUMBER/MAKER lock- ing the saw down for starting. The next picture shows the saw locked down with the LUMBER/MAKER for sharpening.
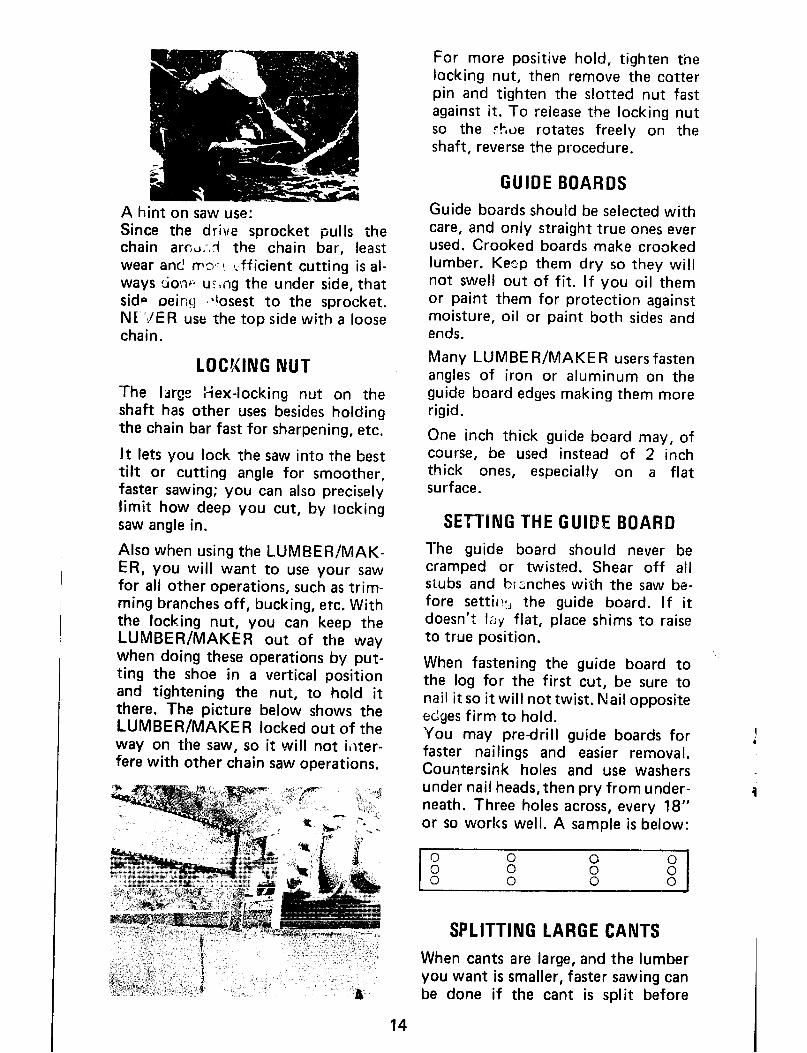
A hint on saw use: Since the drive sprocket pulls the chain arc,ti;,d the chain bar, least wear and rr9- 1 efficient cutting is al- ways tio:~ ur,ng the under side, that sidp oeiriq ,*rosest to the sprocket. NEVER use the top side with a loose chain.
LOCKING NUT The large tiex-locking nut on the shaft has other uses besides holding the chain bar fast for sharpening, etc.
It lets you lock the saw into the best tilt or cutting angle for smoother, faster sawing; you can also precisely limit how deep you cut, by rocking saw angle in.
Also when using the LUMBER/MAK- ER, you will want to use your saw for all other operations, such as trim- ming branches off, bucking, etc. With the locking nut, you can keep the LUMBER/MAKER out of the way when doing these operations by put- ting the shoe in a vertical position and tightening the nut, to hold it there. The picture below shows the LUMBER/MAKER locked out of the way on the saw, so it will not iliter- fere with other chain saw operations.
For more positive hold, tighten the locking nut, then remove the cotter pin and tighten the slotted nut fast against it. To release the locking nut so the Fhtie rotates freely on the shaft, reverse the procedure.
GUIDE BOARDS Guide boards should be selected with care, and only straight true ones ever used. Crooked boards make crooked lumber. Keep them dry so they will not swell out of fit. If you oil them or paint them for protection against moisture, oil or paint both sides and ends.
Many LUMBE R/MAKER users fasten angles of iron or aluminum on the guide board edges making them more rigid.
One inch thick guide board may, of course, be used instead of 2 inch thick ones, especially on a flat surface.
SETTING THE GUIDE BOARD The guide board should never be cramped or twisted. Shear off all stubs and branches with the saw be- fore settir!!, the guide board. If it doesn’t lay flat, place shims to raise to true position.
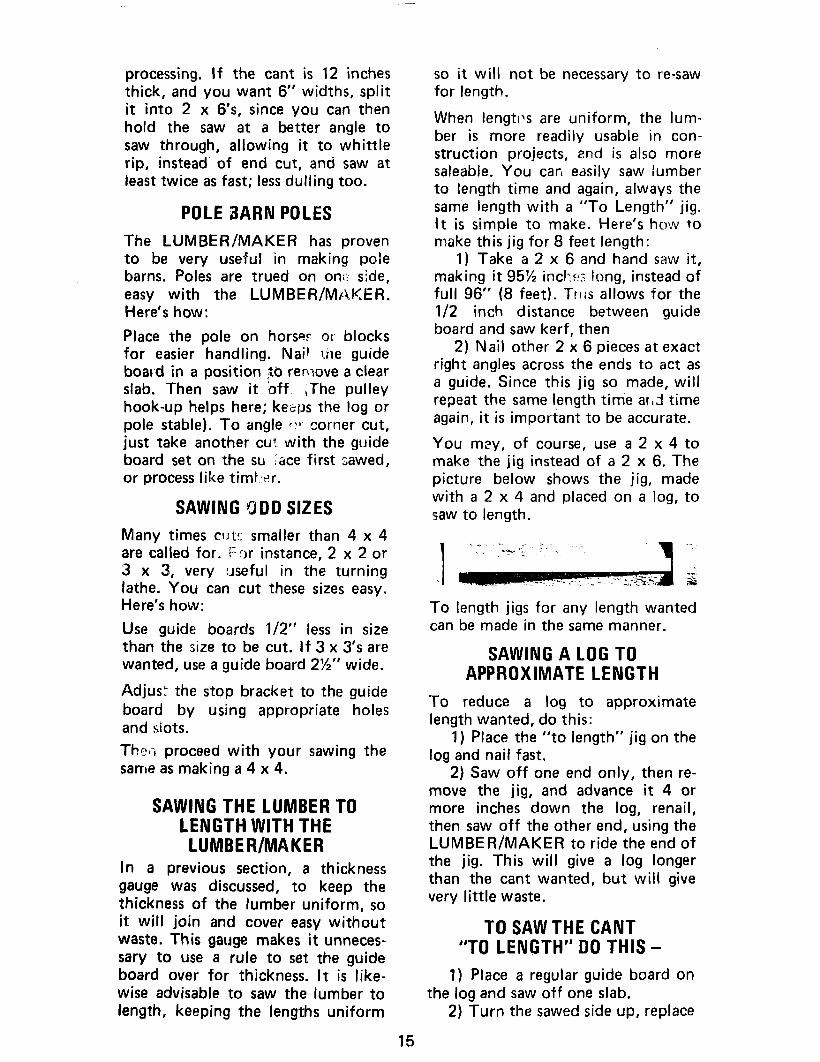
When fastening the guide board to ” the log for the first cut, be sure to nail it so it will not twist. Nail opposite edges firm to hold. You may predrill guide boards for faster nailings and easier removal. Countersink holes and use washers under nail heads, then pry from under- neath. Three holes across, every 18” or so works well. A sample is below:
SPLITTING LARGE CANTS
When cants are large, and the lumber you want is smaller, faster sawing can be done if the cant is split before
processing. If the cant is 12 inches thick, and you want 6” widths, split it into 2 x 6’s, since you can then hold the saw at a better angle to saw through, allowing it to whittle rip, instead of end cut, and saw at least twice as fast; less dulling too.
POLE %ARN POLES
The LUMBER/MAKER has proven to be very useful in making pole barns. Poles are trued on onrr side, easy with the LUMBER/M/#IER. Here’s how:
Place the pole on horse? ct blocks for easier handling. Nail tire guide boar,d in a position Fo renlove a clear slab. Then saw it off ;The pulley hook-up helps here; keqs the log or pole stable). To angle ‘Y corner cut, just take another cu? with the guide board set on the su :tice first sawed, or process like timt:sr.
SAWING ODD SIZES Many times clltt smaller than 4 x 4 are called for . Frjr instance, 2 x 2 or 3 x 3, very useful in the turning lathe. You can cut these sizes easy. Here’s how:
Use guide boards l/2” less in size than the size to be cut. If 3 x 3’s are wanted, use a guide board 2%” wide.
Adjust- the stop bracket to the guide board by using appropriate holes and siots.
The11 proceed with your sawing the same as making a 4 x 4.
SAWING THE LUMBER TO LENGTH WITH THE LUMBER/MAKER
In a previous section, a thickness gauge was discussed, to keep the thickness of the lumber uniform, so it will join and cover easy without waste. This gauge makes it unneces- sary to use a rule to set the guide board over for thickness. It is like- wise advisable to saw the lumber to length, keeping the lengths uniform
15
so it will not be necessary to re-saw for length.
When lengtr\s are uniform, the lum- ber is more readily usable in con- struction projects, end is also more saleable. You can easily saw lumber to length time and again, always the same length with a “To Length” jig. It is simple to make. Here’s how to make this jig for 8 feet length:
I) Take a 2 x 6 and hand saw it, making it 95% in&p: long, instead of full 96” (8 feet). Trr~s allows for the l/2 inch distance between guide board and saw kerf, then
2) Nail other 2 x 6 pieces at exact right angles across the ends to act as a guide. Since this jig so made, will repeat the same length time arJ time again, it is important to be accurate.
You msy, of course, use a 2 x 4 to make the jig instead of a 2 x 6. The picture below shows the jig, made with a 2 x 4 and placed on a log, to saw to length.
1 I ‘. __ Z.‘ . - . “-” “. z&
To length jigs for any length wanted can be made in the same manner.
SAWING A LOG TO APPROXIMATE LENGTH
To reduce a log to approximate length wanted, do this:
1) Place the “to length” jig on the log and nail fast.
2) Saw off one end only, then re- move the jig, and advance it 4 or more inches down the log, renail, then saw off the other end, using the LUMBER/MAKER to ride the end of the jig. This will give a log longer than the cant wanted, but will give very little waste.
TO SAW THE CANT “TO LENGTH” DO THIS -
1) Place a regular guide board on the log and saw off one slab.
2) Turn the sawed side up, replace
the guide board, then saw off an- other slab.
3) Either continue squaring out, before setting the jig, or set it now. Set the jig with the guide board flush to a sawed edge, and saw off the ends, using the ends of the jig for guides. T!;is procedure is pictured below:
SAWING PARALLEL ENDS, ANGLES, BRACES WITH THE
LUMBER/MAKER In the previous section we showed how you can saw parallel ends on logs and cants with a “To Length” jig. This was mainly to reduce logs and cants to a certain uniform length to increase their usefulness, and longer lengths was illustrated. Of course the same jig can be made to be used on smaller and shorter logs. The picture below shows a smaller jig being used for this purpose.
A stop has been placed on the above jig so the log will be kept as straight as possible.
Many other LUMBER/MAKER users find another type jig more to their liking because the same jig permits angles and braces to be sawed as well
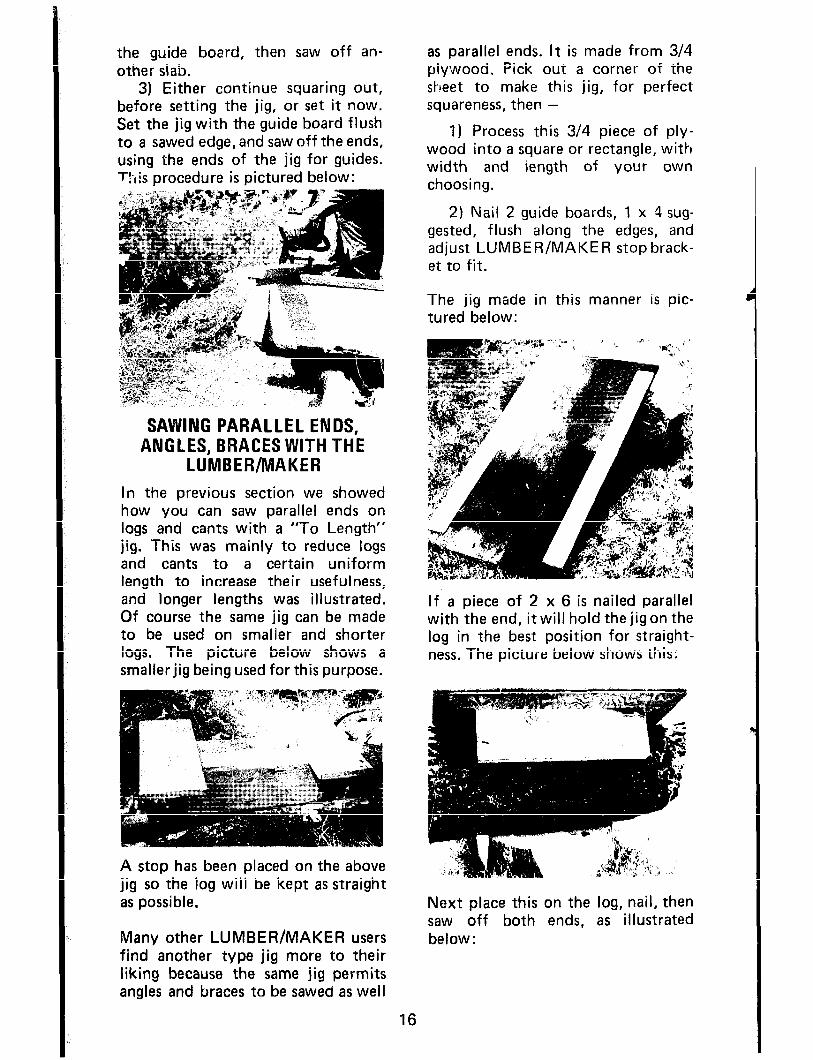
as parallel ends. It is made from 3/4 plywood. Pick out a corner of the sheet to make this jig, for perfect squareness, then -
1) Process this 3/4 piece o wood into a square or rectangle width and length of your choosing.
If ply- , with
own
2) Nail 2 guide boards, 1 x 4 sug- gested, flush along the edges, and adjust LUMBER/MAKER stop brack- et to fit.
The jig made in this manner is pic- tured below:
If a piece of 2 x 6 is nailed parallel with the end, it will hold the jig on the log in the best position for straight- ness. The picture below shows this:
Next place this on the log, nail, then saw off both ends, as illustrated below:
16
This makes a log that will stand straight up, and of certain predeter- mined length for table legs, sun dials, etc. The log shown below stands straight and true.
_I.
-c. f
.,-
), ,‘. +-..
-, -a, il. ‘A.
, .“..
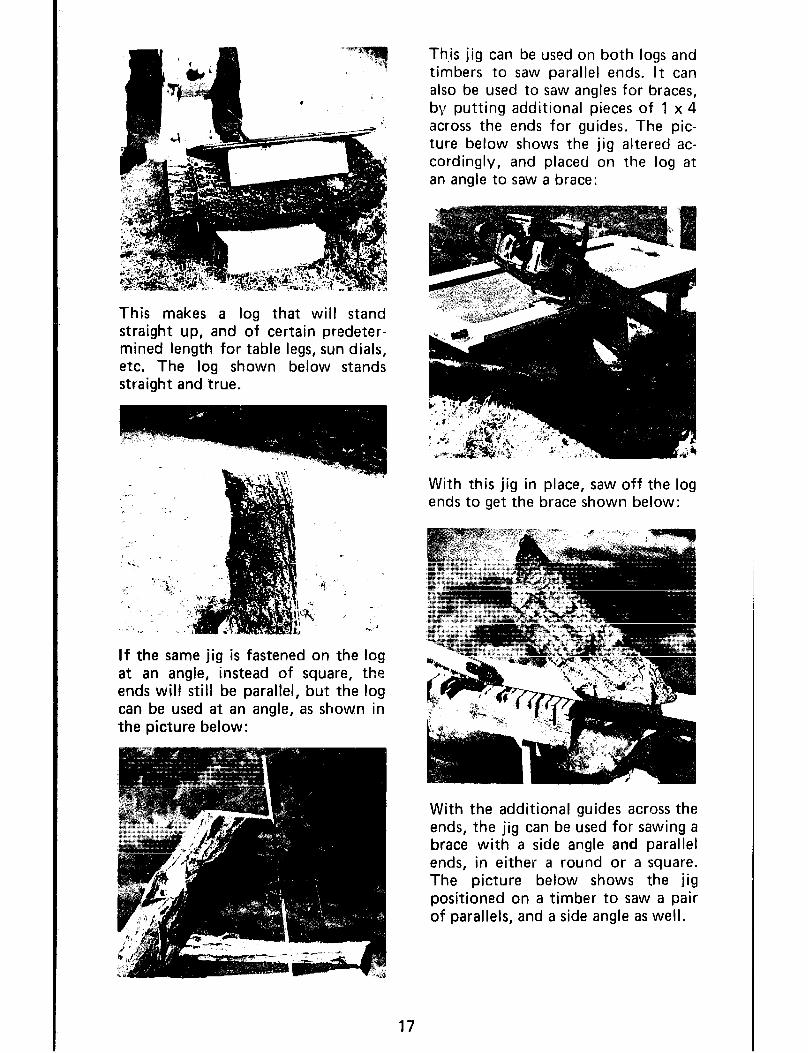
Th,is jig can be used on both logs and timbers to saw parallel ends. It can also be used to saw angles for braces, by putting additional pieces of 1 x 4 across the ends for guides, The pic- ture below shows the jig altered ac- cordingly, and placed on the log at an angle to saw a brace:
With this jig in place, saw off the log ends to get the brace shown below:
If the same jig is fastened on the log at an angle, instead of square, the ends will still be parallel, but the log can be used at an angle, as shown in the picture below:
With the additional guides across the ends, the jig can be used for sawing a brace with a side angle and parallel ends, in either a round or a square. The picture below shows the jig positioned on a timber to saw a pair of parallels, and a side angle as well.
17
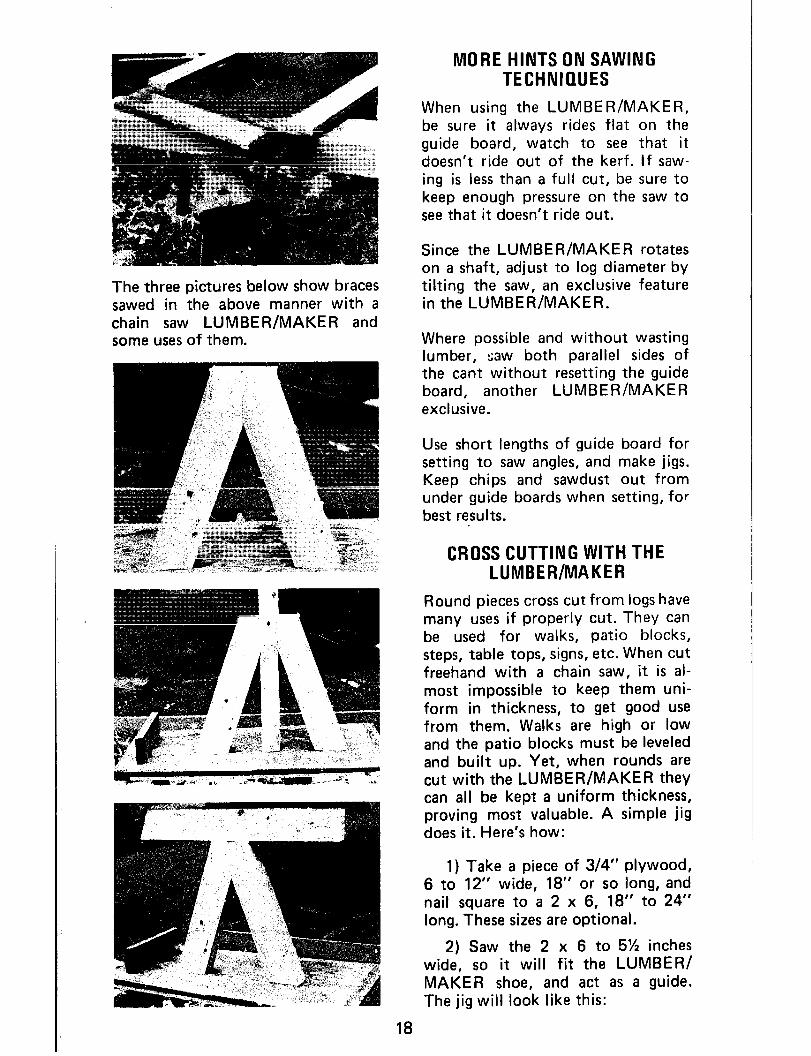
The three pictures below show braces sawed in the above manner with a chain saw LUMBER/MAKER and some uses of them.
MORE HINTS ON SAWING TECHNIQUES
When using the LUMBER/MAKER, be sure it always rides flat on the guide board, watch to see that it doesn’t ride out of the kerf. If saw- ing is less than a full cut, be sure to keep enough pressure on the saw to see that it doesn’t ride out.
Since the LUMBER/MAKER rotates on a shaft, adjust to log diameter by tilting the saw, an exclusive feature in the LUMBER/MAKER.
Where possible and without wasting lumber, saw both parallel sides of the cant without resetting the guide board, another LUMBER/MAKER exclusive.
Use short lengths of guide board for setting to saw angles, and make jigs. Keep chips and sawdust out from under guide boards when setting, for best results.
CROSS CUTTING WITH THE LUMBER/MAKER
Round pieces cross cut from logs have many uses if properly cut. They can be used for walks, patio blocks, steps, table tops, signs, etc. When cut freehand with a chain saw, it is al- most impossible to keep them uni- form in thickness, to get good use from them. Walks are high or low and the patio blocks must be leveled and built up, Yet, when rounds are cut with the LUMBER/MAKER they can all be kept a uniform thickness, proving most valuable. A simple jig does it. Here’s how:
1) Take a piece of 3/4” plywood, 6 to 12” wide, 18” or so long, and nail square to a 2 x 6, 18” to 24” long. These sizes are optional.
2) Saw the 2 x 6 to 5% inches wide, so it will fit the LUMBER/ MAKER shoe, and act as a guide. The jig will look like this:
18
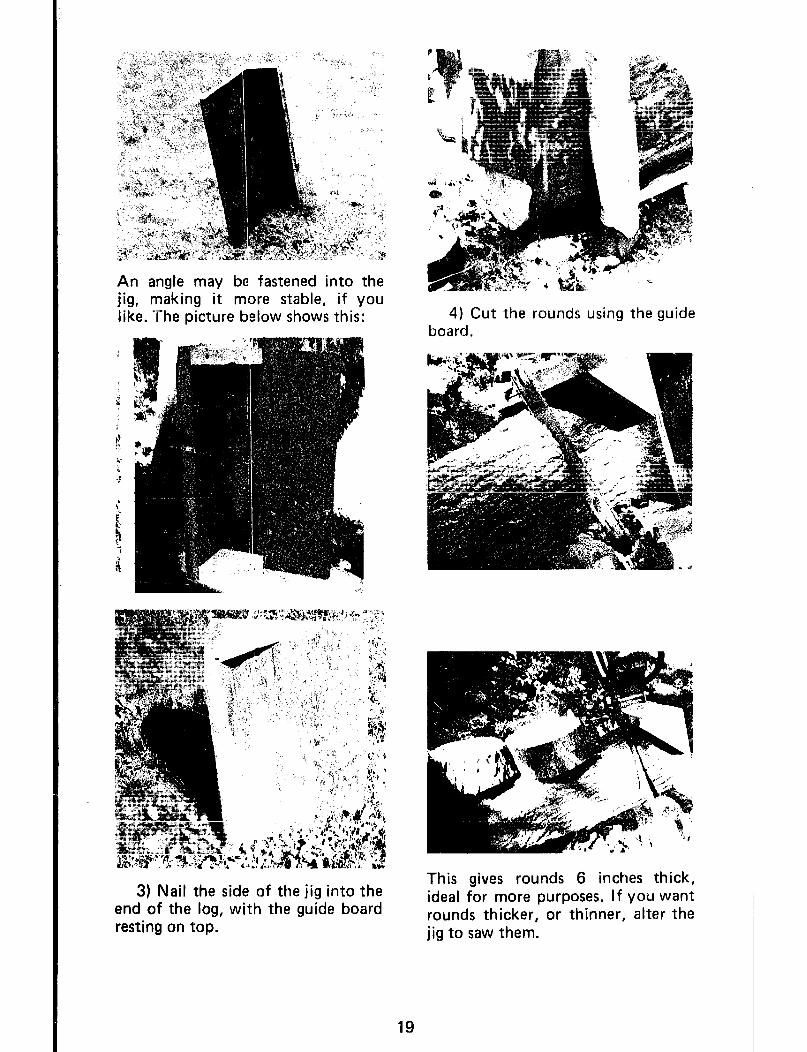
An angle may be fastened into the jig, making it more stable, if you like. The picture below shows this:
3) Nail the side of the jig into the end of the log, with the guide board resting on top.
4) Cut the rounds using the guide board.
This gives rounds 6 inches thick, ideal for more purposes. If you want rounds thicker, or thinner, alter the jig to saw them.
19
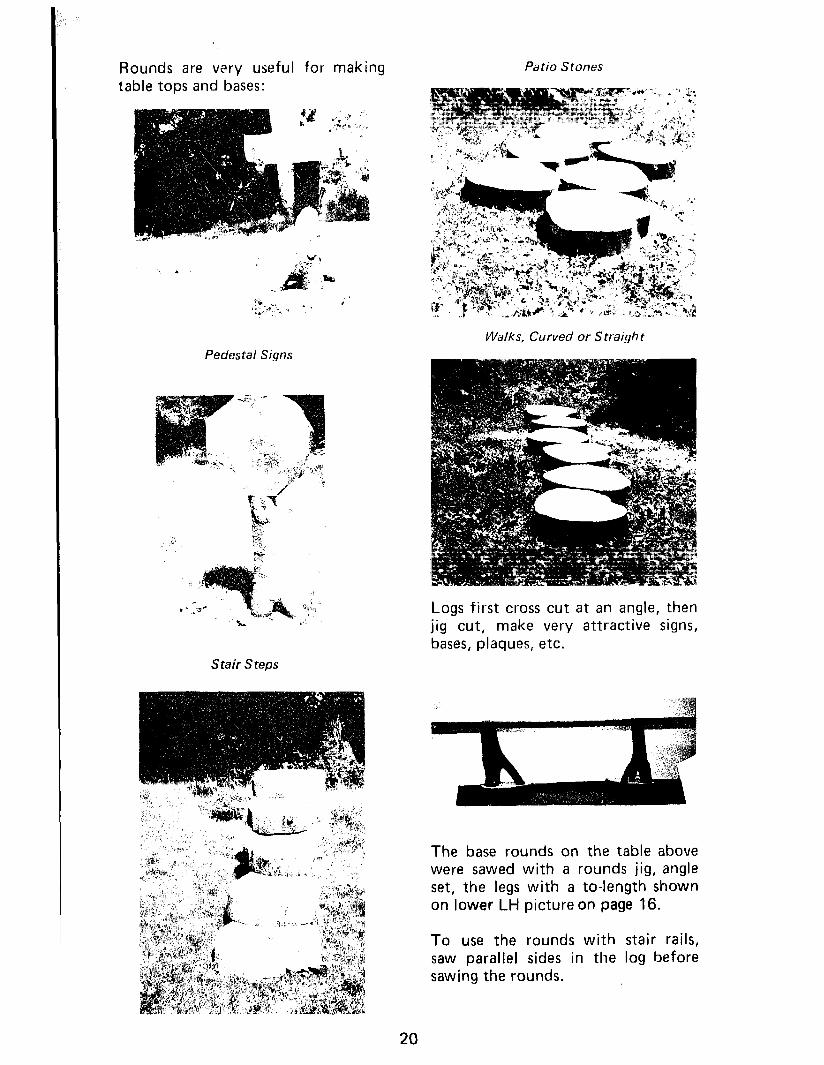
Rounds are very useful for making table tops and bases:
Pedestal Signs
Stair Steps
Patio Stones
Walks, Curved or Straight
Logs first cross cut at an angle, then jig cut, make very attractive signs, bases, plaques, etc.
The base rounds on the table above were sawed with a rounds jig, angle set, the legs with a to-length shown on lower LH picture on page 16.
To use the rounds with stair rails, saw parallel sides in the log before sawing the rounds.
20
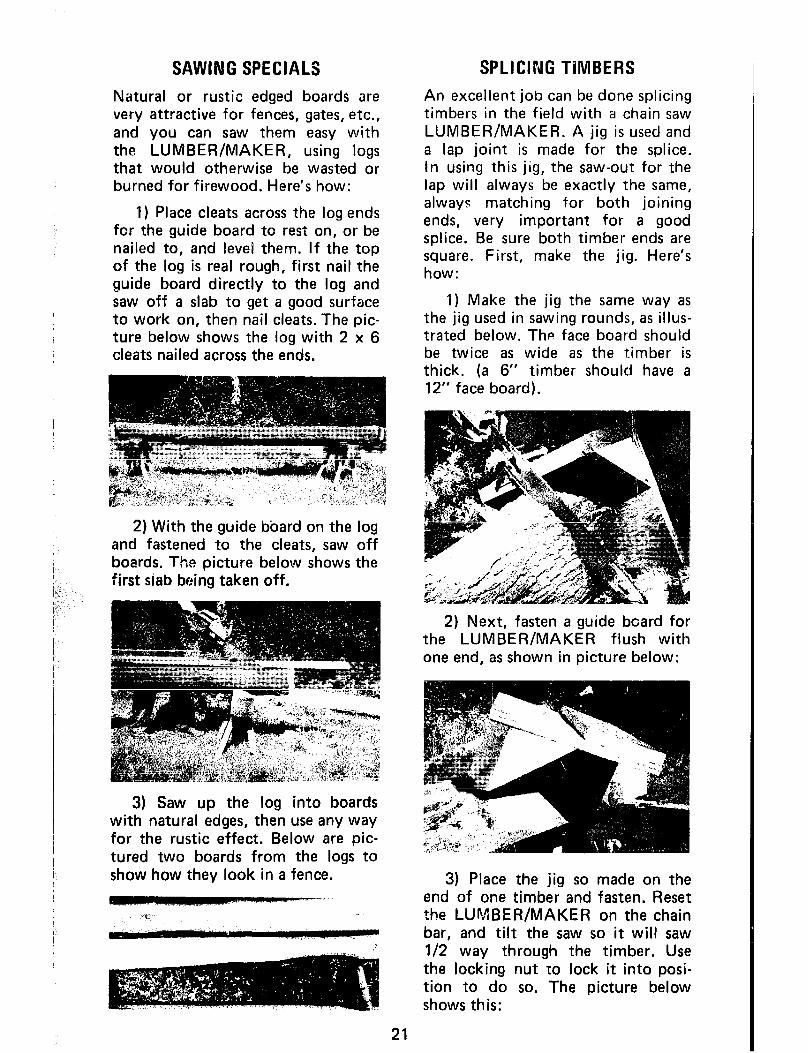
SAWING SPECIALS Natural or rustic edged boards are very attractive for fences, gates, etc., and you can saw them easy with the LUMBER/MAKER, using logs that would otherwise be wasted or burned for firewood. Here’s how:
I) Place cleats across the log ends for the guide board to rest on, or be nailed to, and level them. If the top of the log is real rough, first nail the guide board directly to the log and saw off a slab to get a good surface to work on, then nail cleats. The pic- ture below shows the log with 2 x 6 cleats nailed across the ends.
2) With the guide board on the log and fastened to the cleats, saw off boards. The picture below shows the first siab being taken off.
3) Saw up the log into boards with natural edges, then use any way for the rustic effect. Below are pic- tured two boards from the logs to show how they look in a fence.
___ .-“,._l __
(3
SPLICING TIMBERS An excellent job can be done splicing timbers in the field with a chain saw LUMBER/MAKER. A jig is used and a lap joint is made for the splice. In using this jig, the saw-out for the lap will always be exactly the same, always matching for both joining ends, very important for a good splice. Be sure both timber ends are square. First, make the jig. Here’s how:
1) Make the jig the same way as the jig used in sawing rounds, as illus- trated below. The face board should be twice as wide as the timber is thick. (a 6” timber should have a 12” face board).
2) Next, fasten a guide beard for the LUMBER/MAKER flush with one end, as shown in picture below:
3) Place the jig so made on the end of one timber and fasten. Reset the LUMSER/MAKER on the chain bar, and tilt the saw so it will saw l/2 way through the timber. Use the locking nut to lock it into posi- tion to do so. The picture below shows this:
21
4) Repeat the cut on the mating timber. To make the rip cut, make a ripping jig by placing a short 2 x 6 at right angles to the other kerf so it will rip out l/2”, counting kerf - then saw.
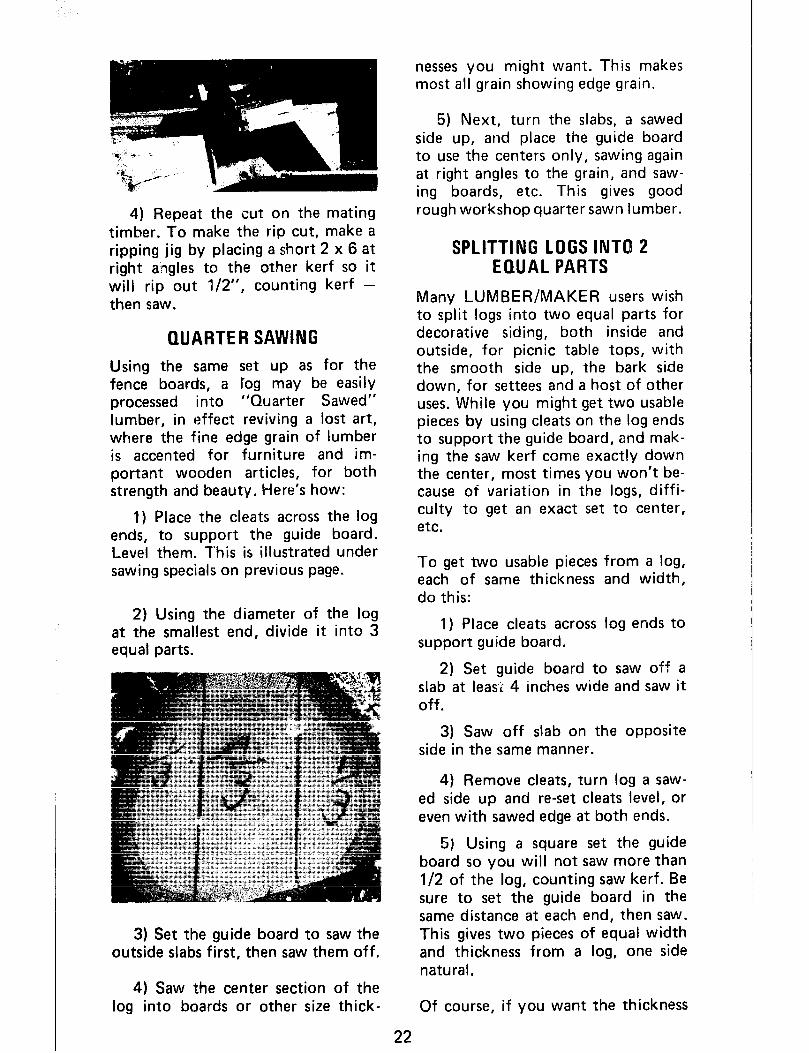
QUARTER SAWING
Using the same set up as for the fence boards, a Tog may be easily processed into “Quarter Sawed” lumber, in effect reviving a lost art, where the fine edge grain of lumber is accented for furniture and im- portant wooden articles, for both strength and beauty. Here’s how:
1) Place the cleats across the log ends, to support the guide board. Level them. This is illustrated under sawing specials on previous page.
2) Using the diameter of the log at the smallest end, divide it into 3 equal parts.
3) Set the guide board to saw the outside slabs first, then saw them off.
4) Saw the center section of the log into boards or other size thick-
nesses you might want. This makes most all grain showing edge grain.
5) Next, turn the slabs, a sawed side up, and place the guide board to use the centers only, sawing again at right angles to the grain, and saw- ing boards, etc. This gives good rough workshop quarter sawn lumber.
SPLITTING LOGS INTO 2 EQUAL PARTS
Many LUMBER/MAKER users wish to split logs into two equal parts for decorative siding, both inside and outside, for picnic table tops, with the smooth side up, the bark side down, for settees and a host of other uses. While you might get two usable pieces by using cleats on the log ends to support the guide board, and mak- ing the saw kerf come exactly down the center, most times you won’t be- cause of variation in the logs, diffi- culty to get an exact set to center, etc.
To get two usable pieces from a log, each of same thickness and width, do this:
1) Place cleats across log ends to support guide board.
2) Set guide board to saw of? a slab at leas-2 4 inches wide and saw it off.
3) Saw off slab on the opposite side in the same manner.
4) Remove cleats, turn log a saw- ed side up and re-set cleats level, or even with sawed edge at both ends.
5) Using a square set the guide board so you will not saw more than l/2 of the log, counting saw kerf. Be sure to set the guide board in the same distance at each end, then saw. This gives two pieces of equal width and thickness from a log, one side natural.
Of course, if you want the thickness
22
the same each time, set the guide board in a preidetermined distance each time,
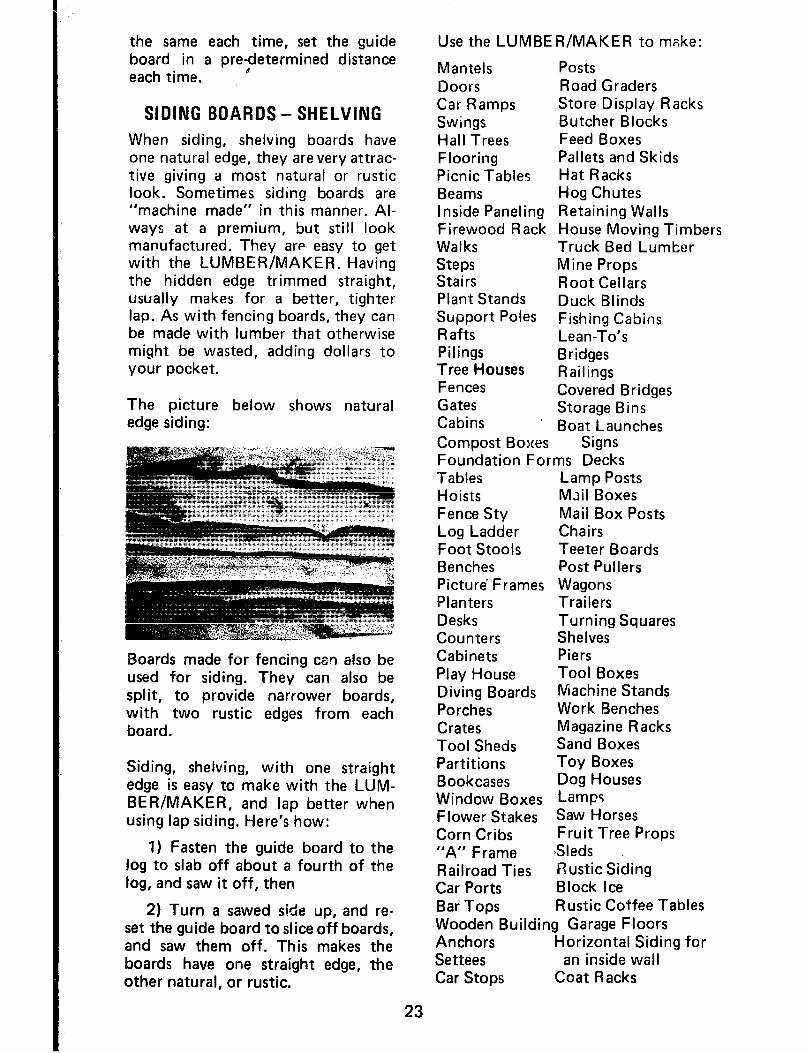
SIDING BOARDS - SHELVING When siding, shelving boards have one natural edge, they are very attrac- tive giving a most natural or rustic look. Sometimes siding boards are “machine made” in this manner. Al- ways at a premium, but still look manufactured. They are easy to get with the LUMBER/MAKER. Having the hidden edge trimmed straight, usually makes for a better, tighter lap. As with fencing boards, they can be made with lumber that otherwise might be wasted, adding dollars to your pocket.
The picture below shows natural edge siding:
Boards made for fencing can also be used for siding, They can also be split, to provide narrower boards, with two rustic edges from each board.
Siding, shelving, with one straight edge is easy to make with the LUM- BER/MAKER, and lap better when using lap siding. Here’s how:
1) Fasten the guide board to the log to slab off about a fourth of the log, and saw it off, then
2) Turn a sawed side up, and re- set the guide board to slice off boards, and saw them off. This makes the boards have one straight edge, the other natural, or rustic.
Use the LUMBER/MAKER to make:
Mantels Posts Doors Road Graders Car Ramps Store Display Racks Swings Butcher Blocks Hall Trees Feed Boxes Flooring Pallets and Skids Picnic Tables Hat Racks Beams Hog Chutes Inside Paneling Retaining Walls Firewood Rack House Moving Timbers Walks Truck Bed Lumber Steps Mine Props Stairs Root Cellars Plant Stands Duck Blinds Support Poles Fishing Cabins Rafts Lean-To’s Pilings Bridges Tree Houses Railings Fences Covered Bridges Gates Storage Bins Cabins Boat Launches Compost Boxes Signs Foundation Forms Decks Tables Lamp Posts Hoists Mail Boxes Fence Sty Mail Box Posts Log Ladder Chairs Foot Stools Teeter Boards Benches Post Pullers Picture’ Frames Wagons Planters Trailers Desks Turning Squares Counters Shelves Cabinets Piers Play House Tool Boxes Diving Boards IViachine Stands Porches Work Benches Crates Magazine Racks Tool Sheds Sand Boxes Partitions Toy Boxes Bookcases Dog Houses Window Boxes Lamps Flower Stakes Saw Horses Corn Cribs Fruit Tree Props “A” Frame Sleds Railroad Ties Rustic Siding Car Ports Block Ice Bar Tops Rustic Coffee Tables Wooden Building Garage Floors Anchors Horizontal Siding for Settees an inside wall Car Stops Coat Racks
23
SIMPLE LOG CABIN CONSTRUCTION USING THE CHAIN SAW
LUMBER/MAKER (Cross and Filler Type Canstruction)
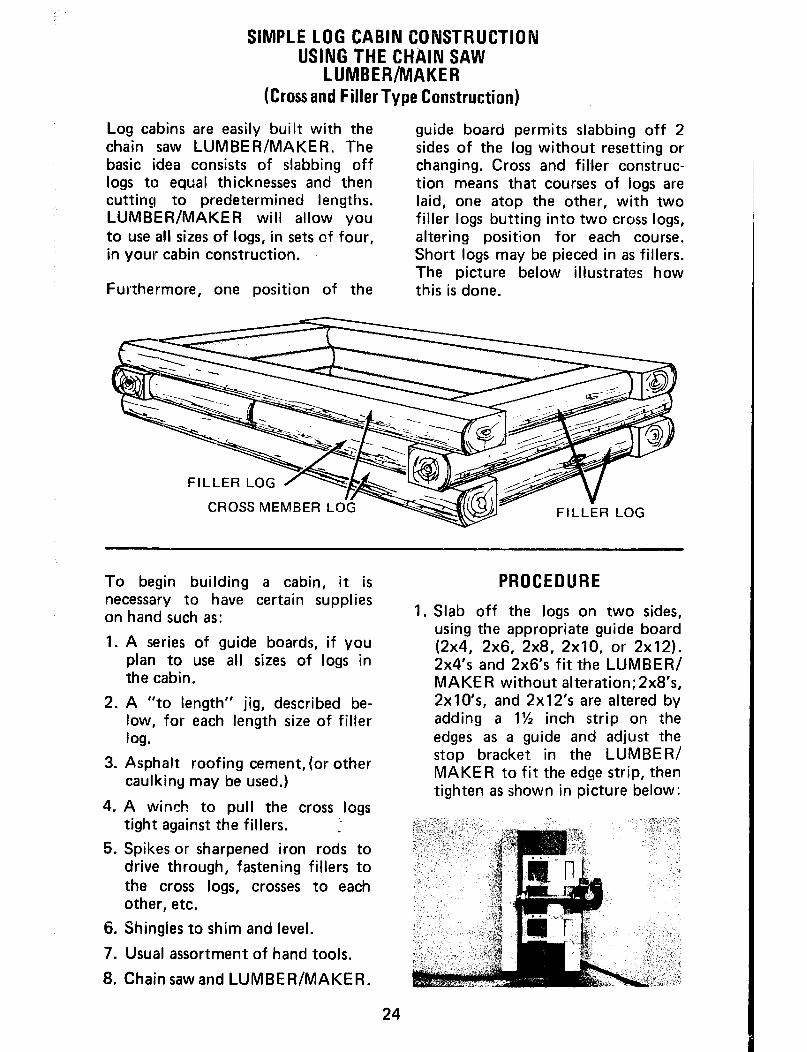
Log cabins are easily built with the chain saw LUMBER/MAKER. The basic idea consists of slabbing off logs to equal thicknesses and then cutting to predetermined lengths. LUMBER/MAKER will allow you to use all sizes of logs, in sets of four, in your cabin construction.
Furthermore, one position of the
guide board permits slabbing off 2 sides of the log without resetting or changing. Cross and filler construc- tion means that courses of logs are laid, one atop the other, with two filler logs butting into two cross logs, altering position for each course. Short logs may be pieced in as fillers. The picture below illustrates how this is done.
FILLER LOG
CROSS MEMBER L
To begin building a cabin, it is necessary to have certain supplies on hand such as:
1. A series of guide boards, if you plan to use all sizes of logs in the cabin,
2. A “to length” jig, described be- low, for each length size of filler log.
3.
4.
5.
A.sphalt roofing cement, (or other caulking may be used.)
A winch to pull the cross logs tight against the fillers. t
Spikes or sharpened iron rods to drive through, fastening fillers to the cross logs, crosses to each other, etc.
6. Shingles to shim and level.
7. Usual assortment of hand tools.
8. Chain saw and LUMBER/MAKER.
24
PROCEDLIRE
1. Slab off the logs on two sides, using the appropriate guide board (2x4, 2x6, 2x8, 2x10, or 2x12). 2x4’s and 2x6’s fit the LUMBER/ MAKER without alteration; 2x8’s, 2x10’s, and 2x 12’s are altered by adding a 1% inch strip on the edges as a guide and adjust the stop bracket in the LUMBER/ MAKER to fit the edge strip, then tighten as shown in picture below:
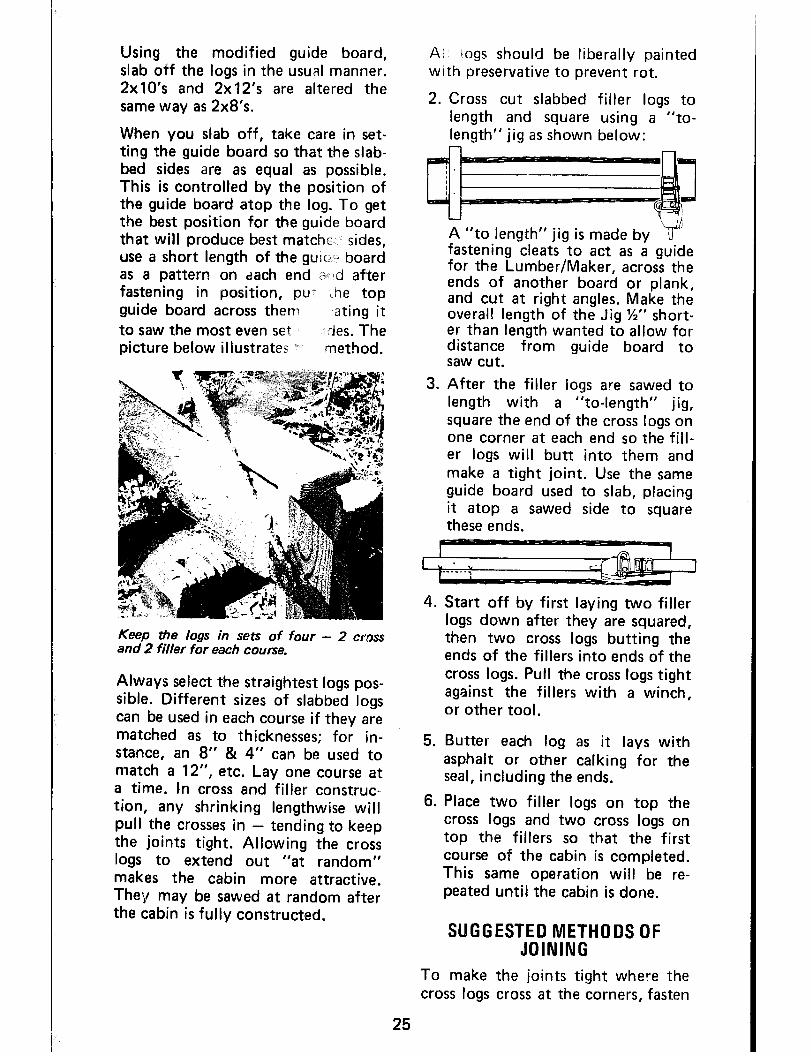
Using the modified guide board, slab off the logs in the usual manner. 2x10’s and 2x 12’s are altered the same way as 2x8’s.
When you slab off, take care in set- ting the guide board so that the slab- bed sides are as equal as possible. This is controlled by the position of the guide board atop the log. To get the best position for the guide board that will produce best matche sides, use a short length of the guie - board as a pattern on dach end ?B:d after fastening in position, pu* <-he top guide board across them :ating it to saw the most even set ‘des. The picture below illustrates method.
Keep the logs in sets of four - 2 cmss and 2 filler for each course.
Always select the straightest logs pos- sible. Different sizes of slabbed logs can be used in each course if they are matched as to thicknesses; for in- stance, an 8” & 4” can be used to match a 12”, etc. Lay one course at a time. In cross and filler construc- tion, any shrinking lengthwise will pull the crosses in - tending to keep the joints tight. Allowing the cross logs to extend out “at random” makes the cabin more attractive. They may be sawed at random after the cabin is fully constructed.
Ai! logs should be liberally painted with preservative to prevent rot.
2. Cross cut slabbed filler logs to length and square using a “to- length” jig as shown below:
“to length” jig is made by fastening cleats to act as a guide for the Lumber/Maker, across the ends of another board or plank, and cut at right angles. Make the overall length of the Jig 1/2” short- er than length wanted to allow for distance from guide board to saw cut.
3. After the filler logs are sawed to length with a “to-length” jig, square the end of the cross logs on one corner at each end so the fill- er logs will butt into them and make a tight joint. Use the same guide board used to slab, placing it atop a sawed side to square these ends.
4. Start off by first laying two filler logs down after they are squared, then two cross logs butting the ends of the fillers into ends of the cross logs. Pull the cross logs tight against the fillers with a winch, or other tool.
5. Butter each log as it lays with asphalt or other calking for the seal, including the ends.
6. Place two filler logs on top the cross logs and two cross logs on top the fillers so that the first course of the cabin is completed. This same operation will be re- peated until the cabin is done.
SUGGESTED METHODS OF JOINING
To make the joints tight where the cross logs cross at the corners, fasten
25
with driven spikes sunk through after the cross logs have been pulled tight into the fillers at the corners. Follow this procedure until the entire cabin is built. Holes may be drilled, slightly smaller than the nails or s$kes, for easier driving. Other ways to join may also be used.
SAWING IN DOORS AND WINDOWS
When it becomes necessary to saw in a door or a window, use a 2x6 guide board, placing it directly at the left of the right hand cut of the door or window in a true perpendicular position. Advance the saw into and through the logs by holding it tight against the guide board and rocking it through, under power. Hold hard to prevent saw climbing out. Saw up and down through the logs. After the right side is completed move the guide board over to the left side and saw through. The logs will drop out when this procedure is completed.
Windows are sawed in the same man- ner, placing the guide board horizon- tally to make the horizontal cuts. Make the top horizontal first.
The roof can be made either flat or gable. Roof over with board and batten, or any other favored method.
You may wish to have the inside of your cabin rough sawn smooth. You can do this easily with your LUMBER/MAKER.
After the log sides have been slabbed parallel, blace the guide board atop a sawed side and saw off the third side. This makes the squaring cut de.- scribed under 3 above unnecessary.
26
Take care to keep the width uni- form. On the filler logs, be sure to do this BEFORE they are sawed to length with the “to length” jig, to keep the ends square.
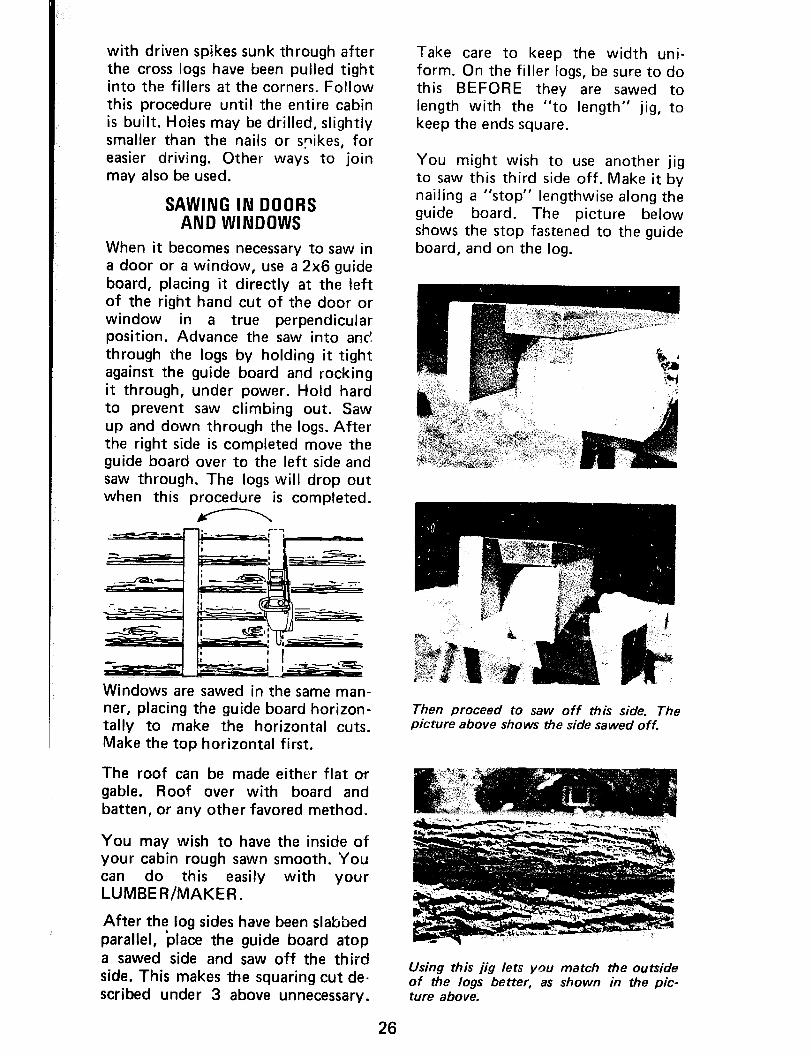
You might wish to use another jig to saw this third side off. Make it by nailing a “stop” lengthwise along the guide board. The picture below shows the stop fastened to the guide board, and on the log.
Then proceed to saw off this side. The picture above shows the side sawed off.
Using this jig lets you match the outside of the logs better, as shown in the pic- ture above.

HERE’S A LIST f ‘HOW TO” ITEMS AND WHERE TO FIND THEM:
Fasten a 2x4 guide board to a log. ........................ .2 Adjust the LUMBER/MAKER to a 2x4 guide. ................ .2 Mount the LUMBER/MAKER on the chain saw with set screw ..... .2 Makea4x4timber ................................... .3 Adjust LUMBER/MAKER for a 2x6 guide board. ! ............. .3 Making a 6x6 timber ................................. .4 Use 2x8,2x10,2x12, as guide board. ...................... .4 Alter the LUMBER/MAKER for using 2x8,2x10, and 2x12 as
guide boards. .................................... .5 Makelumberinahurry ............................... .5 Saw 2x6 from 6x6 timbers ............................. .5 Sawboardsfromacant ............................... .6 Handle large logs and problem logs ........................ .6 Make a set-ever gauge. ................................ .7 Make a pulley hook-up. ............................... .7 Squareoutalogforlumber ............................. .8 Mount the LUMBER/MAKER to chain bar using bolts and nuts. .... .9 Use the LUMBER/MAKER to remove large limbs .............. 10 Use the LUMBER/MAKER to help fell trees. ................. 11 Find the usage and letters for parts. ....................... 12 Find what’s in the parts bag. ............................ 13 Find what tools you need. ............................. 13 Sharpen the saw chain for ripping. ........................ 13 Use the LUMBER/MAKER for Starting, Sharpening, Repairing ..... 13 Use the locking nut ................................. .I4 Select guide boards .................................. 14 Treat guide boards. ................................. .14 Use angles on guide boards ............................ -14 Set the guide board ................................. .14 Split large cants. ................................... .I4 Process Pole Barn poles. .............................. .15 Saw odd sizes, turning lathe. ........................... .15 Saw lumber to length. ............................... .15 Make a “to length” jig ............................... .I5 Sawalogtolength ................................. .I5 Sawacanttolength ................................. .l5 Saw parallel ends. .................................. .I6 Saw angles and braces. ............................... .16 Make a plywood parallel end jig. ......................... 16 Use the plywood parallel jig for angle parallels ................ 17 Use the plywood jig for braces. ......................... .I7 Keep the pressure so saw doesn’t ride out. ................... 18 Adjust to log diameters. .............................. .18 Saw parallel sides without re-setting the guide board ............ 18 Make precision rounds ............................... .I8 Makearoundsjig .................................. .18 Use rounds for a table top.
....................... 19
Use rounds for a pedestal sign : : : : : : : : : : : : : : : : 20 Use rounds for stair steps ............................. .20
27

Use rounds for patio stones. ............................ .20 Use rounds for-walks .................................. 20 Use rounds for table bases. ............................. .20 Use cleats to support guide board ......................... .21 Saw rustic edge siding boards. ........................... .21 Splice timbers, make a jig .............................. .21 Quartersaw........................................2 2 Split logs into equal parts .............................. .22 Saw and use siding boards. ............................. “23 Find an item to make. ................................ .23 Make a cross and filler log cabin, ......................... .24 Determine tools and supplies needed to make a cabin. ........... .24 Modify the guide board for 2x8,2x113, and 2x12 parallels. ........ .24 Set the guide board for the best parallels .................... .25 Make a ‘I’to length” jig ................................ .25 Saw square for the cross seat ............................ .25 Pull the cross logs together ............................. .25 Assemble cross logs and filfer logs. ........................ .25 Join cross logs and filler logs ............................ .25 Saw doors and windows in cabin ......................... .26 Make a aside to saw three sided cabin logs ................... -26 Use a guide to maintain cabin wall thickness. ................. -26 Use a guide to have a finished wall for inside cabin. ............. .26 Use a guide to saw two sets from one log for a cabin ............ .26 Find suggestions for a project ........................... .23 Find where to order a LUMBER/MAKER ................... .28
For further information, current pricing, how to order, etc., write: HADDON TOOL
4718 W. Route 120 McHenry, IL USA
60050
28

Copyright 1976 by Hacldon Tools, McHenry, Illinois 60050 Manlrfactured under patent No. 3,864,830 by Haddon Tools. Printed in U.S.A.