Embed Size (px)
Citation preview
MUSIC Group Research UK Limited, Klark Industrial Park, Walter Nash Road, Kidderminster. Worcestershire. DY11 7HJ. England. Switchboard: +44 1562 741515 www.midasconsoles.com
Company Registration No 07070987
Midas Mixtender iPad App Requirements:
The iPad app will require Generation-II software to be installed on PRO3/6/9 and XL8 before it can be used with these consoles. PRO2 requires minimum V1.15.04 software to work correctly. You will need an iPad running iOS5, a wireless router, an Ethernet cable. The higher the specification of the router the faster the app will operate with the console and the more iPad’s can be used.
Basic Setup Instructions:
1. Connect the console to the wireless network router, using your Ethernet cable: PRO2 (The Ethernet control port to a router)
PRO3/6/9 Ethernet Control 2 (G-II software only) XL8 Ethernet Control 2 (G-II software only)
2. On the console: Go to the Preferences page go to the Configuration tab and in the Remote Control Server section enter an appropriate IP address for your network using the UP/DOWN arrow buttons. Or
select DHCP to be automatically assigned one by your router
3. On the console: Click START. The consoles server software will take several seconds to start up. Once up and running, the status will confirm the IP address (manually or automatically assigned).
4. On the iPad: Connect to the wireless network (1) using the Manufacturer’s instructions
5. On the iPad: Go to SETTINGS and scroll down to Mixtender
1) Enter the IP address you generated on the console (3) in the Server IP Address Field
2) Password is not required 3) Change the enable Automatic Desk Connection to On
4) Change Demo Mode to Off 5) Change Ignore Power Save to On (keeps the connection on)
6. On the iPad: Exit SETTINGS and start Mixtender, the app should connect automatically and detect the correct console type.
7. You must connect to your wireless router and do the setup step BEFORE you open the Mixtender app
8. You can stop the server at any time using the SHUTDOWN function on the console, and this will disable
external control of the console
9. You should not connect the console to an unsecured or public network, as other users could potentially
take control of the console.
Company Registration No 07070987
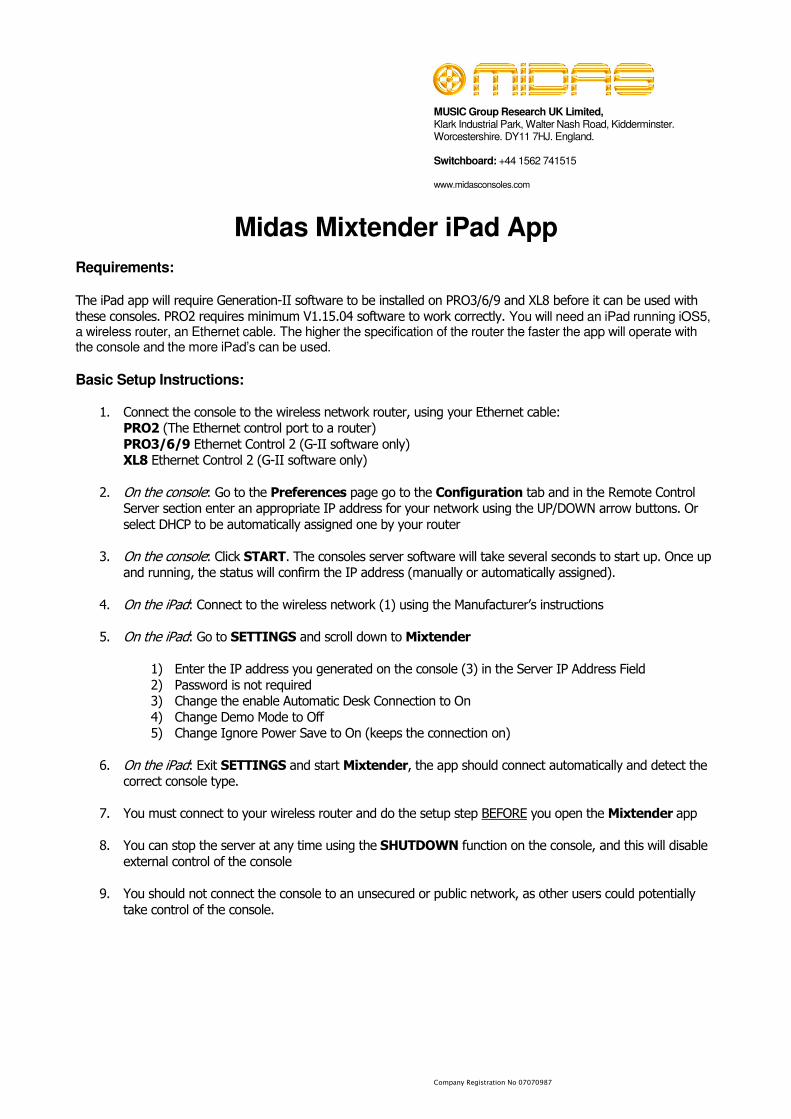
Apple Airport Addendum This addendum explains how to set up a Midas console, Airport Wireless Access Point and iPad together. We have found that the Apple Airport is device that requires specific settings to allow it to connect with an iPad and the console. These instructions were developed using an Airport Express Base Station running firmware 6.3 and Airport Utility V5.6. The information below only deals with setting up the Airport and iPad. You may find that setting up the Airport may require an Ethernet connection from a laptop initially. Once initial set up has taken place standard wireless control should be possible. Please refer to the main instructions for console connections and setup. Apple Airport Setup Instructions: The Airport needs to be set up with a fixed IP address and should not be used in and DHCP or assignable IP address mode. After connecting to the Airport (this may need to be done via an Ethernet cable the first time), use the Airport Utility to access its settings. Once connected you should see something that looks like this:
The settings that you see from your Airport will NOT look exactly the same as the above. Please just use this as a reference. Some settings such as Security type etc will be down to you to decide upon.

Company Registration No 07070987
Click on the Base Station tab (under Airport):
Here you can decide on the basic settings of the Airport, giving it a name and password so that the settings can only be changed by using the password. Click on the Wireless tab (under Airport):
Set all the settings from Wireless Mode down to Wireless Security exactly the same as you see above. The wireless password you can decide for yourself.
Company Registration No 07070987
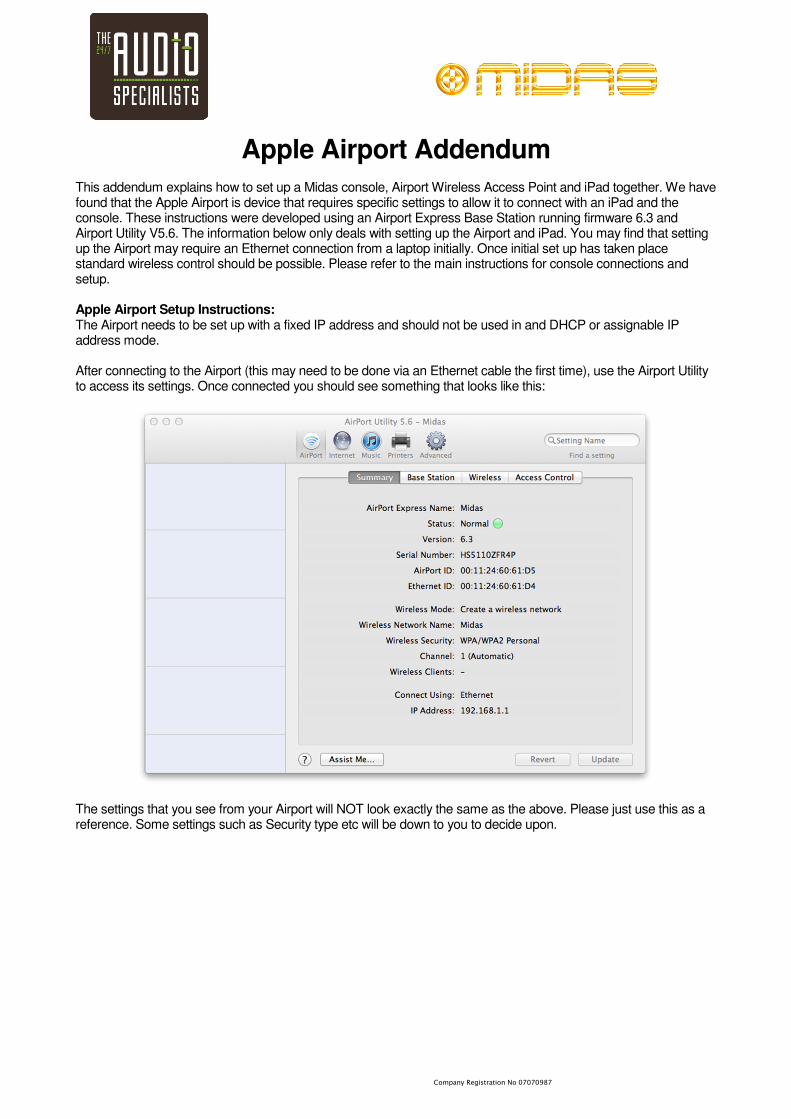
Click on Wireless Network Options (under Airport):
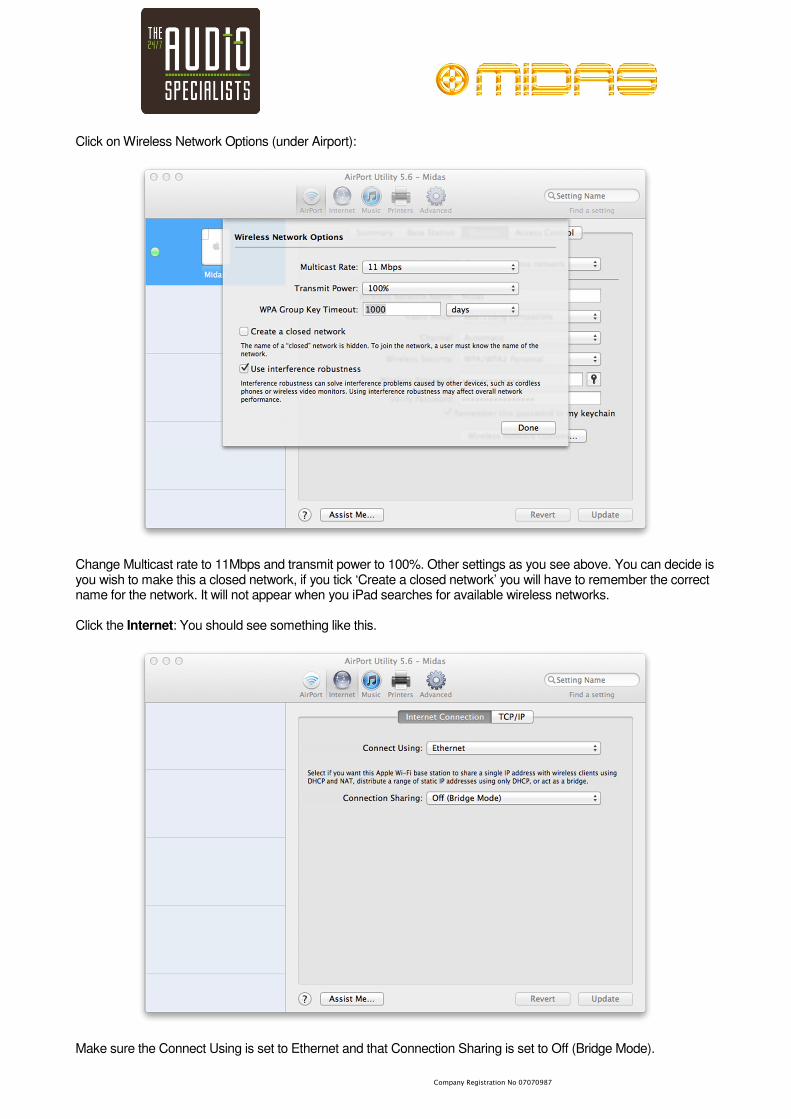
Change Multicast rate to 11Mbps and transmit power to 100%. Other settings as you see above. You can decide is you wish to make this a closed network, if you tick ‘Create a closed network’ you will have to remember the correct name for the network. It will not appear when you iPad searches for available wireless networks. Click the Internet: You should see something like this.
Make sure the Connect Using is set to Ethernet and that Connection Sharing is set to Off (Bridge Mode).
Company Registration No 07070987
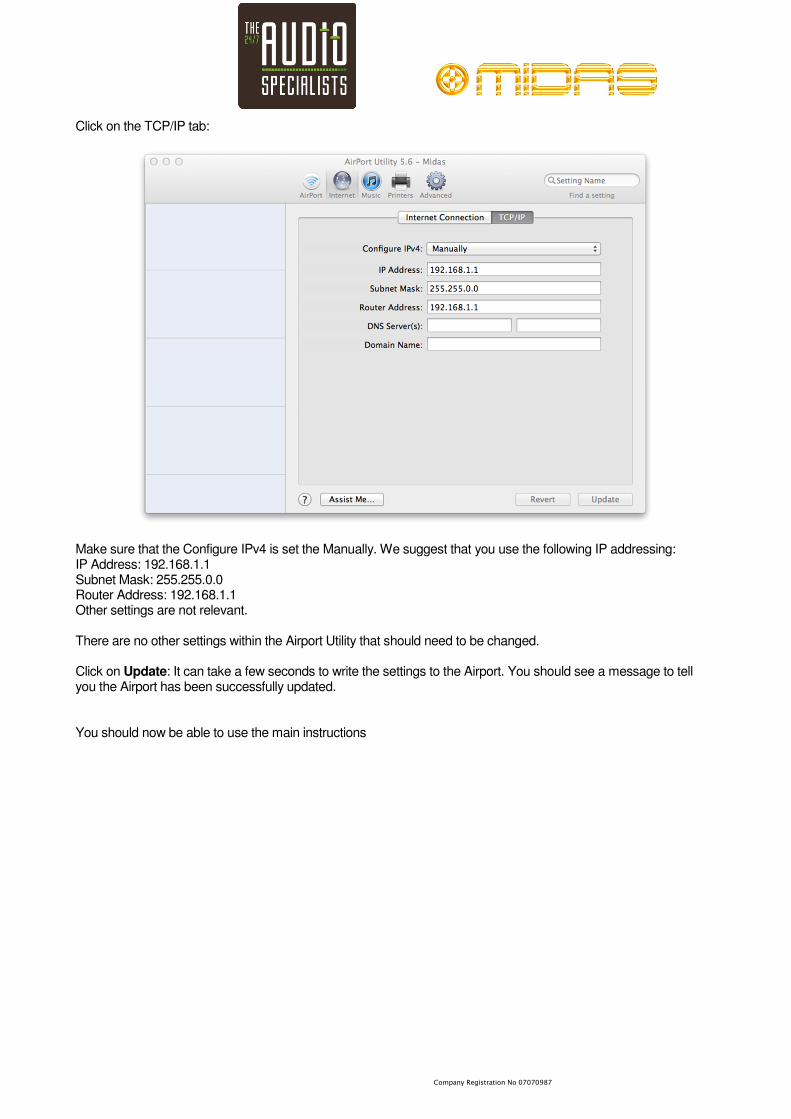
Click on the TCP/IP tab:
Make sure that the Configure IPv4 is set the Manually. We suggest that you use the following IP addressing: IP Address: 192.168.1.1 Subnet Mask: 255.255.0.0 Router Address: 192.168.1.1 Other settings are not relevant. There are no other settings within the Airport Utility that should need to be changed. Click on Update: It can take a few seconds to write the settings to the Airport. You should see a message to tell you the Airport has been successfully updated. You should now be able to use the main instructions
Company Registration No 07070987
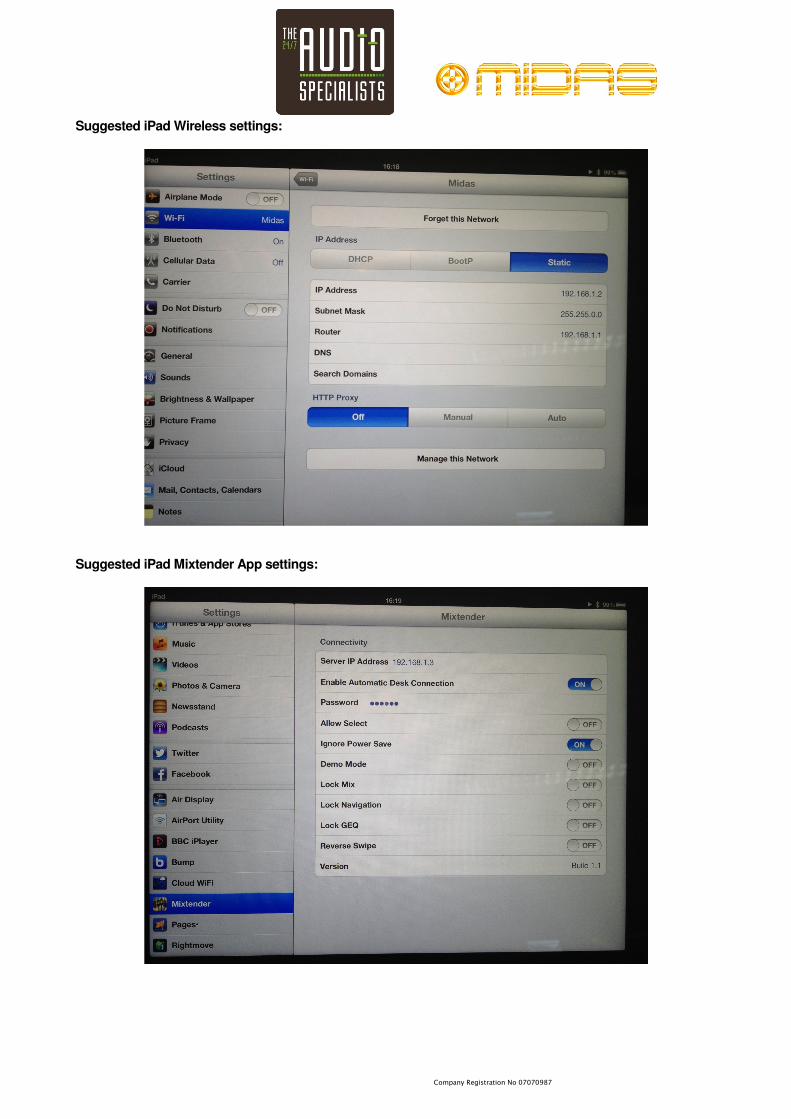
Suggested iPad Wireless settings:
Suggested iPad Mixtender App settings: